OmniFocus Extended
OmniFocus for iOS is enormously useful both as a standalone app on your iPhone and iPad and in conjunction with OmniFocus for Mac, but its power doesn’t stop there. Used along with other apps and features of your device, OmniFocus can work for you in even more exciting ways.
Email Capture (Mail Drop)
Mail Drop is a feature of Omni Sync Server which lets you send emails directly into your OmniFocus Inbox. You can create multiple private send-to addresses to give friends, family, coworkers, or classmates the ability to create actions that land in your OmniFocus Inbox. And, best of all, you can revoke those addresses at any time.
Some possible ways to use Mail Drop include:
Forwarding actionable emails from your PC at work
Processing emails on your iPhone or iPad
Using if this then that to automate all kinds of Internet-y things
Allowing a partner to delegate actions directly into your OmniFocus system
If you’re already using the Omni Sync Server to sync OmniFocus, you can log in to the Sync Server web interface and create your first Mail Drop address. After logging in, just click or tap the Create Address button to automatically generate the email address (a combination of your account name and a random string of characters, for example).
If you don’t have a Sync Server account yet, you can sign up here. The account creation process includes instructions for configuring OmniFocus to use your new account (it’s as simple as tapping or clicking a link in an email).
When you send an email message to Mail Drop, the subject line of that message becomes the name of the new inbox item. The body of the message becomes the Note, which can contain text, attachments (such as images and files), and simple HTML (more complex formatting is removed).
Note
For Mail Drop to work, you should be syncing your OmniFocus database to the same Omni Sync Server account that you’ve used to set up Mail Drop.
Using OmniFocus With Siri
Starting with iOS 11 and OmniFocus 2.21, OmniFocus supports interaction with Siri directly (Reminders capture is no longer required; see that section below for details).
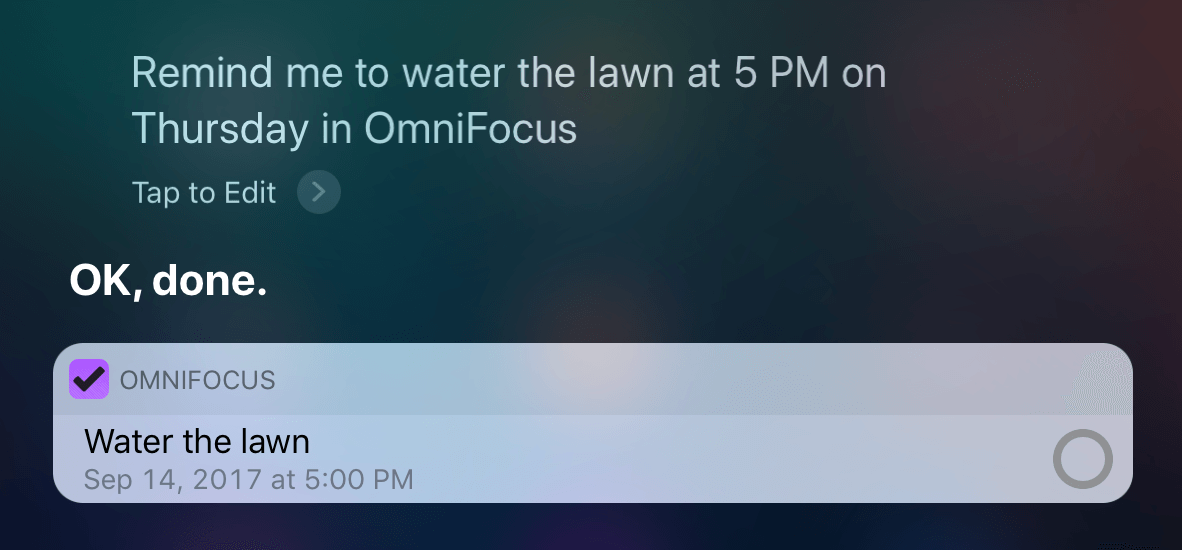
Working with specific inputs that Siri recognizes, you can use voice commands to add and manage items in OmniFocus in many different ways.
Note
It’s important to end your requests to Siri with the phrase “...in OmniFocus”. Otherwise, Siri might whisk your change off to an unrelated app.
When it comes to describing actions and projects, Siri uses words that are a little different from those used by OmniFocus internally. Siri recognizes action items as tasks, while projects and contexts are understood as lists. Depending on the structure of your request, Siri and OmniFocus work together to provide the most logical output.
For guidance on using Siri with OmniFocus in languages other than English, see this support article on the Omni website.
Note
Siri input is currently available on iOS devices where it is supported, but not on Apple Watch.
Adding Actions
One of the most common needs that Siri can address is adding new actions and inbox items to OmniFocus. Siri listens for you to describe these as tasks that you’ll add in OmniFocus—key components of the example phrases you’ll find below.
- “Add a task named ~ in OmniFocus”
Adds an item named ~ to your OmniFocus inbox.
- “Remind me to ~ at 5:00 PM (on Thursday) in OmniFocus”
Adds an item named ~ to your OmniFocus inbox with a due date set for today at 5:00 PM. Including additional parameters for the due date (such as on Thursday) can further define the set date.
- “Remind me to ~ when I get home in OmniFocus”
Adds an item named ~ to your OmniFocus inbox with the location-aware context Home. If a context with matching name and location data is not found, a new context is created with the specified name and location.
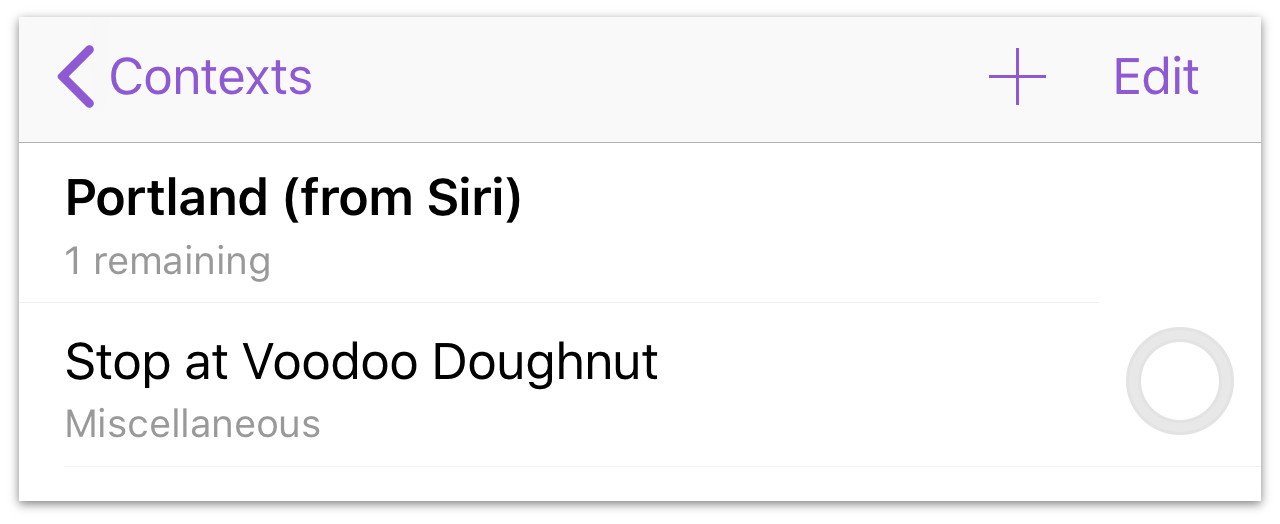
For example, “Remind me to stop at Voodoo Doughnut when I get to Portland, Oregon in OmniFocus” creates a new location-aware Portland (from Siri) context (assuming one doesn't exist) and adds the Stop at Voodoo Doughnut task to it.
Note
Siri can’t directly access location information stored in OmniFocus. When you specify a location as part of a command, Siri searches other available information for a location with a name matching the command.
The most reliable matches are individual addresses associated with locations like your work and home that you’ve set up in your Contacts card in the iOS Phone app. Beyond that, Siri does its best to figure out what you mean by searching other Contacts or location data from the Maps app.
As with other location services on your device, this isn’t always the most reliable way to associate virtual places with reality. If you've set up location aware contexts in OmniFocus already, the easiest way to make sure new items are assigned to them is to use the “Add ~ to my * list in OmniFocus” syntax described below, where * is a uniquely named context with the desired location.
For location-aware contexts to work properly, make sure that OmniFocus is allowed to access your location (in the iOS Settings app under OmniFocus).
- “Remind me to ~ when I get home at 5:00 PM in OmniFocus”
Adds an item named ~ to your OmniFocus inbox with the location-aware context Home and a due date of 5:00 PM today (this example is a combination of the previous two).
- “Add ~ to my * list in OmniFocus”
Adds an item named ~ to a project or context named * (“add eggs to my grocery list in OmniFocus”, for example).
Since Siri’s notion of lists doesn’t distinguish between projects and contexts, you’ll be prompted to confirm the destination for this item (or to choose between available options, if you have more than one project or context with the same name).
- “Remind me to ~ when I get home in my * list in OmniFocus”
Adds an item named ~ with the location-aware context Home. If * is a project, the item is added to that project; if * is a context, the context is discarded in favor of the location-aware one (and the item is added to the inbox).
- “Remind me to ~ every Thursday at 9:00 PM in OmniFocus”
Adds an item named ~ set to repeat every Thursday at 9:00 PM to your OmniFocus inbox. Siri understands OmniFocus’s repeat rules pretty well, so feel free to try any repeating items you can think of.
Adding Projects
When OmniFocus listens to instructions you give to Siri, it interprets a command to create a list as a command to create a new OmniFocus project. (Siri sees both projects and contexts as lists. Because of this ambiguity, OmniFocus chooses the relatively more common project as the list type to create.)
Some example phrases:
- “Create a list called ~ in OmniFocus”
Adds a project named ~ to OmniFocus.
- “Create a shopping list with bananas in OmniFocus”
Adds a project named Shopping and adds the action Bananas to that project in OmniFocus.
Marking Items Complete
Siri can be used to mark OmniFocus items (both actions and projects) as complete using the following example sentence structure.
- “Mark ~ as complete in OmniFocus”
Marks an action or project named ~ as complete in OmniFocus. (Projects of the single action list type can’t be marked complete in this way.)
Note
Due to limitations imposed by iOS, Siri can't mark items complete in OmniFocus while your device is locked.
Searching
Beyond adding and changing items in OmniFocus, you can also ask Siri about the content of your OmniFocus actions, projects, and contexts (what Siri understands as tasks and lists respectively).
Some example searches that you can do on your OmniFocus data are as follows (these don’t make any changes to your actual content):
- “What lists do I have in OmniFocus?”
Shows a list of all the projects and contexts you have in OmniFocus.
- “Show me the ~ list in OmniFocus”
Searches your OmniFocus projects and contexts and shows those with names that match ~. If multiple projects or contexts match the name, all are shown.
- “Read me my lists in OmniFocus”
Shows all of your OmniFocus projects and contexts with their included actions, and reads them aloud, 25 at a time.
- “What reminders called ~ do I have in OmniFocus?”
Shows a list of all items matching ~ that you have in OmniFocus.
- “Read me my ~ task in OmniFocus”
Shows and reads items matching ~ aloud. (If a due date is set, that is read along with the item’s title.)
Reminders Capture
If you would like OmniFocus to capture reminders that you add to the Reminders app (either via Siri or otherwise), check a few settings on your device and you can start adding spoken items to your inbox in no time.
Warning
Reminders capture is no longer the recommended way to add items to OmniFocus with Siri. Instead, use the SiriKit syntax to interact with OmniFocus directly. Reminders capture remains a useful feature for some other automated tasks (and for users without iOS 11 or OmniFocus 2.21).
If you still have a need for Reminders capture, the following documentation provides legacy support for the feature.
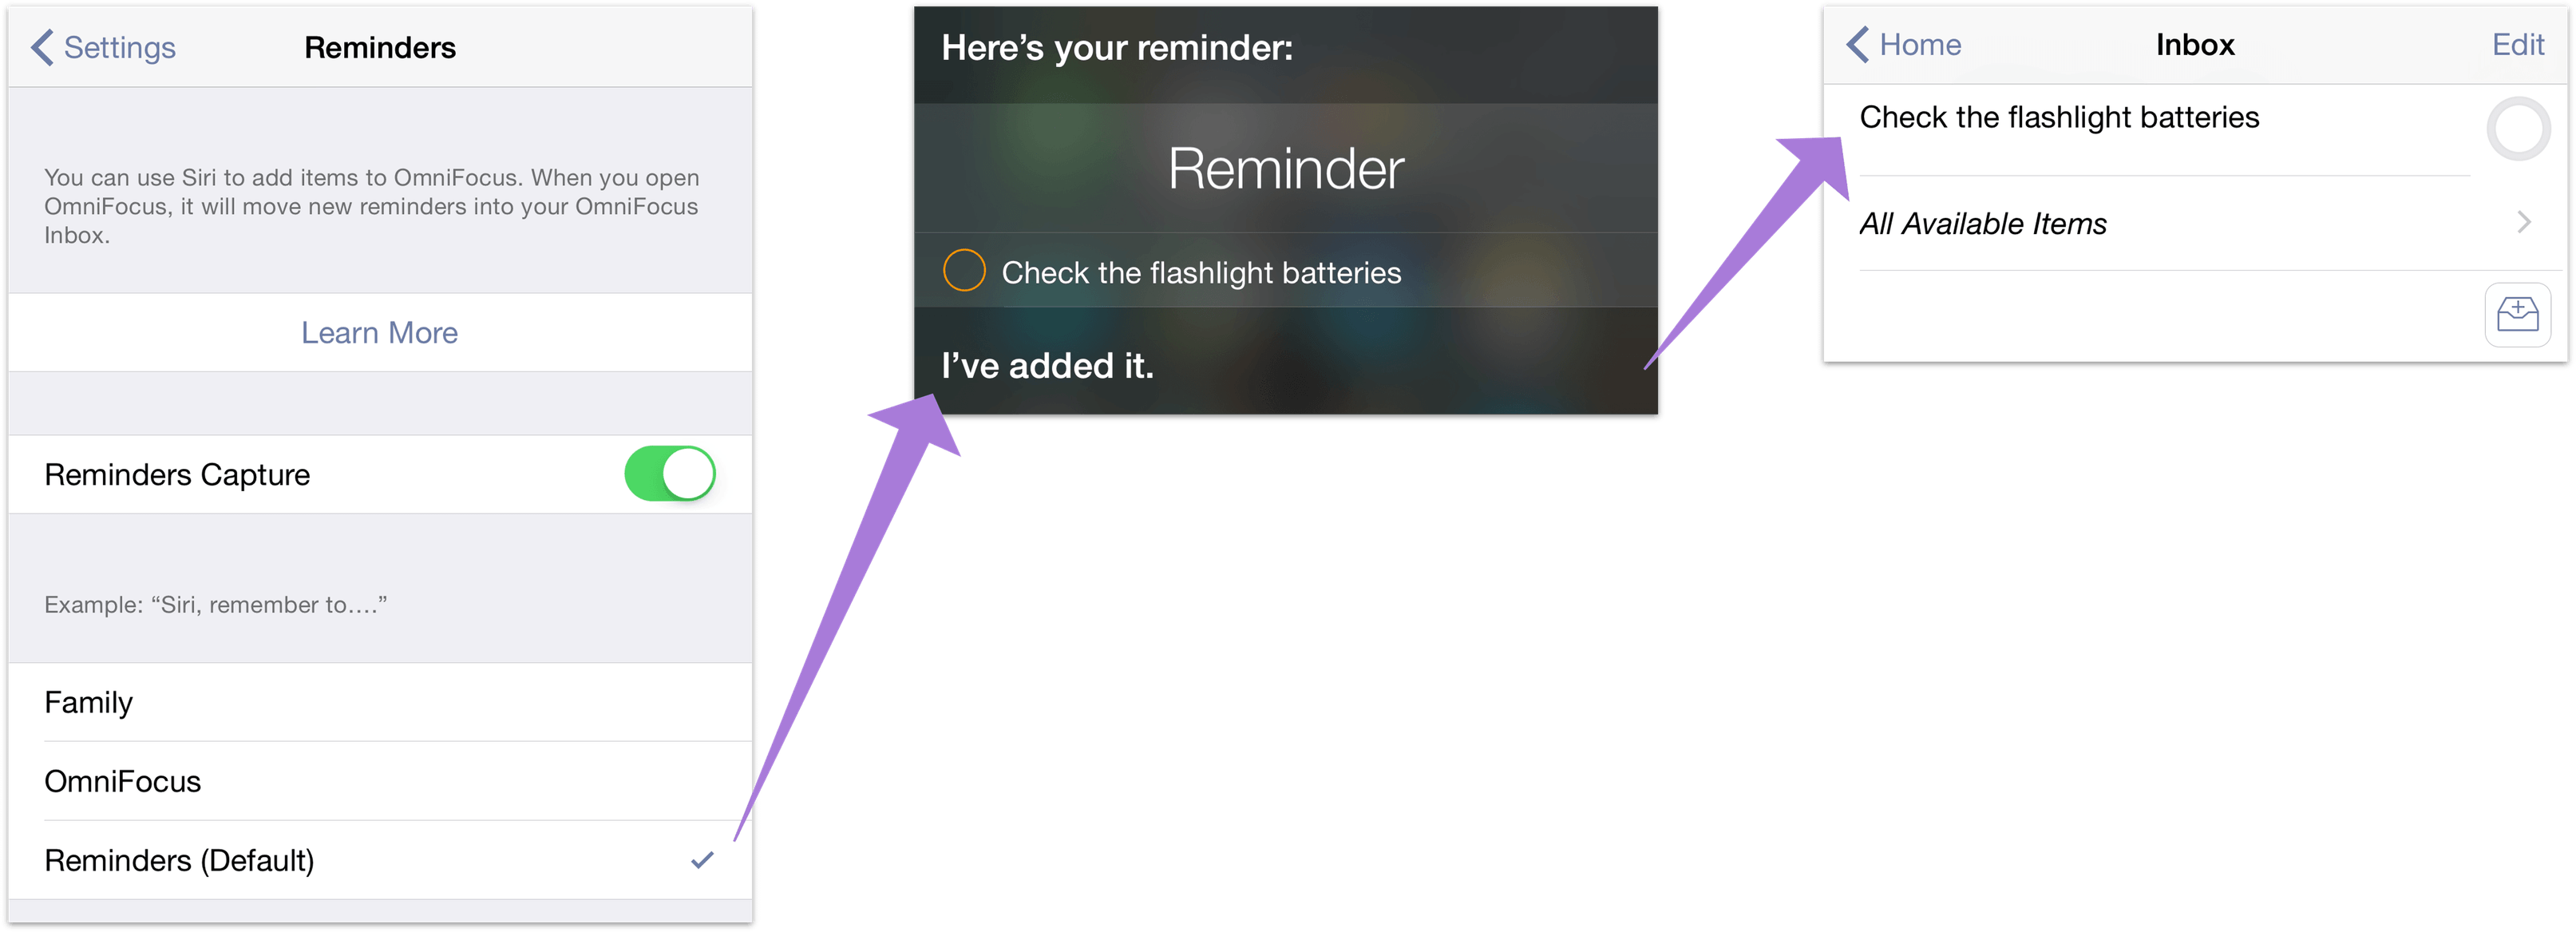
To set up OmniFocus so it captures your reminders:
Tap Settings in the secret bar.
In the Capture section, tap Reminders.
Warning
You should only configure Reminders Capture on a single iOS device. If you rely on iCloud to sync your reminders across devices and you have OmniFocus on iPad and iPhone, you could end up with duplicate entries in your Inbox.
- Finally, you’ll see the Reminders screen, where you can turn on the capture option (an alert pops up asking you to let OmniFocus connect to your Reminders; tap OK) and, if you have multiple Reminders lists set up, choose the list you want OmniFocus to capture from. (If you only have one reminders list, OmniFocus assumes that’s the one you want).
To record a new inbox item with Siri, try these phrases:
Siri, remember to… records a task to the system default Reminders list. OmniFocus grabs it from that list if it’s the one you have chosen to capture.
Siri, remind me to… records a task to the default list, and Siri asks for a due date.
Siri, remind me when I get to (or leave)… records a task to the default list with a contact location attached. If you choose a specific location, make sure it matches an OmniFocus context location.
Note
Use the small dot distance (200 meters/650 feet) if you would like OmniFocus to capture Siri-transcribed actions associated with that location.
- Add … to my OmniFocus list records a task to a list named OmniFocus if you have one set up in Reminders. OmniFocus captures the task if that’s the list you’ve chosen.
Replace OmniFocus with the name of whatever list you’d prefer!
To keep your data safe, there are some Reminders items that OmniFocus will not claim. (Reminders will retain ownership of the data and it will not be lost.) These are items that have data beyond what OmniFocus can track, such as contact locations outside the set of small-size OmniFocus context radii you have established.
For this reason, the location-based aspects of capture are most effective when you tailor the locations of your OmniFocus contexts as closely as possible to your location-based Reminders contacts.
Calendar Alarms
A task’s due date is approaching! By combining the powers of OmniFocus with Calendar on your device, you can set up reminders to let you know about upcoming deadlines automatically.
Note
Hooking up OmniFocus with Calendar is a slightly complex setup process. Since iOS now supports time-based notifications from OmniFocus it’s also one that is only useful in a few cases—when you want an alert before an item is due, or if you want an alert on a device that can subscribe to your calendar but doesn’t have OmniFocus.
Warning
The OmniFocus 2.6 Mac/2.15 iOS updates bring a new, more secure database format to OmniFocus. After migrating to the new format, if you’re set up to publish due items as calendar alarms, a portion of your data corresponding to the two weeks noted above will be unencrypted while stored as part of the .ics file on the sync server.
If you decide to set up calendar export, you’ll first want to enable sync either via Omni Sync Server or another WebDAV server (see Getting Synced at the beginning of this manual for instructions).
Once sync is up and running, tap Settings in the secret bar, and then tap Calendar Alarms. You’ll see the option to view some important security information about the link to the Calendar app before proceeding. If you store potentially sensitive information in your OmniFocus database you’ll want to check this out.

When you’re ready, turn on Calendar Alarms. You’ll have several options for when you’d like to be reminded of your upcoming tasks. Pick the one that works best for you, and then tap Synchronize Now.
Since you’re setting up the link to the Calendar app for the first time, you’ll need to enter your login information next by tapping the Subscribe in Calendar button which appears in the place of Synchronize Now.
After you’ve authorized the new calendar subscription, due date reminders will appear in Calendar for all the upcoming actions and and projects you’ve scheduled.
Warning
When choosing a location to store a subscribed calendar, you may see iCloud as an available location (this is the default location in the Calendar app, for example). Storing a calendar in iCloud that syncs with your OmniFocus database can lead to some annoying and repetitive password prompts, so we recommend storing it locally on the device where you’d like to receive the alerts instead.
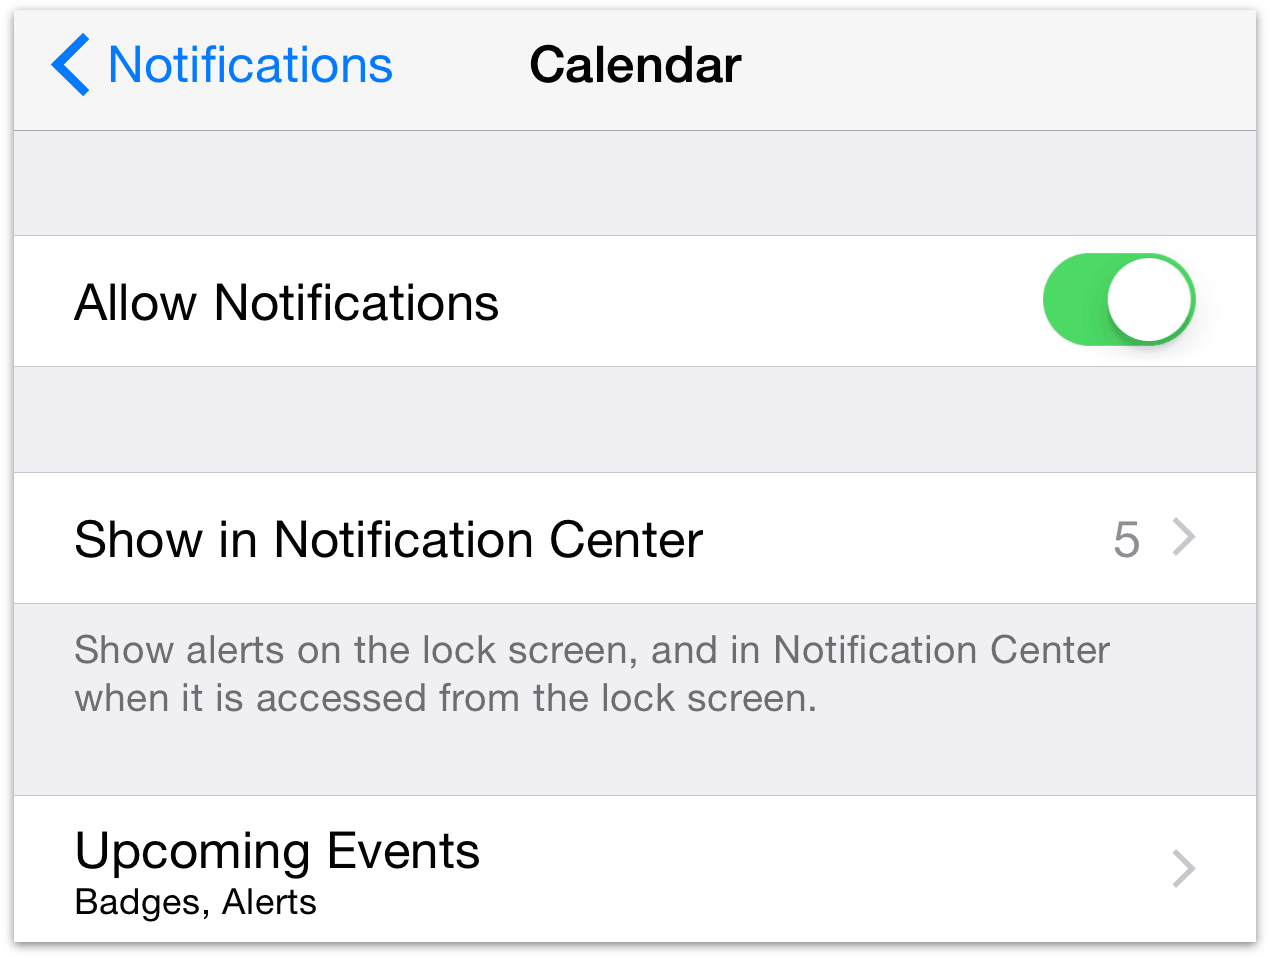
If you have opted to receive push notifications from Calendar on your device, these too will pop up when your to-dos are due. To see what your Calendar settings are, open the iOS Settings app, tap Notifications and then find Calendar in the Include section. You’ll want to choose the number of items to Show in Notification Center, and choose settings for your Upcoming Events alerts (the other Calendar alerts settings don’t effect what OmniFocus-related alerts you’ll see).
Today Extension
Drag down from the top of the screen anywhere on your device, then swipe to the right, and you’ll see what’s going on today: a collection of widgets that iOS presents as a curated set of data relevant to your current place and time.

You may see some Calendar entries, perhaps a Reminder or two (or the weather, as shown above), and you’ll notice that at the bottom of the screen there’s a button labeled Edit. Tap it and you’ll be brought to the edit screen, where you can add other custom widgets to your Today screen – OmniFocus among them!
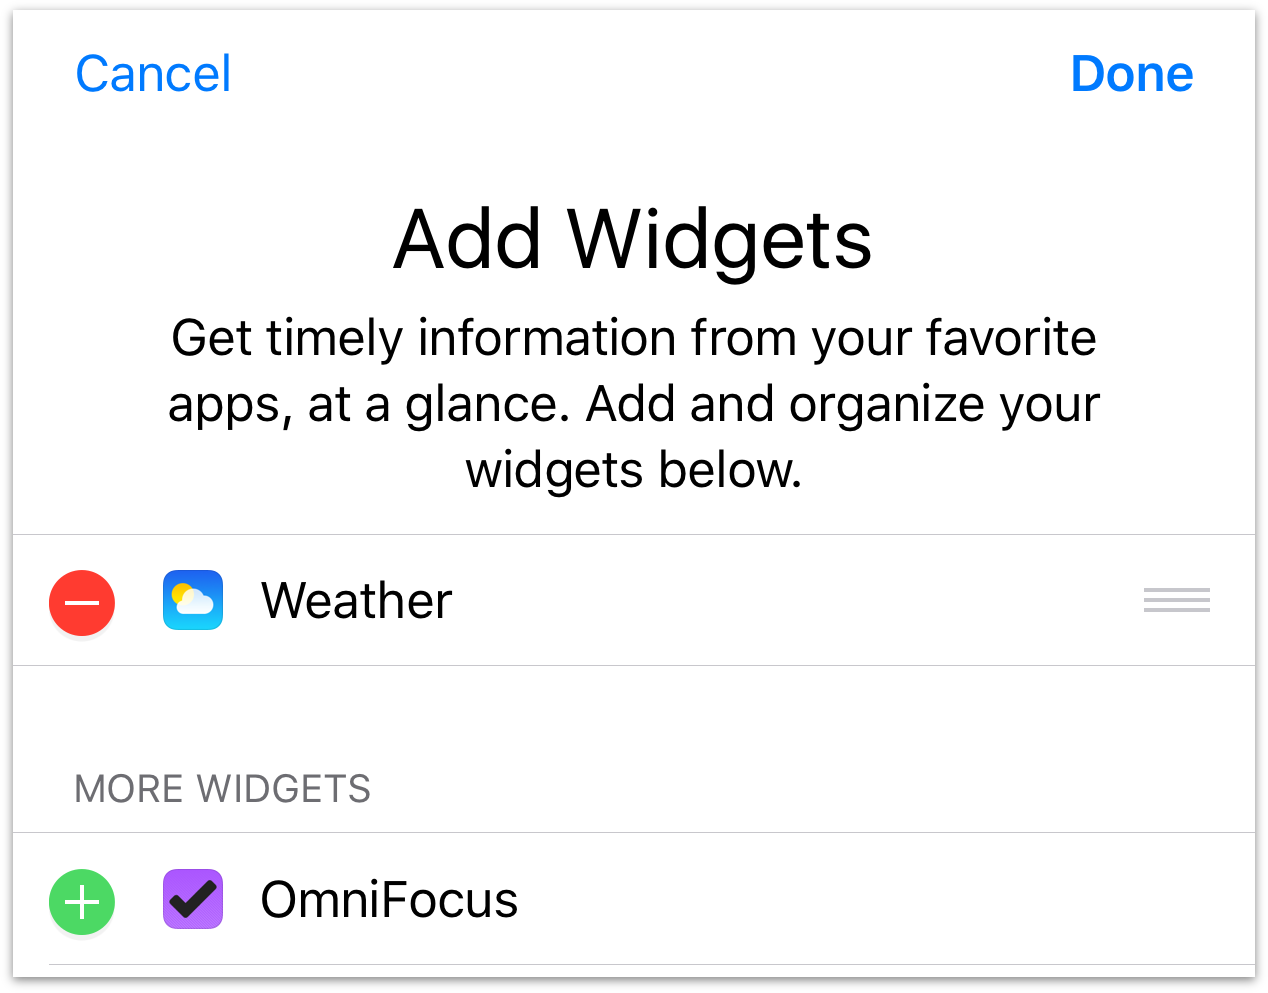
Tap the green plus icon next to OmniFocus and it’ll be added to the list of extensions shown on the Today screen. Use the reordering handles on the right to change their order, and when you’re happy, tap Done. From now on you’ll see OmniFocus items that are relevant today alongside events of current interest from other apps, and you can check on their status (or check them off as complete) from anywhere on your device.
Tip
On a device with 3D Touch, press the OmniFocus app icon on the iOS Home screen to Peek at the OmniFocus Today widget and access other quick actions. This also offers another way to add OmniFocus to the Today screen; press to Peek the OmniFocus app icon and tap Add Widget for a convenient setup short cut.
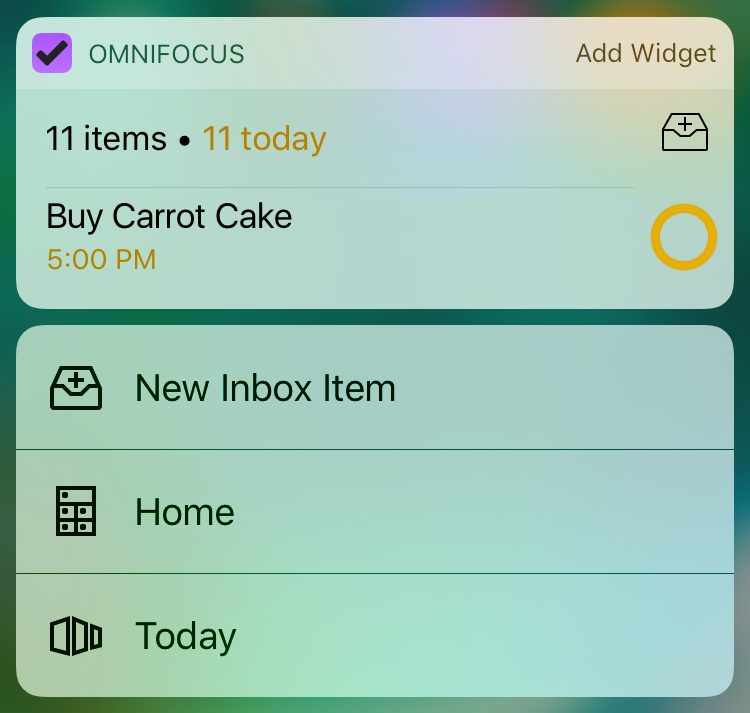
OmniFocus uses the Today & Watch settings to determine which items are displayed in your Today widget. Due Today is the default, but you can choose another (or multiple other) task attributes to suit how you personally describe priority in OmniFocus and put the most important things front and center.
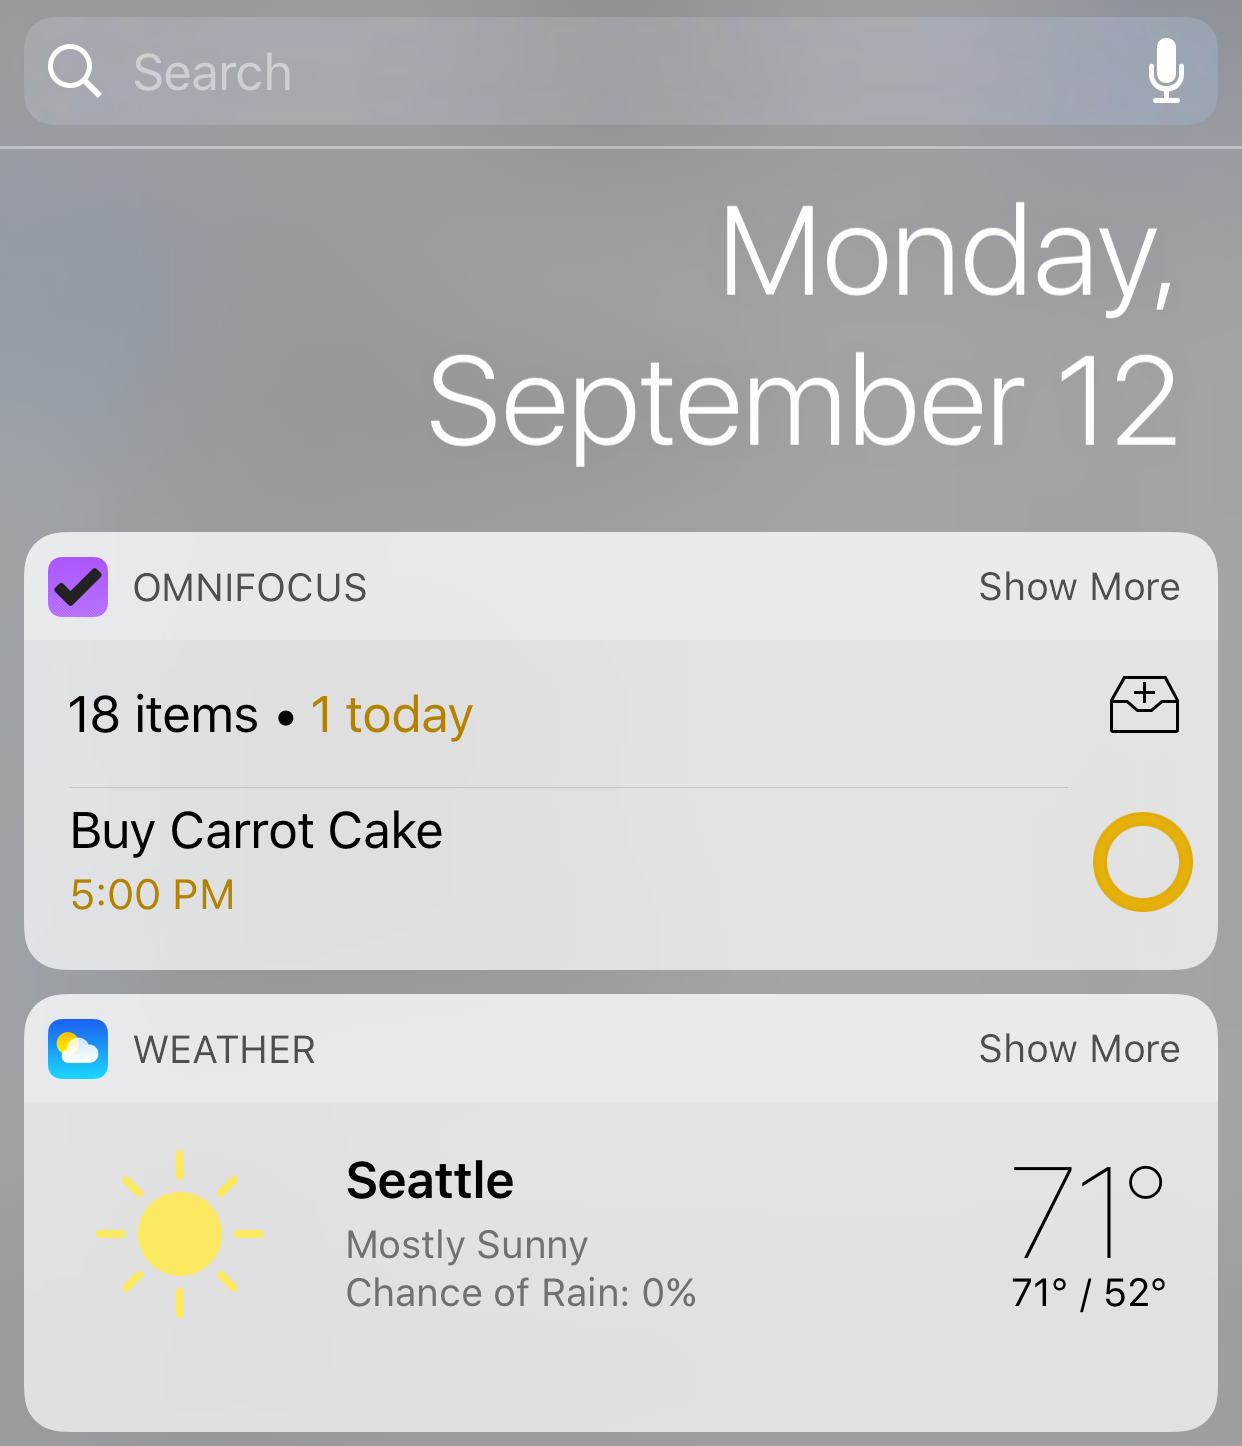
The OmniFocus widget shows a single item by default (the one it deems most relevant based on your settings). Tap Show More to see an extended list of upcoming actions as they appear in chronological order.
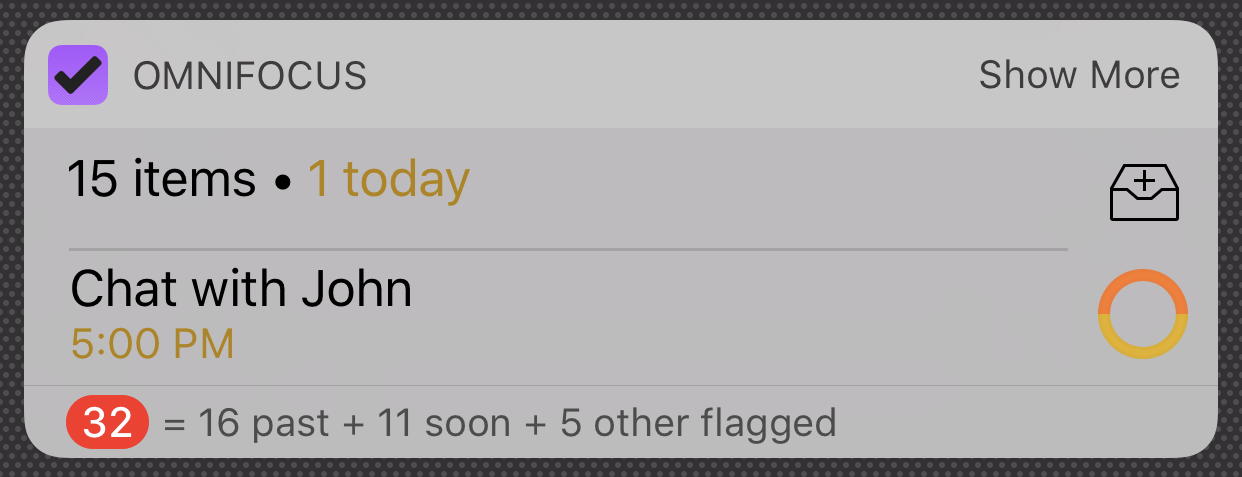
In the Sounds, Alerts, and Badges section of Notificiations settings, you can choose to have a summary of the OmniFocus icon badge count (a badge that displays the number of OmniFocus items deemed important based on your settings) as part of the Today widget. This adds a row beneath your actions that contains the badge count and its breakdown by item type.
Tip
Just beneath Show More (or Show Less) in the OmniFocus widget you’ll find the New Inbox Item button, which makes it even easier to add a task to your OmniFocus Inbox from anywhere on your device. Tap it and OmniFocus opens onto a new blank item, ready to receive your latest inspiration.
If you have an Apple Watch with OmniFocus enabled, the display settings you choose for the Today widget apply to the OmniFocus for Apple Watch home screen and Complications as well (see this support article for help setting up OmniFocus on your Apple Watch).
Note
With OmniFocus Pro, if you’d prefer to display an entirely different custom perspective in the Today widget you can choose to do so in OmniFocus Today & Watch settings.
Interactive Notifications
With the Interactive Notifications feature available in recent versions of iOS, you can take actions on notification from OmniFocus regardless of where you are and what you’re doing on your device. Previous versions would just show you a notification, but now the notifications you see can be actionable items.
Note
To take advantage of interactive notifications, you’ll need OmniFocus notifications to be set up as alerts. Check Notifications > OmniFocus in the iOS Settings app to make sure the alert style is set to Alerts or Banners.
Now, when you see a banner or an alert for an OmniFocus item you’ll have some options. For alert-style notifications, you’ll have several options:
Open
Open OmniFocus directly to the item in question to take further action on it.
Complete
Mark the item complete, effectively checking it off in your OmniFocus database. Done and done!
Note
If you receive multiple notifications from OmniFocus at the same time, the option to complete them won’t be available (we don’t want to trick you into completing things you can’t see!). You can still "snooze" the group of actions to receive a notification again later.
Snooze
Delay consideration of the item for another 15 minutes. This doesn’t change its due date or defer date; it just reminds your device to check in with you again later.
Close
Dismiss the alert for good.
When a banner-style notification appears, swipe down on it to reveal the Complete and Snooze options.
Tip
You can also visit the Notification Center to interact with notifications from OmniFocus. Swipe an item from right to left to snooze, complete, or dismiss it.
Send to OmniFocus
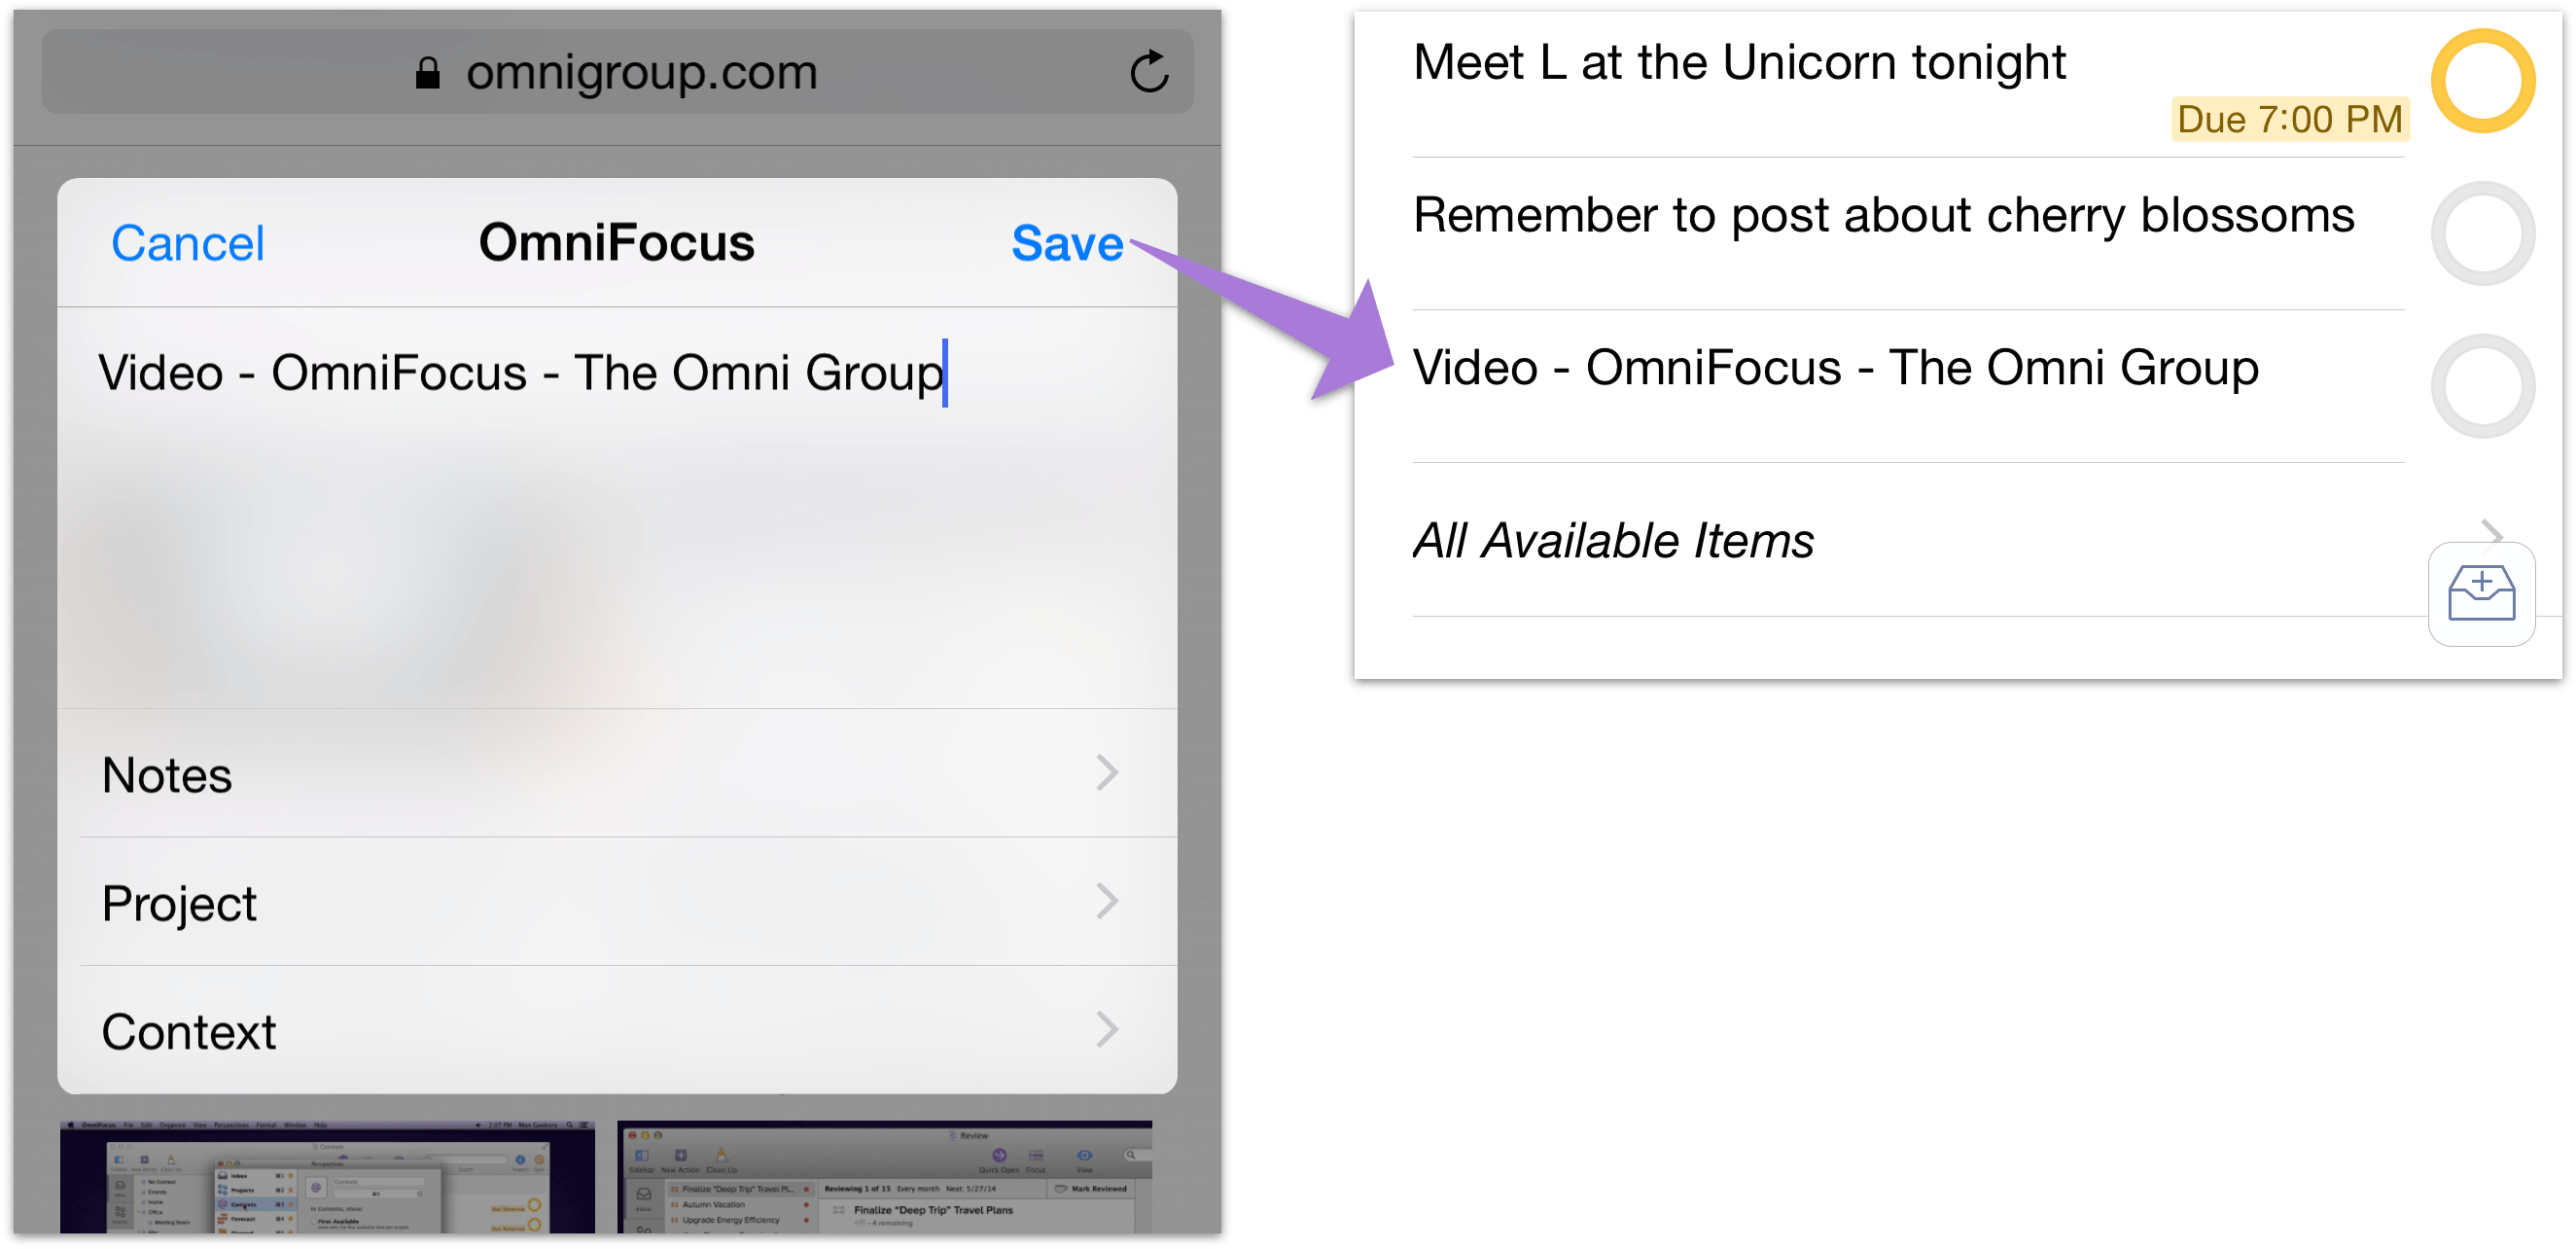
When you’re in another app on your device and you’re inspired to add something to OmniFocus – whether it be a webpage in Safari, a picture in Photos, or a bit of text, image, or audio file from another app that supports sharing – all you have to do is tap Share ![]() , and choose OmniFocus from the list of apps that appears (if it’s not there, swipe from right to left and tap More to add it).
, and choose OmniFocus from the list of apps that appears (if it’s not there, swipe from right to left and tap More to add it).

You’ll get a simple “quick entry”-style form to create a new item, with a field for its title, notes, project, and context; it’ll be populated with some information relevant to the data you’re sharing back to OmniFocus (website URLs in the note field and title pre-filled in the title field, for example), which you can edit to your heart’s content and then hit Save when you’re ready to send it to your Inbox.
OmniFocus for Apple Watch
If you have an Apple Watch and OmniFocus for iOS on your iPhone, you can extend OmniFocus to Apple’s most personal device yet. We designed the OmniFocus for Apple Watch Extension with the device’s unique capabilities in mind. You’ll find details about OmniFocus’s full integration with Apple Watch (including updated support for the features of watchOS 3) in this support article.
Automating OmniFocus
With some knowledge of programming, you can use callback URLs to automate conversations between OmniFocus and other apps on your iOS device. This offers the ability to set up project templates with custom data fields, for example, along with many other powerful automation possibilities. This is an advanced feature that requires some tinkering under the hood; for help getting started integrating OmniFocus with the workflow app of your choice, see URL Schemes in OmniFocus on the Inside OmniFocus website.
1Password Support
If you have 1Password from AgileBits installed on your device, you can use it to store your sync account password, and store and configure your encryption passphrase if you choose to set one up separately.
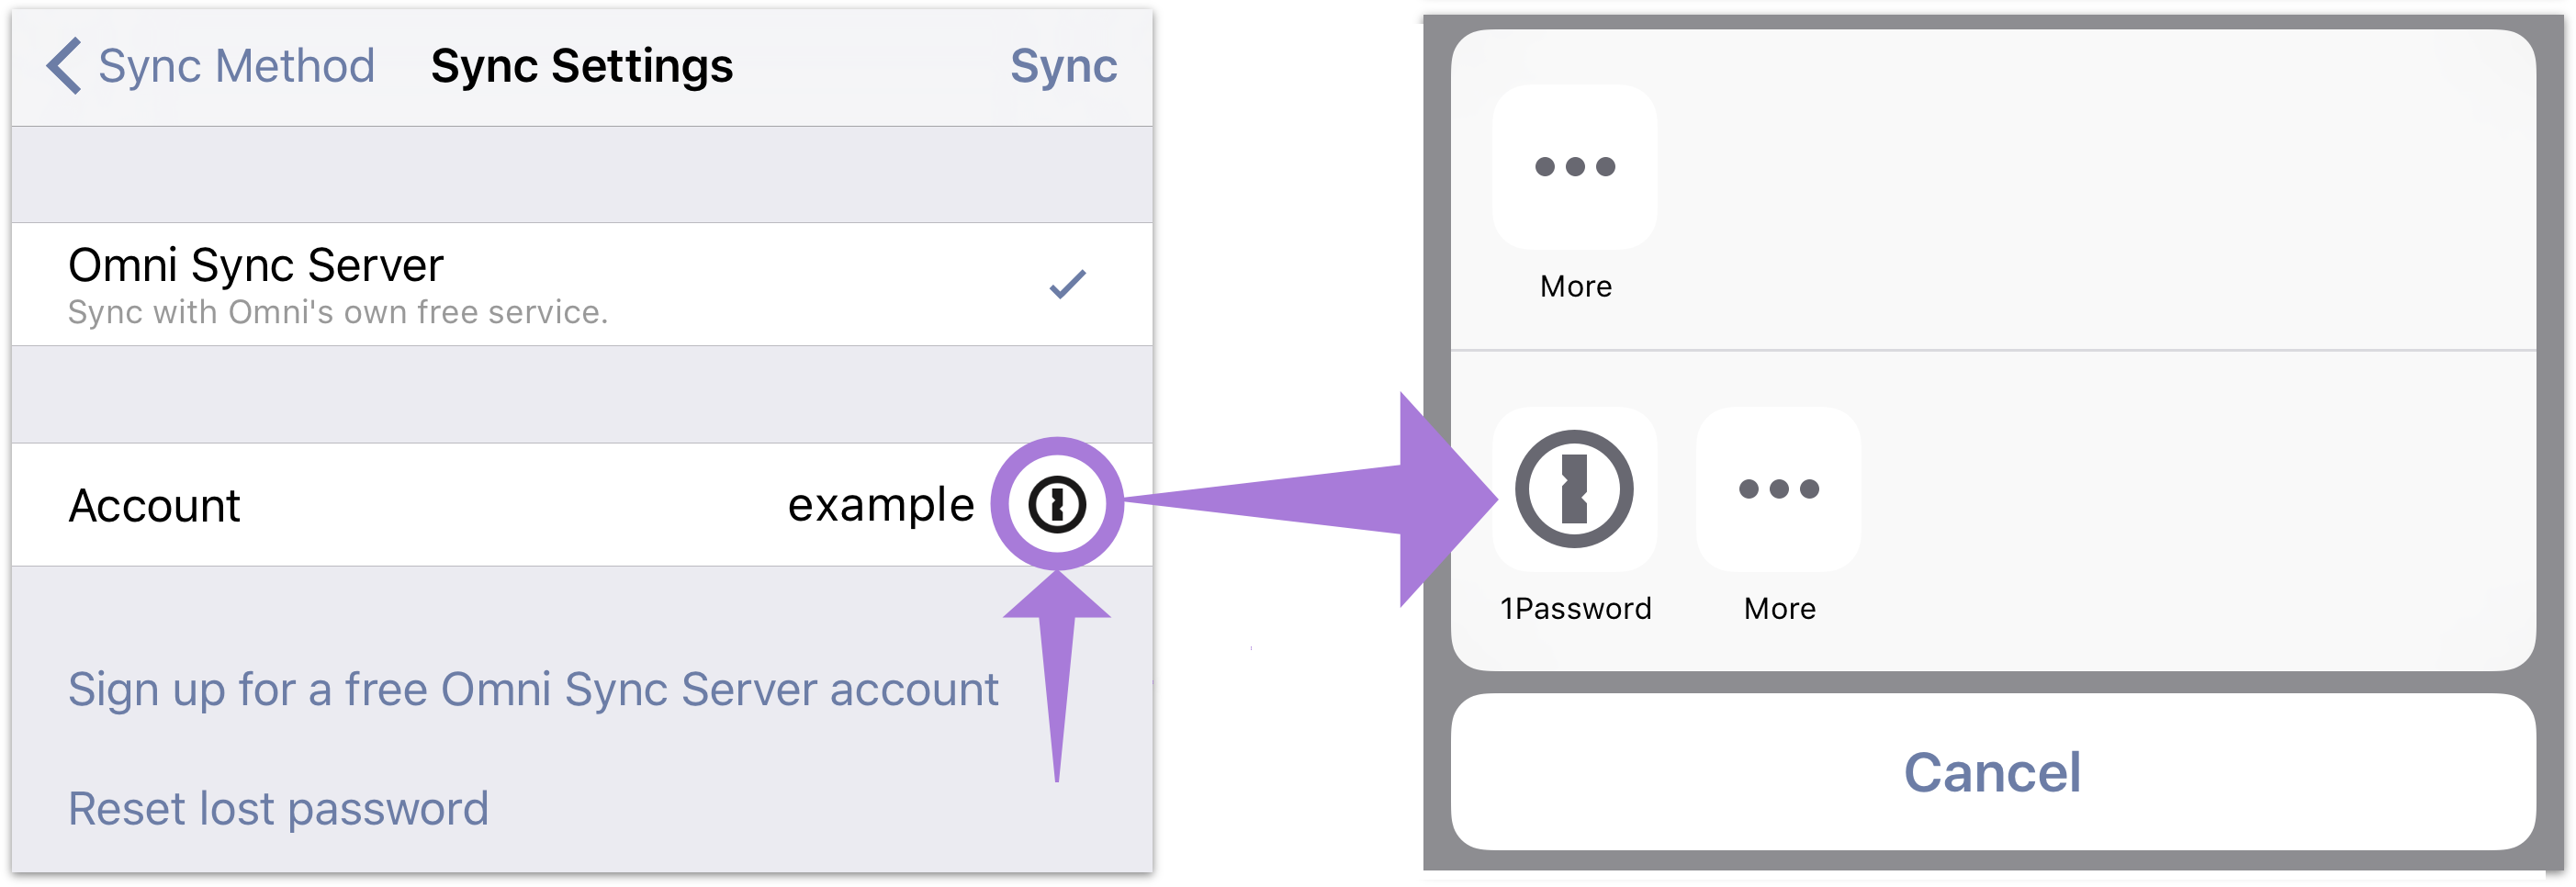
With 1Password installed, OmniFocus adds a 1Password button to password fields throughout the app, as well as in the username field of the Omni Sync Server setup screen (this appears when you first install and launch the app, and also in Settings). Tapping the 1Password button presents the iOS standard share sheet, which contains 1Password as an option; tapping it pops up the 1Password extension.
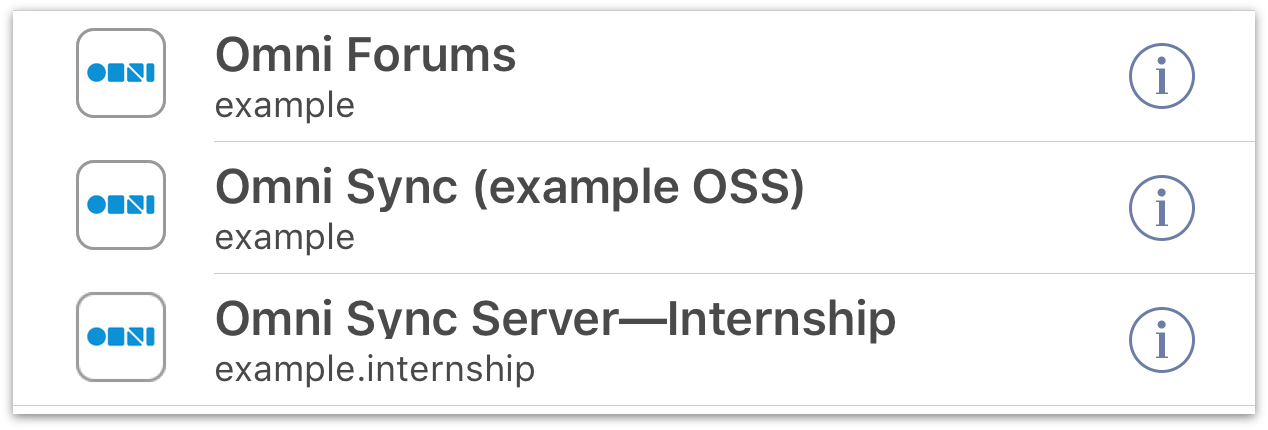
After unlocking 1Password with your Master Password or Touch ID, you’ll be shown a list of existing Login entries that match the server you’re trying to log in to (either Omni Sync Server or custom WebDAV). This list is filtered based on the hostname of the service, so if you have other entries for *.omnigroup.com and are logging in to Omni Sync Server, you may see those other entries offered alongside your sync credentials. (The same goes for multiple logins to different services on the same third-party server that provides your custom WebDAV hosting.)
When you pick an entry, the credentials are sent back to OmniFocus, and it fills out any information you haven’t already provided. Notably, this means that if you typed in a username by hand on the OSS setup screen, then picked credentials from 1Password with a different username, OmniFocus will only use the password and not the changed username. On the other hand, if you chose 1Password from the Omni Sync Server setup screen or in a prompt with both a username and password field, OmniFocus will use both the username and password provided by 1Password.
Note
If you’re syncing with a custom WebDAV server, 1Password will not populate the URL of your sync directory alongside your username and password. You will have to fill out the custom WebDAV address by hand when setting up 1Password support for your account.
If you cancel at any point during password selection, OmniFocus makes no changes. You’ll need to tap the 1Password button again to start the process over, or provide credentials by hand.
You can use 1Password to store both your sync password and your encryption passphrase, if they’re different. In this situation, you’ll go through the 1Password connection process twice: once during sync setup to add your Omni Sync Server or WebDAV credentials, and again in the Encryption section of Settings or when otherwise prompted to enter your new encryption passphrase.
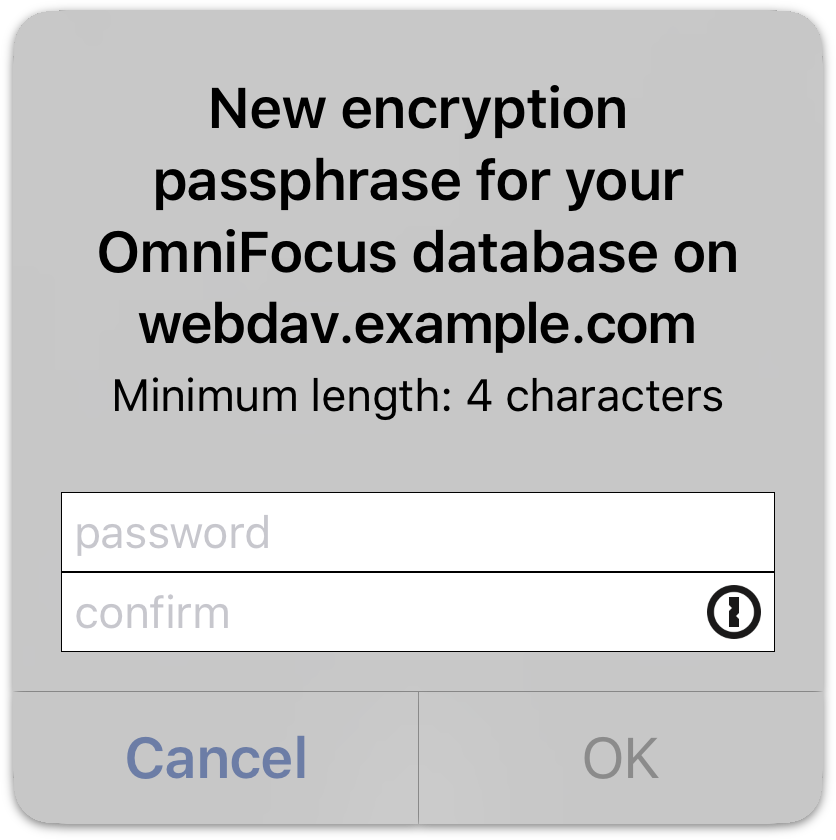
When setting up your encryption passphrase, 1Password can be used in one of two ways.
-
First, it can store a passphrase you create in OmniFocus. To do this, enter the passphrase in the password and confirm fields shown in the screenshot above, then tap the 1Password button and choose 1Password from the share sheet. This creates an entry in 1Password that is populated with the new password; assign a username to it (anything will do, since there is no username associated with the encryption password), save the entry, and you’re good to go.
-
Alternatively, leave the password field blank and tap the 1Password button to open 1Password and create an empty Login entry. You can use 1Password’s built-in passphrase generation tool to create your new encryption passphrase there. Follow the same steps to roundtrip back to OmniFocus, and the passphrase you created in 1Password will be pre-filled in the password and confirmation fields.
OmniFocus uses the same hostname to identify both the sync server and encryption password requests, so it’s likely that the 1Password extension will show both sync and encryption Login items on each request (assuming both items contain the sync URL). It’s a good idea to use a unique Login entry title to differentiate these; for example “OmniFocus sync” and “OmniFocus encryption.”
