Organizing with Contexts
In addition to the hierarchical ways of organizing your actions, you can also assign a Context to each action, project, or group. A Context can be anything you want, such as a place (the hardware store or work), a person (you, your boss, or a coworker), or a thing (your trusty MacBook Pro or a torque wrench). Contexts indicate where you need to be or what you need to have available to complete the item.
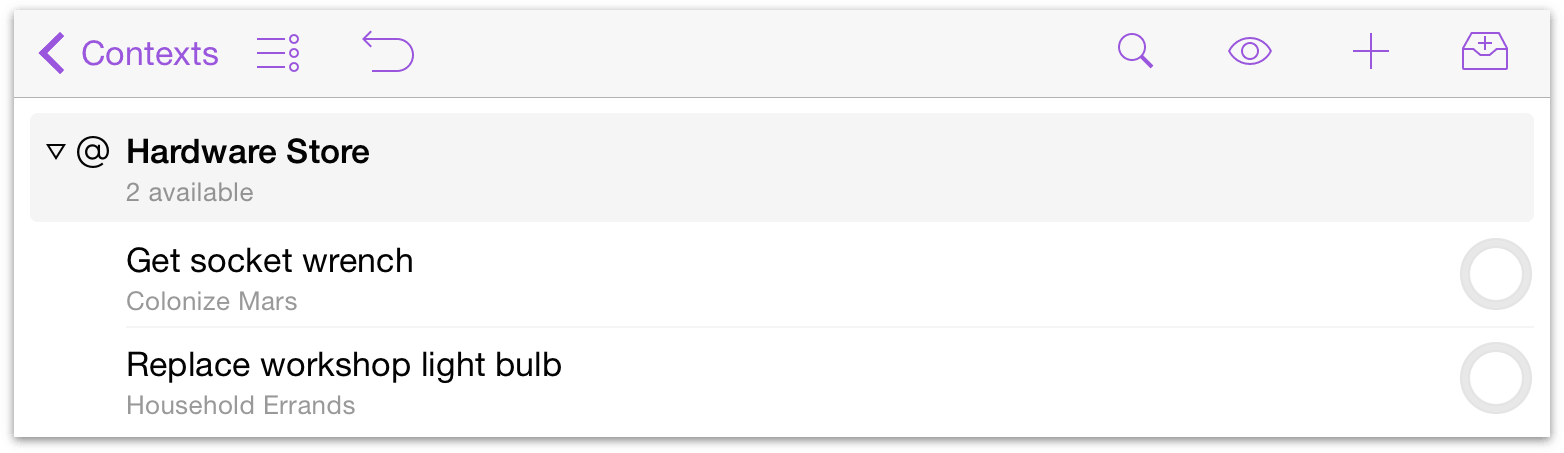
For example, let’s say you’re tweaking the rocket engine you’ve been building in the backyard, and you’re stuck because you need a specific wrench. To make matters worse, the light in your workshop went out when you went searching for that wrench. You’ve added the wrench as an action in your Colonize Mars project, and you just added the lightbulb to your Household Errands project. But what’s to keep you from forgetting one or the other the next time you go to the hardware store? The answer is that while they’re part of different projects, you can associate these items with a Context.
Note
By default, if you only assign a context to an inbox item, it remains in the Inbox with your other tasks until you assign it a project.
Contexts can be created in two ways:
From the Contexts perspective:
Tap Contexts in the sidebar or home screen, then tap the New Context button
 in the toolbar. The context editor appears, where you can assign a name to your new context, set its status (Active, On Hold, or Dropped), and choose a location (see Location Reminders below) for where you need to do that ultra-important thing.
While editing an item:
While editing an inbox item or action in one of your projects, you can choose a context for it or create a new context by entering a unique name in the text field. After entering the name for the new context, don’t forget to tap Create (context name) below the text field to add this context to your list.
Note
Changing a context's status to On Hold marks any items assigned to the context as On Hold as well, causing them to disappear from the Available view setting. If an item mysteriously disappears after you mark its context On Hold, check your view settings! It may just be hiding out of sight.
As you can see, contexts give you an amazing amount of control over the depth of information you can add to actions, inbox items, and projects. We have preloaded OmniFocus with a bunch of contexts that we think you’ll most likely need, and the new contexts you create show up at the bottom of the list. But let’s say that you don’t need some of the preset contexts, or that you want to move your new contexts to the top of the list. Alrighty, let’s do that next.
Managing Your Contexts
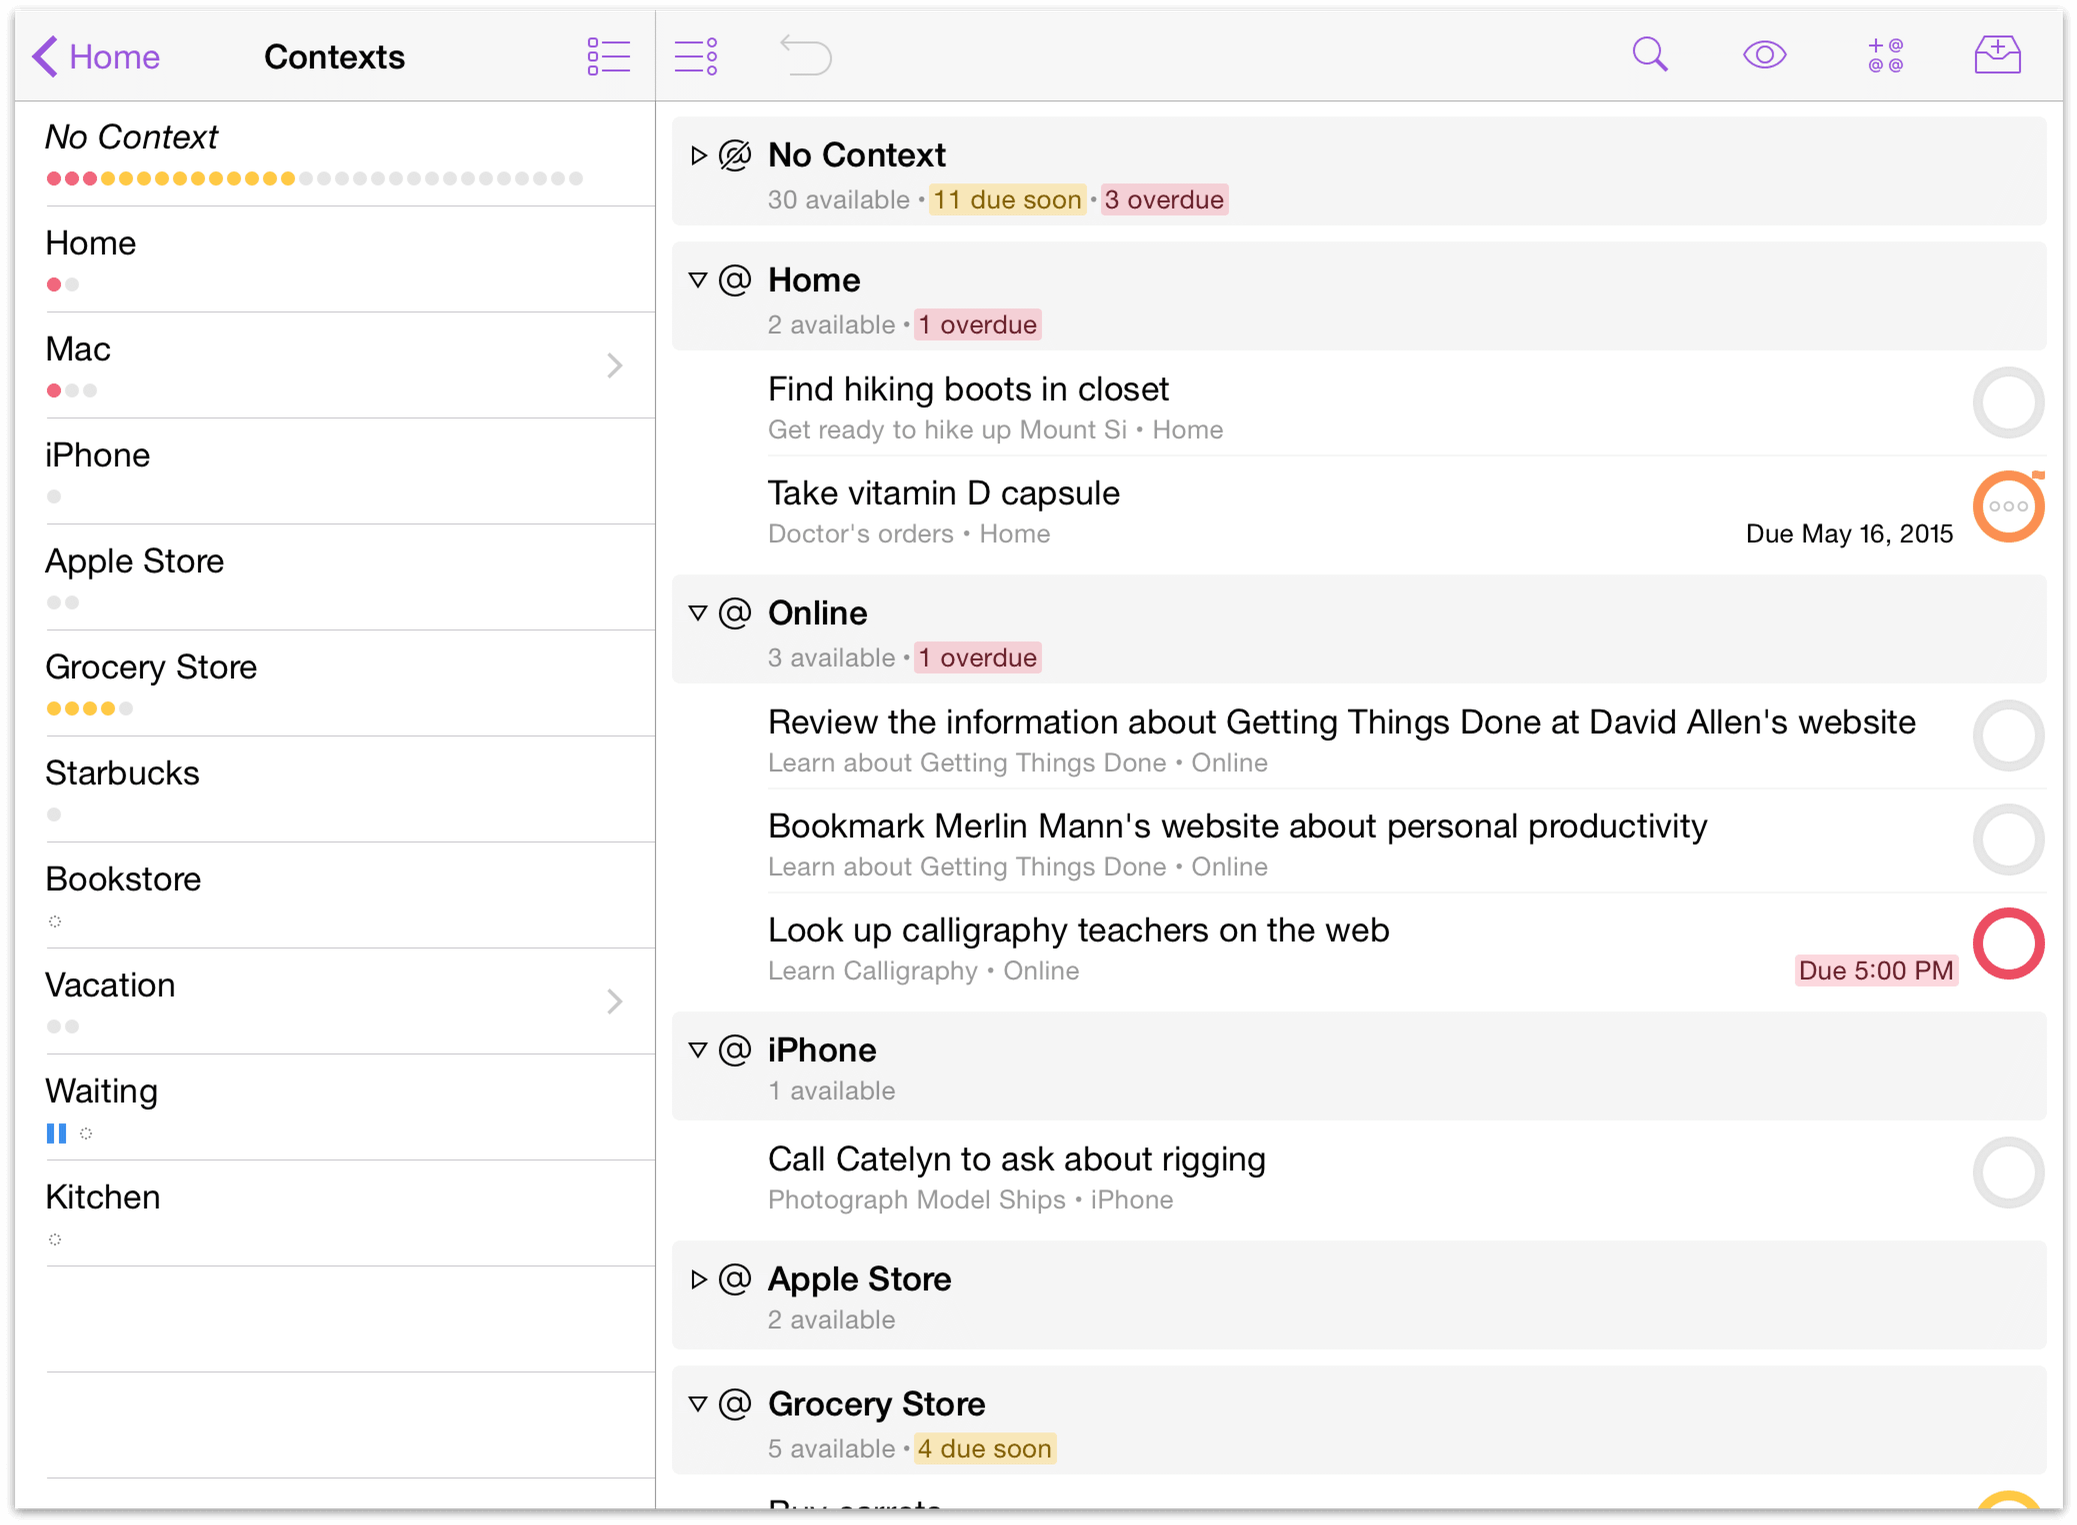
The contexts screen shows a list of contexts with summary dots indicating the at-a-glance status of the actions and projects within them. When you’re ready to get some work done, this is a good place to see only the things that are relevant to a particular context. Actions without a context show up at the top in a No Context group.
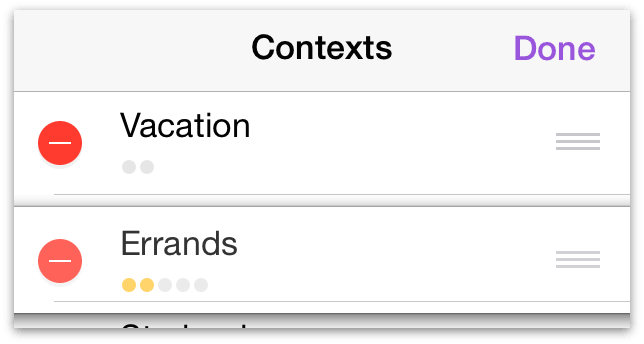
To delete or move contexts around, tap Edit in the toolbar (![]() in the iPad sidebar). To the left of the contexts, you’ll see a deletion switch
in the iPad sidebar). To the left of the contexts, you’ll see a deletion switch ![]() ; and on the right, you’ll see a reordering handle
; and on the right, you’ll see a reordering handle ![]() . If you tap the deletion switch, you won’t delete the item right away. Instead, a Delete button appears to the right where the reordering handle was. Tap Delete to remove the context from your list.
. If you tap the deletion switch, you won’t delete the item right away. Instead, a Delete button appears to the right where the reordering handle was. Tap Delete to remove the context from your list.
To change the order of the contexts in your sidebar, just touch and hold the reordering handle and drag the context up or down in the list. As you move that context around, you’ll notice that the other contexts move out of the way so you can drop the context where you would like it to be.
When you’ve finished making changes to your contexts list, tap Done in the upper-right corner of the sidebar to save your changes.
By default, actions in context lists appear in the same order they are listed in their projects. Tap View Options to sort by flagged items and due dates, with flagged items shown first and then items by due date from soonest to latest.
Note
Copied items can't be pasted into contexts directly. To add a context to a copied item, first paste it into an perspective that uses the project hierarchy (such as the Inbox or Projects perspectives), then tap it to edit its details.
Nesting Contexts
By default, any new contexts you create are added at the top level of the context list. However, if you tap Move ![]() when viewing a context, you can create nested contexts.
when viewing a context, you can create nested contexts.
Note
The Move button doesn't appear in the editor until after a context has been created, so to nest a new context inside another, return to the context list after creating it and choose it from there to open the editor with a refreshed view.
For example, when you have important people who are associated with important places, you could assign contexts to them independently – or, you could group them together by their common location. So if you have a Work context, you can move your boss, coworkers, and even work-related tools like your computer or drafting table into it to keep things clearly organized.
There’s no limit to the amount of context nesting you can do, which means you have the ability to give your actions fine-grained detail about where or how you need to do something.
Location Reminders
When you’re on the go with your device, context-based location reminders are handy for getting a little nudge when you are in the right area to complete an action.

Note
The underlying technology for location reminders on iOS is quirky; you can't quite count on them to occur perfectly every time you enter the specified area. (These location alerts use a less accurate and somewhat unreliable low power location monitoring, rather than the battery draining GPS services available in iOS, although accuracy is improved in all cases when both a cellular network and GPS are available.)
The range of distances at which you might get an alert is pretty wide. If you leave an area and then enter it again within a short span of time, you might not get a second alert. And if you pass through an area quickly (such as while driving on the highway), you might not get an alert at all. So for now it is best to use this feature as an extra layer of occasional helpfulness, not a crucial part of your trusted system.
Turning on Notifications
Before you can use location reminders, the first thing you’ll need to do is to turn them on in OmniFocus’s settings. Tap Settings in the secret bar to open the settings. Under Notifications, tap Sounds, Alerts, and Badges, and then tap the switch under Location Reminders to make sure Show Alerts is turned on.

With notifications turned on, you can now set up locations for the contexts you use in OmniFocus.
Note
If you don't turn on notifications in OmniFocus Settings, you won't be able to assign a notification to a context.
You'll also want to make sure that OmniFocus has permission to receive alerts on your device. You'll have been asked about this at launch, but if you refused at that time, you can open the iOS Settings app and then select Notifications to be sure that alerts are enabled (choose OmniFocus from the list of apps on the right).
If you follow the instructions in this chapter and notifications still aren't appearing, it's possible that location-based alerts have been disabled globally on your device. To check on this, take the following steps:
- Open Settings.app.
- Tap Privacy.
- Tap Location Services.
- Scroll down to the very bottom of the screen and tap System Services.
- Ensure that Location-Based Alerts is set to On.
Giving a Context a Location
Your next order of business is to assign locations to your contexts. This makes it even easier for you to accomplish your goals when you’re out running errands, or to remind yourself of where something needs to be done. With location alerts turned on, OmniFocus will ping you when you’re near that location and bring that particular action item to the front so you can check it off your list.
To set up location info on a context:
In the Contexts list, tap on a context (then tap on its bolded title again to edit it), and then tap Location. None is the default; tap it to specify a place.
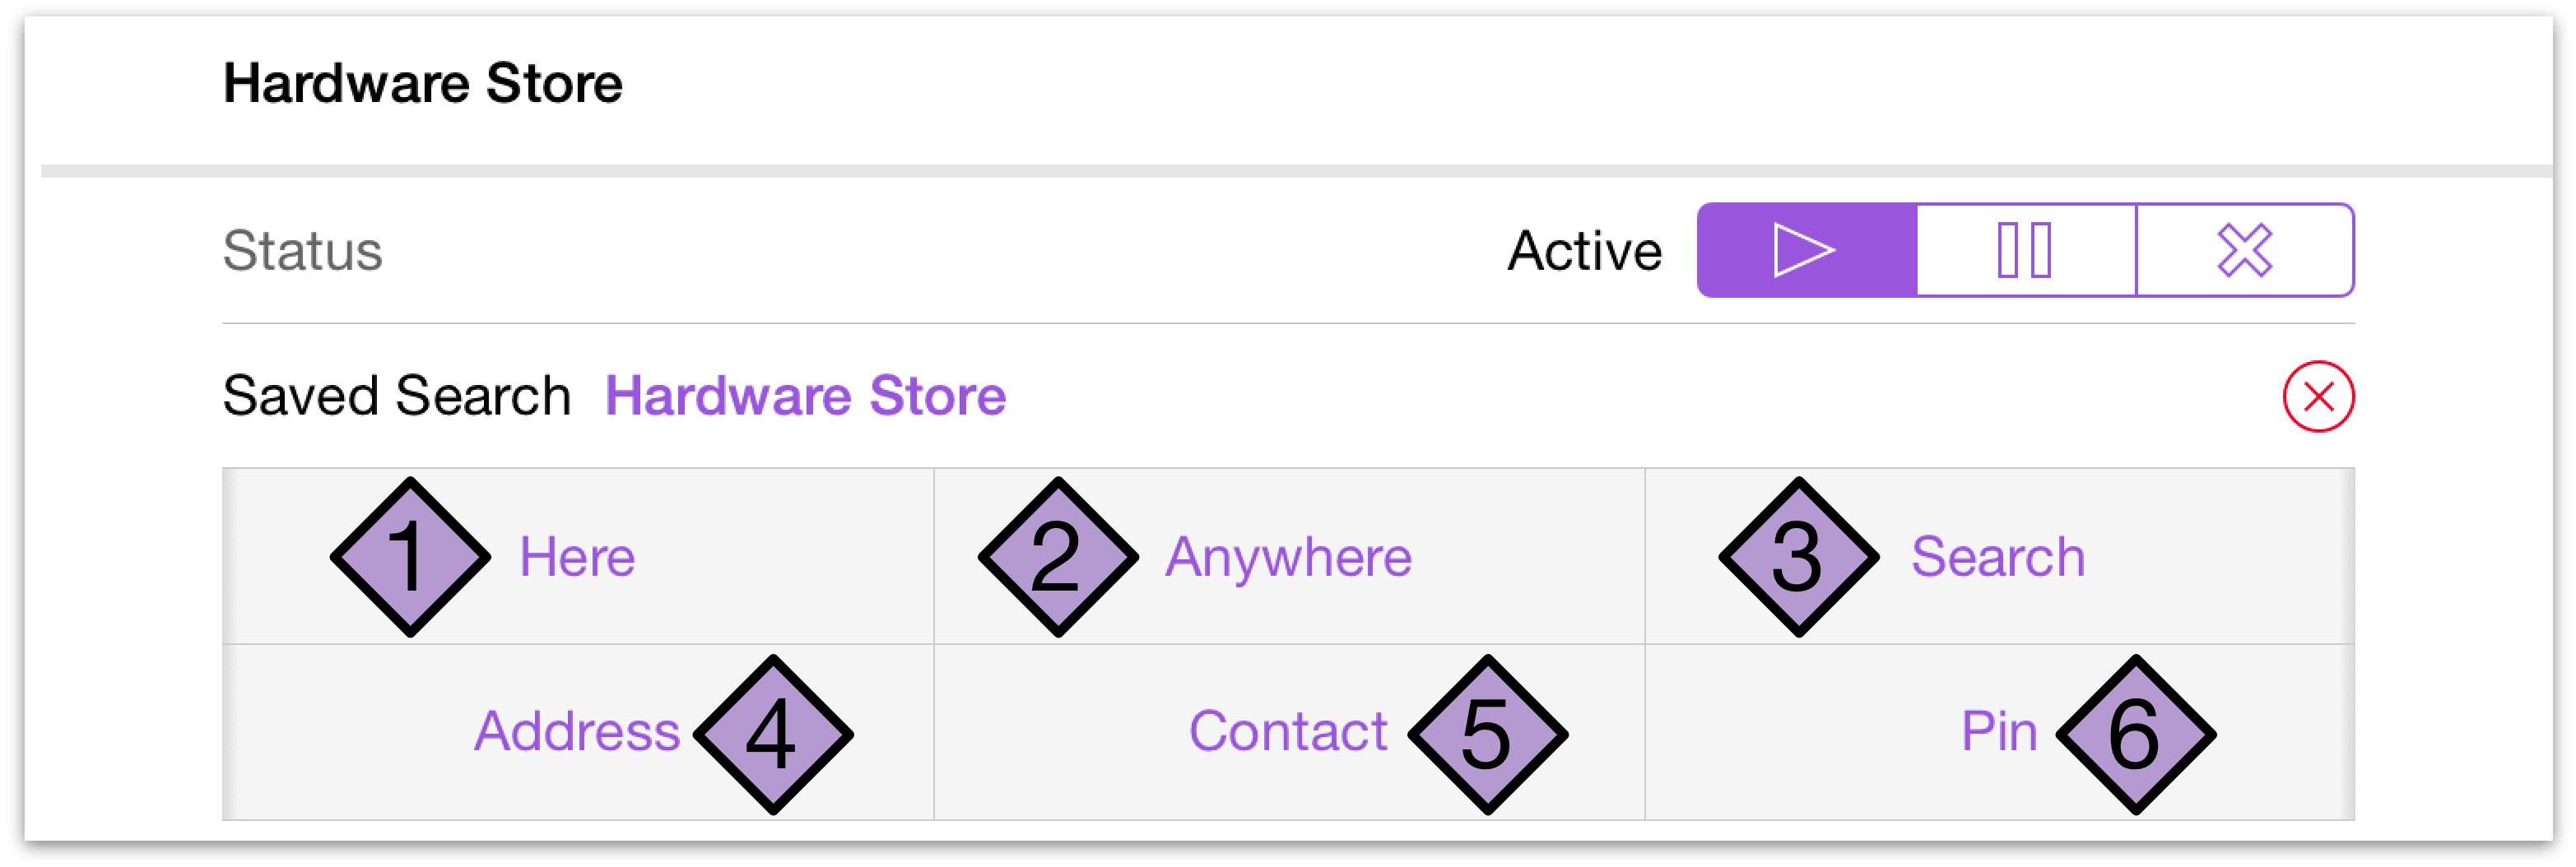
Here uses Wi-Fi or cellular triangulation to pinpoint where you are. Neither method is 100 percent accurate, but they can get pretty darn close.
Anywhere designates the context as always available, no matter where you are. It isn’t really a location—it just means that any context with this location are things that you can do anywhere, such as practicing your banjo (although, don’t try this on the bus during the morning commute).
Search lets you enter a keyword to search for. This option is particularly handy, for example, when you need to pick up something from a hardware store, but aren’t quite sure which one is closest to you. You can just type Hardware and then tap Search on the keyboard to choose a business near you. You can either assign the context an exact location that appears as a result of the search, or you can use the search itself.
Address gives you the option to enter a specific address (if known).
Contact gives you the option to choose the address for a person or place that you’ve added to your contacts. If this is the first time you’ve opted to set a location from the Contacts app, an alert will pop up asking you to authorize OmniFocus to access your contacts.
Pin lets you touch and hold a spot on the map to drop a pin at a location of your choice.
Note
If you've set up context locations on your device and you switch to OmniFocus on your Mac, the context location data won't be shown, but don't worry—it's safely preserved when you sync your OmniFocus data between devices.
Setting Notifications for a Location
After you’ve set the location, you can finally set up a notification, and provide a distance alert for the context as well.
The notification dialog appears below the location you’ve chosen on the editing screen. You can choose to be notified when arriving or when leaving your specified location.
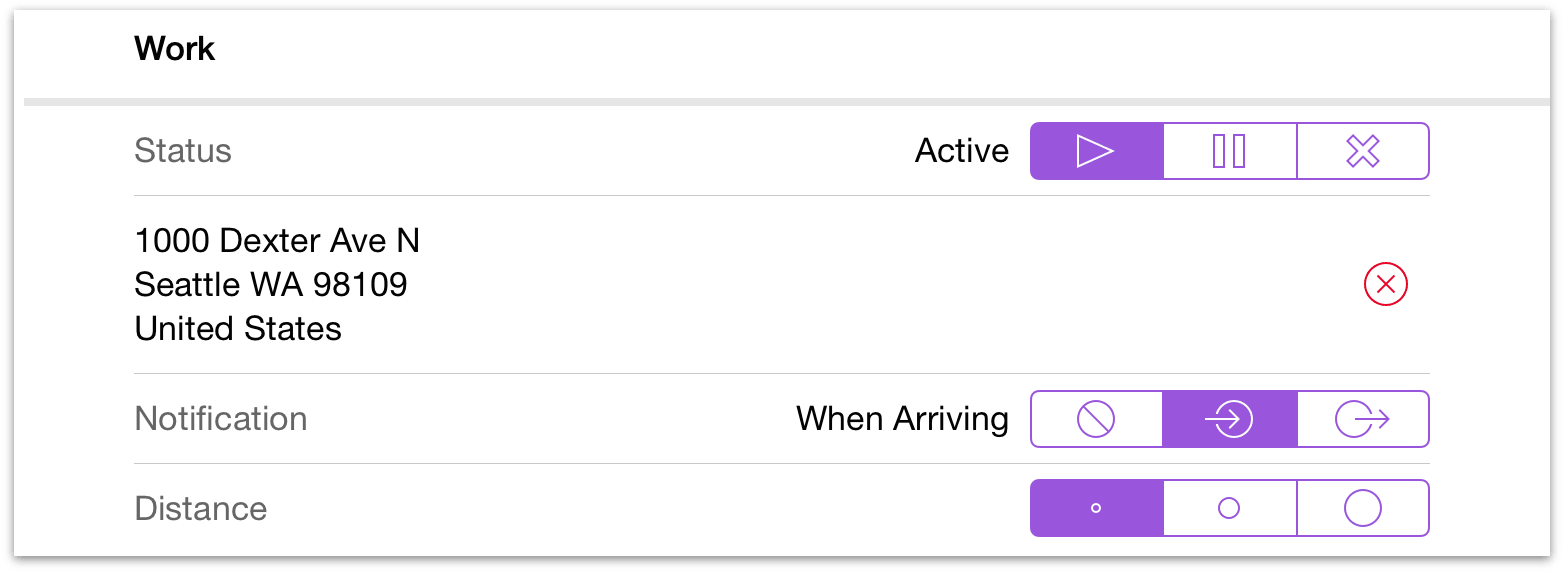
After setting your notification option, you’ll be able to choose a distance. The three distance options are very approximate. The small dot is about 200 meters or 650 feet; it covers about one city block and is useful for things such as coming home or leaving the office. The middle-sized circle is about 500 meters or about a quarter mile; it covers something such as a small neighborhood or park, and is useful for knowing when you are a few streets over from a certain store. The big circle is about 10 kilometers or 6.2 miles; it’s useful for things such as a city you occasionally visit. But remember, the actual distance where you get your notification could be quite a bit different from these rough numbers.
Putting Contexts, Locations, and Notifications to Work
Contexts with search-based locations don't offer notifications; instead, choosing Nearby from the sidebar or home screen shows the results of searches you’ve defined that are close to your current location. This is useful when the most convenient way to accomplish a task could change based on your current location and timeframe.
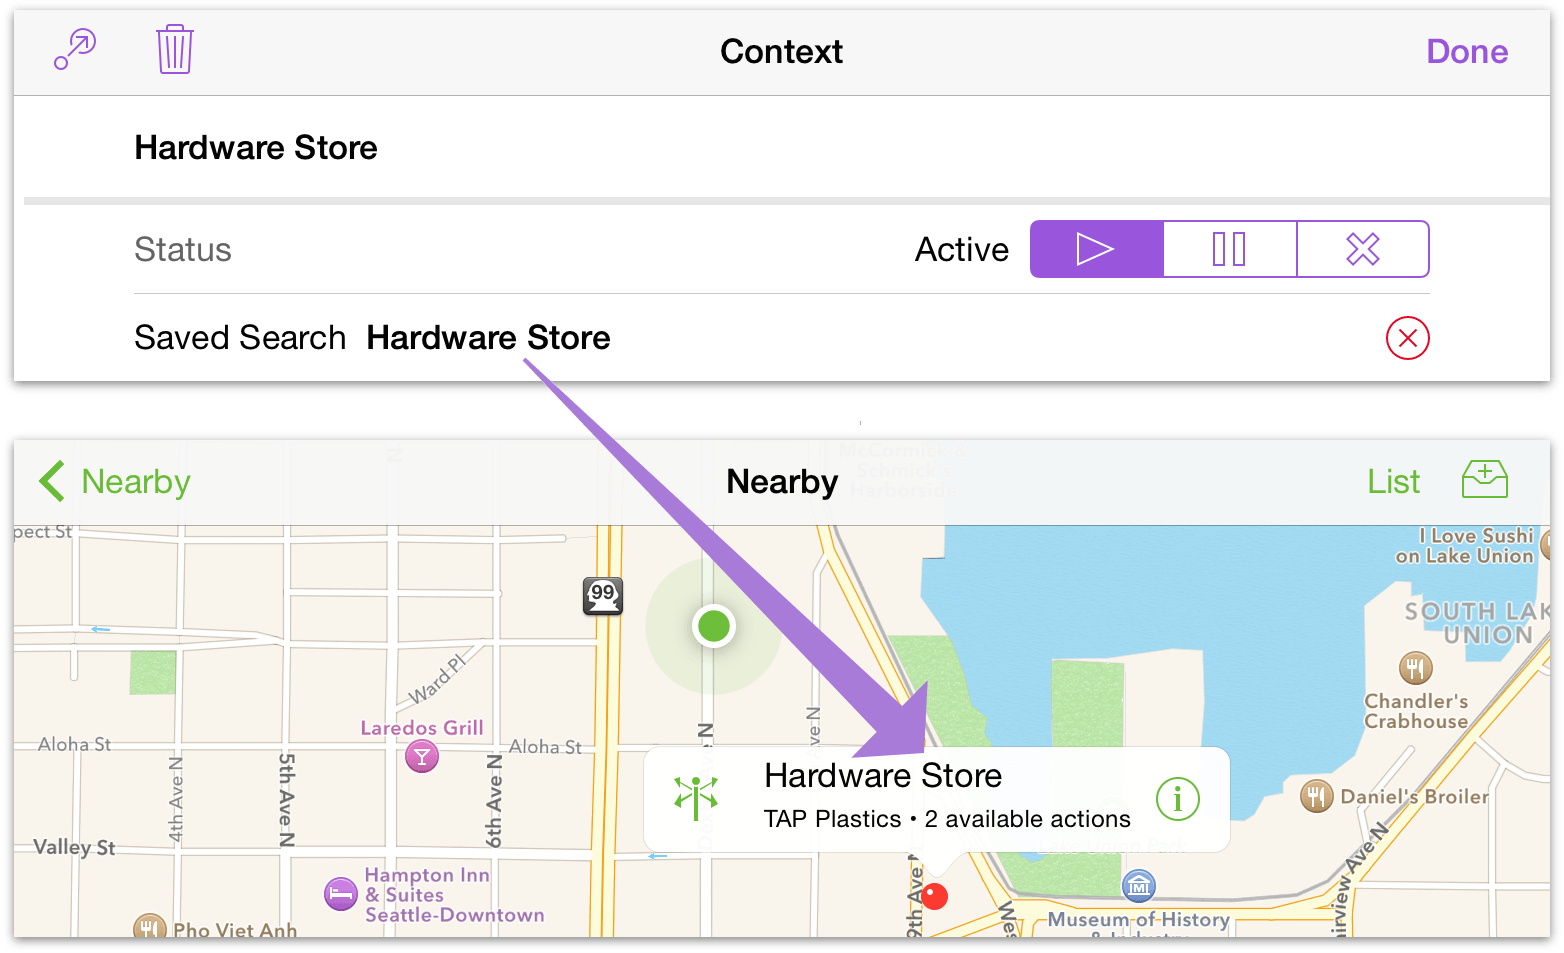
However, if you have set a location that’s far away, you can pinch on the map until you’re zoomed out enough to see a red location pin; tap the pin to see the available tasks associated with that context. Tap Info on the popover to view and edit the context and its associated tasks directly, or tap Get Directions ![]() to get directions to the location based on your current location.
to get directions to the location based on your current location.
When you tap Get Directions, the Maps app comes to the front and plots a course to the destination from your current location. To return to OmniFocus, double-tap your device’s home button and select OmniFocus from the app switcher.