The Inspector
The inspector holds tools for editing your actions, projects, and tags.
The inspector automatically opens to edit the details of an item when you tap it in the outline. On wide devices or in Edit mode, you can also tap the Inspector button  in the outline toolbar to open the inspector.
This chapter explains the purpose and function of the inspector’s various fields and options for editing your OmniFocus items.
Inspector Tools
Several tools for manipulating the current item are available in the inspector’s toolbar and bottom bar.
Pin 
The Pin button appears in the inspector toolbar in wide views. Tap it to pin the inspector to the right side of the OmniFocus view. If the inspector isn’t pinned, it will be dismissed when you navigate between perspectives or anywhere that doesn’t involve an item selection.
Previous 
Tap Previous to return to the item above the currently selected item in the outline.
Next 
Tap Next to advance to the item below the currently selected item in the outline.
Done 
The Done button appears in the inspector toolbar in compact views. Tap it to dismiss the inspector and return to the outline.
Move 
Tap Move to open the Move dialog and reposition the currently selected tag, project, action, or folder. The Move dialog provides destinations for moving the selection to another position within its hierarchy.
-
With a tag selected—Move the tag anywhere within the tag hierarchy.
-
With a project selected—Move the project anywhere within the project hierarchy (created by nesting folders). Projects live within folders but have no intrinsic hierarchical properties themselves; to move a project inside another project, first use Convert to change it to an action group, then drag the action group inside the destination project.
-
With an action or parent action selected—Move the action within its project or the Inbox, repositioning it within the action group hierarchy. To move an action to another project, use the Project row in the inspector.
-
With a folder selected—Move the folder anywhere within the project hierarchy.
Convert 
Tap Convert to open the Convert dialog, where you can convert an action to a top level project, or convert it to a project inside an existing folder. If the selected item is a project, Convert functions in reverse to change it to an action group. (The project becomes the parent action of the group, and its actions are nested inside it.)
Delete 
Tap Delete to remove the selected item or items from your database entirely.
Share 
The Share button appears in the inspector toolbar in compact views. It works the same here as it does in the Outline.
Title and Status Circle
Beneath the inspector’s toolbar are two of the more important components of tasks you capture with OmniFocus: the title and the status circle.
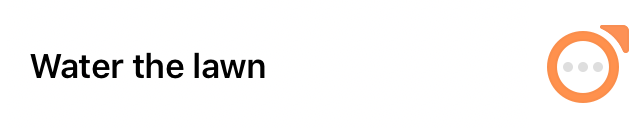
Every item or tag you add to OmniFocus has a title. Tap the title text in the inspector to edit it.
Directly actionable items (Inbox items, actions, and groups) have a status circle opposite their title, useful for getting an at-a-glance summary of the status of the item and serving as a tap target to mark it complete.
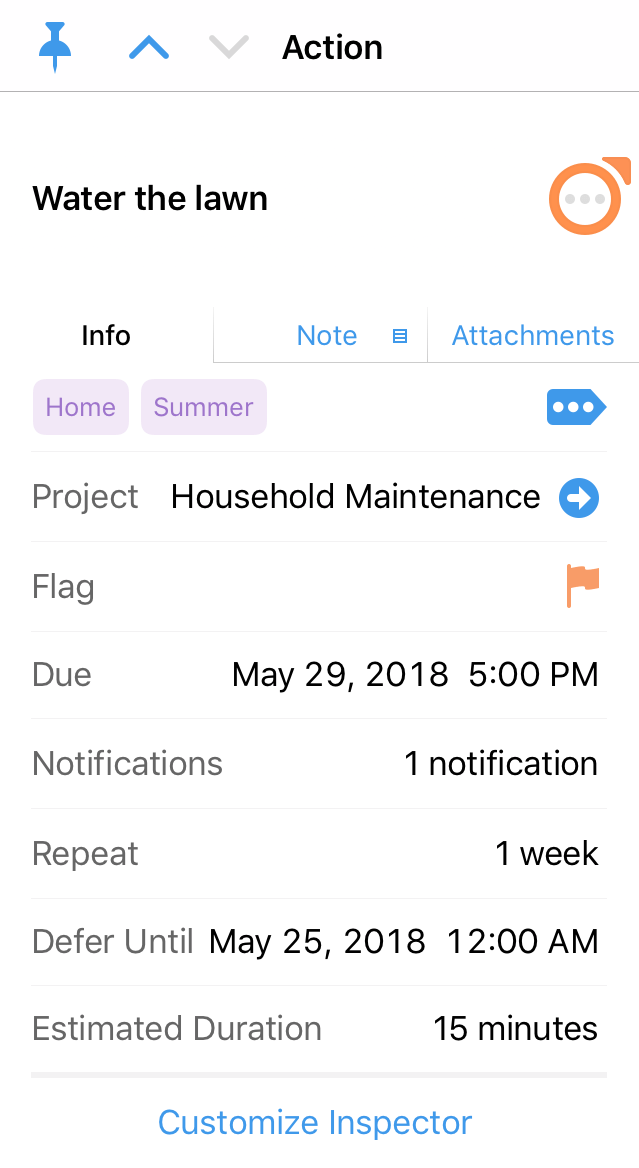
Info, Note, and Attachments
Inbox items, projects, actions, and groups can be further enriched by adding information across three tabs in the inspector: Info, Note, and Attachments.
-
The Info tab includes a list of configurable item attributes, described in detail in Project and Action Attributes. The Info tab can be customized to feature the attributes you use most frequently.
-
The Note tab offers a blank canvas to add as much information about the item as you like. URLs added here become interactive once the note is saved, making it possible to refer back to websites or other apps that use URL syntax.
-
The Attachments tab lists any attachments included with the item, and offers controls for adding image attachments (either from Photos or using the device camera) and recording audio attachments right within OmniFocus.
OmniFocus is not intended to replace a dedicated file syncing service.
OmniFocus sync is designed to accommodate a wide range of uses, but slowness and other problems may occur when syncing large volumes of archival attachments or multiple files of great size.
If you make frequent use of the attachments feature, consider using the Attachments List in Database Settings to review the files attached to your database and remove large or unneeded files.
Customizing The Inspector
You can customize the inspector for items you edit. The inspector starts by showing a default set of commonly used attributes; tap Show More to view all of the attributes available for that item type.
If there are attributes you rely on more frequently, tap Customize Inspector and use the reordering handles on the right to promote those attributes to the Always Show category above the separator bar. Likewise, if there are attributes that you don’t use, you can drag them to the Hide By Default category here.
Changes you make to the inspector are shared between item types (Inbox items, projects, actions, and groups), but not all attributes are relevant to each item. Those that don’t apply to a given item do not appear in that item’s inspector.
Project and Action Attributes
Because rows in the inspector can have their default order changed, the following attributes are listed alphabetically for ease of reference.
Added
Appears For: All Items

A row labeled Added followed by a date and time that represents when the item was added to the database. This attribute exists for reference and cannot be edited.
Changed
Appears For: All Items

A row labeled Changed followed by a date and time that represents when the item was last changed. This attribute is updated automatically and cannot be edited directly.
Complete with Last Action
Appears For: Sequential and Parallel Projects, and Groups

A row labeled Mark Complete with a switch to choose between two options:
-
Manually—The project or group status must be changed to Completed manually, regardless of the completion status of actions within it.
-
With Last Action—The project or group status automatically changes to Completed when its last action is completed.
Projects of the Single Actions type do not display this attribute, since they have no last action and are not conventionally considered complete.
Completed
Appears For: All Completed Items

A row labeled Completed followed by a date and time. Tap to change the date that the item was completed.
If the item status or project status is changed from Completed, this row disappears and the completion date is removed.
Defer Until
Appears For: All Items

A row labeled Defer Until followed by a date and time (or None, if no defer date is set). Tap to set or change the item’s defer date.
When a defer date is set on an item, it is not considered available for action until that date is reached.
If a defer date is set on a project or group, items within it inherit that date. (A defer date set directly on the item will override the inherited date, if it is later.)
Dropped
Appears For: All Dropped Items

A row labeled Dropped followed by a date and time. Tap to change the date that the item was dropped.
If the item status or project status is changed from Dropped, this row disappears and the dropped date is removed.
Due
Appears For: All Items

A row labeled Due followed by a date and time (or None, if no due date is set). Tap to set or change the item’s due date.
When a due date is set on an item, it is considered due at that date (and due soon based on the Due Dates settings).
If a due date is set on a project or group, items within it inherit that date. (A due date set directly on the item will override the inherited date, if it is sooner.)
Estimated Duration
Appears For: All Items

A row labeled Estimated Duration followed by an amount of time (in minutes or hours). Tap to set or change the item’s time estimate for completion.
Estimated duration is particularly useful when setting up custom perspectives with OmniFocus Pro, where you can use this value to create perspectives for tasks that require a certain amount of time to complete.
Flag
Appears For: All Items

A row labeled Flag followed by a flag icon: either empty (unflagged), filled orange (flagged), or with an orange dotted outline (inherited flag). Tap to set or remove flagged status on the item.
When a flag is set on an item, it appears in the Flagged perspective. If a flag is set on a project or group, the items within it inherit the flag.
Notifications
Appears For: All Items

A row labeled Notifications followed by a count of the notifications on the item (or None, if no notifications are set). Tap to view a list of notifications on the item and create new custom notifications.
If any notifications were created automatically for the item based based on your preferences in Sounds and Alerts settings, these appear in the list here.
Tap +Custom Notification (or +Before Due Notification, if the item is due in the future) to add a notification. To delete a notification, swipe its row in the inspector from right to left and tap Delete.
You can set as many notifications on an item as you like; when multiple notifications are set, they are listed from earliest to latest.
Project
Appears For: Inbox Items, Actions, and Groups

A row labeled Project followed by the project name and the Go To Project button (or None, if no project is set). Tap to assign or change the item’s project, or tap Go To Project to open the project in the outline.
The project picker can also be used to create new projects: enter an unused project title and tap Create “New Project”, and the new project will be assigned to the item.
Projects are tasks composed of the action items required to complete them. Unlike tags, an item can only be assigned to a single project at a time.
Project Status
Appears For: Projects

A row labeled Status with buttons for choosing the project status: Active, On Hold, Completed, or Dropped.
Projects have the Active status by default. For more on the meaning of each status and how it affects availability of items within the project, see Project Status.
Project Type
Appears For: Projects and Groups

A row labeled Type with buttons for choosing the project type: Sequential, Parallel, or Single Actions.
Projects have the Parallel type by default. For more on the meaning of each status and how it affects availability of items within the project, see Project Type.
Groups can also have a project type. In this case, type selection in the inspector is limited to Sequential and Parallel (groups cannot have the Single Actions type).
Repeat
Appears For: Items other than Single Action Lists

A row labeled Repeat followed by a summary of the repeat interval (or None, if the item doesn’t repeat). Tap to set or change an item’s repeat interval.
Tap the Repeat switch to indicate that an item repeats. Items can be set to repeat based on a variety of criteria that are progressively disclosed as you make changes in the repeat editor:
-
Interval—Choose a number hours, days, weeks, or months which elapse for every repeat cycle. When weeks or months are chosen, additional custom options become available.
-
Custom: Days of Week—With an interval of weeks, the option becomes available to repeat every weekday chosen here (Monday, Wednesday, and Friday, for example). With an interval of months, the option becomes available to repeat every first through fifth (or last) weekday of the month.
-
Custom: Days in Month—With an interval of months, the option becomes available to repeat on the chosen calendar dates of the month (or the last day of the month).
-
Schedule the Next—Choose whether completing the item will schedule the next occurrence as a:
- Due Date—The item must be completed again by that date. Or;
- Defer Until Date—The item becomes available again on that date.
-
Repeat From This Item’s—Choose whether completing the item will schedule the next occurrence from:
- Completion—The repeat interval begins when the item is completed. Or;
- Assigned Dates—The repeat interval begins at the originally assigned date.
Review
Appears For: Projects

A row labeled Review followed by the date of the project’s next scheduled review. Tap to edit a project’s review details.
Use the Review editor to change the frequency with which the project comes up for review (the default is every week, beginning a week from the project’s creation), and edit the date of the next scheduled review.
A project’s review interval and next review date are among the few attributes that all projects possess. If project review isn’t part of your workflow, feel free to ignore them.
Tags
Appears For: All Items

A row labeled Tags, containing the Add Tag button as well as any tags assigned to the item.
Tags represent associations that tasks have to you and the world around them. Tap Add Tag to add an existing tag to an item, or create a new one to add: enter an unused tag name and tap Create “New Tag”, and the new tag is created and assigned.
Unlike projects, an item can be assigned as many tags as you like. When tags are assigned to an item, tap one in the inspector row to either go to or remove it.
If you have more tags on an item than fit in the row, swipe left or right to find the tag you want.
Task Status
Appears For: Inbox Items, Actions, and Groups

A row labeled Status with buttons for choosing the item status: Active, Completed, or Dropped.
New Inbox items and actions have the Active status by default. For more on the meaning of each status and how it affects availability of items within the project, see Item Status.
Use Floating Time Zone
Appears For: All Items

A row labeled Use Floating Time Zone. Tap to choose whether dates and times associated with the item are floating (the default for new items) or not.
-
Using a floating time zone means that your time zone location is ignored: date and time values you assign to the selection remain the same no matter which time zone you are in. (If you indicate an item is due at 5:00 PM, it will always be due at 5:00 PM no matter where you are.)
-
Choosing not to use a floating time zone means that your dates and times are associated with the time zone where they are entered. When you change time zones, OmniFocus updates the date and time values of the selection to correspond with the new time zone. (An item due at 5:00 PM Seattle time will always be due at 5:00 PM Seattle time—so if you're in New York, you'll see that time as 8:00 PM.)
Tag Attributes
Because rows in the inspector can have their default order changed, the following attributes are listed alphabetically for ease of reference.
Location
Appears For: All Tags
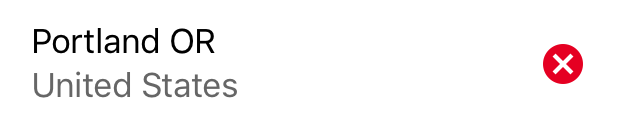
A row labeled Location followed by the location set on the tag (or None, if no location is set). Tap to set a tag’s location. The following options appear:
-
Here—Use Wi-Fi or cellular triangulation to pinpoint where you are right now, and add that as the tag location.
-
Anywhere—This isn’t really a location; instead, it means that this tag contains work you can do no matter where you are.
-
Search—Enter a search keyword (“hardware store”, for example). You can either assign the tag a location that appears as a result of the search, or use the search itself: if you use the search, the tag location becomes the location of the nearest search result at any given time.
-
Address—Enter a specific address to add as the location.
-
Contact—Choose an address from an entry in iOS Contacts. If this is the first time you’ve opted to set a location this way, an alert will pop up asking you to authorize OmniFocus access to your contacts.
-
Pin—Touch and hold a spot on the map to drop a pin at a location of your choice.
To removed an assigned location, tap the X next to it in the row.
When a location is assigned to a tag, it shows up in Nearby when you’re close to that location.
Setting a tag’s location doesn’t automatically mean you will receive proximity-based alerts for that tag. To receive notifications, make sure location alerts are turned on for your device in Sounds and Alerts settings, and make sure that Tag Notification Kind is set to When Arriving or When Leaving.
Tag Notification Distance
Appears For: Tags with Locations

A row labeled Distance with buttons for choosing the location’s area size.
-
Small—Roughly 200 meters or 650 feet. This covers about one city block, and is useful for things such as coming home or leaving the office.
-
Medium—Roughly 500 meters or about a quarter mile. This covers something like a small neighborhood or park, and is useful for knowing when you are a few streets over from a certain store.
-
Large—About 10 kilometers or 6.2 miles. This is useful for turning on tags that are relevant when you visit a distant city.
Tag Notification Kind
Appears For: Tags with Locations

A row labeled Notification with buttons for choosing the location’s notification type.
-
None—You will not be notified when arriving at or leaving from the tag location.
-
When Arriving—You will be notified when you arrive at the area of the tag location.
-
When Leaving—You will be notified when you depart from the area of the tag location.
Tag Status
Appears For: All Tags

A row labeled Status with buttons for choosing the tag status: Active, On Hold, or Dropped.
Tags have the Active status by default. For more on the meaning of each status and how it affects availability of items the tag is assigned to, see Tag Status.