Appendix C
OmniFocus Extended
OmniFocus as a standalone app is an incredibly powerful tool. Beyond what you can do with OmniFocus alone, the app interacts with other apps and services to help you get stuff done with even greater convenience and efficiency.
This appendix lists ways that OmniFocus can be used in tandem with other software to help you achieve your goals.
Today Extension
This feature is available with OmniFocus on versions of macOS prior to macOS 11 (Big Sur). Starting with macOS Big Sur, the Today extension is replaced by OmniFocus widgets.
OmniFocus brings a status summary to your desktop with the OmniFocus Today extension, which you’ll find listed in the Extensions section of macOS System Preferences.
With the Today extension turned on, you can view items that are due soon and overdue in Notification Center, and when they’re complete, check them off right there — the items’ status updates in the app along with any changes you make.
Choose which items appear in Today with OmniFocus’s Extensions preferences.
To change the position of the OmniFocus widget in Notification Center, click Edit at the bottom of the Today pane.
OmniFocus Widgets
Starting with macOS Big Sur, you can add special OmniFocus widgets to Notification Center on your Mac.
To add a widget to Notification Center:
-
Click the time displayed in the upper right of your Mac's menu bar to open Notification Center.
-
Scroll down past your notifications to your widget collection. At the bottom of your widget list, click Edit Widgets.
-
Choose OmniFocus from the list that appears at the left side of the edit screen.
-
Pick the widget style and size that you would like to add from among the OmniFocus widgets in the center of the screen, and drag it to the right to place it among your existing widgets.
OmniFocus offers the following widgets at small, medium, and large sizes.
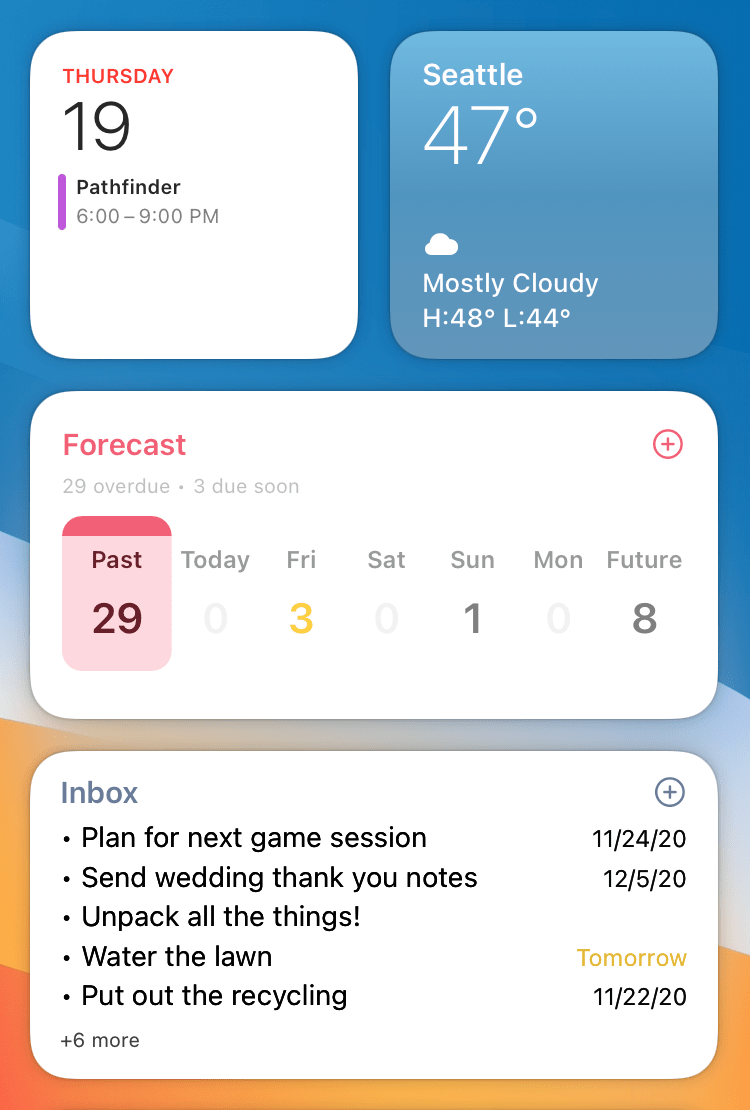
Forecast Widget
Get an overview of your past, today, and due soon items.
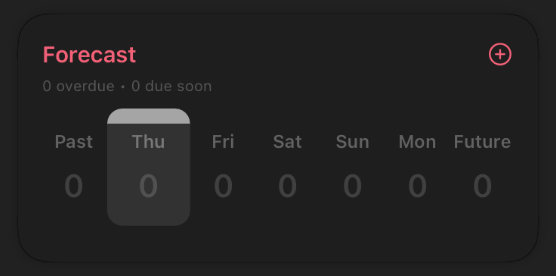
The Forecast widget displays a calendar row of days with the number of items due on each day. Depending on the widget size, it may also display a list of the items due today.
This list corresponds with your view options in the Forecast perspective, so it may also display deferred items and/or items tagged with your Forecast tag.
Perspective Items Widget
See items that are up next for a chosen perspective.

This widget shows a list of items in a chosen perspective, with the number of items shown depending on the size of the widget and its text. The widget shows items in the same order that they appear in the perspective in OmniFocus.
The widget displays the contents of the Inbox perspective by default. To switch to a different perspective, control-click to open the widget's contextual menu and choose Edit Widget.
Customizing Widgets
Control-click a widget to open its contextual menu, where you can choose Edit Widget to customize it.
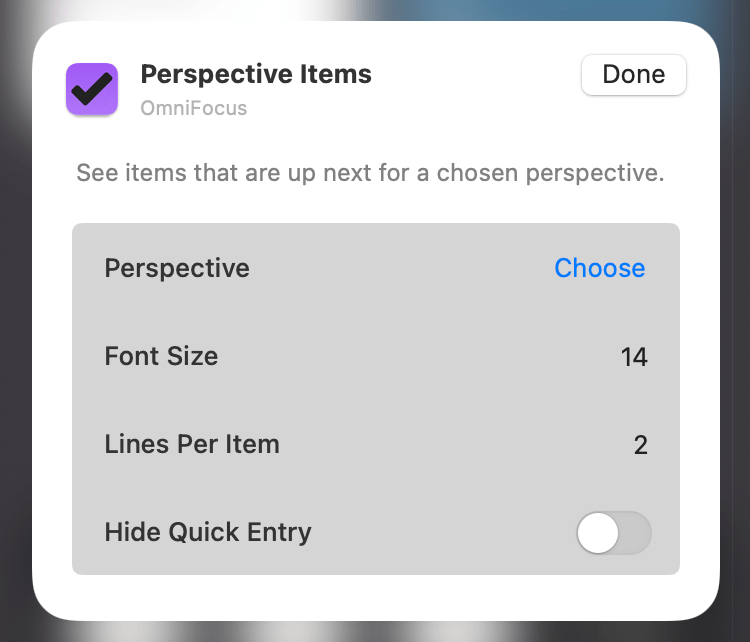
The following customization options are available:
- Perspective—For the Perspective Items widget, choose the perspective for the widget to display.
- Font Size—Step between available font sizes for text in the widget.
- Lines Per Item—Choose the maximum number of lines that an item's text will span.
- Hide Quick Entry—Choose whether to hide the Quick Entry button (+) next to the widget title.
Interactive Notifications
If you use notifications for OmniFocus on your Mac, you can add a bit more oomph to things that really need your attention by requiring an interaction when they appear.
To set up interactive notifications, first visit Notifications preferences and be sure that Notify on this Mac is checked. Next, open Notifications in macOS System Preferences and choose OmniFocus in the list of apps. Select Alerts as the type of notification you’d like to receive.
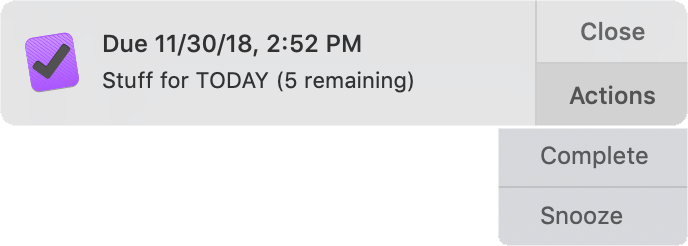
From now on, OmniFocus notifications you receive on your Mac will remain on screen until dismissed. You’ll have the following options when dismissing an alert:
-
Close—Dismiss the notification from your screen without affecting it in any other way.
-
Actions—Open a submenu with the option to either mark the item Complete in OmniFocus, or Snooze the notification for 15 minutes. Postponing the notification in this way doesn't affect dates assigned to the item; it just reschedules the notification to occur again later.
-
Item Title—Click the item title to open OmniFocus and show the item in the Forecast perspective in your currently active window. OmniFocus will launch if it was closed at the time.
Copy as TaskPaper
Most aspects of an OmniFocus item can be represented as tags in the plain text syntax used by Hog Bay Software’s to-do list app TaskPaper. The Edit > Copy as TaskPaper menu item provides an easy way to bring items and their properties (such as due date, tag, or repeat type) from OmniFocus to any other app that supports the TaskPaper tag syntax.
OmniFocus also supports pasting plain text lists formatted in TaskPaper syntax into the open window of an OmniFocus database. So while Copy as TaskPaper can be used to share OmniFocus items with TaskPaper itself, its primary use is as an intermediary between OmniFocus and other apps that support TaskPaper’s tag system.
This can be used to (for example) batch process dozens or hundreds of OmniFocus items at once, round-tripping them out from OmniFocus in the TaskPaper syntax, performing the batch processing actions, and bringing them back to OmniFocus without loss of important metadata.
See this support article for more details on TaskPaper syntax and a list of supported TaskPaper tags.
Archiving and Backup
When your database grows large, unwieldy, or full of obsolete items, or when you need to refer back to versions of your data from days gone by, the archiving and backup features of OmniFocus for Mac here here to lend a hand.
Creating an Archive
After a while of using OmniFocus every day, your database may become quite large, and especially if you synchronize with a mobile device, things could get quite slow. Most of the items are probably completed or dropped items that you rarely or never need to review, so OmniFocus includes a command to archive those old items to a different file, keeping your main database sprightly and nimble.
To archive your old data, choose Move Old Data to Archive from the File menu. A sheet appears with a date field; any items completed before that date, or dropped items that haven’t been changed since that date, will be moved to the archive.
OmniFocus saves your archive file in the same place as your main database. If you ever want to look at your archived data, choose Open Archive from the File menu; your archive opens in its own window.
To retrieve items from an archive you are browsing, drag and drop them into the desired location in your main database (copy and paste works too). In either case, a copy remains behind in the archives; the archived copy can be retained as a record or manually deleted to keep things tidy.
Restoring from a Backup
OmniFocus errs on the side of meticulous data preservation, automatically backing up your database once every two hours.
OmniFocus keeps up to 100 backups of your database at a time, which comes to about two weeks worth if you run OmniFocus continuously (more for most people, since backups do not happen when OmniFocus is closed).
To restore a backed-up version of your database, choose Show Backups in Finder from the File menu, then double-click to choose a backup file to view. It opens in its own separate OmniFocus window so you can browse it and determine if it is the one you want; if so, choose Revert to This Backup in the notice bar and it will replace your current database.
Printing
To print content from OmniFocus to paper (or save it as a PDF), first set up a window that contains exactly the data you want by focusing ![]() , selecting items in the sidebar, or expanding and collapsing rows in the outline. Then choose Print from the File menu. OmniFocus resizes the content to fit horizontally on the paper you’ve chosen.
, selecting items in the sidebar, or expanding and collapsing rows in the outline. Then choose Print from the File menu. OmniFocus resizes the content to fit horizontally on the paper you’ve chosen.
Exporting
Your data belongs to you; if you want to send it to other applications, run scripts on it, publish it on the web, or do other exciting stuff with it that we haven’t even thought of, you’re more than welcome to write it out to the format of your liking.
To export your database, choose File > Export, and then choose a format and a location. The available formats are:
-
OmniFocus Document — This is an ordinary OmniFocus document, like the one that you use as your database. If you open such a file in OmniFocus, it appears in its own window and you can work with it normally, but settings specific to your database (such as custom perspectives and View options) don’t come along with it.
-
Plain Text — This is a lightweight plain-text representation of your data, able to be opened in the text editor of your choice.
OmniFocus’s plain text export is inspired by TaskPaper, the light to-do application from Hog Bay Software. As such the output should be roughly compatible and able to be imported to TaskPaper with a minimum of fuss; see Copy as TaskPaper for more on OmniFocus and TaskPaper compatibility.
-
Simple HTML — This is a single-file HTML representation of your data; the stylesheet and even the icons are embedded in the HTML. If you are proficient with CSS, you should be able to restyle the result however you like.
-
Comma Separated Values (CSV and CSV UTF–16) — CSV is a common syntax for applications old and new on all platforms: all of your data in a plain text file with its columns separated by commas. Once you have your data in CSV format, it’s easy to run scripts on it, convert it to some other format, or open it in applications that understand it (like OmniPlan). If you’re having trouble persuading other applications to read the non-ASCII characters in your CSV file, such as accented letters or non-Roman characters, try exporting with the UTF–16 CSV option.
-
Backup Document (OmniFocus) — This export option creates a file in a format (.ofocus-backup) that is essentially the same as the standard OmniFocus database format, with one key difference.
Unlike a standard OmniFocus database file, when you open a backup in OmniFocus, the option to Revert to This Backup appears in a notice bar beneath the toolbar. Click this button to replace your local default database with the database contained in the backup.
Applescript Support 
With OmniFocus Pro you have access to powerful scripting tools using the built-in AppleScript library. To access the dictionary of scripting commands specific to OmniFocus, open AppleScript Editor and choose File > Open Dictionary (Shift-Command-O), then choose OmniFocus.app from the list that appears.
You can add scripts that live in your OmniFocus toolbar by placing them in the directory accessible from the Help > Open Scripts Folder menu item.
Check out the resources below to get started with ideas, tips, and help for adding automation to your OmniFocus workflow:
-
AppleScript discussion on the official OmniFocus Forums.
-
An AppleScript overview, tips, and an extended list of resources can be found at Inside OmniFocus.
Omni Automation
OmniFocus Pro supports automating tasks in OmniFocus using JavaScript. You can create your own plug-ins or use plug-ins created by others; see the Omni Automation website for a set of sample plug-ins that you can use right away, or find documentation resources for creating your own.
Installing Omni Automation Plug-Ins
Once you have a plug-in that you would like to try, you will need to install it in a connected folder that OmniFocus recognizes.
If you are looking for a place to start with plug-ins, head on over to the Omni Automation website and find one you like.
First, download the plug-in and unzip it. The resulting file will have an .omnijs extension (the file format for Omni Automation Plug-Ins).
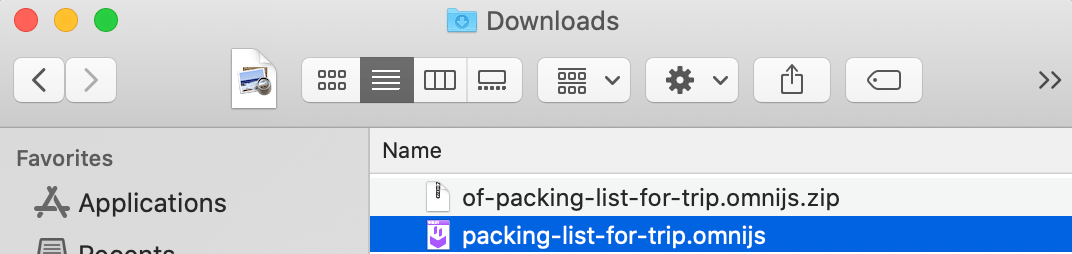
With a plug-in downloaded, you have a couple of options for installing it. You can double-click the plug-in file, which presents an import dialog in OmniFocus:
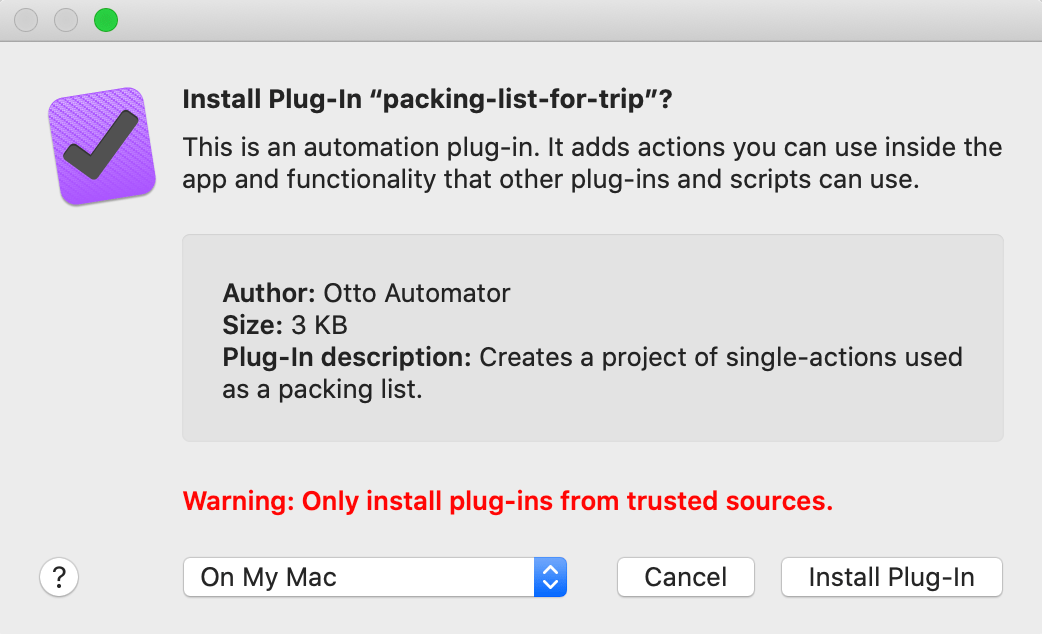
If everything looks in order, choose an install destination from the drop-down menu and click Install Plug-In. The plug-in is copied to that location and appears in the OmniFocus Automation menu, ready to use.
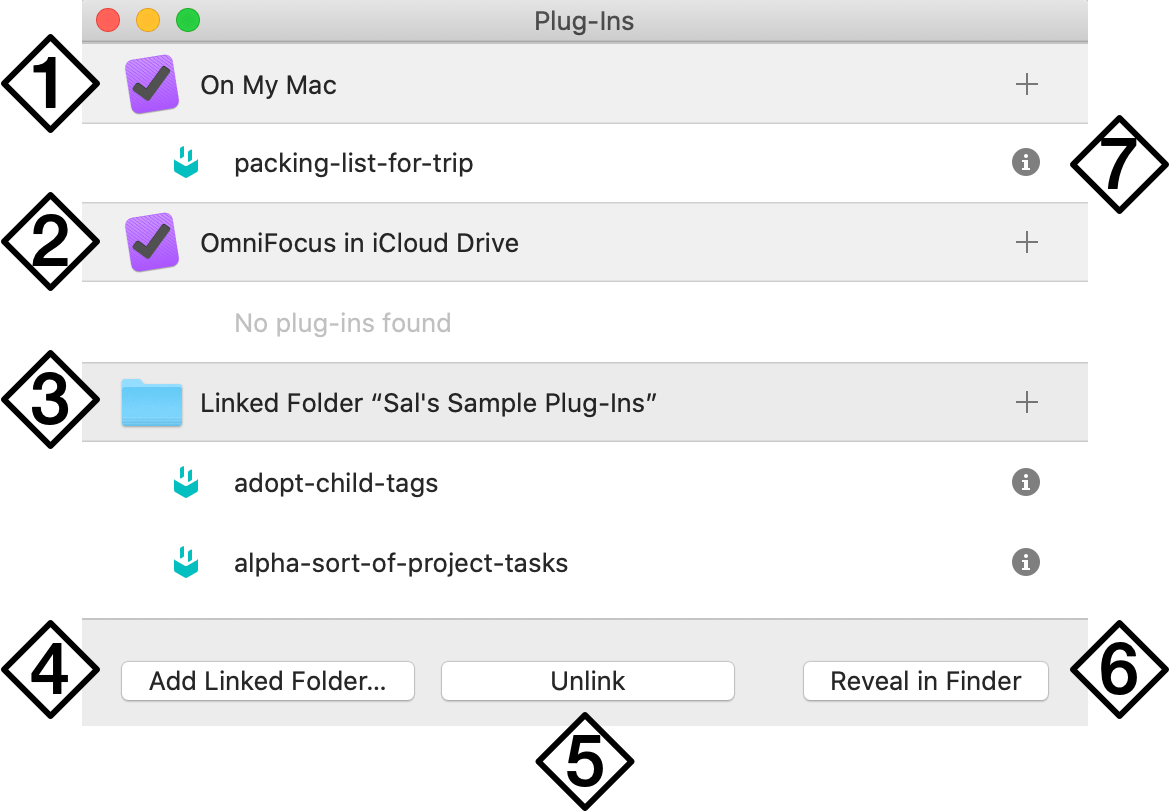
Alternatively, you can choose Automation > Plug-Ins in OmniFocus to open the Plug-Ins window for managing your Omni Automation Plug-Ins. At first it will be empty, looking something like this:
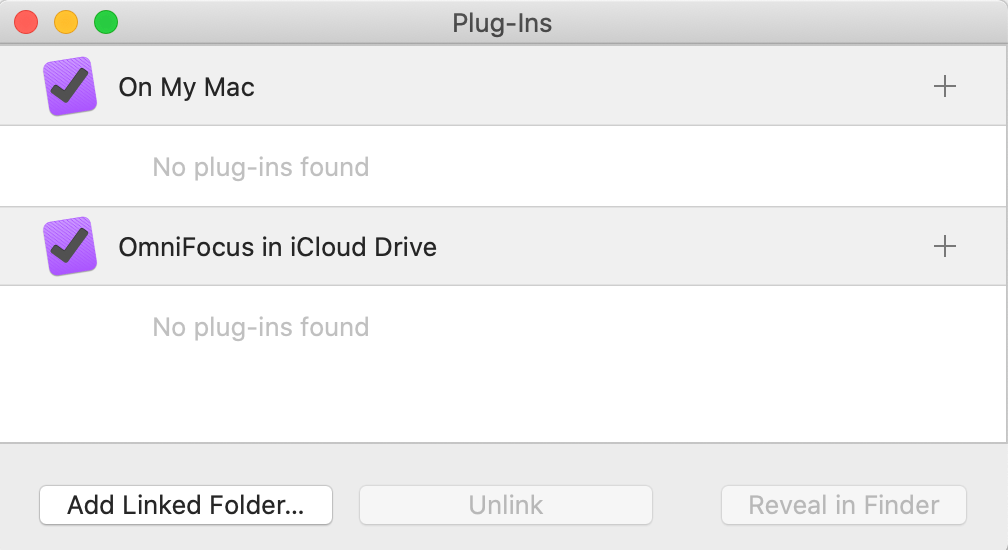
To add a plug-in using this window, drag and drop it from its location in the Finder on top of the destination in the window that you prefer. OmniFocus automatically copies the plug-in to that location.

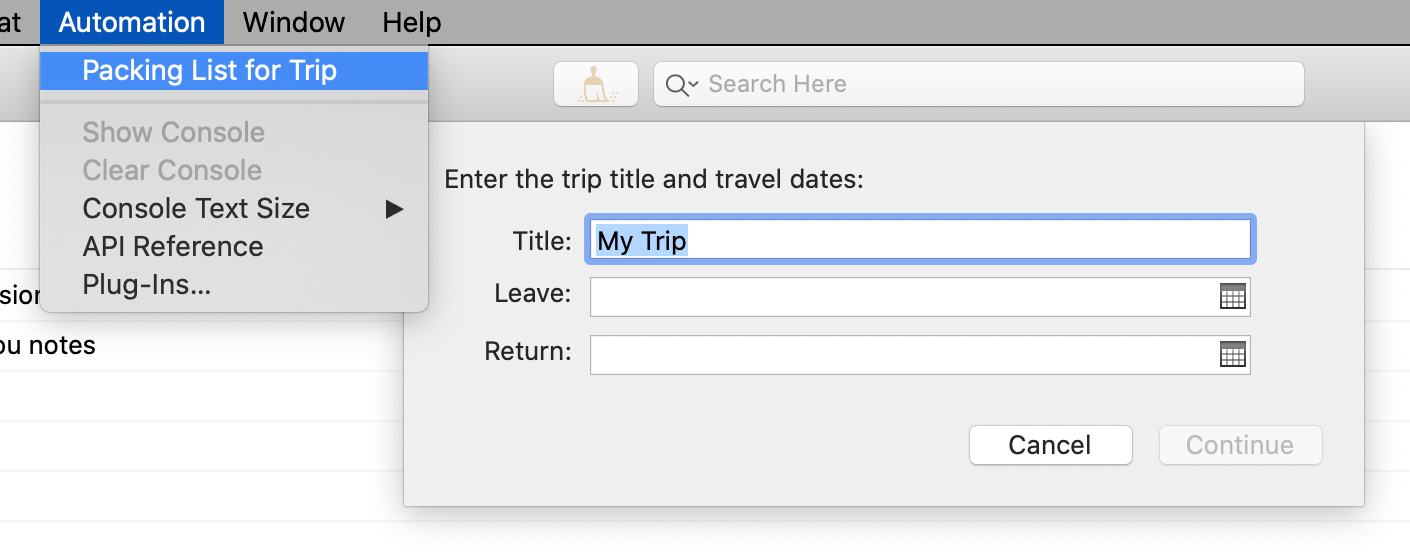
Once you have installed your first plug-in, it appears as an item in the Automation menu. Select it to run the plug-in, and start experimenting with what Omni Automation can do.
Managing Plug-Ins
Use the Plug-Ins window (Automation > Plug-Ins) to add, remove, and organize your Omni Automation Plug-Ins and connected plug-in locations.
-
On My Mac—This is the default storage location for plug-ins associated with OmniFocus, a folder that lives deep in the Finder's OmniFocus-specific file tree. Drag and drop a plug-in onto this location to copy it into the folder, or click the Plus button to create a new pre-formatted plug-in file ready for customizing to suit your needs.
-
OmniFocus in iCloud Drive—With iCloud Drive set up on your Mac, OmniFocus can use its application folder there to sync plug-ins between your various devices. Note that plug-in files are stored separately from your OmniFocus sync database and they must be managed separately. iCloud Drive is not capable of syncing your OmniFocus database.
-
Custom Locations—Beyond the two default storage locations above, you can link as many additional plug-in folders as you like. These are regular folders on your Mac that contain the plug-in files that you want to use in OmniFocus. Once a folder is linked, its plug-ins become available in the Automation menu.
-
Add Linked Folder—Click to open a file browser for selecting additional plug-in folders that you would like to link to OmniFocus.
-
Unlink—Click to remove a custom location's association with OmniFocus. This removes the folder and its contents from the Plug-In window and Automation menu, but does not move or alter its contents in any way. If you change your mind, you can click Add Linked Folder again to restore it.
-
Reveal in Finder—With a location or plug-in selected, click to open its corresponding folder in Finder.
-
Plug-In Info—Click the Info button on a plug-in's row to show detailed information about the plug-in, including its name, version, author, description, and information about the actions that the plug-in contains.
Some additional tips for managing plug-ins:
- Control-click a plug-in to open its contextual menu, with commands for revealing it in the Finder or moving it directly to the Trash.
- Drag-and-drop a plug-in between locations to move its associated file from one folder to another.
OmniFocus for the Web
OmniFocus for the Web is a browser-based companion app that works in tandem with OmniFocus for Mac and iOS to provide access to the core features of OmniFocus from any modern web browser. The app is provided as an optional subscription-based add-on to your existing OmniFocus purchase, or as part of an OmniFocus subscription package.
Learn more about subscribing to OmniFocus for the Web here.
Workflow Automation
With some knowledge of programming, you can use callback URLs to automate conversations between OmniFocus and other apps on your Mac. This offers the ability to set up project templates with custom data fields, for example, along with many other powerful automation possibilities.
This is an advanced feature that requires some tinkering under the hood; for help getting started integrating OmniFocus with the workflow app of your choice, see URL Schemes in OmniFocus on the Inside OmniFocus website.