The Toolbar and Using the Tools
As you discovered, the Tool Palette has a lot to offer, and we brushed over them pretty lightly to just give you a glimpse of what was possible. Here we’ll go into a bit more depth and walk through each of the buttons in the Tool Palette so you can find the right tool for the job.
The Toolbar
Along the top of OmniGraffle’s window is the Toolbar. Packed with buttons and a customizable Tool Palette featuring Expando-Collapso Technology, the toolbar is where you’ll go for all your drawing needs.

As you can see, the toolbar is packed with controls. From buttons to add new layers to a canvas—or an entirely new canvas—to tools for drawing and connecting objects together, the Toolbar has everything you need to get your job done.
On opposing ends of the toolbar you’ll find controls for hiding and showing the left and right sidebars. On the left is the Canvases and Contents sidebar, while on the right is the Inspectors sidebar which also includes the Stencils Library. Above those, you’ll find the standard OS X window controls for Closing, Hiding, and for taking OmniGraffle into Full Screen mode.
At the center of the toolbar along the top, you’ll see a Document Icon which you might assume does nothing other than tell you what type of file this is. But if you hold down the Command key (⌘) and click that icon, you’ll get a contextual menu that shows you where the file is stored on your Mac. This is sometimes handy for when you’re working on duplicated files and you can’t remember where you saved the last revision. Next to that is the filename, and if your OmniGraffle file has more than one Canvas, the filename is appended by a colon (:) followed by the name of the canvas you’re presently working on.
Beneath the Document icon and filename are buttons that let you interact and control the behavior of the objects on the canvas. You can flip objects to the back or bring them to the front, lock them in place (which is really, really handy), and for grouping and ungrouping objects.
But the big tools are coming up next: the Style Well and the Tool Palette.
The Tool Palette
The Tool Palette contains all of the tools that you need to draw and interact with objects on the Canvas. In its default state, the Tool Palette contains the following tools:

- Selection Tool (Arrow)
- Used for selecting objects on the Canvas.
- Shape Tool
- Used for drawing shapes, such as squares, rectangles, and circles.
- Line Tool
- Used for drawing lines between objects on the Canvas.
- Text Tool
- Used for entering text labels to a Line or for adding a random blob of text on the Canvas.
- Pen Tool
- Used for creating custom shapes.
- Expando-Collapso
-
 OmniGraffle 6 includes advanced Expando-Collapso Technology. Okay, it’s really just a button after the Pen tool, but you can use this to collapse the tool palette down to just a core set of tools, or click it—Expando!— to gain access to a bunch more tools. Collapso lets you save precious toolbar space for other buttons, and Expando gives you the whole enchilada.
- You can move the Expando-Collapso divider in the Drawing Tools preferences to change which tools are available in the palette’s collapsed state, or get rid of the button entirely.
- Diagram
- Used to rapidly create new objects on the canvas.
- Style Brush
- Used for copying the style of an object (including its shape, stroke, text style, and so on) so you can “paint” the style on other objects.
- Rubber Stamp
- Used for rapidly copying and pasting objects on the Canvas. To select a different object when the Rubber Stamp is in Persistent Tool mode, hold down the Option key and then click another object on the Canvas.
- Magnet
- Used to relocate the magnets that connect lines to objects.
- Zoom Tool
- Used to zoom in on the Canvas. When the Zoom Tool is in Persistent Tool mode, hold down the Option key and click on the canvas to zoom out.
- Hand
- Used to drag the canvas around.
- Action Browse Tool
- Used to interact with an object if an Action has been set in the Properties inspector.
Note
The Action Browse Tool is available in both OmniGraffle Standard and Pro, but you can only assign actions to objects with OmniGraffle Pro.
See The Tool Palette for in-depth coverage on OmniGraffle’s tools.
Persistent Tool Activation
By default, clicking a tool once activates it for a single use; after that one use the Selection tool becomes active again. When you select a tool in the toolbar, the button takes on a light gray background to indicate that the tool is active.

However, if you double-click on a tool, it becomes the permanently active tool until you switch to another tool. The tool button takes on a dark gray background to indicate that the tool is persistent.

You can change this behavior in the Drawing Tools preferences, so that tools are always (or never) activated persistently.
Quick Access to Tools
With the mouse pointer hovering over the Canvas, you can quickly activate any tool in the Tool Palette using a Hot Key. For example, if you press and hold t, the mouse pointer changes to a text insertion tool; just click on the Canvas and start entering some text. When you let go of the Hot Key, the mouse pointer changes back to the Selection tool.
Similarly, you can press the number keys to activate tools. Each key from 1 to 0 corresponds to a tool in the palette, from left to right. (The only exceptions are the Hand and Action Browse Tool, which don’t have a number assigned; instead, use the Space Bar or b key, respectively.) Pressing a number key twice makes that particular tool persistent.
You can configure each tool’s Hot Key in the Drawing Tools preferences.
Customizing the Toolbar
As noted earlier, the Toolbar comes packed with a variety of tools by default. However, you can customize the toolbar by adding additional buttons or rearranging their order, to suit your needs.
To customize the toolbar, choose View ▸ Customize Toolbar or Control-click on the toolbar and select Customize Toolbar. When you do, a sheet slides down from under the toolbar, revealing a slew of function-related buttons that you can drag up to the toolbar. For example, you could add the Make Table or Start Presentation buttons to the toolbar if you’ve purchased OmniGraffle 6 Professional.
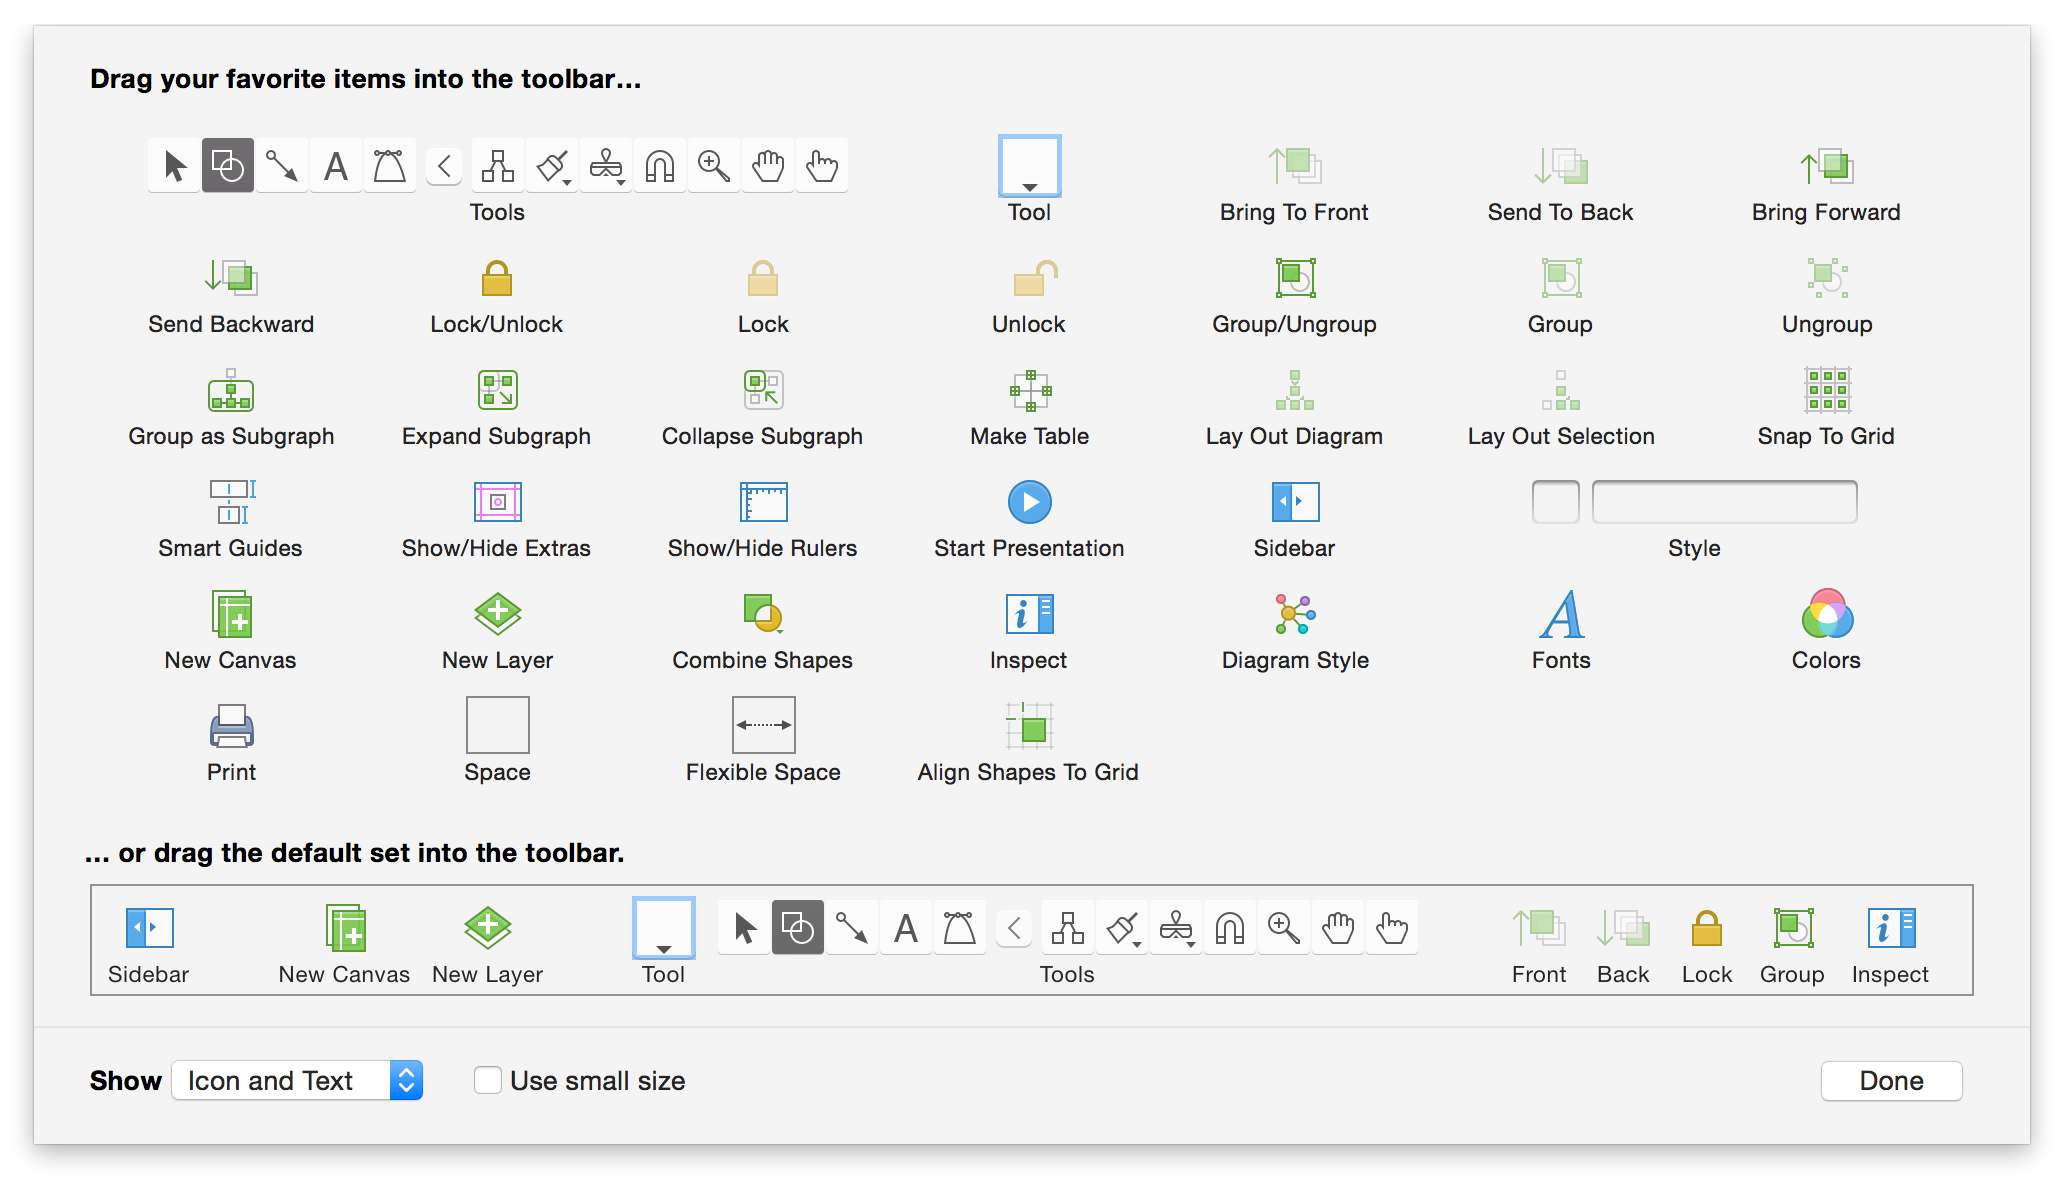
If you don’t like the changes you’ve made, or if you ever want to reset the toolbar to it’s default state, all you need to do is drag the bottom row up to the toolbar. When you’ve finished making changes to the toolbar, click Done.
Using the Style Well
With the Shape, Line, Text, or Pen tool selected, a style menu for the applicable tool becomes available from the button to the left of the Selection tool. It contains various styles that you can apply to the tool itself.
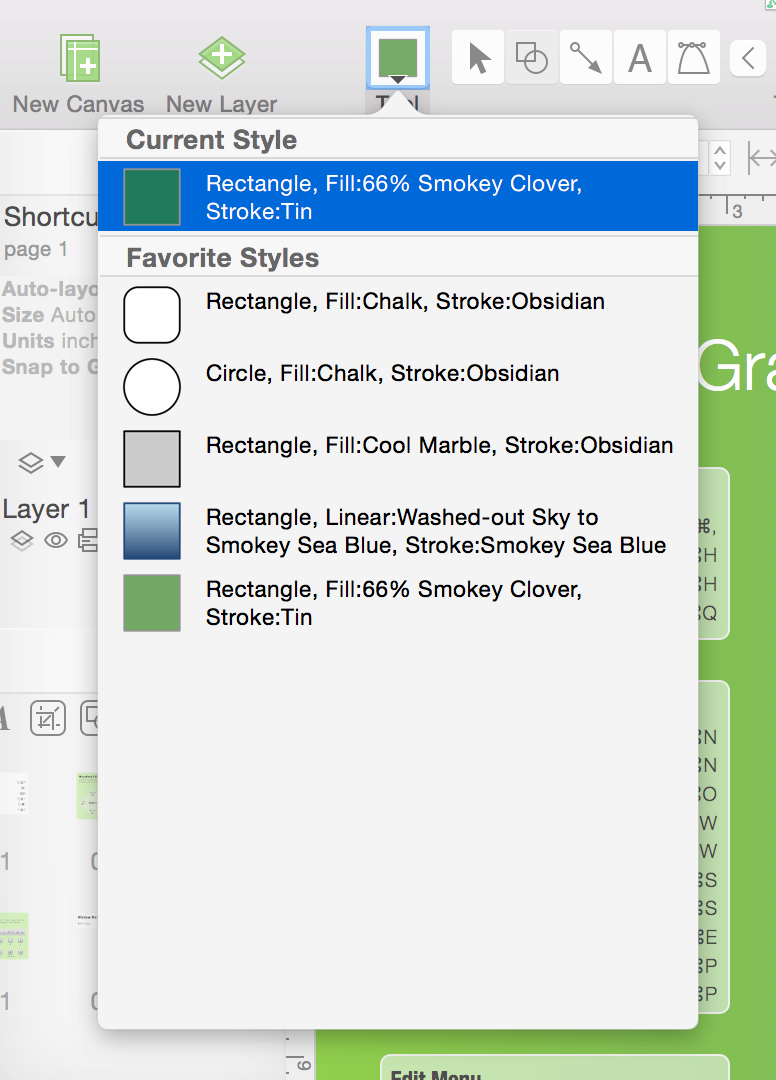
The very top item in the menu, Current Style, is the last style you set. Other sections you may see include:
Canvas Styles, which is dependent upon the tool you have selected in the Tool Palette, shows related styles for that object type for everything on the canvas. For example, if you have selected the Line tool in the Tool Palette, the Canvas Styles section shows you the different styles for all of the lines you’ve drawn on your canvas.
To use one of the Canvas Styles — First select one of the tools in the Tool Palette, and then click the Style Well and choose one of the available styles in the Canvas Styles section. The style you have selected now becomes the default style for that drawing tool.
Favorite Styles, available with the upgrade to OmniGraffle Pro, is your personalized list of styles you intend to reuse from one project to another.
To create a Favorite Style, Control-click an object on the canvas and choose Add to Favorite Shape Styles from the contextual menu. To remove a style from the Favorite Styles list, select any object on the canvas, click on the Style Well icon in the toolbar, and then Control-click on the style you would like to remove and select Remove from Favorites from the contextual menu.
Selecting, Moving, and Editing Objects with the Selection Tool 
The selection tool is the most basic tool; it looks just like the ordinary OS X mouse pointer.
Selecting Objects
Click an object on the canvas to select it.
When you select an object on the Canvas, the inspector sidebar switches over to the Object inspector automatically. From there, you can use the inspectors to change anything about the selected object.
To select several objects at once, click in an empty area of the canvas and drag a box around the objects. If you hold Option, only objects entirely inside the rectangle are selected. You can also Command- or Shift-click an object to add it to or remove it from the selection.
To select a member of a group, table, or subgraph, click once to select the group as a whole, then click again to select the member. The rest of the canvas dims to show that you are in group editing mode. Click anywhere outside the group to leave group editing mode.
Moving Objects
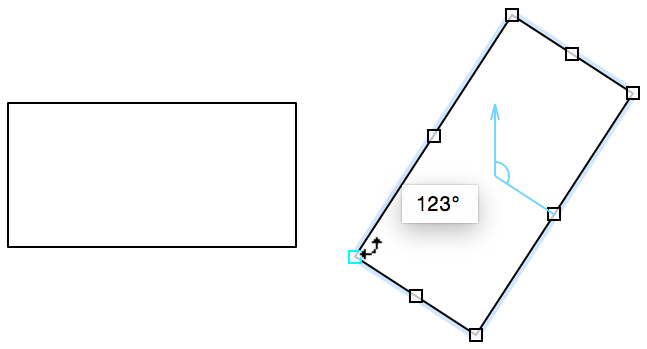
To move an object, use the Selection tool to click-and-drag the object to a new location. If you want to move a line, you might have to detach its end points from any objects they’re attached to. To move an object horizontally or vertically, hold Shift as you drag. To rotate an object, Command-drag one of its selection handles; you can also hold Shift to restrict the rotation to 15-degree increments.
If you’re using a Mac with a touch-sensitive trackpad, you can use the rotate gesture with two fingers to rotate the selected objects (be sure that Multi-Touch gestures are enabled in OmniGraffle ▸ Preferences ▸ General ▸ Multi-Touch).
To move the selected object very precisely, press the Arrow keys. Hold Option or Shift to move by larger steps.
With Smart Guides enabled (Arrange ▸ Guides ▸ Smart Alignment Guides and Smart Distance Guides), you can line up objects and space them on the Canvas precisely. Hold Command after you start dragging to temporarily enable or disable Smart Guides.
To drag a copy of an object instead of the object itself, hold Option as you drag.
Resizing Objects
Any object (or group of objects) that can be resized has eight selection handles.
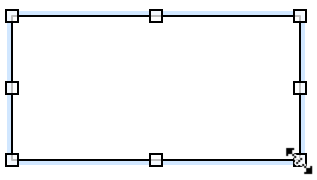
To change the shape’s size, use the Selection tool to click and drag one of the resize controls. As you click and drag on one of the handles, you’ll notice that the object is anchored by the opposing handle, and the object resizes in the direction you are moving the mouse.
The following keys provide additional functionality when interacting with the resizing handles:
- Hold Shift while resizing to maintain the aspect ratio of the original object.
- Hold Option to resize an object with its center point being anchored.
- Hold Shift-Option while resizing to maintain the aspect ratio and resize the object based on its center point.
- Hold Command, and the resize control changes to a rotate control so you can rotate the object.
If you have objects of different sizes on the canvas, but would like them to be the same size, first select the object that has the dimensions you’d like the others to emulate, choose Arrange ▸ Size and then choose one of the resizing options.
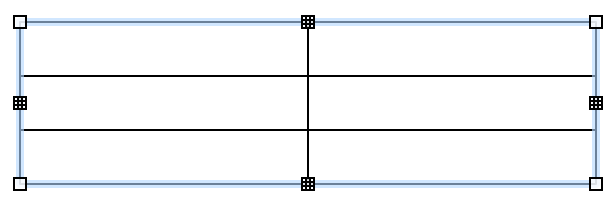
If you select a table, the edge handles look like little grids. You can drag them to change the number of rows or columns in the table. Drag the corner handles to resize the table normally.
Note
If you have Smart Guides enabled, they appear as you drag to help you size objects equally. Hold Command after you start dragging to temporarily enable or disable Smart Guides.
Editing Points
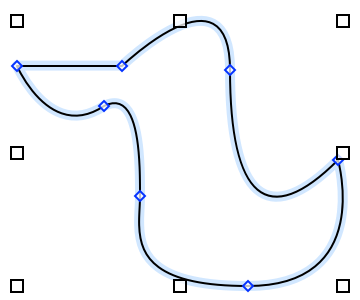
When you select a connection line or a custom shape, it shows the points that define its shape; these points appear as tiny blue diamonds.
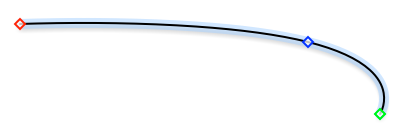
Any line (created with the Line tool) has two points: a red one at its source and a green one at its destination. A line may also pass through any number of blue midpoints. Drag one of the points to move it; by dragging the source or destination point you can make the line connect to or disconnect from other objects.
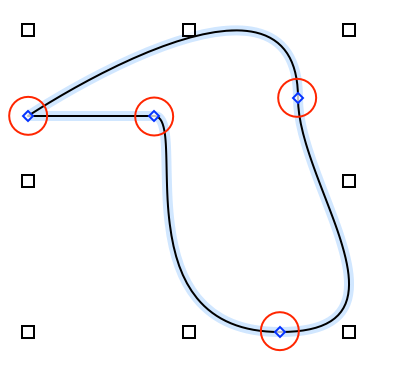
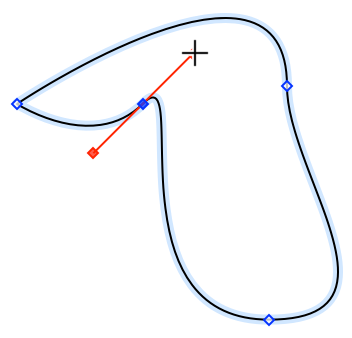
Custom shapes (created with the Pen tool) and Bézier-type lines have control points at each vertex. Click a control point to select it; if a control point is hiding behind a selection handle, Option-Command-click to select it, or just select a different control point first to make the handles go away. If a control point has Bézier handles, they appear when you select the point:
- Drag either of the two handles to adjust both, or Option-drag to adjust them one at a time.
- Shift-drag to constrain the handle’s angle to 45-degree increments.
- Command-drag a point to give it handles.
- If you drag a handle close enough to the point itself, the handle disappears entirely.
The default way to add points to an existing line is to double-click the line, but this can be changed in the General preferences (OmniGraffle ▸ Preferences ▸ General).
To add a point to a custom shape, double-click somewhere along the shape’s stroke.
To delete a point from a line or a custom shape, select it and then either press the Delete key or select Edit ▸ Delete from the menu bar.
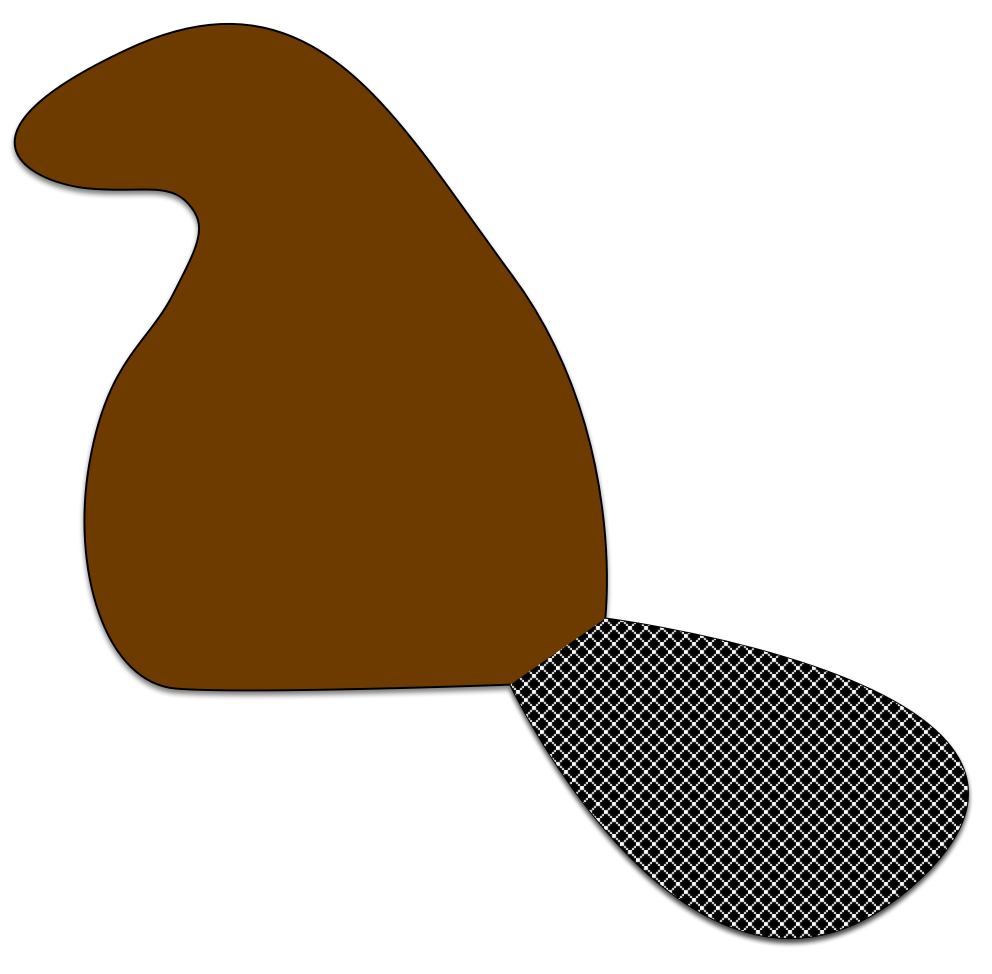
Creating Shapes with the Shape Tool 
This tool is quite simple; use it to create shape objects—squares, rectangles, circles, and so on—based on the shape you’ve selected in the Shapes object inspector.
To create a shape:
- Drag across the canvas until you get the size you want.
- Hold Shift while dragging to make a shape of equal width and height (a perfect square, a perfect circle, and so on).
Once you have created a shape, you can select it and change its attributes with the Object, Type, and Properties inspectors.
Connecting Objects with the Line Tool 
Use the Line tool to make logical connections between objects. Connected objects stay connected unless you disconnect them, no matter how much you move them around or change them.
To create a new line:
- Click where you would like the source of the line; this can be an object (to which the line will stay attached) or an empty spot on the canvas (so the beginning of the line remains unattached).
- Click as many empty spots on the canvas as you like to give the line midpoints.
- End the line at an object by clicking the object (to which the line will stay attached), or end the line at an empty spot on the canvas by double-clicking there; this can be changed in the Drawing Tools preferences (OmniGraffle ▸ Preferences ▸ Drawing Tools ▸ Line Editing).
Hold Shift while drawing a line to constrain the next point to angles at 45-degree increments from the previous point. Hold Option while drawing a line to prevent it from connecting to objects.
When two objects are connected by a line, the object at the source is considered the parent of the object at the destination. This defines the objects’ relationship in the outline view and when you use automatic layout.
Lines can have line labels attached to them. Click a line with the Text tool to create a new text label. Or, drag an existing blob of text to the line until the line is highlighted, then drop it to attach it as a label.
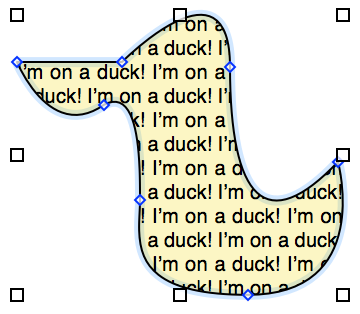
Creating and Editing Text with the Text Tool 
Use the text tool to add a label to an object, to edit the label on an object, or to create a new shape with text inside.
Click a shape to start editing its text. While you are in text editing mode, the top ruler becomes a text ruler, and you can use standard OS X text editing commands (for example, you can use the arrow keys to move the insertion point around).
Click or drag in an empty area of the canvas to create a new shape with settings particularly suited to containing text. A single click creates an object that expands horizontally to fit the text you enter; a drag creates an object of a specific width. Remember that the objects you create in this way are not fundamentally different from other shapes; they just start with certain settings in the Text inspector which make them convenient for containing text.
Click a connection line to add a new label to it. This label is just like the object created when you click an empty area of the canvas, except it is attached as a line label.
Text inside objects can be found by OS X’s Spotlight search feature, in case you need to find your OmniGraffle diagrams that contain certain words.
Drawing Your Own Shapes with the Pen Tool 
Use this tool to create custom shapes, such as the duck shown earlier. We’ve included a lot of nice shapes in the Lines and Shapes inspector and on the stencils, but perhaps you would like to draw your own.
To start a new shape, click anywhere on the canvas. Each subsequent click adds a new point to the shape, until you double-click or press Return to make the final point. At any step along the way, instead of just clicking, click and drag to create a point with Bézier handles. While creating a shape, you can press Delete to remove the last point you added.
Bézier handles can define any shape, once you get the hang of them. Each point can have a handle facing the next point, and a handle facing the previous point. The line between two points is defined by the first point’s forward-facing handle and the second point’s backward-facing handle. With no handles at all, you get a perfectly straight line. With handles, the line between them is a curve that tries to compromise between the handles’ length and direction. This is truly one of those things that makes a ton more sense once you try it for yourself, so please do.
Once you have created a shape, you can select it with the Selection tool and edit its points, adjust existing handles, add handles to points without them, or change the shape’s attributes with the Object, Type, and Properties inspectors.
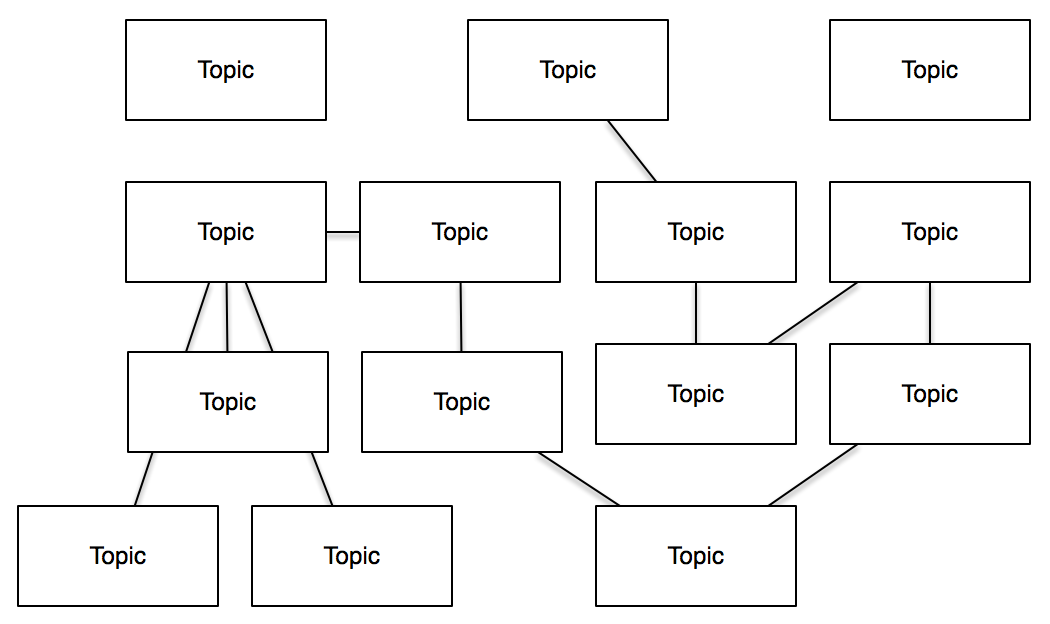
Rapidly Creating Structure with the Diagram Tool 
The Diagram tool is for rapidly creating new objects on the Canvas. This tool is especially fun if you have Auto layout turned on (Canvas Inspectors ▸ Diagram Layout, and then make sure Auto layout is checked).
With nothing selected, click any empty spot on the Canvas to create a new generic shape there and select it. Once you have a shape selected, try some of these combinations:
- Click any empty spot on the canvas to create a new shape connected to the original one.
- Hold Option to create a sibling (connected to the same parent as the selected shape) instead.
- Hold Shift to add an aunt (essentially reversing the connection line of the new object).
- Hold Command to create a completely disconnected shape.
If you already have an object on the Canvas, first select it with the Selection Tool so that you can use it as a starting point for creating more connected shapes, and then switch to the Diagram Tool by pressing and holding the d key.
Once you get the hang of the modifier keys, you can create really complex diagrams with just a few clicks.
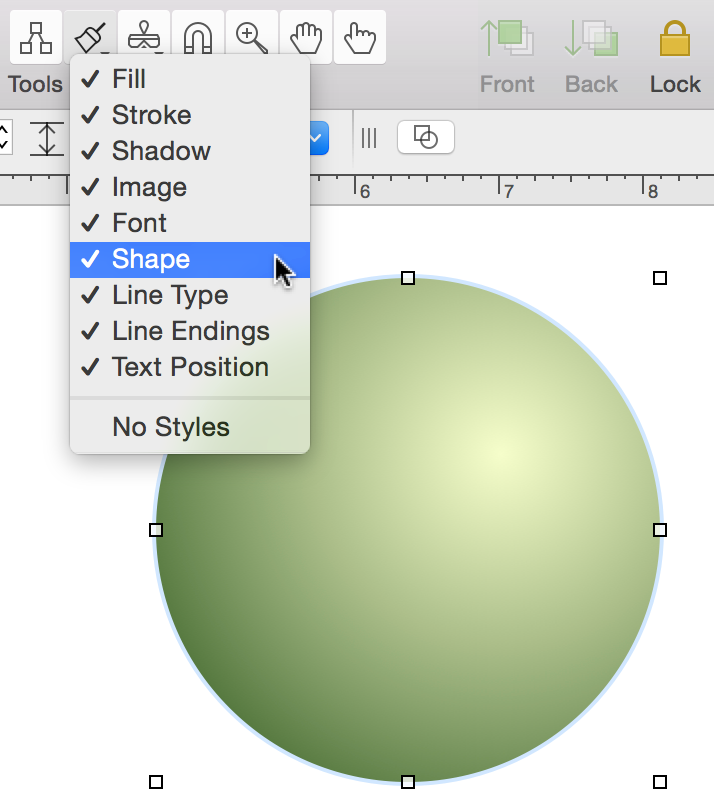
Replicating Styles with the Style Brush Tool 
Use this tool to replicate styles. When you first open OmniGraffle, the Style Brush tool is empty, and its cursor has arrows showing that you can absorb a style. Select it and click any object on the canvas to absorb the object’s style into the brush. Once the brush contains a style, you can click any object to replace the object’s style with the style stored in the brush.
The tool’s popup menu contains a list of styles that can be absorbed; select whichever ones you like, and the brush will only absorb or apply those styles. For example, if you only select Fill, you can apply a certain fill style to objects without affecting any of their other styles.
To reset the contents of the brush, select Clear Contents from the Brush tool’s popup menu; you can then absorb a new style. You can also Option-click a different object to replace the brush’s contents.
Duplicating Objects with the Rubber Stamp Tool 
Use this tool to replicate objects. When you first open OmniGraffle, the Rubber Stamp tool is empty. Select it and click any object on the canvas to grab the object into the stamp. Once the stamp contains an object, each click on the canvas creates a new copy of the object.
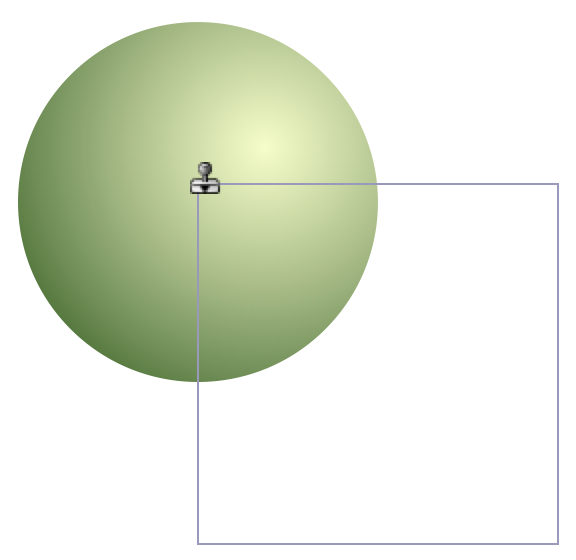
If you hold the Shift key down, the Rubber Stamp tool will align the soon-to-be-pasted object along the centerline (either horizontally or vertically) of the original or previously pasted copy.
To reset the contents of the stamp, select Clear Contents from the tool’s popup menu; you can then grab a new object. You can also Option-click a different object to replace the stamp’s contents.
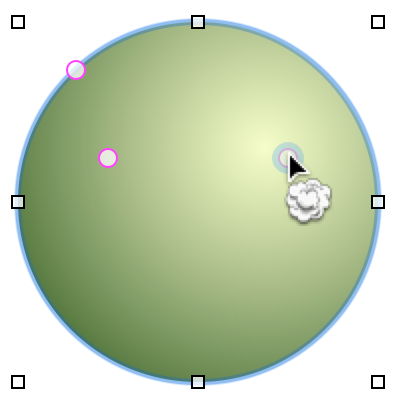
Adding and Adjusting Connections with the Magnet Tool 
Use this tool to add magnets to a shape or to edit a shape’s existing magnets. To view the available magnets for the objects on your Canvas, choose View ▸ Magnets.
Magnets are special spots on a shape that attract connection lines. If there are no magnets on a shape, all lines connect to the shape’s center by default. If there is at least one magnet, each connected line is attracted to the nearest one. You can also connect lines directly to magnets, to make sure they stay connected to the same magnet regardless of how the shape is moved.
You can view the magnet presets in the Connections inspector (Command–3). However, if you want to place magnets in very specific places on a shape, click the Magnet Tool and then click anywhere on the object.
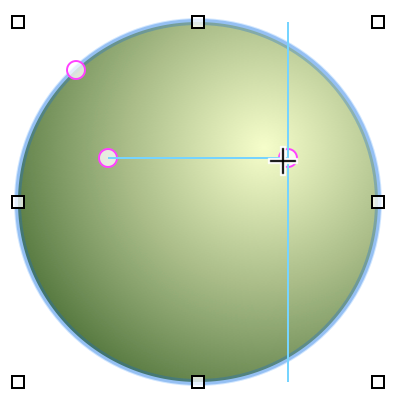
To change a magnet’s position on the object, click and drag an existing magnet to another location. If an object has more than one magnet, Smart Guides will appear so you can align the magnets as well. To delete a magnet, Shift- or Option-click on a magnet.
Getting a Closer Look at the Canvas
with the Zoom Tool 
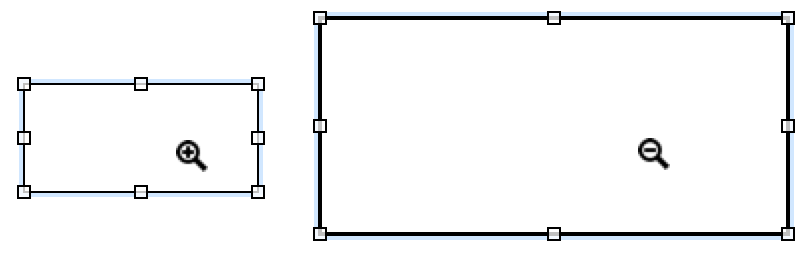
Use the Zoom tool to get a closer (or more distant) look at the Canvas. Click anywhere on the canvas to center on that point and double the zoom percentage. Option-click to zoom back out.
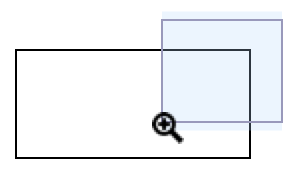
- Click and drag a box across the canvas to specify the rectangle you would like to zoom to; the shading shows the area that will be visible in the window when you release the mouse button.
- If you Option-drag, the rectangle is centered on the spot where you start dragging. This is particularly useful for when you need to focus on a single element on the canvas.
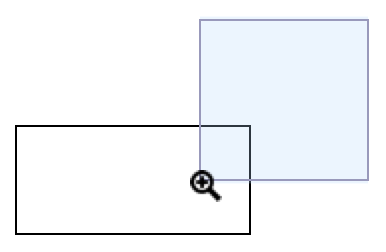
While dragging, press and hold Shift to move the zoom selection area around instead of resizing it.
Shift-click the zoom tool in the tool palette to return to 100 percent zoom, or actual size.
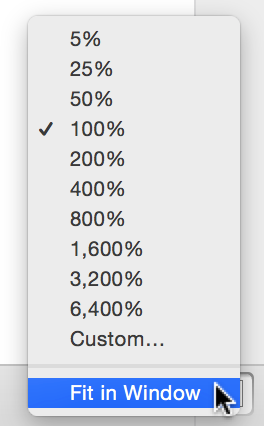
You can always zoom to a specific percentage with the zoom menu in the lower-right of the Bottom Bar, just beneath the Canvas.
If your Mac has a Multi-Touch–capable trackpad, you can use it to change the zoom level using the pinch gesture. To enable Multi-Touch, go to OmniGraffle ▸ Preferences ▸ General ▸ Multi-Touch and turn on Enable Multi-Touch trackpad gestures. Now you can pinch open to zoom in, or pinch close to zoom out. Multi-Touch zoom makes it much easier for you to zoom-in and -out on the objects on the Canvas.
Moving the Canvas Around with the Hand Tool 
Use this tool to drag your view of the canvas around, to see part of the canvas that is out of sight.
You’ll mostly use the Hand tool when you’re zoomed in on the canvas and want to move to a different location. For this, use the Hand tool’s quick access key, the Space Bar, to switch the mouse pointer to a hand, and then click and drag to move the canvas around.
As you drag, you’ll notice that the open hand changes to a clutched fist to indicate that you’re grabbing onto the Canvas.
Activating Scripted Objects with the Action Browse Tool (Pro) 
Use the Action Browse Tool to work with interactive OmniGraffle documents.
The secret here is that you assign actions to objects using the Action properties inspector (Command–3), which is only available in OmniGraffle Pro.
Start by creating and selecting an object on the Canvas, and then switch to the Action properties inspector. By default, an object Does Nothing, which means it just sits there on the Canvas looking pretty. Other Actions you can bind to an object include:
- Opens a URL — lets you assign a URL to open; when clicked, the page opens in the user’s default web browser.
- Opens a File — lets you assign a file to open; when clicked, the file opens in the default app based on that file type’s preferences. You can also choose to open a synchronized file in an OmniPresence folder.
- Runs a Script — runs an AppleScript when the object is clicked.
- Jumps Elsewhere — lets you jump to another Canvas in the OmniGraffle project, highlight other objects, or zoom in or out on the canvas.
- Shows or Hides Layers — lets you show or hide specific layers in your project.
The Actions you assign to an object make it easy for you to create highly interactive presentations and even UI/UX mockups for that killer iOS app you’re designing.
For more details, see Making Objects Interactive with the Action Inspector.
Note
While the Actions inspector is only available in OmniGraffle Pro, OmniGraffle Standard users can still use the Action Browse tool to interact with files created with OmniGraffle Pro.