A Quick Tour of OmniOutliner for iOS
The document editor is the place to view, create, and manage your outlines.
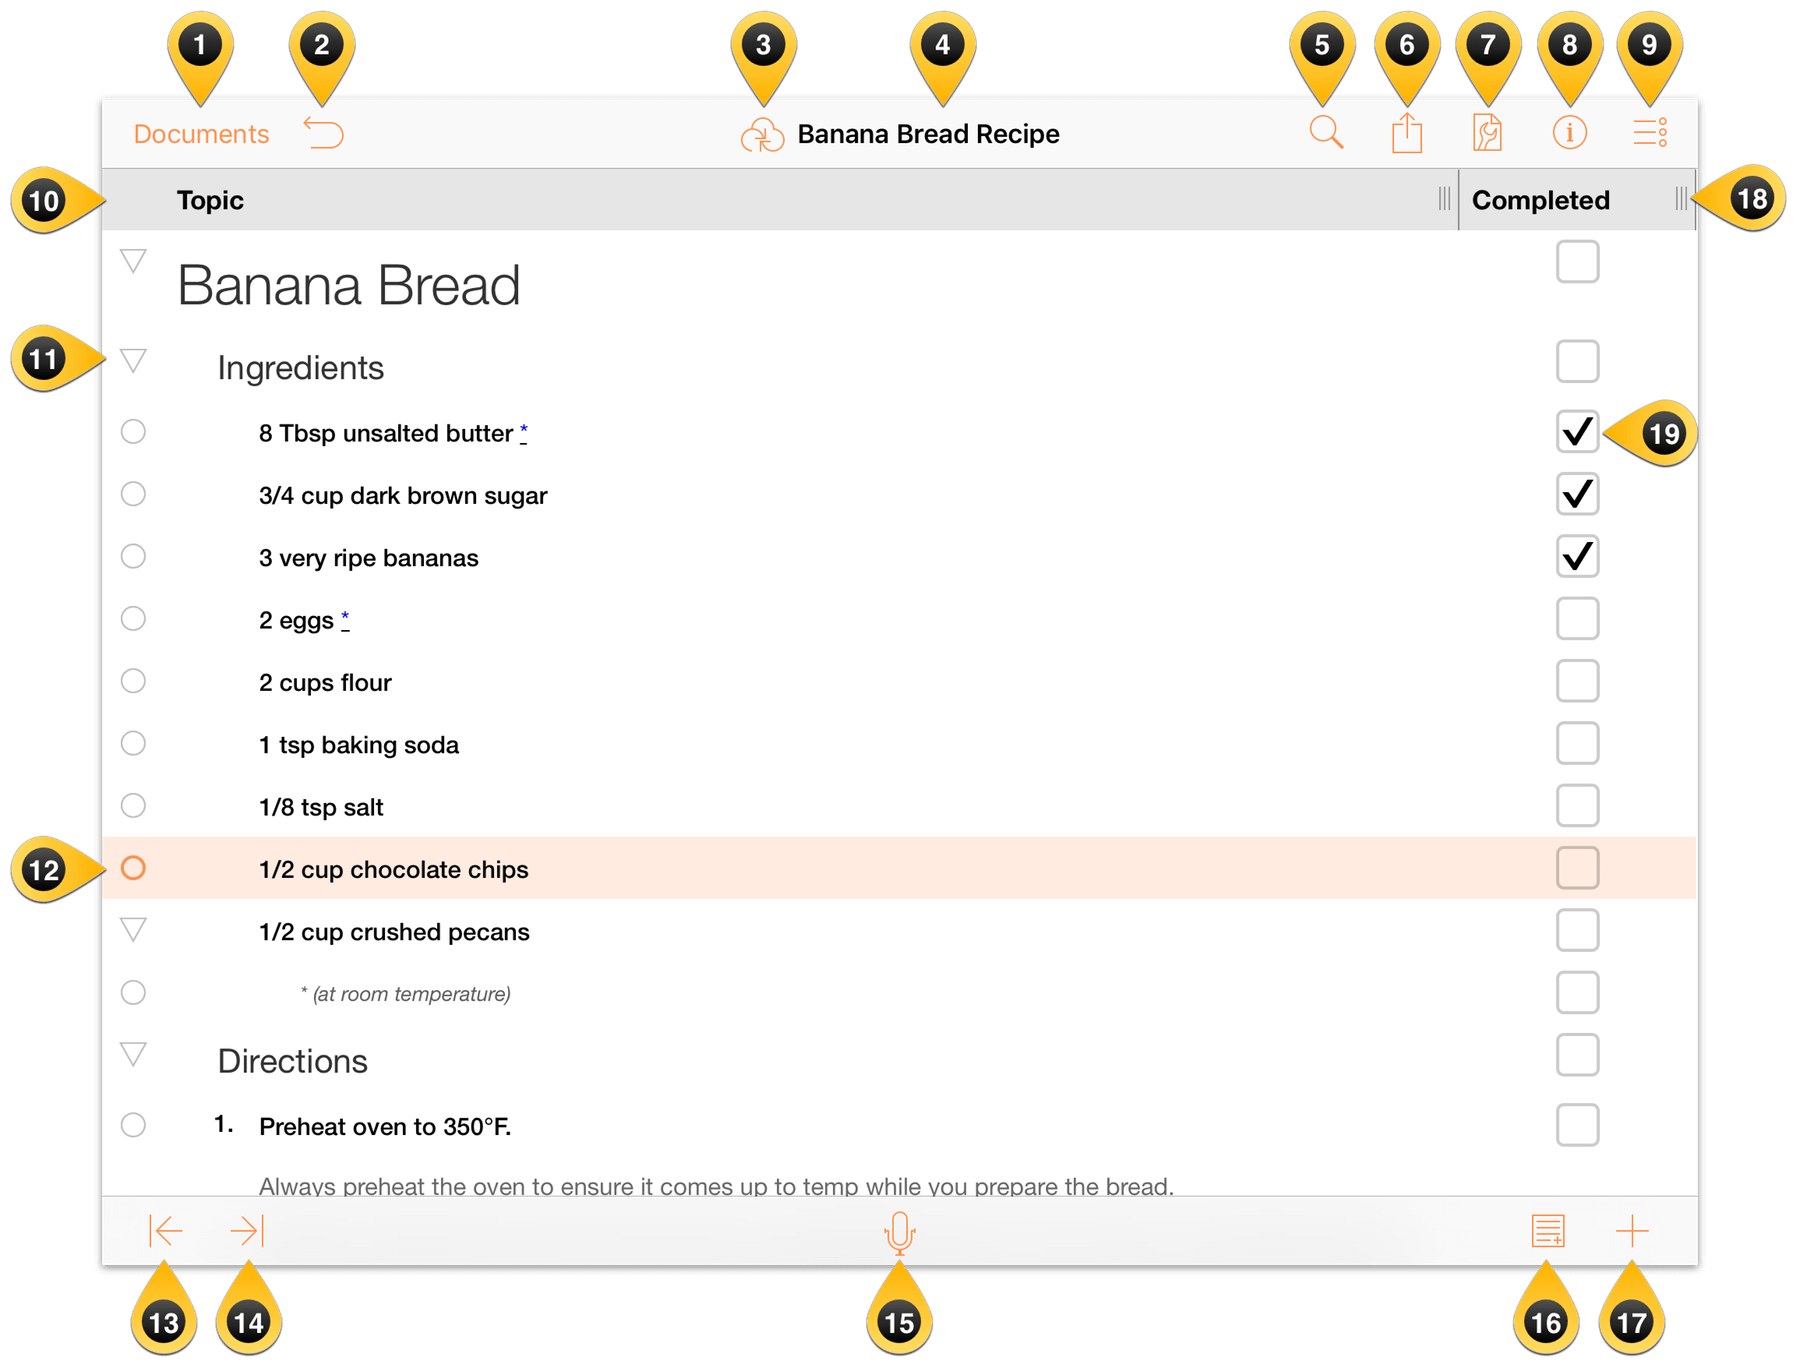
Documents — tap here to exit the current document and view other documents in the current folder.
Undo/Redo — tap to Undo the last change, or press and select Redo from the popup menu to replicate the previous task.
- OmniPresence Sync — tap here to force an OmniPresence sync with Omni Sync Server. (This icon is only available in the toolbar when you have connected to an OmniPresence account; see Working in the Cloud.
Document Title — tap here to change the name of the current Outliner document. New files are named My Outline by default, so be sure to change the title to something that’s specific to the project you’re working on.
Search — tap here to search within the current document. The search field is dynamic, which means that OmniOutliner starts to look for results as soon as you start typing. When you see the item you’re looking for, just tap it in the results and you’re taken to that location in your Outliner file.
Share — tap here to open the Share menu, which has the following options:
- Send via Mail — lets you choose a format for sending the current file as an email attachment.
- Export to WebDAV — lets you choose a format before saving a copy of the current file to a designated WebDAV share.
- Export to... — lets you choose a format before saving a copy of the current file to a Cloud Storage Provider.
Note
The Export to... option is only available if you have enabled access to Cloud Storage Providers in OmniOutliner’s preferences. See Working in the Cloud for more information. - Send to App — lets you choose a format and then select another app on your iOS device in which to open that file.
- Create Template from Outline — creates an OmniOutliner Template from the current document.
Tip
The Share menu is also available in the Document Browser.Contents — tap here to add more depth to the contents of your document. Options include:
- Columns — Add and remove a column, configure its style properties, and specify the type of content that can go into the column (such as rich text or a checkbox for things you want to tick off).
- Styles — Apply a theme for your document, as well as for the individual rows and notes.
- Document — Set the zoom level, assign a background color, as well as set an optional color for alternating rows.
Tip
You’ll also find the Expand All and Collapse All buttons in Document settings. This comes in handy for big documents when you want to either see every fine detail or just the main rows.If you are using a Bluetooth keyboard along with OmniOutliner, you can use the keyboard shortcut Control-Command-9 for Expand All, or Control-Command-0 for Collapse All.
Text Style — select a row and tap here to set the text styles for that row. Tap Customize style to set the type size, specify the font and color of the text, add a background color, set a numbering style, change the alignment and more.
Edit — tap here to bring up the editing controls along the bottom of the screen. Tap a Row Handle to select the row, and then use the controls at the bottom of the screen to Cut, Copy, Delete, Group, or Move the items you’ve selected. When you’re finished, tap Done in the upper-right.

Column Headers — hidden by default with a single-column outline, you can add columns and rename column headers to further define the content of your outline.
Disclosure Triangle — items that are grouped together have a disclosure triangle as their Row Handle. A disclosure triangle is open when it points downward, and closed when it points to the right; tap to open the row and see what’s hiding inside.
Row Handle — tap and hold on these to drag rows around in your outline. These come more into play when using the Edit features in OmniOutliner; when you tap a row in Edit mode, the empty circle fills to indicate that the row has been selected for some action. To deselect the row, tap it again.
Outdent — tap to reduce the indent level of a selected row; Outdent isn’t available if a row is not indented.
Indent — tap to indent the row.
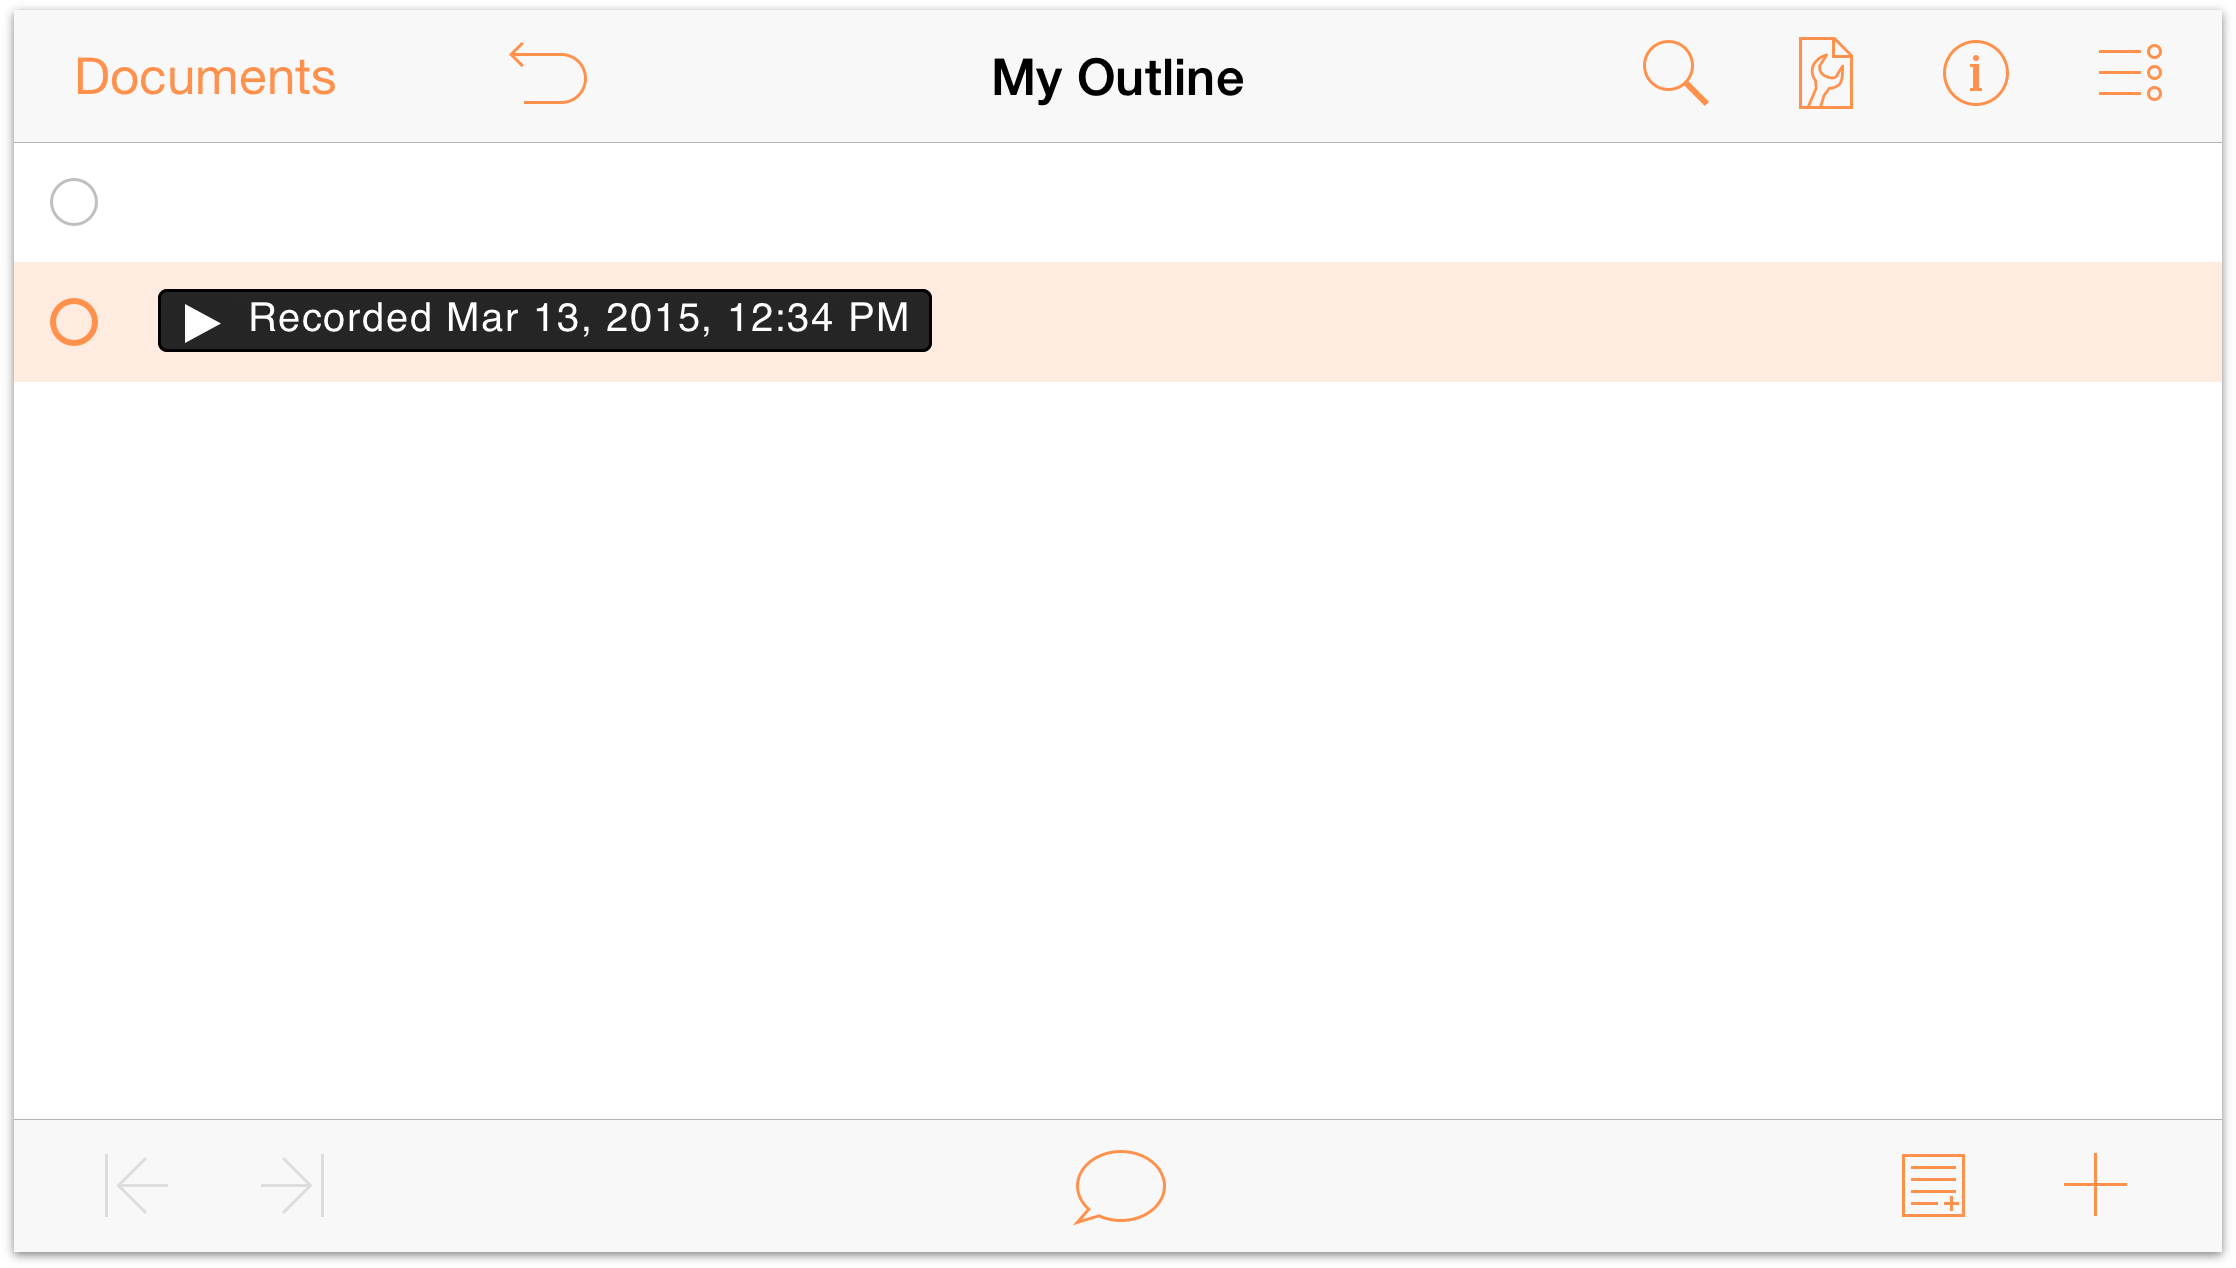
Record — tap to open the voice recorder and start recording. The Record button changes to an audio level indicator with a pause button on the left and a checkmark to the right. Tap Pause to stop recording and the circle fills with red to indicate that recording has stopped. Tap the Pause button again to continue recording, or tap the Checkmark button to finish and save the recording to a new row in your document.


Notes — tap to add a note, if one doesn’t exist. If there is already a note attached to this particular row, a single tap to the Notes button will hide or show the existing note. If you touch and hold the Notes button, you’ll notice that two buttons fly out. The one on the left hides all Notes in your document, while the one on the right reveals all Notes.
- Add/Plus — tap here to create a new row directly beneath and at the same level as the current row and start entering some text. Similar to the Notes button, if you touch and hold the Add button, four additional buttons fly out:
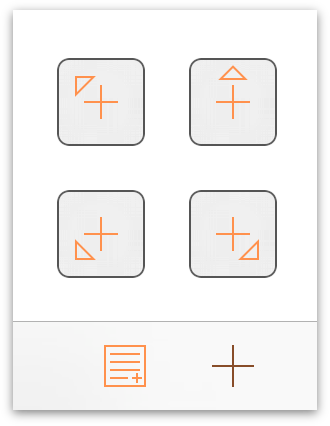
- Insert Parent
 — Inserts a new row at the next-highest level from the selected row.
 - Insert Above
 — Inserts a new row above and at the same level as the selected row.
 - Insert Child
 — Inserts a new row beneath and at one level lower than the selected row.
 - Insert Aunt
 — Inserts a new row beneath and one level higher than the selected row.
- Insert Parent
- Column Width Handles — drag these left or right to adjust the width of a column.
- Status Checkboxes — use status checkboxes for things like checking things off as you complete them, or to indicate a binary state for items in your outline.
As you can see, there’s more than meets the eye when it comes to a quick glance at OmniOutliner for iOS. You will learn more about how to master OmniOutliner while working through the step-by-step tutorials in Creating a New OmniOutliner Document and Working with Templates and Styles.
But before you jump ahead to those chapters, be sure to read the next two chapters so you can learn how to configure OmniOutliner to sync your files, as well as all the fine details of how to use the Document Browser to manage your files.