Managing Files with the Document Browser
In developer circles, OmniOutliner is known as what’s called a document-based application, which in non-nerdy language means: “This app creates and manages files.” And as a file-creating application, we need to provide a way for you to manage and organize your files. We call this the Document Browser.
Note
If you are familiar with the Mac, think of our Document Browser is analogous to the Finder. You use the Document Browser to organize and access your OmniOutliner documents.
This chapter provides you with an overview of OmniOutliner’s Document Browser, and shows you how to manage the files you create. You’ll learn how to create subfolders, move files around between the Local Documents folder and a folder in the cloud, as well as sharing and trashing files that you no longer need.
Let’s go!
Getting Acquainted with the Document Browser
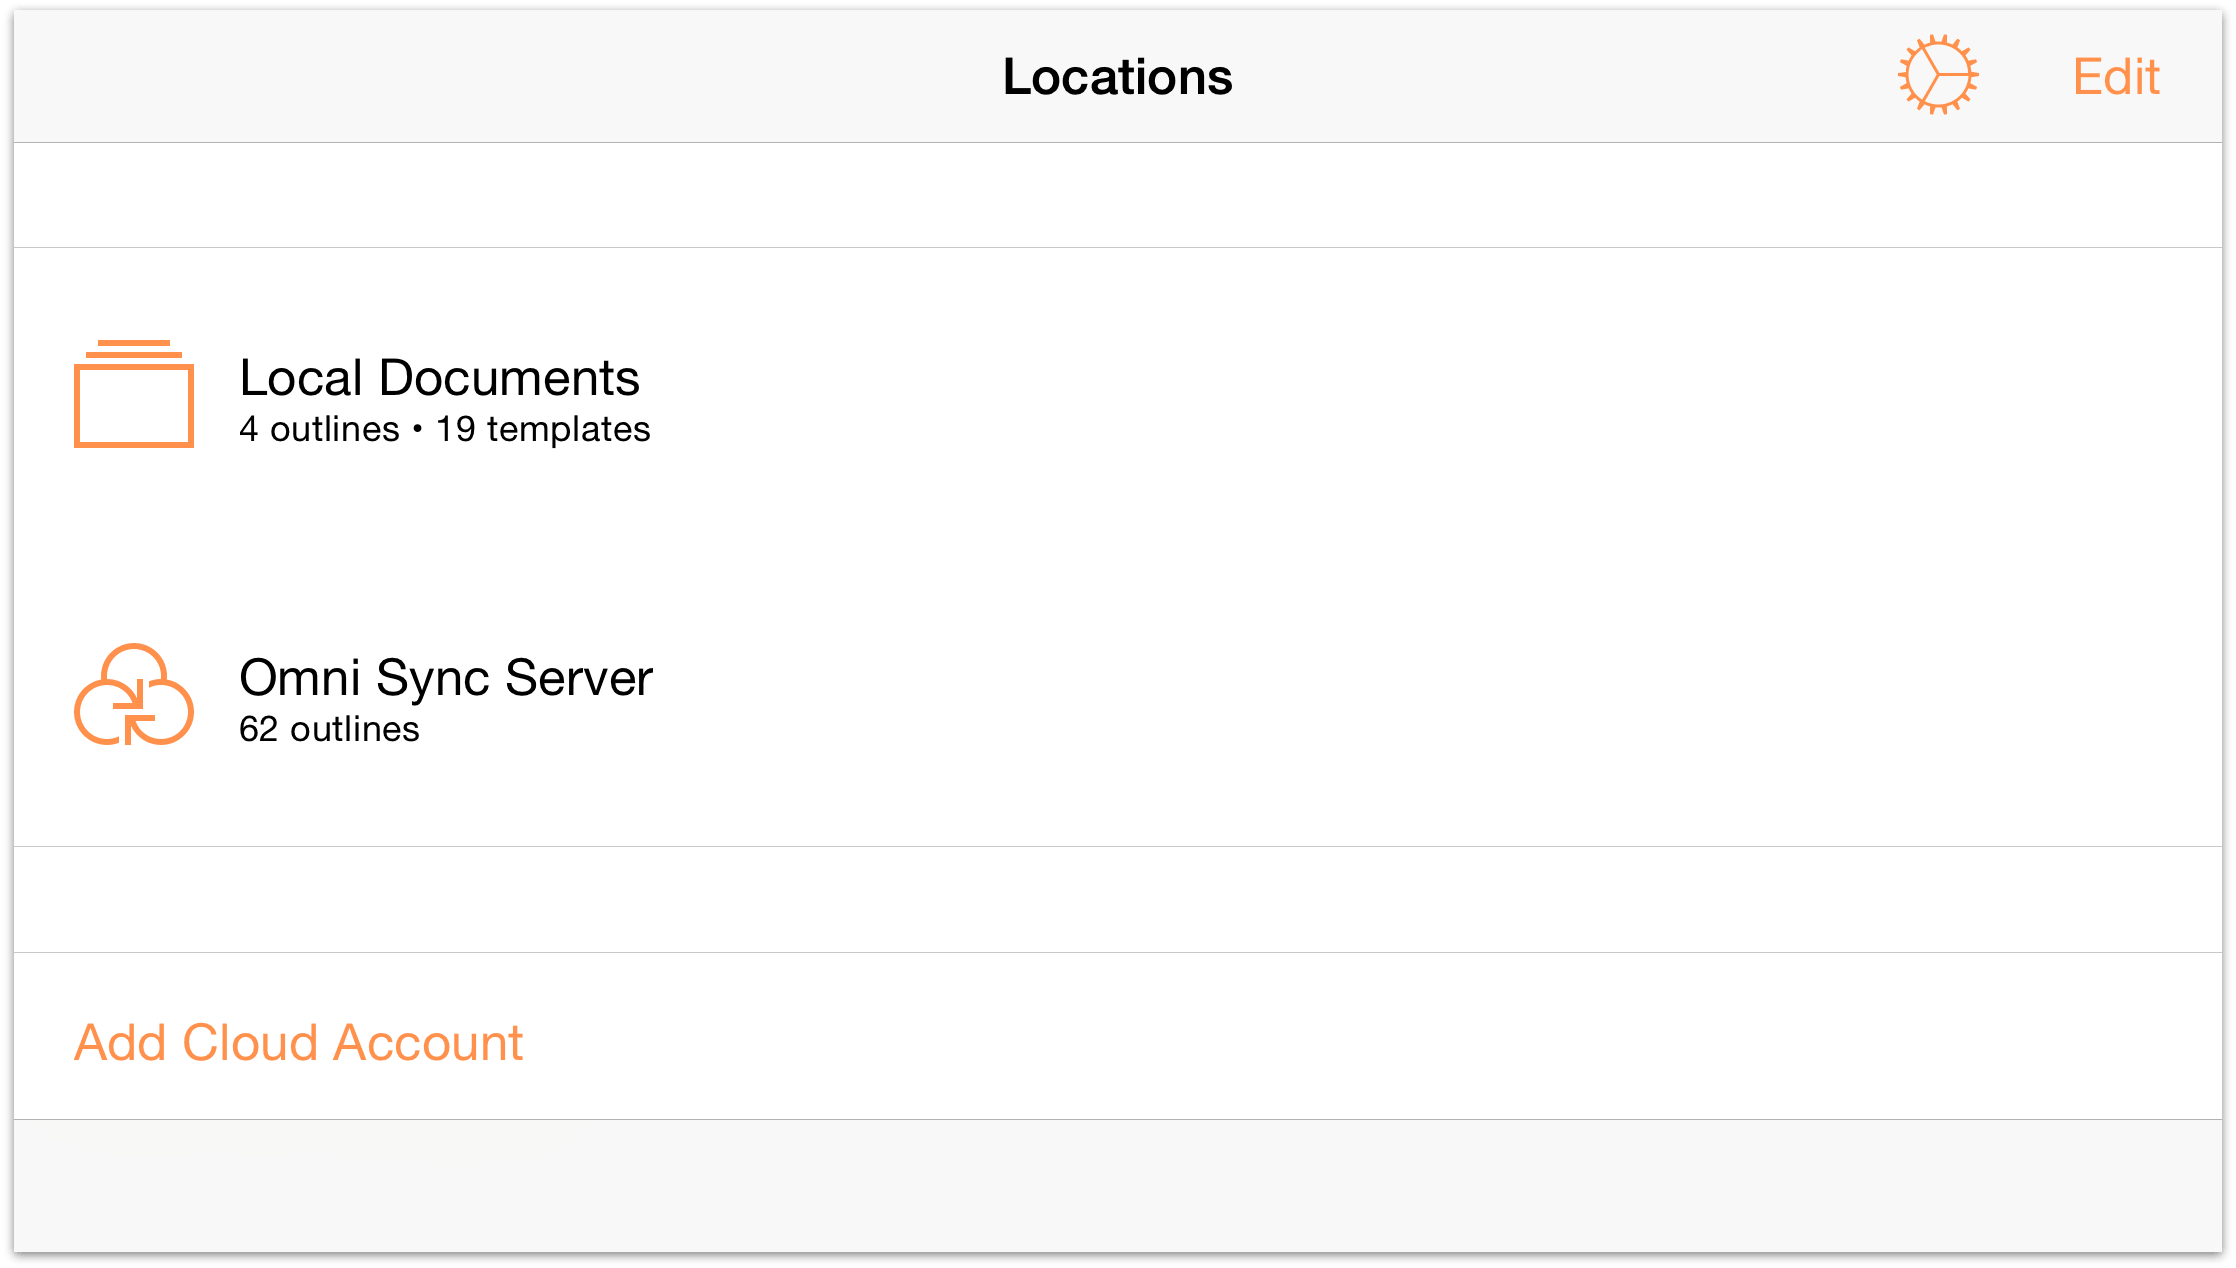
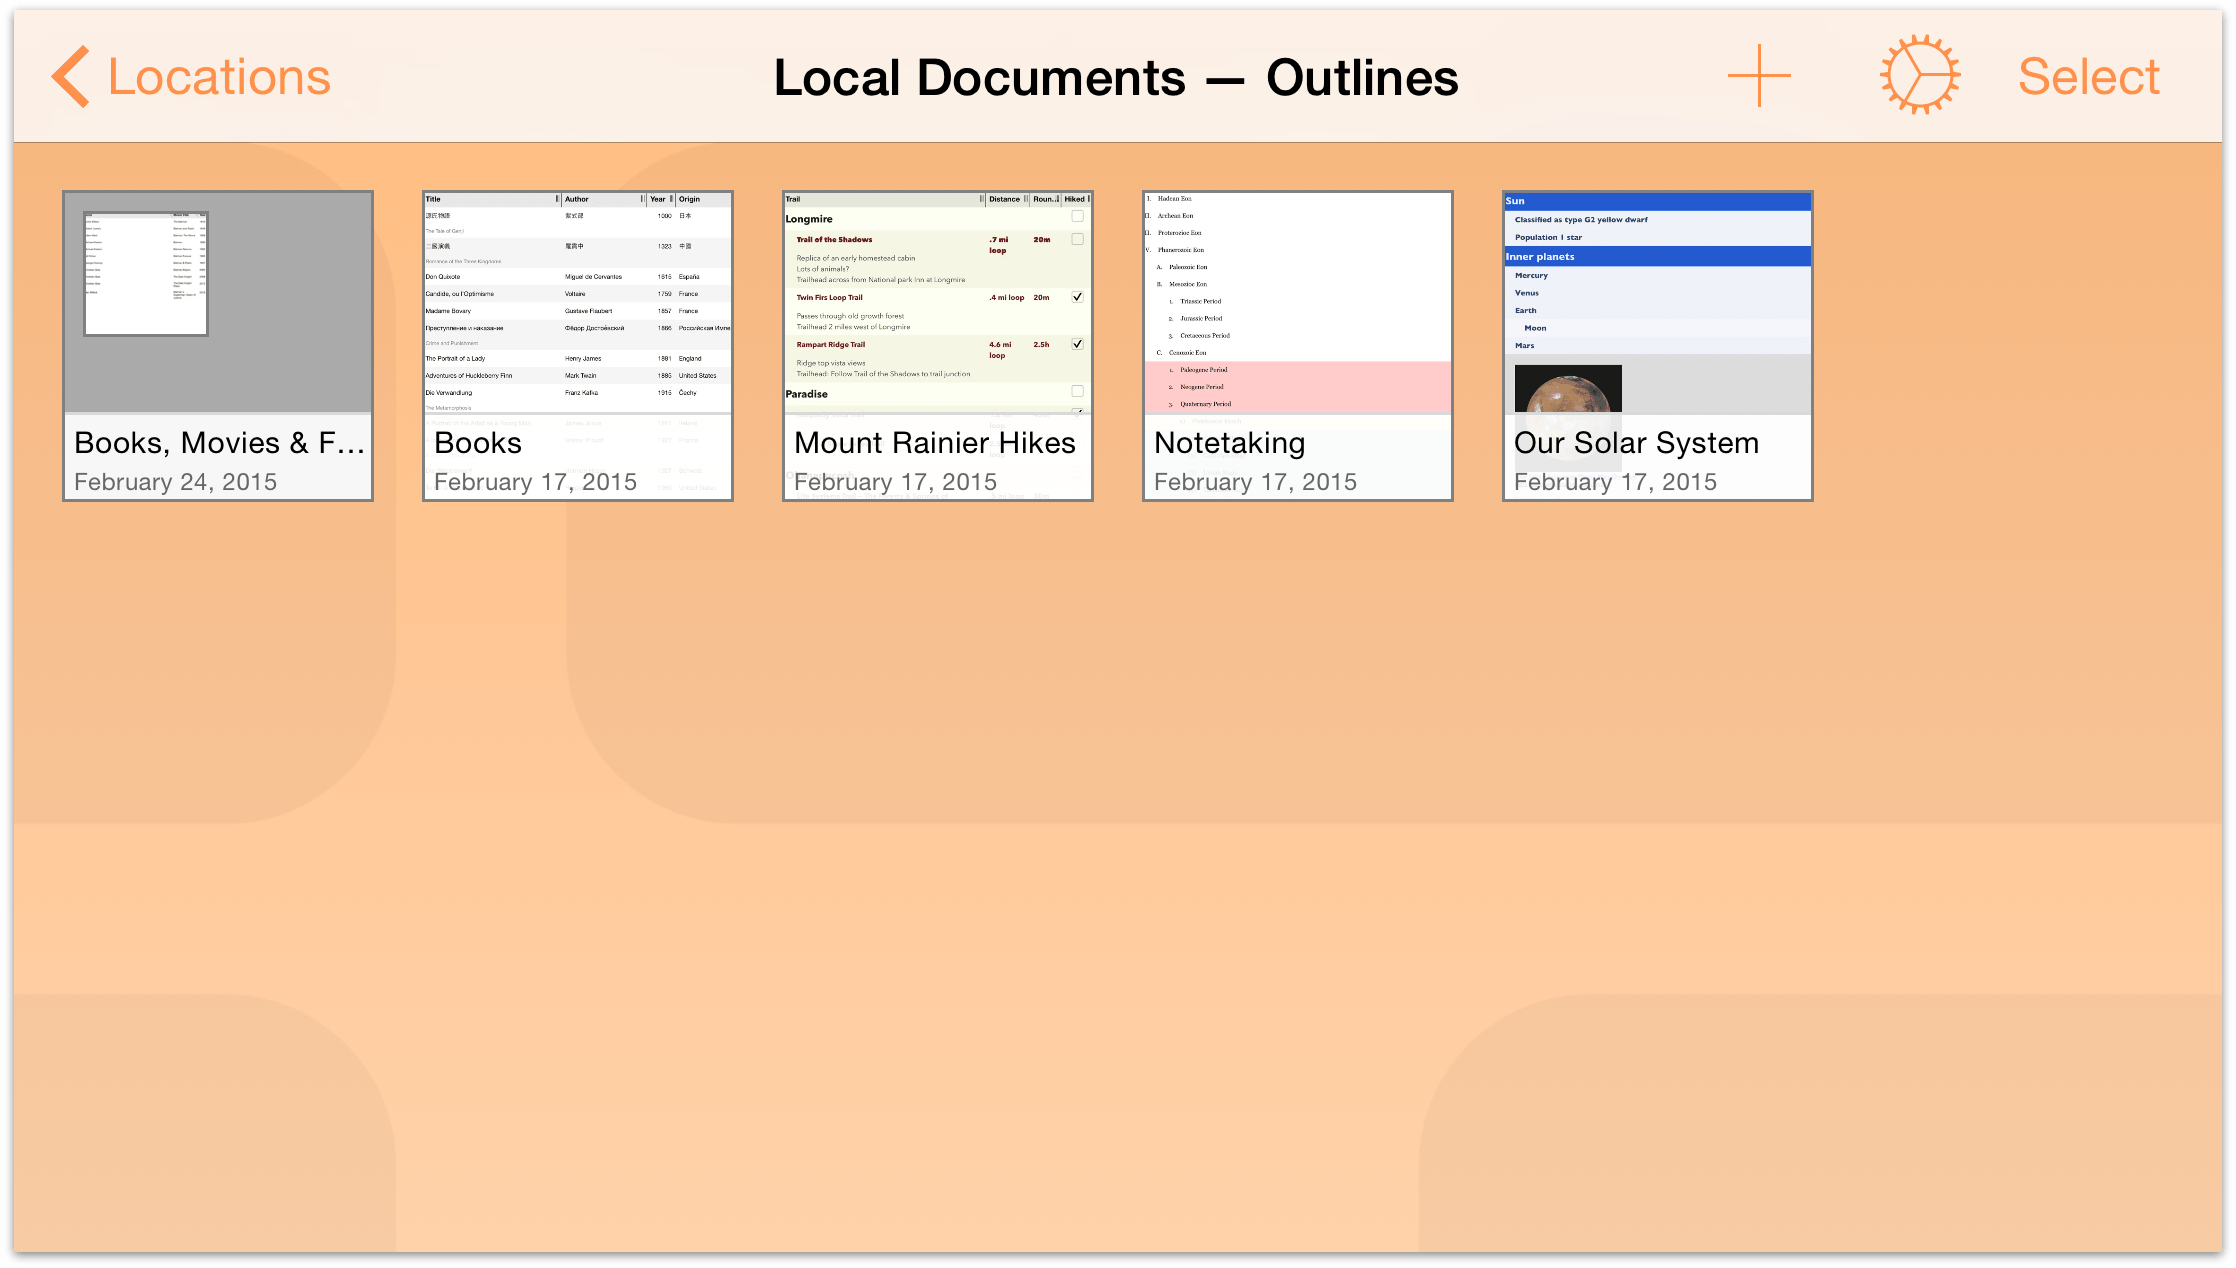
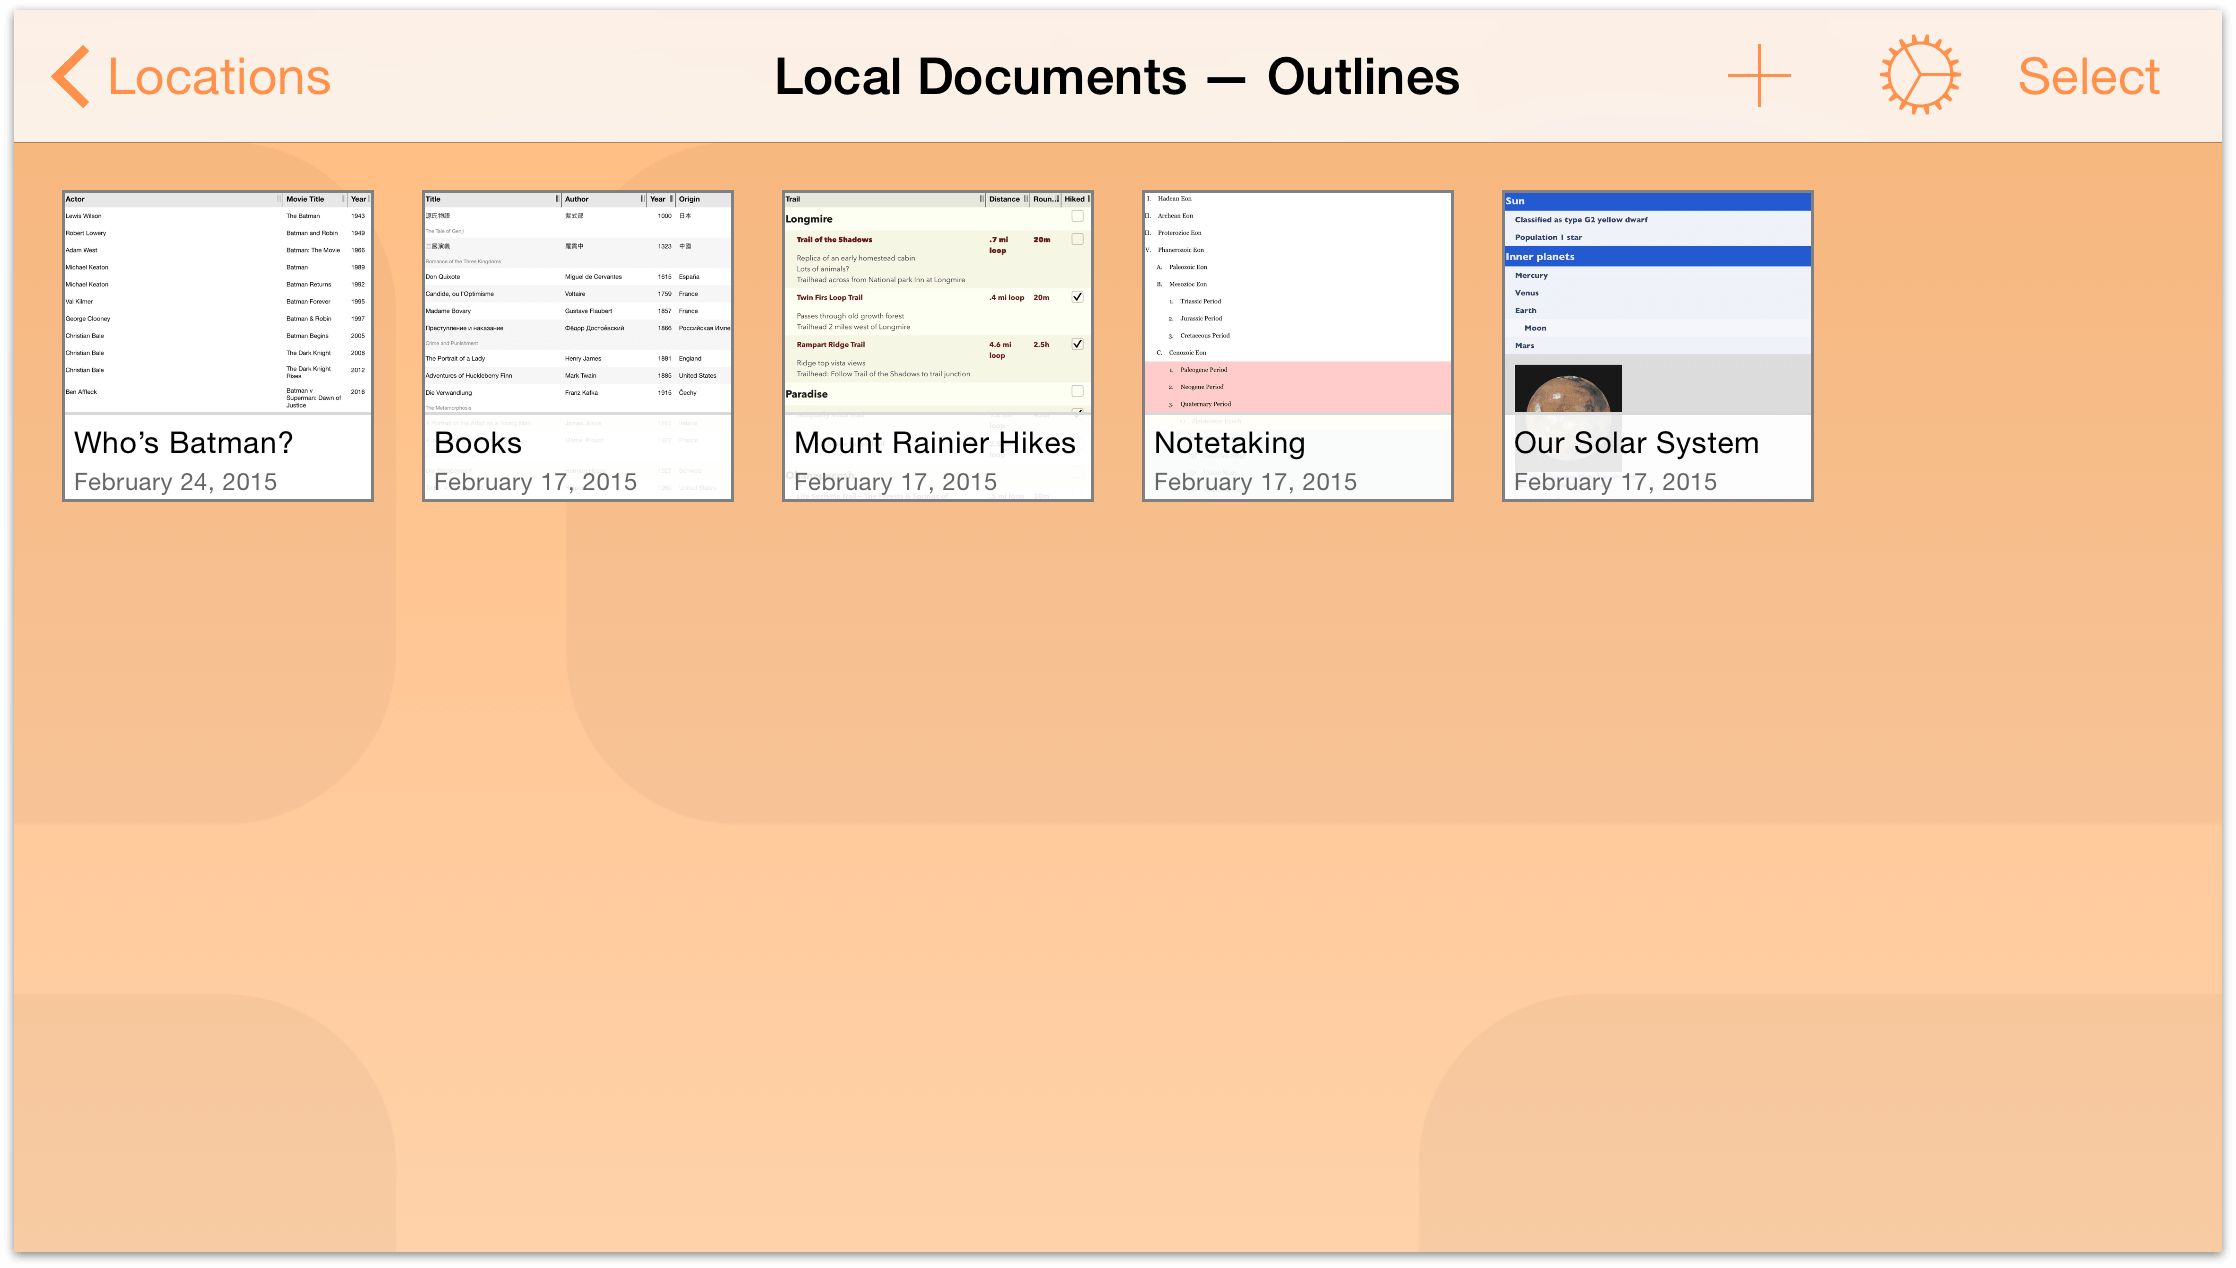
When you first open OmniOutliner, you’re taken to the Locations screen which is the place you go to access and manage your documents. There is a Local Documents folder, which we’ve preloaded with some sample OmniOutliner files that you can use as inspiration for the documents you’ll create.
Note
When you configure a Cloud Account, such as a free Omni Sync Server account (or connect to any WebDAV service you’ve subscribed to), you’ll also see a folder for that as well. See Working in the Cloud for details on how to connect OmniOutliner with files you store in the cloud.
Tap Local Documents to see what’s inside this folder:
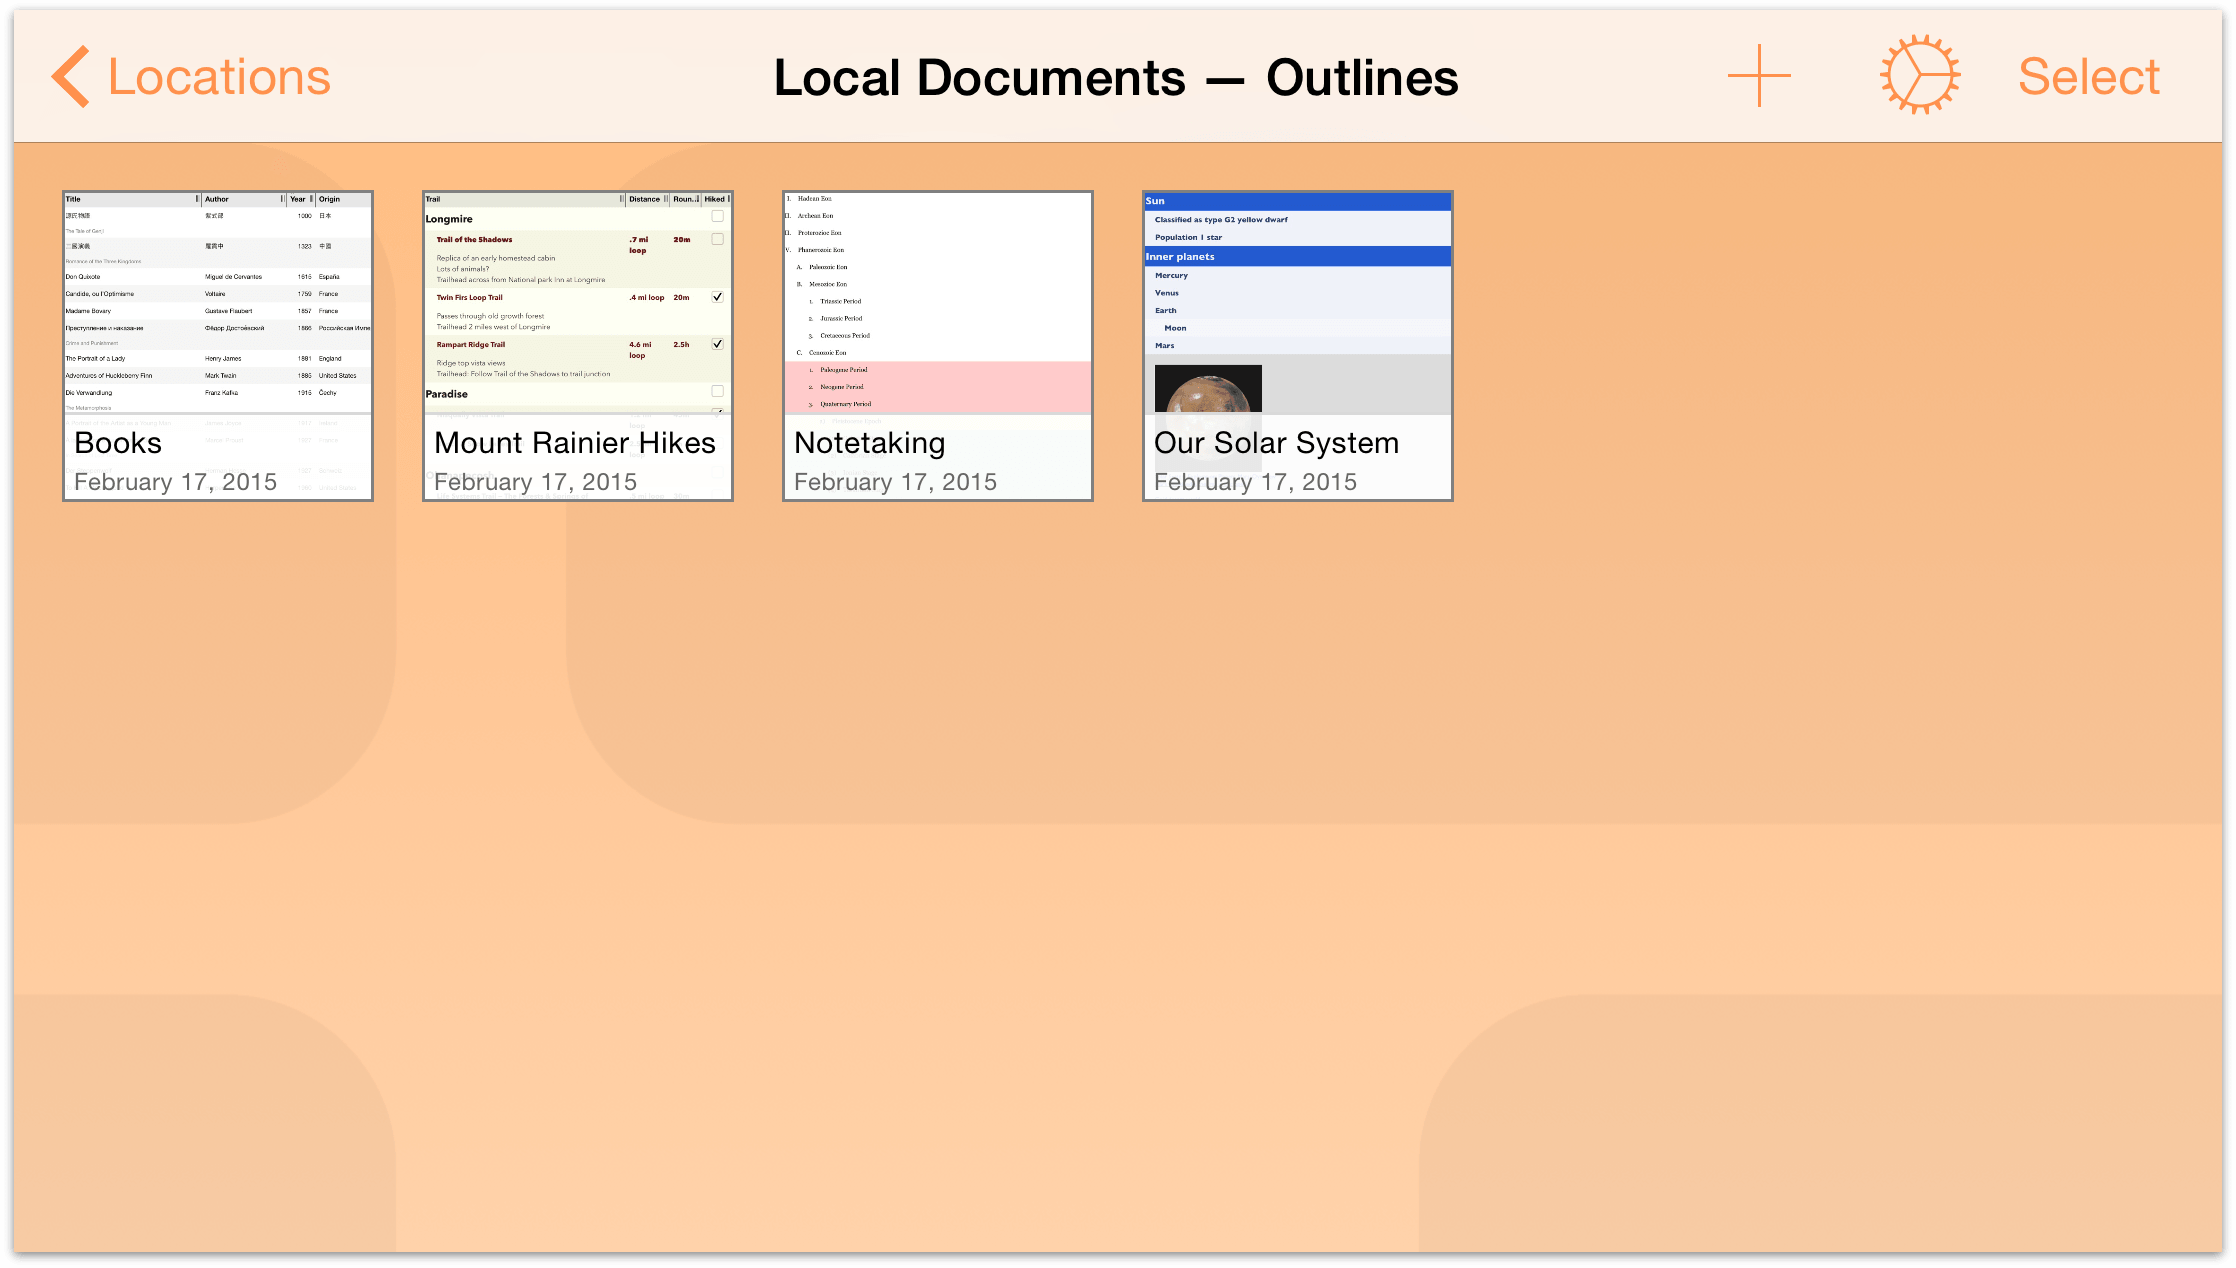
If you swipe down while viewing the contents of a folder, you’ll discover the Document Organizer. By default, OmniOutliner sorts your files by the date created and displays any OmniOutliner documents in that folder. You can opt to sort by Title instead, or view the available Templates as well.
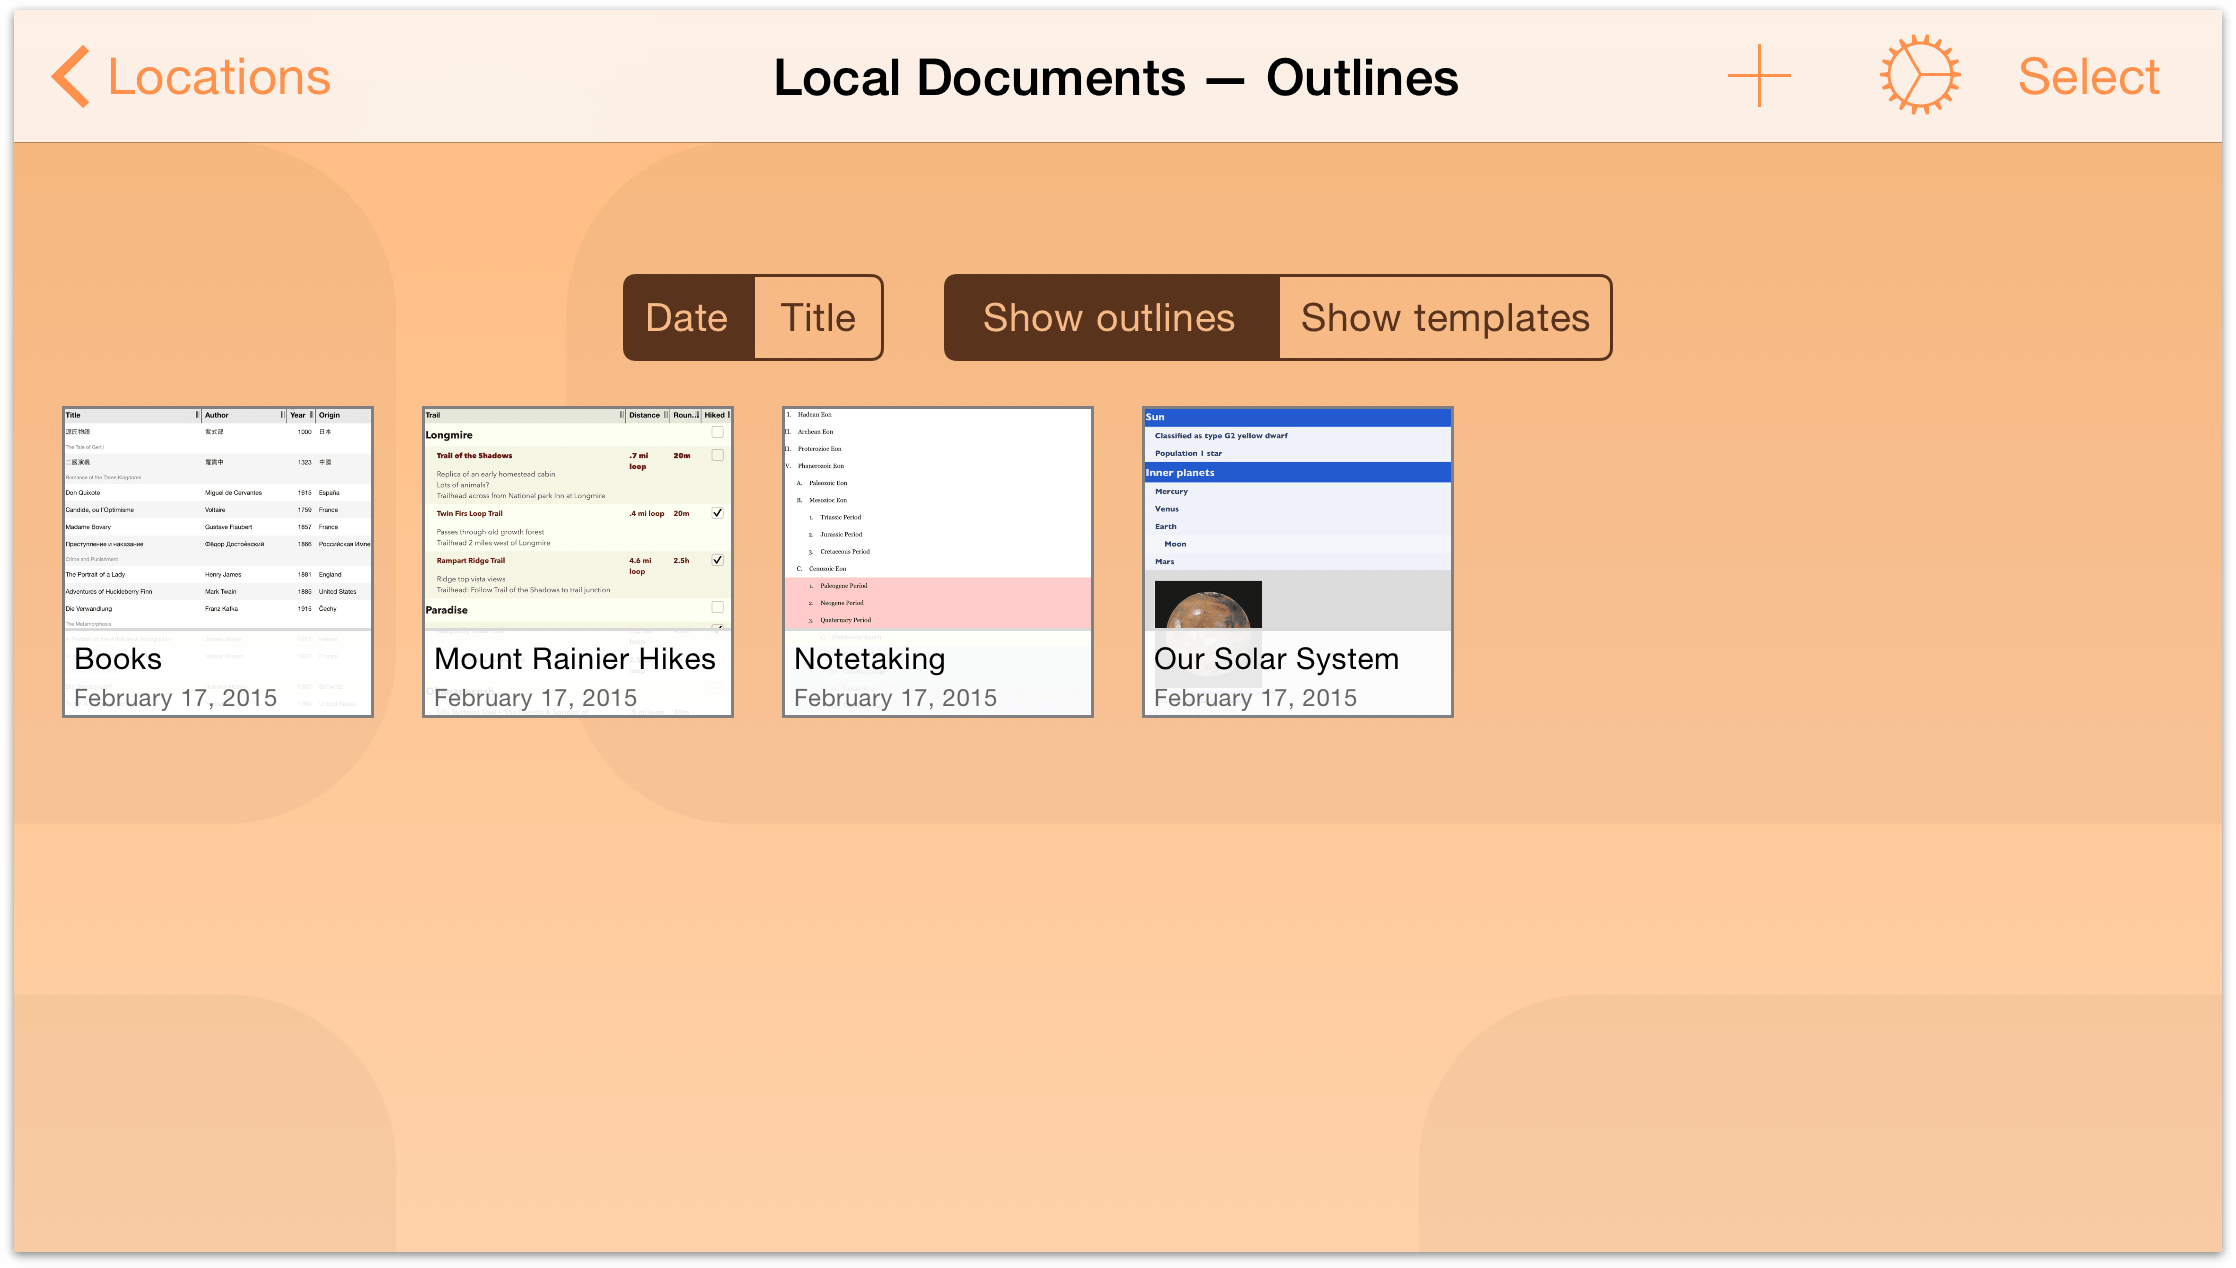
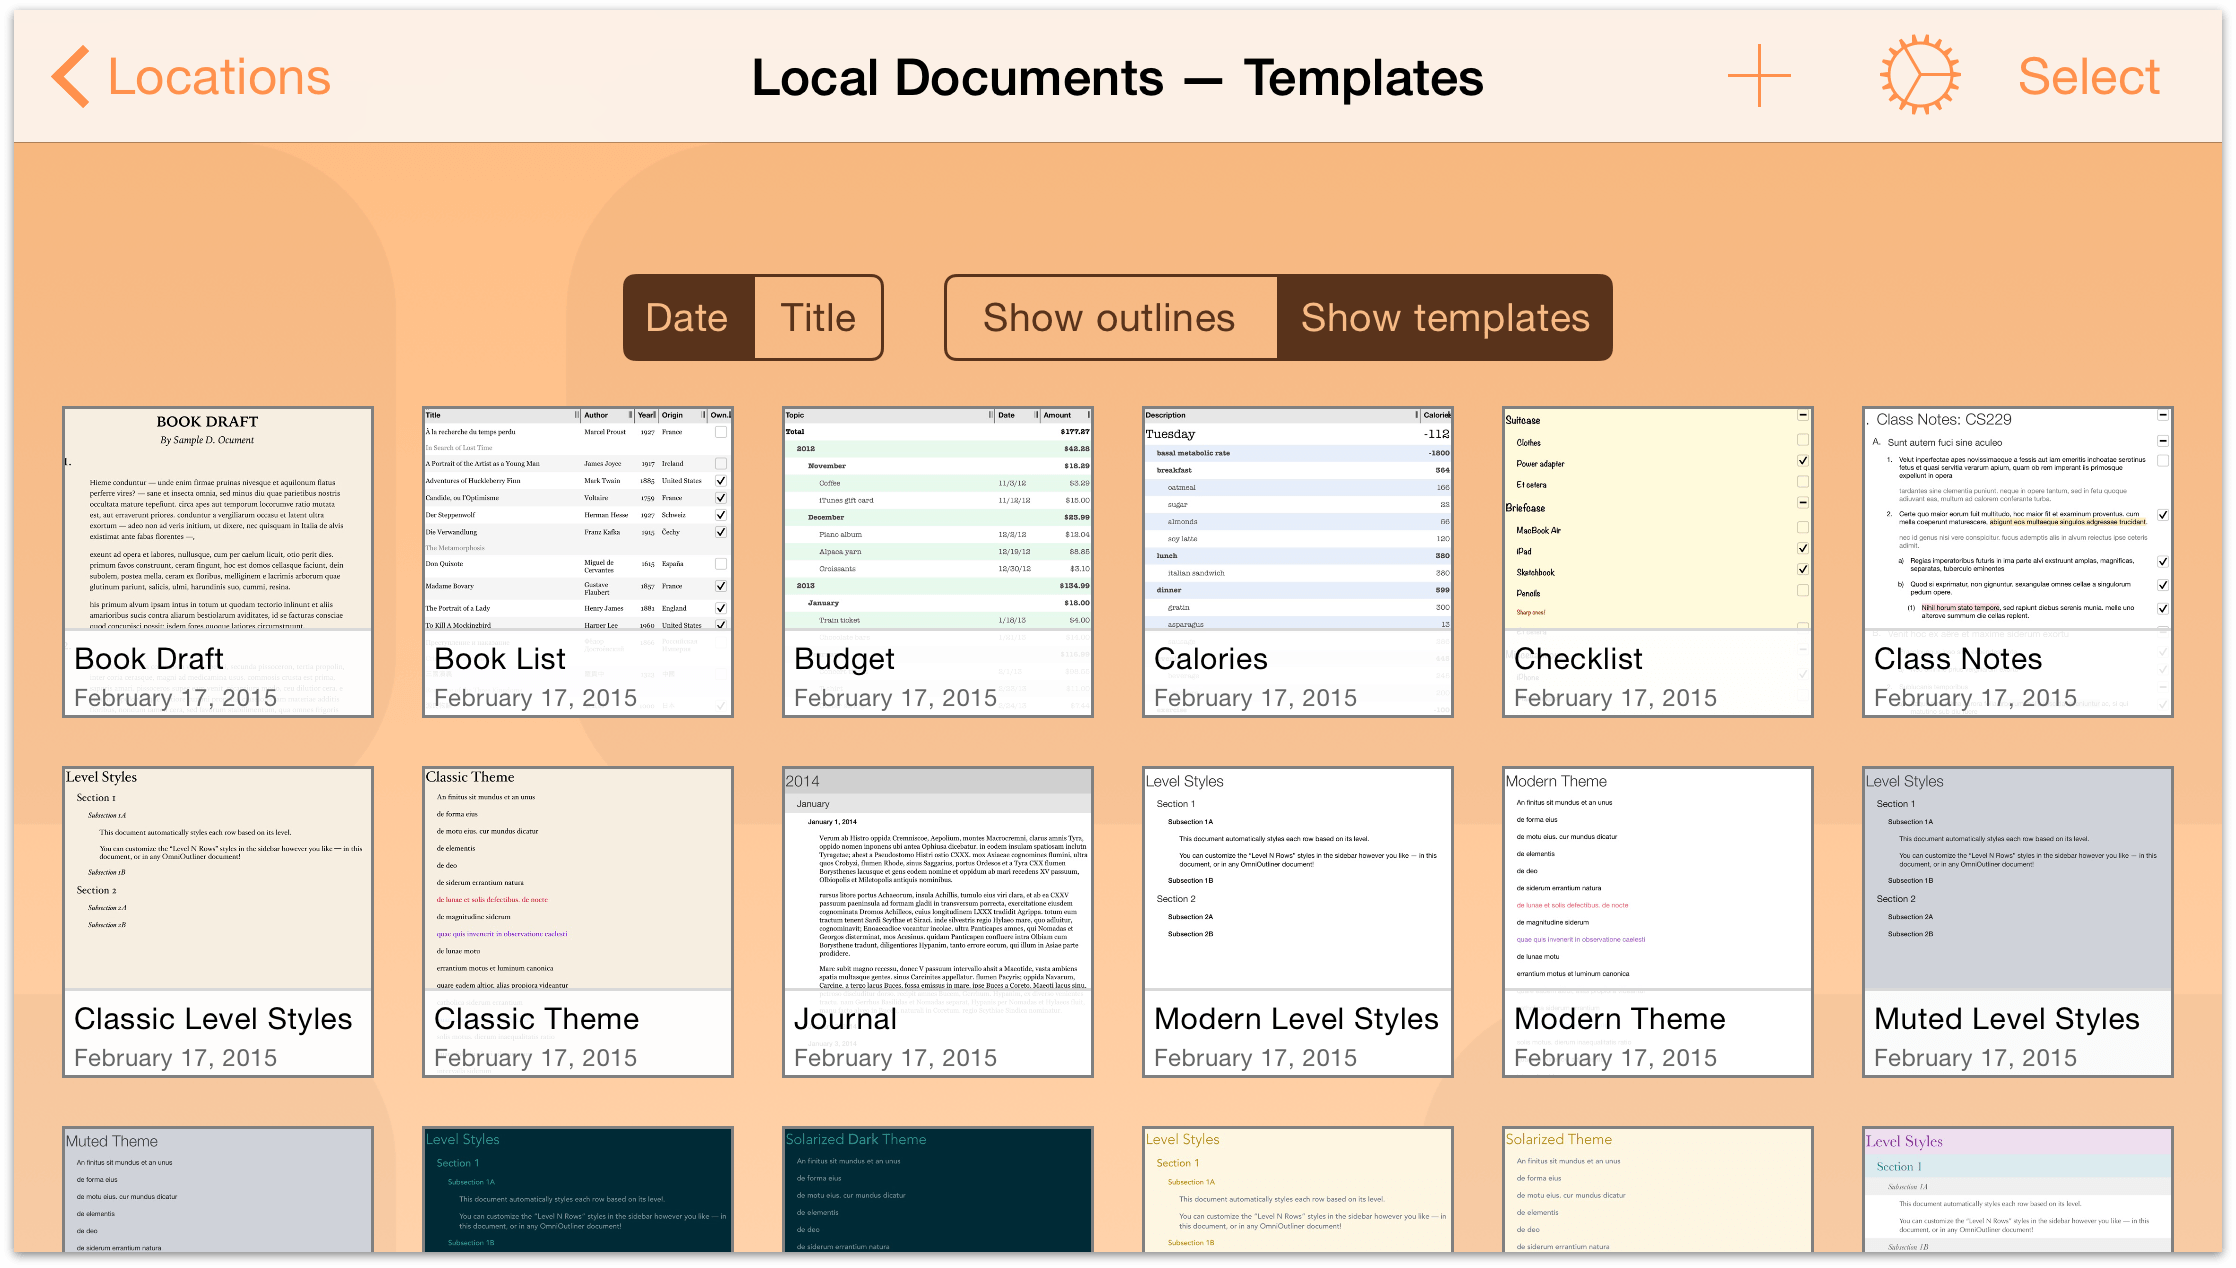
Tap Show templates to see the available templates. Take some time to scroll through the list of templates to see the types of document styles available to you. When you’ve finished, tap on Show outlines. To hide the Document Organizer, swipe up.
Using 3D Touch in the Document Browser
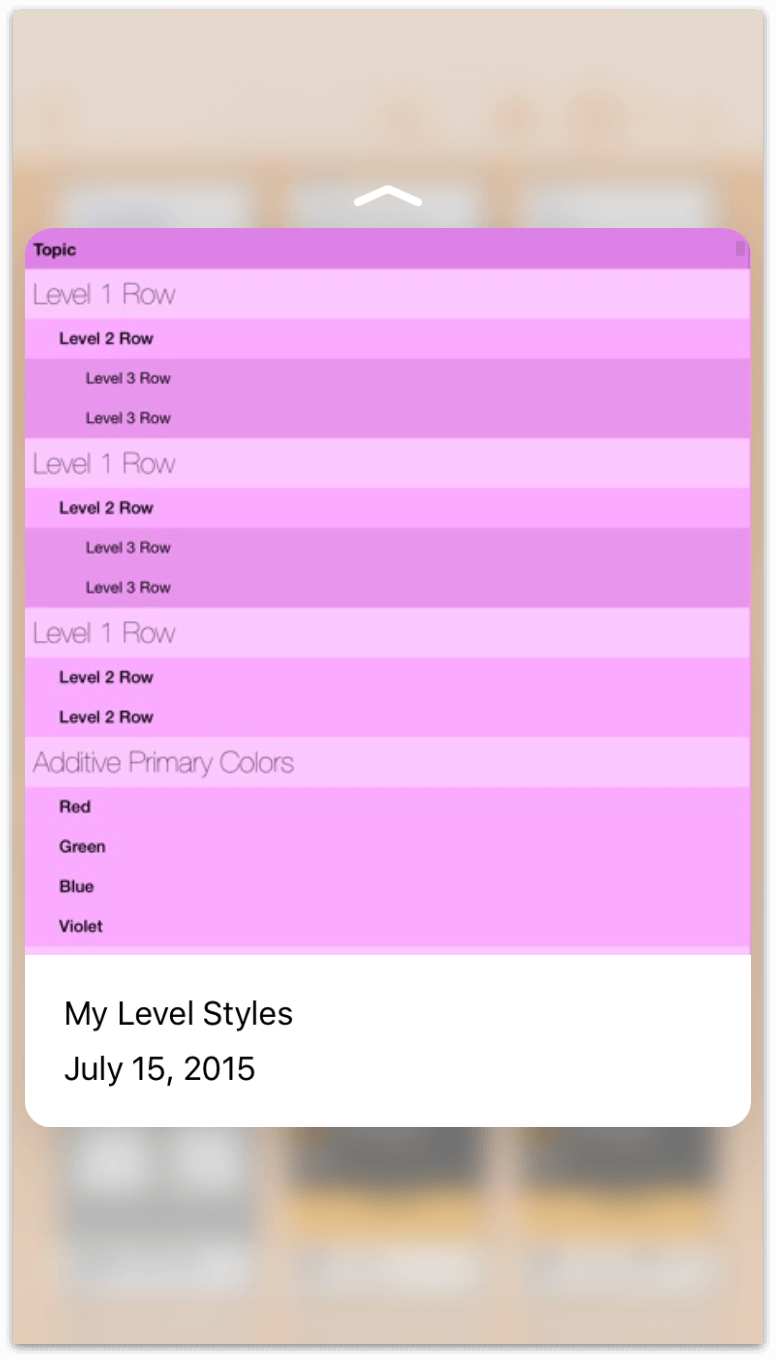
If you have an iPhone 6s or iPhone 6s Plus, you can take advantage of 3D Touch from within the Document Browser. When viewing the files within a folder, you can Peek at the contents of an outline with a long press:
When you feel the iPhone’s Taptic Engine react to your finger press, OmniOutliner’s presents a preview of the file:
If you look just above the document preview, you’ll notice a little upward-pointing arrow. Slide your finger up to see options for Export, Move, Duplicate, or Move to Trash.
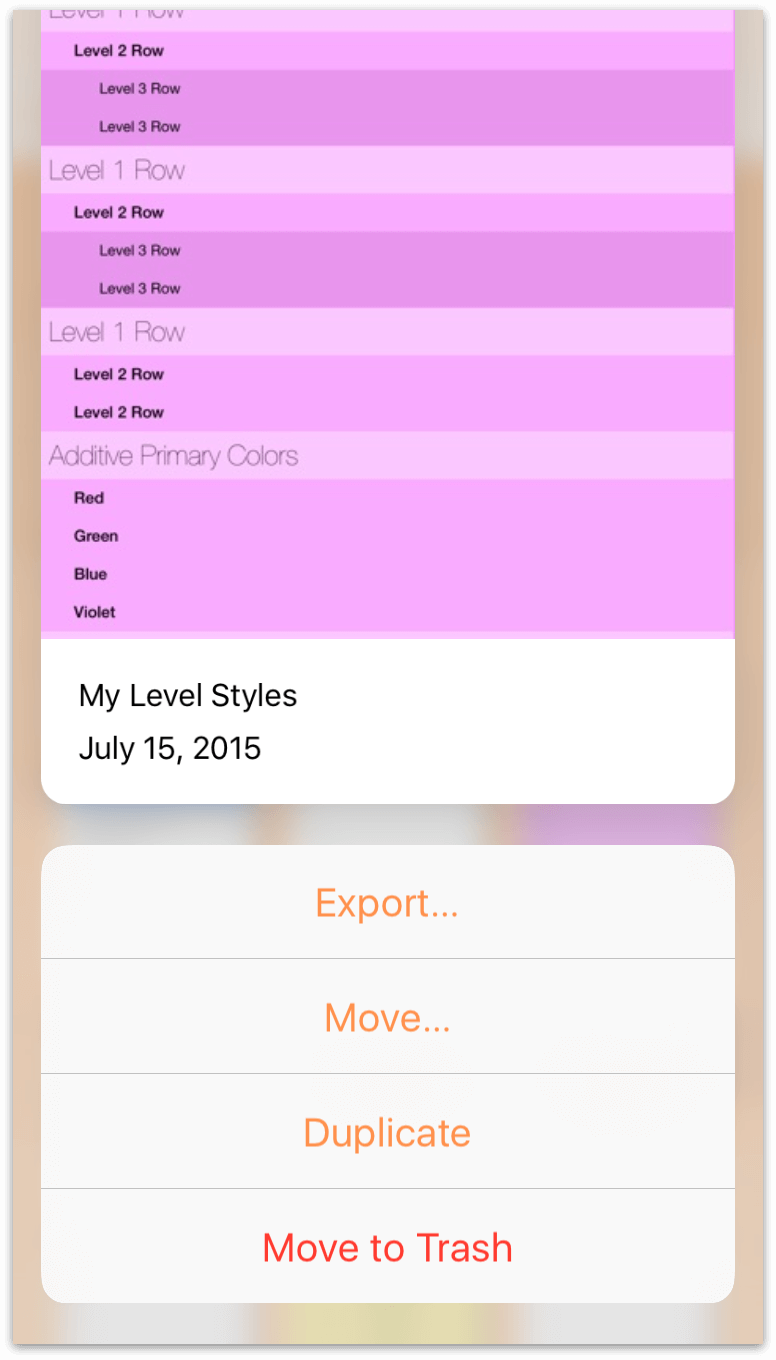
You can either choose one of those four options, continue sliding up to open the document, or slide down to dismiss any actions and return to the Document Browser.
Doing More with Your Files
The Document Browser isn’t just about sorting files and organizing templates; it offers so much more. When you have chosen a folder in which to create a new file or open an existing file, you’ll notice that the navigation bar at the top of the screen gains a few more options.
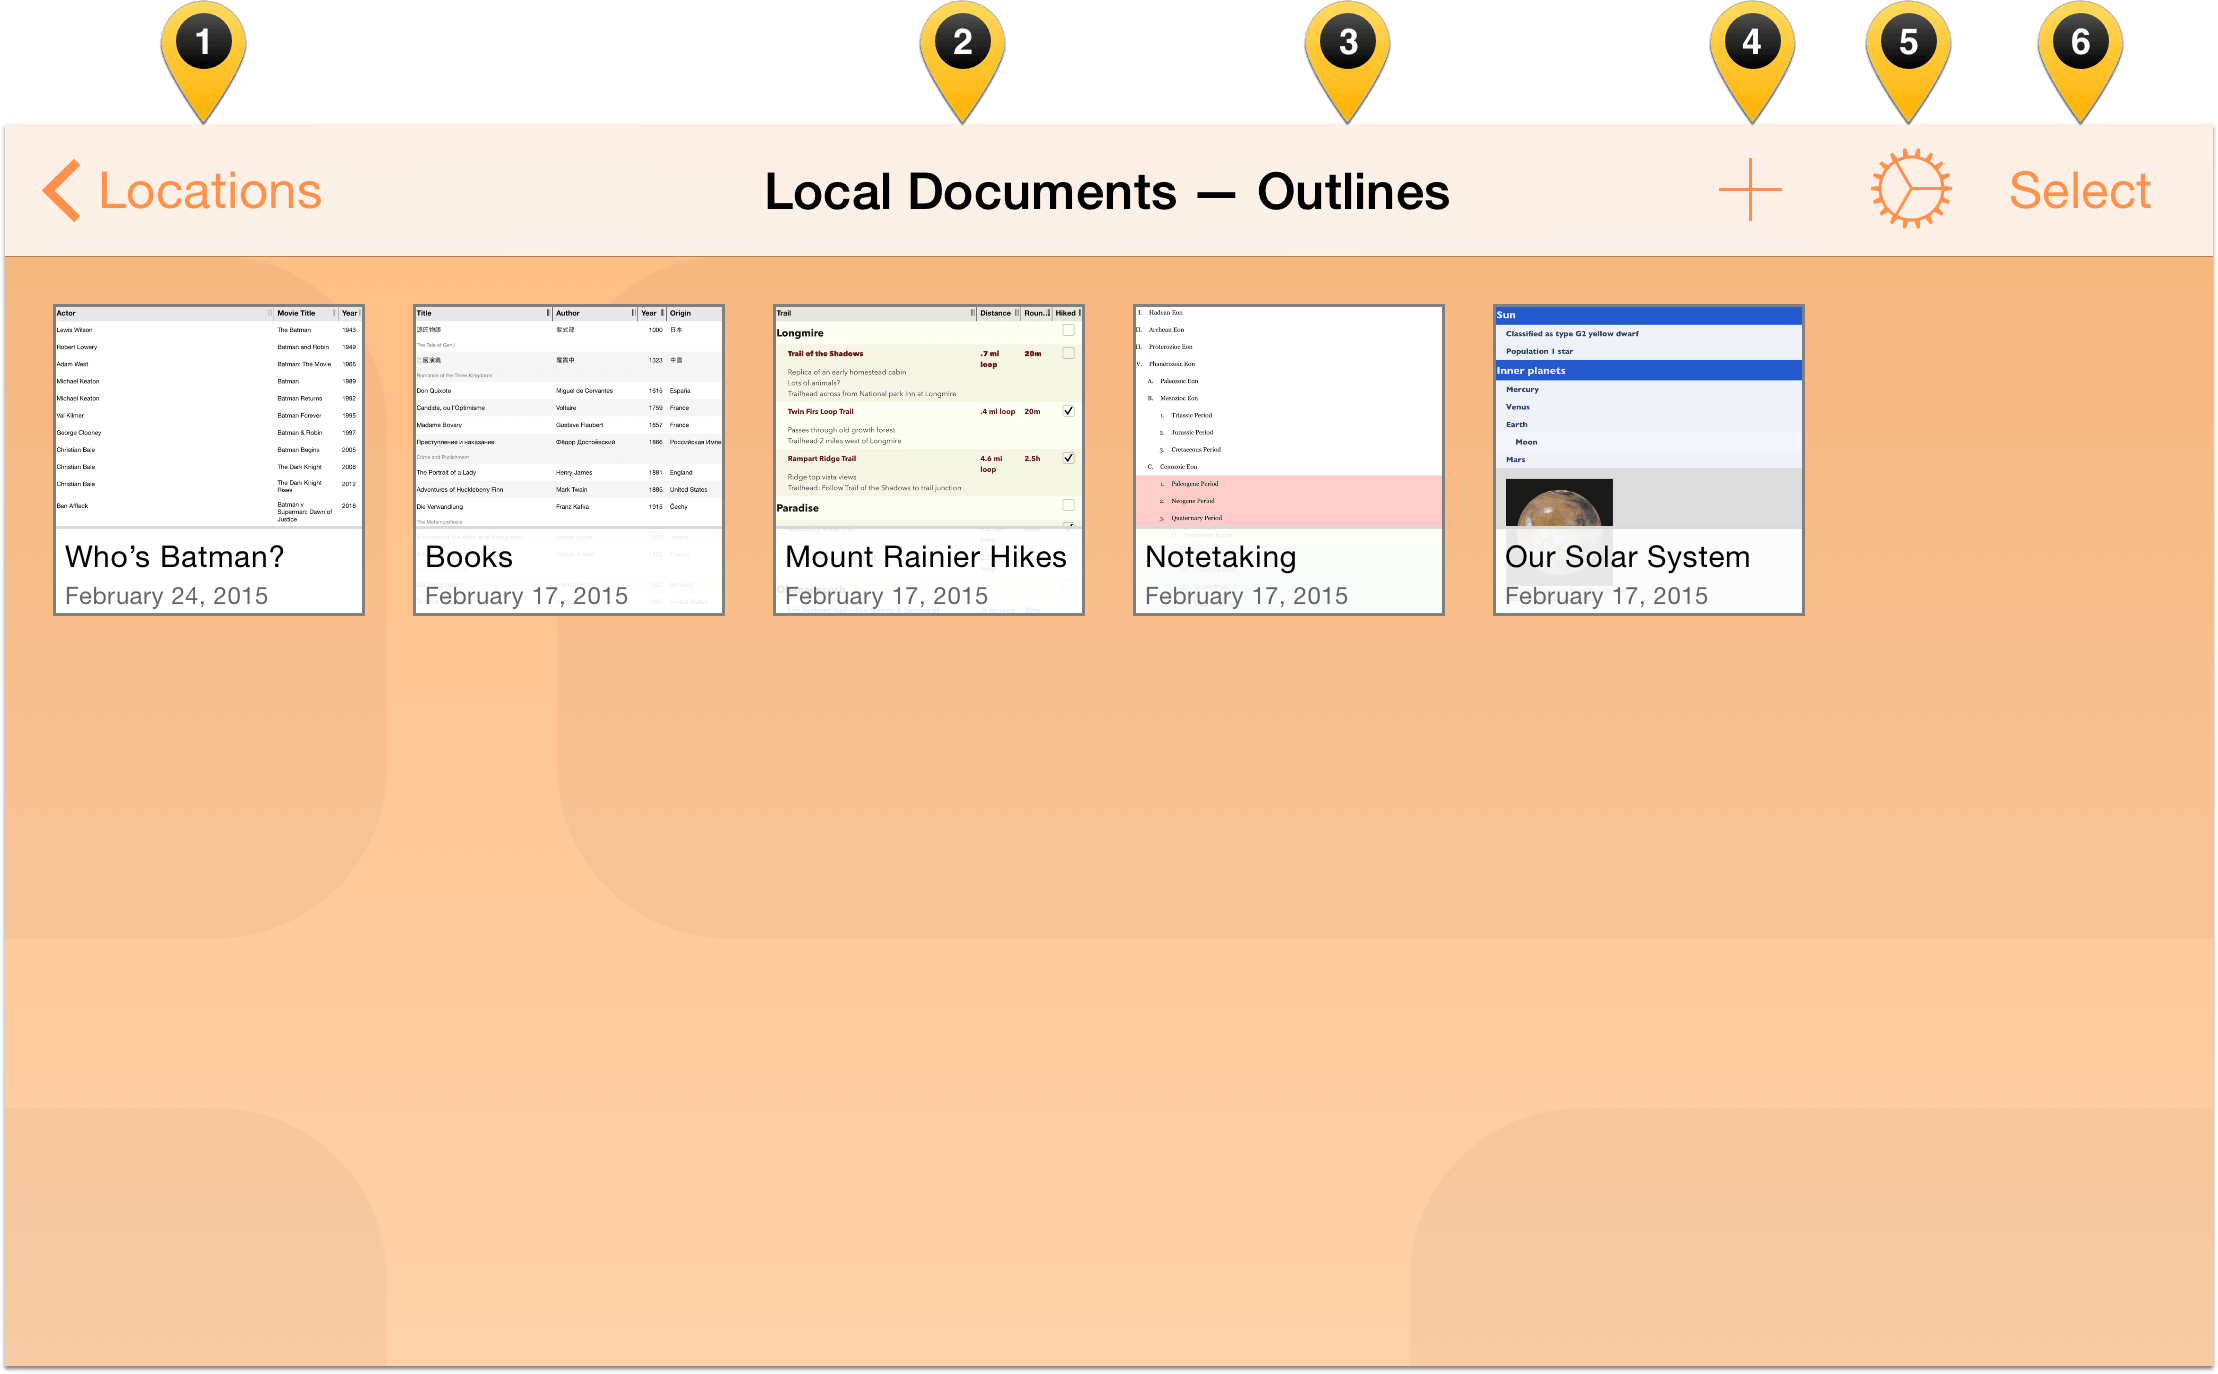
Let’s examine these items:
- Locations: Tapping here takes you backwards in the folder hierarchy, eventually landing you on the Locations screen.
- Current Folder: In the center of the navigation bar, you’ll see the name of the current folder.
- Document Type: As you saw earlier, swiping down within the Document Browser reveals the Document Organizer. If the organizer is set to Show outlines, the text shown here is “Outlines”; if the organizer is set to Show templates, the text here is “Templates”.
Note
When in portrait mode on iPhone, the Current Folder and Document Type appear beneath the navigation bar, and above the files within that folder.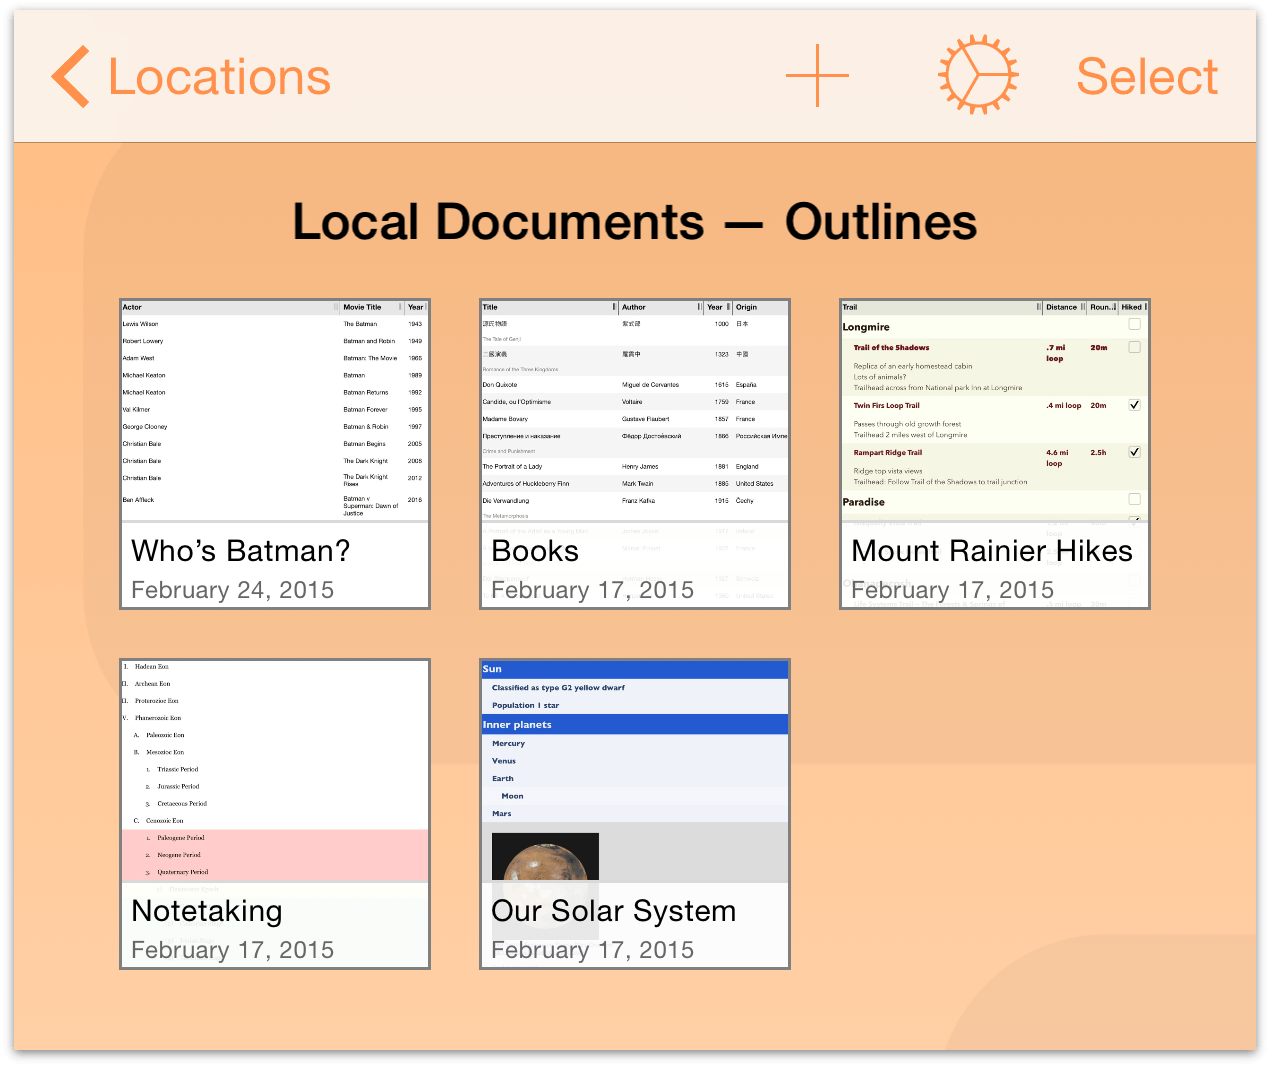
 (New Outline/Template): Tap the plus-sign button to create a new outline or template.
 (Application Menu): The Gear icon represents the Application Menu which, when tapped, provides you access to the following:
- About OmniOutliner: Discover details about the build of OmniOutliner installed on your device, and details for contacting The Omni Group.
- OmniOutliner Help: Get access to the online help and EPUB manual for how to use OmniOutliner.
- Contact Omni: Tap this item to send us an email. We preload the Subject line of the message with details about your build of OmniOutliner, that way we are better able to assist you when you contact us.
- Release Notes: Find out what’s new with the latest build of OmniOutliner.
- Restore Sample Outlines/Templates: You can delete the sample outlines or templates if you would like to free up some storage space on your device. However, if you later decide that you need one of those sample files back, tap here to view the list of available outlines or templates and then choose which one you would like to restore.
- Copy from WebDAV: Tap here to specify a source from which you would like to import files. As with sync, you can connect to an Omni Sync Server or WebDAV repository to import files to the current OmniOutliner folder (for example, to Local Documents or a synced folder).
Copy from: Tap here to import a file from iCloud Drive. This saves a copy of that file to the current folder. The original file remains where it was—in the cloud—and remains untouched.
Note
The Copy from option is only available if you have turned on Use Cloud Storage Providers in Settings. This is a feature in OmniOutliner for iOS.
If you choose Copy from and you edit the file, you will have two “different” versions of the file: the original source file on iCloud Drive, and the file you imported to a folder on your iOS device. When you finish working on the file, you can export it back to iCloud Drive using the Document Browser. See Working in the Cloud for more details.
- Settings: Use this screen to customize OmniOutliner’s Settings.
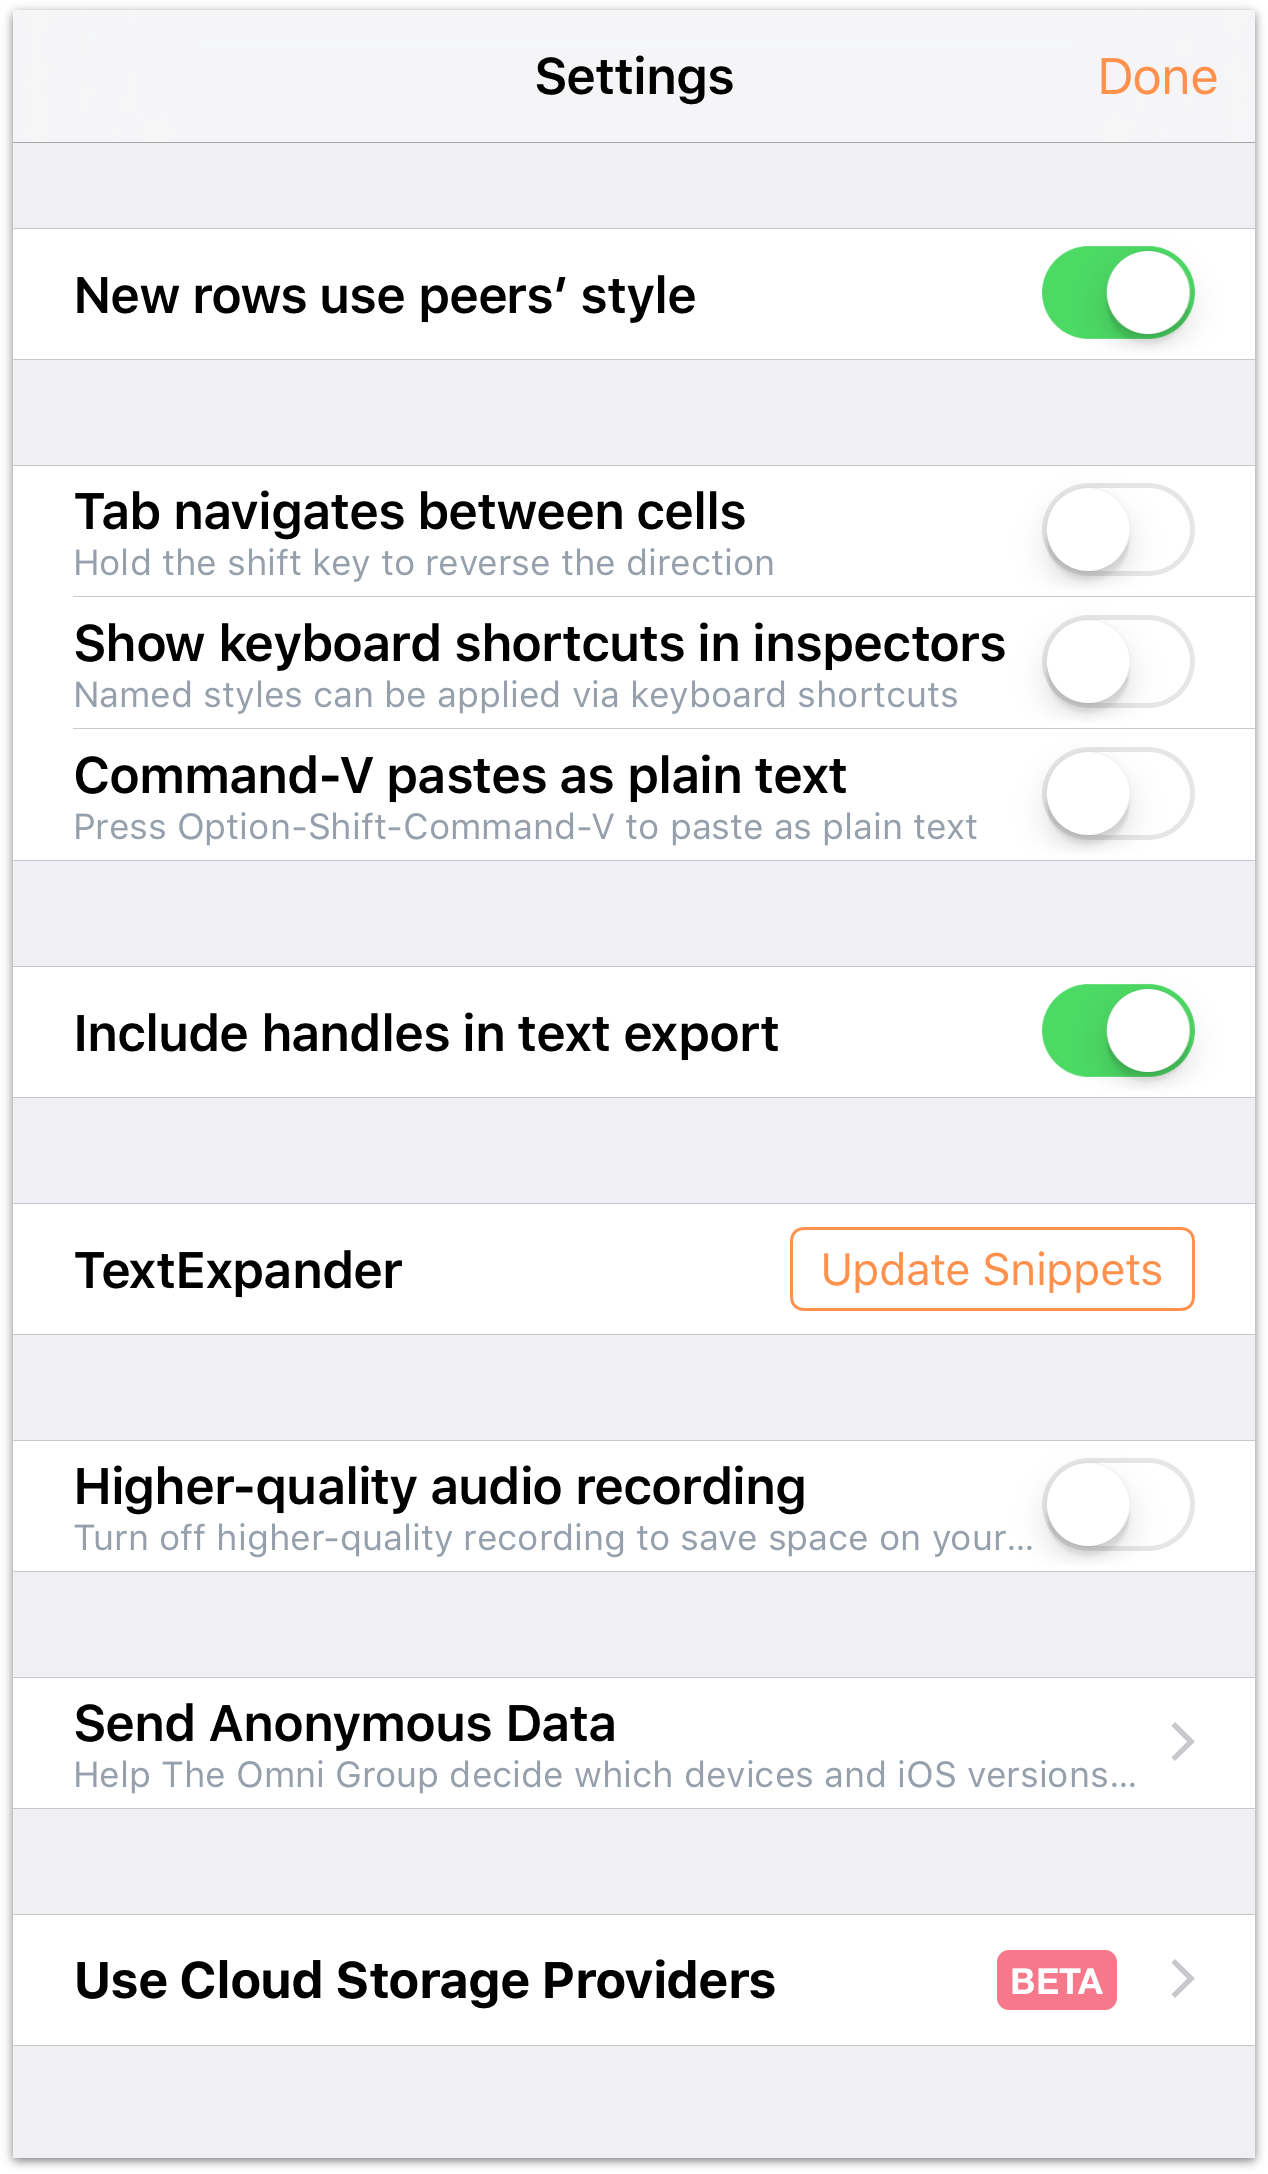
The options on this screen are particularly helpful if you are using an external keyboard with OmniOutliner, or if you are also using TextExpander for iPad or iPhone (available separately on the App Store).
- Select: The final option, Select is the most-used item in the navigation bar. Tapping Select allows you to choose files so you can do other things with them, such as move them from one folder to another, email a file to a coworker, or duplicate a file.
Tip
As an alternative to tapping Select whenever you need to do something with a file, tap and hold a file for a couple of seconds. When you see the blue highlighted border around the file, remove your finger and then tap to select other files or tap one of the icons in the navigation bar to perform an action.
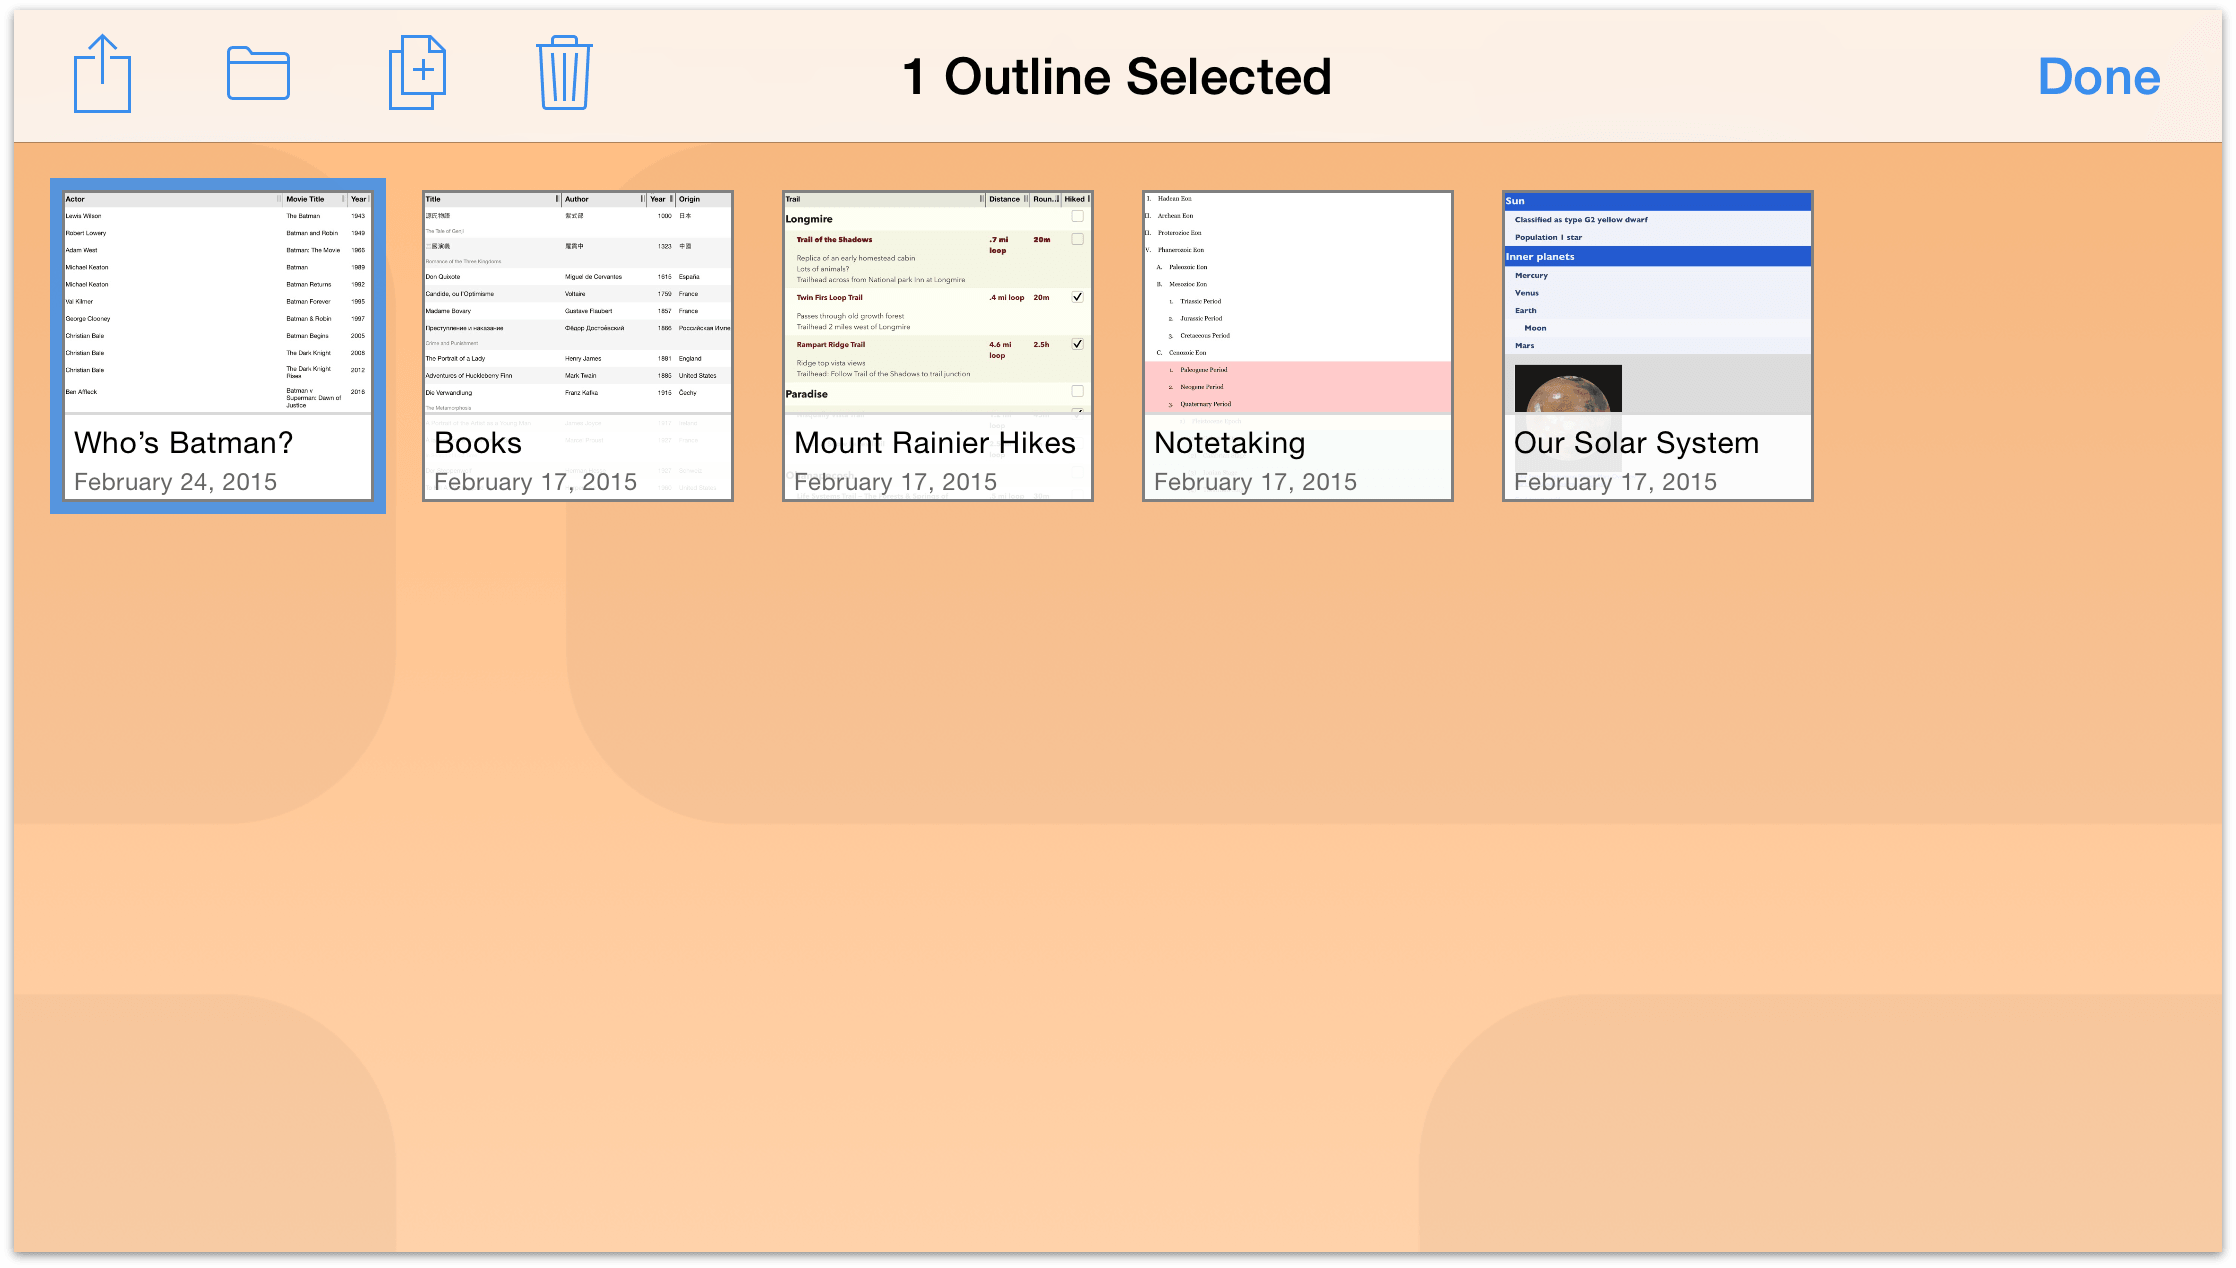
When you tap Select, the navigation bar turns into an Action Bar. At first, the buttons you see in the Action Bar are disabled (as noted by their gray color), but when you tap to select a file, those buttons become active (changing from gray to blue).
The following buttons relate to the actions you can perform on a selected file:
- Tap
 to share and export files.
 - Tap
 to move files between folders or to create a new subfolder.
 - Tap
 to make a copy of the selected file.
 - Tap
 to move the selected file to the Trash folder.
These functions are described more in-depth in the sections that follow.
Sharing Files and Creating Templates
Every now and then you’ll find the need to share some document you’ve created in OmniOutliner with someone else. But all of the files are on your iPad, how are you going to do this?
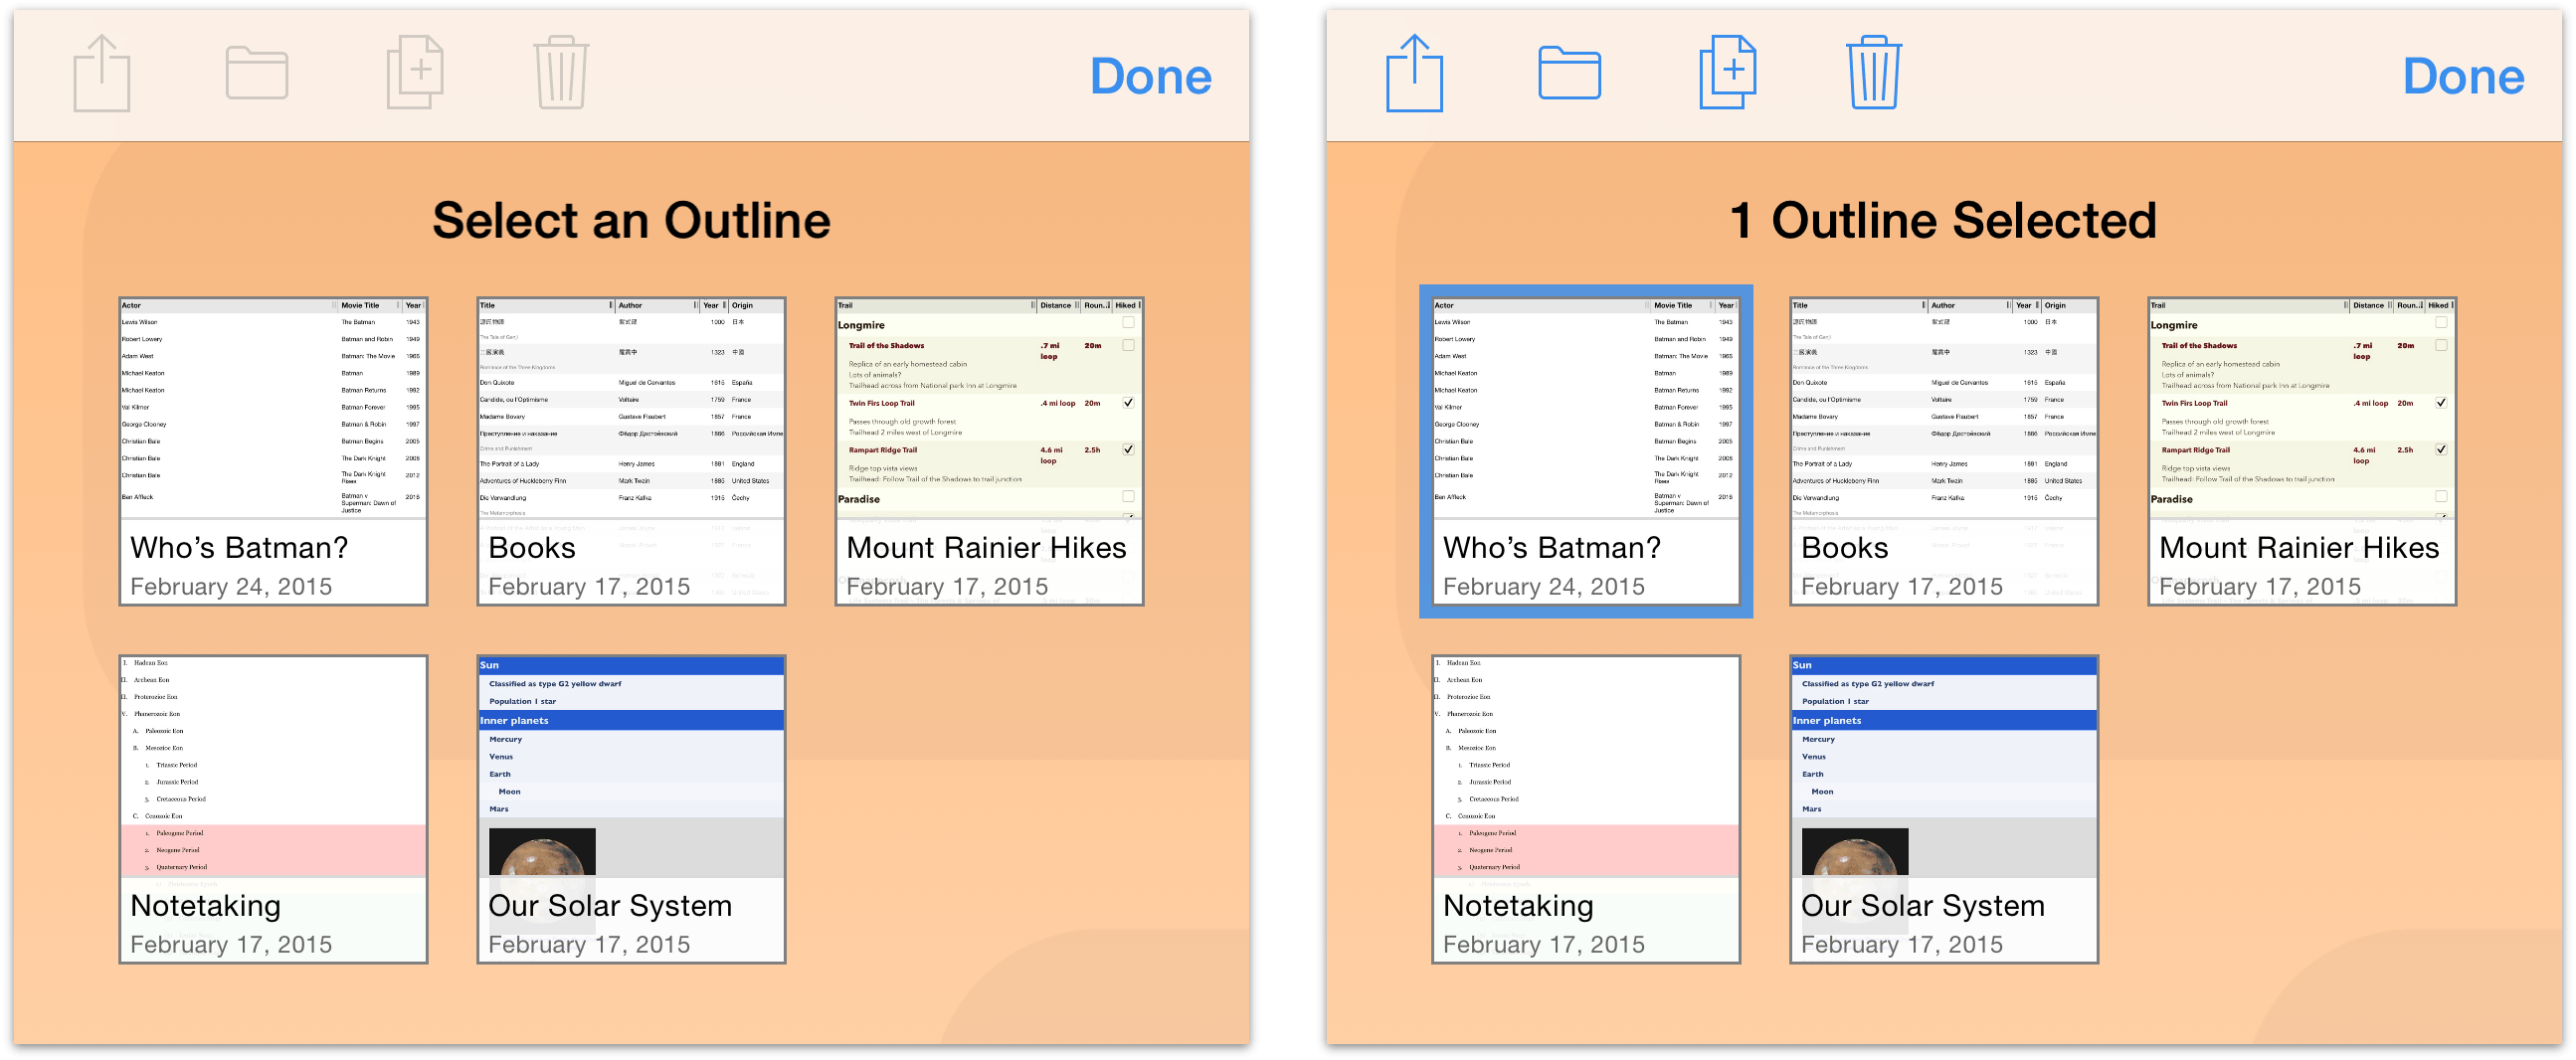
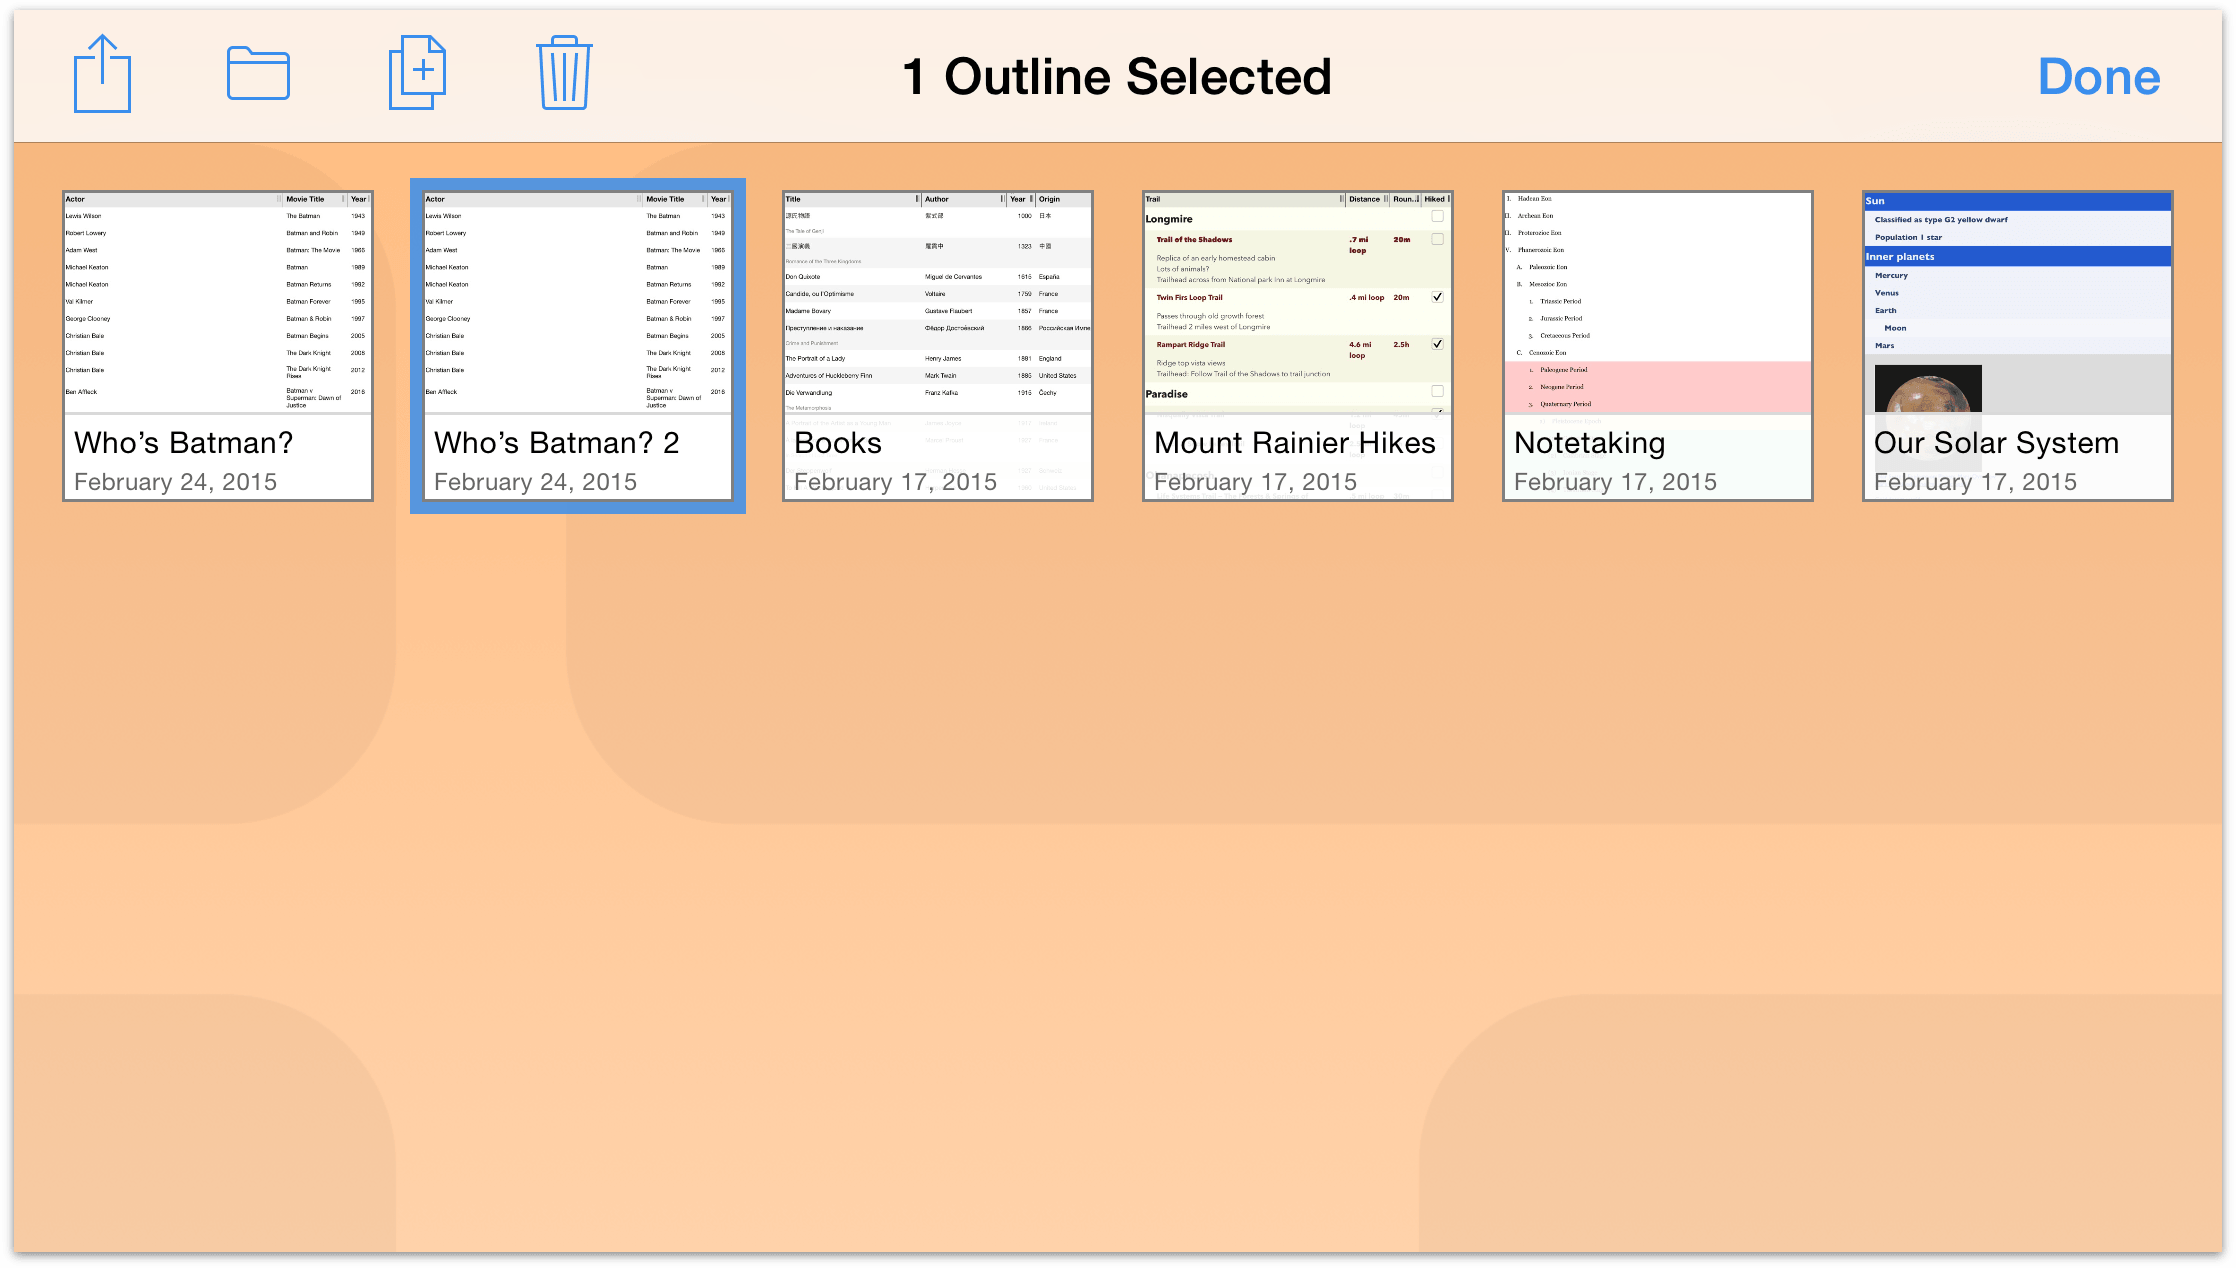
When you open a folder, such as your Local Documents folder, tap Select in the navigation bar, and then select the file that you want to share. This places a blue highlight around the file to let you know which files you’ve selected to do something with.
Now tap the Share button in the navigation bar and select from one of the following options:
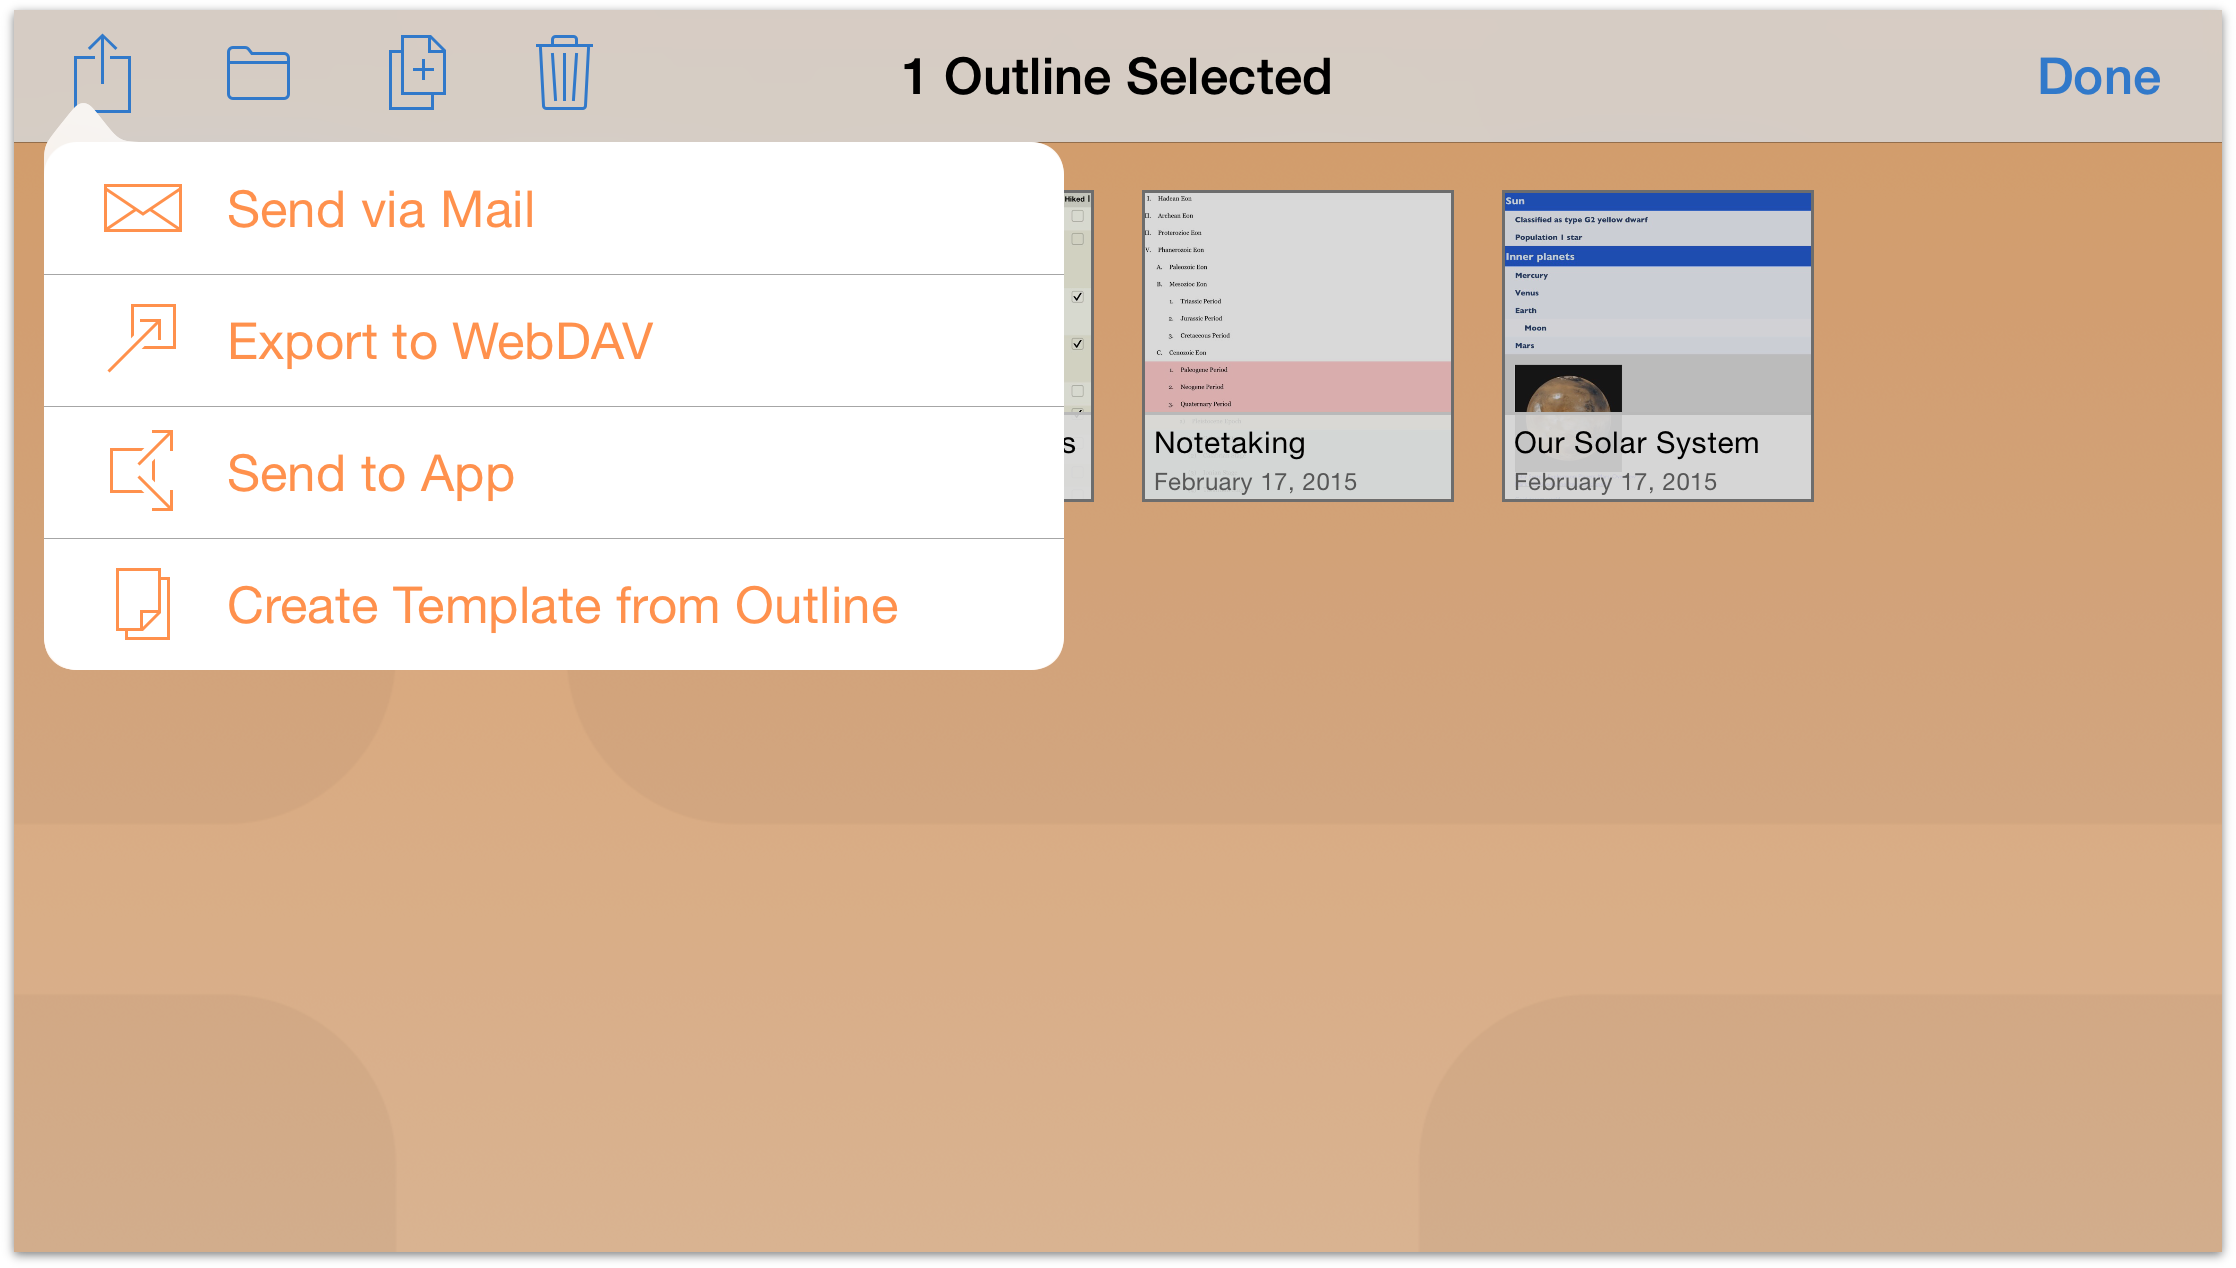
Send via Mail — lets you choose a document format for the file you want to email, and then queues up an email message for your to send.
Export to WebDAV — lets you move the file over to a WebDAV share. If you haven’t already configured a WebDAV Cloud Account, you’ll need to do that before you can export the file.
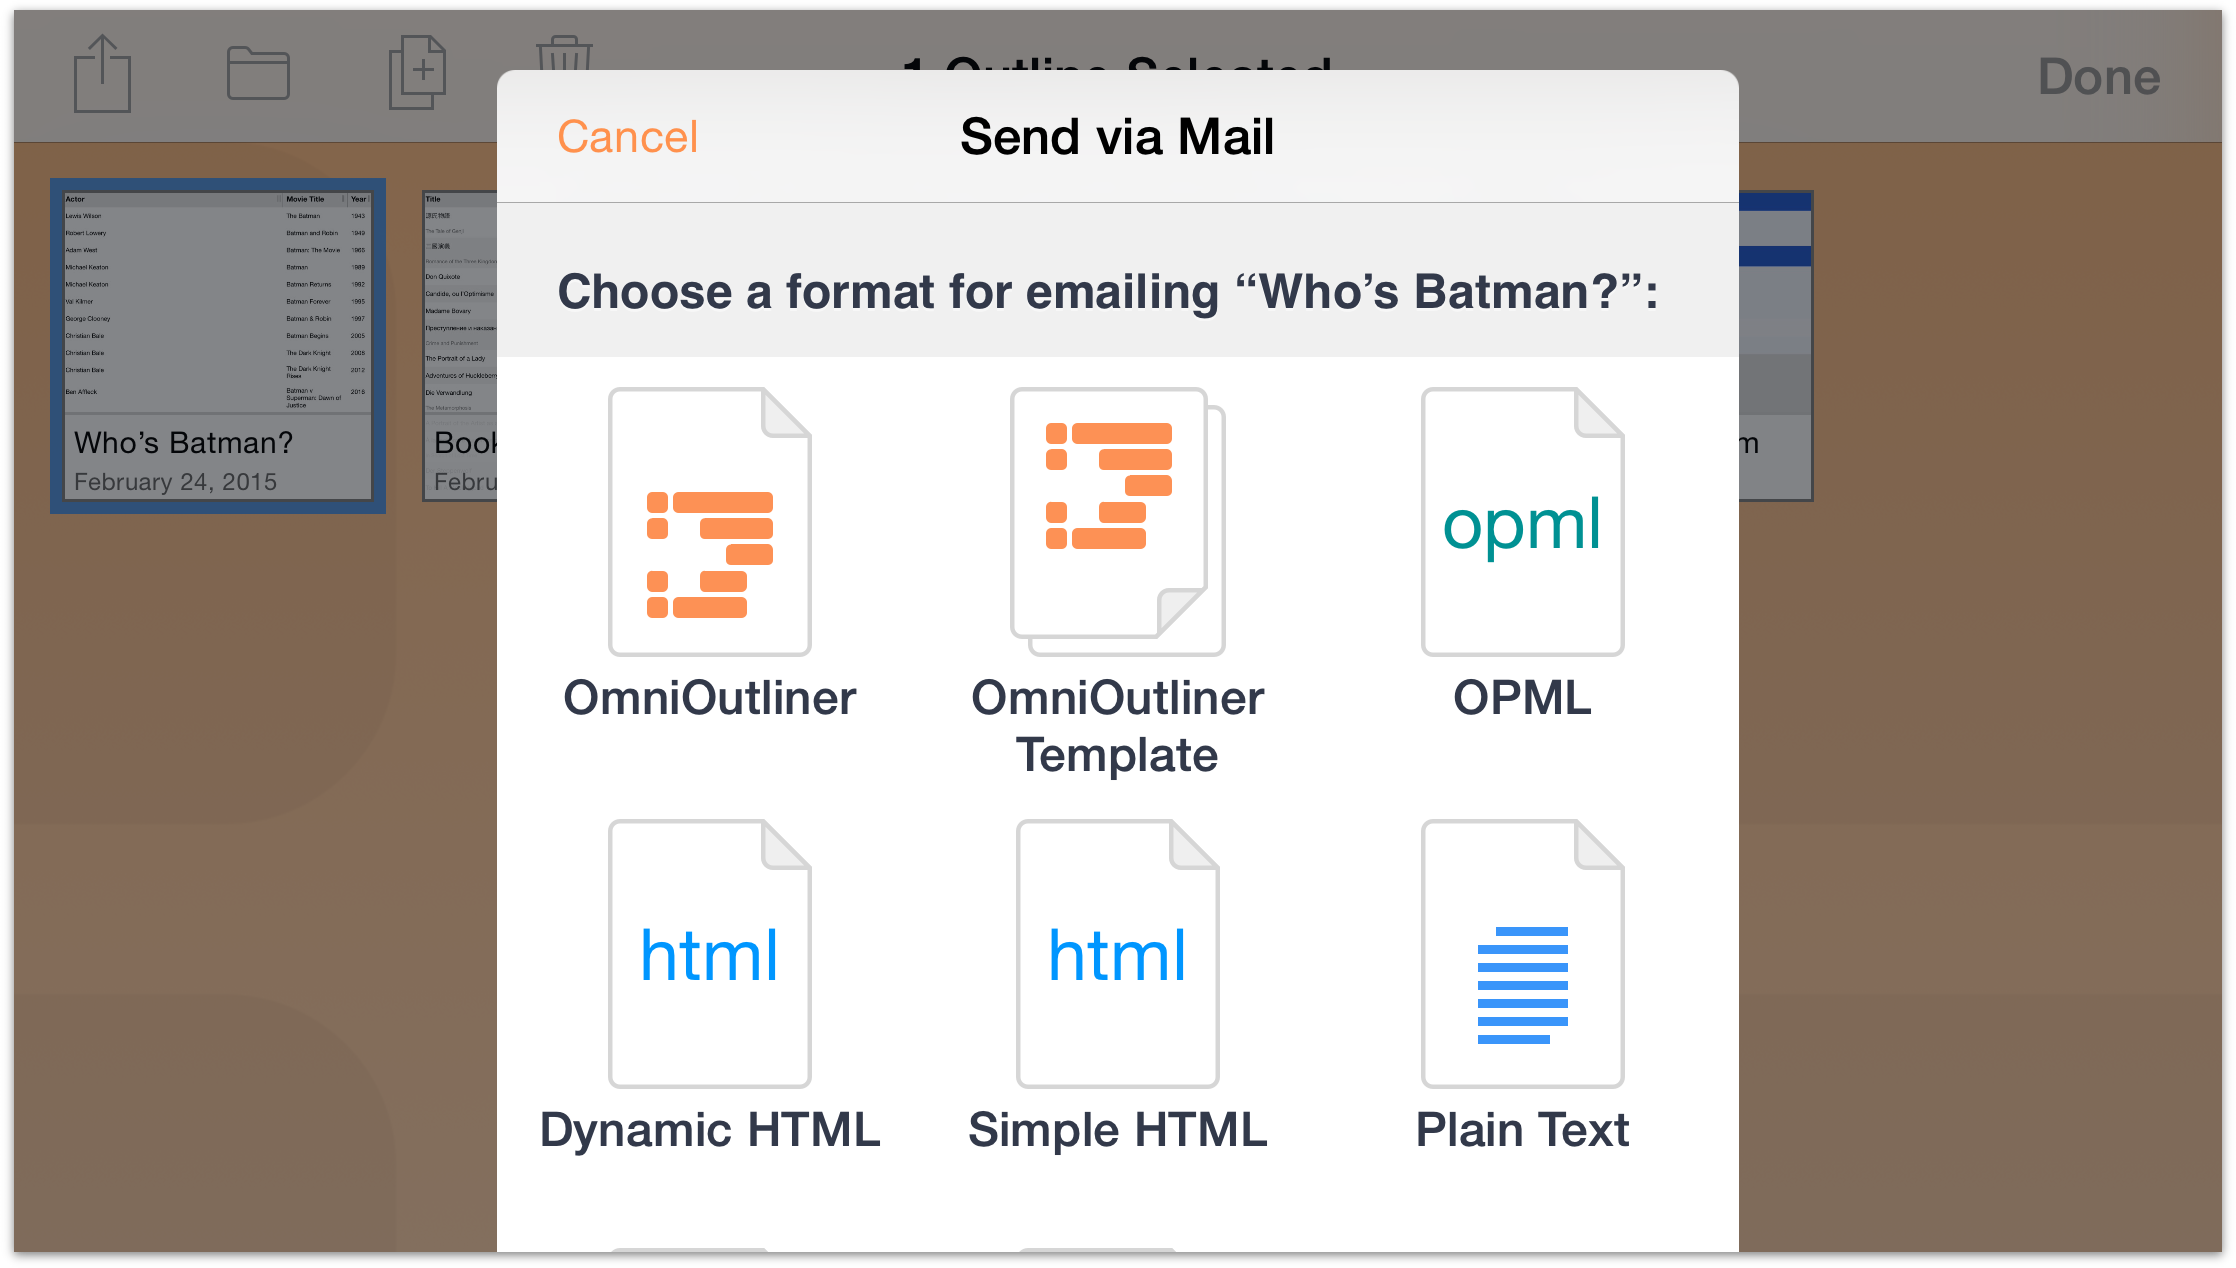
You can export from OmniOutliner in the following formats:
- OmniOutliner outline (.oo3)
- OmniOutliner Template (.oo3template)
- OPML (.opml)
- Dynamic HTML
- Simple HTML (.html)
- Plain Text (.txt)
- CSV (.csv)
- Microsoft Word (.docx)
- Microsoft Word Indented (.docx)
- Microsoft PowerPoint (.pptx)
Tip
Similarly, OmniOutliner can also open (import) files in the following formats:- OPML (.opml)
- Plain Text (.txt, or .text)
- Rich Text (.rtf, or .rtfd)
- Tab-separated values (.tsv)
- Property List format (.plist)
Export to — lets you export files to another format and/or to iCloud Drive.
Note
The Export to option is only available if you have turned on Use Cloud Storage Providers in Settings. This is a feature in OmniOutliner for iOS.
Send to App — lets you open the file in a compatible app on your iPad, or, if you are on a Wi-Fi network with someone you know, you can share the file with another iOS device or Mac using AirDrop.
Note
Sharing files with AirDrop requires that both iOS devices are using iOS 8 or later, or a Mac with OS X Yosemite (v10.10) or later. Both parties also need to turn on Wi-Fi and Bluetooth, and they need to be on the same Wi-Fi network.For more information on AirDrop, see Apple’s support site.
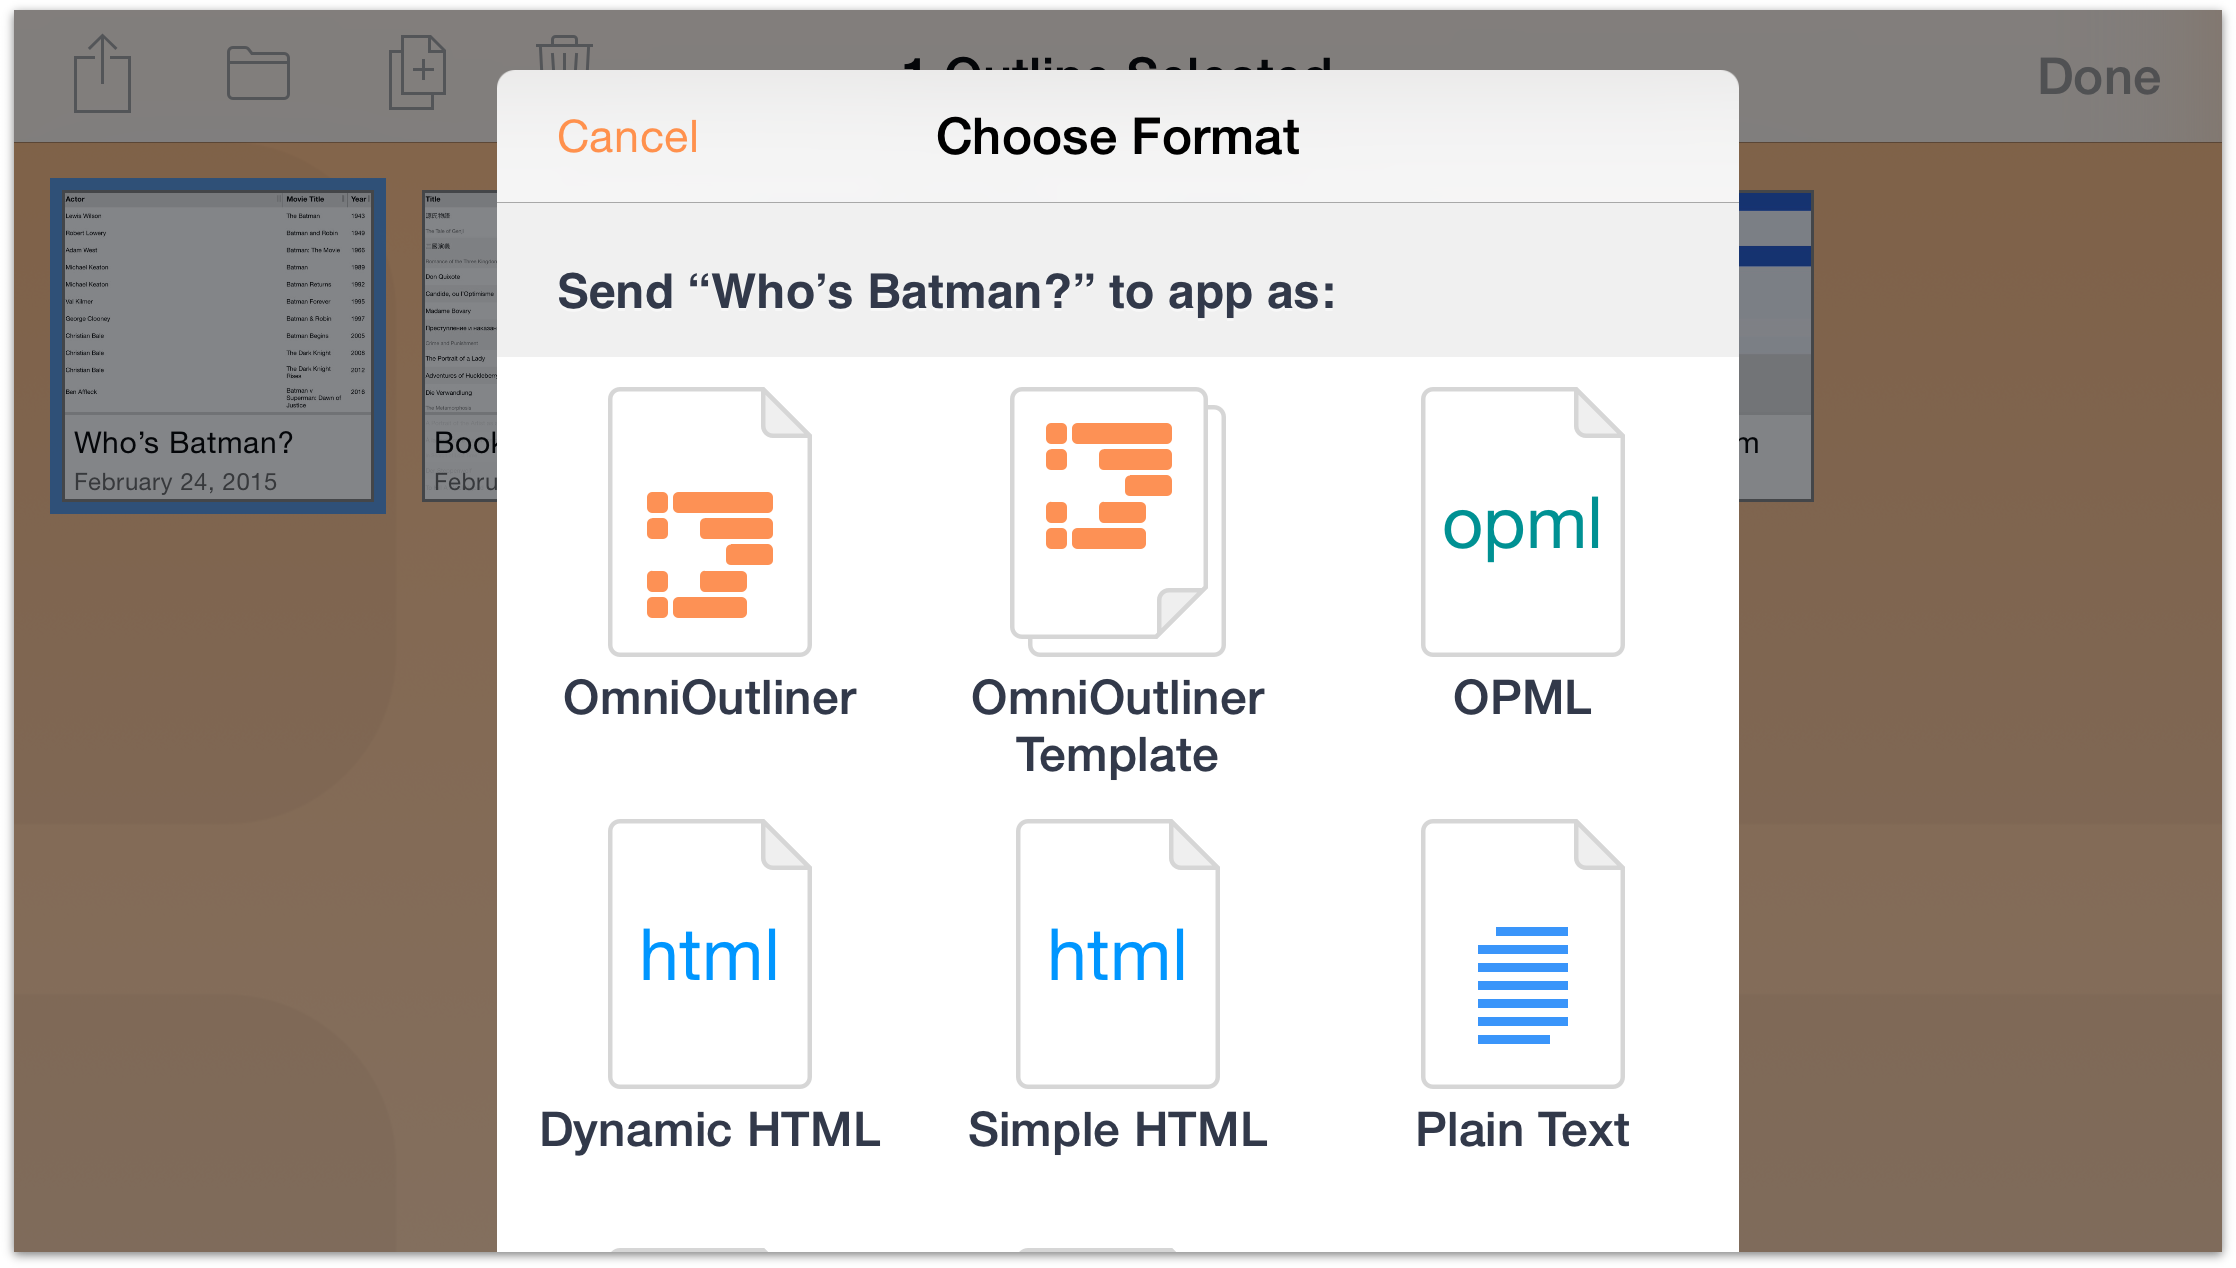
First choose a Format, and then choose an app on your device that you would like to send the file to. You can choose to export your outline in the following formats:
- OmniOutliner
- OmniOutliner Template
- OPML
- Dynamic HTML
- Simple HTML
- Plain Text
- CSV (comma-separated values)
- DOCX (Microsoft Word)
- DOCX Indented (Microsoft Word’s outline format)
- PPTX (Microsoft PowerPoint XML, which can be opened by Apple’s Keynote app on iOS or Mac)
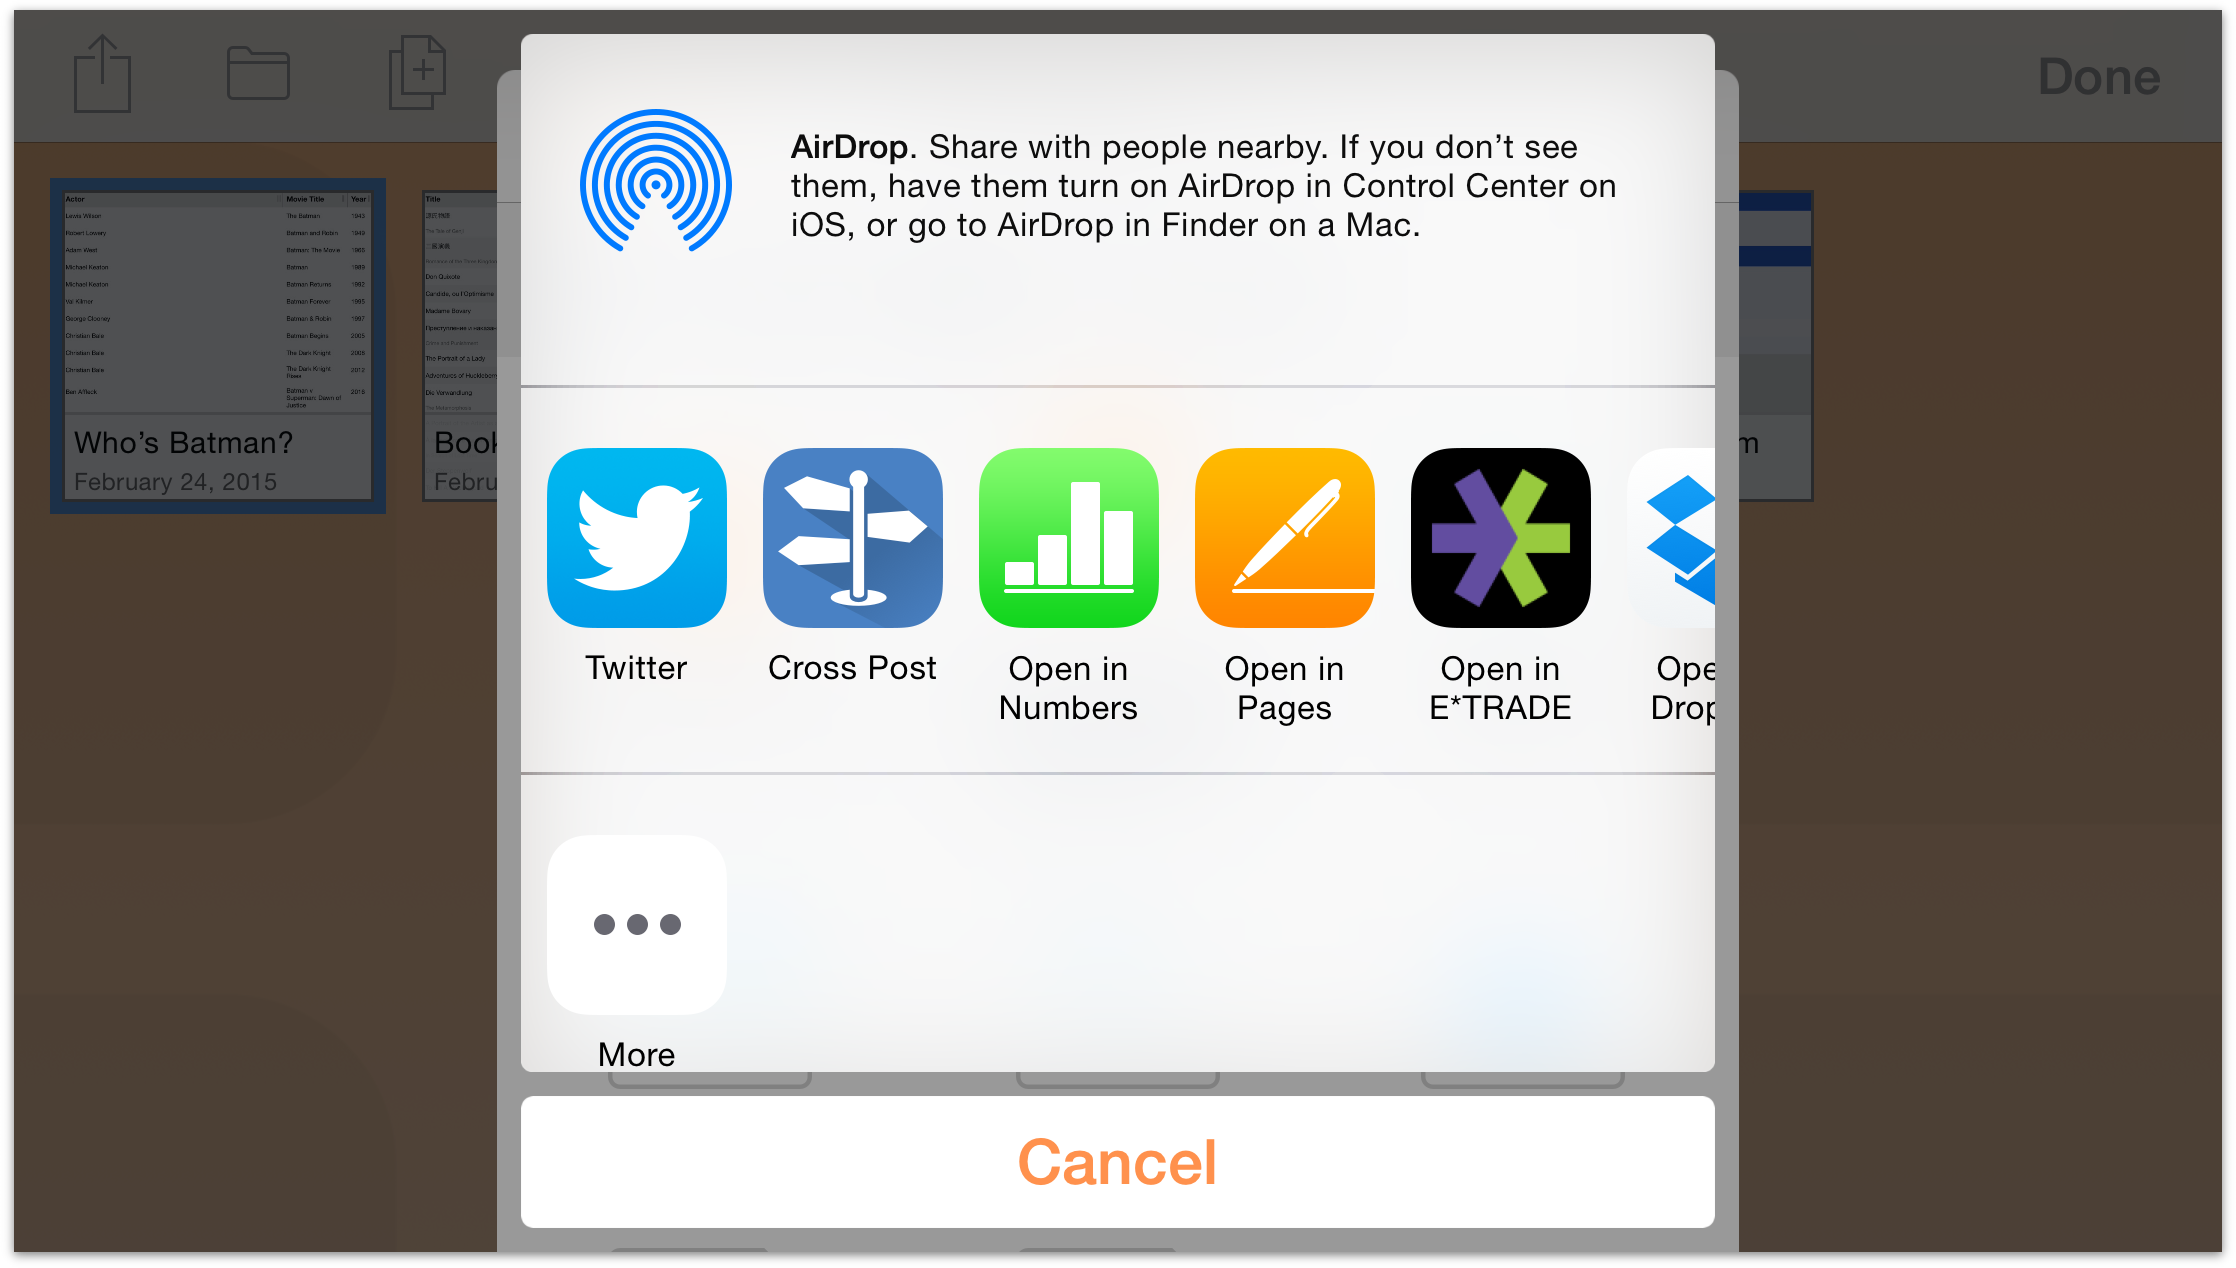
Optionally, you can also send the file to another person via AirDrop.
Create Template from Outline — turns the selected document into a template, which you can later use as the basis for a new document. All of the content—as well as any styles, images, or media you’ve added—remains in the template file; you’ll just need to enter new content over what’s there.
Creating Subfolders
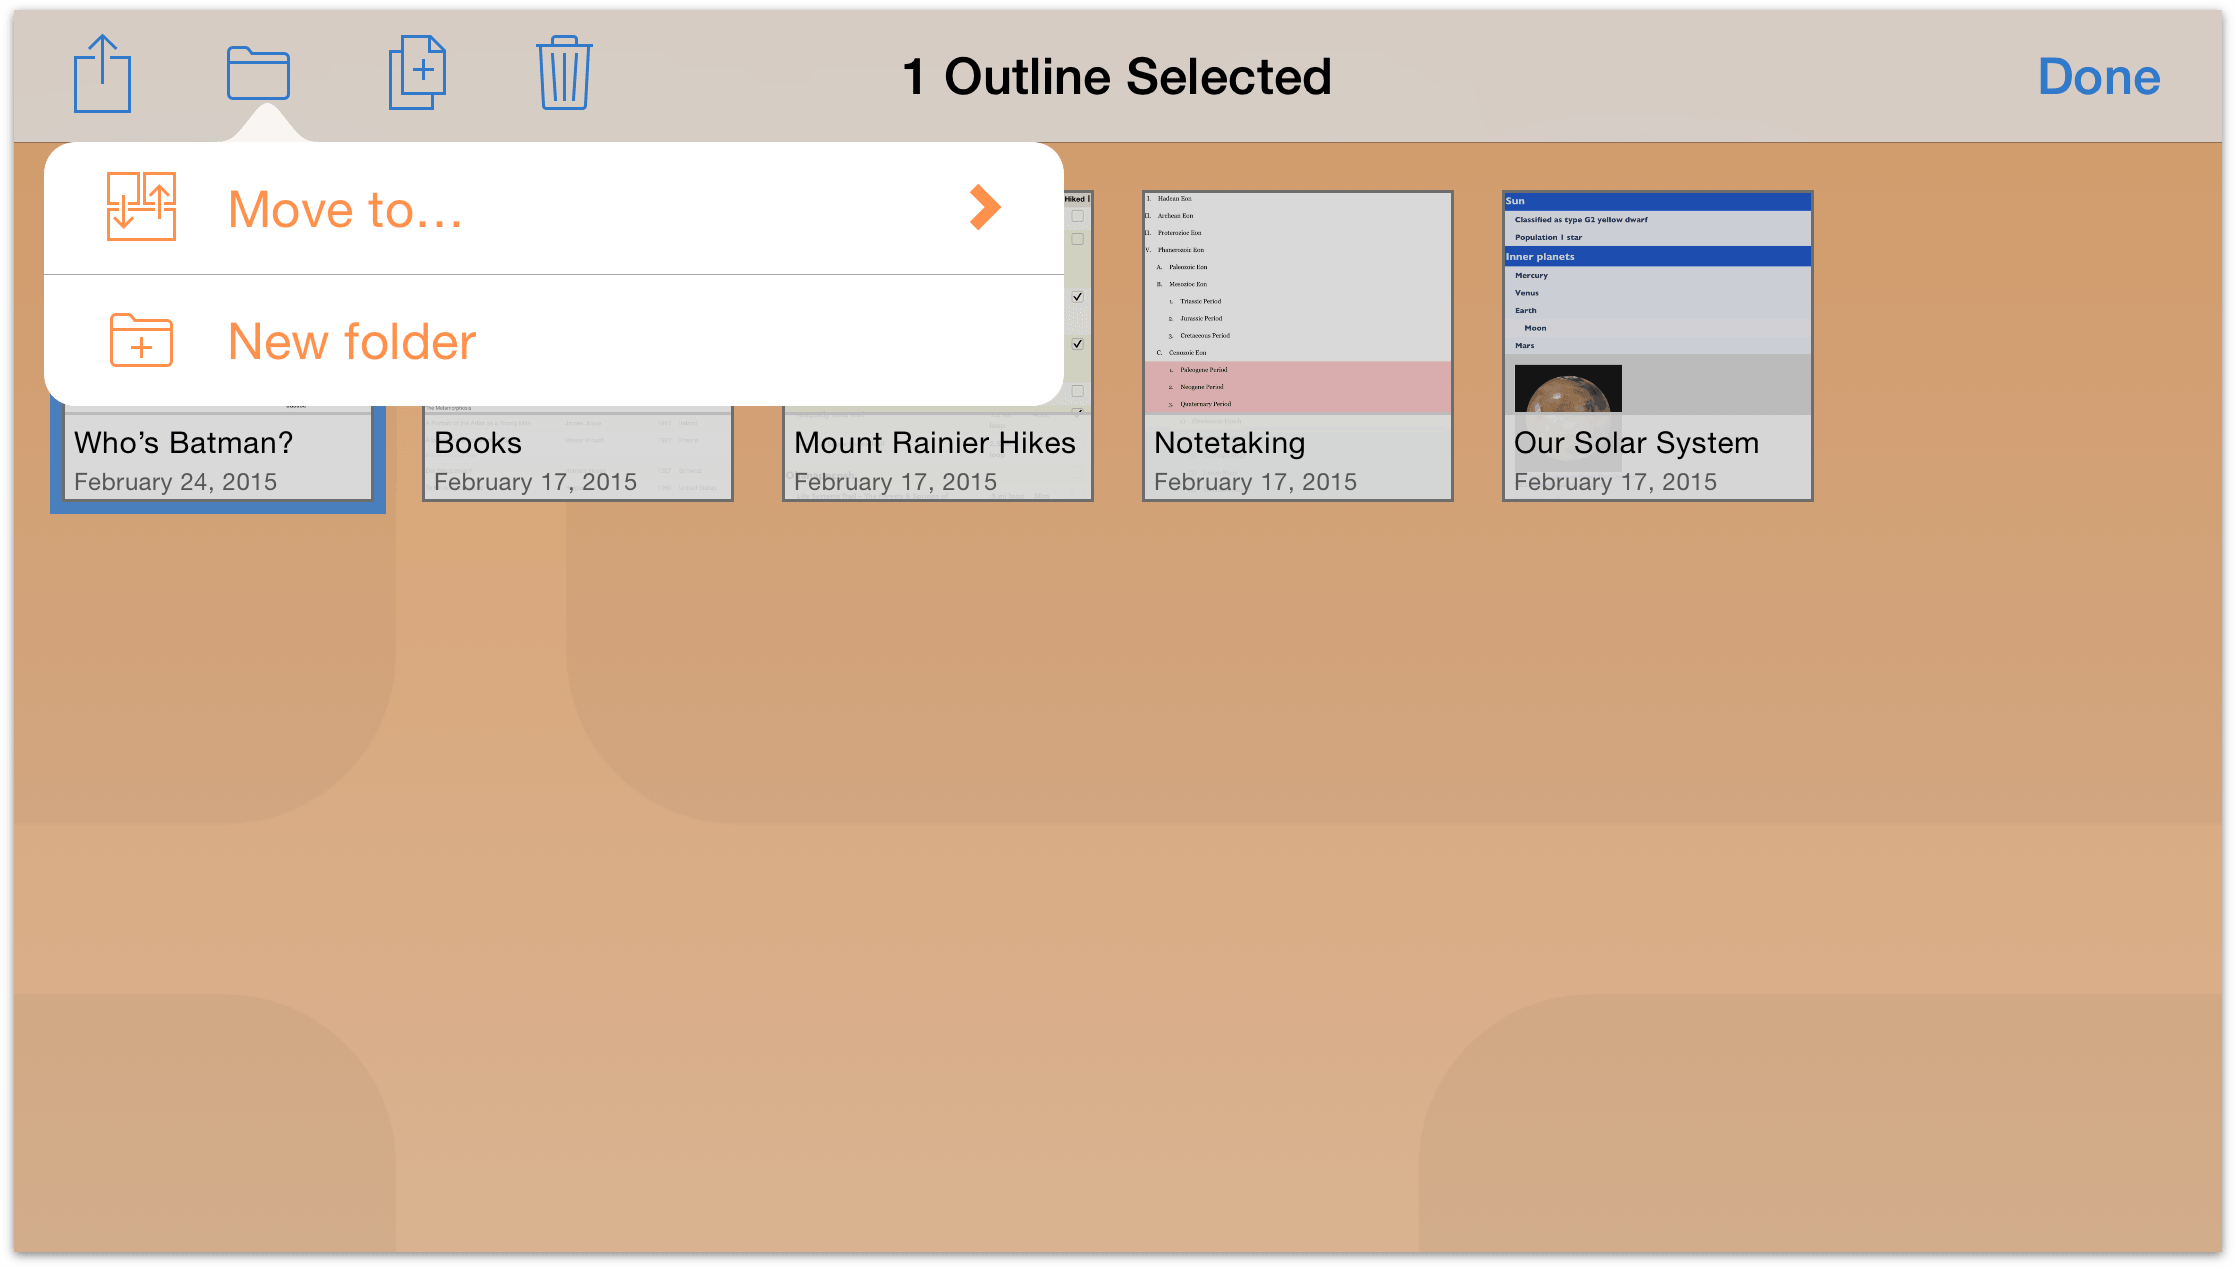
To help you better organize your files, you can also move files to other folders or create subfolders that contain similar documents. Tap Select, and then choose the file (or files) you would like to move. Tap ![]() in the Action Bar to move a file to another folder, or to create a new subfolder containing the selected files.
in the Action Bar to move a file to another folder, or to create a new subfolder containing the selected files.

Tap New folder to create a new folder containing the selected file. The file is moved out of the current folder into a new Untitled subfolder. Enter a new name for the folder and tap Done.
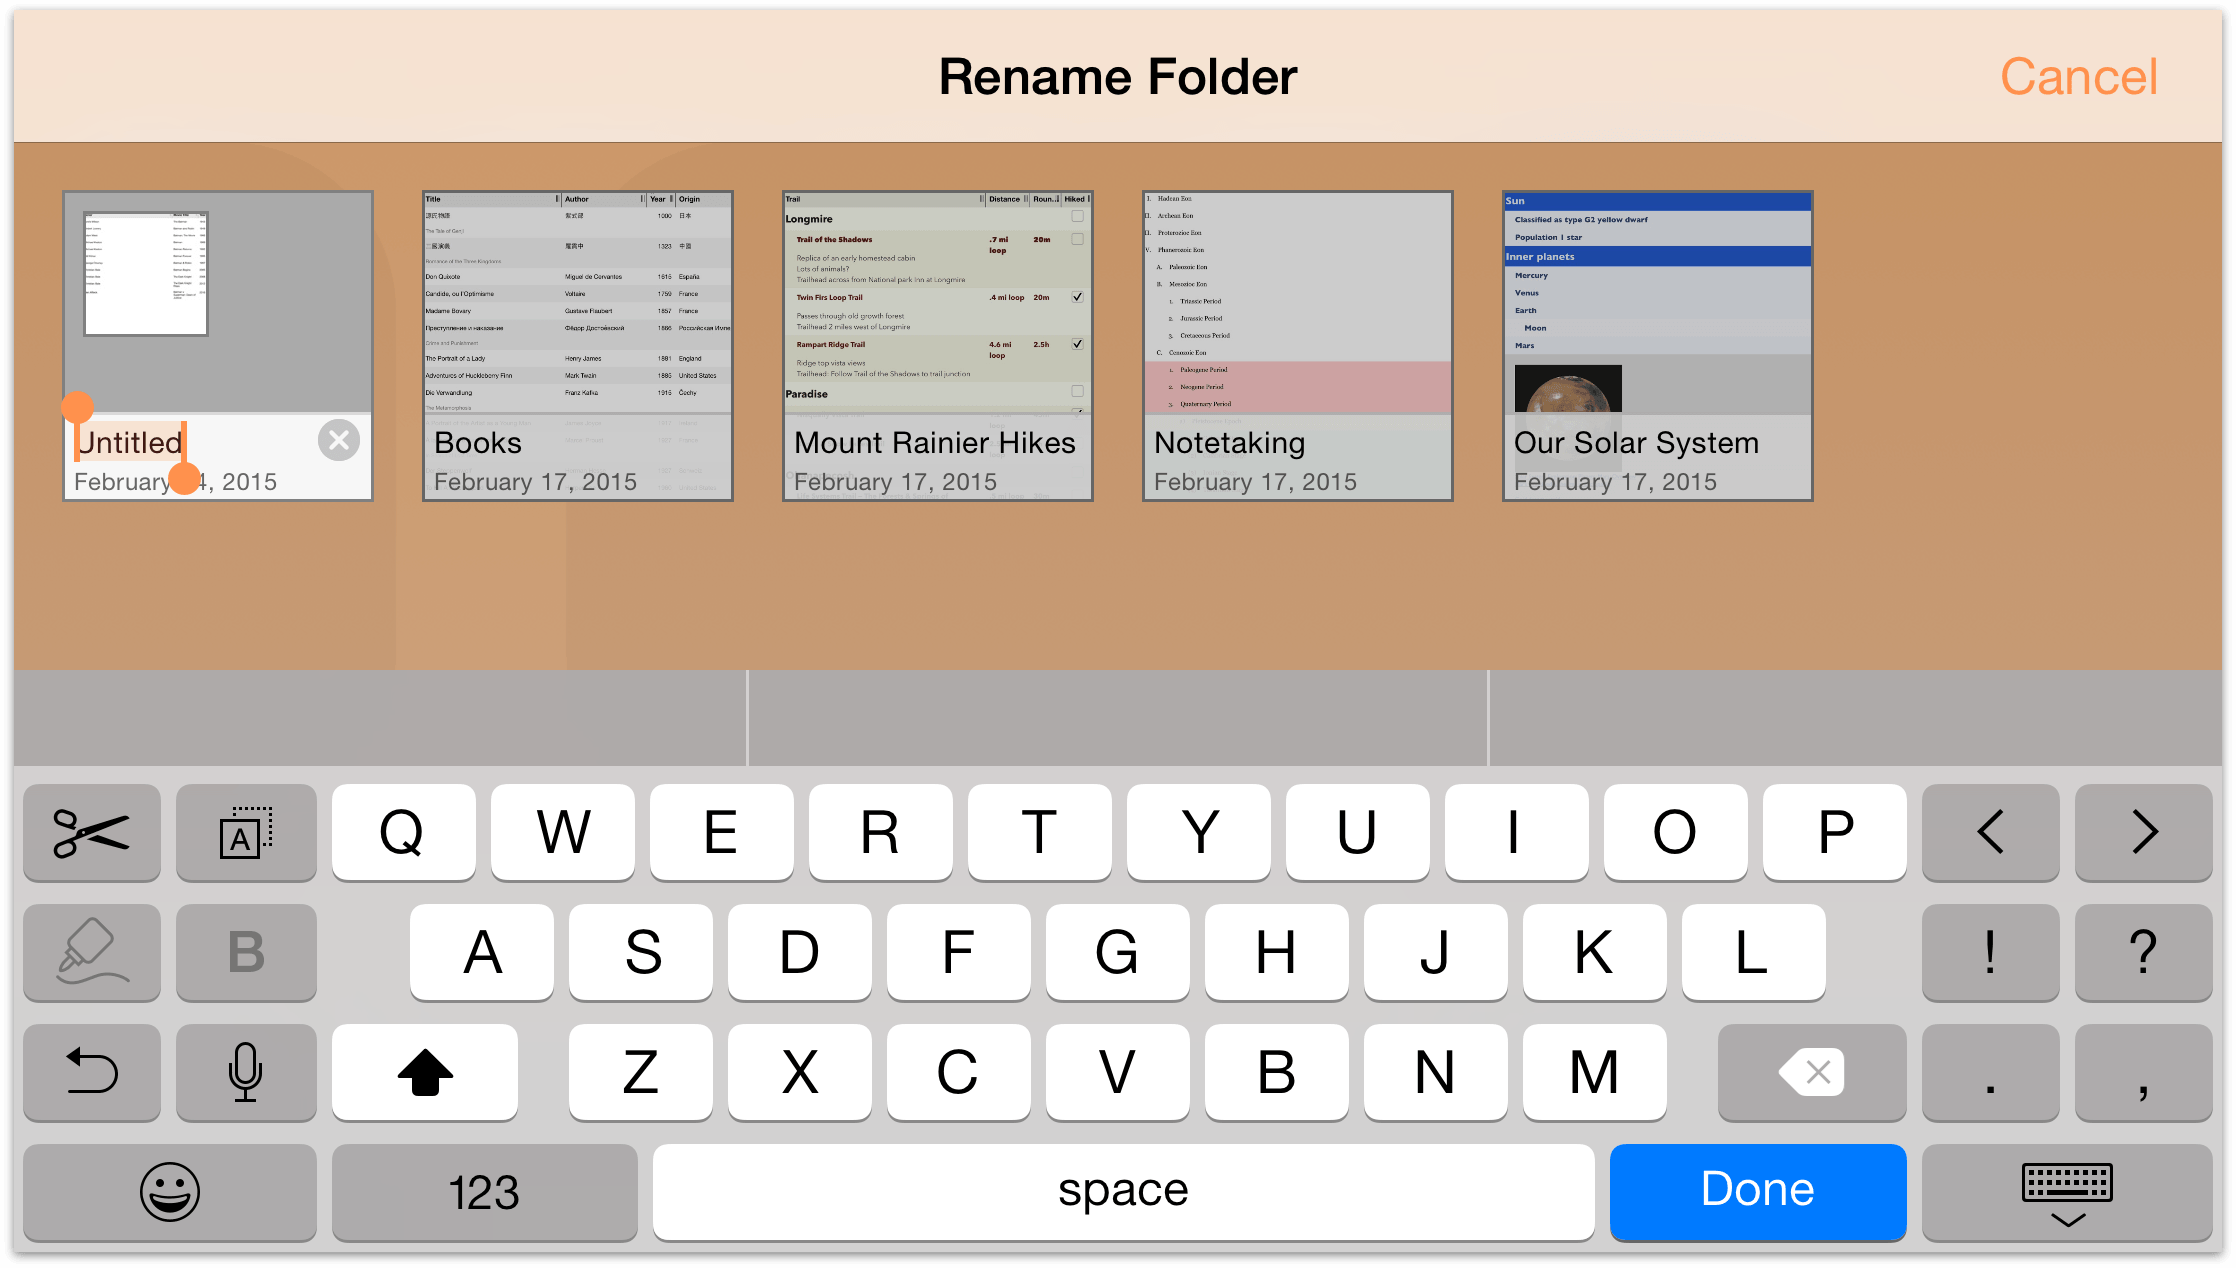
Subfolders have a dark gray background and show mini icons for the files contained within.
To open a file within a subfolder, tap the folder to open it, and then tap the file.

When you remove all of the files from a folder, either by moving them to the trash or to another folder, that folder disappears automatically. The exception to this rule, however, is the Local Documents folder and the root folder for any Omni Sync Server accounts or WebDAV servers which you have added as Cloud Accounts. Those are the only folders that can remain empty on your device.
Moving Files Between Folders
Once you get the hang of creating subfolders, you should be well on your way to devising ways to better organize your OmniOutliner files. Work files here, your books-to-read list over there, and so on.
Regardless of how you decide to organize your folders, you’ll inevitably get to a point where you want to move files between the folders you have created. Or, you may decide that you want to free up the storage space on your iPad or iPhone and shift all of your files from the Local Documents folder to a folder on Omni Sync Server.
To move files from one folder to another, follow these steps:
- In the navigation bar, tap Select
- Tap to select the files you want to move. When you select a file, a blue border appears around the file. If you tap a file by mistake, just tap it again to deselect that file.

- In the navigation bar, tap
 to open the Folder menu.
 - Tap Move to to move the selected file to another location.
- In the Folder menu, tap the name of the folder to which you want to move the selected file. If you see a ❯ symbol to the right of a folder name, that means the folder has subfolders within.

After you select the folder, the file makes the jump from the current folder to the folder you’ve chosen.
- Tap Done when you have finished moving files out of the current folder.
Need to move more files around? Go back to the Locations screen, tap to open another folder, and then repeat the aforementioned steps.
Copying Files
You may not need to copy files all that often, but when you do, the Document Browser can help you with that, too. From the Locations screen, select the folder that contains the file you’d like to copy, and then follow these steps:
- Tap Select and then tap to select the file you’d like to copy:
- In the Action Bar, tap
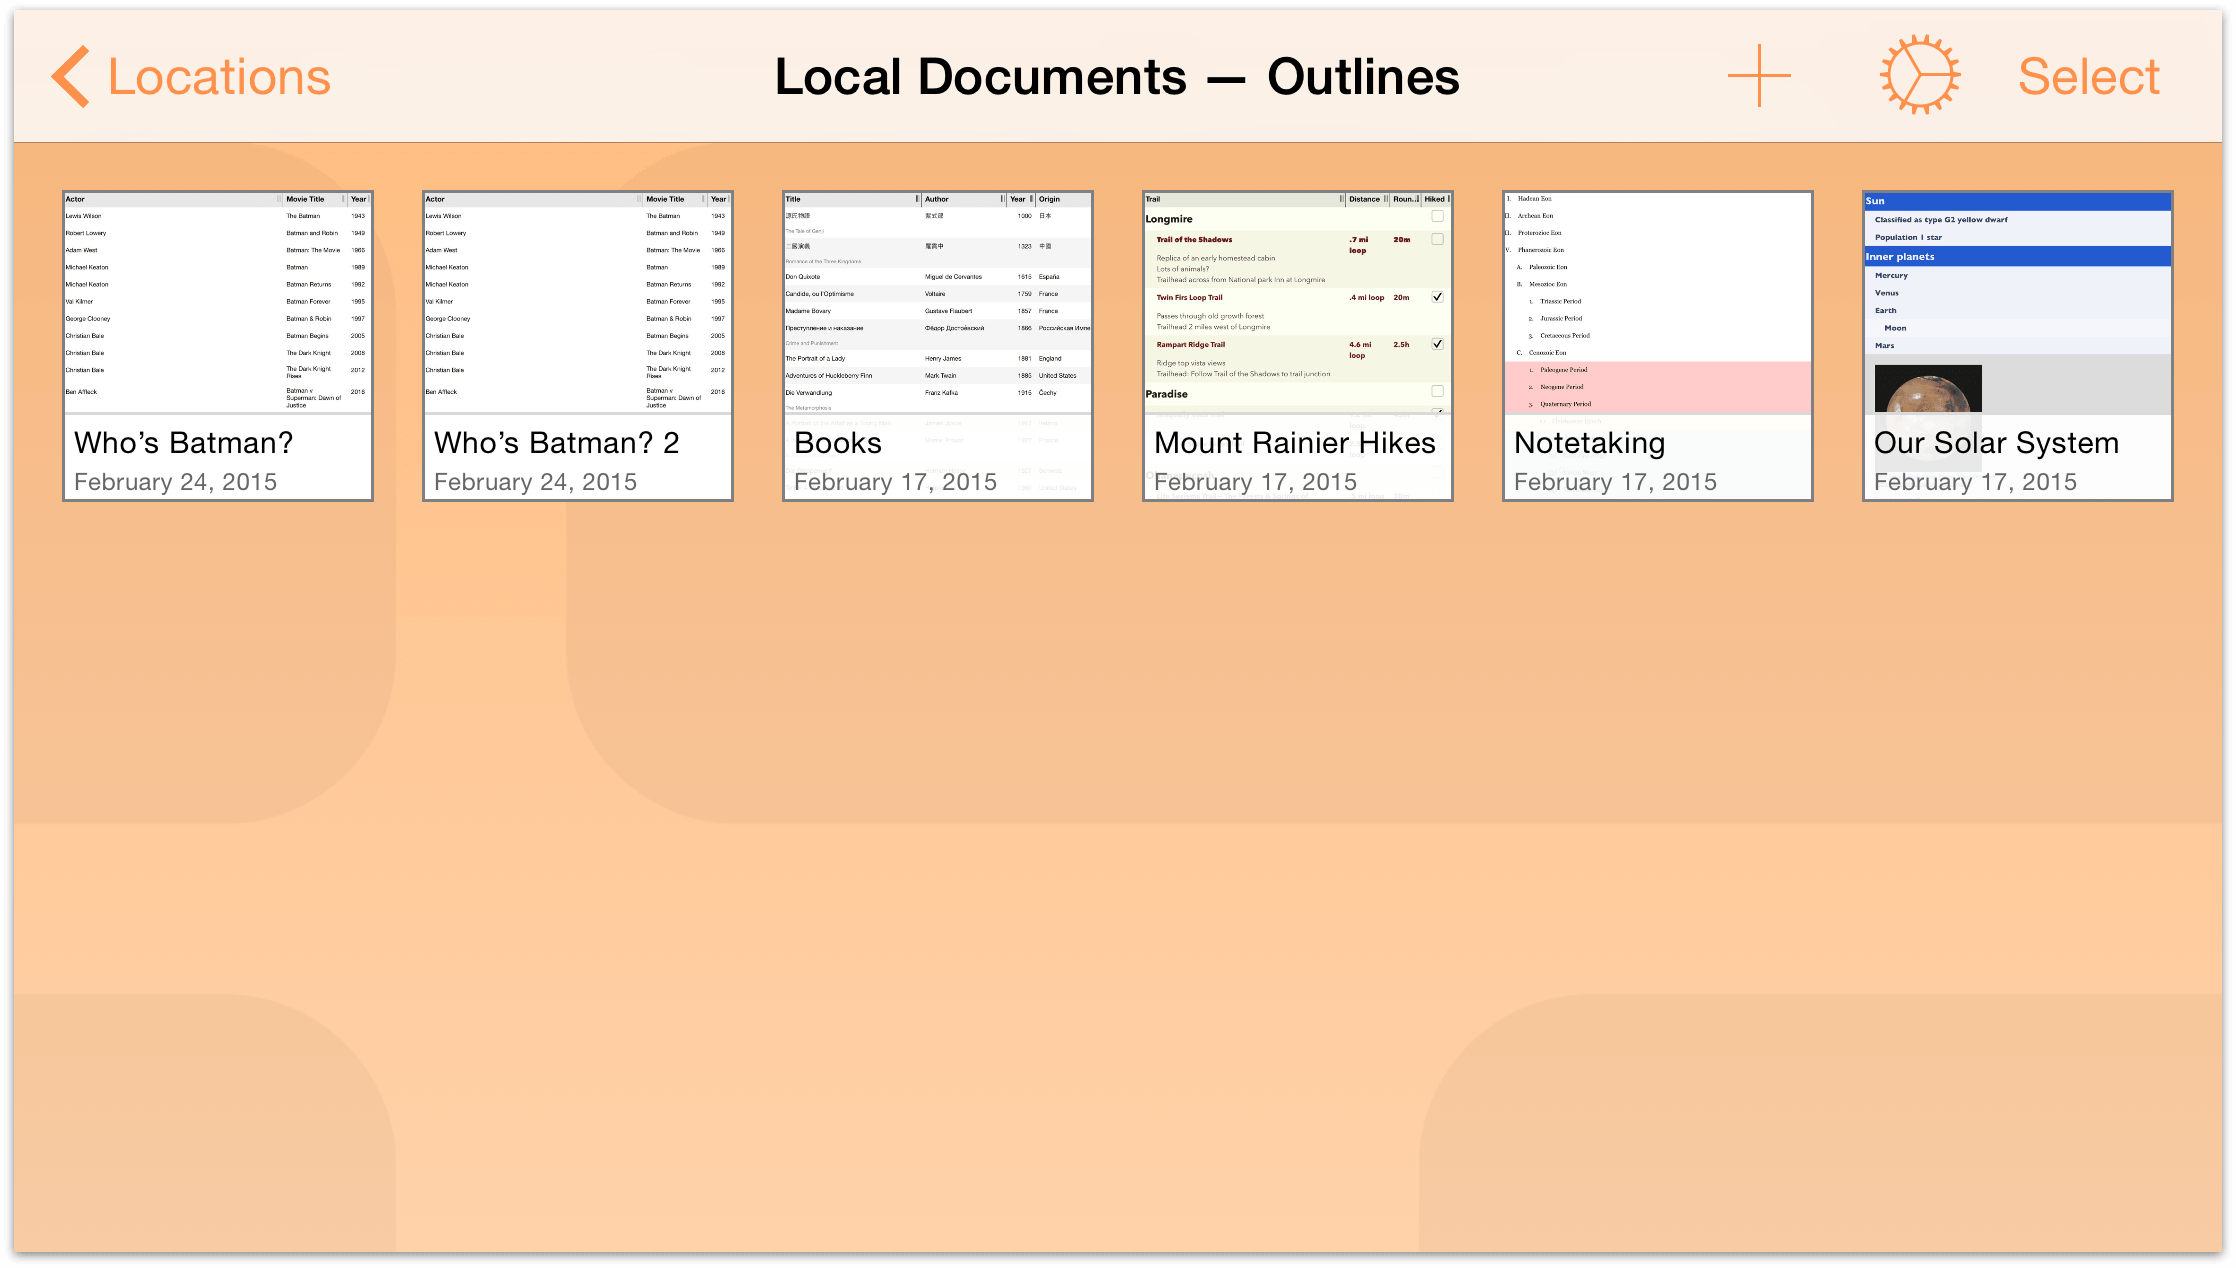
 . OmniOutliner makes a copy of the selected file and places it next to the original, adding a number to the filename; for example, a copy of Who’s Batman? would be named Who’s Batman? 2.
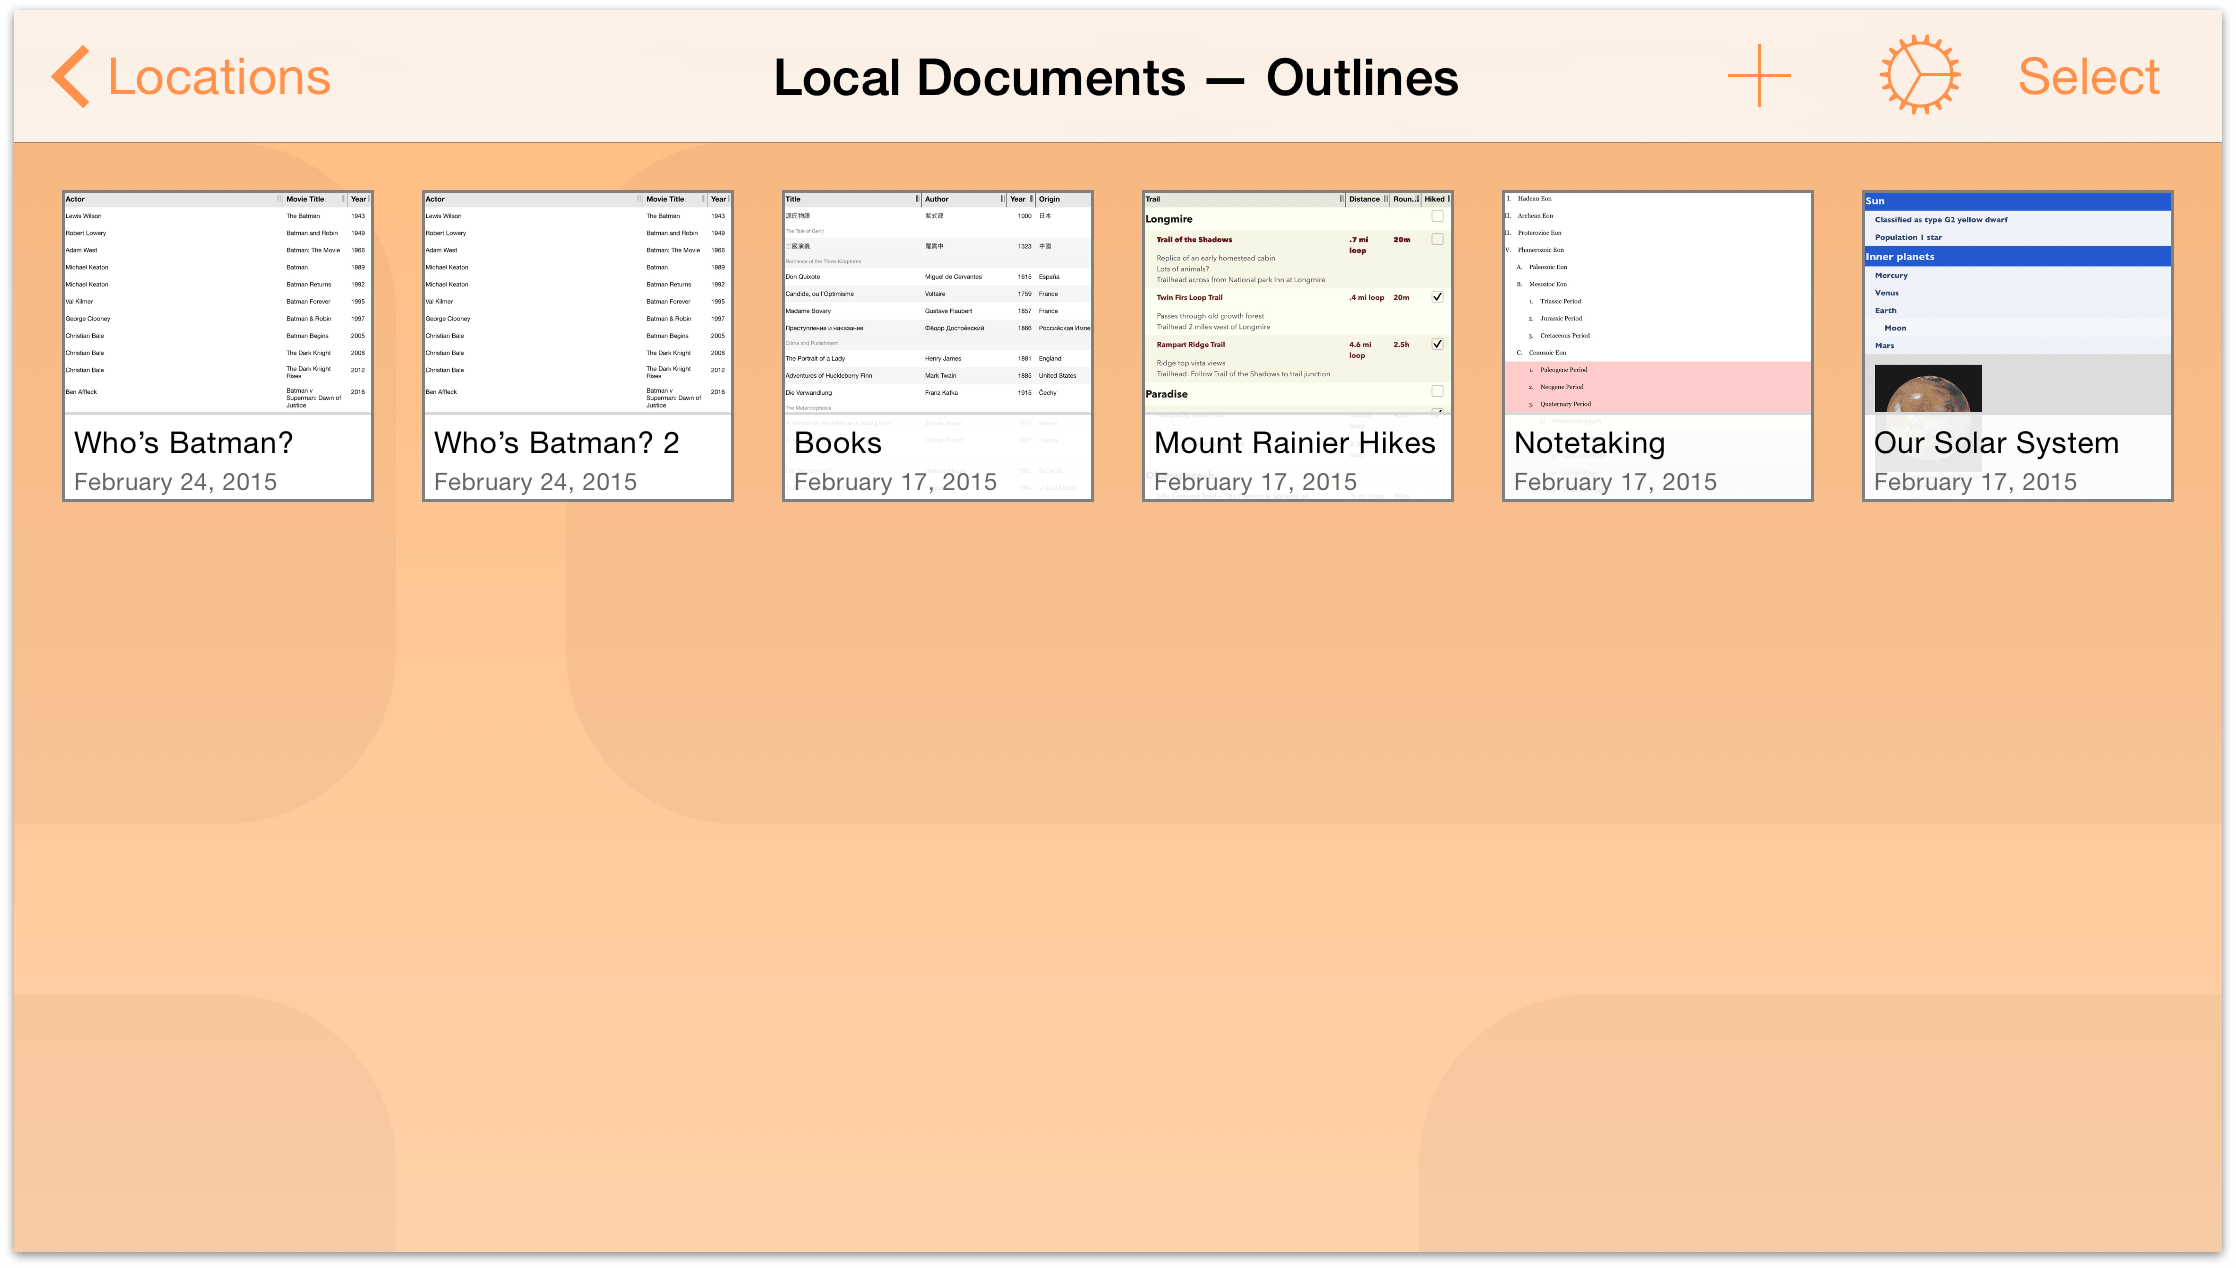
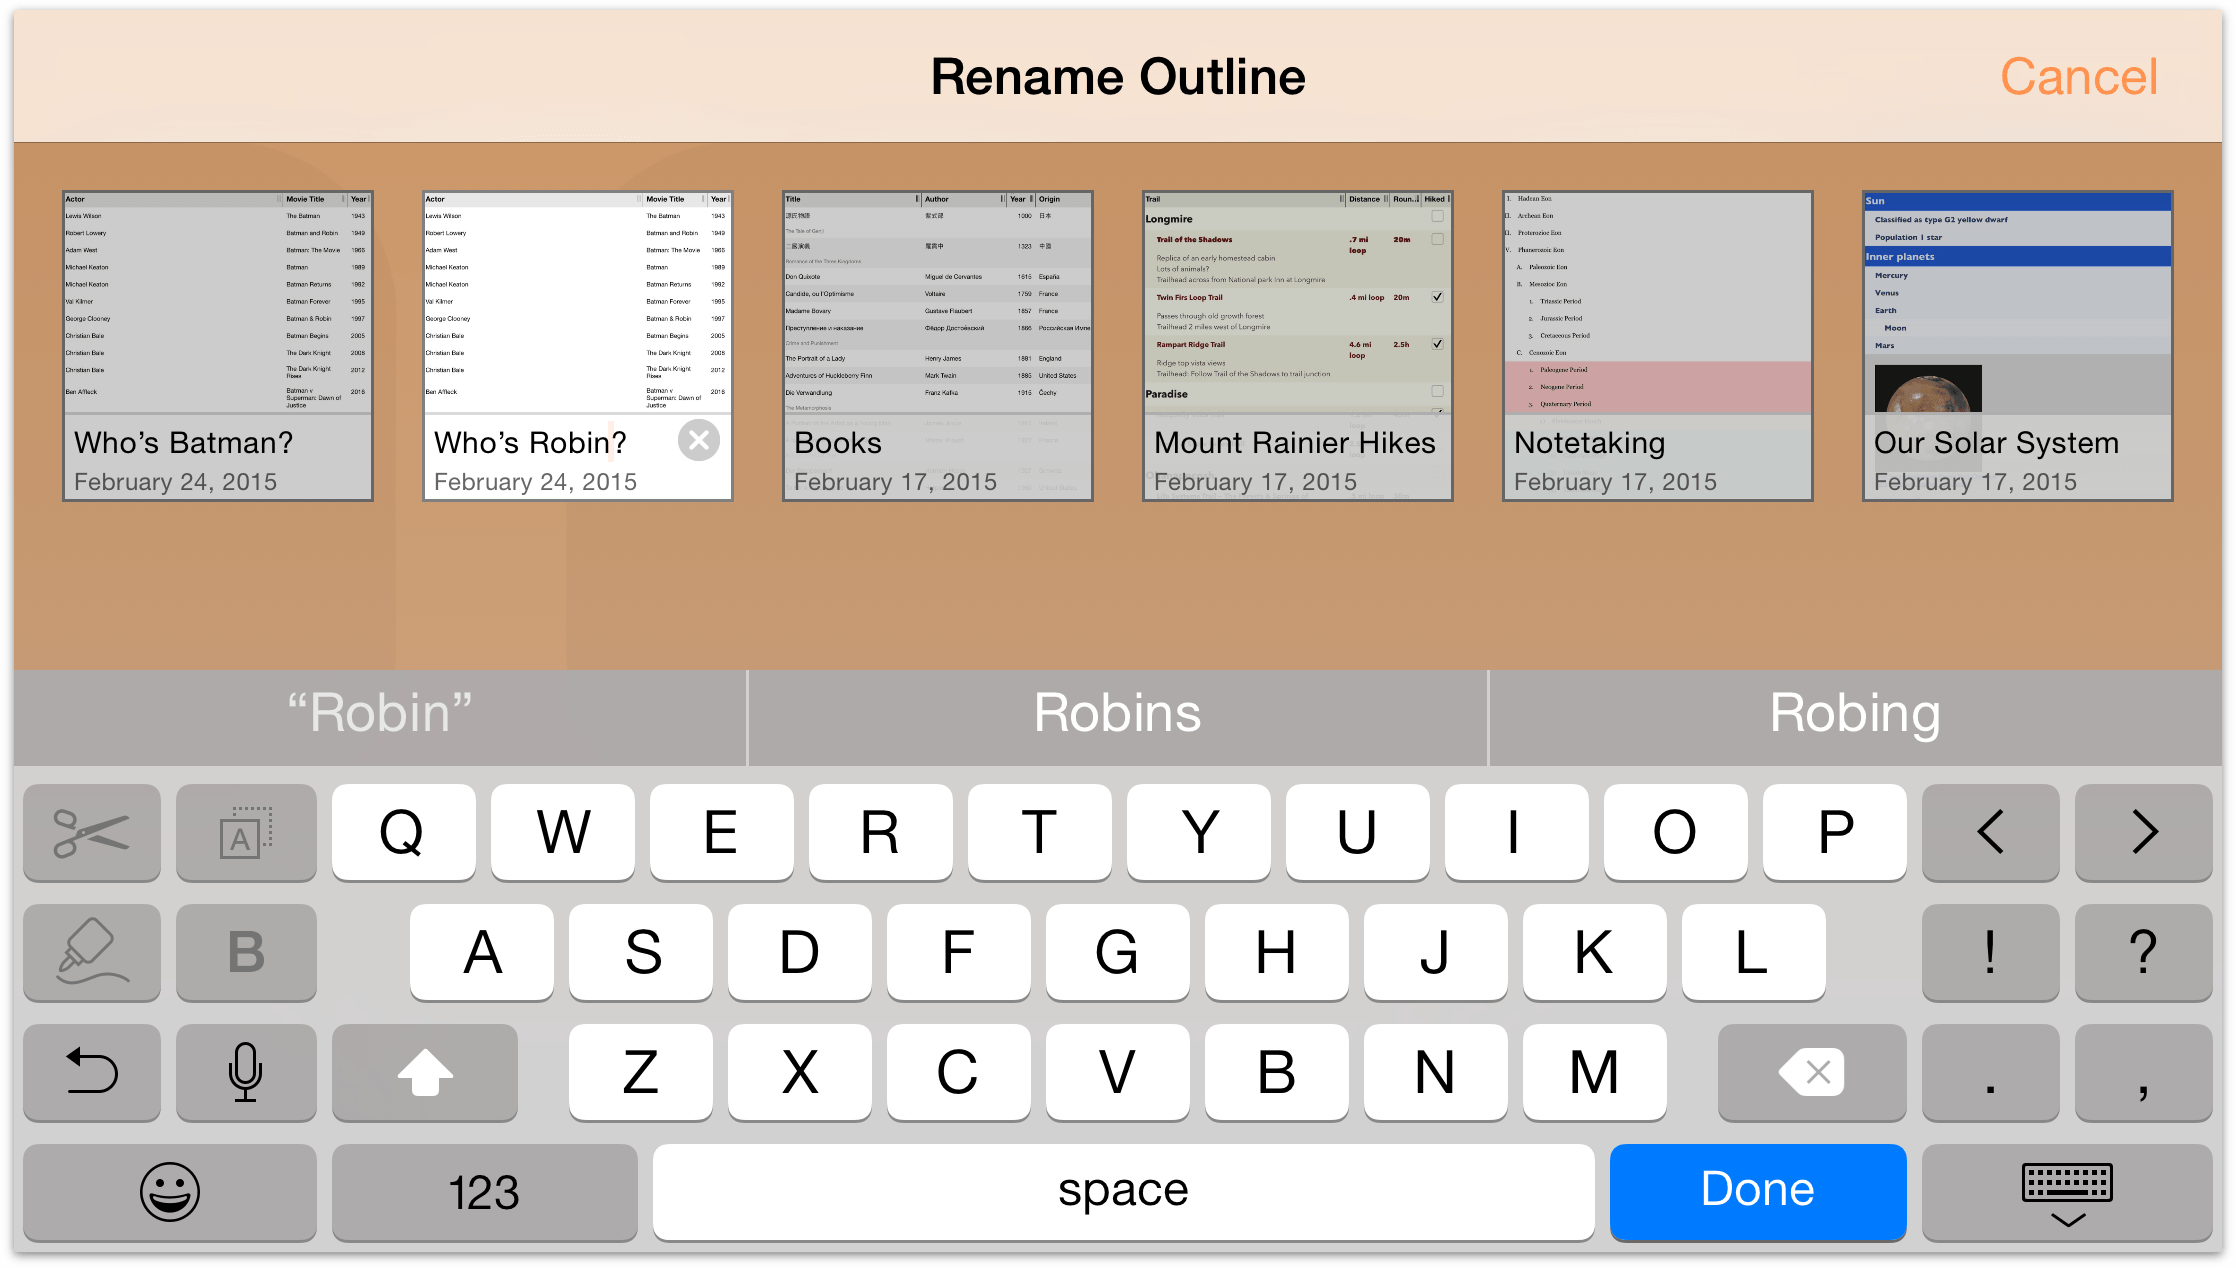
After copying the file, chances are that you will want to rename that file to something more unique and fitting of its purpose. For example, that file might be better suited to keeping track of who played Robin in the Batman movies.
Start by tapping the filename of the file icon. The keyboard on your device comes into view so you can edit the filename. You can also tap the × to clear out the old title before you start entering a new title.

-
When you have finished entering the new filename, tap Done to accept the name.
Renaming Files on Compact Devices
If you are using OmniOutliner on an iPhone 6/6s or an iPod touch, the way you change the name of a file is a little different. Instead of being able to change the name of an outline with the file open, you can only change the file name in the Document Browser. Just follow these steps:
- In the Document Browser, choose the folder that contains the file whose name you want to change.

- Tap the file name to make it editable.
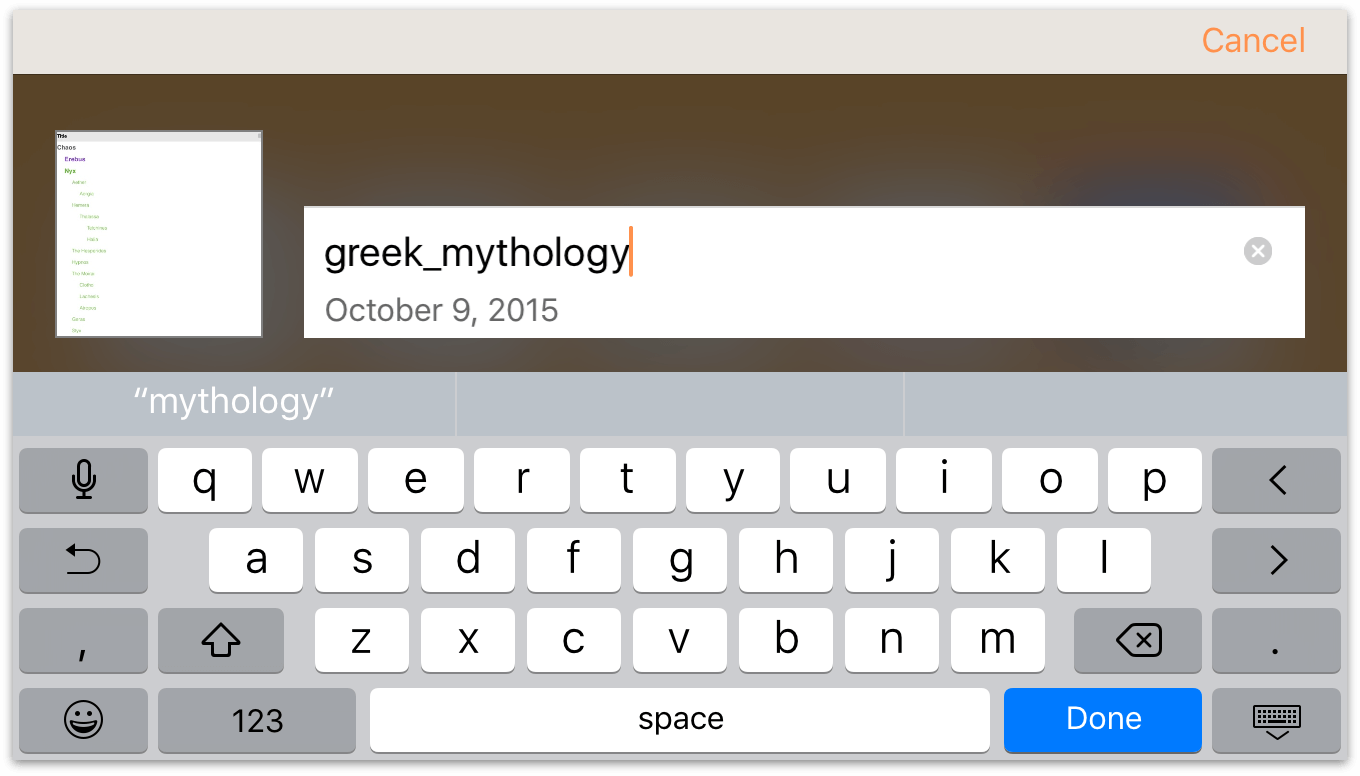
After tapping the file name, an orange cursor is placed at the end of the current file name along with an
 you can tap to erase the entire title.
You can either tap the
to erase the file name entirely, or tap the Delete key on the keyboard to erase the current file name one character at a time.
- Enter a new name for the file, and then tap Done on the keyboard to accept the change.

When you tap Done OmniOutliner accepts the new file name, and returns you to the Document Browser.

Taking Out the Trash
Every now and then, you’ll find that it’s time to do a little housecleaning in OmniOutliner. That list of actors who’ve played Batman is no longer relevant, so it’s time to dump that document into the trash and purge it from your device forever (or from your synced Cloud Account, if you have one of those configured).
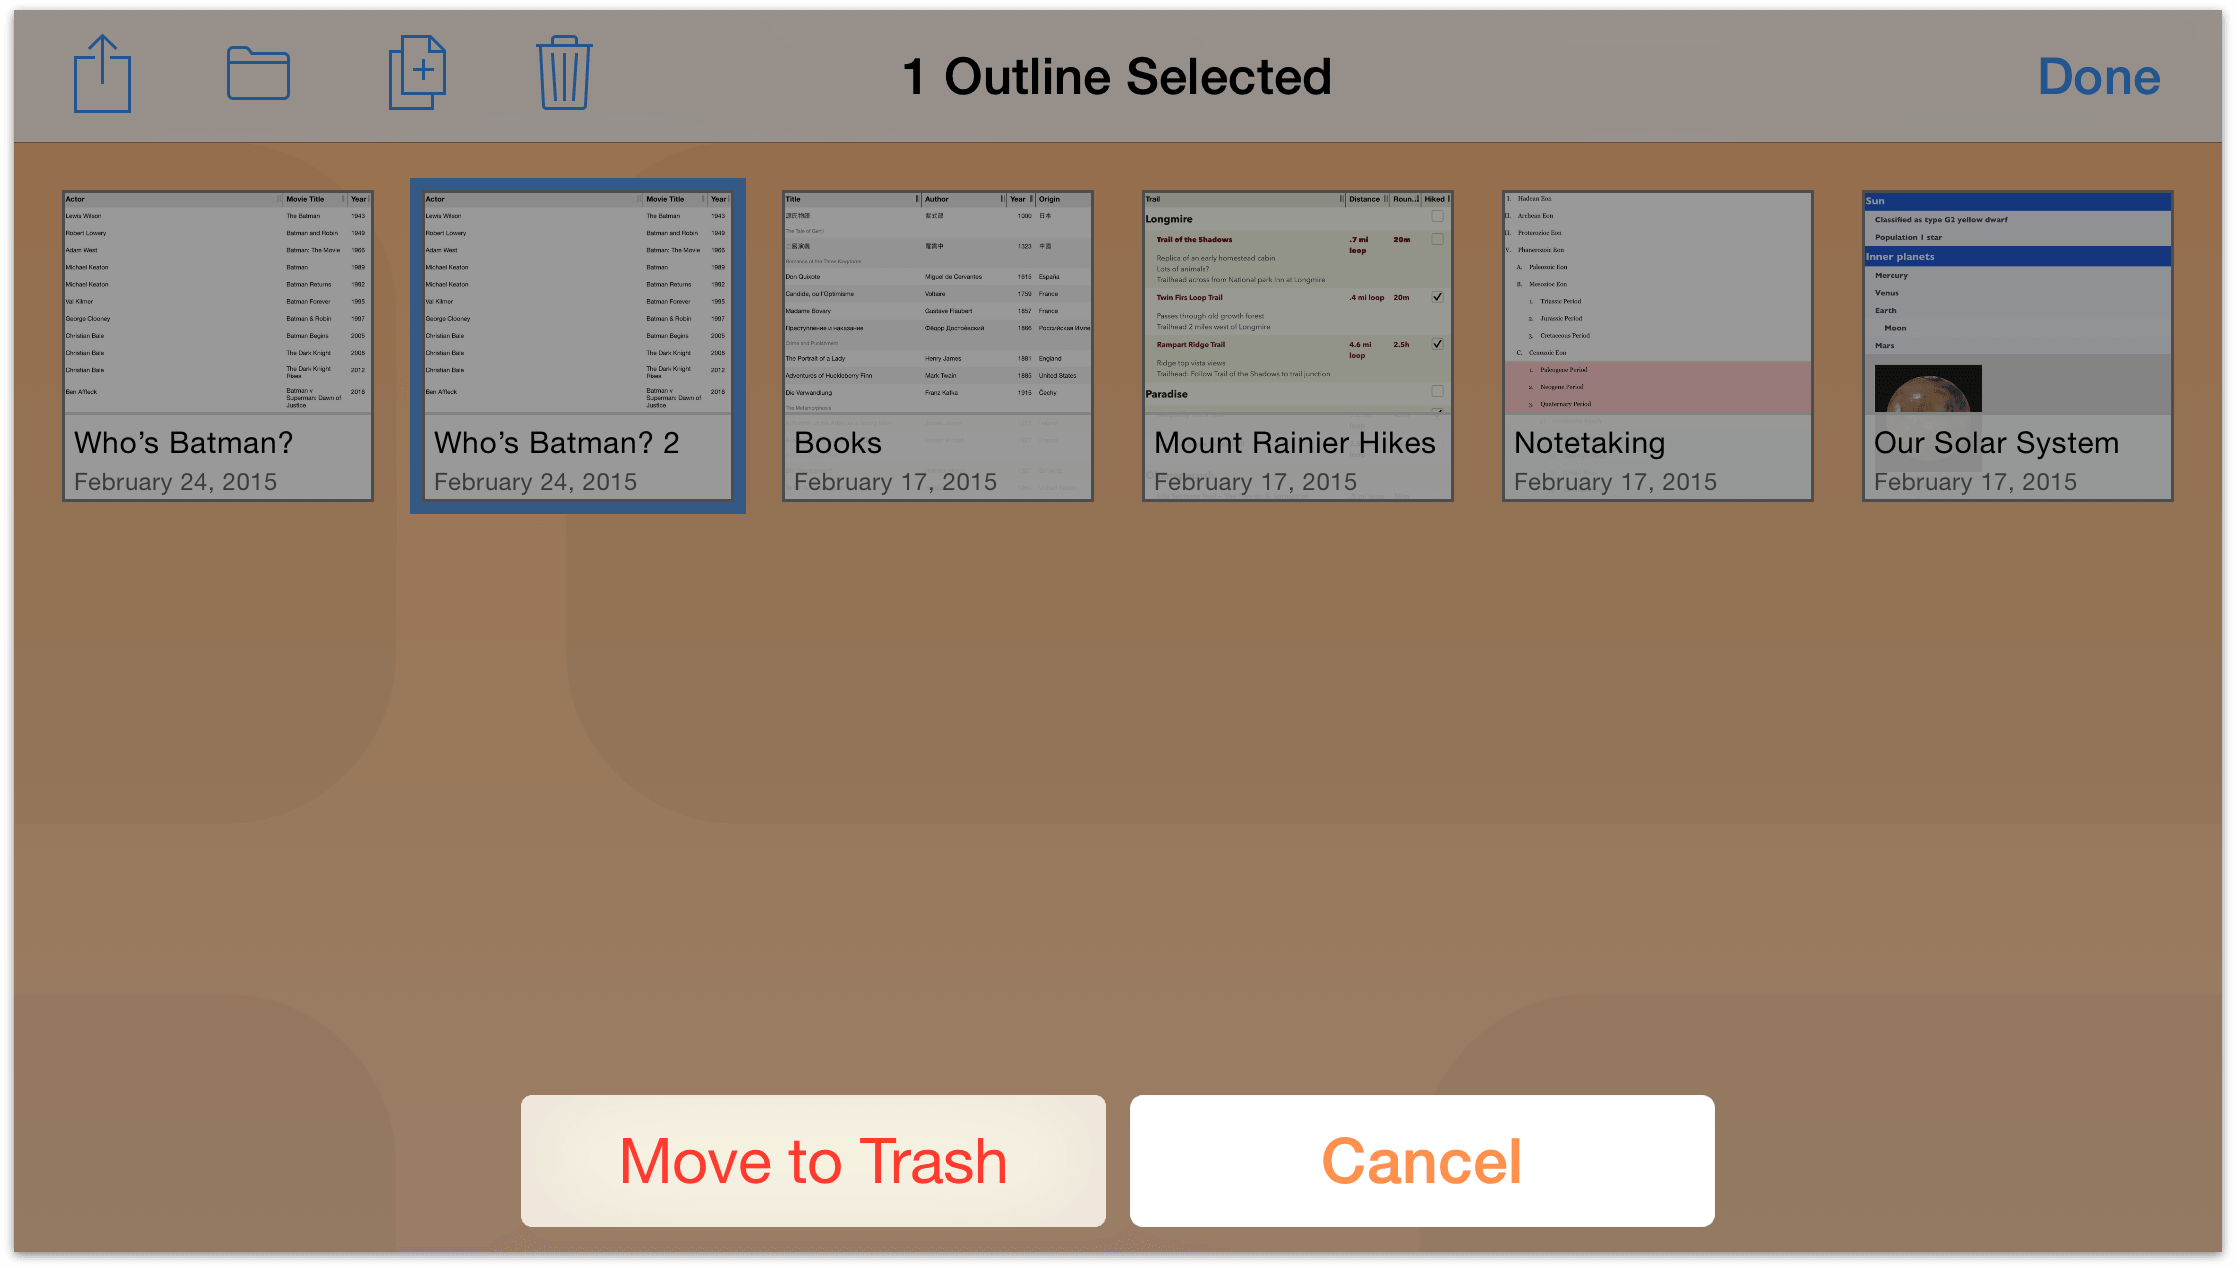
Fortunately, deleting files from OmniOutliner is just as easy as it is to find someone to play Batman. When viewing a folder of documents, tap Select in the navigation bar at the top of the screen. Then tap on the document you’d like to delete; you’ll see that the file now has a blue highlight around it.
Tap the Trash icon in the navigation bar to move the document to the Trash.
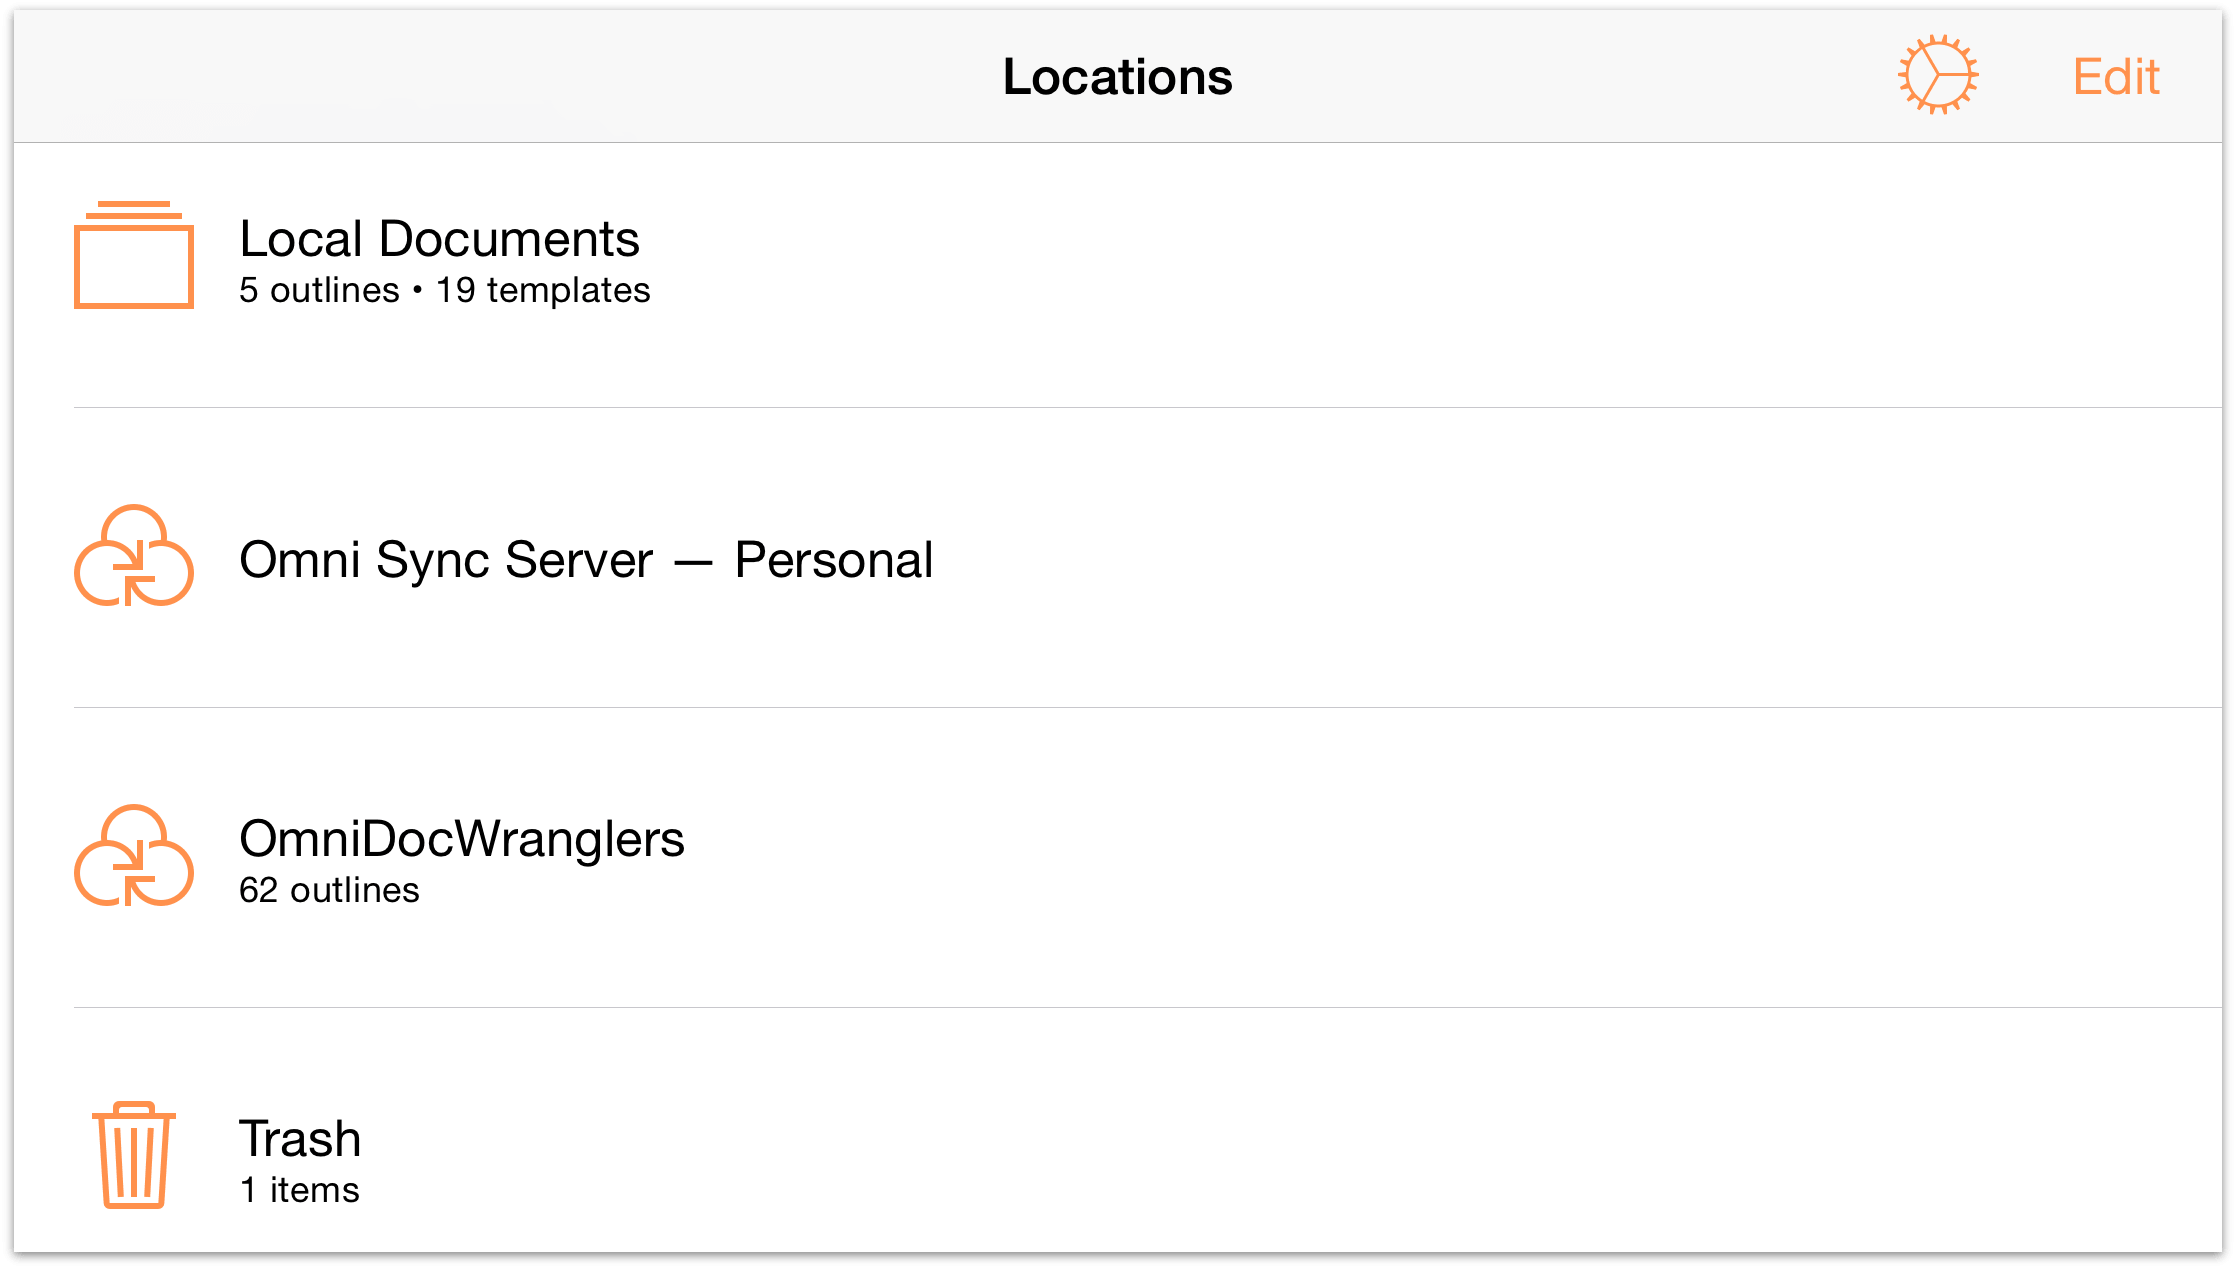
If you tap Locations in the navigation bar, you’ll see a Trash folder in your list of OmniOutliner folders. Right now, the file is still on your device.
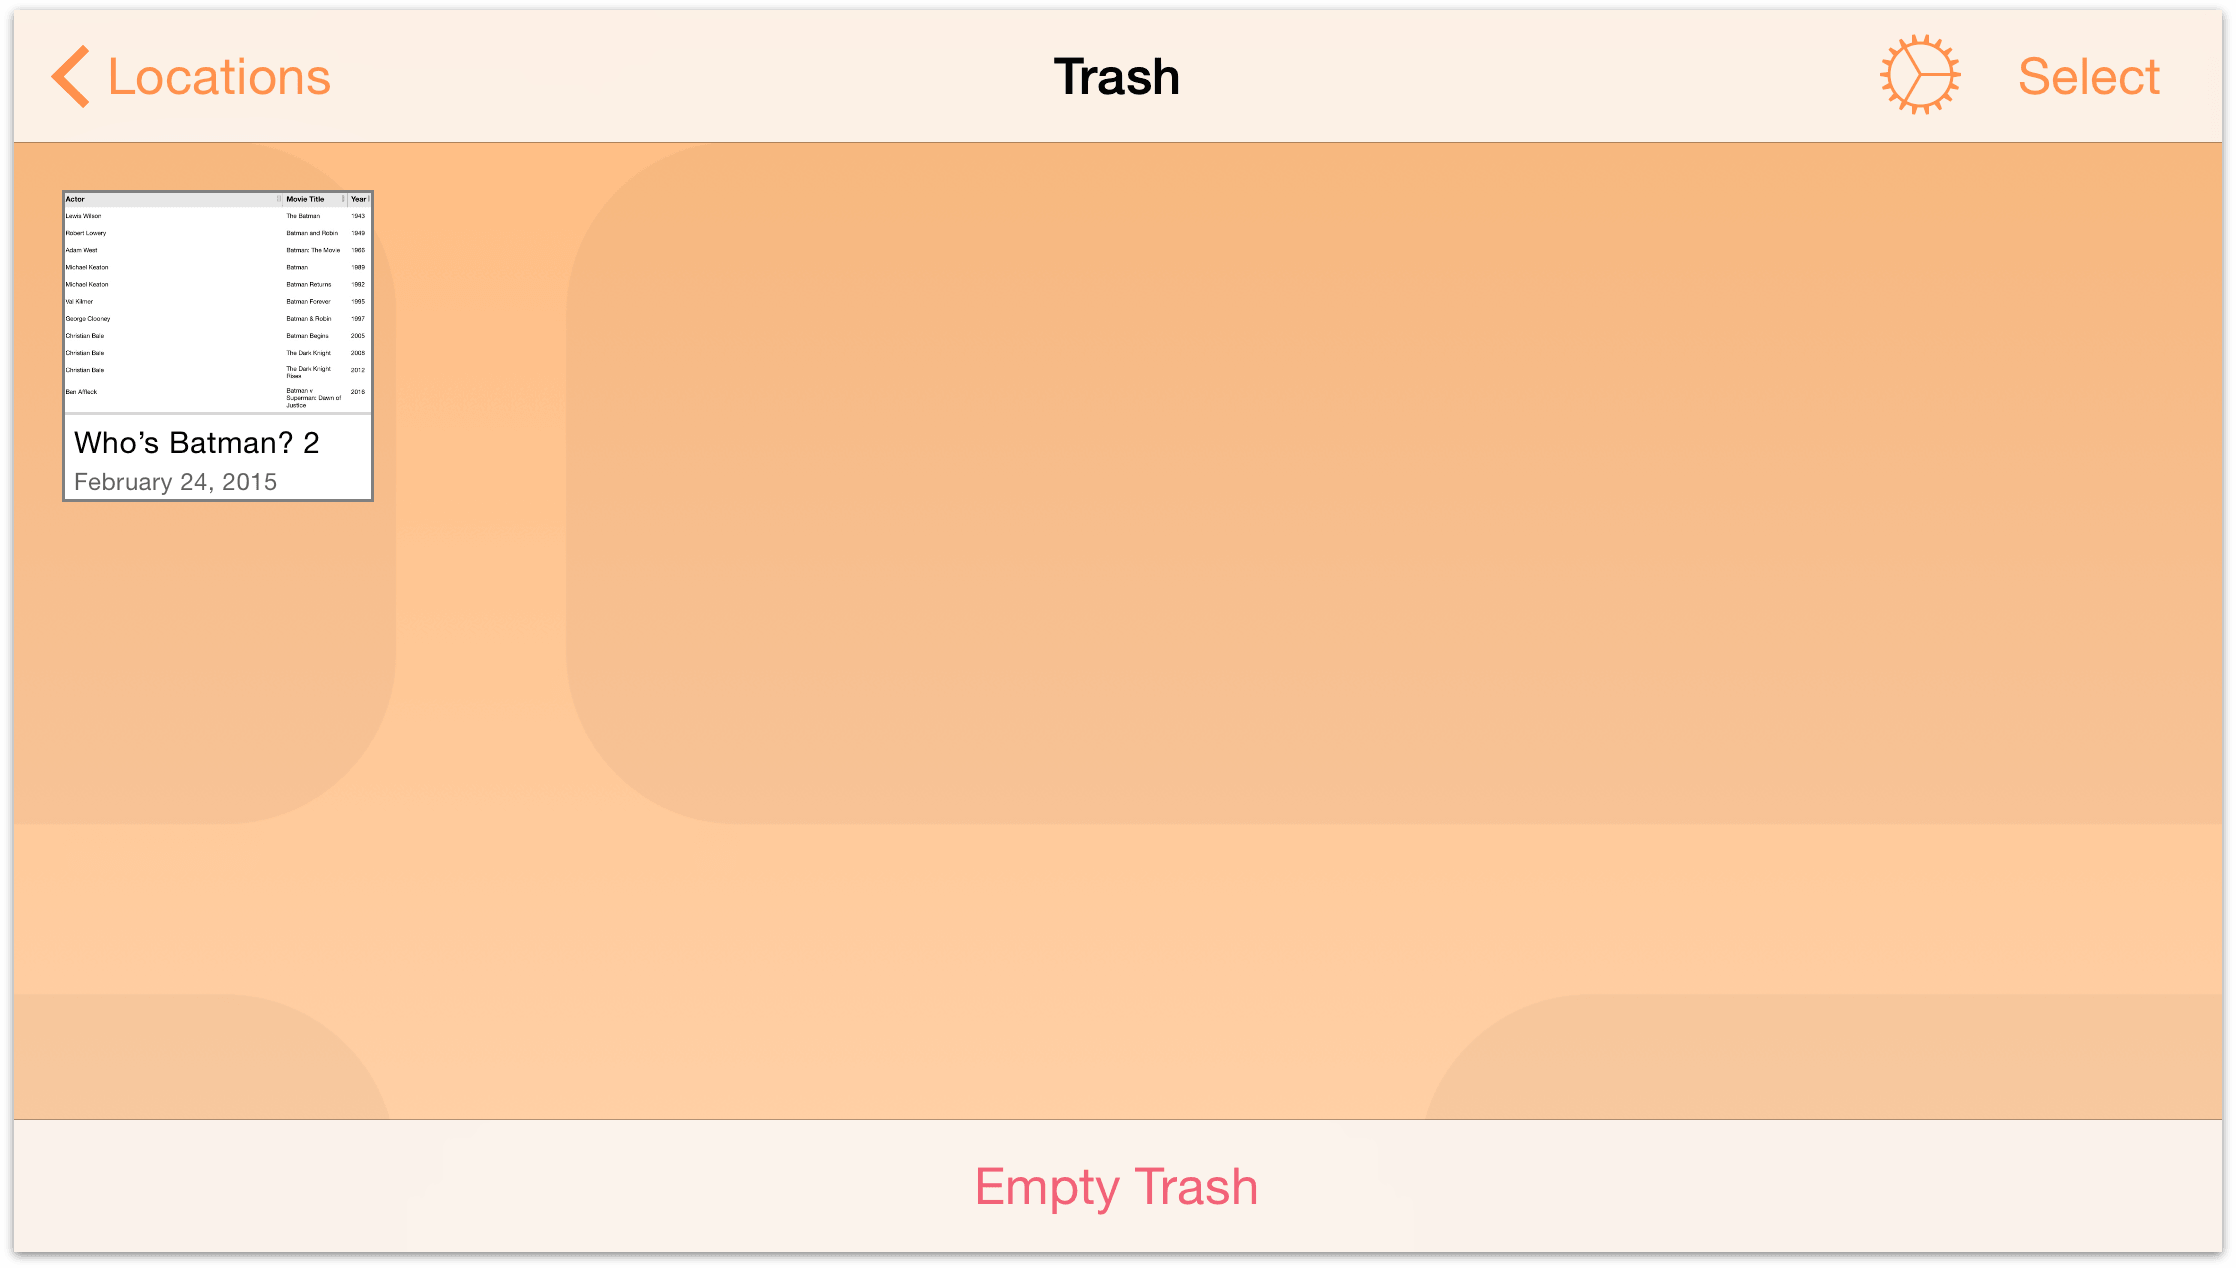
Tap to open the Trash folder and then either tap the Restore button in the navigation bar or tap on the file, you’ll get a popup menu with options to restore the file to your Local Documents folder or, if you have set up a Cloud Account, to a synced file share.
Finally, if you really are sure that you no longer need this file, you have a couple options for emptying the trash:
- Tap Empty Trash at the bottom of the screen to permanently remove all of the files in the Trash folder.
- If you have multiple files in the Trash but you think you might not want to get rid of all of them just yet, you can select the only the files you know need trashing. Tap Select in the Action Bar, and then tap to select the files you want to delete. Next, tap the
 (shred), and then tap Delete Document at the bottom of the screen to delete the selected file.
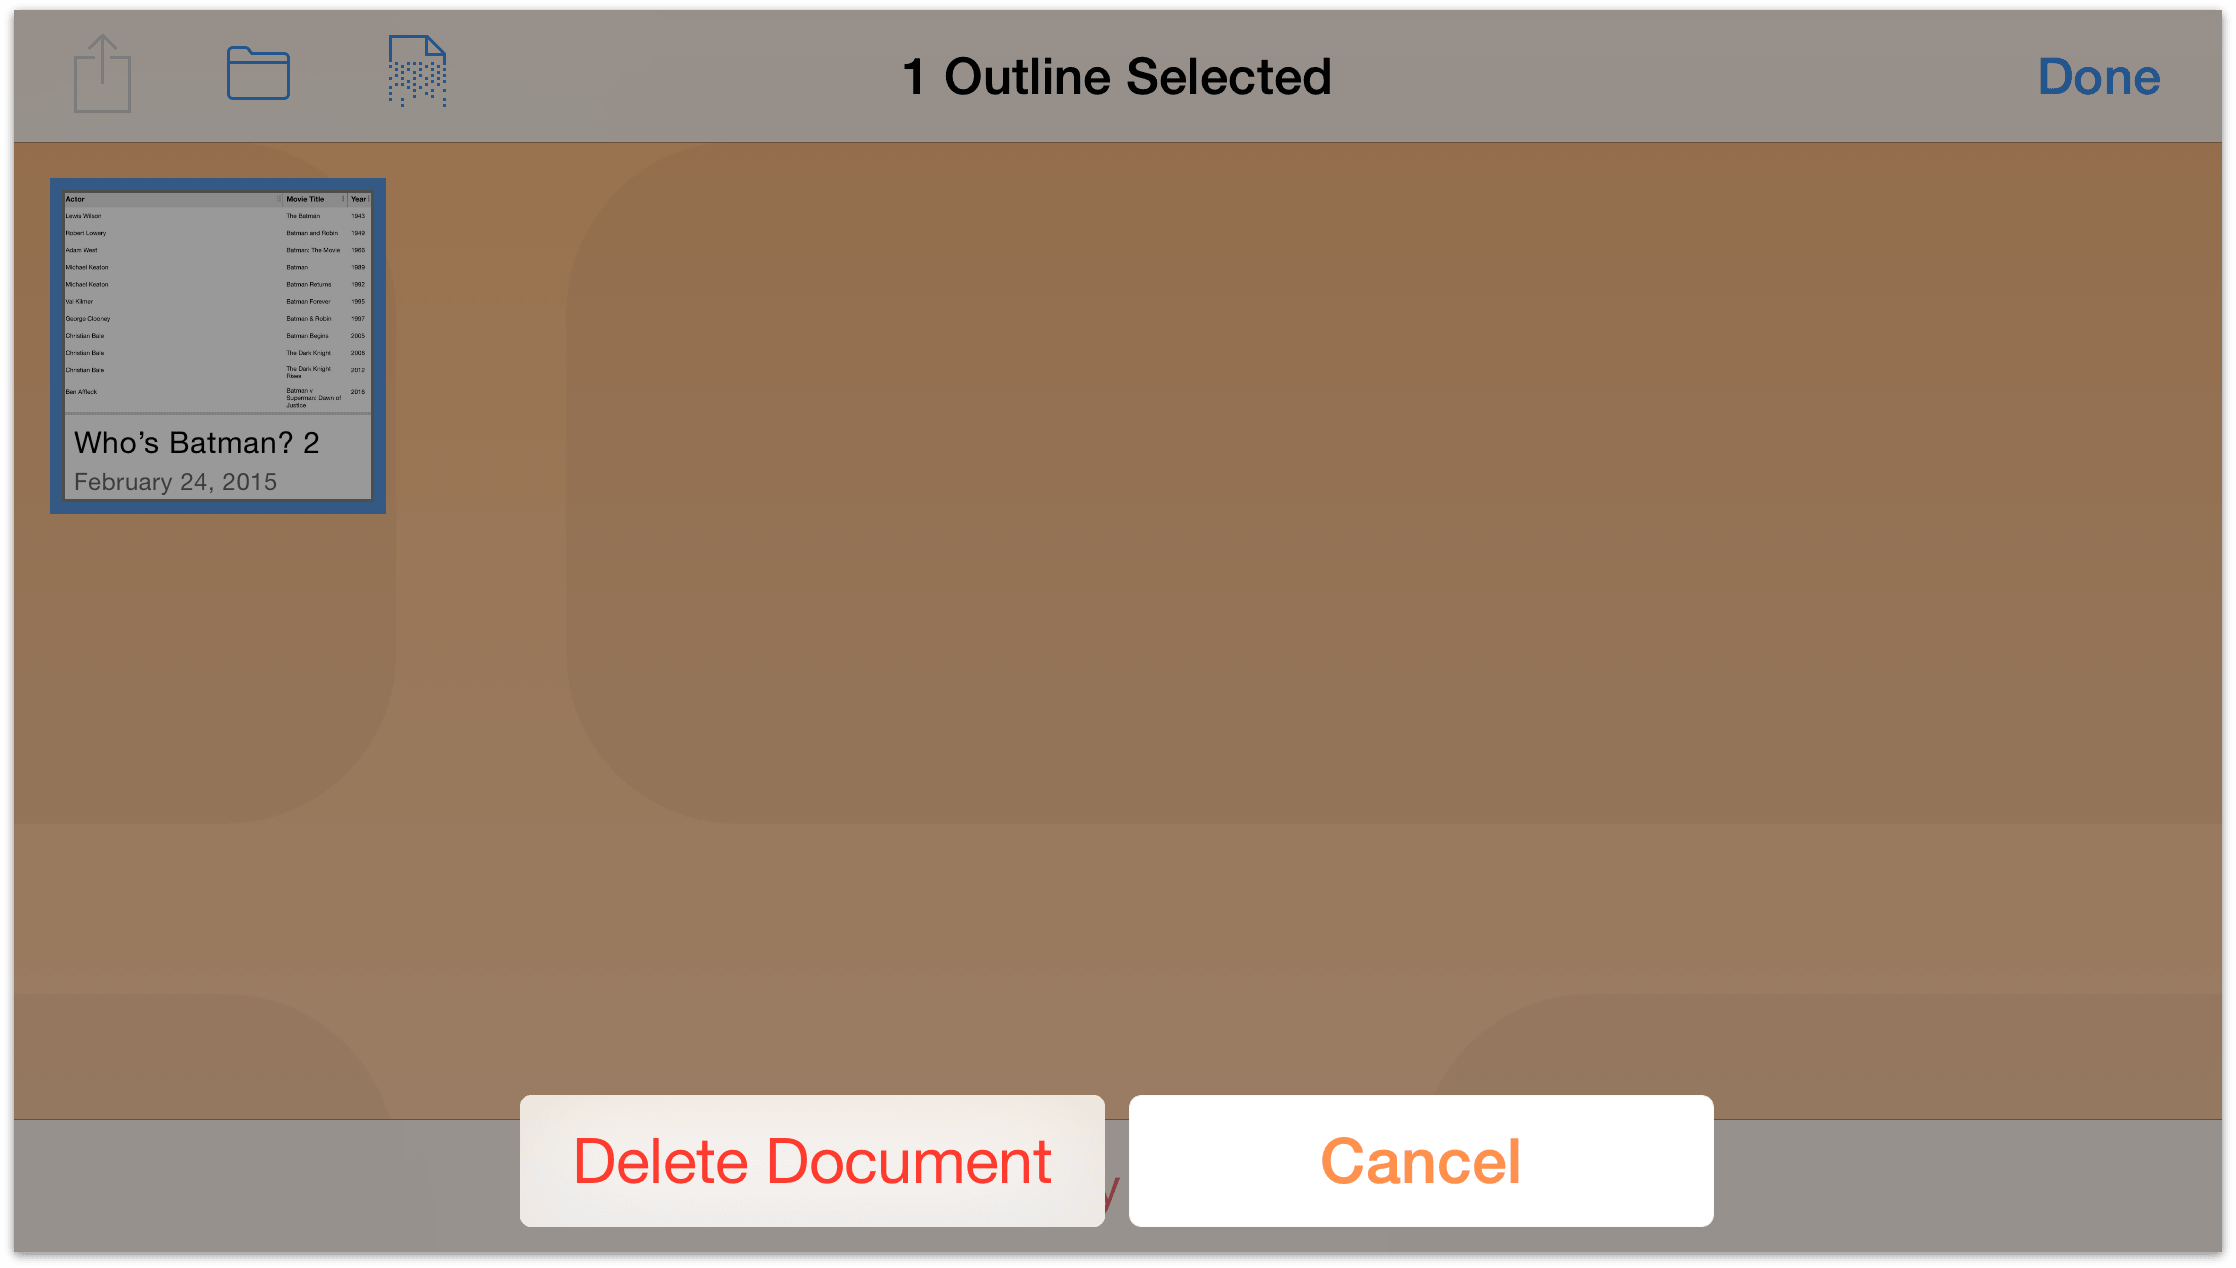
The difference here is that tapping Delete Document only deletes selected files whereas tapping Empty Trash deletes everything in the Trash folder, regardless of whether any files have been selected.
Now that you have a firm grasp on how to use the Document Browser, it’s time to expand your horizons and start working on your first OmniOutliner document.
Before moving on, though, take some time to practice moving and copying files, and try creating a few subfolders to organize your files. It’s also worth noting that you can move a file out of the Trash and back into another folder, so go ahead and try that after duplicating one of the templates.
Catch you in the next chapter.