Importing from an Older Version of OmniOutliner for iPad
OmniOutliner 2 doesn’t share its data with the v1.x version you may have installed on your iPad.
The easiest way to bring files from OmniOutliner v1.x to OmniOutliner 2 for iOS is to set up OmniPresence sync with an Omni Sync Server account, and then sync both versions to the same cloud folder.
If you have a sync account set up for OmniOutliner v1.x, you’ll want to use the same login information when you set it up for OmniOutliner 2 for iOS. If you’re starting fresh with a new account, you’ll need to set it up in both versions.
OmniPresence Sync in OmniOutliner v1.x
To check your sync settings in OmniOutliner v1.x, go to the Document Browser and tap the Local Documents menu in the toolbar. If you only see the Local Documents and Trash folders in this menu, you will need to set up a cloud account to sync your files.
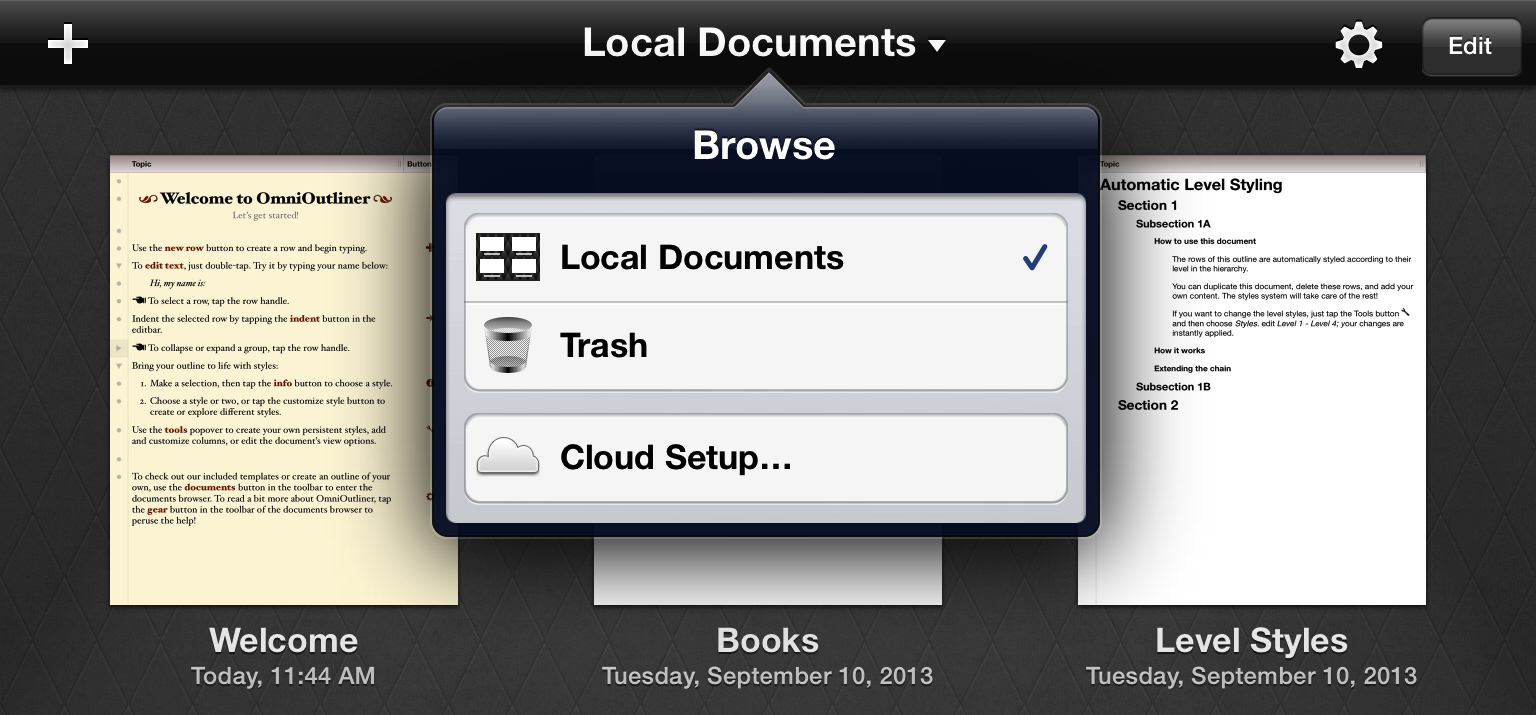
Tap Cloud Setup from the toolbar. Follow the onscreen prompts or refer to Syncing with OmniPresence in the in-app help for more detailed instructions.
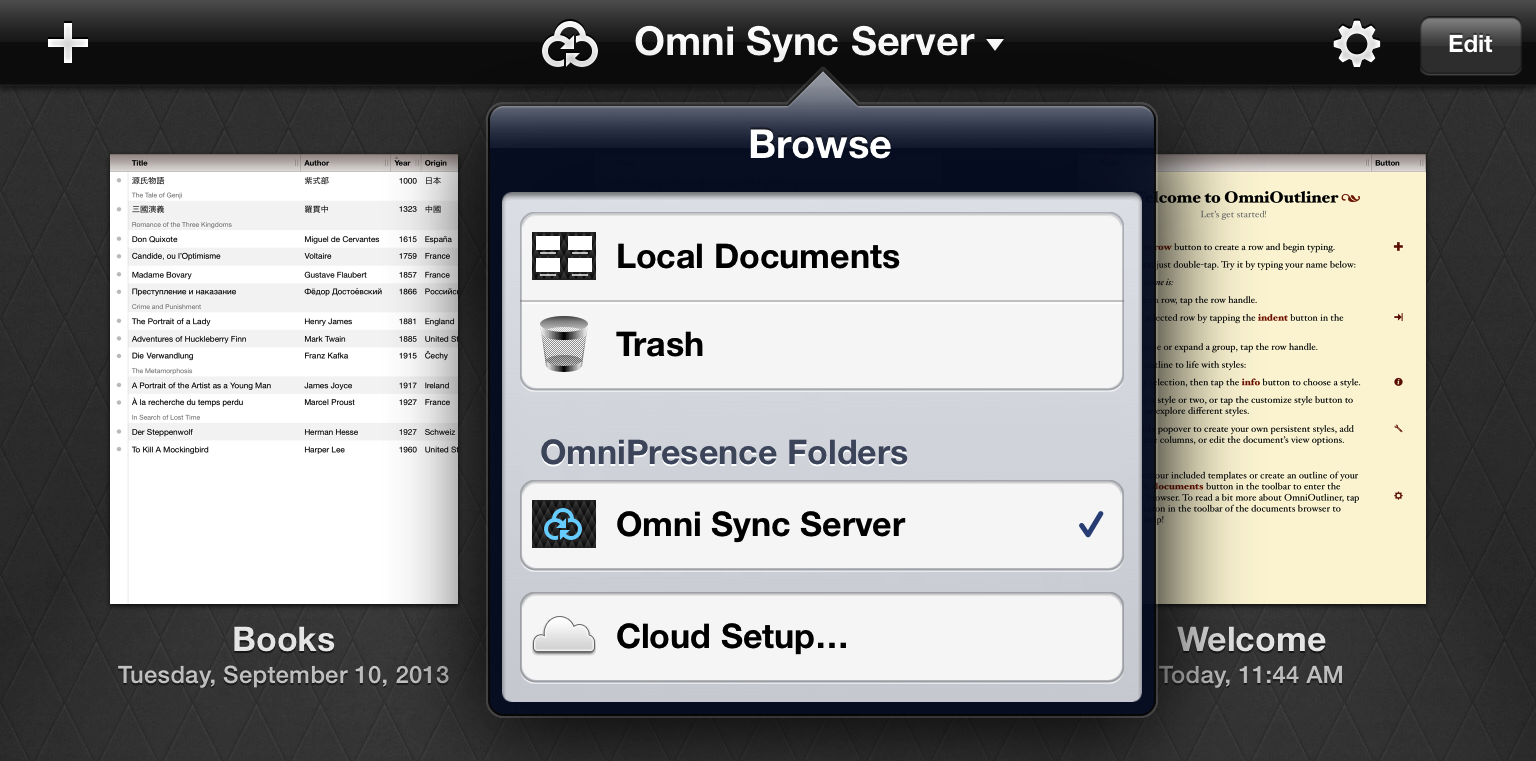
If you already have a cloud account set up that you would like to use to migrate your data, make sure all the files you want to transfer are in your OmniPresence folder, then tap the sync icon in the toolbar. After using the same account information to set up cloud sync in OmniOutliner 2, your files will be available there as well.
Other Import Options
If you prefer not to migrate your documents using OmniPresence and Omni Sync Server, other options are available.
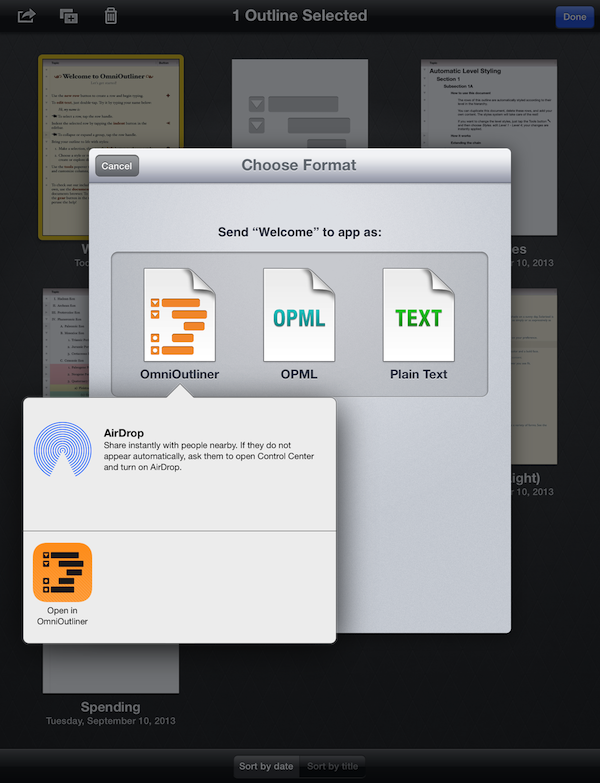
- With OmniOutliner v1.x and OmniOutliner 2 for iOS both installed on your iPad: Select individual documents in OmniOutliner v1.x and use Send to App from the Share button in the document browser toolbar to send files to OmniOutliner 2.
- Using iTunes 12 for Mac: Connect your iOS device with OmniOutliner v1.x to your Mac, and follow these instructions to transfer Outliner documents to your computer:
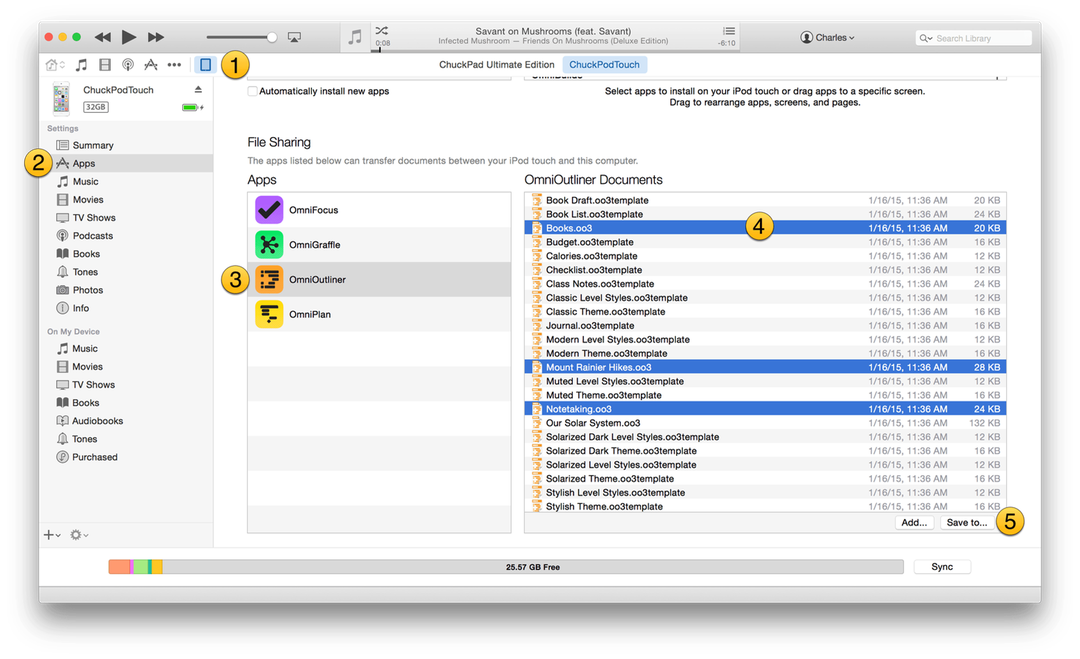
- Choose your iOS device; information about the device shows up in the Device sidebar on the left of the iTunes window.
- Under Settings, choose Apps.
- Scroll down on the right side of the iTunes window until you see the File Sharing section. Choose OmniOutliner in the list.
- Command-click to select the OmniOutliner Documents you would like to save to your Mac.
- Click Save to and choose a location on your Mac to where you can temporarily save the files you have selected.
To transfer the files you’ve saved to your Mac into OmniOutliner 2 for iOS, repeat Steps 1-4 in the previous list, but instead of clicking Save to, click Add. Use the window that appears to choose the files you want to restore in OmniOutliner 2 for iOS and then click Add.
Note
If you encounter any problems with this, feel free to contact our Support Humans for additional assistance.