Glossary
- App Menu
- The App Menu contains information to help you get the most out of OmniOutliner and settings for customizing your OmniOutliner experience. Tap
 in the toolbar of the document browser to access it. See The App Menu for more details.
 - Contextual Menus
- Since iOS doesn't have a menu structure similar to macOS, OmniOutliner uses contextual menus to provide a method of interacting with the user interface. Where available, contextual menus appear when you touch and hold on an object and then release your finger. Contextual menus appear as a black bar—with menu options specific to the object or interface element you have tapped.
- If a contextual menu has additional options, you will see an arrow on the right edge of the menu; tap
 to reveal the additional menu options. After scrolling the menu to the right, a
  appears on the left edge of the contextual menu so you can scroll back to the previous set of options.
 - In iOS 13 and later, contextual menus can also appear as vertical lists (such as those that appear for files in the document browser).
- Document
- OmniOutliner 3 for iOS creates two different types of documents. Outlines (with the file extension .ooutline) represent structured writing or other data, and are the primary document type. Templates (with the file extension .otemplate) are the other type, used to store style presets or other document attributes you might frequently reuse.
- OmniOutliner can also open and export other document types.
- Document Browser
- The file browser that OmniOutliner uses to help you manage OmniOutliner outlines and templates. Starting with OmniOutliner 3.4, OmniOutliner uses the built in iOS file browser for document management, including access to your files in the cloud (with iCloud Drive or another storage service) and files synced with OmniPresence to Omni Sync Server or a WebDAV server.
- Drag & Drop
- Drag & Drop is a system-level function that’s integrated with OmniOutliner and other apps on iOS. You can drag into OmniOutliner from other apps, reorder items in the outline, as well as drag rows or selected text from an open OmniOutliner file to other apps on your device.
- Files
- The Files app offers a way to access files in local app directories, as well as those in the cloud. You can copy files to the local app directory, tap OmniOutliner files to open them in OmniOutliner, and also drag from OmniOutliner into the Files app.
- Inspector
- The inspector
 is a sidebar full of controls used to define custom properties of selected rows or text, set up styles to apply throughout your outline, and set document parameters for saving and adding metadata to your OmniOutliner documents. The controls are contained in two separate tabs (the Selection and Document inspectors respectively).
 - Keyboard Shortcut
- A set of keys pressed to invoke a menu command, available when a Bluetooth keyboard is paired with your device. Press and hold command (⌘) to see a list of shortcuts available from your current location in the app.
- Omni Automation
- A method of scripting OmniOutliner with JavaScript. See the Omni Automation website for more information on this feature.
- Outline
- A document with one or more rows, and at least one column, with cells created by their intersection. Outline rows can be nested hierarchically and easily reordered by touching and holding their row handles and dragging them to another location in the document.
- Plug-In
- An Omni Automation Plug-In can contain a collection of scripts, libraries, and assets. For more information, see the Omni Automation website.
- Template
- An OmniOutliner file type that contains the base settings such as the row styles, background colors, or numbering used when creating a OmniOutliner outline. Templates can also include outline content, which is used as the basis for documents newly created using the template chooser. (Templates applied to existing documents do not add this outline content.)
- Toolbar
- The region along the top of the document browser (and outline, when editing a document) is the toolbar. The toolbar contains controls for adding to and modifying the content of the current view—whether adding new documents in the document browser, navigating to other file locations, or using the sidebar and inspectors to edit the contents of an outline.
The Document Browser
When you first launch OmniOutliner you arrive at the document browser, where you can open an existing file or create a new one from scratch.
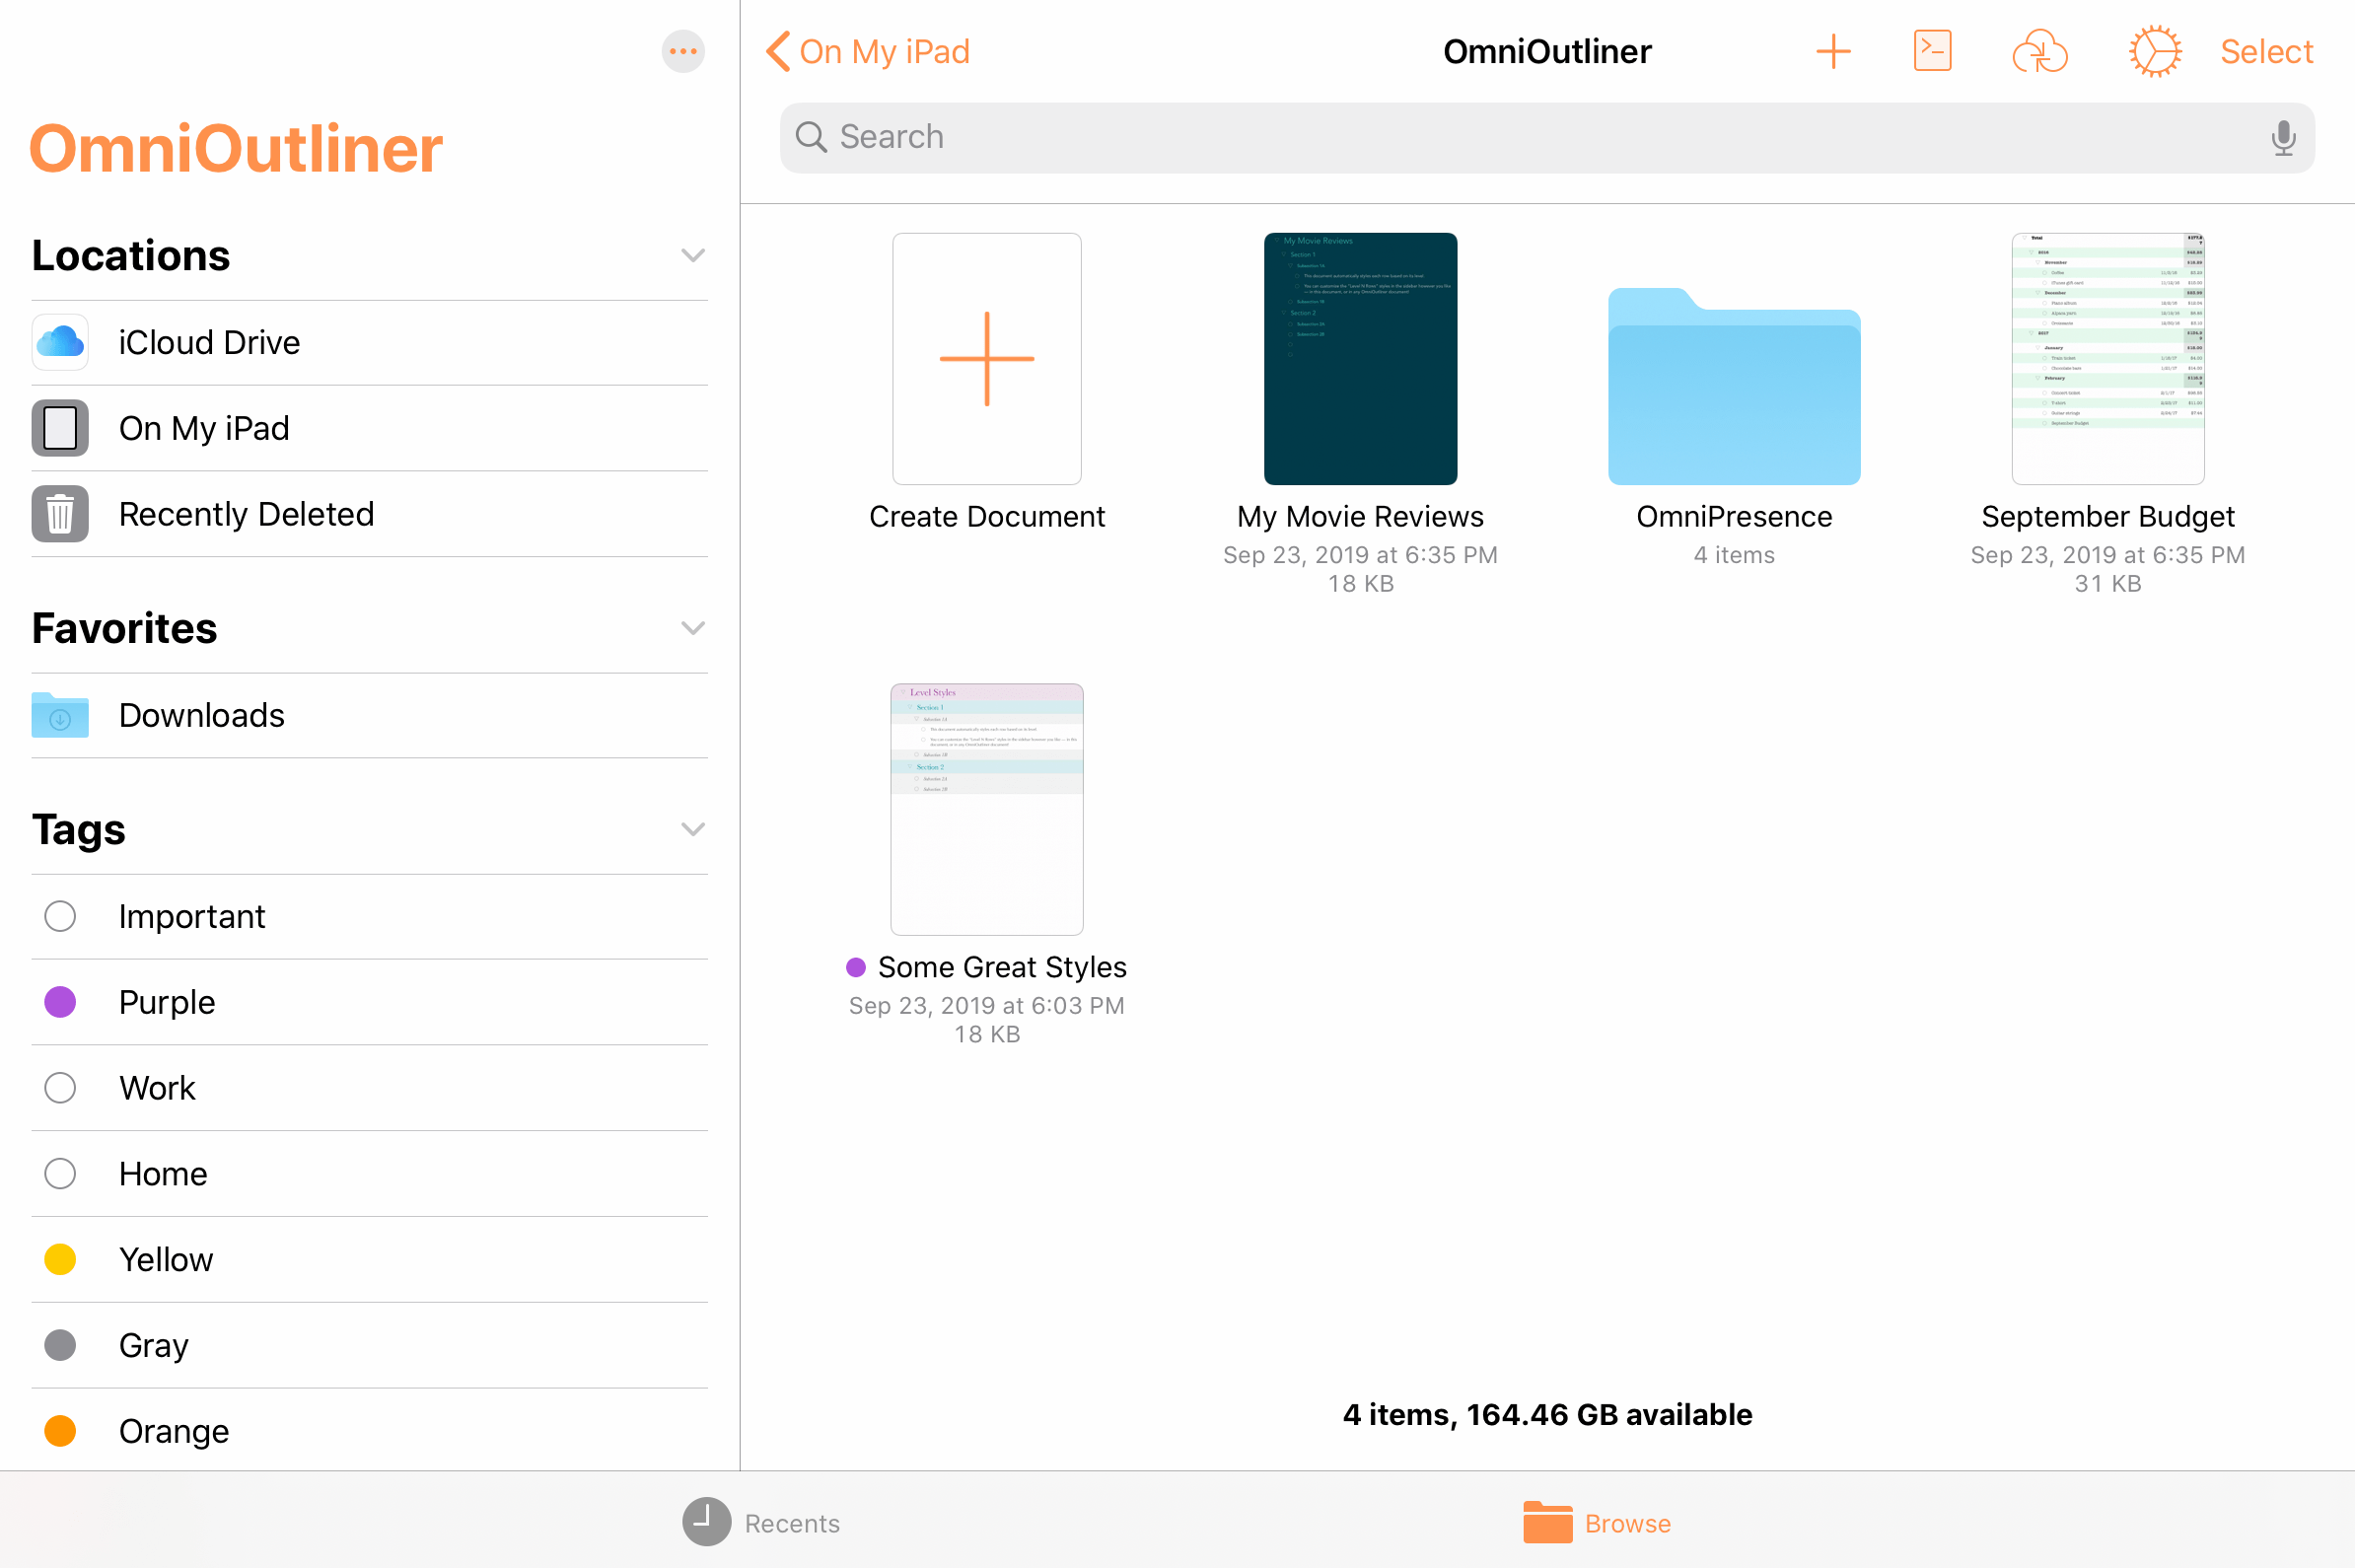
The document browser provides access to the same file storage locations as the iOS Files app, including the OmniOutliner folder on your device (where files are kept locally), your cloud storage locations (such as iCloud Drive), and any OmniPresence folders you have connected.
Recents View
Tap the clock icon  to switch to the Recents view of the document browser, which shows a collection of files that you have worked with recently. This list is drawn from every location available on your device, and includes files stored locally as well as those in the cloud.
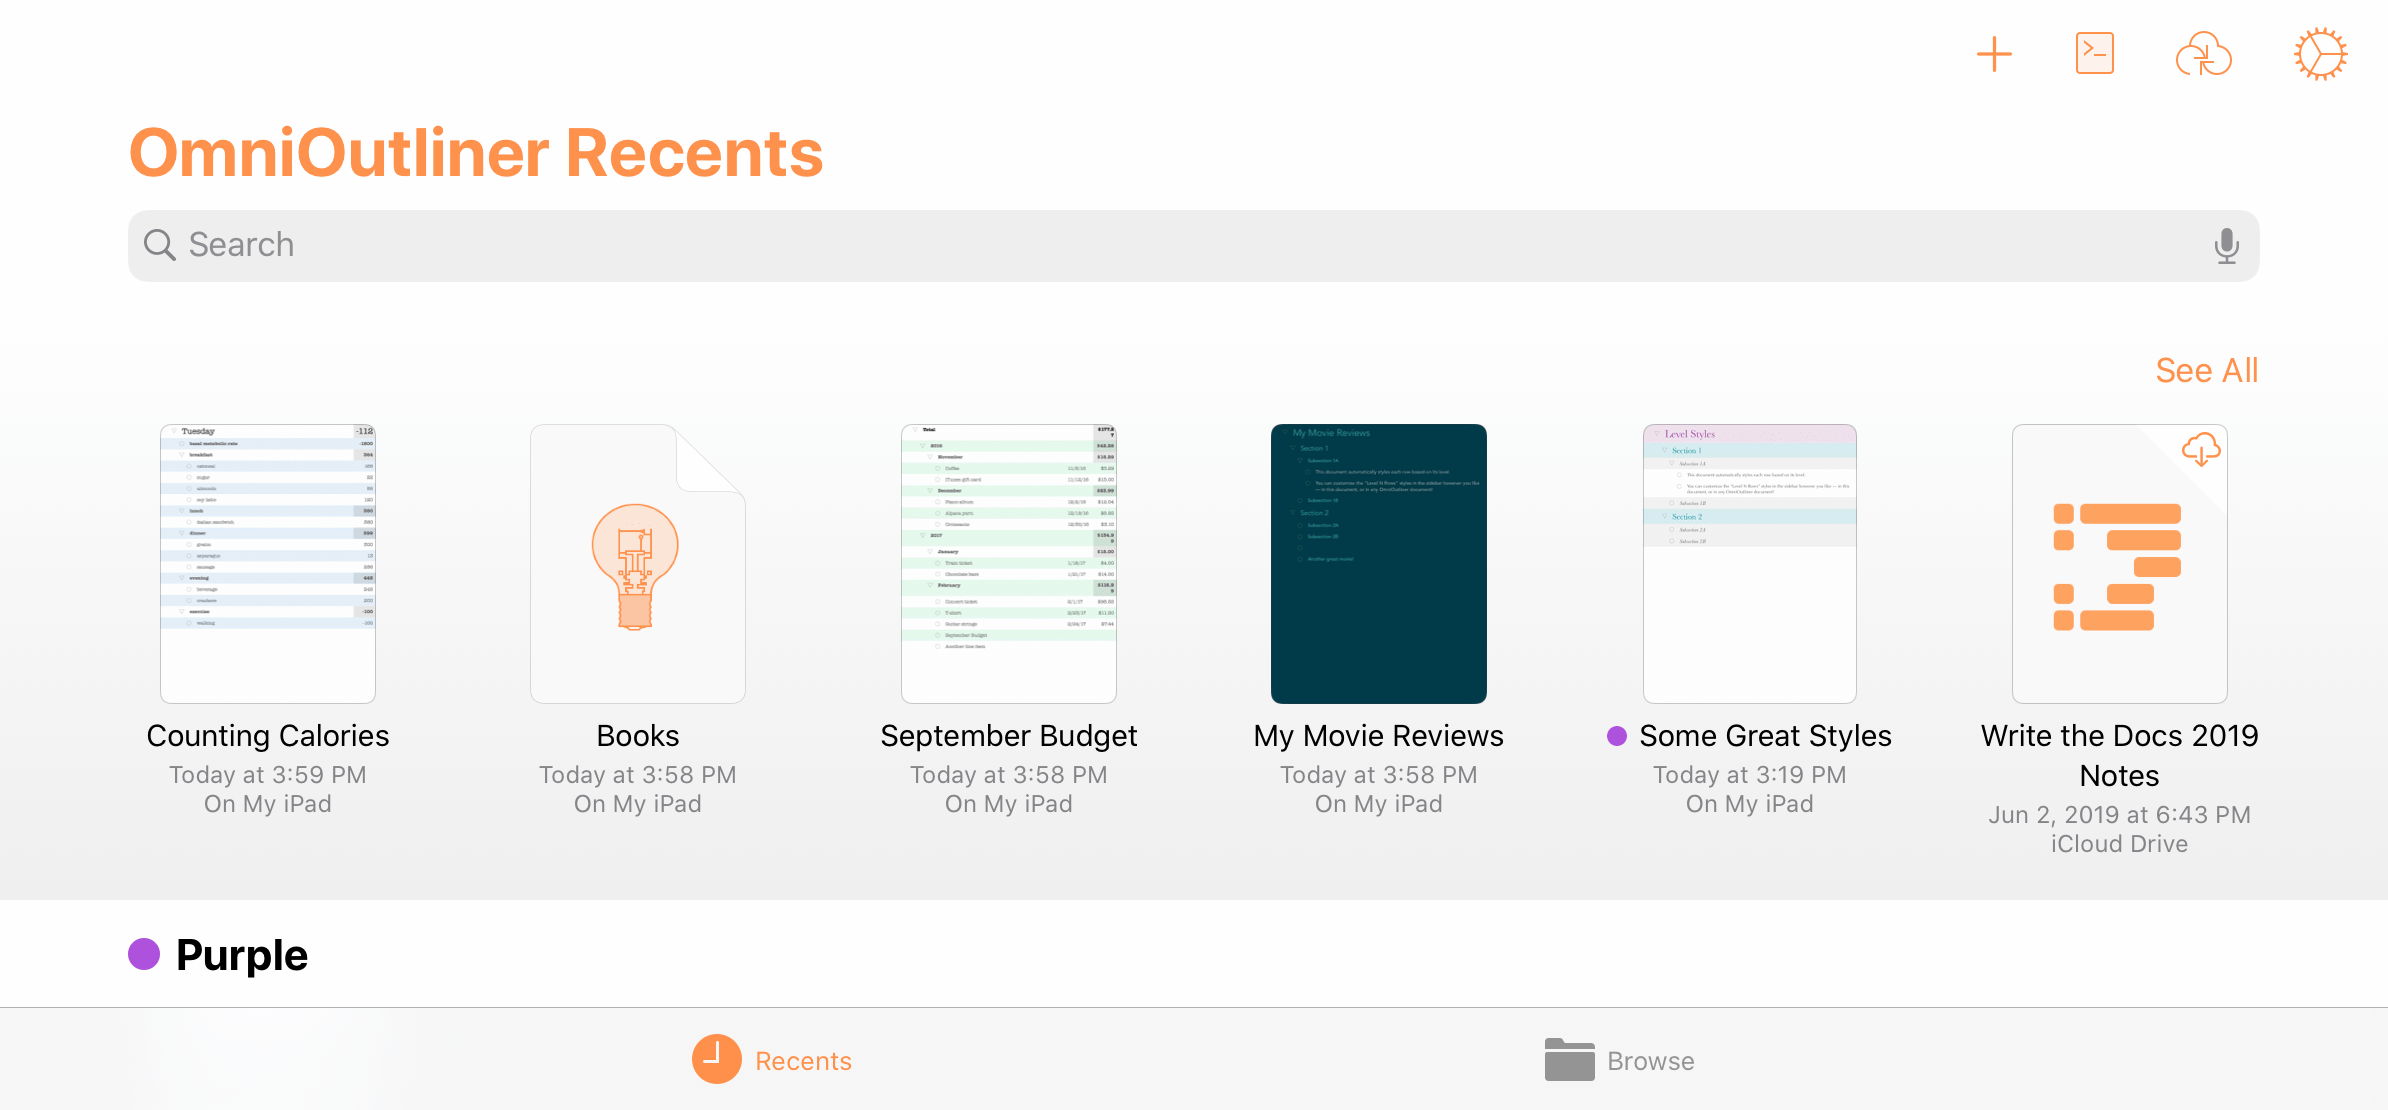
The Recents view is a flat list of files sorted by date from most recently accessed to oldest. If you don't see a file here that you expect, you can use the Search dialog to look through all the files available, or switch to the Browse view to look through the hierarchy of files on your device along with any connected cloud locations.
Browse View
Tap the folder icon  to switch to the Browse view of the document browser, which displays the hierarchy of locations and folders you have stored on your device, as well as any connected cloud service providers.
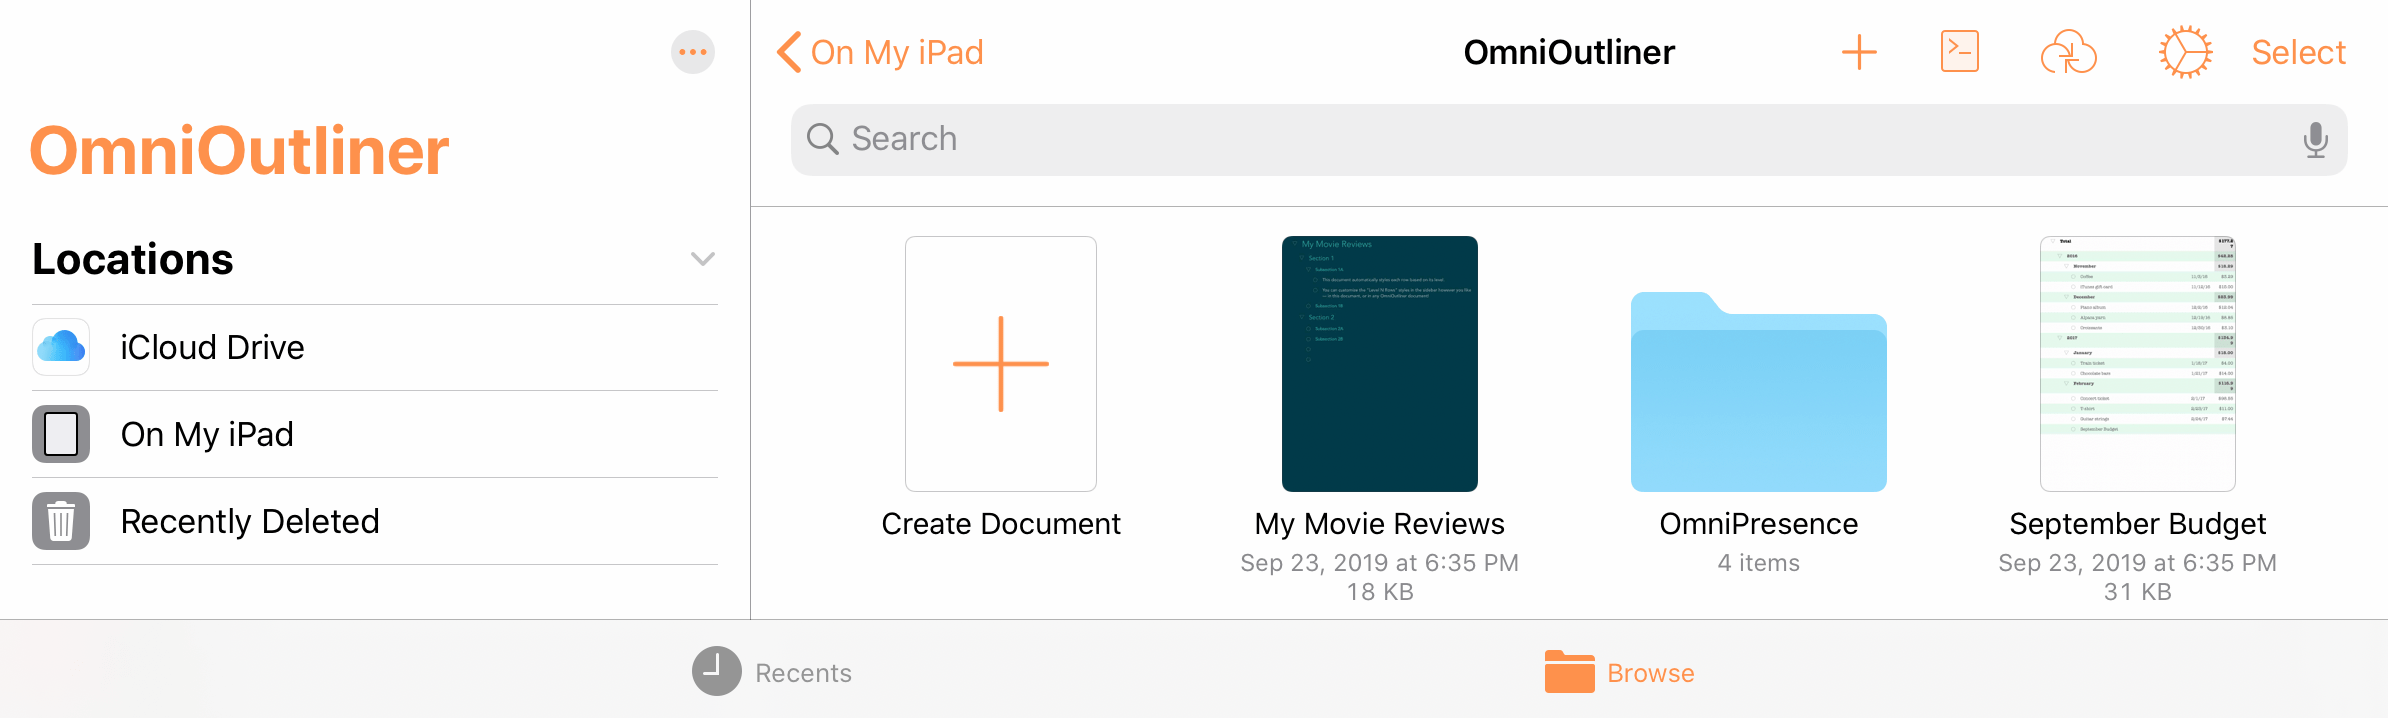
In wide device views, the Locations list offers high level navigation on the left side of the screen, with the contents of a selected location shown on the right; in compact views, Locations sits at the top of the navigation hierarchy with specific locations and their contents nested beneath.
The Locations List
When browsing your files, the Locations list displays the storage destinations that are available on your device. This always includes On My [device], which contains all of your files stored locally. If you have an Apple ID connected, iCloud Drive also appears as an available cloud storage location.
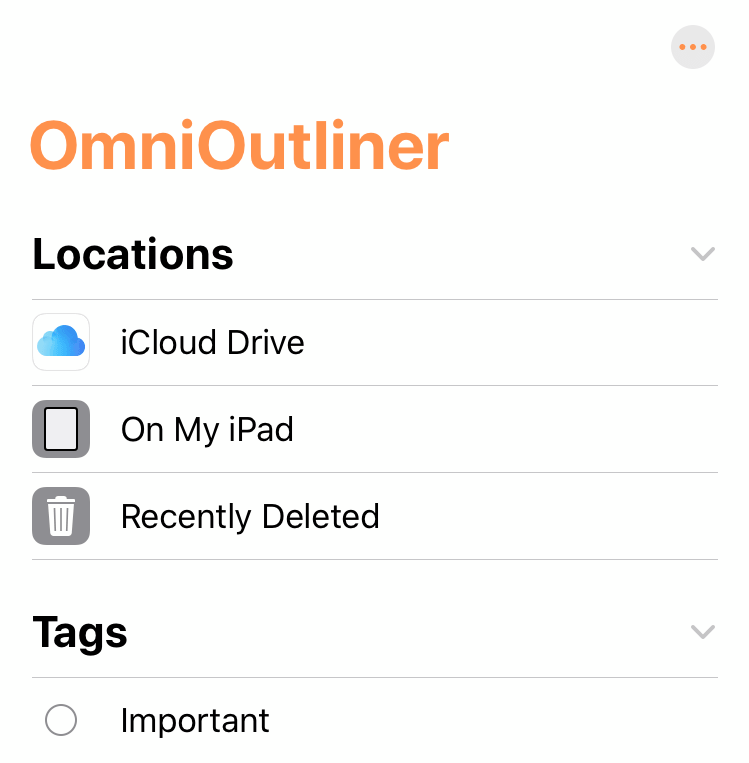
If you have any additional cloud storage providers installed on your device they will appear in this list as well.
Note that OmniPresence, the cloud sync solution operated by the Omni Group, does not appear in the list of service providers here because it doesn't run as a separate application. Instead, you can sync with a dedicated OmniPresence folder inside your On My [Device] > OmniOutliner folder, as described here.
Not all cloud storage providers work equally well with all file formats. We recommend using iCloud Drive or a connected OmniPresence folder to sync your OmniOutliner files; other providers may have trouble depending on the technologies they use.
The final item in the Locations list is Recently Deleted, where iOS temporarily stores files after you have deleted them in case you want them back.
Managing Deleted Files
If you delete an OmniOutliner file, that file is moved to the Recently Deleted folder in the Locations list.
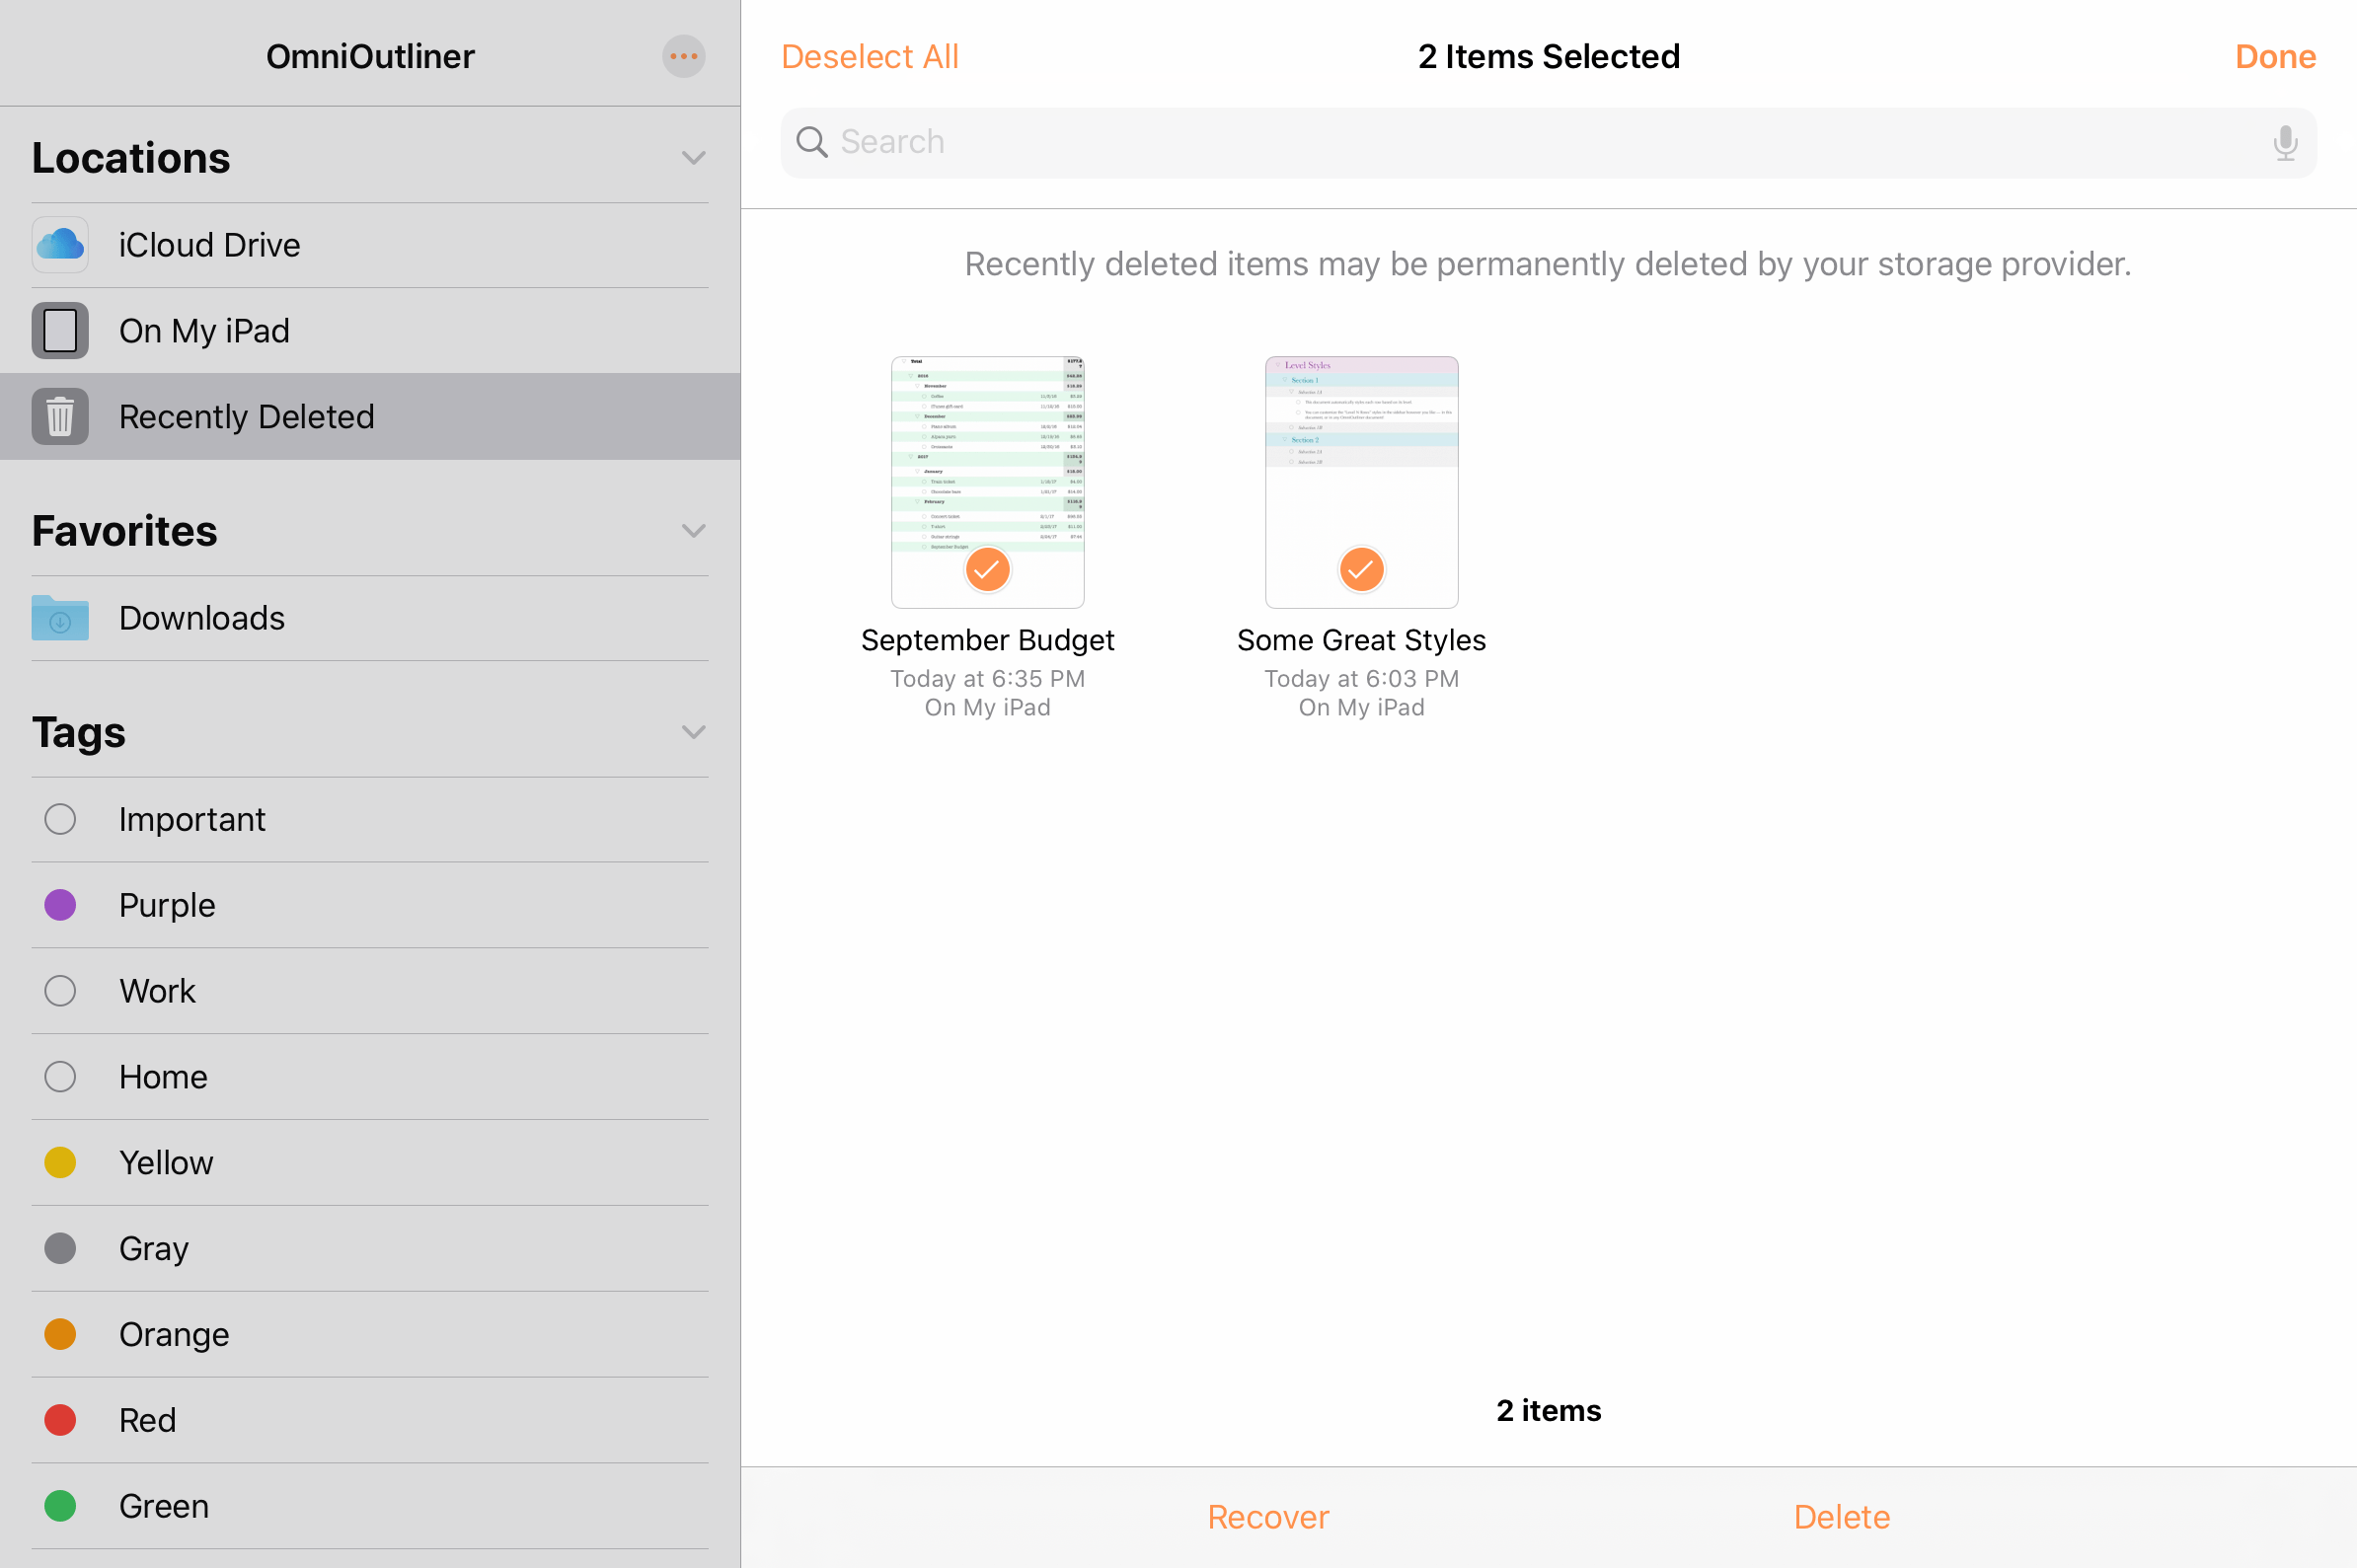
To manage files in the Recently Deleted folder, tap Select in the upper right and tap the thumbnails for each file you would like to manage. Options appear at the bottom of the screen to either Recover the files, returning them to their previous location, or Delete the selected files permanently.
Note that files stored with some cloud storage providers may be permanently deleted immediately instead of moving to Recently Deleted first. Because these recovery standards differ, it's a good idea to always take care when deleting files.
Beneath the list of available locations is a list of Tags. Tap a tag in the list to view all of the items with that tag applied; you can apply tags to individual files using their contextual menu (see File Details below).
Finally, the More button  at the top of the Locations list provides additional functions for modifying the contents of the list.
-
Connect to Server—Choose a server to connect to via SMB, adding it as a location in a separate Shared section of the Locations list.
-
Edit—Switch the list to Edit mode, where you can rearrange locations and tags, and choose which locations you want to be visible in the list. Note that changes made here apply to the Locations list everywhere it appears, including the Files app and other apps that use the iOS document browser.
Browsing a Location
Upon selecting a location in the Locations list, its contents appear in a pane to the right (this pane appears on top of the Locations list when in compact views).
A search field at the top of the pane offers options to search recently opened files, the entire current location, or just the current folder for filenames that match the search terms.

Drag down on the browsing pane to access more controls for the location, choose how files are sorted, and switch between thumbnail and list views.
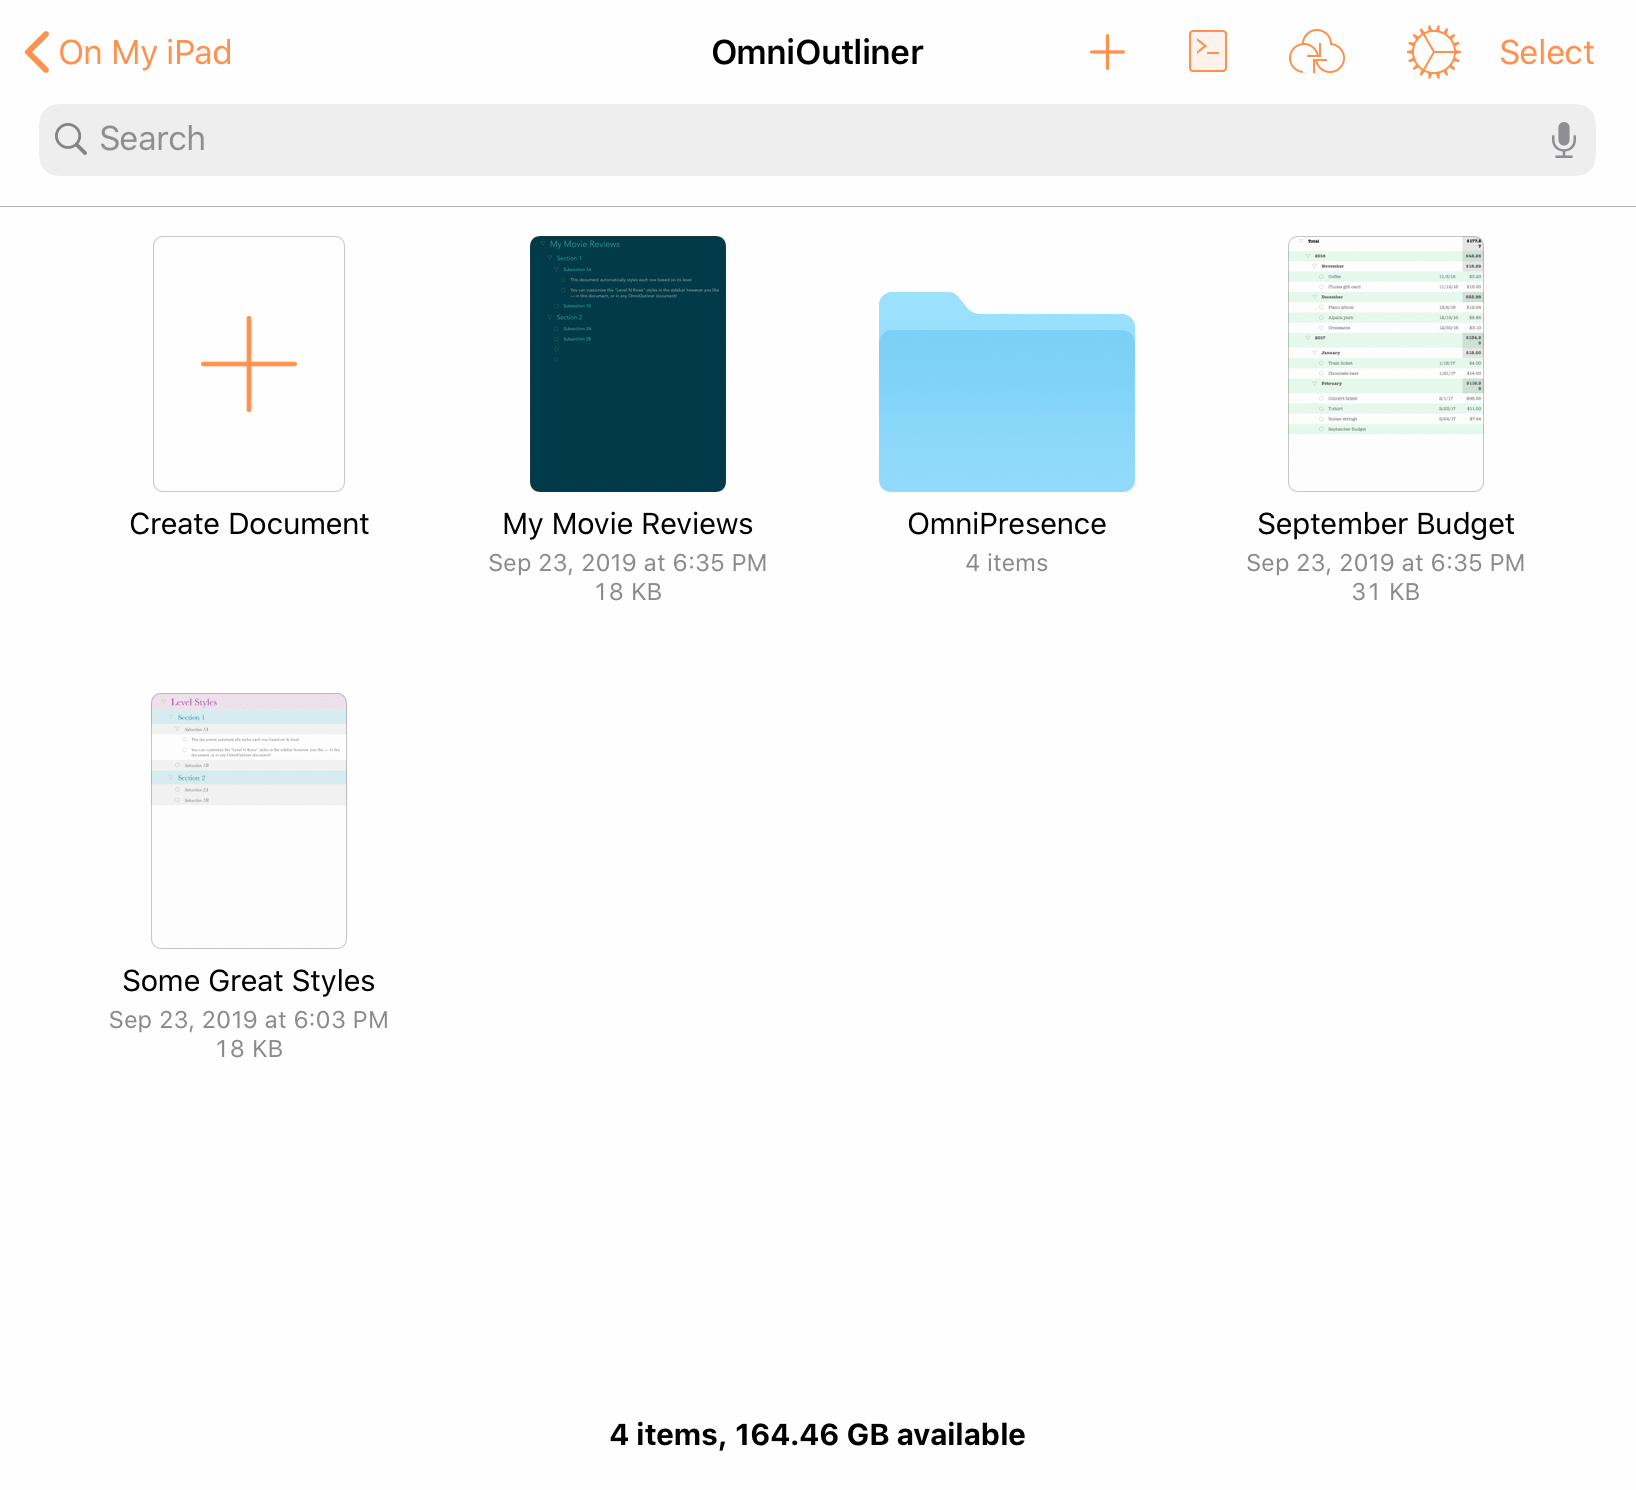
File Details
Each file is represented by a thumbnail image. Once modified, OmniOutliner generates a preview based on the contents of the file; otherwise, the file is represented by a generic document icon.
Along with the thumbnail, each file displays its name, the date it was last opened, and its location on your device.
-
Tap a document preview to open the associated file.
-
To change the name of a file or folder, tap the name and then enter a new title.
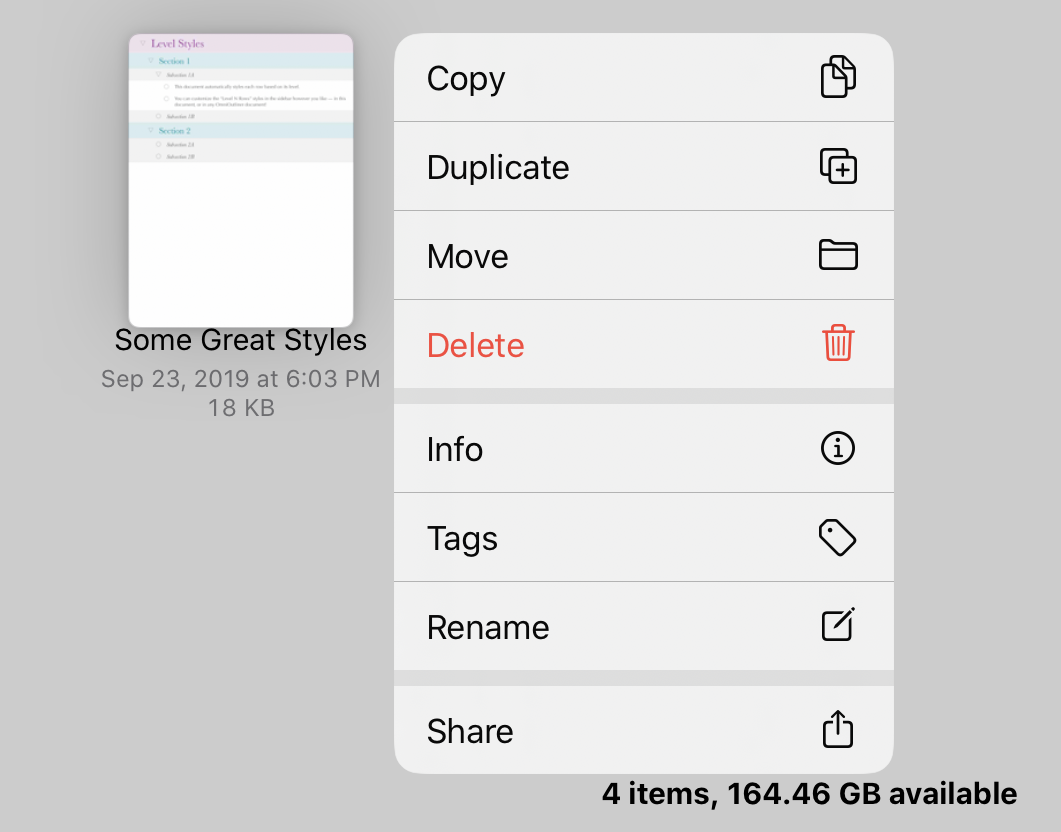
Contextual Menu
Tap and hold a file's thumbnail to open a contextual menu for the file, with the following commands:
-
Copy—Copies the selected file and makes it available on the clipboard for pasting.
-
Duplicate—Copies and instantly pastes a copy of the selected file at the current location.
-
Move—Opens a hierarchical view of your locations where you can choose a new destination for the file.
-
Delete—Deletes the selected file (it can still be recovered if necessary).
-
Info—Presents a popup with detailed information on the file, including a larger document preview, metadata related to the file's creation and modification, location on your device, and any tags you have assigned.
-
Tags—Presents the list of available tags along with the option to create a new one. Tap a tag in the list to assign it to or remove it from the file.
-
Rename—Opens the file rename dialog, just as if you had tapped its name in the document browser.
-
Share—Opens the iOS share sheet, where you can choose from among the standard array of iOS share destinations as well as additional OmniOutliner-specific share options, as described below.
Sharing and Exporting
From a file's contextual menu or with a file selected, tap the Share button  and then choose one of the following actions to perform on the file.
Share As... 
Choose a format for sharing the file, and then choose a destination from the standard set of iOS share destinations.
When sharing an OmniOutliner file, you can choose the format to share or send as either an OmniOutliner file, an OPML file, Dynamic HTML, Simple HTML, PDF, Plain Text, CSV, XLSX, DOCX (plain or indented), or PowerPoint PPTX.
Print 
Prints the selected file to an AirPrint printer of your choosing.
To save the file as a PDF rather than printing to paper, choose PDF document when exporting with the Share As... command listed above.
Create Template from Outline 
Creates an OmniOutliner template file from the selected outline document.
Copy 
Copies the selected file to the clipboard.
Learn more about OmniOutliner import and export in Opening and Exporting Files.
OmniOutliner File Types
Several file types are associated with OmniOutliner outlines, templates, and plugins. Files of these types can be opened, edited, and saved within OmniOutliner for iOS.
-
.ooutline, .otemplate—The newest standard file formats for OmniOutliner outlines and templates, as created by OmniOutliner 3 for iOS and OmniOutliner 5 for Mac. These formats support all of the new features of these versions of OmniOutliner.
-
.oo3, .oo3template—Older formats used by OmniOutliner 2 for iOS and earlier, as well as OmniOutliner 3 and 4 for Mac. These files can be read and edited by OmniOutliner 3 for iOS, but do not support the full feature set of the newer formats.
If warnings are turned on in OmniOutliner Settings, upon opening a file in an older format you are presented with the option to convert it.
- .opml—The Outline Processor Markup Language format, which is not unique to OmniOutliner but can be both read and written by it. Some features such as text and document styles are not supported by this format.
OmniOutliner can import and convert files of other non-native formats; in these cases, the files are copied into the app as outlines and the originals are left behind.
The Location Toolbar
When viewing the contents of a location in the document browser, the toolbar along the top of the screen includes the following buttons:

Back 
On the far left of the toolbar is the Back button, followed by the name of the folder that contains the files being viewed. Tap to go backward in the folder hierarchy or return to the Locations list.
Folder Title 
At the center of the folder toolbar is the name of the current folder (such as On My iPad).
Add New 
Tap to create a new OmniOutliner document. After tapping Add New, the Template Chooser opens and displays a list of available templates for your document (starting with the custom templates you've created, if any).
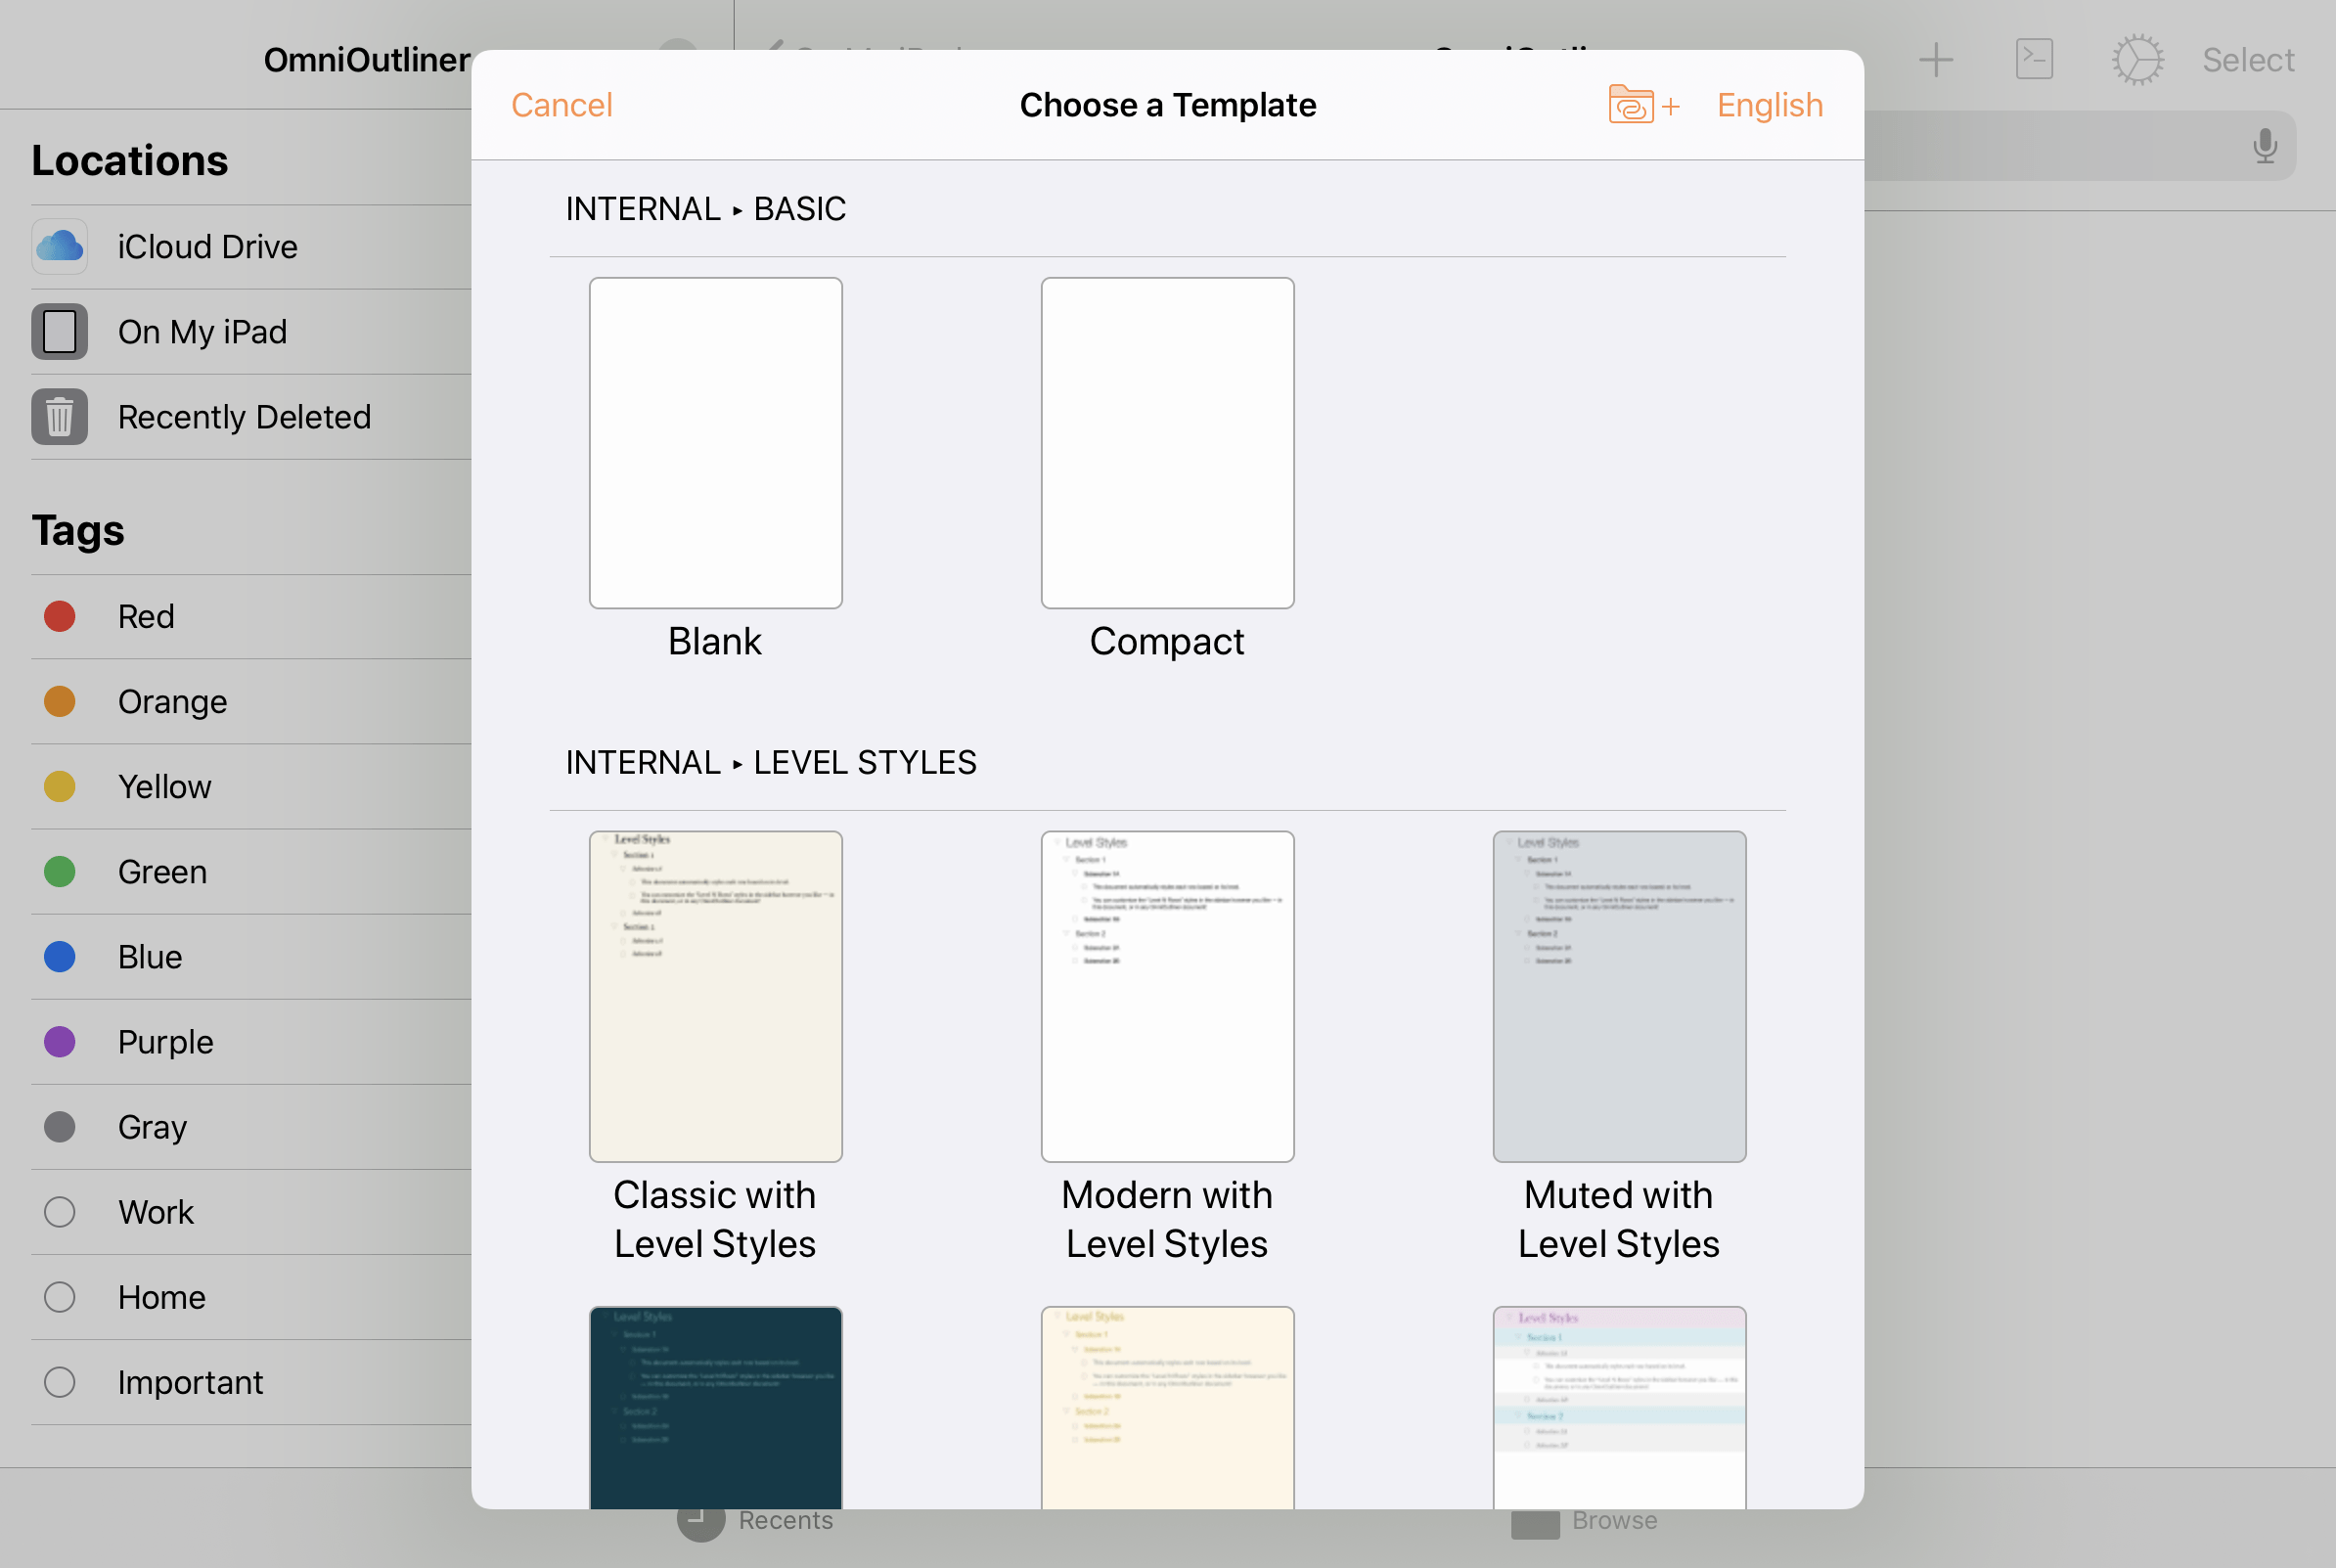
If you would prefer to create a document based on a template in a language other than the system default, tap the language name in the upper right for a list of available alternatives.
Choosing a template creates a new document pre-populated with the contents of that template, including sample text (if any) and all of the template's default structural and named styles.
To add templates from other locations on your device, tap  in the template chooser or use Configure Resource Locations in OmniOutliner Settings to connect the folders that contain them.
Automation Menu 
Tap to open a menu with controls related to Omni's JavaScript automation.
-
Automation Console—Opens the automation window to the console pane.
-
Automation API Reference—Opens the automation window to the API reference pane.
-
Configure Plug-Ins—Opens a pane that contains a list of automation Plug-Ins on your device, and controls for linking to a folder that contains Plug-Ins stored elsewhere (such as a cloud storage location).
If any Plug-Ins are installed, they appear in a list titled Actions beneath the Configure Plug-Ins menu item.
Learn more about automating OmniOutliner at the official Omni Automation website.
With OmniOutliner 3.9 and later, you can use shortcuts created with the Shortcuts app to run OmniOutliner's Omni Automation Plug-Ins and scripts. Learn more at the Omni Automation website.
OmniPresence Menu 
With an OmniPresence folder connected, the OmniPresence menu button appears in the toolbar. Tap it to open the OmniPresence menu, where you can download files to a connected OmniPresence folder or navigate directly to them by tapping files in the list.
See this support article for details on using OmniPresence with iOS 13 and later.
App Menu
Tap to open a menu with tools and settings related to OmniOutliner itself. See The App Menu below for details.
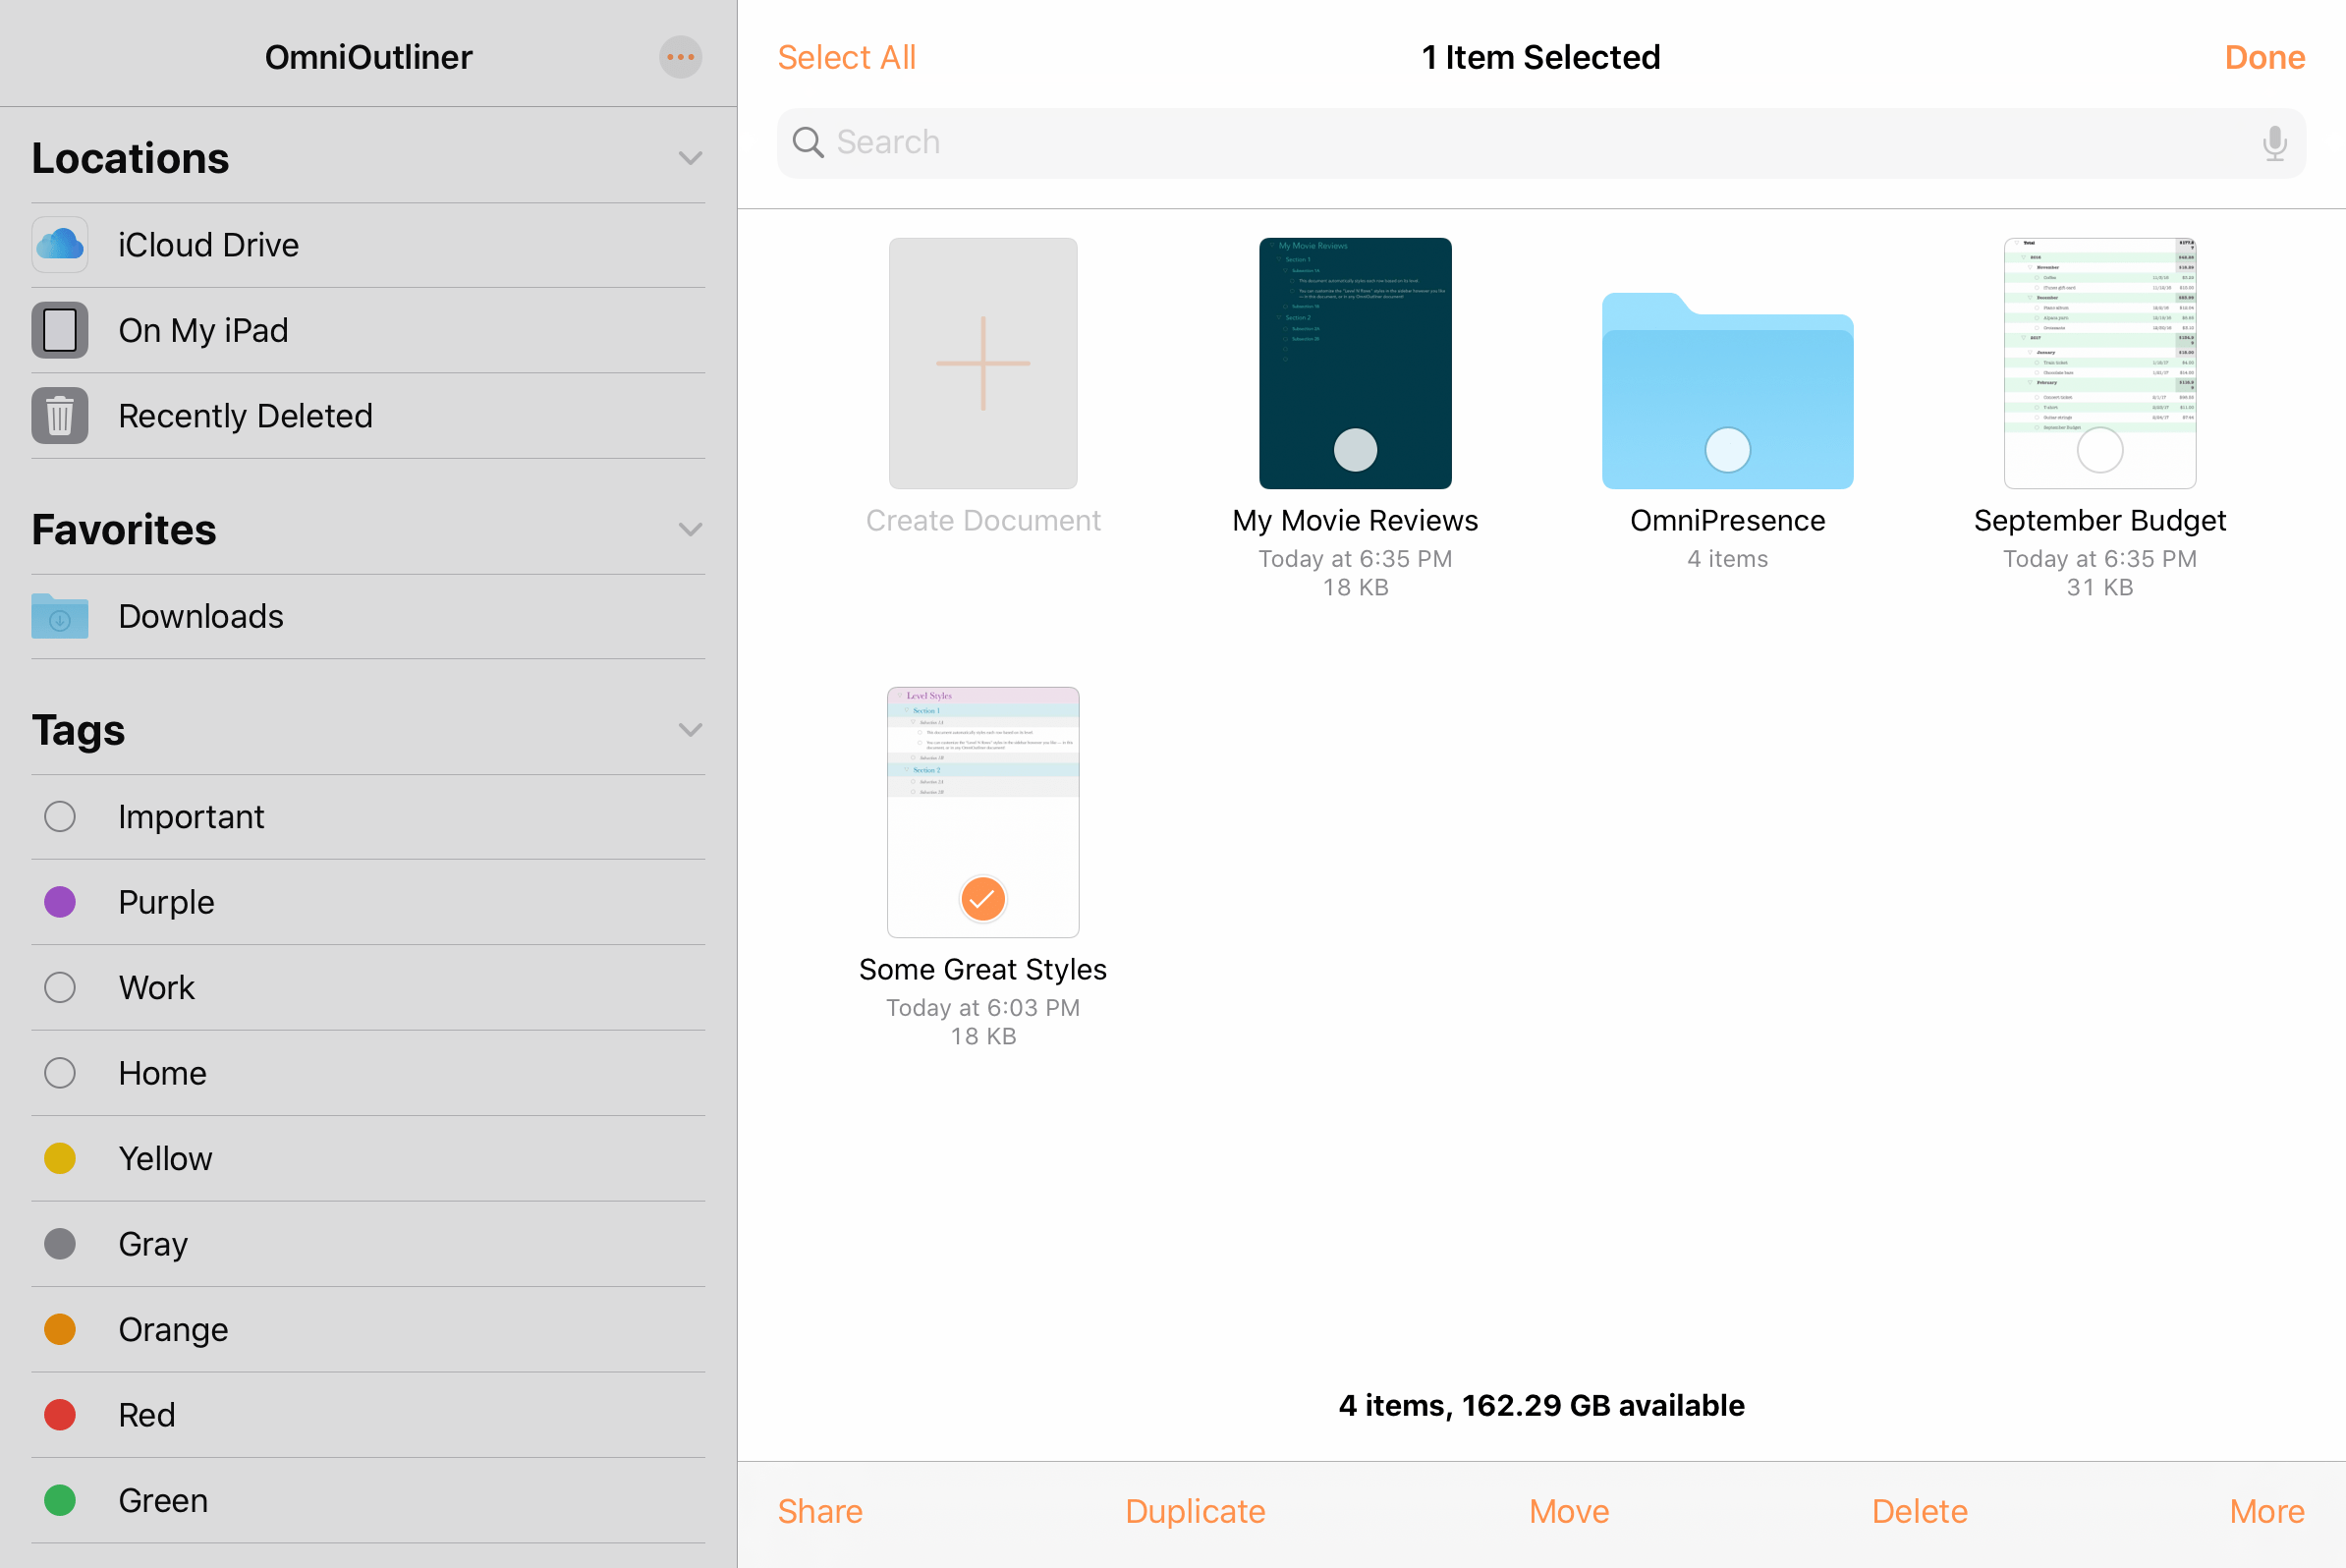
Select
At the far right edge of a folder’s toolbar is the Select button. When tapped, Select makes it possible for you to tap to select documents within a folder. Once a document is selected, use the buttons in the bottom toolbar to share or duplicate the file, move it to another folder, delete it, or copy it.
The App Menu
When viewing the contents of a location in the document browser, tap  at the top of the screen to open the App Menu:
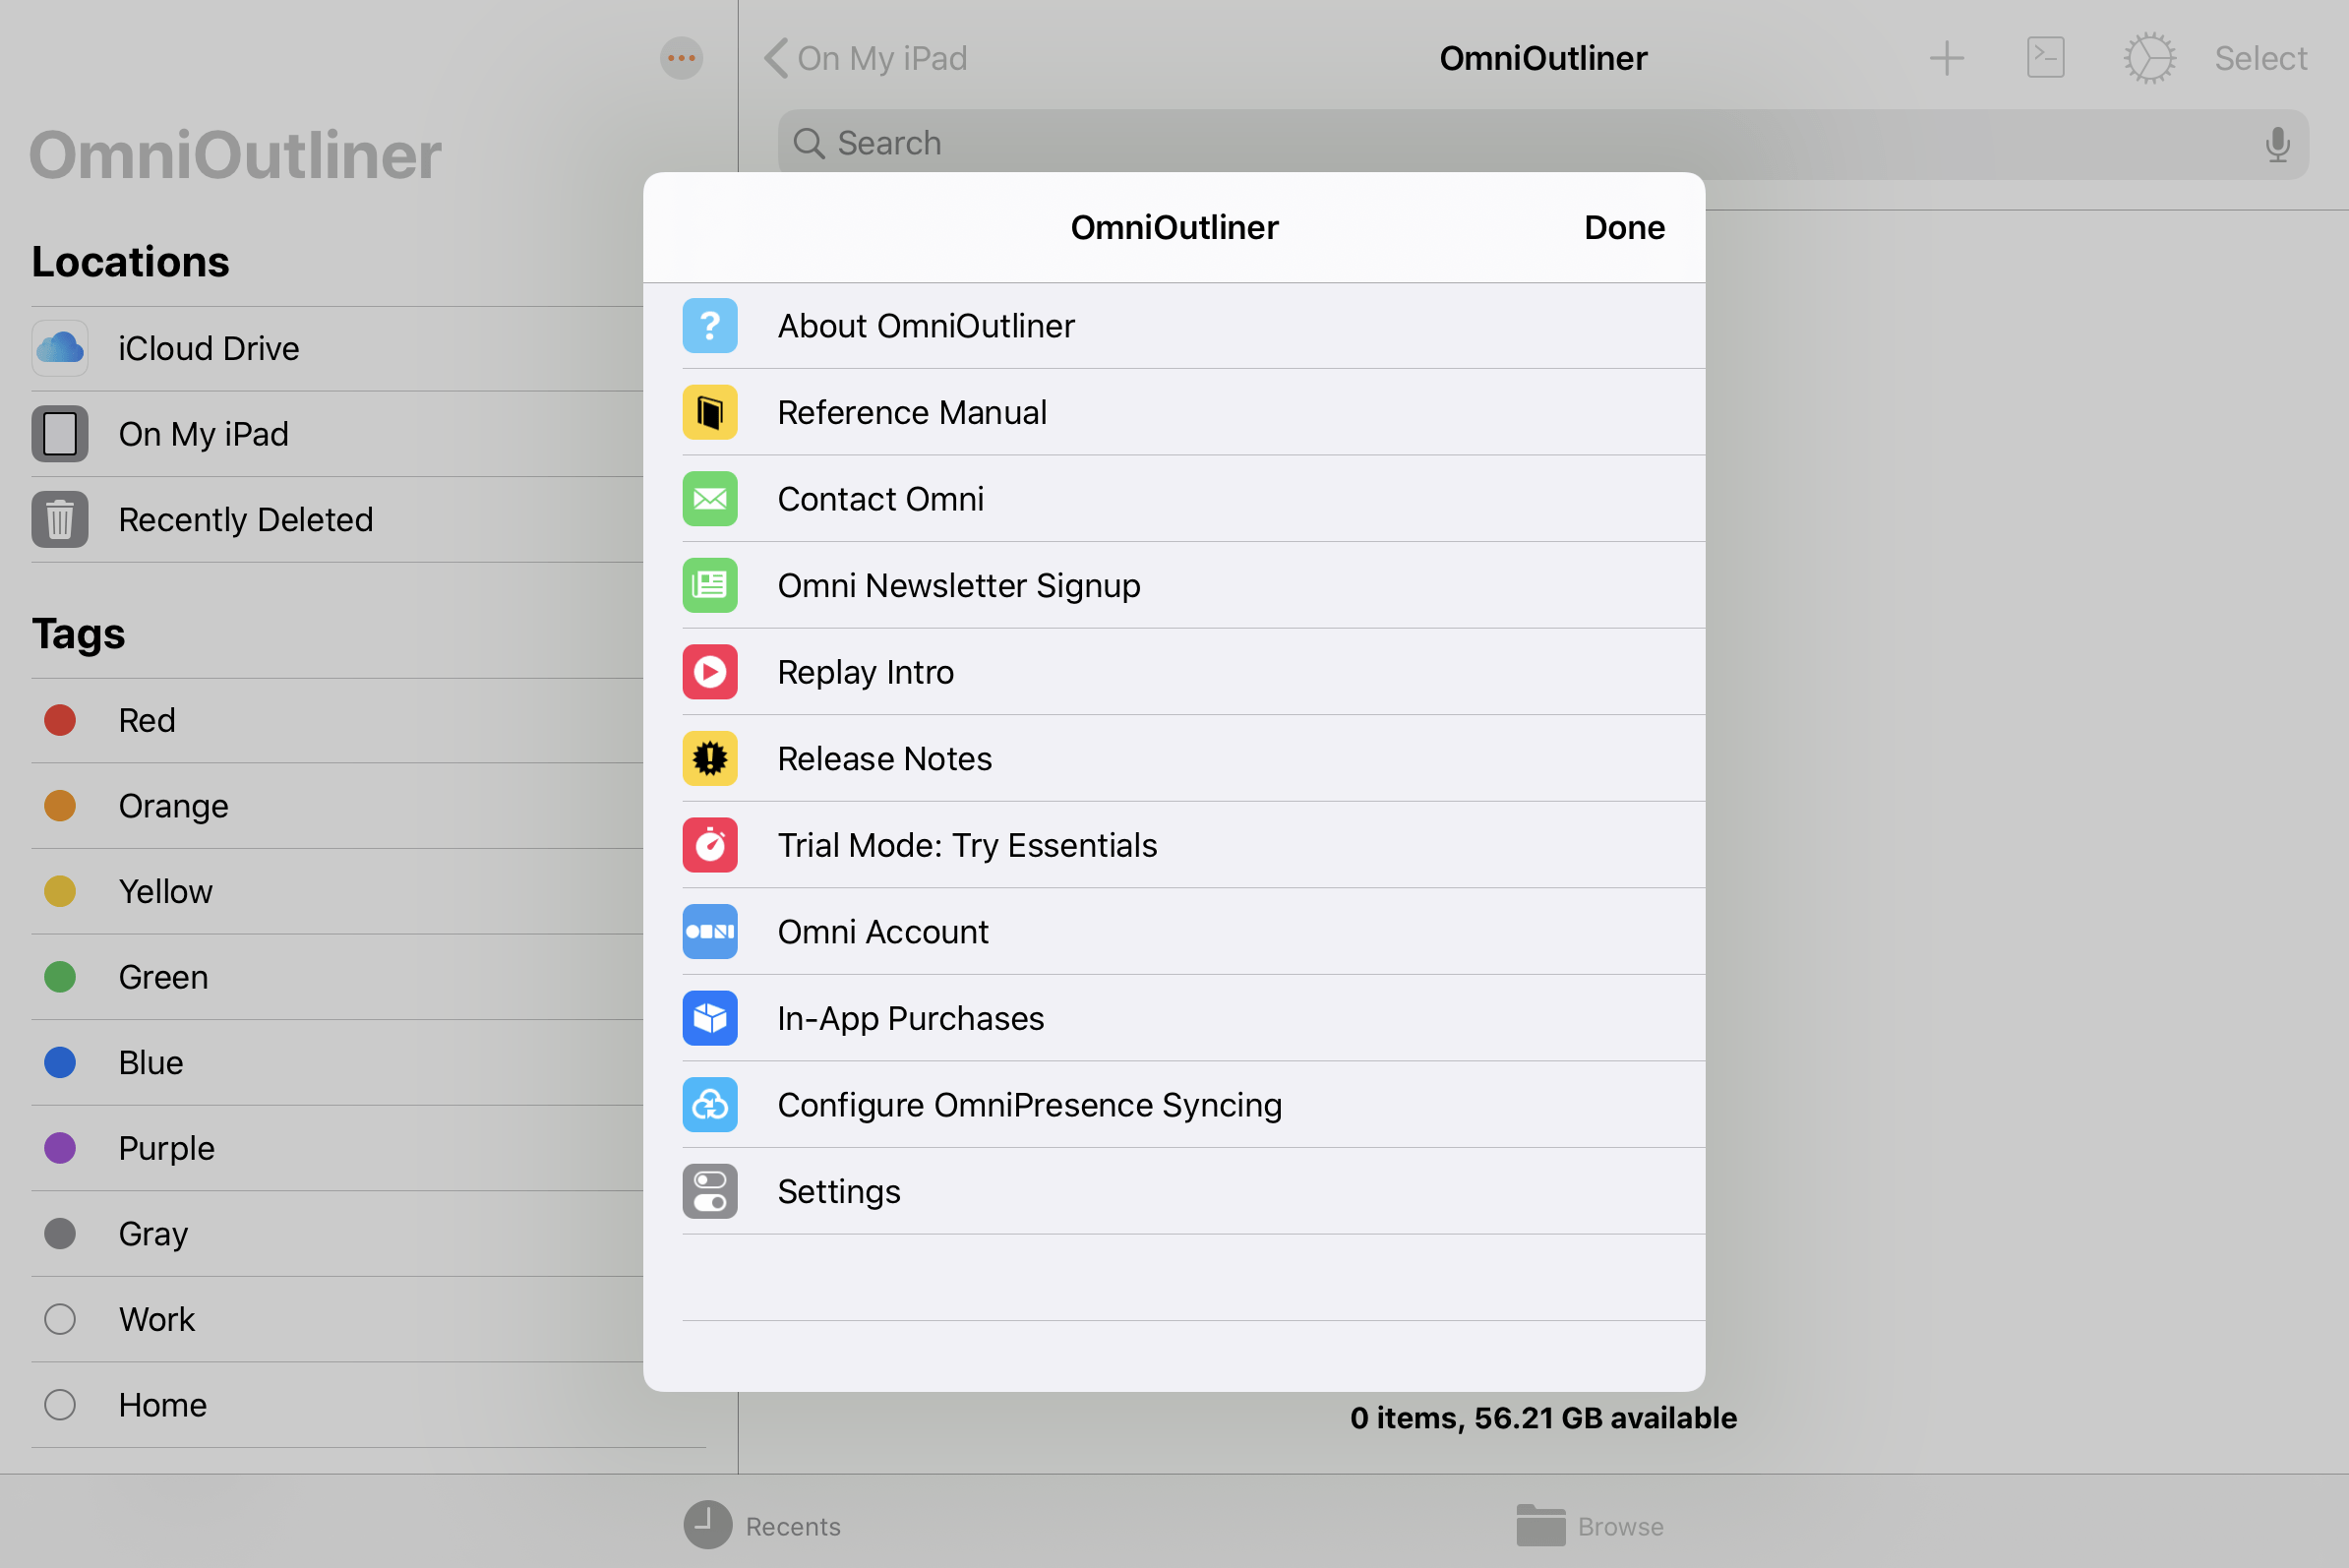
The App Menu has the following options:
About OmniOutliner 
Tap to see which version of OmniOutliner is installed on your device, and to find Omni’s contact information.
Reference Manual 
Tap to view the in-app reference manual.
Contact Omni 
Tap to send us an email.
Omni Newsletter Signup 
Tap to subscribe to Omni’s quarterly newsletter via email. When tapped, you are taken to the Omni website where you can enter your email address to subscribe.
Replay Intro 
Tap to revisit the introductory experience and tutorial presented the first time you opened OmniOutliner.
Release Notes 
Tap to see what’s new in the current release. The release notes are also available on Omni’s website.
Trial Mode 
Trial Mode is only available prior to purchasing the upgrade to OmniOutliner Essentials or Pro. Tap to switch between Essentials and Pro to see which version is right for you.
Omni Account 
Tap to open the Omni Account sign in sheet. If you are an OmniOutliner subscriber, use this window to sign in to your Omni Account and unlock the full OmniOutliner feature set.
In-App Purchases 
Tap to purchase the upgrade from Trial Mode to either OmniOutliner Essentials or Pro. This is also where you can restore purchases, if you ever need to reinstall OmniOutliner on a device.
Configure OmniPresence Syncing 
Tap to connect an OmniPresence cloud synced folder to your device. Documents in this folder are automatically synced to the cloud whenever a change is made. You can sync with a free Omni Sync Server account, or an OmniPresence-capable WebDAV server of your choice.
See this support article for details on using OmniPresence with iOS 13 and later.
Settings 
Set preferences for working in OmniOutliner. See OmniOutliner Settings for more details.
The Outline and Edit Bar
The Outline is the primary window on your content in an OmniOutliner document. Here you'll see your data laid out hierarchically with rows and columns, and use the Edit Bar below to add and edit additional rows, notes, and audio recordings.
The Anatomy of an Outline
An outline in OmniOutliner Pro is composed of one or more rows and one or more columns, with data entered into the cells created by their intersection. The Topic column can additionally display rows in hierarchy, offering the ability to create sophisticated outline structures.

Rows
In OmniOutliner, rows display text or other data in a way that is conducive to hierarchical display. In addition to the main text field, rows have other components that make them even more useful: handles ![]() for repositioning, collapsing, or expanding sections; notes for adding related content; and checkboxes
for repositioning, collapsing, or expanding sections; notes for adding related content; and checkboxes  for managing lists.
Columns
All outlines contain at least one column used for the vertical structure of the outline's data. Many templates contain only the single hierarchical Topic column, but others use multiple columns to organize and separate data of different types.
In a given document the column headers may be hidden by default; use the Column Headers control in the Document inspector to reveal the column headers in the outline.
Use the controls in the Document inspector's columns list to add columns to the outline, change their visibility, and edit their details (such as name and column type). Drag handles to the right of each column's name in the column header to resize the columns manually.
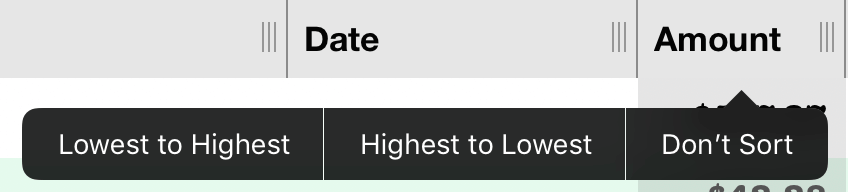
To sort the contents of a column, touch and hold the column header to reveal the contextual menu, then choose Sorting for options specific to each column. Columns are sorted with logic depending on their column type.
Editing Rows and Notes
Tap a row cell to select it for editing. A cursor appears in the cell for adding text or data.

When editing a row, touch and hold it to reveal the contextual menu. In addition to the iOS-standard controls for styling, selecting, copying, and pasting text, you can:
-
Tap Paste Plain to paste the most recently copied item at the location of the cursor. Any text styles will be removed, and the text will inherit existing custom styles on the row.
-
Tap Split Row to split the row at the location of the cursor, creating a new row that contains any contents of the current row that follow the cursor position.
-
Tap
 to add a line break at the location of the cursor, creating a new paragraph (or adding a carriage return) within the row.
To edit a note, tap the Notes button  in the edit bar to expose the note on a row and then tap the note field to open it for editing.
Alternatively, tap the notes column adjacent to a row to reveal the note field for that row.
Adding Hierarchy to Rows
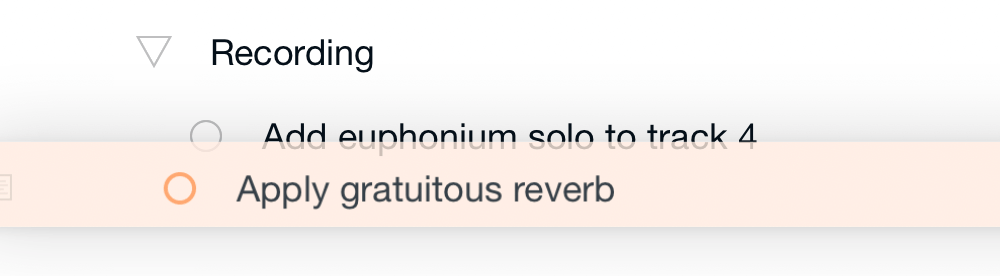
Tap the row handle ![]() to the left of a row to select it, then tap Indent
to the left of a row to select it, then tap Indent  in the Edit bar to convert the row to a child of the row above it—the child row is now contained inside its parent, and considered 'inside' it for purposes of organization and positioning.
The handle of the new parent row changes from ![]() to a disclosure triangle
to a disclosure triangle ![]() to indicate that it contains additional rows inside it.
to indicate that it contains additional rows inside it.

Tap a parent row's disclosure triangle to collapse and expand its contents. A vertical line descending from an open disclosure triangle denotes the span of child rows contained in the parent row.
Any number of levels of hierarchy can be added to the outline (provided there are enough rows to keep indenting), and each level can be given its own unique structural style to visually distinguish rows at the same level with their peers.
Copying and Pasting Rows
Touch and hold a row, then release it to reveal its contextual menu. This contains several editorial functions such as Cut, Copy, and (with something on the pasteboard) Paste.

Choose any of these commands to edit the outline as needed. When using the contextual menu to paste, the option is presented to paste above, below, or inside the target row (adding the pasteboard contents as children).
When copying and pasting a row with children (one with a disclosure triangle ![]() handle), the parent row and all of those hierarchically nested beneath it come along for the ride.
handle), the parent row and all of those hierarchically nested beneath it come along for the ride.
Organizing Rows With Drag and Drop
Touch and hold a row handle ![]() or disclosure triangle
or disclosure triangle ![]() to pick it up, then drag it elsewhere in the outline to reposition it. When you have the row where you want it to be, let go and it will fall into place.
to pick it up, then drag it elsewhere in the outline to reposition it. When you have the row where you want it to be, let go and it will fall into place.
As you drag a row over others, they will move apart to make room for the row you're holding to be dropped between them as a peer (if dragging between a parent and child, the dropped row becomes a peer of the child). If you position a row directly atop another before dropping it, the row beneath is highlighted and upon being dropped, the held row becomes a child of the one you drop it on top of.
When dragging and dropping a row with children (one with a disclosure triangle ![]() handle), the parent row and all of those hierarchically nested beneath it come along for the ride.
handle), the parent row and all of those hierarchically nested beneath it come along for the ride.

Multiple rows can be picked up at a time. To do this, touch and hold the first row you want to move, then tap each other row to add them to the selection (each row is picked up and added to the first). Dropping multiple rows works just like dropping a single one; any hierarchy in the rows you pick up will be preserved after dropping them.
Edit mode is available as an alternative to drag and drop for more complex organizational tasks, such as copying and pasting or moving multiple discontiguous sections at once.
The Edit Bar
The edit bar is located beneath the outline, and contains all the basic controls you need to add content to your document and organize it.

Indent and Outdent 
Use the Indent and Outdent buttons to add hierarchy to your outline.
Tap to indent the selected row, making it a child of the row above it. Tap to outdent the selected row, making it a parent of the row or rows below it.
Audio Recording 
Tap to start an audio recording. Tap  to pause the recording, and tap
  to end and save it.

The first time you record an audio clip, OmniOutliner asks for permission to access your microphone and to access notifications. This is in order to check for available recording space on your device; OmniOutliner will send you a notification if space is running low.
When you finish a recording, the audio file is attached to the outline in a new row beneath the current selection (or at the end of the document, if nothing is selected). The audio attachment file is labeled with the timestamp of the recording.

Tap the recording file in the row to play it back, and tap it again to pause playback. During playback, controls to start, pause, and cancel playback appear in the edit bar as well.
To delete an audio recording from the document, open its row for editing and press delete to remove it just as you would a piece of text.
Recorded audio is saved in the .m4a file format at a 22,050 Hz sample rate by default. If storage space is not a concern, a higher quality 44,100 Hz setting is available in OmniOutliner settings.
Notes
Tap to edit the note on the currently selected row. Touch and hold the Notes button and other options appear as flyouts: tap  to expand all notes in the outline, and tap
  to collapse all notes.
New Row 
Tap to add a row to the outline that is beneath and at the same level as the currently selected row. Touch and hold the New Row button and other options appear as flyouts.
-
Add Parent

Tap to add a row above and one level of hierarchy higher than the selected row.
-
Add Above

Tap to add a row above and at the same level as the selected row.
-
Add Aunt

Tap to add a row beneath and one level higher than the selected row.
-
Add Child

Tap to add a row beneath and one level lower than the selected row.
-
Expand All

Tap to expand all sections of the outline, revealing every row.
-
Collapse All

Tap to collapse all sections of the outline, hiding all but the top level rows.
Attaching Files
OmniOutliner supports adding just about any type of file to the outline as an attachment.
There are two ways to attach files to an outline:
-
Touch and hold an item in another app to reveal the contextual menu and choose Copy. Then switch to OmniOutliner, and touch and hold at the location in the outline where you would like to attach it and choose Paste from the contextual menu that appears.
-
With multitasking on iPad, drag and drop items directly from other apps into OmniOutliner.
The way that OmniOutliner handles attachments differs slightly depending on the file type.
-
OmniOutliner recognizes all common image types (such as JPEG, PNG, and GIF), and adds them to the outline as images imbedded in the row where they are dragged or pasted.
-
Files of other types (such as OmniGraffle diagrams or OmniPlan projects) are represented in the rows where they are added by icons indicative of the file type.
Tap an attachment to open the iOS share sheet and access the standard array of controls that it provides for duplicating, saving, or copying the file to another application.
Dragging from the Outline
When multitasking on iPad, you can drag rows and selected text from the outline to other apps. This enables you to quickly export text from the outline or place it in other apps on your device.
For example, you can drag rows, sections, or text selections to:
- ...Files, creating a new text file (named "text" by default) in the target location, such as another app’s local documents folder or iCloud Drive.
- ...Mail or Notes, adding the selected rows as a hierarchically indented plain text list.
By default, when you drag out of the OmniOutliner outline to another app, the selected content is exported in a hierarchically indented plain text list.
Use the controls in OmniOutliner Settings to determine whether handles are included in this text export.
For export options for the entire document, see Available Export File Formats.
The Document Toolbar
The Document Toolbar is located above the outline whenever you are working in an OmniOutliner document. The document toolbar presents document-specific controls, from opening and closing the sidebar or inspectors to sharing or exporting the currently open document.


On an iPad with iPadOS 16 or later and OmniOutliner 3.10 or later, you can customize the toolbar to include controls that you prefer.
From left to right, the default controls in OmniOutliner's document toolbar are as follows:
Show/Hide Sidebar 
Tap to show or hide the Sidebar along the left side of the screen. (This button is represented by  at smaller device widths.)
Documents 
Tap to close the current document and return to its folder in the Document Browser.
Document Title
The toolbar displays the name of the current document here. Tap to edit and change the file name.
On narrow devices the document title is hidden to leave room for more functional button controls. You can always change the title of your document by tapping its preview icon text in the document browser.
Only files stored in your On My [device] folder or a connected OmniPresence folder can be renamed within OmniOutliner. To rename other files (such as those stored in iCloud Drive), tap the filename in the Files app instead.
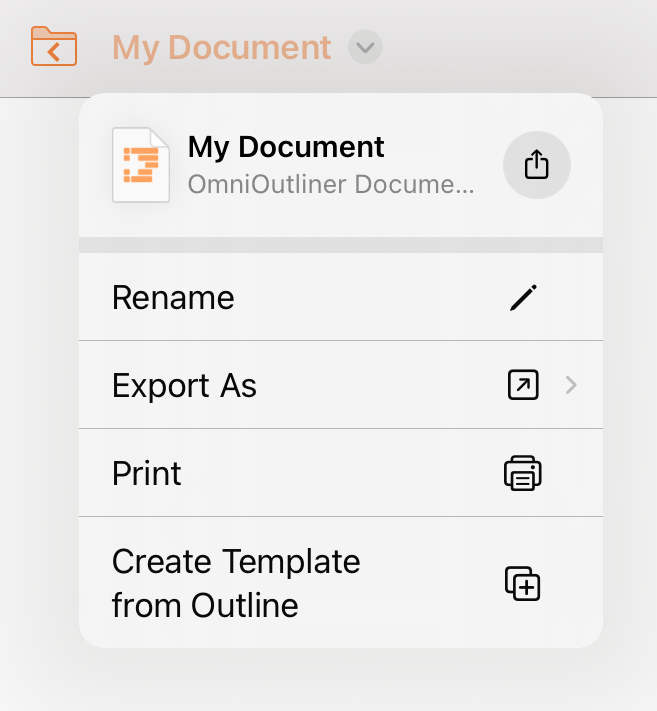
Starting with OmniOutliner 3.10 and iPadOS 16, the document title adds a menu that includes controls for sharing, exporting, printing, and creating a template from the document (in addition to renaming it), as described in Sharing and Exporting.
Sync with OmniPresence
This icon appears to the right of the document filename if the file is synced via OmniPresence. The icon indicates whether a sync is in-progress; tapping the OmniPresence icon initiates a sync
This icon doesn't appear in the toolbar in OmniOutliner 3.10 on iPadOS 16.
Sync Statuses
When editing a file synced with OmniPresence, the sync icon in the document toolbar can appear in the following states:
- Sync Ready
In its most basic state, OmniPresence is online and ready to sync files.
- Sync In-Progress

Whenever OmniPresence notices a change to the files in the sync folder, the icon appears to be lifting a barbell.
- Sync Offline

If you lose your Internet connection (which is required for syncing), the icon turns light orange to denote that you are offline.
- Sync Error

If you see a light orange sync icon with an exclamation mark, it means that OmniPresence failed to connect to the sync server. This could be the result of an invalid Account Name or Password, or something as simple as an intermittent Internet connection that drops while OmniPresence is trying to connect to the sync server.
If the icon remains in this state, here are some things you could try:
- Tap the icon to display the nature of the error. This may suggest an immediate fix for the problem.
- Double-check your Account Name and Password.
- Check your network connection in Settings.app.
If that doesn’t help, contact our Support Humans for assistance.
Undo/Redo 
Tap to undo the previous change to your document. Touch and hold to reveal a pop-up menu with the option to Redo.
Search 
Tap to open the search bar, a secondary bar which spans the width of the outline beneath the document toolbar. Enter keywords here to filter the outline to only rows and notes containing those terms.

Tap Filtering on: to change the scope of the filter from the default Entire Document to something narrower, such as a single column or the Notes field.
If you create a search that you plan to refer to often, tap Save as Filter to save it as a filter for future use.
Tap X at the far side of the search bar to clear the field, and tap Cancel to dismiss the search.
Share 
Tap to open a menu containing options for exporting or sharing the document you are working on. See Sharing and Exporting in the Document Browser chapter for details on the menu options.
Starting with OmniOutliner 3.10 and iPadOS 16, the Share button no longer appears in the toolbar and can instead be found in the Document Title menu.
Automation 
Tap to open a menu with controls related to Omni's JavaScript automation. See Automation Menu in the Document Browser chapter for more on these tools.
Edit Mode 
Tap to switch to Edit Mode for selecting rows and applying changes en masse. In Edit Mode the Sidebar and Inspector are still available, but other controls are hidden.
While in Edit Mode, tap a row anywhere to select (or deselect) it. With one or more rows selected, the following controls become available in the edit bar at the bottom of the screen. (Depending on your device width, some of them may be hidden behind a More button.)
- Cut

Remove the selected rows and copy them to the pasteboard.
- Copy

Copy the selected rows to the pasteboard. To paste them, tap Done to exit Edit Mode and select the row where you would like the pasted rows to appear. Touch and hold it to reveal the contextual menu. Tap Paste and choose Above, Below, or Inside to add the copied rows as peers above or below the selected row, or as children of the selected row.
- Delete

Deletes the selected rows from the outline.
- Group

Creates a new row and groups the selected rows as children beneath it.
OmniOutliner for iOS does not have an Ungroup option as part of the Editing tools. If you need to ungroup some rows, use the Editing tools to select and move the rows below the parent row. Then, if needed, delete the old parent row.
- Move

Tap Move, then tap a row in the outline to move selected rows relative to a position relative to it. A contextual menu appears, offering options to move the selected rows Above, Below, or Inside the target row.
Show/Hide Inspector
Tap to show or hide the inspector.
More 
If you see three dots in the toolbar, this implies there are more options/buttons available than there is space for in the toolbar. Tap to open the More menu, which presents the other available options.
Starting with OmniOutliner 3.10 and iPadOS 16, the toolbar adds a More menu with a new icon  and controls for customizing the document toolbar and accessing the OmniOutliner app menu.
Customizing the Toolbar
On an iPad with iPadOS 16 or later and OmniOutliner 3.10 or later, you can customize the document toolbar to include a variety of additional controls not present in the default toolbar arrangement.
To customize the contents of the document toolbar, open the More menu and choose Customize Toolbar.
The custom toolbar editor appears, where you can drag controls up to where you'd like them in the toolbar; you can also remove or rearrange existing controls by dragging them to different spots in the toolbar.
Tap Reset in the editor header to restore the toolbar to its default set of controls.
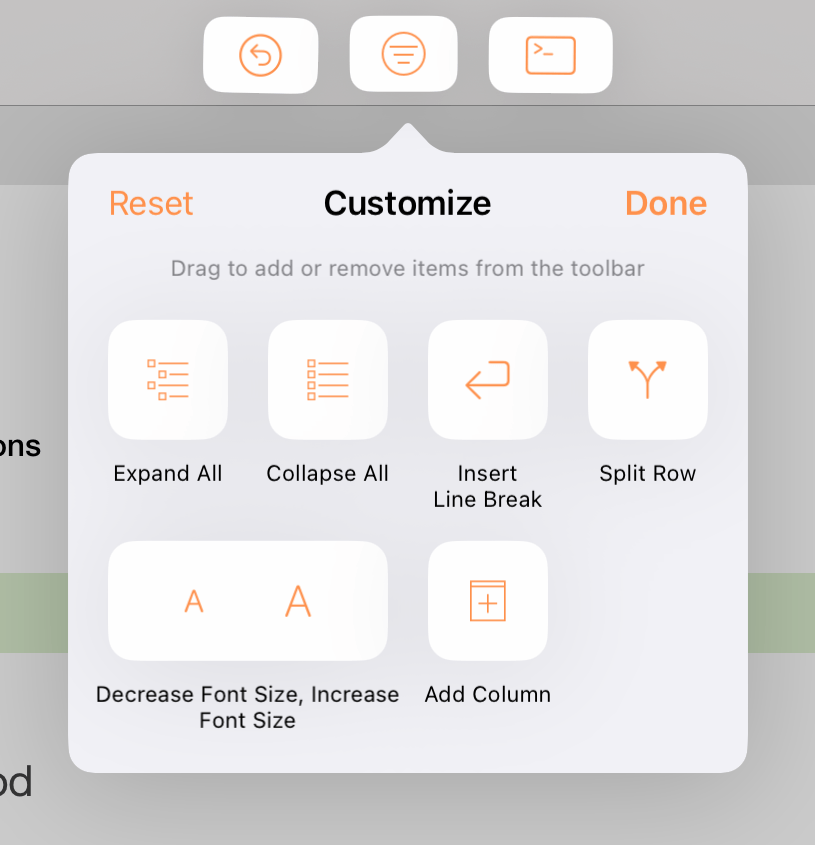
If there isn't enough room in the toolbar for all of the controls you add, any that don't fit are added as menu items in the More menu instead.
Note that changes you make to the document toolbar apply across all documents.
The Sidebar
OmniOutliner's sidebar, revealed by tapping (or on compact screens), offers multiple ways to choose specific parts of your content to focus on. The sidebar contains two panes: Sections, which provides a focus-able, hierarchical summary of your document, and Filters, which holds custom rules you set up to limit which rows are displayed in the outline.
Sections
The Sections tab of the sidebar contains a hierarchical summary of your outline, with each section of the outline represented by a single row containing the first line of its text (truncated when necessary).
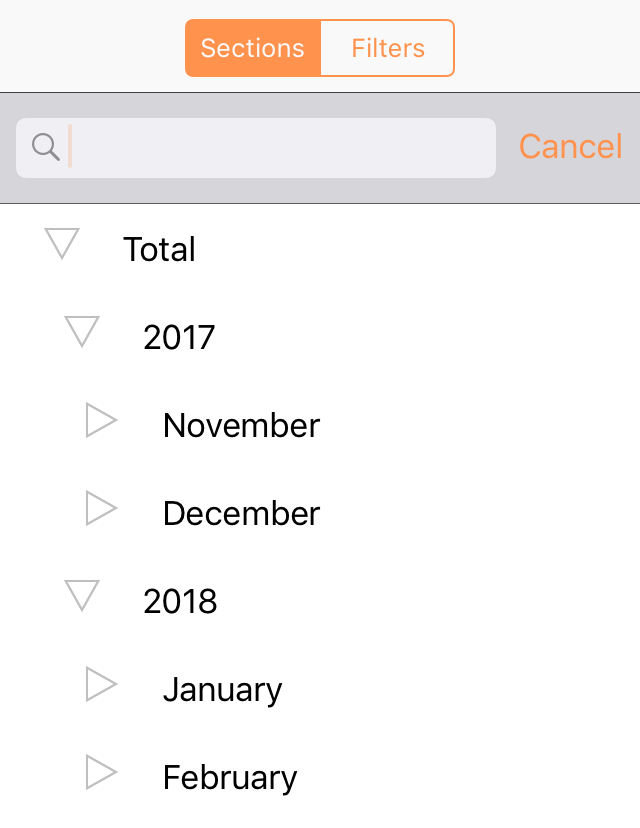
The sections in this list can be collapsed, expanded, and focused upon by tapping the disclosure triangles and row text respectively.
Use the search field at the top of the list to batch find all sections with text matching the keywords you enter there.
Focusing
Tap a row in the sections list to focus on it, displaying only that row and any of its children in the outline. Tap multiple rows in the list to add them to the focused selection, and tap them again to remove them from focus.
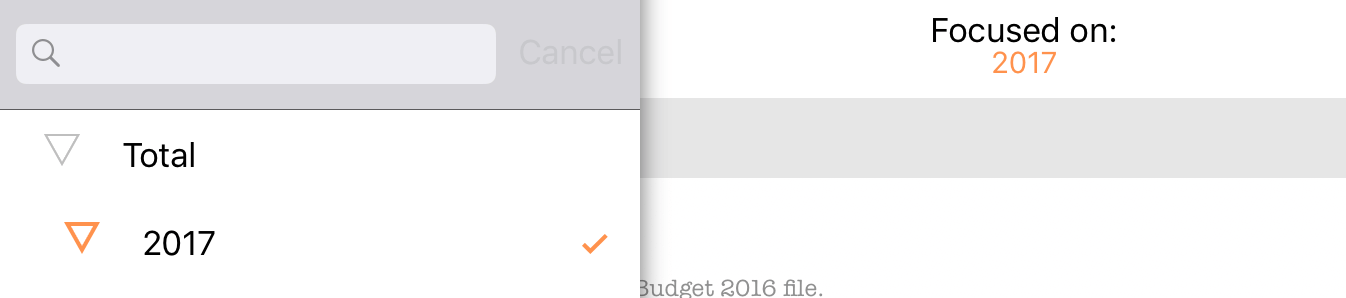
When focused, a notice bar appears at the top of the outline indicating the section being focused on (if multiple sections are selected, this is indicated as well). Tap the notice bar for a popover that provides another way to remove focus on the selection.
Batch Finding
Enter keywords in the search field at the top of the sections list to find all sections of the document containing those keywords. The list displays all rows with matching text, with the keyword text highlighted.
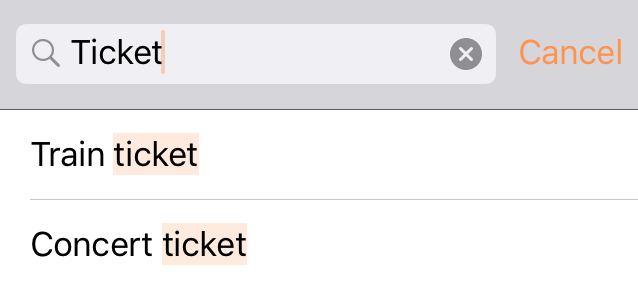
Tap a row in the batch find results to navigate to its corresponding position in the outline, with the keyword text selected.
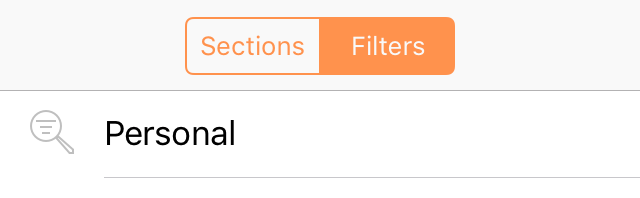
Filters
The Filters tab of the sidebar contains a list of filters stored with your outline. Filters are custom rules you create on a per-document basis that describe a subset of the outline that you want to view. OmniOutliner 3 for iOS supports filters in the following ways:
- Creation of keyword-based filters.
- Application of existing filters to a document, whether created in OmniOutliner 3 for iOS or OmniOutliner 5 for Mac.
- Deletion of filters from the document.
Filters are saved along with individual documents, and travel with the document when synced or copied to another location or device.
Creating a Filter
To create a filter, tap the Search button in the document toolbar and enter text in the field that appears.
When you have the outline filtered as you like, tap Save as Filter to preserve it along with the document. The filter is now saved in the Filters tab of the sidebar for future use.
Applying a Filter
To apply an existing filter to the outline, open the sidebar and tap the Filters tab to show the list of filters saved with the document. Tap a filter's name to apply it to the document; tap it again to remove the filter.
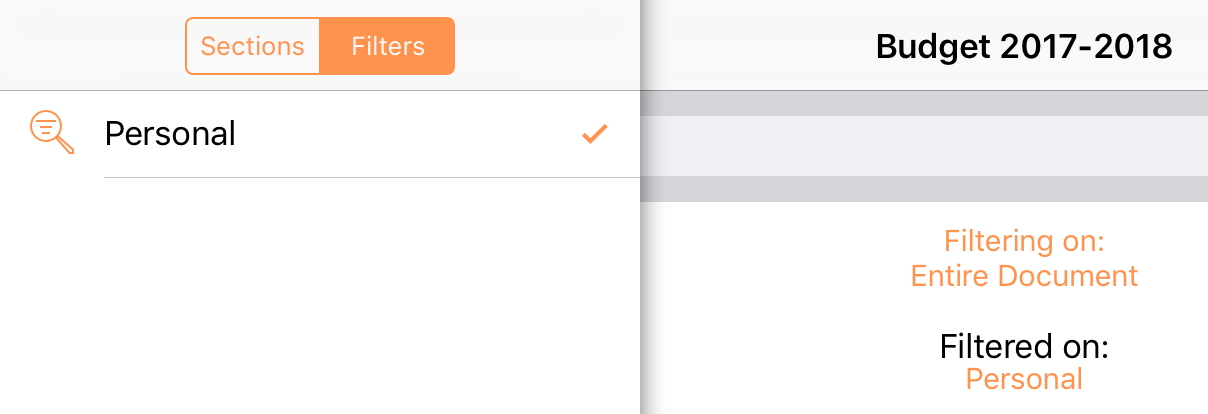
Only one filter can be applied to an outline at a time.
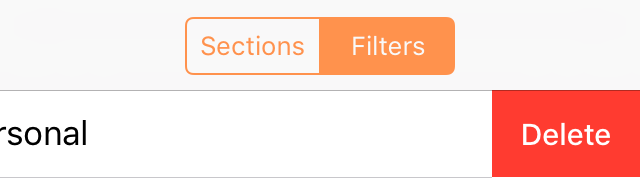
Deleting a Filter
Swipe left on a filter in the Filters tab of the sidebar to reveal the filter's Delete button. Tap Delete to remove the filter from the outline entirely.
The Selection Inspectors
OmniOutliner's Inspector, revealed by tapping , contains controls for customizing the appearance, layout, styling, and technical properties of your document. The inspector controls are split into two groups: the Selection inspectors, which govern properties of selections in the outline, and the Document inspectors, which contain document-wide settings, column controls, and style editing tools.
Tap the segmented control at the top of the inspector pane to switch between the Selection and Document inspectors.

This chapter describes the features of the Selection inspectors, including controls for changing the selection's Font, Paragraph layout, Row numbering, and applying or editing Style presets saved along with the outline.
The Selection inspectors govern the style properties of content currently selected in the outline.
If nothing is selected, changes made apply to the Whole Document structural style, as described in Structural Styles and Style Layers.
Font
The Font inspector controls the font family, color, styles, and size of the current selection.
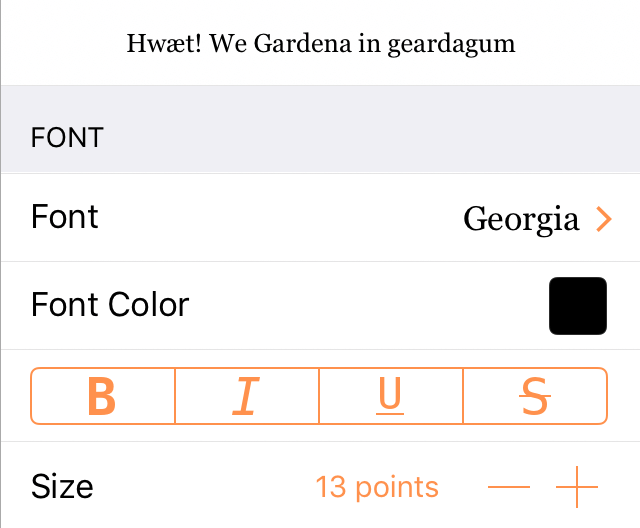
Font Family
Choose from Recommended Fonts or All Fonts; tap  for additional style attributes.
Font Color
Tap to select a color. See Choosing Colors for more detail on setting colors in OmniOutliner.
Bold, Italic, Underline, Strikethrough
Tap B to embolden the text; tap I to italicize the text; tap U to underline the text; or tap S to apply a strikethrough.
Size
Tap the minus button  or the plus button
  to make the text smaller or larger, respectively. Optionally, double-tap the point size to enter a specific value.
Paragraph
The Paragraph inspector controls the text alignment and background color of the current selection.
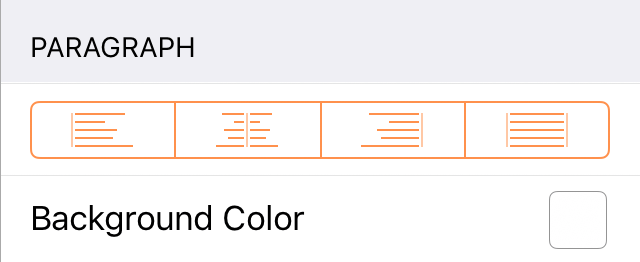
Alignment
Choose how text aligns horizontally; align to the Left, Center, Right, or Justified, respectively. With a row or rows selected, the alignment applies to text in each cell in the row. With text selected, the alignment applies to all text in the cell containing the selection.
Background Color
Choose a background color for the selected text or rows. With a row or rows selected, the background color applies to the entire row. With text selected, the background color applies to the selected text only, unless all of the text in a note or cell is selected, in which case the background color applies to the entire note or cell.
Row
The Row inspector controls the row numbering and numbering style of the current selection.
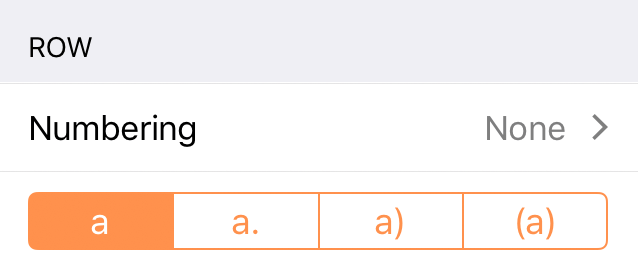
Numbering
With a row or rows selected, choosing a numbering scheme from this sub-inspector applies numbers (or letters) to each of the selected rows corresponding to their position in the outline.
Since numbering applies to entire rows, this control works the same when editing text in a cell as it does when the row itself is selected.
Adornments
With a row or rows selected, choosing an adornment style from the segmented control applies it to the front of the row adjacent to the row number. (if no row number is present, the adornment appears alone.)
Column
The Column inspector appears when editing text in a cell, and corresponds to the column containing that cell (in a single column document, this is always the default Topic column).
Use the controls in the Column inspector to rename the column, change the column's data type, determine whether (and how) the column displays summaries of its data and whether the column autosizes to fit the document, and set the custom style properties of the column.
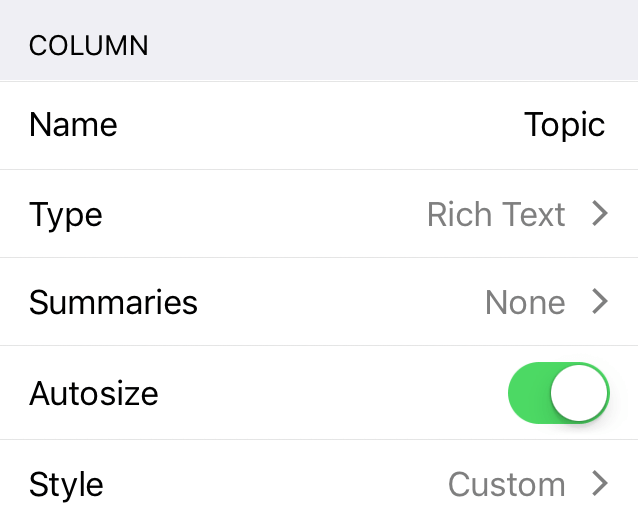
Column Name
Tap here to change the existing column name to something else.
Column Type
The Topic column and any additional columns always start out with the Rich Text type by default. However, you can change this to one of the following to suit the needs of your outline.
If you add custom content specific to a chosen column type, switching the column type to one that doesn’t support that specialized content will cause it to be lost.
If you unintentionally switch column types, tap Undo to switch back to the previous type and revert any data loss.
- Rich Text
- Choose Rich Text for regular text; this is the default column type for new columns.
- Number
- Choose Number as as the column type when you have a numbered value that you’d like to record.
- Tap the Info button to choose from a variety of available formats for numbers in this column.
- 9,999.99—Numbers with a two-digit decimal at the end. Large numbers will use a comma to separate thousands.
- 9999.99—Numbers with a two-digit decimal.
- 10000—Whole numbers; decimal numbers are rounded up or down to the nearest whole number. For example, 2.67 is rounded up to 3, while 3.14 is rounded down to 3.
- 10000%—A whole number percentage; a decimal number that gets entered is rounded up or down to the nearest whole number. For example, 2.67% is rounded up to 3%, while 3.14% is rounded down to 3%.
- 99.99%—Percentages with a two-digit decimal value, if needed. For example, 99% appears as that and not 99.00%, while 3.14159% is rounded to 3.14%.
- $9,999.99—Use this option for representing currency values based on the settings you choose in iOS Settings > General > Language & Region. For example, if your region is set to Japan, the currency value would show up with the Yen symbol (¥).
- Date
- Tap the Info button to choose a date and optional time format to use in the column.
- When entering dates into columns, OmniOutliner uses date parsing logic that accurately interprets things like now, yesterday, 2d, September, thu, or –5w and renders the date in the relevant format.
- Duration
- Use a Duration column for estimating or tracking the amount of time a task or project takes.
- Tap the Info button to choose from Work Time (the default; 8 hours per day) and Calendar Time (24 hours per day). OmniOutliner formats the duration time based on the setting you’ve chosen; for example, 12h in Calendar Time is equivalent to 1d 4h in Work Time (assuming an 8 hour workday).
- Pop-up List
- Choose the Pop-up List column type when you have a set of repeating options that you want to choose from.
- Tap the Info button to set up the list of values (pop-up options) for the column. Tap the + button at the bottom of the inspector to add new values, and tap Edit to rearrange or delete them. Tap the values in the list to edit their text.
- After creating the list, tap a cell in the Pop-up List column to choose from a menu of the preset values. Alternatively, use the field at the top of the menu to search for a value to apply. If the value doesn't exist, tap Add "x" to add it to the list.
- Checkbox
- Tap the checkbox in a checkbox column cell to toggle between a checked and unchecked binary state. (The checkbox is the only content in a column of this type.)
Column Summaries
The second control in the Column inspector provides options for converting the column into a summary.
The most important thing to know about summary columns is that they only appear on the parent row for a group. In that parent row, the summary appears in the column calculated based on the values of its children, but with a gray background to the cell. The gray background is a transparent layer of black, which slightly darkens any background color you’ve assigned to the row style.
The options in the Summary popup menu change depending on the column type.
Rich Text column type summary options include:
-
None—There is no summary.
-
Hidden—The summary cell is empty.
Number column type summary options include:
-
None—There is no summary.
-
Total—The summary cell displays the total of all cells in the column.
-
Minimum—The summary cell displays the lowest number in the column.
-
Maximum—The summary cell displays the highest number in the column.
-
Average Leaves—The summary cell displays the weighted average of numerical values among children of branches of the parent row (also known as leaves). If one branch has two leaves and another has one, for example, the first branch is weighted at 2/3 of the average displayed in the parent cell, while the second is weighted at 1/3.
-
Hidden—The summary cell is empty.
Date column type summary options include:
-
None—There is no summary.
-
Minimum—The summary cell displays the earliest date (or time) in the column from among the child rows.
-
Maximum—The summary cell displays the latest date (or time) in the column from among the child rows.
-
Hidden—The summary cell is empty.
Duration column type summary options include:
-
None—There is no summary.
-
Total—The summary cell displays the total of all cells in the column.
-
Minimum—The summary cell displays the lowest duration in the column.
-
Maximum—The summary cell displays the highest duration in the column.
-
Average Leaves—The summary cell displays the weighted average of durations among children of branches of the parent row (also known as leaves). If one branch has two leaves and another has one, for example, the first branch is weighted at 2/3 of the average displayed in the parent cell, while the second is weighted at 1/3.
-
Hidden—The summary cell is empty.
Pop-up List column type summary options include:
-
Minimum—The summary cell displays the earliest entry in the Column Type inspector from among those in the children it summarizes.
-
Maximum—The summary cell displays the latest entry in the Column Type inspector from among those in the children it summarizes.
-
Hidden—The summary cell is empty.
Checkbox column type summary options include:
-
None—There is no summary; the summary cell displays a checkbox that acts completely independent of its children.
-
State—Displays an empty checkbox if no items have been checked off, a checkbox with a dash inside if some items have been checked, or a filled checkbox if all of the items have been checked.
-
Hidden—The summary cell is empty, regardless of the state of the other checkboxes in the column.
Autosize Column
When the Topic column is selected, use the Autosize switch to have it resize automatically based on the changing widths of the device view or the other columns in the outline. (This control only appears when editing the Topic column and is not available for other columns.)
Column Style
Tap to apply a custom style to the column. The top level of the Column Style editor has controls for commonly used styles like bold, italic, and underline, as well as the list of named styles saved with the document.
Tap Customize style for the full set of additional style controls, identical to those in the Selection inspector (described throughout this chapter).
Apply Styles
The Apply Styles inspector provides controls for applying named styles to the current selection, editing existing styles, and removing custom styles from the selection.
To apply a style to a selected row, rows, or text, tap the style's name in the inspector. A check mark appears next to the style to indicate that it is applied to the selection. (Tap the style's name again to remove it.)
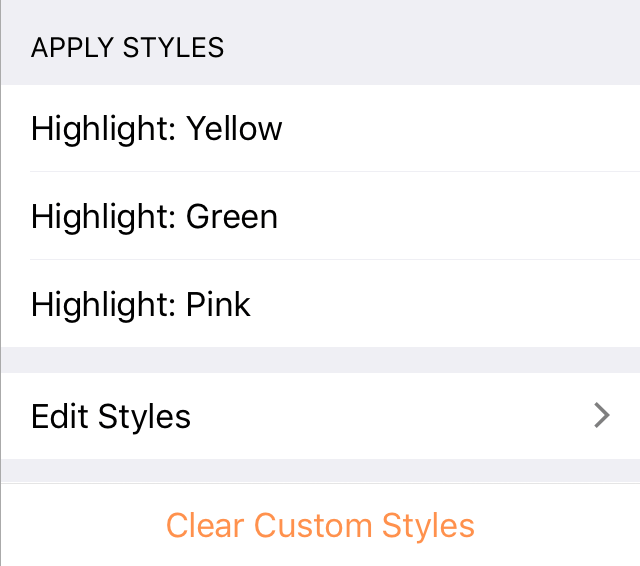
Edit Styles and Add Named Styles
Tap Edit Styles to view a list of all style presets currently saved with the document. These include structural styles, which apply to universal components of the outline, and named styles, which are saved sets of style attributes that can be applied to individual selections.
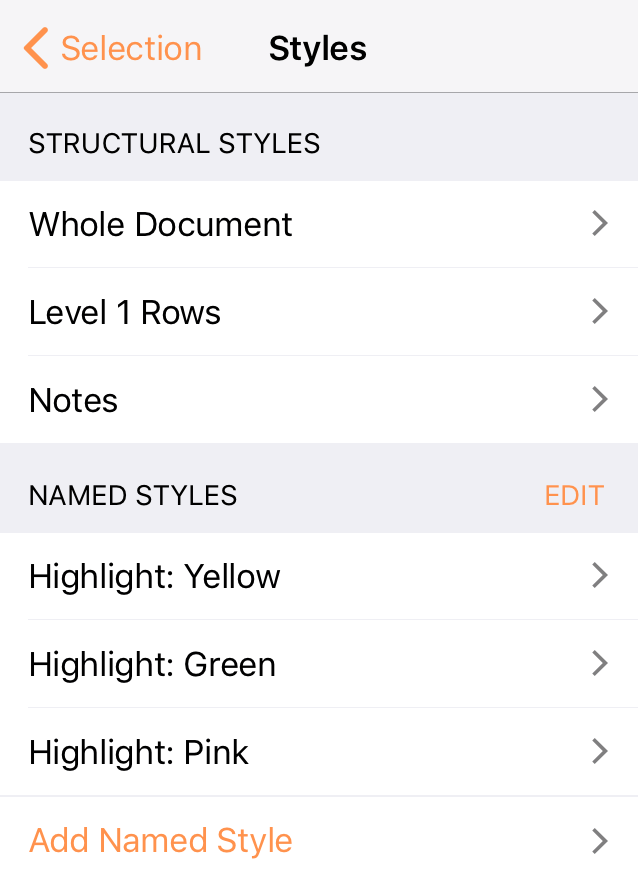
Tap a style's name in the list to open it for editing. An inspector pane appears with controls similar to the Selection inspectors described in this chapter, except that the values set for each parameter apply to the chosen style rather than a selection in the outline. (When a named style is applied to a selection, it brings its entire set of style attributes along for the ride.)
To reorder or delete named styles saved with the document, tap Edit next to the Named Styles inspector header. Use the reordering handle on the right of a style's row to change its position in the list, and tap the Delete button on the left to reveal a delete control that removes the style from the document entirely.
To create a new named style, tap Add Named Style at the bottom of the list of named styles. This presents the style editor, where you can add a name for the style and define its attributes just as if you were setting style attributes on a selection in the outline.
Clear Custom Styles
If any custom styles have been applied to the selection, tap Clear Custom Styles to remove them all and return the selection style to that inherited from the document's underlying structural styles.
Structural Styles and Style Layers
Structural styles, as the name implies, are style presets that apply to sections of the document based on its structure.
Since a document's structure depends on how you organize it, elements of structure are made available for styling based on changes you make to the outline (rather than adding to the list of styles in the style editor, as is the case with named styles).
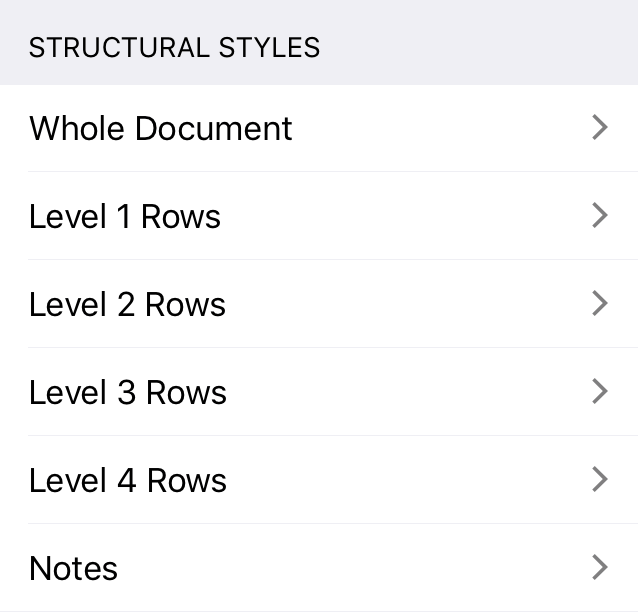
The list of available structural styles includes Whole Document (properties applying to every row in the document), Notes (properties that apply to all notes), and individual styles for every row level in the document hierarchy (Level 1 Rows, Level 2 Rows, etc.).
Additional structural styles are added automatically whenever you add a new, deeper level of hierarchy to the outline.
As the list of structural styles indicates, multiple styles may apply simultaneously to the same row, text, or section of the document. When this is the case, styles are layered from the general (bottommost layer) to the specific (topmost layer), with styles on top receiving priority for display when they conflict with styles beneath.
From lowest to highest, the order of style priority is as follows:
- The Whole Document structural style (the base on which other styles are layered)
- The Alternate Row Color, if one is set
- The column style
- Structural styles for individual row levels and structural styles for notes
- Named styles applied to a selection
- Ad hoc styles applied using the selection inspectors
Note that multiple named styles can be applied to the same selection. When this is the case, the styles take precedence in the order they appear in the named styles list, with the lowest on the list appearing on top of the others.
Including Styles Within Other Styles
A control unique to the style editor is Included Styles, which can modify the properties of a style by including other named styles within it. To include other styles within a style that you are editing, tap Included Styles to show a list of the document's named styles, then tap one or more to select them for inclusion.

When a named style is included with another style, its properties are linked to that style on a level below the style's existing properties. For example, including a style that contains a font inside another style that already has a font selected will result in the container style's font coming out on top, and the style's font won't visibly change.
The properties of an included style are linked, rather than copied, so any subsequent changes made to the included style are reflected in the style that contains it.
Choosing Colors
Throughout the inspectors, you will find color swatches which you can tap to change the default colors.
Tapping a color swatch— —takes you to a pane of preset color palettes, from which you can choose another color.

Tap to select another color, or tap the HSB, RGB, or Gray tabs to mix your own colors by adjusting the sliders in those tabs.
The Document Inspectors
OmniOutliner's Inspector, revealed by tapping , contains controls for customizing the appearance, layout, styling, and technical properties of your document. The inspector controls are split into two groups: the Selection inspectors, which govern properties of selections in the outline, and the Document inspectors, which contain document-wide settings, column controls, and style editing tools.
Tap the segmented control at the top of the inspector pane to switch between the Selection and Document inspectors.

This chapter describes the features of the Document inspectors, including controls for applying a template theme to the entire document, editing the document's structural and named styles, creating, editing, and managing global settings for document columns, and managing other document-wide visual and file properties (such as (encryption and metadata).
Document Styles
The Styles controls in the Document inspector apply to styles spanning the entire outline. These include controls for applying a set of structural styles to the entire outline at once (using templates), and choosing from a list of document-wide styles to edit (or create).
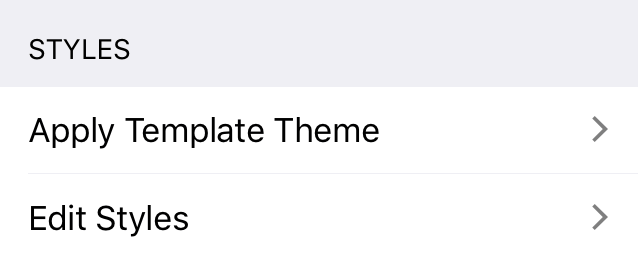
Apply Template Theme
Choose Apply Template Theme to open the template chooser and select a template with structural styles that you would like to apply to the outline.
Unlike choosing a template at initial document creation (where the document you create is populated with sample content from the template), applying a template to an existing outline just overwrites the document's style properties—not any of its content.
Applying a template theme will overwrite not only the structural styles currently present in the document, but also all of its named styles, including any new or custom styles added after creating the document.
This means that not only will the existing structural styles be replaced; any named styles applied to content in the document will also be removed. (Unless a style with an identical name exists in the new template; in this case, the style will be replaced.)
Ad hoc styles applied directly to text will not be cleared by changing templates.
Edit Styles
Tap Edit Styles to view a list of all style presets currently saved with the document. These include structural styles, which apply to universal components of the outline, and named styles, which are saved sets of style attributes that can be applied to individual selections.
This style editor is similar to the one in the Selection inspectors' Apply Styles section, and is covered there in detail.
Columns
The Columns section of the document inspector governs the appearance of columns in the outline, and provide the opportunity to customize existing columns and create new ones.
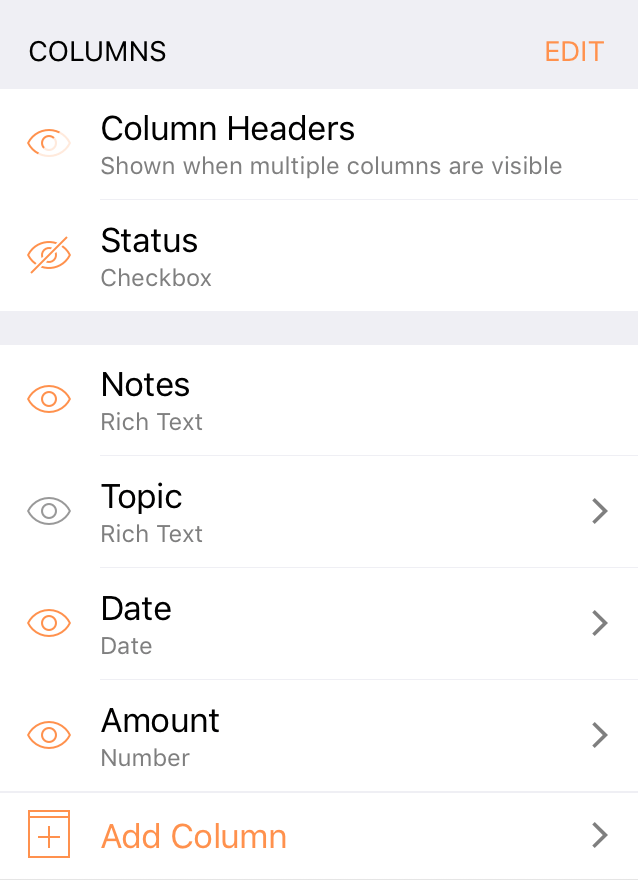
Column Headers
Tap the View icon  next to the Column Headers control to toggle between three visibility settings for column headers: Always Shown, Shown when multiple columns are visible, and Hidden.
Status
Tap the View icon next to the Status control to toggle status checkbox visibility on the Topic column.
The Status checkboxes described here are a component of the outline's hierarchical column (the Topic column by default). Changes to checkbox status persist regardless of the checkbox visibility setting, so you can check them off while visible, hide them, and reveal them again, and the latest checked (or unchecked) status remains.
Note that status checkboxes as a component of the hierarchical column are distinct from status checkboxes as a column type, though they behave similarly.
The Columns List
The columns list is a vertical list of every column in the outline in order from left to right, along with controls for creating new columns, rearranging them, and customizing them.
-
Tap
 Add Column at the bottom of the list to add a new column to the outline. Creating a new column opens it for editing in the inspector, with controls for its style properties and column type as described in the Selection Inspectors' Column section.
 -
Tap Edit next to the Columns inspector header to reveal handles
 next to each column for rearranging them in the outline.
 Touch and drag the reordering handle of the column you want until it is in the desired location in the list.
-
While editing the column order, columns other than Notes and Topic also have buttons
 that can be tapped to delete them from the outline entirely.
 -
Tap the View icon
next to a column in the list to show or hide it from view. Hiding a column this way only removes it from display in the outline; its contents are preserved intact.
Tap any column in the list to configure its style and column type properties, as described in the Selection Inspectors' Column section.
Two columns are present in every document upon creation, and differ slightly from others subsequently added to the outline: Notes and Topic.
The Notes Column
The Notes column exists in every document, and acts as a visual and interactive indication of the presence of notes on a row.
When visible, the notes column displays icons ![]() next to each row with a note attached. Tap one of these icons to open or close the note on the row, or tap the empty space where an icon would be to add a new note on a row without one.
next to each row with a note attached. Tap one of these icons to open or close the note on the row, or tap the empty space where an icon would be to add a new note on a row without one.
Tap the View icon next to the Notes column in the columns list to toggle its visibility in the outline.
Other than toggling the column's visibility or changing its order in the columns list, the Notes column cannot be modified.
The Topic Column
The Topic column is the only column that can be structured hierarchically in a document created using one of OmniOutiner's default templates. (For many templates, it is the only column other than Notes.)
As such, it has some unique properties not shared by other columns (See The Anatomy of an Outline for a complete overview).
-
The Topic column can be set to Autosize based on the width of the window or other column widths.
-
The Topic column contains components not present in any other column, including hierarchy, row handles, and its own built-in checkboxes.
-
The Topic column is linked to the Note field such that notes only span the width of the Topic column, not any other subsequently created columns.
-
Unlike other columns, the Topic column cannot be hidden.
When editing the Topic column, its default name can be changed and the document saved as a custom template for outlines where another hierarchical column name would be more descriptive.
Document Properties
The Document Properties section of the Document inspector include custom style properties that span the entire document, as well as visibility settings and settings for properties of the file itself including file type, encryption, and metadata.
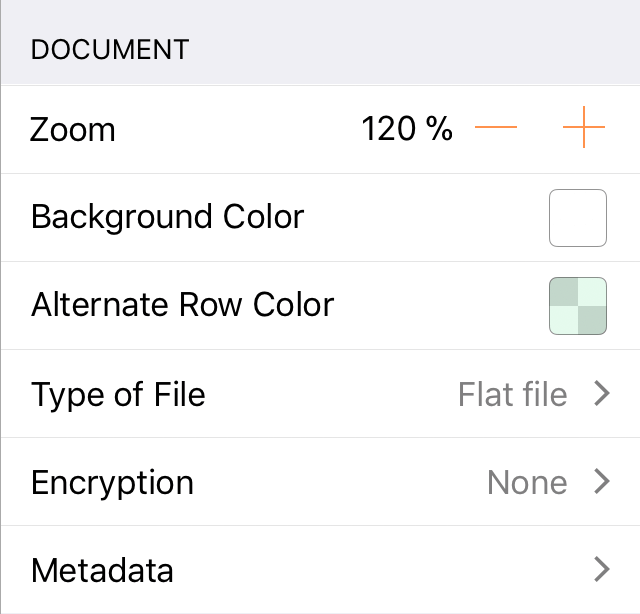
Zoom
The Zoom setting controls the magnification of text in the outline. Tap the plus and minus buttons to increment or decrement the zoom by ten percent.
This setting does not affect the actual size of the text in the outline; just the display size. This is useful for improving visibility of small text or fitting more of the outline onto the screen without changing any of its style properties.
Background Color
This control offers a convenient way to set the background color of the entire outline. This is identical to the background color property of the Whole Document structural style, so changing it in either place leads to the same result (the change is reflected in both places).
Alternate Row Color
This control adds an alternating row color to every row in the outline. This style is applied above the Whole Document style but below any row level structural styles, so setting a background color on a Level X Row style supersedes the alternate row color for that level row and any above it.
See Structural Styles and Style Layers for a general explanation of the order in which styles are applied to content in the outline.
Type of File
By default, OmniOutliner saves documents as flat files: files that are compressed down to the smallest practical size. Flat files don’t just take up less space on your device; they’re also easier to share, and to sync between devices.
Alternatively, you can choose to save your file as a file package. This means the file won't be compressed, and isn't generally recommended. It can be useful in specific cases, however, such as for files stored in a version control or document management system, or when running scripts (Python, Ruby, and so on) on the XML inside your document.
If you're syncing with a third party cloud storage provider such as Dropbox, be sure to use the flat file type for saving your OmniOutliner files. Using the package file type will result in errors when syncing with these services.
Encryption
Encryption adds password protection to documents containing private or sensitive material.
When you choose to encrypt a document, you are prompted to enter and confirm a password. With the enter password and verify password fields matching (and an optional password hint added), tap OK to finish the encryption process.
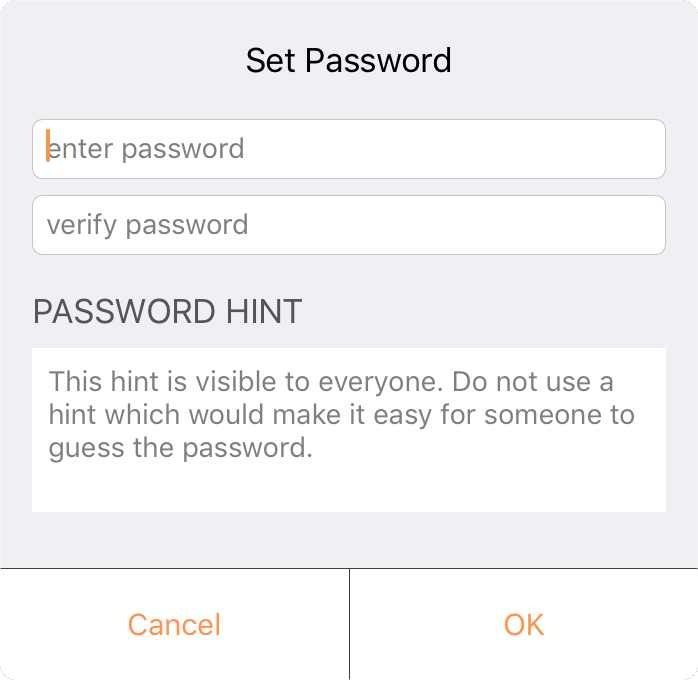
The document is now encrypted using industry standard AES-256 encryption in CCM mode. The document's thumbnail preview in the document browser changes to a lock icon to indicate that the contents are hidden and password protected.
The next time you open the document, you’ll see the following prompt:
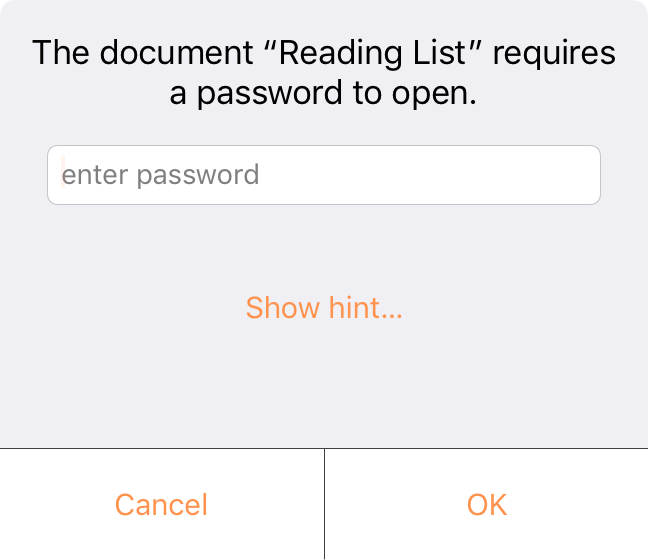
Your document is now encrypted and cannot be opened—or have its contents otherwise read—without entering the password. This is true both of the original document and any copies of it that are subsequently created, so if you send a copy to a coworker they’ll need the password to open it.
After adding a password to a document, controls in this section change to include Remove Password and Change Password. Enter the current password when prompted to either remove the password entirely (and remove encryption from the document), or to change the existing password to something else.
Metadata
The metadata section of the Document inspector provides a set of ten metadata properties for adding information to enrich and contextualize your document.
The first five metadata properties are text fields (labeled Empty by default). Tap any of these to enter text in the field.
- Copyright
- Version
- Subject
- Description
- Comments
The remaining metadata consist of key-value pairs. Each property represents a key; tap it to add values corresponding to that key.
- Authors
- Organizations
- Languages
- Keywords
- Projects
Tap Edit when viewing a key-value list to delete or reorder the values stored there.
Opening and Exporting Files
OmniOutliner supports several native file types which can be opened, edited, and saved without changing formats. In addition to these, there are other file types that OmniOutliner can import and convert into the standard OmniOutliner file format for subsequent editing.
OmniOutliner can also export from its native formats to several file types used by other applications.
If you would like an outline to include content from a file of a type not read by OmniOutliner directly, you can add it as an attachment.
Opening and Importing
OmniOutliner supports working with files in two different ways, depending on the file type: opening and importing.
Files are opened when OmniOutliner can natively read and write them, saving them wherever they are originally located. This includes the following file types (described in more detail in the Document Browser chapter):
- OmniOutliner Document (.ooutline, .oo3)
- OmniOutliner Template (.otemplate, .oo3template)
- Outline Processor Markup Language Document (.opml)
When opening files in older OmniOutliner formats (.oo3 and .oo3template), a notice bar appears beneath the document toolbar indicating that some features are disabled. Tap Learn More in the notice bar and choose Convert to update the file to the newest format, or choose Hide Warning to leave the file as-is.
Import File Types
The following formats can be imported by OmniOutliner. Copying a file into OmniOutliner in one of these formats converts it to a native OmniOutliner file for subsequent editing (the original file is left behind in its original format).
- Plain Text (.txt)
- Rich Text Format (.rtf)
OPML Editing
OmniOutliner 3 for iOS supports native editing of OPML files. OPML is a structured writing file format that is widely used among various platforms, but does not support the rich styling controls offered by OmniOutliner.
When editing an OPML file in OmniOutliner, the Selection inspectors are disabled to indicate that custom styles are not saved along with the file while it is in OPML format. Template themes can be applied with the Document inspector, but are not saved when closing the file.
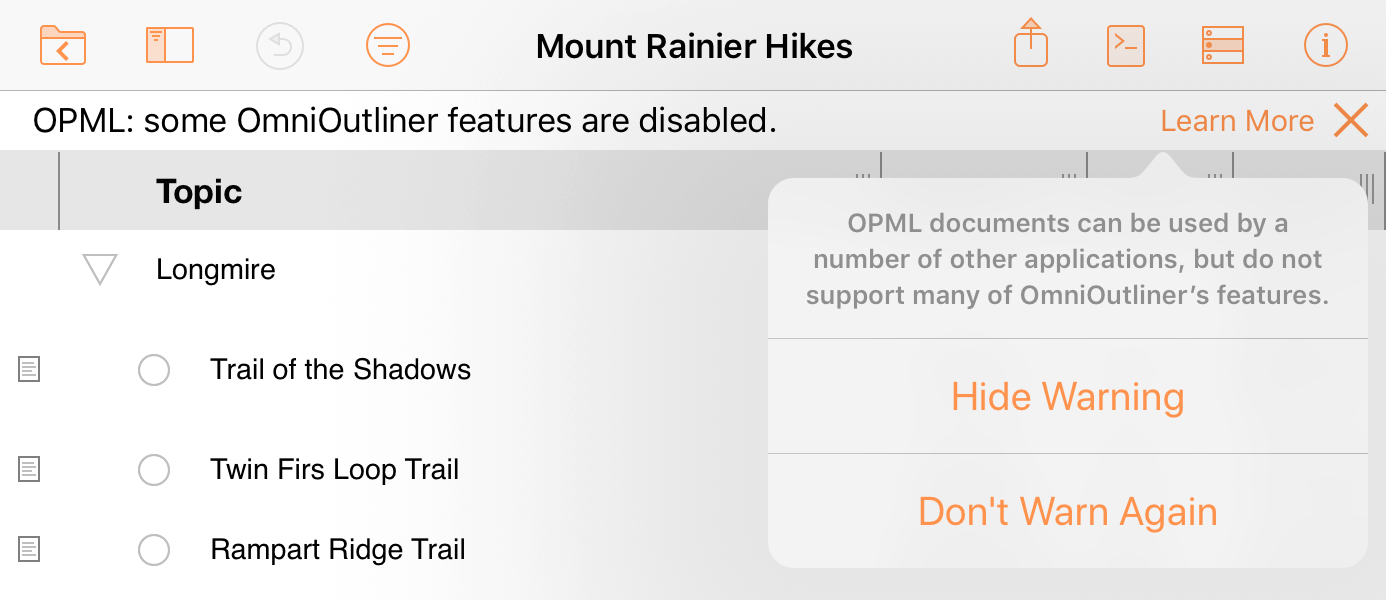
If OPML warnings are turned on in OmniOutliner Settings, a notice bar appears at the top of the outline indicating that some features are unavailable while editing a native OPML document.
Available Export File Formats
Export a document from OmniOutliner by either tapping  in the document toolbar with the document open, or by selecting the file in the Document Browser and tapping Share .
Pick Share As... to open a sheet for choosing from these export file formats:
- OmniOutliner Outline (.ooutline)
- OmniOutliner Template (.otemplate)
- OmniOutliner 3 Outline (.oo3 — legacy format)
- OmniOutliner 3 Template (.oo3template — legacy format)
- Outline Processor Markup Language (.opml)
- Portable Document Format (.pdf)
- Dynamic HTML (.html)
- Simple HTML (.html)
- Plain Text (.txt)
- Comma-Separated Values (.csv)
- Microsoft Excel XLSX (.xlsx)
- Microsoft Word DOCX (.docx)
- Microsoft Word DOCX (indented) (.docx)
- Microsoft PowerPoint PPTX (.pptx)
OmniOutliner Settings
From the document browser, tap the app menu button in the toolbar (), and then choose Settings to set the following options for working with OmniOutliner.
The options on this screen are particularly helpful if you are using an external keyboard with OmniOutliner, or if you are also using TextExpander for iPad or iPhone (available separately on the App Store).
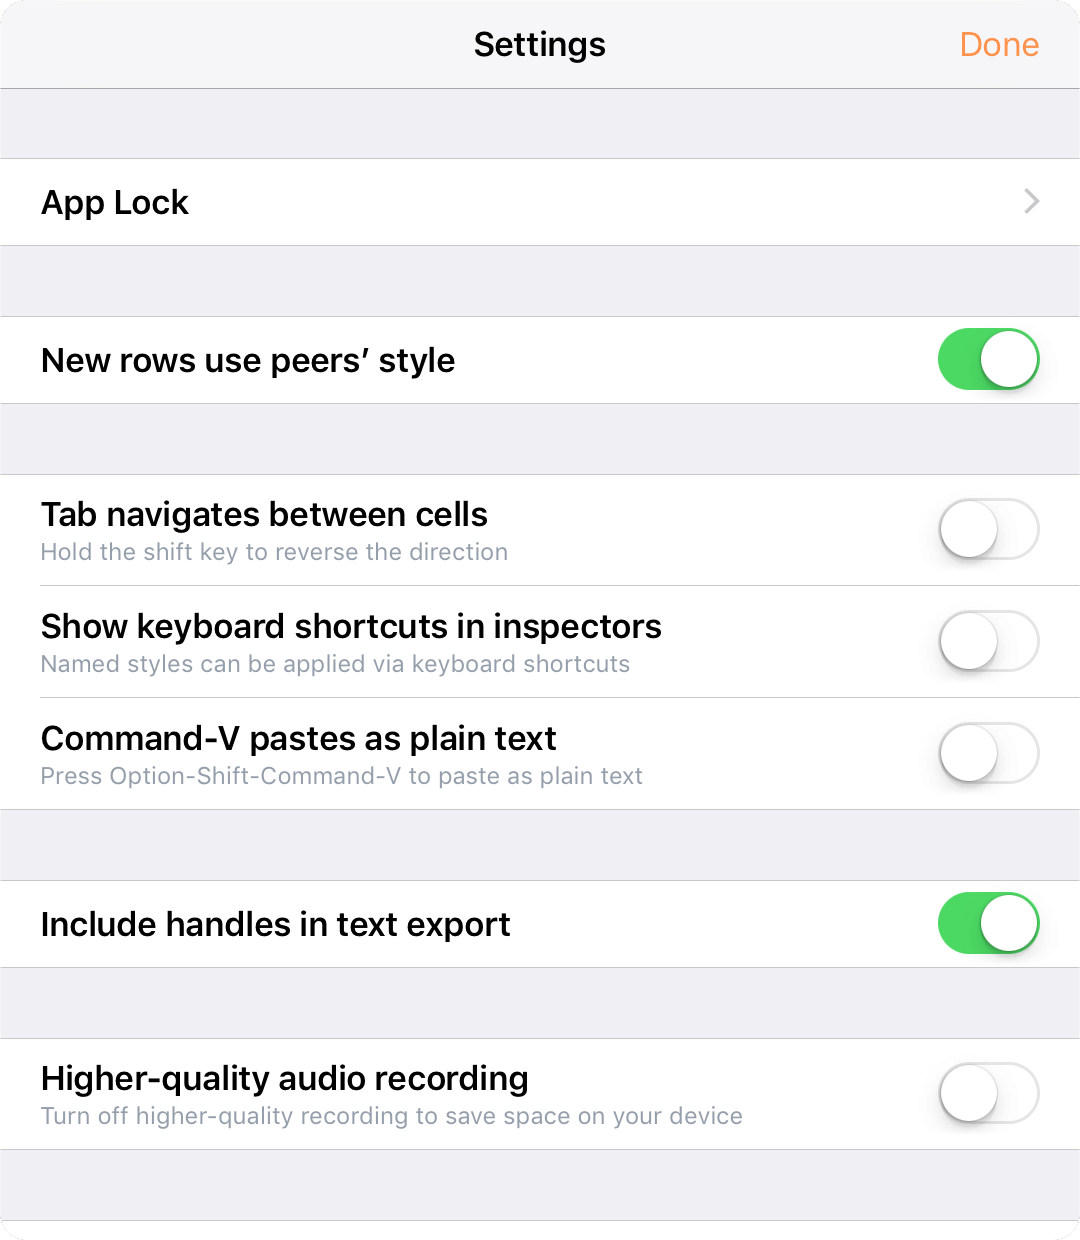
App Lock
If you use OmniOutliner on a device that you occasionally share (with your children, coworkers, or clients, for example), there may be times when you would prefer that your OmniOutliner documents remain out of reach. The App Lock feature prevents accidental taps and casual glances by adding a password-locked privacy screen that must be dismissed before any of your documents or settings can be accessed.

App Lock does not encrypt your data, and does not prevent someone with access to your device from connecting it to iTunes and copying your files, or deleting OmniOutliner from your device outright.
App Lock is intended as a privacy feature to prevent accidental exposure or corruption of data when others are using your device. It is not meant to thwart serious attempts to access or compromise your data.
Device-level security measures are recommended for those with additional security needs.
New rows use peers' style
When turned on, new rows use the selection styles applied to the previously selected row.
Tab navigates between cells
When turned on, pressing Tab on a hardware keyboard moves the cursor to the next cell rather than indenting the row.
Show keyboard shortcuts in inspectors
When turned on, keyboard shortcuts appear next to their related commands in the inspectors (particularly named styles in the Selection inspector).
Command-V pastes as plain text
When turned on, Command-V (the standard paste keyboard shortcut) pastes copied text without any of its original style attributes. Use Option-Shift-Command-V to paste rich (formatted) text instead.
When turned off, Command-V pastes rich text, and Option-Shift-Command-V pastes plain text.
Include handles in text export
When turned off, row handles are not included when exporting to Plain Test. When turned on, row handles are represented as a single dash (-) when exporting to Plain Text format. This applies to text export from OPML files as well as OmniOutliner files.
TextExpander (Update Snippets)
This menu item appears when you have TextExpander from Smile Software installed. Tap Update Snippets to update text snippets that you use within OmniOutliner.
Higher-quality audio recording
When turned on, audio clips are recorded at a higher sample rate. Turn this off to save space on your device.
Configure Resource Locations
Open a sheet with a list of connected locations that the app will check for template files. Tap Add Location to open a file browser and navigate to the desired folder, then tap Done to link it.
Not all cloud storage providers are capable of acting as linked resource folders for OmniOutliner. Providers that aren't compatible have their names greyed out in the browser list.
Configure Plug-Ins
Open a sheet with a list of the Omni Automation Plug-Ins available in connected folders on your device. To add Plug-Ins to this list, choose Add Linked Folder at the bottom of the list and navigate to the folder on your device that contains them.
For more information about this feature, see the Omni Automation website.
Send Anonymous Data
Help us help you; turning on the Send Anonymous Data option provides Omni with anonymous information about the platforms on which OmniOutliner is being used.
Warnings
Set whether compatibility warnings will appear when you open files in nonstandard formats (older OmniOutliner files and OPML files).
Keyboard Shortcuts
The following keyboard shortcuts can be used with OmniOutliner, and require a hardware keyboard. Press and hold command (⌘) to see a list of shortcuts available from your current location in the app.
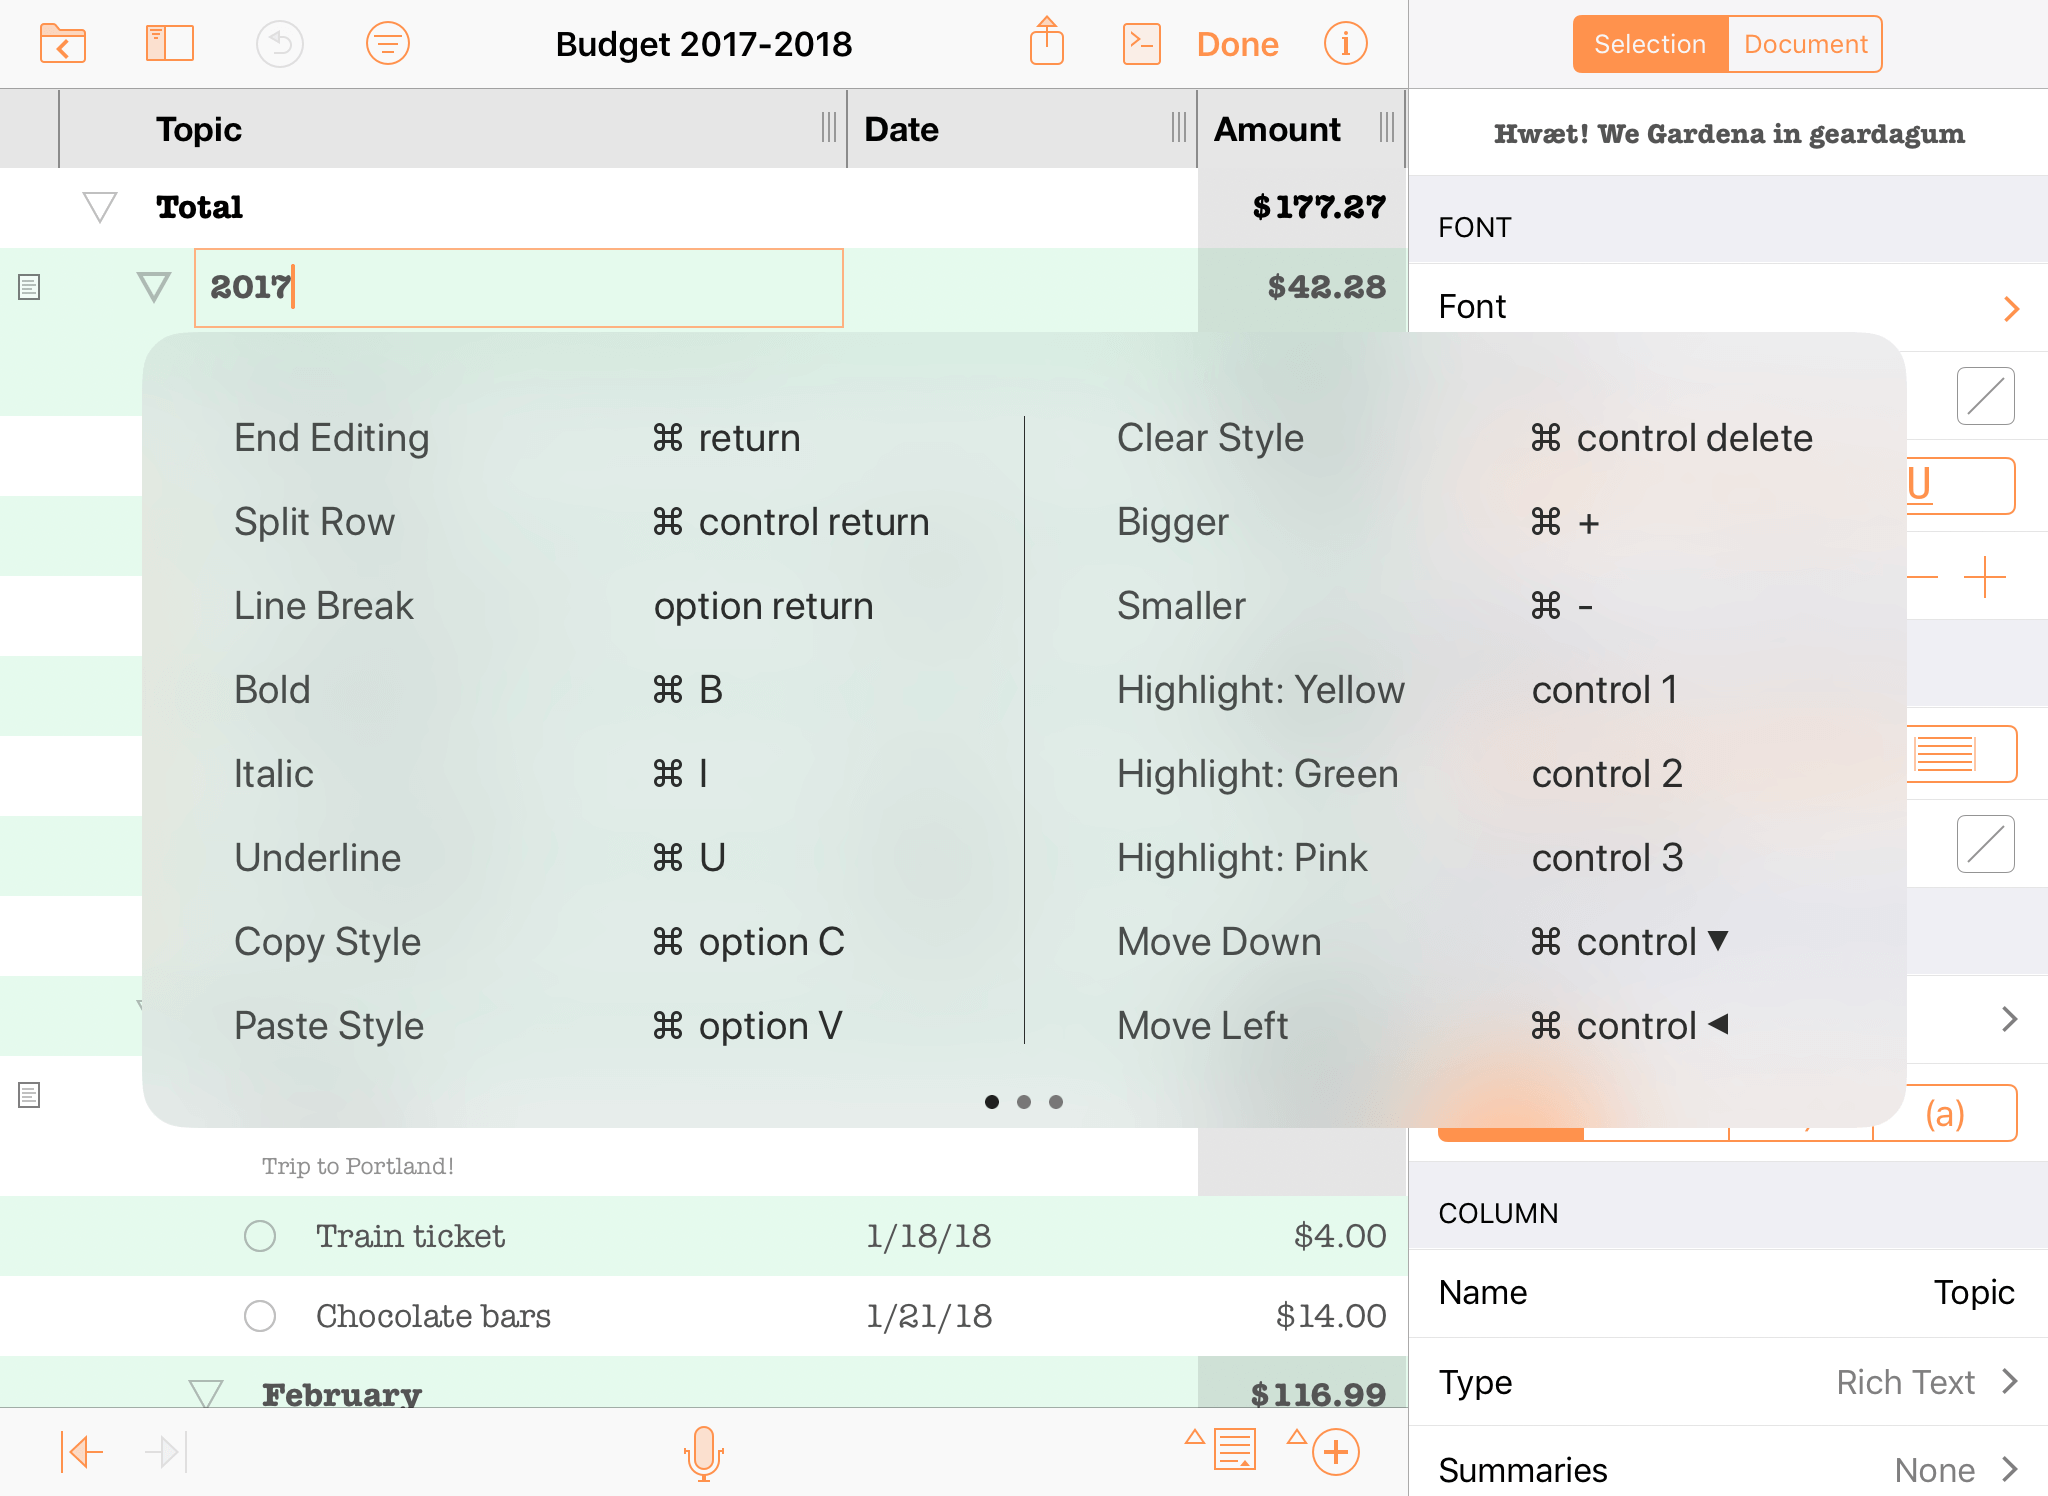
The majority of keyboard shortcuts apply only when editing or selecting rows, row text, or note text. Exceptions are noted in the header for each group.
| Action | Shortcut |
|---|---|
| Editing Shortcuts (on a selection of rows or text) | |
| Cut | ⌘-X |
| Copy | ⌘-C |
| Paste | ⌘-V |
| Undo | ⌘-Z |
| Redo | Shift-⌘-Z |
| Styles Shortcuts (on a selection of rows or text) | |
| Bold | ⌘-B |
| Italic | ⌘-I |
| Underline | ⌘-U |
| Copy Style | ⌘-Option-C |
| Paste Style | ⌘-Option-V |
| Clear Custom Style | ⌘-Control-Delete |
| Increase Font Size | ⌘-+ |
| Decrease Font Size | ⌘-– |
| Toggle First Named Style | Control-1 |
| Toggle Second Named Style | Control-2 |
| Toggle Third Named Style | Control-3 |
| Toggle Fourth Named Style | Control-4 |
| Toggle Fifth Named Style | Control-5 |
| Toggle Sixth Named Style | Control-6 |
| Toggle Seventh Named Style | Control-7 |
| Toggle Eighth Named Style | Control-8 |
| Toggle Ninth Named Style | Control-9 |
| Toggle Tenth Named Style | Control-0 |
| Organizational Shortcuts (on a selection of rows or text) | |
| Move Row Up | Control-⌘-↑ |
| Move Row Down | Control-⌘-↓ |
| Move Row Left | Control-⌘-← |
| Move Row Right | Control-⌘-→ |
| Split Row at Cursor | Control-⌘-Return |
| Indent Row | ⌘-] or Tab |
| Outdent Row | ⌘-[ or Shift-Tab |
| Add Row | Return |
| Add Row Above | Shift-Return |
| Add Child | Shift-⌘-] |
| Add Aunt | Shift-⌘-[ |
| Group | Option-⌘-G |
| Ungroup | Option-⌘-U |
| Duplicate | ⌘-D |
| Insert Line Break | Option-Return |
| Toggle Editing Row | ⌘-Return |
| Toggle Editing Note | ⌘-' |
| Select All | ⌘-A |
| Deselect All | Shift-⌘-A |
| Back Delete | Delete |
| Forward Delete | fn-Delete |
| Move to Next Cell | Tab |
| The Tab key can be used to either indent/outdent or to navigate between cells, based on your choice in OmniOutliner Settings. | |
| View Management Shortcuts (regardless of selection) | |
| Expand All Rows | Control-⌘-9 |
| Collapse All Rows | Control-⌘-0 |
| Expand Selected Rows | ⌘-9 |
| Collapse Selected Rows | ⌘-0 |
| Expand Selected Rows Completely | Option-⌘-9 |
| Collapse Selected Rows Completely | Option-⌘-0 |
| Toggle Note Visibility For All Rows | Control-⌘-' |
| Zoom In On Text | ⌘-option-+ |
| Zoom Out On Text | ⌘-option-- |
| Show or Hide Sidebar | Option-⌘-1 |
| Show or Hide Inspector | Shift-⌘-I |
| Open or Close Search Field | ⌘-F |
| Selection Management Shortcuts (on a selection of rows) | |
| Scroll to First Row | ⌘-↑ |
| Scroll to Last Row | ⌘-↓ |
| Move Selected Row Up | u |
| Move Selected Row Down | d |
| Move Left | l |
| Move Right | r |
| Edit Row | e |
| Toggle Checkbox Status | Spacebar |
| Select Row Above | ↑ |
| Select Row Below | ↓ |
| Expand Selected Row(s) | → |
| Collapse Selected Row(s) | ← |
| Add Row Above to Selection | Shift-↑ |
| Add Row Below to Selection | Shift-↓ |
| Toggle Note Visibility for Selected Row(s) | Option-⌘-' |
| Document Shortcuts | |
| Add New (while in the document browser) | ⌘-N |
| Close (while editing a document) | ⌘-W |
Getting Help
When you’re in need of help—whether you’re trying to figure out how styles work, how to set up column summaries, or if you’re having some other issue with OmniOutliner—it’s good to know that the Support Humans at the Omni Group are always available to lend you a hand.
Release Notes
For a detailed, comprehensive summary of the latest changes to OmniOutliner, tap while in the document browser and choose Release Notes. This is a good first place to check if something is behaving in a way you didn’t expect.
Finding Help Online
The OmniOutliner Support Site provides a wealth of information, including this Reference Manual, as well as How-Tos and Support articles, which go into finer detail on working with OmniOutliner.
Similarly, the OmniOutliner product page is always a good place to find the latest information about features and updates to OmniOutliner.
Videos
In addition to the online help, we also provide a series of online videos for OmniOutliner. These videos range in topics from available features in the latest version of OmniOutliner to how-to tutorial videos to help you level up in your OmniOutliner skills.
Email Support
If you’re stuck, if you have a good idea for the next version of OmniOutliner, or if you just want to let us know how we’re doing, go ahead and send us an email. In the document browser toolbar, tap and choose Contact Omni to queue up an email message addressed to us, or just send us an email with your thoughts. We take support pretty seriously, so you can expect a prompt response actually typed by human hands.
Phone Support
We understand that sometimes you just can’t wait for an email response when you’re knee-deep in an outline and you’re stuck or something isn’t working quite right. We get that. When this happens, you can call our Support Humans at 800-315-OMNI or 206-523-4152. Our Support Humans are available Monday-Friday, from 10 a.m. to 5 p.m. Pacific Time (-0700 GMT).
Online Forums
Omni maintains online forums for all of our products, which are available to everyone. Come share your questions and ideas with other users, share OmniOutliner files to show off how you’re using OmniOutliner for a particular outline, and seek help from the OmniOutliner community.
Credits
OmniOutliner 3 for iOS was developed with the following additional resources. Thanks!
MultiMarkDown License
OmniOutliner makes use of MultiMarkDown.
MultiMarkdown Copyright (c) 2010-2015 Fletcher T. Penney
MultiMarkdown is released under both the GPL and MIT licenses. You may pick the license that best fits your needs.
Modifications to remove reliance on Glib2: Copyright (c) 2011 Daniel Jalkut, licensed explicitly MIT.
LyX export code (c) 2013-2014 Charles R. Cowan, licensed under both GPL and MIT licenses.
Portions based on: peg-markdown Copyright (c) 2008-2011 John MacFarlane ODF output code (c) 2011-2013 Fletcher T. Penney
peg-markdown is released under both the GPL and MIT licenses. You may pick the license that best fits your needs.
Original Markdown specification by John Gruber
http://daringfireball.net/projects/markdown/
The MIT License Permission is hereby granted, free of charge, to any person obtaining a copy of this software and associated documentation files (the "Software"), to deal in the Software without restriction, including without limitation the rights to use, copy, modify, merge, publish, distribute, sublicense, and/or sell copies of the Software, and to permit persons to whom the Software is furnished to do so, subject to the following conditions:
The above copyright notice and this permission notice shall be included in all copies or substantial portions of the Software.
THE SOFTWARE IS PROVIDED "AS IS", WITHOUT WARRANTY OF ANY KIND, EXPRESS OR IMPLIED, INCLUDING BUT NOT LIMITED TO THE WARRANTIES OF MERCHANTABILITY, FITNESS FOR A PARTICULAR PURPOSE AND NONINFRINGEMENT. IN NO EVENT SHALL THE AUTHORS OR COPYRIGHT HOLDERS BE LIABLE FOR ANY CLAIM, DAMAGES OR OTHER LIABILITY, WHETHER IN AN ACTION OF CONTRACT, TORT OR OTHERWISE, ARISING FROM, OUT OF OR IN CONNECTION WITH THE SOFTWARE OR THE USE OR OTHER DEALINGS IN THE SOFTWARE.
For more information, visit http://fletcherpenney.net/multimarkdown/
highlight.js License
OmniOutliner makes use of highlight.js.
Copyright (c) 2006, Ivan Sagalaev All rights reserved. Redistribution and use in source and binary forms, with or without modification, are permitted provided that the following conditions are met:
- Redistributions of source code must retain the above copyright notice, this list of conditions and the following disclaimer.
- Redistributions in binary form must reproduce the above copyright notice, this list of conditions and the following disclaimer in the documentation and/or other materials provided with the distribution.
- Neither the name of highlight.js nor the names of its contributors may be used to endorse or promote products derived from this software without specific prior written permission.
THIS SOFTWARE IS PROVIDED BY THE REGENTS AND CONTRIBUTORS ``AS IS'' AND ANY EXPRESS OR IMPLIED WARRANTIES, INCLUDING, BUT NOT LIMITED TO, THE IMPLIED WARRANTIES OF MERCHANTABILITY AND FITNESS FOR A PARTICULAR PURPOSE ARE DISCLAIMED. IN NO EVENT SHALL THE REGENTS AND CONTRIBUTORS BE LIABLE FOR ANY DIRECT, INDIRECT, INCIDENTAL, SPECIAL, EXEMPLARY, OR CONSEQUENTIAL DAMAGES (INCLUDING, BUT NOT LIMITED TO, PROCUREMENT OF SUBSTITUTE GOODS OR SERVICES; LOSS OF USE, DATA, OR PROFITS; OR BUSINESS INTERRUPTION) HOWEVER CAUSED AND ON ANY THEORY OF LIABILITY, WHETHER IN CONTRACT, STRICT LIABILITY, OR TORT (INCLUDING NEGLIGENCE OR OTHERWISE) ARISING IN ANY WAY OUT OF THE USE OF THIS SOFTWARE, EVEN IF ADVISED OF THE POSSIBILITY OF SUCH DAMAGE.
For more information, visit https://highlightjs.org
TextExpander License
OmniOutliner makes use of TextExpander.
License Agreement
The TextExpander framework is Copyright © 2009-2016 SmileOnMyMac, LLC dba Smile, and is supplied "AS IS" and without warranty. SmileOnMyMac, LLC disclaims all warranties, expressed or implied, including, without limitation the warranties of merchantability and of fitness for any purpose. SmileOnMyMac assumes no liability for direct, indirect, incidental, special, exemplary, or consequential damages, which may result from the use of the TextExpander framework, even if advised of the possibility of such damage.
PLCrashReporter License
OmniOutliner makes use of PLCrashReporter.
Except as noted below, PLCrashReporter is provided under the following license:
Copyright © 2008–2013 Plausible Labs Cooperative, Inc. All rights reserved.
Permission is hereby granted, free of charge, to any person obtaining a copy of this software and associated documentation files (the “Software”), to deal in the Software without restriction, including without limitation the rights to use, copy, modify, merge, publish, distribute, sublicense, and/or sell copies of the Software, and to permit persons to whom the Software is furnished to do so, subject to the following conditions:
The above copyright notice and this permission notice shall be included in all copies or substantial portions of the Software.
THE SOFTWARE IS PROVIDED “AS IS”, WITHOUT WARRANTY OF ANY KIND, EXPRESS OR IMPLIED, INCLUDING BUT NOT LIMITED TO THE WARRANTIES OF MERCHANTABILITY, FITNESS FOR A PARTICULAR PURPOSE AND NONINFRINGEMENT. IN NO EVENT SHALL THE AUTHORS OR COPYRIGHT HOLDERS BE LIABLE FOR ANY CLAIM, DAMAGES OR OTHER LIABILITY, WHETHER IN AN ACTION OF CONTRACT, TORT OR OTHERWISE, ARISING FROM, OUT OF OR IN CONNECTION WITH THE SOFTWARE OR THE USE OR OTHER DEALINGS IN THE SOFTWARE.
Additional contributions have been made under the same license terms as above, with copyright held by their respective authors:
Damian Morris damian@moso.com.au
Copyright © 2010 MOSO Corporation, Pty Ltd. All rights reserved.
HockeyApp/Bitstadium
Copyright © 2012 HockeyApp, Bit Stadium GmbH. All rights reserved.
The protobuf-c library, as well as the PLCrashLogWriterEncoding.c file are licensed as follows:
Copyright © 2008, Dave Benson. All rights reserved.
Licensed under the Apache License, Version 2.0 (the “License”); you may not use this file except in compliance with the License. You may obtain a copy of the License at http://www.apache.org/licenses/LICENSE–2.0 Unless required by applicable law or agreed to in writing, software distributed under the License is distributed on an “AS IS” BASIS, WITHOUT WARRANTIES OR CONDITIONS OF ANY KIND, either express or implied. See the License for the specific language governing permissions and limitations under the License.