Every Single Menu Item and Keyboard Shortcut
Here it is, an exhaustive list of every single menu item, along with any corresponding keyboard shortcut, available in OmniOutliner 4. This section doesn’t just provide a once-over of the available commands, you’ll also find hidden gems—tips—to help you select the right menu option (or combination thereof) so you can unlock your OmniOutliner Power User badge and be the envy of all your friends and coworkers.
Note
There is no real badge, per se, that you can unlock for mastering OmniOutliner. That would be an Easter Egg, and we don’t do that sort of thing here. (Not sure what an Easter Egg is? Look here.)
If you find a menu option that doesn't have a keyboard shortcut but you really-really want one, you can always define new ones in System Preferences. For details on how to do this, don't miss the sidebar in Getting to Know OmniOutliner 4.
The OmniOutliner Menu
- About OmniOutliner
- This opens the About box so you can learn more about OmniOutliner, including the current version and build number (in case you need that for technical support). And speaking of technical support, we’ve also included handy email links so you can inquire about Sales info or to contact our Support Humans with any questions you may have about using OmniOutliner (or any of our other products for that matter). And if you’d rather speak to one of our Support Humans, just dial the phone number we’ve included; we’re here Monday through Friday from 10 a.m. to 5 p.m. Pacific Time.
- Check for Updates
- If your Mac is connected to the Internet, selecting this option will connect with our servers to see if an updated version is available for OmniOutliner. If one is available, you’ll be asked first if you want to update, and if so, the new build will download and install on your Mac.
Note
You won’t see the Check for Updates option if you’ve purchased OmniOutliner 4 from the Mac App Store.
- Preferences (Command-,)
- This opens the Preferences window so you can further configure OmniOutliner to suit your needs and your work style.
- Licenses
- This opens the Licenses window, in which you can enter or delete a license, or if you are using an evaluation copy of OmniOutliner, you can click Buy Licenses to be taken to our online store where you can purchase a license key.
Note
You won’t see the Licenses option if you’ve purchased OmniOutliner 4 from the Mac App Store.
- Services
- Here you’ll find a list of applications that OmniOutliner can share information with. Just select something in OmniOutliner, and then choose this menu option to see which apps you can send stuff.
- Hide OmniOutliner (Command-H)
- Hides OmniOutliner’s window, suppressing it to the land of hidden apps. To bring OmniOutliner back into view, either click the app icon in the Dock, or use Command-Tab to use OS X’s application switcher to switch back to OmniOutliner.
- Hide Others (Option-Command-H)
- Banish the windows of other open apps to the land of hidden apps. As with Hide OmniOutliner, to bring a hidden app back into view, either click that app’s icon in the Dock, or use Command-Tab to use OS X’s application switcher to switch back to the app you need.
- Show All
- Choose this menu option to quickly bring all of the hidden app windows out of hiding.
- Quit OmniOutliner (Command-Q)
- This does what it says; it quits OmniOutliner. If you haven’t saved the file before, you’ll be prompted to save the file (giving it a name and specifying a location to save the file to). If you are working in a file that you’ve previously saved, you don’t have to worry about saving before you quit, thanks to OS X’s Auto Save feature. But, if you’re really paranoid, you can use Command-S to save the file before using Command-Q.
The File Menu
Options for creating, opening, renaming, exporting, and printing documents and templates:
- New (Command-N)
- Create a new document using the default template.
- Resource Browser (Shift-Command-N)
- Opens the Resource Browser.
- Open (Command-O)
- Open an existing file.
- Open Recent
- OmniOutliner keeps track of recently opened files and includes the filenames in this menu so you can reopen a file and continue your work.
- Close (Command-W)
- Close the current window; use Option-Command-W to close all open OmniOutliner windows. You will be prompted to name and new, Untitled, document files before the window is closed.
- Save (Command-S)
- Save the contents of the current document.
- Duplicate (Shift-Command-S)
- Create a duplicate copy of the current document. The exact contents of the current window are copied into a new document window, which has the filename in the titlebar highlighted so you can enter a different name for the file. The file will be saved in the same location as its parent.
- Rename
- Choose this option to highlight the filename in the document’s titlebar so you can enter a new name for the file.
- Move To
- Choose this option to open a sheet and select another location on your Mac’s hard drive to store the file.
- Export (Option-Command-E)
- Export your OmniOutliner document to one of the following formats mentioned in Exporting From OmniOutliner.
- Save As Template
- Saves the current file as an OmniOutliner template file. Template files are stored on your Mac in
~/Library/Containers/com.omnigroup.OmniOutliner/Data/Library/Application Support/The Omni Group/OmniOutliner/Templates.
Note
If you’ve purchased OmniOutliner 4 from the Mac App Store, swap out com.omnigroup.OmniOutliner with com.omnigroup.OmniOutliner.MacAppStore, or com.omnigroup.OmniOutlinerPro.MacAppStore if you have OmniOutliner 4 Pro.
- Revert To
- Opens Time Machine so you can sift through earlier saves of the current document and restore it from an older save.
- Print Setup (Shift-Command-P)
- This opens the Print Setup dialog, so you can apply any previously saved Settings, choose which printer to format the document for, select a paper size, orientation, and scale for the document.
- Print (Command-P)
- Sends the current document to your default printer. You can use Print Setup (Shift-Command-P) to choose a printer other than your default printer; for example, if you have a document that needs to print in Tabloid-Landscape on a color printer.
The Edit Menu
Options for editing your content:
- Undo (Command-Z)
- Undoes the previous change you’ve made. OmniOutliner supports unlimited Undo, so go ahead and hit Command-Z a few dozen times and watch all of your hard work disappear.
- Redo (Shift-Command-Z)
- Just like Undo, Redo puts back something that you’ve undone but have decided that you really want to be there. For example, let’s say that you were testing out the strength of hitting Command-Z repetitively, but then you want to put all of that back. Yep, that’s right; you can just hit Shift-Command-Z to put everything back in place.
- Cut (Command-X)
- Deletes whatever you’ve selected and places that on the Clipboard so you can paste it back later, or just ignore it.
- Copy (Command-C)
- Copies whatever you’ve selected and places that on the Clipboard so you can paste it somewhere else, or in another document, later.
- Paste (Command-V)
- Pastes in whatever is on the Clipboard.
Paste's behavior is slightly different in OmniOutliner than what you find in some other apps. If you cut or copy text that has line breaks from another app and paste that into OmniOutliner, all of the text appears on a single row, but with those line breaks intact.

However, if you wanted each line to appear on its own row in OmniOutliner, first select a row by clicking in the gutter, and then use Edit ▸ Paste (or Command-V) to paste in the text.
- Paste and Match Style (Option-Shift-Command-V)
- Unlike Paste, this option pastes in whatever is on the Clipboard, but applies any predetermined style for that row or column in your OmniOutliner to the pasted material.
- Duplicate Selection (Command-D)
- Copy and paste the current selection into the current document automatically.
- Delete
- Deletes the current selection. Unlike Cut, however, Delete just wipes out whatever you’ve selected without placing it on the Clipboard.
- Select All (Command-A)
- Select every single thing in your OmniOutliner document.
- Deselect All (Shift-Command-A)
- Unselect every single thing in your OmniOutliner document. This is sometimes handy for when you’re not sure if something is selected and you’re about to paste something in.
- Set Status
- Use one of the following to set the status of a row’s checkbox:
- Checked
- Unchecked
- Calculated
- None
- Edit Note (Command-’)
- Edit the Note for the currently selected row or column cell.
- Attach File
- Attach a file to the document.
- Start/Stop Audio Recording
- Add an audio clip to your document.
- Insert Time Stamp
- Inserts one of the following time stamps on the current row:
- Short Date (Command-/)
- Inserts a localized numerical date string; for example: 10/05/2013.
- Long Date (Option-Command-/)
- Inserts a localized numerical date string; for example: October 5, 2013.
- Time (Command-@)
- Inserts a localized numerical time string; for example: 12:34:56 PM.
- Short Date and Time (Command-|)
- Inserts a localized numerical date and time string; for example: 10/05/2013 12:34 PM.
- Long Date and Time (Option-Command-|)
- Inserts a localized numerical date and time string; for example: October 5, 2013 12:34:56 PM PDT.
- Find
- Use one of the following search options:
- Show/Hide Search (Option-Command-F)
- Displays the search field in the Sidebar. When the search field is displayed, a Hide button appears to its left. Click the Hide button, or use the Hide Search menu option (or the same keyboard shortcut) to make the search field go away.
- Find (Command-F)
- This opens the Find dialog, in which you can enter something to search for. You can search for a text string, such as The Omni Group, or you can use a regular expression, such as
Omni\s, to search for the word Omni followed by a space (\s). - Find Next (Command-G)
- Find the next instance.
- Find Previous (Shift-Command-G)
- Find the previous instance.
- Use Selection for Find (Command-E)
- Uses the current selection as the search criteria when using Find. You can use this option before or after opening the Find dialog (Command-F).
- Spelling
- Choose one of the following options for checking the spelling and grammar in your document:
- Spelling (Command-:)
- Checks the spelling and grammar in the current document.
- Check Spelling (Command-;)
- Just checks the spelling in the current document. Who cares about grammar, anyway?
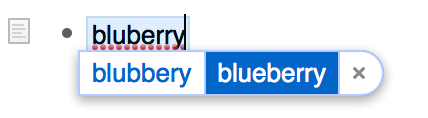
- Check Spelling as You Type
- Turned on by default, this option checks your spelling as you type. If you misspell something, the word will get a red squiggle underneath and OS X offers up similar words from which you can select the correct spelling.
- Speech
- You can have OS X read aloud the text in the current row or note using the system voice you’ve set up in the Dictation & Speech preferences (System Preferences ▸ Dictation & Speech ▸ Text to Speech).
- Start Speaking
- Start speaking the text in the current row.
- Stop Speaking
- Stop speaking.
- LinkBack
- LinkBack is a way of embedding content between applications in such a way that you can always go back and edit the content with the software used to create it originally.
- Edit LinkBack Item
- If you have pasted LinkBack content from another app, select the object and use this command to open the content in the original app.
- Remove LinkBack for Item
- Selecting this option removes the LinkBack feature from the selected content so that this content can only be edited within OmniOutliner.
- Start Dictation (fn fn)
- When dictation is turned on, OmniOutliner uses OS X’s speech recognition capabilities to convert the words you speak into text. When you’ve finished, just press fn fn again to stop dictation.
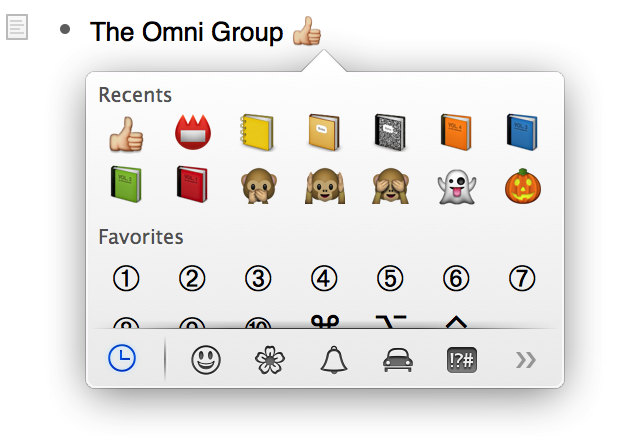
- Special Characters (Control-Command-Space)
- This opens the special characters popover, which gives you access to a broader set of characters, including arrows, symbols, and even Emoji.
The Format Menu
Options for formatting the contents of your document, including font and text styles, row numbering, and more:
- Copy Style (Option-Command-C)
- Copies the style of the current selection and places that on the Clipboard.
- Paste Style (Option-Command-V)
- Pastes the previously copied style onto the current selection.
Tip
The Copy and Paste Style options are very useful for cleaning up your document. Once you have a row styled just right, you can select Copy Style and then select the other rows that you’d like to have the same style, and then select Paste Style.
- Clear Style (Control-Command-Delete)
- Removes any styles that have been applied to an item and reverts the selection to the default style.
- Font
- Change the typeface and style of your text:
- Show Fonts (Command-T)
- This opens the Fonts window, from which you can choose another font, its typeface, and size.
- Bold (Command-B)
- Turns on or applies bold to the current selection.
- Italic (Command-I)
- Turns on or applies italics to the current selection.
- Underline (Command-U)
- Turns on or applies an underline to the current selection.
- Outline
- Turns on or applies an outline to the current selection.
- Bigger (Command-+)
- Increase the size of the current row or selected text.
- Smaller (Command-−)
- Decreases the size of the current row or selected text.
- Kern
- Use these options to change the spacing between characters:
- Use Default
- Use None
- Tighten
- Loosen
- Ligature
- Use these options to control ligatures in your document:
- Use Default
- Use None
- Use All
- Baseline
- Use these options to adjust the baseline of the current row or selection:
- Use Default
- Superscript
- Subscript
- Raise
- Lower
- Show Colors (Shift-Command-C)
- Opens the color palette so you can make all of your text chartreuse (if you’d like).
- Text
- Alignment options for text, images, and attachments:
- Align Left
- Aligns text and objects to the left margin of the current row or column.
- Center
- Aligns text and objects based on the midpoint of the current row or column.
- Justify
- Evenly space the words in a row or column so that multiline text uses the full width of the column.
- Align Right
- Aligns text and objects to the right margin of the current row or column.
- Writing Direction
- Change the writing direction:
- Right to Left
- Change the writing direction from Left to Right to Right to Left.
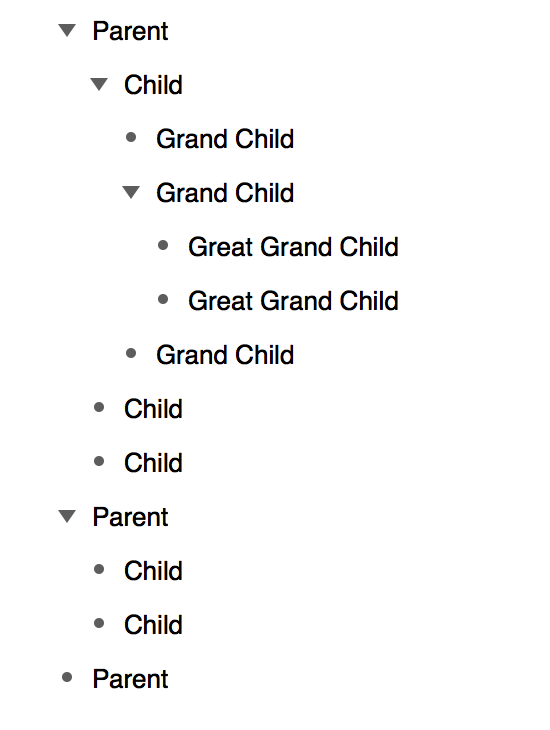
- Row Numbering
-
Assign a row-numbering scheme to your document. Row numbers are based on their indentation level. Assuming that a row with no indent is the Parent, the first indented row would be a Child, and subsequent indented rows are Grand Children and Great Grand Children, unnumbered rows would have the following hierarchy:
The Row Numbers menu is split into two parts. The upper section of the menu lets you determine a numbered style to use as the prefix for the rows in your document. If you have set a numbered style other than None, the styles in the lower section—x., x), and (x)—can also be applied to the row number; for example 1.1.1., 1.1.1), or (1.1.1), respectively.
Set the formatting for row numbers:
- None
- When selected, the rows in your document will not be numbered.
- 1, 2, 3, 4
- When selected, the rows in your document are numbered sequentially, starting with 1.
- A, B, C, D
- When selected, the rows in your document are lettered sequentially using uppercase letters, starting with A.
- a, b, c, d
- When selected, the rows in your document are lettered sequentially using lowercase letters, starting with a.
- I, II, III, IV
- When selected, the rows in your document are numbered sequentially using uppercase Roman numerals, starting with I.
- i, ii, iii, iv
- When selected, the rows in your document are numbered sequentially using lowercase Roman numerals, starting with i.
- 1, 1.1, 1.1.1
- When selected, the rows in your document are numbered sequentially using section numbering, starting with 1 for the parent row, 1.1 for the next level of indented rows, and so on.
- No Prefix or Suffix
- Selected by default, this option implies that no characters will appear before or after a row number.
- x.
- This places a period after the chosen row number style; for example, 1.1.2..
- x)
- This places a closing parenthesis ) after the chosen row number style; for example, 1.1.2).
- (x)
- This places row numbers in parenthesis; for example, (1.1.2).
- Apply Template Theme
- Opens a sheet that looks similar to the Resource Browser so you can choose and apply a template theme to the current document.
The View Menu
Options for working within your OmniOutliner document:
- Expand All (Control-Command–9)
- Expand all of The rows in your document.
- Collapse All (Control-Command–0)
- Collapse all of the rows in your document.
- Expand Row (Command–9)
- Expand the current row.
- Expand Row Completely (Option-Command–9)
- Expands the row and all child rows as well.
- Collapse Row (Command–0)
- Collapses the current row.
- Collapse Row Completely (Option-Command–0)
- Collapses the row and all child rows as well.
- Focus (Shift-Command-F)
- Brings the current row (and its children) into focus by hiding everything else in your OmniOutliner document. This is particularly helpful, for example, when you want to focus on the outline for a chapter of a book or a parts list for an engineering project. You can also assign multiple levels of Focus based on the structure of your document. For example, if you have a row with a few nested children, you could assign focus to the one of the child rows, and again to one of its rows if any were nested.
- Unfocus (Option-Shift-Command-F)
- Removes the previously assigned Focus.
- Unfocus All
- Removes the Focus as applied to every object in your OmniOutliner document.
- Zoom In (Command->)
- Magnify the view of your document. You can scale your document up to 400 percent.
- Zoom Out (Command-<)
- Demagnify the view of your document. You can scale your document down to 50 percent.
- Zoom to Actual Size
- Automatically scales your document back to 100 percent (normal size). This is particularly helpful when you’ve zoomed in to 400 percent and want to quickly return to a normal view.
Tip
If you find that you’re zooming in and then back to actual size a lot, consider adding a keyboard shortcut for Zoom to Actual Size. Many great Mac apps, such as Acorn, use Command–1 to zoom to actual size.
- Column Headers
- Choose whether column headers are displayed using one of these options:
- Show
- Displays all column headings.
- Automatic
- Turns on column headings if there are two or more columns in your document (the Note column does not count).
- Hide
- Hides all column headings.
- Show/Hide Status Checkboxes
- Choose to display or hide the clickable status checkboxes. These are helpful for when you an outline that pertains to a project (such as the outline for writing OmniOutliner’s documentation) and you want to tick things off as you go.
Tip
Use the status checkboxes in concert with the Reorganize ▸ Keep Sorted or Reorganize ▸ Sort Outline options for sorting a document’s status by checked or unchecked status boxes.
- Hide Column (Pro)
- Hides the column that presently has the focus.
- Columns (Pro)
-
Choose which columns to display:
- Show All Columns (Pro)
- Displays all of the columns in your OmniOutliner document.
- Note (Pro)
- Hide or show the Notes column.
- Topic (Pro)
- The Topic column cannot be hidden; it is always viewable.
Note
Since you can change the default name of the column heading from Topic to anything else, the options you see in the Columns submenu will reflect the titles you’ve assigned to the column headings, including text or any Emoji characters you may have used.
- Row Text (Pro)
-
Use these options for displaying text within a row:
- Always Show Full Text
- The text in a row will always be visible, even when the cursor is in another row.
- Collapse When Not Editing
- The text in the row will be truncated at the end of the first line (rather than wrapping and continuing) when the row is not being edited. This is particularly helpful when you’ve imported text from another document (such as a Word document), and you only want to see the text for the row you’re working on.
- You can still see the text in rows that are collapsed; just move the mouse pointer over another row, and a popup appears with that rows text.
- Notes (Pro)
-
While Notes in general are a standard feature of OmniOutliner 4, the ability to control how they are displayed is only available in OmniOutliner 4 Pro. Choose how you want the Notes in your OmniOutliner file to appear; either inline or in a separate pane:
- Display Inline
- Have your Notes appear inline with the rest of of your content.
- Display in Pane
- An OmniOutliner Pro feature, you can opt to have the Notes in your OmniOutliner file appear in a separate pane at the bottom of the window.
- Show/Hide Note (Option-Command-‘)
Show/Hide Note Pane (Pro) (Option-Command-’) - Shows or Hides inline notes or the Note Pane. (Show/Hide Note Pane is an OmniOutliner Pro feature.)
- Show/Hide All Notes (Control-Command-’)
- Toggle the visibility of the Notes in your document.
- Hide/Show Sidebar (Option-Command-1)
- Choose whether to display the left sidebar that contains Search, Document info, and Styles.
- Enter/Exit Full Screen (Control-Command-F)
- Make it so OmniOutliner takes over the entire screen. The advantage of going to Full Screen is so you can focus on your work without other distractions. The Inspector sidebar will float on top of your window, and you can still access the buttons in OmniOutliner’s toolbar by moving your mouse pointer toward the top of the screen. To exit from Full Screen mode, use either Control-Command-F again, or press the Esc key.
- Show/Hide Toolbar (Option-Command-T)
- Choose whether to display the toolbar at the top of the document window.
- Create/Remove Document-Specific Toolbar (Pro)
- This option lets you create a toolbar that’s specific to the document you’re working on. For example, the tools you need for writing a script might be totally different from the tools you use to create invoices. After creating a document-specific toolbar, you might consider saving that file as an OmniOutliner Template (File ▸ Save as Template) so you don’t have to recreate that toolbar ever again.
- Customize Toolbar
- Choose this option if you want to customize the toolbar for every OmniOutliner document, except for any templates for which you’ve created a document-specific toolbar (see the previous menu option). See the earlier section, Customizing the Toolbar for details on how to customize and create document-specific toolbars (an OmniOutliner Pro feature).
The Organize Menu
Options for adding, removing, and sorting the contents of your document:
- Add Row
- Insert a row beneath the current row.
- Add Inside (Command-})
- Inserts and indents a new row beneath the current row.
- Add Outside (Command-{)
- Inserts and outdents a new row beneath the current row.
- Add Column
- Inserts a new column after the currently selected column.
- Remove Column
- Removes the selected column.
- Keep Sorted
-
Choose one of these options to either reset or maintain the type of sorting you’d like for your document:
- Clear Sorting
- Removes any previously selected sorting choice. This is useful for when you want to resort a document using another method.
- Notes, A-Z
- Sorts the contents of the document in alphabetical (A-Z) order based on the Notes for each row.
- Notes, Z-A
- Sorts the contents of the document in reverse alphabetical (Z-A) order based on the Notes for each row.
- Status, Unchecked to Checked
- Sorts the contents of the document based the state of the Status Checkboxes, from unchecked to checked.
- Status, Checked to Unchecked
- Sorts the contents of the document based the state of the Status Checkboxes, from checked to unchecked.
- Topic, A-Z
- Sorts the contents of the document in alphabetical (A-Z) order based on the Topics used in the document.
- Topic, Z-A
- Sorts the contents of the document in reverse alphabetical (Z-A) order based on the Topics used in the document.
- Sort Outline
- Sort the items in your document, once, based on the following options:
- Notes, A-Z
- Sorts the contents of the document in alphabetical (A-Z) order based on the Notes for each row.
- Notes, Z-A
- Sorts the contents of the document in reverse alphabetical (Z-A) order based on the Notes for each row.
- Status, Unchecked to Checked
- Sorts the contents of the document based the state of the Status Checkboxes, from unchecked to checked.
- Status, Checked to Unchecked
- Sorts the contents of the document based the state of the Status Checkboxes, from checked to unchecked.
- Topic, A-Z
- Sorts the contents of the document in alphabetical (A-Z) order based on the Topics used in the document.
- Topic, Z-A
- Sorts the contents of the document in reverse alphabetical (Z-A) order based on the Topics used in the document.
- Move
-
Use the following commands to move, indent, or outdent rows in your document:
- Move Down (Control-Command-↓)
- Moves the selected row down one row.
- Move Right (Control-Command-→)
- Outdents the selected row.
- Move Up (Control-Command-↑)
- Moves the selected row up one row.
- Move Left (Control-Command-←)
- Indents the selected row.
- Indent (Command-])
- Indents the current row.
- Outdent (Command-[)
- Outdents the current row.
- Group (Option-Command-G)
- Indents the selected rows and groups them together under a new parent row.
- Ungroup (Option-Command-U)
- Ungroups the rows of a selected group. Ungrouping does not remove a parent row; you’ll need to delete that separately, if you so choose.
The Window Menu
Options for working with OmniOutliner’s windows:
- Minimize (Command-M)
- Relegates the current window to the right side of the Dock so it’s out of your way. To bring the window back into focus, you can either choose Window ▸ [filename] (look at the bottom of the Window menu for a list of open documents), or just click on the document’s icon in the Dock to make it zoom back into view.
- Zoom
- This resizes the OmniOutliner document window to make it smaller (and sometimes really small), or to snap it back to normal-sized. This performs the same function as clicking the green Zoom button (
 ) in the upper-left corner of the document window.
 - Show/Hide Inspector (Shift-Command-I)
- Open the Inspectors.
- Inspectors
- Choose to go directly to one of the following Inspectors:
- Style
- Column
- Outline
- Document
- Style Attributes
- Bring All to Front
- Brings all open OmniOutliner windows to the front of any other application windows that are currently open on your Mac.
The Help Menu
Can’t figure something out in OmniOutliner? We’re here to Help:
- OmniOutliner Help
- Opens the in-app help document that you’re currently reading.
- Welcome
- A little greeting from us to you. (Aw!)
- Release Notes
- Discover what’s new in the latest release of OmniOutliner. Details you’ll find here include bug fixes, additions, and changes.
- Contact Omni
- This queues up an email to omnioutliner@omnigroup.com so you can send us feedback about, or ask for help with, OmniOutliner. We’ve pre-filled the Subject line of the message with your specific build number and the license key for your version of OmniOutliner so we can better help you.