OmniOutliner, Your Way
There are a lot of options for configuring OmniOutliner to be even more relevant to your specific computing habits, compositional needs, and workflow. The following features get OmniOutliner working for you in a serious way.
Custom Toolbar
If there are controls you use frequently (or don’t use at all), you can customize OmniOutliner’s Toolbar to put the most useful buttons one click away. Choose View ▸ Customize Toolbar (or right-click the Toolbar itself and choose Customize Toolbar from the contextual menu).
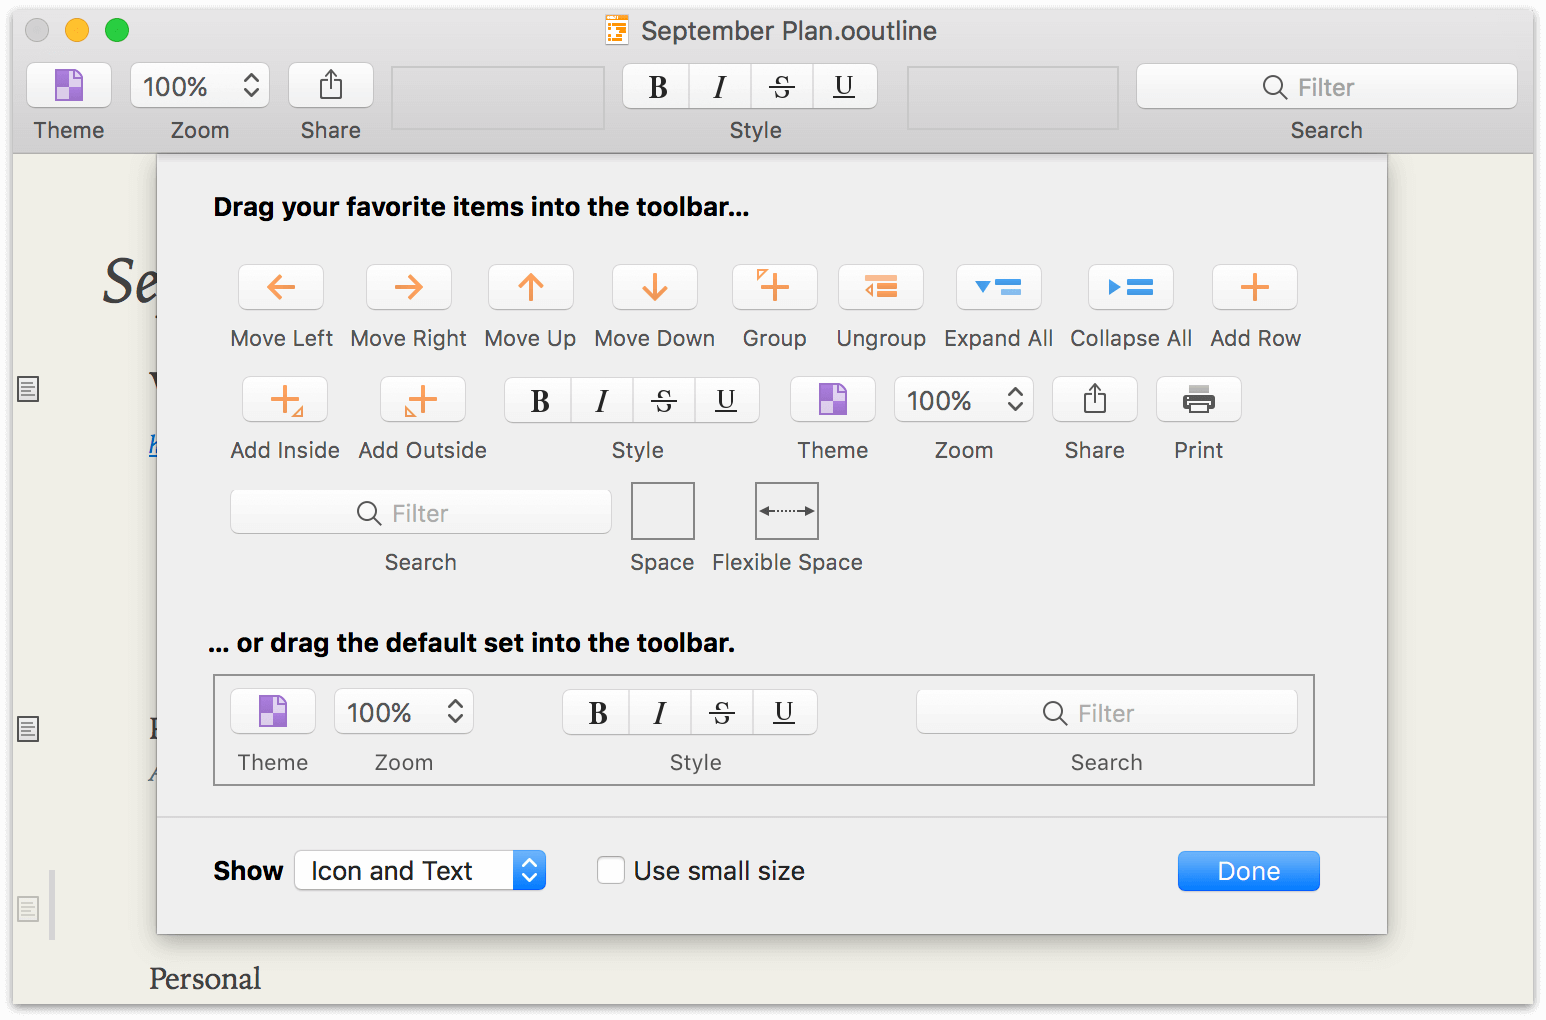
Drag individual buttons to or from the custom sheet to add them to, or remove them from, the Toolbar. To start over from scratch and restore the set of default Toolbar buttons, drag the row from the bottom of the sheet up into your document Toolbar.
Custom Touch Bar
If your Mac supports it, OmniOutliner uses the Touch Bar to bring the most useful tools and controls to your fingertips.

The Touch Bar adapts based on what is selected in the outline, displaying different controls if you have:
- A row or rows selected
- Text selected
In each instance, a separate palette of contextually relevant controls appears in the Touch Bar. You can further customize each palette by choosing View ▸ Customize Touch Bar and dragging controls to and from the Touch Bar interface.
Any changes you make are saved separately along with each palette, so you’ll always have the most relevant controls available without fear of overwriting others.
Keyword Filtering
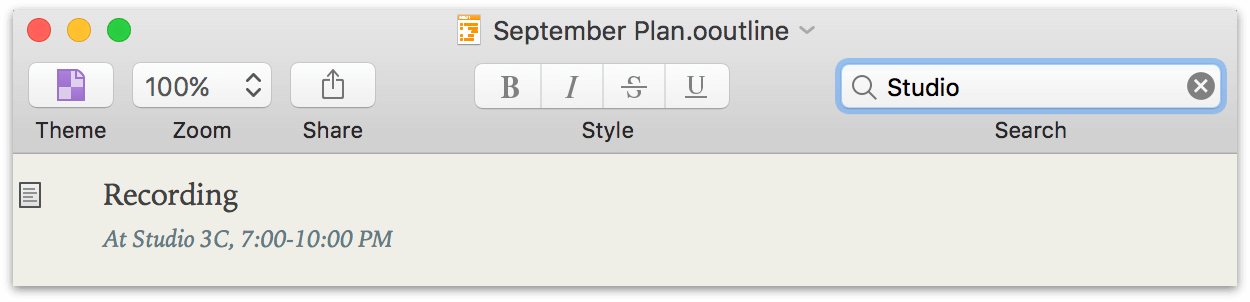
For particularly long documents it can be useful to filter away content that isn’t relevant to your current work. The search field in OmniOutliner’s Toolbar offers a convenient way to narrow the criteria for rows displayed in your outline—type a keyword in the field, and only rows with matching text in the row (or an attached note) are displayed.
Keyword Find and Replace
When you need to find a specific instance of a keyword or phrase in your outline, the Find dialog, accessed from Edit ▸ Find ▸ Find (Command-F), offers a standard set of keyword search tools. Enter a search term in the Find String field and click Next. If present in the document, the first instance of the term will be selected.
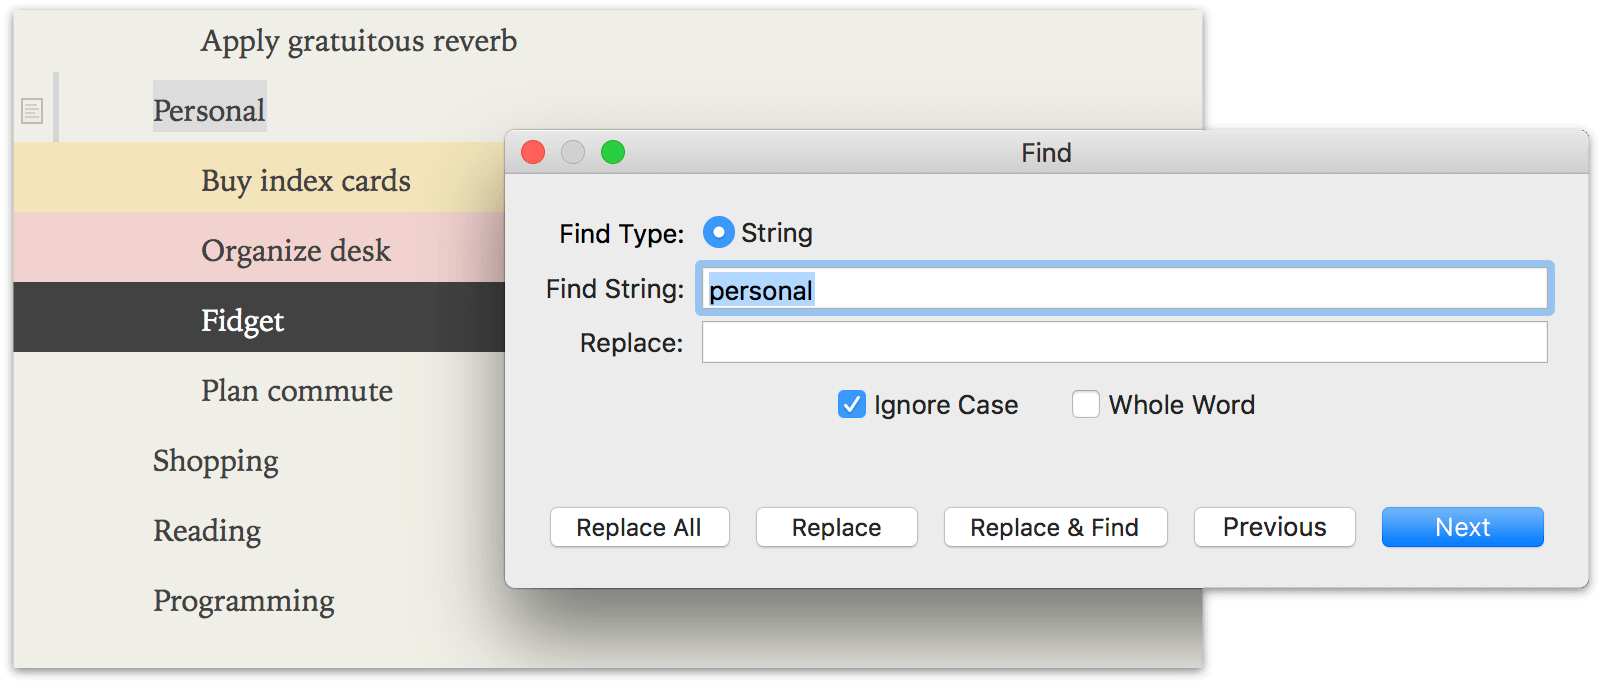
Use the Next and Previous buttons (or the Edit ▸ Find submenu’s Find Next (Command-G) and Find Previous (Shift-Command-G) commands) to navigate through instances of the term in your outline, or use the Replace field and buttons to quickly edit identical strings wherever they appear.
The Edit ▸ Find submenu also includes Use Selection For Find (Command-E), which searches for the next instance of text matching the currently selected string in the document.
Word Count
For a quick summary of your work, check out the bar at the bottom of the document window. It displays the number of rows, words, and characters in the content currently shown in the outline.

The numbers here reflect what is actually being shown in your outline right now, so if you filter the outline with a keyword they may change. (Row expansion state doesn’t affect this, however.)
Sorting
If your outline contains a list of items that would be useful to have listed in order by specific criteria, you can use the Keep Sorted and Sort Outline commands in the Organize menu to sort alphabetically (forward or backward) by note and title, or sort by checkbox status.
Keep Sorted adds a rule to your document that reorganizes rows once you finish editing them to conform to the sort order you choose. This isn’t permanent; choose Clear Sorting from the submenu to restore the outline’s original row order.
By contrast, Sort Outline submenu commands perform a single sort operation on existing rows that rearranges their order permanently (and then leaves them alone).
You can apply multiple Keep Sorted criteria to your outline as long as they aren’t mutually exclusive (Topic, A-Z and Topic, Z-A, for example). When sorting by note, rows with notes appear beneath rows without them.
Zoom
When visibility of your outline is important but you don’t want to reconfigure your text styles, choose View ▸ Zoom In (Command->) or View ▸ Zoom Out (Command-<) to increase (or decrease) text size throughout the document. Return the view to its original size with View ▸ Zoom to Actual Size.
Typewriter Mode
OmniOutliner keeps your scroll position static when you add a new row to an outline or select a row other than the current one (until you reach the very bottom of the window).
View ▸ Use Typewriter Mode changes this. When in use, typewriter mode detects when your selection moves above or below the center of the document window, and adjusts the scroll position in response. This keeps the row you select front and center—just like it would on a typewriter.
OPML Editing
OmniOutliner acts as a full editor for documents in the .opml file format. It can open .opml files, save edits to them, and export native .ooutline files as .opml. This is useful when you need a basic format to share with other applications that support hierarchical outlining. However, OmniOutliner has many features that .opml doesn’t support (theming and styling in particular).

When you first open a .opml file, a bar appears noting that these unsupported features are disabled. To take advantage of OmniOutliner’s full feature set, save the file as an OmniOutliner document.
OmniOutliner Pro Support
OmniOutliner for Mac comes in two flavors: Essentials and Pro. Files created by either edition can be read in the other (so if someone sends you a Pro file, you can open and read it in Essentials).

To edit a Pro document in OmniOutliner Essentials, click Convert in the bar that appears. The document is duplicated as an unsaved copy with Pro content removed, where it can be edited and saved as normal.
Wondering what’s in OmniOutliner Pro, or if it’s right for you? Check out the OmniOutliner website for a breakdown of the features offered in each version.
Intra-Document Links
OmniOutliner Pro includes the Copy as Link menu item, which copies links to individual rows within OmniOutliner documents for pasting elsewhere in an outline. Clicking a link in the format omnioutliner:///open?row=mLUW8Czar_j inside an OmniOutliner document takes you to the linked row inside that same document.
These links can't be created in OmniOutliner Essentials, but clicking them still works (unless it's to an invalid destination, like a deleted row or a row in another document).
Preferences
To open OmniOutliner’s Preferences window, choose OmniOutliner ▸ Preferences (Command-’). There are three preference panes that you can use to further customize OmniOutliner 5 to suit your needs and your work style.
Each preference pane includes a Reset and Help button so you can revert back to the default settings, or get to this Help page quickly from within the app.
General Preferences
Use the General Preferences pane to make changes that apply across the board for everything you do in OmniOutliner.
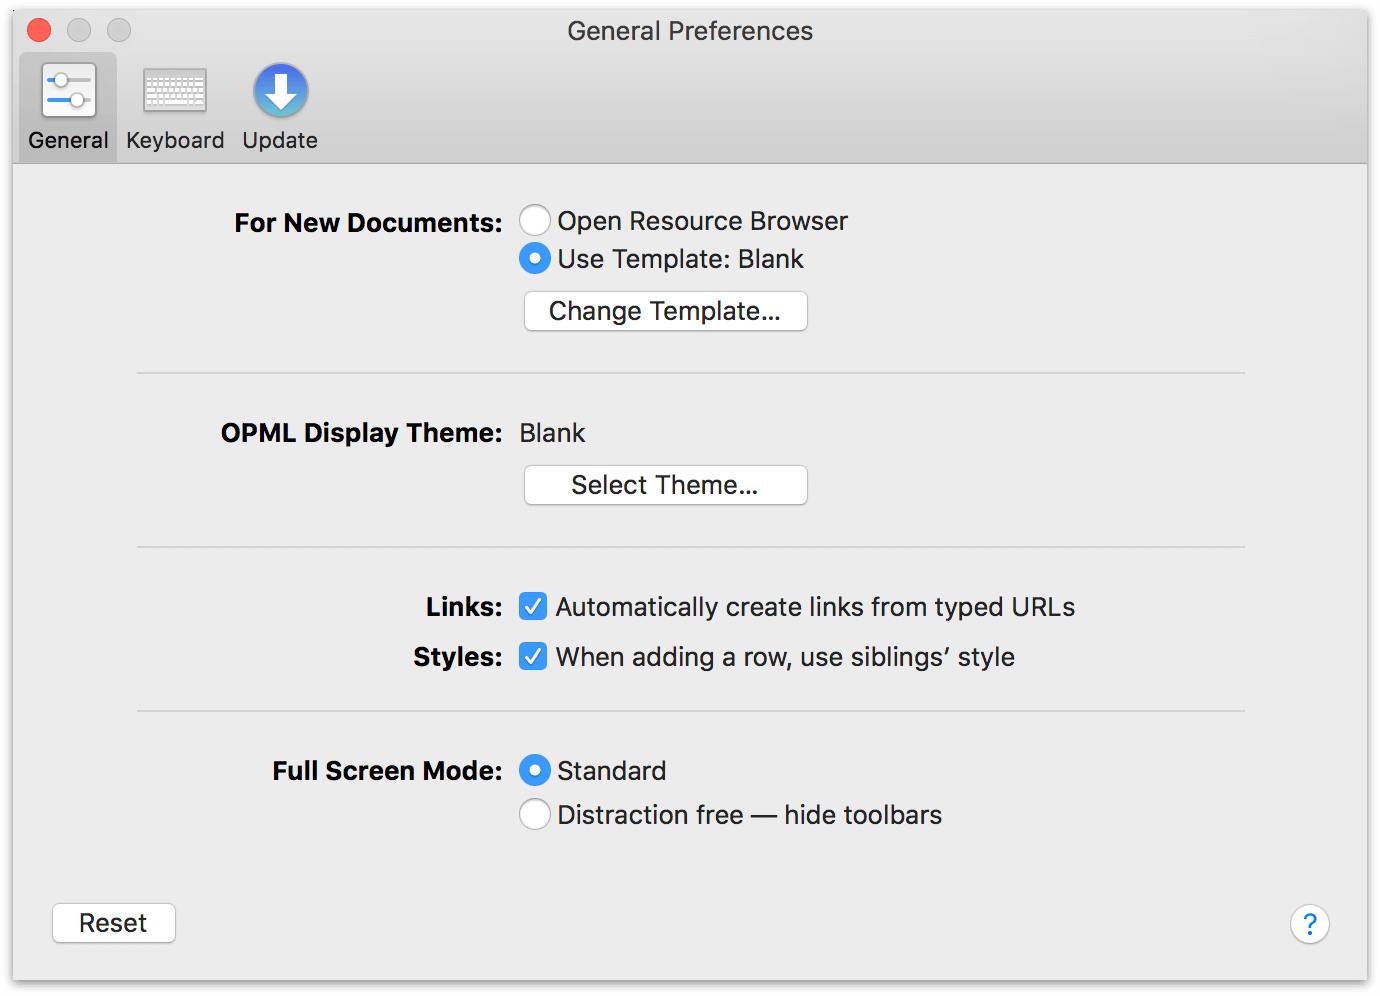
Options in General Preferences include:
- New Documents
-
Choose what happens when you create a new document, by either choosing File ▸ New or using the Command-N keyboard shortcut. You can choose between opening the Resource Browser (where you can choose a template for a new document, or open a recently edited one), or creating a new document based on the default template.
If you want to change the default template, click Change Template and select a different theme from the browser.
- OPML Display Theme
- Choose the theme that applies to .opml files when opened in OmniOutliner. Unlike theming for OmniOutliner files (where text and row styles are applied and saved), this preference is purely visual. Style settings are not retained within .opml files.
- Links
- Turn on or off the ability to make hyperlink (a URL such as https://www.omnigroup.com) clickable. If you uncheck this option, the URLs you enter are rendered as Rich Text and clicking them will not open the URL in your default web browser.
- Styles
- Turn on or off the setting for a new row to adopt the style from that row’s sibling. When this is checked and you add a new row (by pressing Return or Shift-Return), that new row adopts the styles of the row you were previously in. When unchecked, any new rows you create revert to the default styles from the theme you’ve chosen.
- Full Screen Mode
- This preference switches between the Standard full screen mode, with the Toolbar visible at all times, and Distraction Free mode, which hides the Toolbar unless you move the mouse cursor up to the top of the screen.
Use View ▸ Enter Full Screen (Control-Command-F) to make the current window occupy your entire screen (use the same command to leave full screen mode when you’re finished).
Alternatively, click the green Full Screen button in the upper left of the window to enter or leave full screen mode.
Keyboard Preferences
Use the Keyboard Preferences to adjust how OmniOutliner reacts when you press certain keys.

These options are as follows:
- When pressing Return
-
By default, pressing Return creates a new empty row. You can change this to Insert a line break in the current row by switching the radio buttons; however, pressing Option-Return always inserts a new line in the current row.
Similarly, with Split the current row at the insertion point set, you can split the current row into two rows at the cursors position by pressing Return. Even when this option is turned off, you can press Control-Return to split a row in two.
- New rows are created
- By default, new rows are Indented if there are children when you press Return. If you switch the radio button to Always at the same level, new rows are created at the same level as the line your cursor is on when you press Return.
- When pressing Escape
-
There are two options for what happens when you press the Escape key. By default, pressing the Escape key opens the system-wide completion menu. This comes in particularly handy when you aren’t quite sure how to spell something. You can just type in the first few characters of the word, press Escape, and a popup menu appears with a list of possible options. To accept one of the options, you can click it with your mouse, or use the Down Arrow key to move the highlight to the word you need and then either press Tab or Return to accept that option.
Use the other option, Begin or end text editing, for times when you’re doing quick entry and need to move around in your outline, editing rows more efficiently. Pressing Escape after entering some text in a row will select that row. Press Escape again places the cursor at the end of the line so you can continue typing.
- Apply named styles with
- By default, you can use one of the Function keys (F1 through F9) to apply one of the styles in the Format menu to the current row. This preference switches the keyboard shortcuts between the Function keys and a Control-number shortcut scheme.
Automatic Software Update Preferences
There’s nothing worse than out-of-date software, and one way to ensure that you’re always using the latest and greatest version of OmniOutliner is with the Automatic Software Update Preferences.
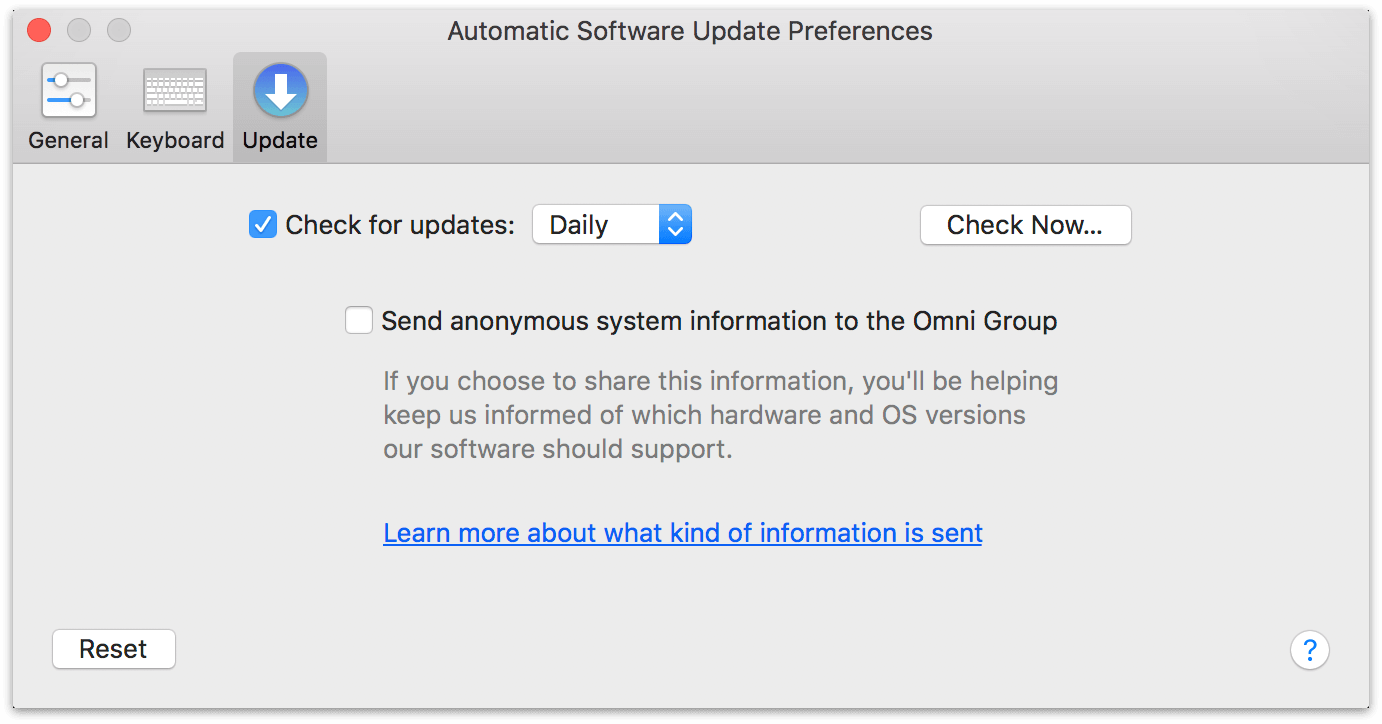
You can choose to check for updates either Daily (the default), Weekly, or Monthly, or if you think you may have missed something you can click Check Now....
If you’d like to help us improve future versions of OmniOutliner for you and others, you can choose to send us anonymous information about your system when you check for updates to the app. Click Learn more about what kind of information is sent to see a list of exactly what info is collected, and learn how it’s used.
If you’ve purchased your copy of OmniOutliner through the Mac App Store, you can disregard this preference pane as you will be notified in the App Store app when a new update is available. However, we still offer Mac App Store customers the option to send us anonymous system information when updating.