Using Notes and Attachments
Notes are a great way to enrich the actions and projects you’re working on. Instead of cluttering an action title with a list of instructions for completing it, try adding them in the note field instead—note text is fully searchable, so there’s no worry about the minutiae getting lost in a hidden field.
To add a note to an action or a project, tap it and choose the Note tab in the editor.
When a picture is worth a thousand words, try adding an attachment! Images and audio can be added to an action or project as attachments, which are located in the Attachment tab of the action or project editor.
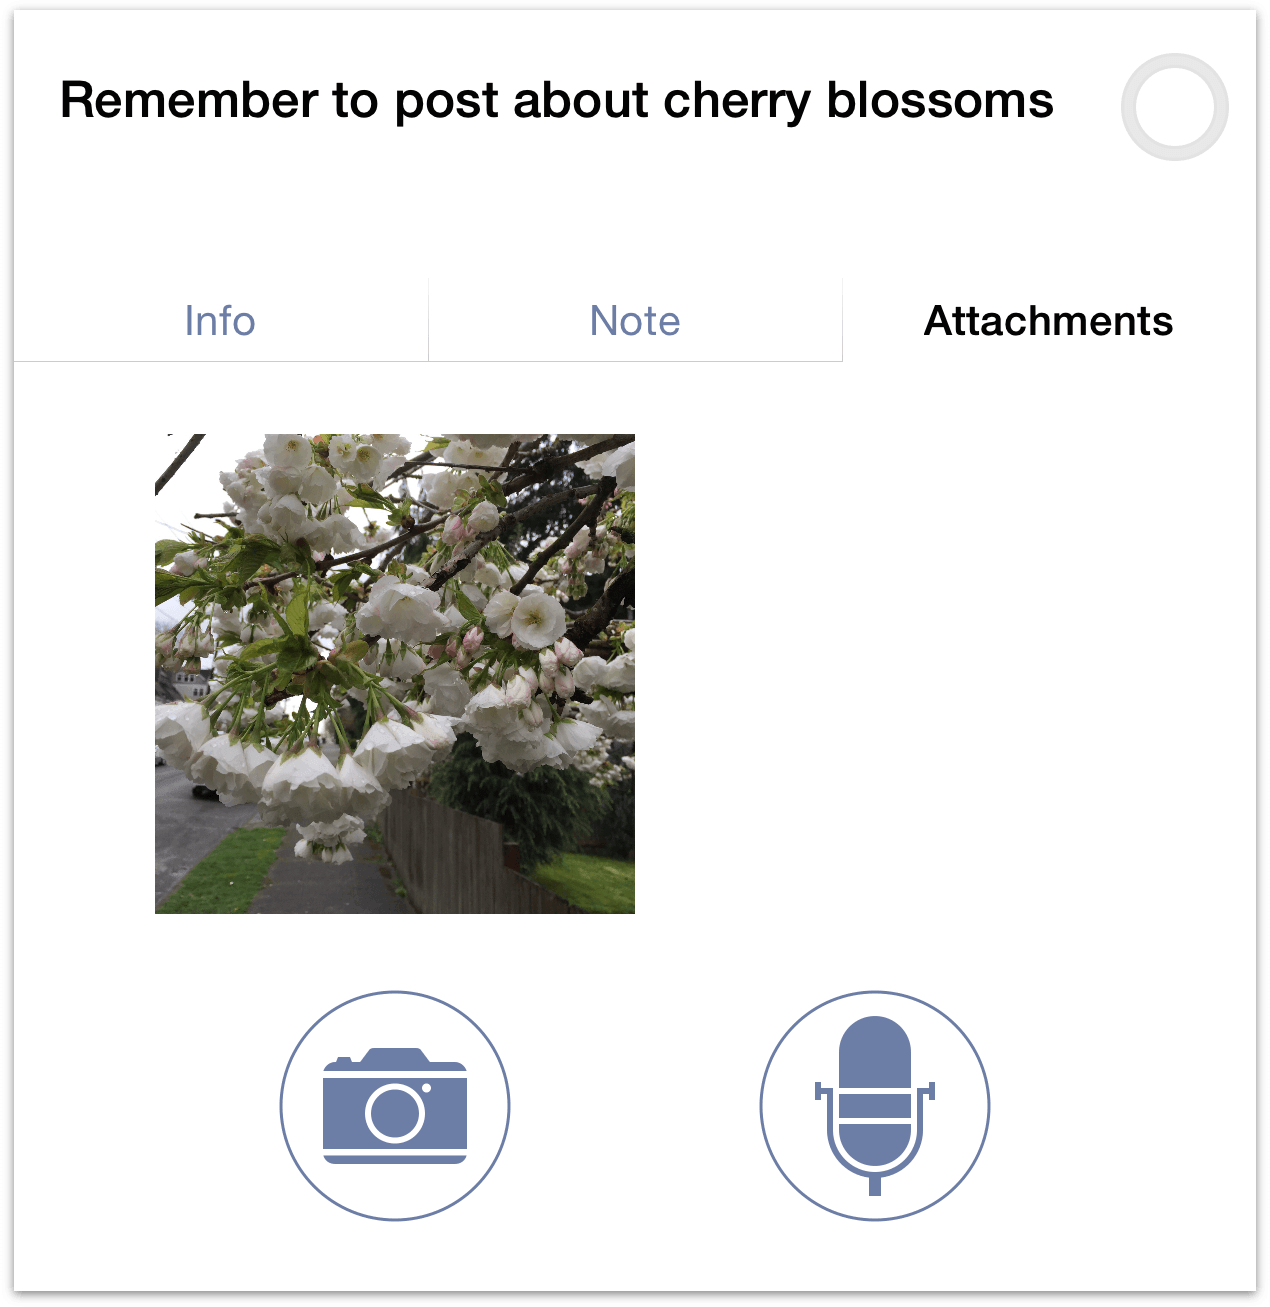
You can attach images to a project or action by tapping the camera button, which gives you the option to either take a picture or to choose an image from one of your photo albums. Audio attachments are added by tapping the microphone button. The segmented bar shows the volume level of the audio being recorded.
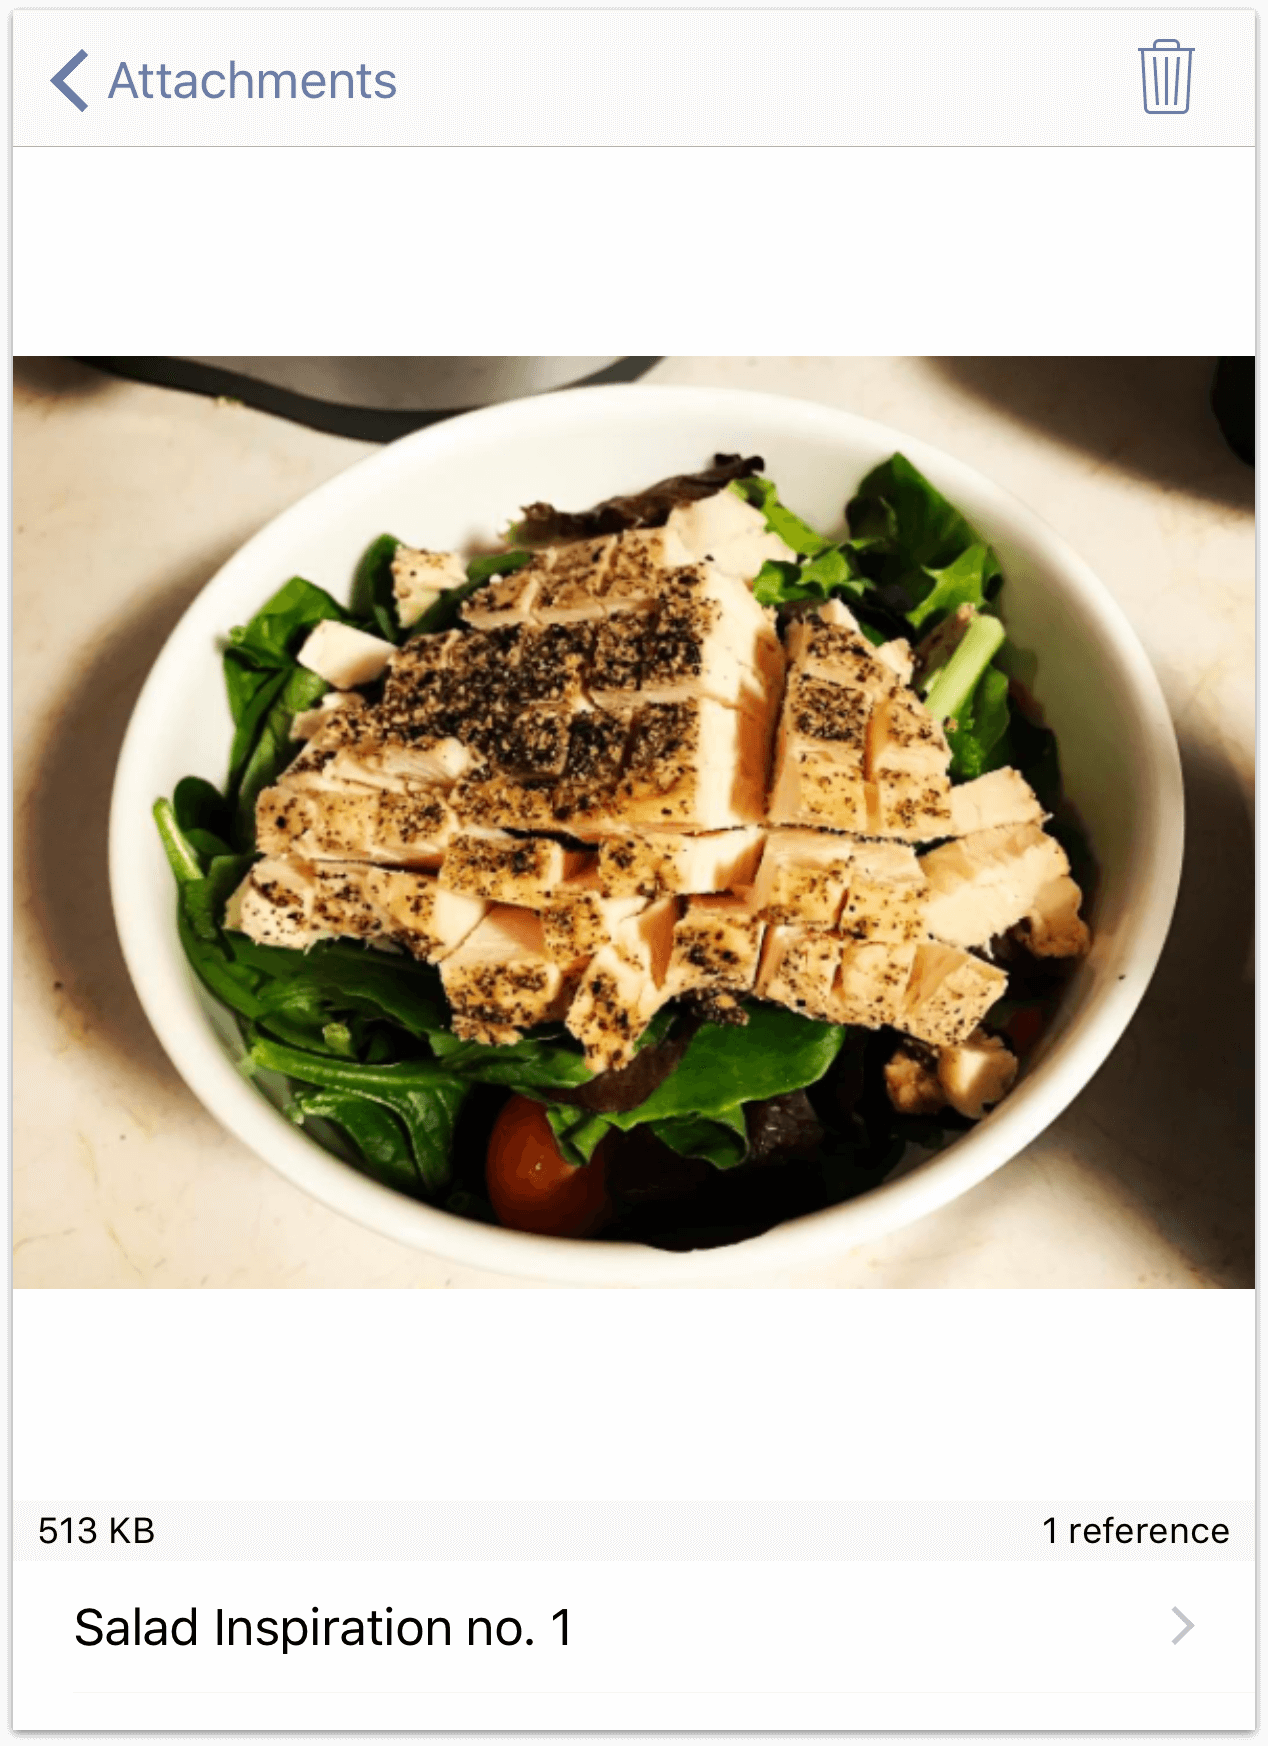
Attachments can be viewed (or listened to) by tapping the thumbnail associated with the audio clip or image. To delete an attachment, select it and tap Delete.
Warning
Large attachments will dramatically slow down sync times, especially if you are on a slow — or cellular — network (this might cost a lot of money, too!).
Cleaning Up Attachments with the Attachment List
If you use attachments a lot, you may find that your OmniFocus database eventually becomes clogged with files that you no longer need. The Attachment List is here to help!
From the Home Screen, drag down to reveal the secret bar and tap the Gear button to open OmniFocus Settings. Scroll down to the Database section, and tap Attachments to open the Attachment List.
The Attachment List displays all of your attachment files without having to go hunting through individual items they are attached to.
Tap an individual attachment for a detail view which lists the attachment file size, the number of references to the file in your database, and a list of associated database items. Tap one of those items to go straight to where the file is attached, or tap Delete in the upper right to remove the file from your database.
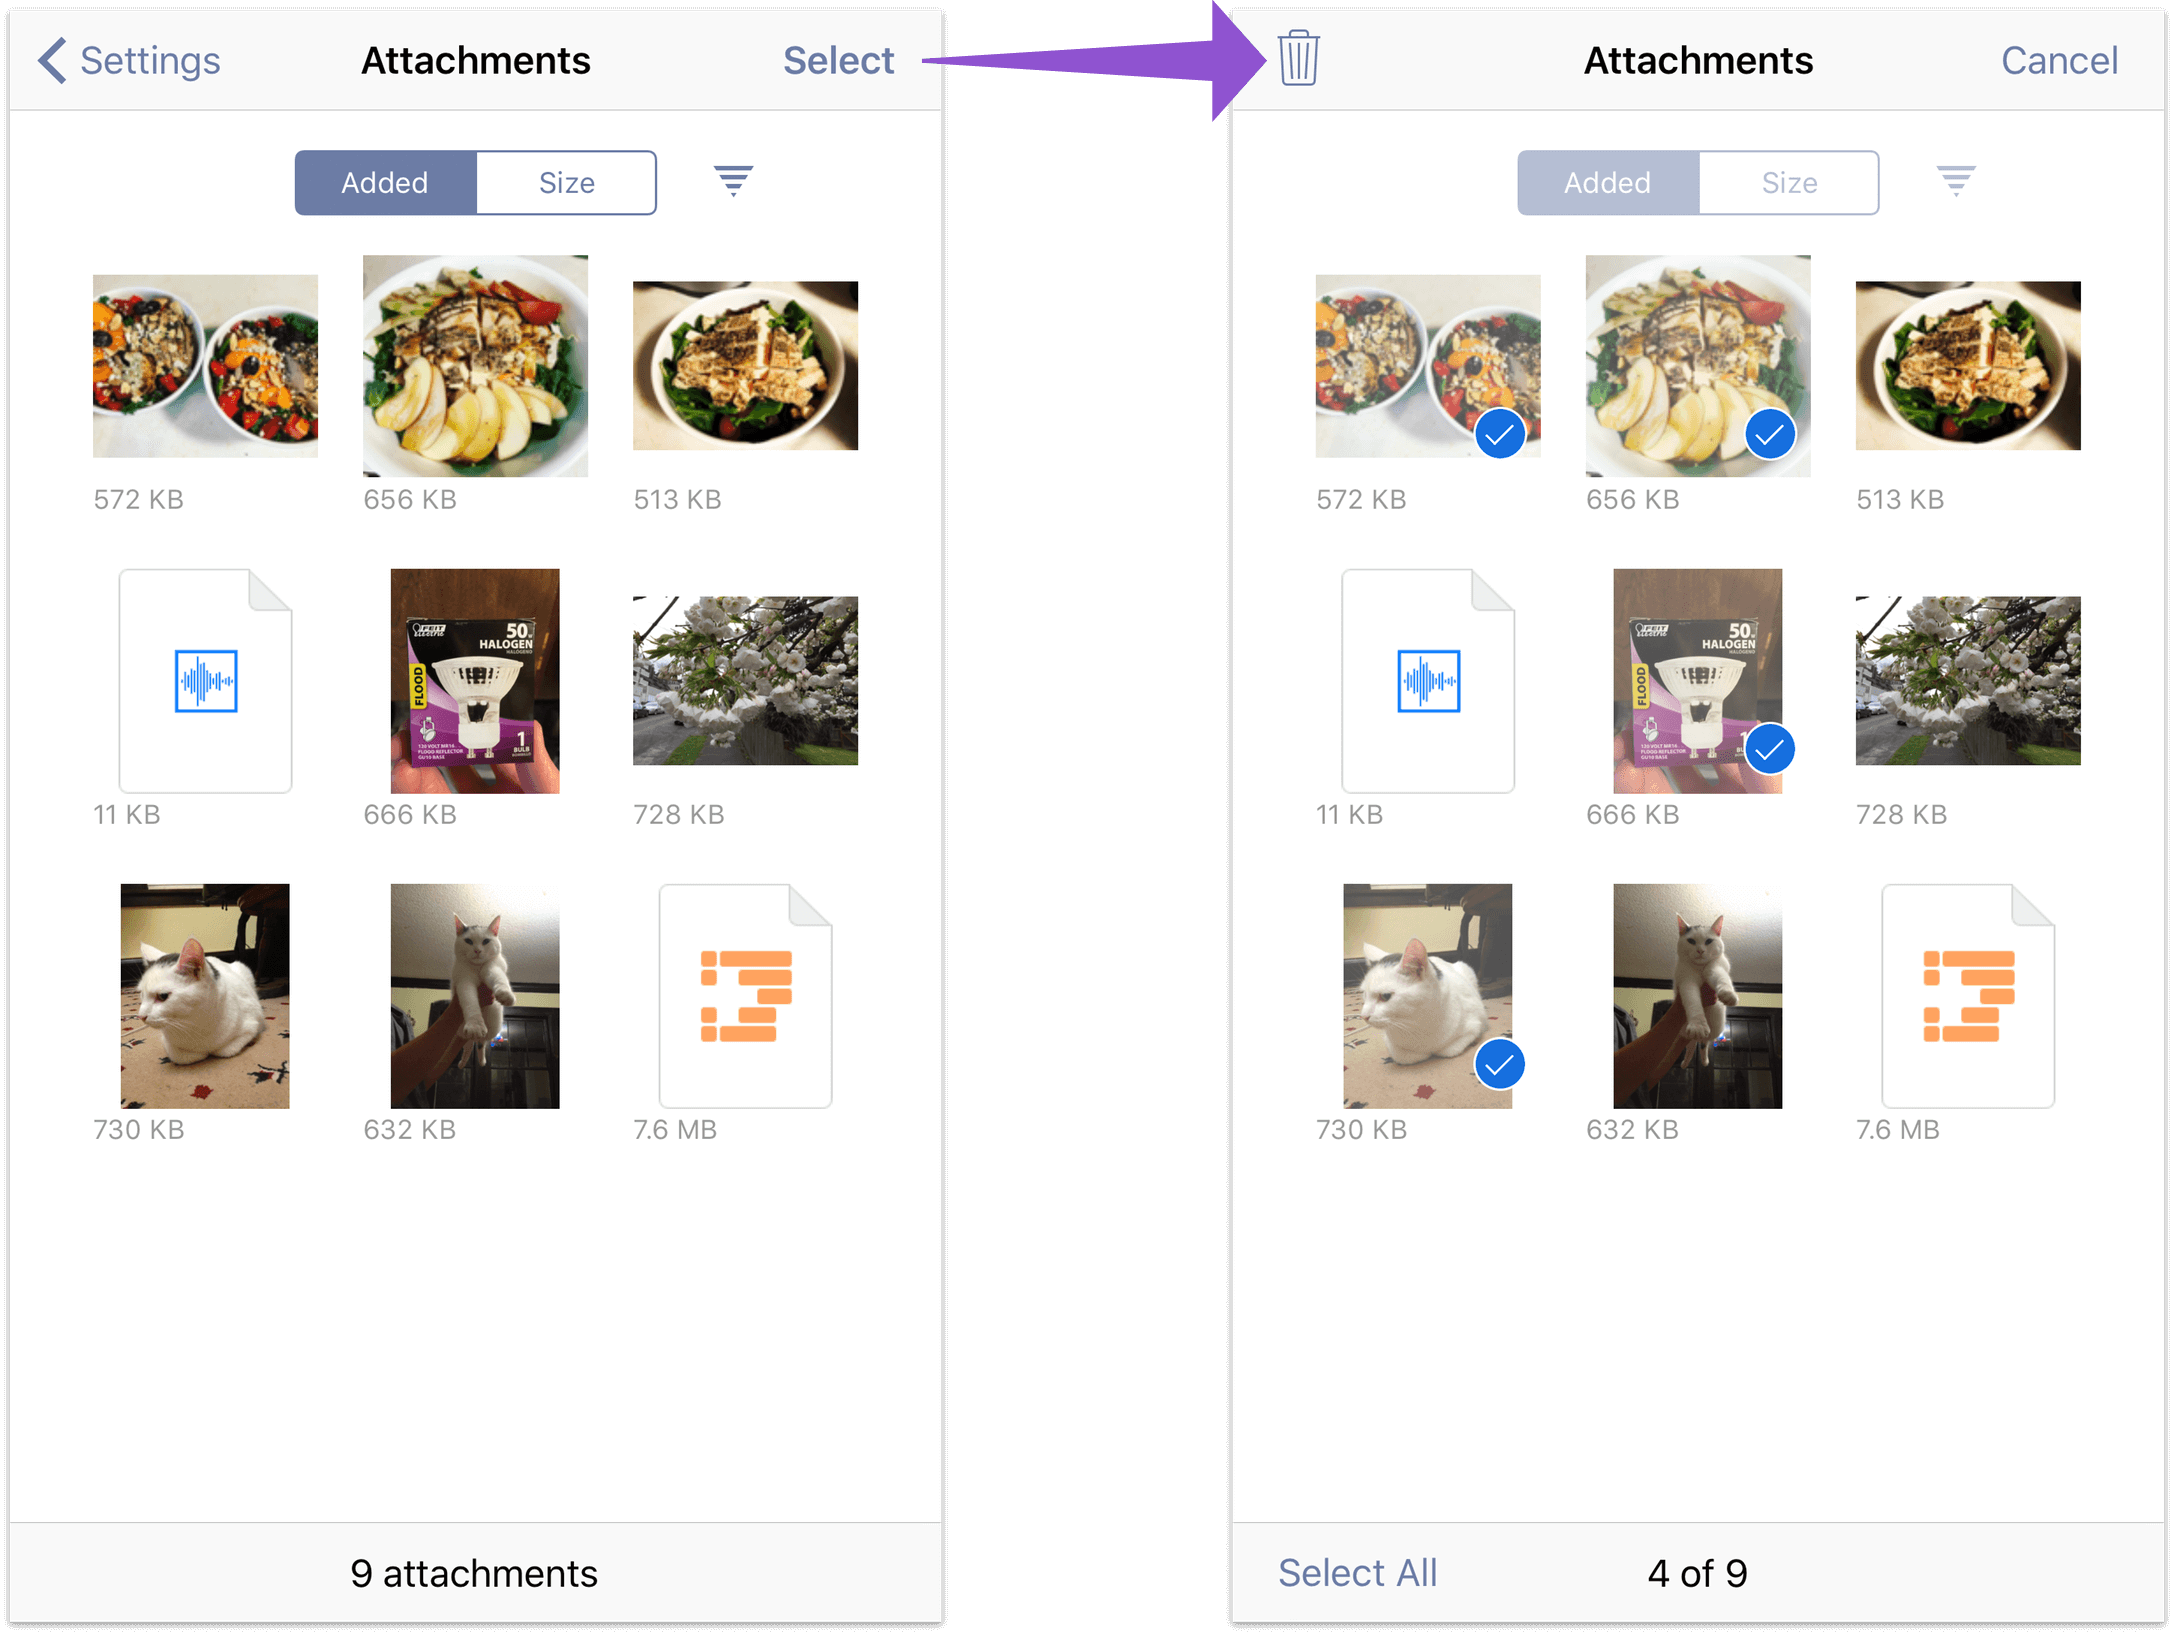
To remove attachments en masse, tap Select in the main Attachment List view and tap all of the files you would like to delete. Use the controls above the attachment thumbnails to sort the files by size or date added (largest and most recent files are shown first by default; tap the triangle button to switch the ordering).
With the unwanted files selected, tap Delete in the upper left to remove them from the database.
Syncing Attachments with OmniFocus for Mac
When adding attachments in OmniFocus for Mac, there are two ways to ensure the attachments make it across to your iPad or iPhone (or your other Macs with OmniFocus installed). The important theme here is to embed the attachments, as simply linking to them won’t work. Due to the file formats supported on iOS, not all attachments added in OmniFocus for Mac are viewable in OmniFocus for iOS or iPhone.
Note
The reason why linking to attached files won't work is because filesystem links on OS X are just that—they are links to files on that system. When you sync OmniFocus for Mac, those filesystem links no longer work because iOS filesystems are different from the one on your Mac.
However, when you embed an attachment and sync OmniFocus, that file is copied into your OmniFocus database and is stored on the sync server where it can easily be pulled down on either platform.
Warning
While you can sync most anything from your Mac to your iOS device as an OmniFocus attachment, OmniFocus is happiest when you only sync the things you really need. Considering which attachments need to live everywhere and pruning those that don't can save sync time and bandwidth money, and improve overall performance of the app.
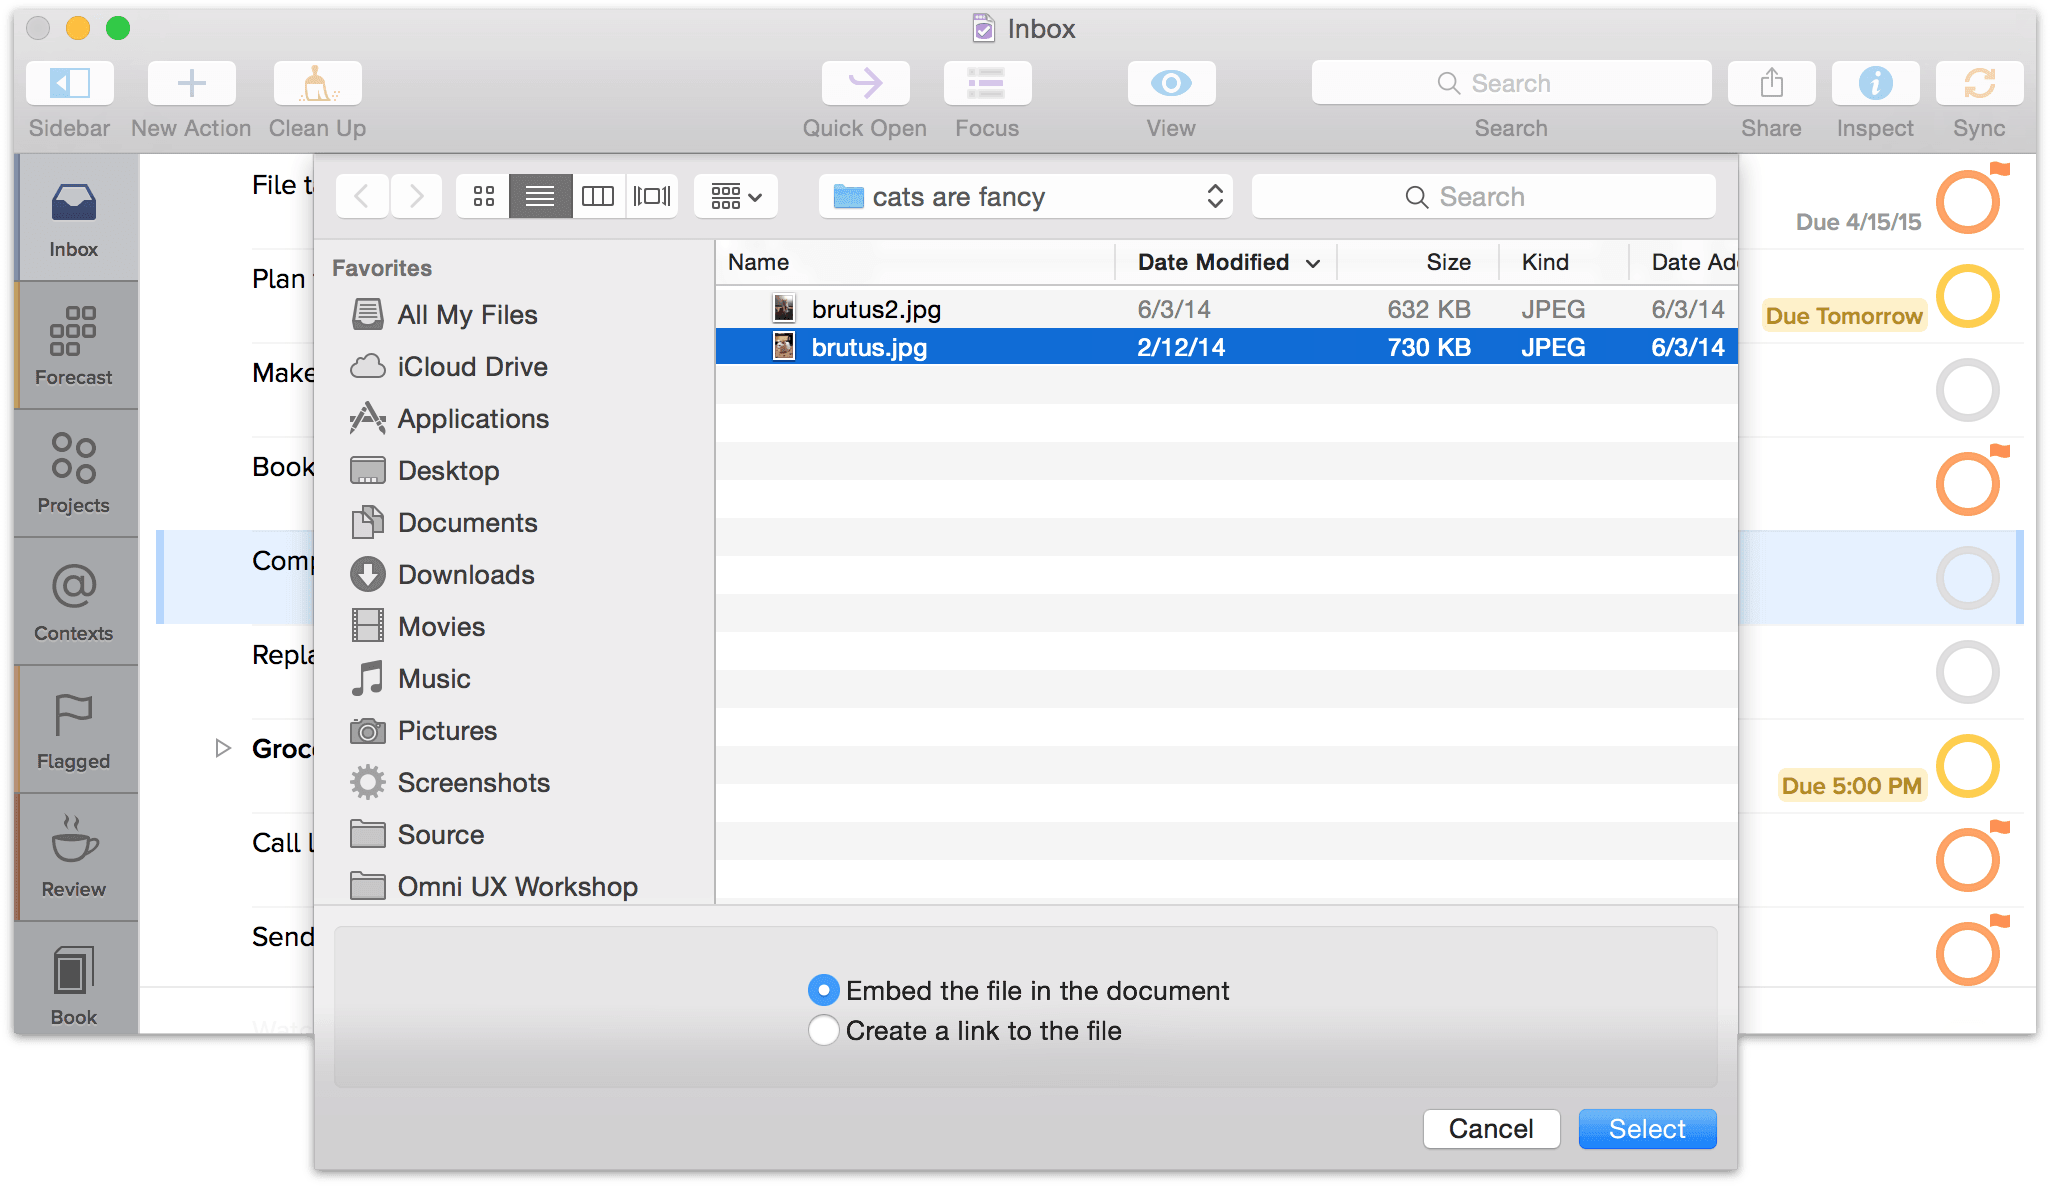
Attaching Files from the Edit Menu
With OmniFocus open on your Mac, select the item to which you’d like to attach something, and then select Edit ▸ Attach File in the menu bar. In the Open sheet that slides down, select the file you would like to attach, and then make sure you select the Embed the file in the document radio button before you click Select.
Note
The Embed the file in the document option is selected by default. This makes syncing your attachments the default state of affairs; if you'd prefer not to sync an attachment (for bandwidth or database efficiency reasons), choose Create a link to the file instead.
Attaching Files from the Finder
To attach a file from the Finder (it’s the blue smiley-faced icon on the far left edge of the Dock on your Mac) you will need to Option-drag the file from the Finder to the note field of your item in OmniFocus. Make sure the note field is open and selected, then place the Finder window next to the OmniFocus window and select the file you want to attach by clicking on it. Hold down the Option key while pressing the mouse button. You’ll notice that when you press the Option key, the mouse pointer changes to a green circle with a plus sign inside. This is exactly what you want! Now drag that file onto your OmniFocus item, let go of the mouse button, and the file is attached.
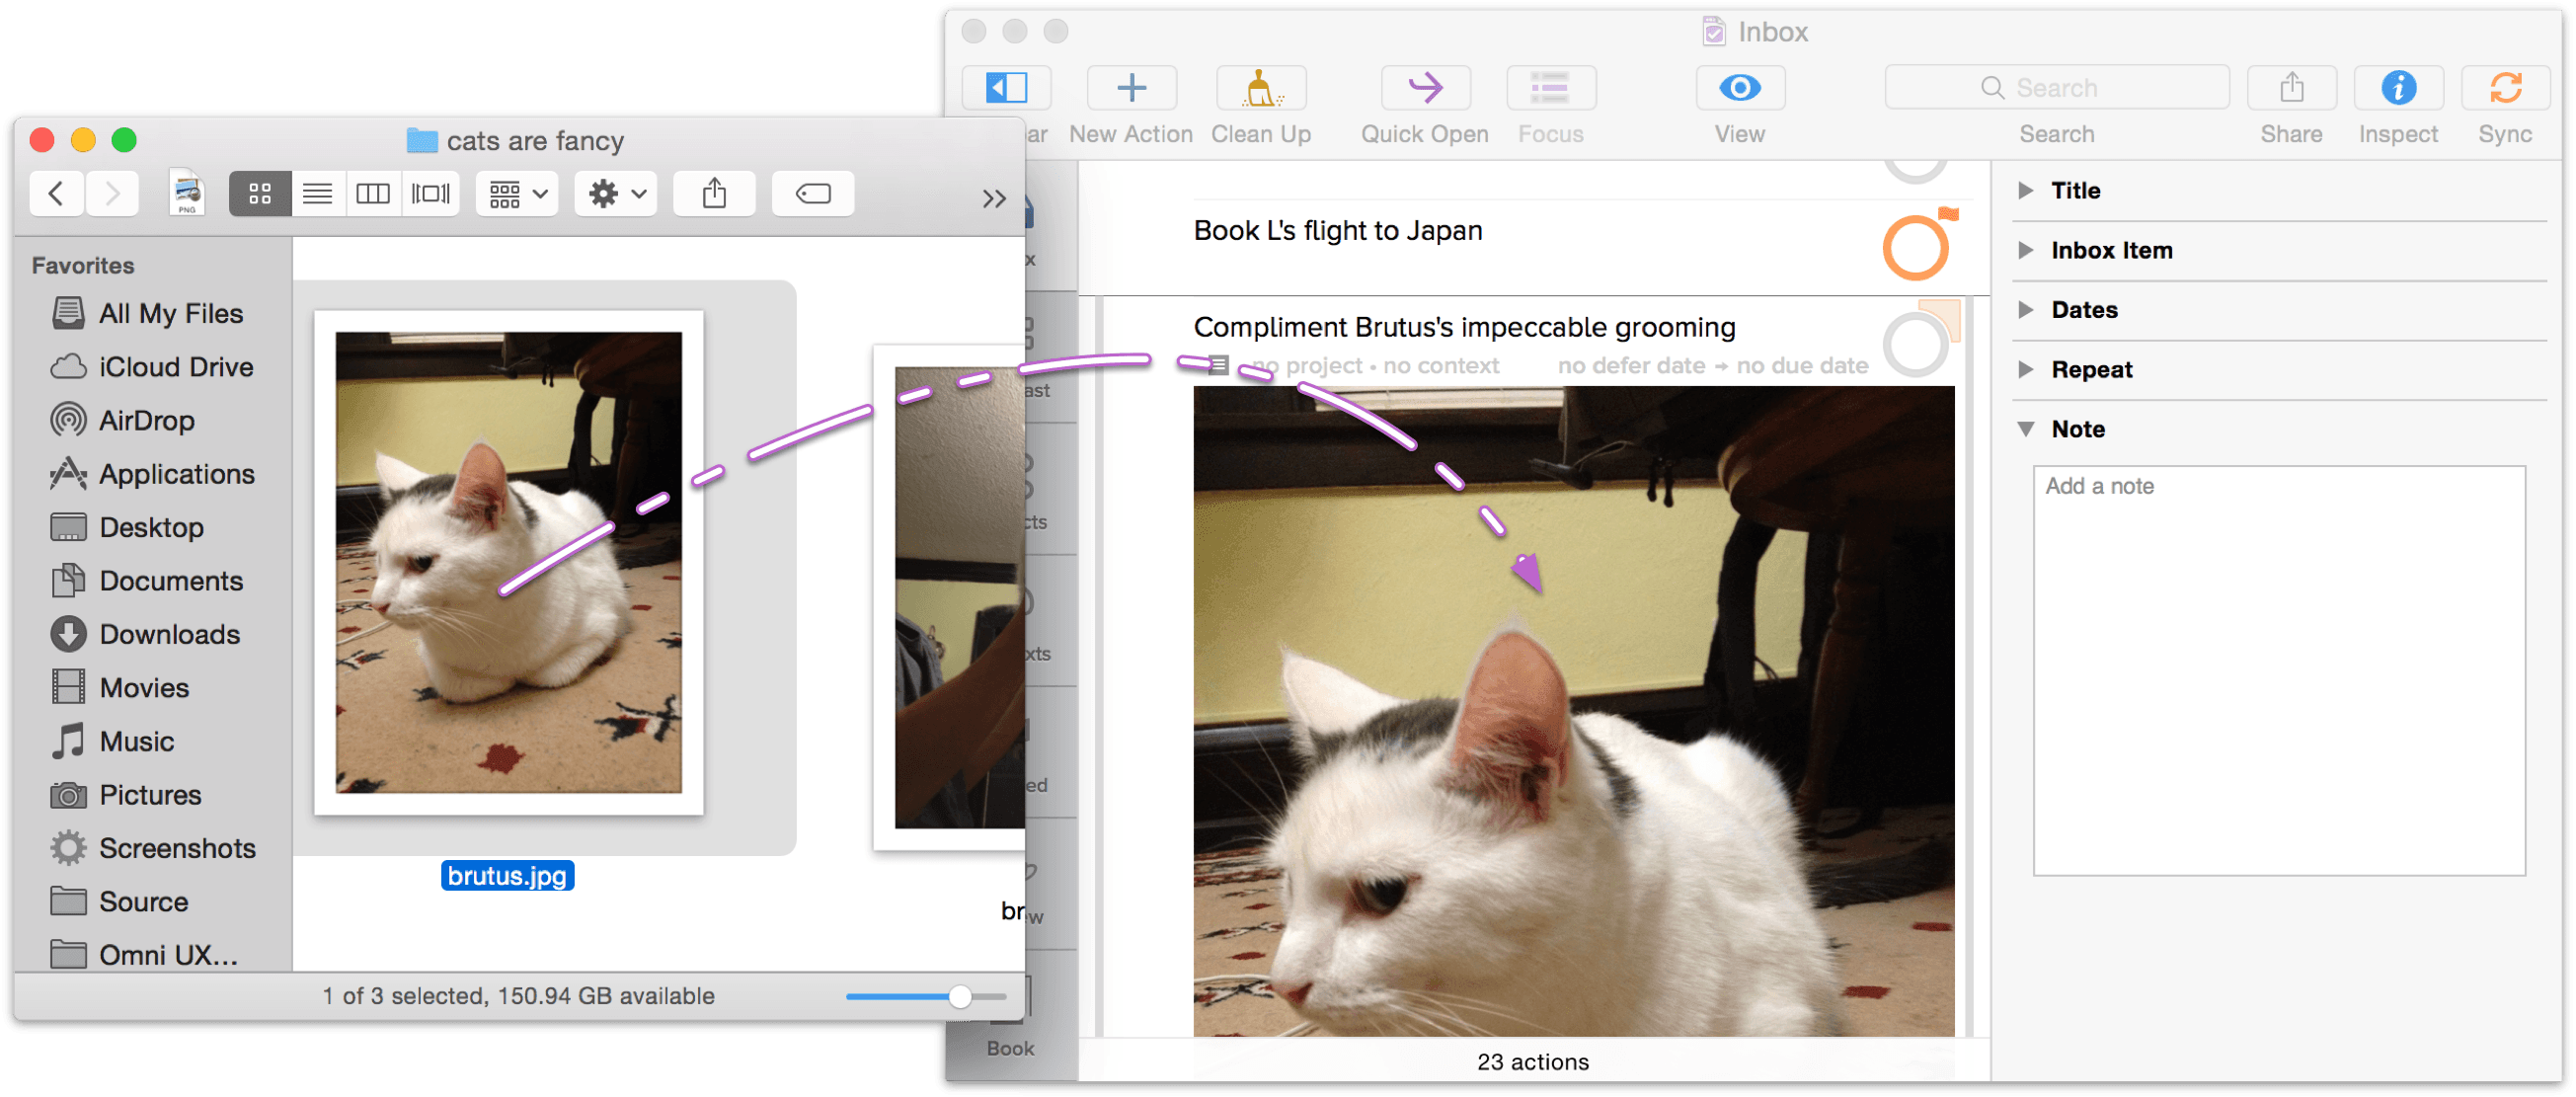
After you have attached the file in OmniFocus on your Mac, be sure to click Sync in the toolbar. Then, when you switch to OmniFocus for iOS or iPhone, tap Sync to bring the attachments over to your other device.
Note
Your Mac supports all kinds of different file types, mainly because of the wide variety of apps that can run on OS X. Conversely, iOS doesn't support nearly as many file types by default. The rule of thumb to keep in mind is that in most cases, if you have compatible versions of an app on your Mac and iOS device, you should be able to open those attachments in OmniFocus on either platform.