Guided Tour
After you’ve set up your sync preferences and on subsequent launches of the app, you’ll be presented with an OmniFocus window that provides a view on all the tasks and to-dos you’ve accumulated. If you’re running OmniFocus for the first time, this will include the Tutorial Project and nothing else; if you’ve set up sync with an existing database, you’ll see your database contents spread before you.
What follows is a guided tour of the various parts of the app interface you’ll interact with regularly in the process of getting stuff done.
The Toolbar
The toolbar at the top of your OmniFocus window contains icons for commonly used app functions that you’d like to have accessible at the click of a button. The default toolbar includes buttons or fields for:

- Showing and hiding the sidebar
- Adding a new action or a new inbox item
- Cleaning up the contents of your main outline
- Showing the Quick Open window
- Focusing on the currently selected project (Pro)
- Showing the View Options for your current perspective
- Sharing the current selection with another app via the share extension
- Searching in the main outline
- Showing and hiding the Inspector relevant to your current selection
- Prompting OmniFocus to Sync with a remote database
Customizing the Toolbar
Secondary click on the toolbar to reveal a contextual menu that contains the Customize Toolbar command, or choose it from the View menu. You’ll see a sheet with a multitude of buttons you can drag into place in the toolbar to suit your workflow.
Note
In OmniFocus Pro, this includes custom perspectives you’ve created in the Perspectives Editor, and any AppleScript scripts you’ve added to the scripts folder.
You can choose whether to display toolbar icons, text, or both, and toggle between large and small versions of the icons.
Perspective Tabs
All of your to-dos in OmniFocus live in a database behind the scenes. Perspectives are how you look at and interact with the contents of that database. OmniFocus 2 for Mac comes with six built-in perspectives that represent specialized, commonly-used view states specifically designed to help you organize, prioritize, schedule, and review your tasks.
Note
In OmniFocus Pro, you can change the order and visibility of perspective tabs and add custom perspectives using the Perspectives Editor.
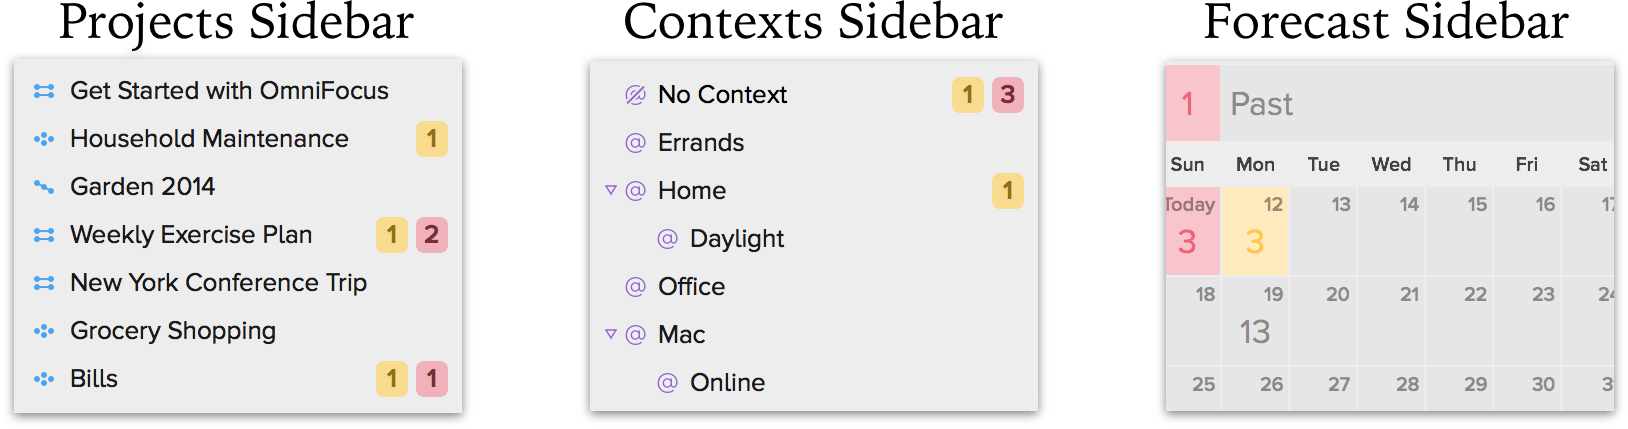
You can browse your visible perspectives using the tabs on the left side of the OmniFocus window. By default this includes:

- The Inbox, where you’ll stash all the tasks and to-dos that come to mind for later processing.
- Projects, where related tasks are grouped together into overarching plans and hierarchies.
- Contexts, the places, people, things, and states of mind most relevant or conducive to accomplishing your tasks.
- Forecast, where you can view your tasks chronologically and integrate them into your schedule.
- Flagged, where tasks designated with the most important priority or visibility are gathered.
- Review, the place to regularly check up on your progress and determine the status of projects.
Note
Completed and Changed are two additional perspectives, available from the Perspectives menu, that can help you recover misplaced items or review progress and recent changes to your database. These are designed as temporary views on your database, so switching away from them to another tab removes the tab from your sidebar (you can open them from the Perspectives menu again at any time).
The Sidebar
Nestled between the main outline and the perspective tabs lives the magical land known as the sidebar. It appears when viewing each built-in perspective other than the inbox, and provides a powerful, high-level means for surveying what’s on your plate. The function of the sidebar for each built-in perspective is discussed in the chapter for that perspective.
The sidebar can be collapsed and hidden using the sidebar button in the toolbar, or by dragging the handle in the bottom bar to the left, with the View ▸ Hide Sidebar menu item, or with the shortcut Option-Command-S.
The Focus Bar
When you’re in a special mode of the app where only a subset or nonstandard implementation of your database is visible, a bar will appear beneath the toolbar to indicate the mode that you’re in.
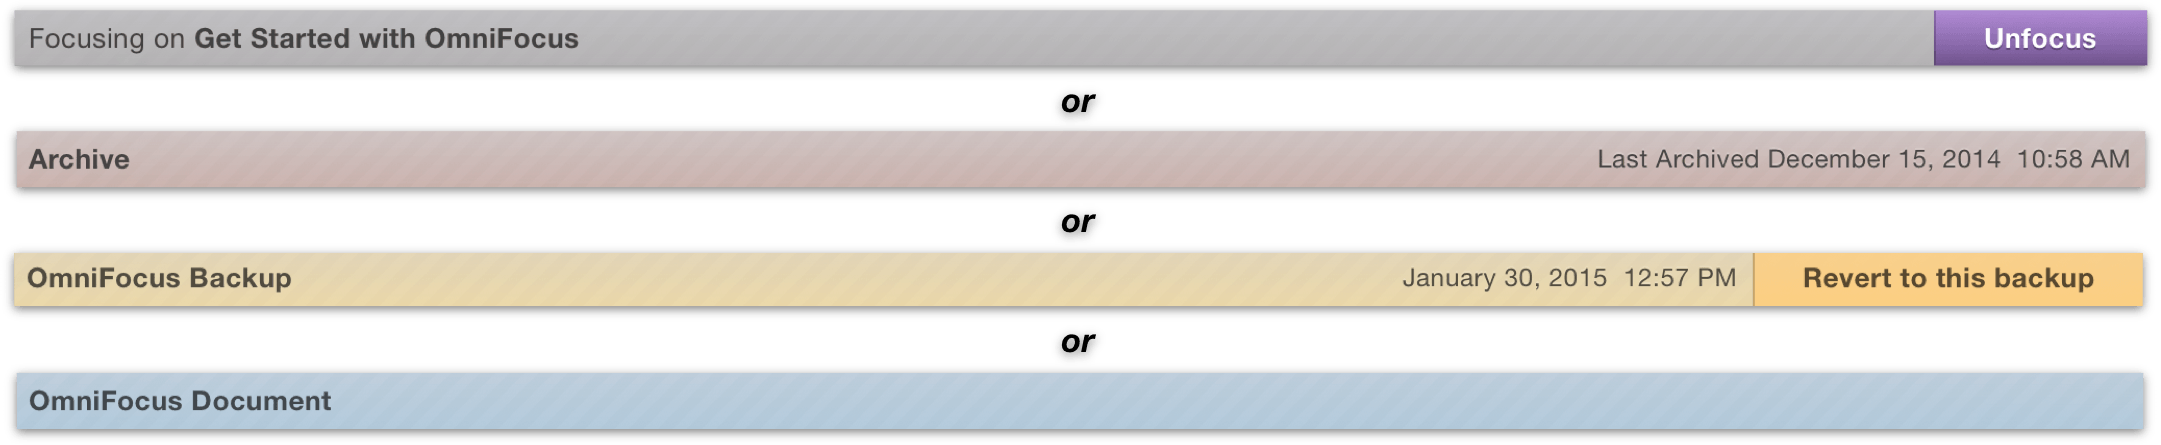
The most common case in which the bar appears is when you’re focusing (in OmniFocus Pro). A bar also appears to notify you when:
The Main Outline
This is where you’ll view, add, and manipulate the tasks you’re working on at a given moment. What you see here is based on which perspective you’re viewing, what you have selected in the sidebar, whether you’re focusing on something, and more—you can narrow your concentration on just a few things you’d like to accomplish in the near term, or get a broad overview of the tasks ahead across a number of projects.
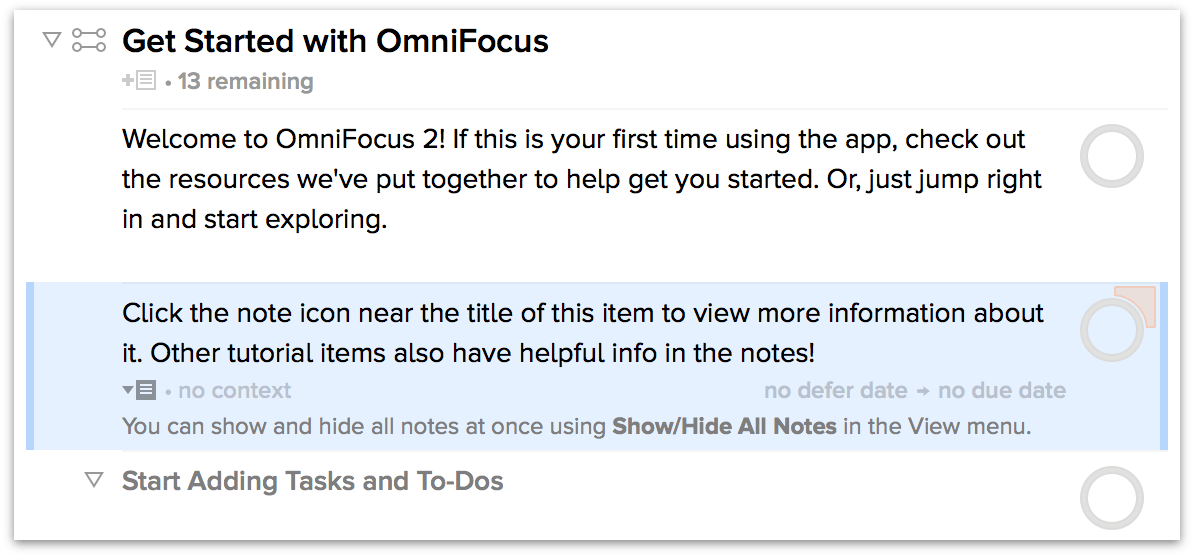
The main outline displays a list of items—inbox items, projects, actions, or groups—that fit the criteria you’ve established with your other view parameters. Each item displays associated information that’s the most relevant info you’ve entered about it.
Status Circles and What They Mean
Items you’re looking at in the main outline have circles next to them. These are called status circles. Some may may be colored, have dots in the center, a jaunty little flag icon in the corner, or even appear solid with a check mark in the middle: these display the various states an item can be in for quick reference as you view your list of tasks.
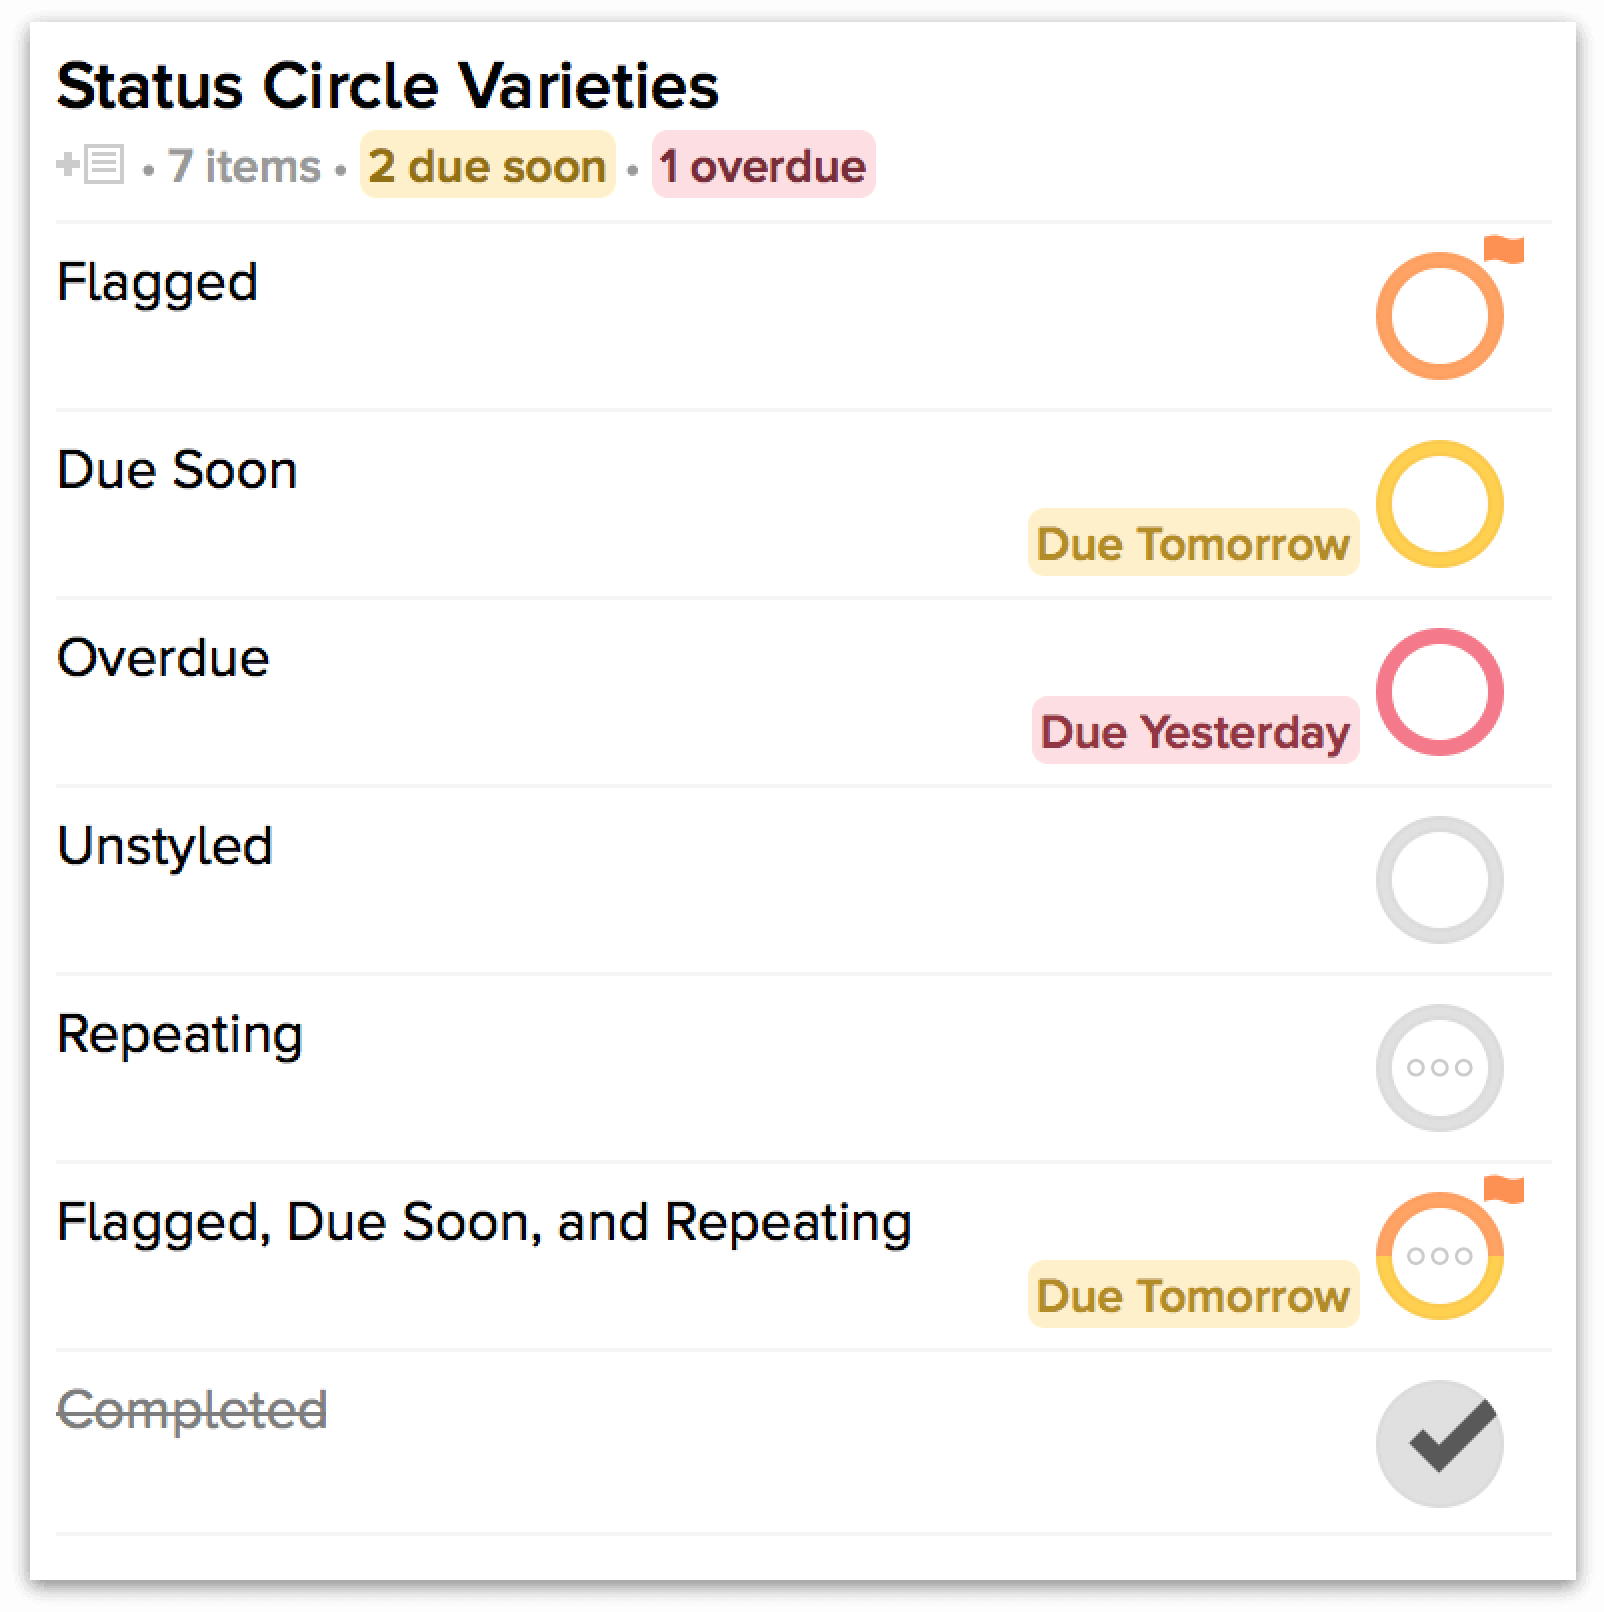
The figure above shows many common visual states of the status circle, including from top to bottom:
- Flagged—orange circle and corner flag
- Due Soon—amber circle
- Overdue—red circle
- Unstyled—grey circle
- Repeating—dots in center
- Flagged, Due Soon, and Repeating—halved amber/orange circle with flag and dots
- Completed—solid with check mark
Note
Status circles can display various combinations of states when more than one is applicable to the same item (as is the case with the action that’s Flagged, Due Soon, and Repeating, above).
The Inspector
The right side of the OmniFocus window is the domain of the inspector. This handy spot is where you view (“inspect”) the details of an item or context you’ve selected in the sidebar or the main outline.
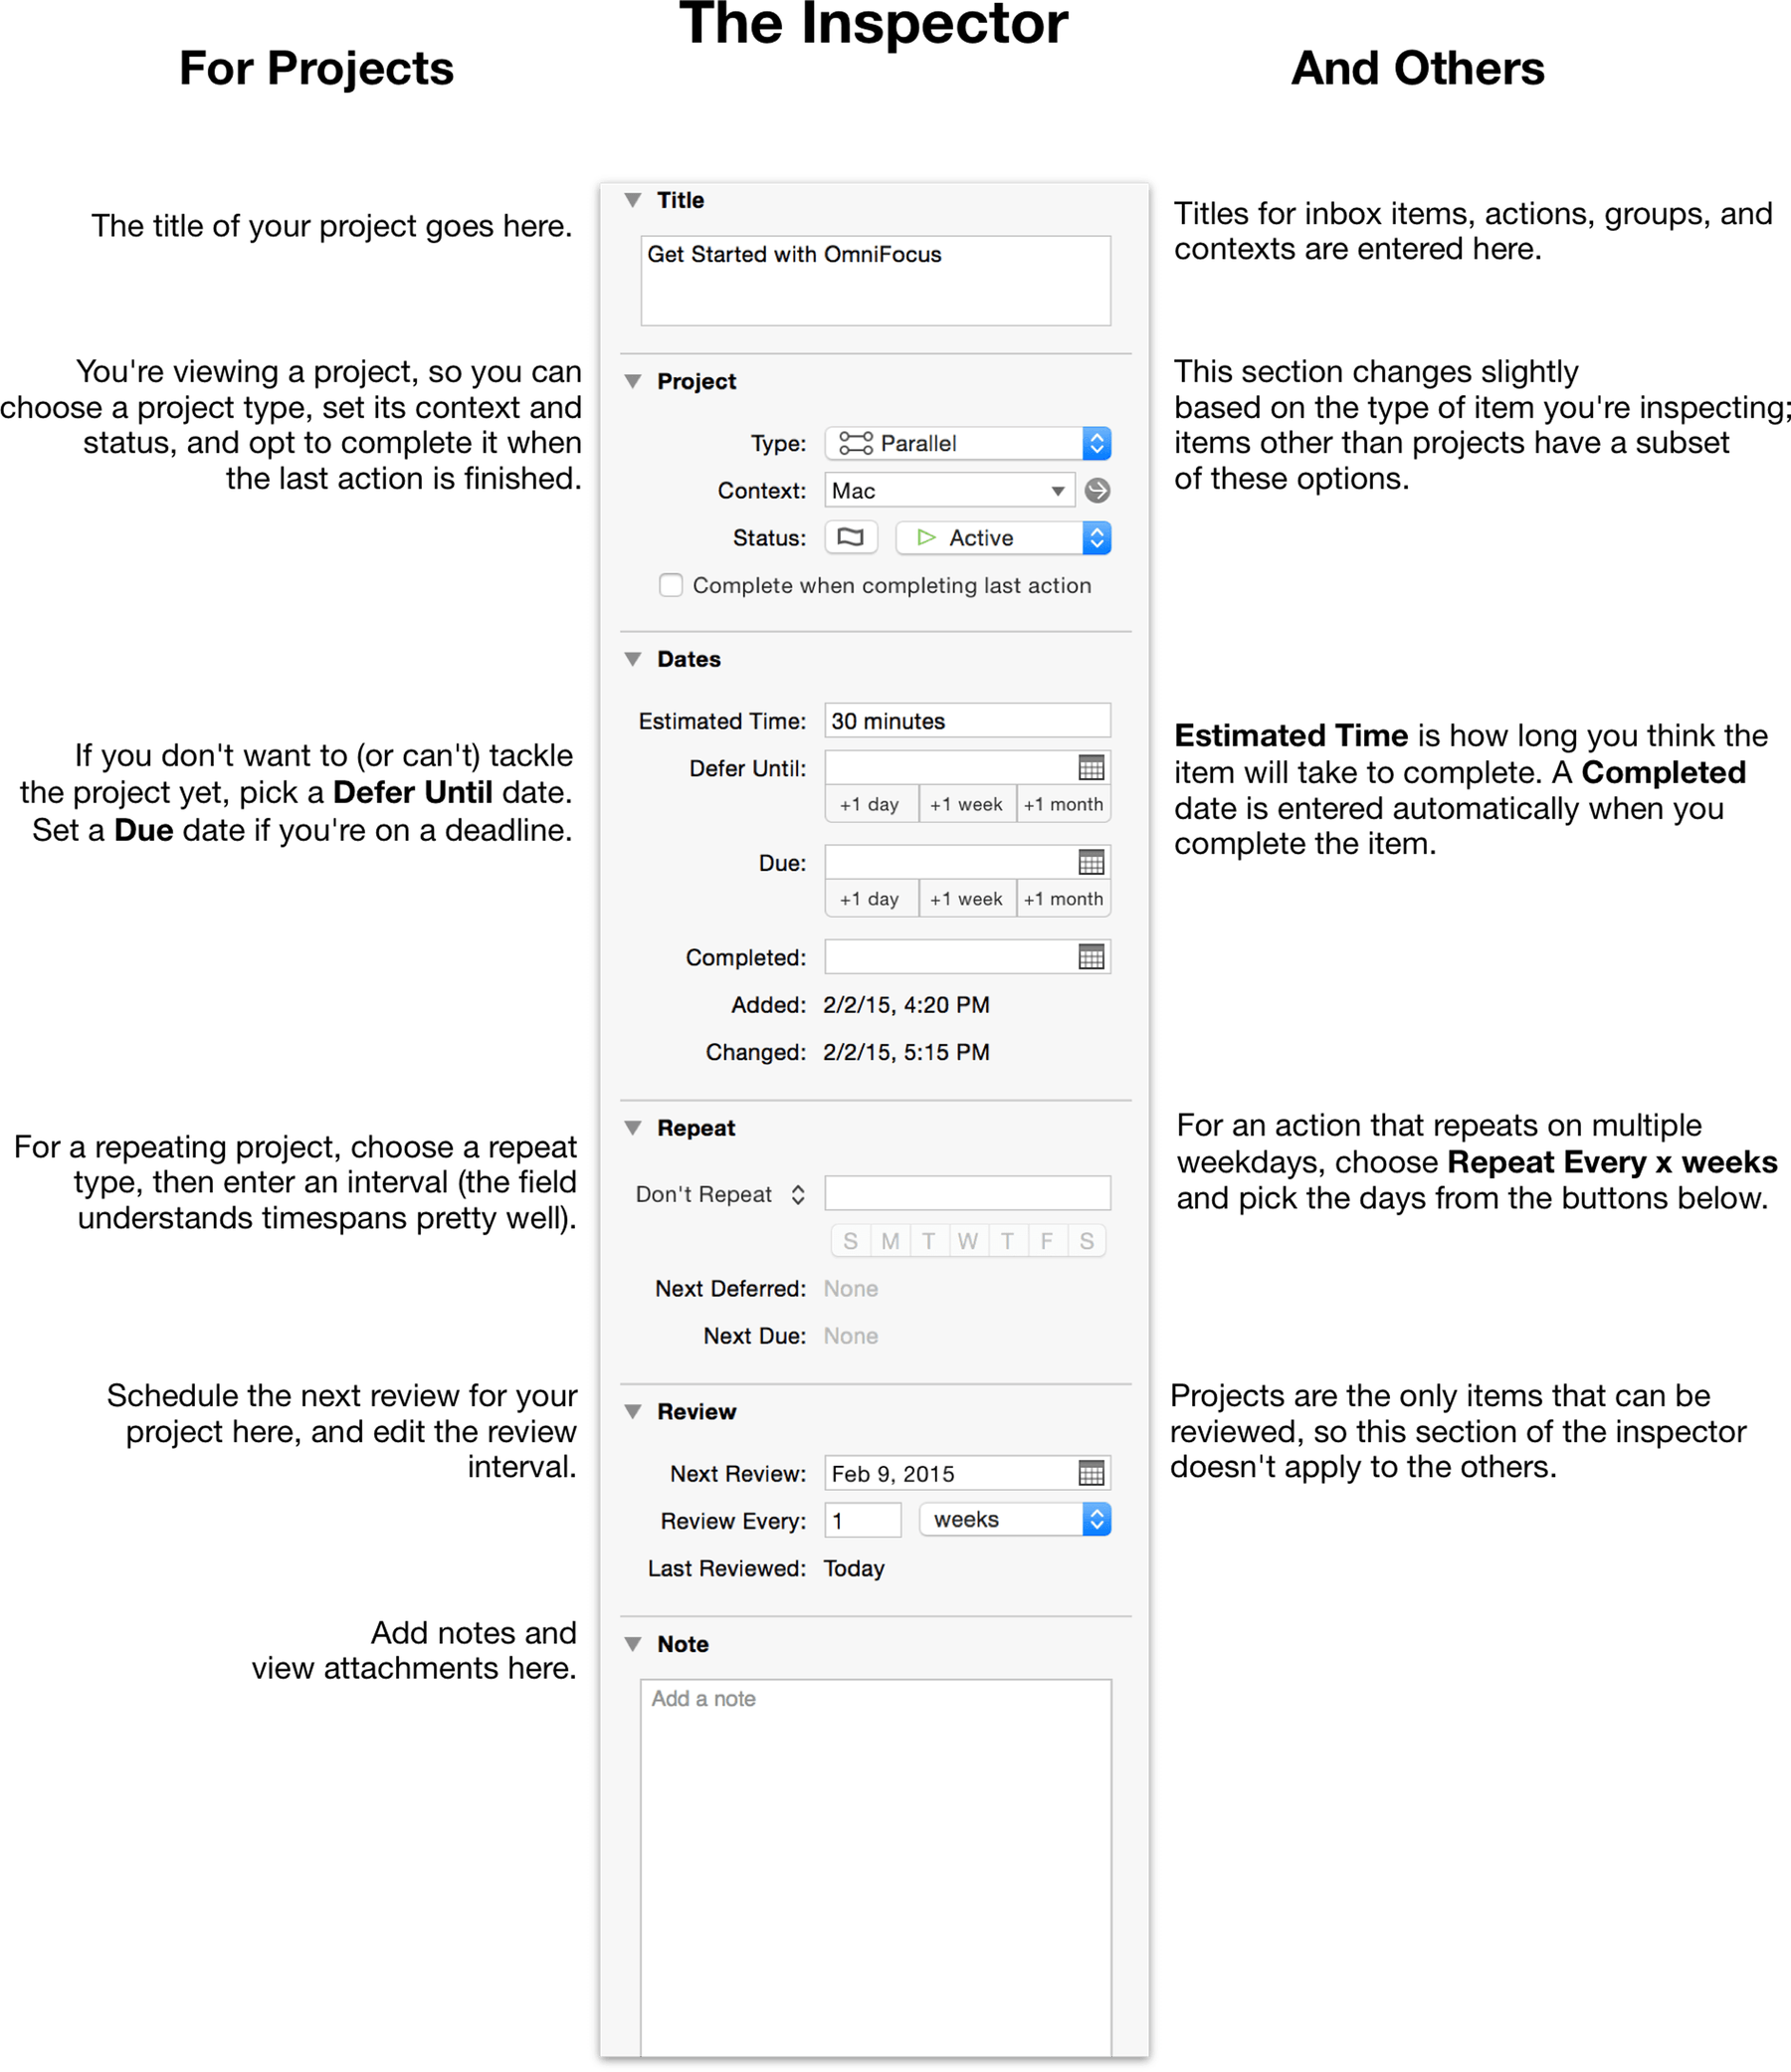
You can show and hide the inspector using the inspect button in the toolbar, dragging the right handle in the bottom bar, with the View ▸ Hide Inspector menu item, or with the keyboard shortcut Option-Command-I.
The Bottom Bar
The bottom bar contains tools for quick access to commands based on your current perspective, as well as a summary of the contents of your main outline.
Handles to collapse and expand the sidebar and inspector.
A summary of the contents of the main outline, letting you know at a glance how many projects, contexts, and actions are being displayed.
When in Projects or Contexts, the plus button adds items relevant to your current perspective.
The gear menu provides a host of tools for manipulating your sidebar selection, primarily in Projects and similar perspectives.