Capture Methods
As you get the hang of entering tasks, creating projects, and moving through your perspectives to get things organized and completed, you’ll find that OmniFocus keeps getting more powerful and easier to use.
And to help you get things into your OmniFocus database, we’ve built in some handy methods to make it easier for you, including Quick Entry, Clippings, Mail Drop, and even importing a list from OmniOutliner.
Copying from Plain Text
If you’ve written a list of items elsewhere that you’d like to copy into OmniFocus (say, a grocery list typed up in Notes), OmniFocus can use line breaks to determine where one item ends and the next begins.
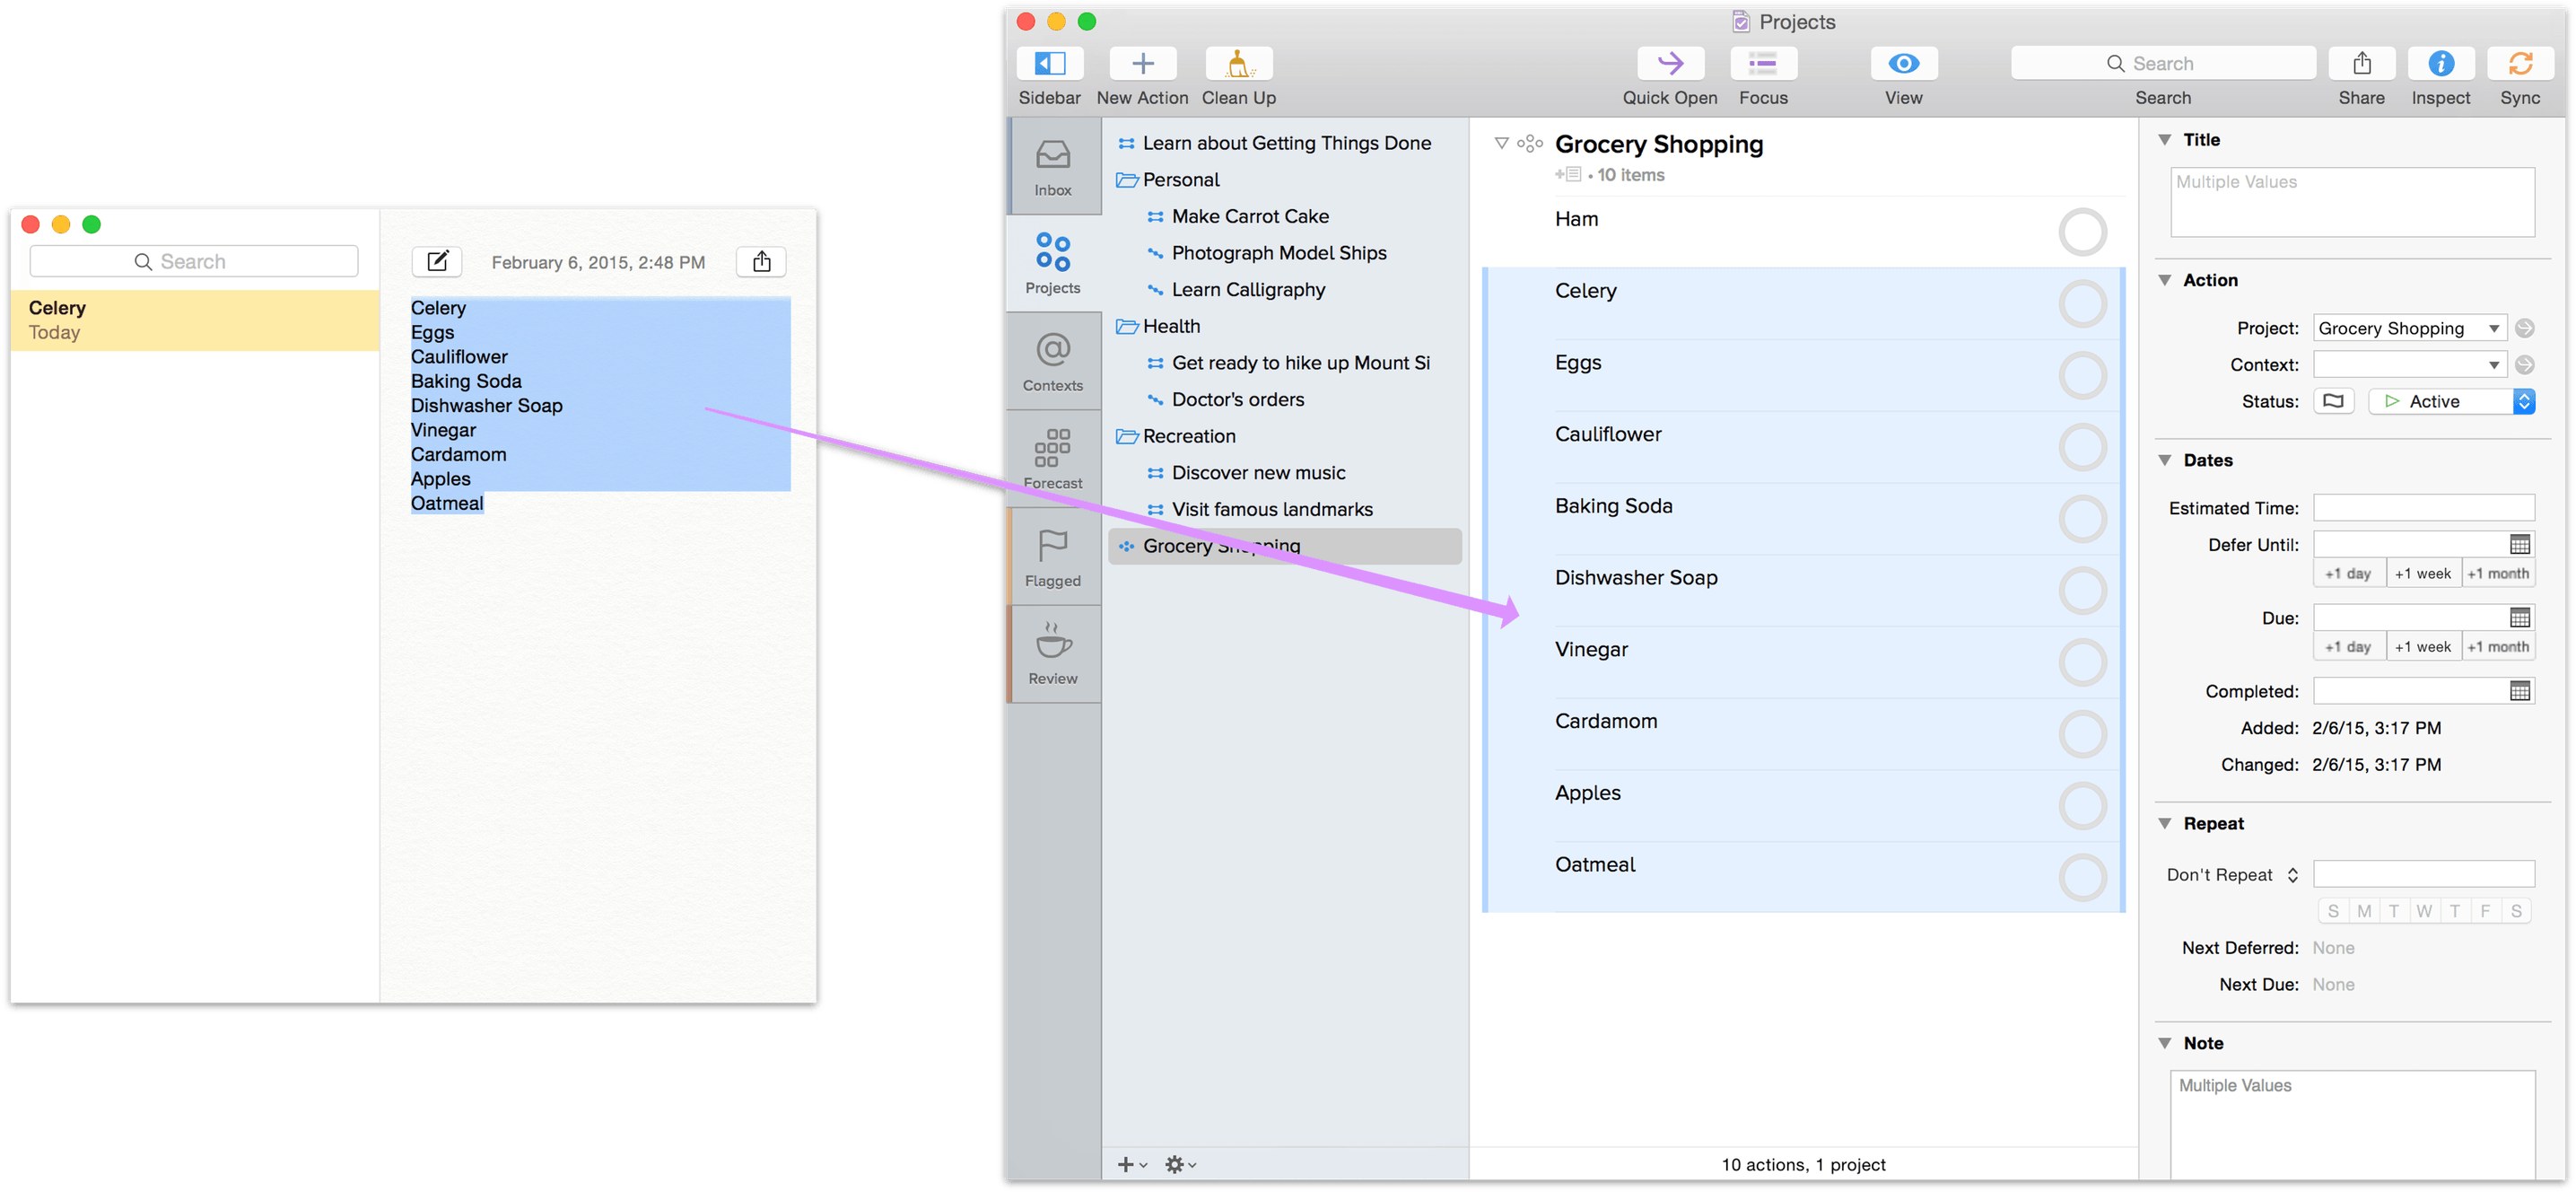
Just select the text you’d like to add as items and copy it (Command-C). In OmniFocus, select an item without activating any of its text fields, then paste (Command-V) to add the copied text as a list of items below the one you have selected.
Note
The items will be pasted as peers of the one initially selected, so if you’d like to paste text as a list of actions in a project, you’ll want to select an existing action in the project first (selecting the project results in a pasted list of projects rather than actions).
Quick Entry
With an easily configurable keyboard shortcut, you can use Quick Entry from anywhere on your Mac to add items to your database as long as OmniFocus is running. Make sure the shortcut in OmniFocus ▸ Preferences ▸ General is what you want, and it’ll open the Quick Entry window no matter which app you’re viewing in the foreground.
When using Quick Entry, a couple of other keyboard interactions are affected by your Outlining choice in General preferences.
- If you decide against posting an item with Quick Entry, in Modern mode press Esc to close the window. In Classic mode, use Cancel (Command-.) instead.
- Press Return in Quick Entry to save the current item and close the window. To add another item before closing the Quick Entry window, hold down Shift and then press Return — twice if in Modern mode, once if in Classic mode.
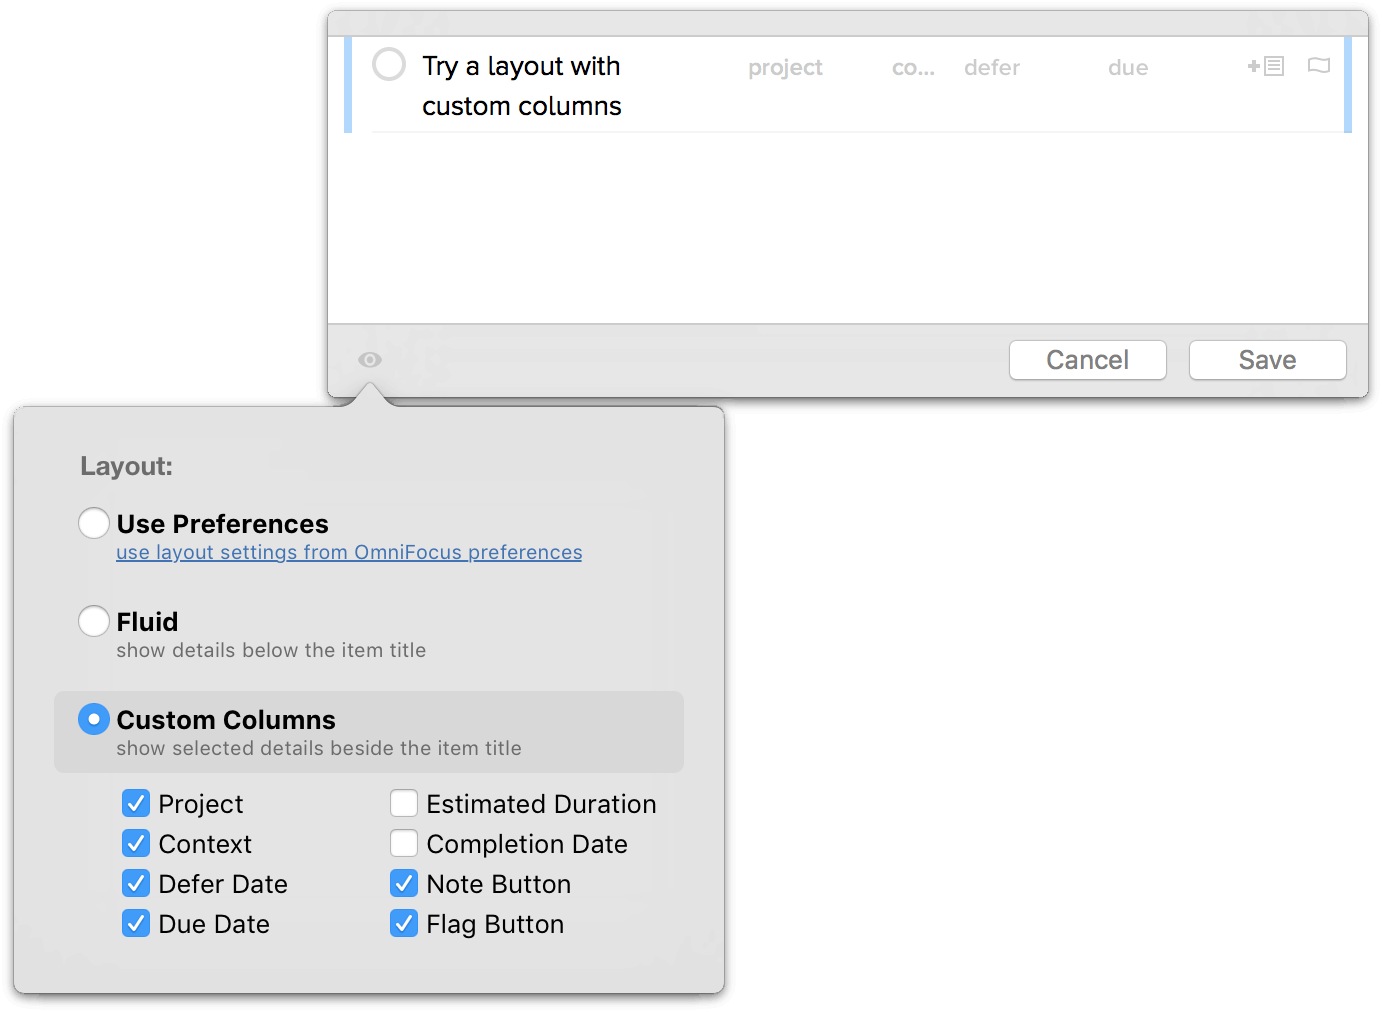
With OmniFocus Pro, the option to customize your main outline extends to the Quick Entry window as well. Open the View options with the button in the lower left of the window to choose whether to use the style set up in Layout preferences, override it with the original fluid row style or use a custom set of columns for just the data you want when you’re adding items with Quick Entry.
Clippings
You may come across an email message, a web page, a newsreader article, or some other scrap of info that you’d like to turn into an OmniFocus action. In the olden days you might heft your mouse, highlight the text, copy it, summon up the OmniFocus quick entry window, and paste. But no, you’re living in the future. You use the OmniFocus Clippings service.
To clip content from another application:
- Highlight some text in any application (that is, any application that supports Mac OS X Services, which should be all applications these days, ahem).
- Press the Clippings keyboard shortcut (instructions on setting one up are below), or open the application menu and then the Services submenu, then choose OmniFocus: Send to Inbox.
- A new item, with the highlighted content (rich text and embedded images) as its note, lands in the quick entry window for you to revise and save.
Setting Up a Clippings Shortcut
At the bottom of General Preferences in OmniFocus, you’ll find a setting for the Clippings Shortcut which opens these instructions as well as opening a window for the Keyboard section of System Preferences.
Note
Sandboxed apps aren’t allowed to customize the keyboard shortcuts for their own services—such as the OmniFocus “Send to Inbox” service—which is why you need to do the rest of this on your own.
In that window, you should see two panes: on the left is a list of shortcut categories, and on the right is an outline of items within that category. In the left pane, click on “Services”, and on the right scroll down until you see the group of Text services. In there, you should see an item for the OmniFocus “Send to Inbox” service. Click on that service, and an “add shortcut” button should appear which you can use to assign a keyboard shortcut.
If you have more than one copy of OmniFocus installed, you may see duplicate copies of this service—one for each installed copy of OmniFocus. You may wish to uncheck the service associated with other copies to disable them so that you don’t accidentally send your clipping to the wrong copy of OmniFocus.
Email Capture (Mail Drop)
Mail Drop is a feature of Omni Sync Server which lets you send emails directly into your OmniFocus Inbox. You can create multiple private send-to addresses to give friends, family, coworkers, or classmates the ability to create actions that land in your OmniFocus Inbox. And, best of all, you can revoke those addresses at any time.
Some possible ways to use Mail Drop include:
- Forwarding actionable emails from your PC at work
- Processing emails on your iPhone or iPad
- Using if this then that to automate all kinds of Internet-y things
- Allowing a partner to delegate actions directly into your OmniFocus system
If you’re already using the Omni Sync Server to sync OmniFocus, you can log in to the sync server web interface and create your first Mail Drop address. After logging in, just click the Create Address button to automatically generate the email address (a combination of your account name and a random string of characters, for example).

If you don’t have a Sync Server account yet, you can sign up here. The account creation process includes instructions for configuring OmniFocus to use your new account (it’s as simple as tapping or clicking a link in an email).
When you send an email message to Mail Drop, the subject line of that message becomes the name of the new Inbox item. The body of the message becomes the Note, which can contain text, attachments (such as images and files), and simple HTML (more complex formatting is removed).
Note
For Mail Drop to work, you should be syncing your OmniFocus database to the same Omni Sync Server account that you’ve used to set up Mail Drop.
Importing from OmniOutliner
OmniFocus integrates with OmniOutliner for Mac, so you can outline an agenda in OmniOutliner and then easily bring it into OmniFocus and take action. There are three ways to bring your OmniOutliner data into OmniFocus:
- Import a Document
- Using the File ▸ Import OmniOutliner Document menu command, OmniFocus imports an OmniOutliner outline of your choice into your OmniFocus database. The outline’s rows become OmniFocus items, and its columns become fields for those items (you can choose what OmniFocus item field corresponds to each outline column as part of the import process).
- Drag and Drop
- Drag a selection of rows from an OmniOutliner document onto a project or group in OmniFocus, and they’ll become actions within that project or group with hierarchy preserved. As with the Import menu command, when you release the drag OmniFocus will ask how you’d like data in the outline’s columns to be interpreted.
- Copy and Paste
- Select any number of rows in an Outliner document and copy them (Command-C). Paste them (Command-V) into the Inbox or into another selected OmniFocus item, and the copied rows will appear in place with hierarchy preserved. As with the Import menu command, when you paste in a valid location OmniFocus asks how you’d like data in the outline’s columns to be interpreted.