Drawing Basics
Now that you’ve had a chance to skim through OmniGraffle’s interface and have explored the Document Browser, it’s time to put all of that knowledge to good use. It’s time to create a new document and try some of what you’ve learned.
To create a new document:
- Go to the Locations screen.
- Select the folder in which you’d like to store the file.
- Tap
 in the toolbar at the top of the screen.
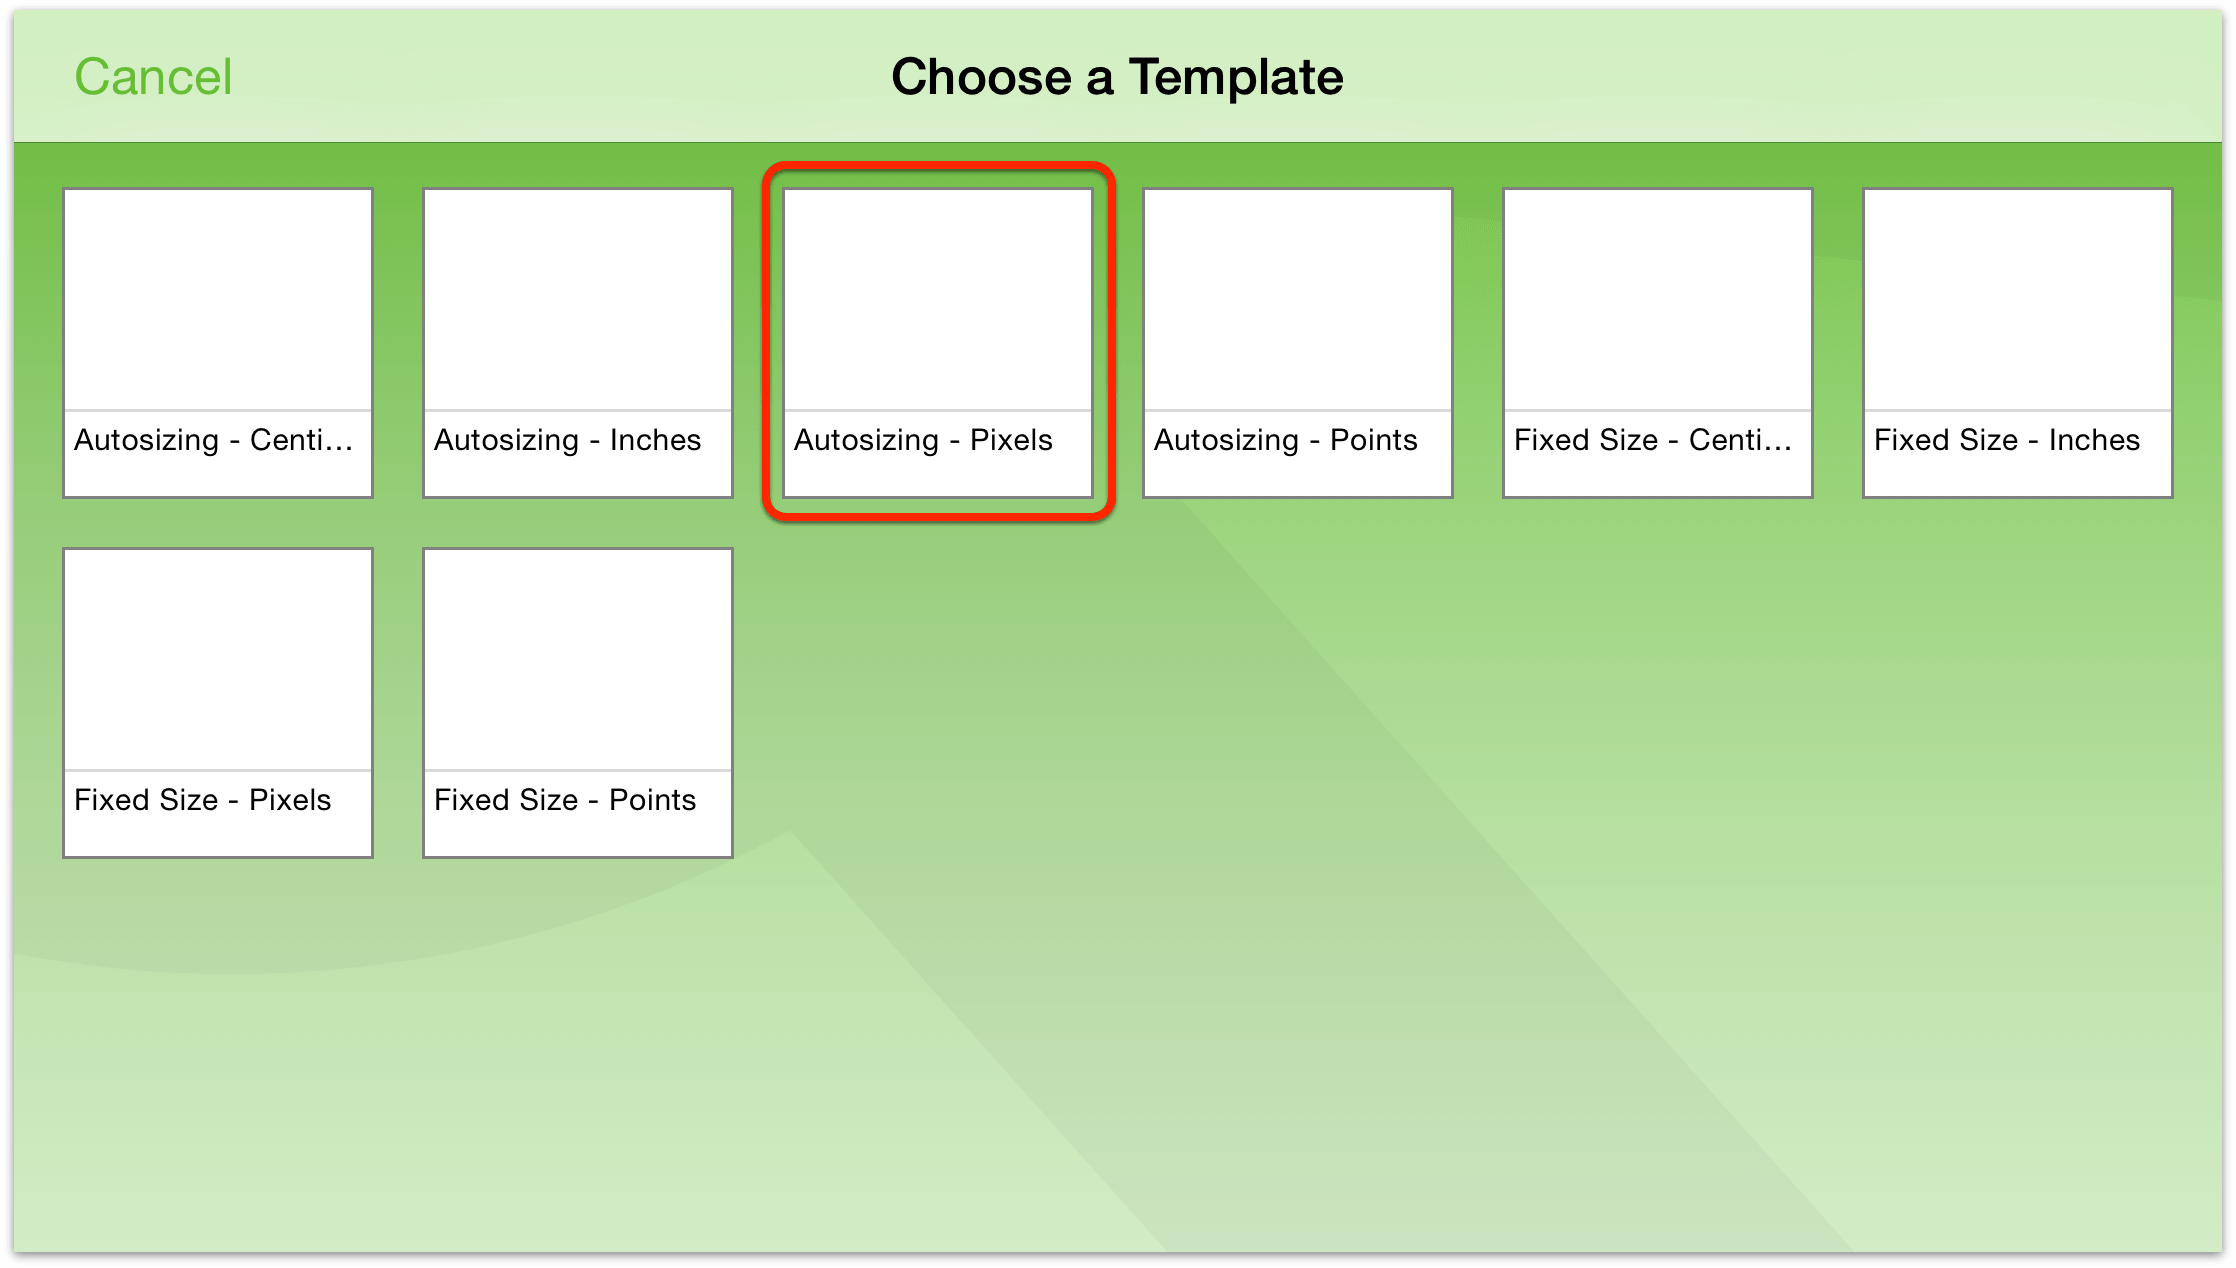
 - Choose a Template from one of the eight pre-installed templates or from one you’ve created or added to OmniGraffle. For the sake of following along, choose the third template in the first row, Autosizing - Pixels.
After choosing the template, OmniGraffle opens a new document (named My Diagram, but you can change that later).
The other buttons in the toolbar include:
Tap
 to hide and show the Canvases sidebar on the left. This is where you manage, create, and delete Canvases and Layers in your document.
You can also toggle between List or Styles view, which is really convenient for when you need to make changes to a bunch of like-styled objects. You know, for that one instance when your manager wants you to change the fills from aubergine (
#3d0734) to chartreuse (#c1f80a).Tap
 to discover details about the Canvas you are working on. If you have an object selected on the Canvas, this is also where you access the Inspectors.
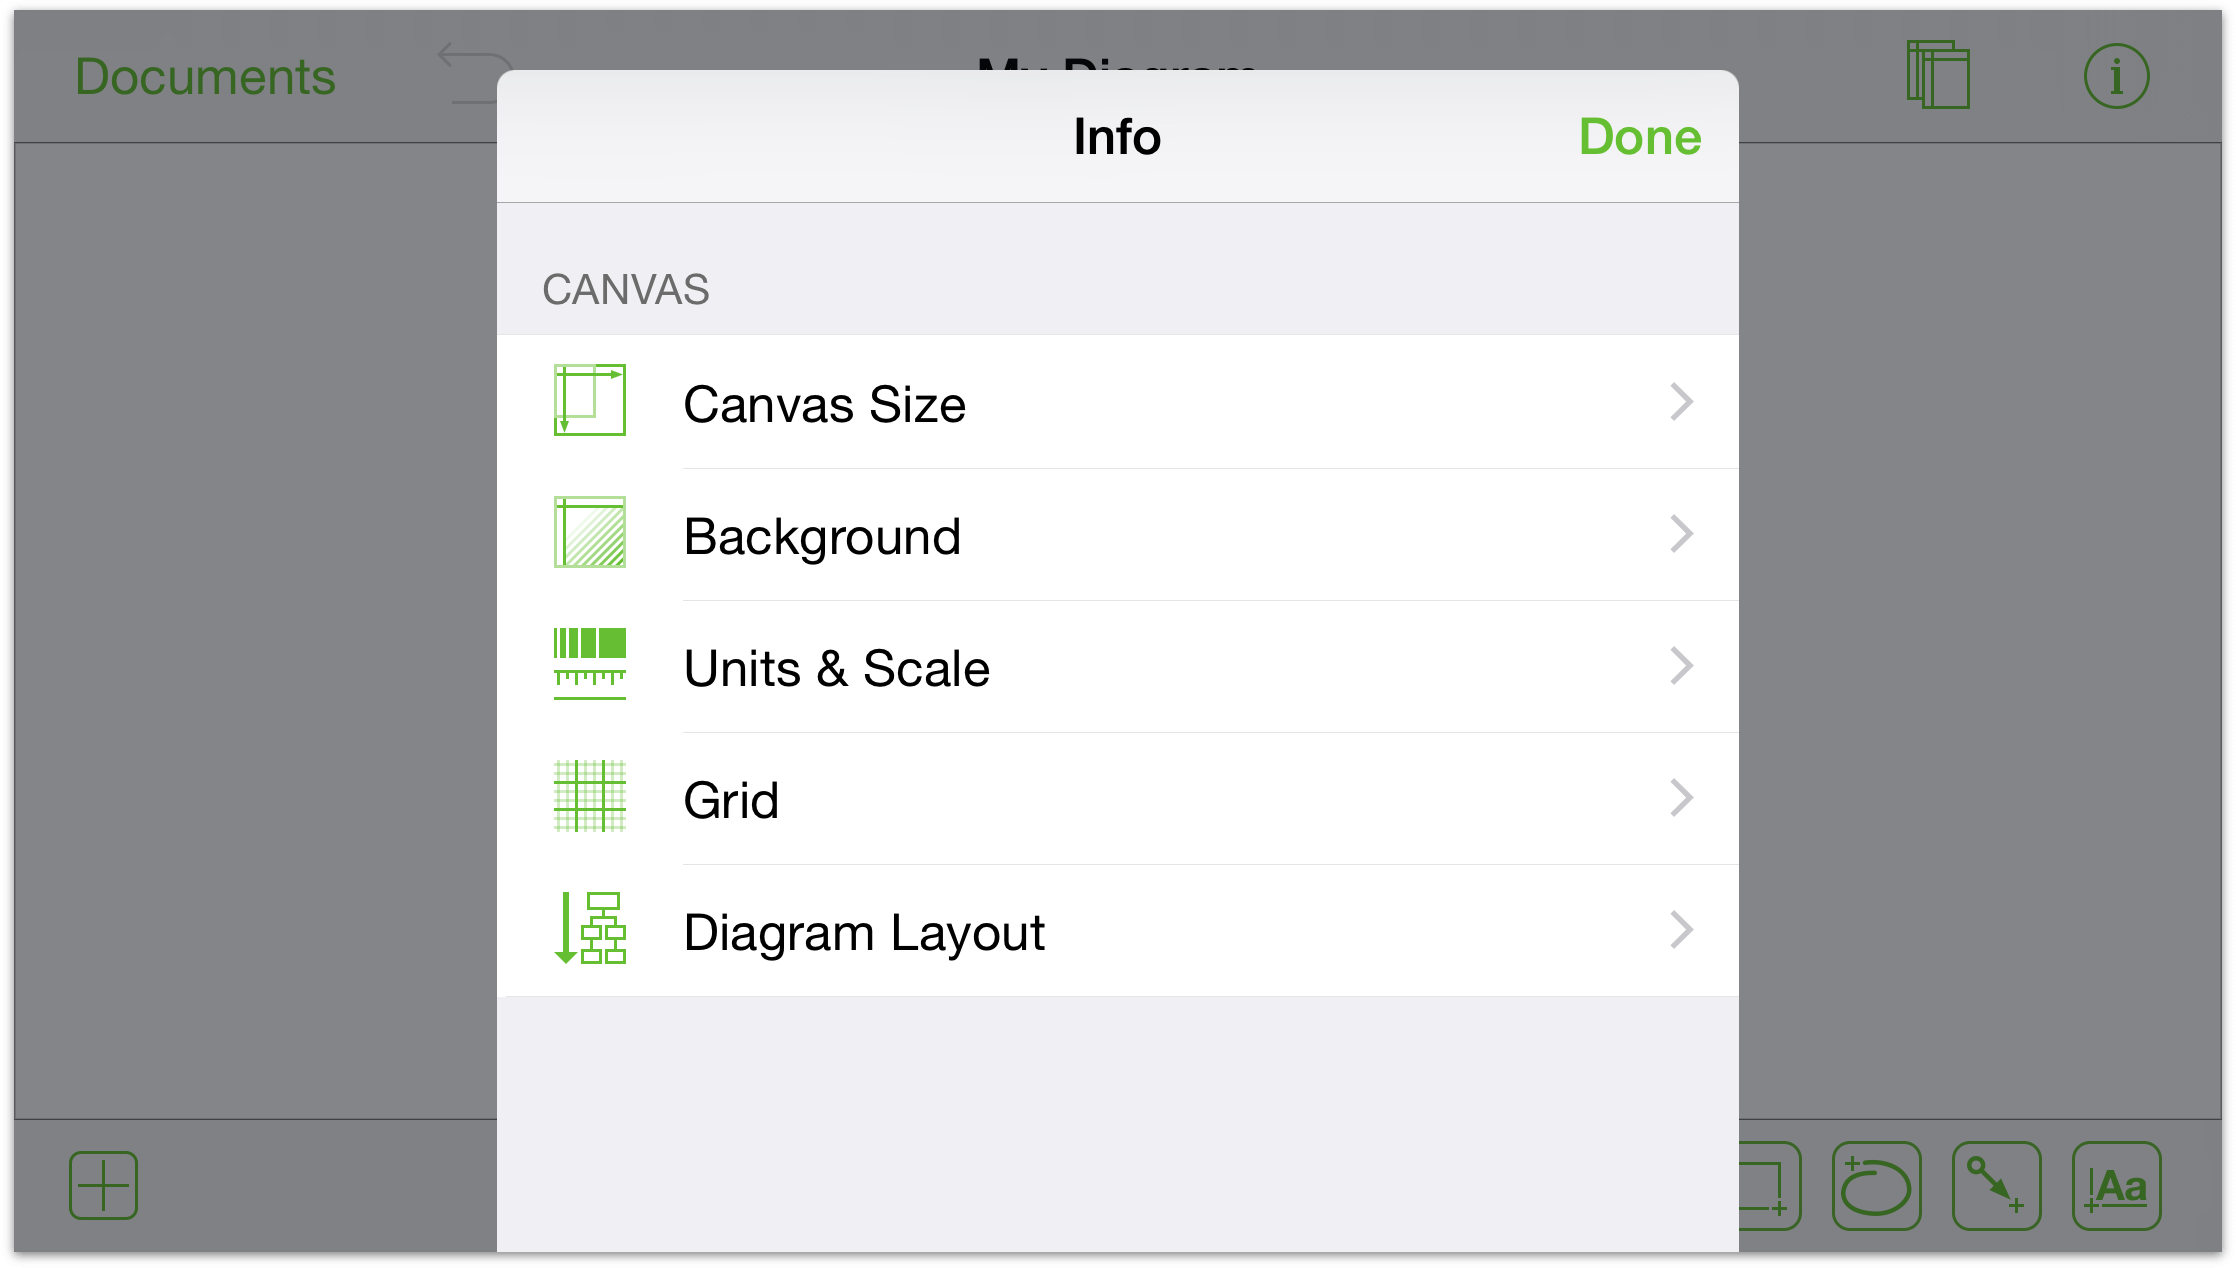
Tap
 to open the Stencils library. Use the Stencils library to find and drag objects to the Canvas, or to search Stenciltown online for new stencils.
Now that you’ve had a chance to peruse the buttons in the toolbar, it’s time to take the Drawing Tools out for a little test drive.
Adding Shapes
A shape is a two-dimensional object that you add to your canvas. Shapes can be styled with an addition like a nice gradient or color, for example. You can also add a label to a shape. The quickest way to add shapes is to drag from the stencil palette:
Tap
 to select the Shapes tool.
With one finger, tap on the Canvas and drag your finger to draw a shape.
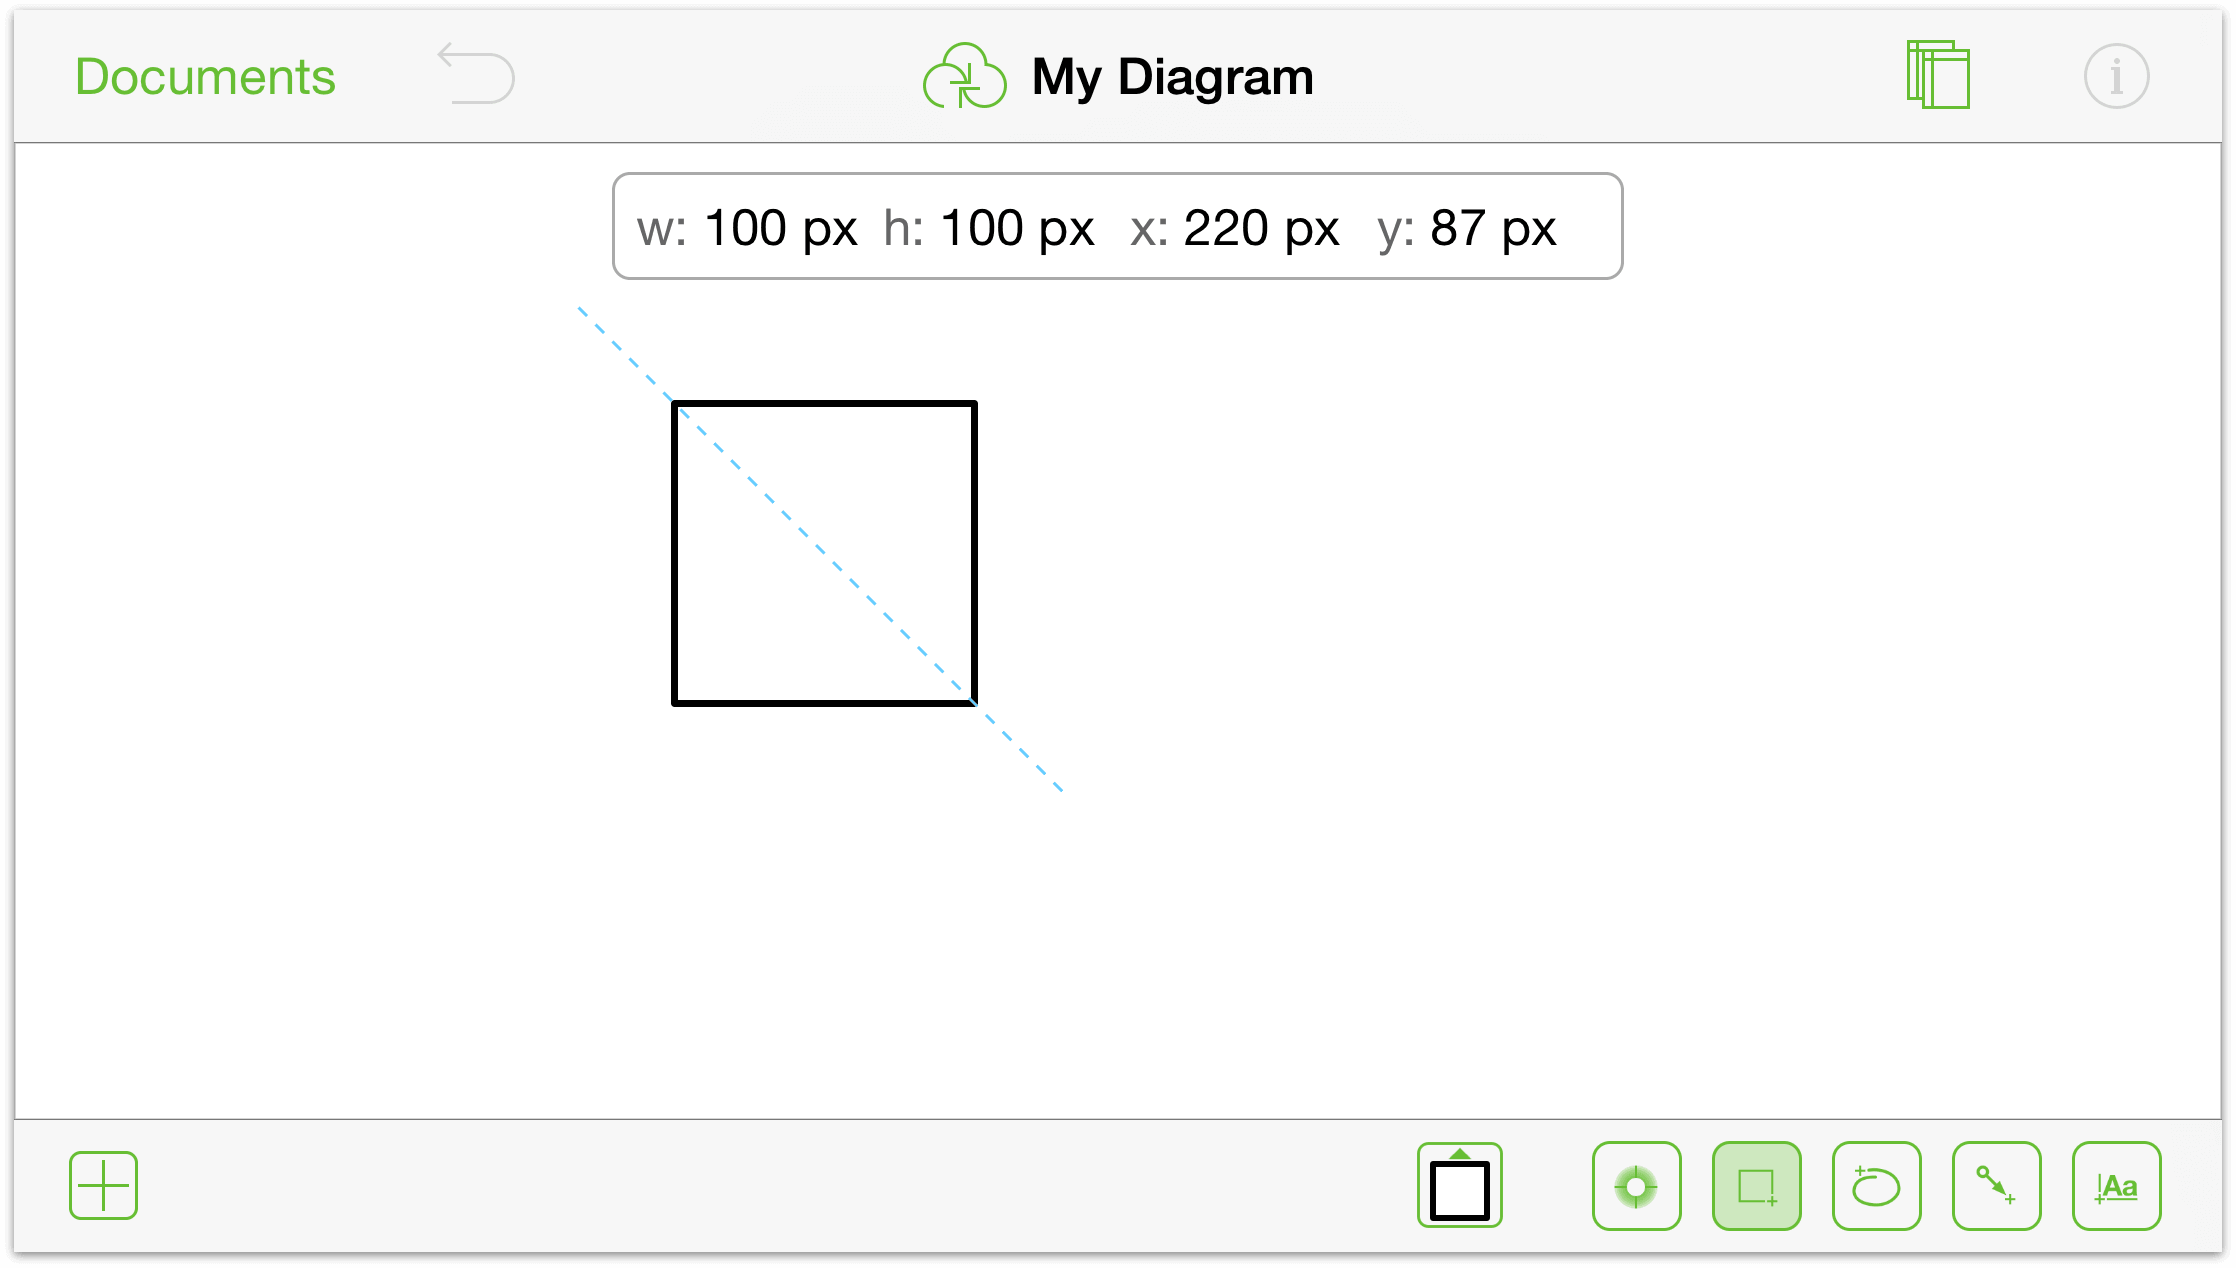
As you draw on the Canvas, OmniGraffle displays the dimensions of the shape you are drawing, as well as its x/y position on the Canvas.
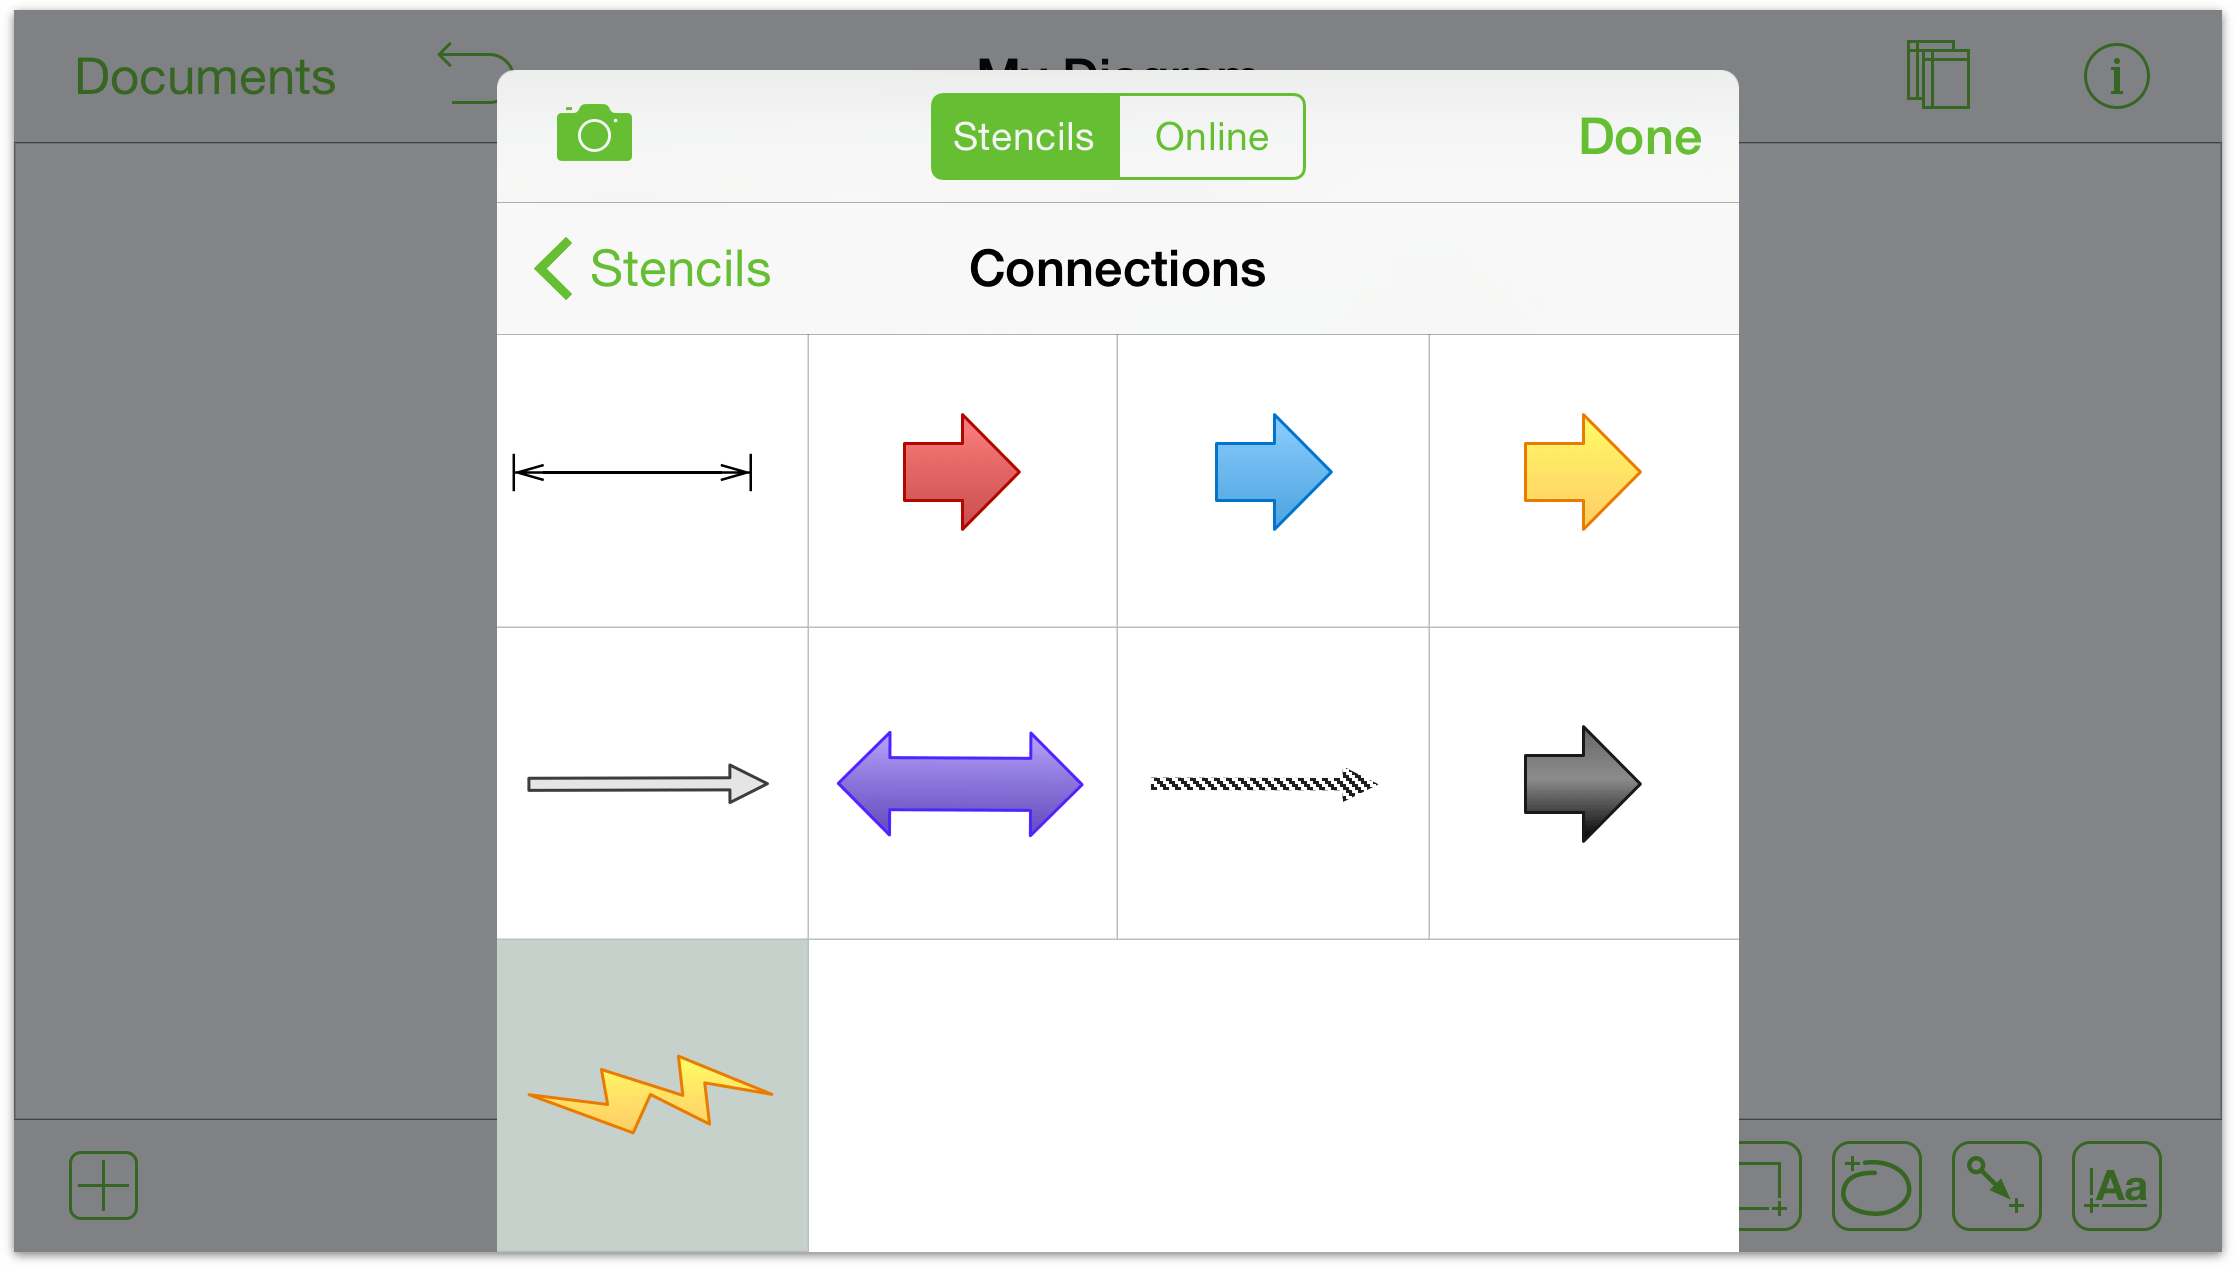
If you prefer to use one of the pre-installed stencils, tap ![]() in the top bar. This opens a menu from which you can select any stencil. You can either double-tap a stencil to add it to the canvas:
in the top bar. This opens a menu from which you can select any stencil. You can either double-tap a stencil to add it to the canvas:
Or you can touch and hold a stencil and then drag it to the canvas:
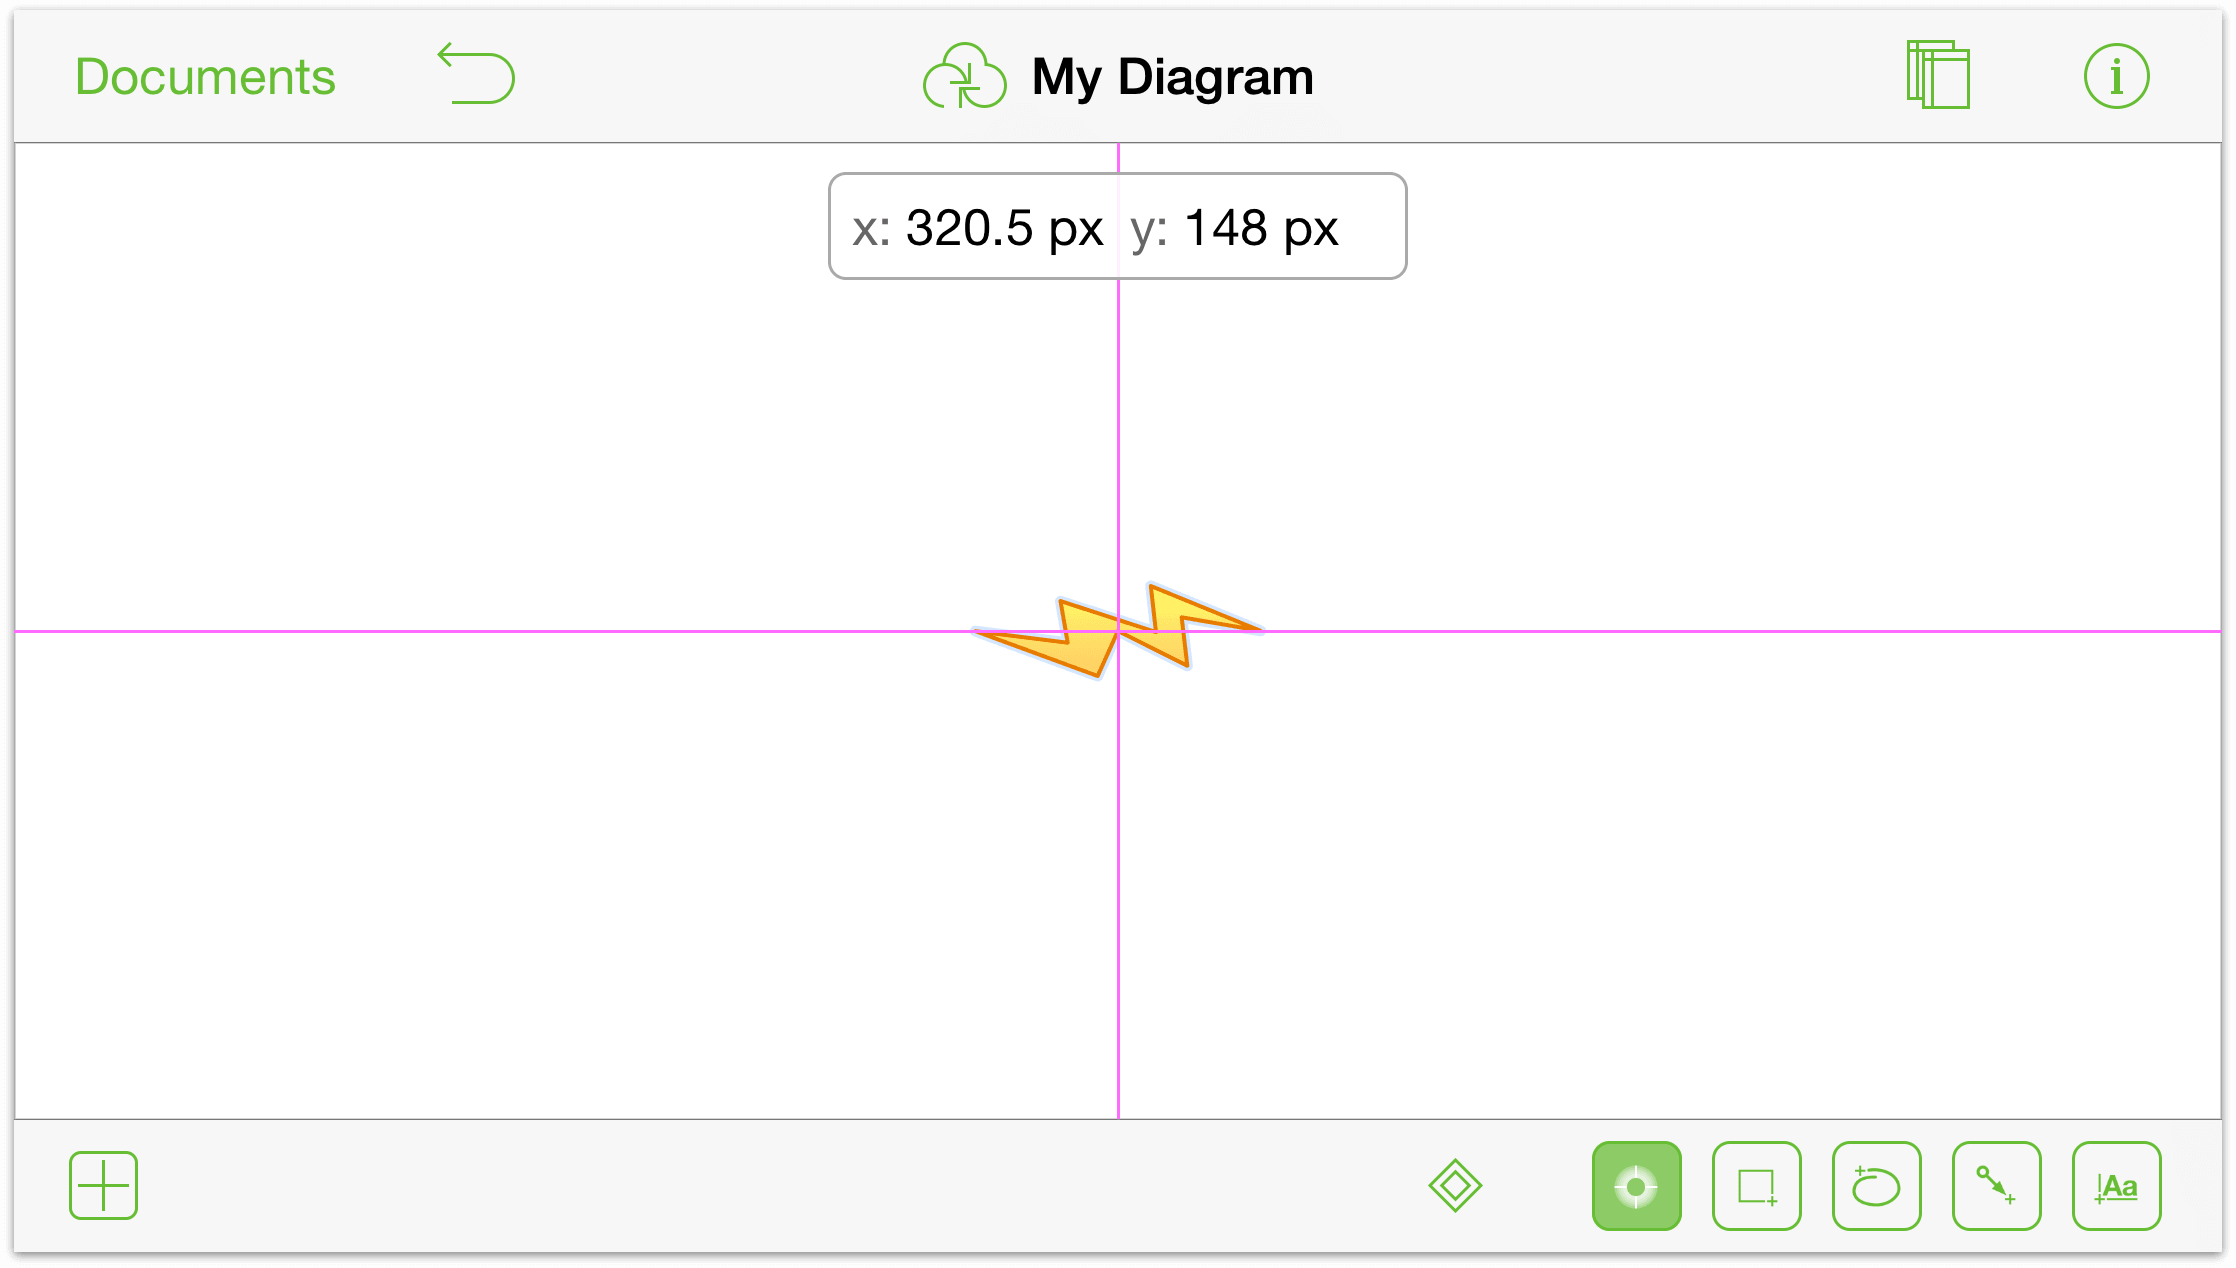
When you drag a stencil to the canvas, the Stencils menu disappears and blue alignment bars appear to help you position the object on the Canvas. Pink alignment bars help you position the object at the horizontal and vertical centers.
You can also create custom shapes:
Tap
 to activate the Freehand drawing tool. Don’t forget, you can also double-tap on a tool to make it persistent; for example
  .
.Use your finger (or your favorite stylus) to draw on the Canvas.
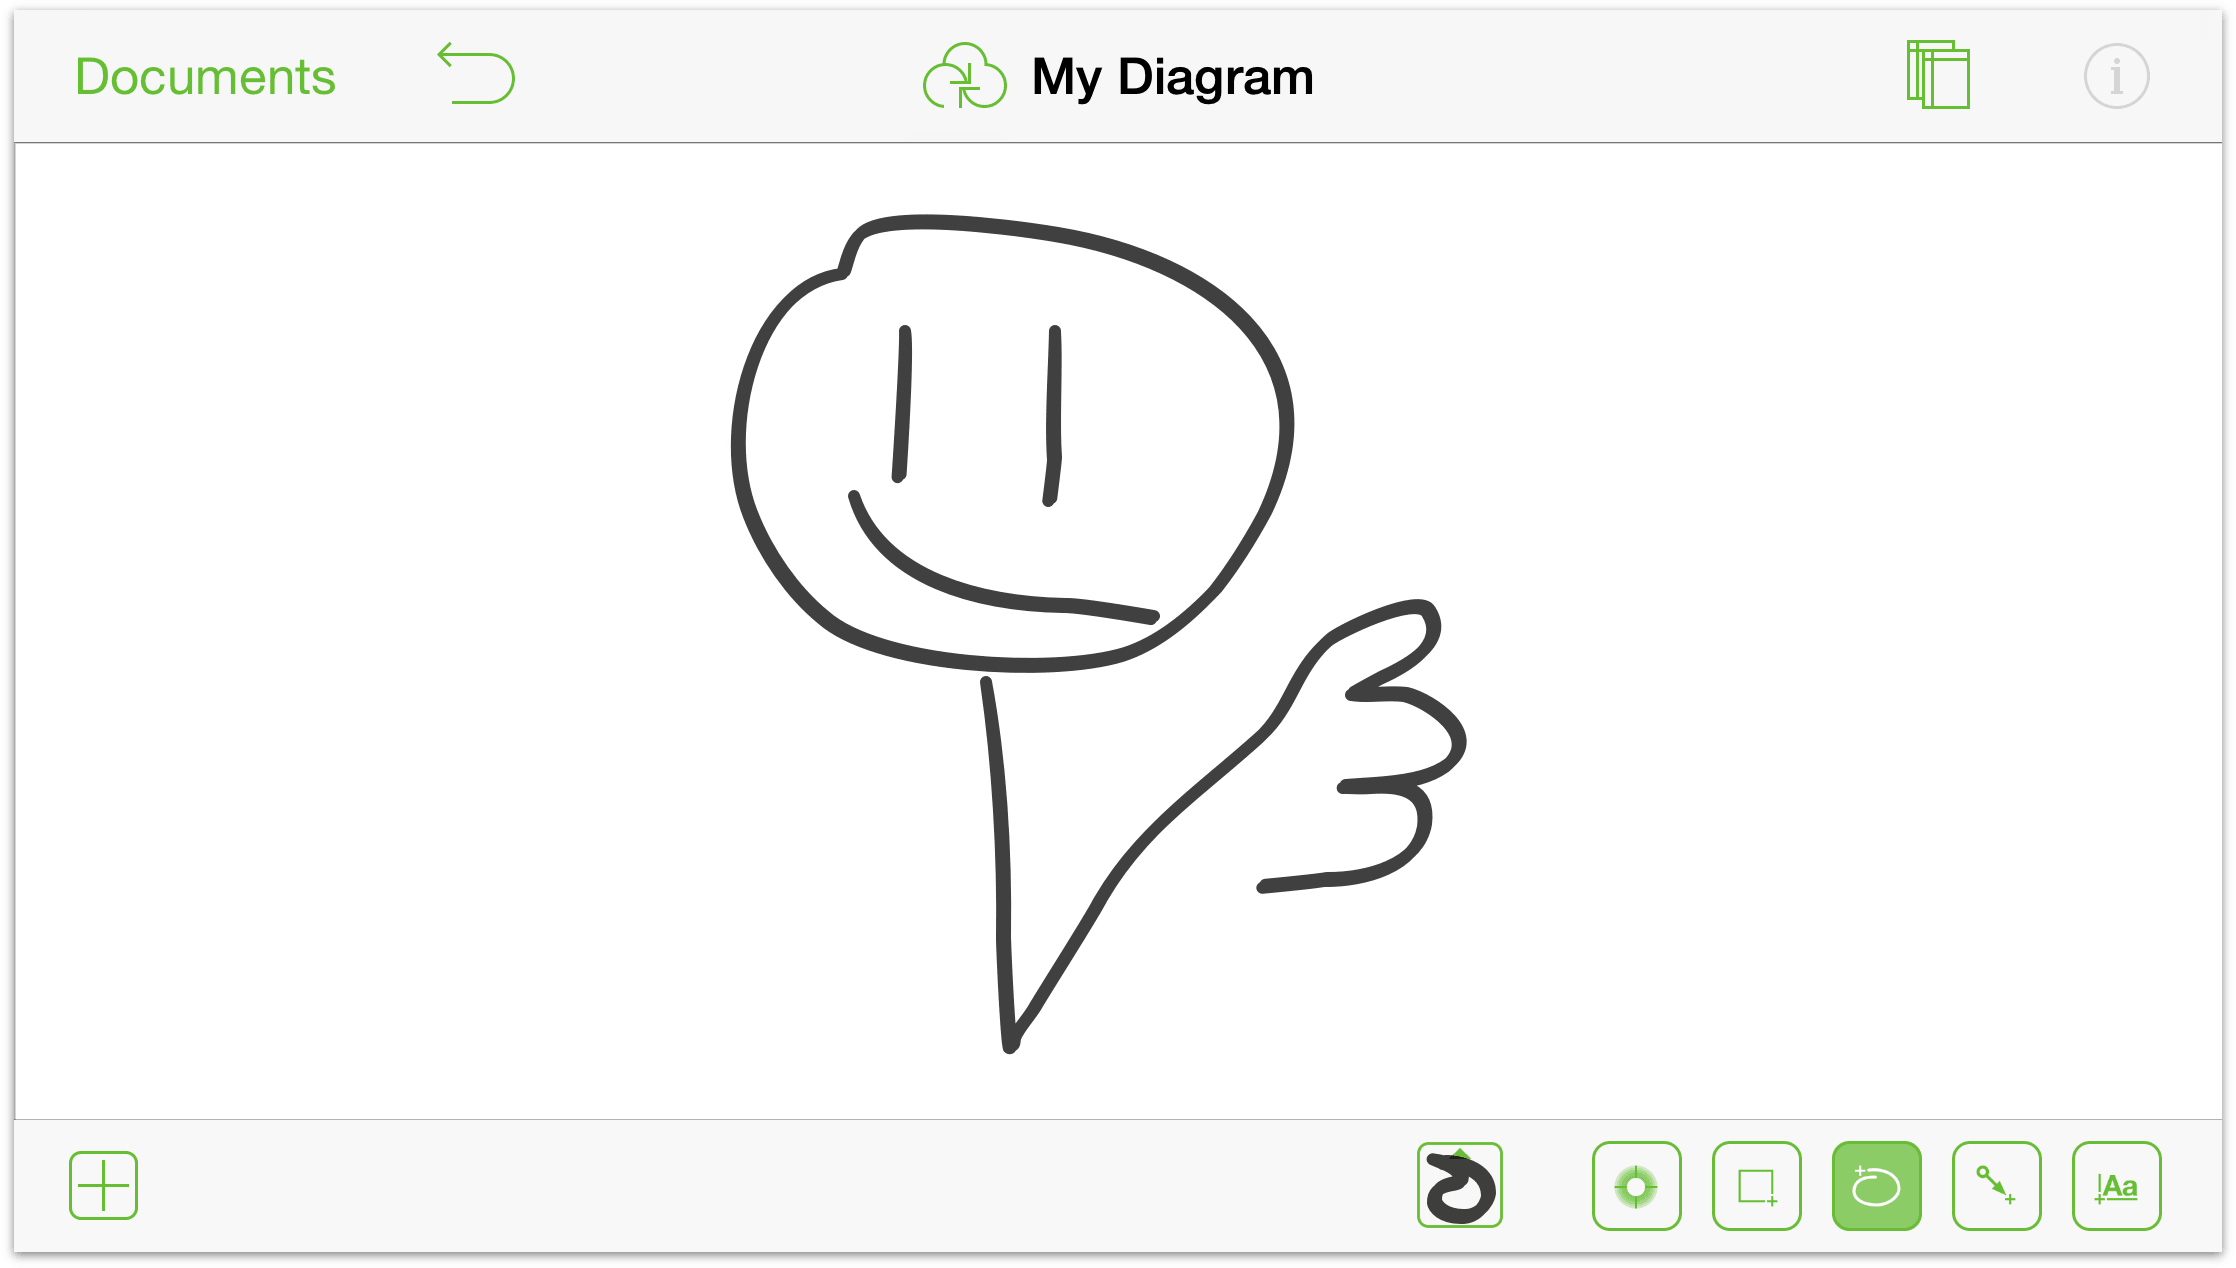
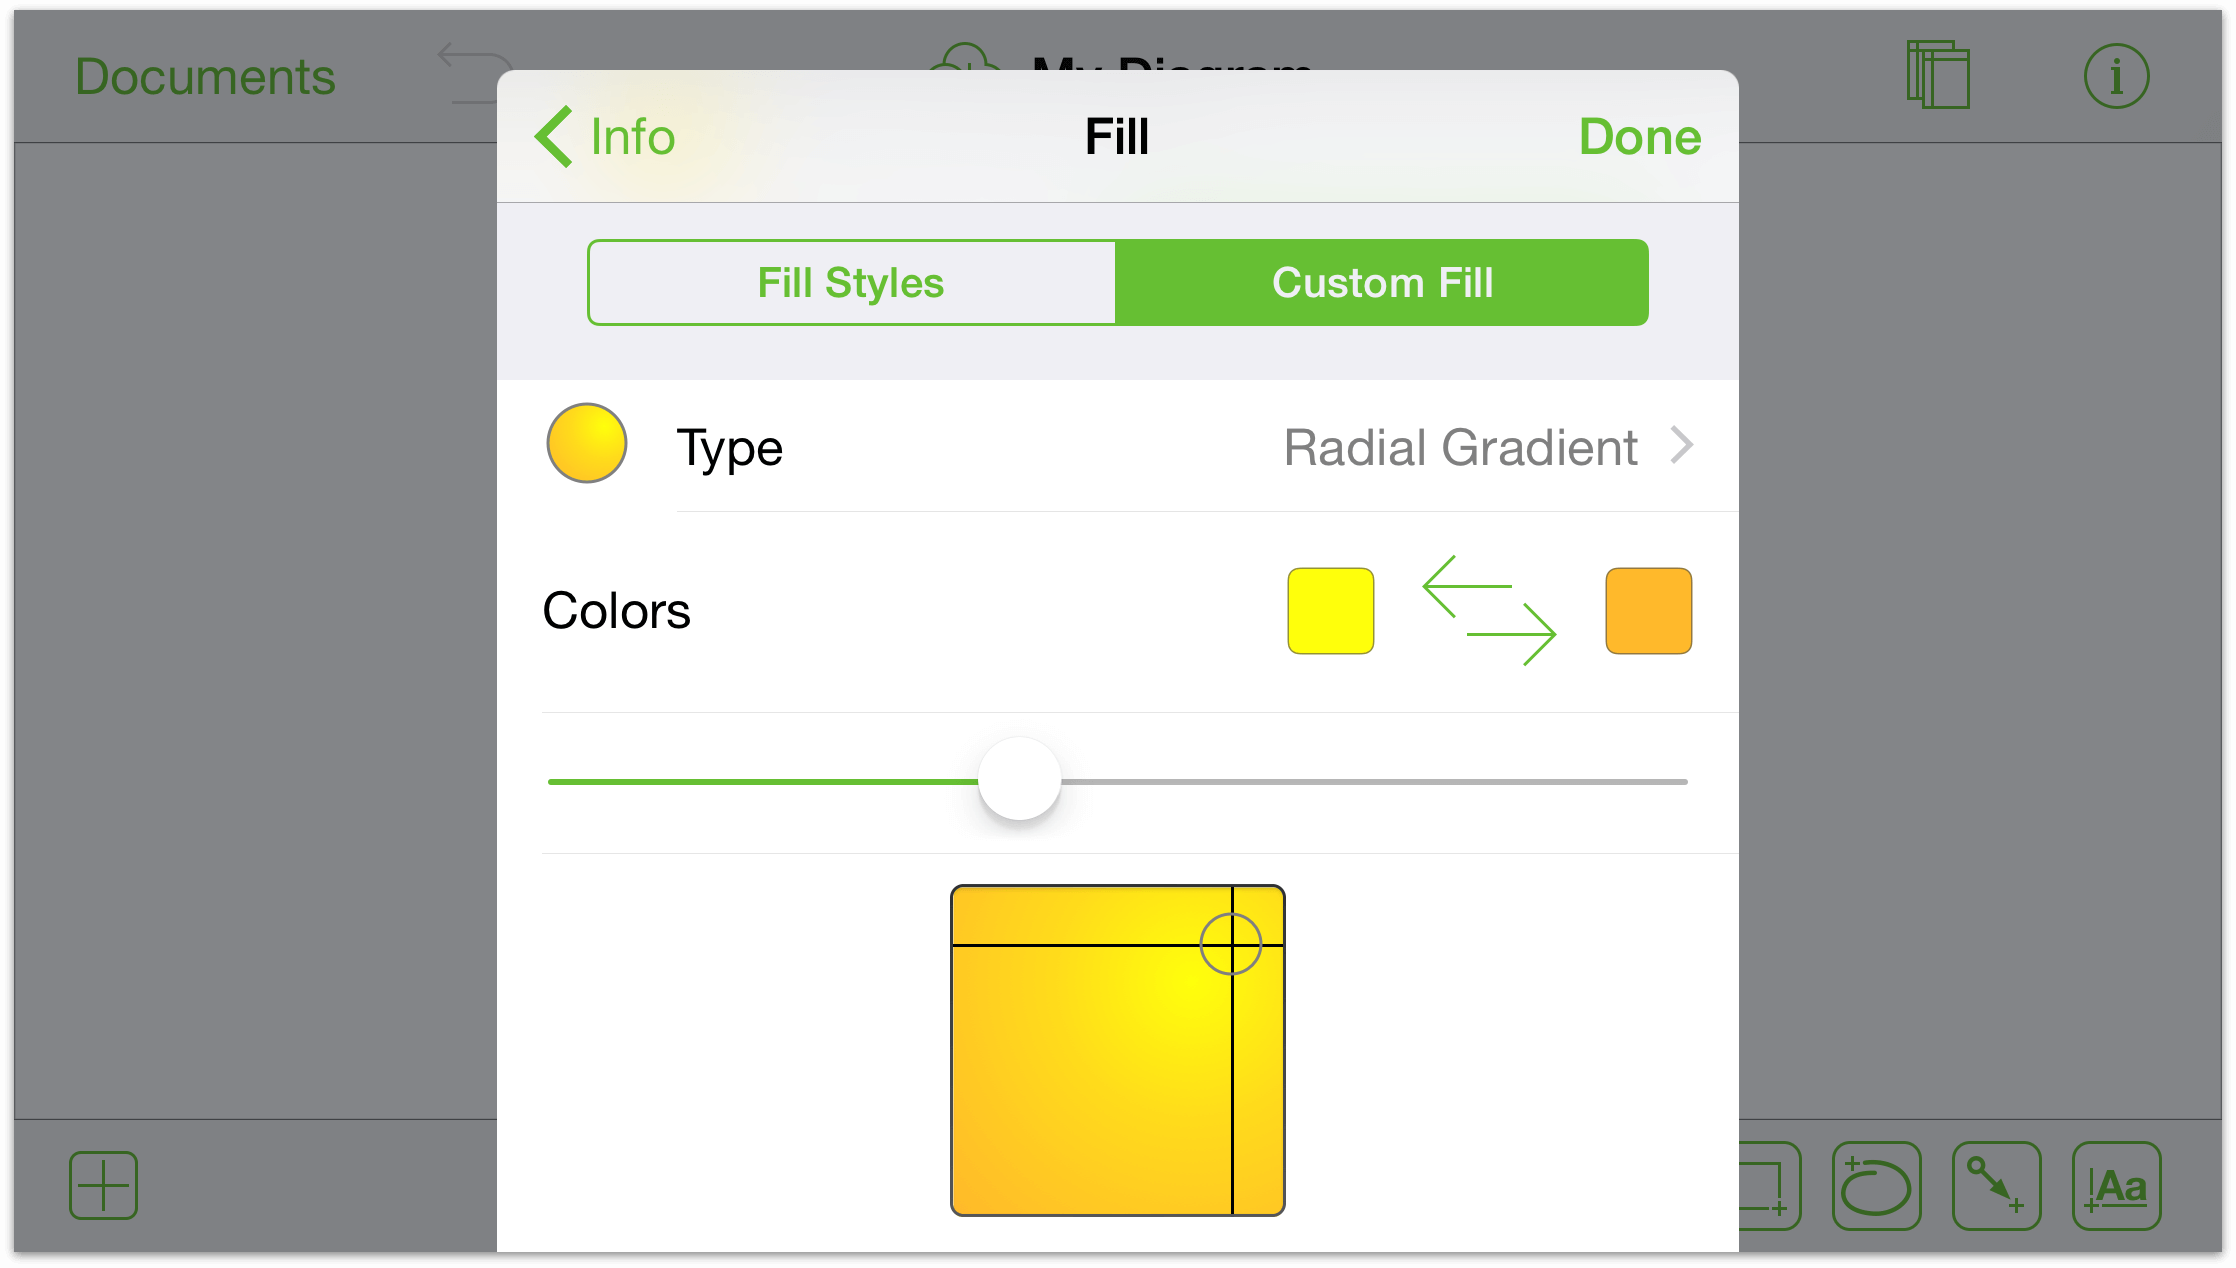
You can select and customize your shapes with the Inspectors by tapping the ![]() button in the top bar. Here, we’ve selected the “head” for the smiley face and have added a yellow radial fill.
button in the top bar. Here, we’ve selected the “head” for the smiley face and have added a yellow radial fill.
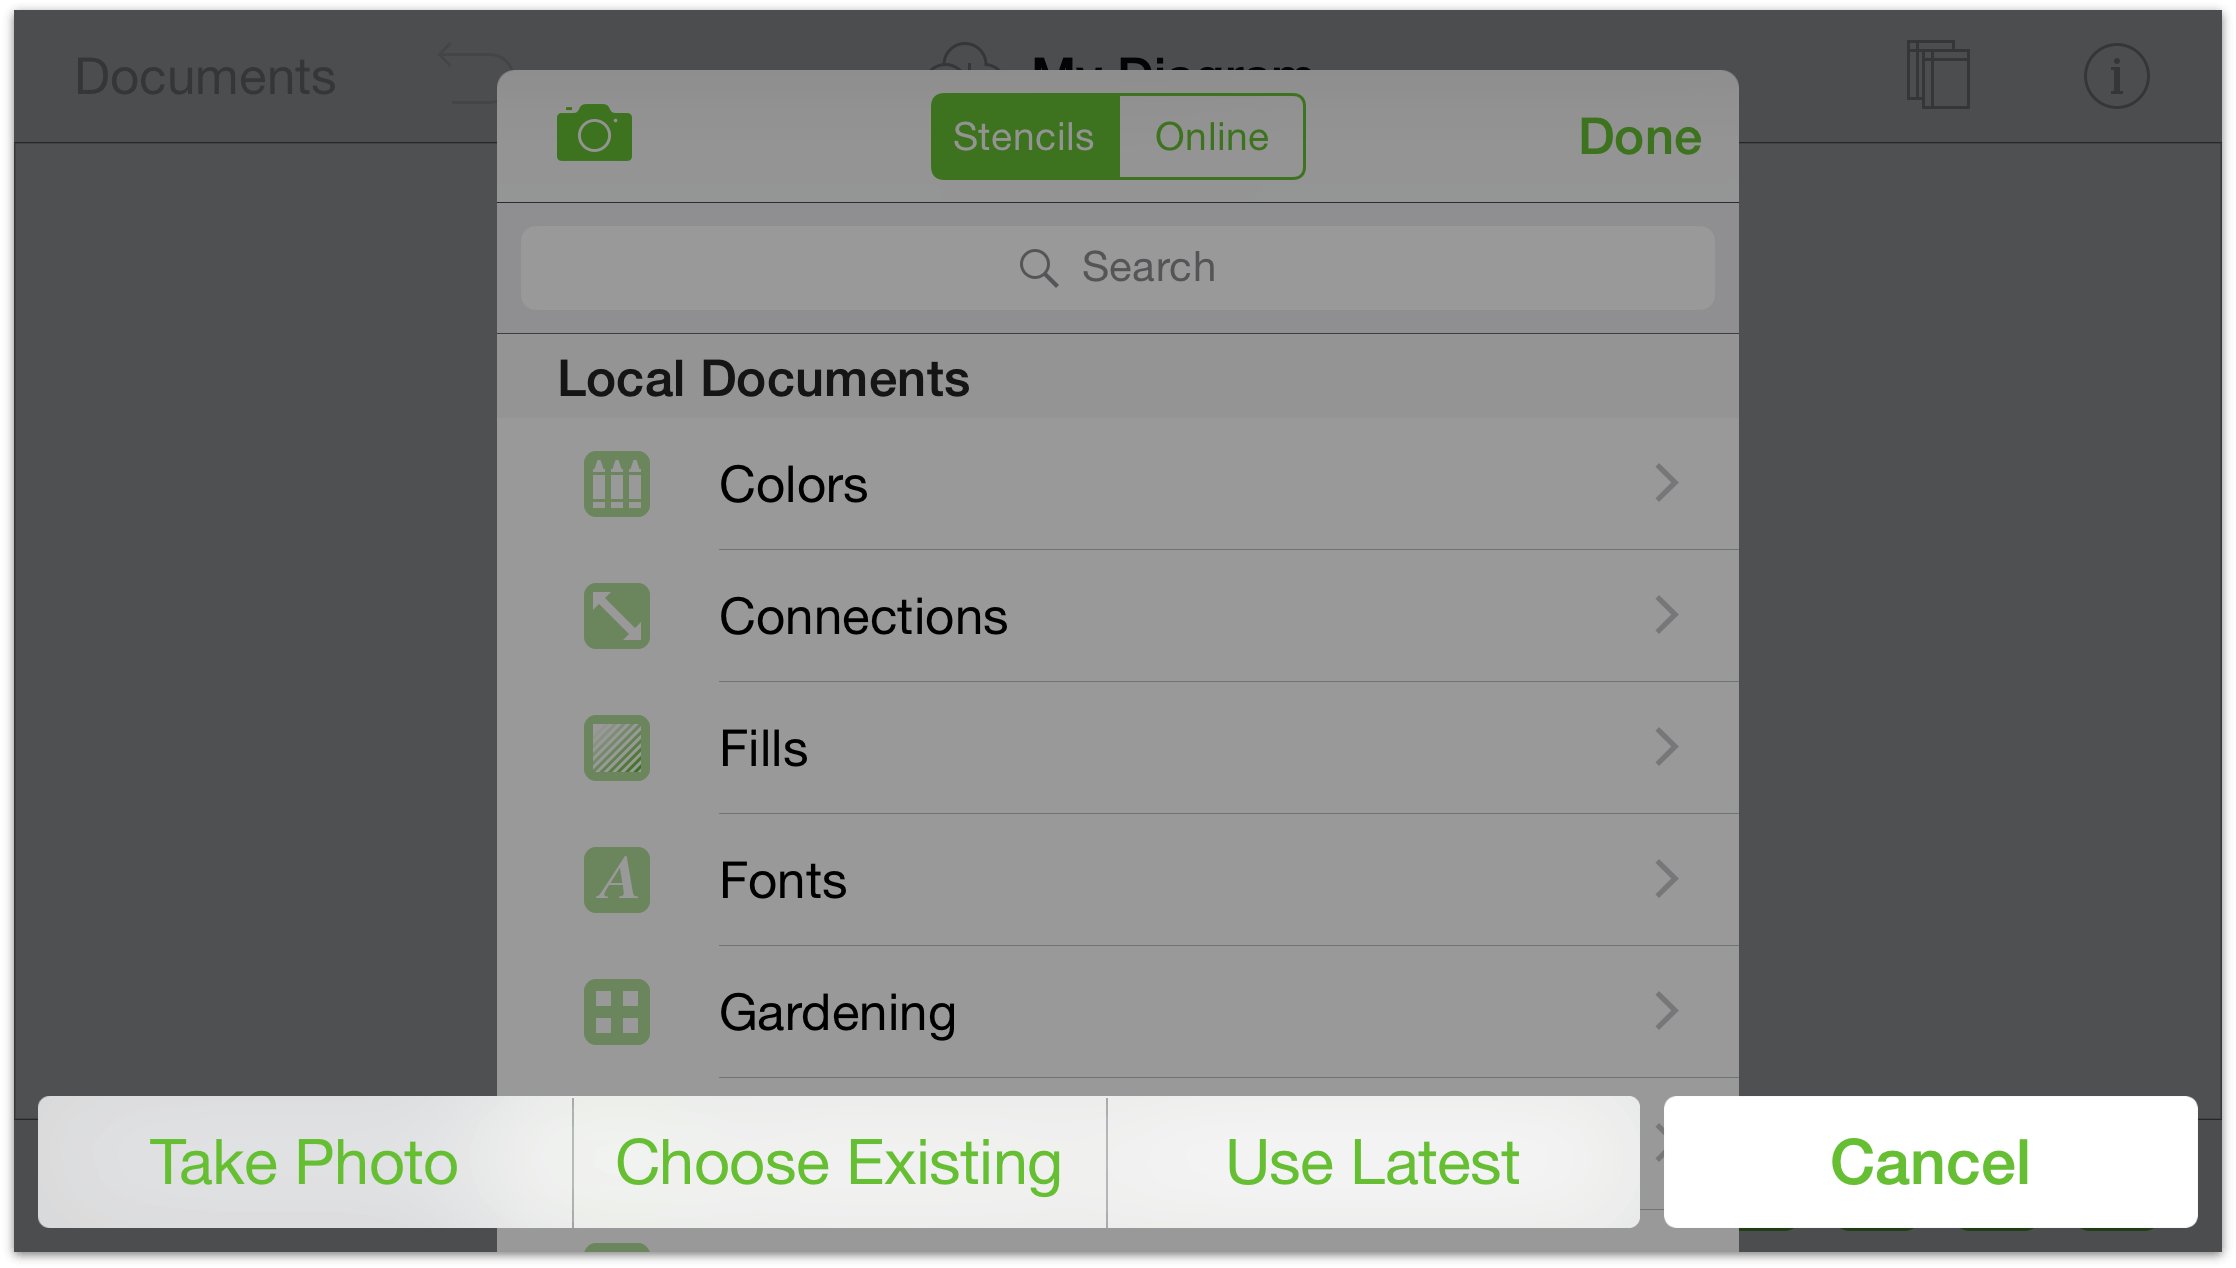
You can also add an image to the Canvas through the Stencils menu:
Tap
 to open the Stencils menu.
Tap
 at the top of the Stencils menu.
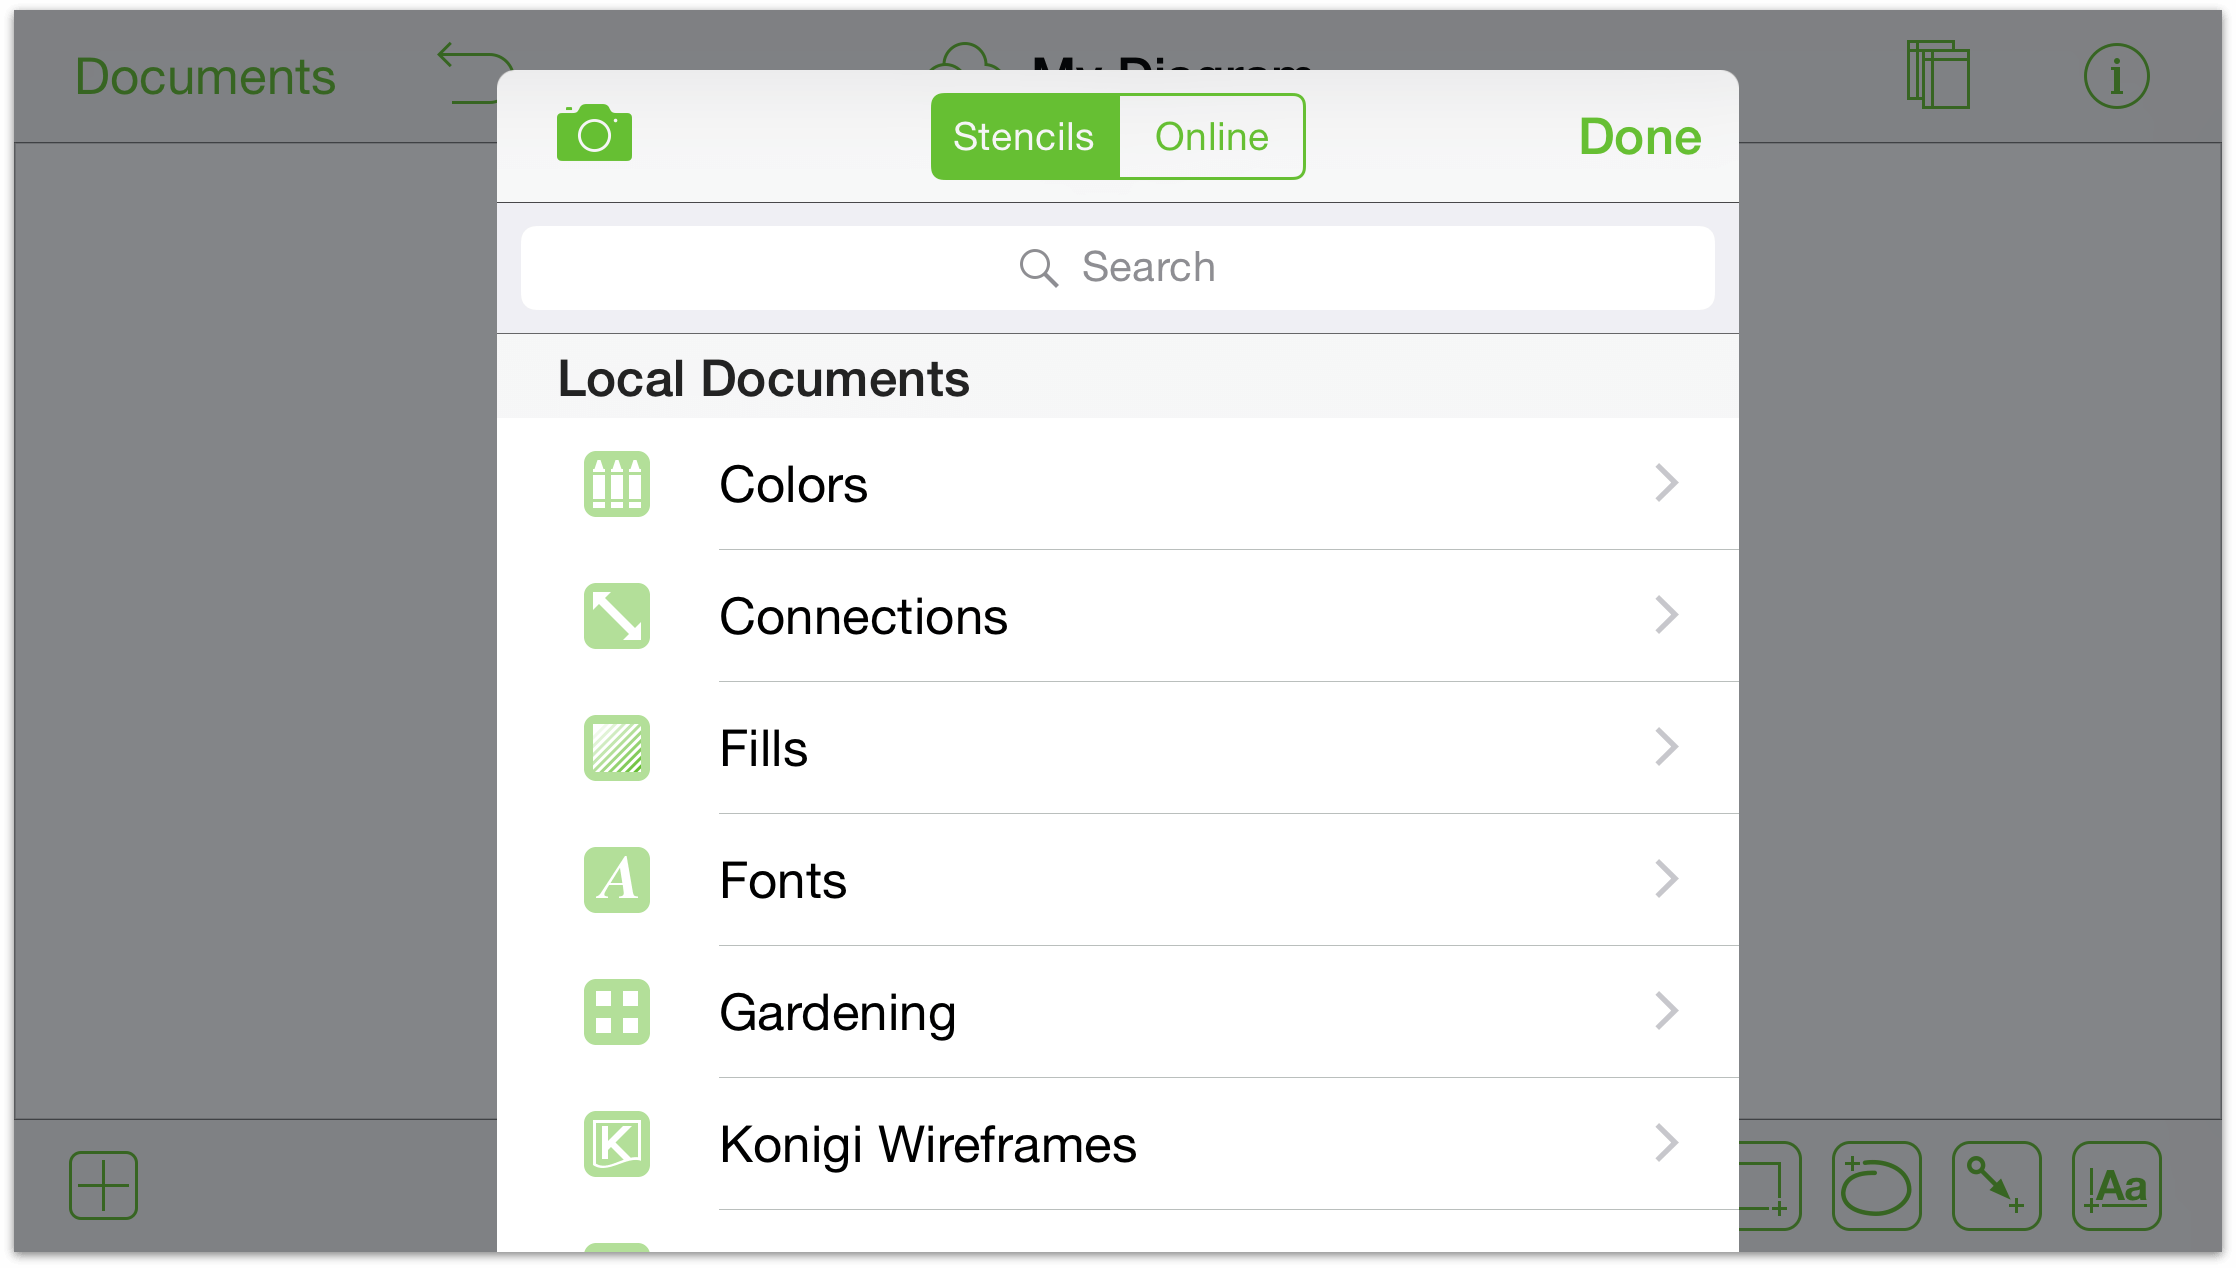
If you haven’t already authorized OmniGraffle access to your Photos app, you’ll see the following alert:
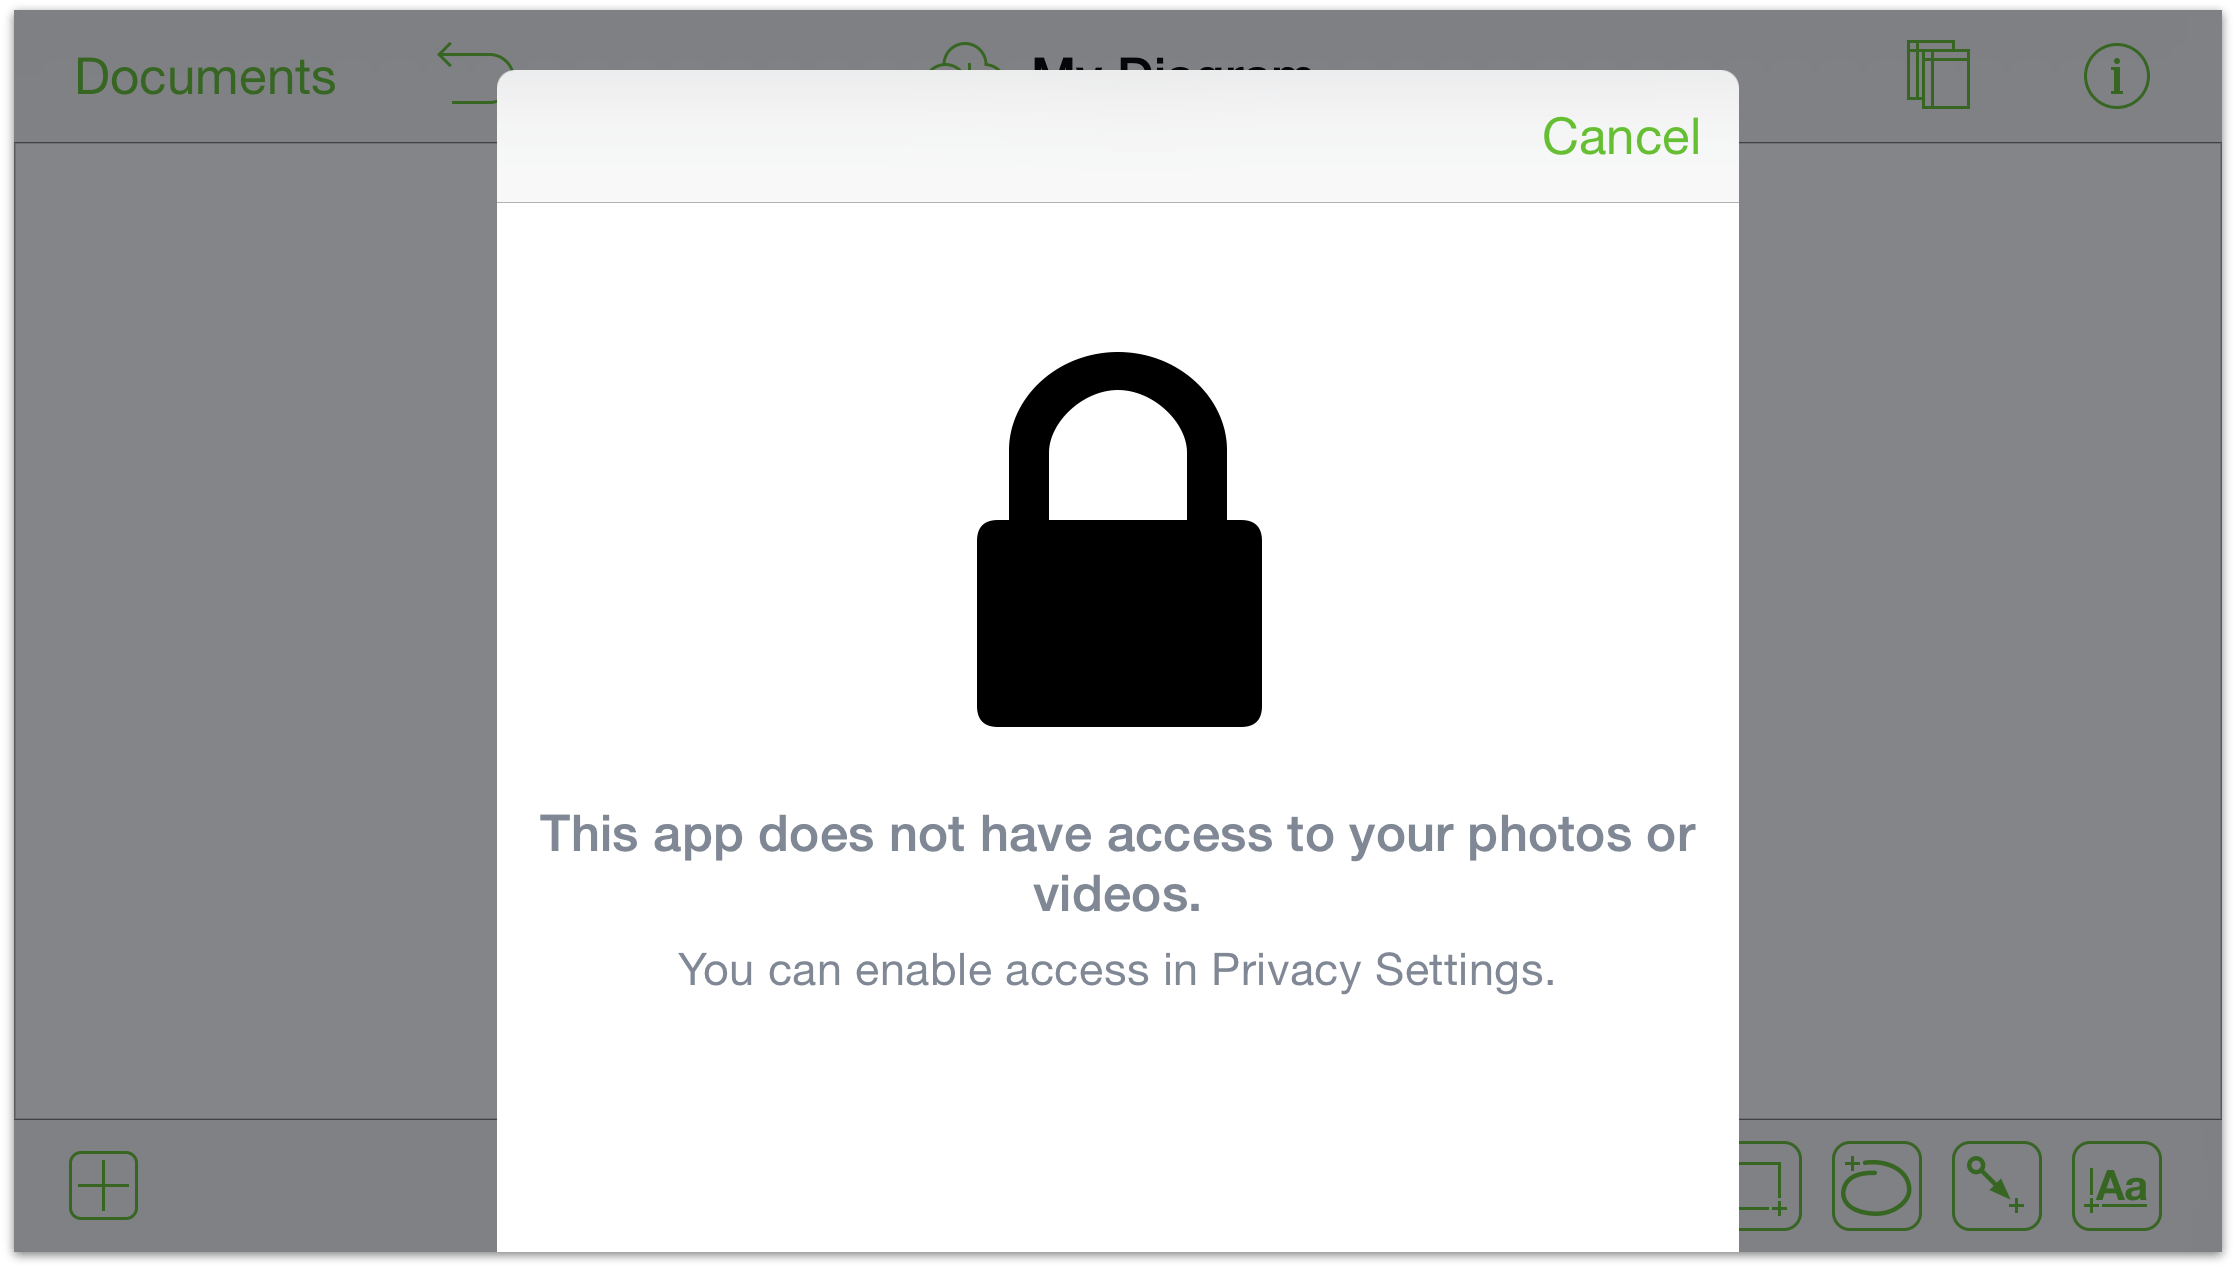
To grant OmniGraffle access, double-tap the Home button on your iPad, locate and open the Settings app, then tap Privacy on the left, and then flip the switch for OmniGraffle.
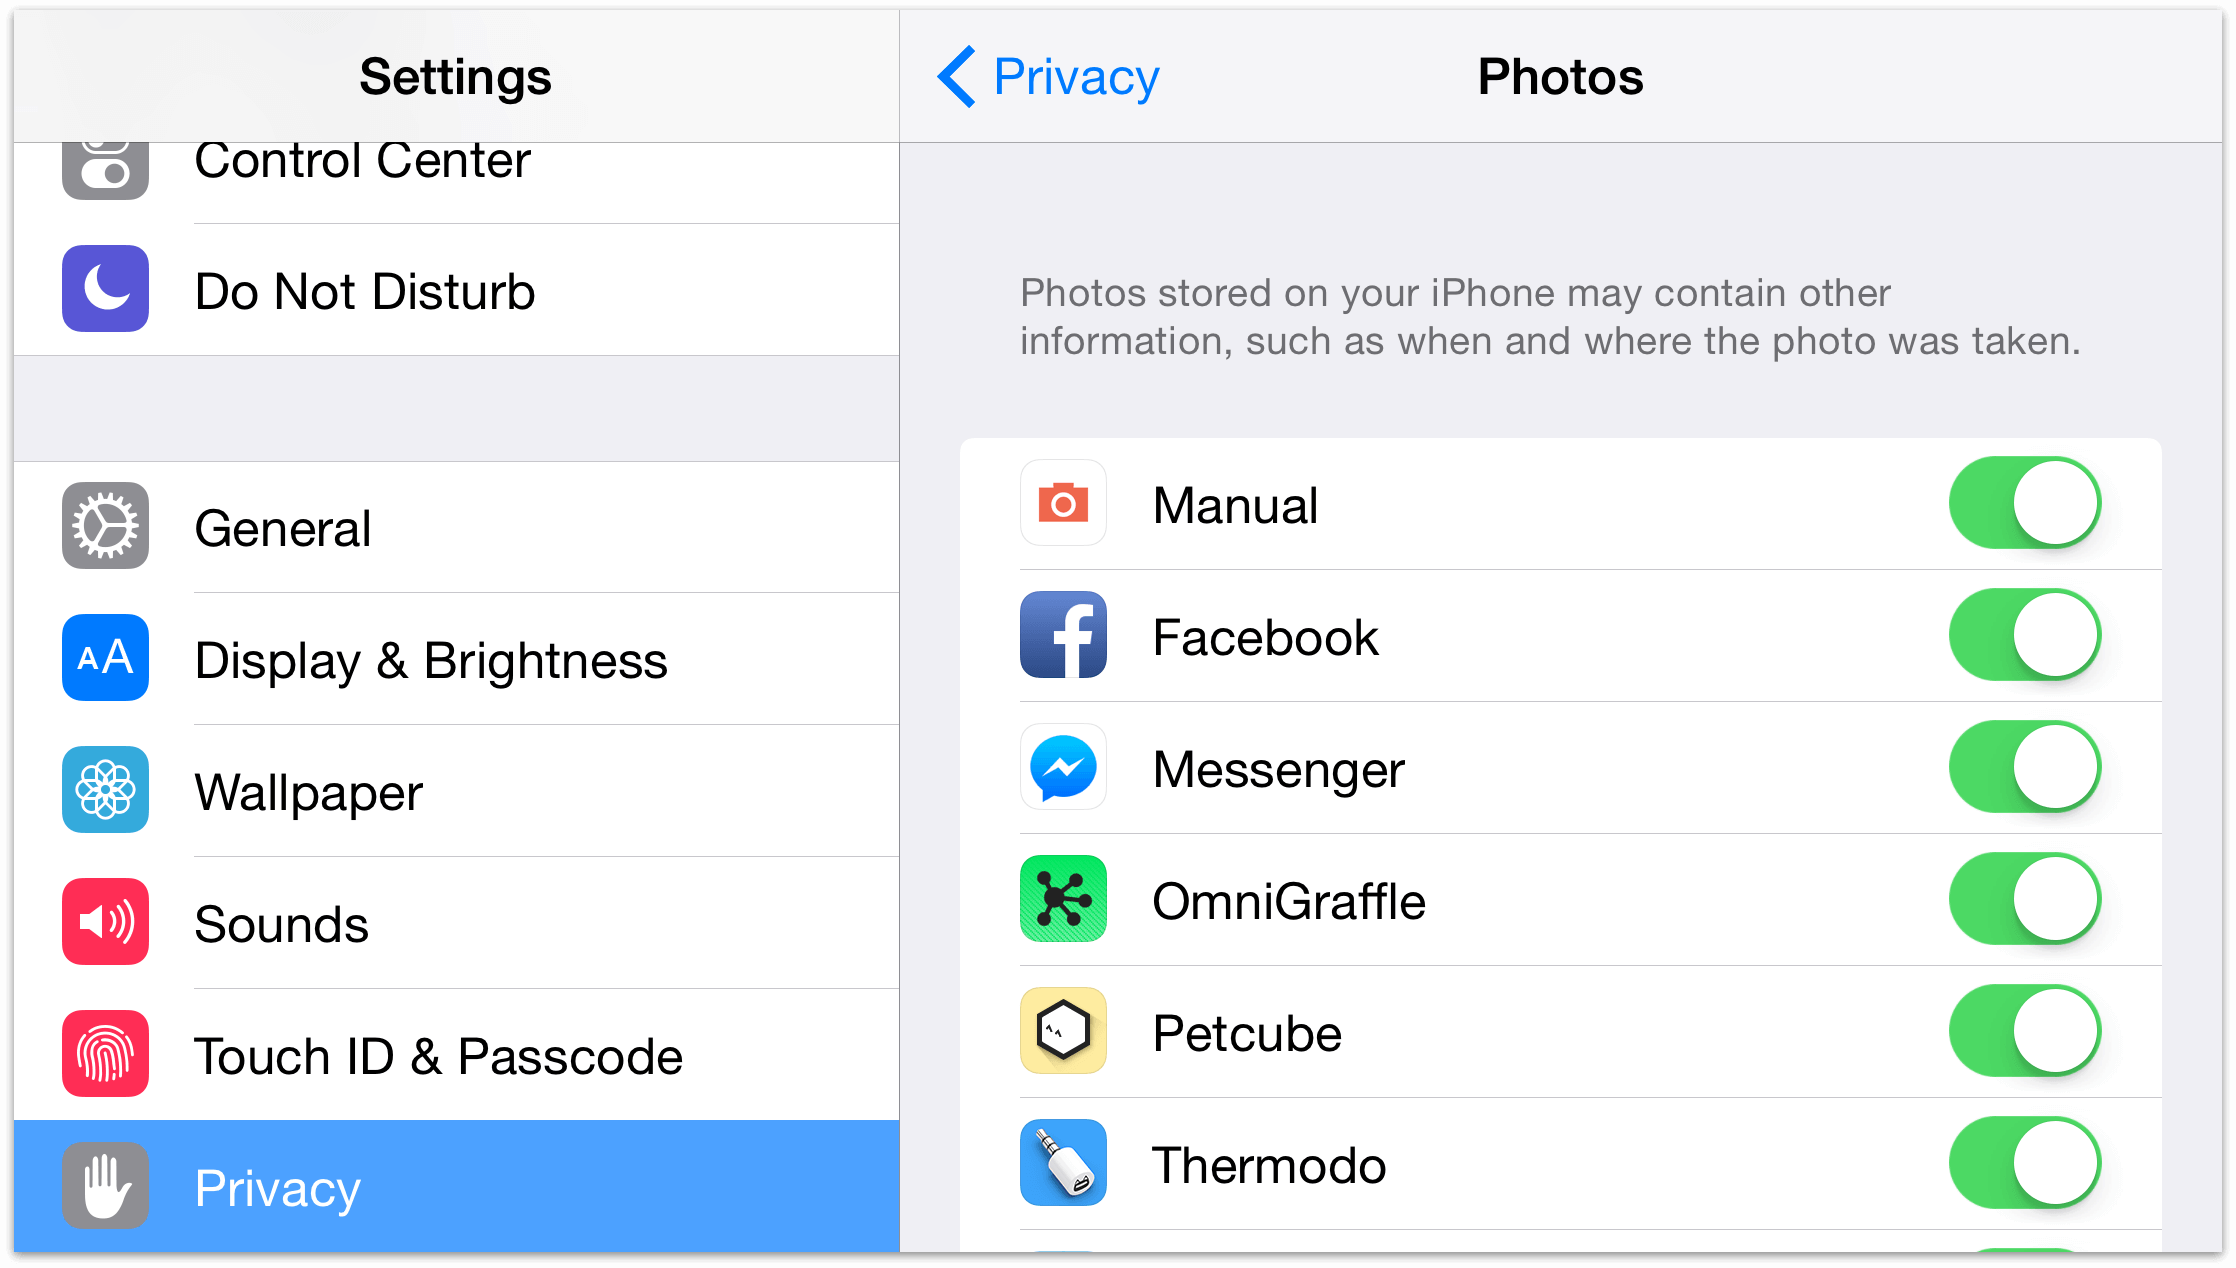
Now double-tap Home again and switch back to OmniGraffle.
After tapping
 , some options slide up from the bottom of the Stencils menu:
- Tap Take Photo to use the iPad’s camera.
- Tap Choose Existing to select an image from your Photos library.
- Tap Use Latest to have OmniGraffle place the last image added to your Photos library.
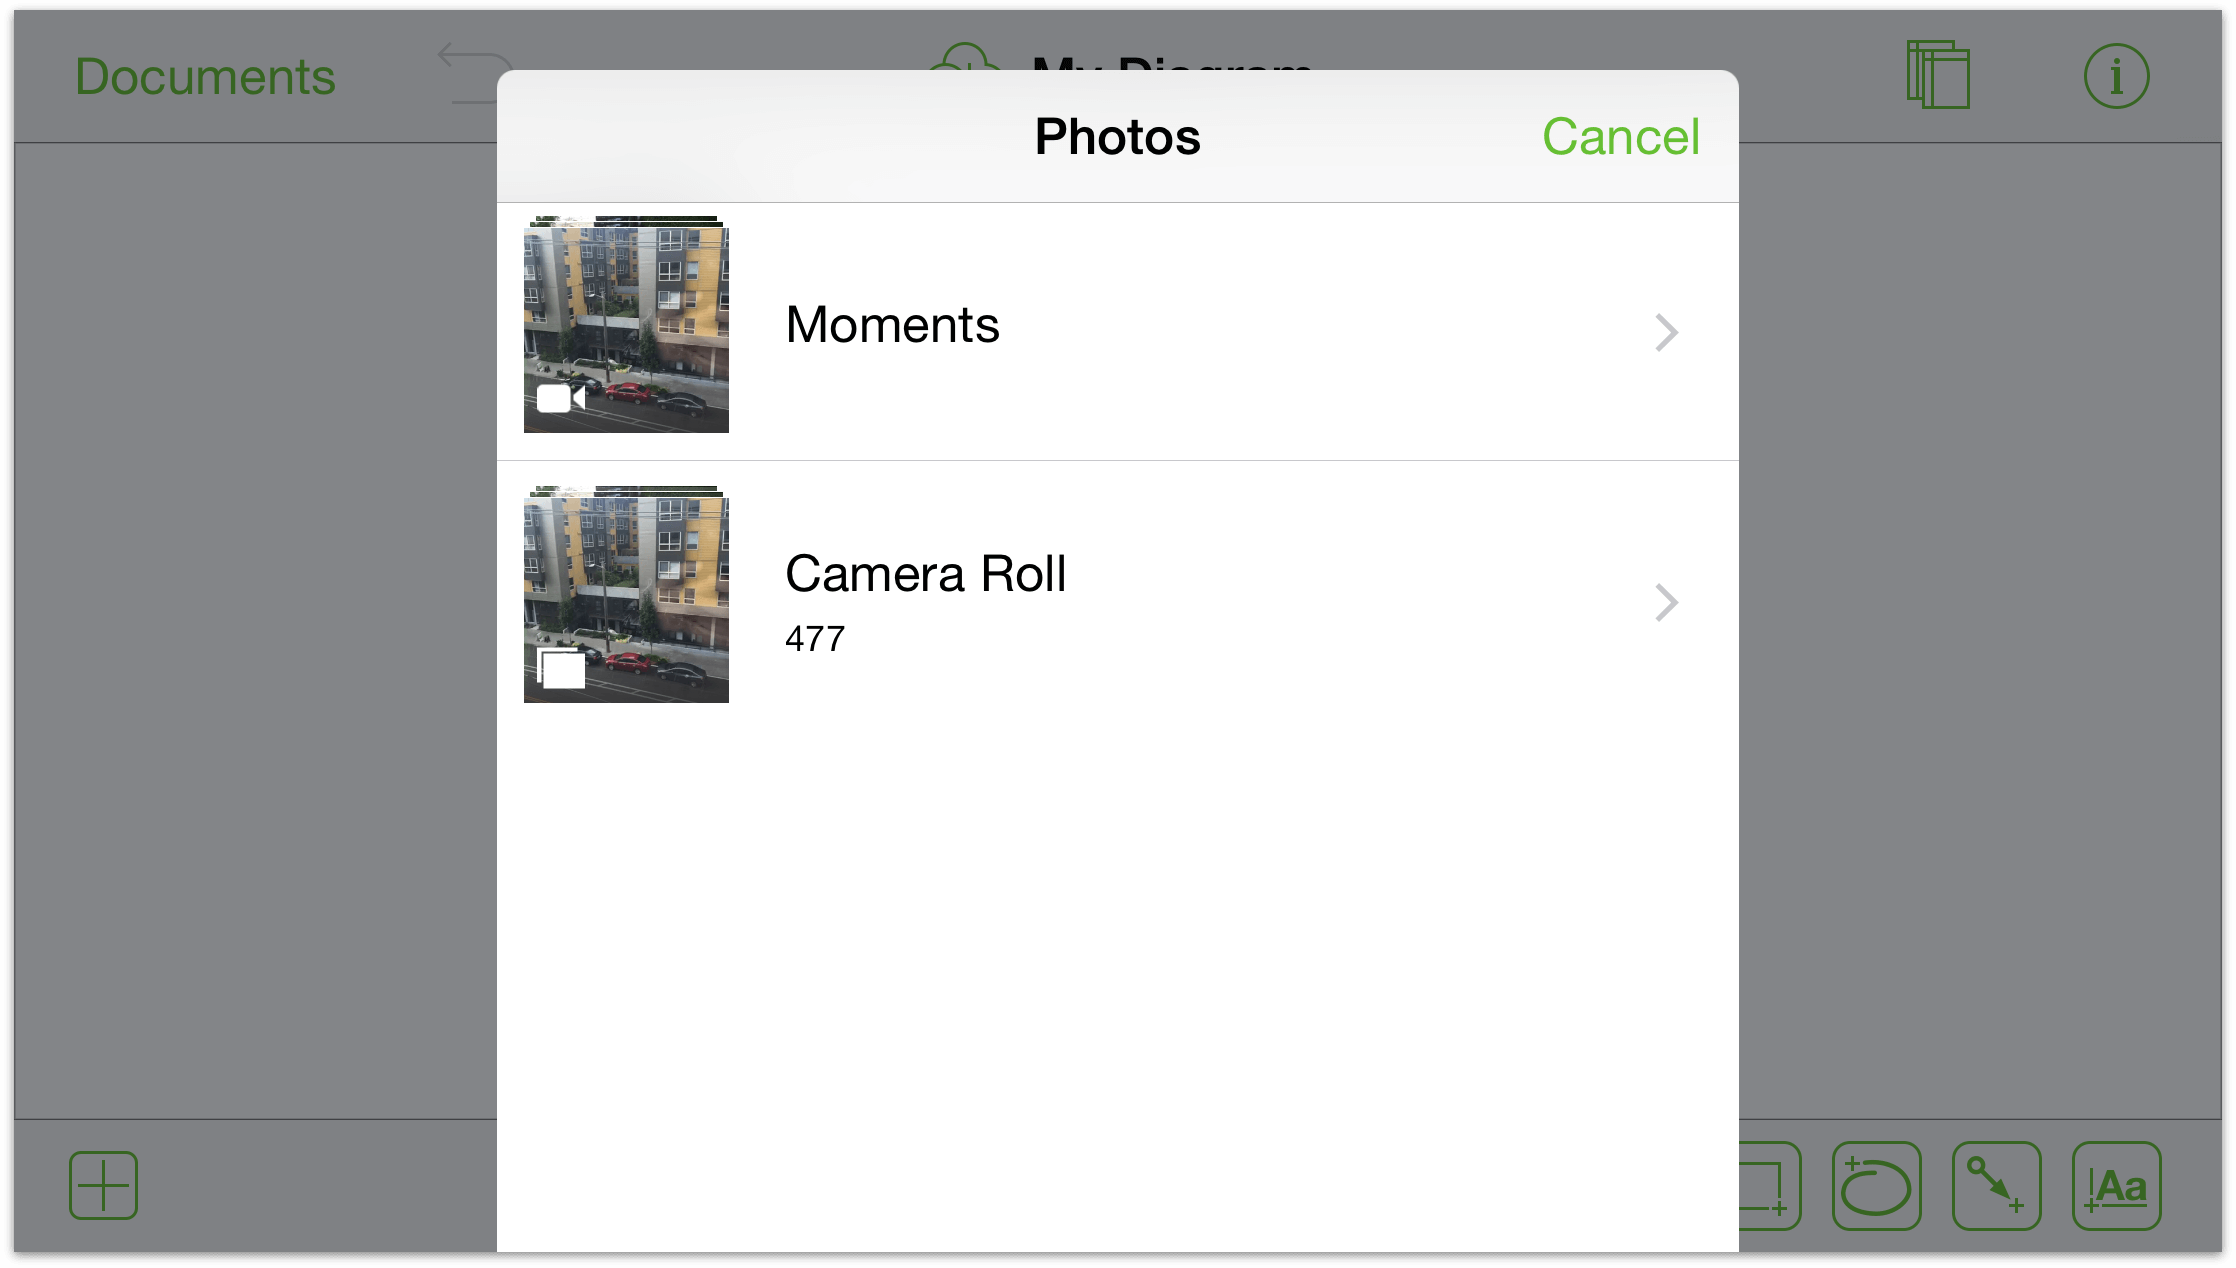
If you tap Choose Existing, a Photos pane slides into the menu. From here, you can choose from All Photos on your iPad, or photos that have been Recently Added.
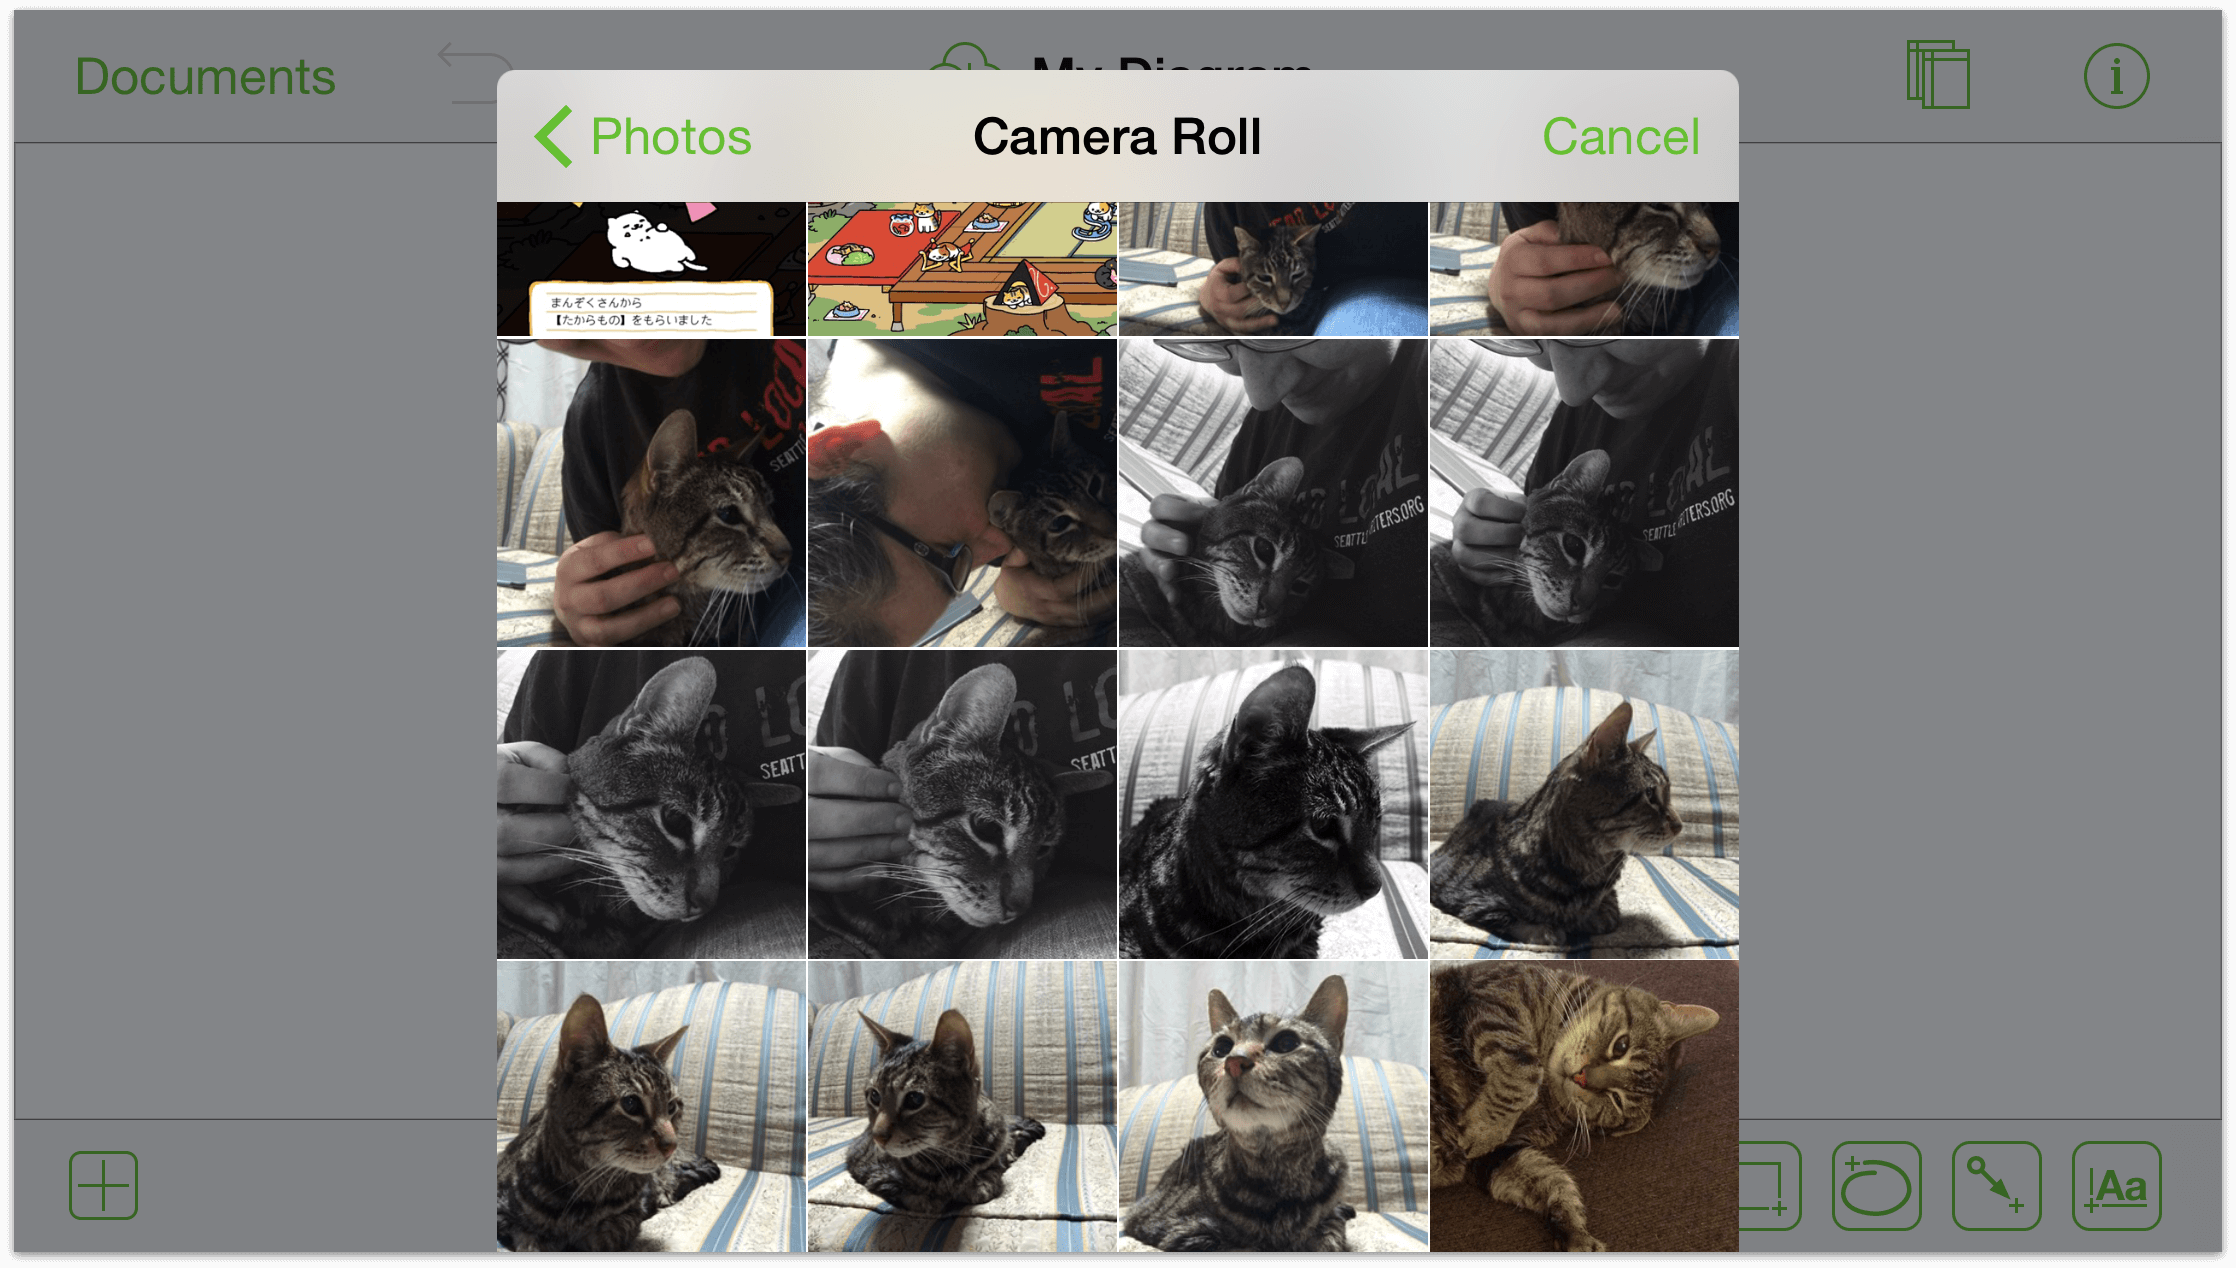
Finally, scroll through the images and tap the image you would like to add to the Canvas.
The Stencils menu disappears and the image is placed on the Canvas.
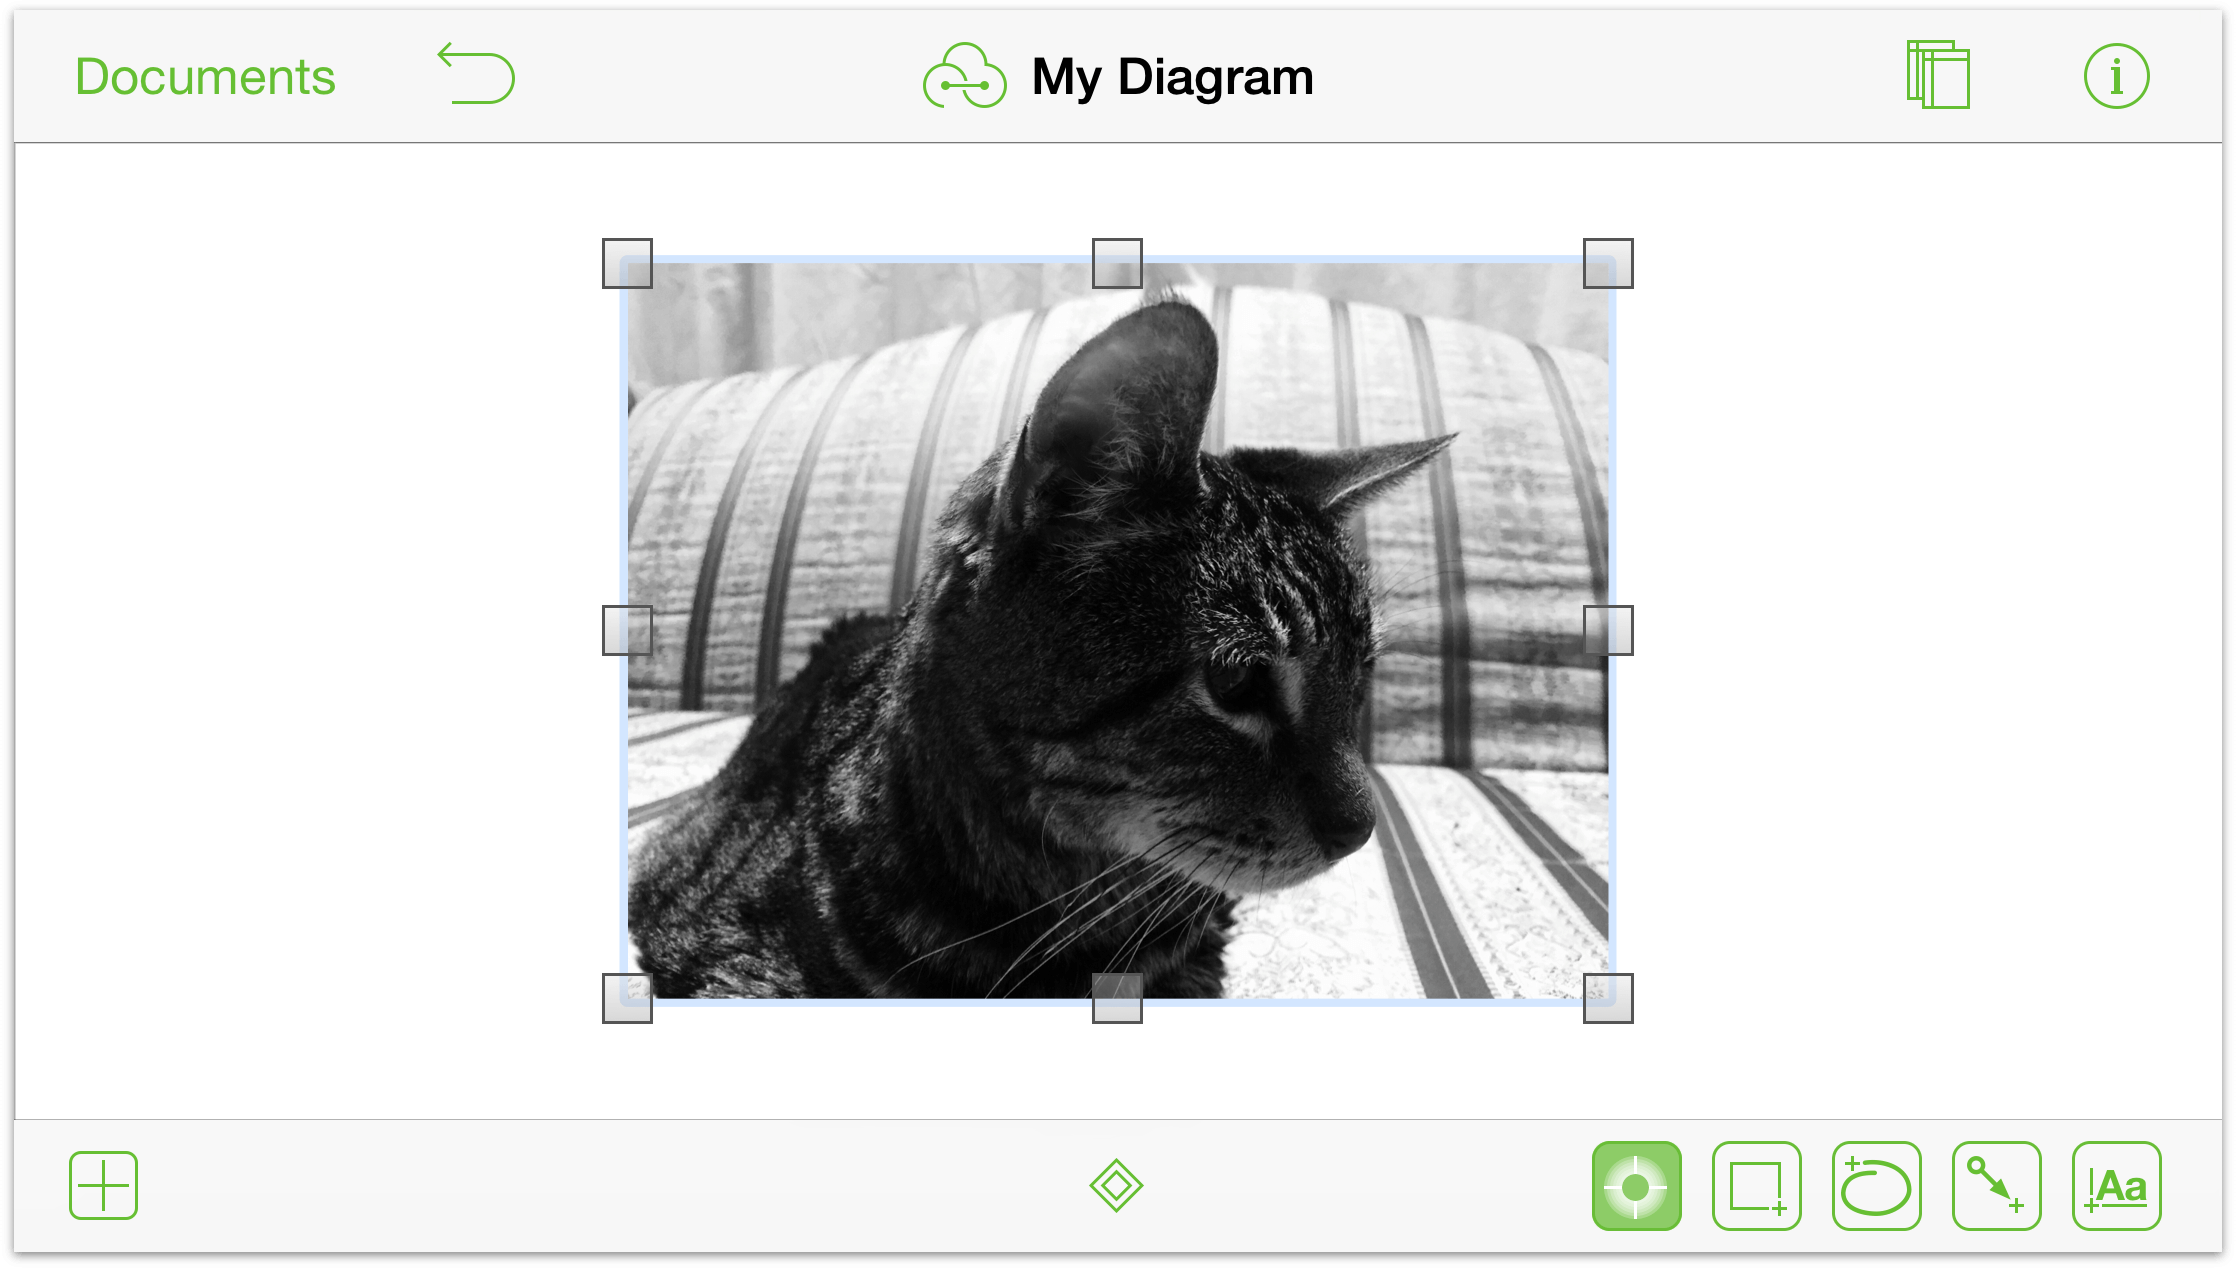
You can further alter the image with the Inspectors. First select the image, and then tap ![]() in the navigation bar. This opens the Inspectors menu, from which you can apply any number of styles and effects to the image.
in the navigation bar. This opens the Inspectors menu, from which you can apply any number of styles and effects to the image.
Connecting Objects with Lines
Connections are lines between objects that often help clarify the relationship between the objects. To create connections between objects:
Double-tap
 so you can draw some objects on the Canvas; a couple rectangular shapes should be good.
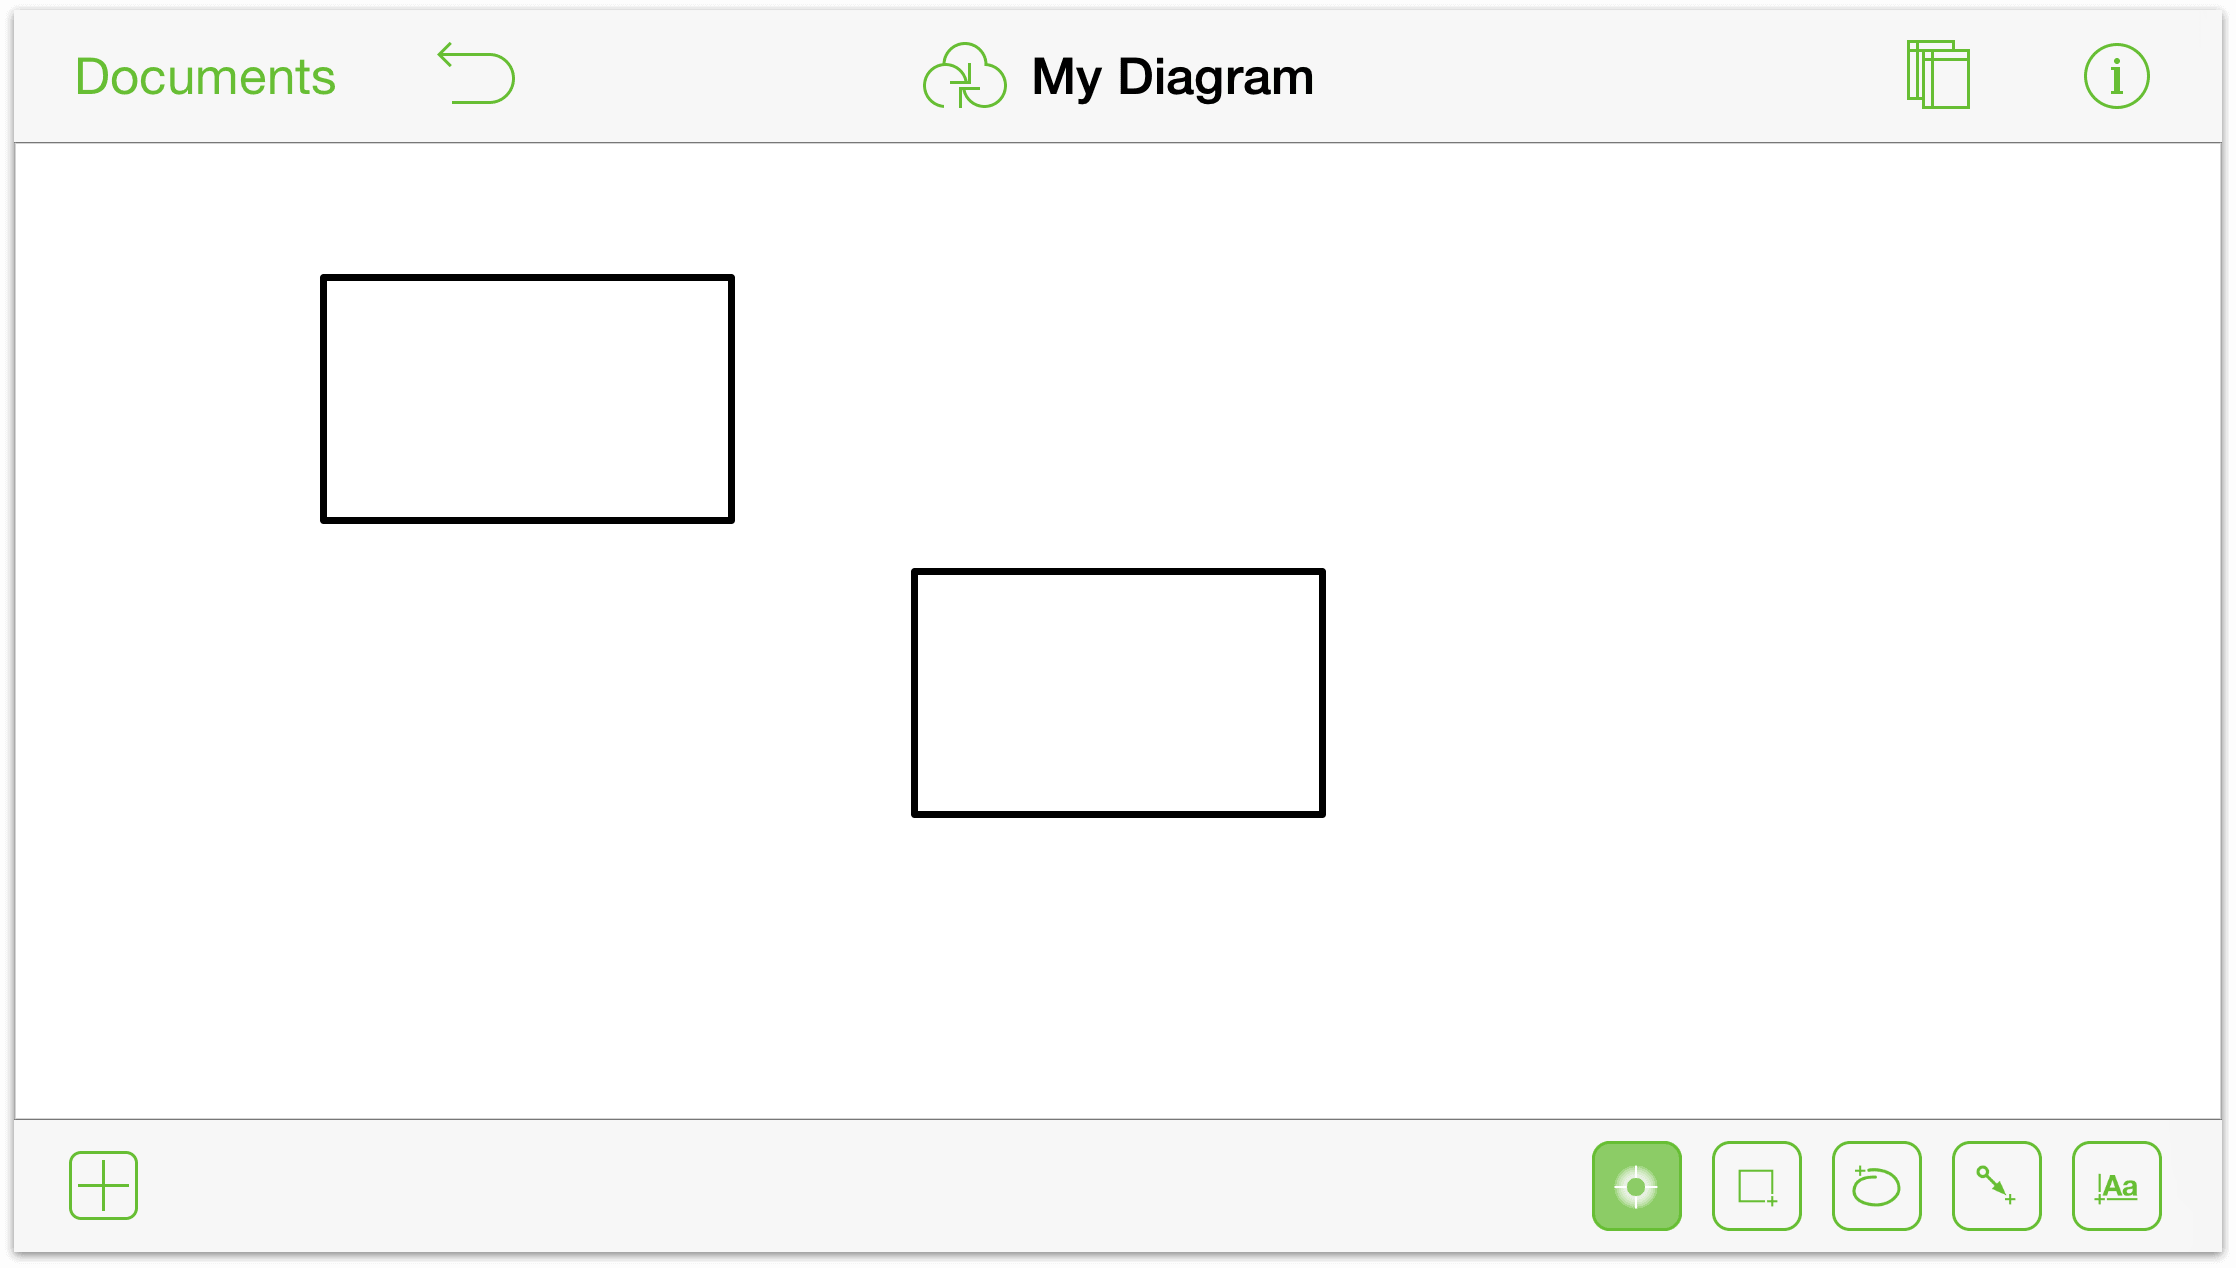
Notice the light blue sizing guides along the objects. These appear when you draw similar shapes on the Canvas so you can match their sizes. (Of course, you could just draw one shape, and then Copy and Paste the object using tap and hold gestures.)
Tap
 to make the Line tool active.
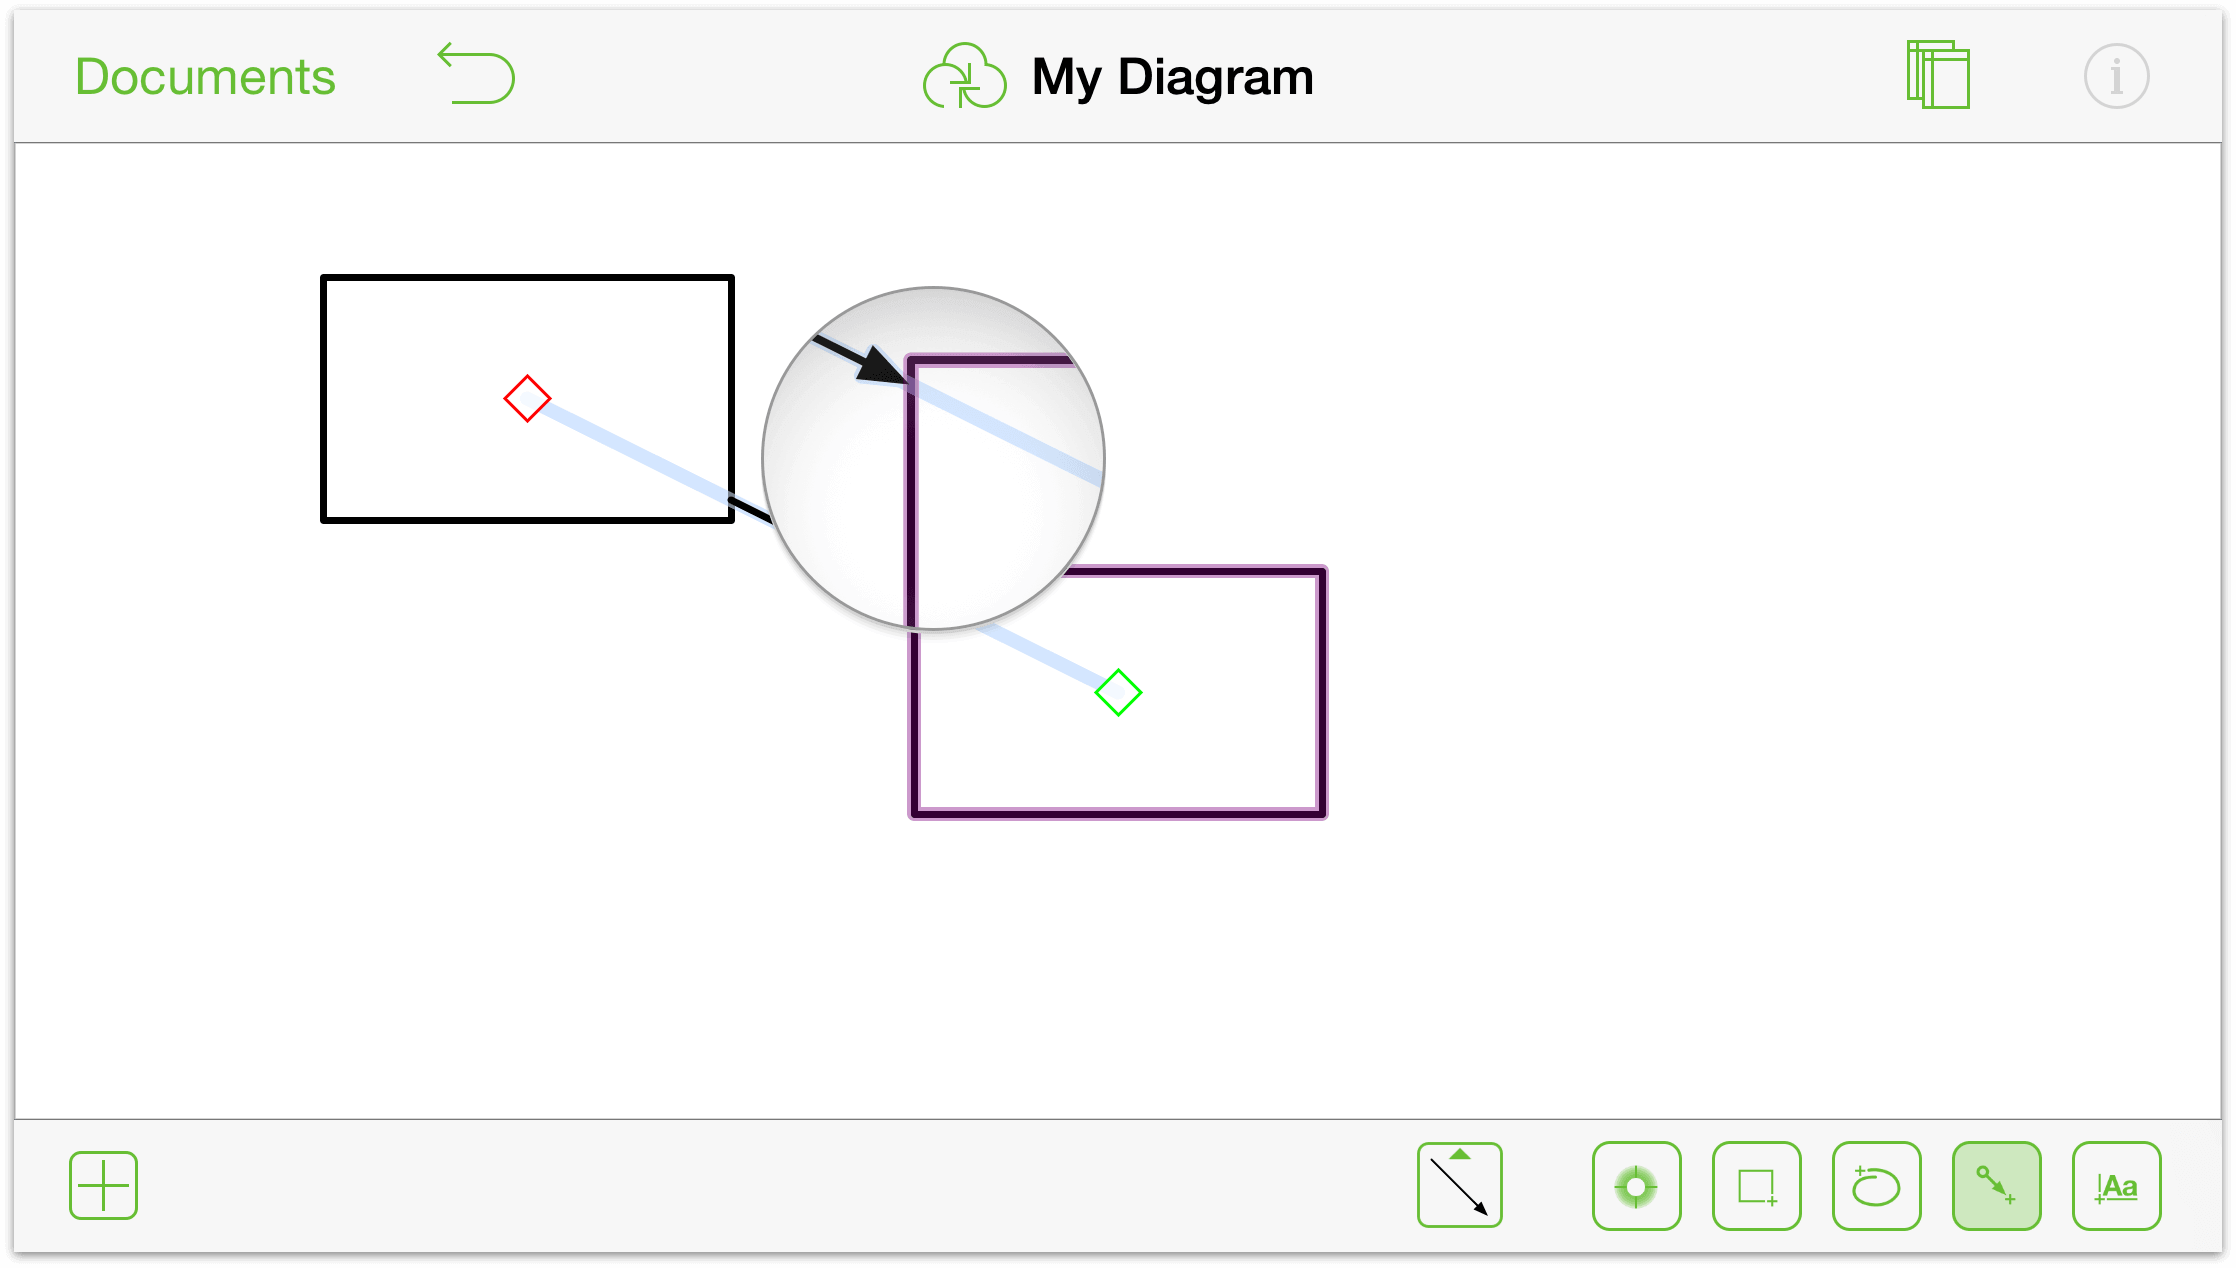
To draw a line between shapes: drag from one shape to the next.
To draw an unattached line: drag across the canvas.
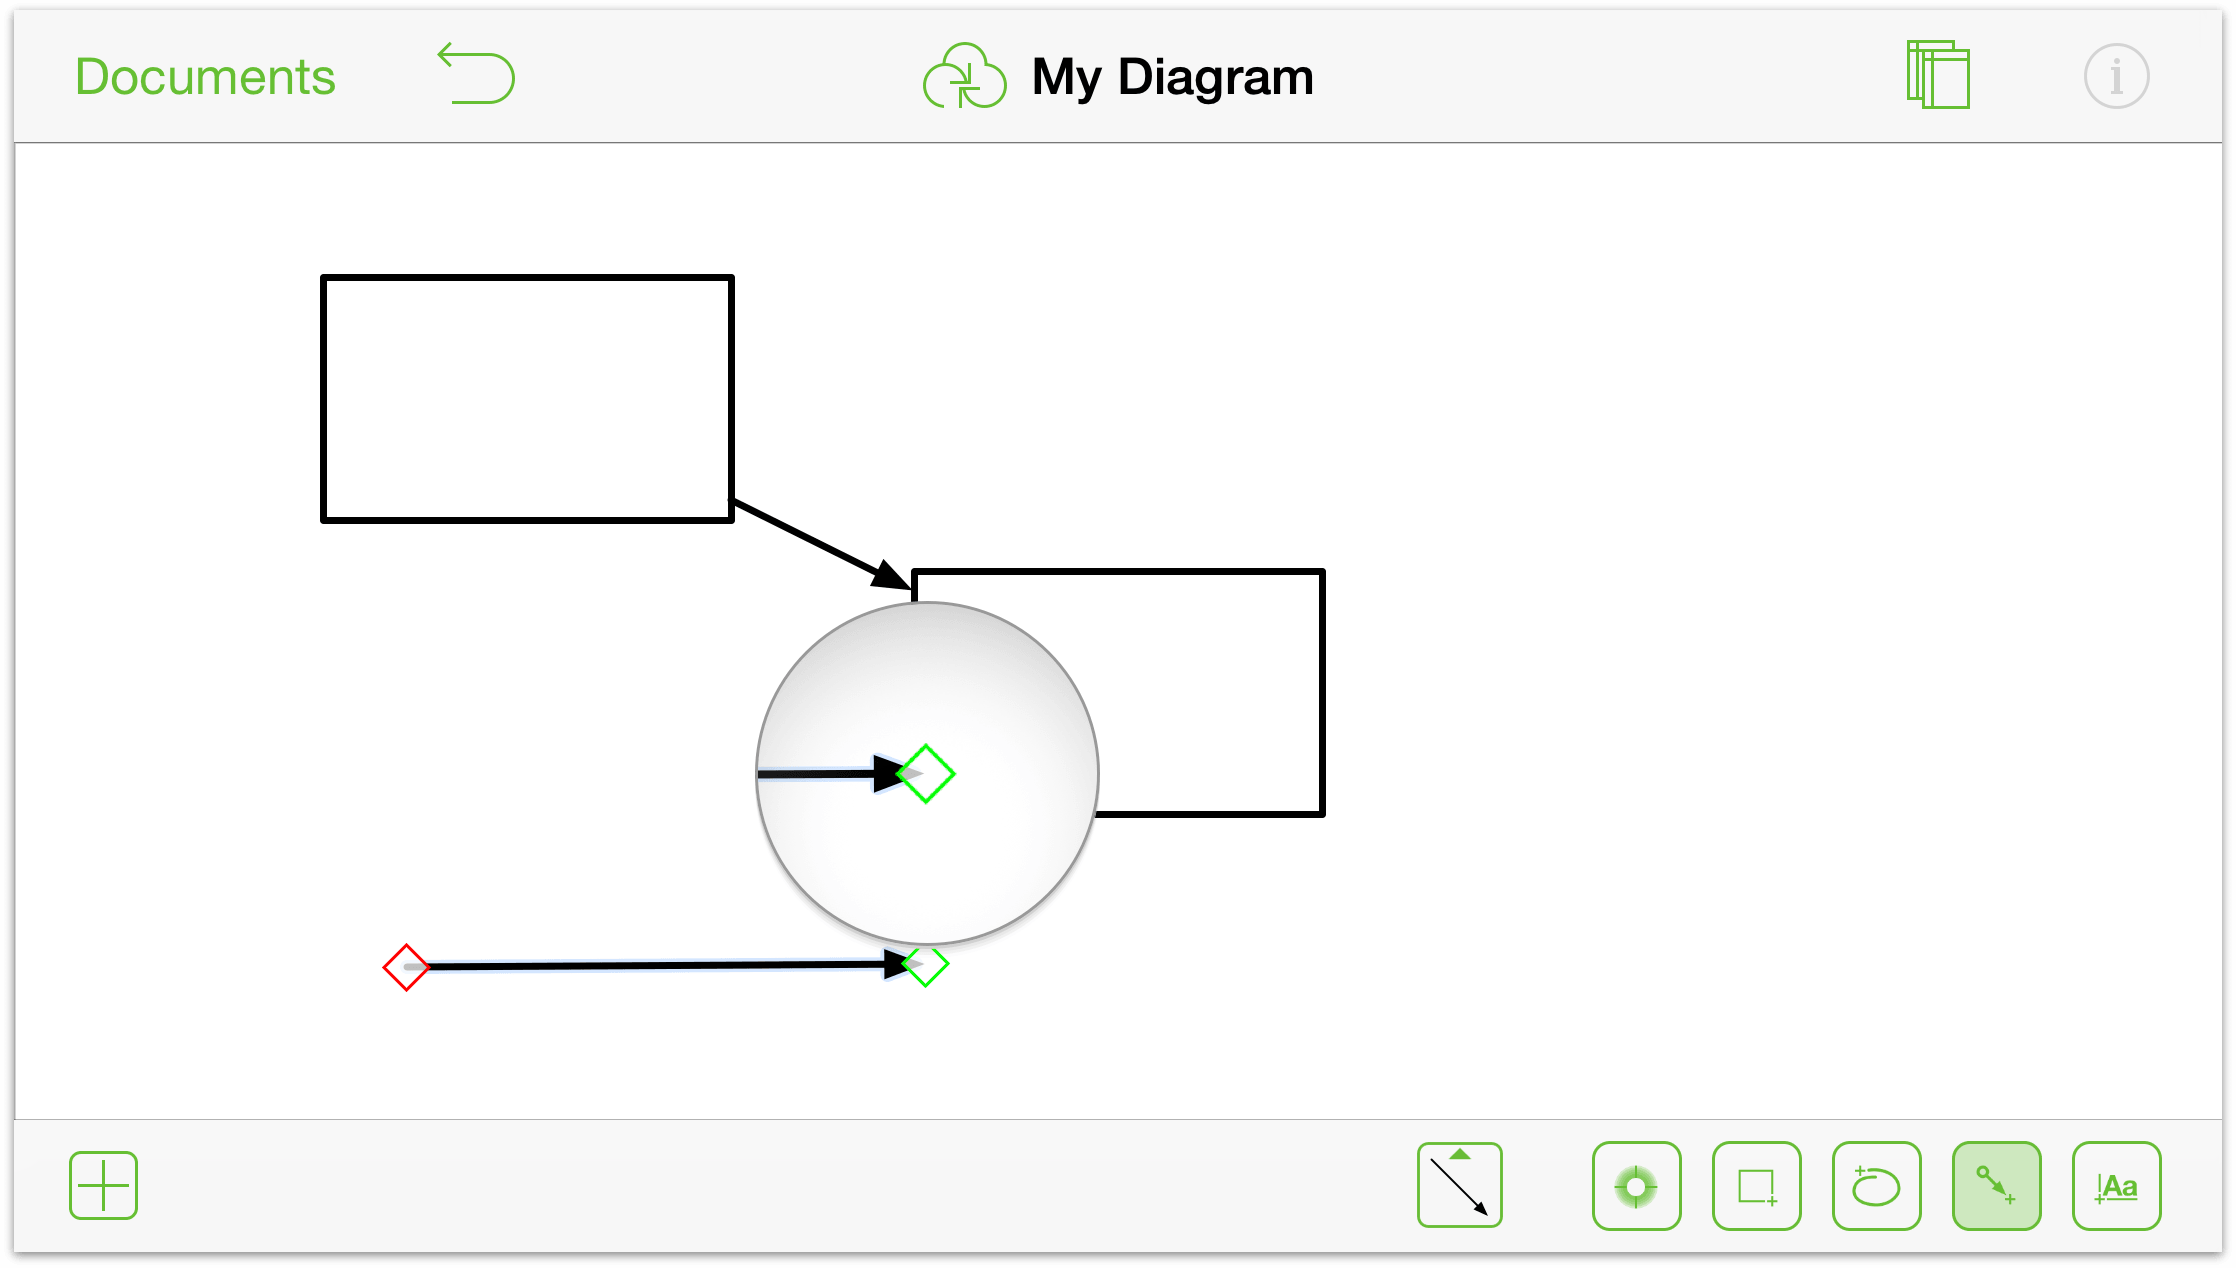
To adjust the endpoints of the line:
Touch and hold an endpoint of your line…
…and then drag it to the new desired location:
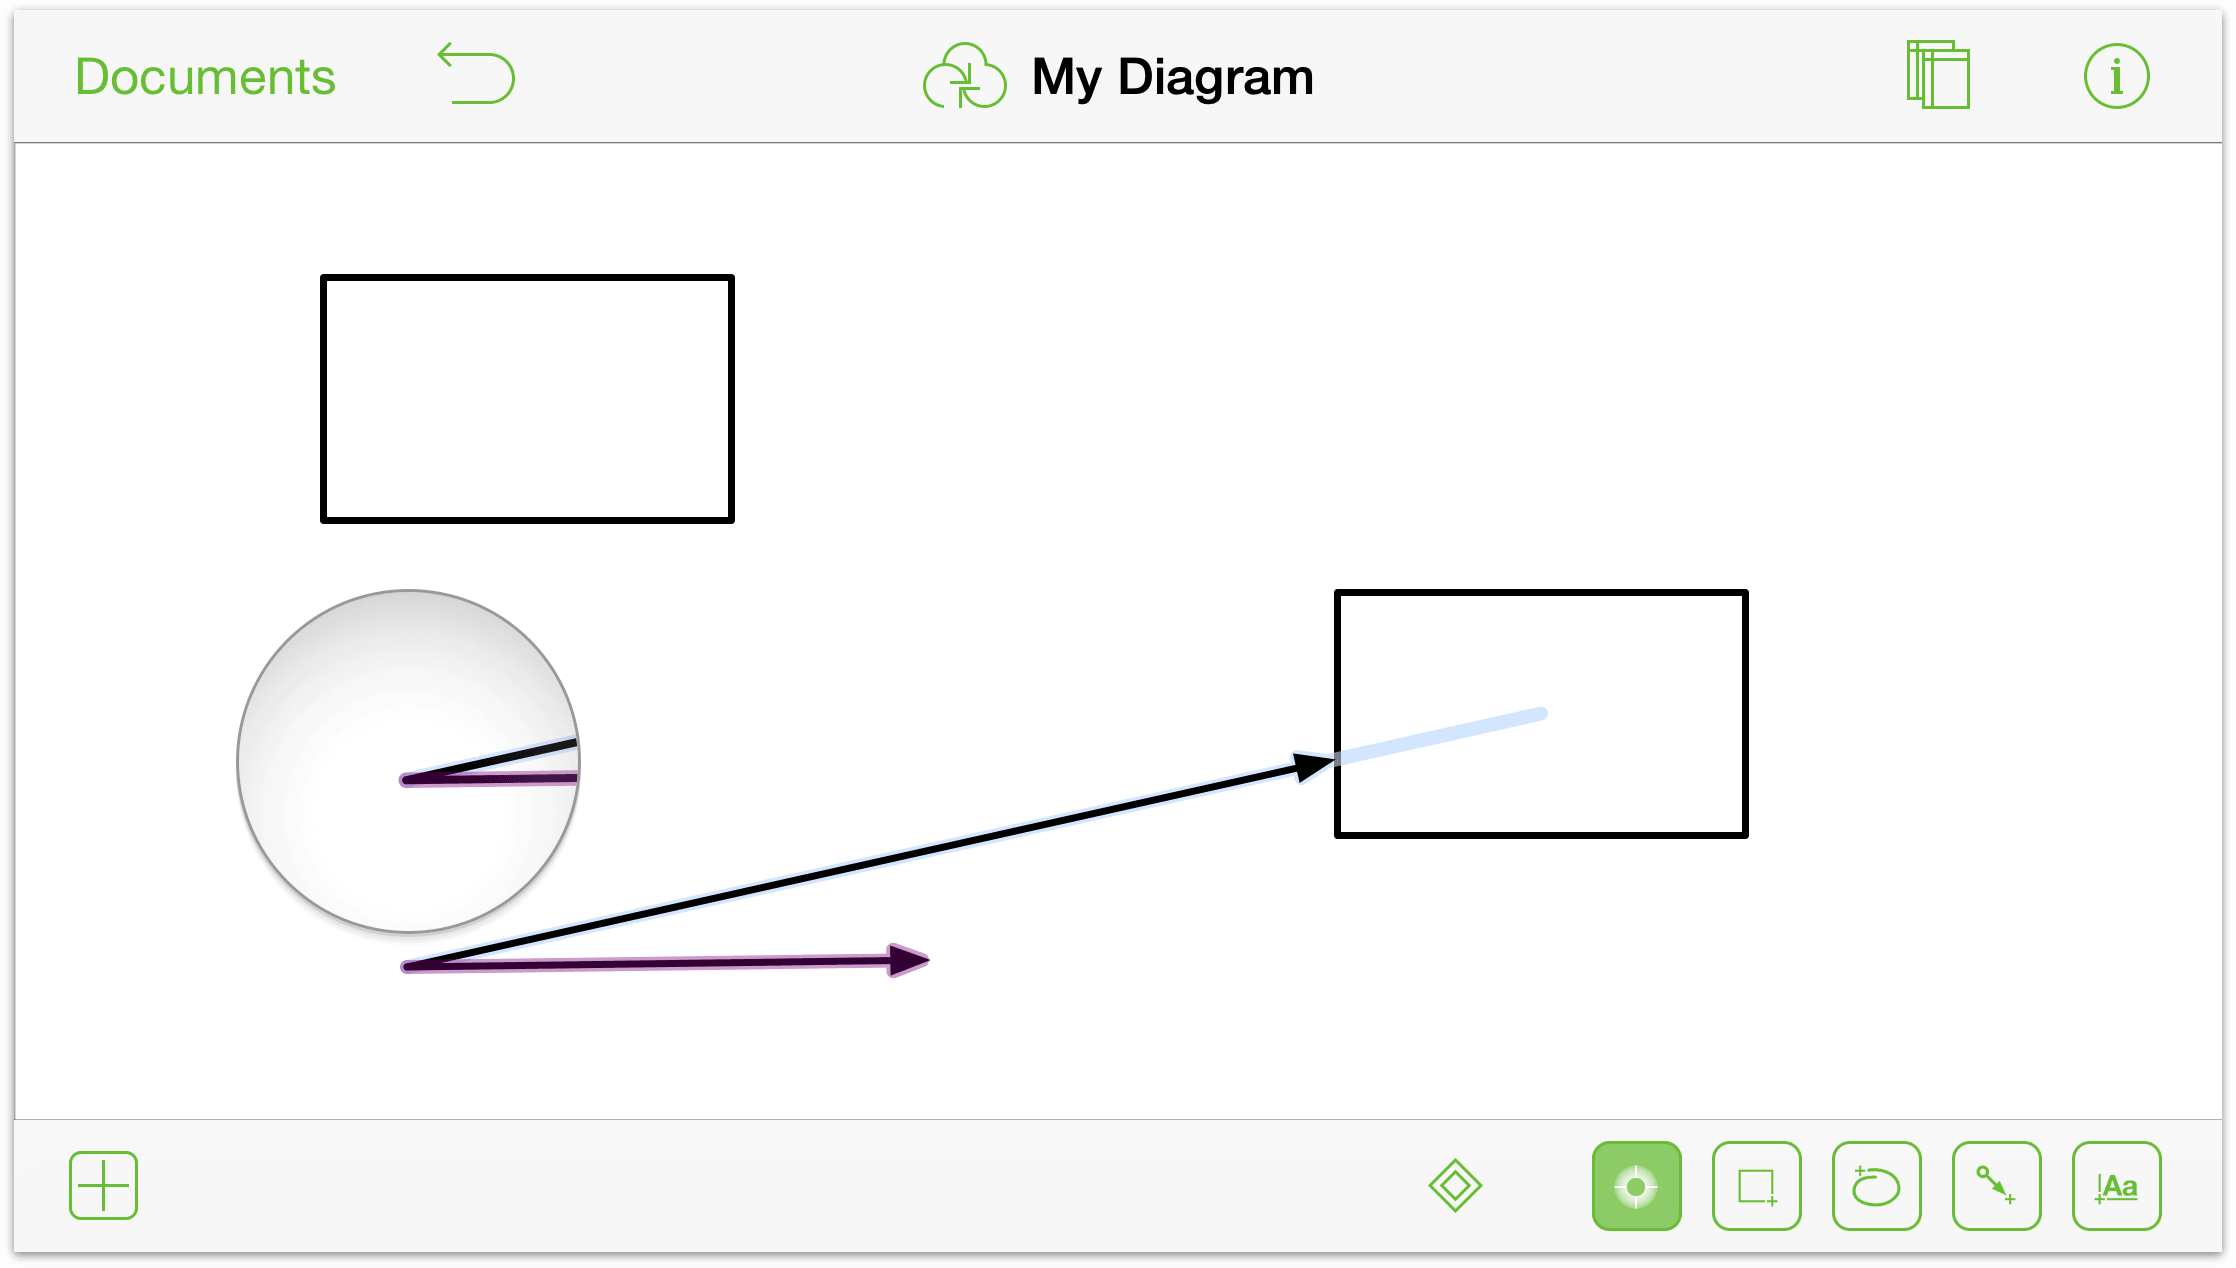
Notice how the endpoint snaps onto the leading point of the other line when it gets close.
Adding Labels
Labels are text objects that are attached to shapes and lines, typically used to define an object or the relationship between them.
You can also add standalone blocks of text to the Canvas by using the Text tool ( ). Such blocks of text are independent from the other objects on the Canvas unless you group them together.
To add a label to a shape, double-tap the shape. The default text, Label appears already highlighted so you can just enter text to give the object a proper name.
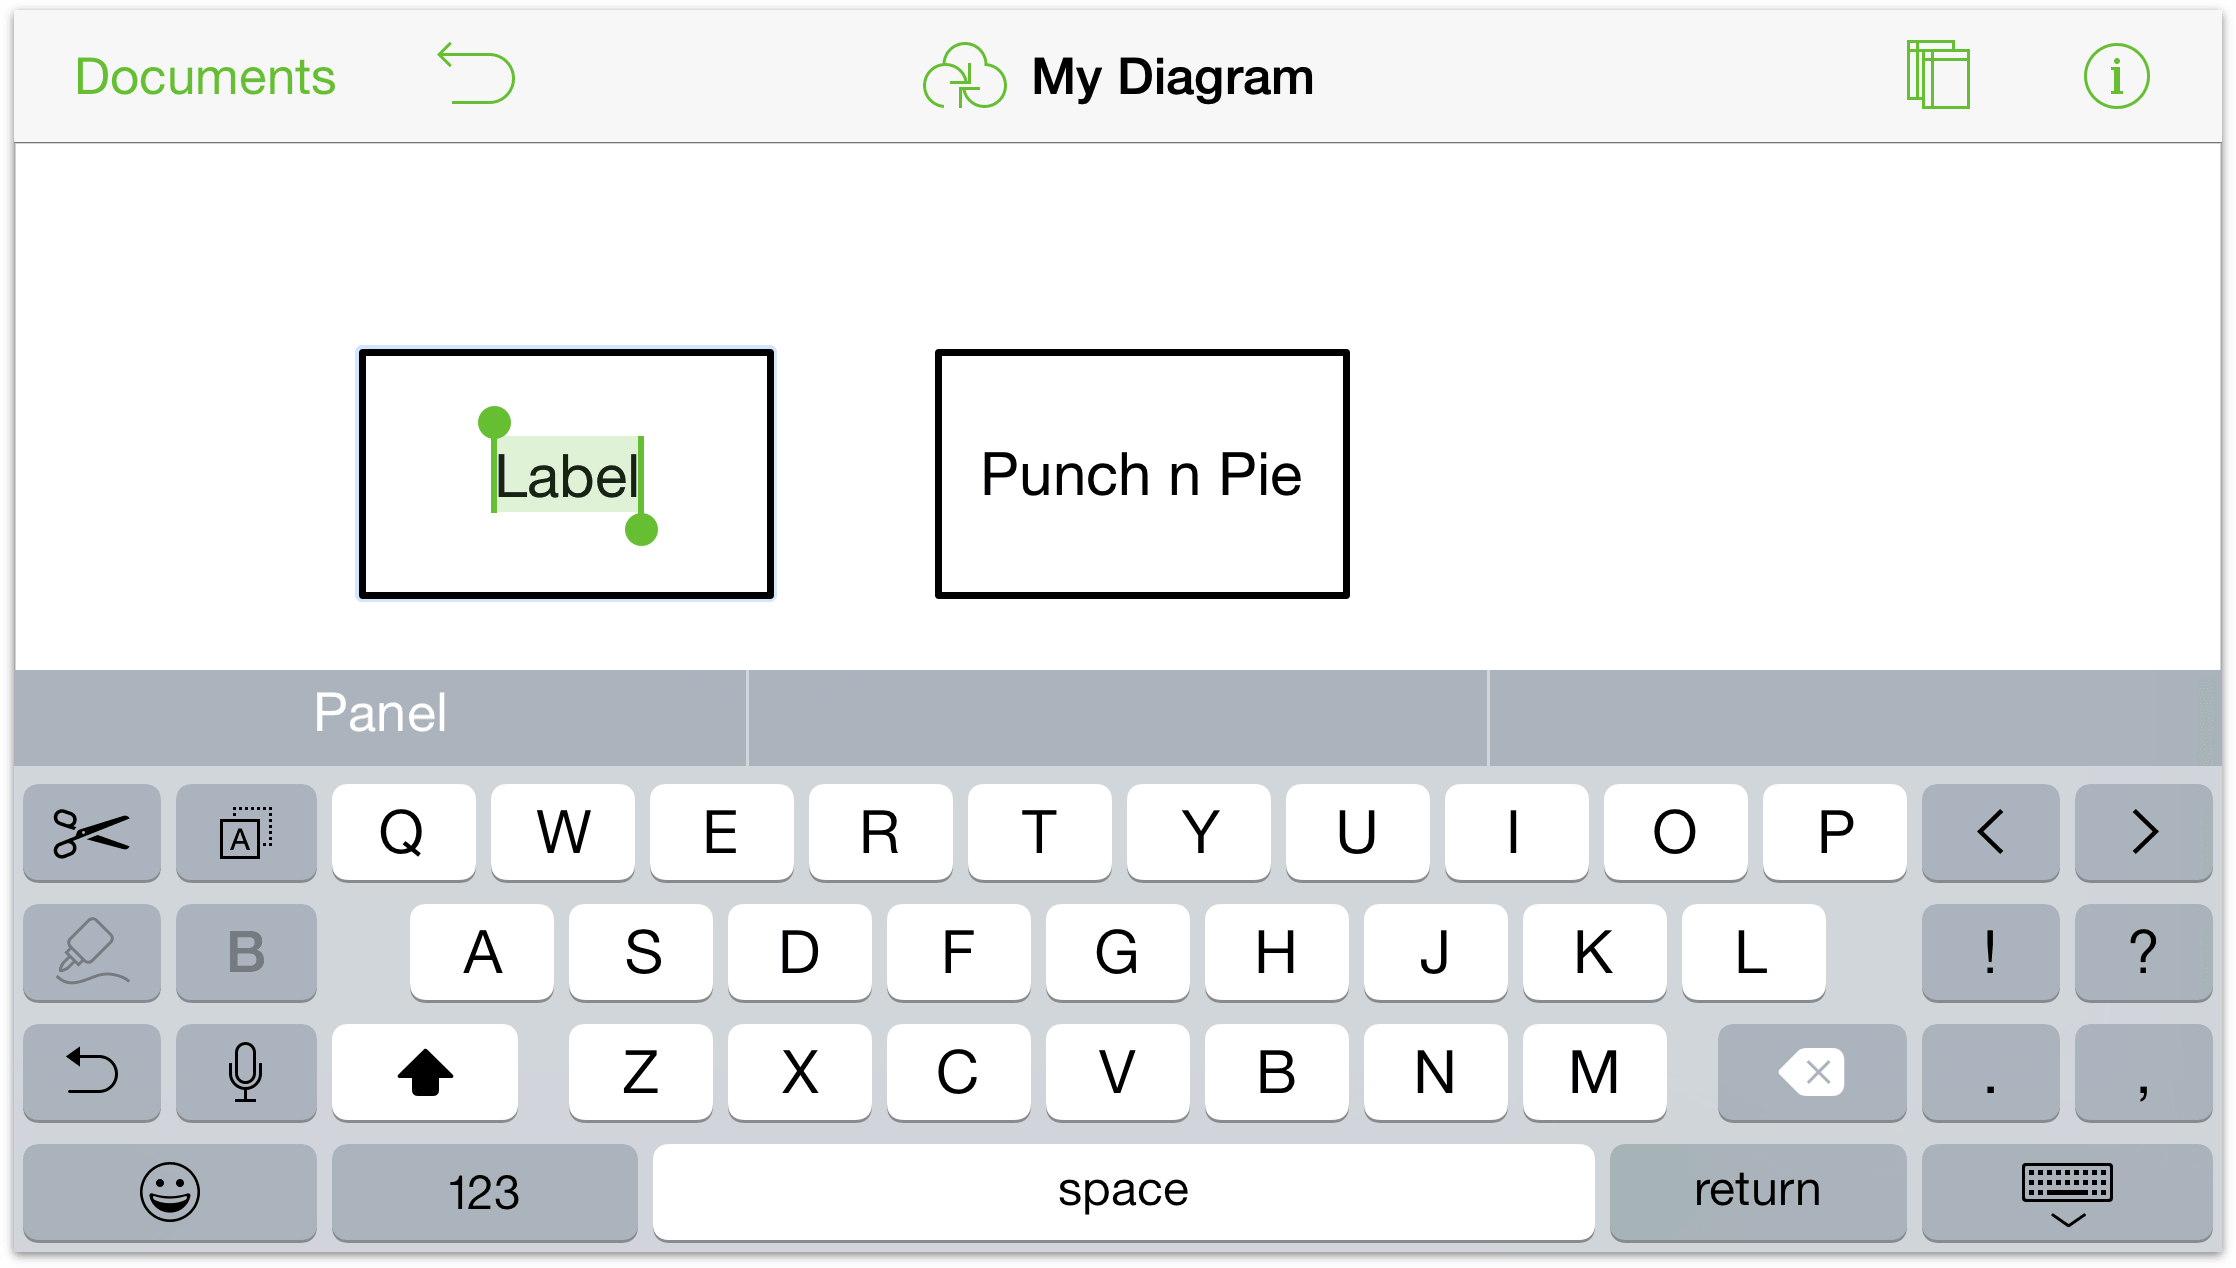
 When you’ve finished typing, tap the Hide Keyboard button in the lower-right corner of your iPad’s keyboard. If you’re using a Bluetooth keyboard, press Esc to accept the text you’ve entered.
If you ever need to edit a label, all you need to do is double-tap the label to select it, and then make the changes you need. If you need to insert or delete a certain character, you can touch and hold on the text object and then use your fingertip to move the insertion point to another location in the text.
To add a label to a line:
Double-tap on a line and a text label appears.
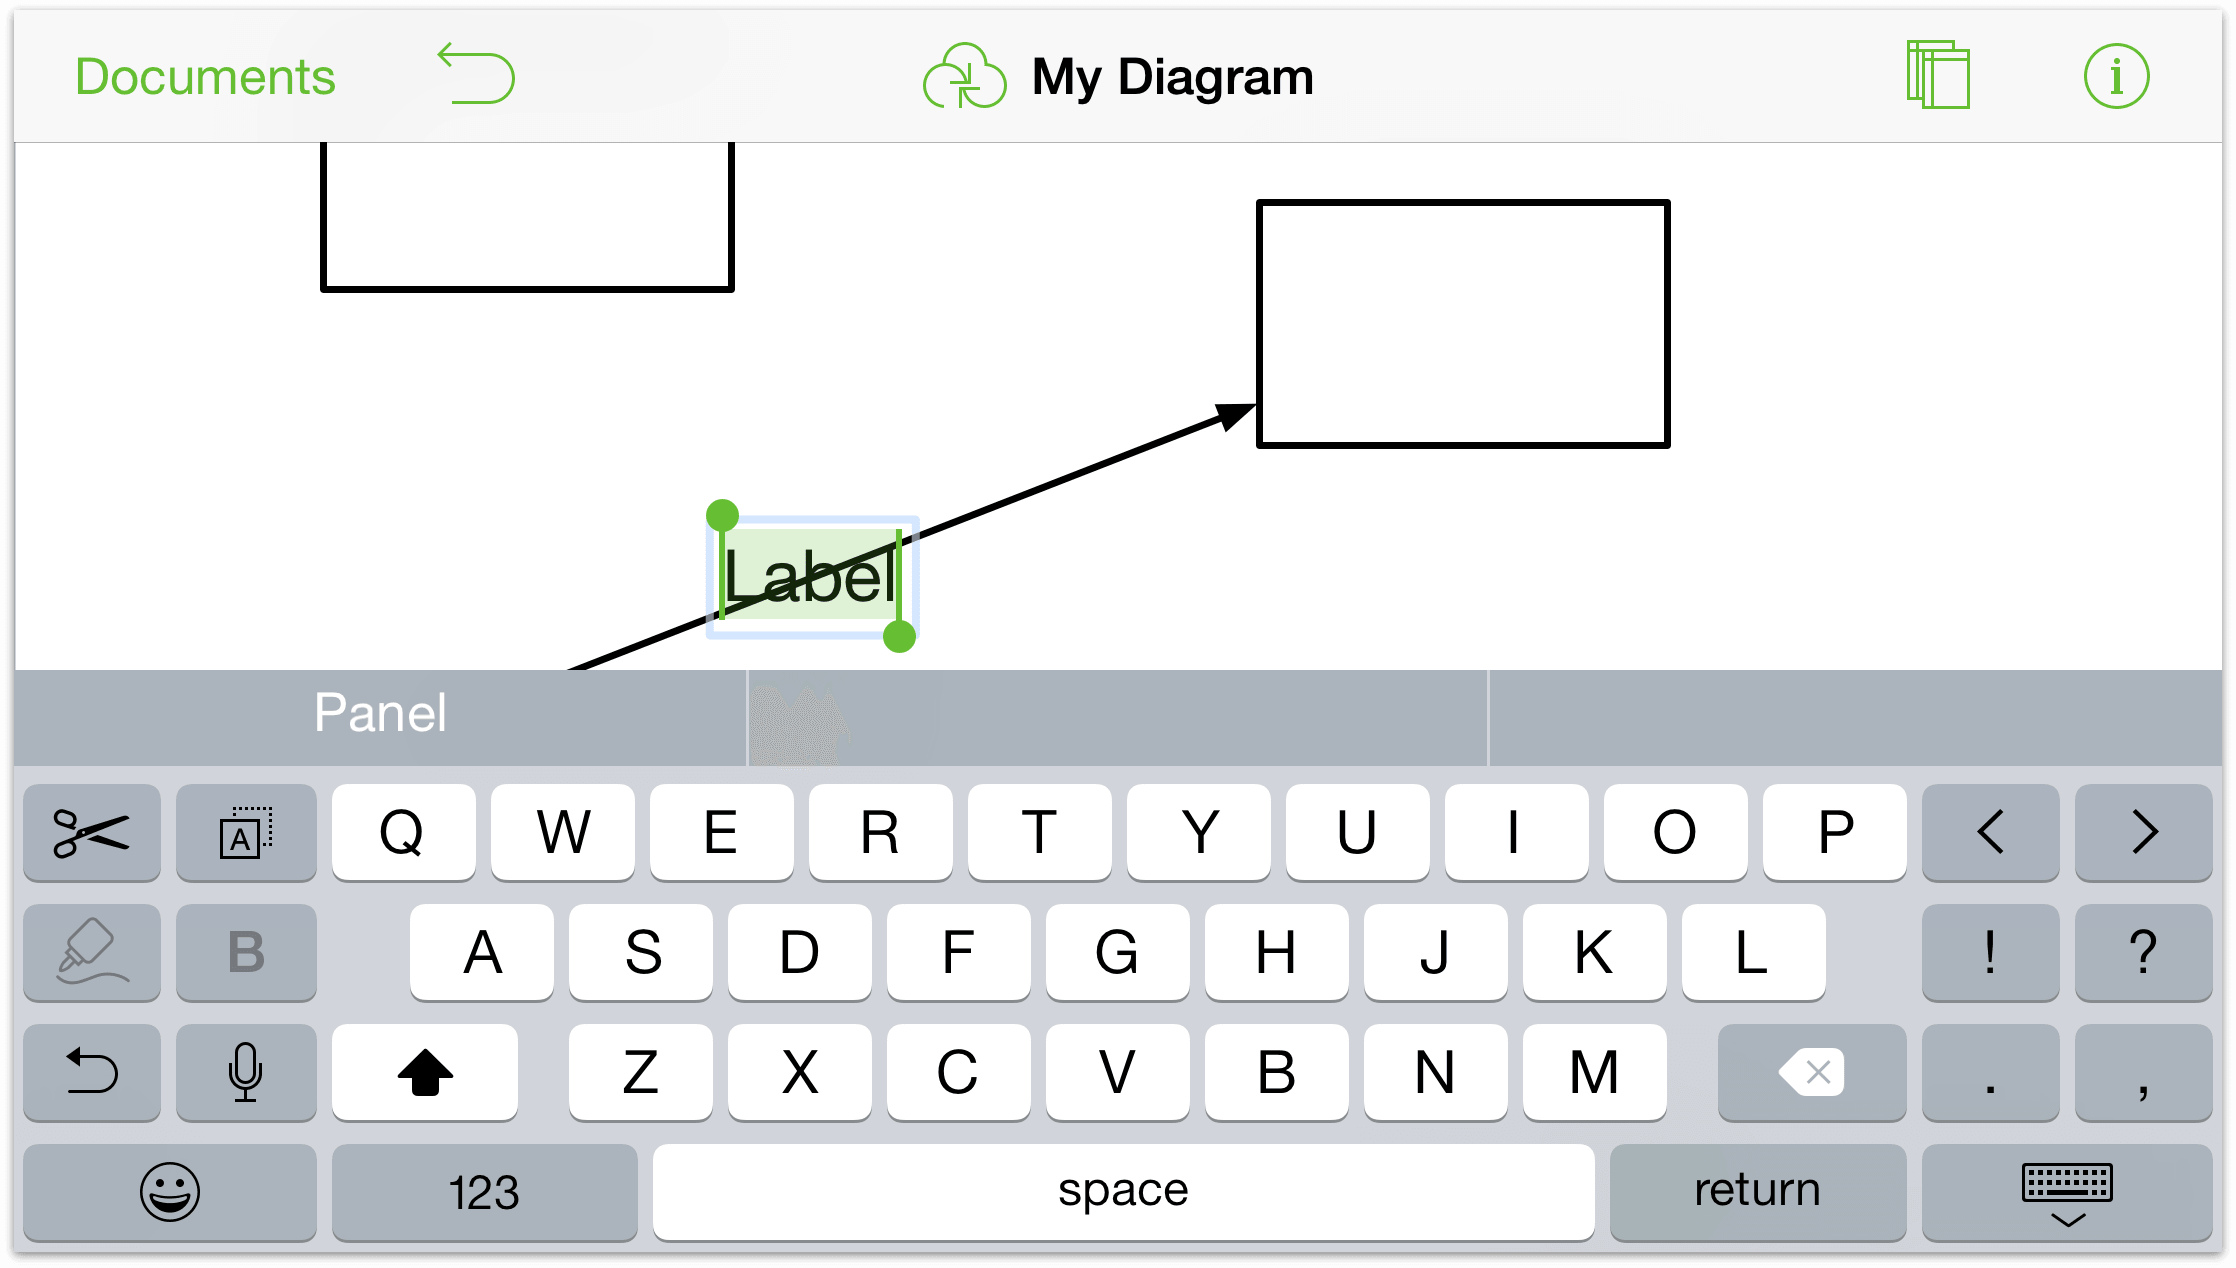
Enter some text to describe the action related to the line’s direction.
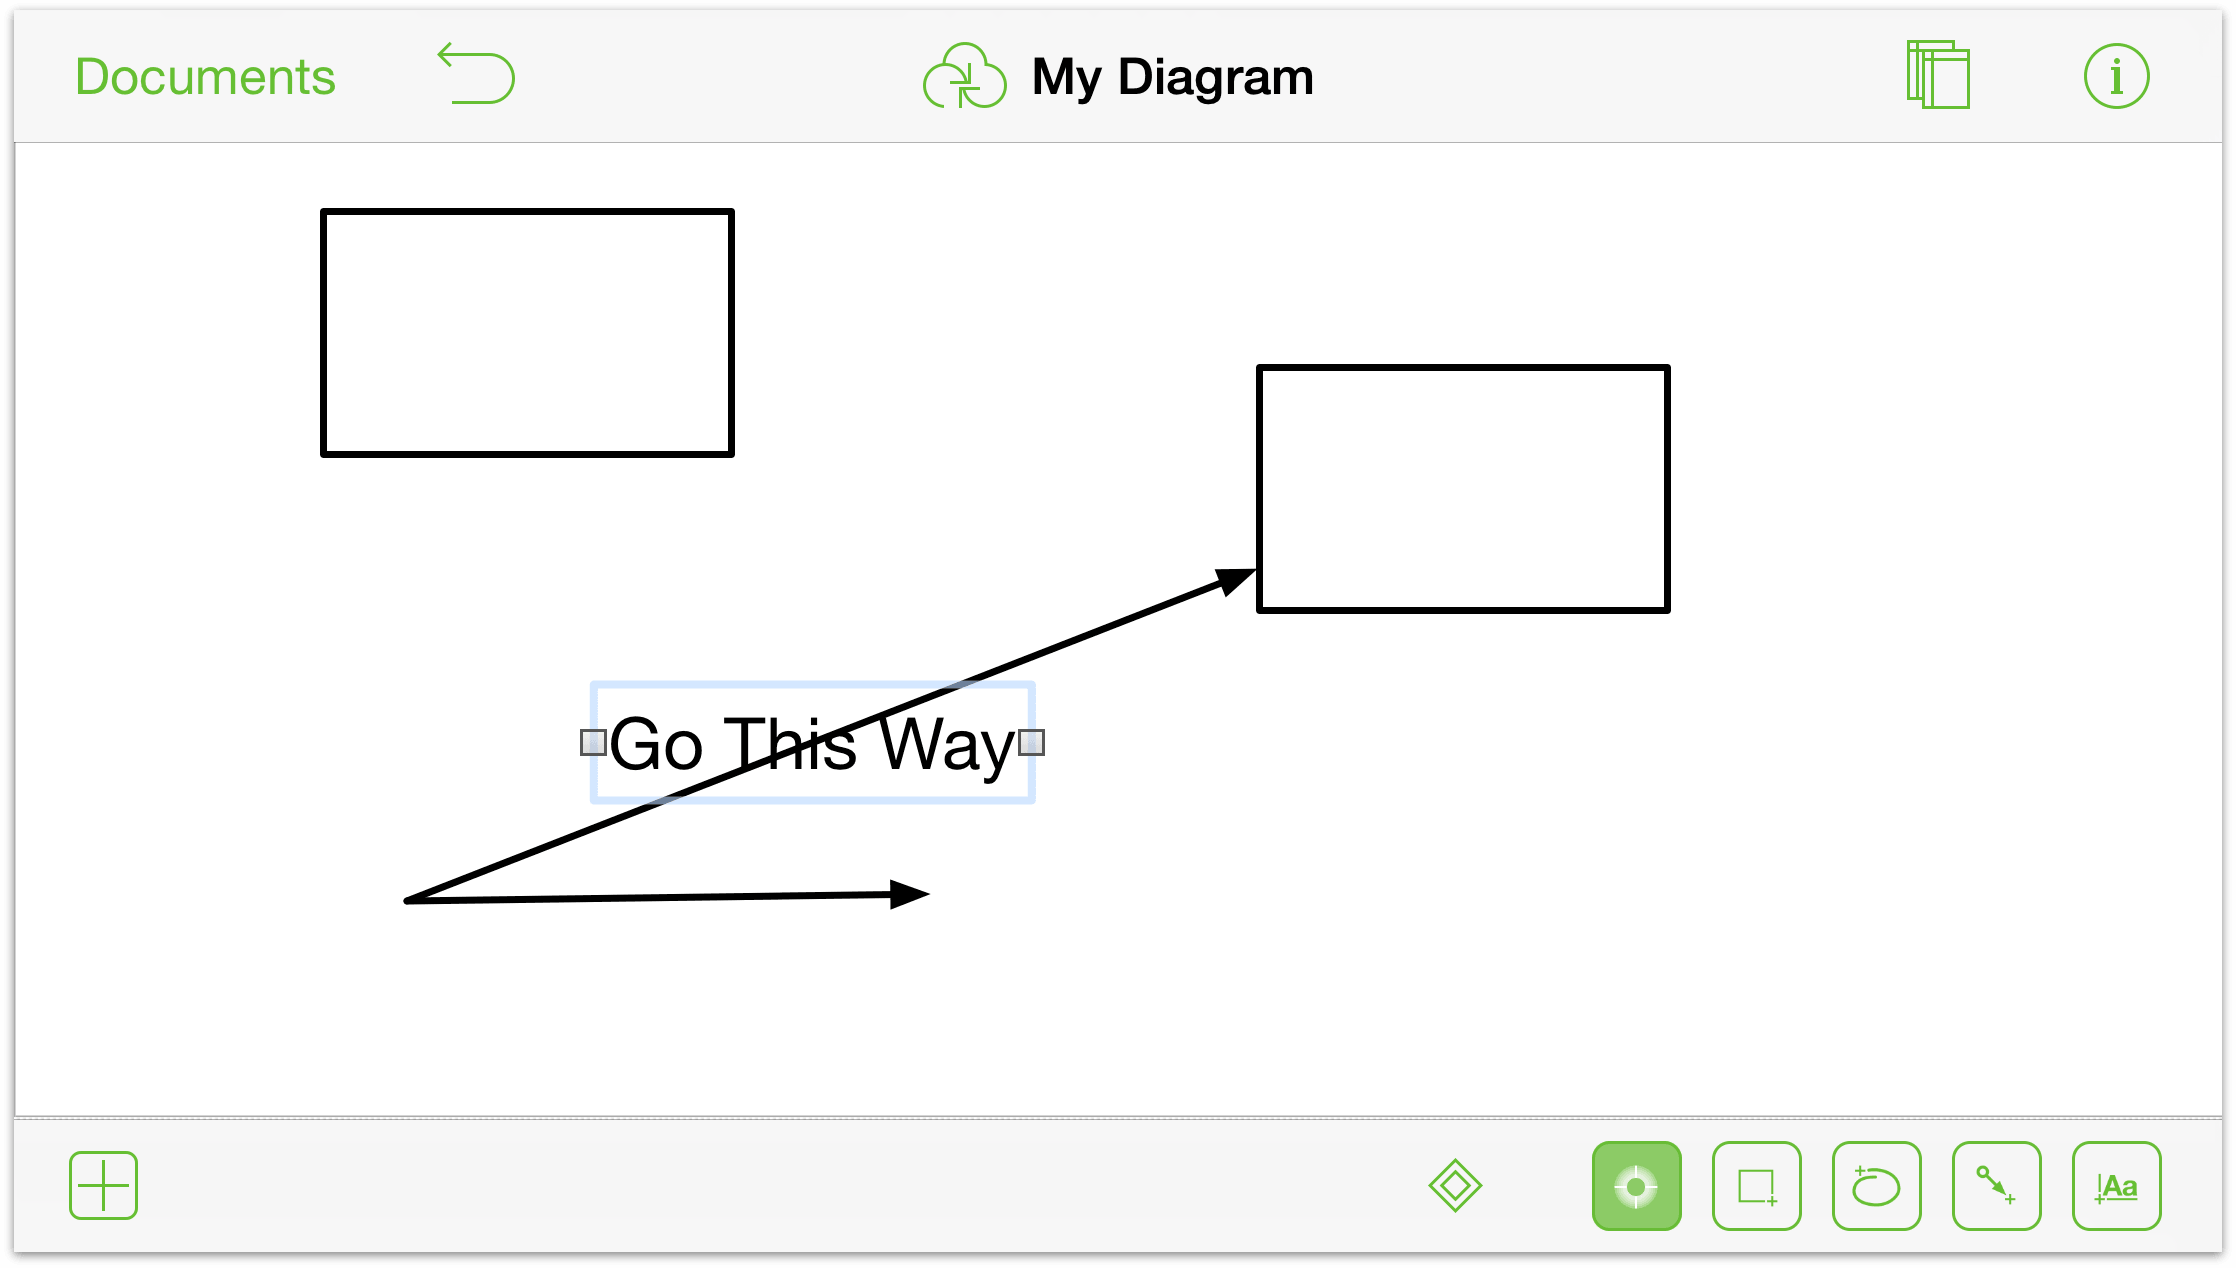
To adjust the label’s position on the line, tap
 to open the inspector.
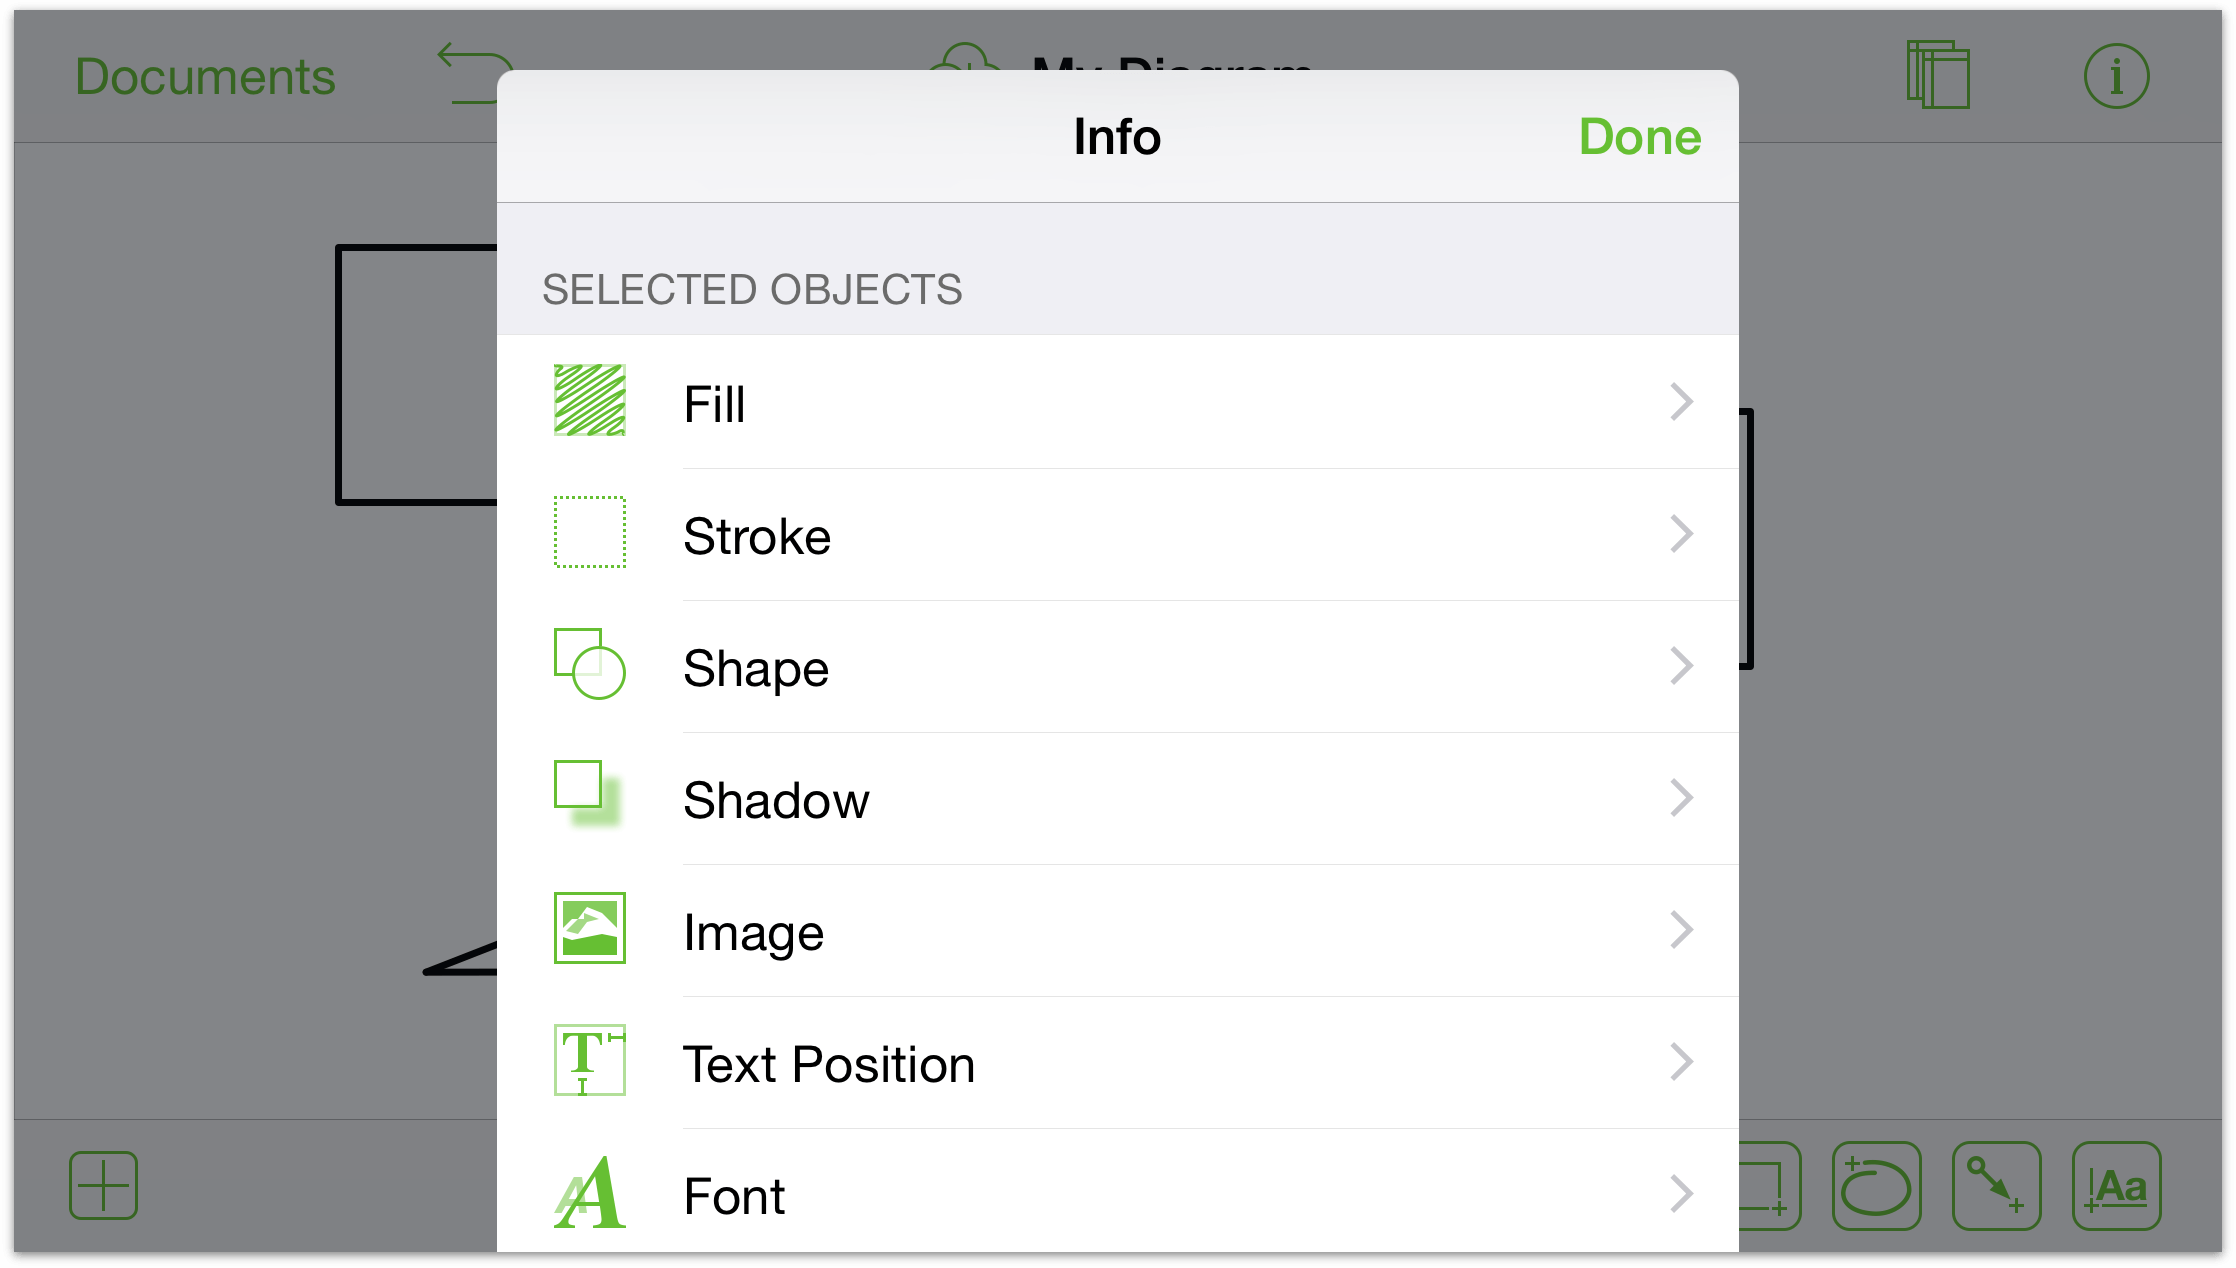
You can:
- use the Fill inspector to add a background color to the label.
- use the Text Position inspector to adjust the label’s position and text alignment.
- use the Font inspector to change the font size, style, and color.
- use the Geometry inspector to rotate the label if you need to.
- use the Notes inspector to add additional information about the label or the objects it connects to.
Tip
Remember, if you ever need to add text to an object, line, or the canvas, just double-tap the thing that needs text and OmniGraffle grants your wish.
Adding Control Points and Curves to a Line
All forms of drawing begin with a basic line. And while the Line tool makes it easy for you to draw a straight line, there are times when you need to angle or bend a line to get the effect you’re after. For this, you need Control Points. Just as the name implies, a control point gives you more control over the line’s appearance and style.
To add a control point to a line:
Tap
 and select the line.
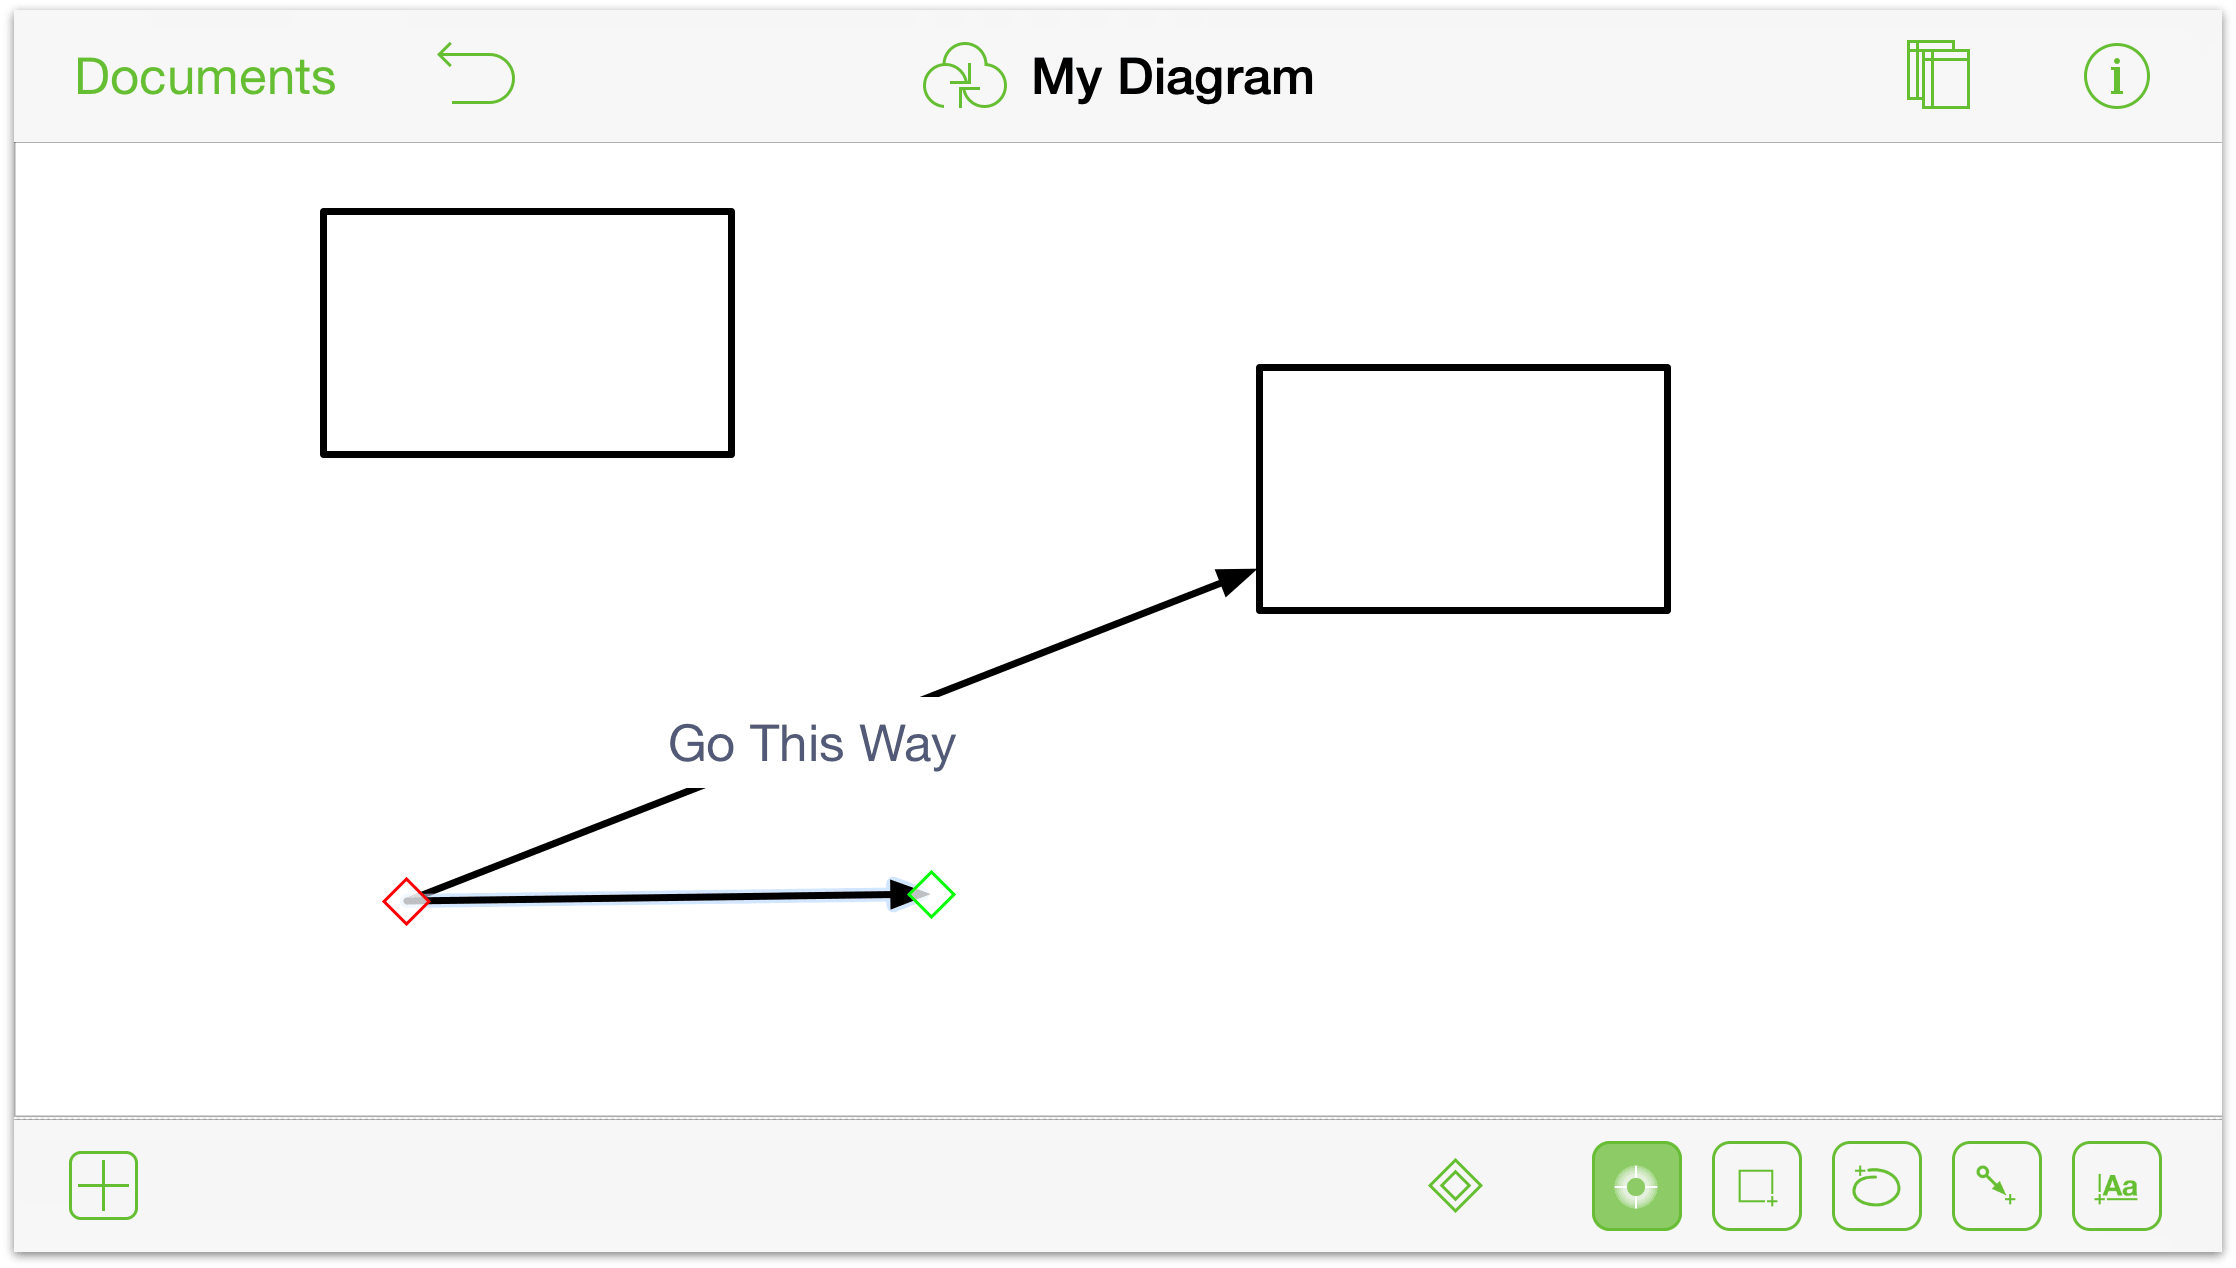
Tap
 to use the Point Editing Tools.
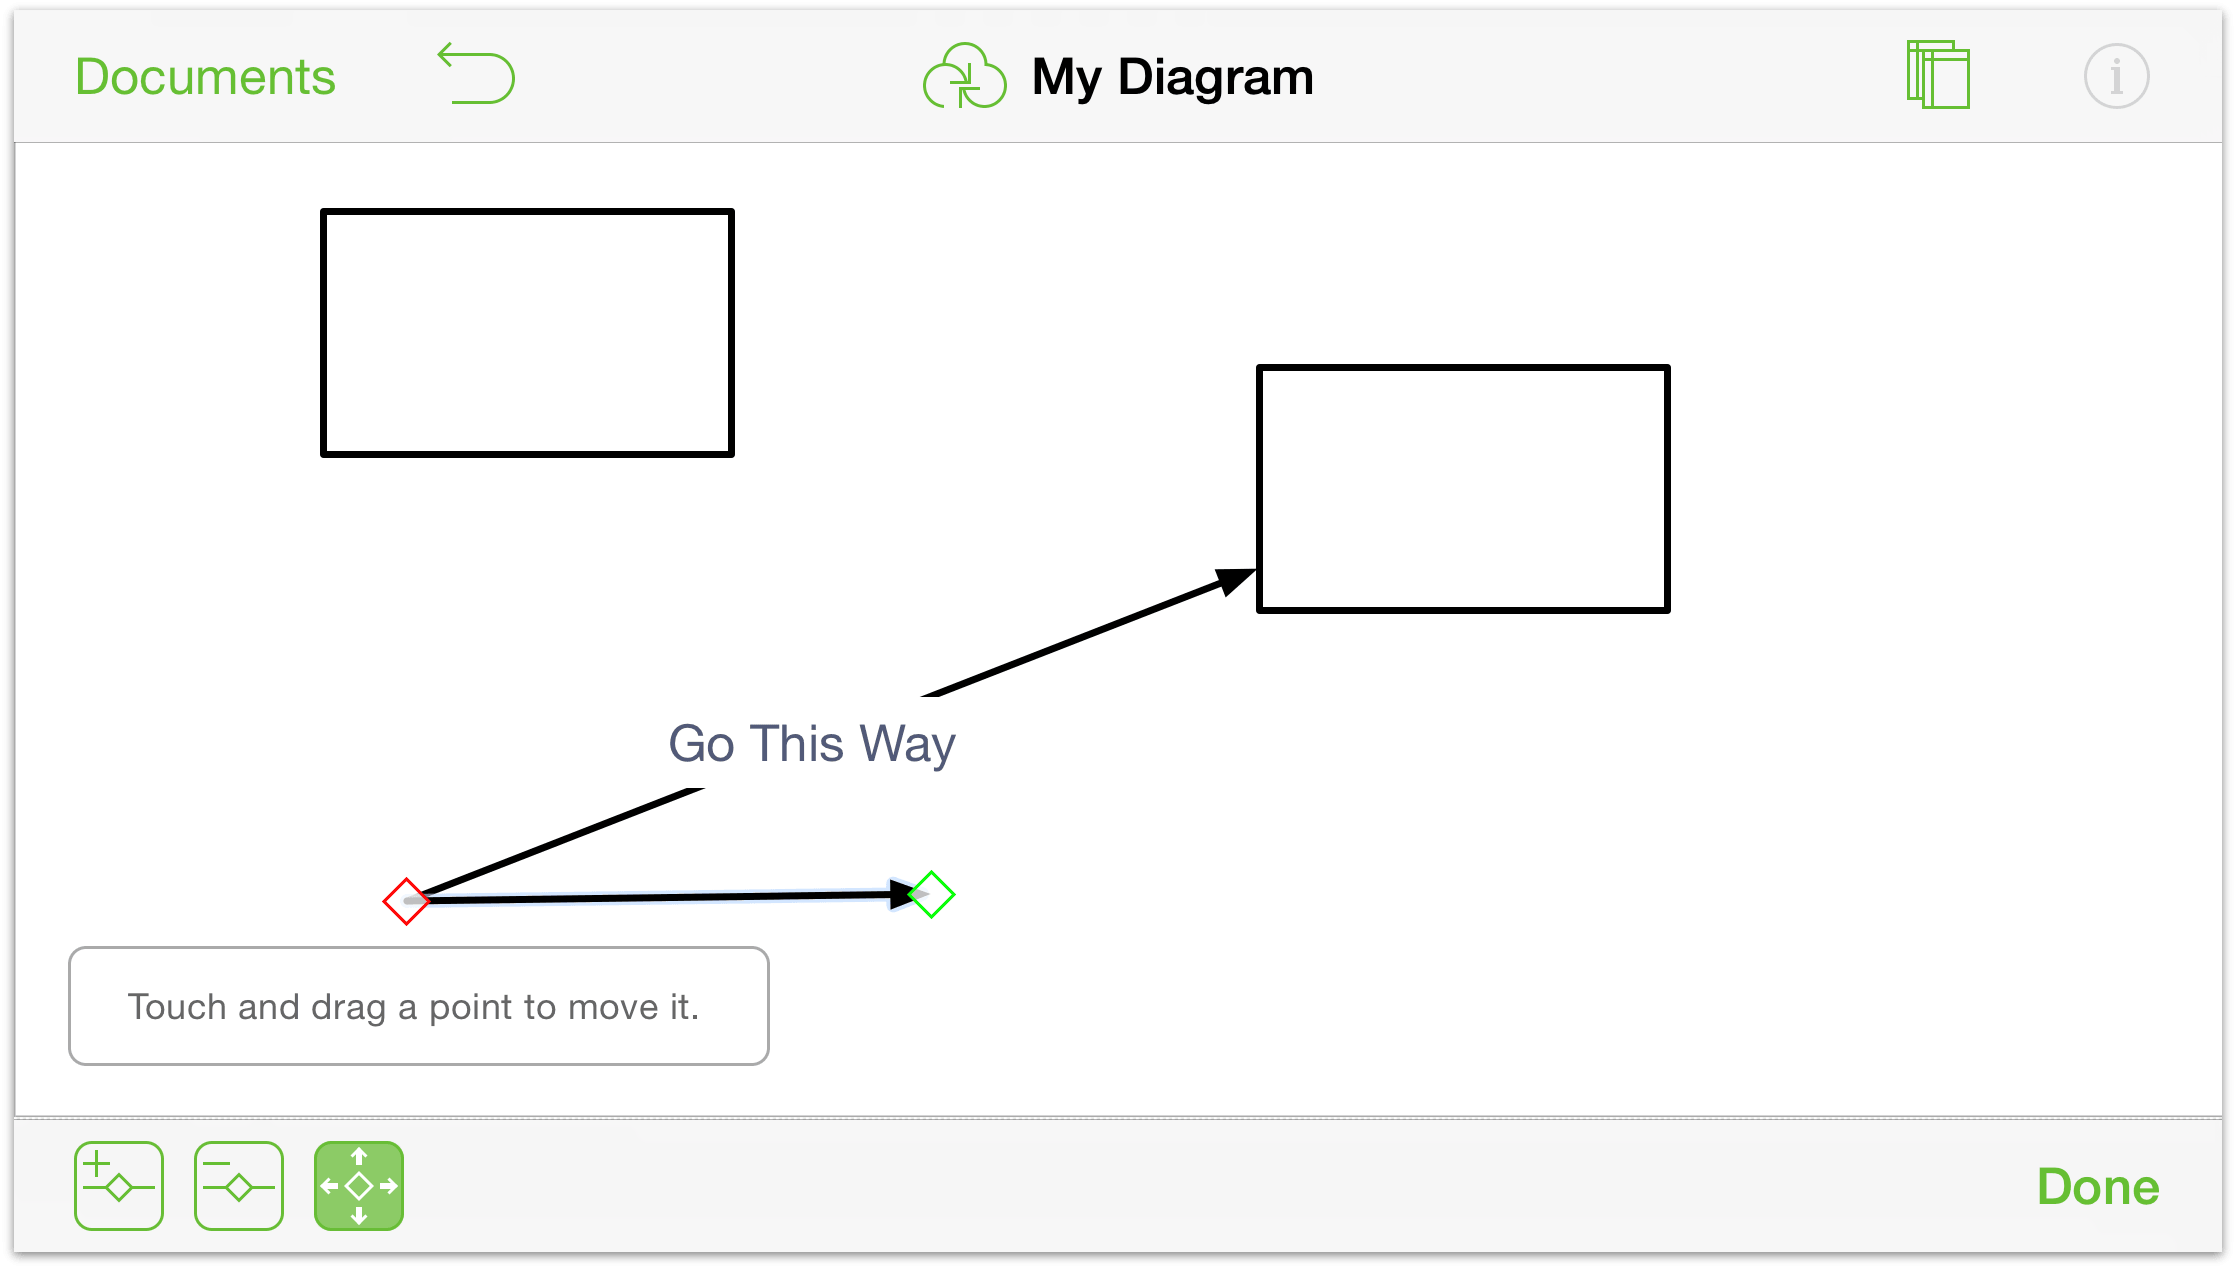
Tap
 to choose the Add Point tool, and then tap on the line where you’d like to place a new control point. A little blue diamond appears on the line where you tapped.
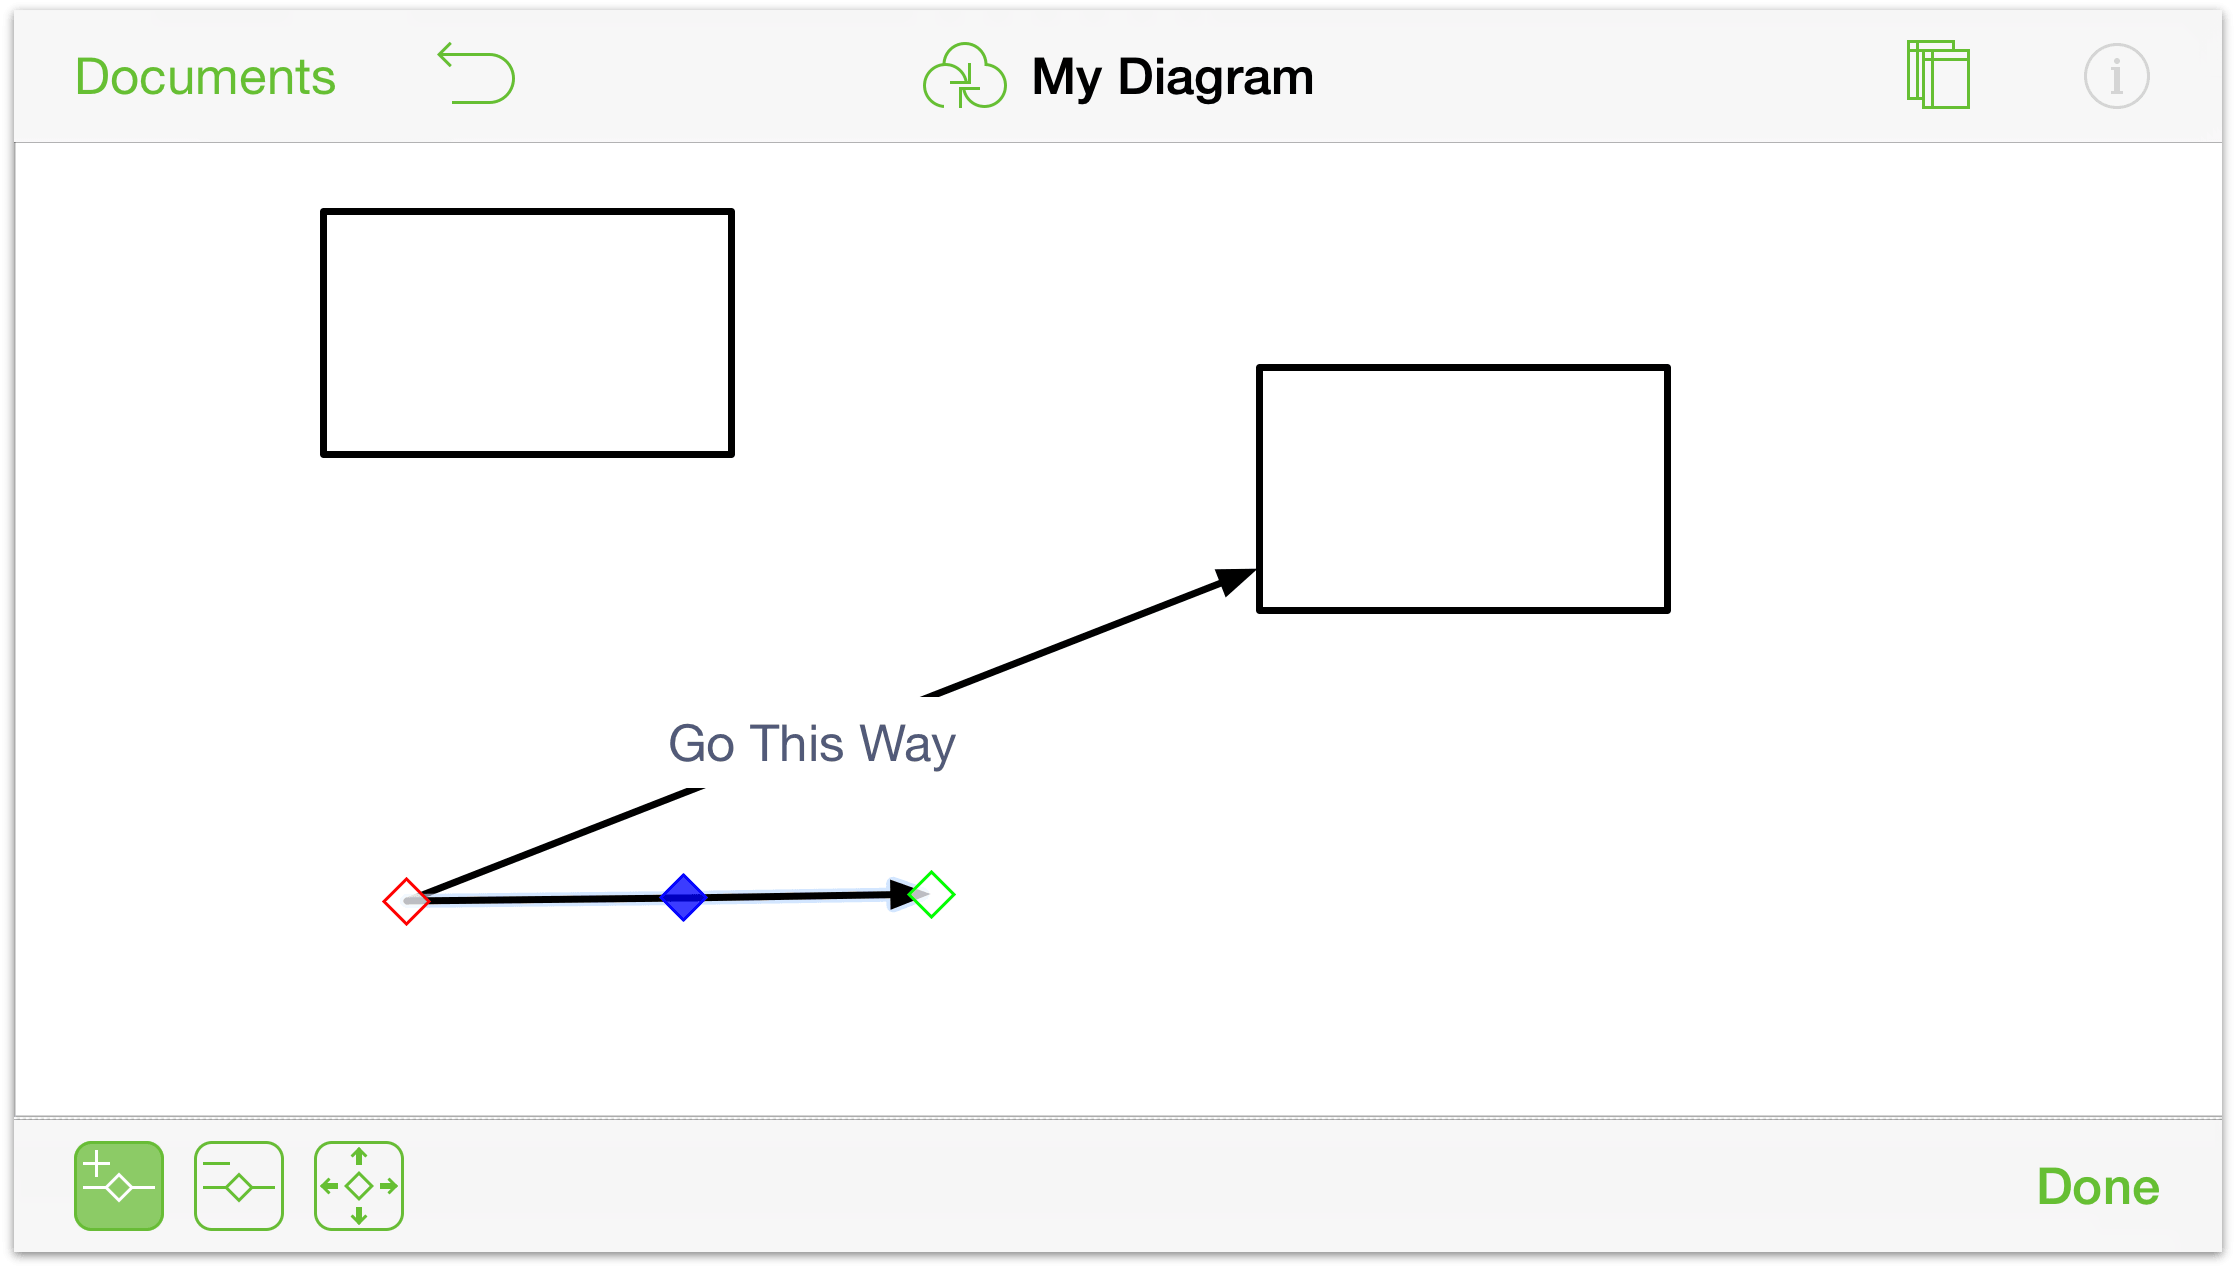
To move a control point along the line, tap
 to use the Point Selection Tool, and then tap and drag the control point along the canvas.
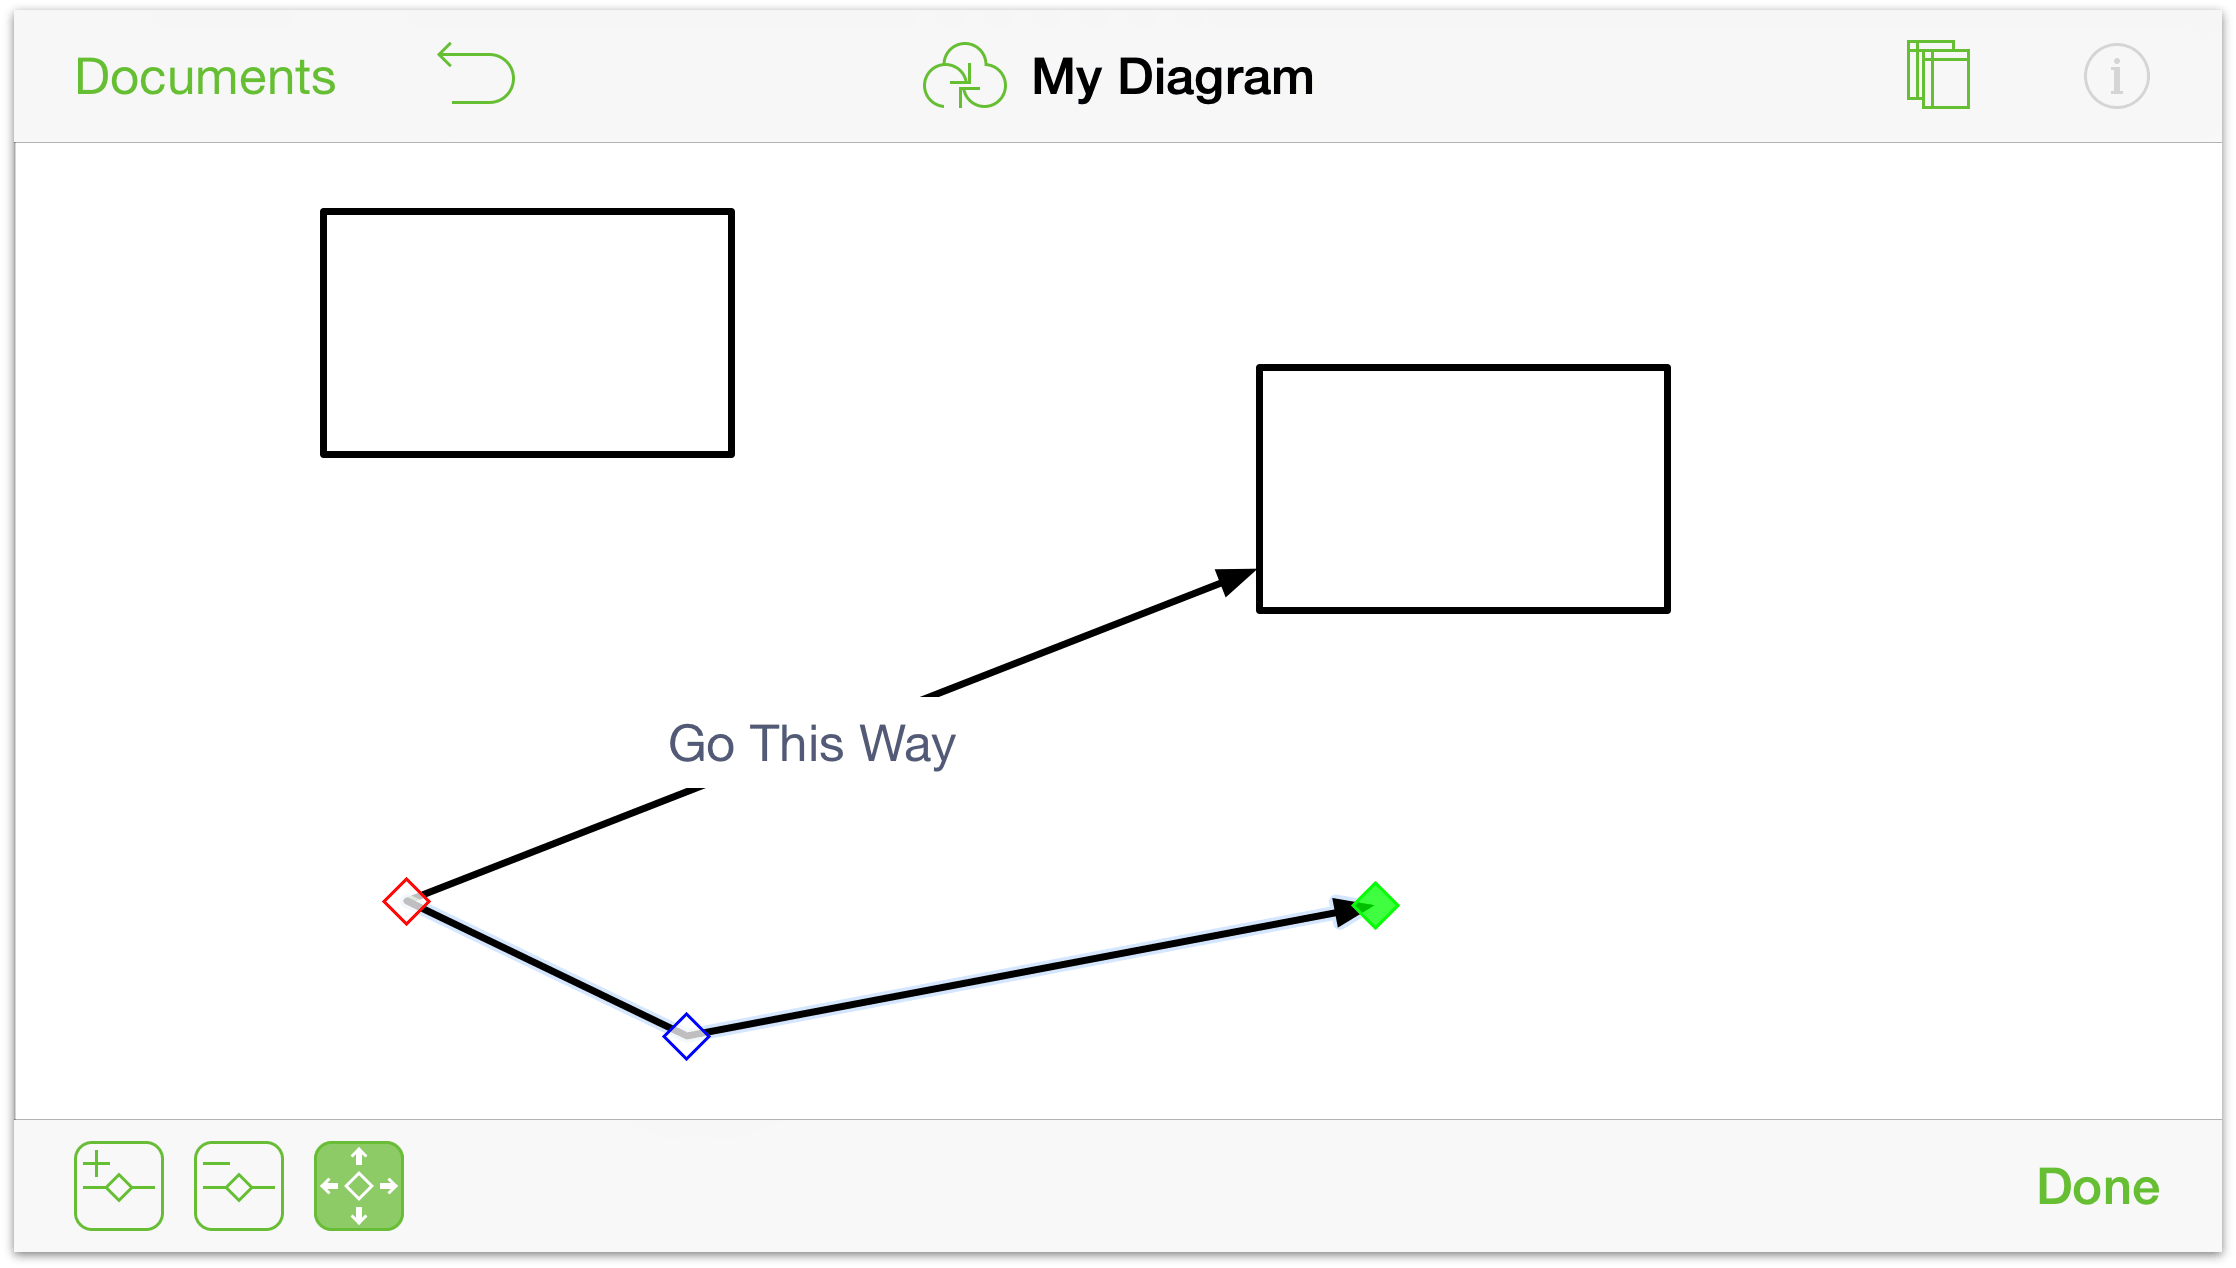
You can add as many control points as you’d like to a line (as long as all of them fit, of course). After adding the control points, you can further change the line’s appearance using the Line inspector.
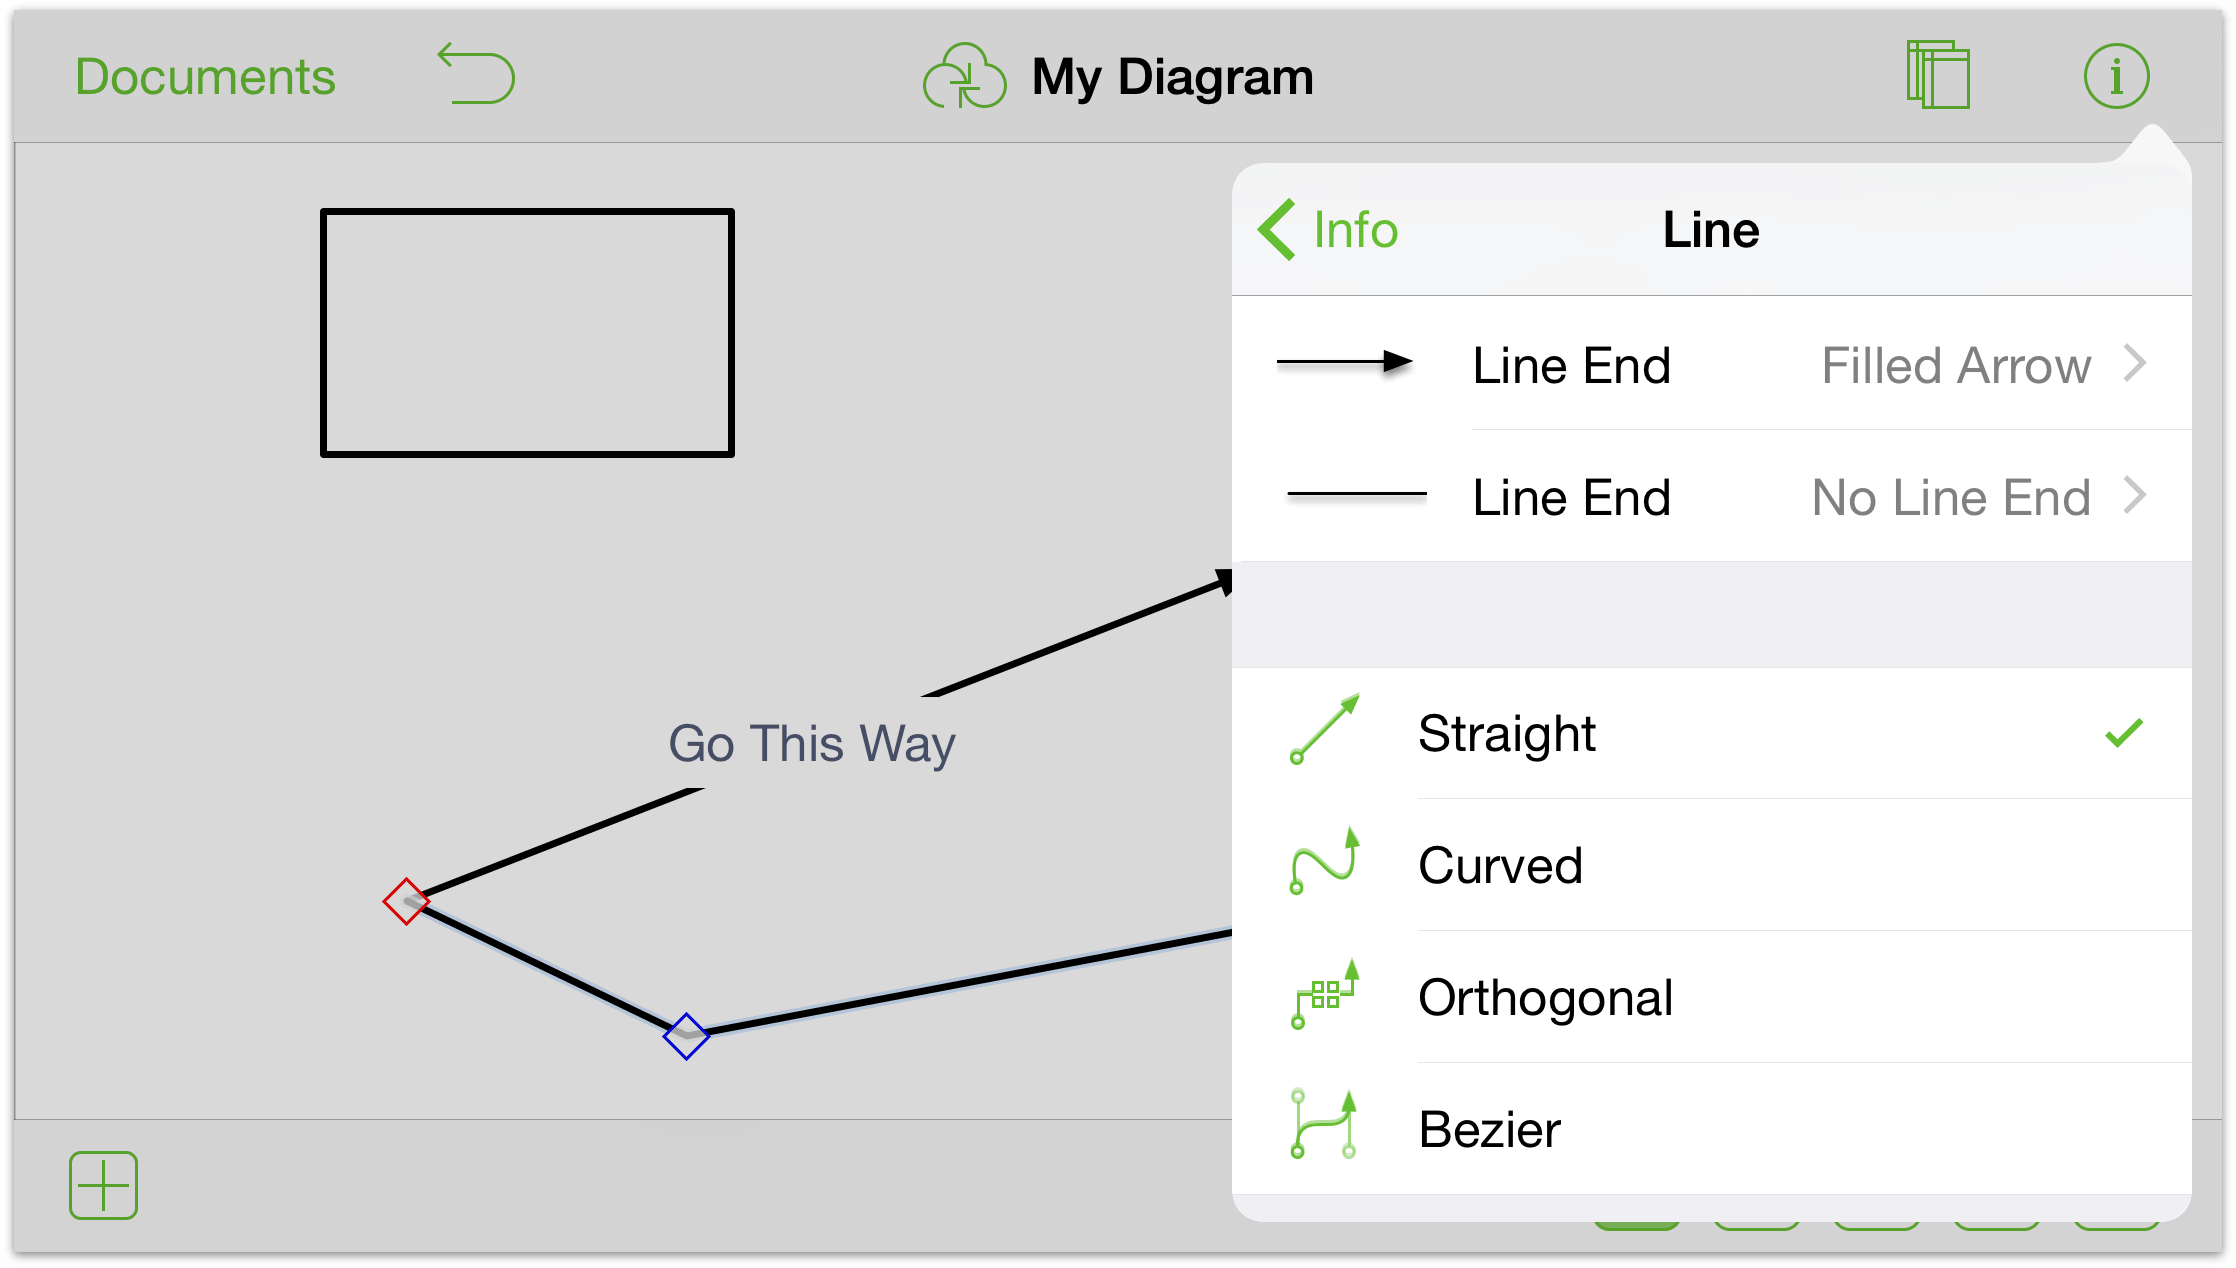
For example, you can change the line from Straight to Curved to get a wavy line, or you could change it from Straight to Bézier so you can create beautifully curved lines with ease.
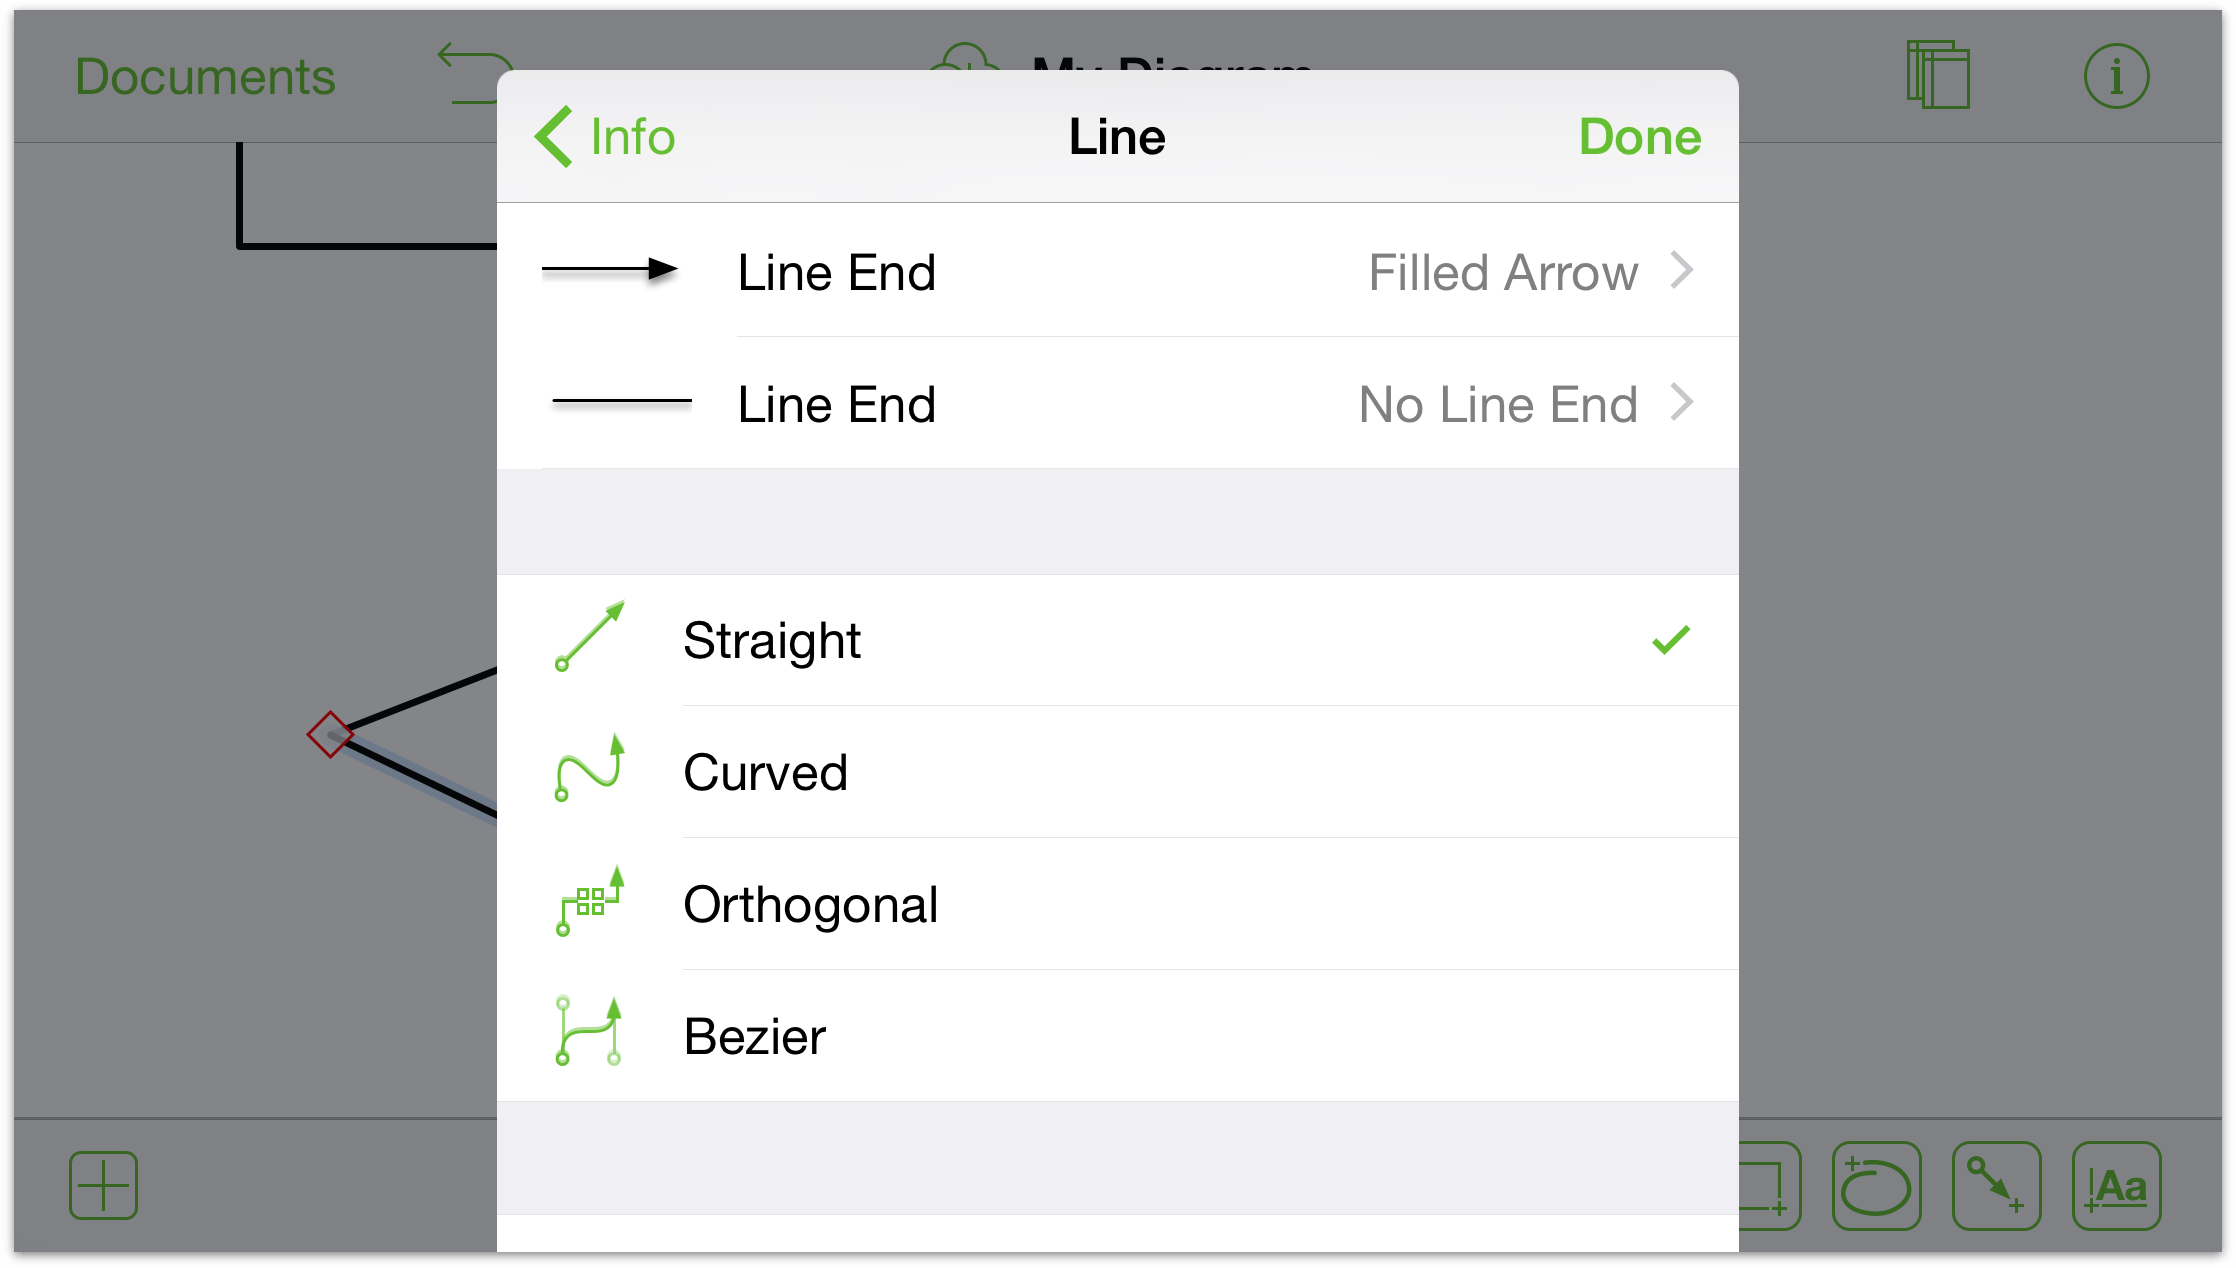
For more details about Bézier curves, see Working with Bézier Curves later in this chapter.
Selecting, Resizing, and Moving Objects
Once you’ve added some objects to the Canvas, you may find that you need to move things around to get the right configuration. For this, you will primarily need the Selection tool.
Start by tapping in the Drawing toolbar to make it active.
To select an object, just tap it.
To select everything on the Canvas, touch and hold the Canvas for a second or two, and then let go. A contextual menu appears just above where you pressed; tap Select All in the menu.
To select multiple objects on the Canvas, touch and hold on the Canvas (don’t let go!); when the selection indicator appears, drag over the objects you’d like to select.
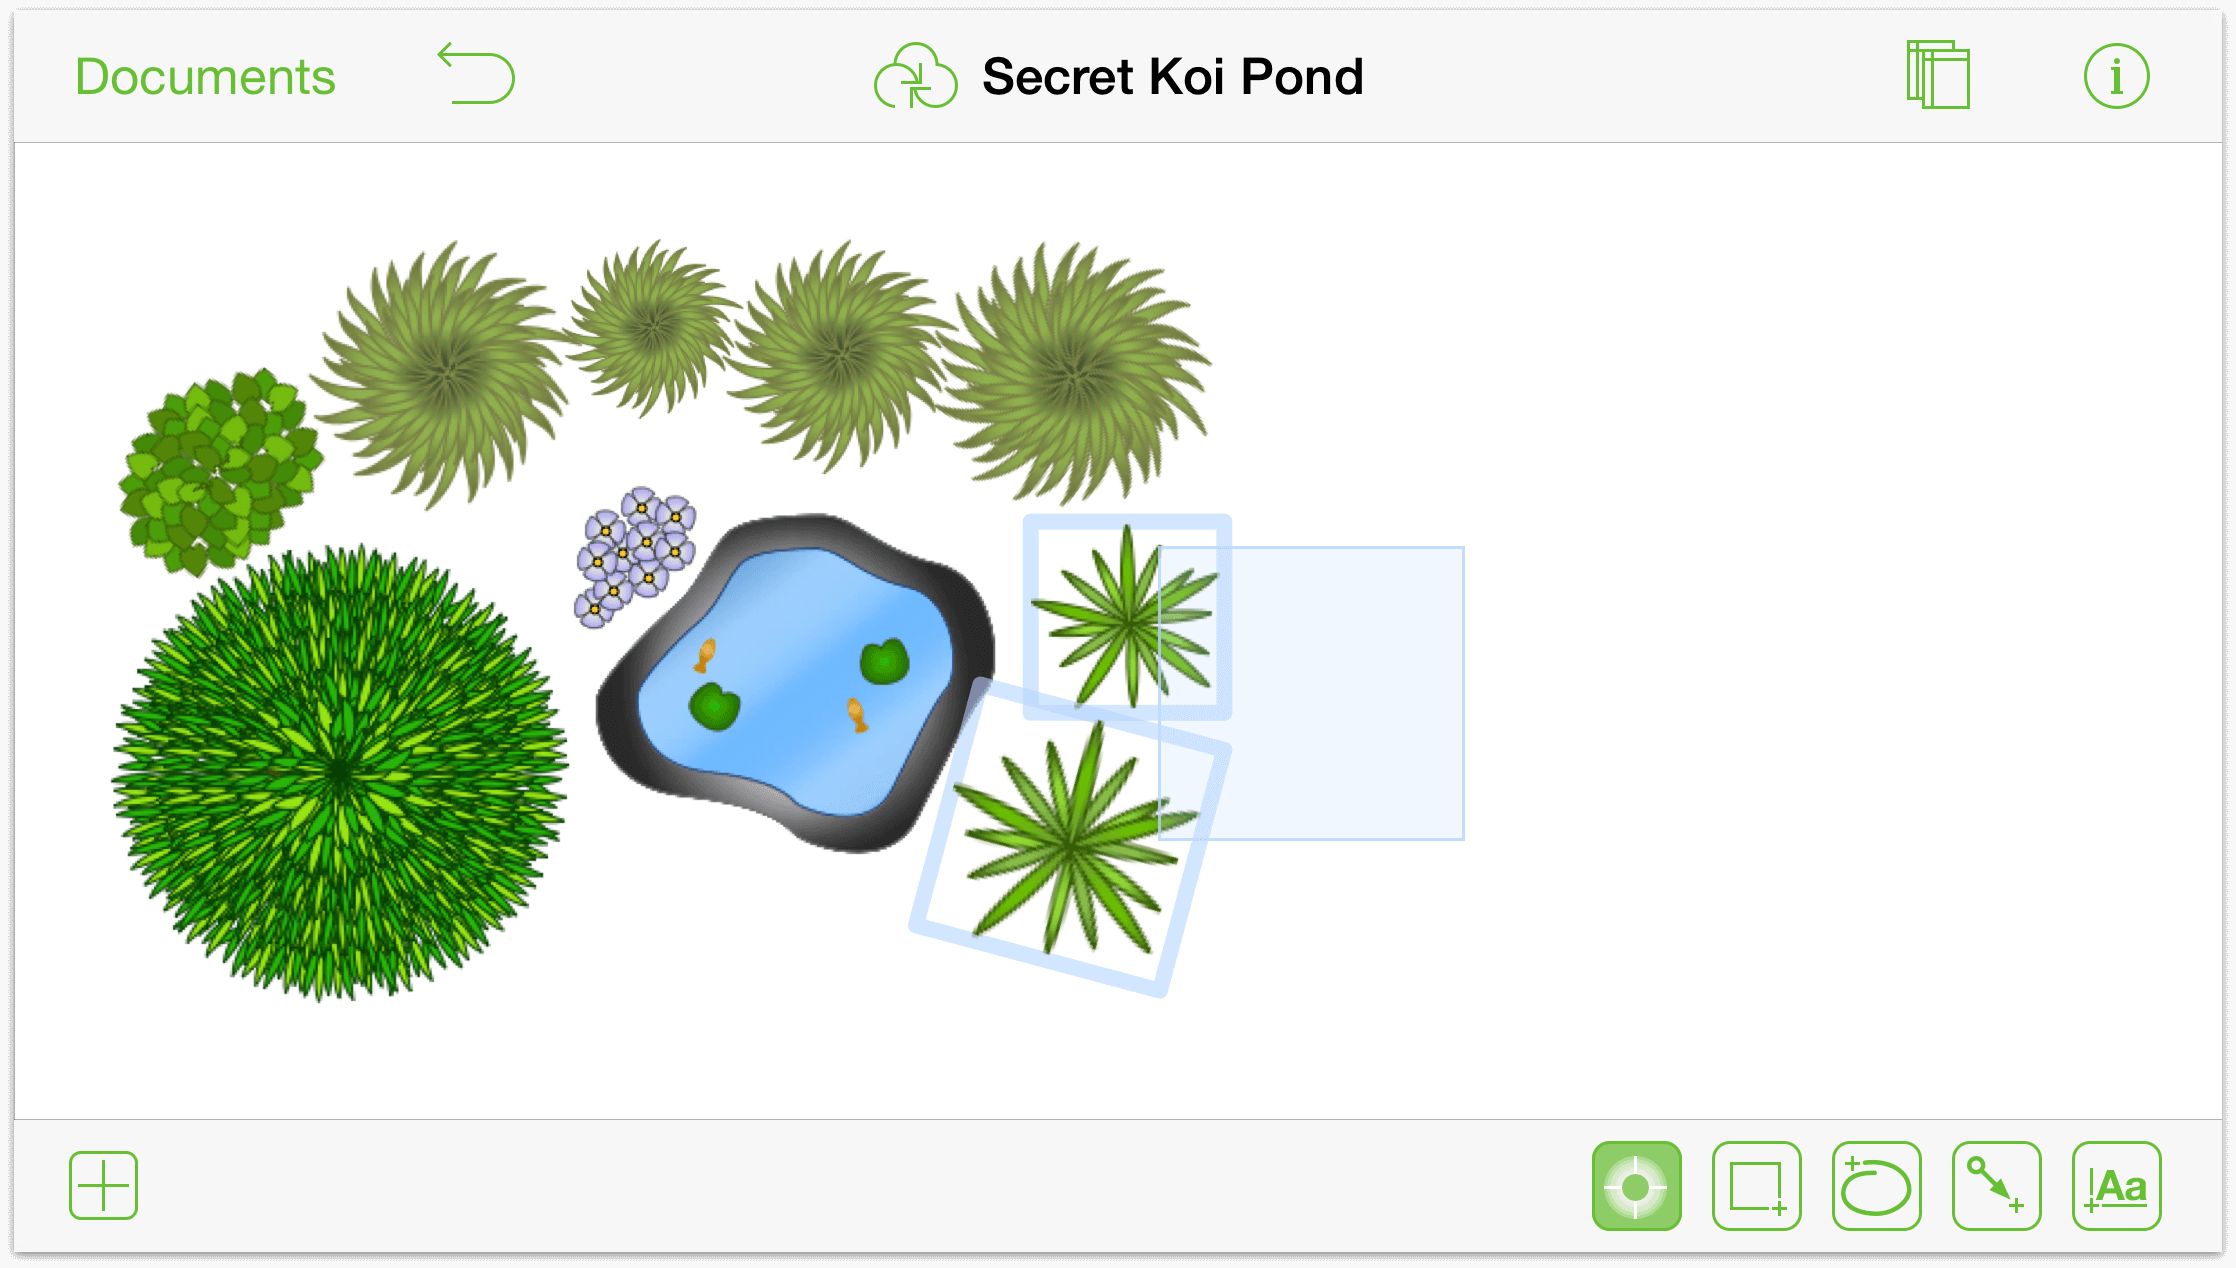
Alternatively, you can touch and hold an object with one finger, while tapping others with another, to add to your selection one object at a time.
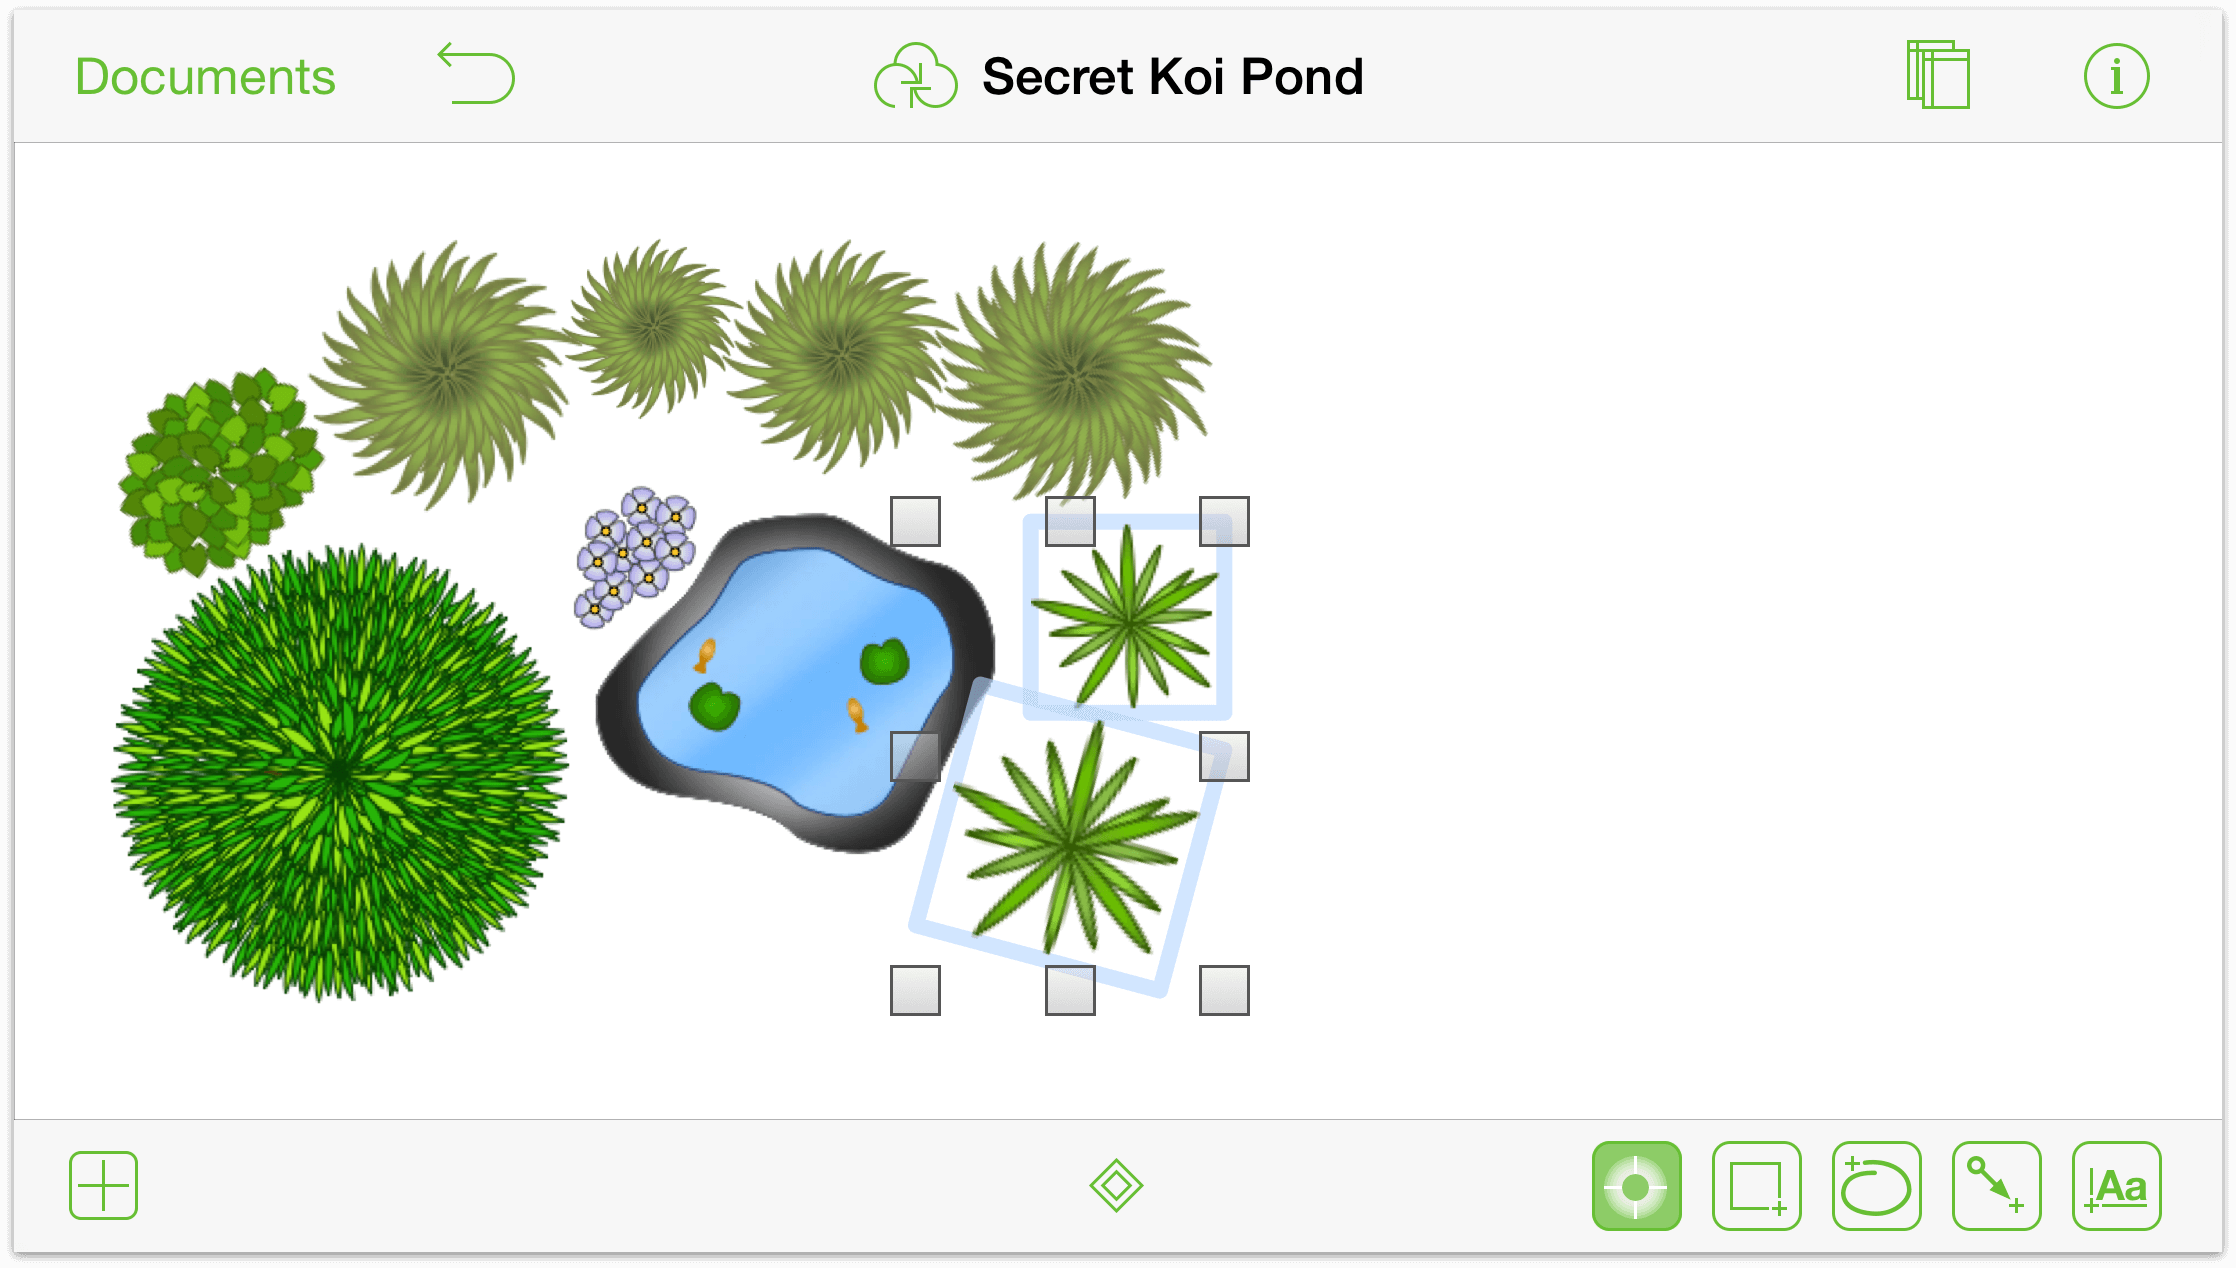
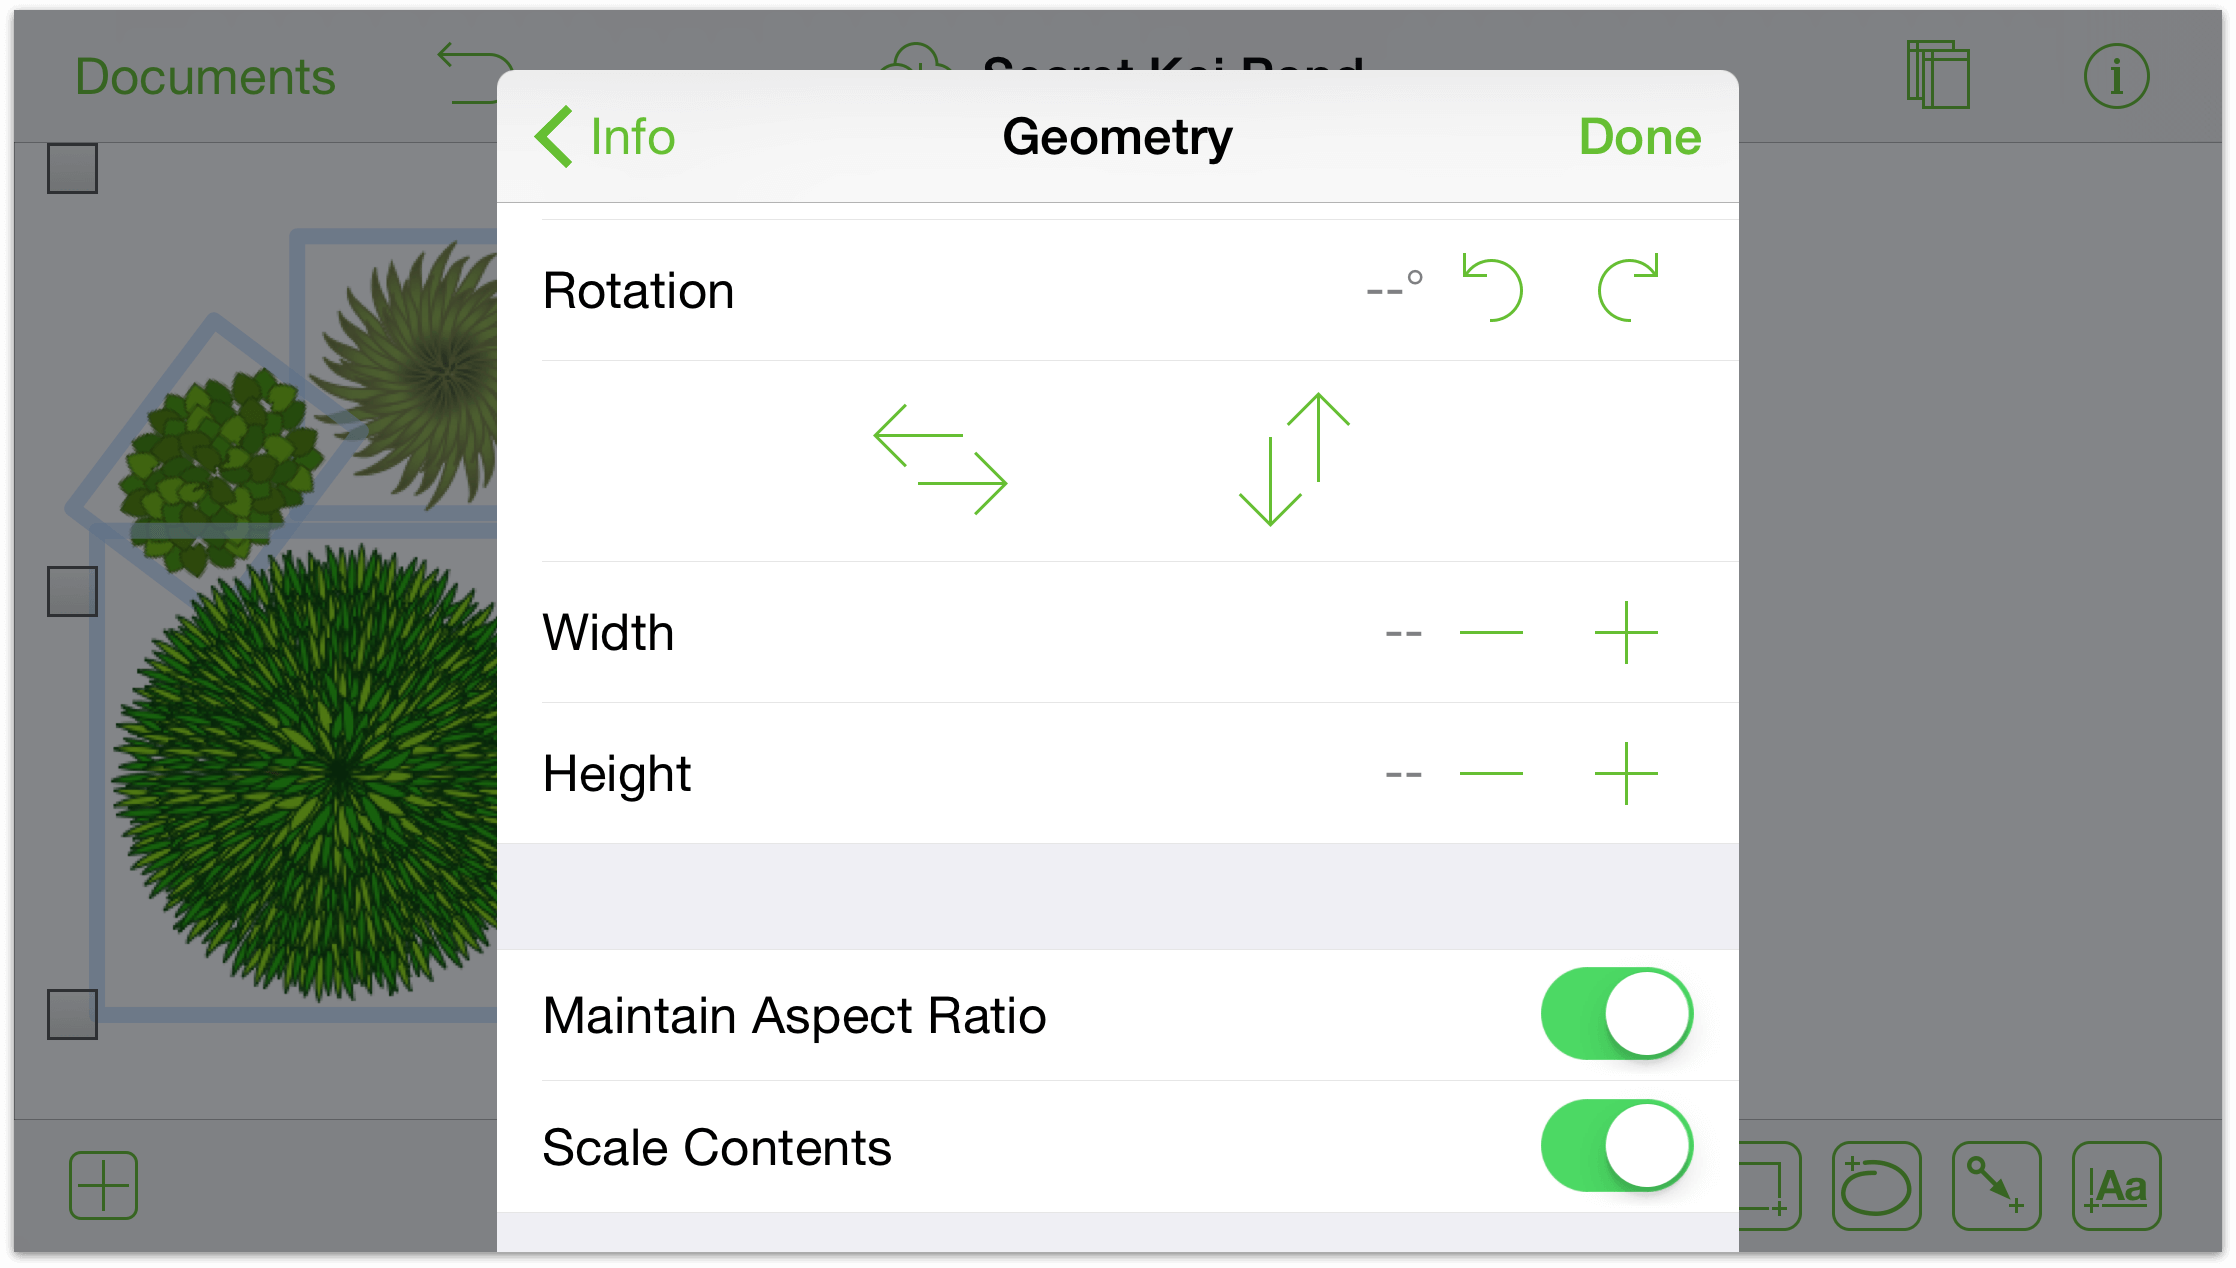
To resize an object (or group of objects):
- Select the objects you wish to resize.
- Touch and hold one of the handles, and then drag to resize (either larger or smaller). If the object is a shape or a label, a heads-up display appears on the canvas with the selection’s dimensions.
To specify a size without dragging, tap the object and use the Geometry inspector to specify height and width. You may also want to turn on the Maintain Aspect Ratio and Scale Contents options at the bottom of the Geometry inspector to ensure that your objects continue to look their best.
To move an object: touch and hold the object, and then drag it around the Canvas until you find an appropriate place for it. If the object has connections, its connecting lines come along for the ride, too.
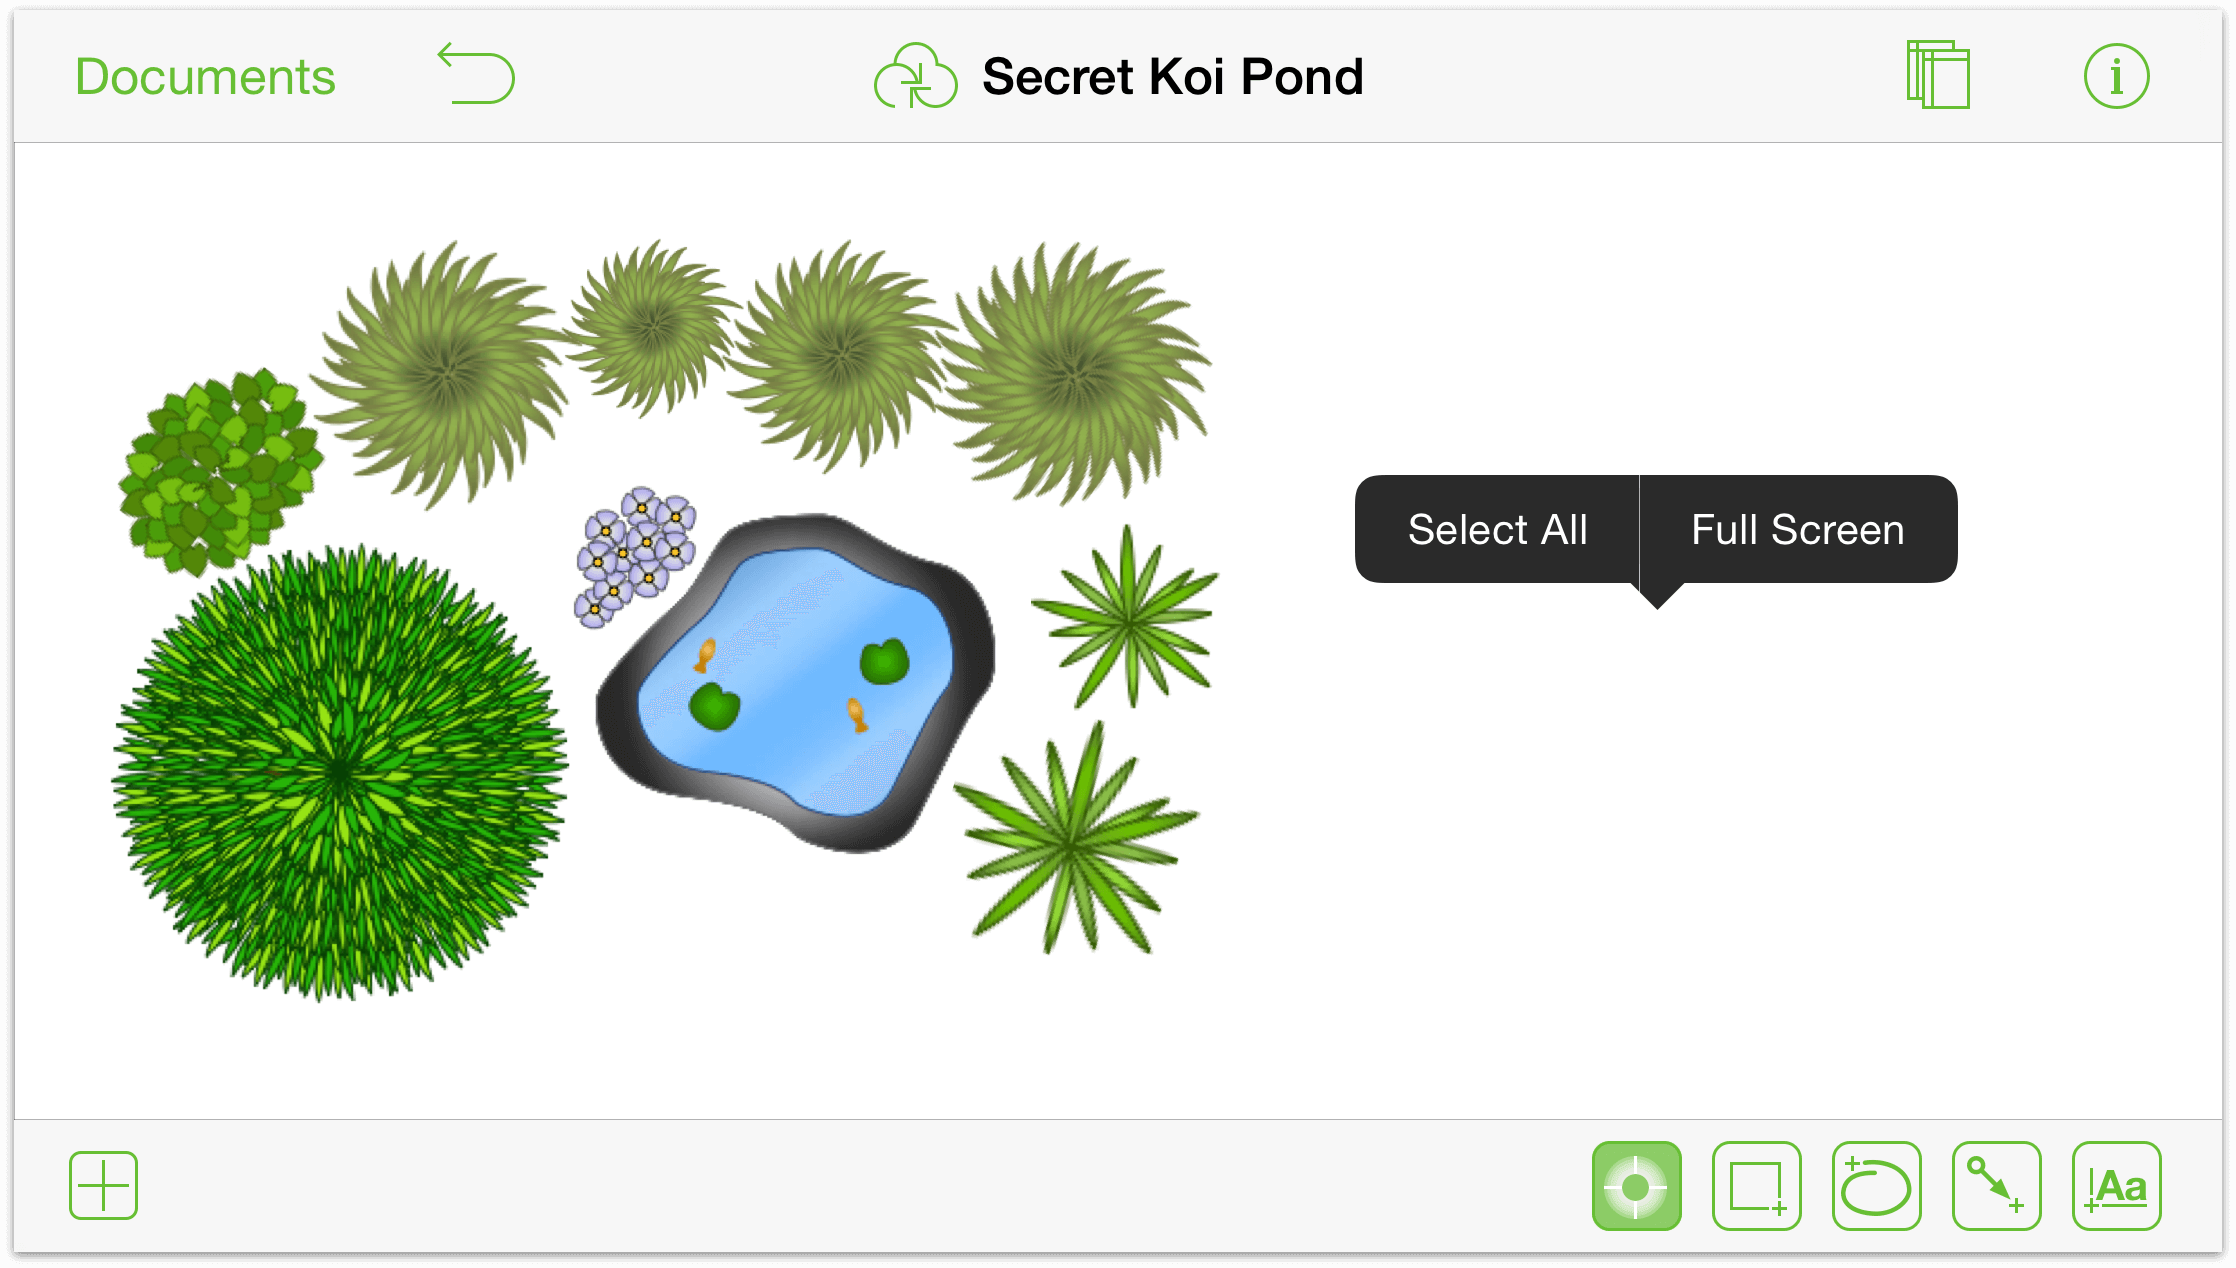
Making Good Use of the Contextual Menu
When you touch and hold on an object or the Canvas, a black and white contextual menu appears above the thing you’ve touched. This menu, much like the contextual menus you find on your Mac, offers shortcuts for common things you need to do.
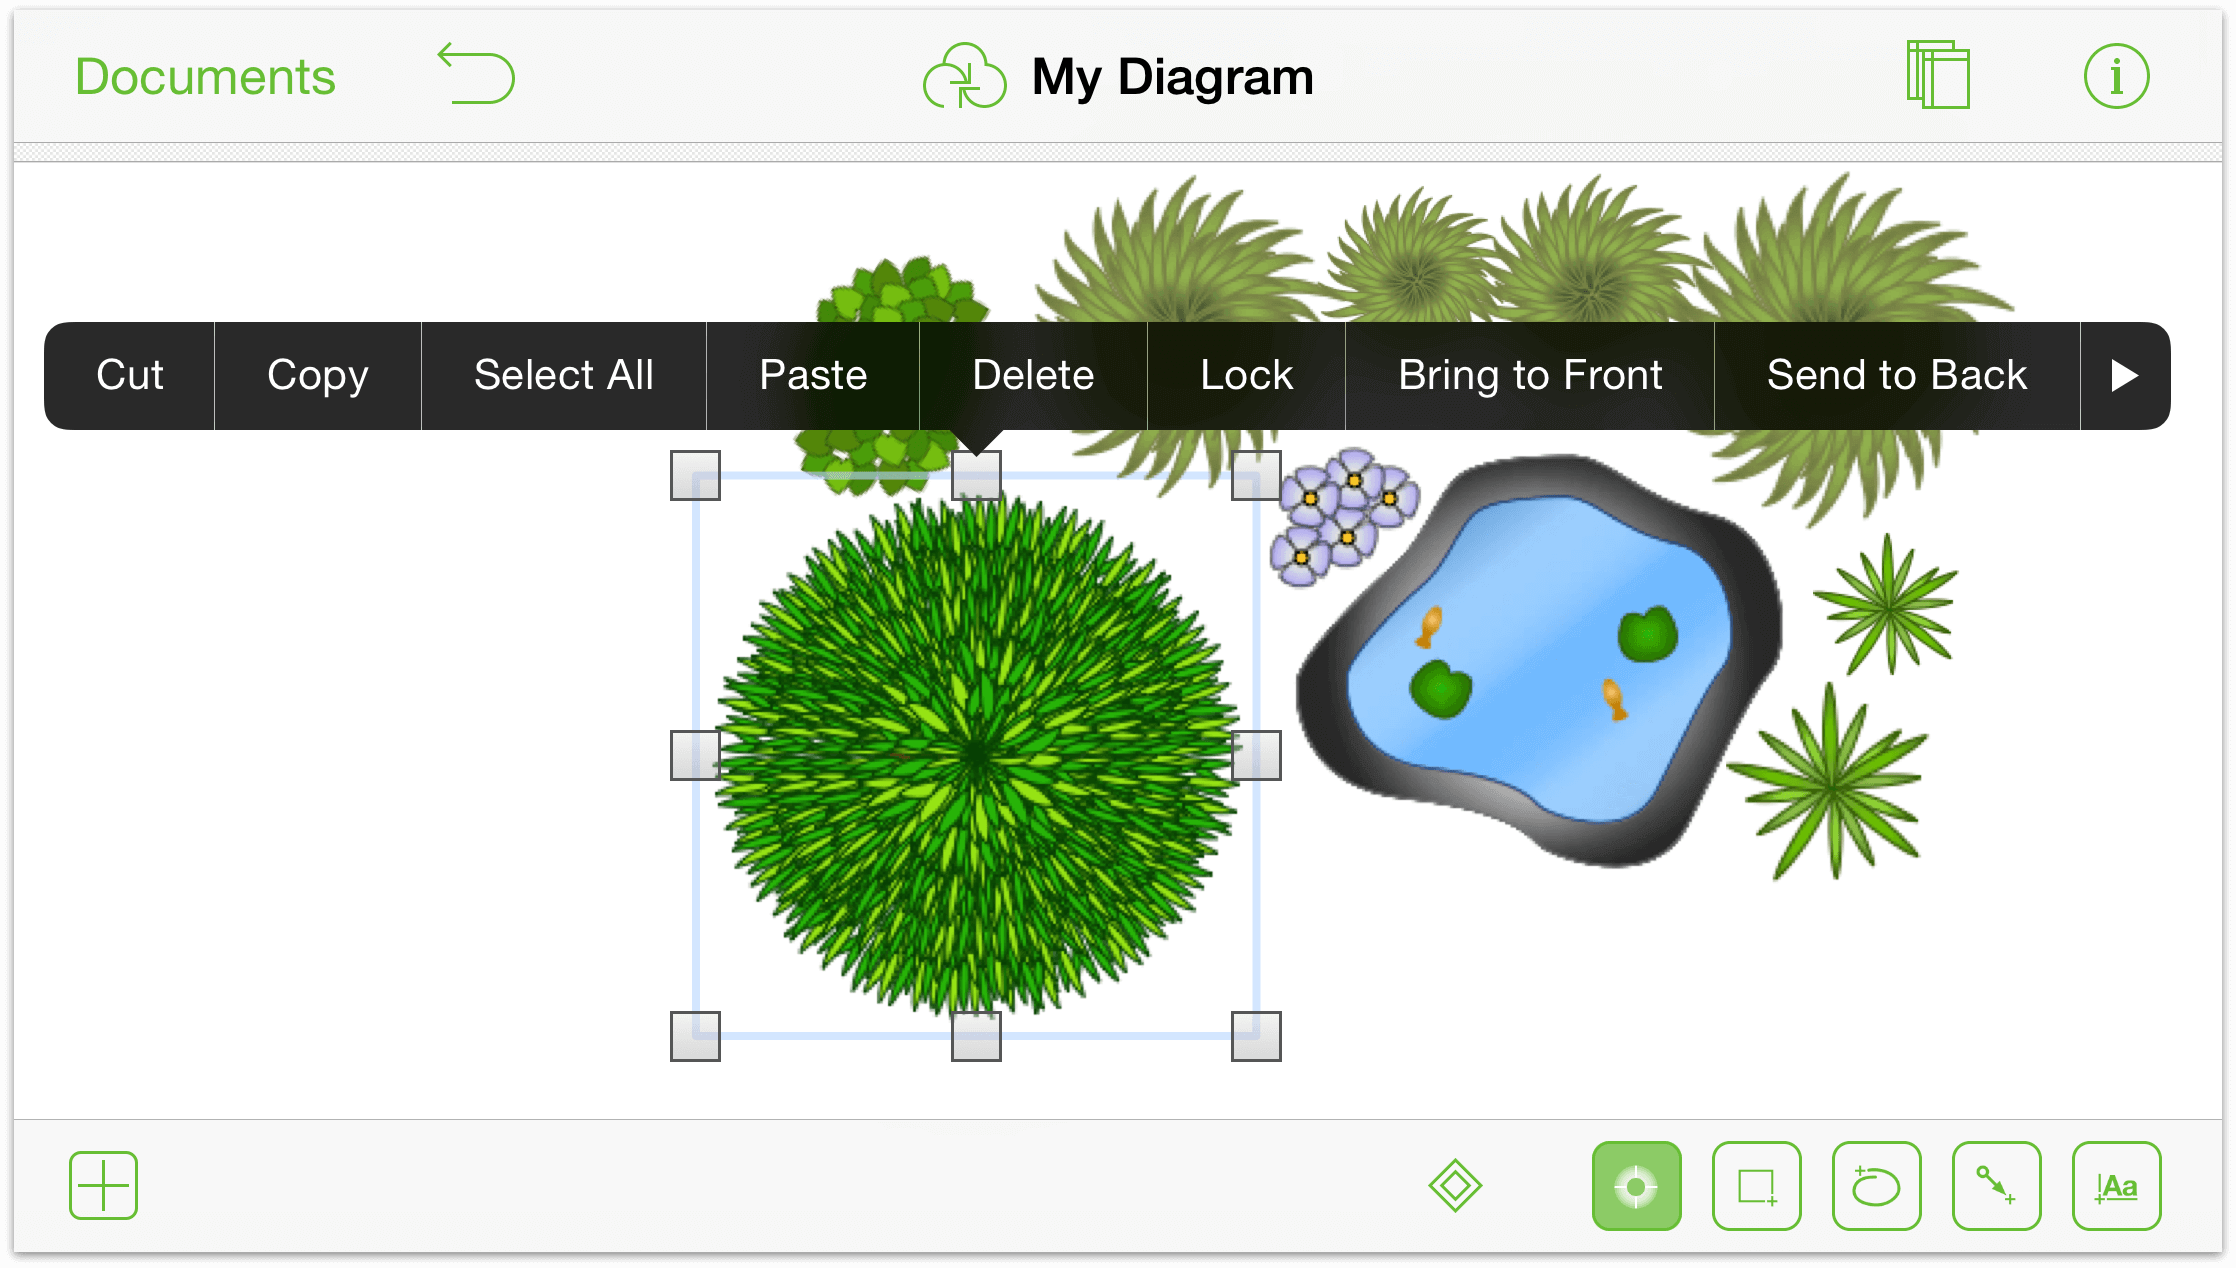
If you touch and hold on the Canvas, the contextual menu offers these options:
- Select All selects everything on the Canvas.
- Full Screen hides everything but the Canvas. Choose this option for when you need an unfettered view of your work, or when you want to show off the things you’ve been drawing in OmniGraffle. To get the navigation and drawing tools back, touch and hold on the Canvas, and then choose Exit Full Screen from the menu.
- A third option, Paste appears in the Canvas’s contextual menu if something has been copied or cut to the clipboard.
Options you’ll find in the contextual menu when you select a single object are:
- Cut
- Copy
- Select All
- Paste (if something is already on the clipboard)
- Delete
- Lock/Unlock
- Send to Back
- Make Table (Pro)
- Copy Style
- Full Screen/Exit Full Screen
And finally, if you have multiple objects selected and touch and hold to reveal the contextual menu, you’ll get all of the previous options, plus Group or Ungroup.
Using the contextual menu can save you a lot of time for performing tasks you might otherwise use a keyboard shortcut for when using OmniGraffle on your Mac.
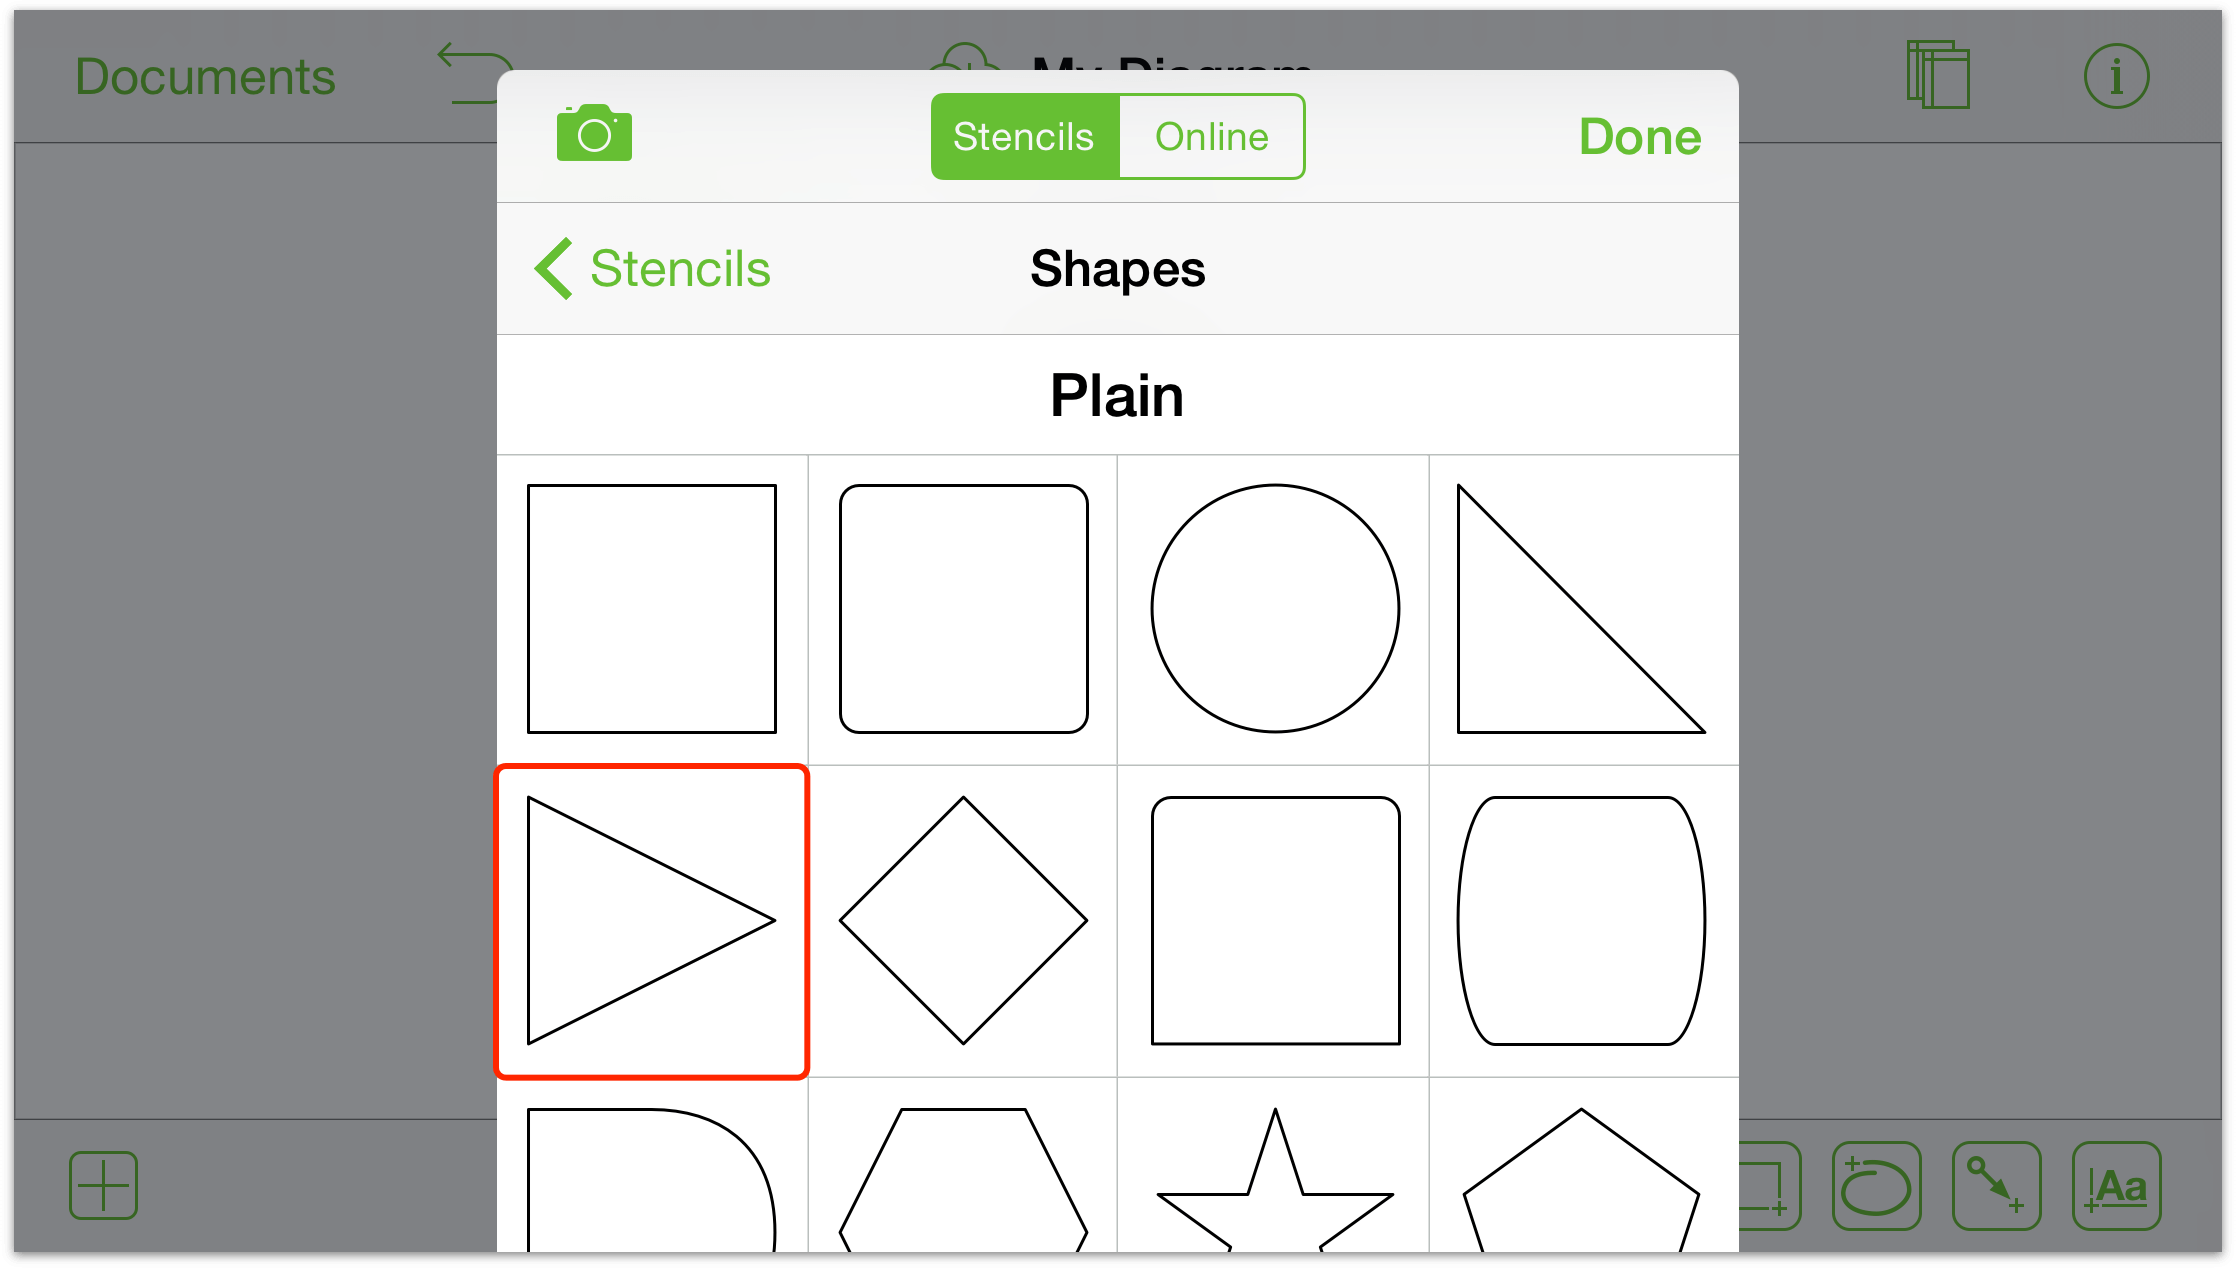
Working with Bézier Curves
OmniGraffle isn’t just for creating flow charts and diagrams; it’s a full-blown illustration app. With a little practice, you can quickly master drawing complex shapes in OmniGraffle. And once you have those beautiful things on your Canvas, you can use the Inspectors to style objects to your liking.
This quick tutorial will show you how to take a basic shape (a triangle) and turn that into a leaf. Just follow along…
From your favorite folder, tap
to create a new document.Choose the Autosizing - Pixels template.
In the navigation bar, tap
 to open the Stencils menu.
Select Shapes.
In the listing of Plain shapes, double-tap the triangle shown here to add it to the Canvas:
Tap anywhere on the Canvas to make the Stencils menu go away.
You now have a lone, right-pointing, triangle on the Canvas. And we’re sure that you’re thinking, “How in the heck am I going to turn that into a leaf?!”. Hang on, we’re getting there.
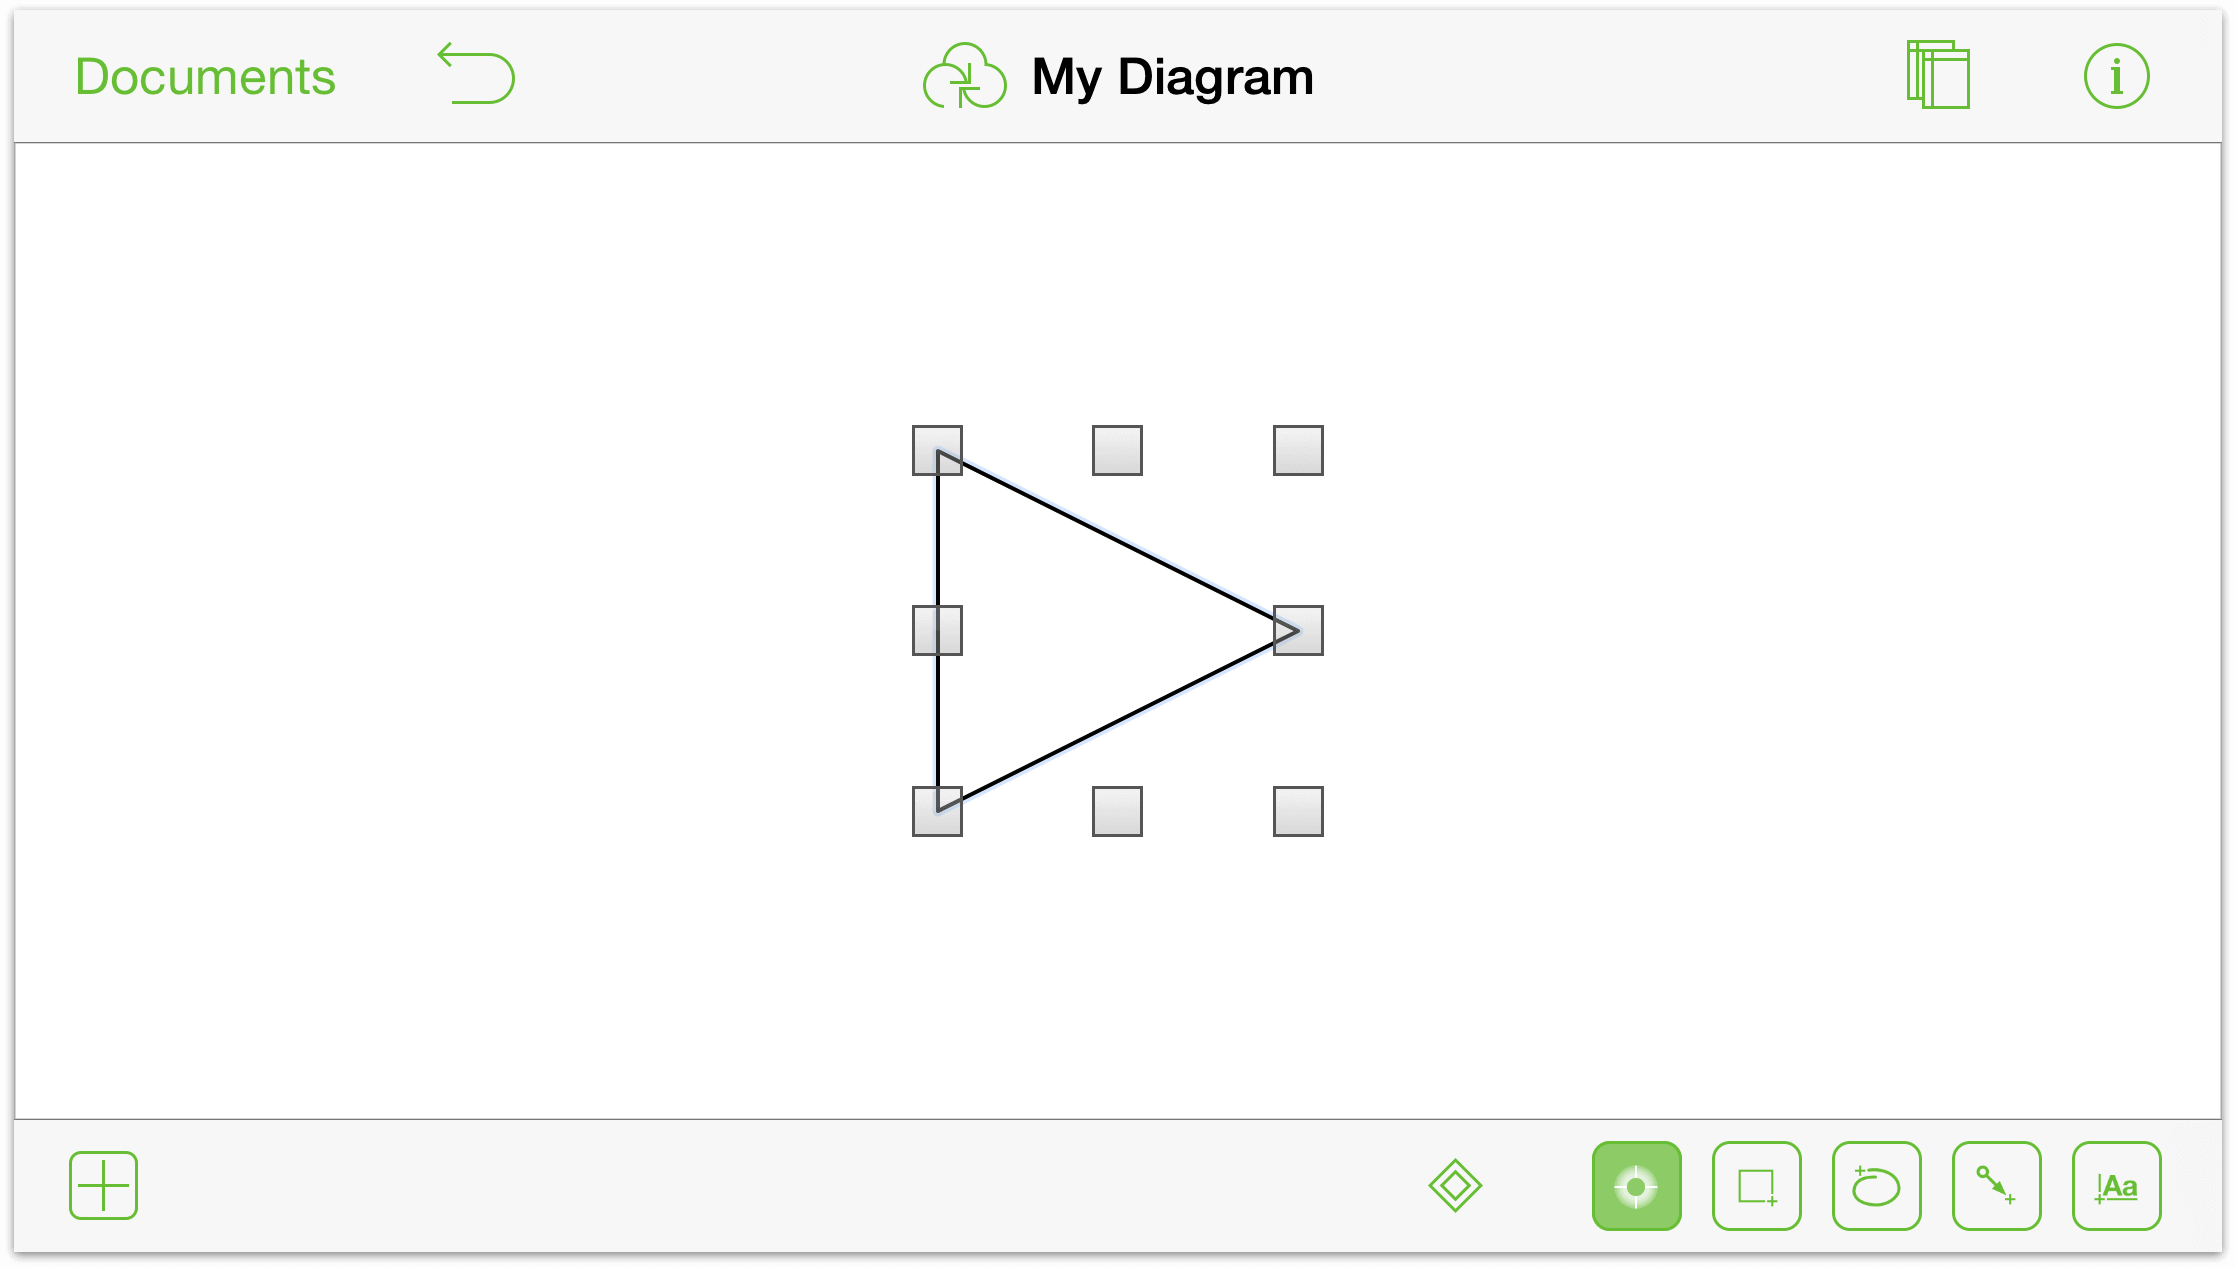
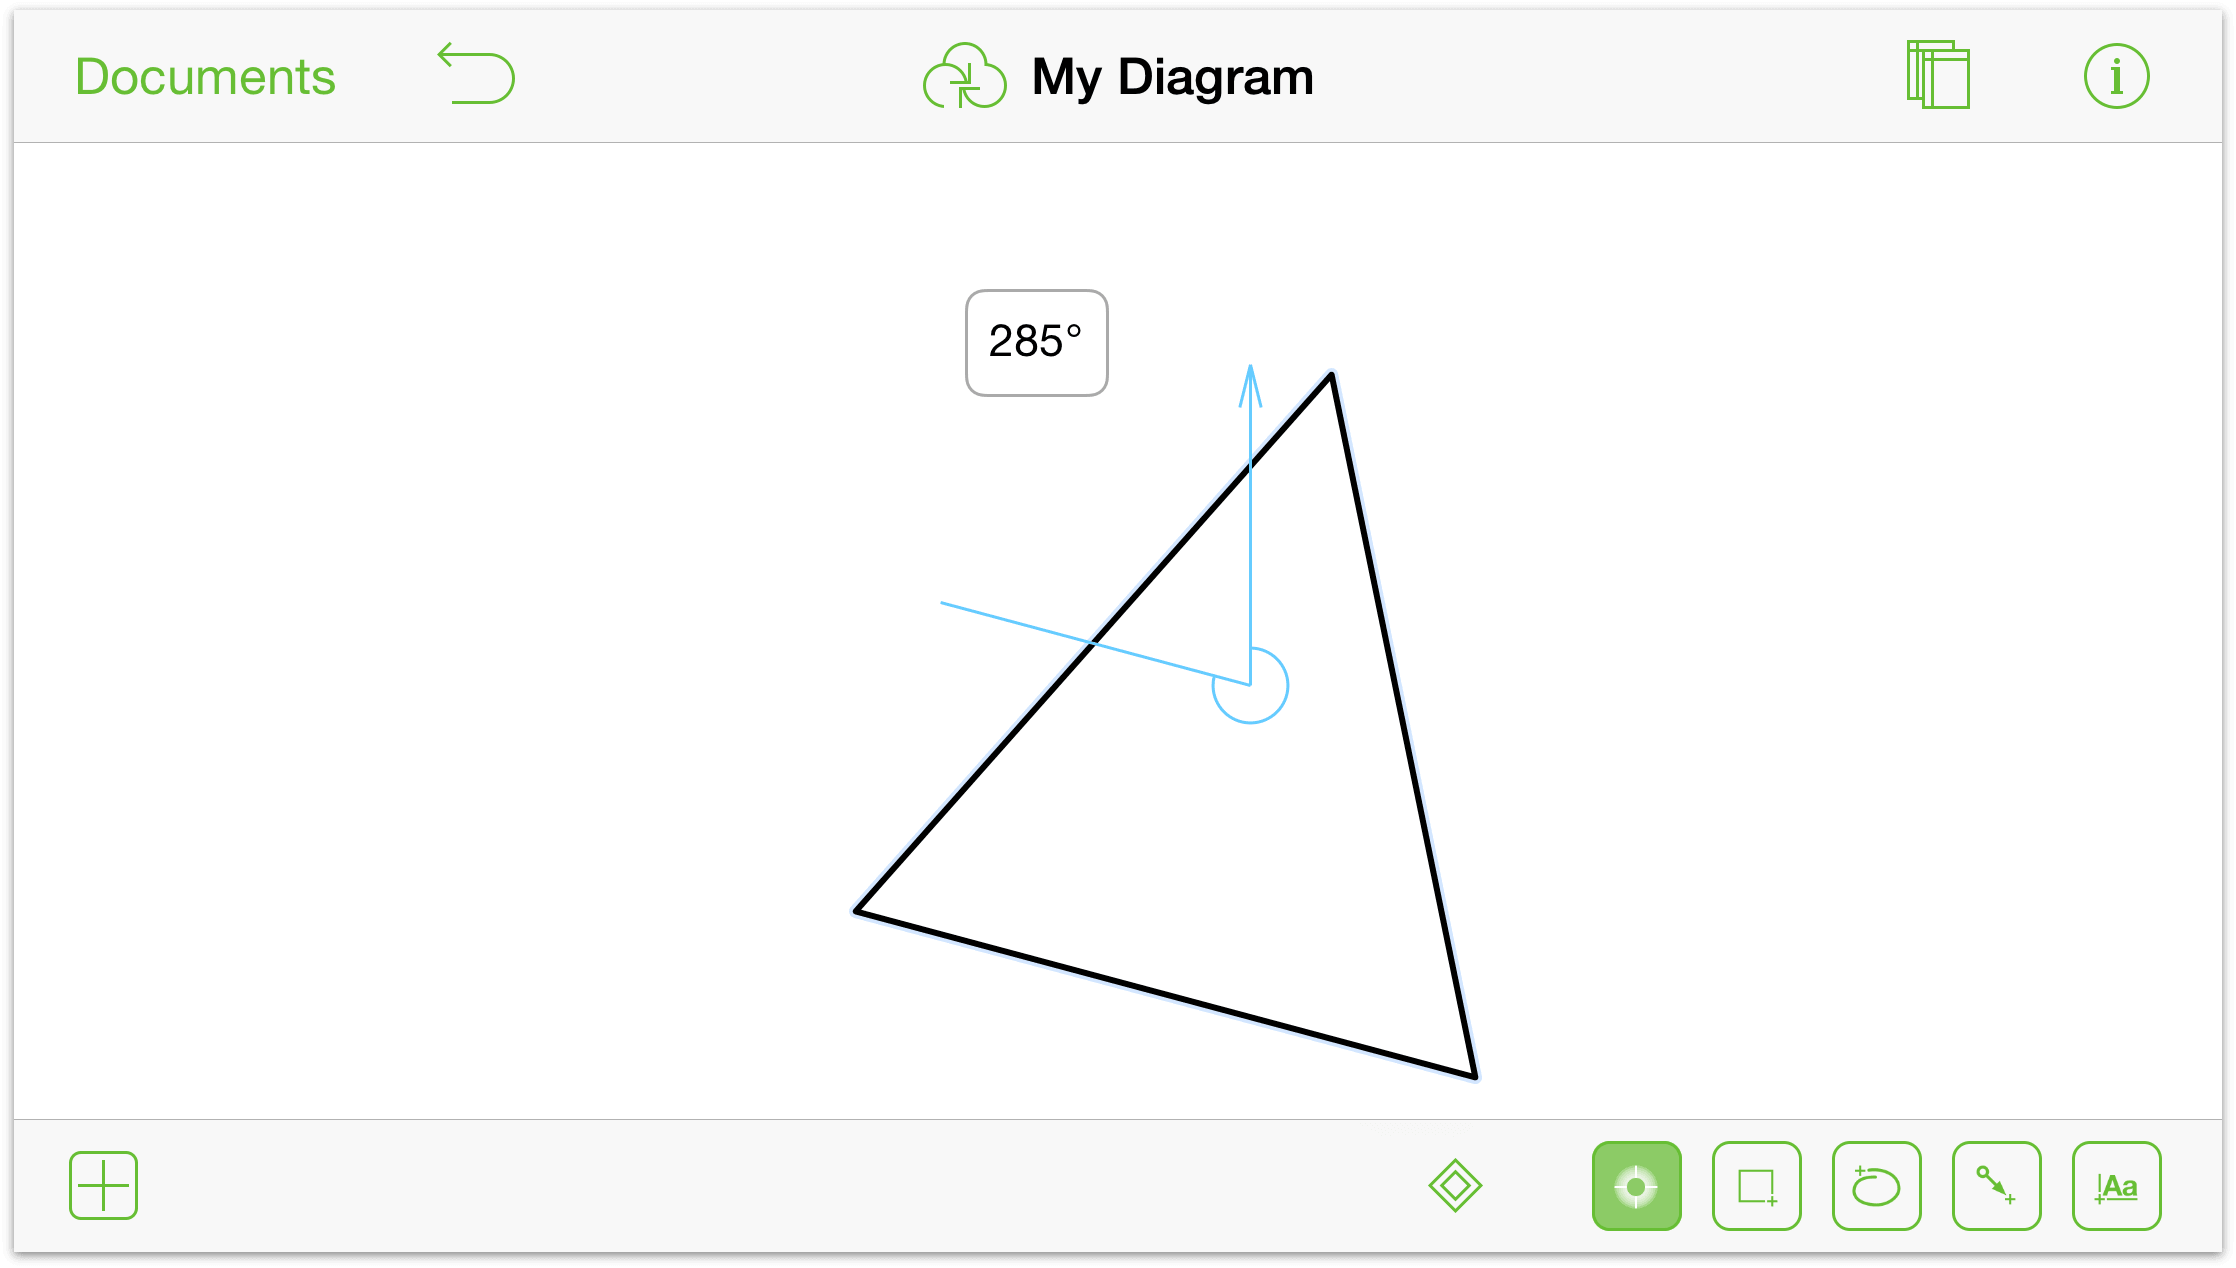
The next task is to rotate the triangle so it is pointing upward (or relatively so).
Pinch to zoom in on the triangle. Your zoom may vary; the point here is to zoom in enough so you can use a two-finger gesture to rotate the object.
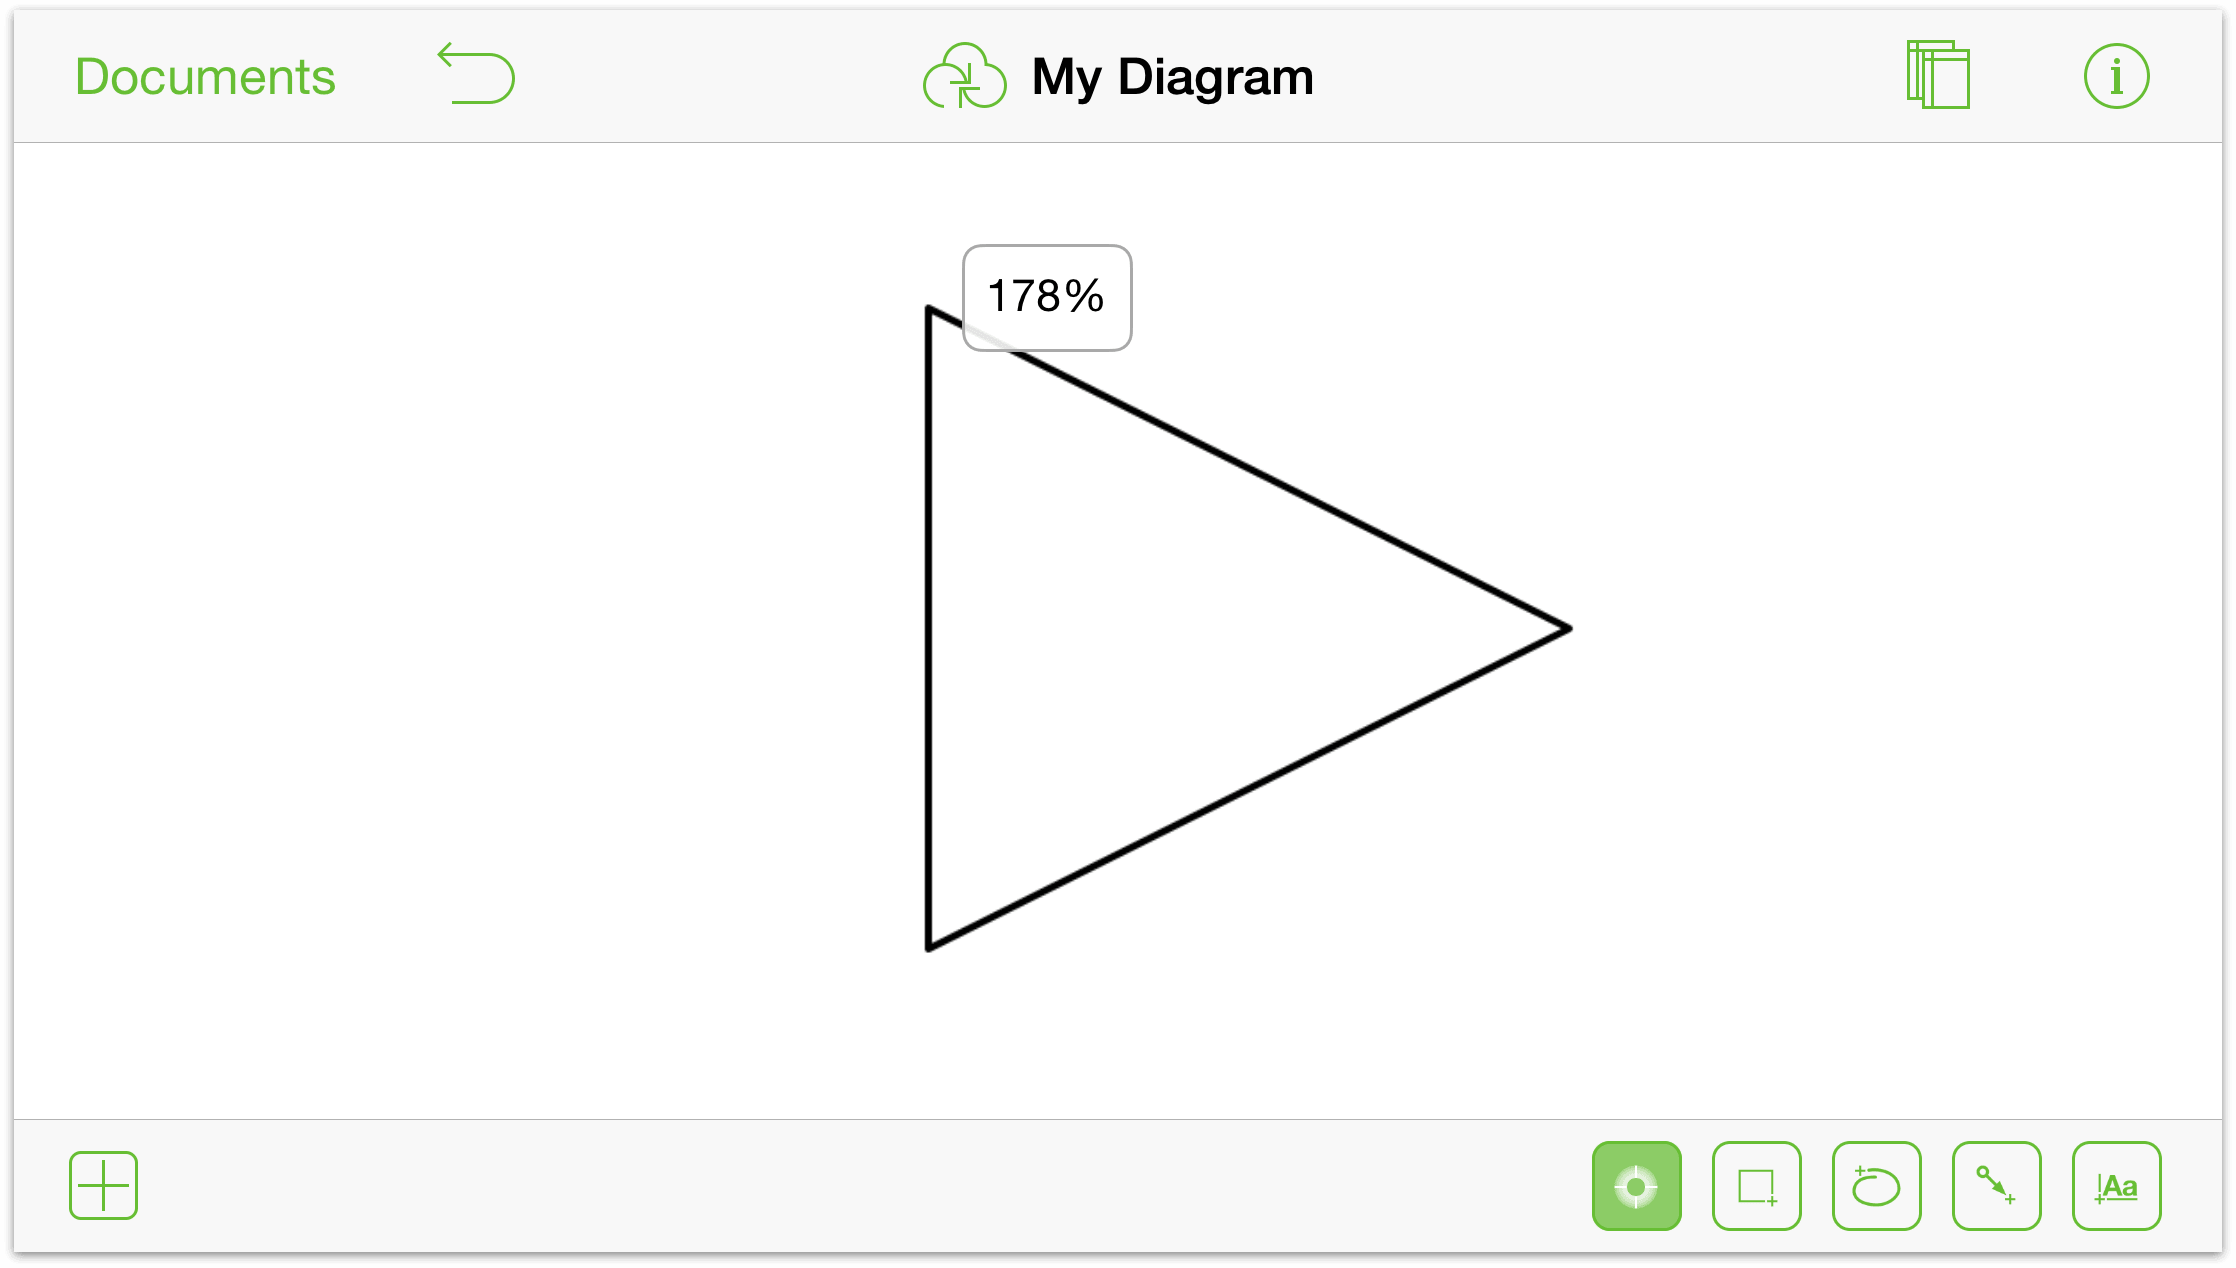
Using two fingers at the same time, touch and hold the triangle. Rotate your fingers slightly. When you see an upward-pointing blue arrow appear, remove one of fingers from the display and then use your other finger to rotate and spin the triangle to the left. You can see the angle of rotation in the Inspector bar; here we’ve set the angle to 285 degrees.
Now we can get down to the business of Béziers. Vive la Béziers!
With the triangle selected, tap
 to use the Point Editing Tools. By selecting the Point Editing Tool, the three points of the triangle now become editable control points. You’re going to convert all three into Bézier curves.
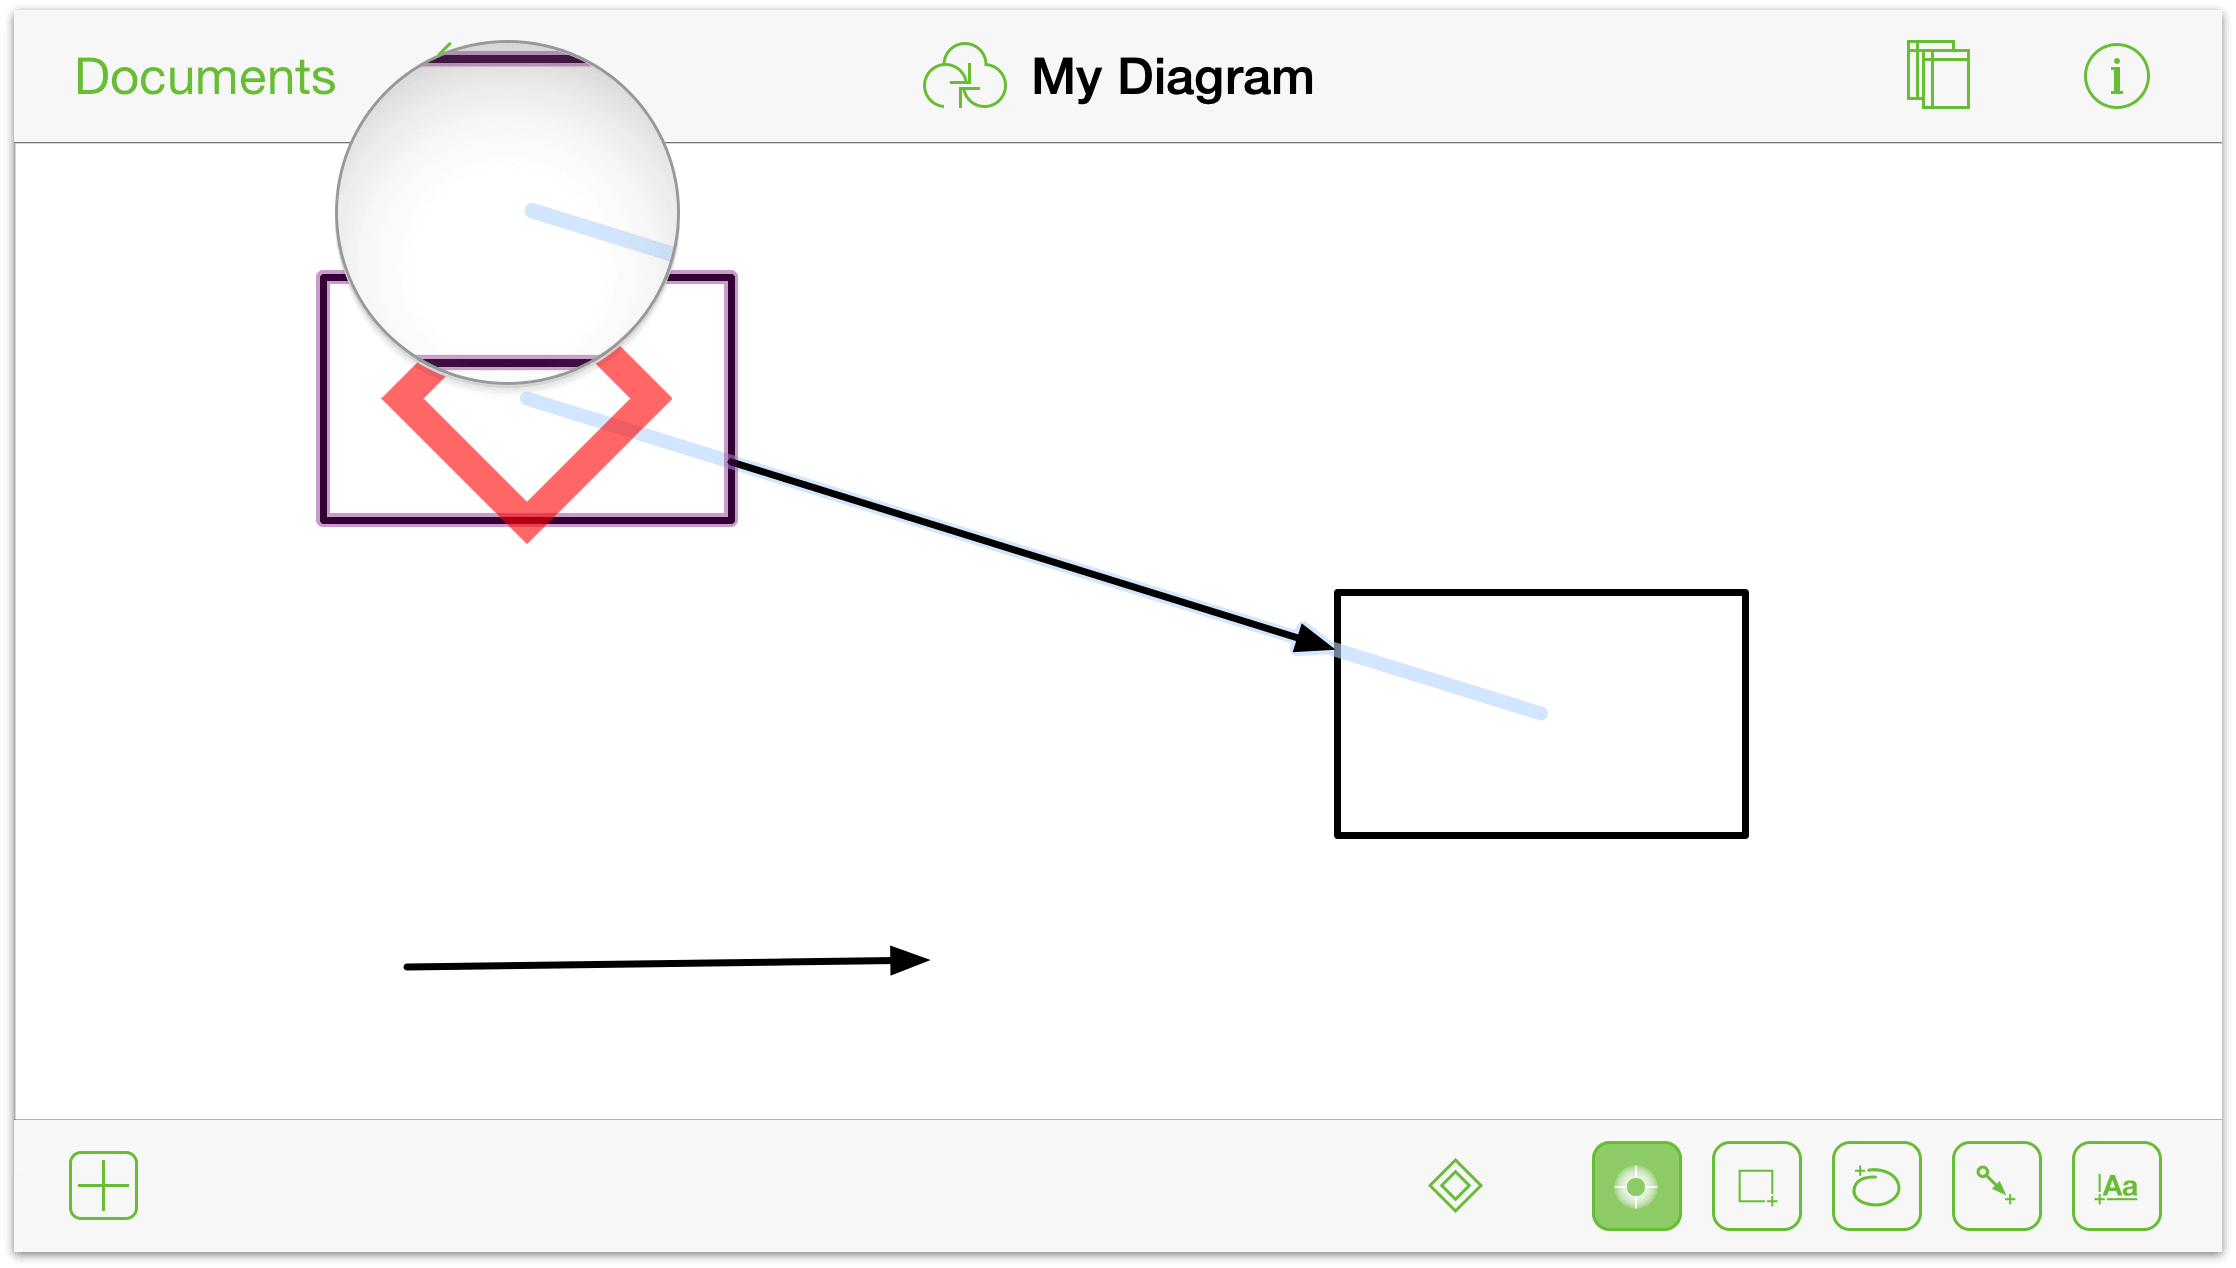
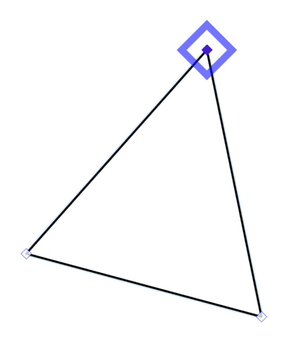
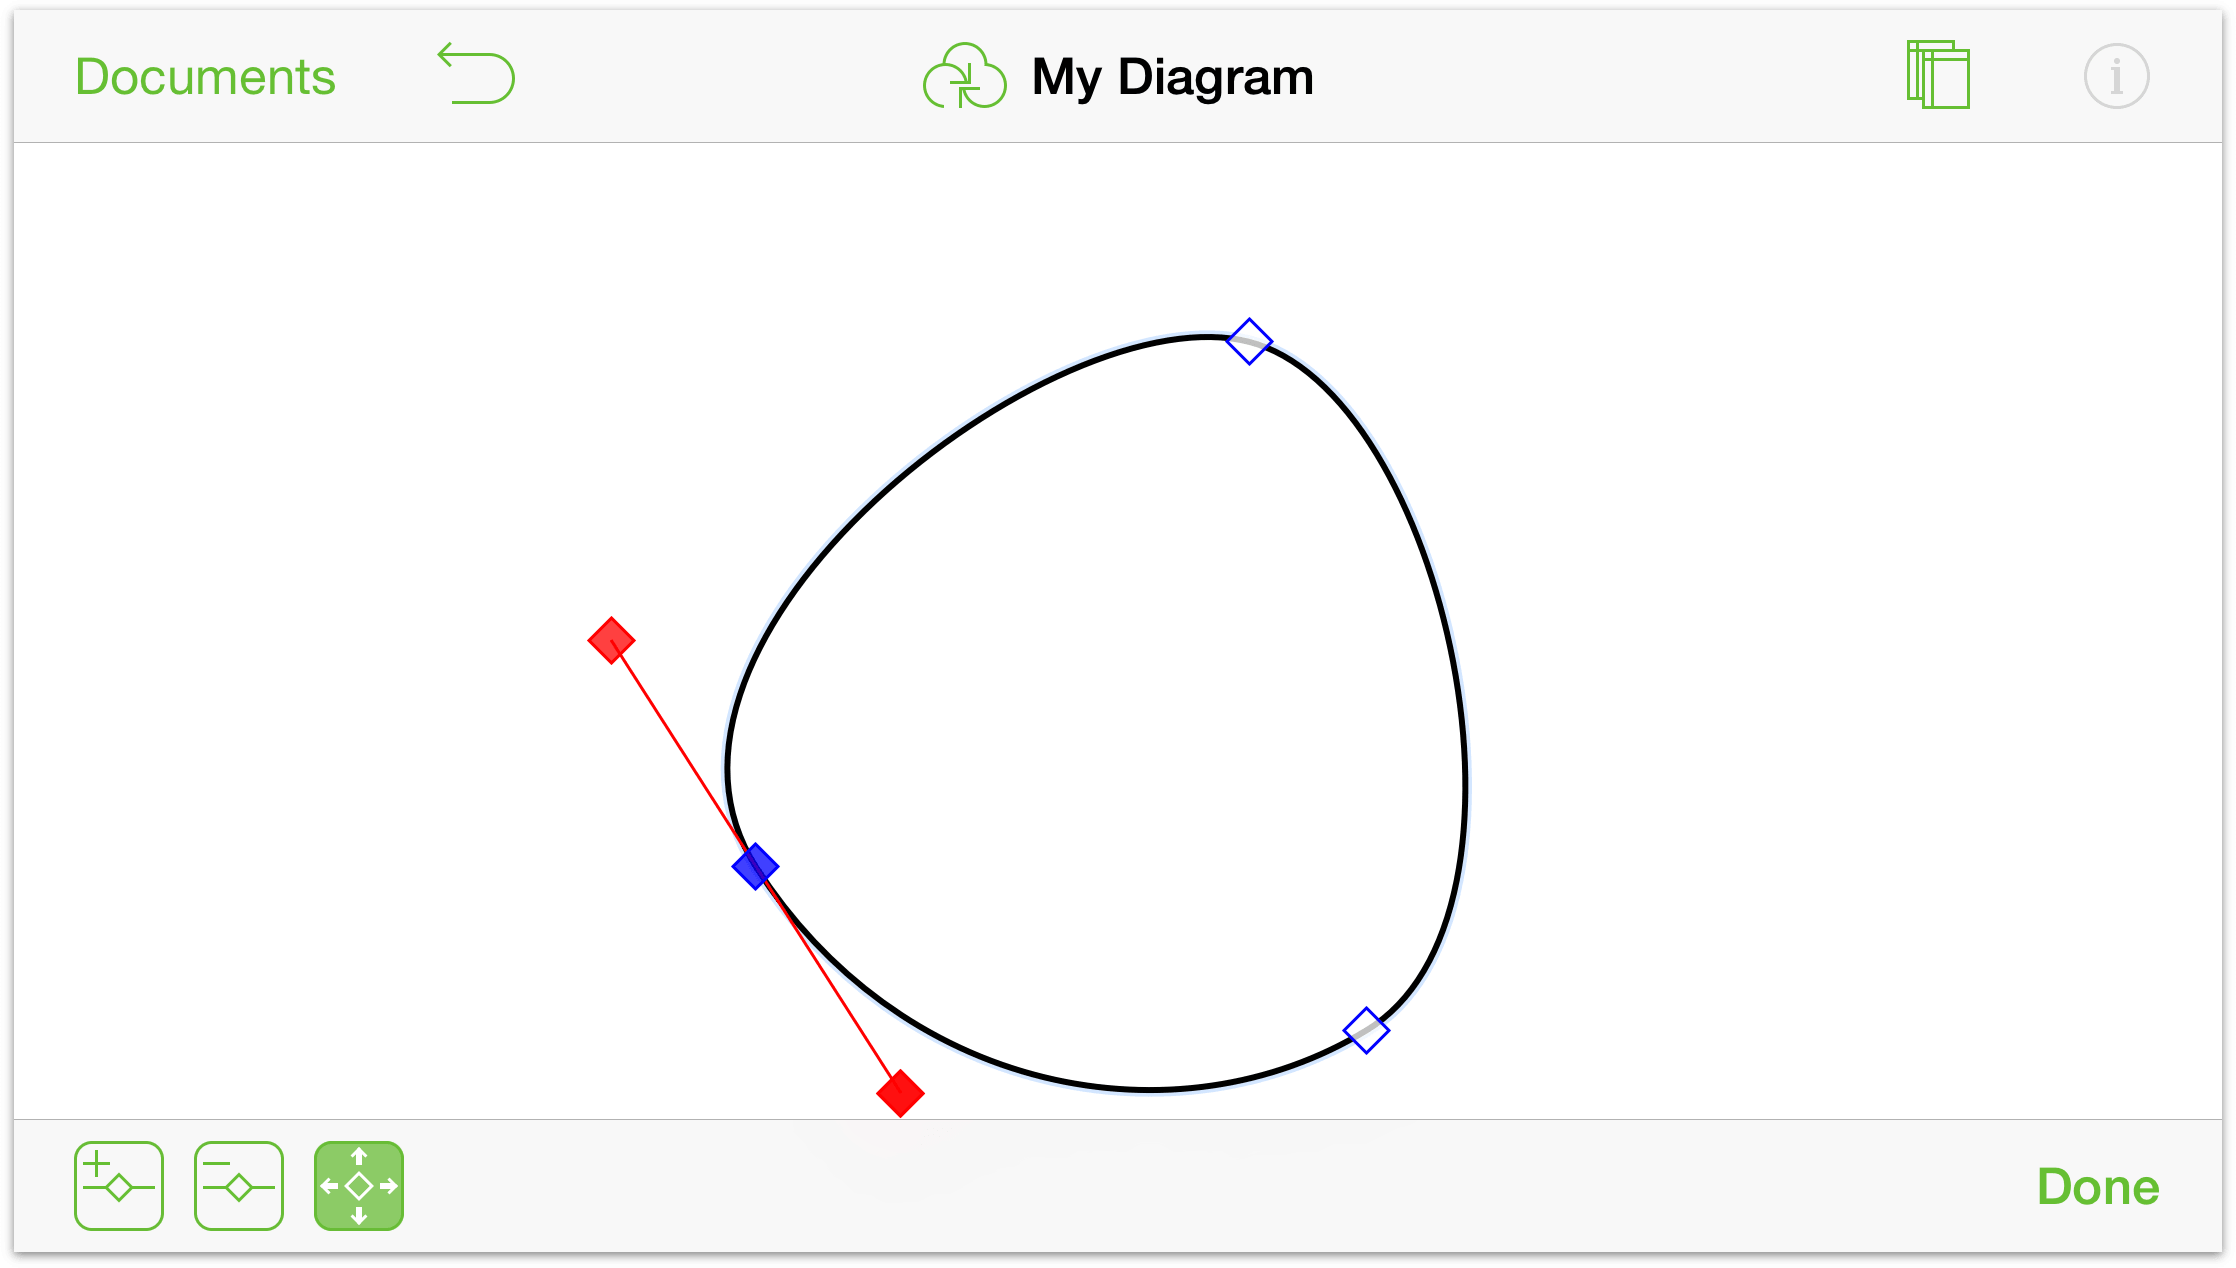
Touch and hold the top control point of the triangle. There are a few things that happen rather quickly, so let’s step through them one by one:
When you touch and hold on the top control point, a blue diamond animates around the point to isolate that control point; this to let you know you can drag the point around to change the shape of the triangle—but don’t do that, there’s more to be done.
As you continue to touch and hold the top control point, the blue square changes to a red diamond; this to let you know that you can drag to convert this point into a Bézier point:
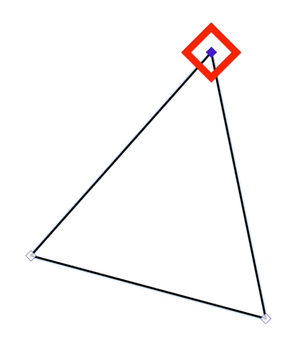
If you continue to touch and hold the top control point, the red diamond changes into a set of blue crosshairs; this to let you know that the control point is temporarily locked into position and you’re free to drag out the Bézier control bar.

Drag your finger to the right to convert the control point into a Bézier curve. A red Bézier control bar follows your finger as you drag it away from the control point.
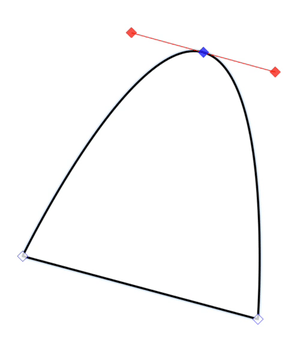
As mentioned earlier, all of this happens in the blink of an eye—okay, maybe two blinks—but it’s important to understand what’s happening here. For example, if all you wanted to do was grab a control point and drag it to alter the shape of the triangle, you would just have to wait for the blue triangle to appear over the point.
Convert the two remaining control points into Bézier curves. You should have something that looks like this:
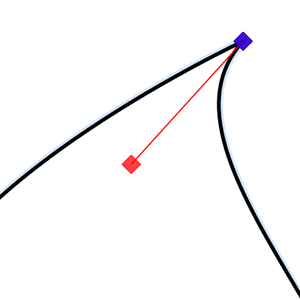
After converting all of the control points to Béziers, it kinda looks like an egg, but with a little work your freaky little circle will take form. Experiment with the different Bézier points on the circle:
Drag the Bézier handles in or outward to get the curvature of the leaf just right.
Double-tap between the existing control points to add more, if needed.
If you only need to adjust one side of the Bézier, first touch and hold one of the Bézier handles, and then touch and hold* somewhere else on the Canvas with another finger. That extra finger you’ve just added locks the Bézier curve’s control point so you can swing the other finger around to create angular or more oblique curves.

To create a sharp point with a curve on the other side, touch and hold one of the Bézier handles, and then touch and hold with another finger elsewhere on the Canvas to lock the control point. Now, with the finger that controls the Bézier handle, drag that inward to the control point. You’re left with a one-sided Bézier curve.
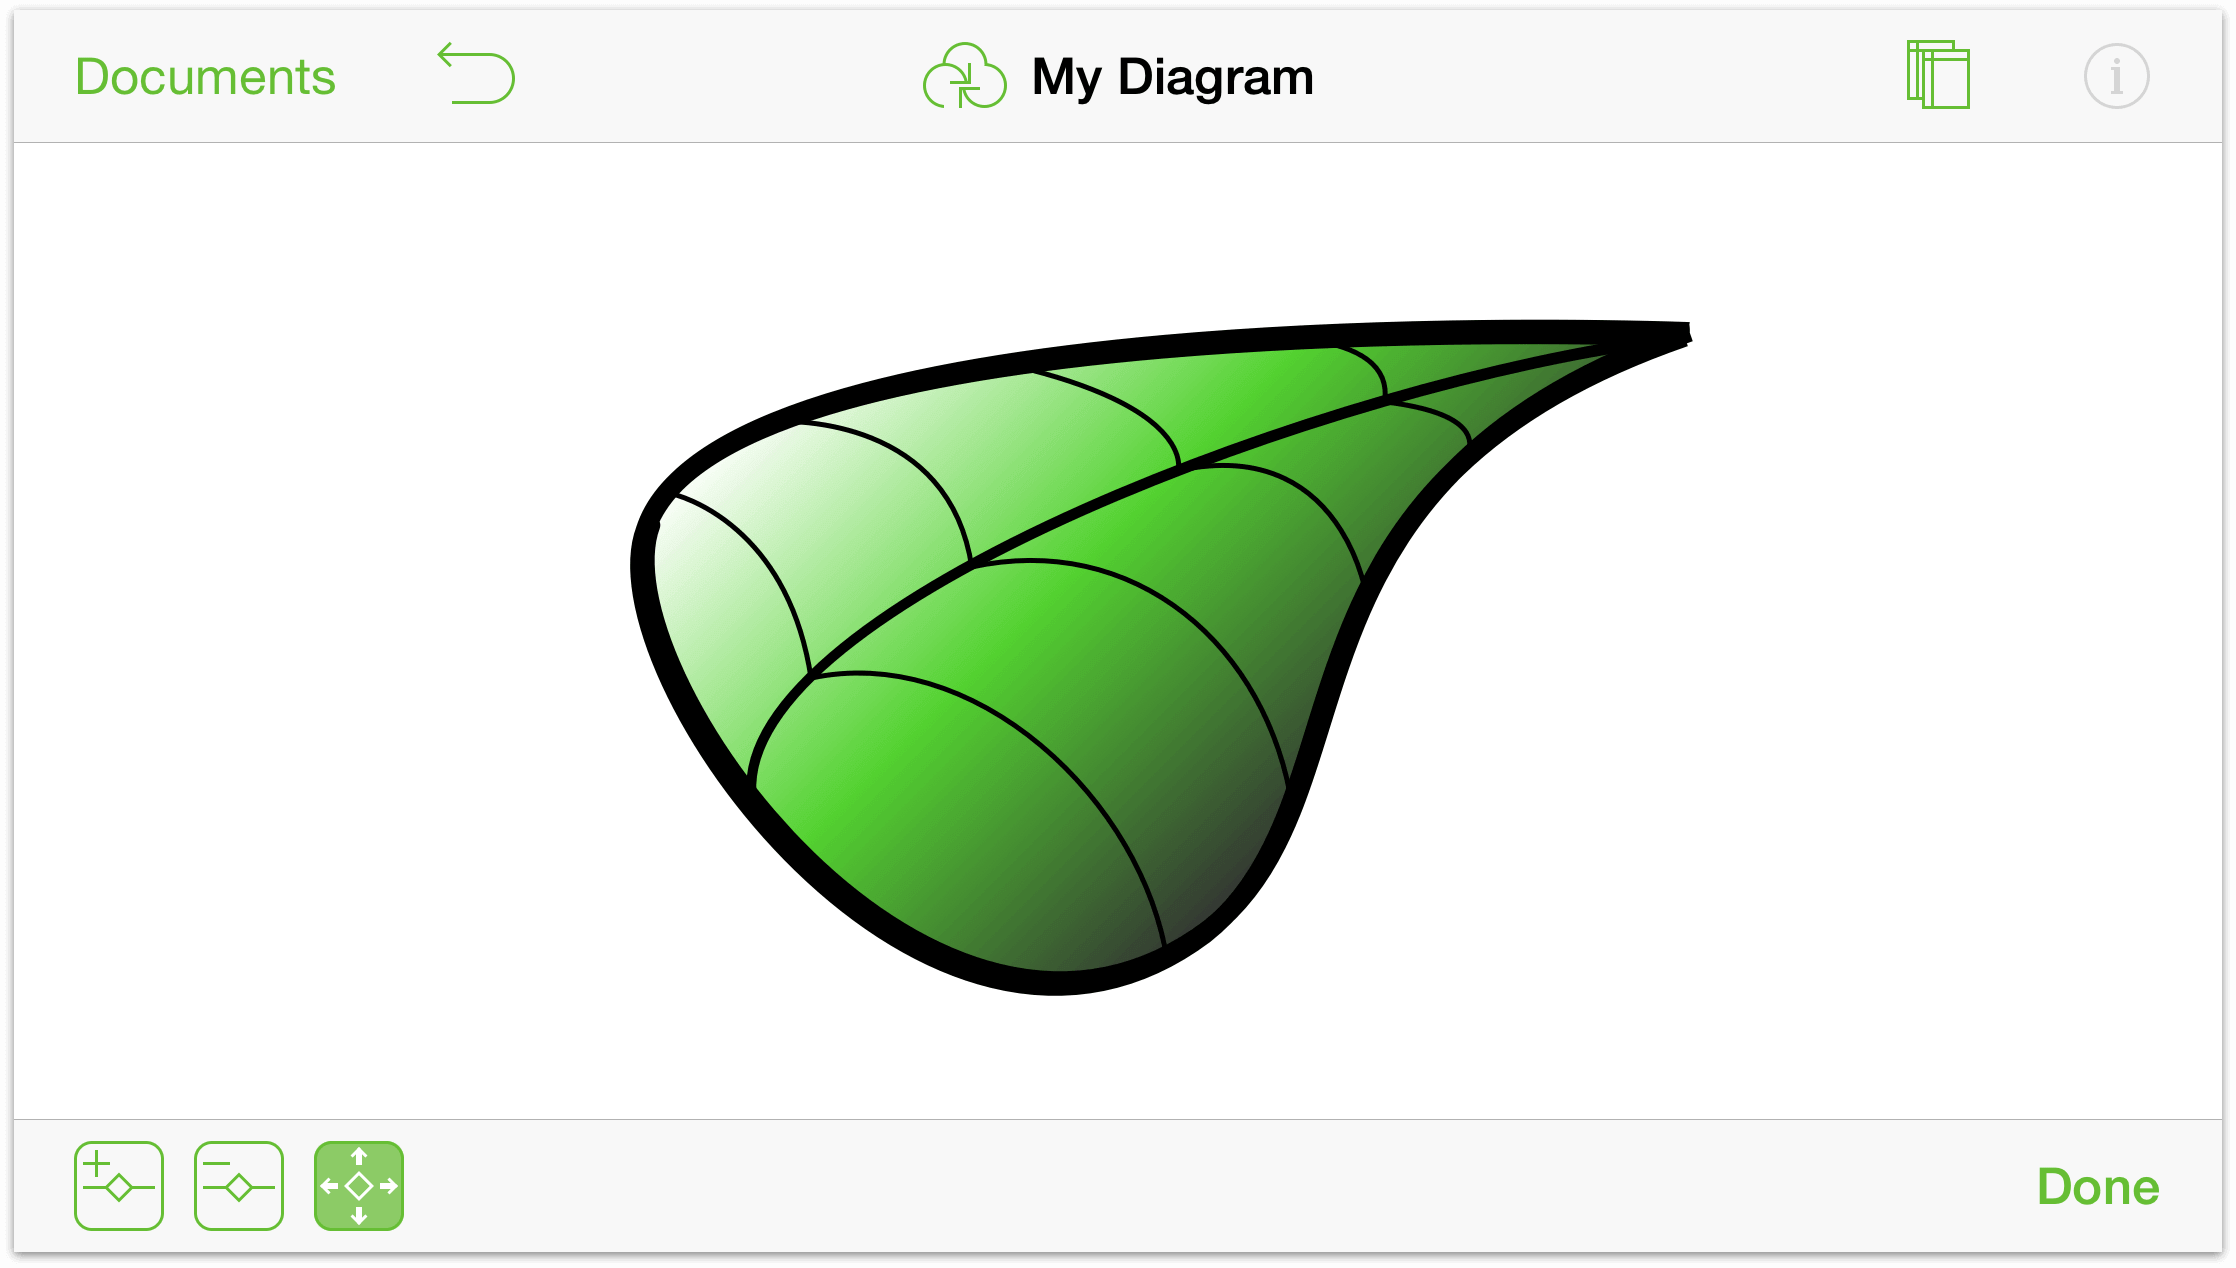
Finally, after a little work and by adding a few more lines, your leaf can look something like this:
Some of the tools and inspectors you’ll need include:
- Use the Connections inspector on the leaf edge to turn off all possible connections. This makes it so you can place the lines for the spine and veins wherever you need them to be.
- Use the Line tool to create the spine and veins.
- Use the Line inspector to remove endpoints from the lines.
- Use the Stroke inspector to vary the point size of the lines.
- Use the Stroke inspector to change the style of the leaf edge to Freehand.
- Use the Fill inspector to apply a double linear gradient to the leaf.
- Use pinch gestures to zoom in and out on the Canvas while placing the spine and veins of the leaf.
And, if you create something really cool that you think other OmniGraffle users could enjoy, don’t forget that you can submit it as a stencil to Stenciltown.
Interacting with Objects Using the Actions Tool (Pro)
Actions allow you to assign interactions between objects in your OmniGraffle documents. Actions do things, such as open a URL or hide a layer or canvas when an object clicked. This makes OmniGraffle a powerful tool for prototyping website and app designs, where you want to show interactions between different elements.
This section just shows you the basics of how Actions work in OmniGraffle. A more detailed tutorial on using OmniGraffle’s actions will be coming later this year.
Let’s get started...
Types of Actions
There are four actions you can set on an object:
 Does Nothing: As the name of this action implies, when assigned, tapping or clicking this object does nothing. This is the same as not setting an action on an object (an object’s default state), except that you might find the need to assign a non-action to, for example, the background for a website that you are prototyping.
 Opens a URL: Allows you to set a URL to open when this object is tapped or clicked.
 Jumps Elsewhere: Allows you to determine whether an object will take you to another canvas when tapped or clicked.
 Shows or Hides Layers: Allows you to set the visibility of a layer when this object is tapped or clicked.
And when you assign an action to an object, that object gets a little badge that lets other OmniGraffle users know that they can tap on the object and have it do something:
 — Tapping an object with this badge opens the assigned URL in Safari on iOS, or in the user’s default browser on Mac.
 — Tapping an object with this badge switches to the designated canvas within the same document.
 — Tapping an object with this badge hides or shows the designated layer on the same canvas.
After assigning an action to an object, it doesn’t really look any different, which can make you wonder later which objects have which action. Fortunately for you, we have added a way for you to see these badges:
 — Tapping this button reveals the action badges assigned to objects on the canvas.
 — Tapping this button hides the action badges assigned to objects on the canvas.
Taking Actions for a Spin
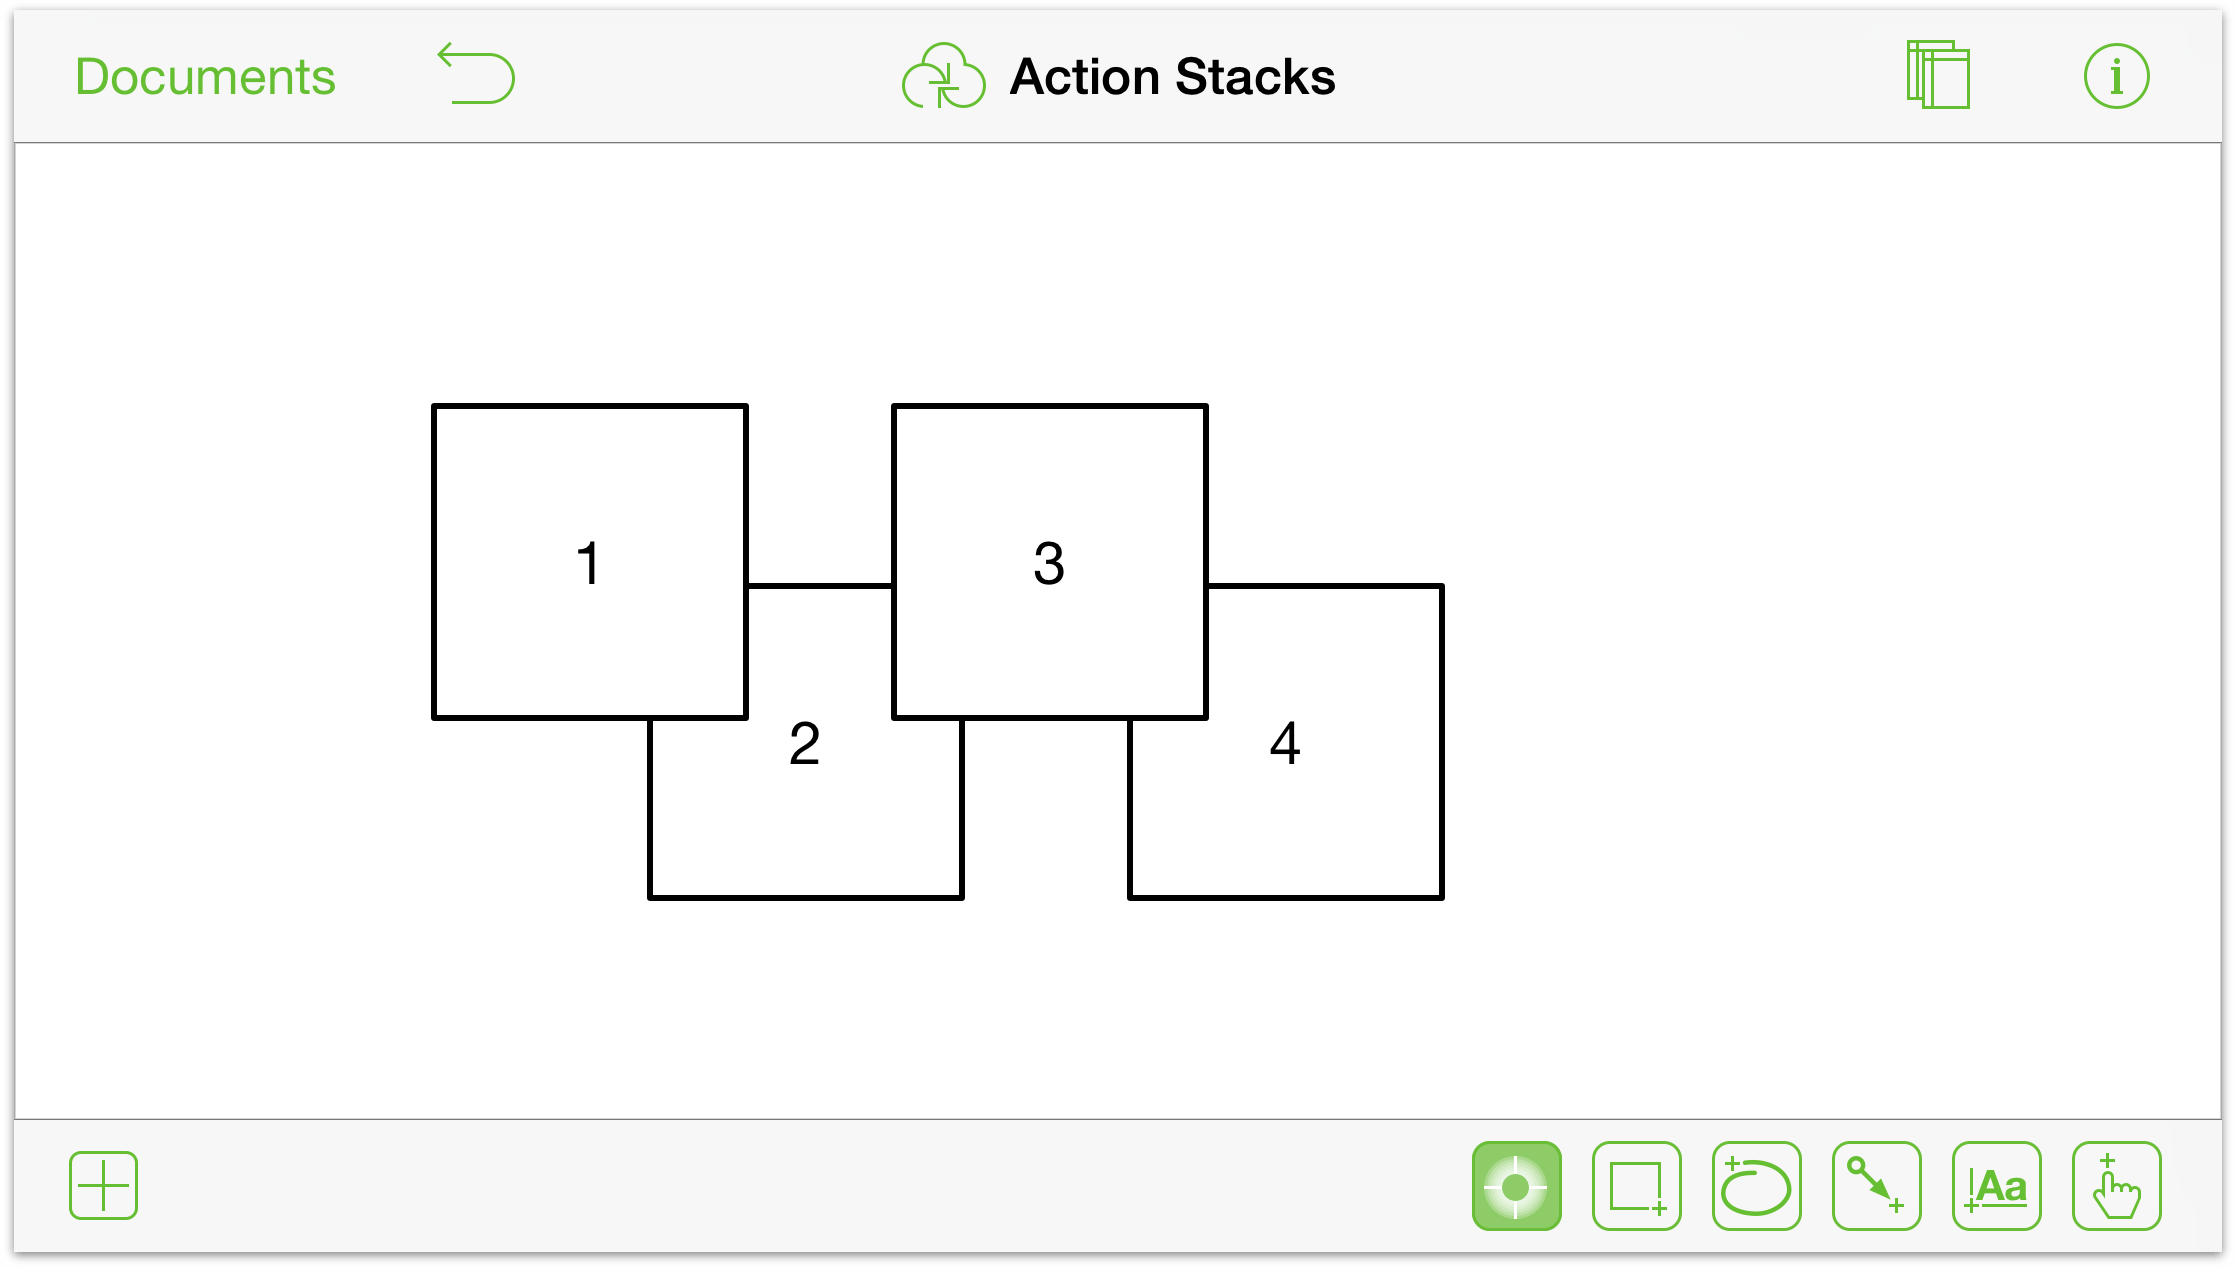
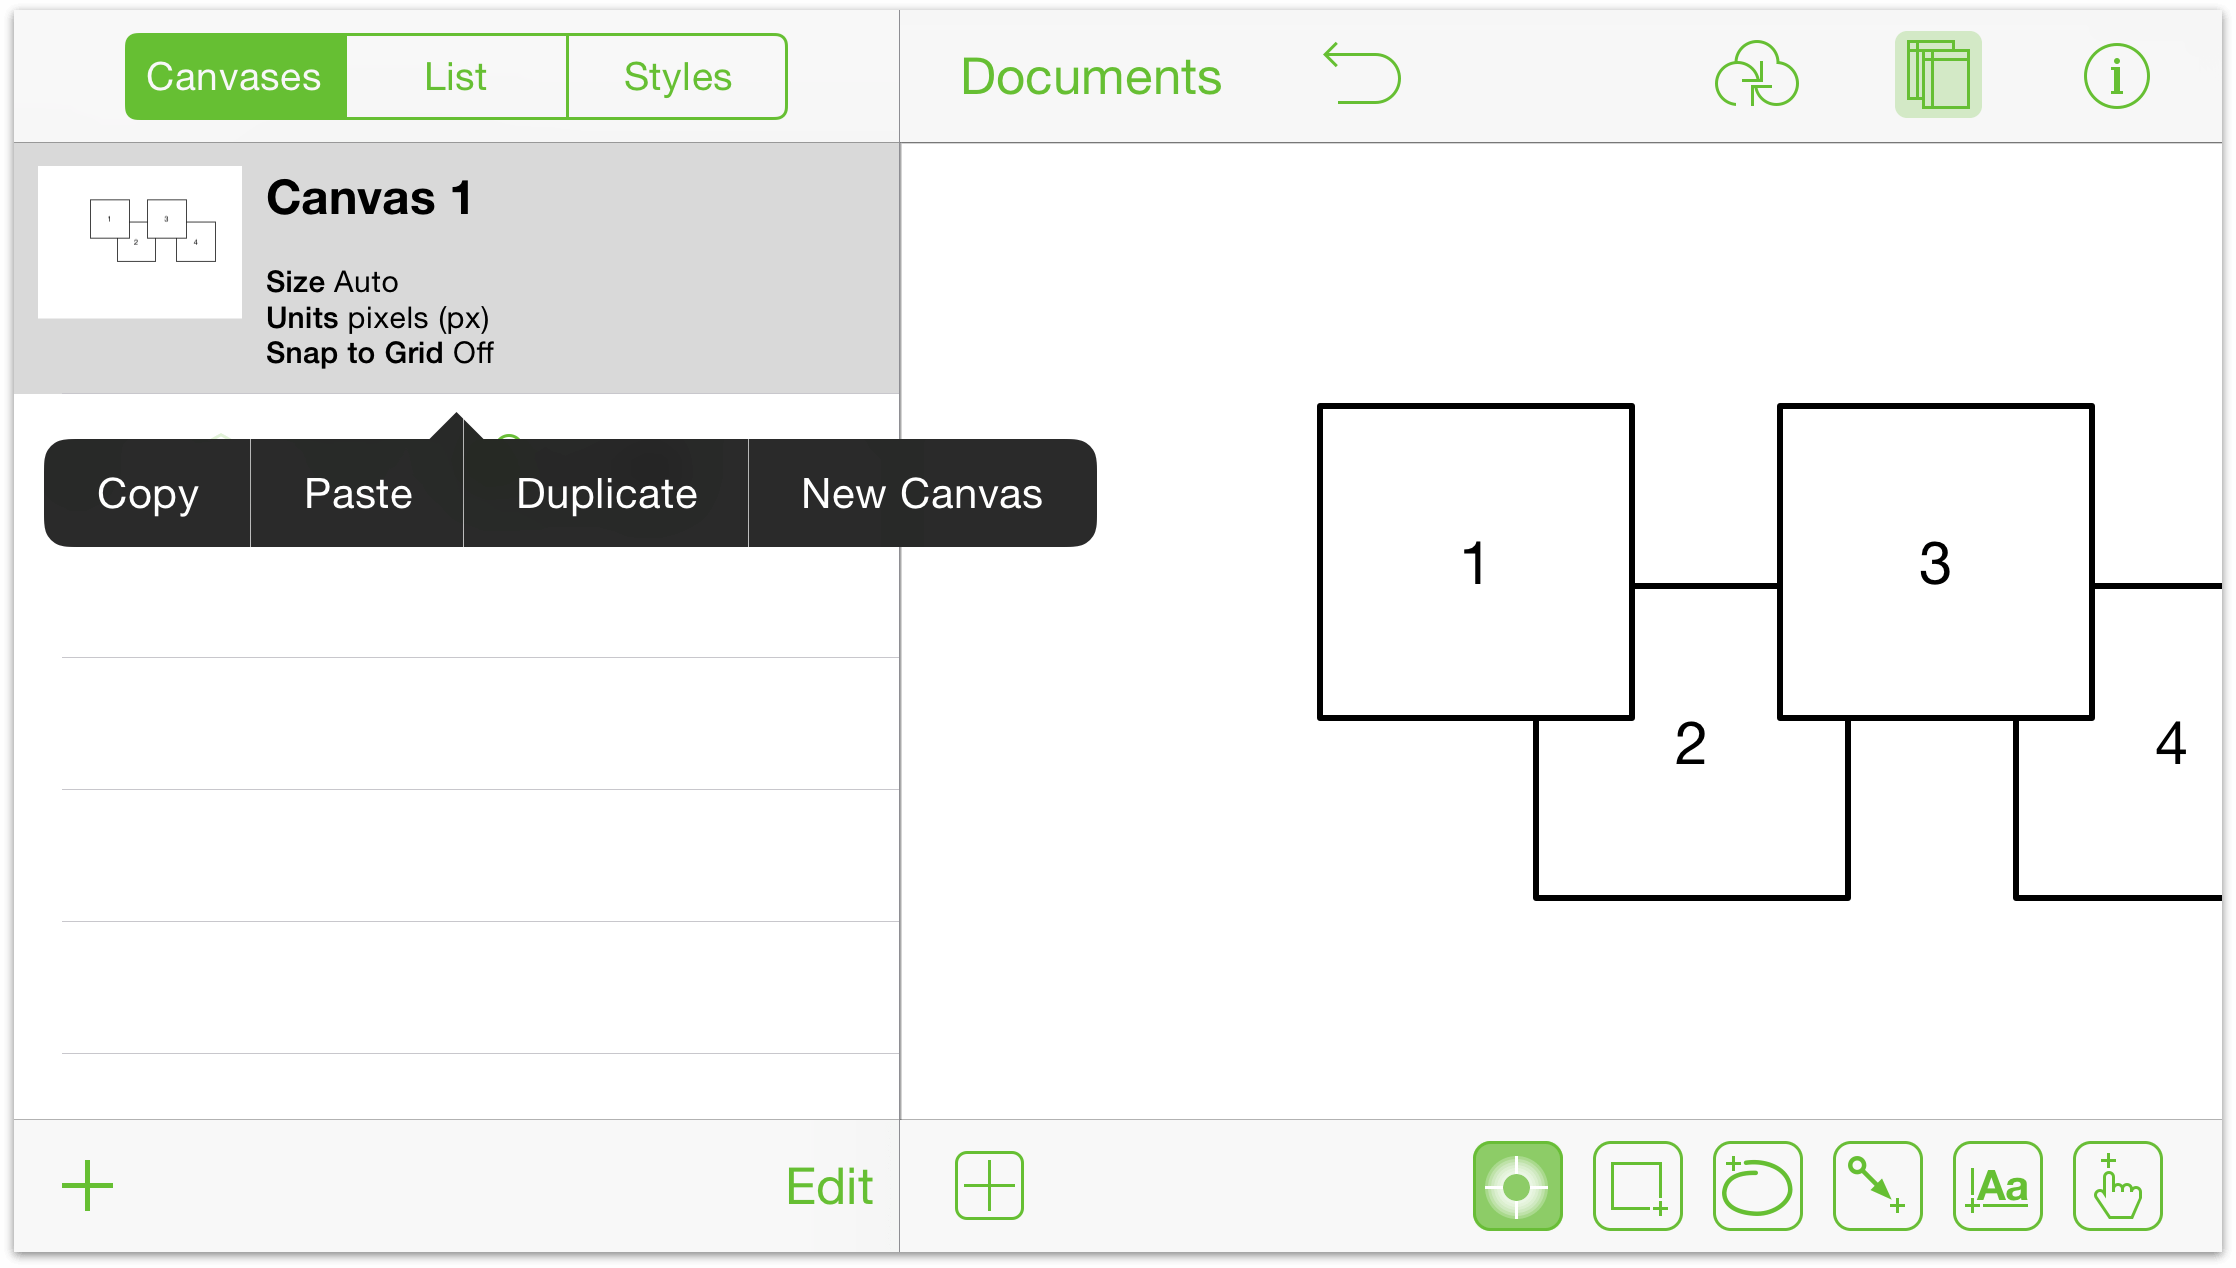
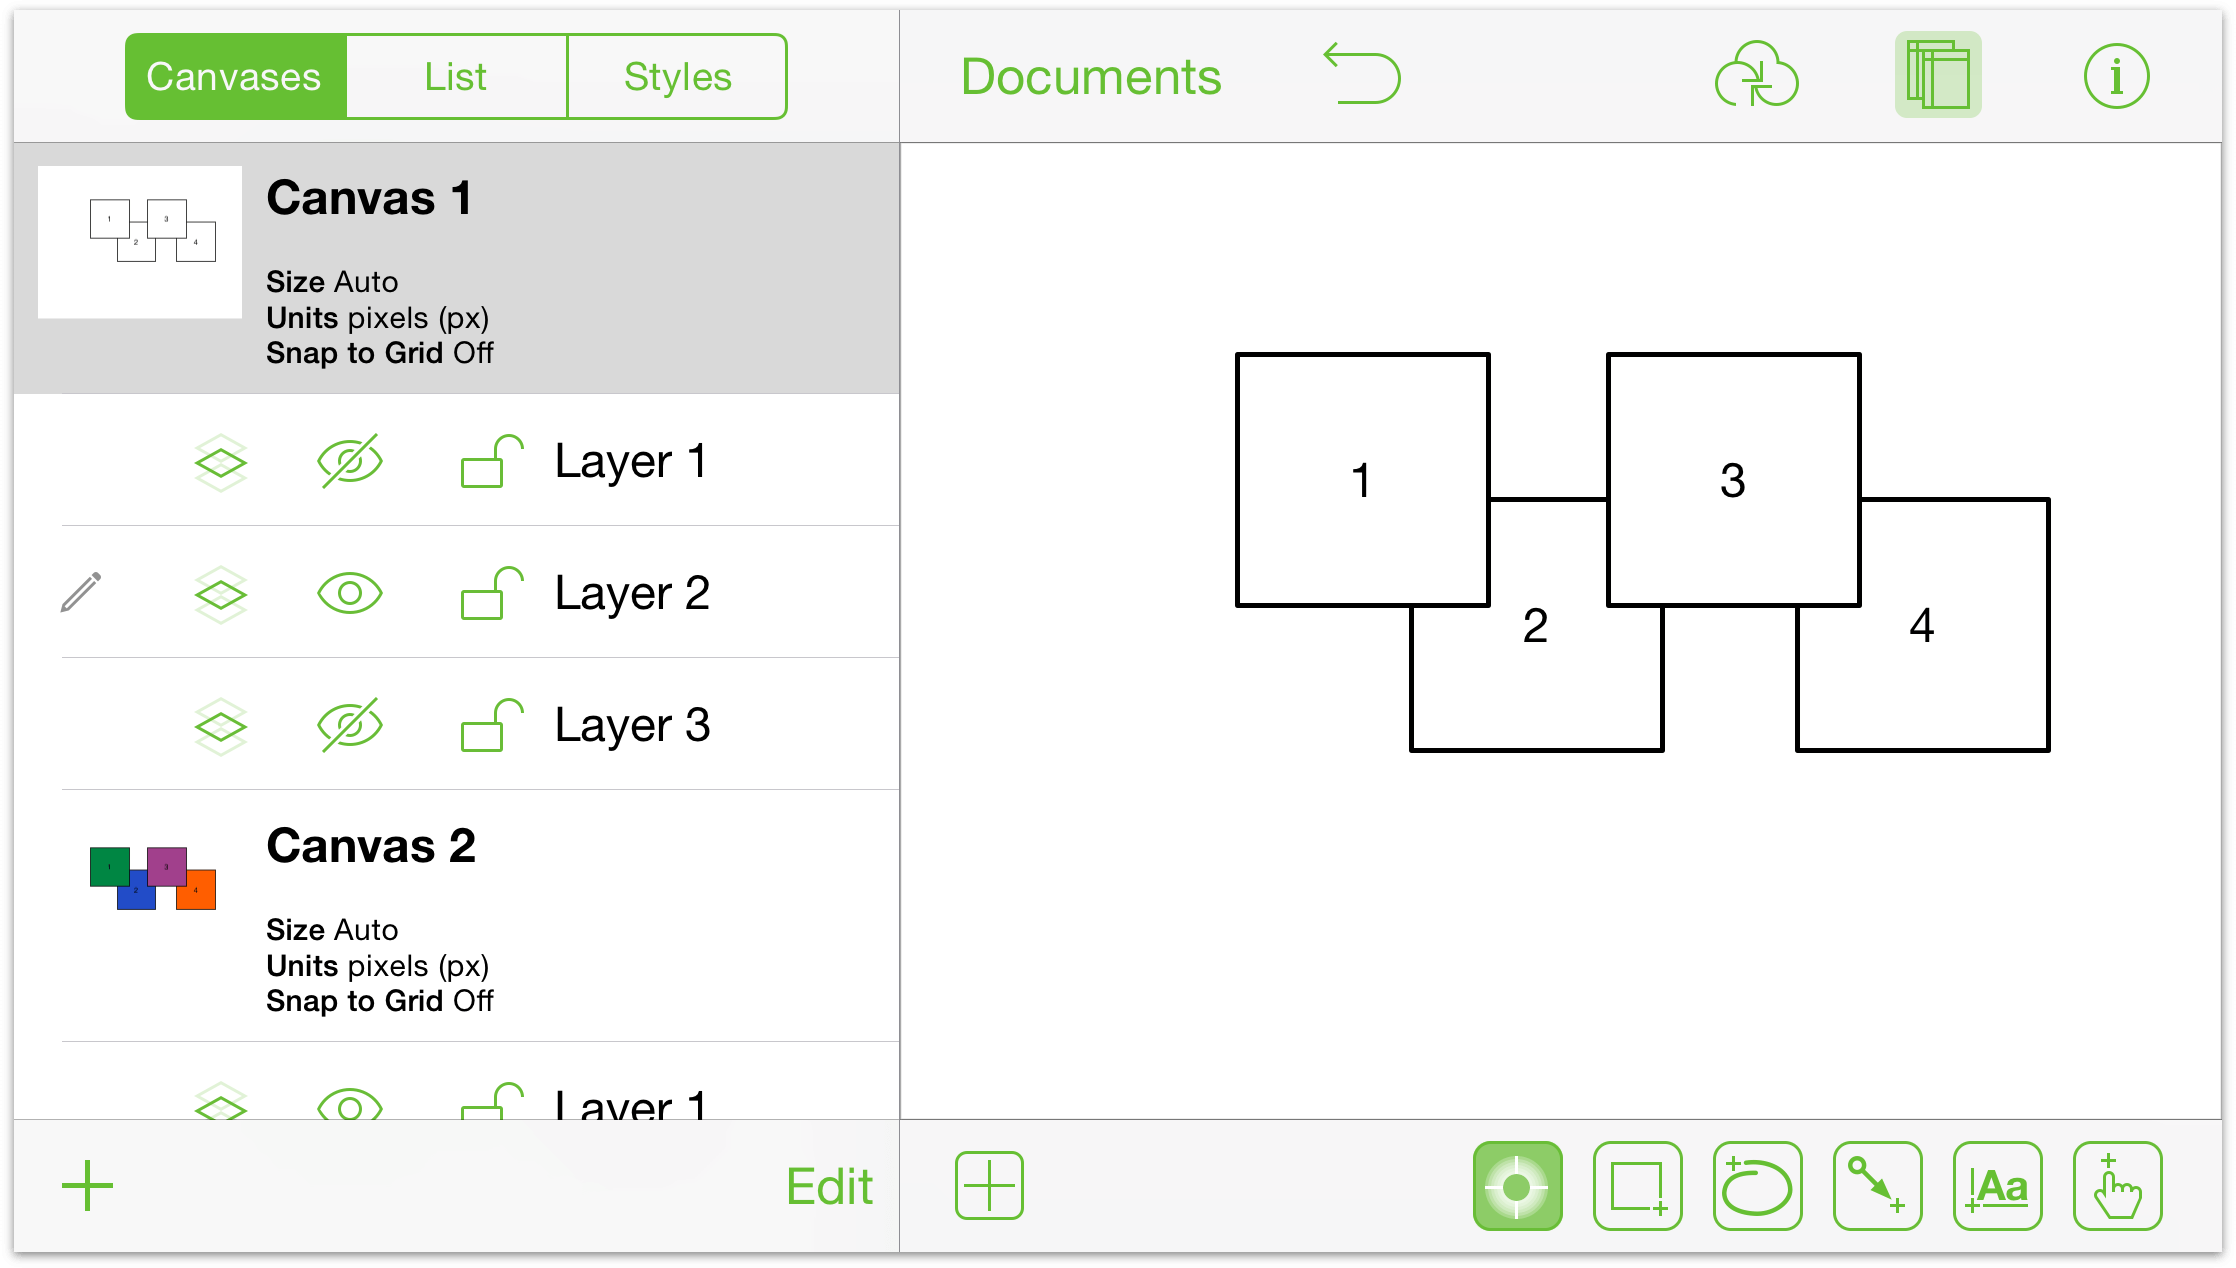
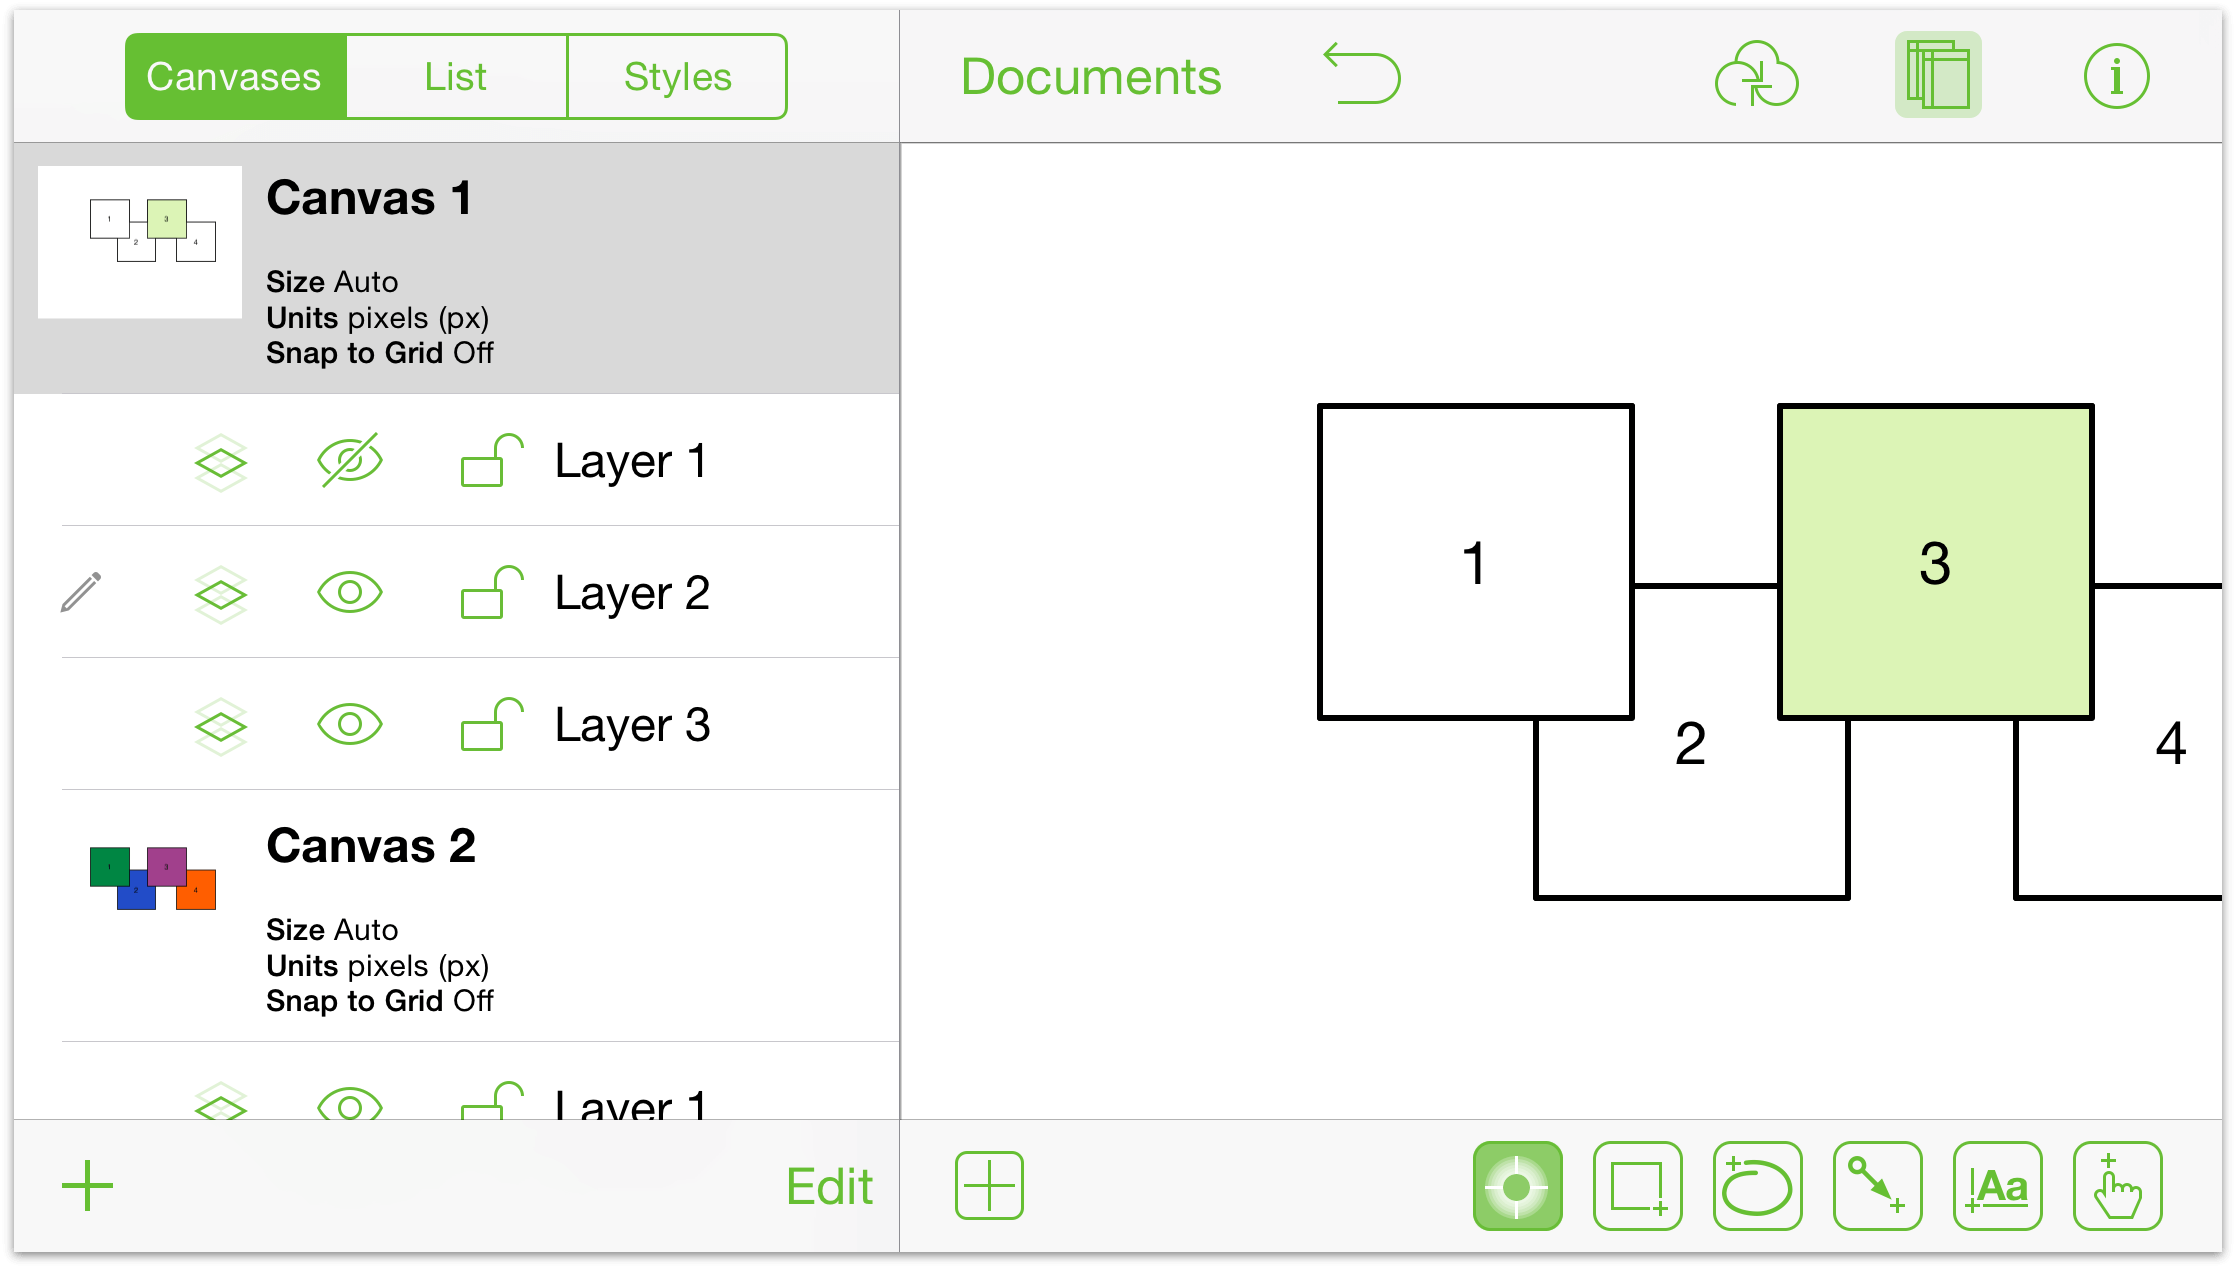
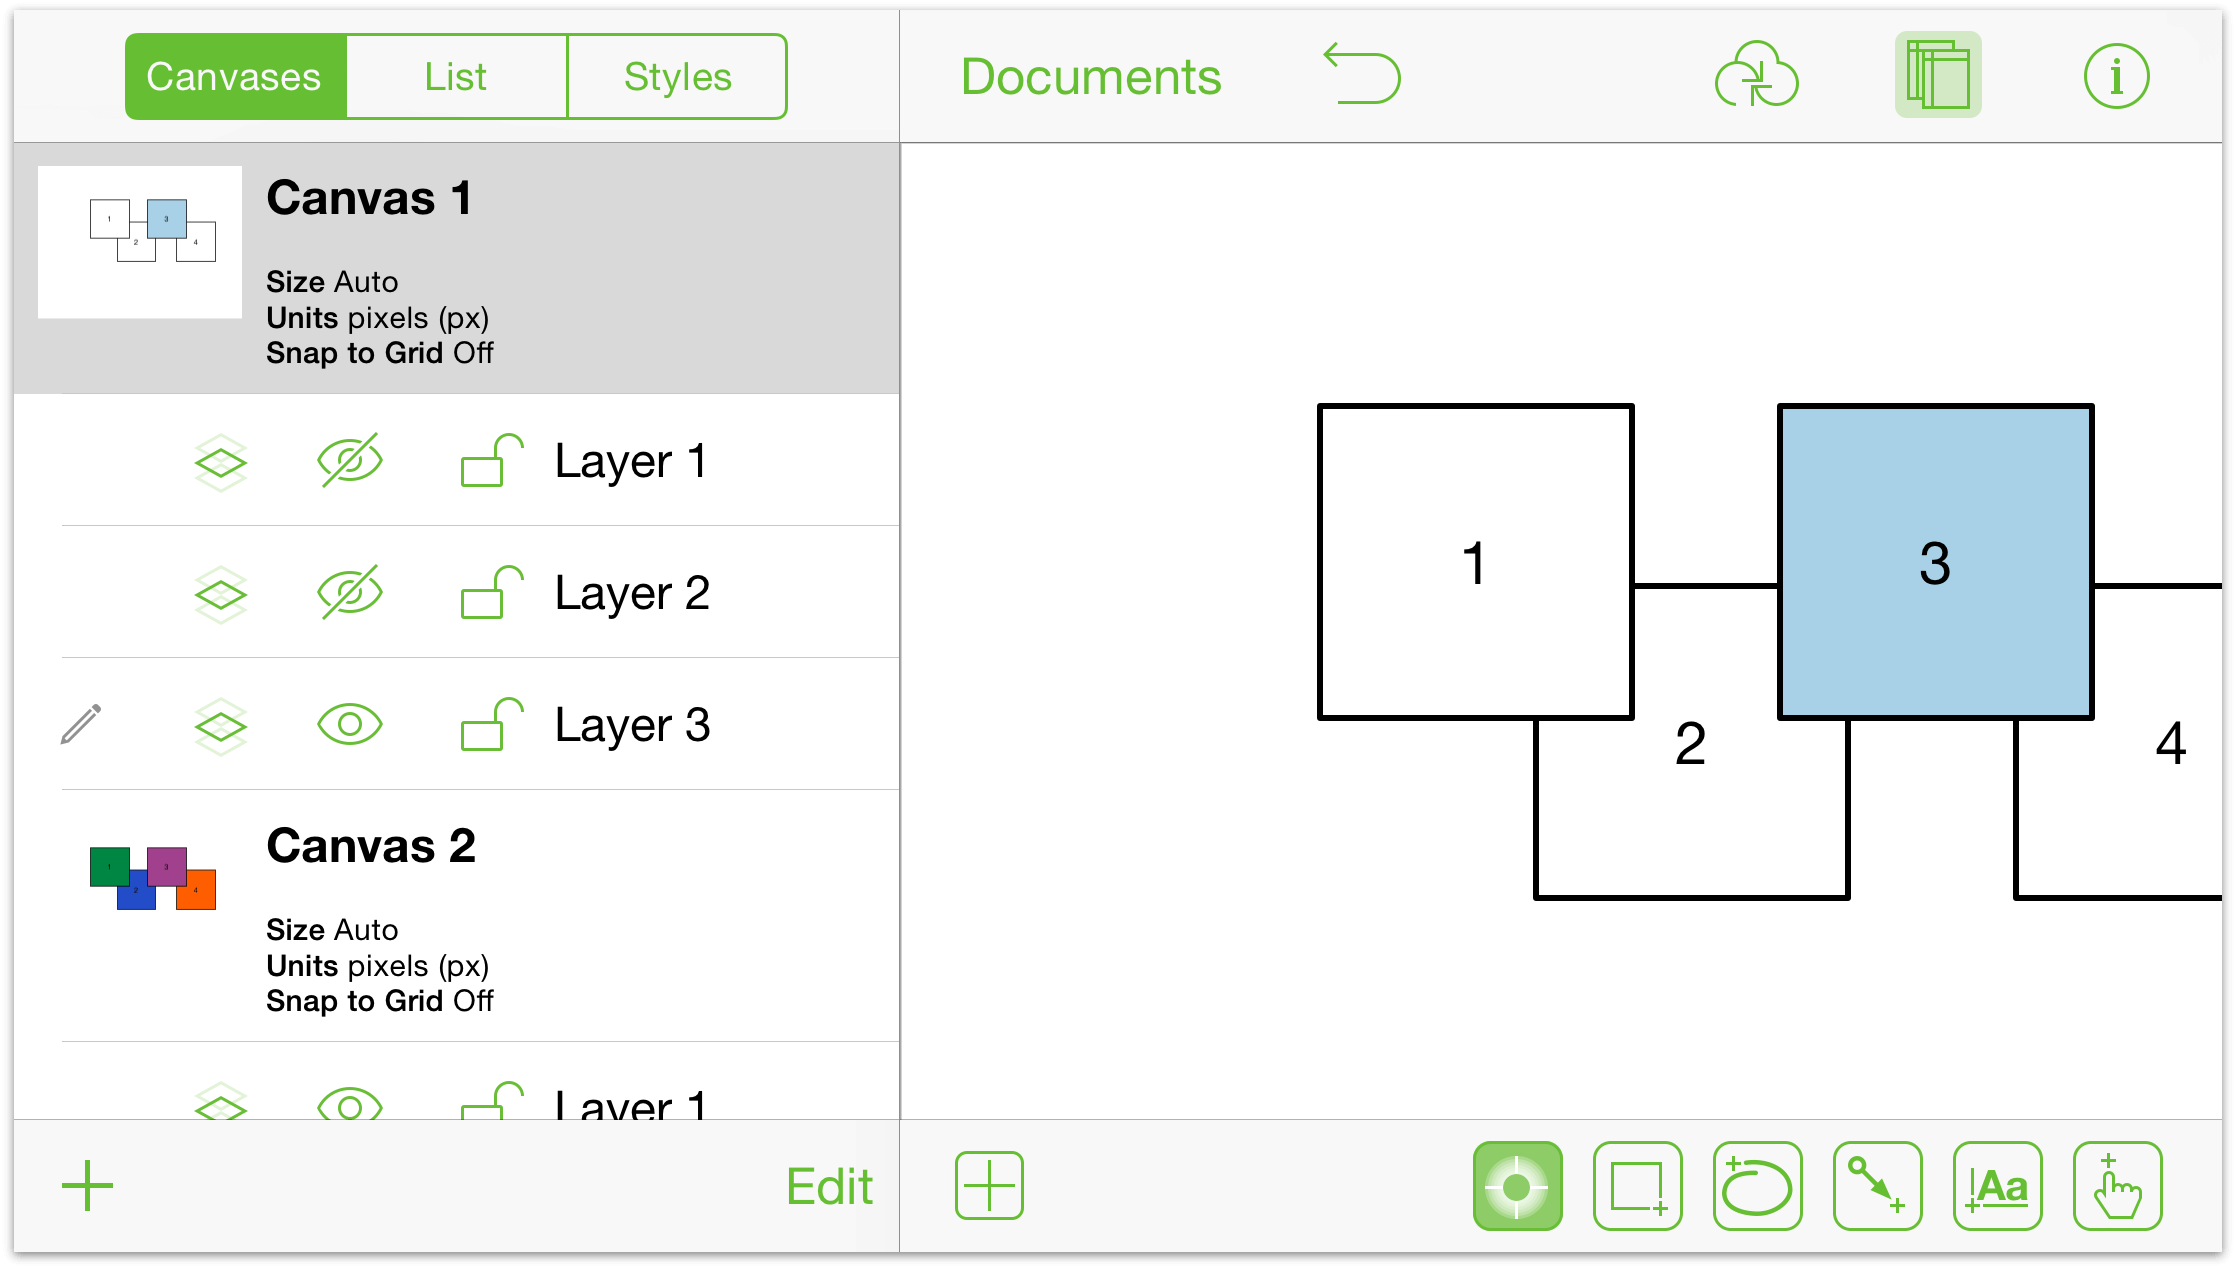
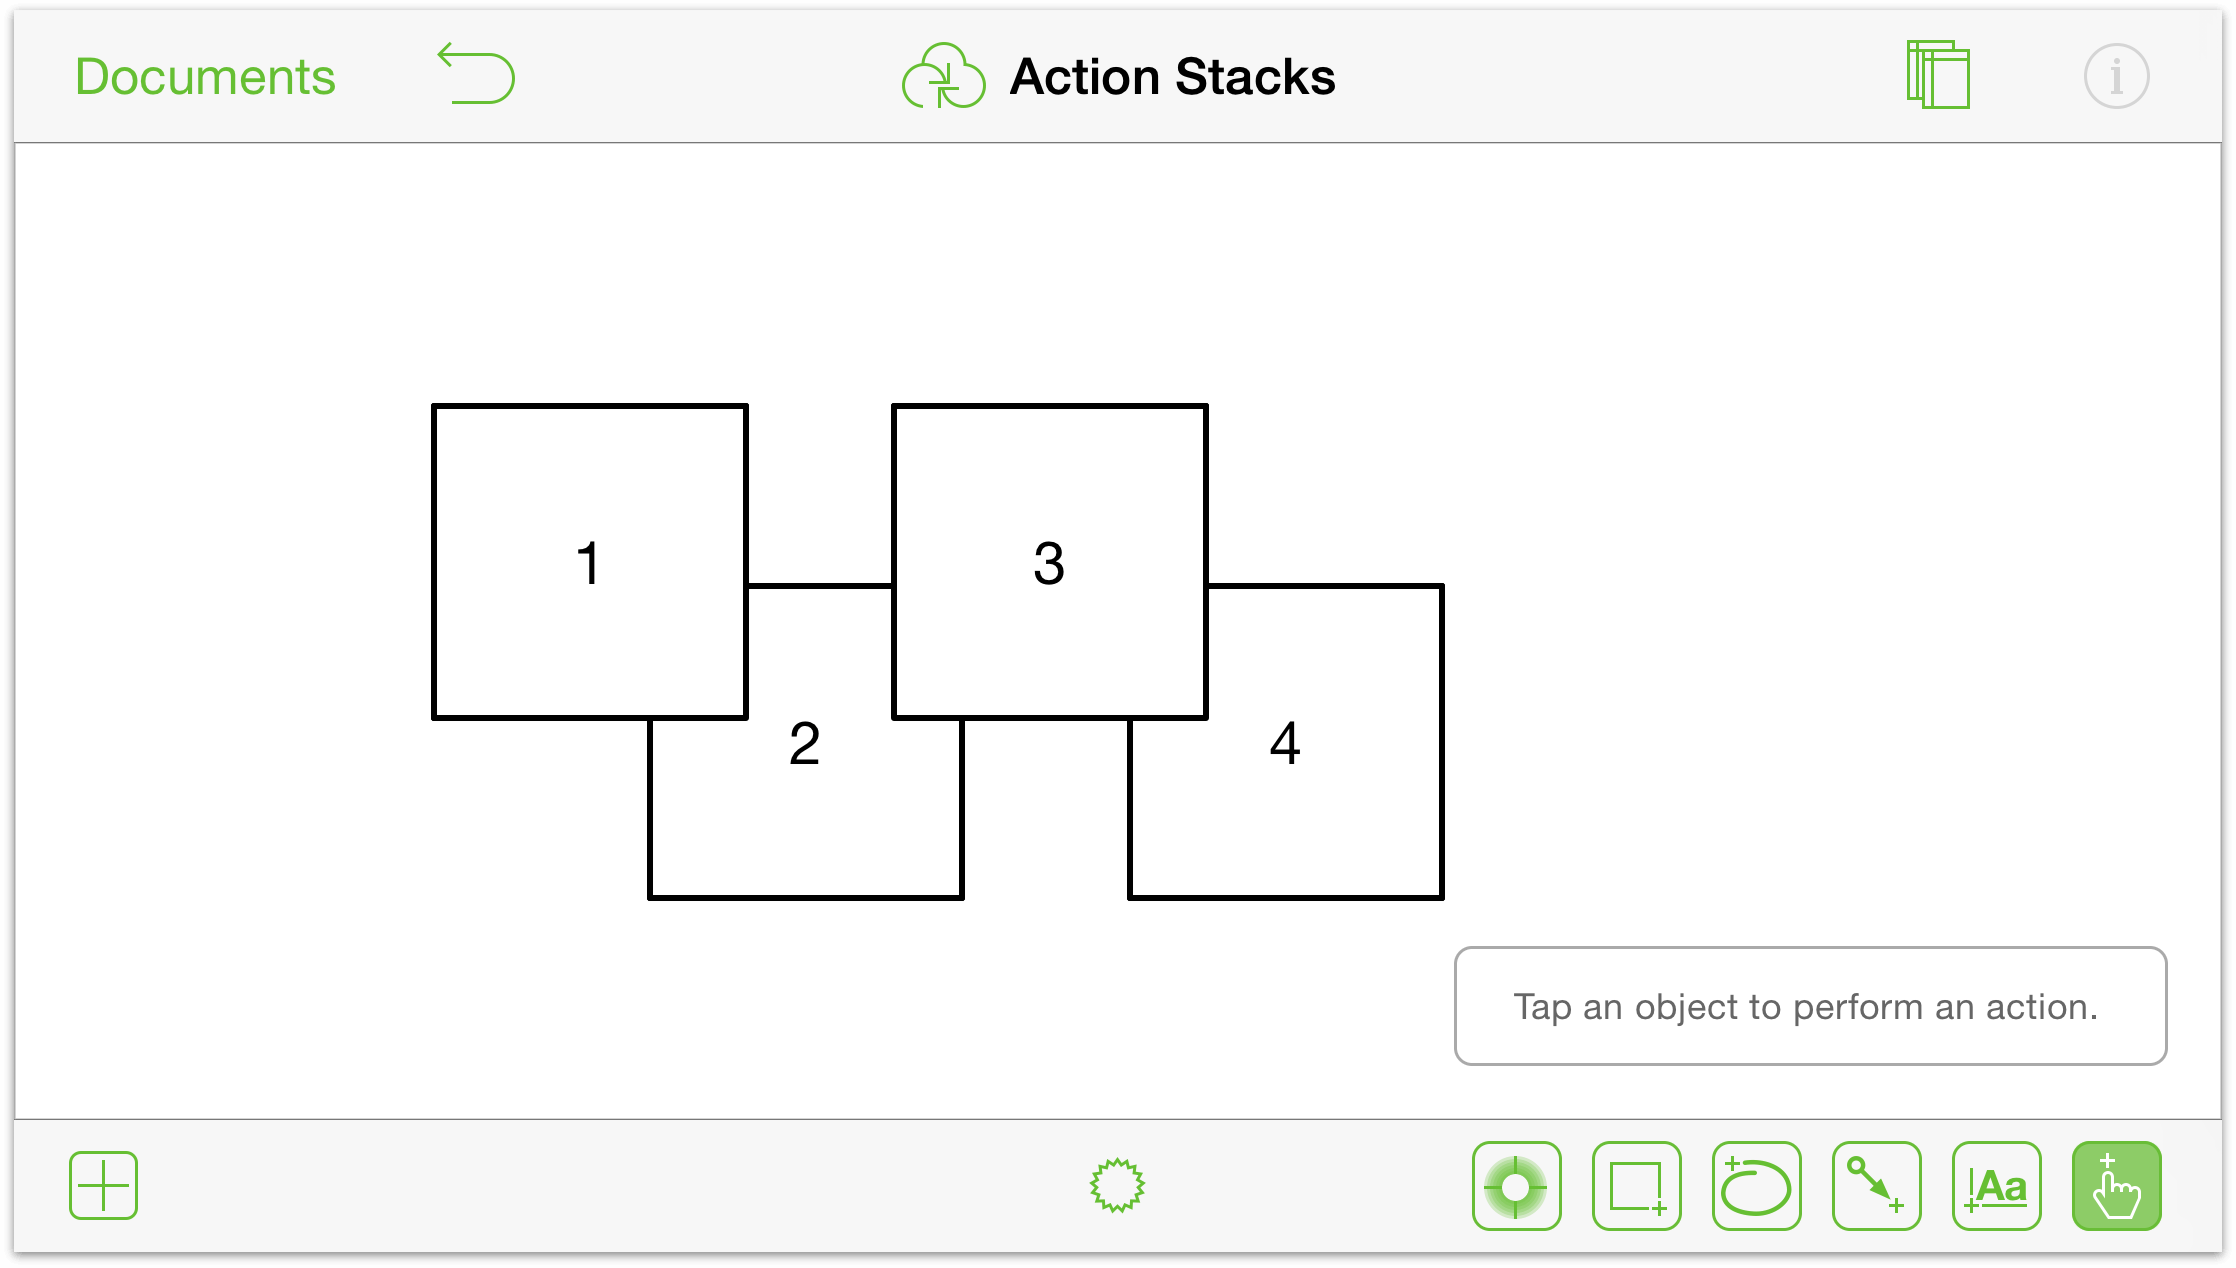
To test these out, start by drawing a single square and then place three additional copies of the square on the canvas in an offset pattern. Then, add labels to each square, numbering them from 1 to 4, such as this:
To help illustrate how Actions work, there’s some additional setup; follow these steps:
- If the Canvases sidebar isn’t open, tap

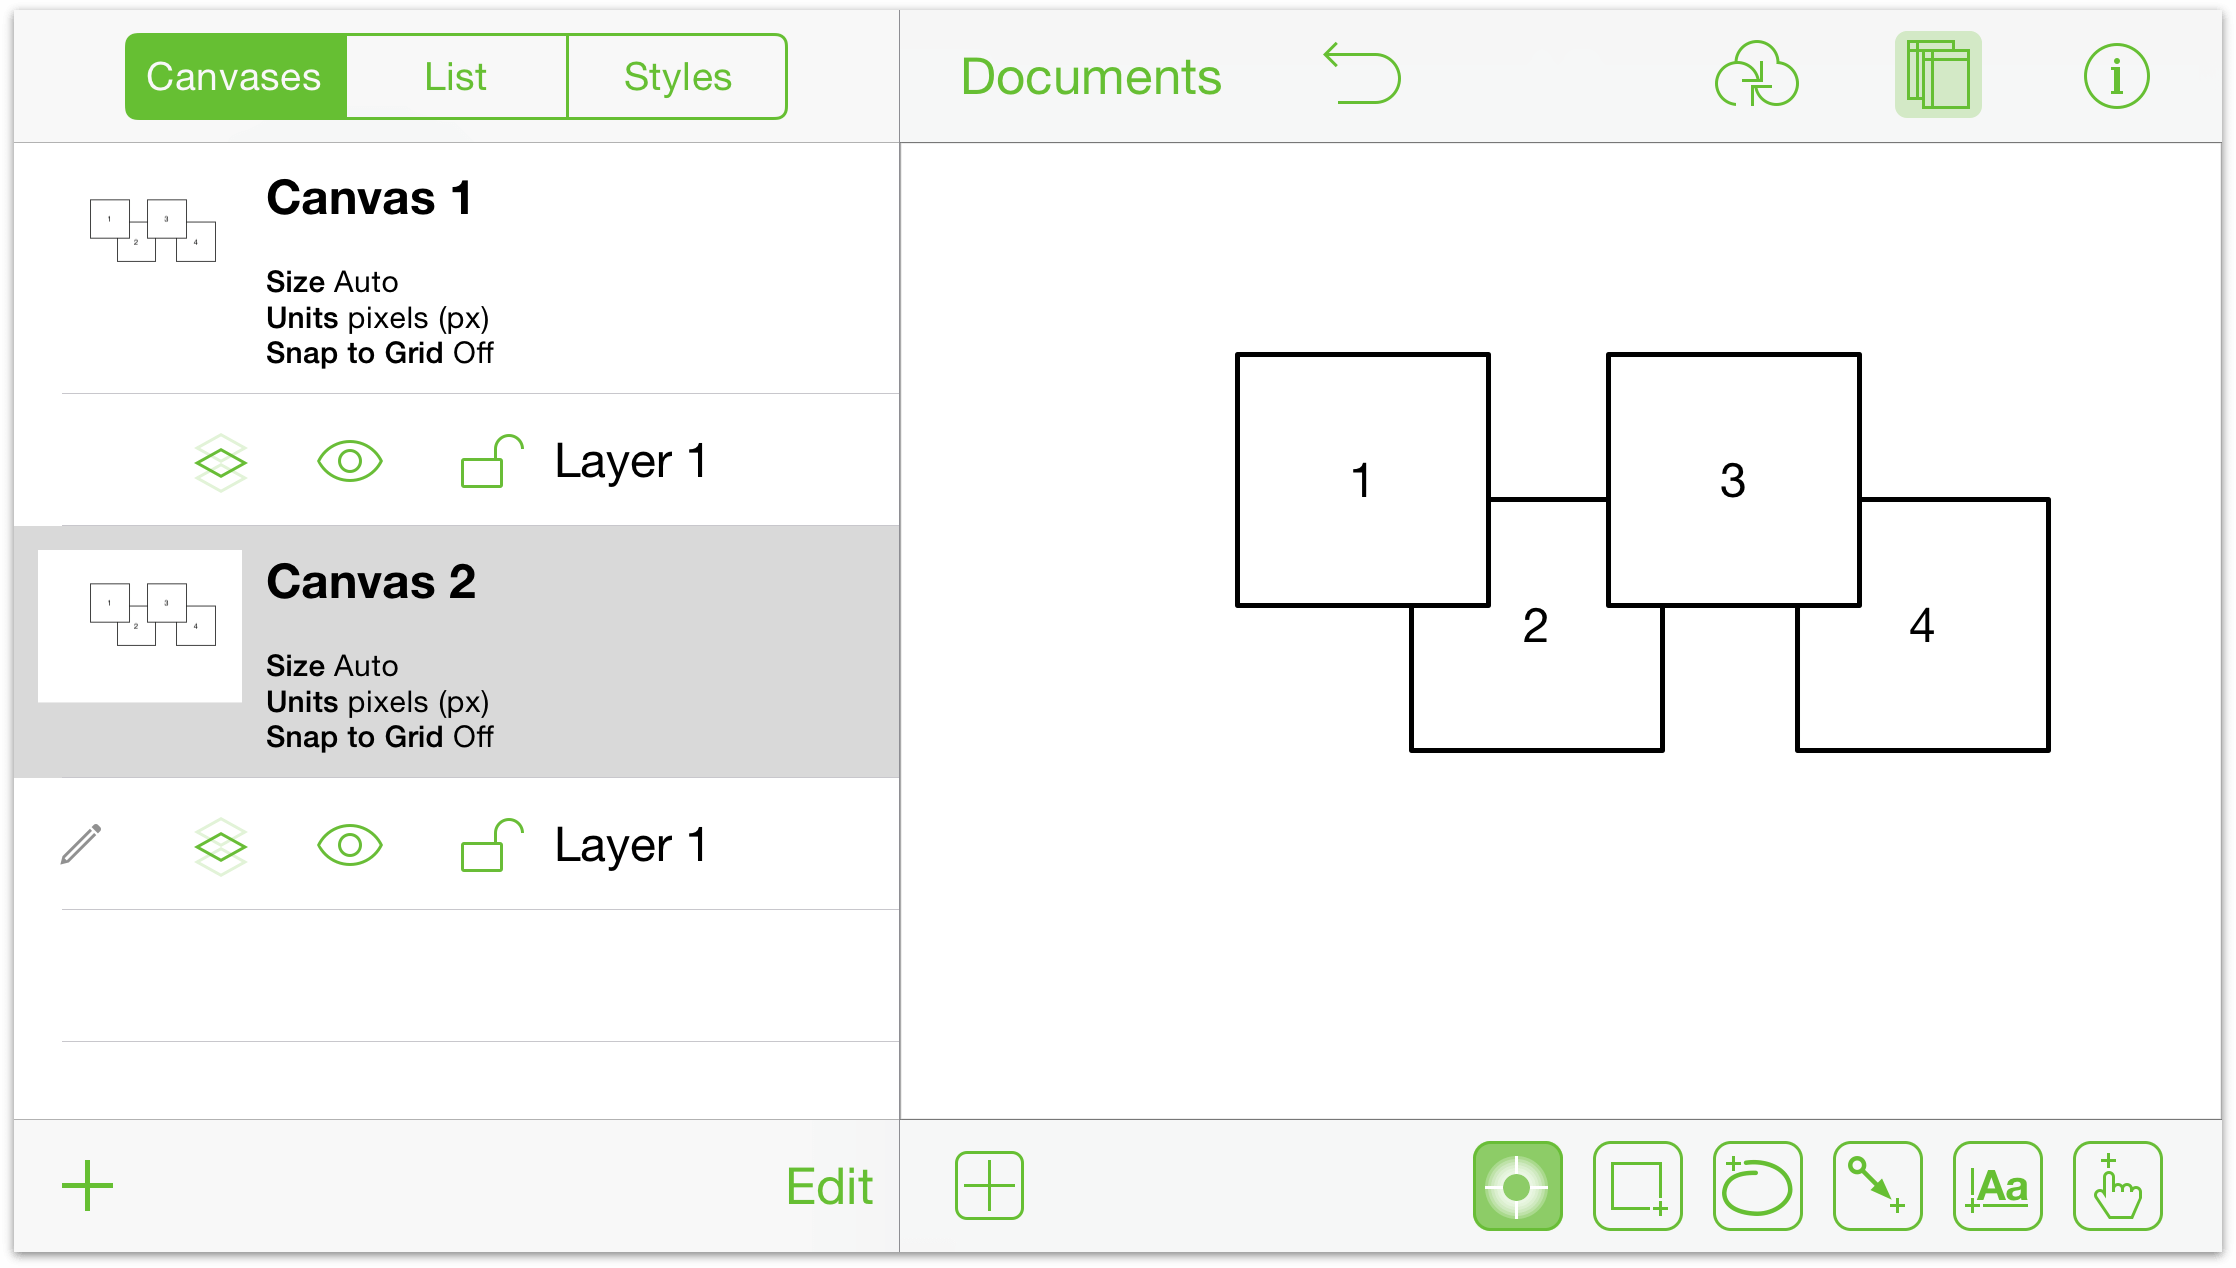
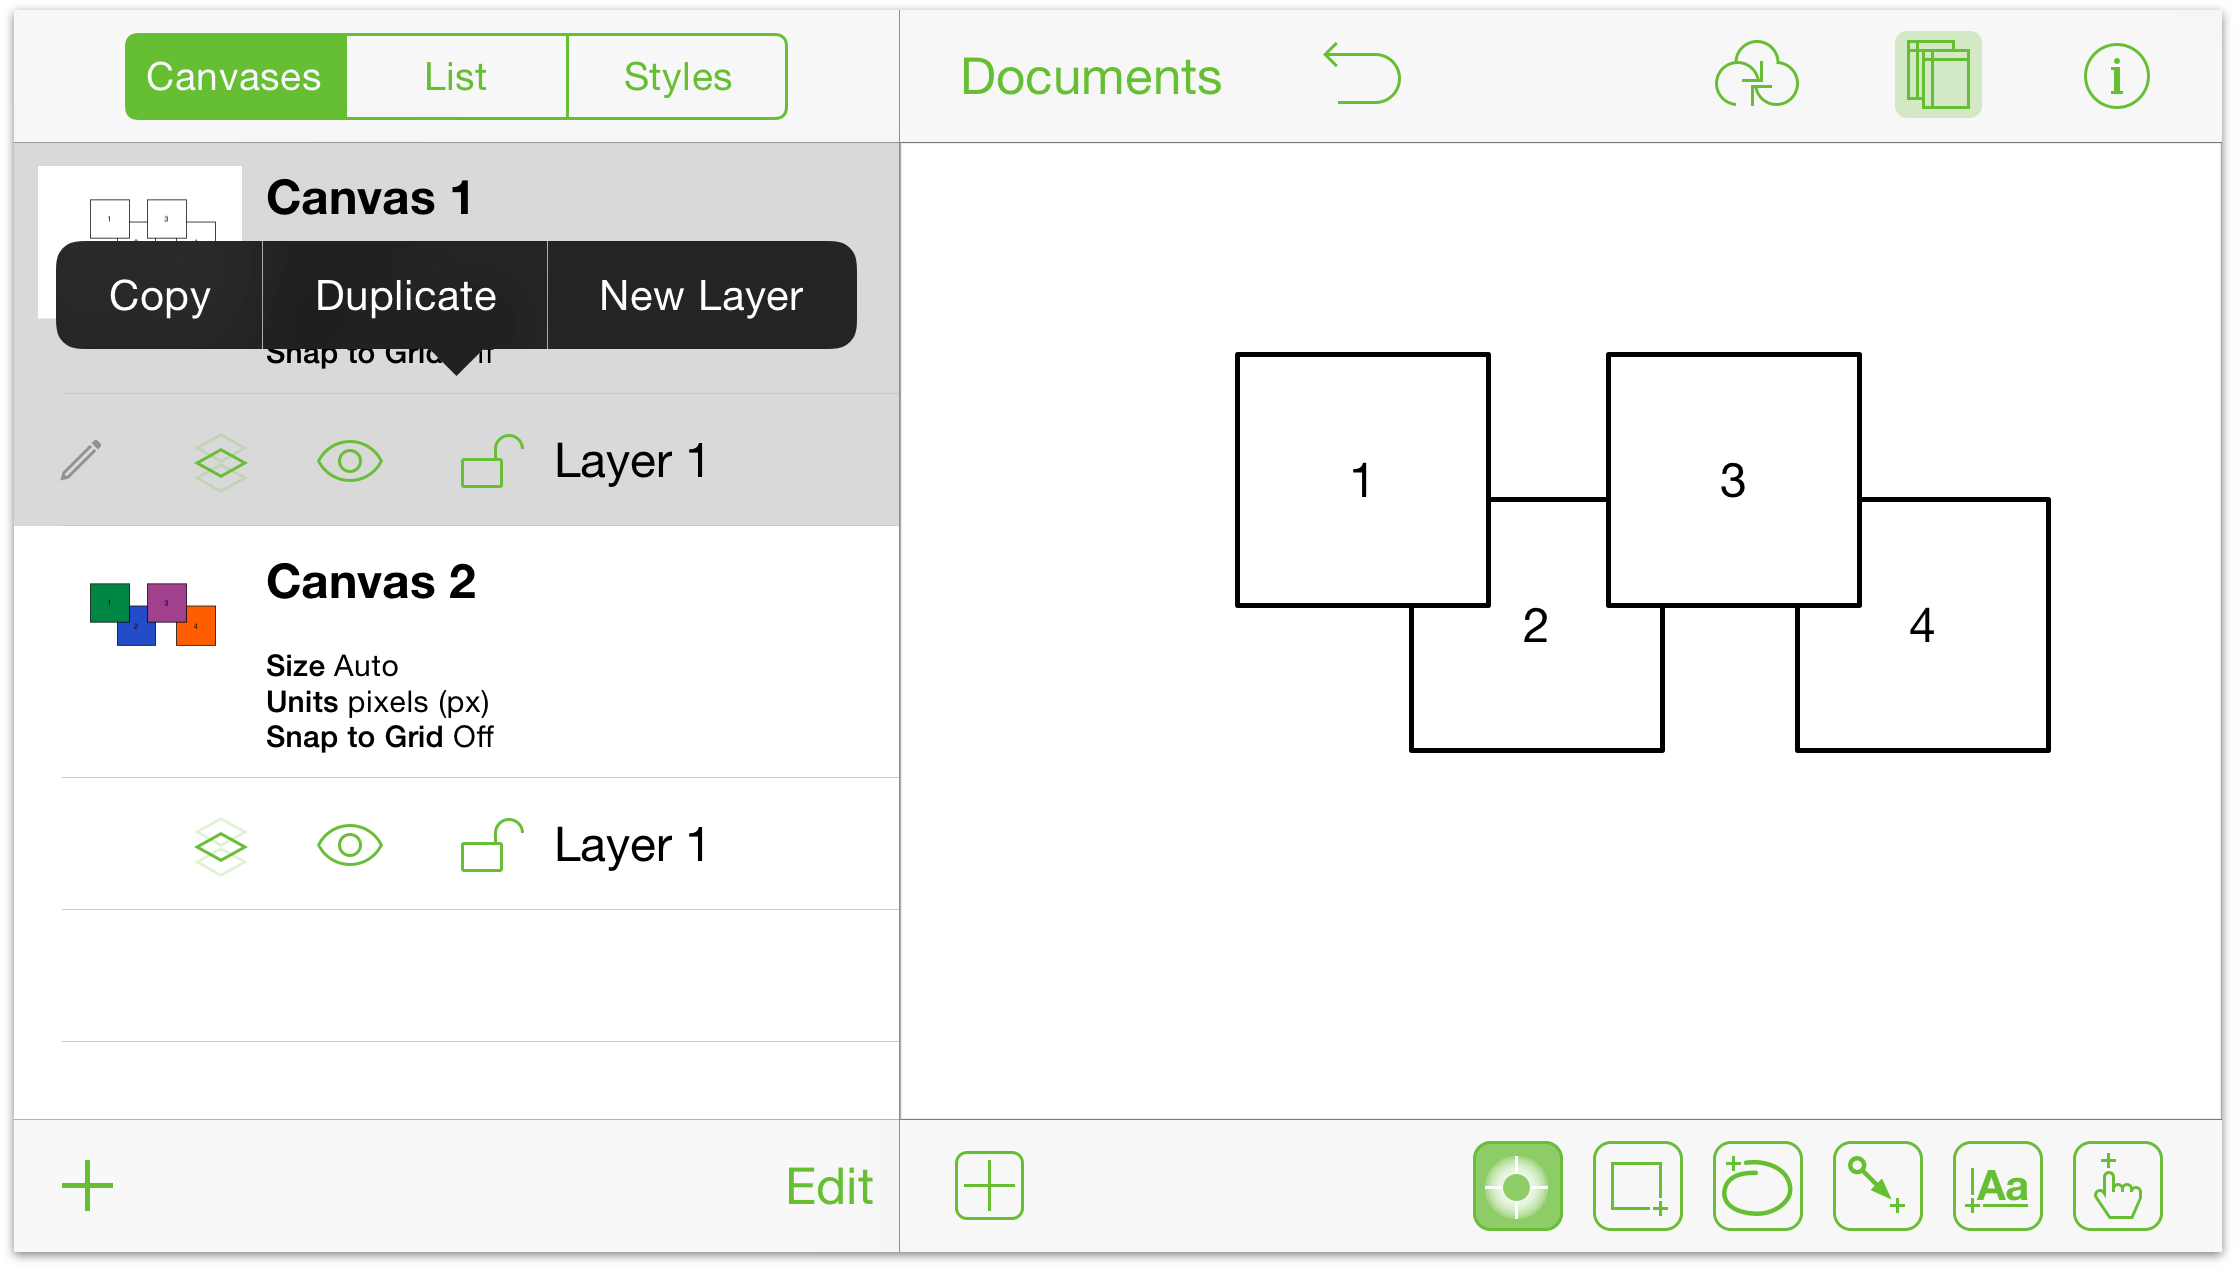
- Touch and hold on Canvas 1 to open its contextual menu; then tap Duplicate.
This places an exact copy of the four squares onto another canvas (named Canvas 2).
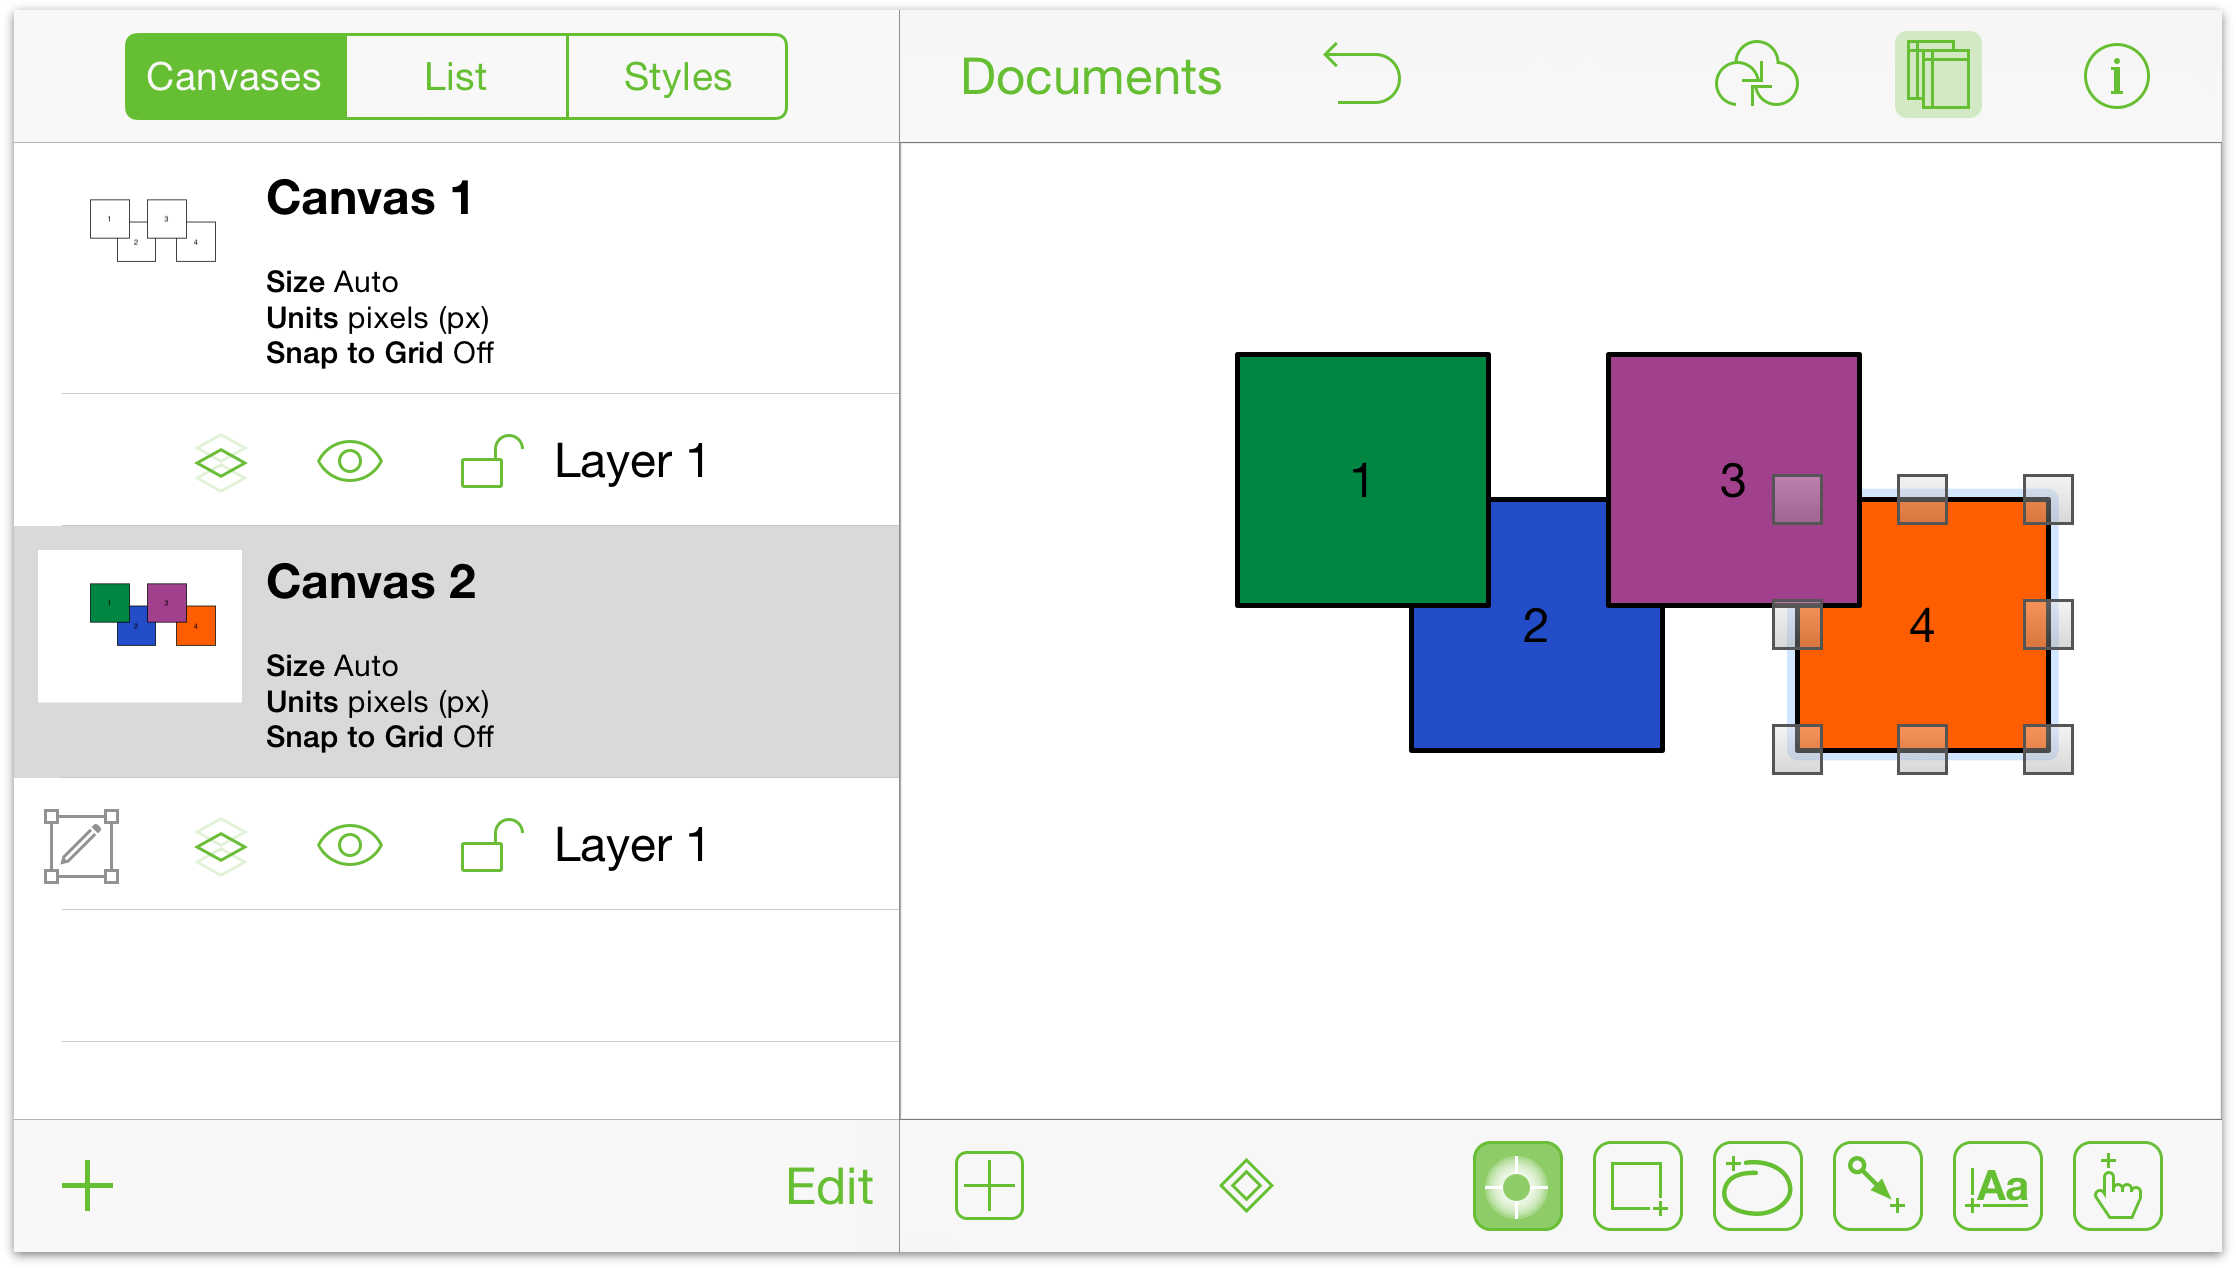
- Use the Fill inspector to assign colors to each of the four squares on Canvas 2:
- Tap on Canvas 1, and then tap and hold on Layer 1 to open its contextual menu:
Duplicate Layer 1 twice, and then reorder the layers so they appear in numerical order:

- Hide Layers 1 and 3 by tapping to the left of the layer name.
- Tap to select Layer 2
- Tap to select the third square, and give it a fill color using the Fill inspector:
- Hide Layer 2, and make Layer 3 visibile by tapping their respective layer visibility buttons . As with the previous step, assign a fill color of your choice to the third square.
- Finally, tap to select Layer 1 and then make Layers 1 and 2 visible again by tapping their respective buttons.
With the diagram set up, now it’s time to assign some Actions to these squares.
- Box 1: Tap to select Box 1, and then tap
 to open the inspectors:
- In the list of inspectors, tap Actions, and then tap Opens a URL.
- Enter a URL for your favorite website in the field that appears; for example:
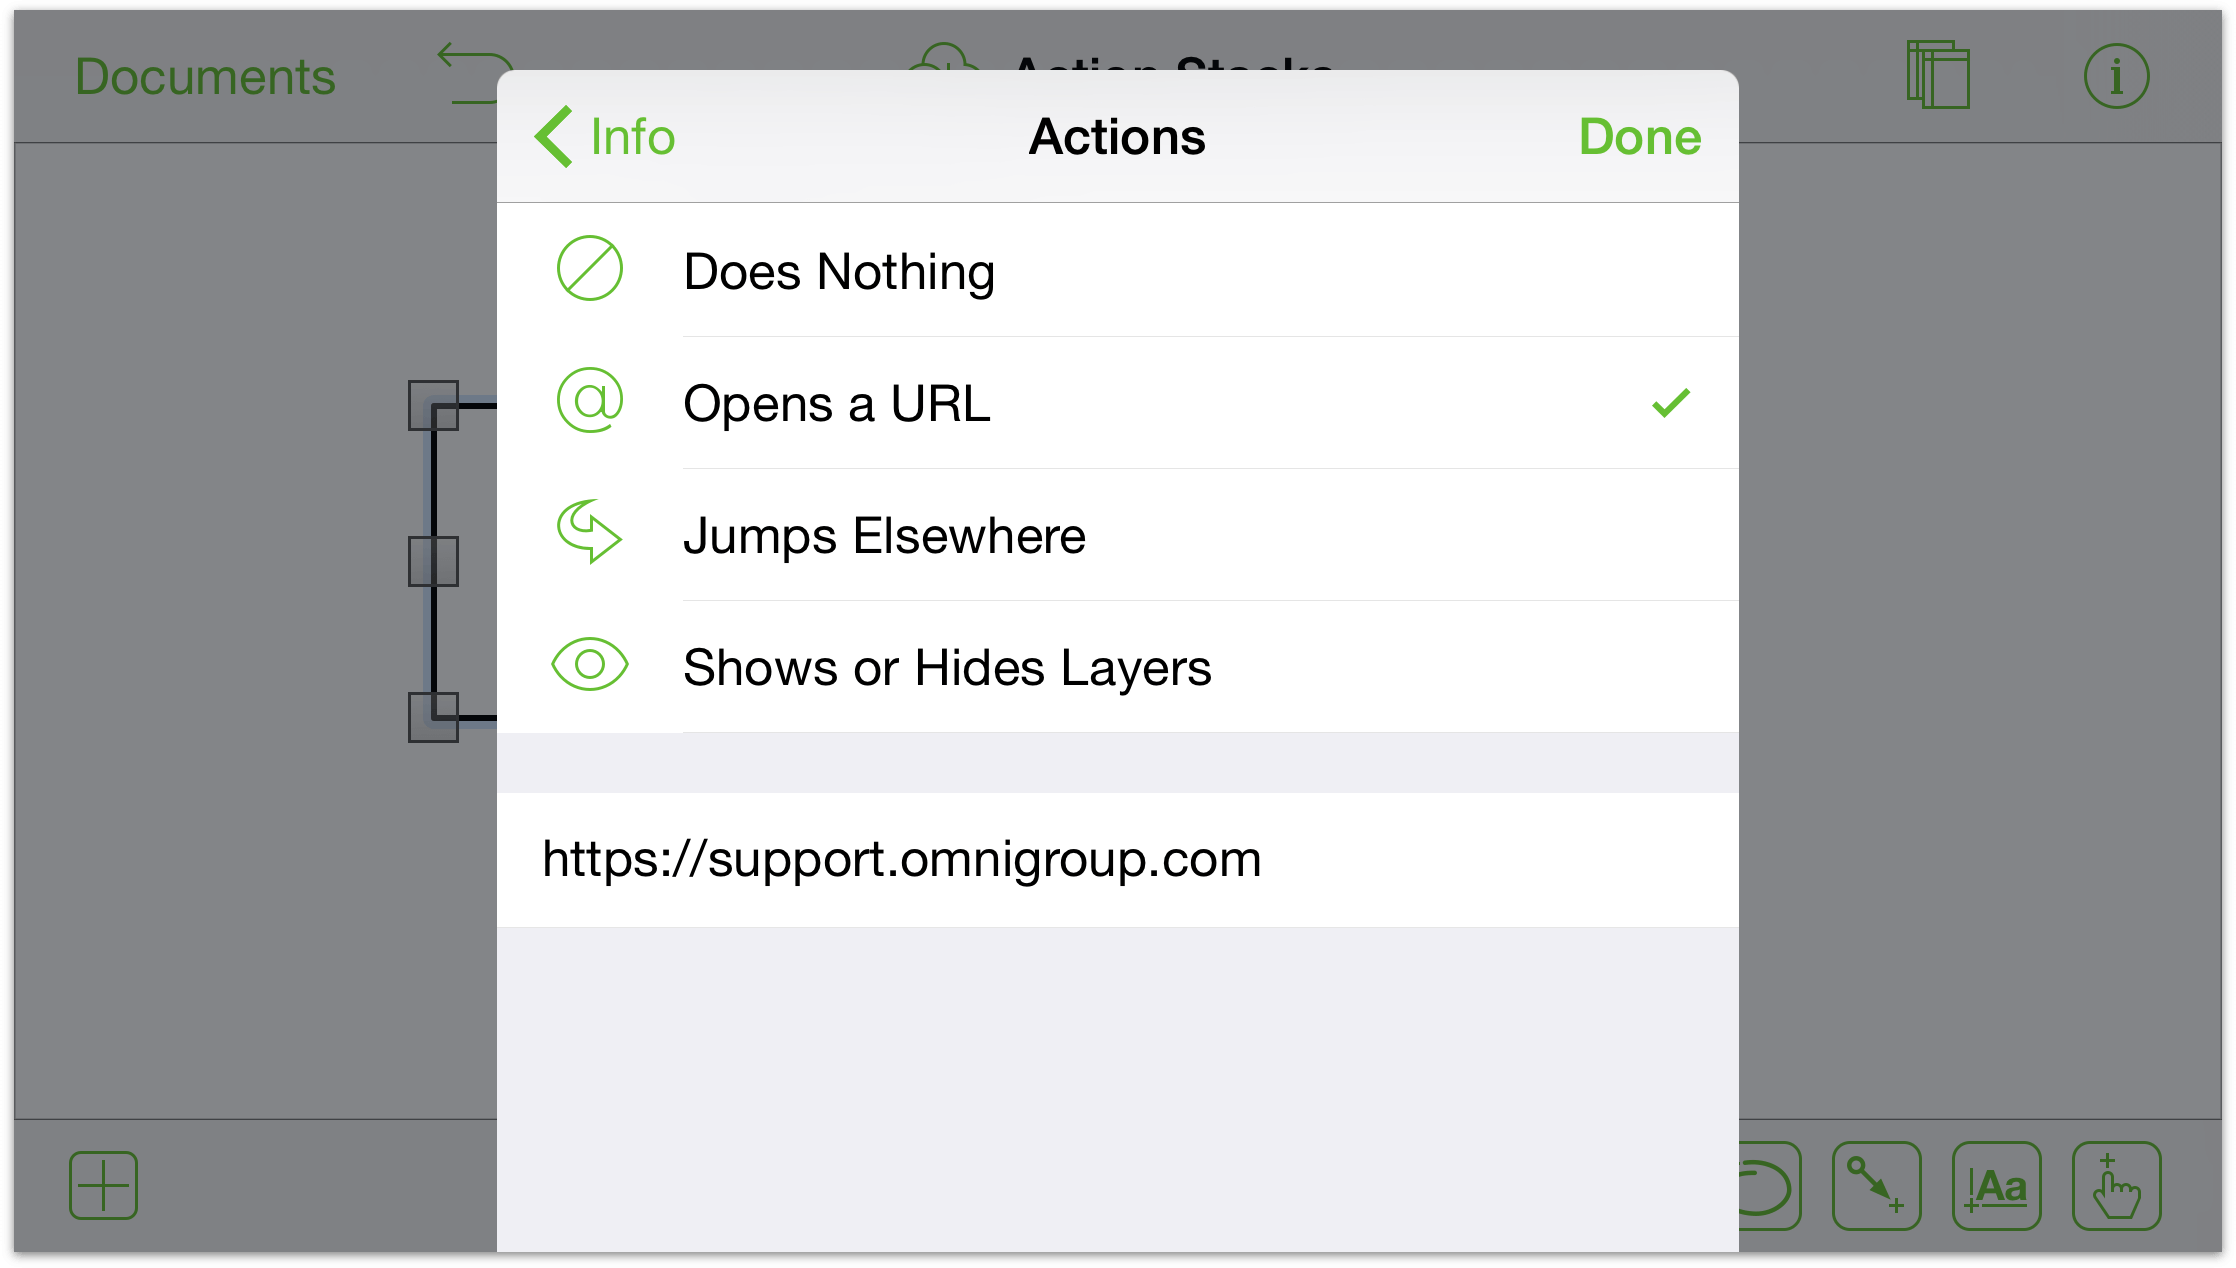
Tap Done when you’ve finished entering the URL. That saves the action to the square.
- Box 2: Tap to select Box 2, and then tap
 to open the inspectors:
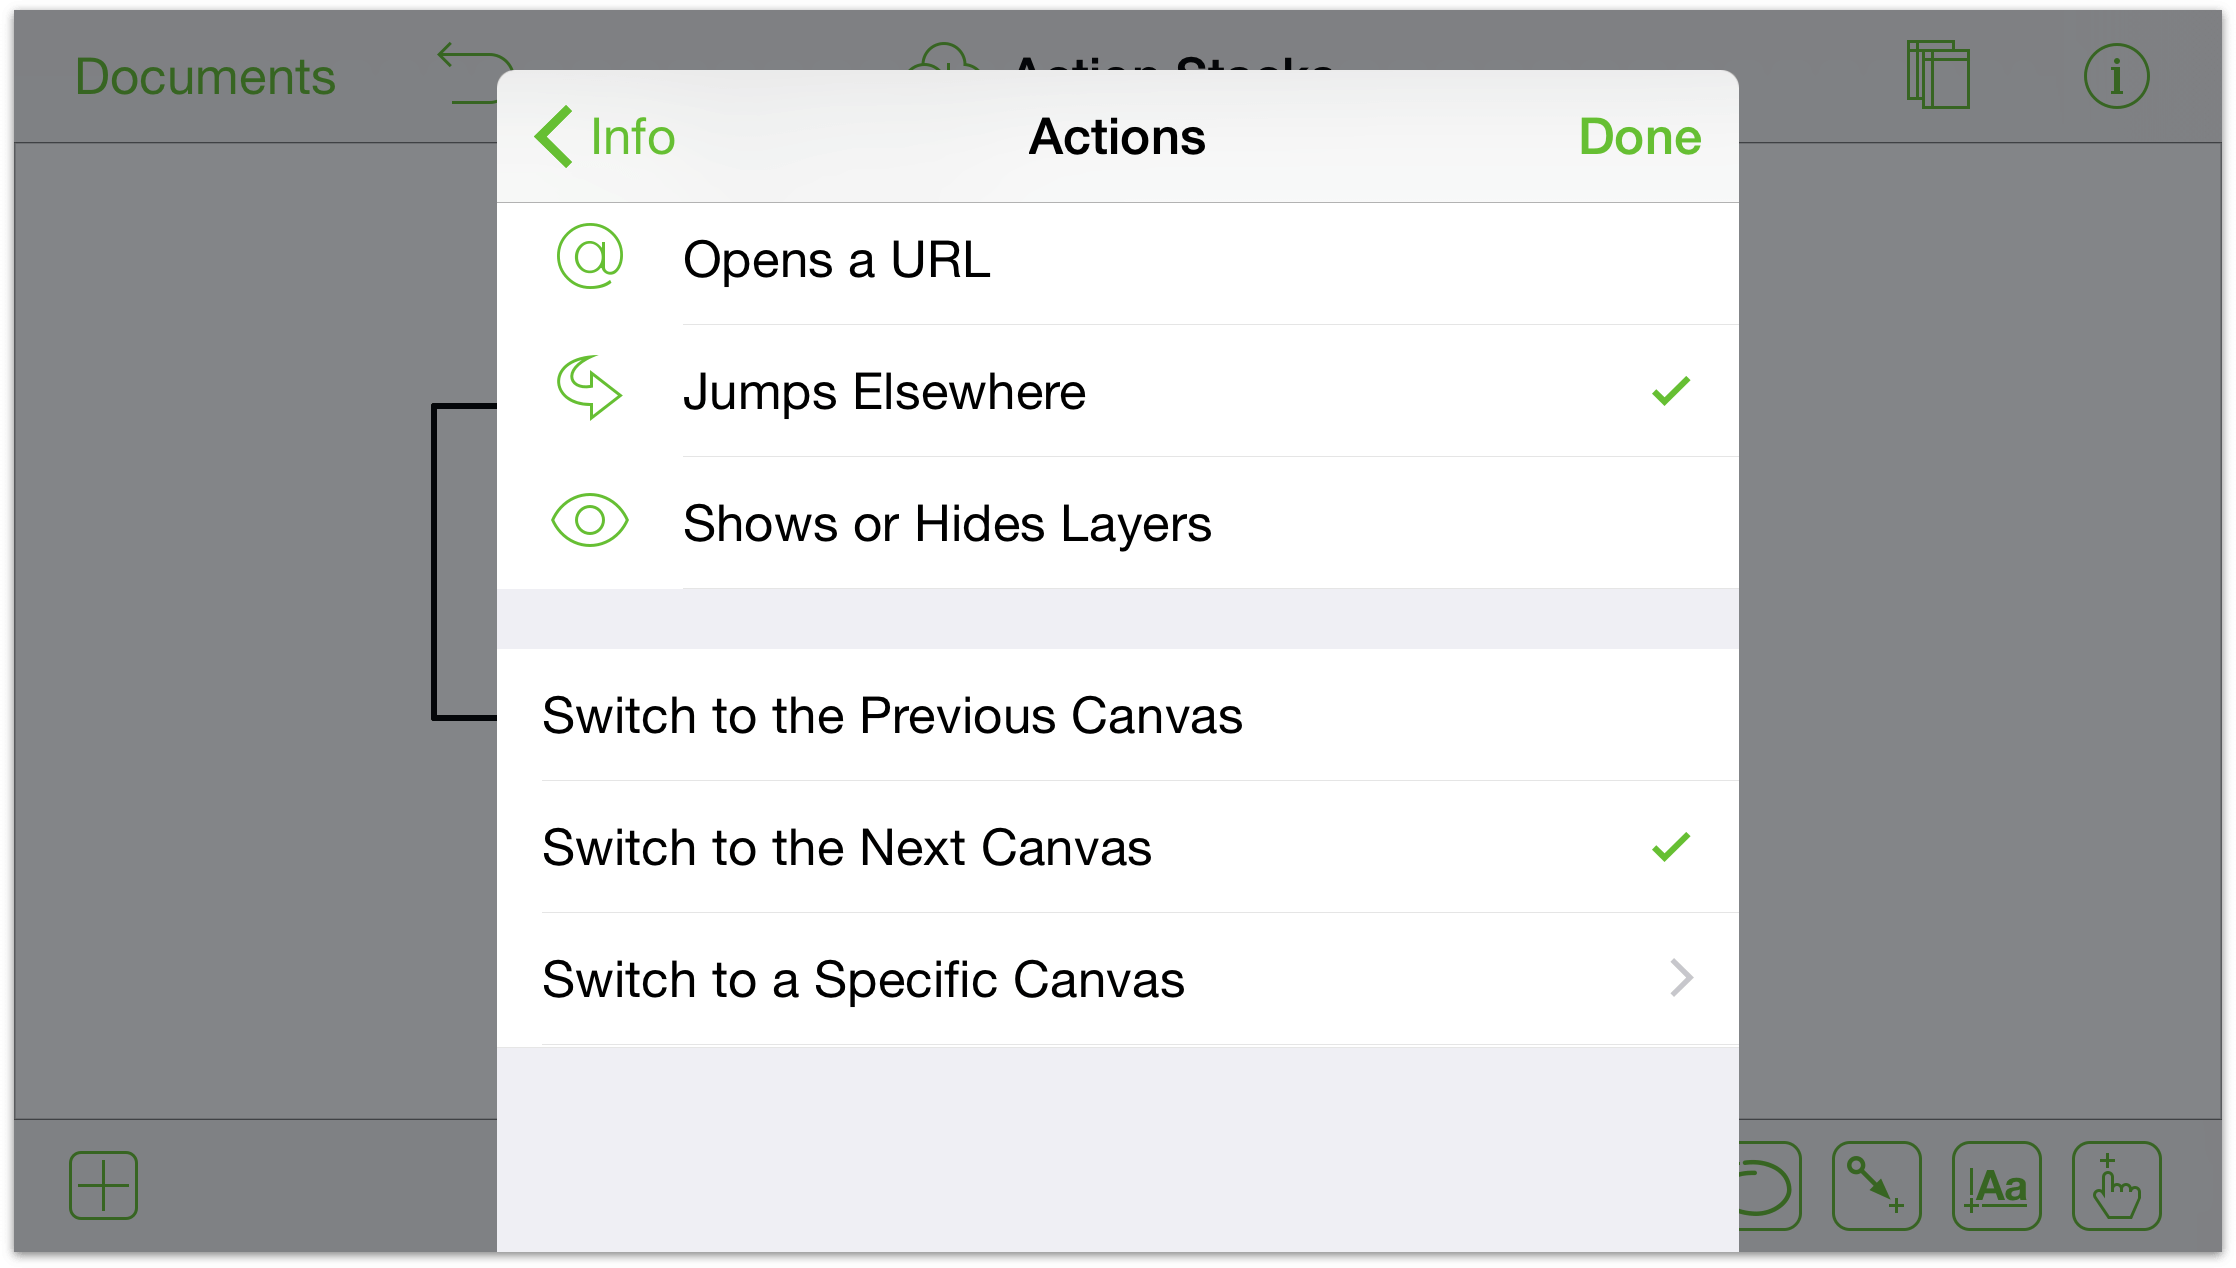
- In the list of inspectors, tap Actions, and then tap Jumps Elsewhere.
- You now have three possible choices for choosing where a tap on that square takes you:
- Switch to the Previous Canvas
- Switch to the Next Canvas
- Switch to a Specific Canvas
Since you are working on the squares on Canvas 1, tap Switch to the Next Canvas and then tap Done.
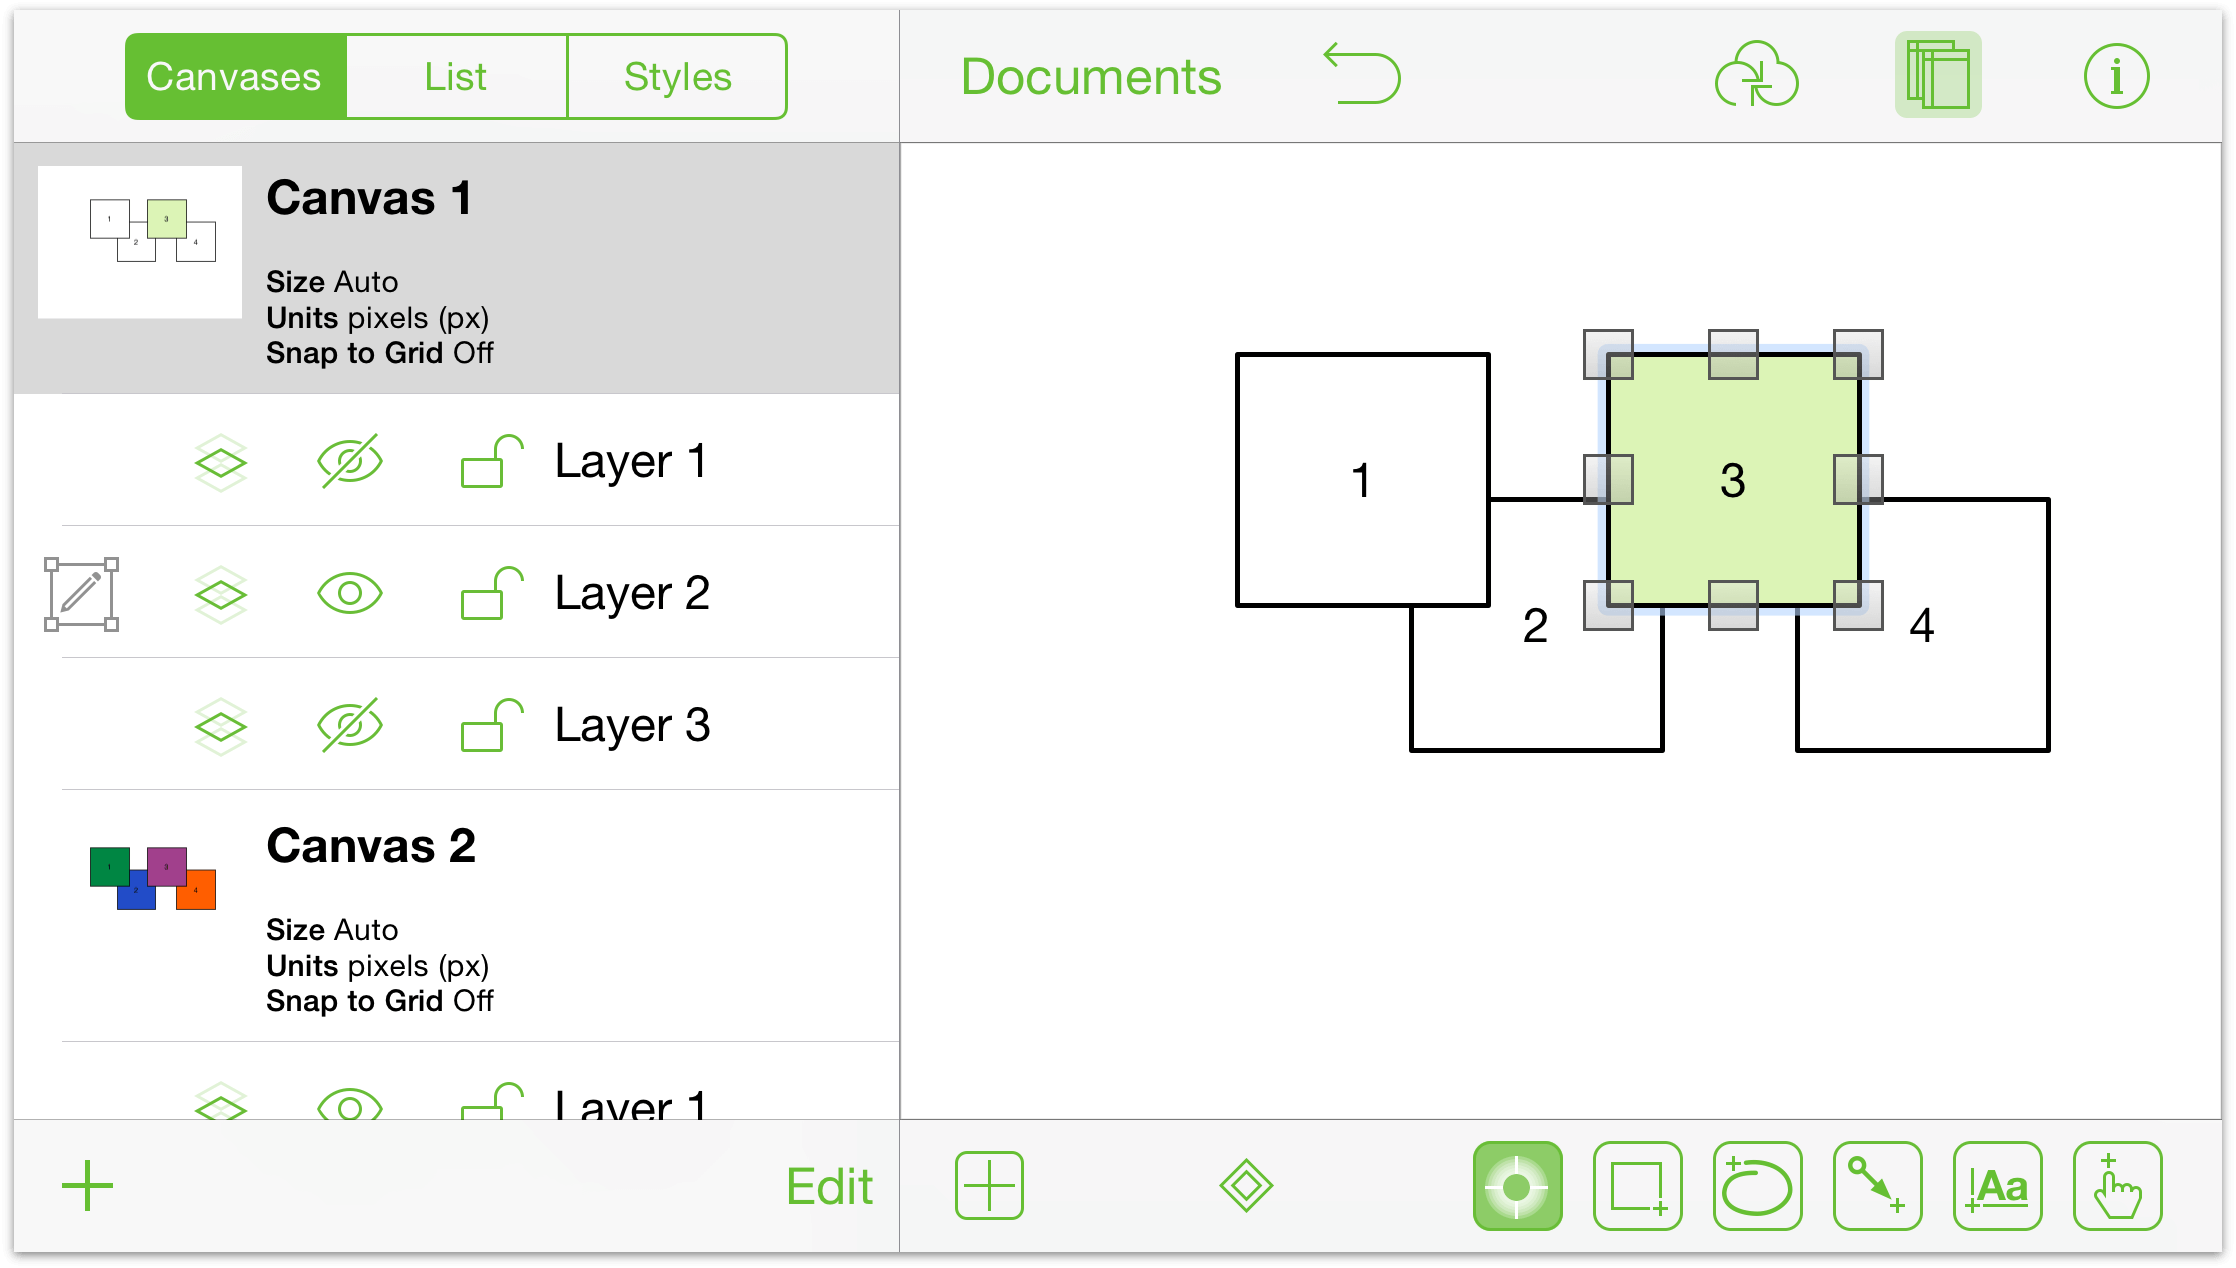
- Box 3: Make sure that you are on Canvas 1, Layer 1. Tap to select Box 3, and then tap
 to open the inspectors:
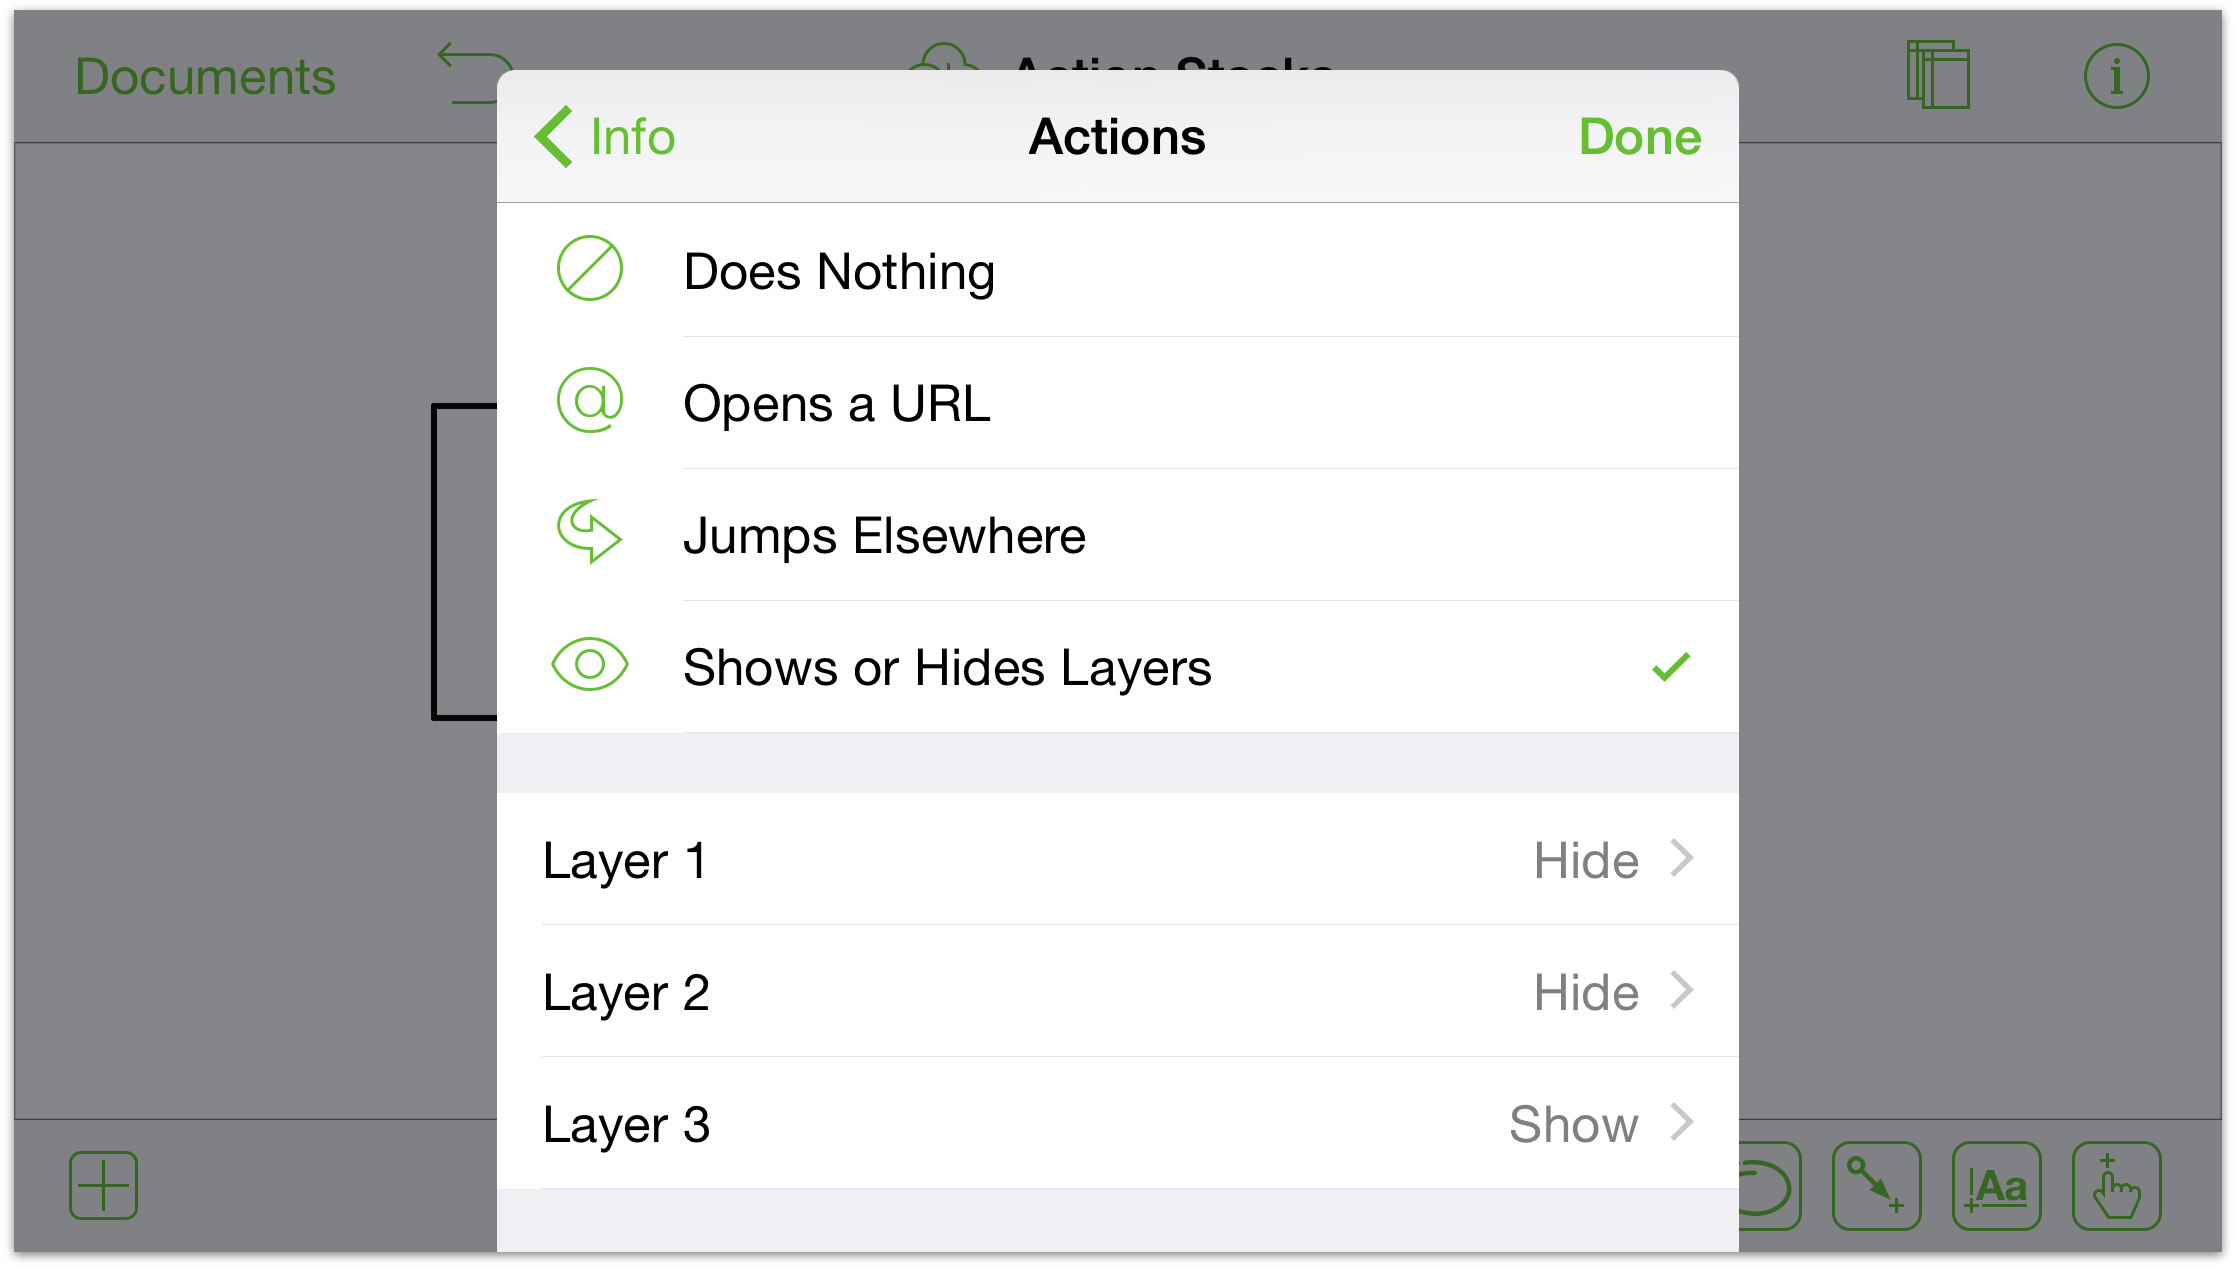
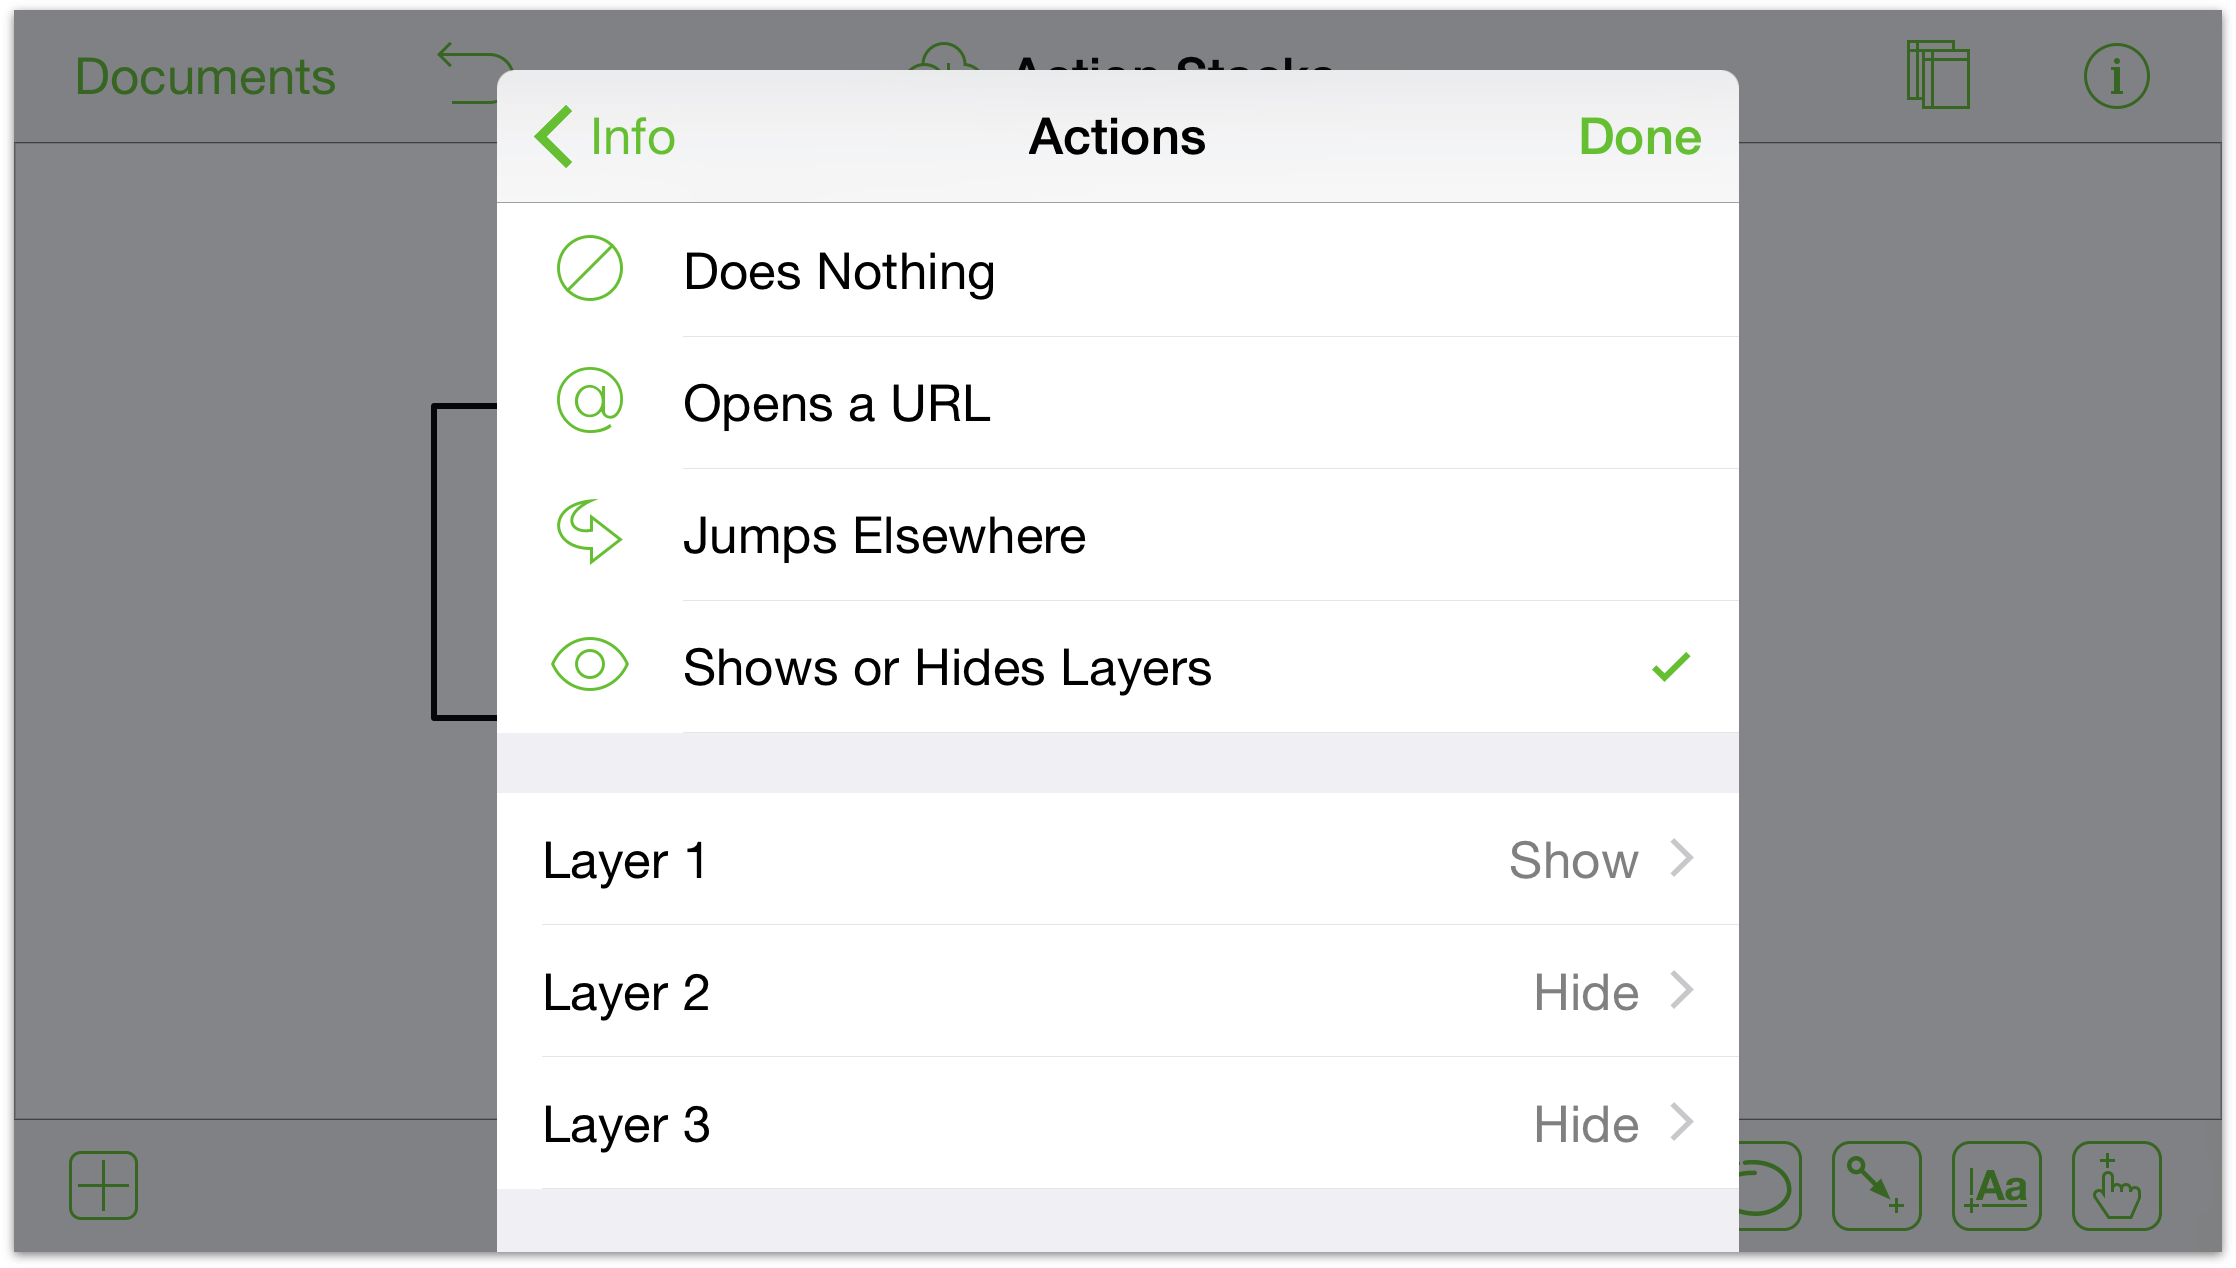
- In the list of inspectors, tap Actions, and then tap Shows or Hides Layers; you’ll see the three layers listed beneath to which you can set an action for its visibility. To start, each layer has None set up as the action to take (i.e., tapping it won’t do anything right now).
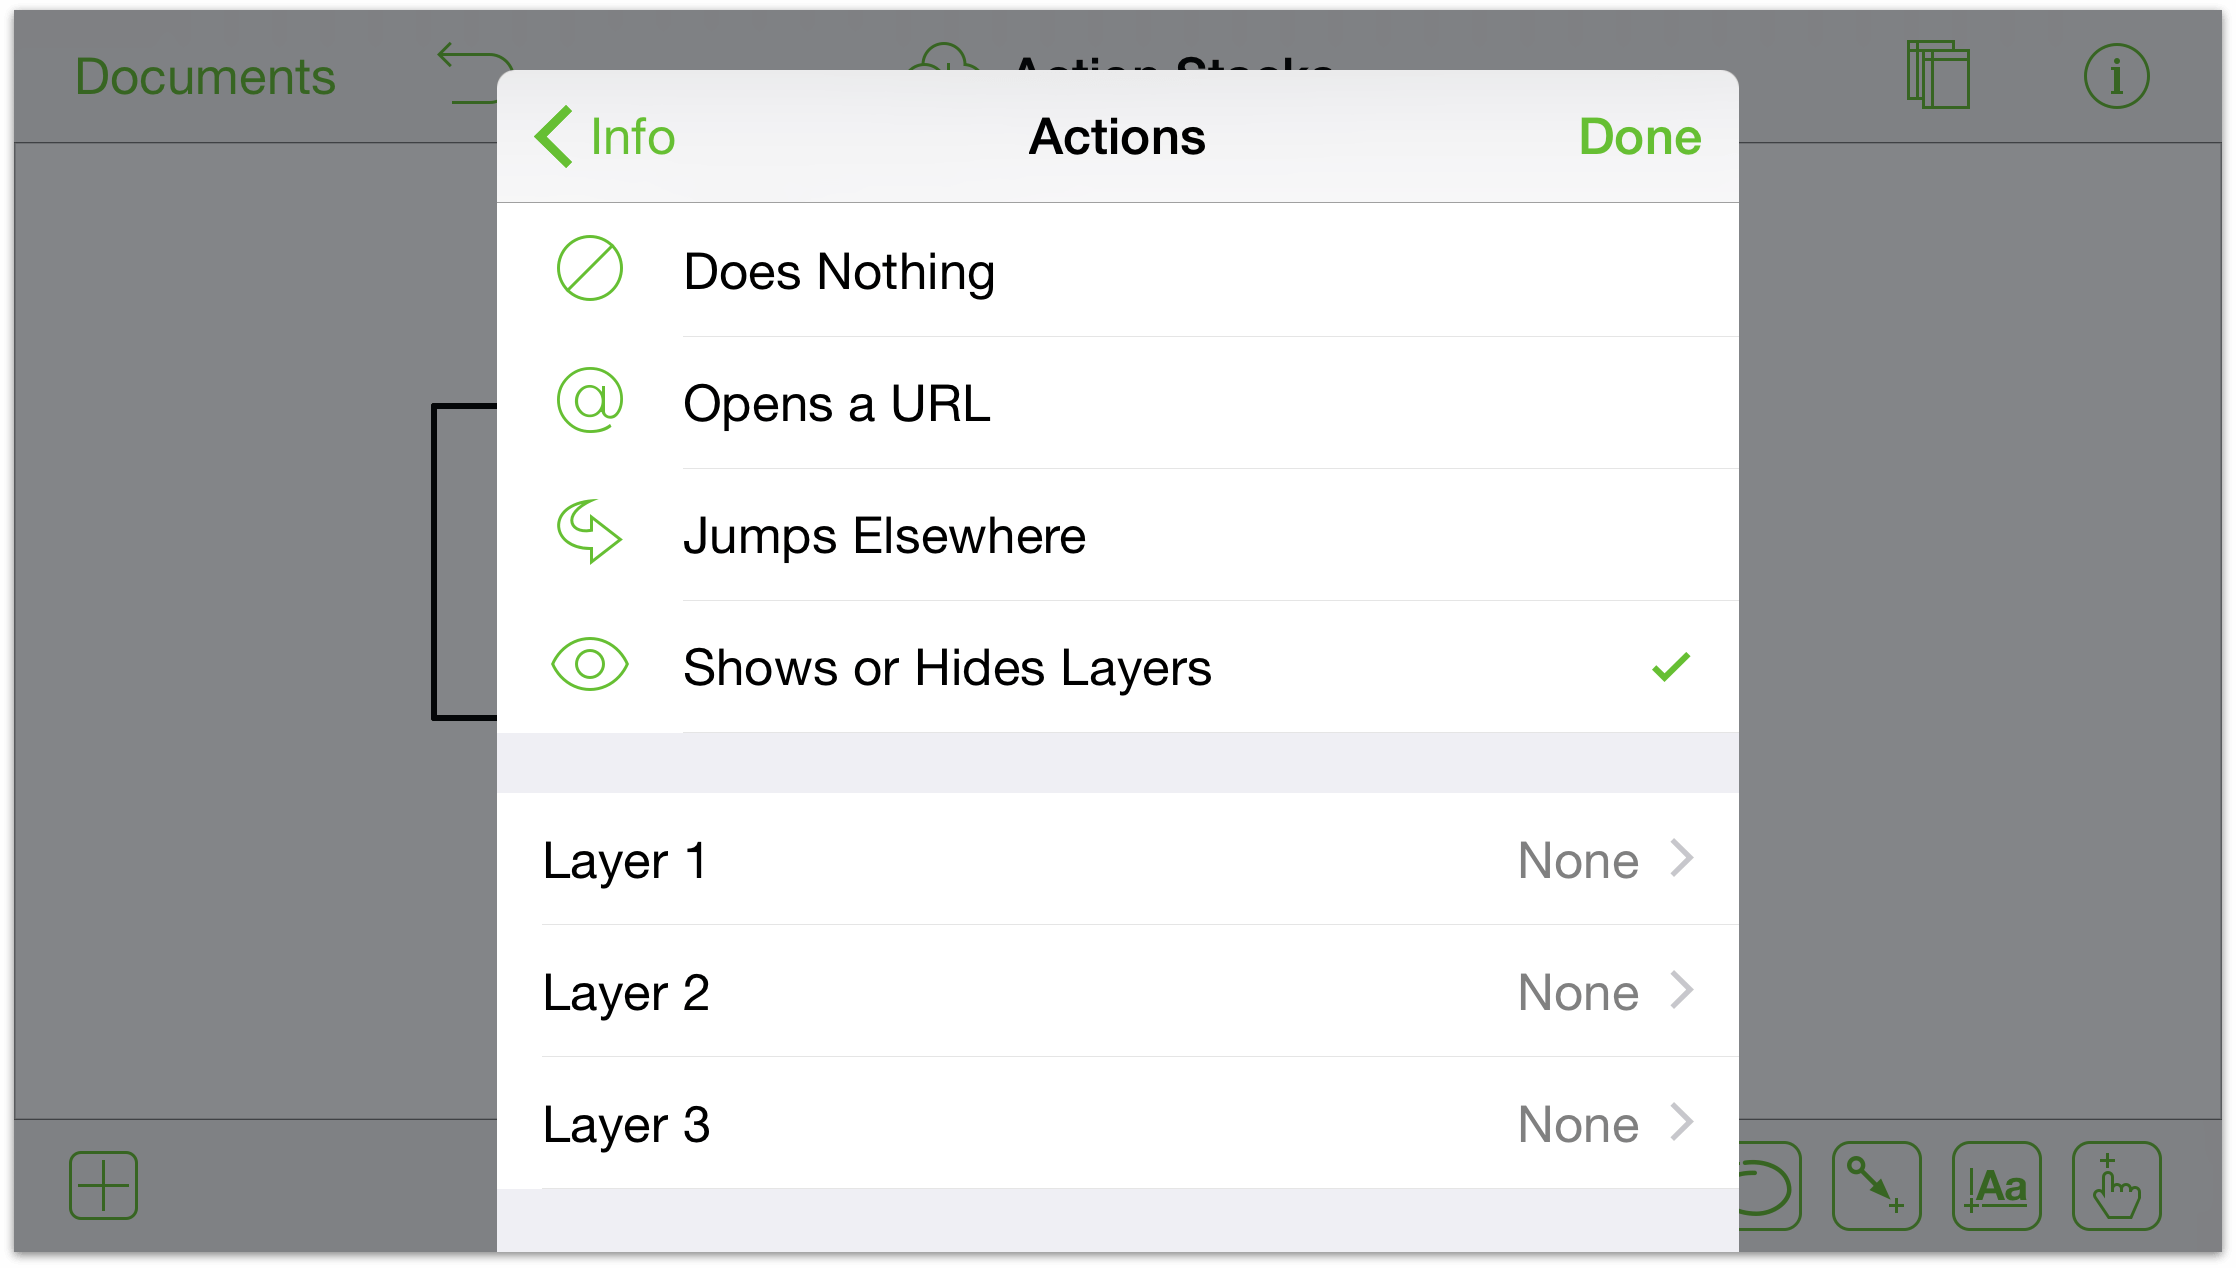
-
Set up Layer 1’s actions as follows:
- Layer 1: Hide.
- Layer 2: Show.
- Layer 3: Hide.

-
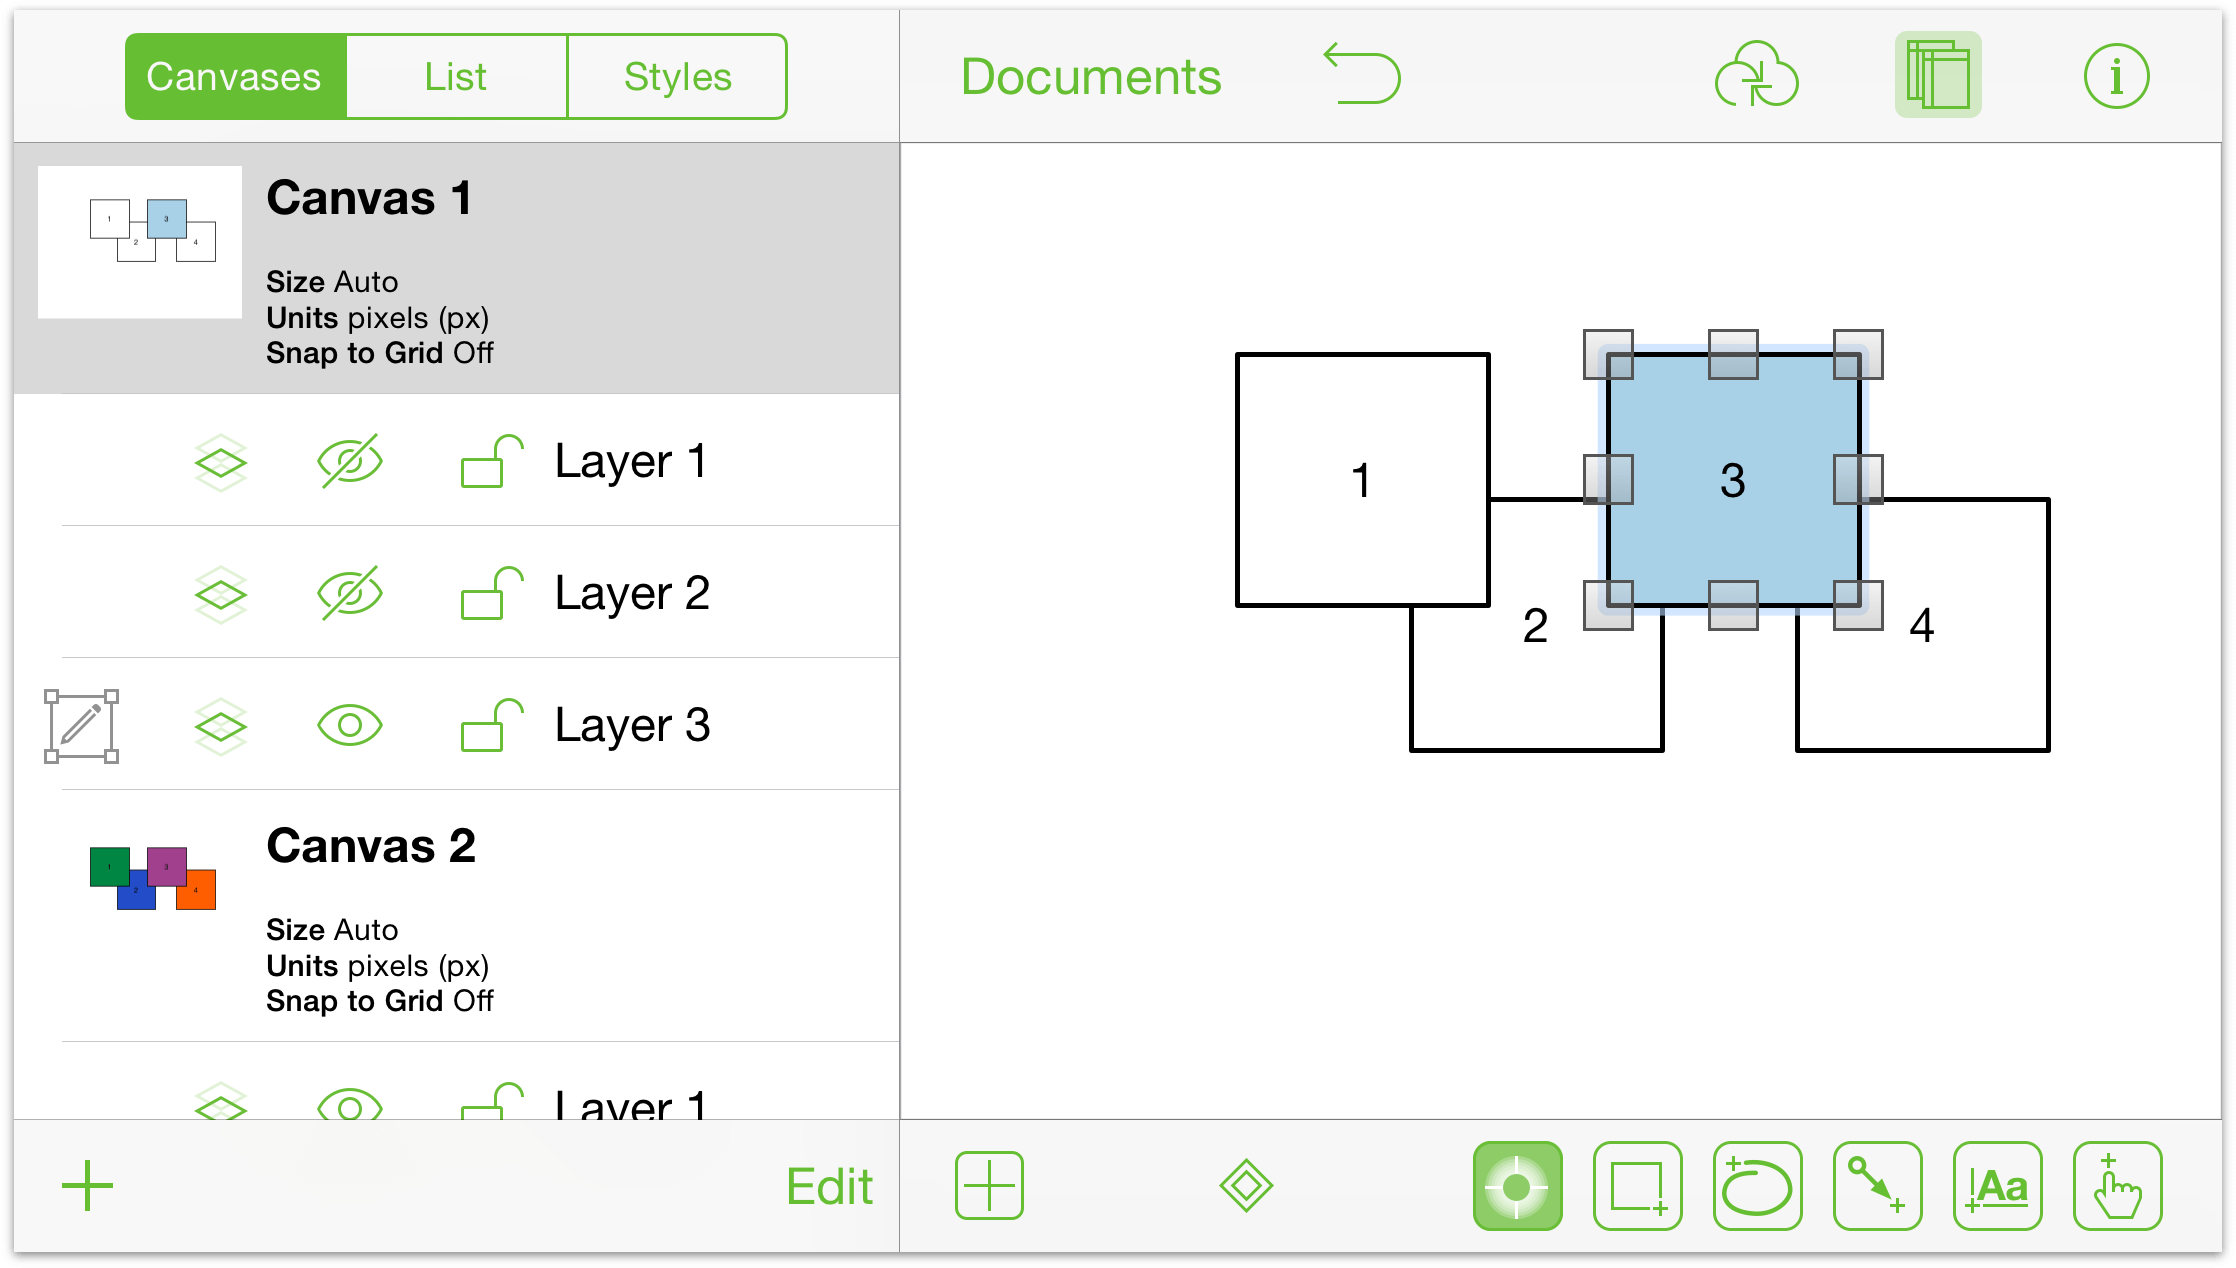
Open the Canvases sidebar (tap
 ), and then tap to select Canvas 1, Layer 2. Tap to hide the layer visibility for Layers 1 and 3.
- Close the Canvases sidebar if needed, and set up the actions for Layer 2 as follows:
- Layer 1: Hide.
- Layer 2: Hide.
- Layer 3: Show.
-
Open the Canvases sidebar (tap
 ), and then tap to select Canvas 1, Layer 3. Tap to hide the layer visibility for Layers 1 and 2.
- Close the Canvases sidebar if needed, and set up the actions for Layer 3 as follows:
- Layer 1: Show.
- Layer 2: Hide.
- Layer 3: Hide.
- In the list of inspectors, tap Actions, and then tap Shows or Hides Layers; you’ll see the three layers listed beneath to which you can set an action for its visibility. To start, each layer has None set up as the action to take (i.e., tapping it won’t do anything right now).
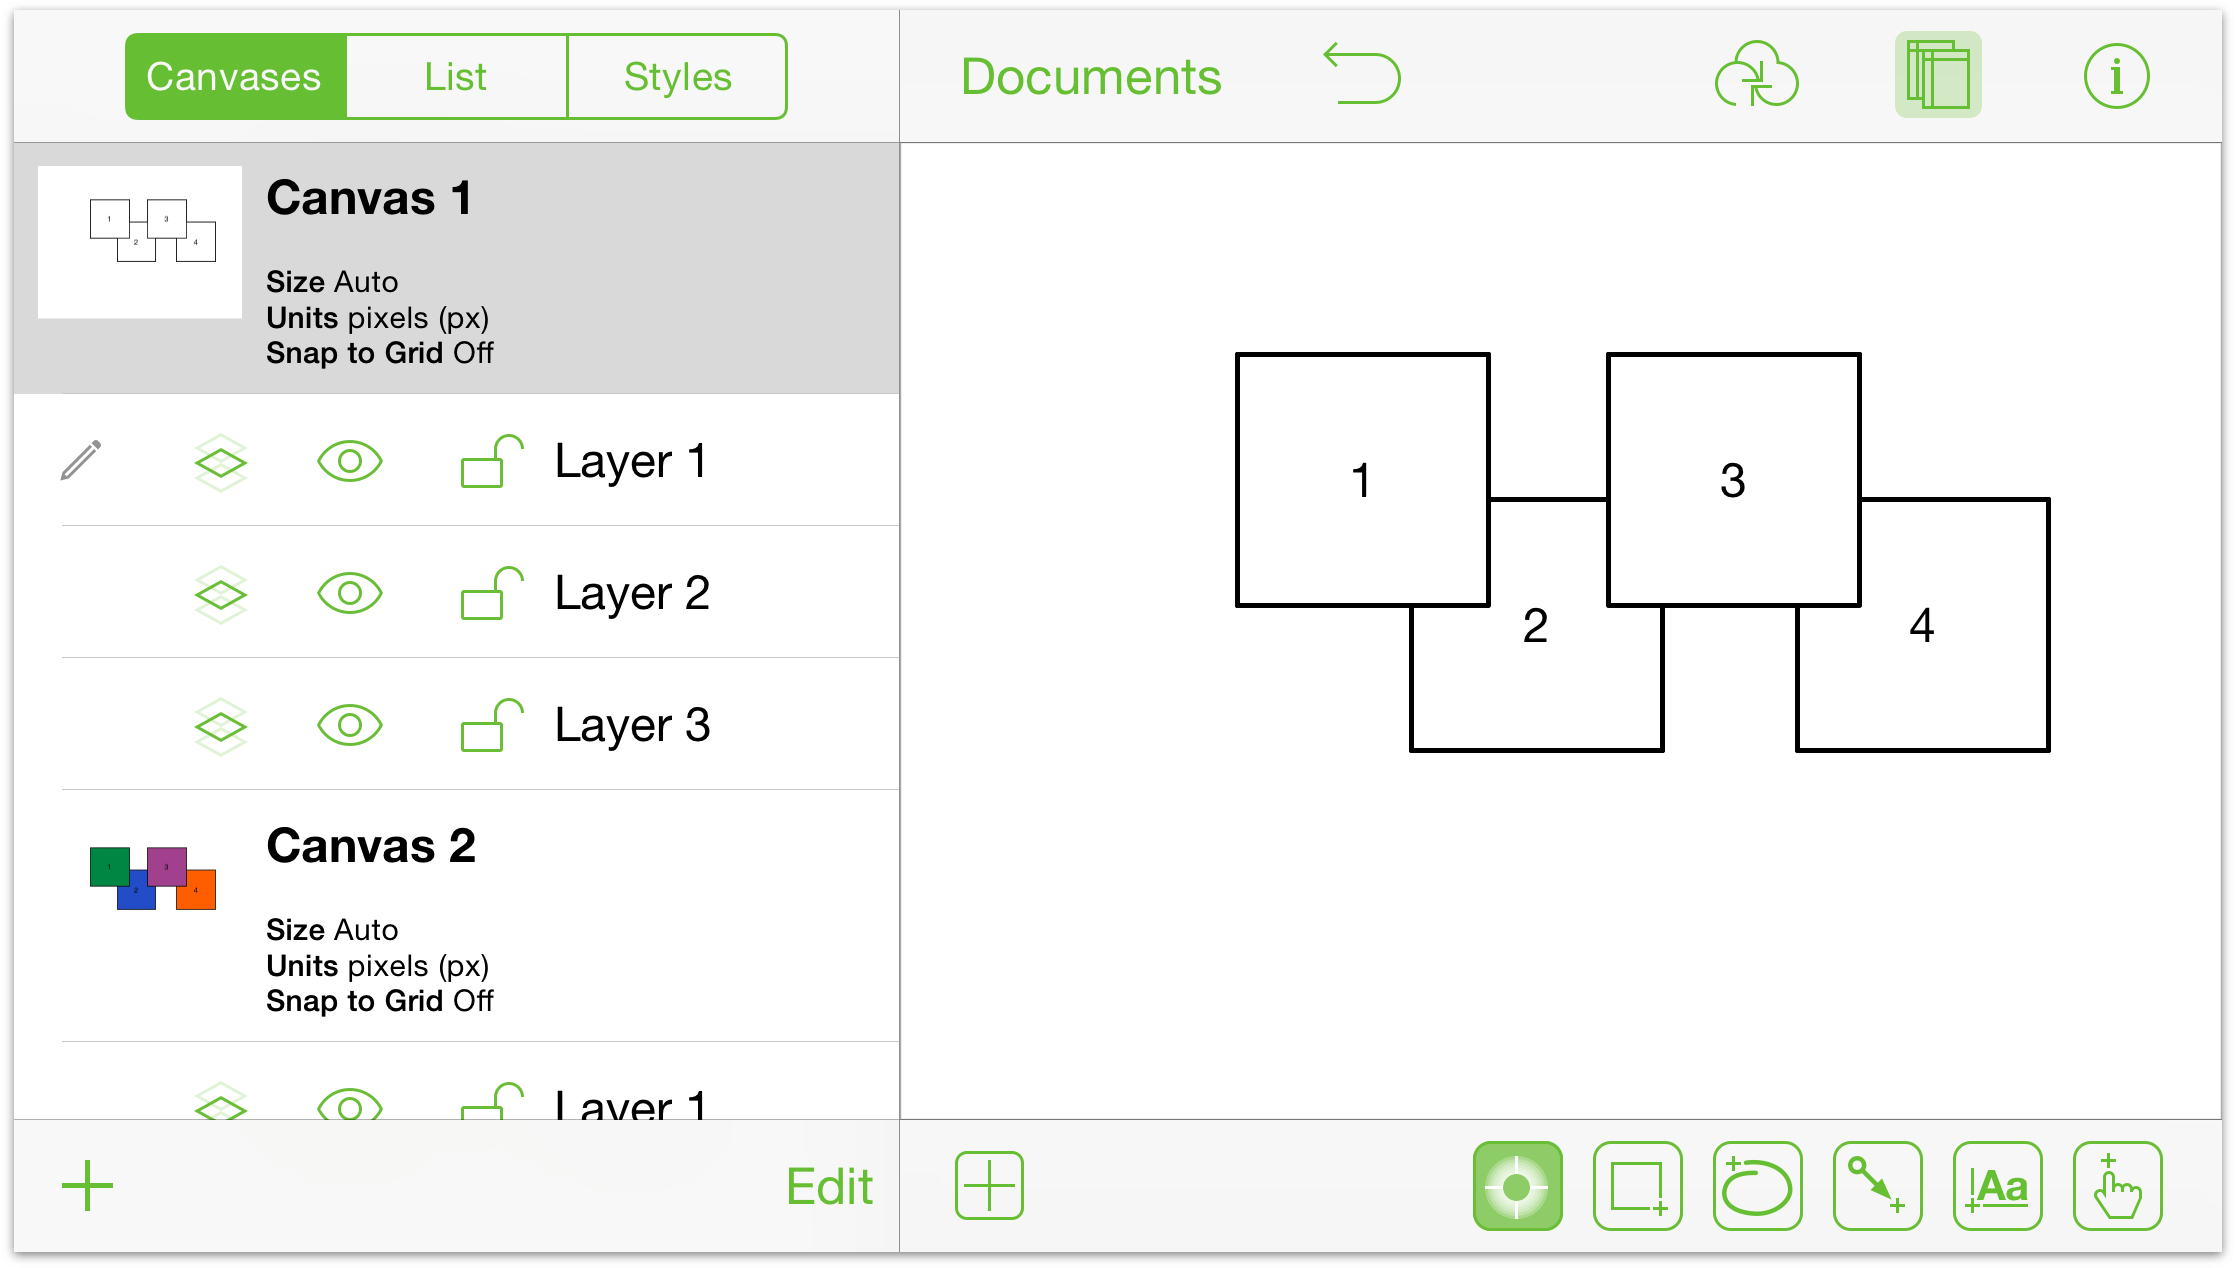
- Finally, switch back to Canvas 1, Layer 1.
Understandably, that’s a lot of work for a quick demo. If you have taken the time to work through all of that, take a short break; you’ve earned it.
To perform the Actions you’ve just assigned, double-tapp the Action tool to make it sticky ( ). When you do, you’ll notice an empty action badge (
![]() ) beneath the canvas:
) beneath the canvas:
When you tap ![]() , that button changes to
, that button changes to ![]() , but now you will see which actions are assigned to each square.
, but now you will see which actions are assigned to each square.
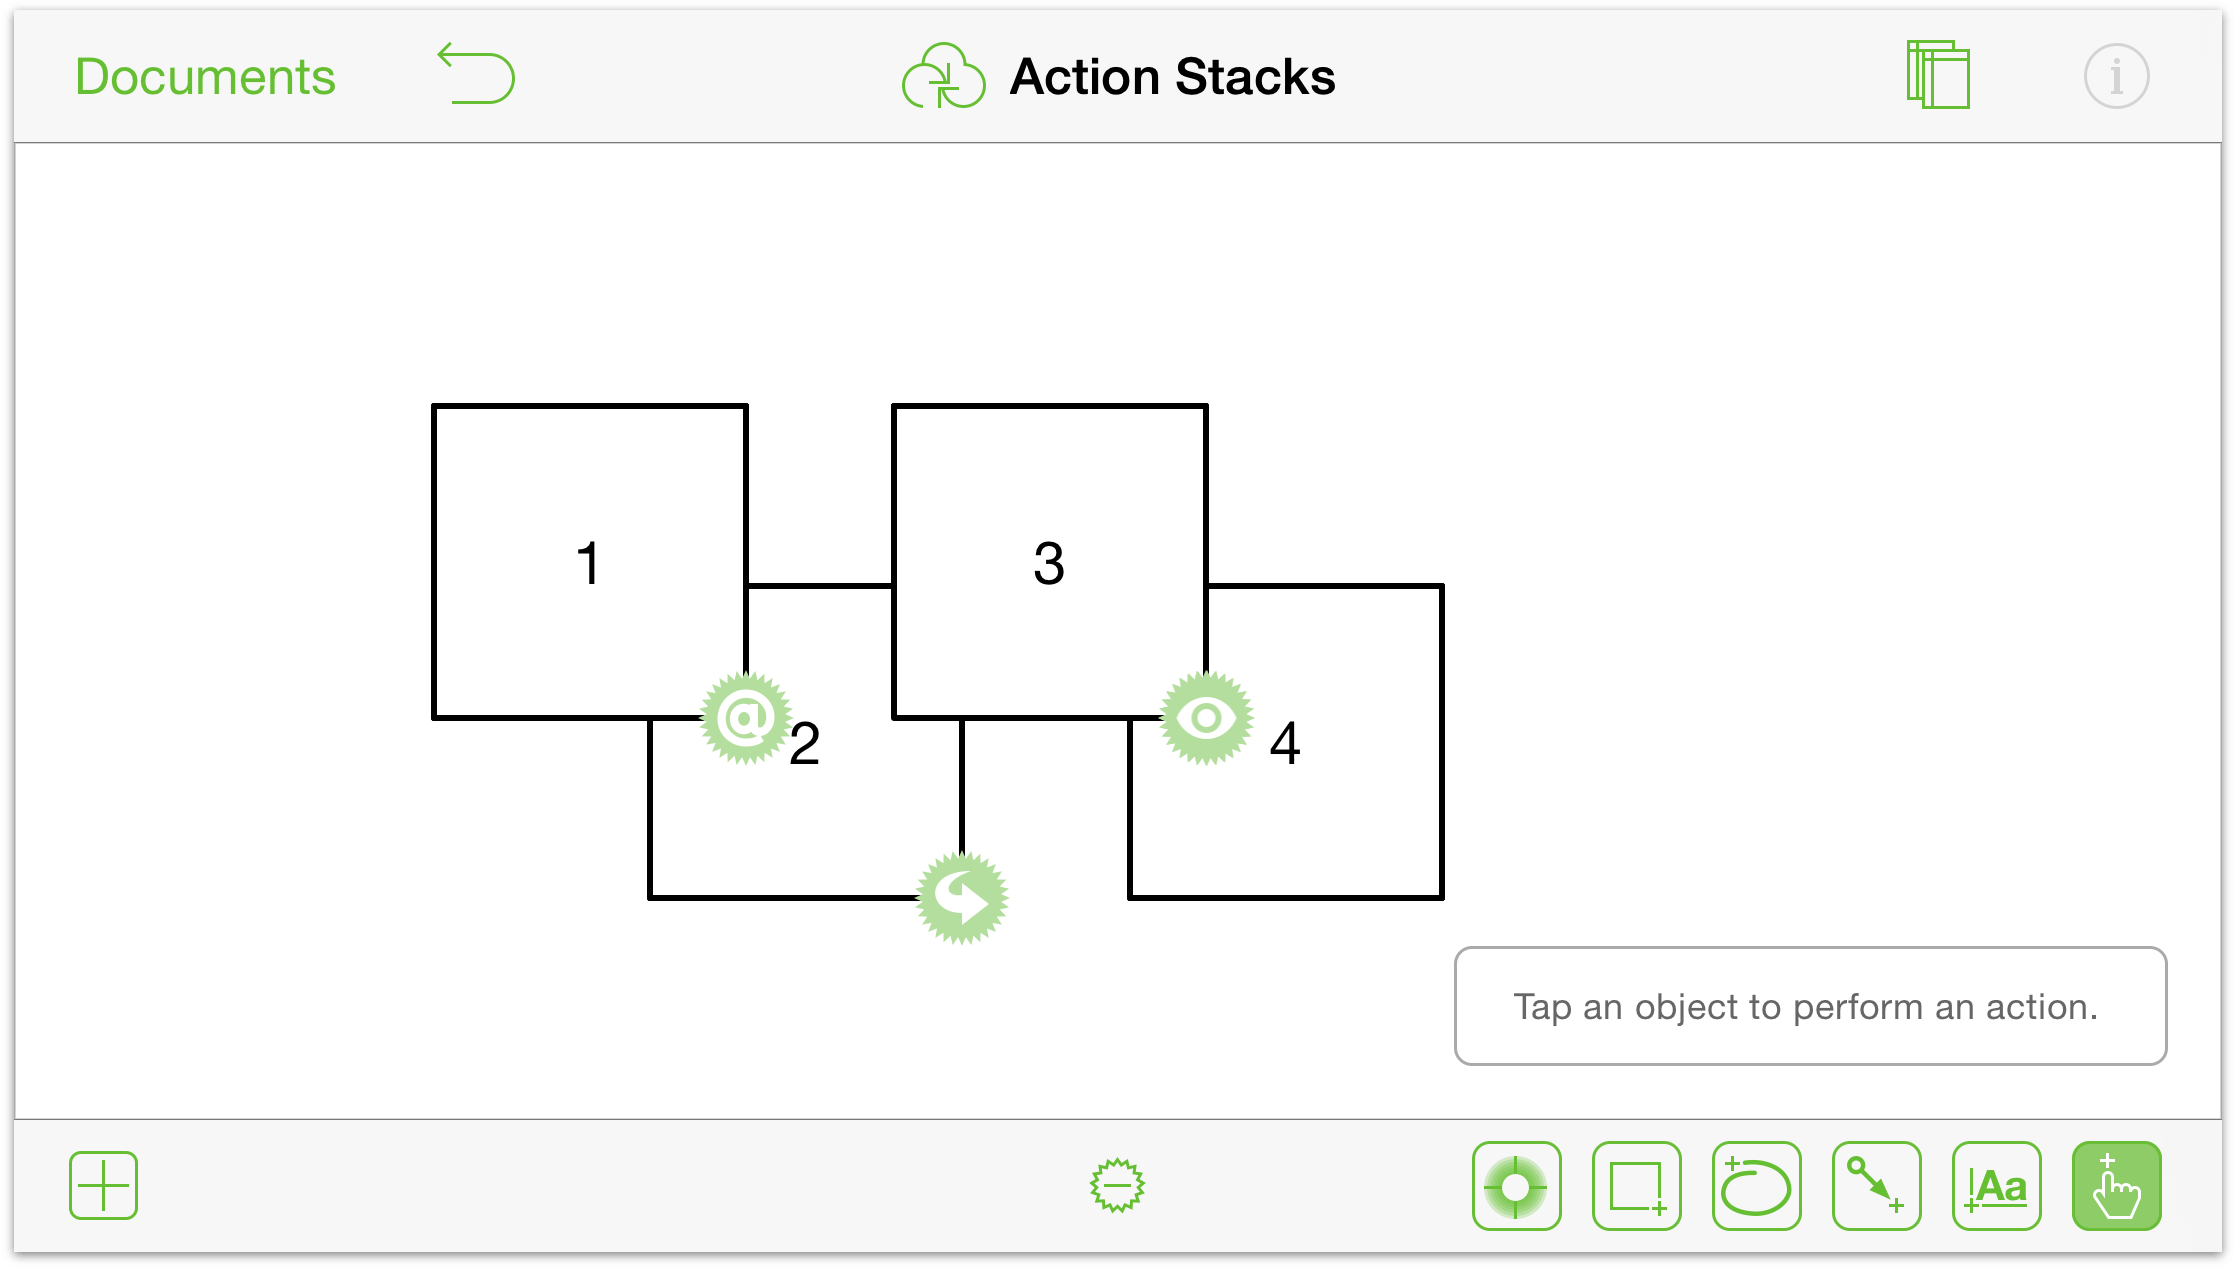
If you’ve done this correctly, here’s what happens when you tap each box:
- Box 1: Your iOS device switches to Safari and attempts to open the URL you assigned as the Opens a URL action. (To get back to OmniGraffle, double-click the Home button on your iOS device, and then tap OmniGraffle’s icon.)
- Box 2: Your document switches to Canvas 2. To return to Canvas 1, tap Box 2 on Canvas 2.
- Box 3: Repeatedly tapping Box 3 takes you through the different layers of Canvas 1, with Box 3’s color changing as you cycle through the layers.
- Box 4: Absolutely nothing! We never set an action for Box 4, so nothing happens when you tap this box.
As you’ve seen, Actions can be really useful for showing interactions within your diagrams. They can work across multiple canvases and layers within the same document—which is really useful for prototyping the UI/UX of a mobile app—and, in the case of prototyping a new website design, you can set the Opens a URL action to open live websites to help illustrate your interaction model.