Using and Creating Stencils
Remember those template things you used to get as a kid to help you draw perfect squares, circles, and other shapes? Well, that’s kinda what Stencils in OmniGraffle are: replicant objects—ranging from simple geometric shapes to complex multilayered illustrations—that you can reuse as often as you’d like.
A stencil can be anything—from your corporate logo to placeholder widget boxes for designing a website—that you intend to reuse again and again. Rather than having to redraw the same thing over and over—and worrying about each thing’s preciseness—you can just draw that thing once, make some minor tweaks in OmniGraffle’s inspectors, and then save and close the stencil file.
Once you create the thing and export a version as an OmniGraffle stencil file, you’ll never have to redraw that thing again. All you’ll need to do is locate the stencil in the Stencils Library and drag it to the Canvas. And with the newest member of the OmniGraffle family, Stenciltown, you can locate and share stencils with other OmniGraffle users.
This chapter shows you how to use the Stencils Library to your advantage, how to create a new stencil, and how to properly set up your stencil in OmniGraffle.
Using the Stencils Library
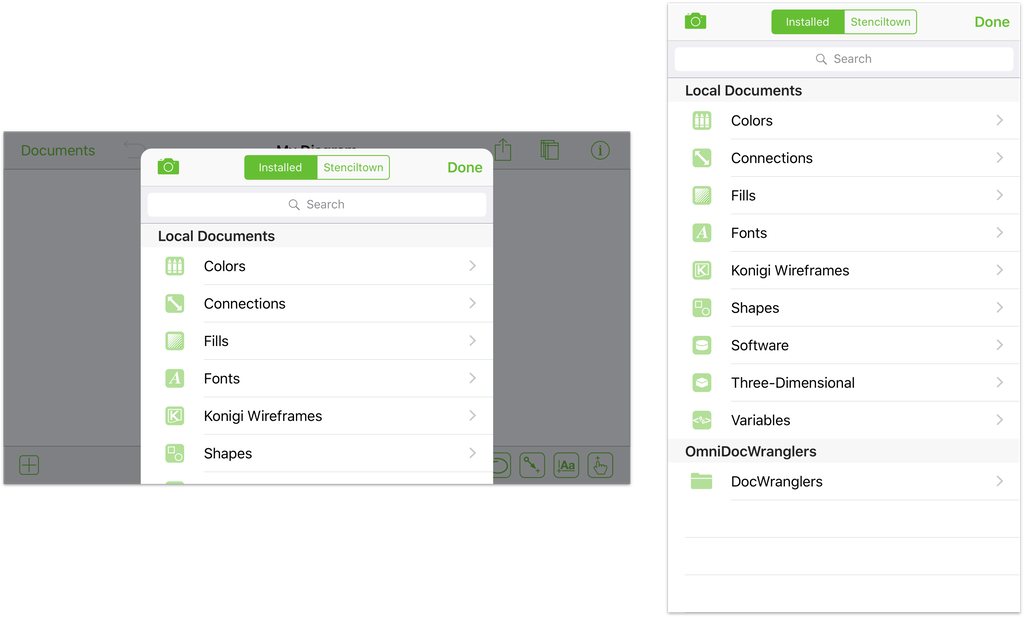
To use a Stencil, open the Stencil Library by tapping ![]() at the lower-left corner of the screen. OmniGraffle 2 for iOS ships with nine different Stencil Sets, which you can peruse in the menu that appears.
at the lower-left corner of the screen. OmniGraffle 2 for iOS ships with nine different Stencil Sets, which you can peruse in the menu that appears.
Note
As noted at right in the previous screenshot, the Stencil Library displays the folders in which OmniGraffle detects a stencil file, including synced folders available via OmniPresence.
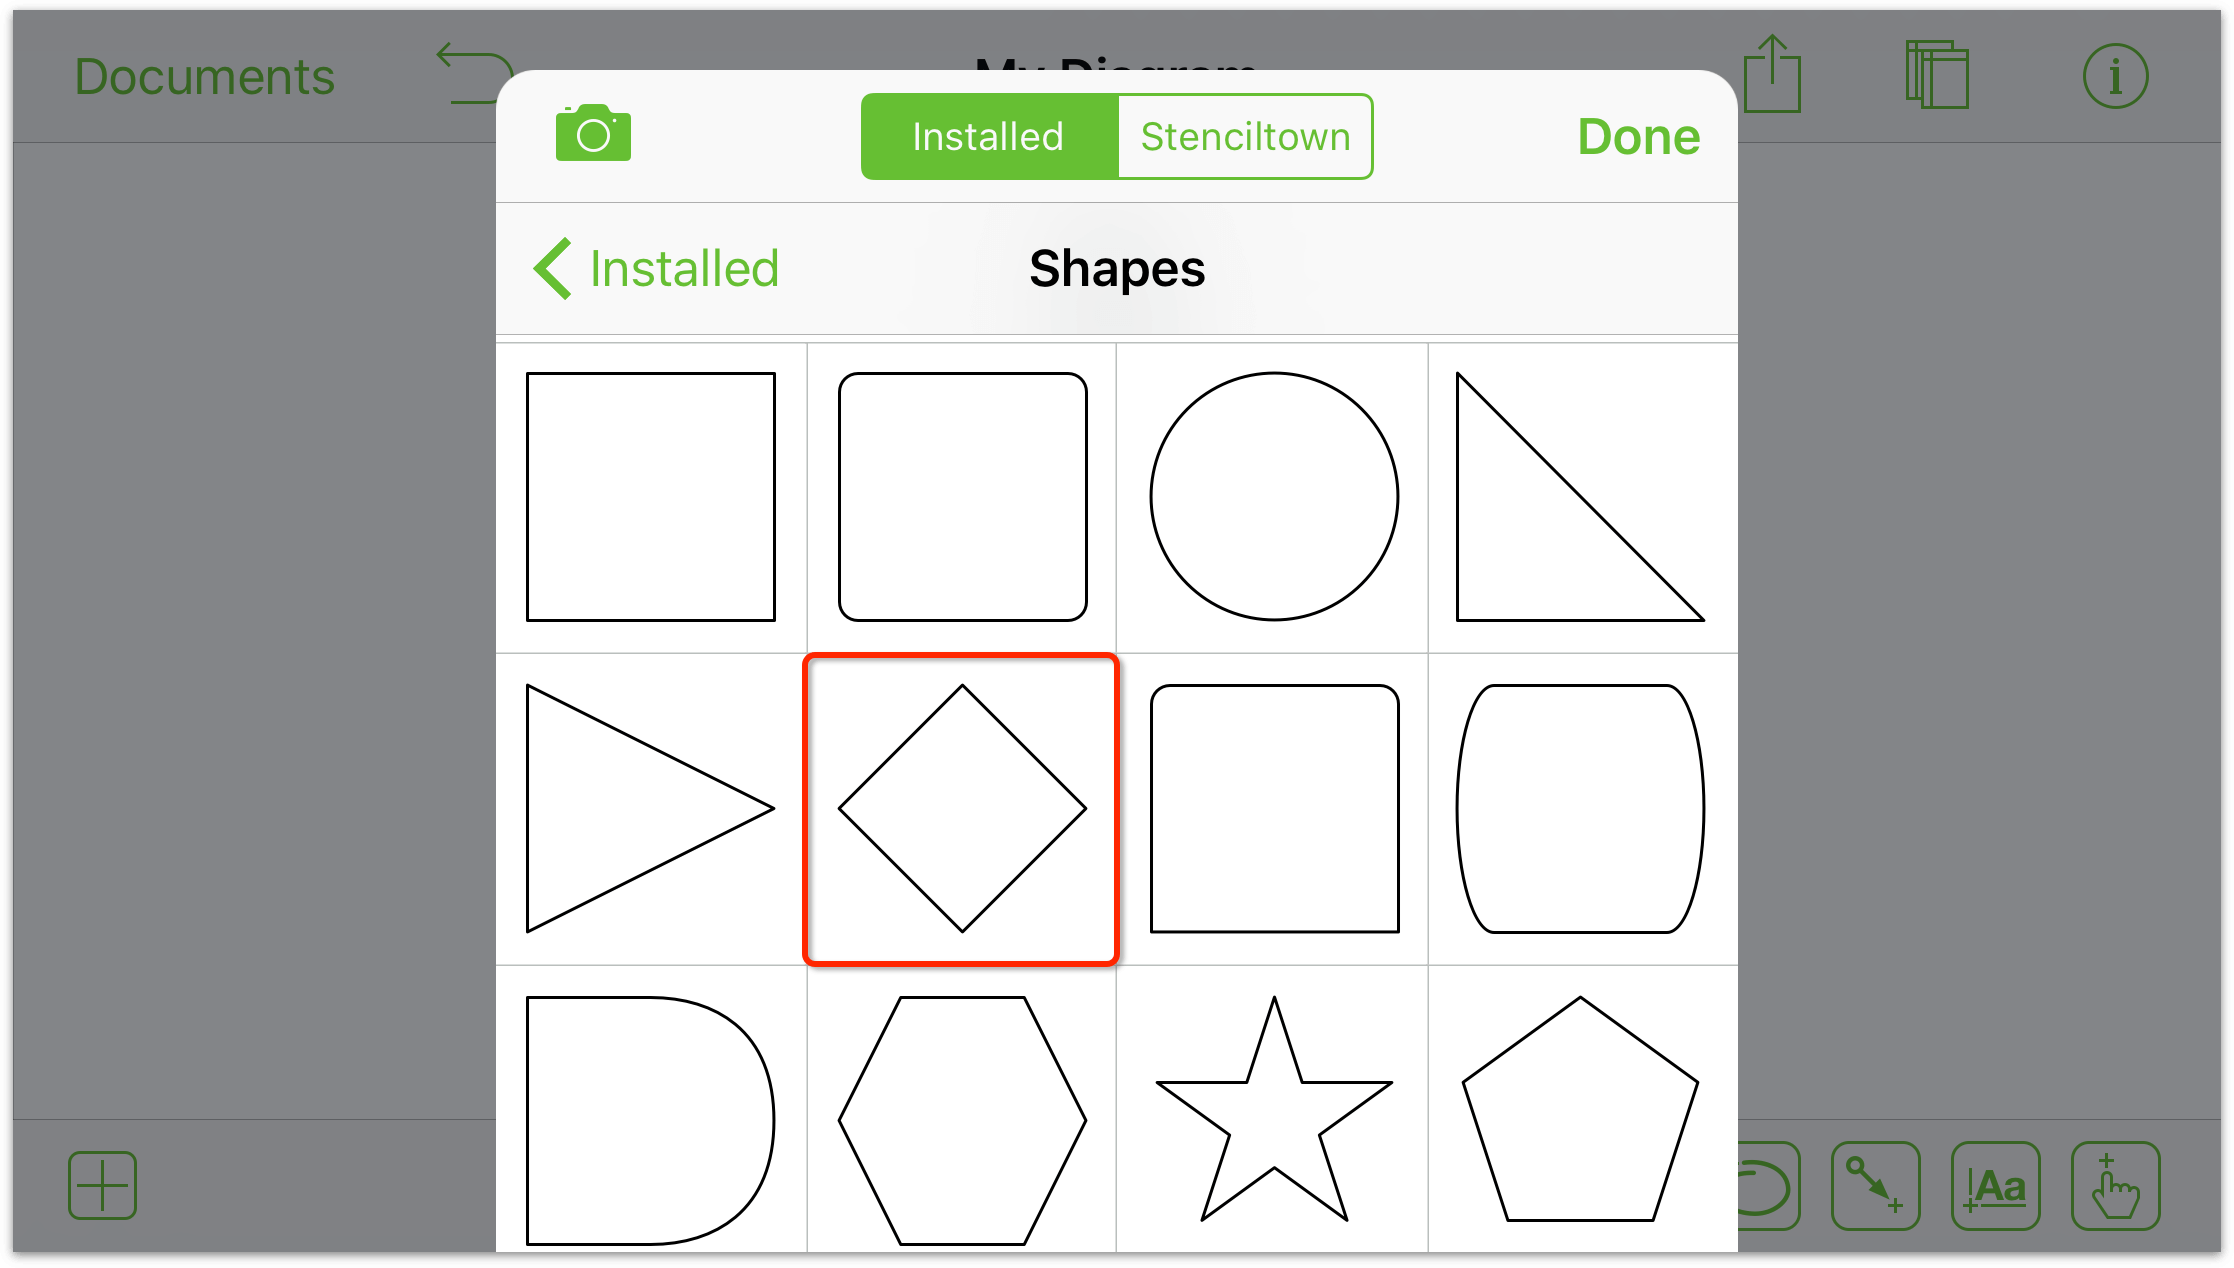
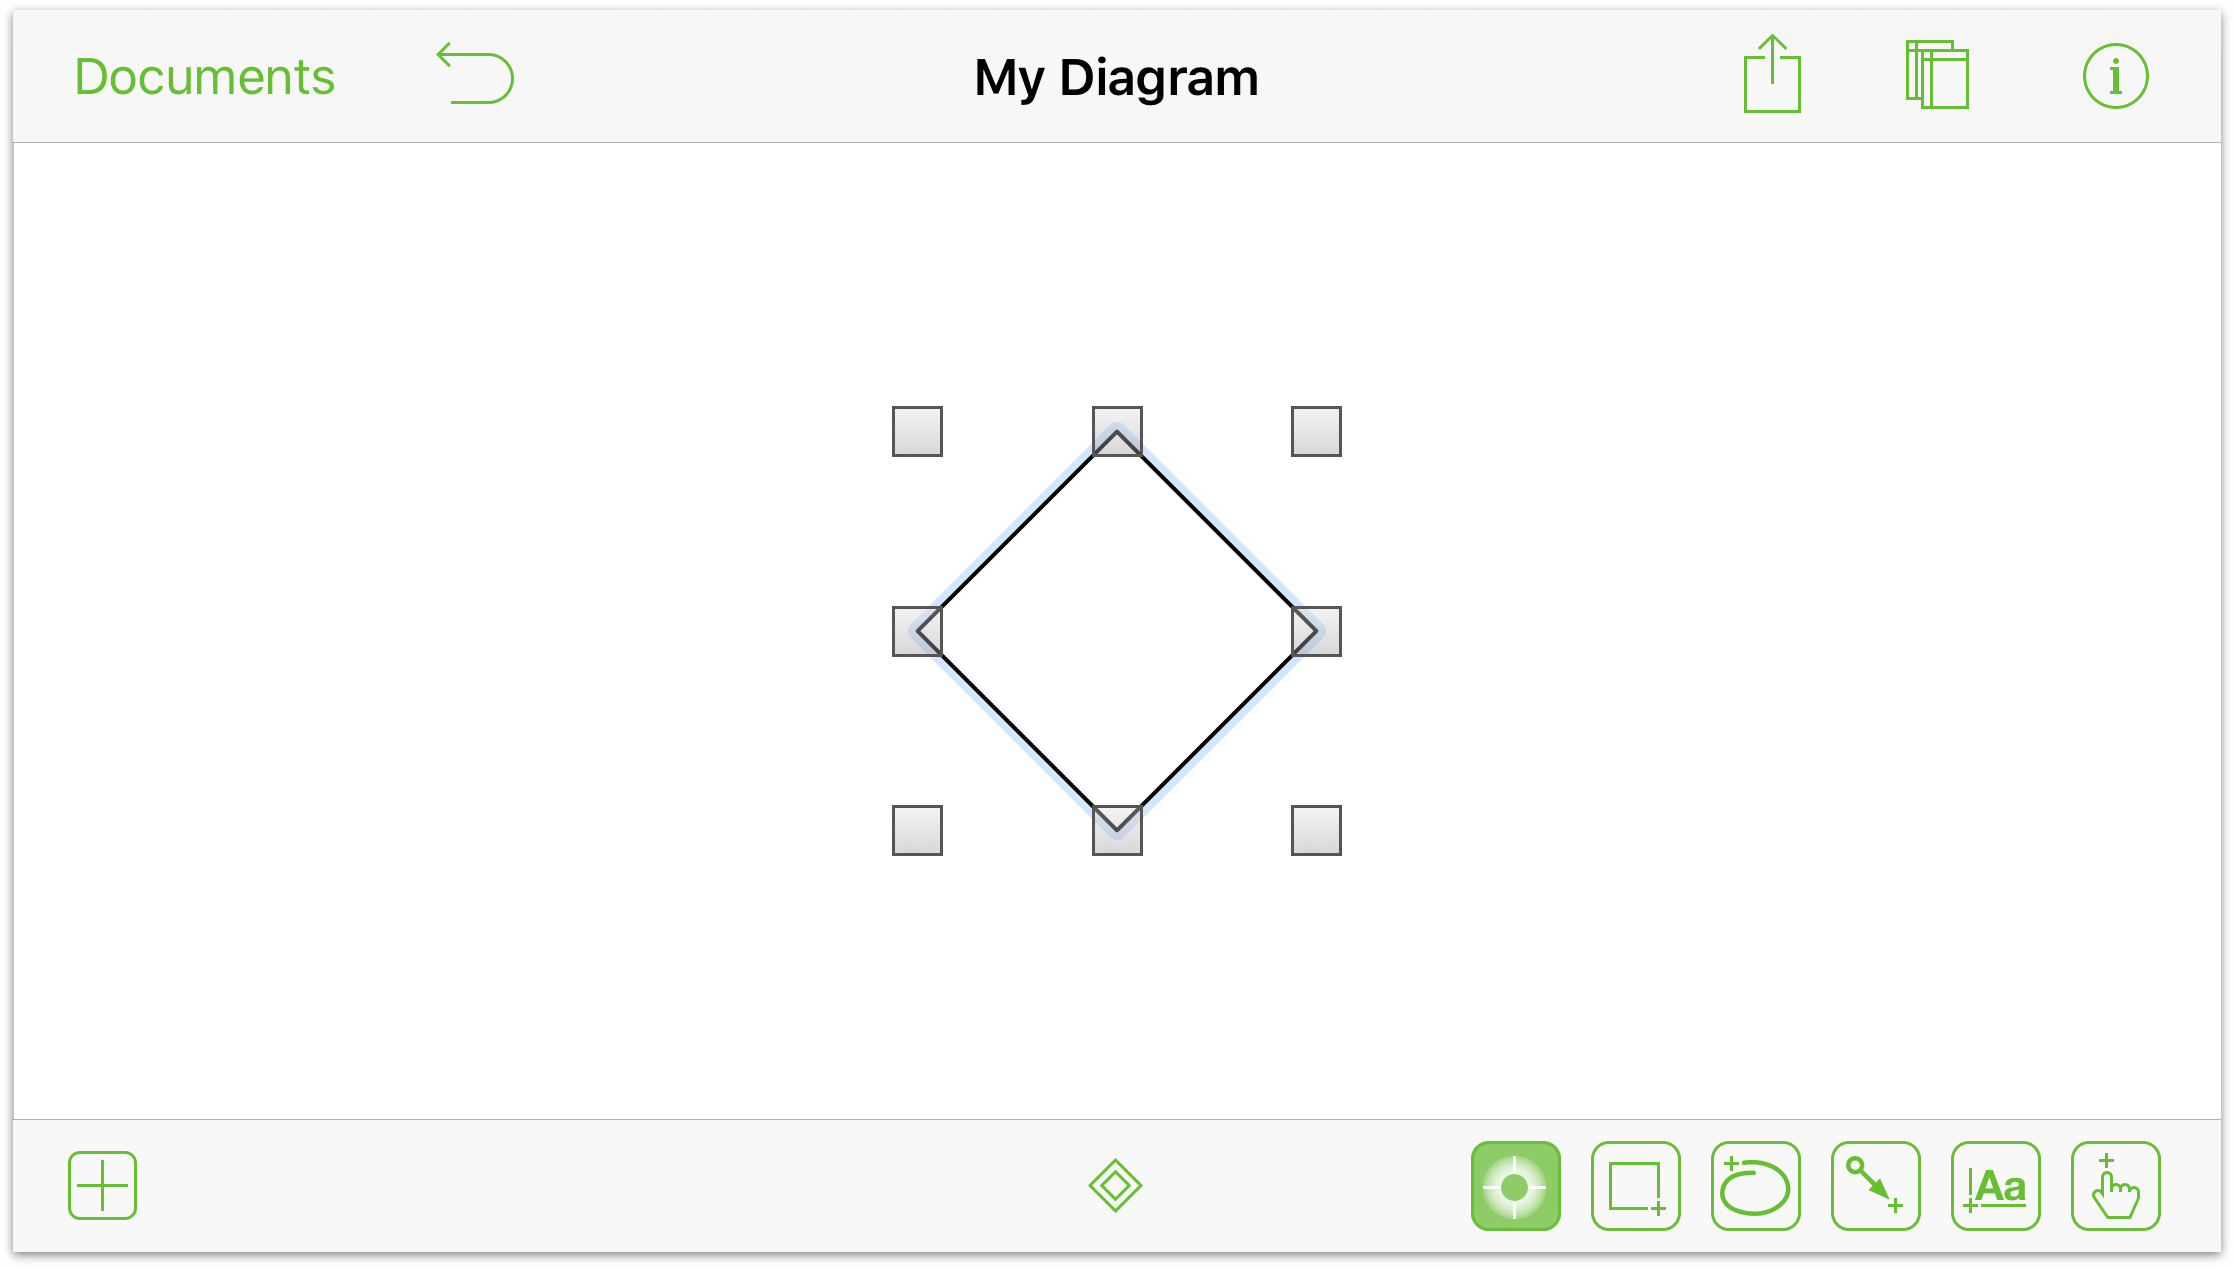
To add a stencil object, all you need to do is tap to select the object you’d like to use. The object is placed on the Canvas, where you can interact with the stencil object just as you would with any other object you draw. For example, you can edit a shape’s path to transform an ordinary triangle into a leaf—or pretty much anything else by adding more control points or combining shapes.
Searching for Stencils
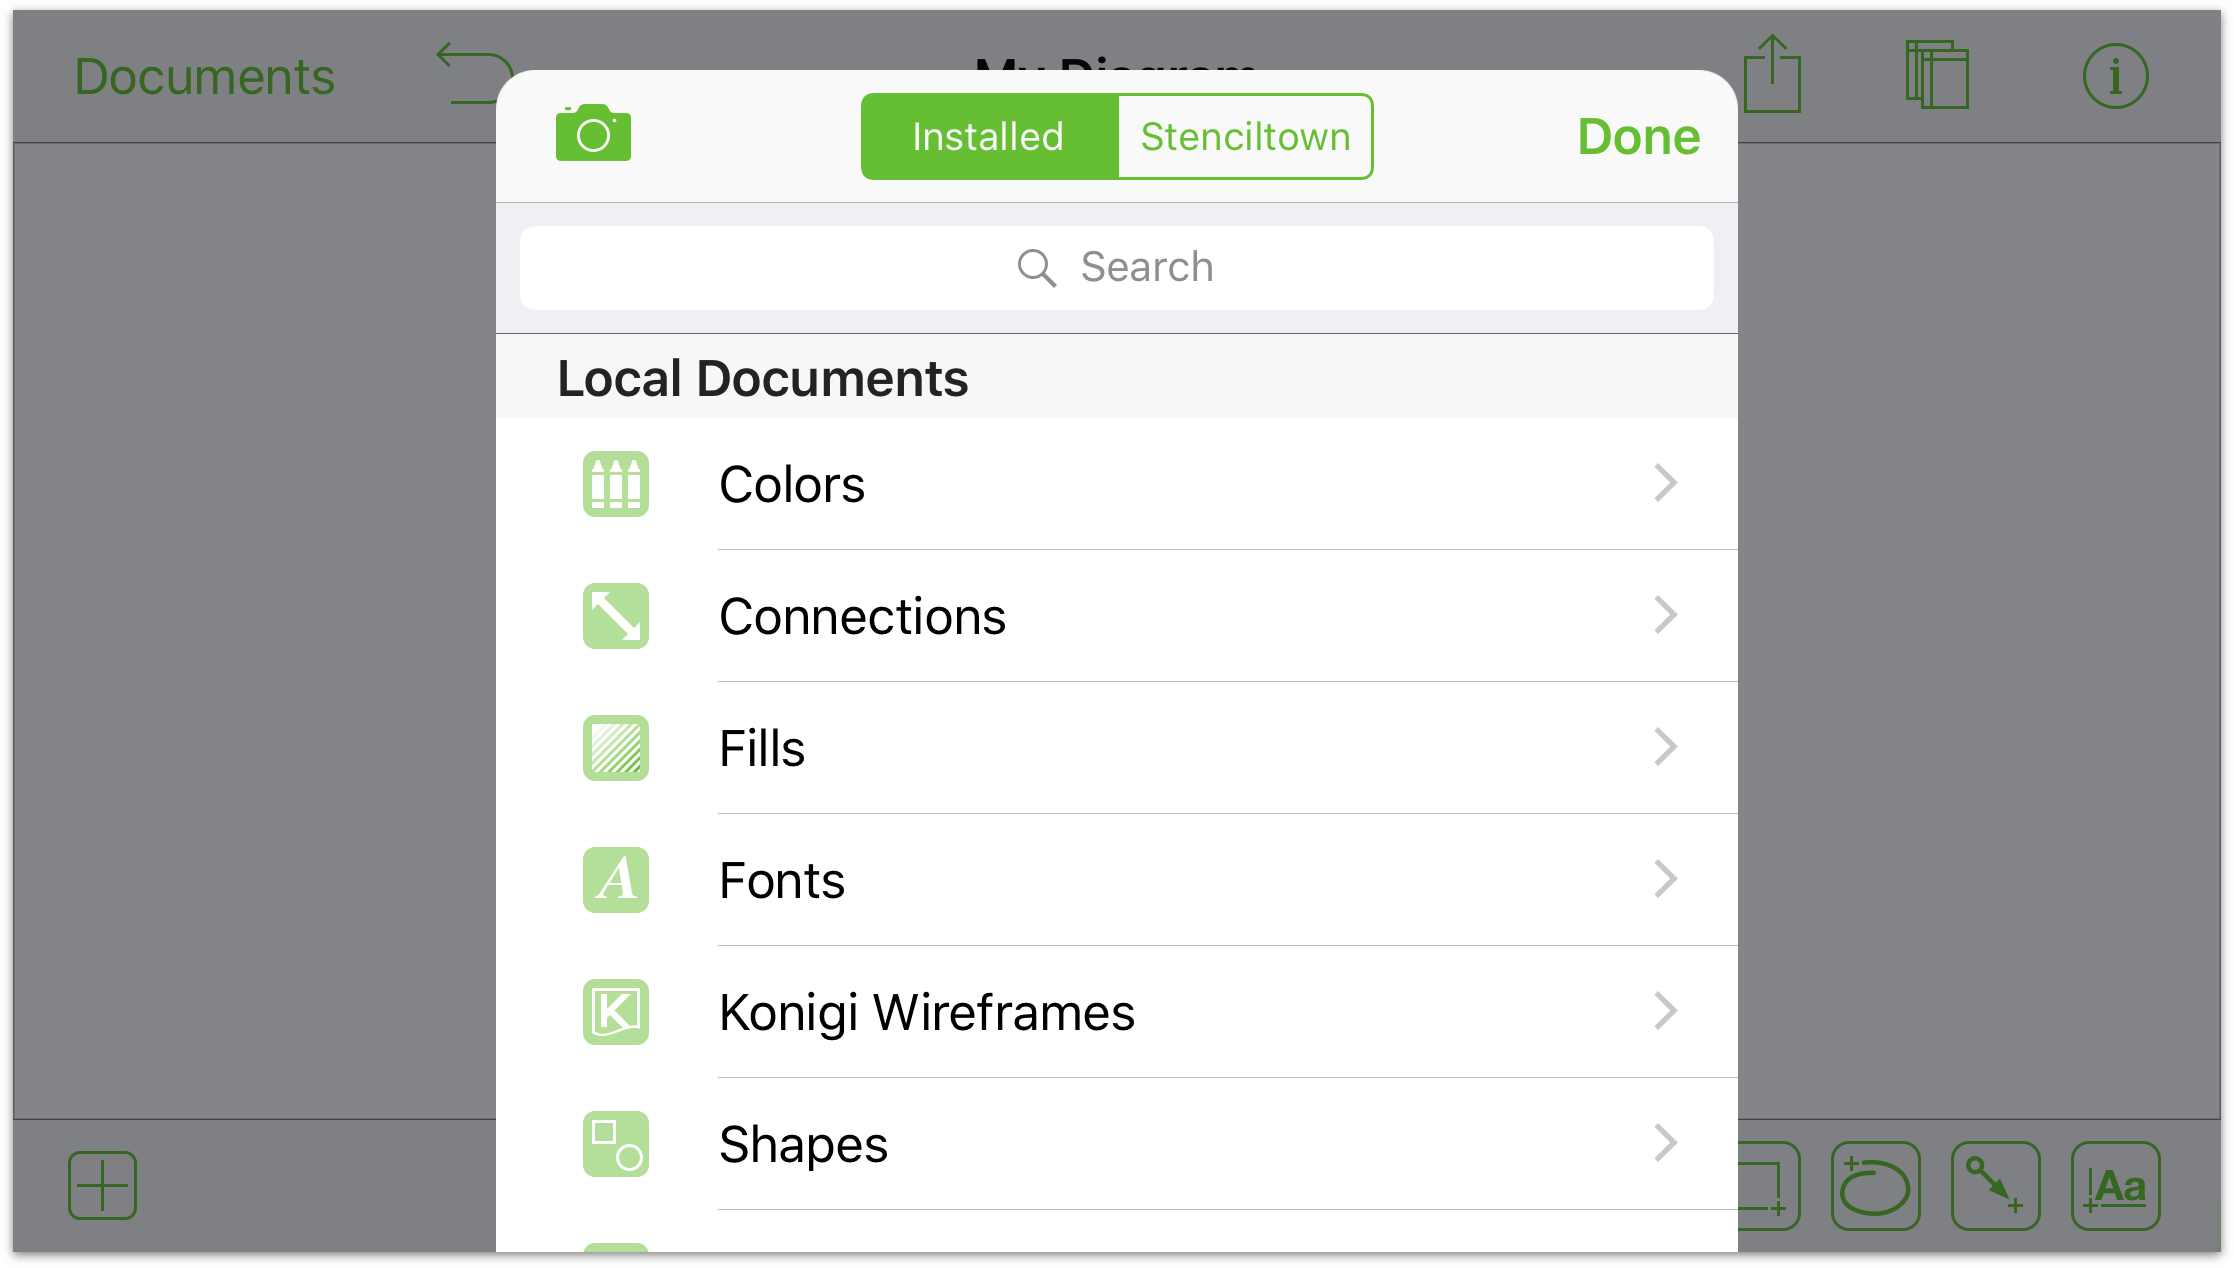
At the top of the Stencils Library, you’ll find two buttons—Installed and Stenciltown—which are followed by a Search field. Stenciltown is Omni’s own online user-supported stencil repository.
Note
OmniGraffle only searches for stencils on Stenciltown if your iOS device is connected to the Internet.
You can use the Search field to look for stencils you already have installed on your iOS device, or on Stenciltown, depending on which button you have pressed at the top of the menu. For example, if you wanted to prototype an iOS 9 app in OmniGraffle:
- Tap Stenciltown at the top of the Stencil Library.
- Enter iOS 9 in the Search field.
- Tap Search to search on Stenciltown for any stencils related to iOS 9.
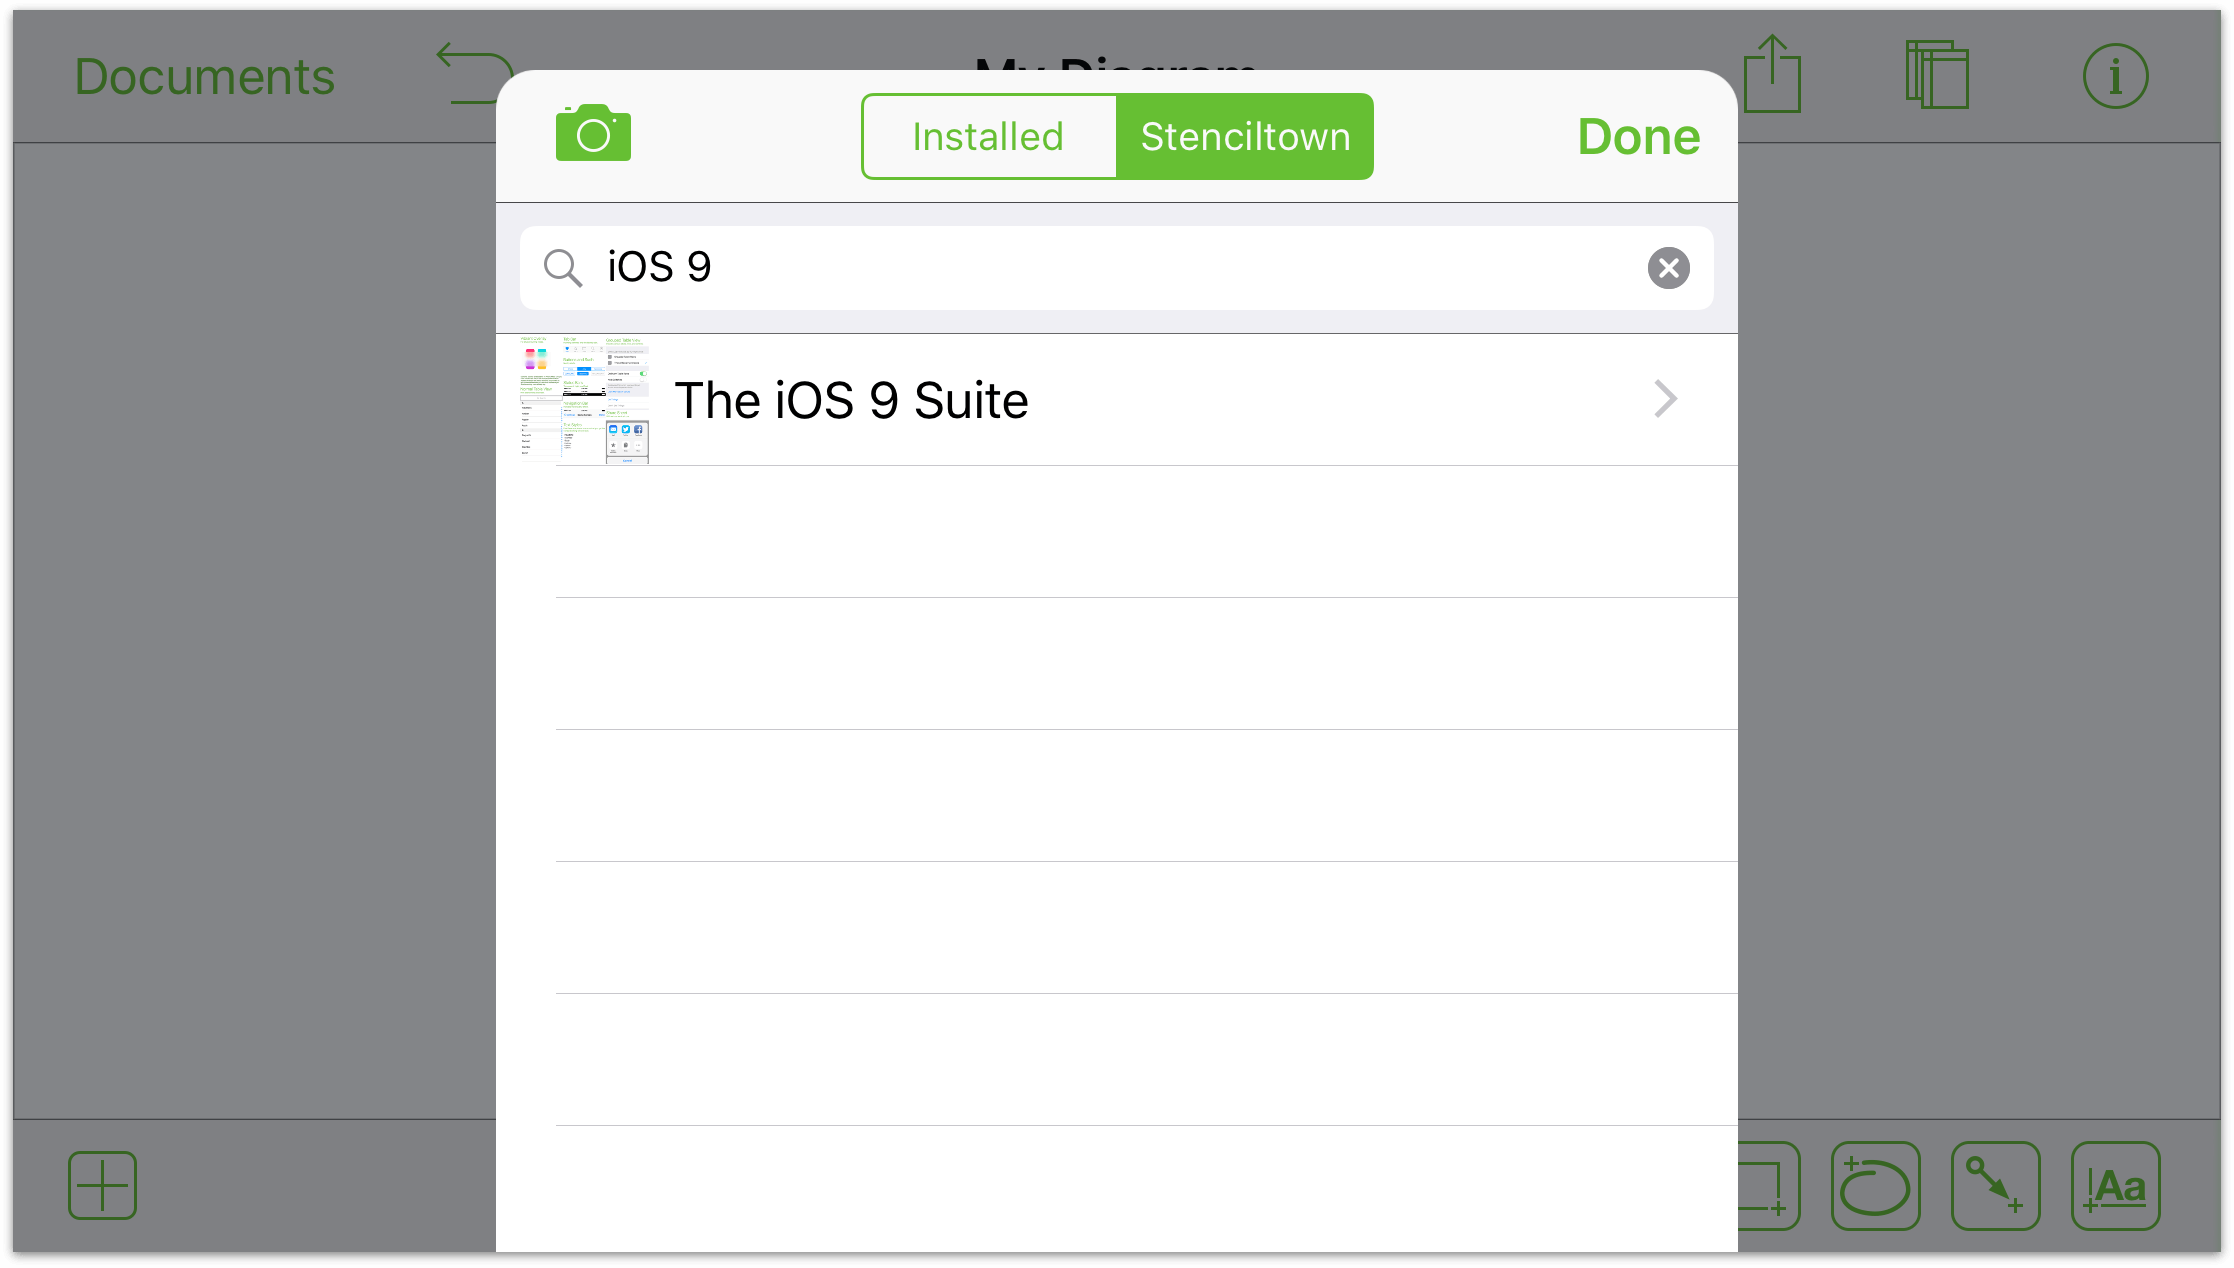
- Tap the result to examine the stencil before you download it to your device. Each stencil includes a brief description, and an estimated file size, so you know how much space that stencil will take up on your device.
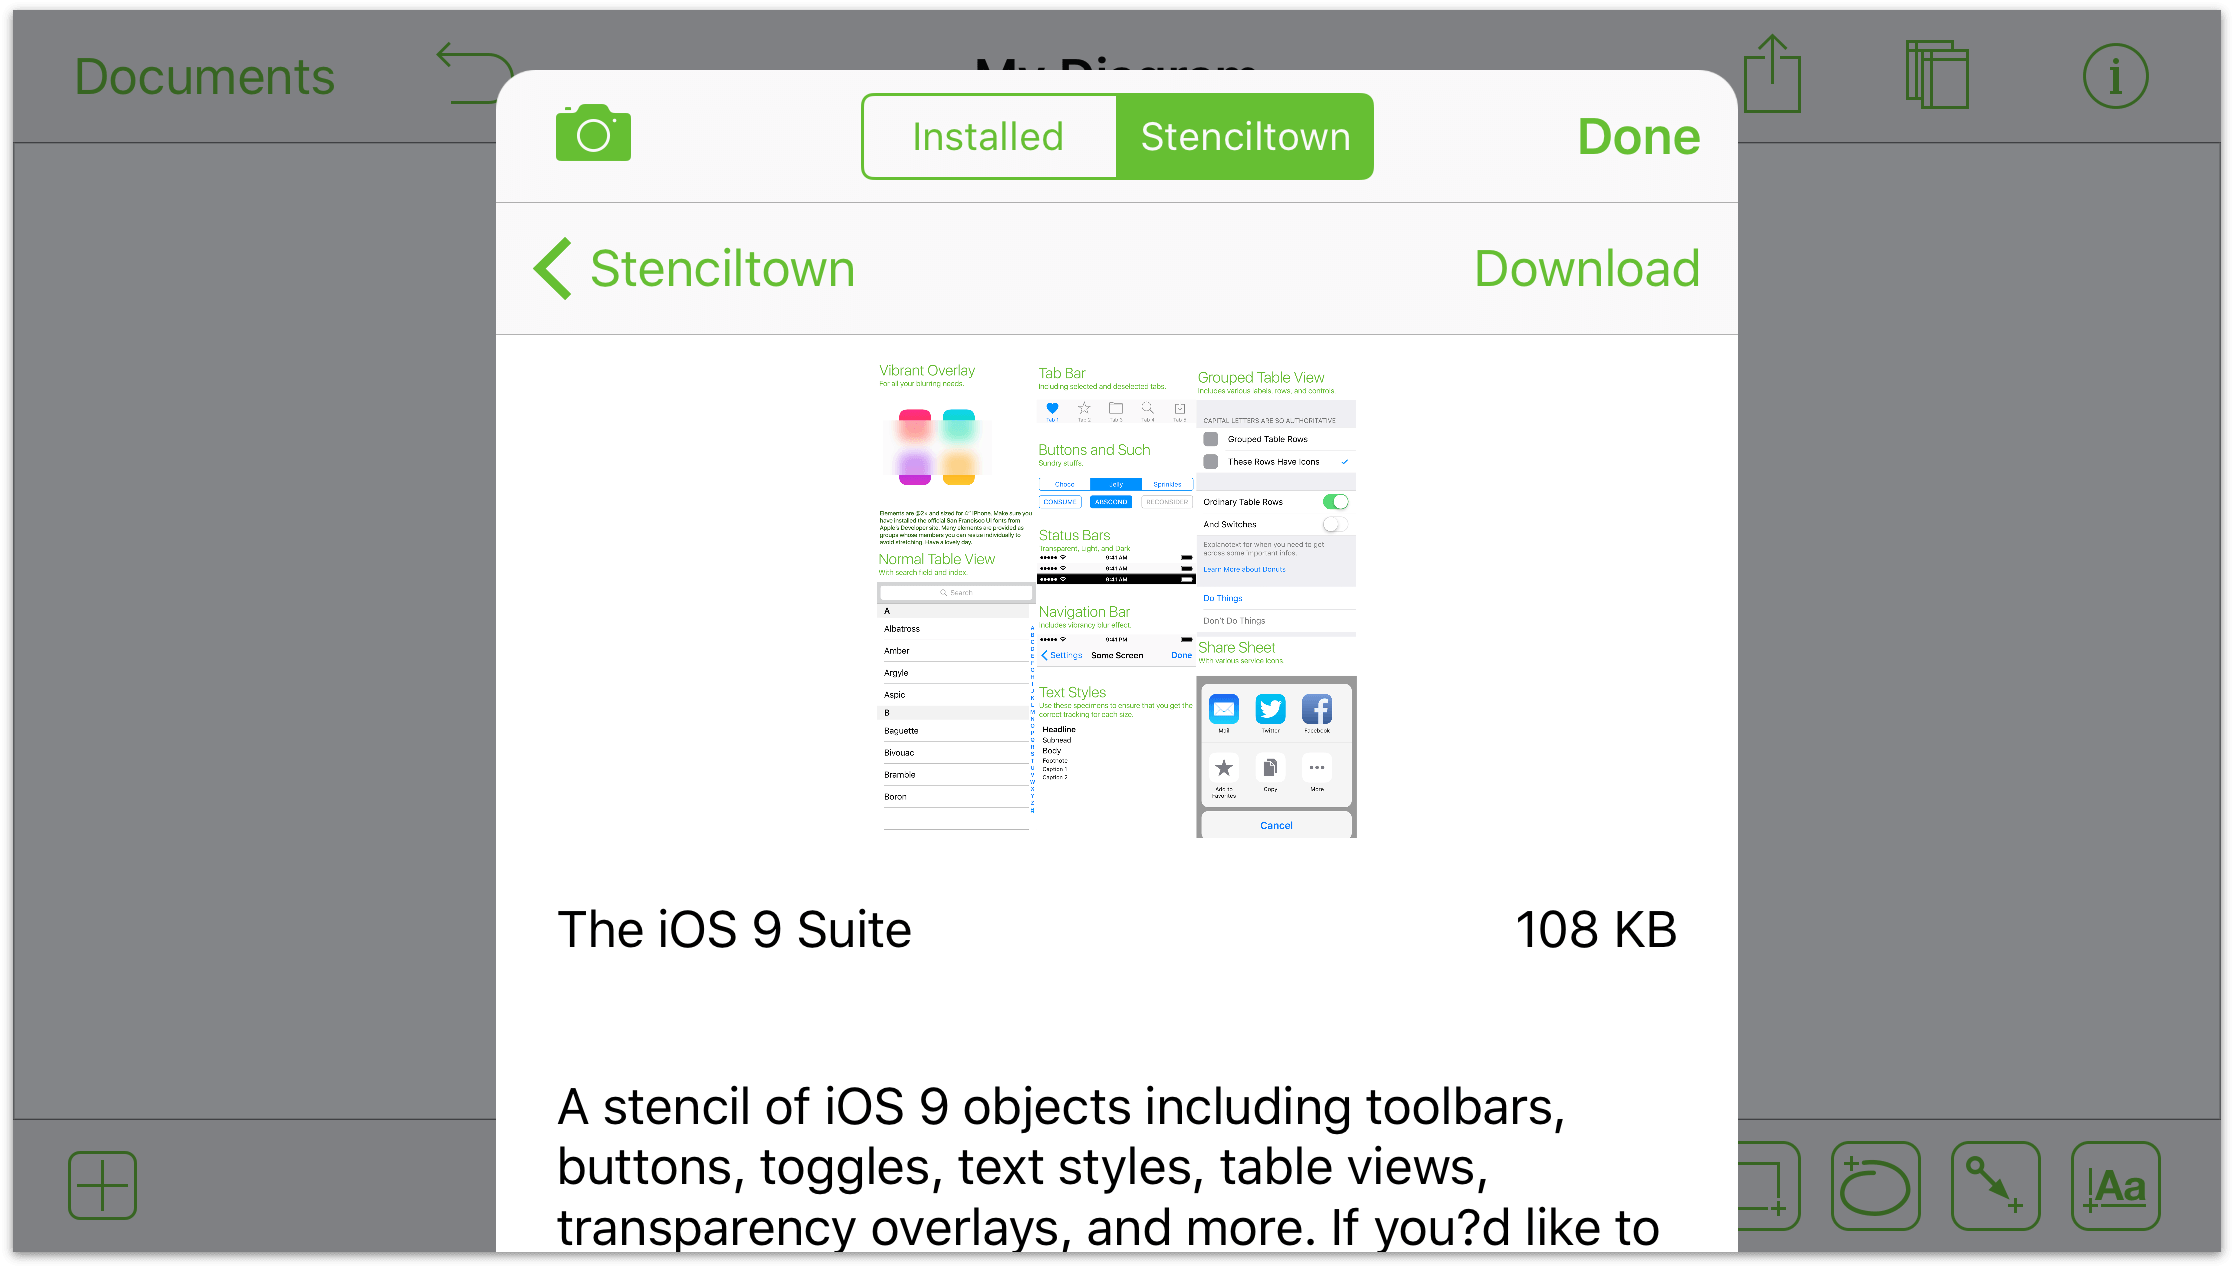
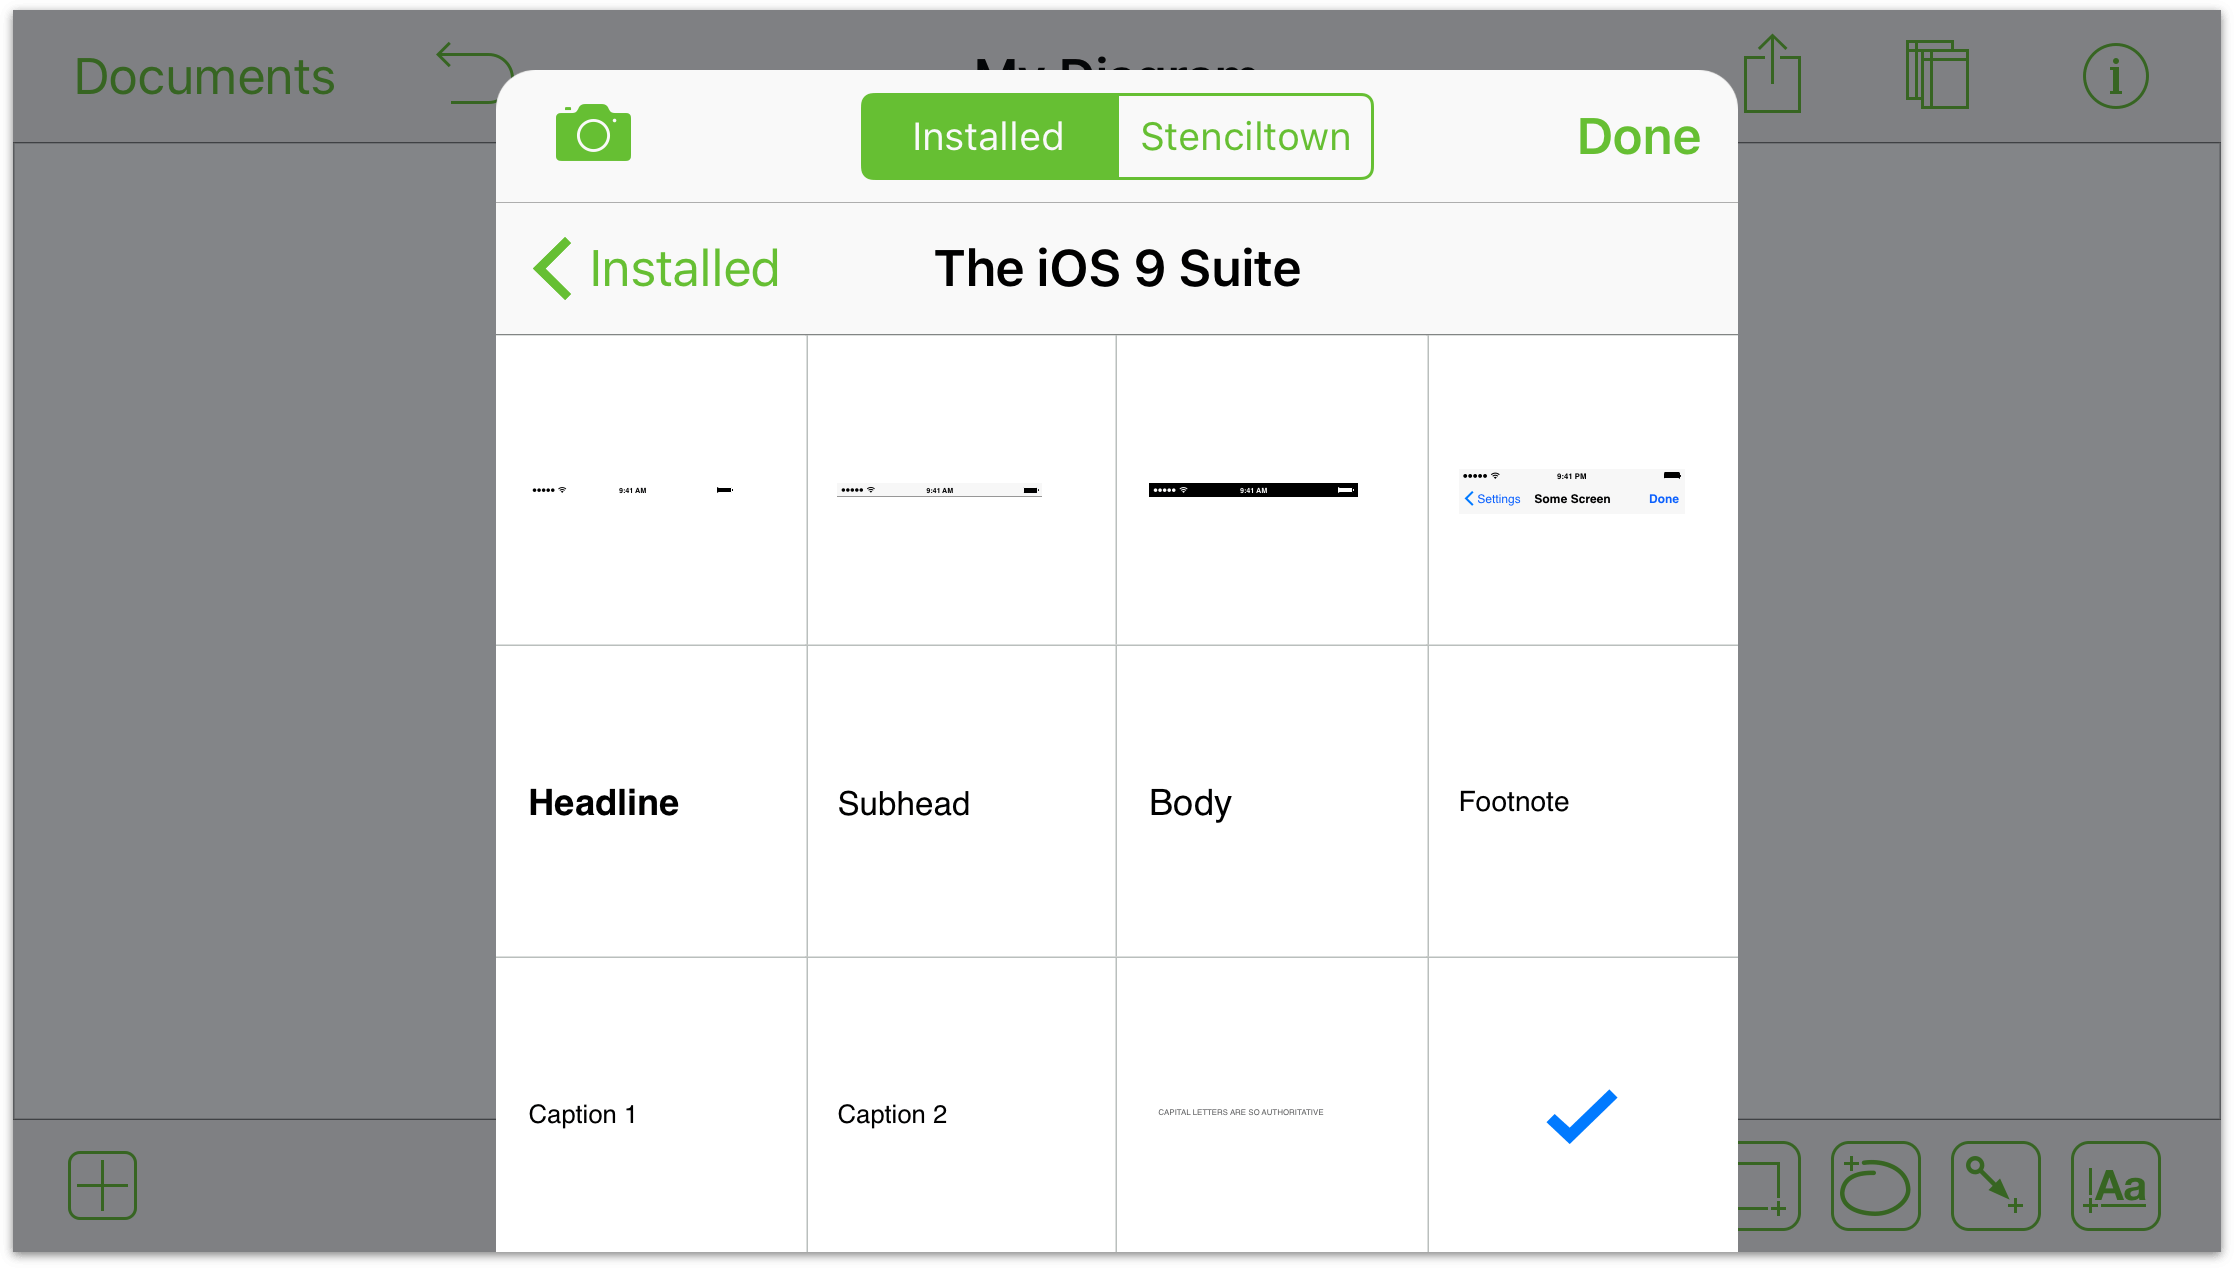
- Tap Download to download and install the stencil on your iOS device. After the stencil has installed, you can more closely examine each item in the Stencil Set.
If you can’t find the stencil you’re looking for, either in OmniGraffle or on Stenciltown, you could always draw your own stencil set in OmniGraffle. And, if you’re inclined, you could share that with other OmniGraffle users on Stenciltown.
Editing an Existing Stencil
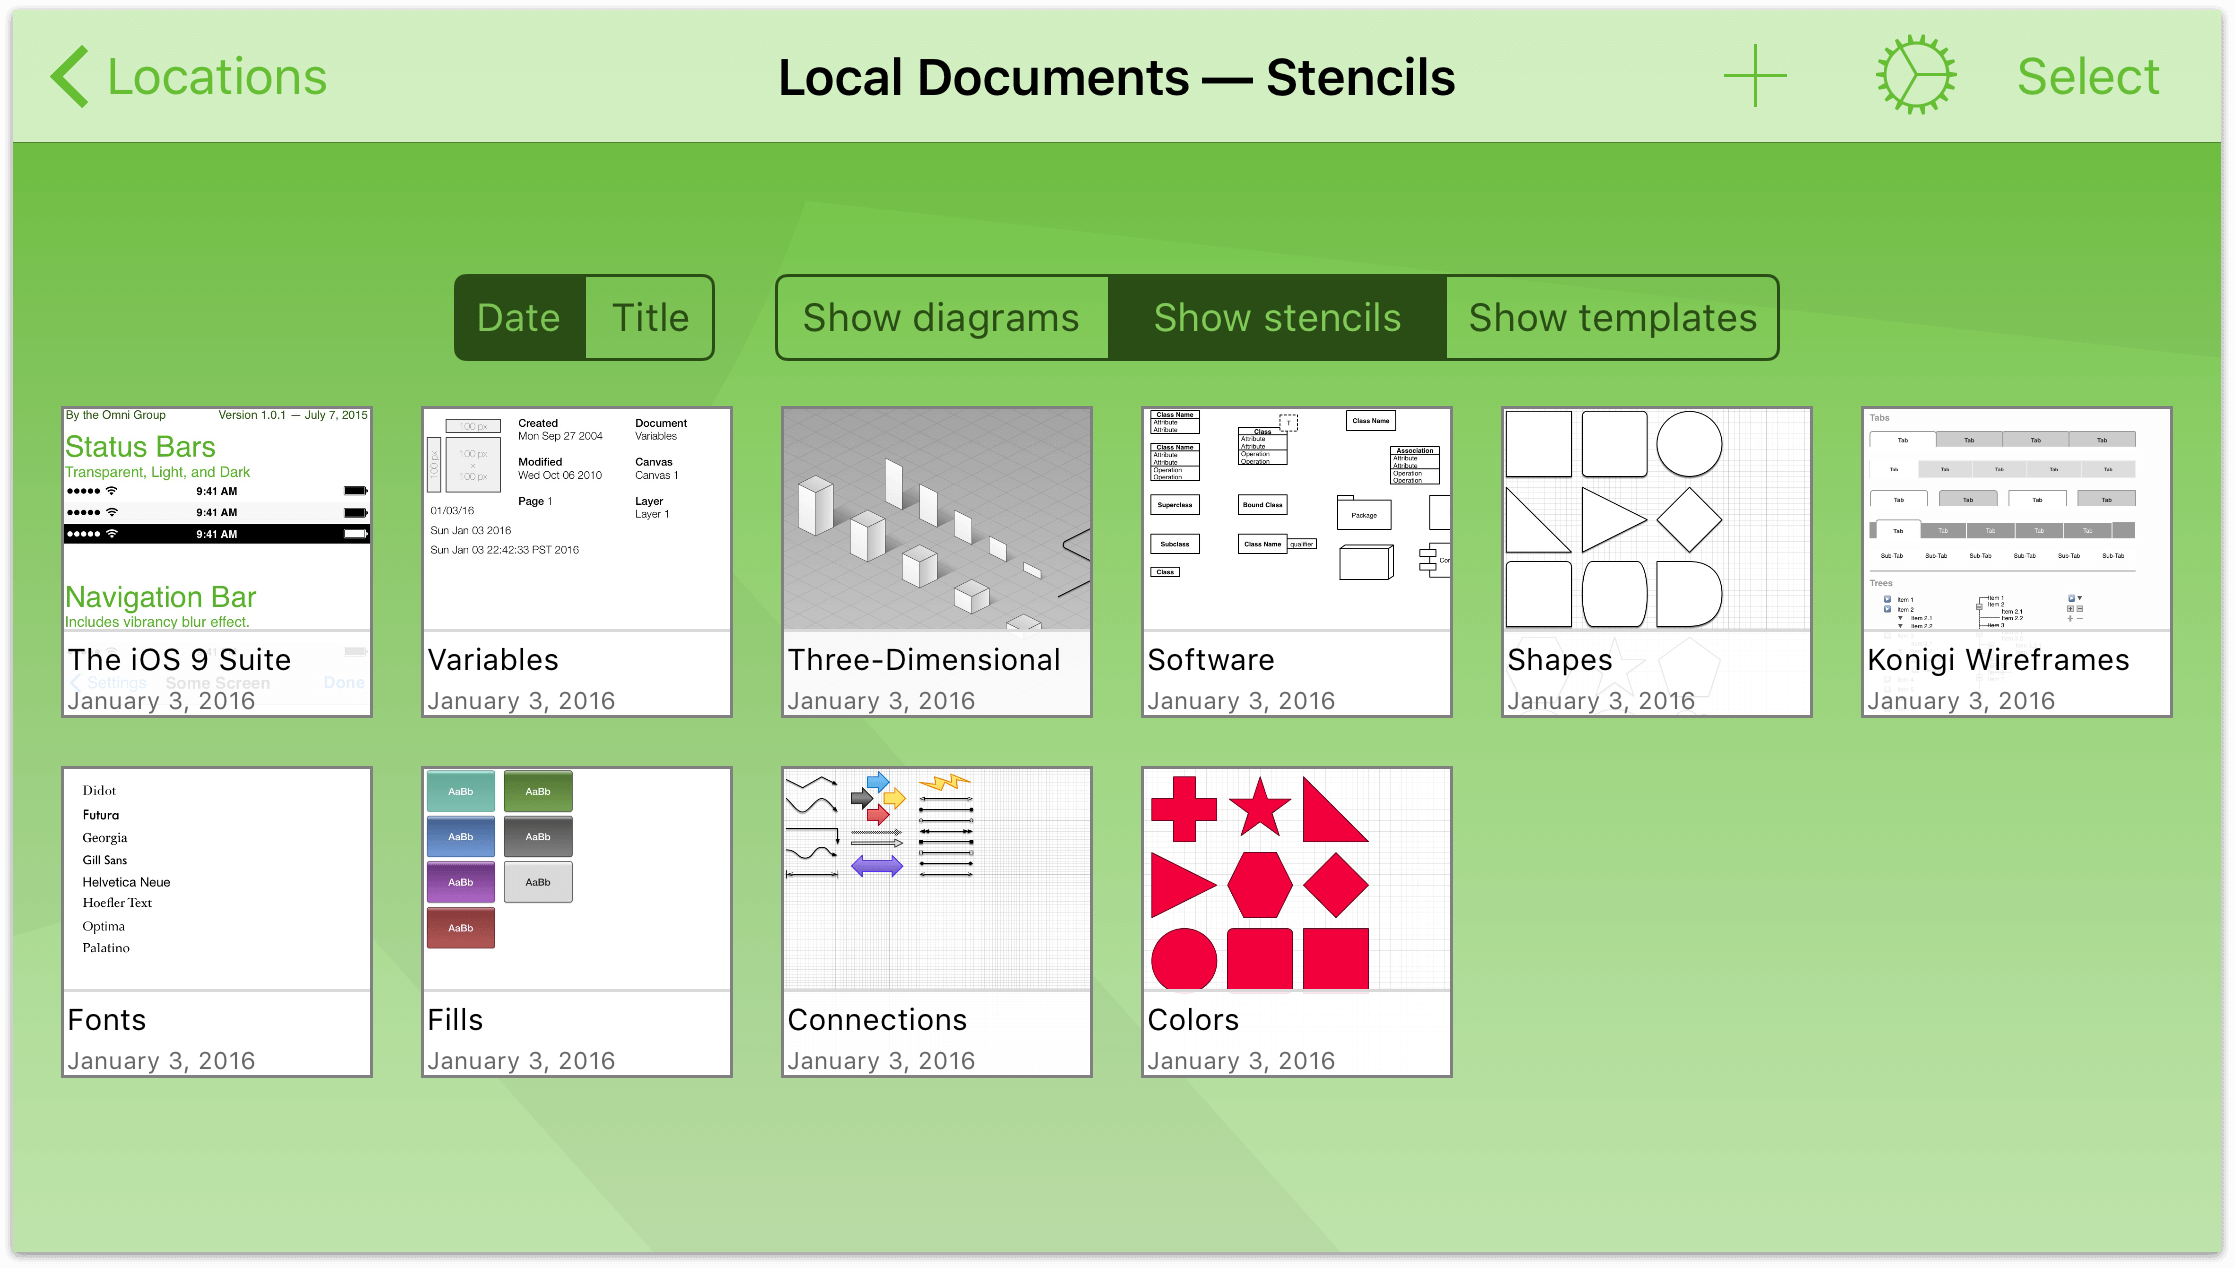
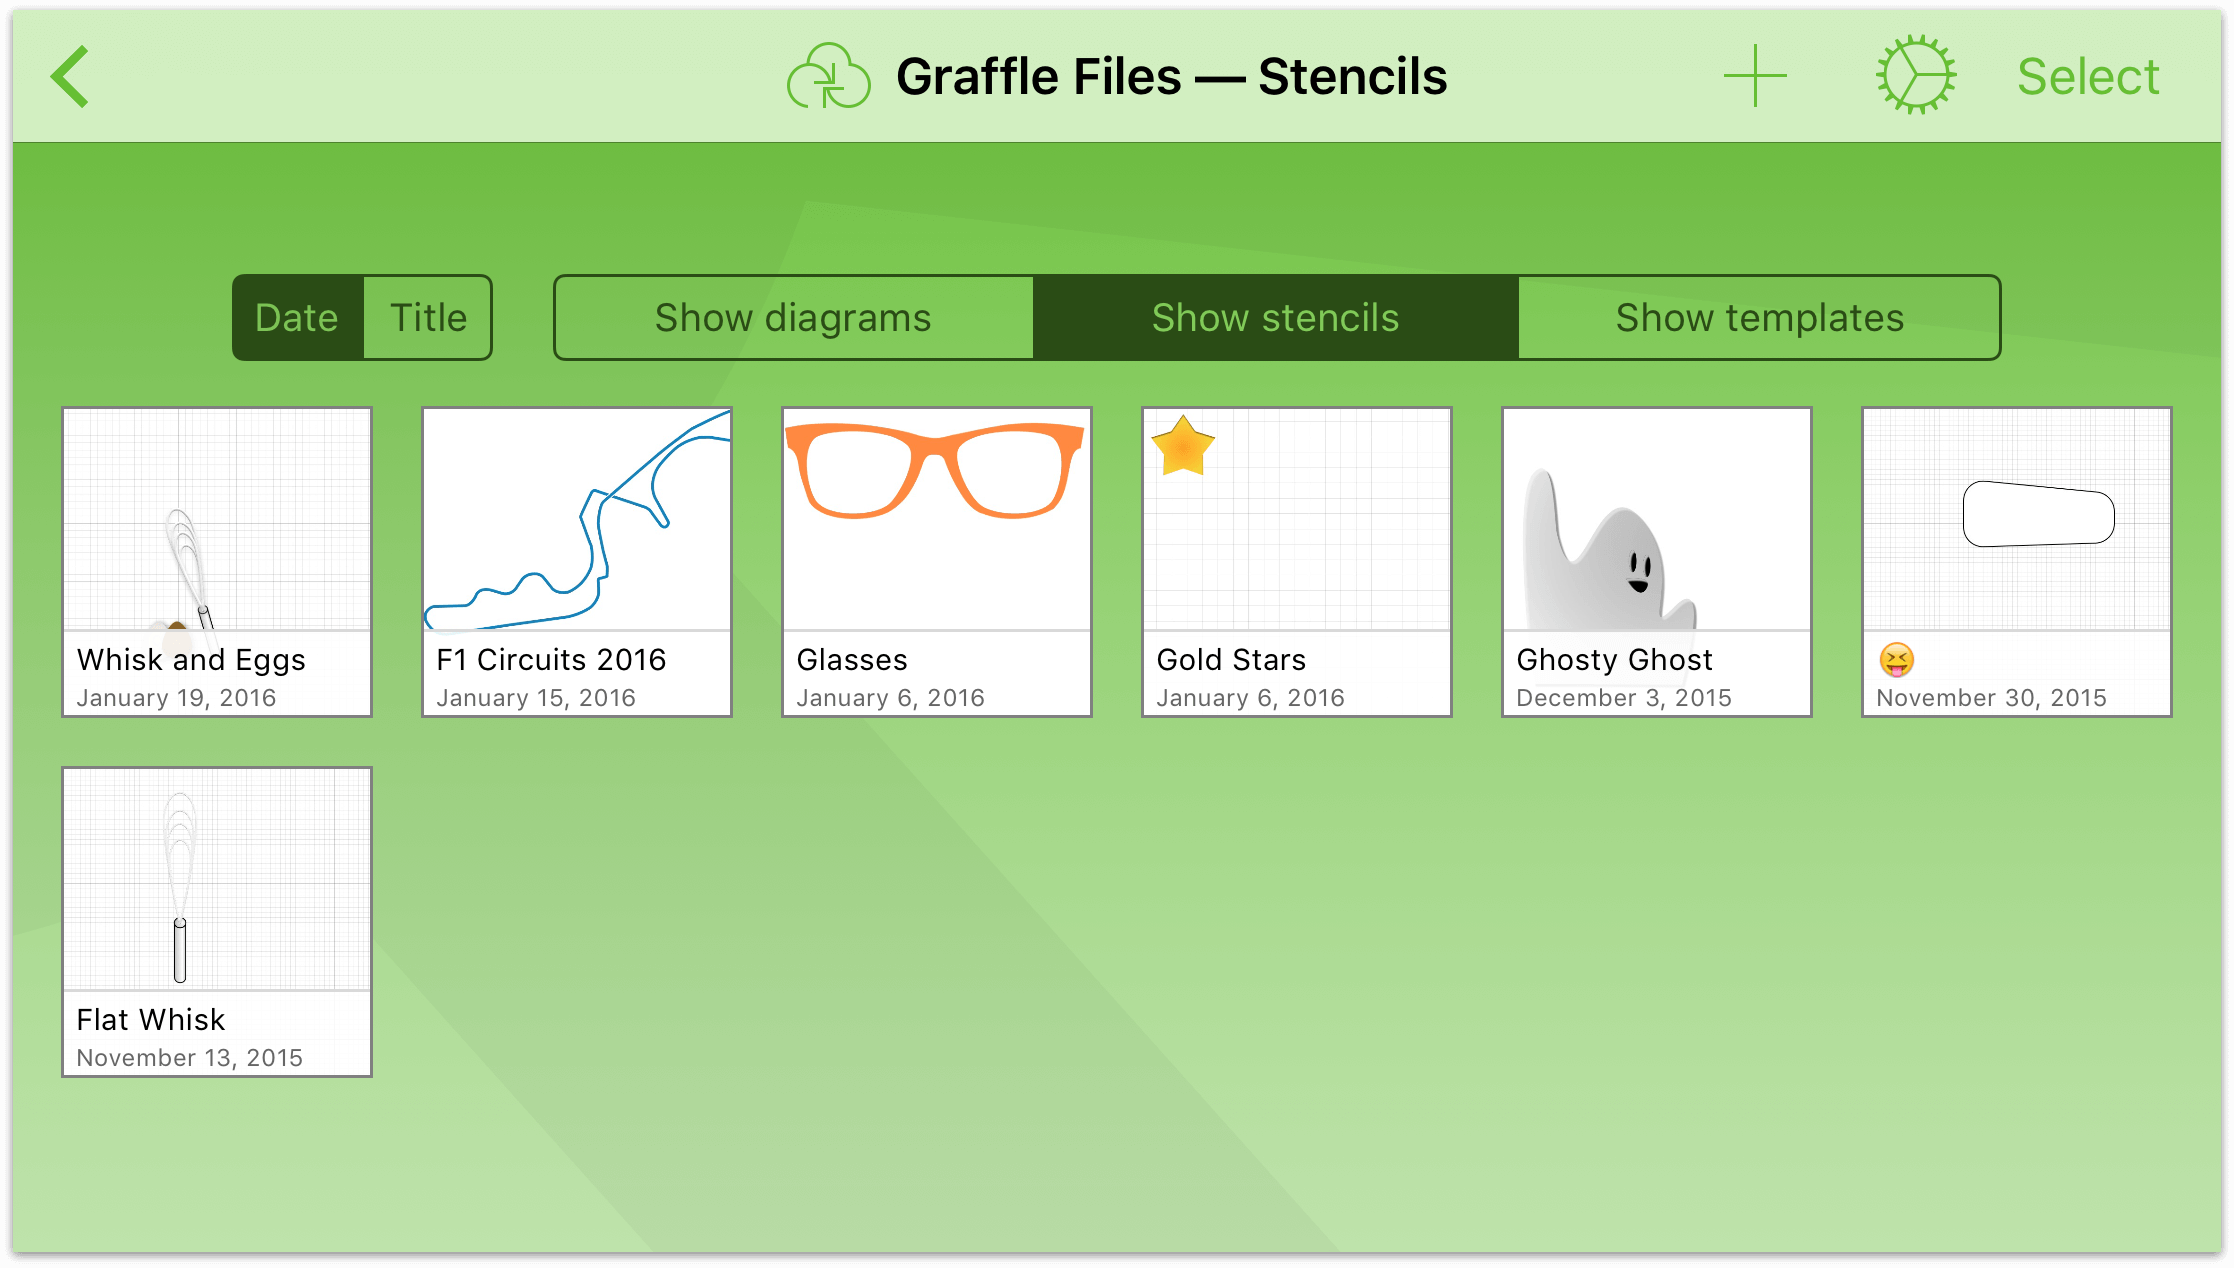
If you ever need to edit a stencil—say, to change an object’s color or size—OmniGraffle makes it super easy for you to do that. Start by closing any open documents and returning to the Locations screen. Tap to choose the folder that contains the stencil you need to edit (for example, Local Documents), and then swipe down on the screen to reveal the document organizing buttons.
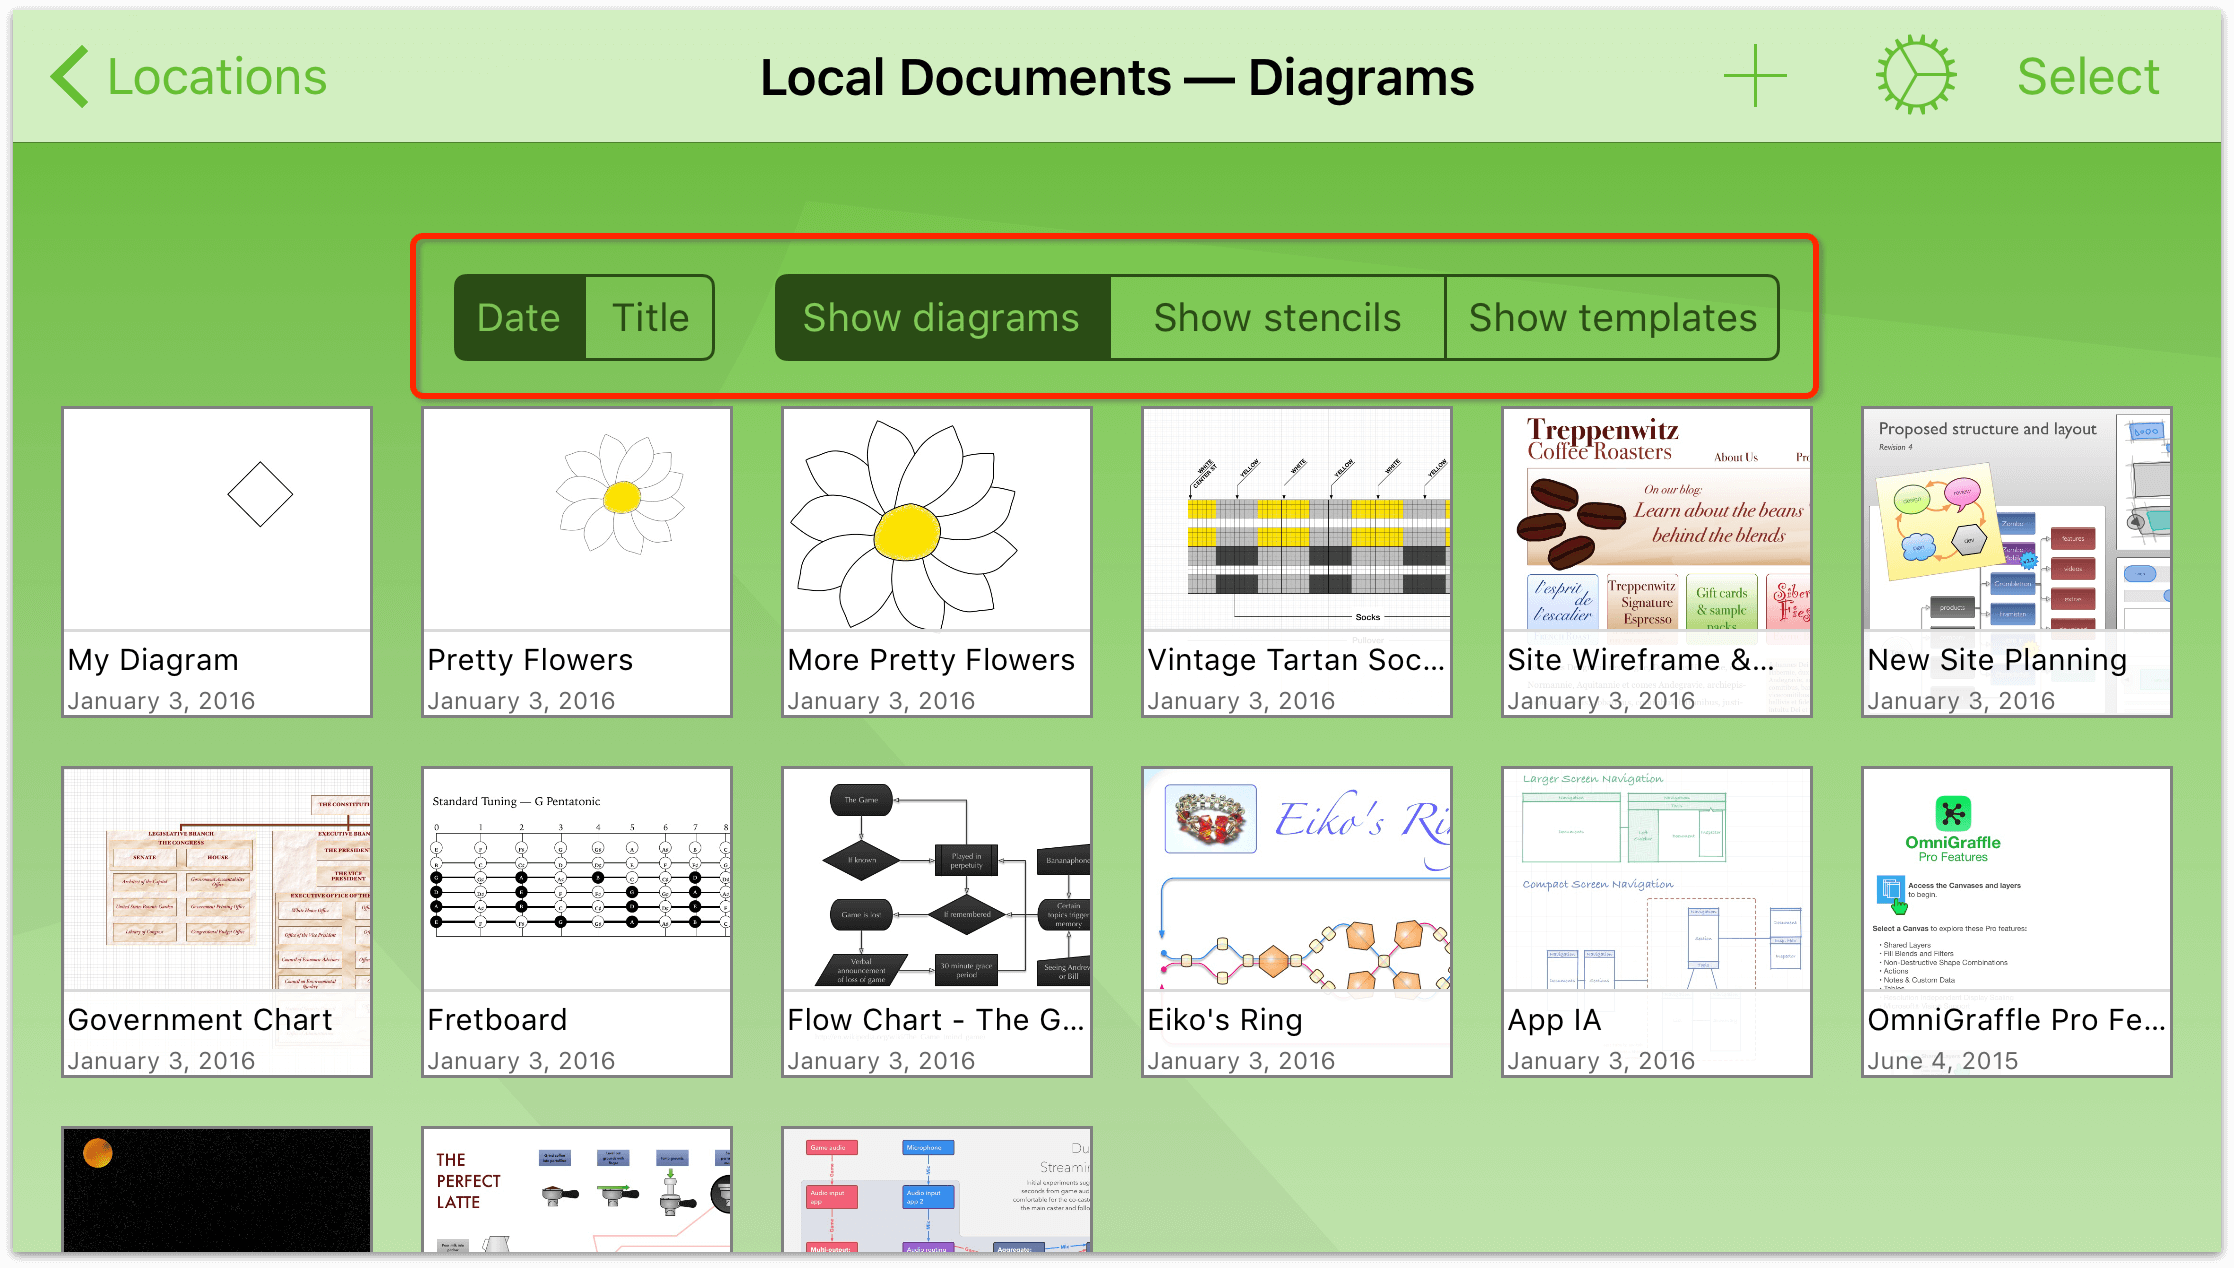
You can use these buttons to organize the documents by Date or Title, and choose the type of files that you would like displayed. Tap Show stencils to reveal the available stencil files installed with OmniGraffle, and then tap to open the Colors stencil set.
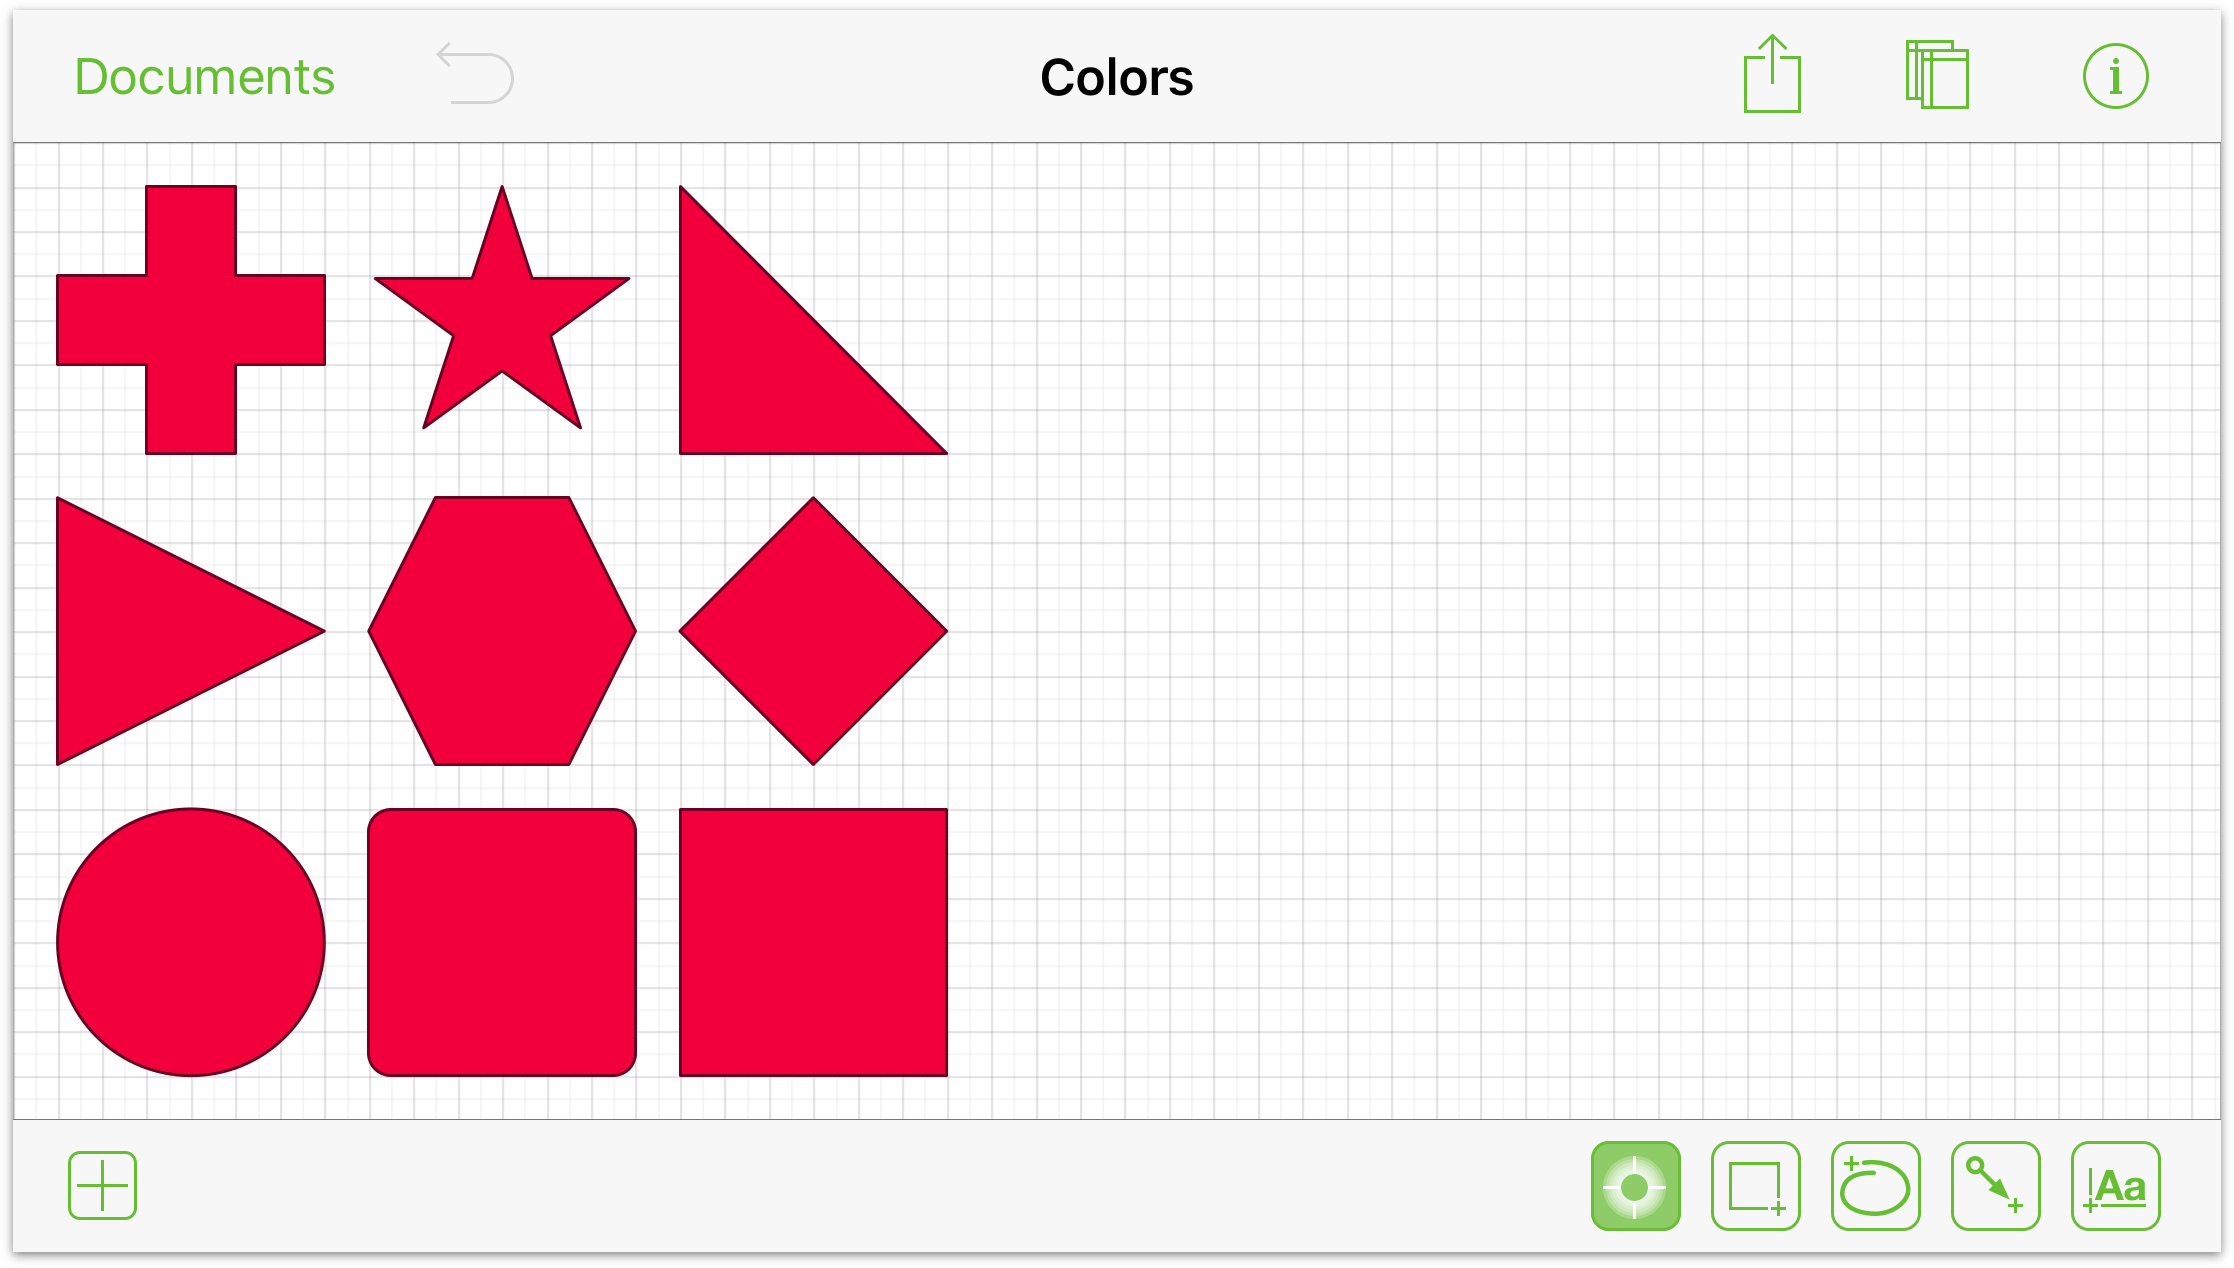
Once the stencil is open in OmniGraffle, you can work on it just like you would with any diagram or drawing you’ve made. For example, the objects in the Colors stencil have a stroke assigned to them; here’s how you can remove that stroke:
- Press on the Canvas for a couple seconds and then let go to reveal the contextual menu:
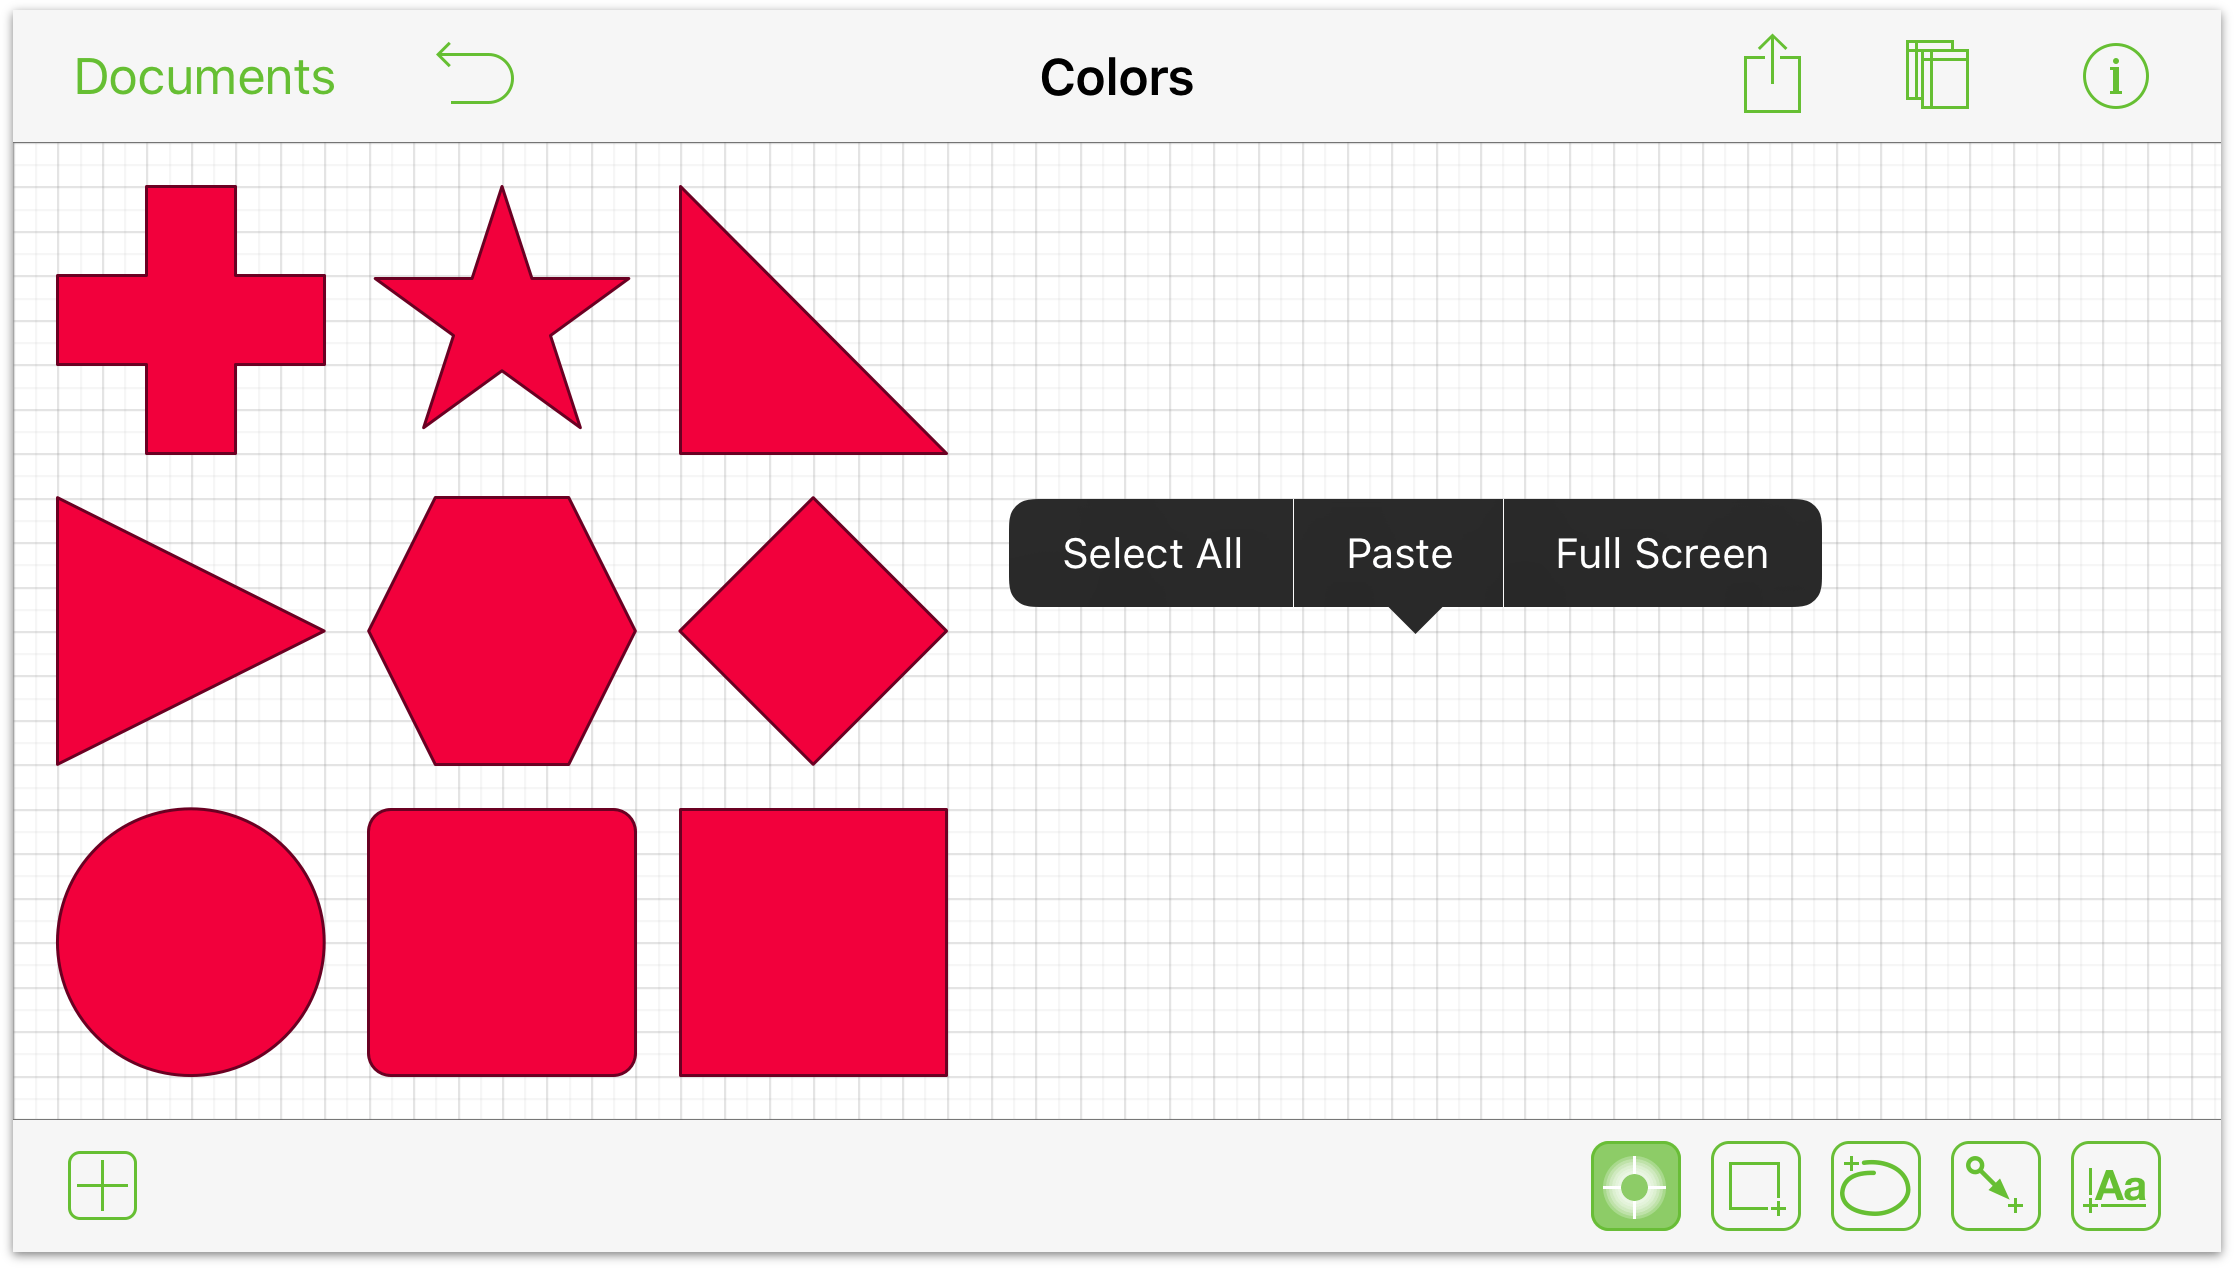
- Tap Select All to select all of the objects on the Canvas.
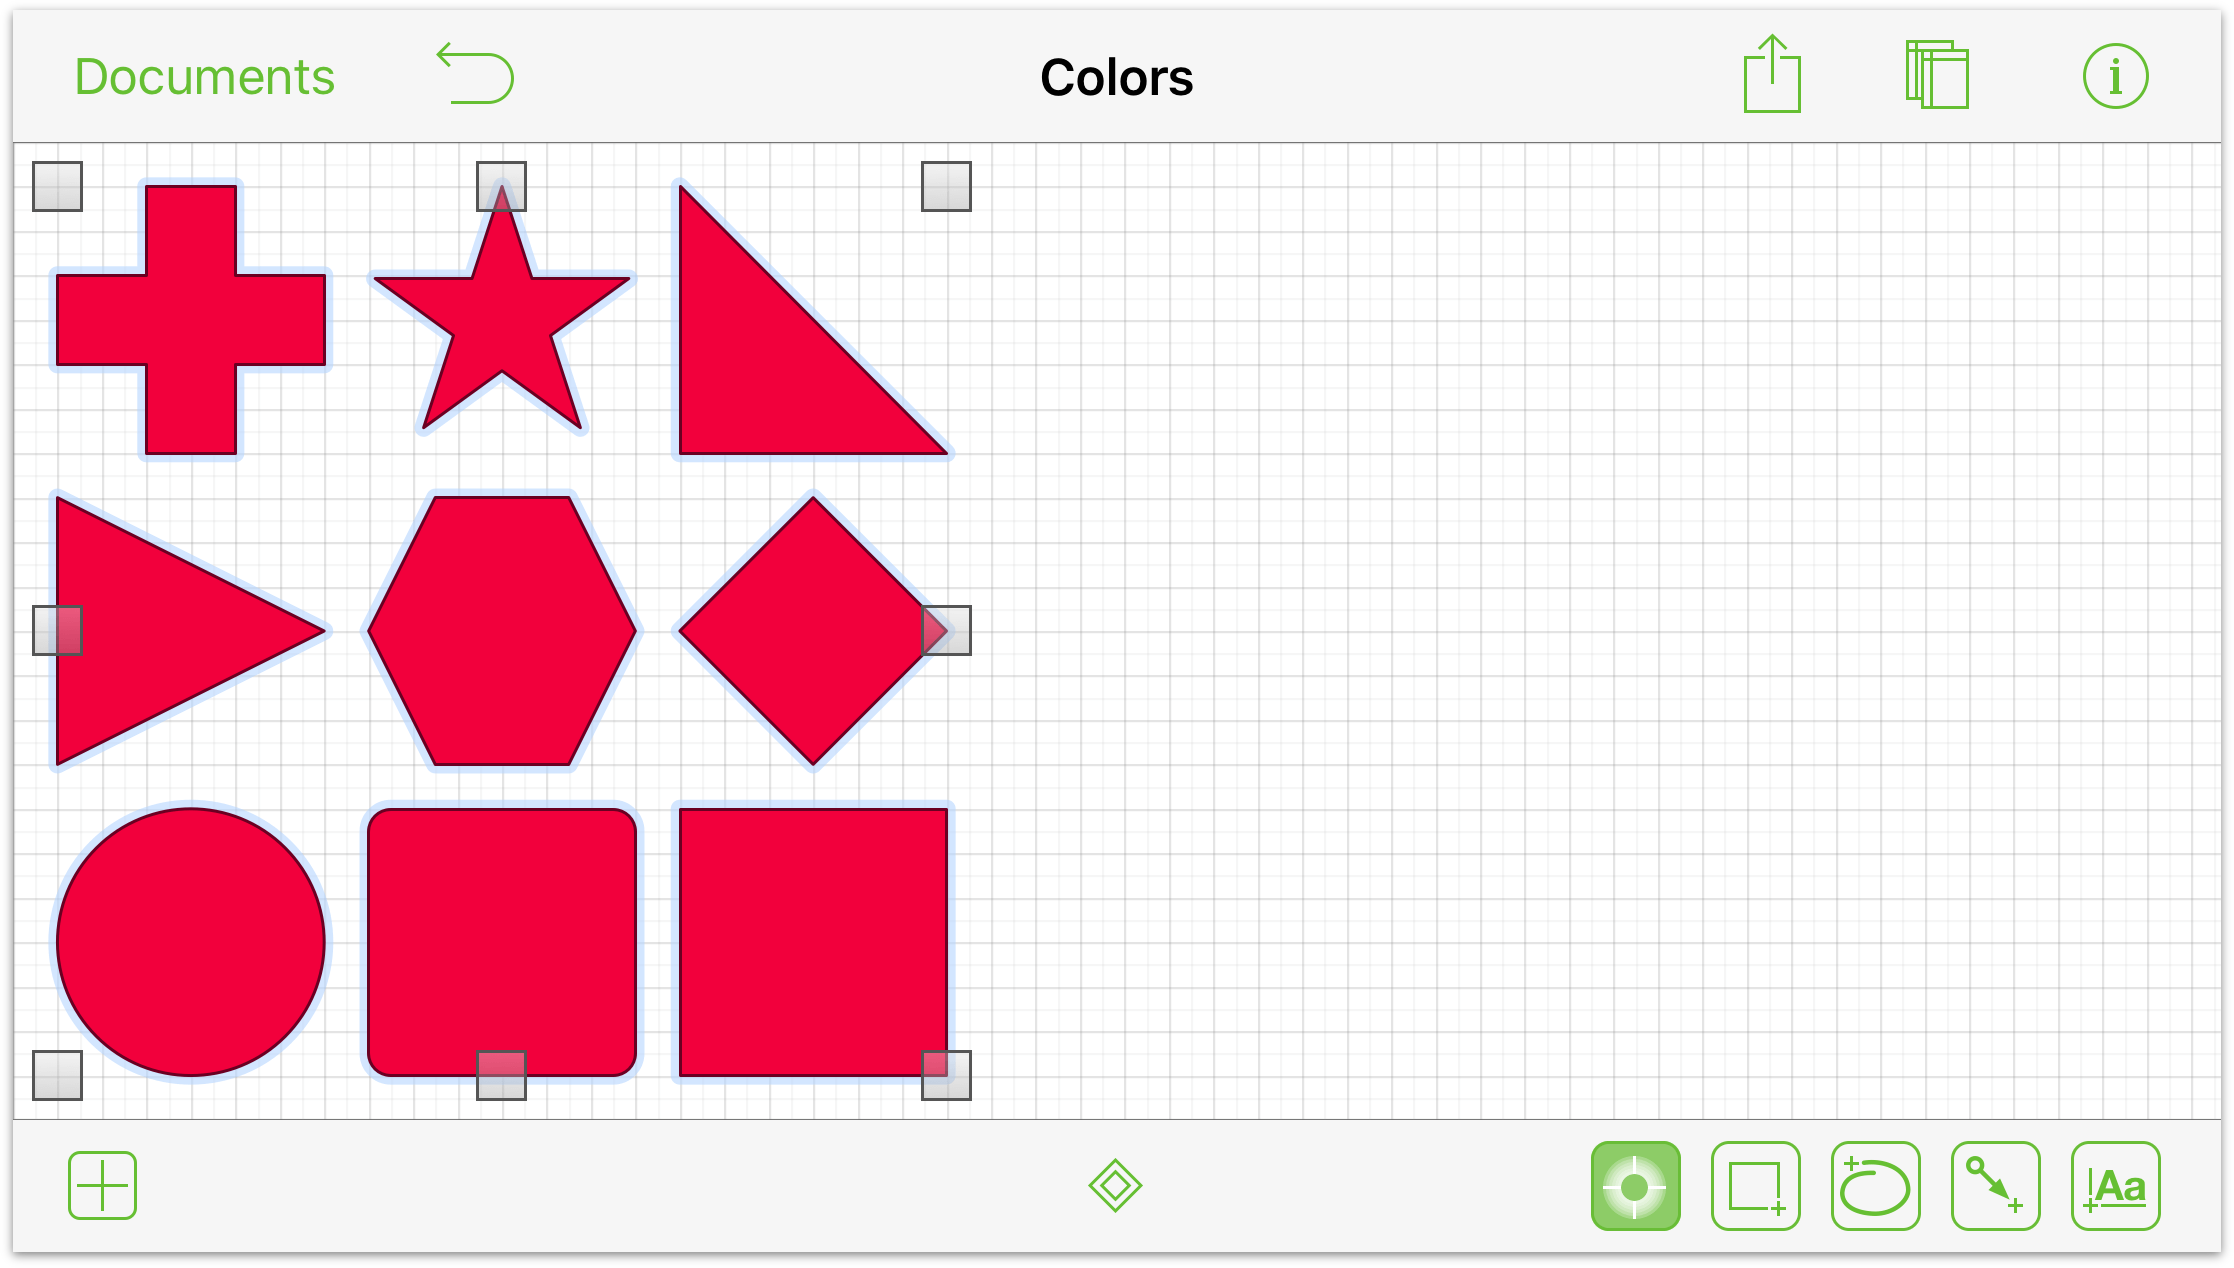
- Tap
 to reveal the available inspectors.
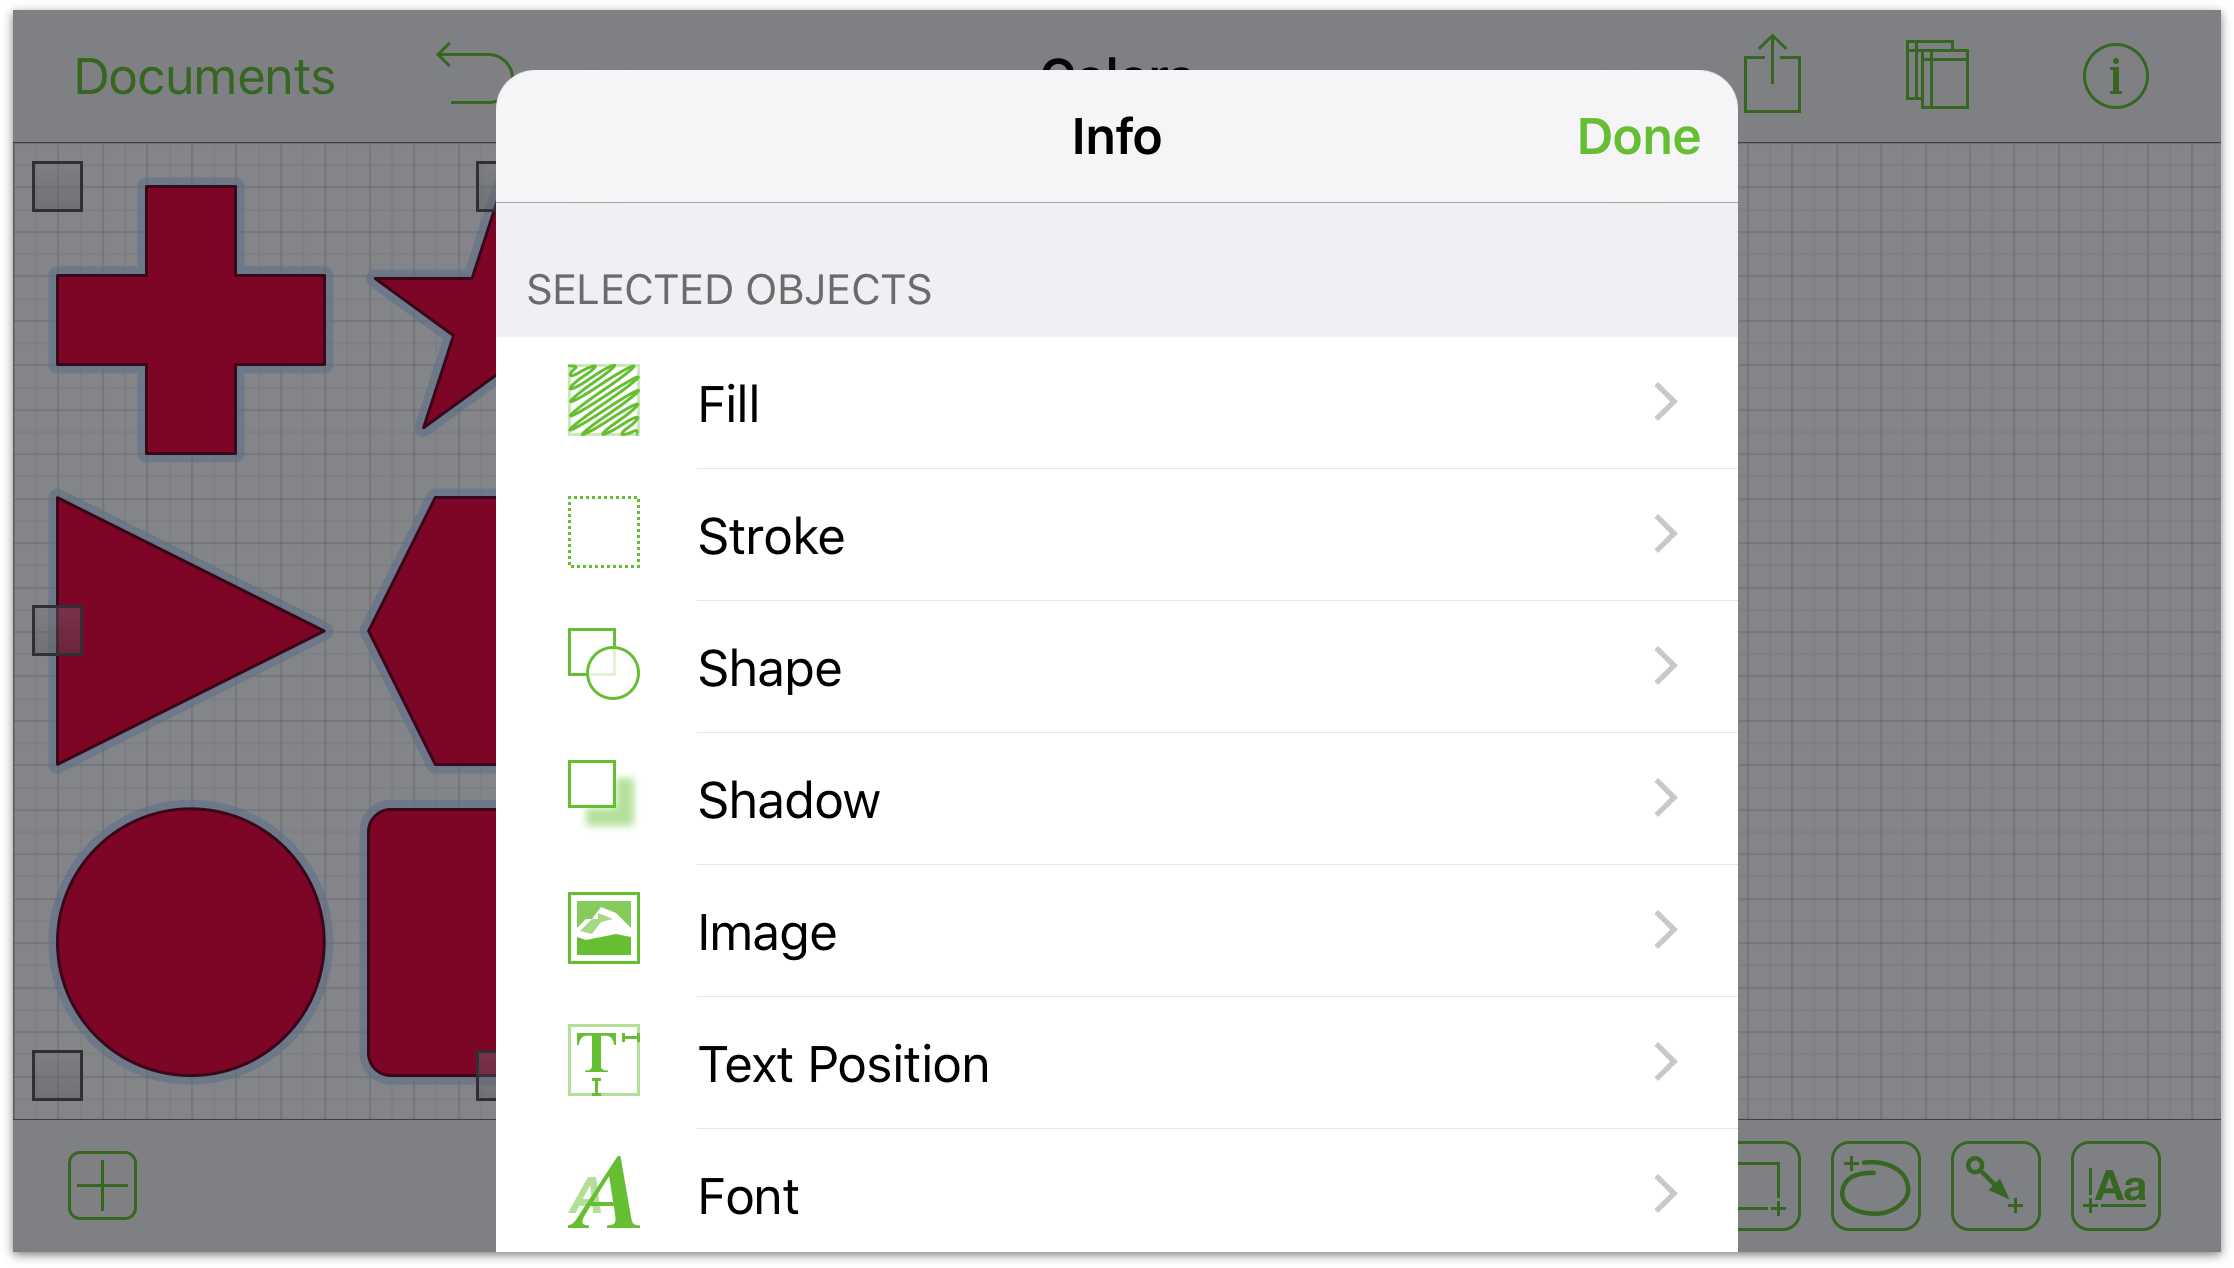
- Tap Stroke to open the Stroke inspector:
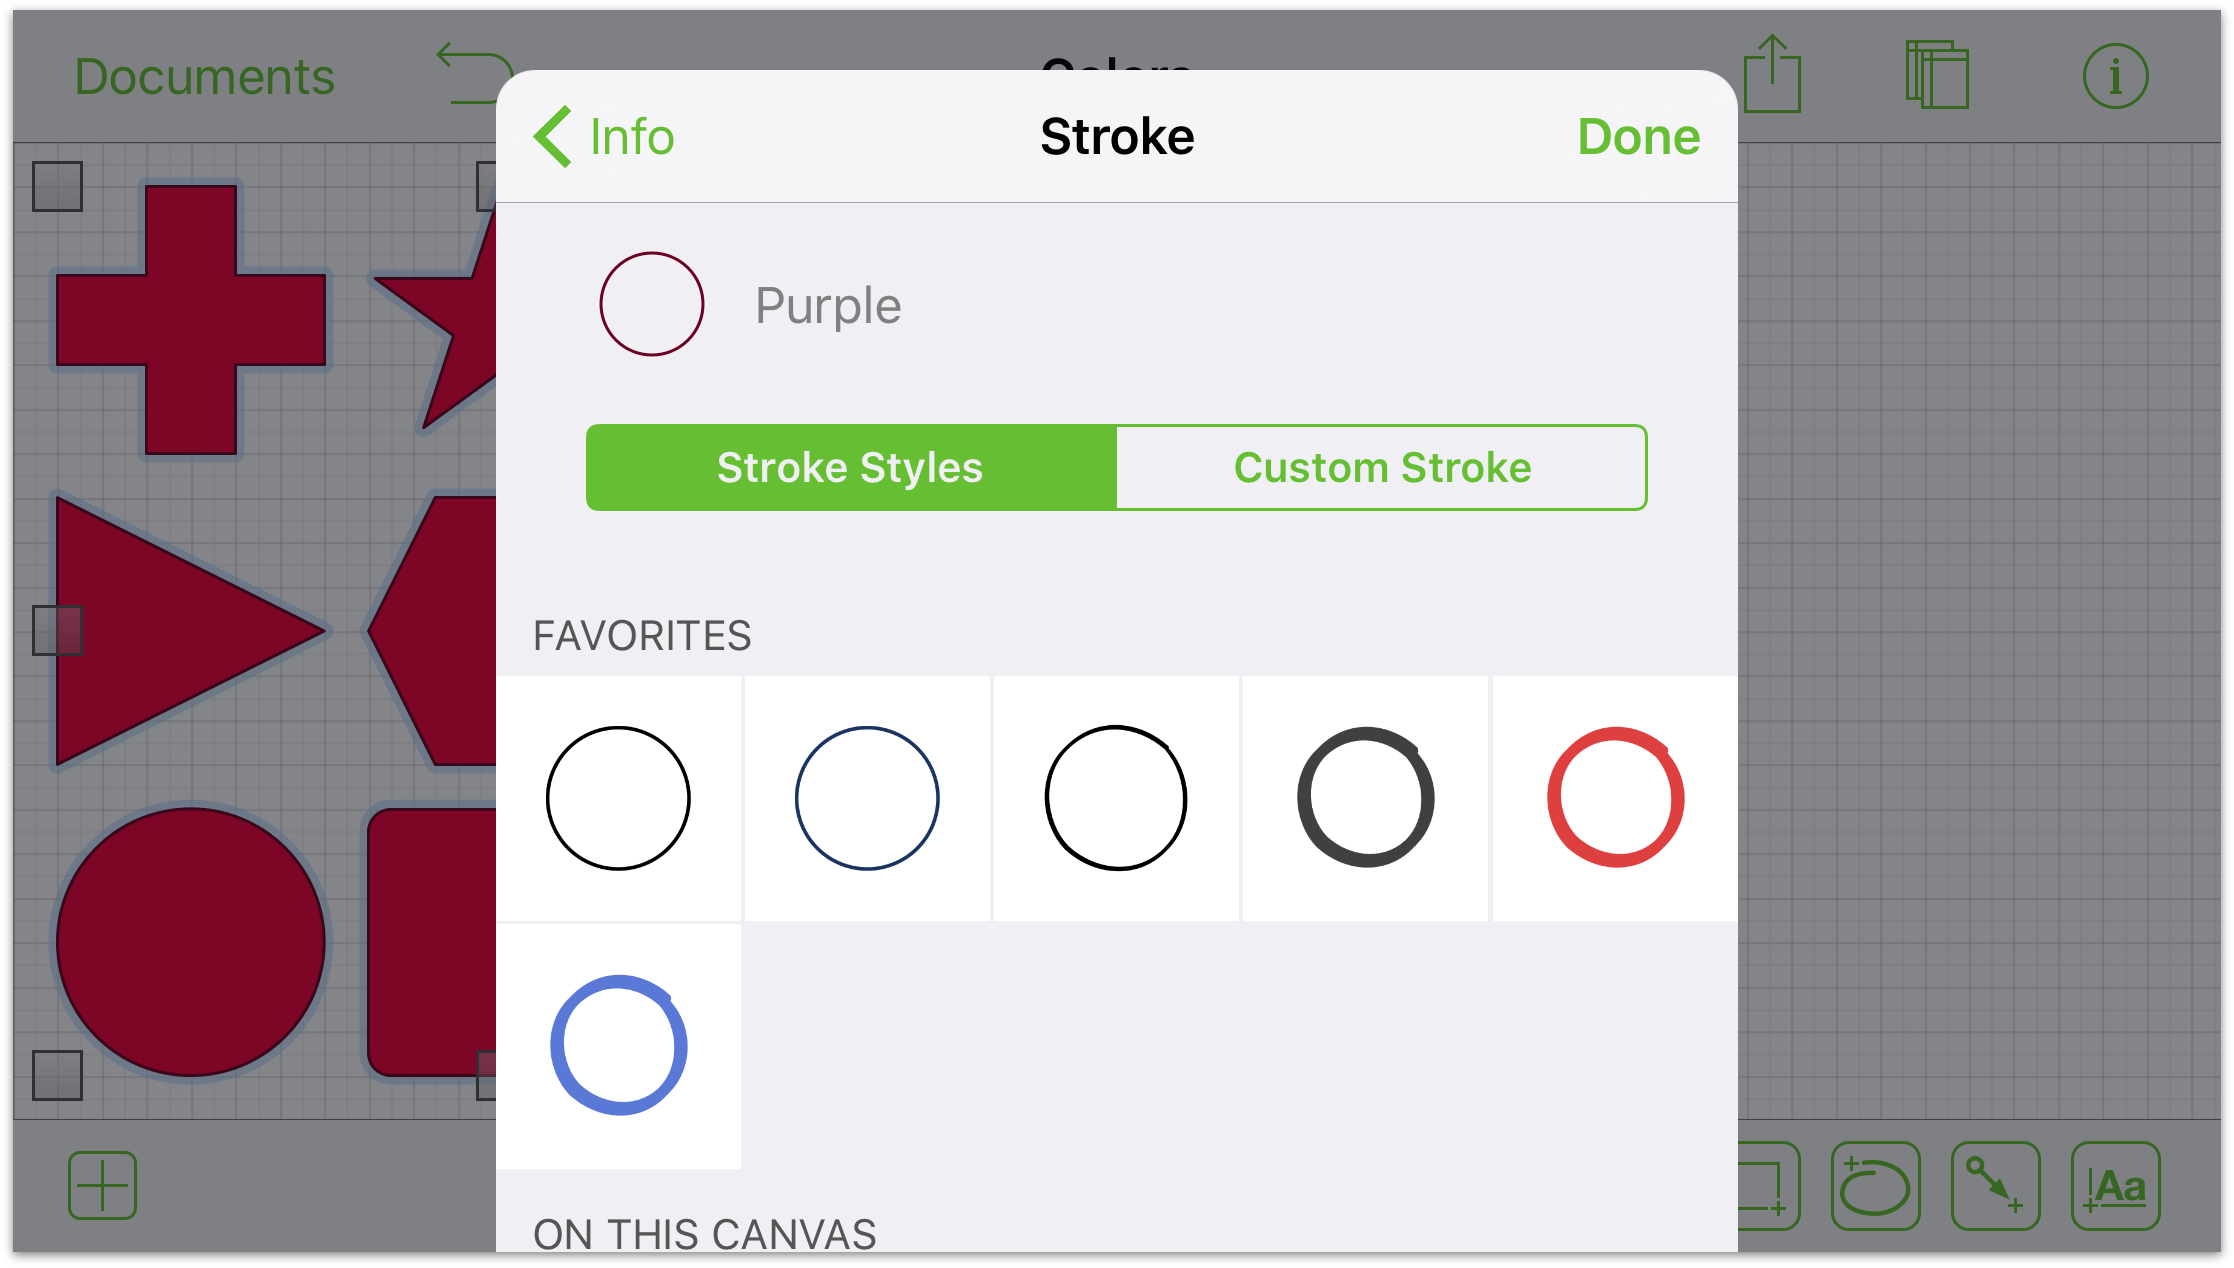
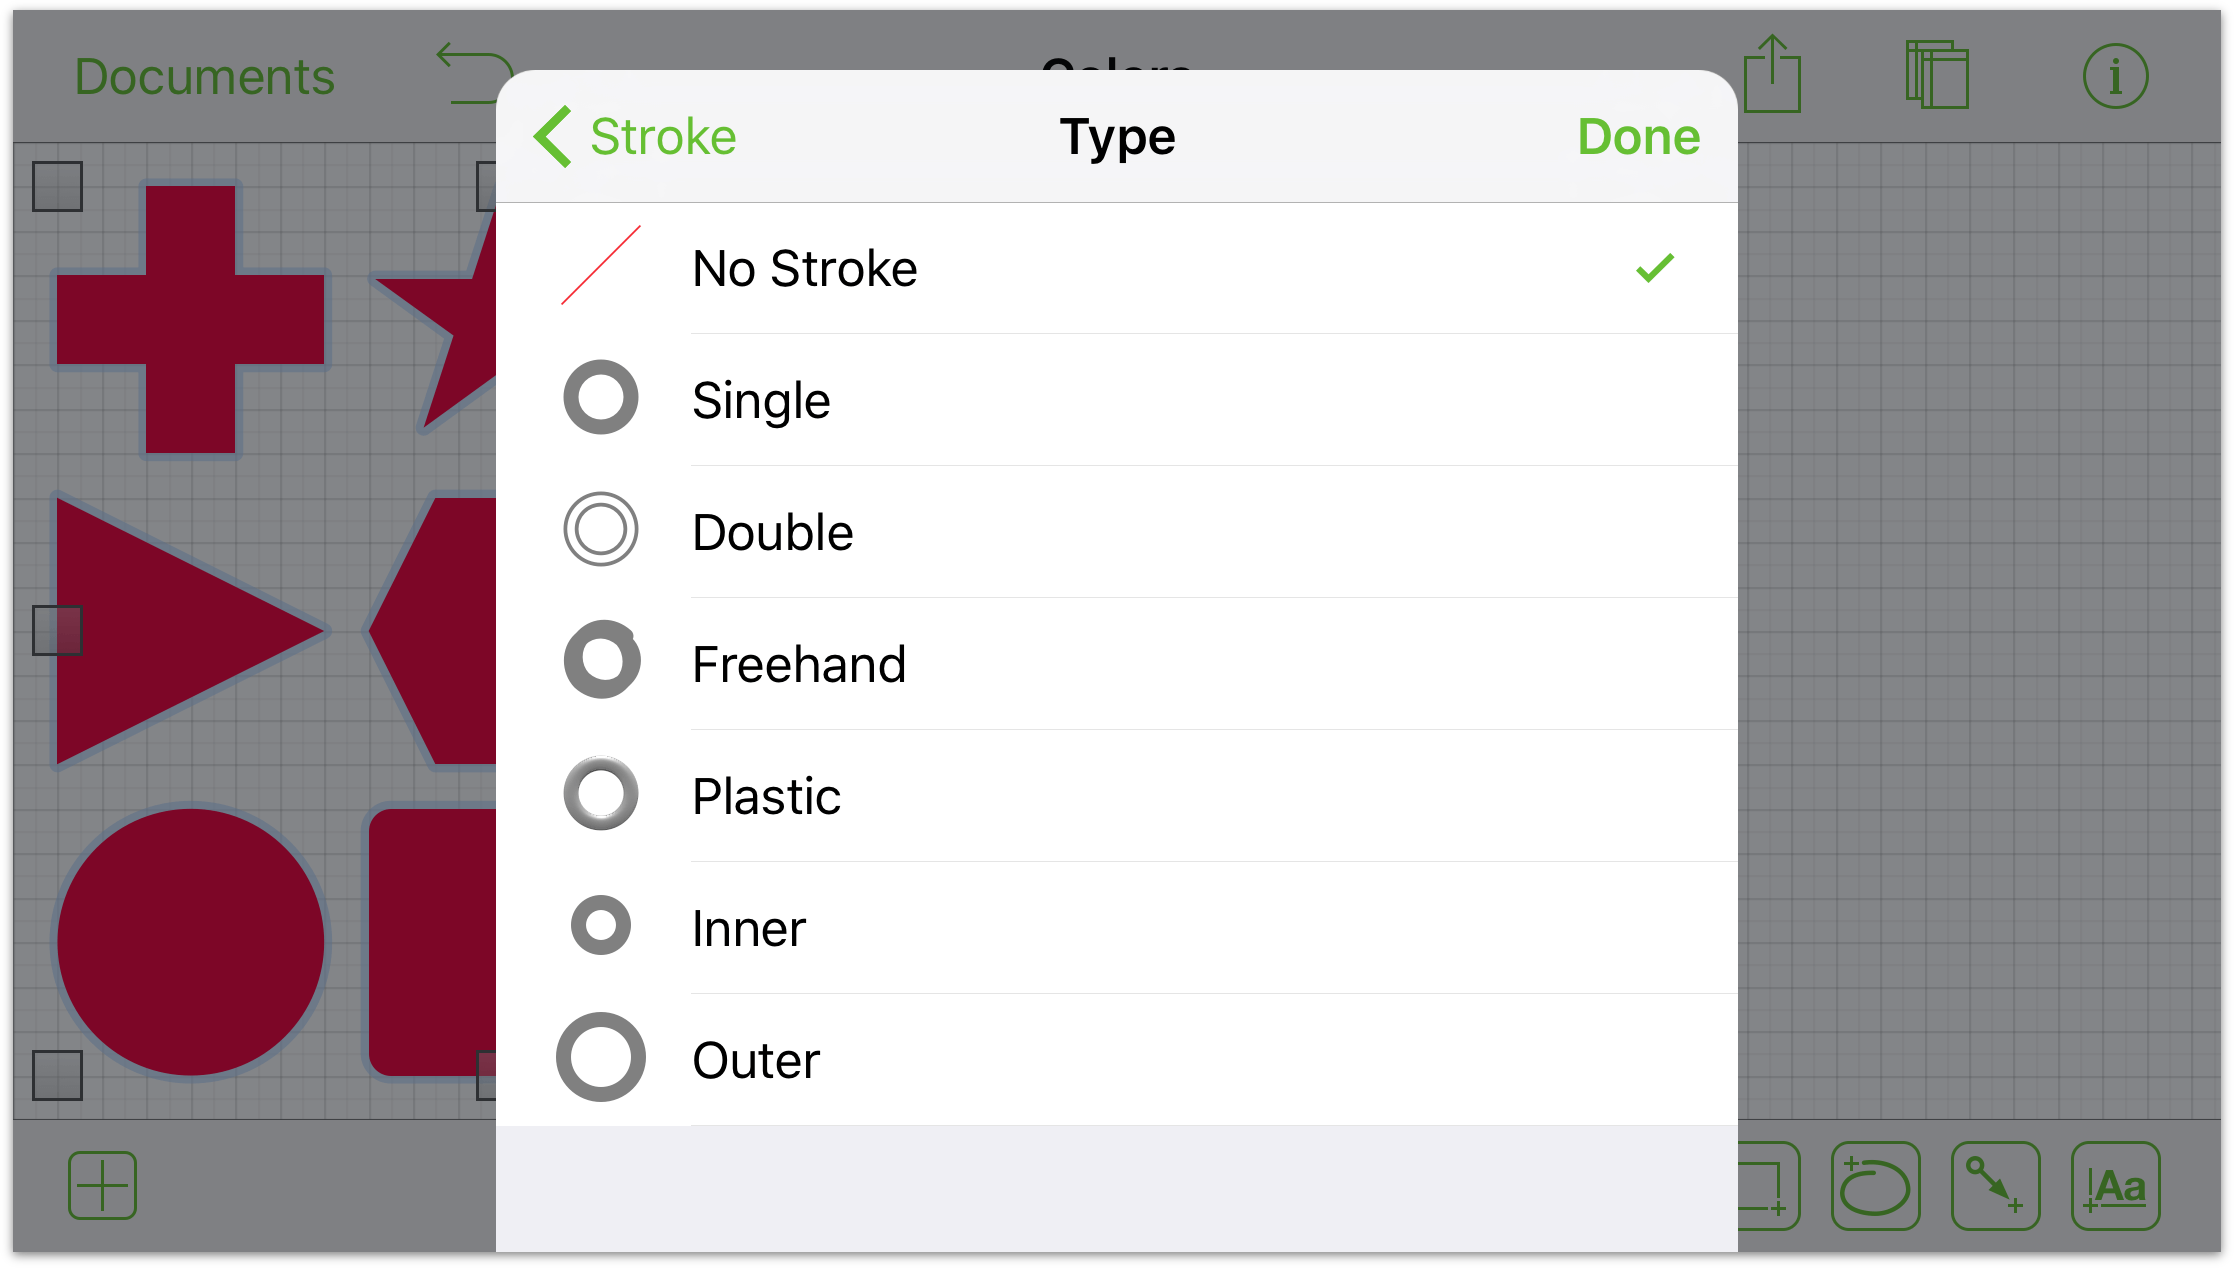
- Tap Custom Stroke, and then tap Type to change the type of stroke that’s applied to the objects on the Canvas:

- Tap No Stroke to remove the stroke from the objects on the canvas:
- Tap Done to close the inspectors and examine your handiwork. All of the objects on the Canvas should no longer have a stroke applied to them.

If, at this point, you decide that you want the objects to have the strokes, tap ![]() at the top of the screen to undo the style change you just made.
at the top of the screen to undo the style change you just made.
Creating Stencils
Now that you know how to find and use a stencil, it’s time to learn how to create one. After all, part of the reason why you’re using OmniGraffle is to draw things, and there’s a good chance that you’ll want to reuse that thing again later. That’s where stencils come in!
What goes into making a great stencil, however, goes far beyond the artistic quality of the thing you create. There are some things you can do in OmniGraffle—from how you name the stencil file, naming canvases and objects, even adding descriptions for individual stencils—to help make your stencil usable and accessible to everyone who uses OmniGraffle.
The remainder of this chapter is devoted to showing you the ins and outs of creating a really great stencil file. So, let’s start at the beginning—creating the stencil file.
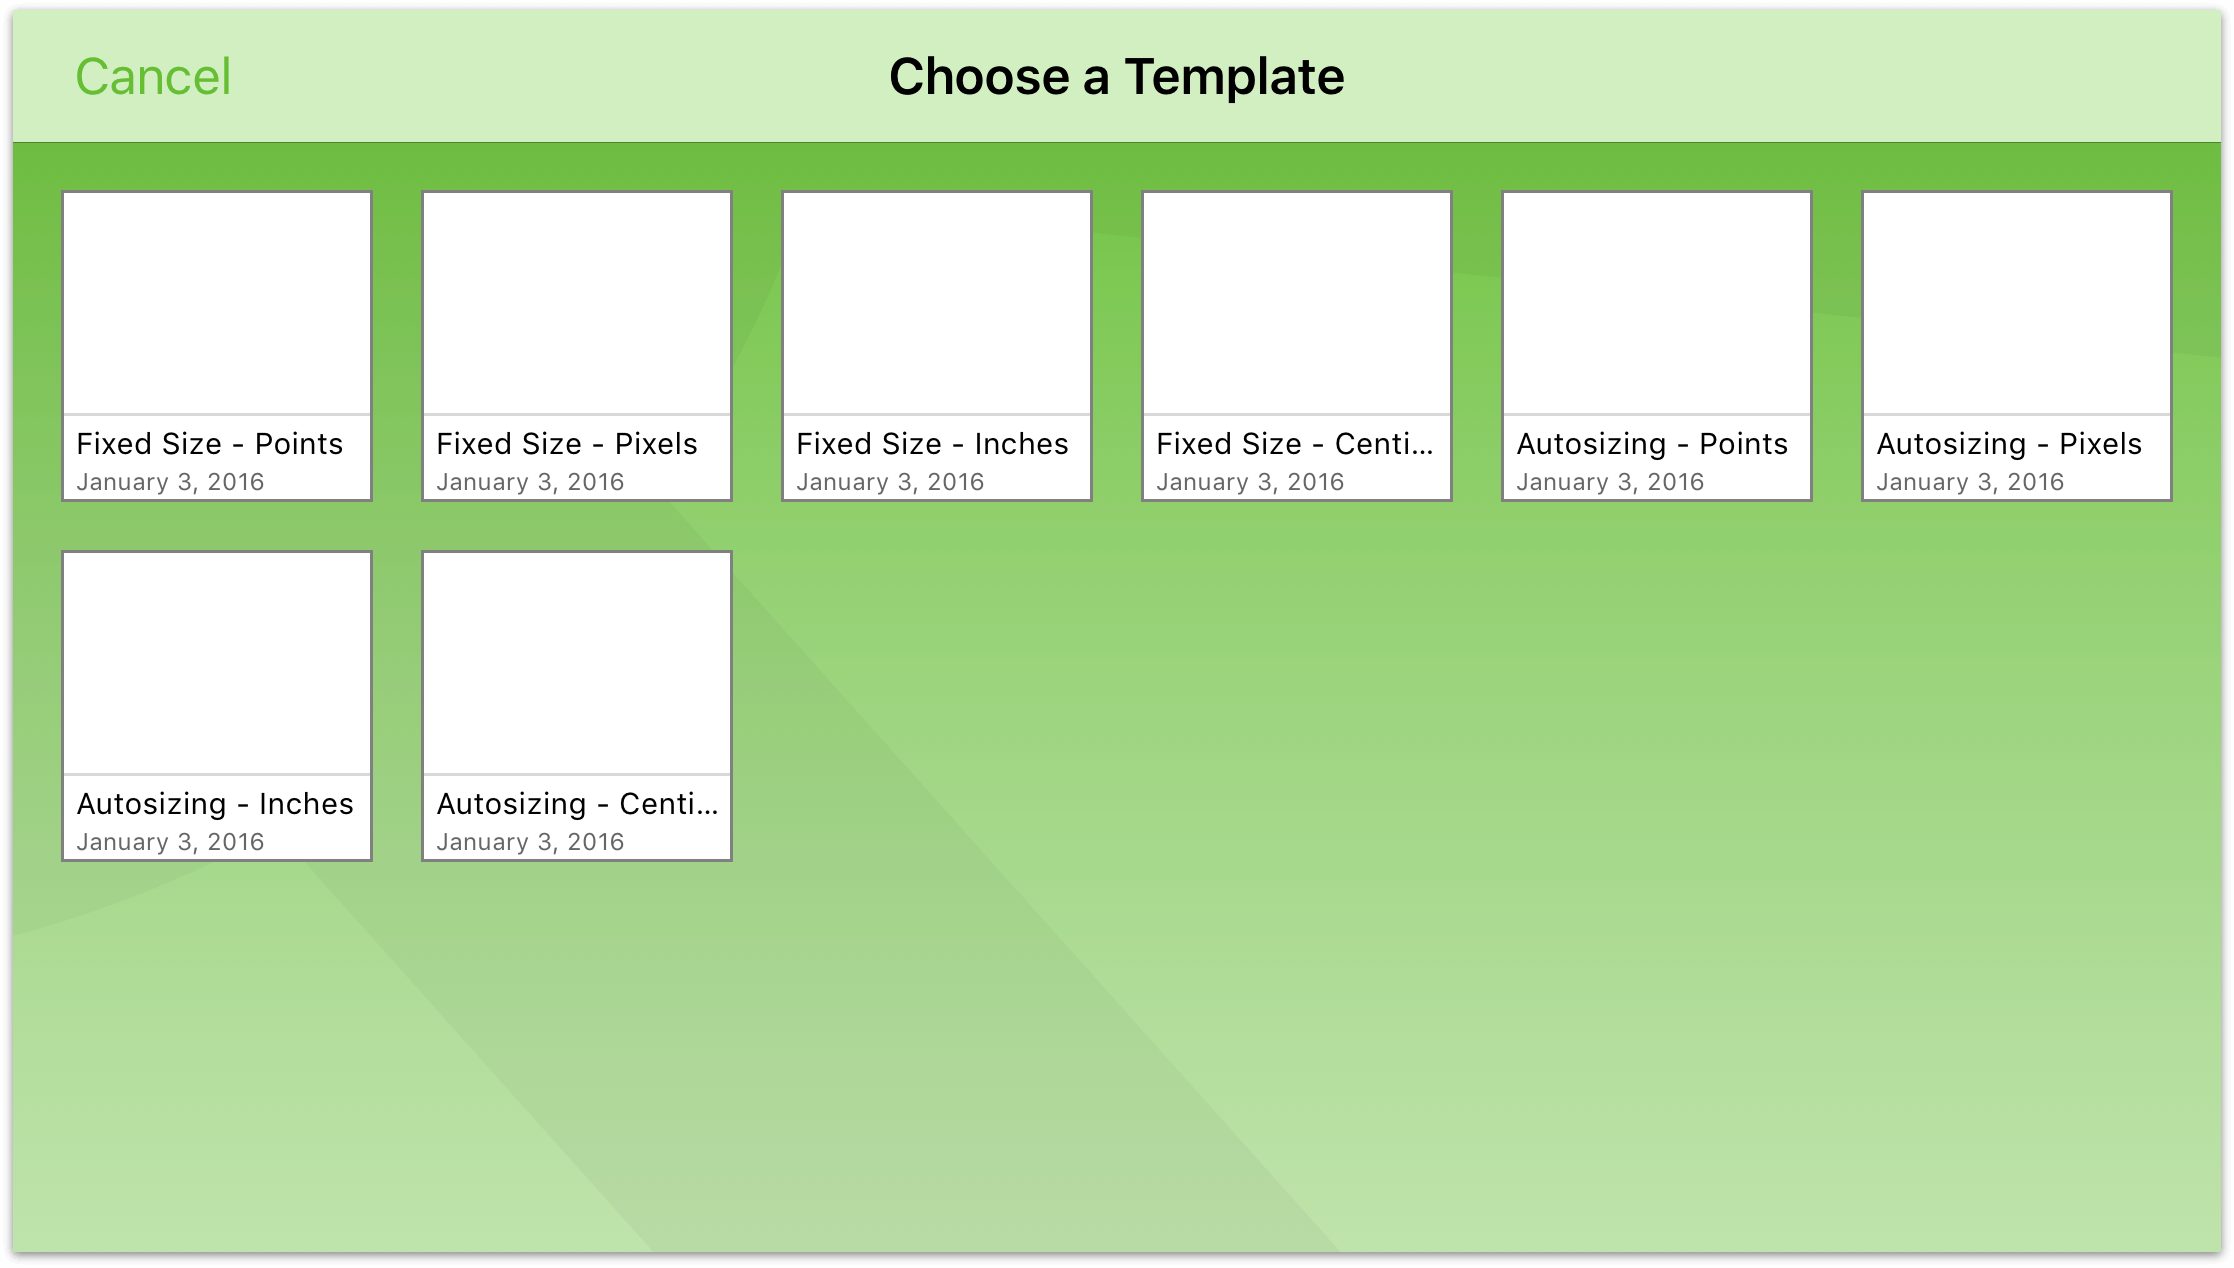
Creating a New Stencil from Scratch
When you create a new file in OmniGraffle (by tapping ![]() in the Toolbar), OmniGraffle decides which type of file it creates (Diagram, Stencil, or Template) based on the current setting in the Document Organizer.
To create a new Stencil file from scratch, you need to set the Document Browser to Show stencils.
in the Toolbar), OmniGraffle decides which type of file it creates (Diagram, Stencil, or Template) based on the current setting in the Document Organizer.
To create a new Stencil file from scratch, you need to set the Document Browser to Show stencils.
- Start by opening the folder in which you want to save the stencil file, and then swipe down on the screen in the Document Browser. This reveals the Document Organizer above the files.
- Tap Show stencils. This reveals the Stencil files stored in that folder on your iOS device.
Note
Similarly, if you want to create a new Diagram or Template file, set the Document Browser to Show diagrams or Show templates, respectively.
- Tap to select a document Template to use:
When you close the file (by tapping Documents in the document toolbar), OmniGraffle automatically saves it as an OmniGraffle Stencil file (with a hidden .gstencil file extension). Furthermore, the stencil file is immediately available in the Stencil Library.
An OmniGraffle stencil file looks just like any other OmniGraffle file. You have the same canvas. The same inspectors. Even the same toolbar. Under the hood, though, OmniGraffle specifies and recognizes this file as a reusable stencil.
Exporting an OmniGraffle Document as a Stencil
Rather than having to open the preexisting OmniGraffle document so you can copy and paste the thing into a new document, why not create a stencil from that object and add it to your Stencils Library?
It’s actually quite simple:
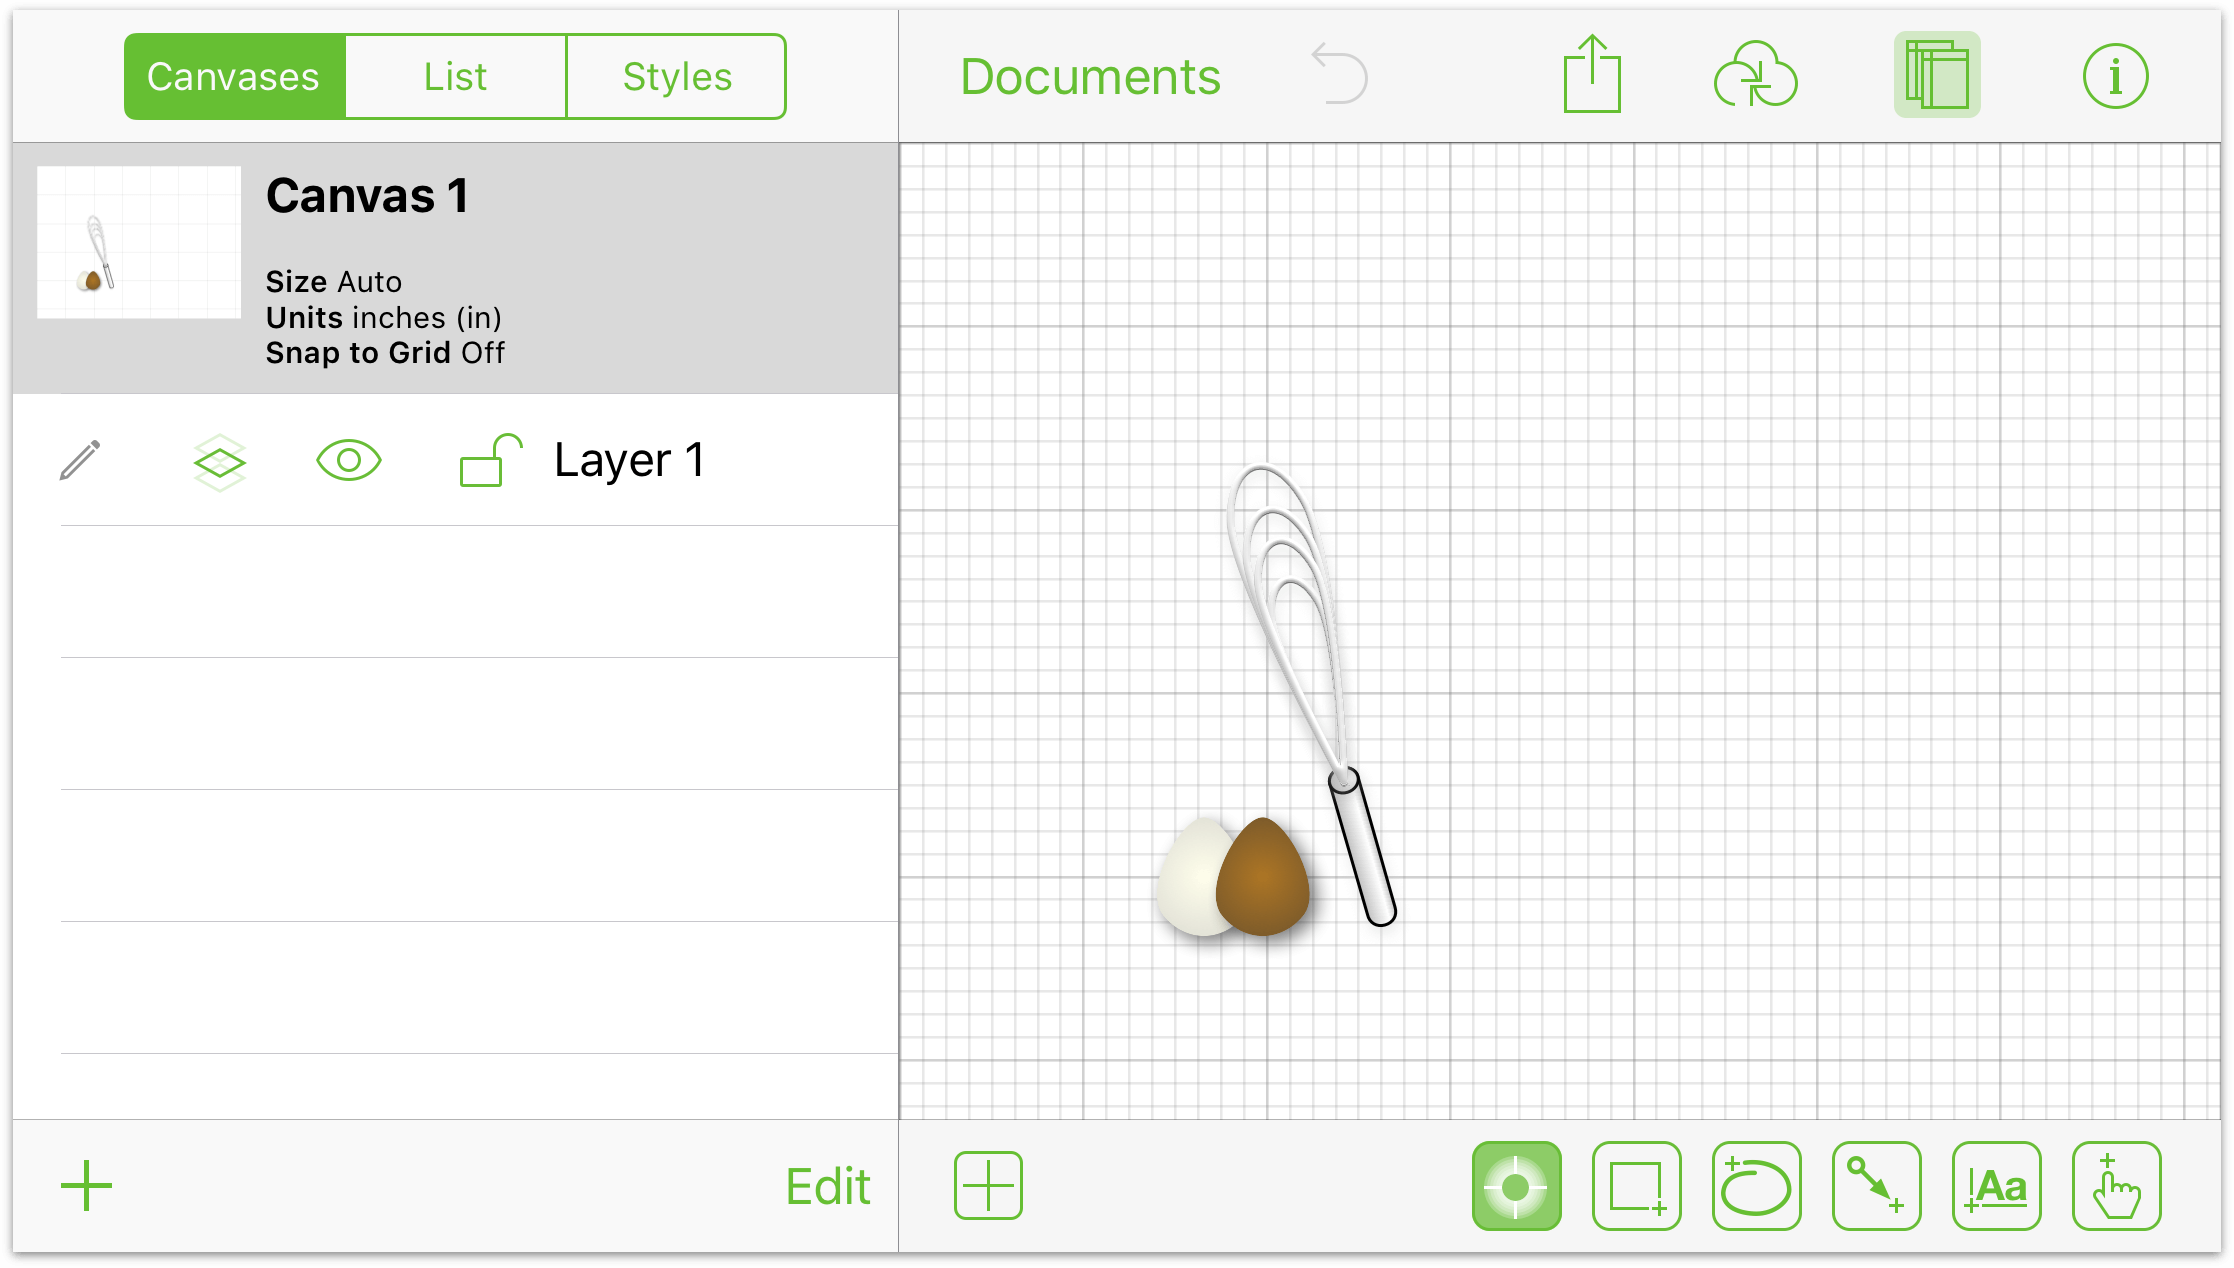
Open the document that contains the thing that you want to save as a stencil. If the OmniGraffle file contains multiple things, as with the following image, each “thing” gets recognized as an individual stencil.
Tap
 in the toolbar.
- In the Actions sheet, tap Create Stencil from Diagram:
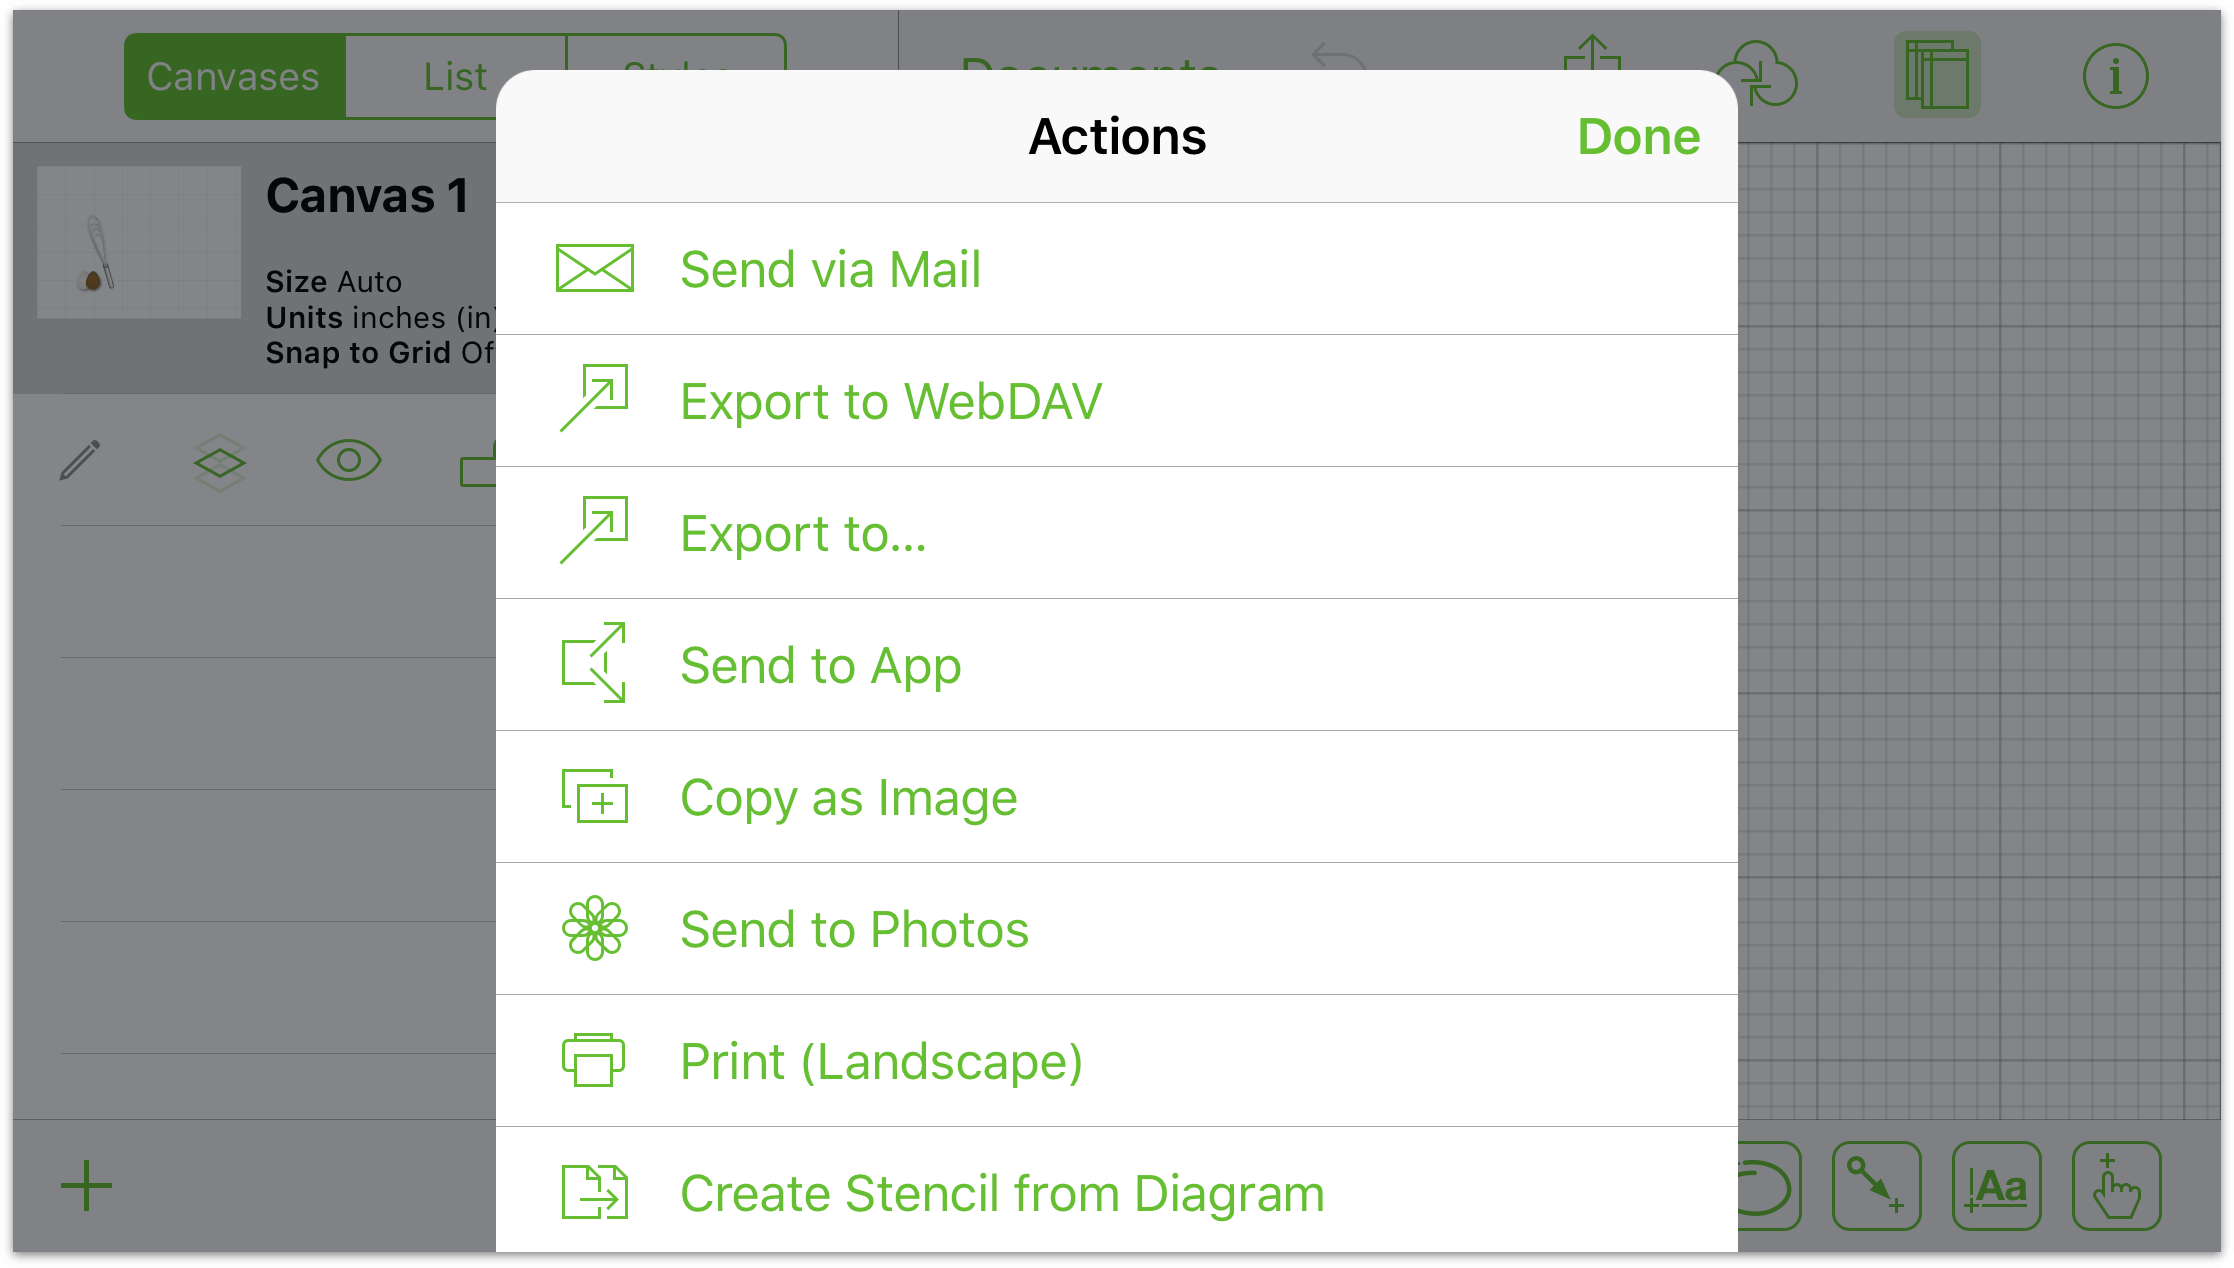
After you tap Create Stencil from Diagram in the Actions sheet, OmniGraffle closes the file you had open, switches to the Show stencils view in the Document Browser, and then drops in the new stencil file you created.
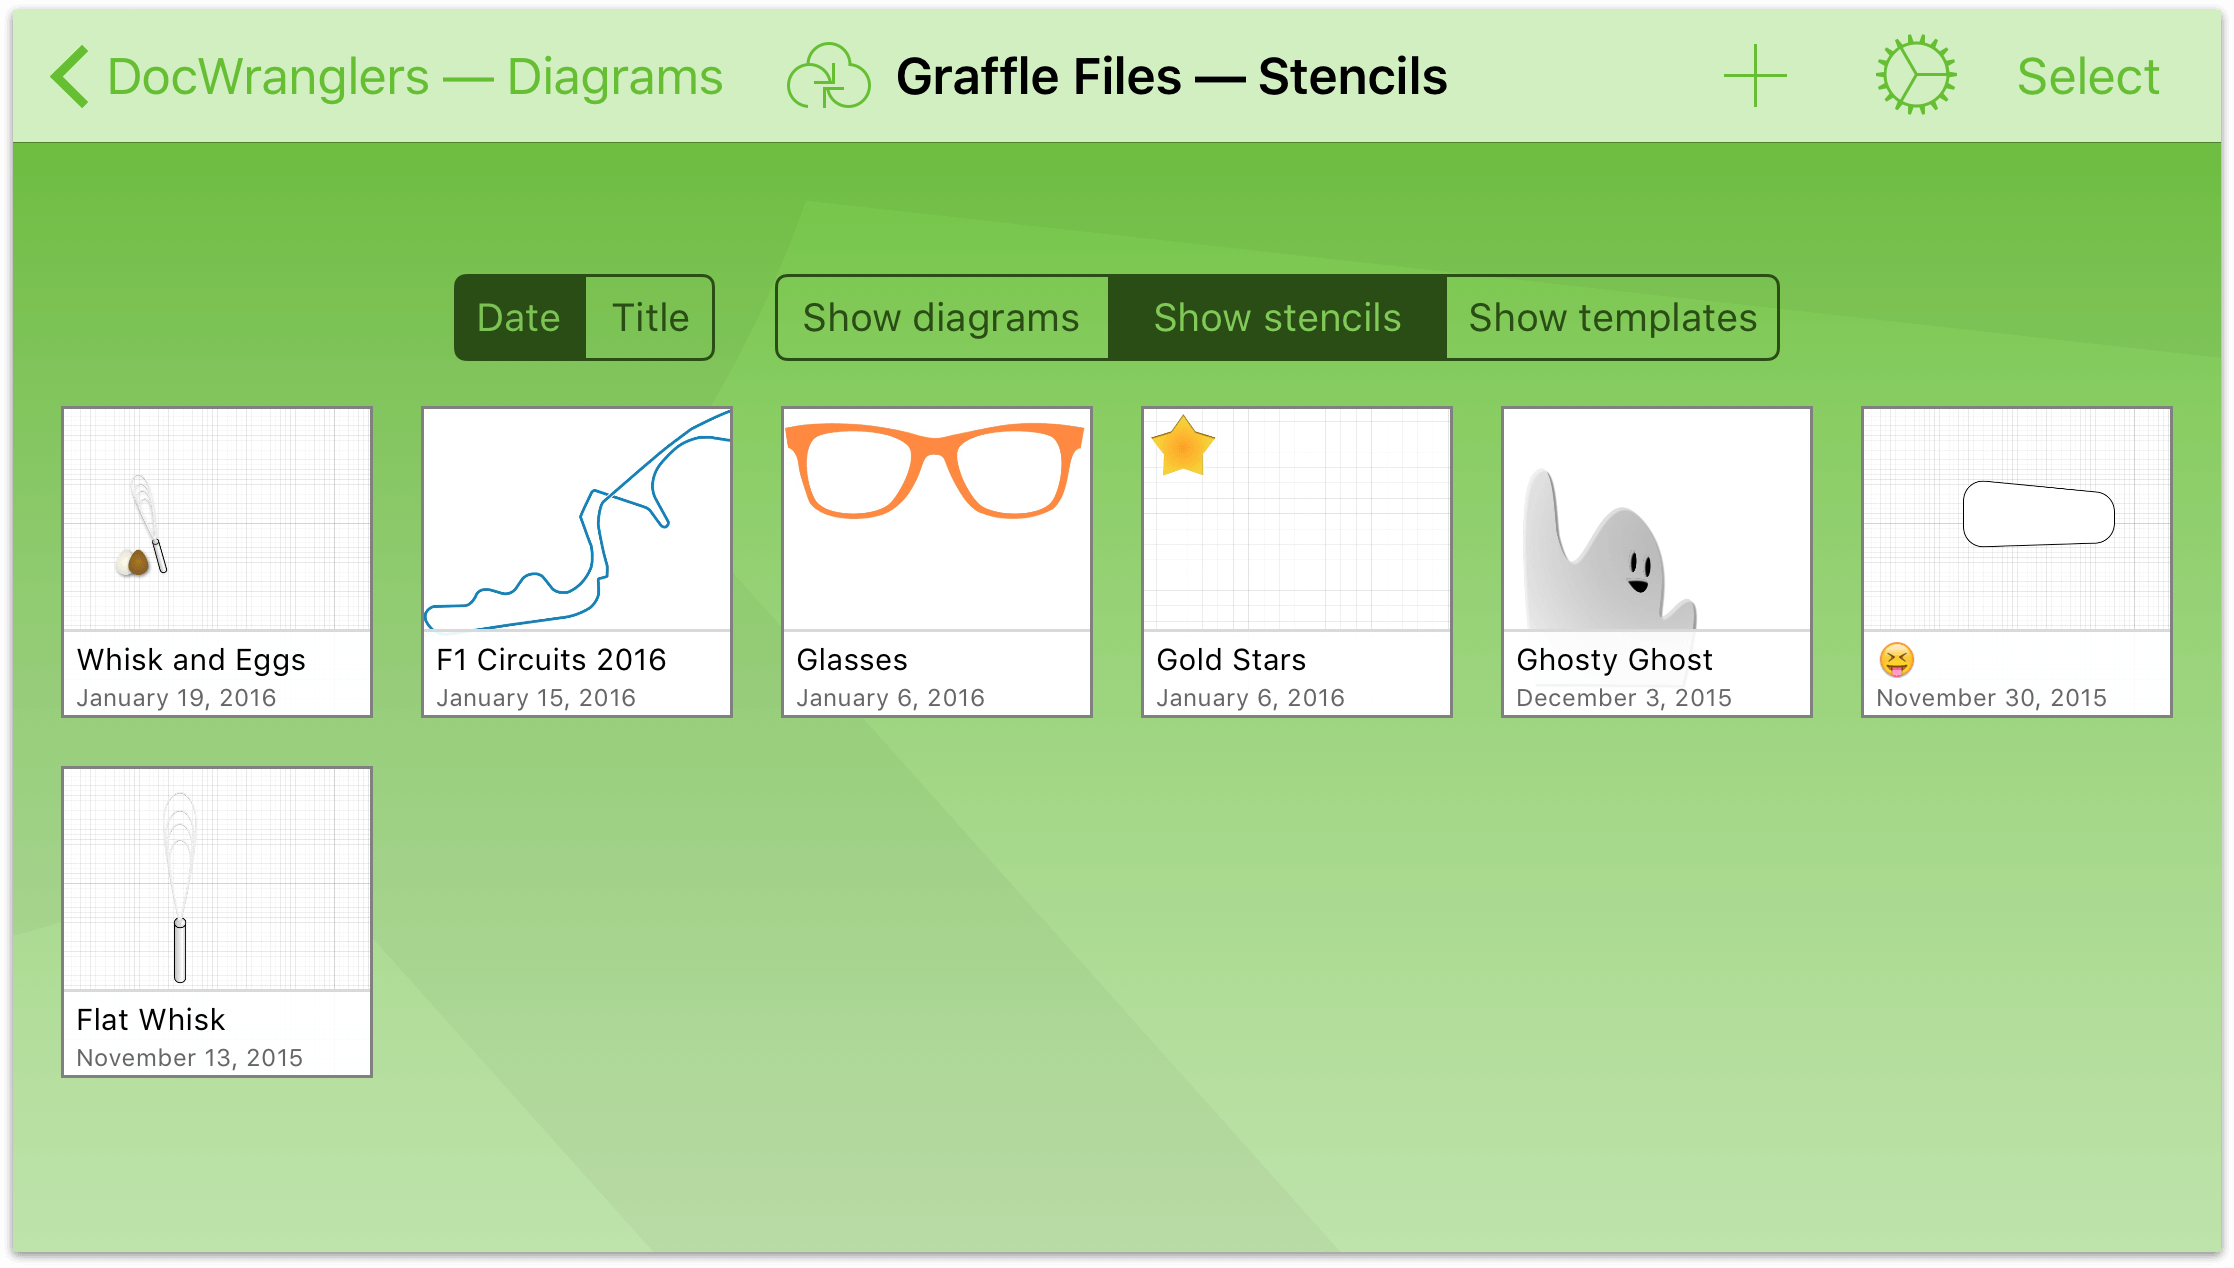
If you tap Show diagrams, you’ll see that the original OmniGraffle document is still there.
Tips for Creating a Great Stencil
Beyond the design aspect of creating a great stencil, there is plenty more that you can do to your stencils to make them more useful for other users, particularly if you intend to share them on Stenciltown. For example, how you name the actual stencil file can make a huge difference in how users see your stencil in the Stencil Library.
Here you’ll find a series of tips for things you can do with your stencils in OmniGraffle to help make them stand out in the Stencil Library.
One or Many Objects Per Canvas?
There is no restriction on the number of objects you can have on the canvas. Every object, or group of objects, is its own stencil. For example, if you have three objects on the canvas—two standalone objects and a group of multiple objects—then your stencil file contains three different stencils.
Group Objects That Make Up The Thing
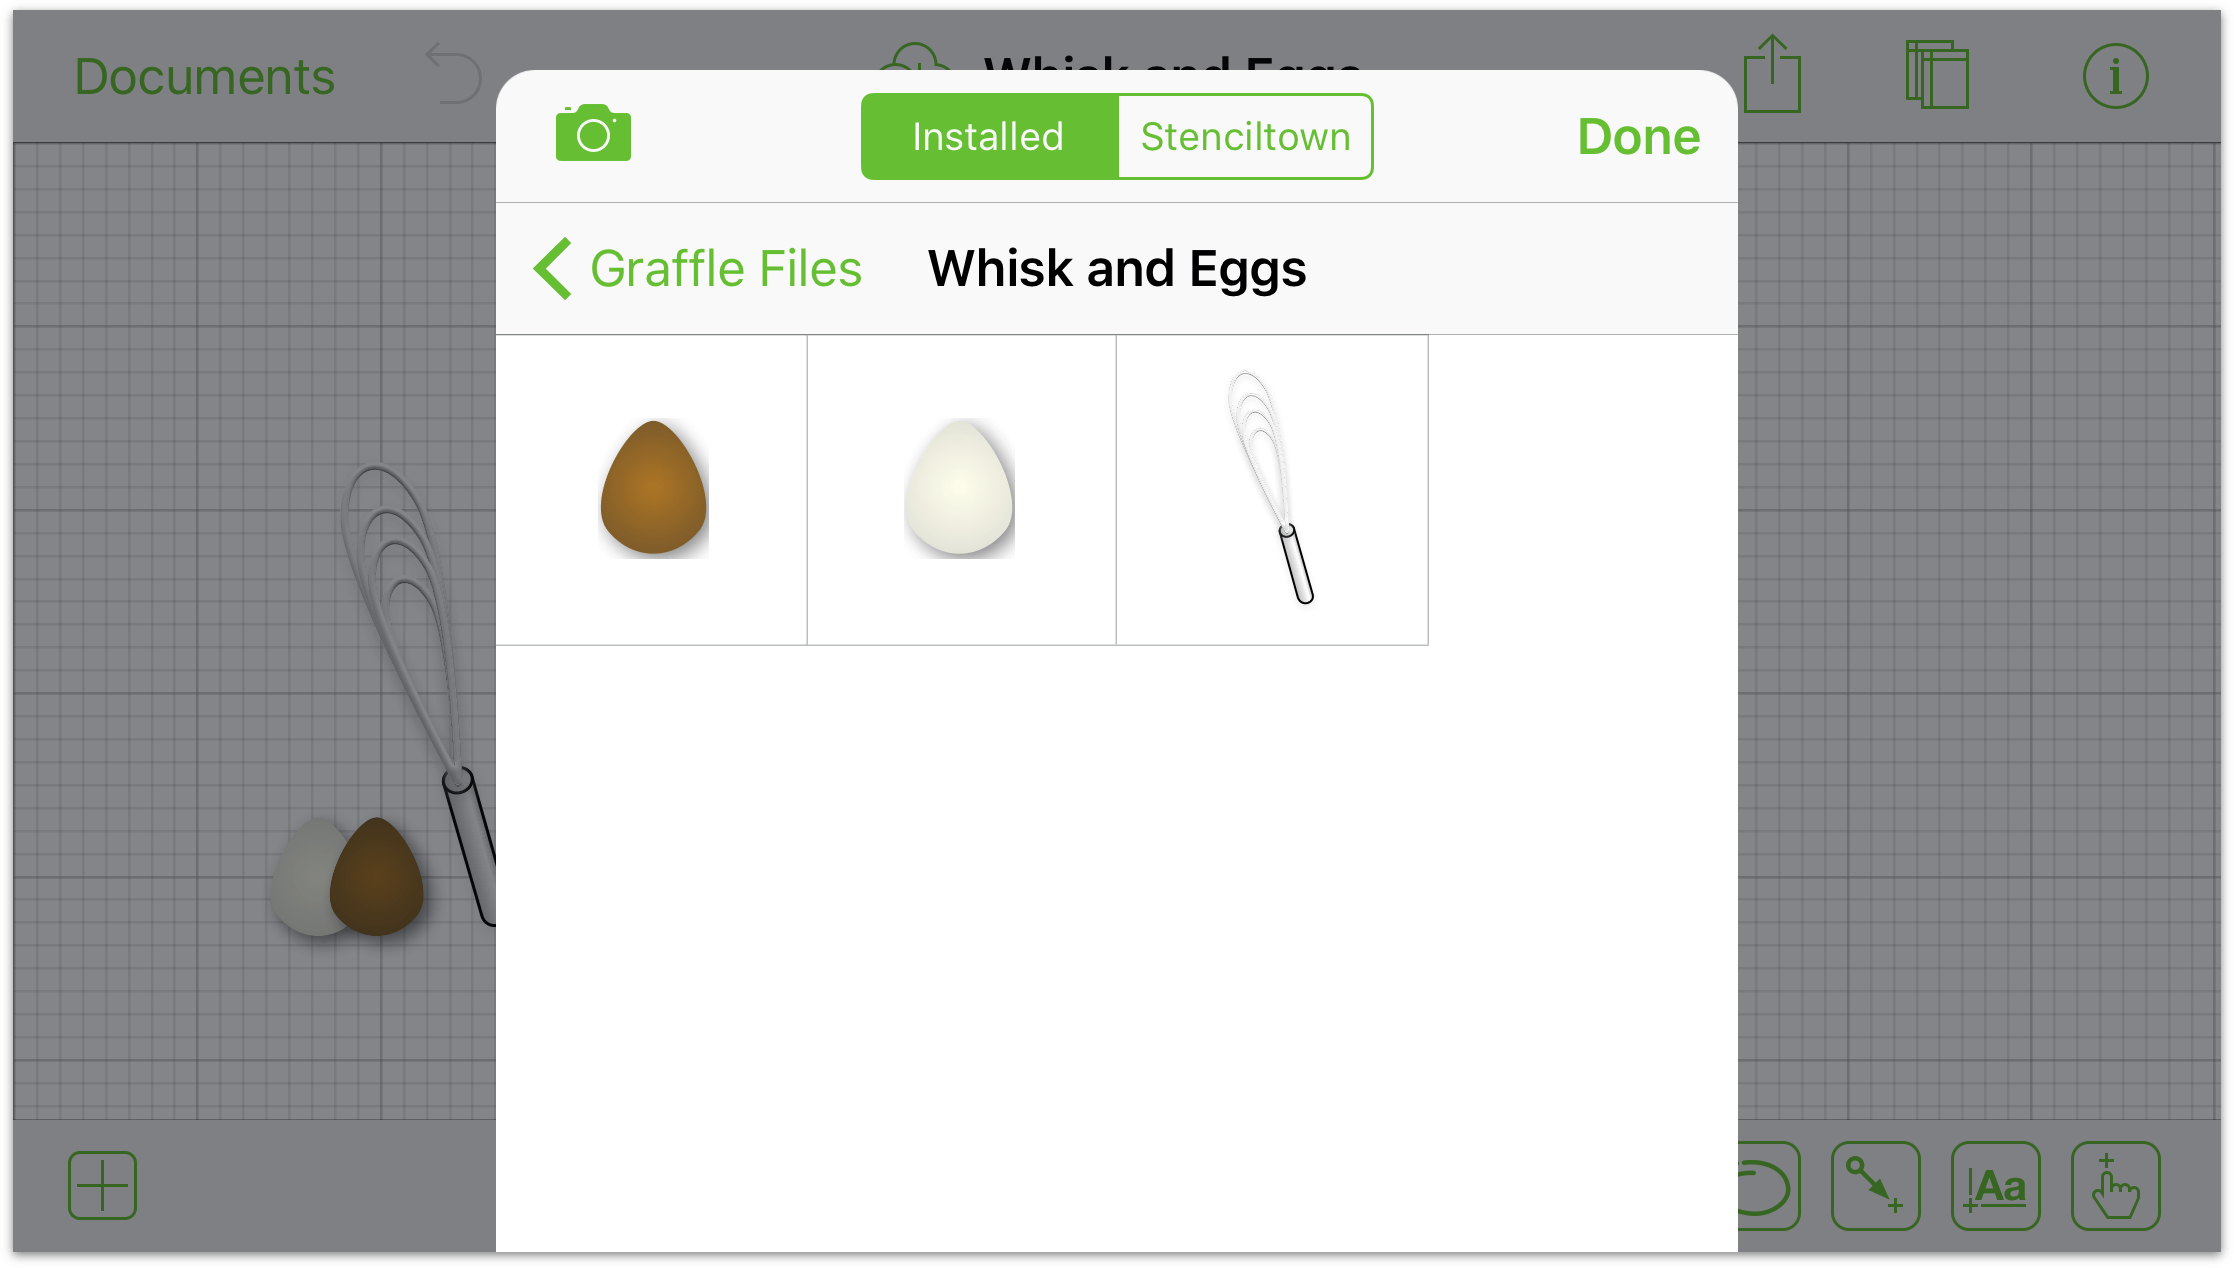
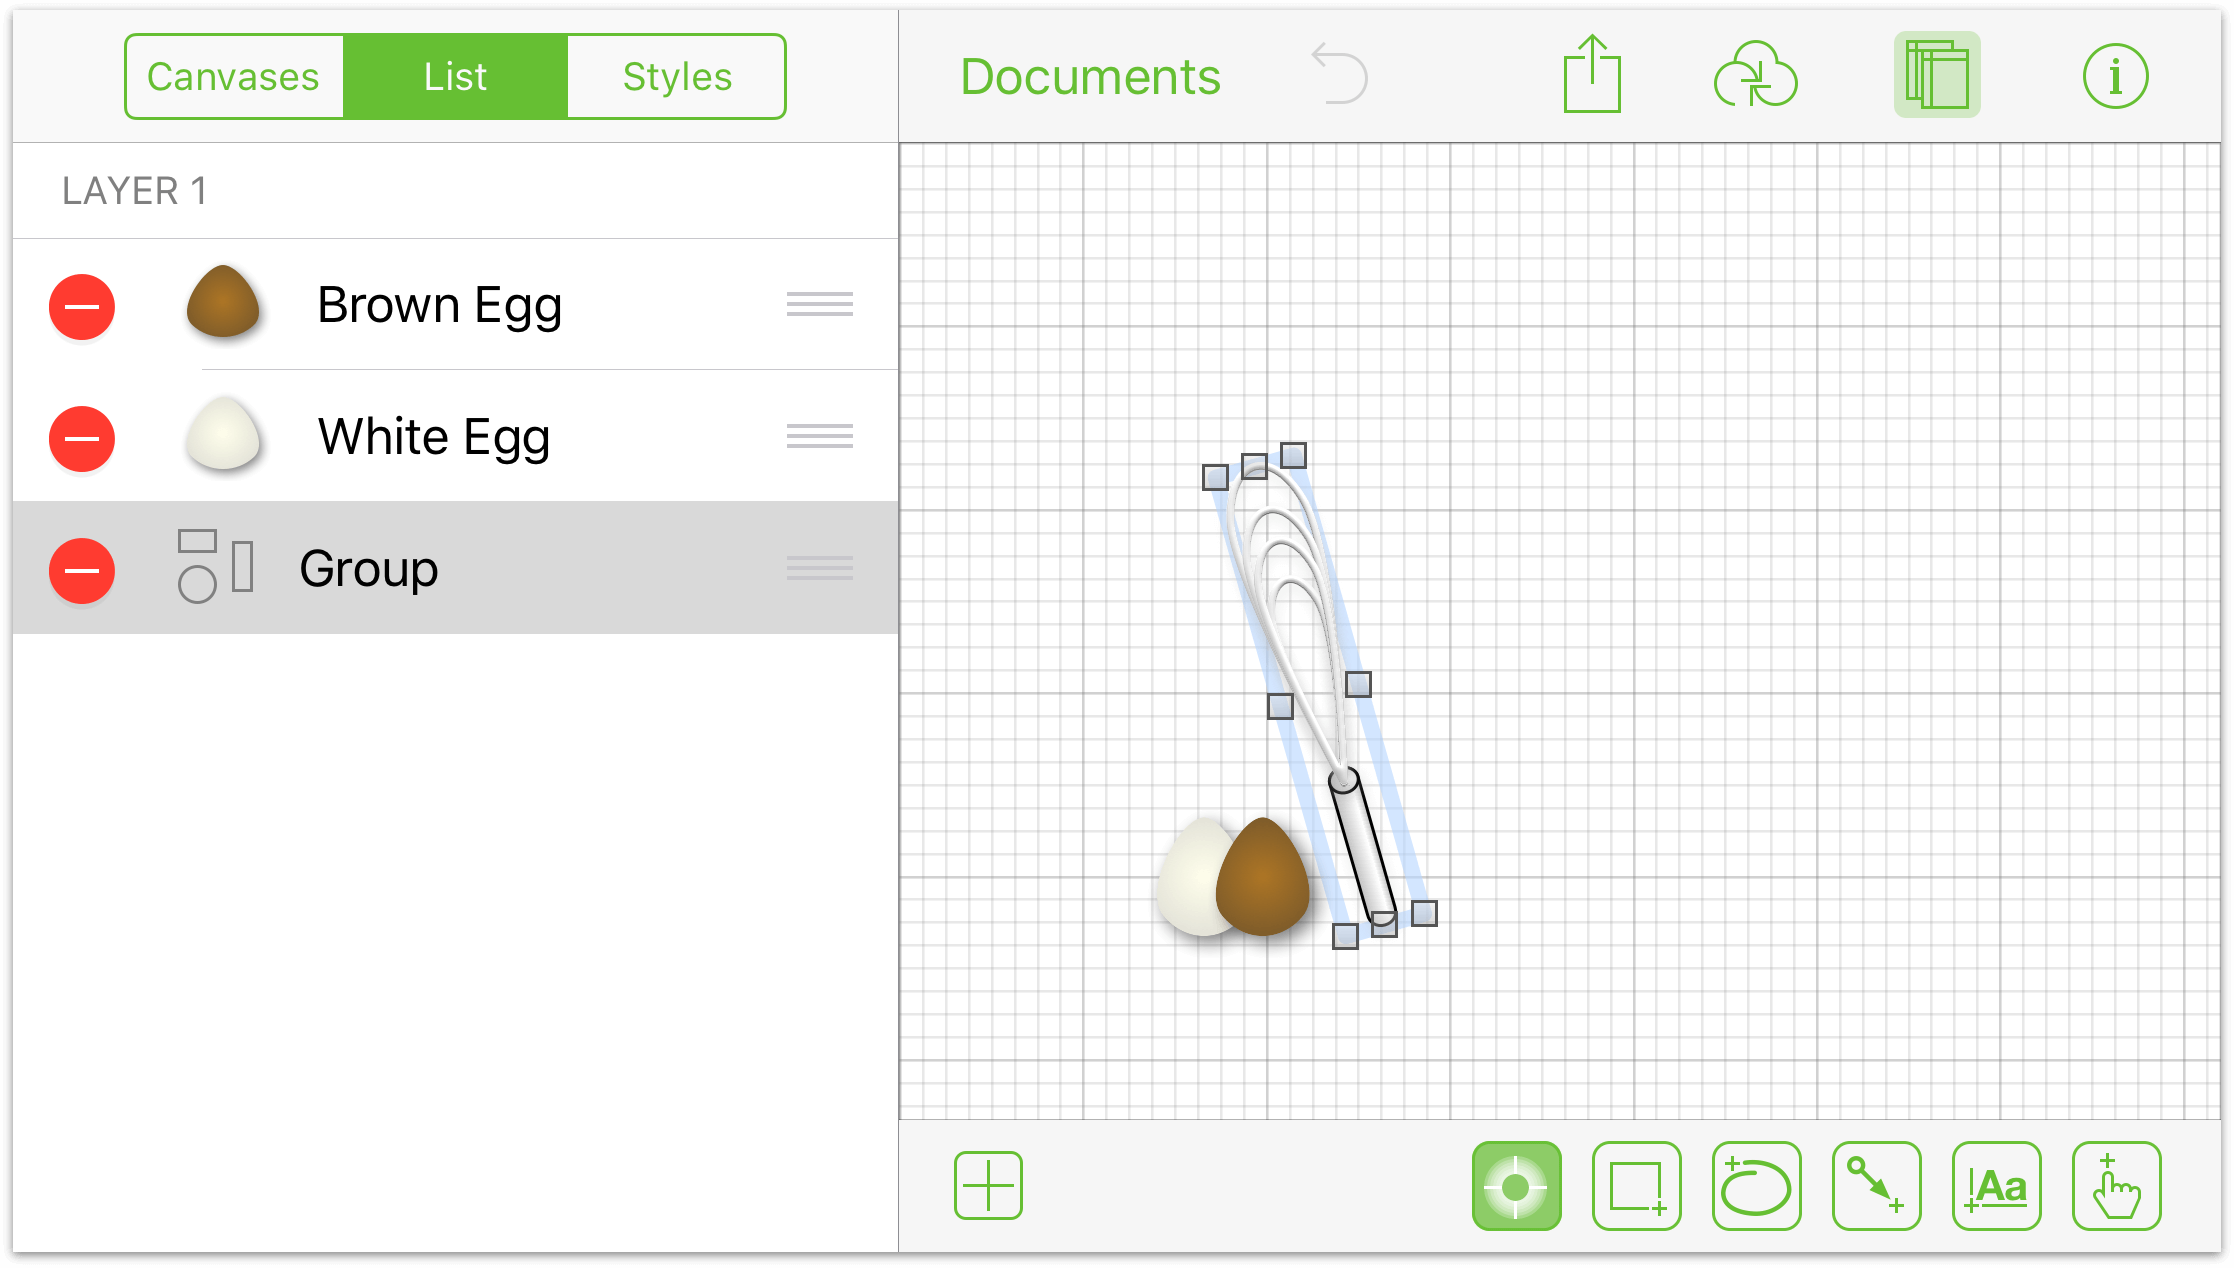
Let’s say that you’re creating a bunch of stencils for standard kitchen utensils, such as whisks, spatulas, slotted spoons, and so on. Each thing you draw probably consists of multiple objects. If you don’t group together all of the objects for a particular item (for example, that whisk), each of those objects are exported as separate stencils.
Rather than being a single stencil of a whisk, the stencil contains five objects: one for the handle (which is actually a group of three objects itself), and four wire loops that make up the flat head of the whisk. However, if you group the objects together, you’ll get a single stencil object of the whisk:

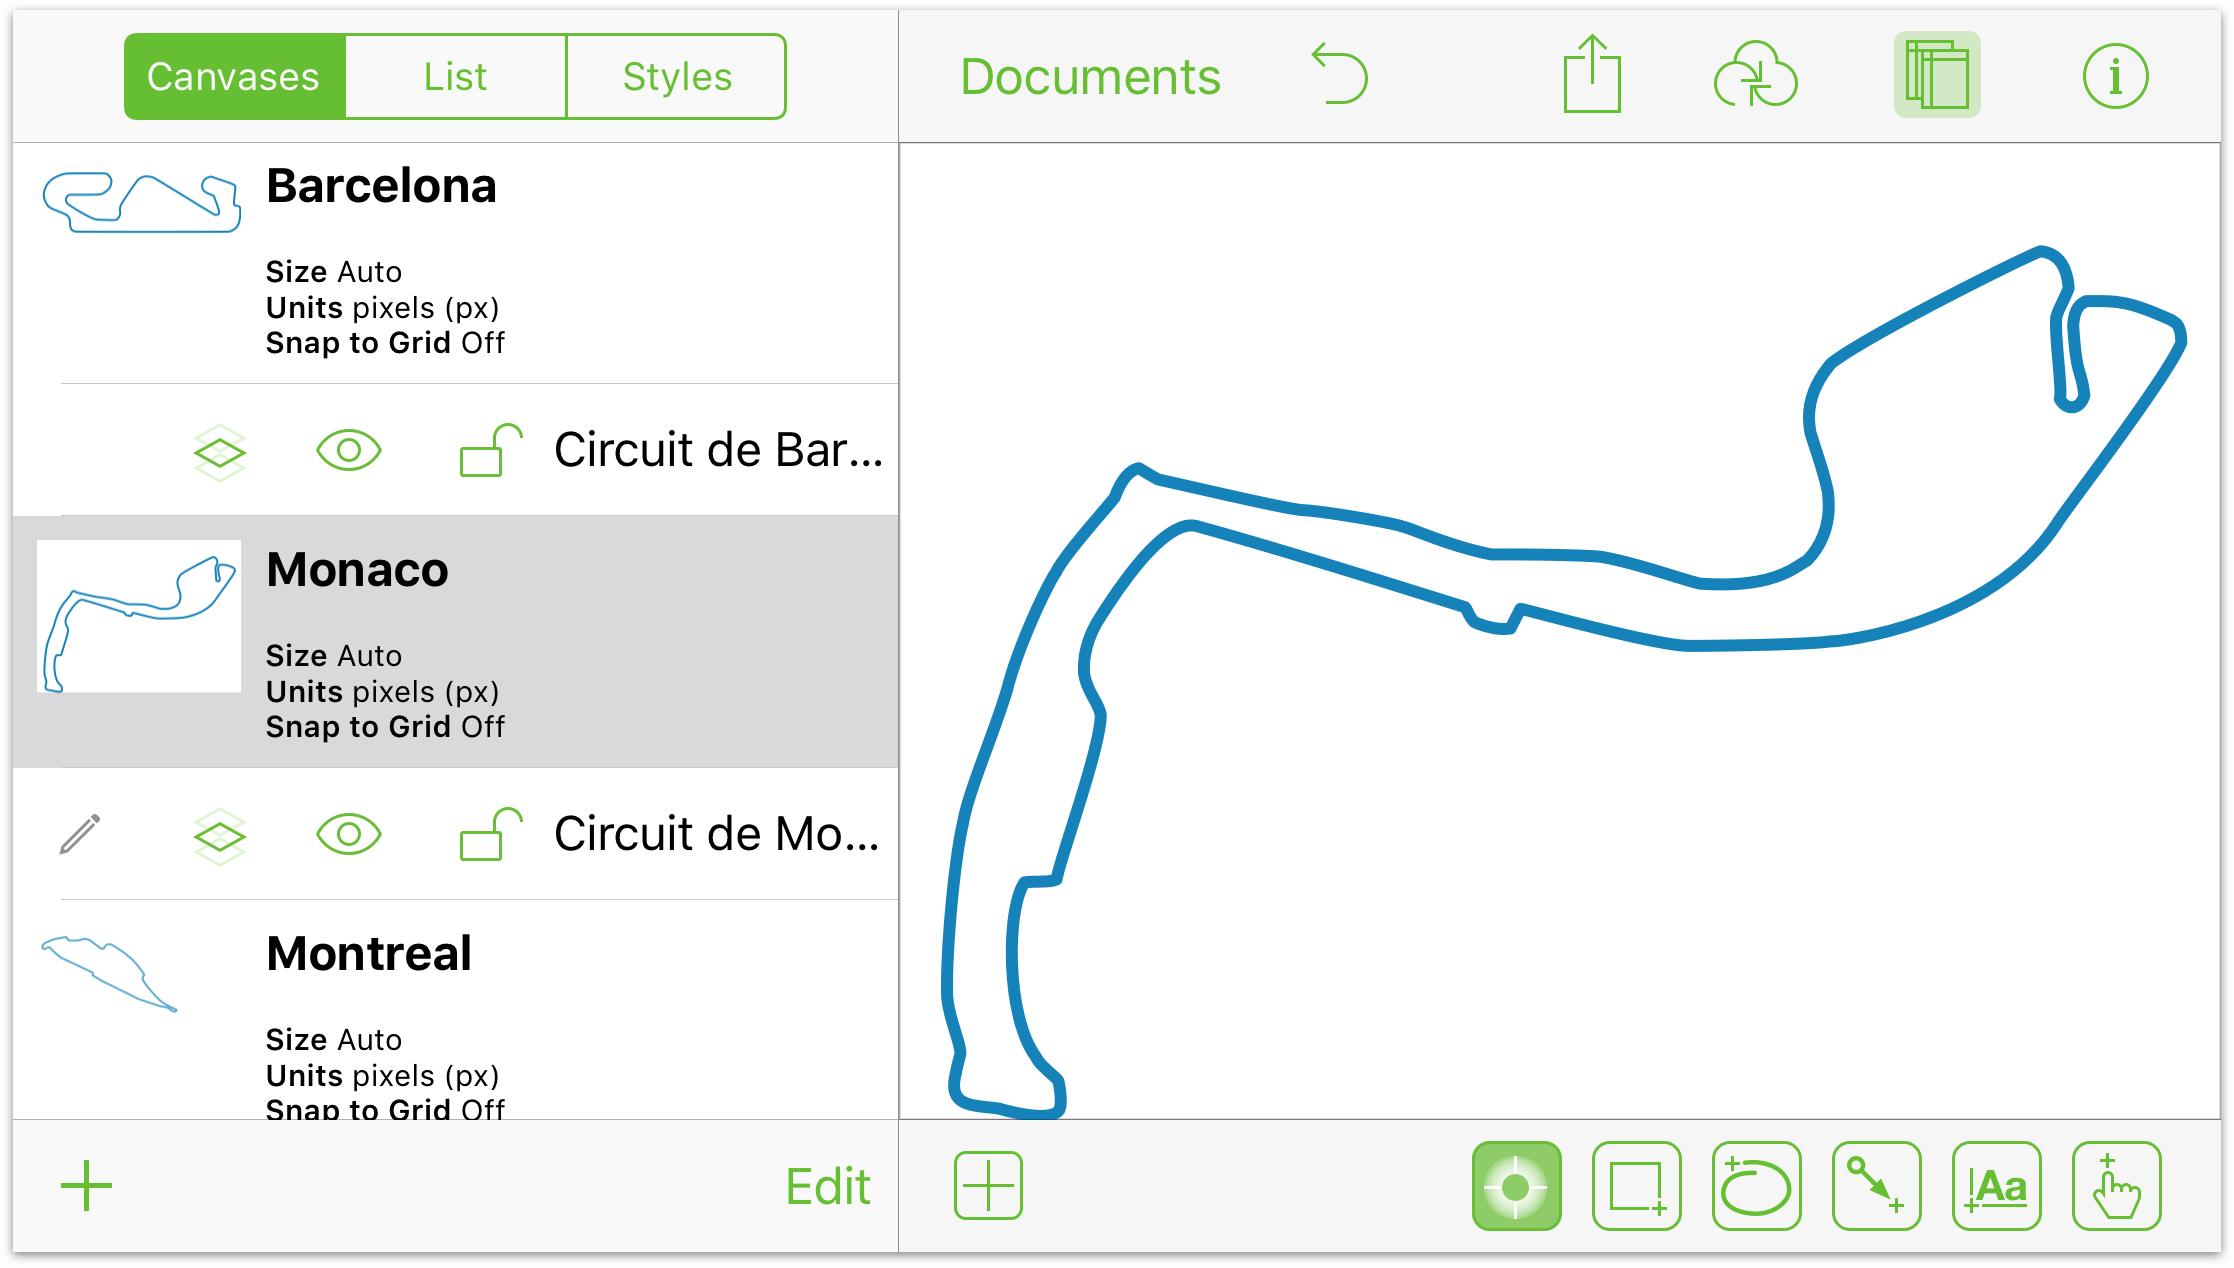
Naming Canvases
Even if your OmniGraffle document only has one canvas, don’t just leave it named “Canvas 1”. Instead, enter a short name to the stencil, such as “Espresso Machine” or “Website Prototype”. This is particularly essential when you have a stencil file with items spread across multiple canvases.
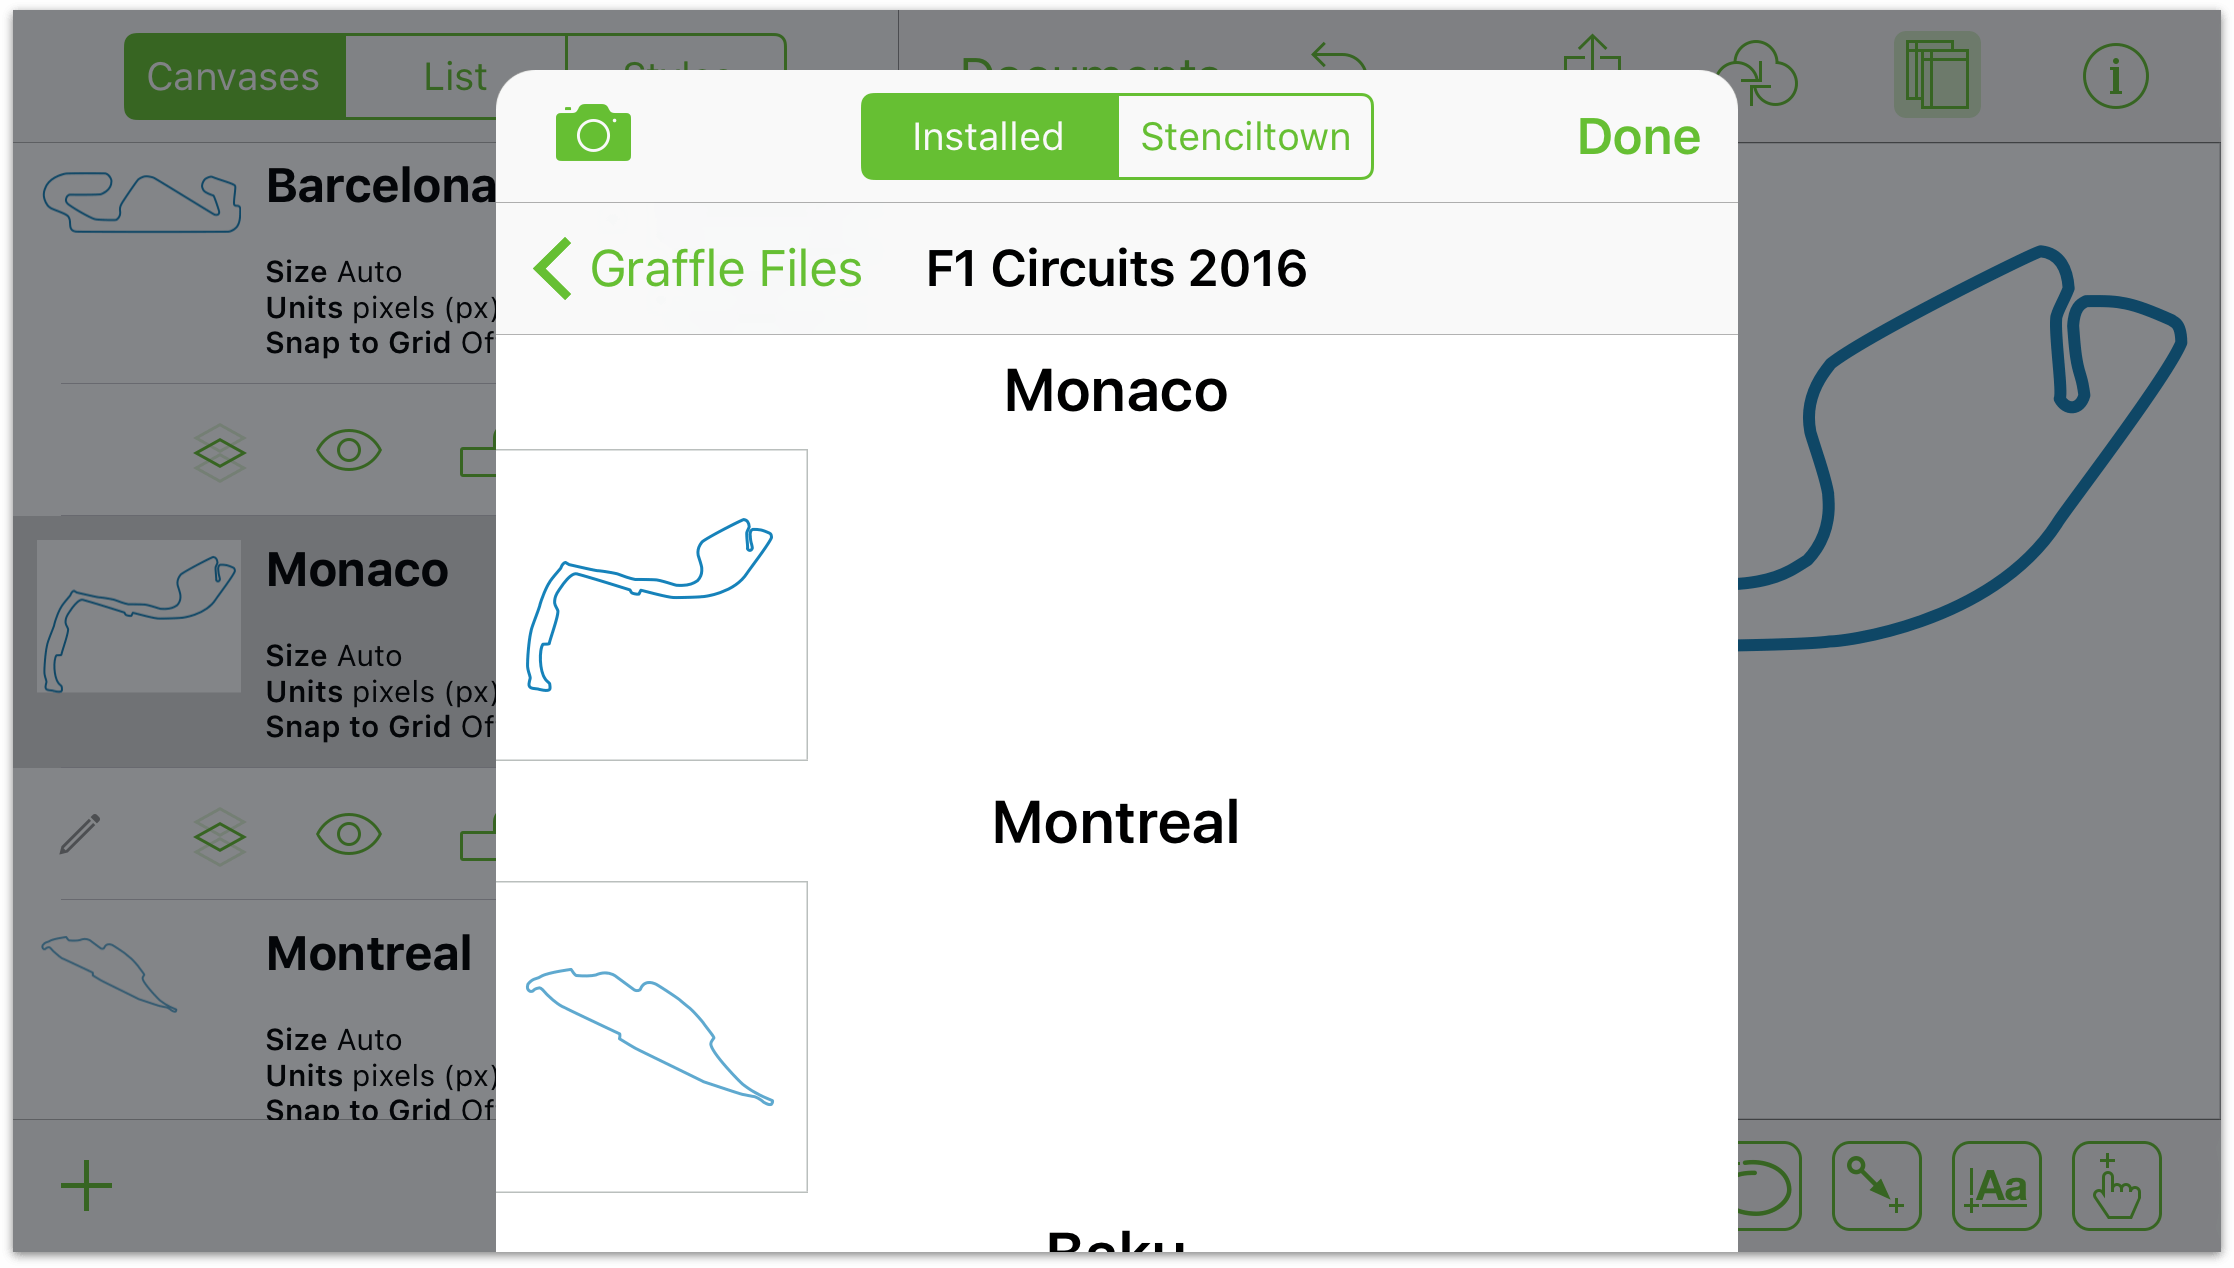
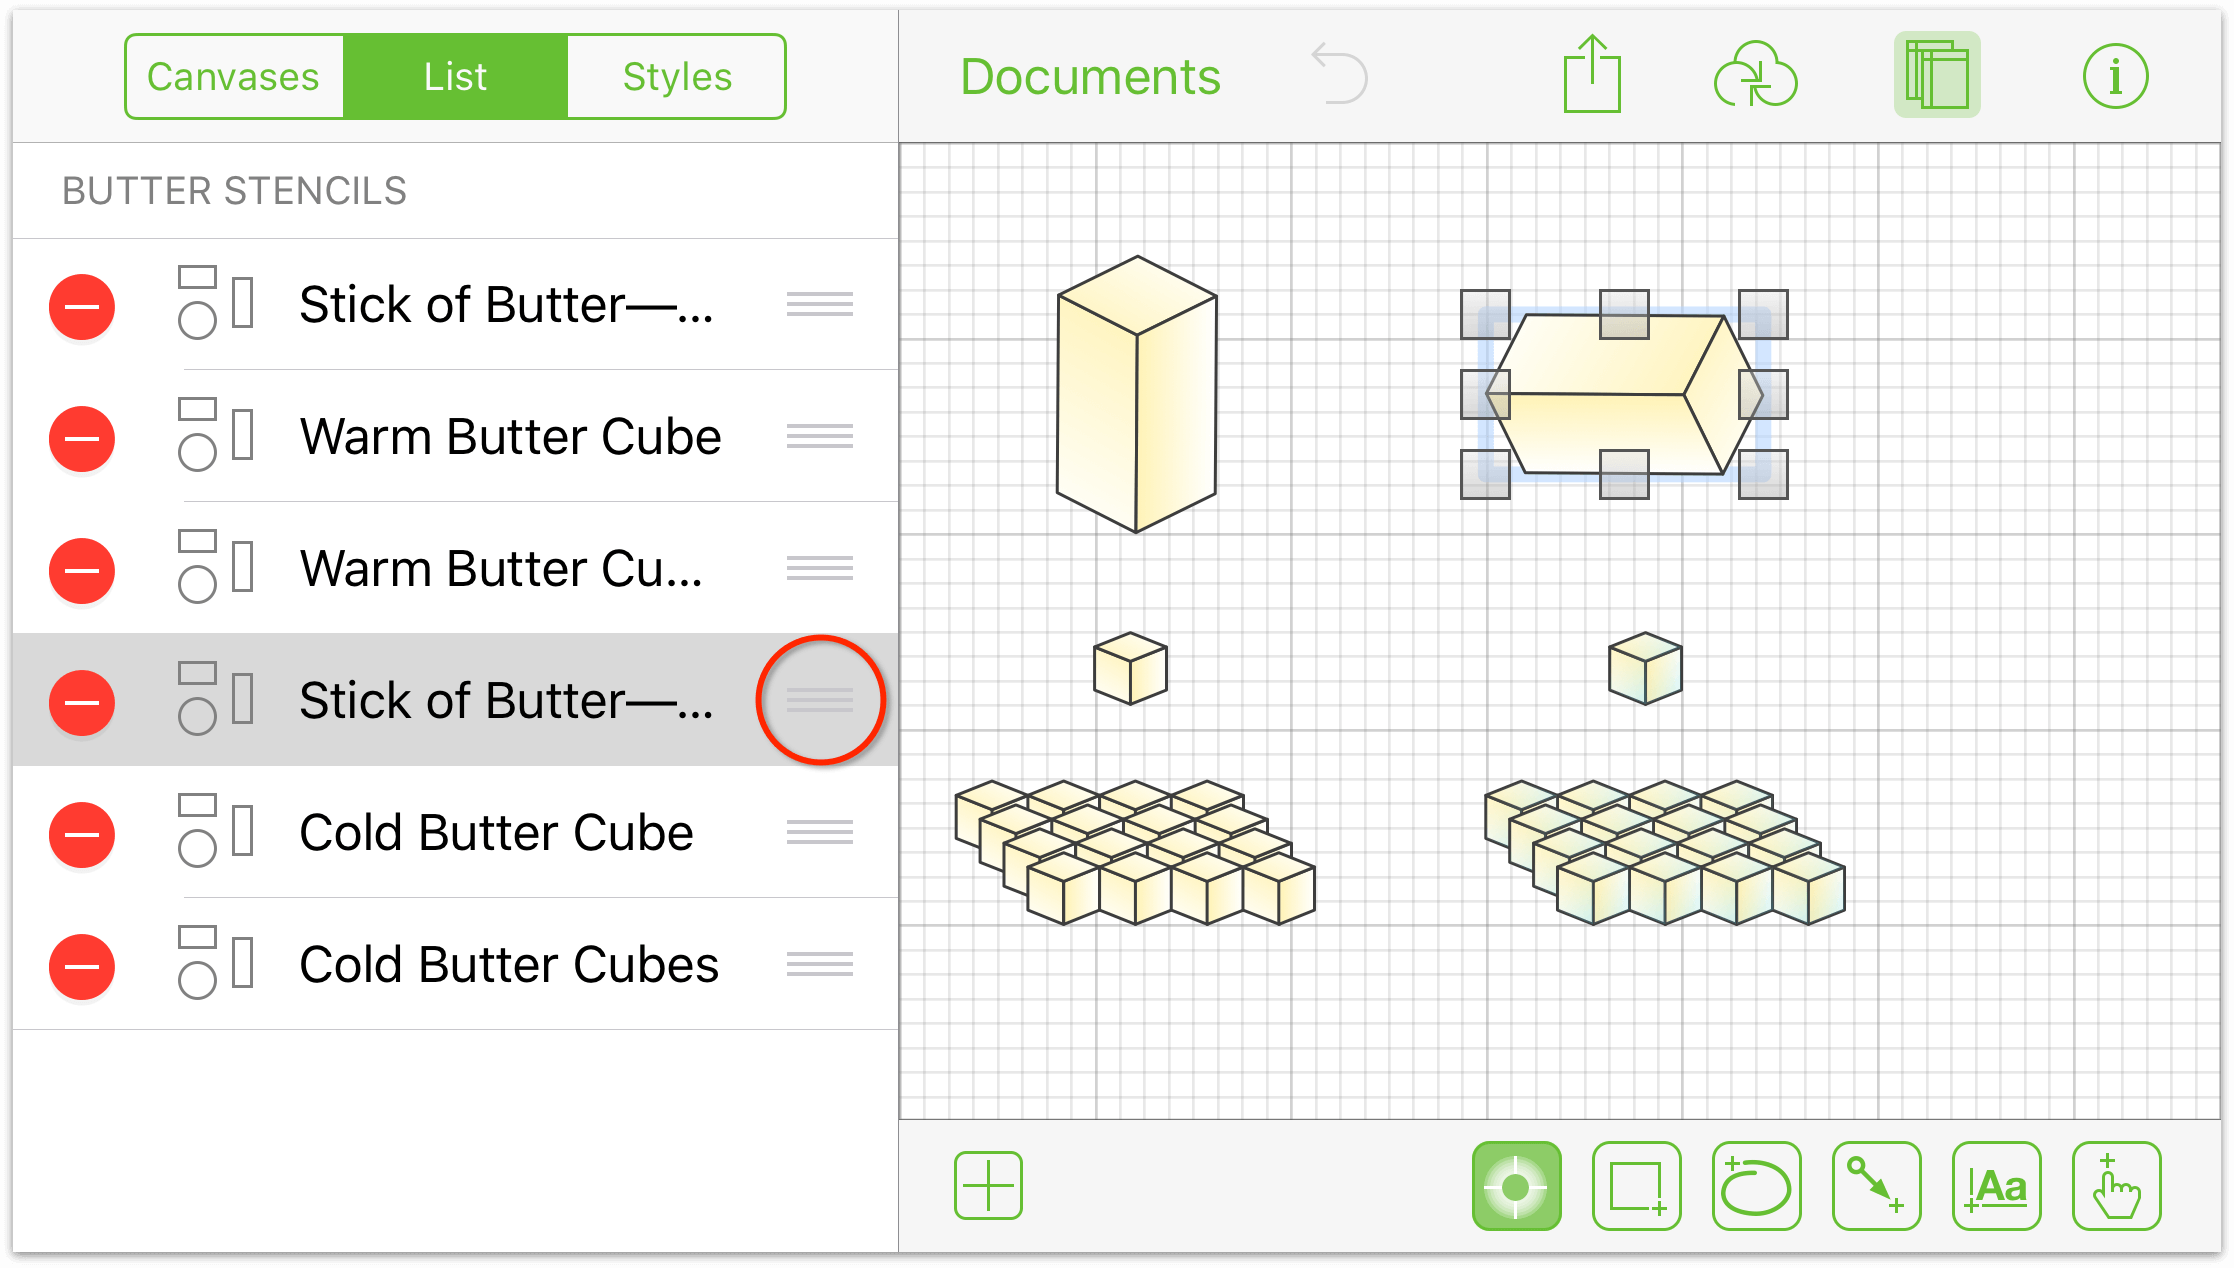
When viewed in the Stencils Library, you can see that the canvas names are shown as bold headings, with each stencil offset to the left:
Note, however, that if all of your objects are on the same canvas and you do rename that canvas, the stencils are shown without any heading:
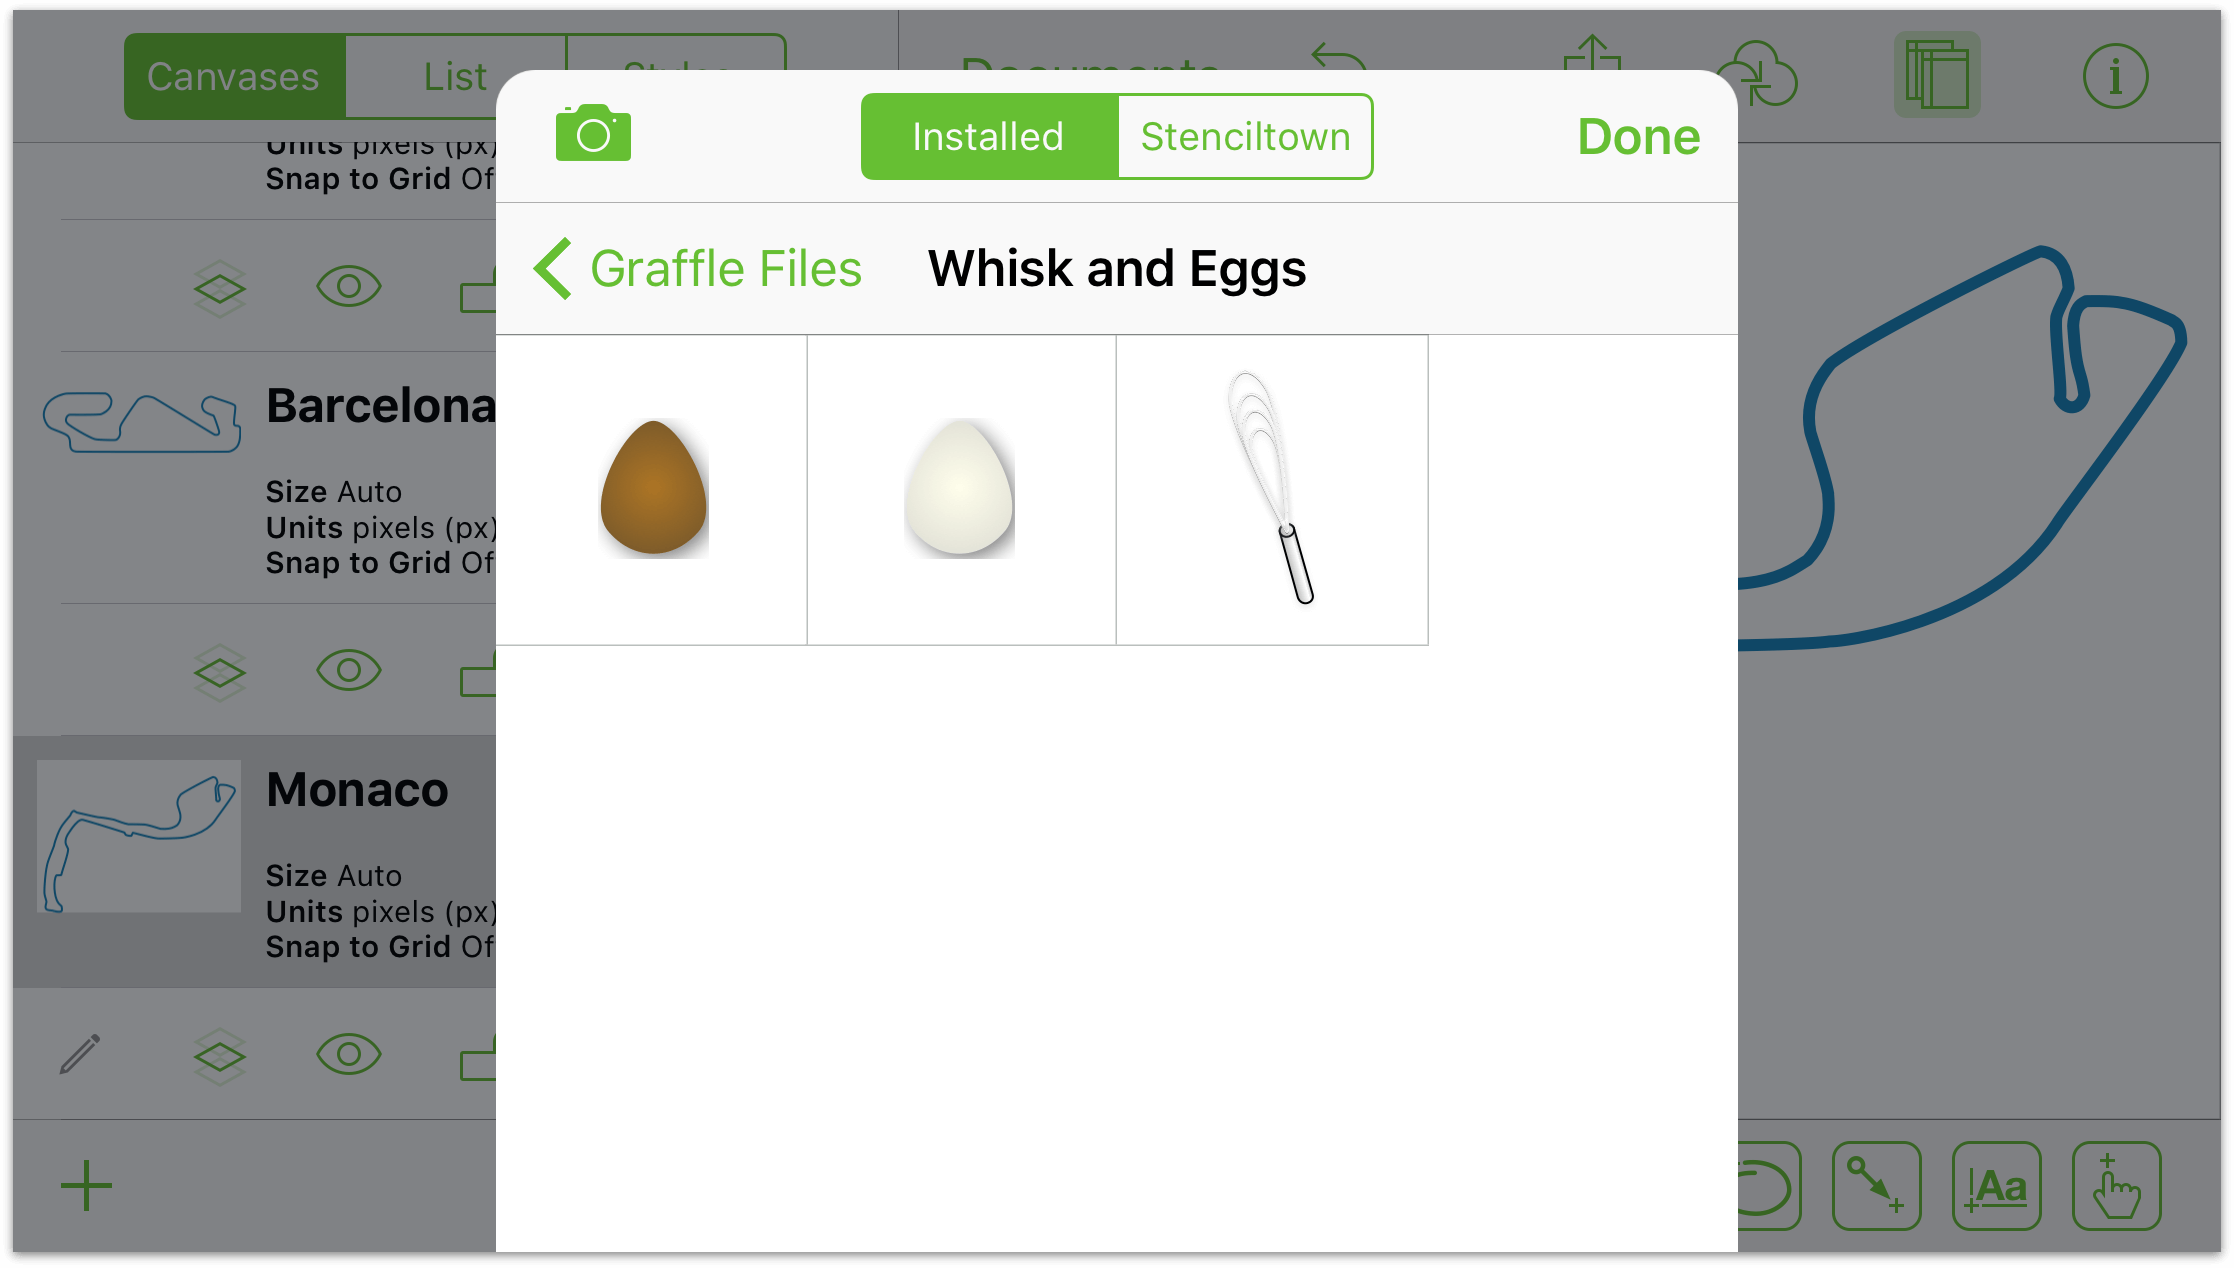
The only name that appears is the name of the Stencils file, above the stencils.
Naming Object Groups in the Note Inspector (Pro)
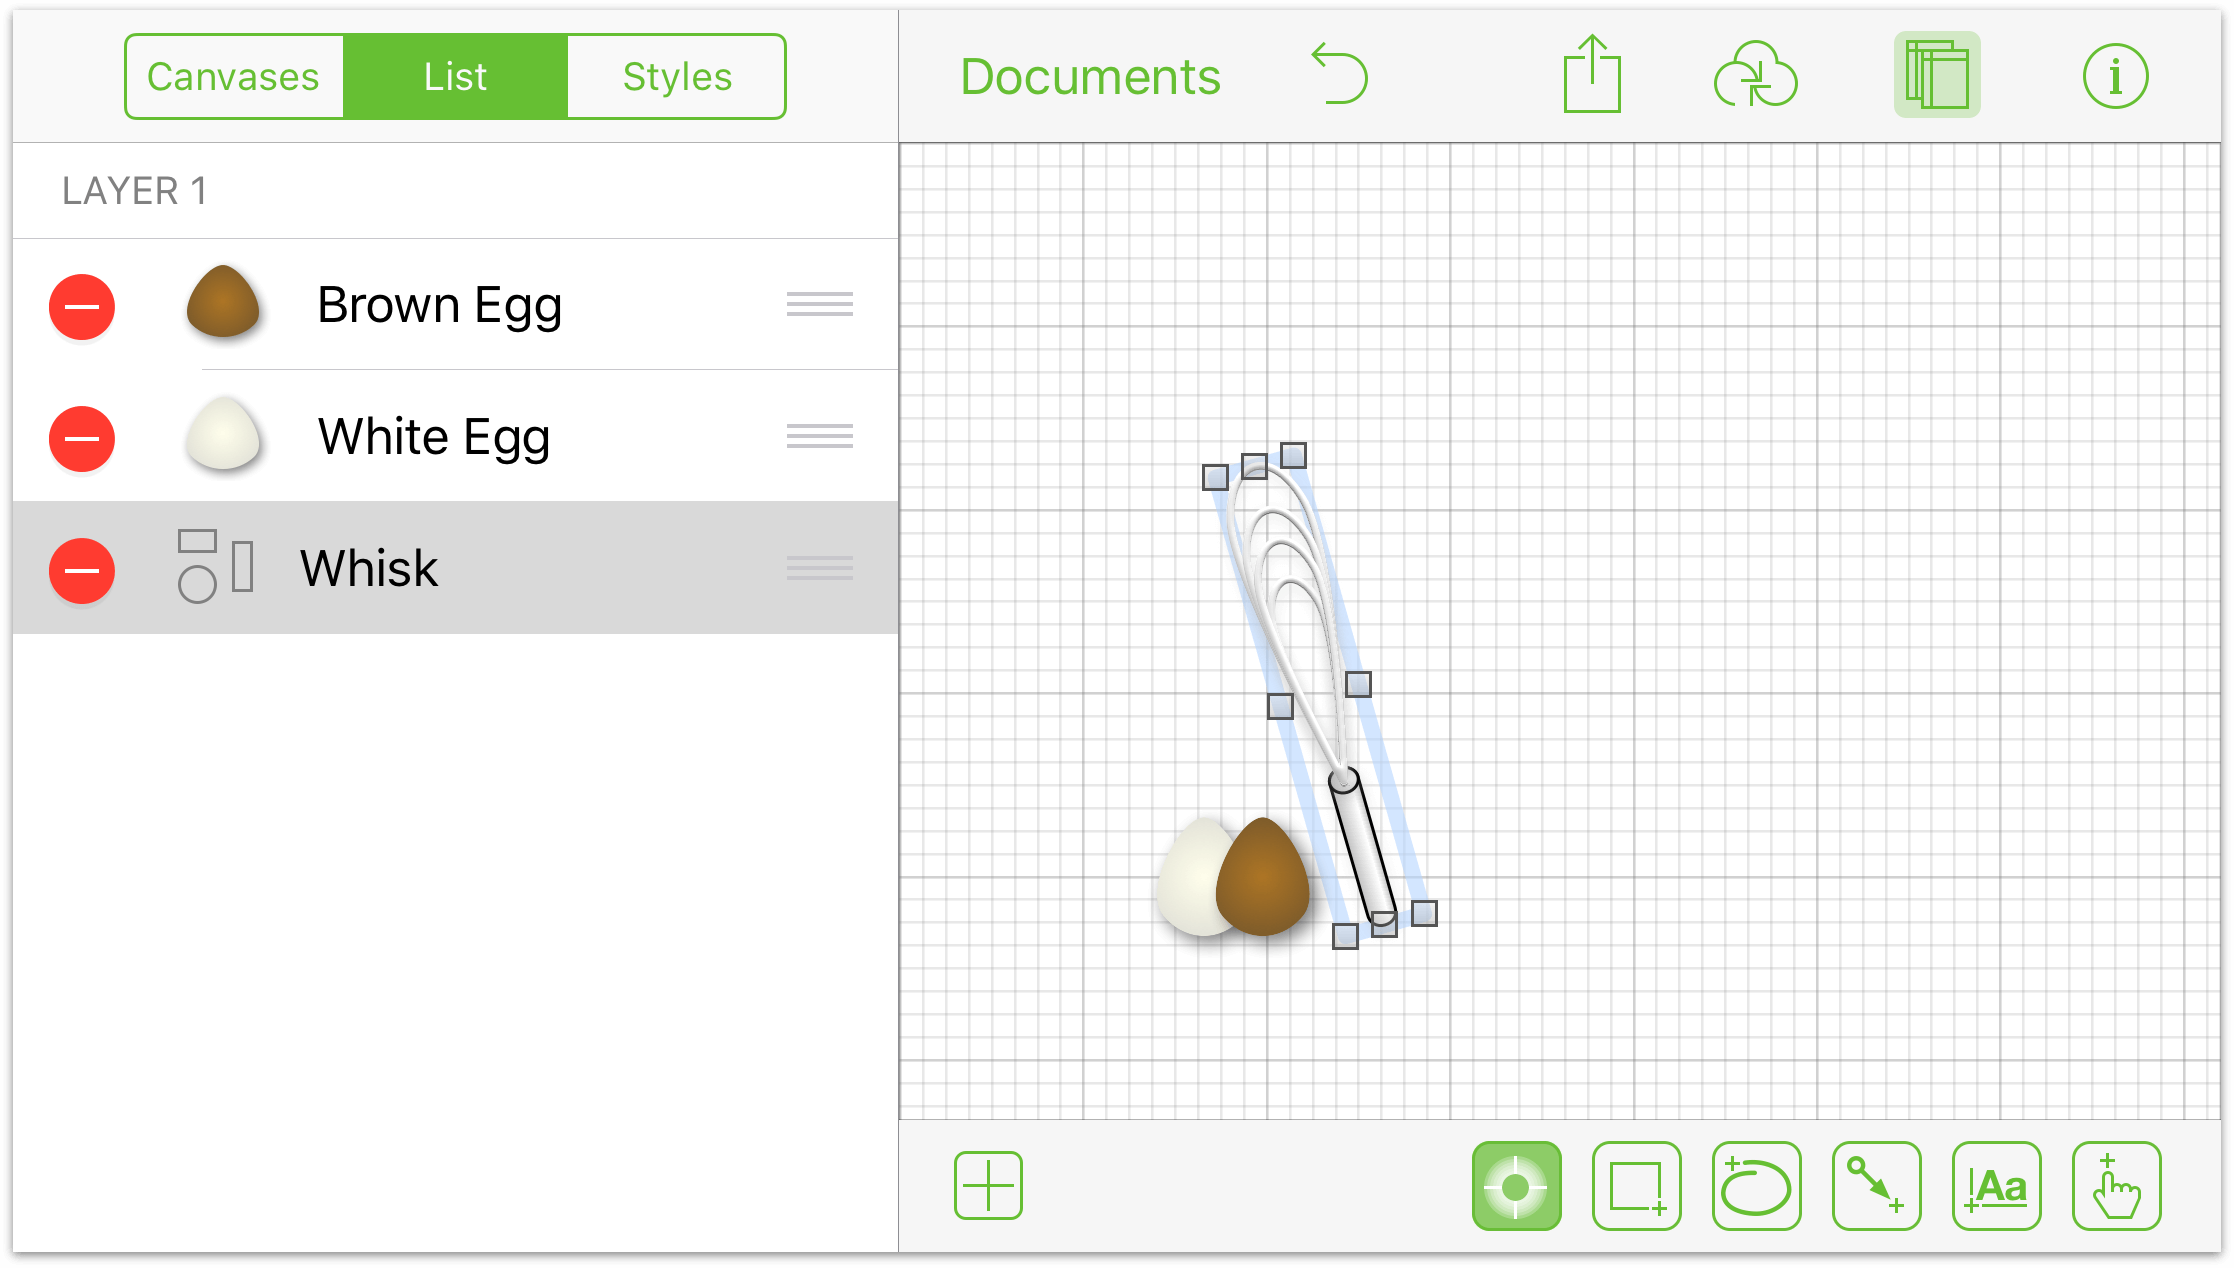
If you created a stencil that consists of a group of objects, you might notice that the object carries the name of “Group” when viewed in the Sidebar’s List mode.
If you have OmniGraffle Pro, you can select the Group object, and then tap ![]() to open the inspectors. Scroll down in the list and tap Notes, and then enter a Name for the object. Tap Done at the top of the inspector when you are finished entering the Name.
to open the inspectors. Scroll down in the list and tap Notes, and then enter a Name for the object. Tap Done at the top of the inspector when you are finished entering the Name.

As you can see, the Group name has changed to Whisk, which makes identifying the object much easier.
Give this a try with your own stencils, and see how much this fine level of detail improves your work.
Adding Stencil Descriptions in the Note Inspector (Pro)
If you have OmniGraffle Pro, you can also add a short description to your stencils. Stencil descriptions not only make it easy for other users to understand how to use that particular stencil, but they can also serve as useful reminders to yourself when you go back to use a stencil months from now.
Neatly Organizing Stencil Sets
Another way you can better present the stencils in a Stencil Set is to organize them in the sidebar’s List view. The aptly named List displays all of the objects on the canvas in a list that you can reorganize by tapping and holding on the grabber handle on the right edge.
To reorder the objects in the List, tap and hold on the grabber handle (![]() ), and then drag the item up or down in the list:
), and then drag the item up or down in the list:
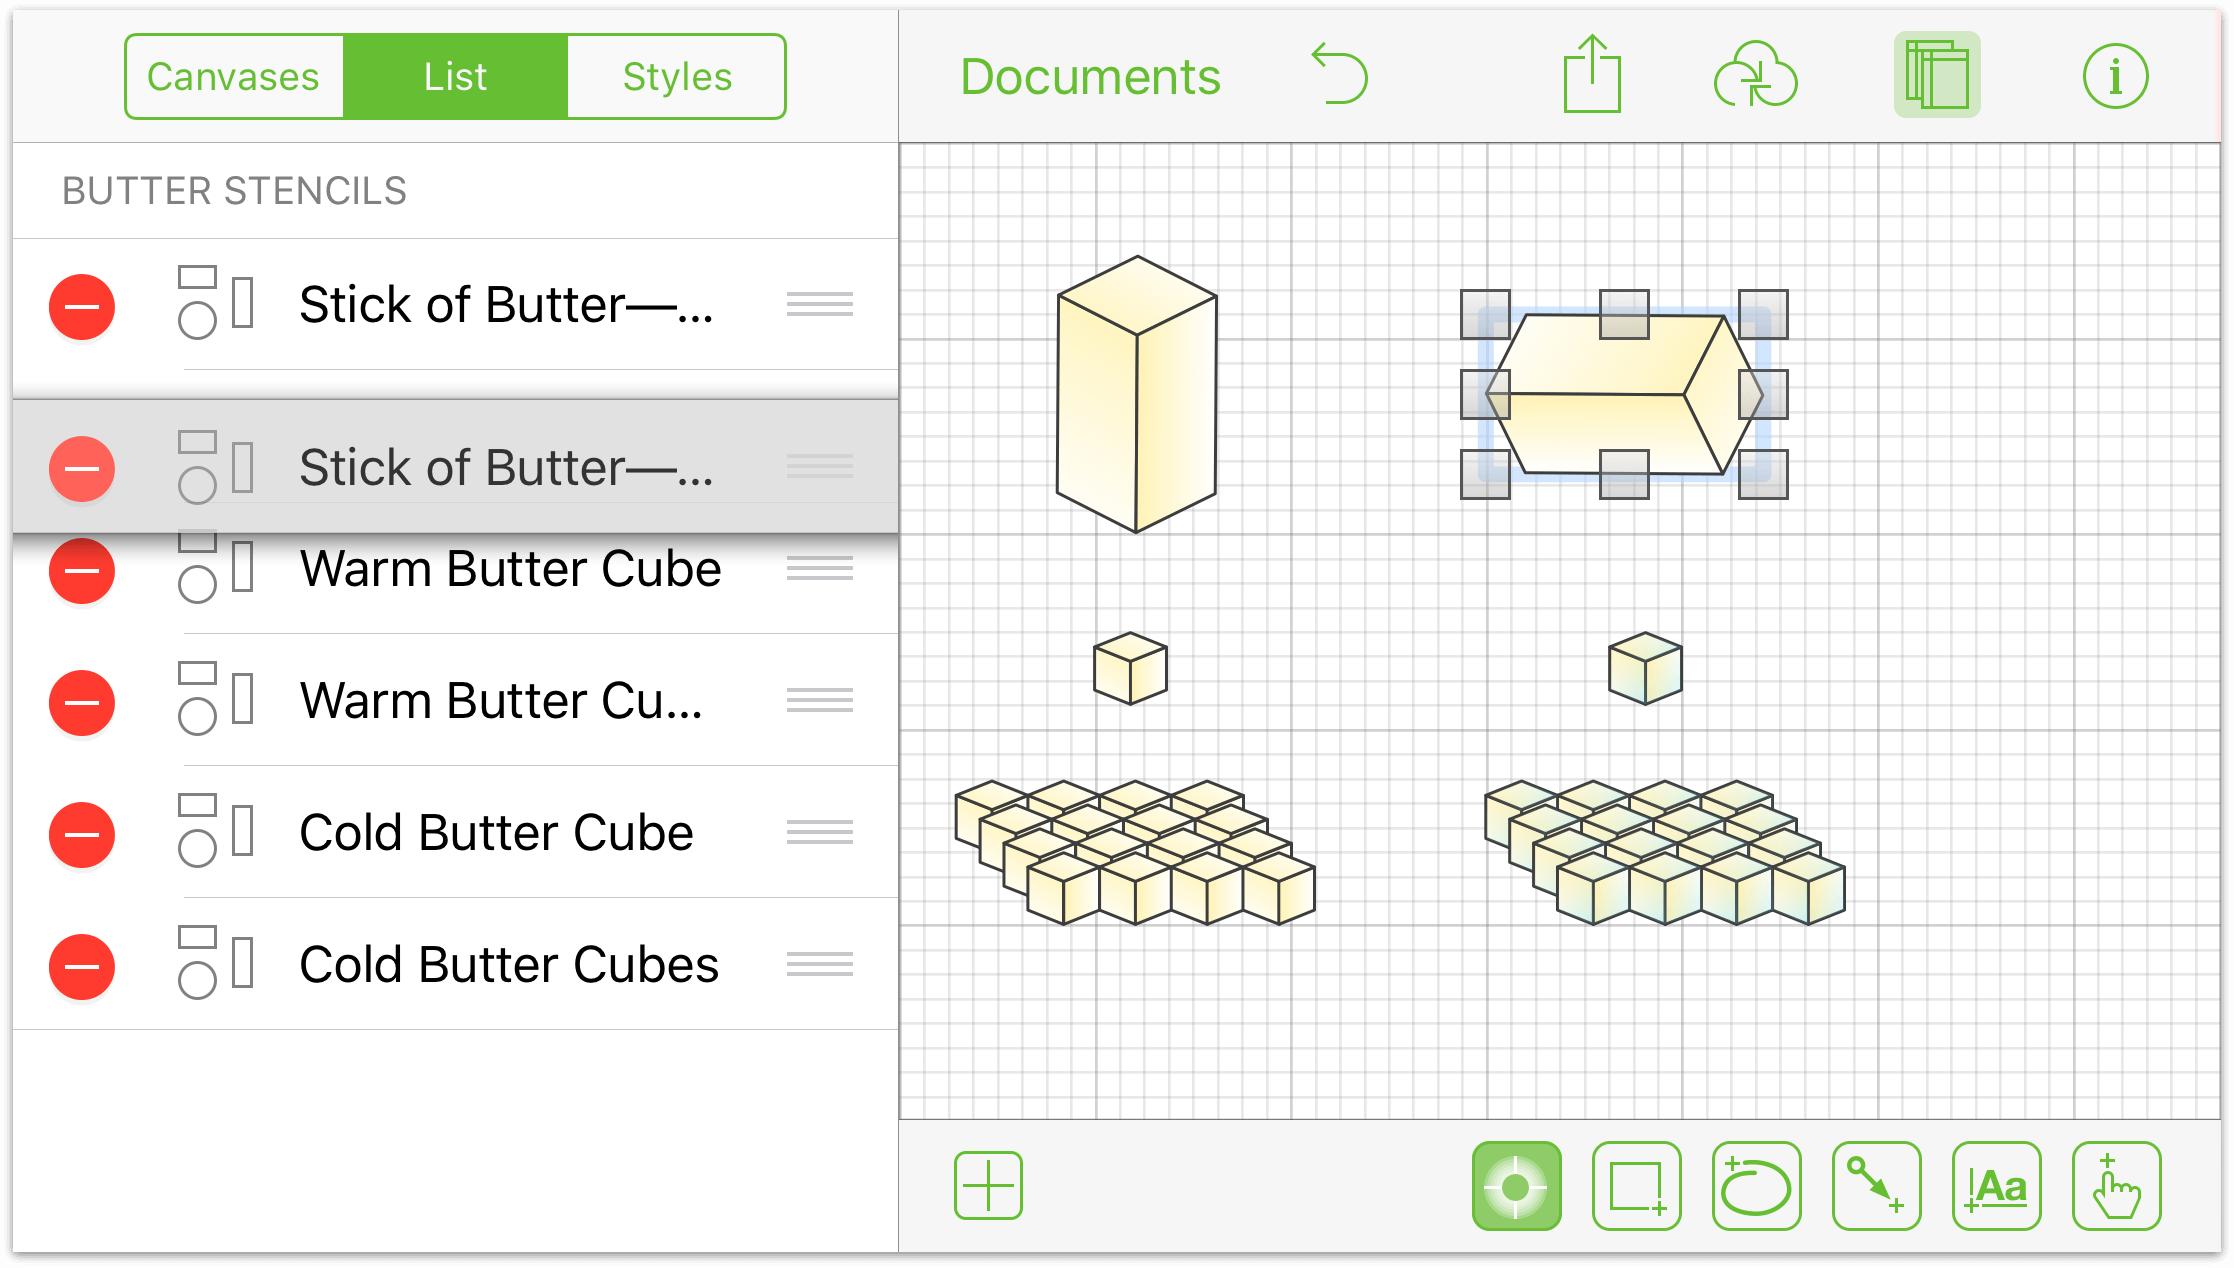
When you let go of the item, it pops into its place in the list. There is no right or wrong way to organize your stencils; just use your best judgment.
Naming Canvas Layers
While this might not necessarily apply to a stencil, you should get in the habit of naming the layers in the things you create.
How to Properly Name a Stencil File
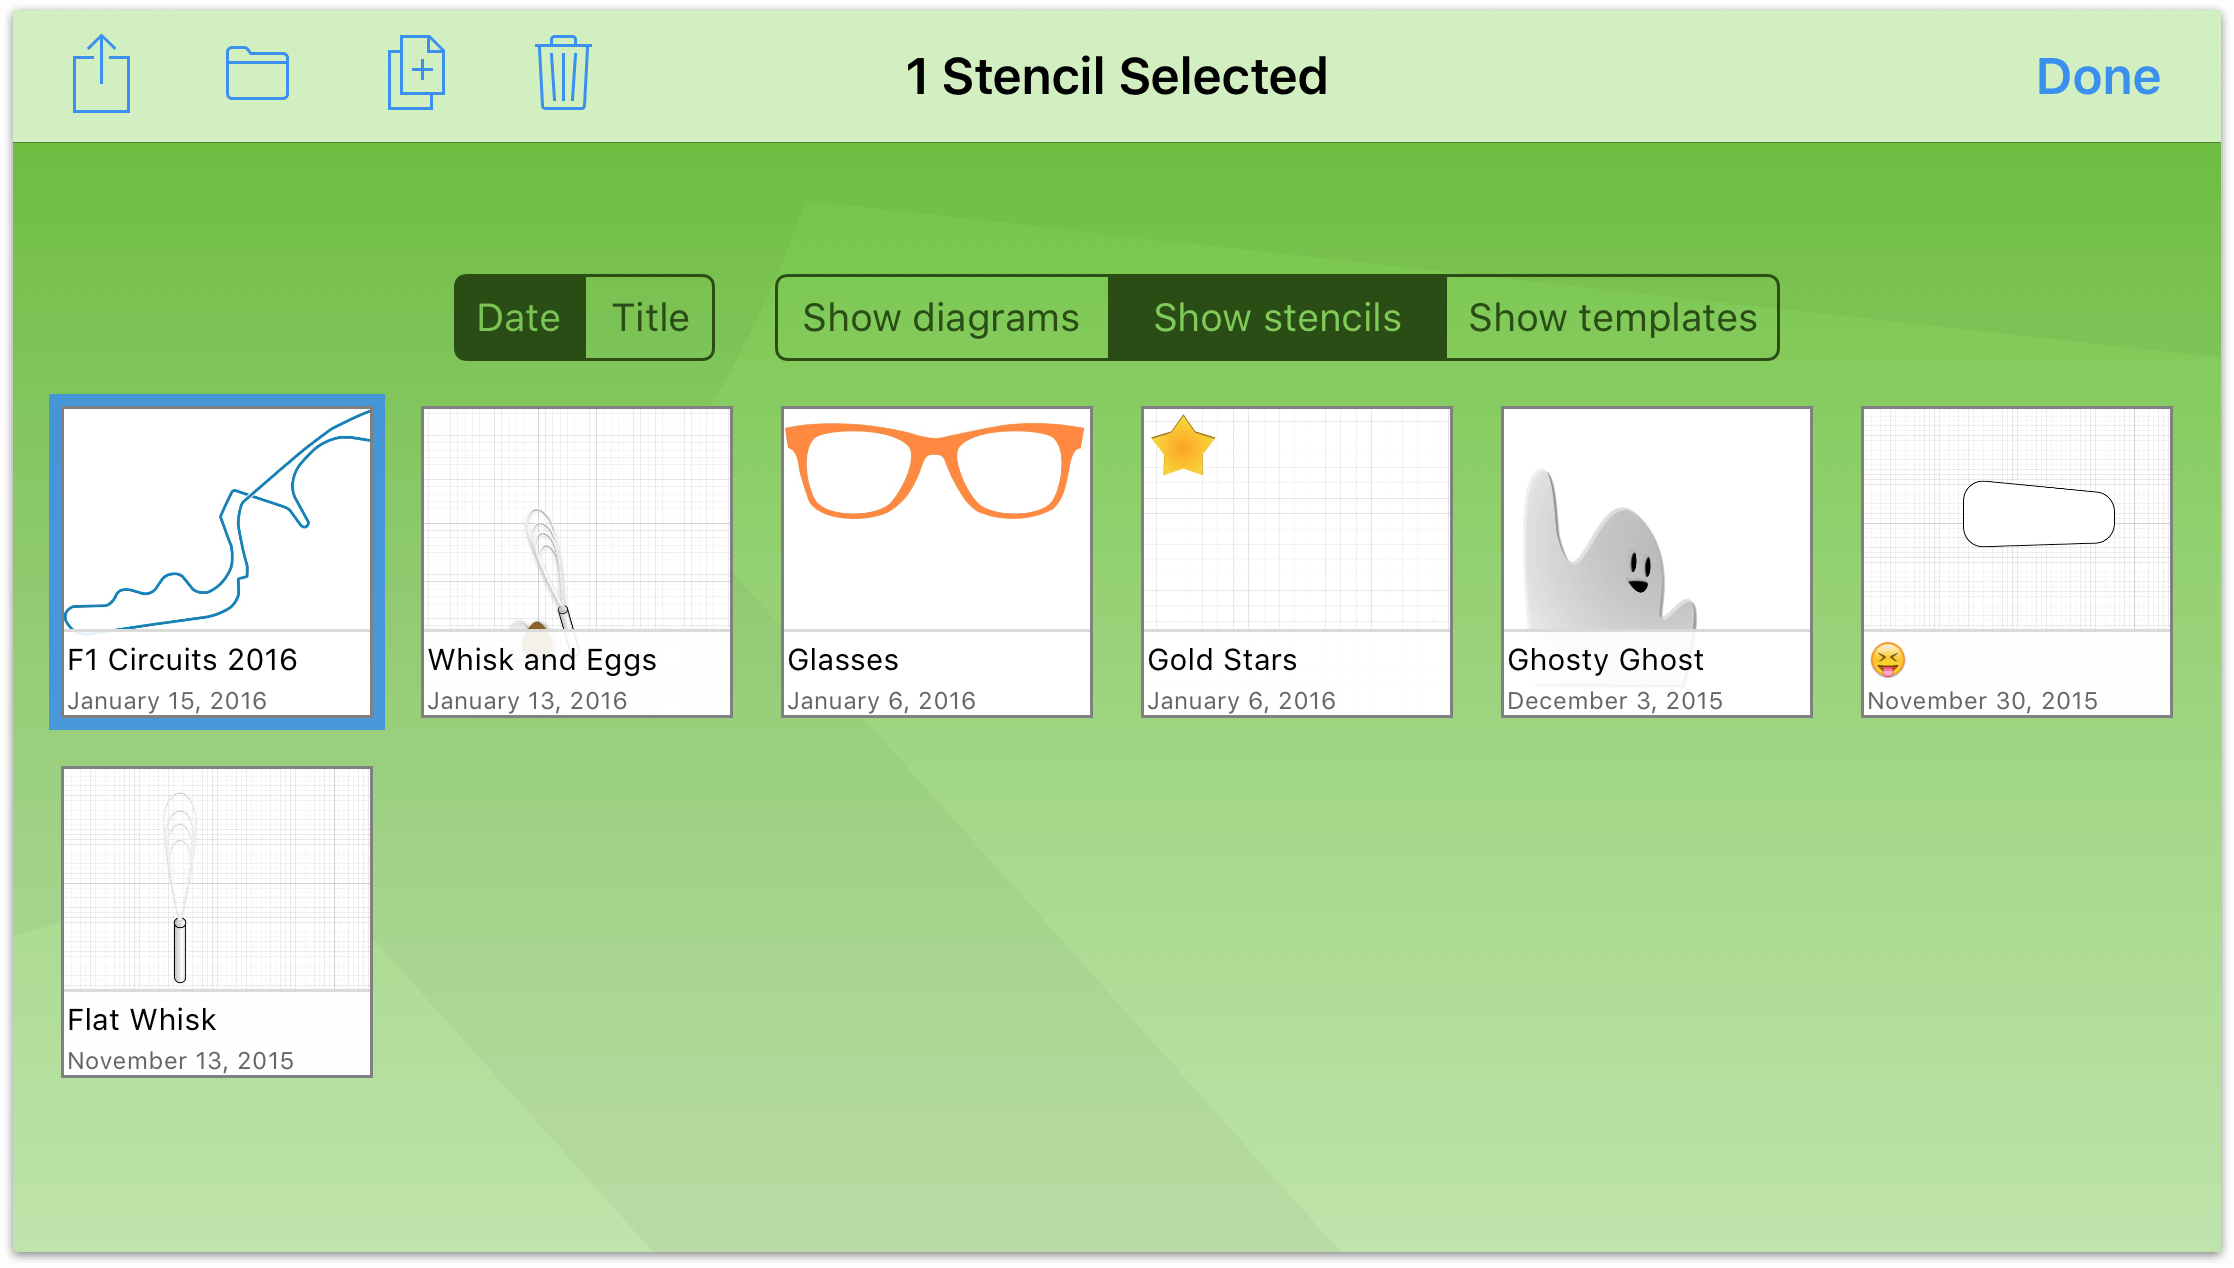
Don’t be cryptic when naming your stencil file. Use something that aids in findability. For example, you could use something like F1 Circuits 2016 for a stencil set that contains outlines of the circuits for the upcoming Formula One season.
Don’t use underscores or hyphens in filenames. If you have a stencil, such as F1 Circuits 2016 that normally has spaces in it, don’t resort to using hyphens or underscores in the filename if that’s normally how you roll. Leave the spaces in there; they make the stencil name easier to read.
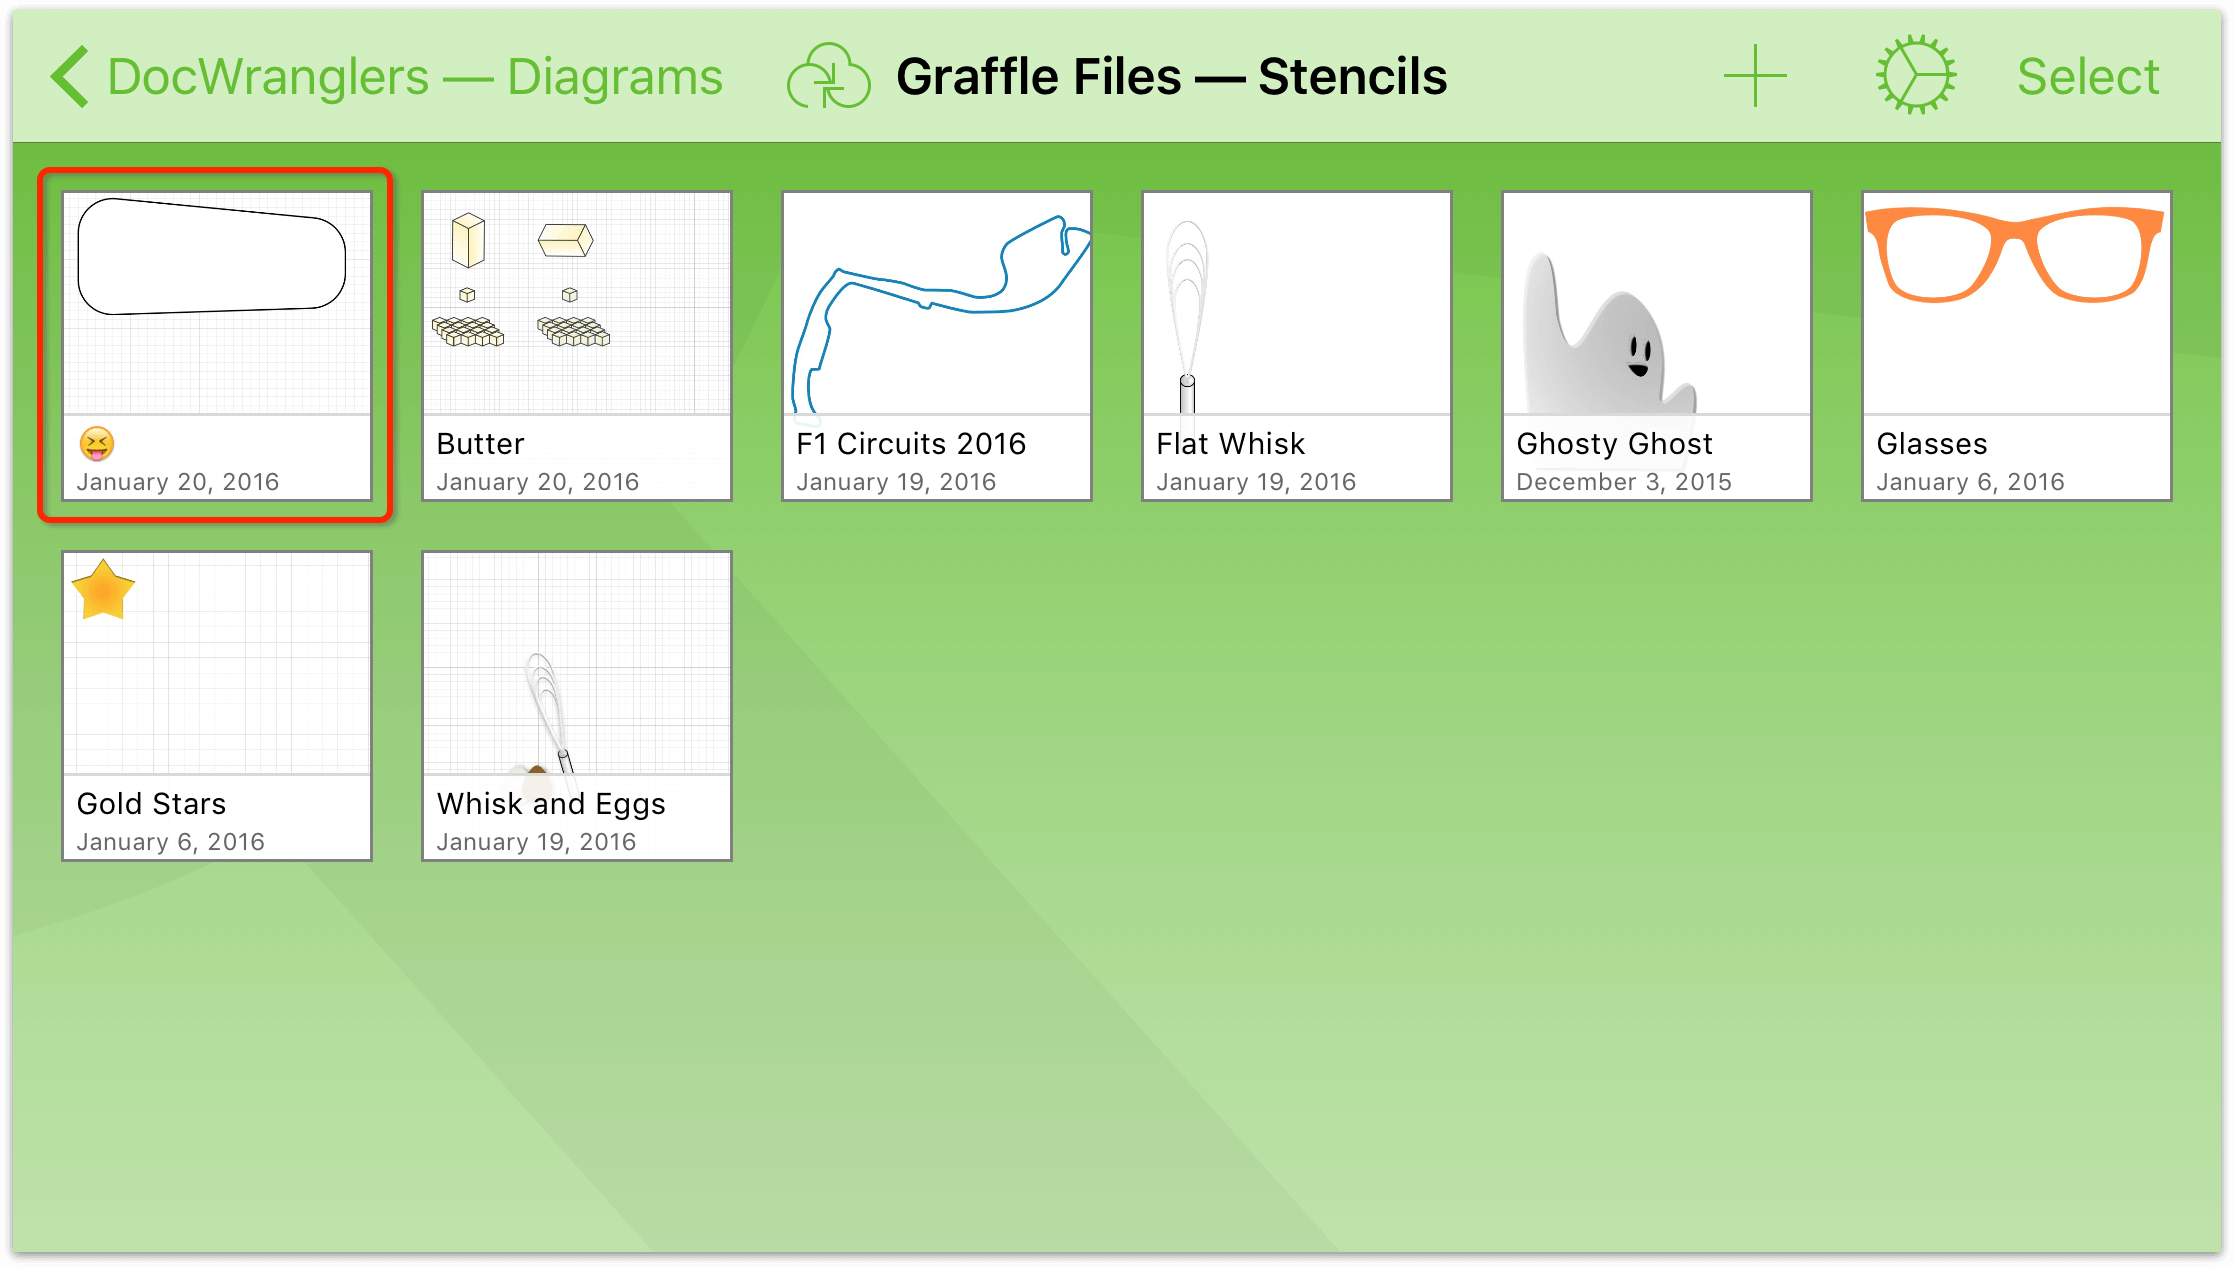
Finally, don’t use an emoji as the filename of your stencil. Since the point of sharing stencils on Stenciltown is to help other OmniGraffle users find the things they need, using an emoji as the filename hinders that process.
To Scale or Not to Scale?
One of the great things about stencils, is that you can take whatever the shape or thing might be, and resize it to the size you need. To aid in this behavior, use the Geometry inspector and turn on the Maintain Aspect Ratio option.
- Tap to select the object that will be the stencil.
- Tap to open the inspectors.
- Tap Geometry.
- Turn on both Maintain Aspect Ratio and Scale Contents. Scaling the contents ensures that any objects that are grouped together—such as text, images, and other shapes—will also scale accordingly.
- Tap Done to close the inspector.
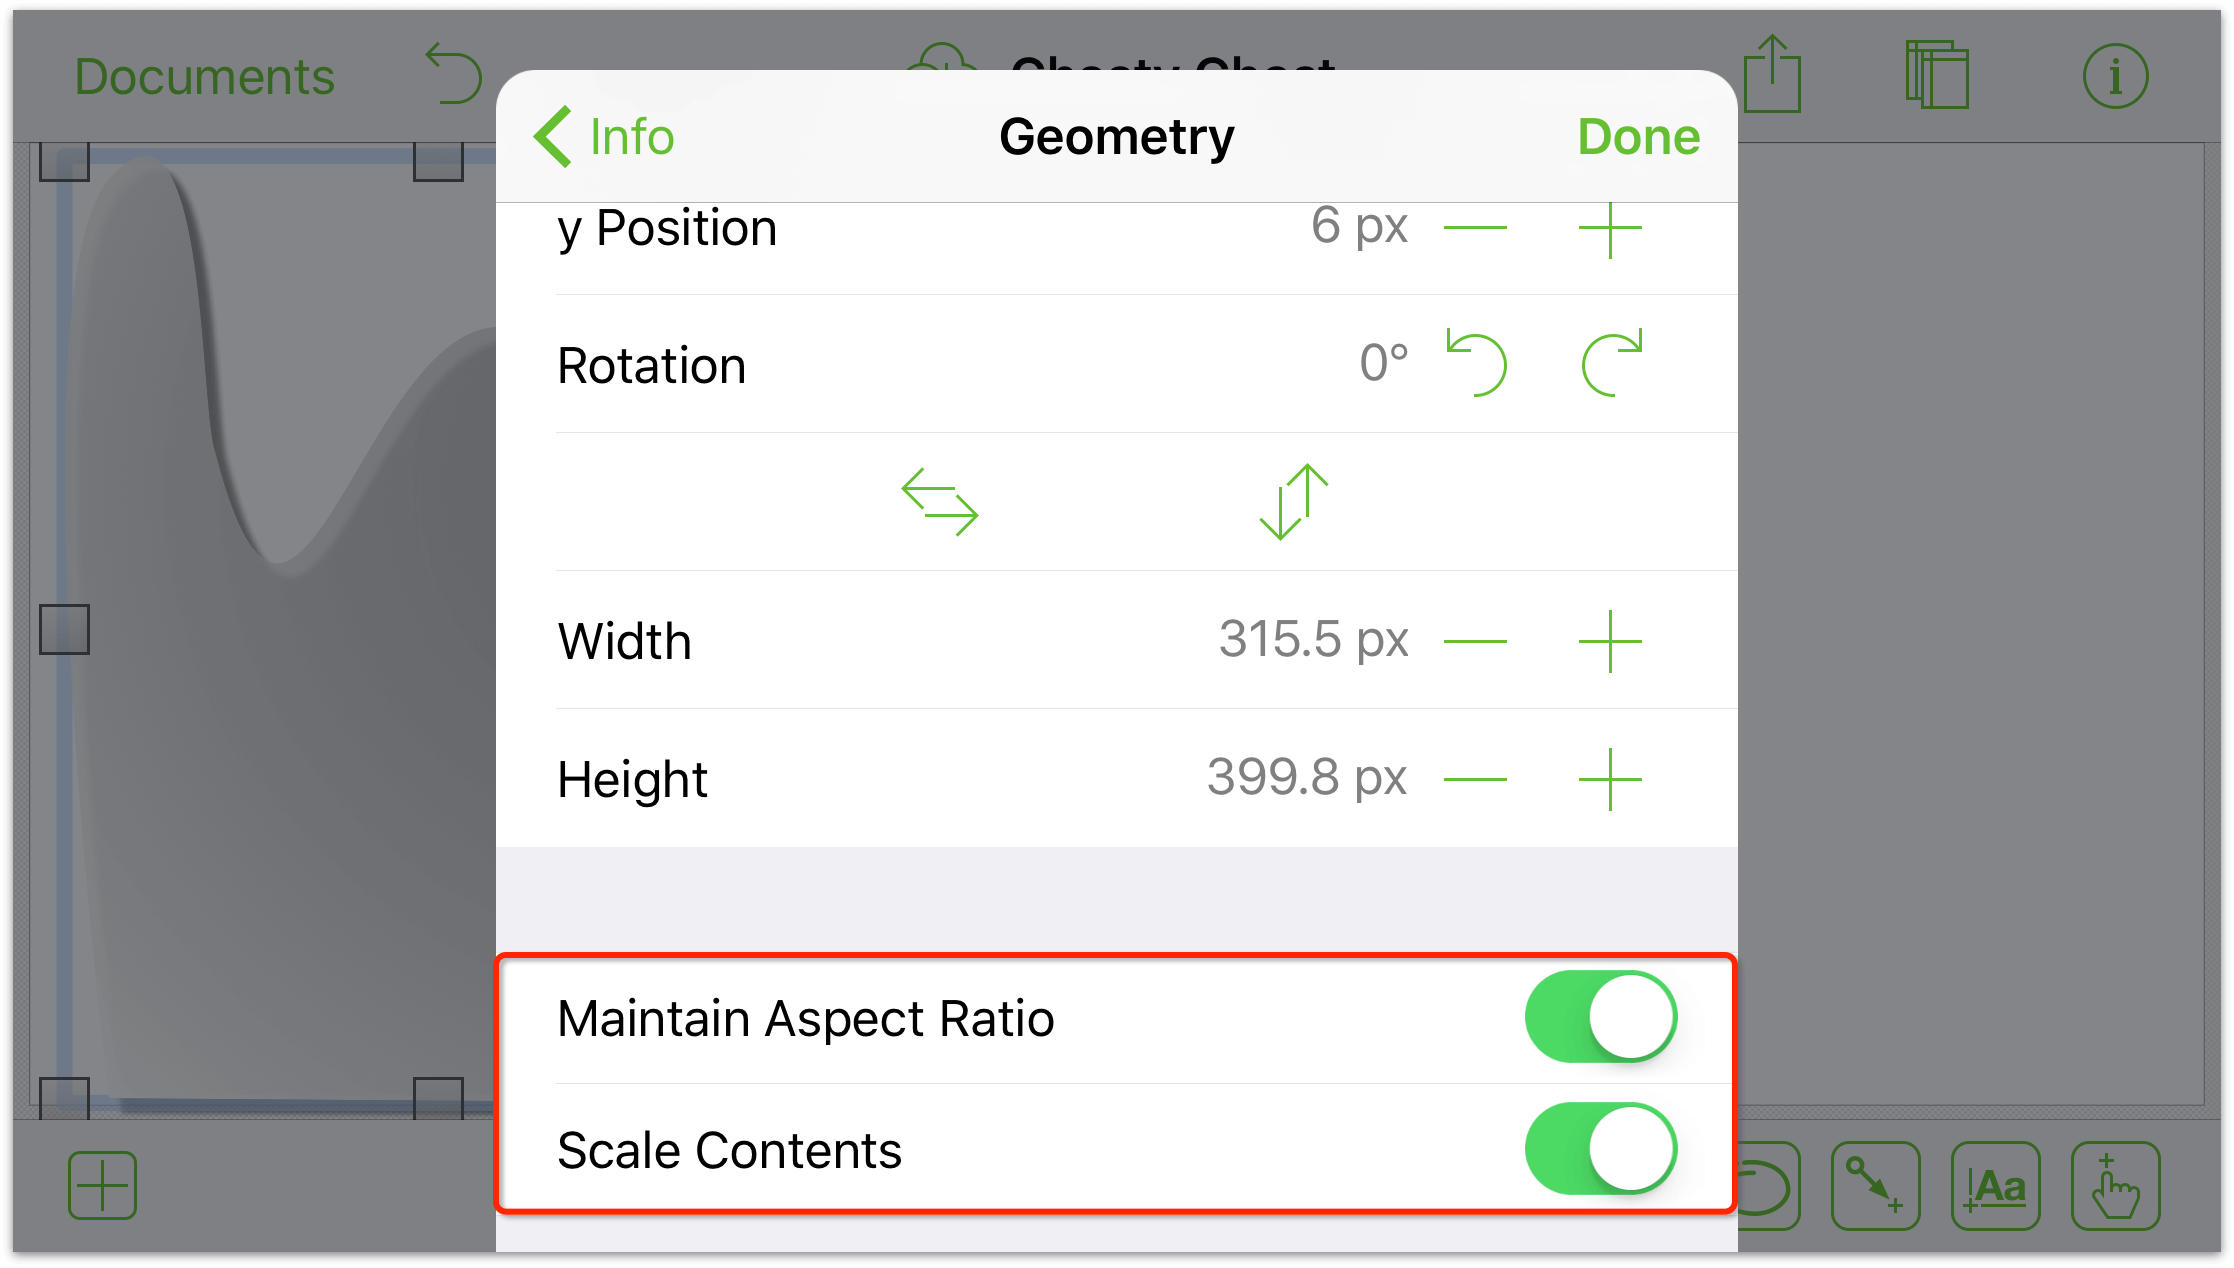
Setting Maintain Aspect Ratio helps to ensure that your stencil will appear as intended when you drew the thing. And, of course, if the person using your stencil decides they want to resize it without scaling, they can always turn off Maintain Aspect Ratio.
Submitting Stencils to Stenciltown
After you have created your own stencil in OmniGraffle, why not share it with other users? No, silly, not just the folks in your office or at the coffee bar you’re working at: the whole world of folks!
Stenciltown is kind of like Green Acres—it’s the place to be. Stenciltown is where you can share the awesome things you create in OmniGraffle with other users. We’ve even gone as far as building Stenciltown connectivity—and searchability—into OmniGraffle on Mac and iOS.
To get started, you’ll need to create an account on Stenciltown. Your Omni ID consists of a username, your email address, and a password. That’s all of the information we require; just make sure that your password is secure. We don’t need your mailing address, names of your children or pets, or anything like that. Your Omni ID is, at the moment, your way of signing into and sharing stencils on Stenciltown.
Once you have created your Omni ID for Stenciltown, you can log into Stenciltown directly from OmniGraffle on your iOS device; just follow these steps:
- Open the folder (either Local Documents or another connected-folder) in OmniGraffle, and then swipe down on the screen to reveal the Document Organizer above all of the file icons:


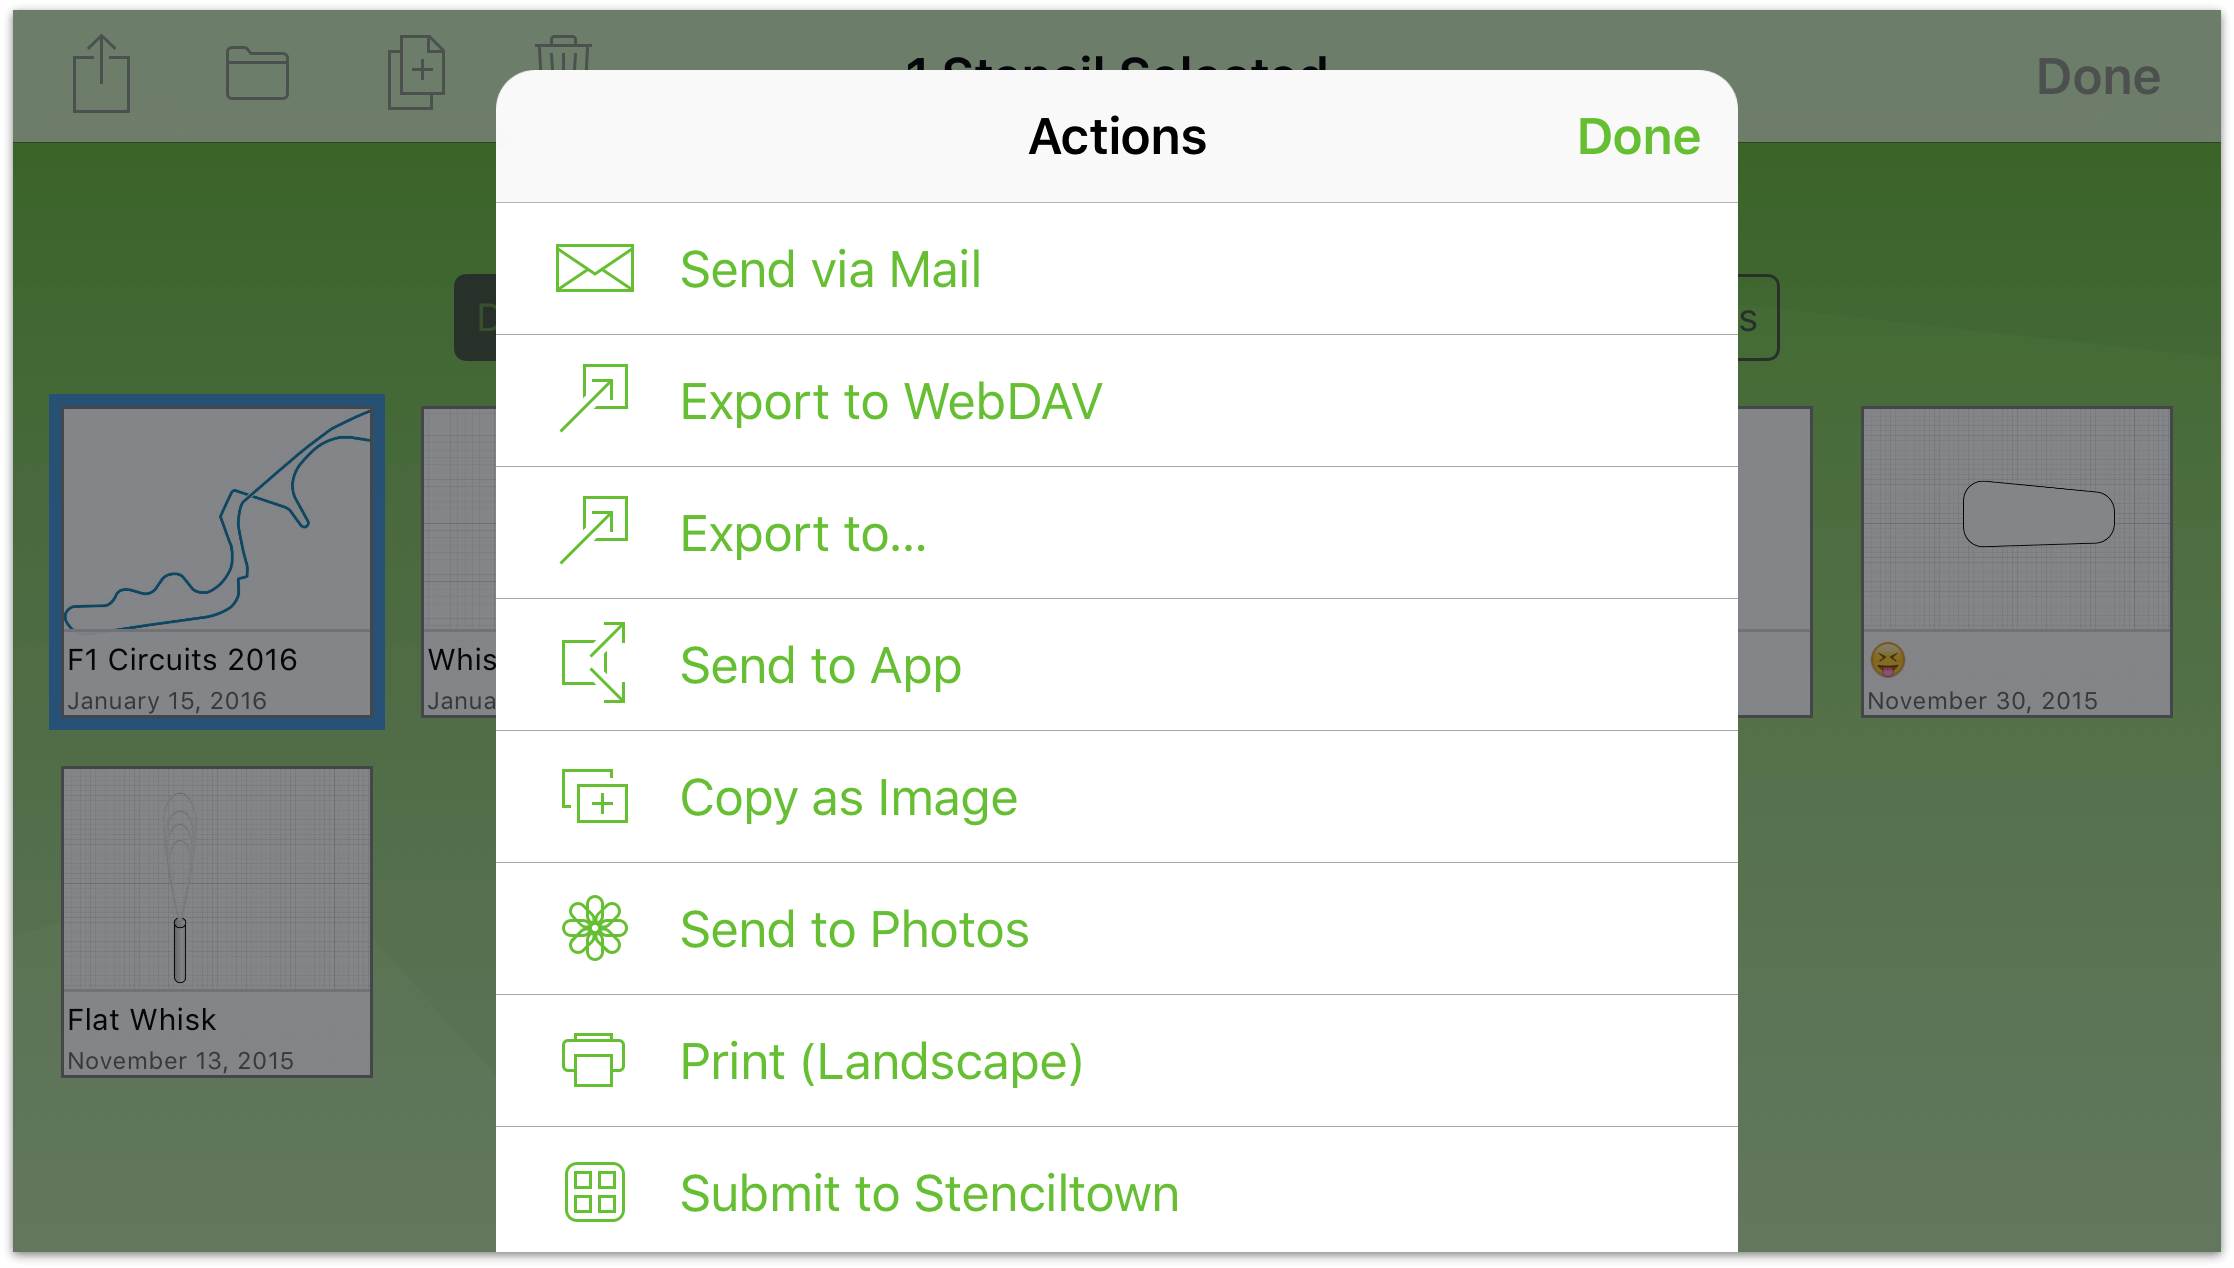
- Tap Select in the Toolbar, and then tap to select the file you want to submit to Stenciltown. The file you select will have a blue border around the file icon.
- Tap
 in the toolbar to open the Actions sheet/menu, and then tap Submit to Stenciltown.
-
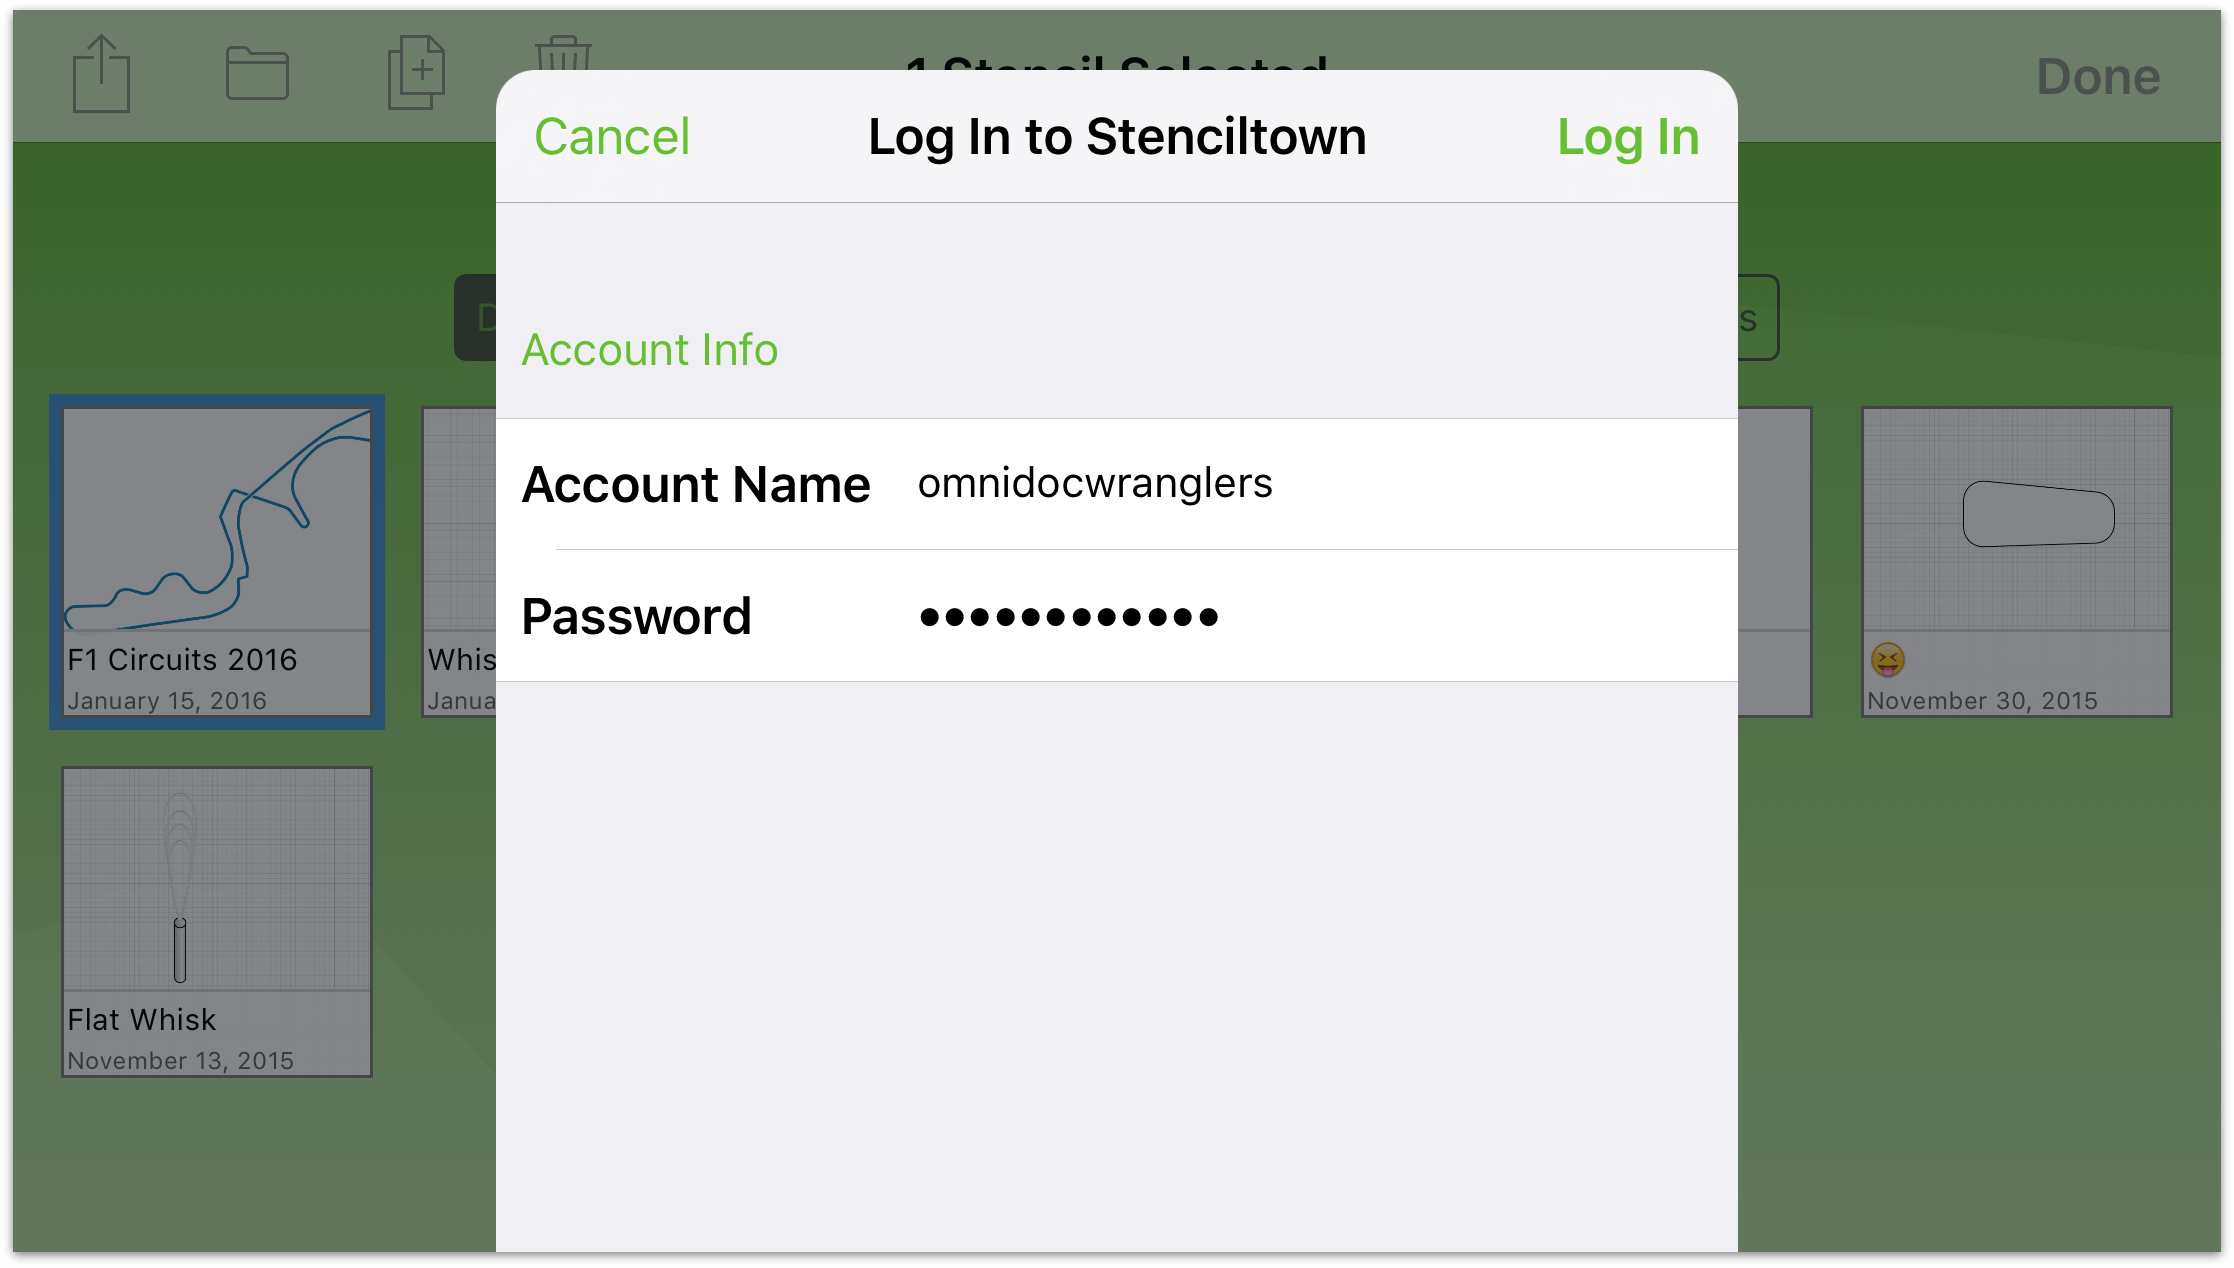
If you haven’t yet connected to Stenciltown from within OmniGraffle, you need to enter your Account Name and Password, and then tap Log In.
Note
When you log in to Stenciltown, OmniGraffle stores a cookie containing your credentials so you don’t have to repeat the process of entering your Username and Password every time you want to submit a stencil. If you have multiple accounts on Stenciltown, or if you don’t want that information stored, you can scroll down past your stencil preview (see the next image), and then tap Cancel and Log Out.
- OmniGraffle automatically uses details entered in the Document Data inspector, along with an image based on the first canvas in the file for the preview image, to fill in the basic information for your stencil. If you want to change the Name or Description, tap either of those fields to enter different information for the stencil.
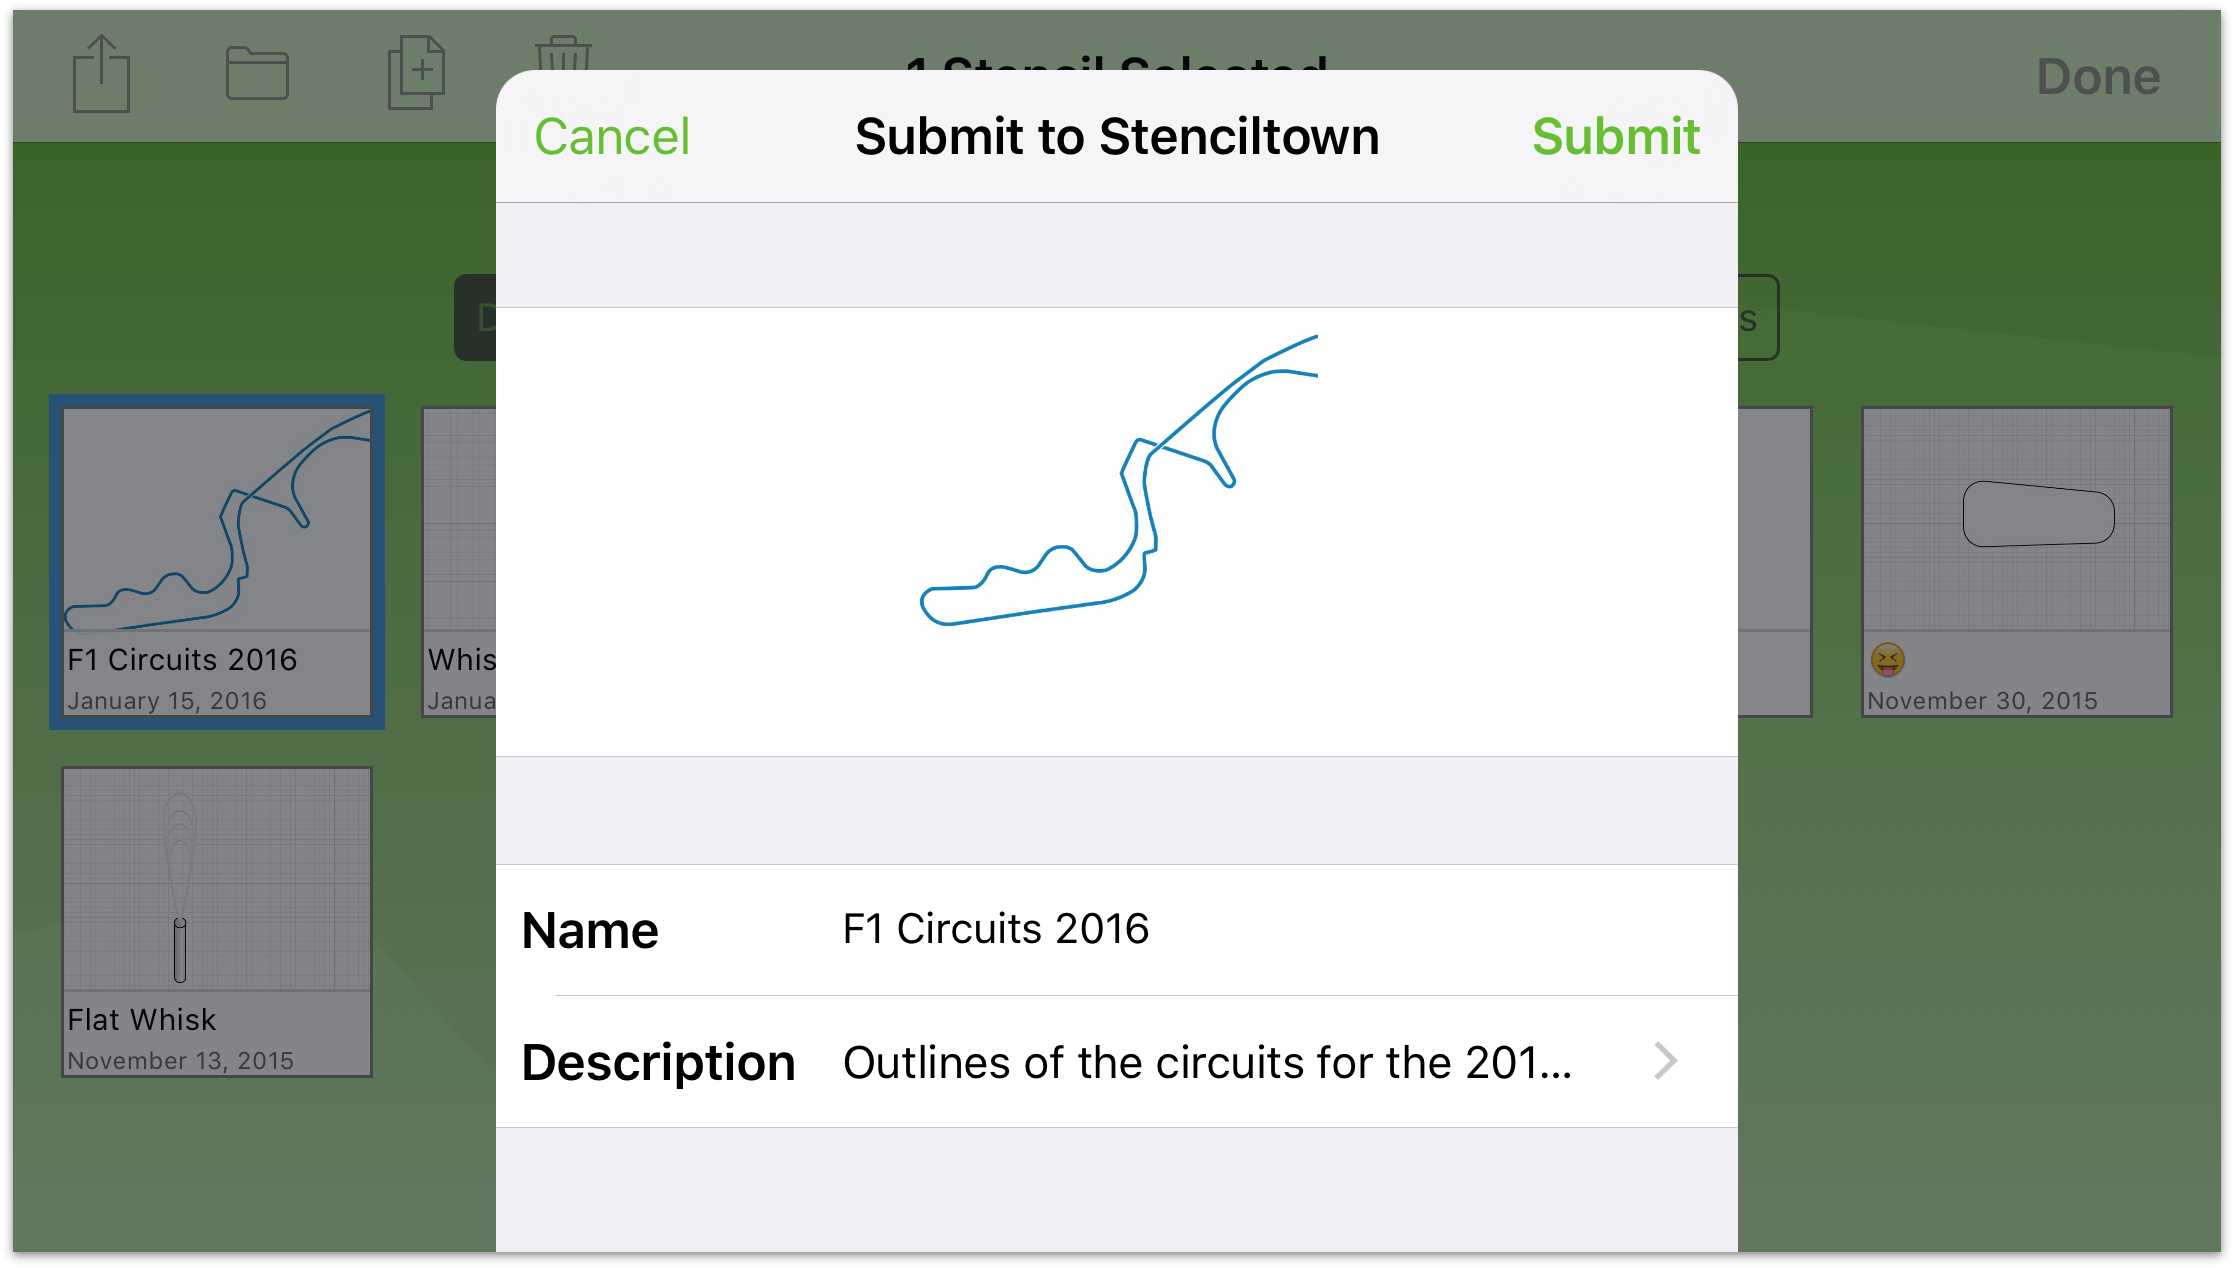
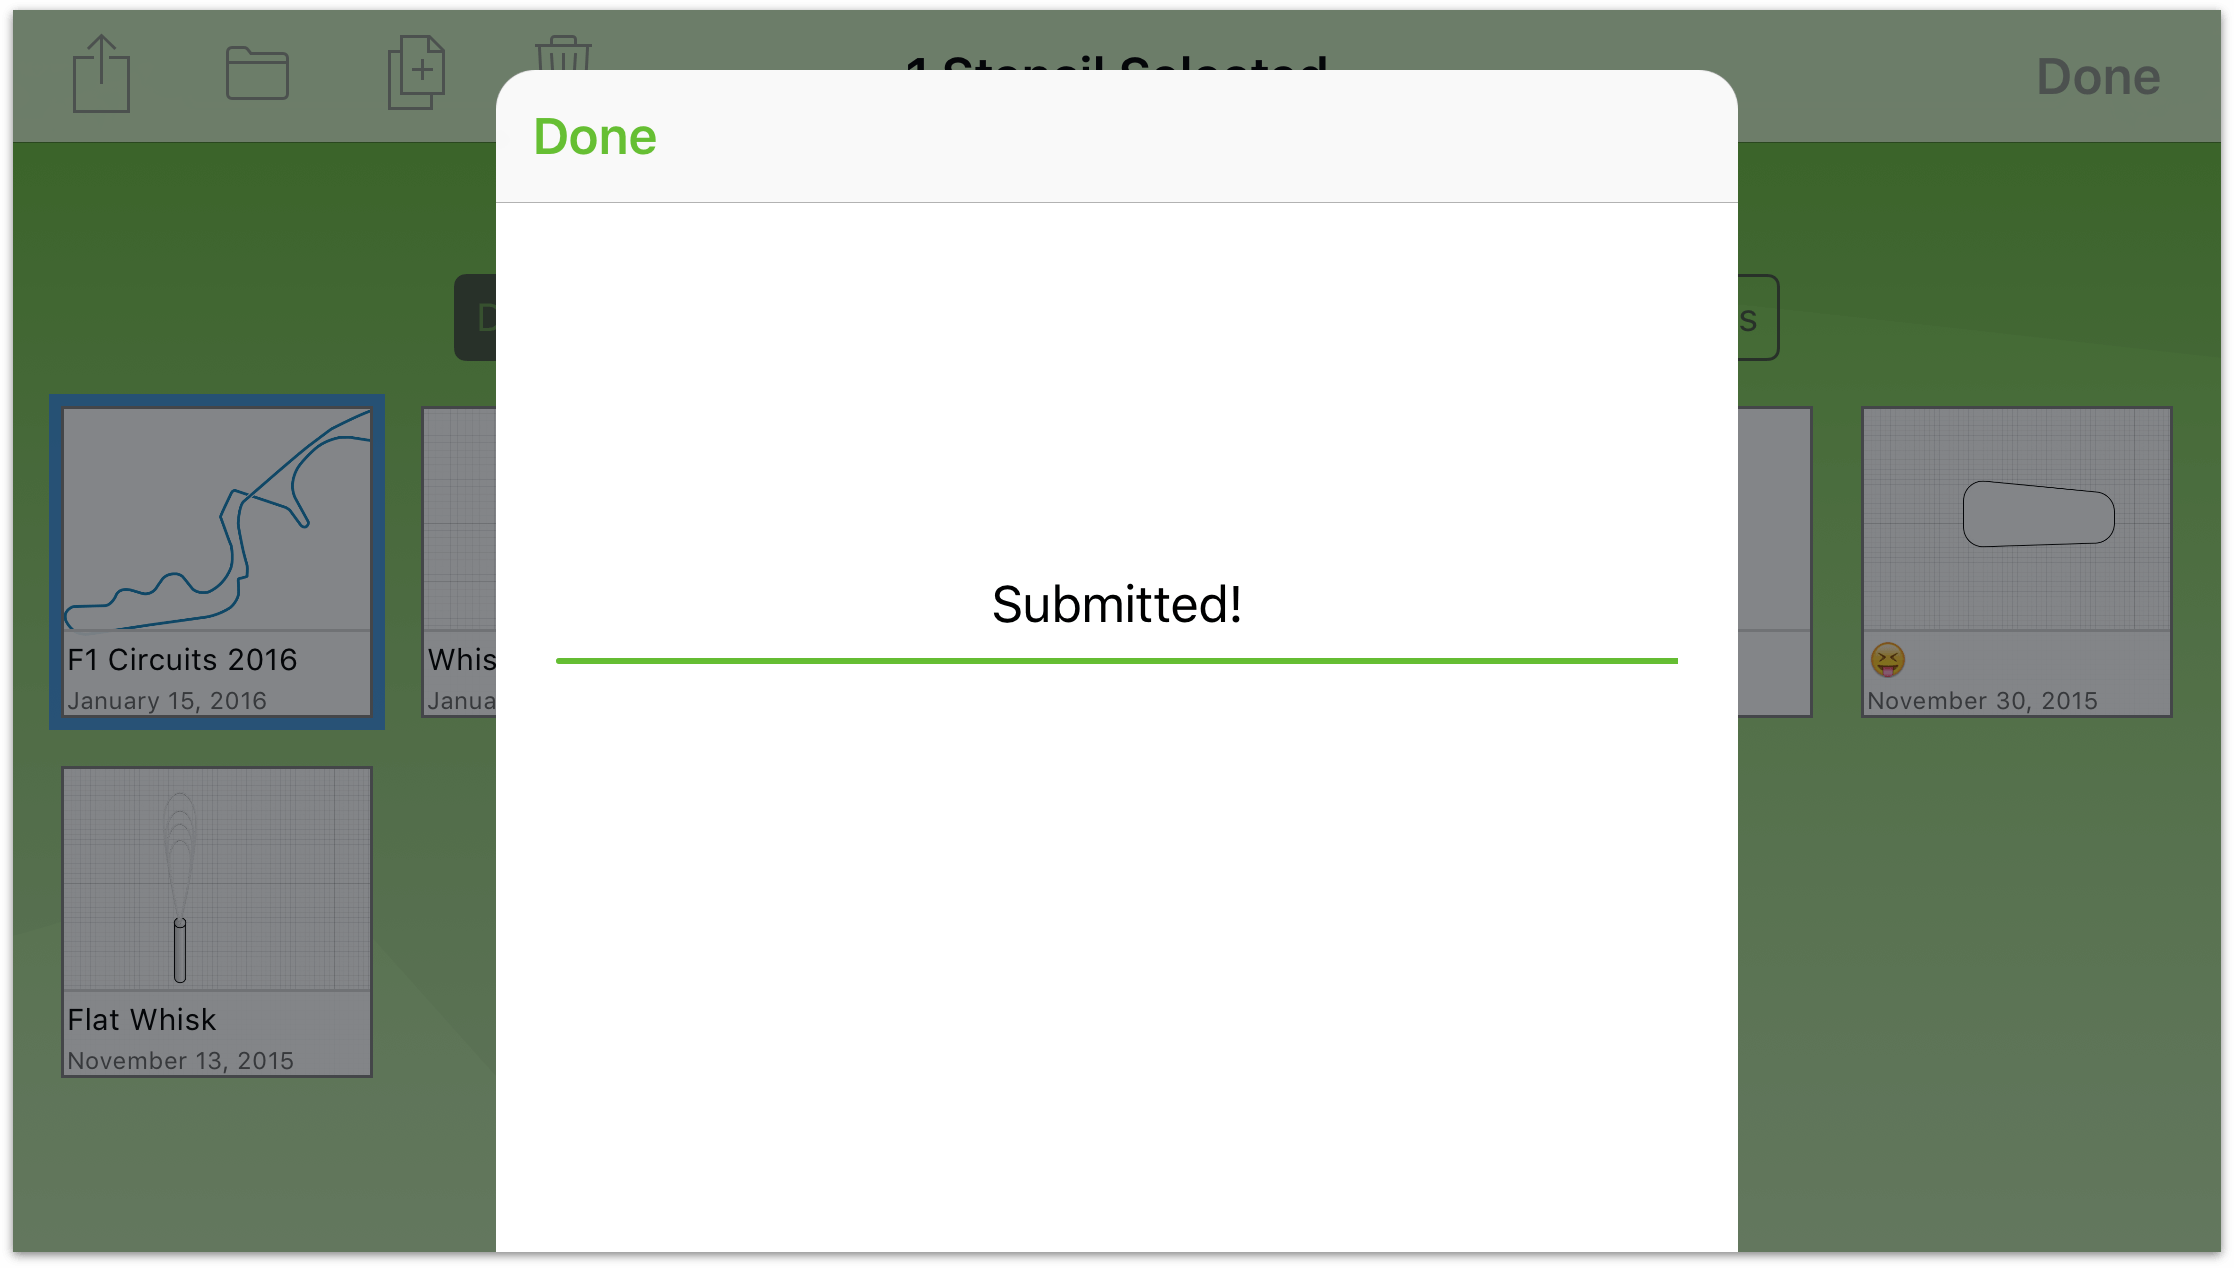
- At the top of the sheet, tap Submit. Your stencil file is sent through the Interwebs to our server. OmniGraffle lets you know when your stencil file has finished uploading to Stenciltown.
If you want to make changes to the stencil name or description, or to remove the stencil from Stenciltown:
- Log in on the Stenciltown website.
- Click the icon next to your Omni ID in the upper-right:
- Click Stencils to see the stencils you have submitted to Stenciltown, and then choose the stencil you would like to update or delete.