Drawing Basics
Everything you’ll do in OmniGraffle involves drawing. Whether you’re creating the basic shapes for an organizational chart or prototyping a user interface for your next iOS or Mac app, OmniGraffle is packed with tools to feed your creativity.
Before you dive right in, though, take some time to learn some of the basics of drawing in OmniGraffle. There are many tips and tricks here that can help you master OmniGraffle in no time.
Creating Shapes
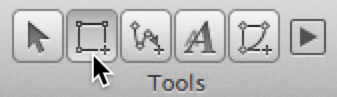
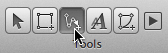
The most basic way to create a shape is with the Shape tool. Select the Shape tool in the toolbar (note, this tool might look different if you have changed its style).
With the Shape tool selected, drag across the canvas until you have a shape that is the size you want. It doesn’t have to be perfect right now; to set an exact size, use the Geometry object inspector (Command–1).
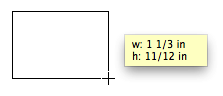
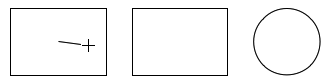
When you draw a shape, the mouse pointer changes to a set of crosshairs. The shape you draw takes on the Current Style in the Style Well. The default is a white-filled box with a simple black stroke. Click and drag to draw the shape; as you do, you’ll see a little box appear that gives you the dimensions of the object you’re drawing. Hold down the Shift key while drawing to restrain the dimensions of the shape to get that perfect square or circle you’ve been striving for.
Selecting, Resizing, and Moving Objects
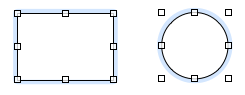
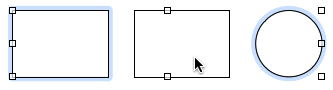
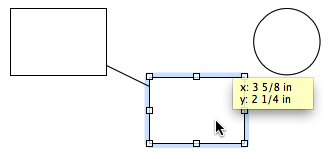
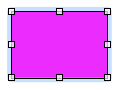
To select an object, first make sure you are using the Selection tool ( ), and then click the object. When the object is highlighted—and if it can be resized—you will see eight handles along its edges.
Once you have selected an object, you can modify it with the Inspectors or use the menu commands to alter its appearance.
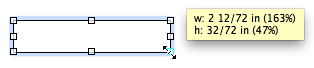
- To resize an object, first select the object and then drag one of its resizing handles until the object is the size you’d like.
- To select or deselect more objects without losing the selection you’ve already made, hold Command as you click other objects.
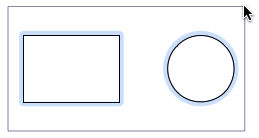
- To select several adjacent objects at once, click in an empty area of the canvas and drag a box around the objects that you want to select. If you hold down the Option key while dragging, you’ll get only the objects that fit completely inside the selection rectangle.
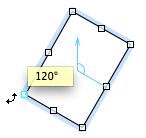
- To rotate an object, hold down the Command key while mousing over one of the eight handles. The pointer changes from a standard resizing control to a curved one. An angle control appears inside of the object, along with a helper dialog that shows the degree of the angle.
- To quickly create a copy of an object you’ve drawn, hold down the Option key and then click on and drag the object you would like to copy. An exact duplicate appears on the canvas; this method is much faster than using Copy and Paste from the Edit menu or their respective keyboard shortcuts.

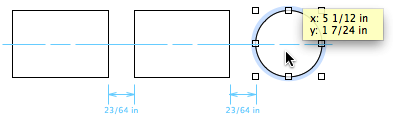
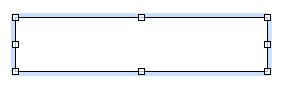
- To move an object, use the Selection tool to click and hold on the object, and then drag it to its new location. Smart Guides (the light blue lines) appear to help you align objects to one another.
To group several objects together so they can be moved or styled as a single unit, select all of the objects and choose Arrange ▸ Group (Shift-Command-G).
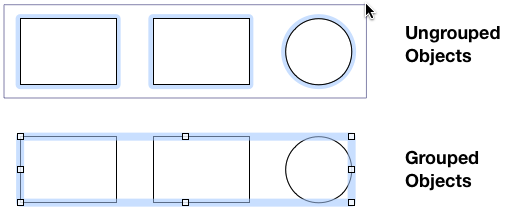
A group behaves like a single object; you can select it, move it around, resize it, use inspectors to change its style and properties, connect lines to it, and so on. Any objects can be grouped, even groups.
Click once to select the group as a whole, then click again to select an individual member of the group. You can keep clicking to select members of groups within groups.
To take a group apart, select it and choose Arrange ▸ Ungroup (Shift-Command-U).
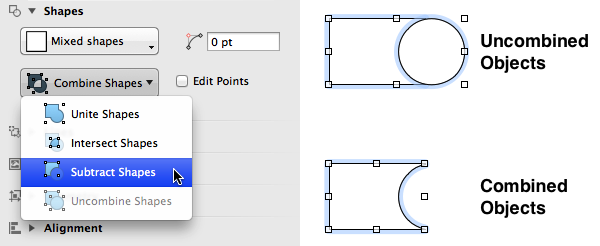
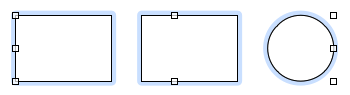
(Pro) To combine two or more objects—for example, a circle that overlaps a rectangle—to create a unique shape, select the objects and then use the Shapes Object inspector (Command–1) to combine the shapes.
Connecting Objects with Lines
You can connect any two objects with the Line tool ( ).
).
- Select the Line tool. (Note, this tool might look different if you change its style.)
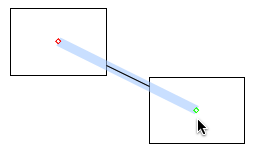
- Click the first object you would like to connect; this object becomes the source of the line.
- Click the second object you would like to connect; this object becomes the destination of the line.
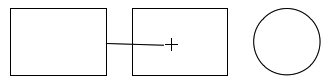
- When the objects are connected with a line, they stay connected no matter how much you change or move them around. That means the logical integrity of your diagram is preserved regardless of how you choose to style the objects.
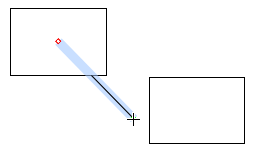
- You can disconnect a line from an object by selecting the line and then dragging one of its end points. To delete the line, just select the line and hit Delete.
Editing Objects
Any attribute of an object can be changed using the Object Inspectors; its size, shape, color, position, and so on. When you select an object, the applicable Inspectors become available in the right sidebar. Use the Inspector that deals with the attribute you want to change. As you change the settings in the inspector, the object changes on the canvas.
For example, let’s say that you want to change the Fill color inside of that boring white object you’ve just created:
Select the object on the canvas.

Select the Object Inspector (Command–1) in the right sidebar.

The Fill inspector has two controls: Fill type on the left, and Fill color on the right. For now, let’s leave the Fill type alone, and just select a color to fill the inside of the object.
Clicking the arrows on the side of the Fill color control pops up a list of some preset colors which you can choose from. However, if you click the little square next to the little arrows, the color well pops open.
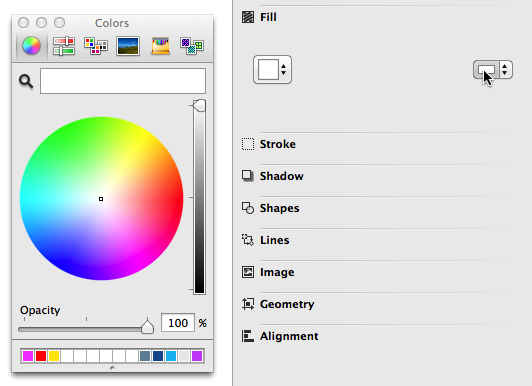
Use the Colors panel to choose a new fill color for the object.
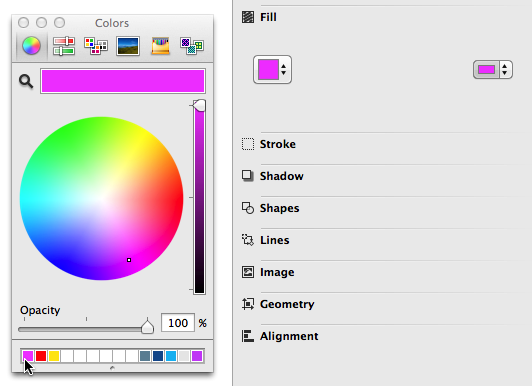
Your object has a new fill color! Yeah!
Tables (Pro)
A table is a special kind of group that organizes rows and columns of objects. To create a table:
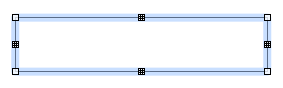
- Create a single shape object to be the first cell of your table.
- With the object selected, choose Arrange ▸ Make Table (Shift-Command-T). Notice the grid-like handles on the top, bottom, left, and right sides of the object; this lets you know the object is a table.
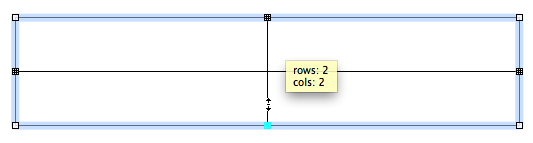
- Drag the right-side table handle to the right to add columns.

- Drag the bottom table handle down to add rows.
You can also select a number of already-existing objects and then choose Arrange ▸ Make Table; OmniGraffle rearranges the objects into rows and columns to the best of its ability.
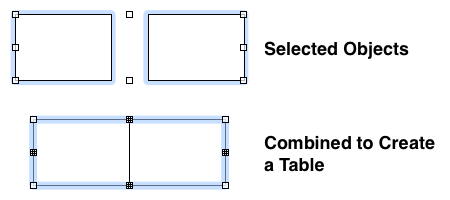
Table cells can be selected and edited just like group members. If you resize a cell, the rest of the cells in its row and column resize accordingly. When selecting cells, you can Shift-click to select everything between the cell you click and the last cell you selected.
You can add or remove rows or columns at any time by dragging the table handles outward or inward. Resize the table as a whole by dragging the ordinary corner handles. Use the Edit ▸ Tables commands when working within table cells to insert or select rows and cells.
To dismantle a table, select it and choose Arrange ▸ Ungroup (Shift-Command-U).
Subgraphs (Pro)
A subgraph is a special kind of group that can be expanded to show the hierarchy inside it, or collapsed to make it a single compact object. To create a subgraph:
- Select some objects on the canvas.
- With the objects selected, choose Arrange ▸ Group as Subgraph. Your objects are enclosed by a subgraph rectangle.
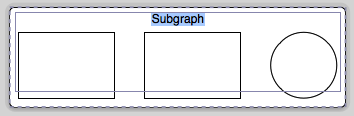
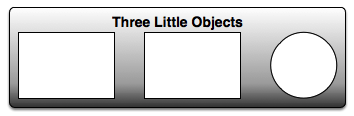
- Style and label the enclosing rectangle however you like.
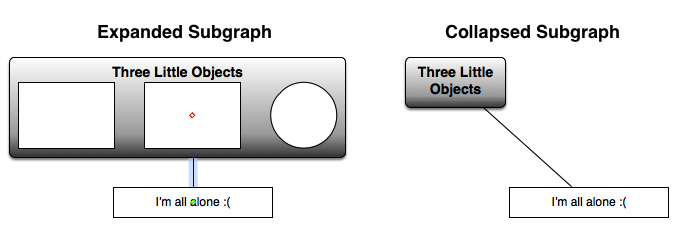
To collapse a subgraph, select it and then choose Arrange ▸ Collapse Subgraph (or from the contextual menu that appears when you Control-click the subgraph). The objects contained in the subgraph are hidden away, and the subgraph becomes a single object. Any incoming or outgoing connection lines belonging to objects in the subgraph become incoming or outgoing lines of the collapsed object itself.
Subgraph members can be selected and edited just like group members: click once to select the subgraph, then click again to select a member inside.
You can resize the containing rectangle, as long as you don’t make it too small to contain its member objects.
To disassemble a subgraph, select it and choose Arrange ▸ Ungroup (Shift-Command-U).
Smart Arrows
Finally, the various arrow shapes in OmniGraffle 6 have some smart behavior, whether they are connecting shapes or not. When you resize an arrow shape, it tries to keep its arrowheads the same size, rather than stretching them along with the rest of the shape. If you want to change the size of the arrowheads or the thickness of the stem, click the blue handle in the crook of the arrowhead and drag.