Using the Tools
In the center of the toolbar, you’ll find OmniGraffle’s Tool Palette. Much like a Swiss Army Knife, the Tool Palette can flip open to reveal or hide additional tools
This chapter provides you with an overview of the Tools, including tips for quickly accessing the tool you need, when you need it.
Using the Tool Palette
The Tool Palette contains all of the tools that you need to draw and interact with objects on the Canvas. The Tool Palette is divided into two sections, separated by an arrow which you can click to hide or show the Tools to the right. When fully open, the Tool Palette contains the following tools:

Click the Expand/Collapse Arrow in the center of the Tool Palette to collapse the tool palette down to just a core set of tools on the left, or click it to gain access to the remaining tools.

And, as you discovered in Customizing the Tool Palette, you can reorganize the tools and their positions in the Tool Palette in the Drawing Tools preference pane.
Persistent Tool Activation
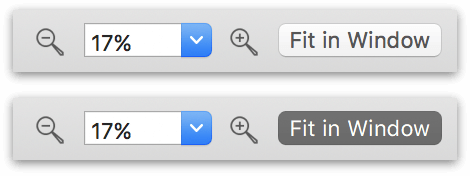
By default, clicking a tool once activates it for a single use; after that one use the Selection tool becomes active again. When you select a tool in the toolbar, the button takes on a light gray background to indicate that the tool is active.

However, if you double-click on a tool, it becomes the permanently active tool until you switch to another tool. The tool button takes on a dark gray background to indicate that the tool is persistent.

The Point Editor tool, when selected, is always persistent.
You can change this behavior in the Drawing Tools preferences, so that tools are always (or never) activated persistently.
Using Hot Keys and Numbers to Quickly Access the Tools
Each of the Tools in the Tool Palette has a Hot Key which you can press to quickly activate the tool. This makes it really easy for you to switch between tools while you’re working on a project without having to actually click on the tool. Some of the tools also have a Hot Number, ranging in order from 1 to 0 from left to right in the Tool Palette; these work exactly like the Hot Keys.
With the mouse pointer hovering over the Canvas, you can quickly activate any tool in the Tool Palette by pressing a Hot Key or Number. For example, if you press and hold s or 2, the Shape tool becomes available; just click on the Canvas and drag to create a shape.
When you let go of the Hot Key or Number, the mouse pointer changes back to the Selection tool. If you double-tap a Tool’s Hot Key or Number, that tool becomes persistent (see Persistent Tool Activation) and remains active until you switch to another tool.
The following table lists the Hot Keys and Numbers associated with the Tools in the Tool Palette.
| Tool | Letter | Number (Standard) | Number (PRO) |
|---|---|---|---|
| Selection | v | 1 | 1 |
| Shape | s | 2 | 2 |
| Line | c | 3 | 3 |
| Text | t | 4 | 4 |
| Pen | e | 5 | 5 |
| Point Editor | f | 6 | 6 |
| Artboard (PRO) | a | -- | 7 |
| Divider | -- | 7 | 8 |
| Diagram | d | 8 | 9 |
| Style Brush | w | 9 | 0 |
| Rubber Stamp | r | 0 | -- |
| Magnet | m | -- | -- |
| Zoom | z | -- | -- |
| Hand | Space | -- | -- |
| Action Browse | b | -- | -- |
You can change a tool’s Hot Key in OmniGraffle ▸ Keyboard Shortcuts. See Customizing OmniGraffle’s Keyboard Shortcuts earlier in this guide for details on how to change OmniGraffle’s shortcuts.
Using the Style Well
 Immediately to the left of the Tool Palette is the Style Well. The Style Well is part popup menu and part visual display of the shape, line, or text to be created when you have the Shape, Line, Text, Pen, or Artboard tool selected.
The Style Well works in concert with the Object inspectors (Fill, Stroke, Shadow, Shape, Line, Font, Text Position, and Geometry) in defining the object properties for the shape or text you’re about to draw on the canvas.
To use the Style Well, first select one of the aforementioned tools, and then click the Style Well button to open the menu:
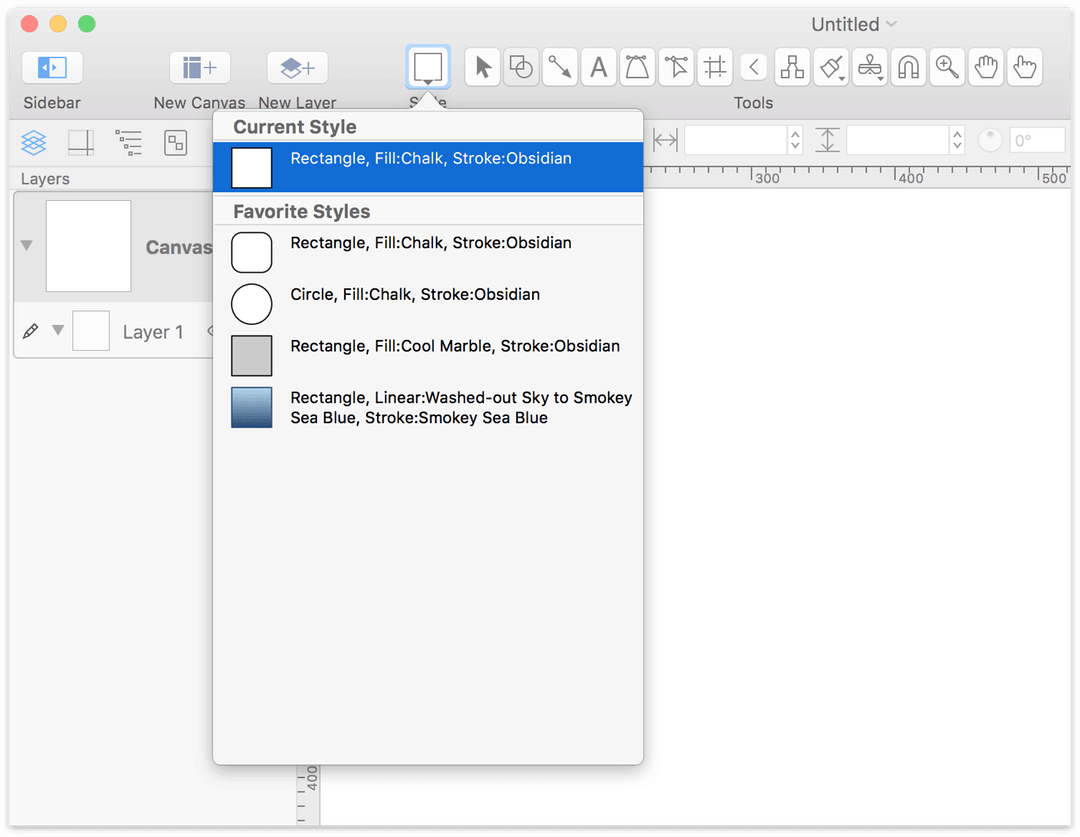
The very top item in the menu, Current Style, is the last style you set with the selected tool.
The Style Well’s popup menu is divided into three sections:
- Current Style
- This is set to the last object style used, or it reflects the styles for a shape or text as you set those styles in the Object inspectors.
- Favorite Styles
-
OmniGraffle includes some default object and text styles which you can choose from, depending on the tool you have selected. For example, if you have selected the Line tool in the Tool Palette, the Favorite Styles section displays the default line options available for you to choose from.
If you have OmniGraffle Pro, you can add styled objects, as well as styles shown in the Canvas Styles section of the popover, to the list of Favorite Styles.
To add a new Favorite Style:
- Choose the Shape tool in the toolbar.
- Click to open the Style Well popover.
- In the Canvas Styles section of the Style Well, locate the object that you'd like to add to the Favorite Styles section.
- Control-click the object and choose Add to Favorites from the contextual menu. Another option is to click and drag the object from Canvas Styles to the Favorite Styles portion of the Style Well.
To remove a style from the Favorite Styles list:
- Choose the Shape tool in the toolbar.
- Click to open the Style Well.
- Control-click on the object in the Favorite Styles list that you would like to remove, and select Remove from Favorites from the contextual menu.
You can choose from one of the default object Favorite Styles so you can quickly get going with your project, or you can define the object properties first and use the Style Well’s preview as a guide.
- Canvas Styles
- Once you have some things drawn on the canvas, those shapes, lines, and text show up under the Canvas Styles section. This makes it easy for you to reuse an existing shape in the project in which you are working.
- To use one of the Canvas Styles, first select one of the tools in the Tool Palette, and then click the Style Well and choose one of the available styles in the Canvas Styles section. The style you have selected now becomes the default style for that drawing tool.
Getting to Know the Tools
The tools are an essential part of the way you work in OmniGraffle. From simple tasks, such as resizing or moving an object on the canvas, to complex operations, such as building an action-based prototype in OmniGraffle Pro, there’s a tool for all your design needs.
This section provides you with a quick overview of all of the tools you’ll find in the Tool Palette.
 Selecting, Moving, and Editing Objects with the Selection Tool
The selection tool is the most basic tool; it looks just like the ordinary macOS mouse pointer.
Selecting Objects
Click an object on the canvas to select it.
When you select an object on the canvas, the inspector sidebar automatically switches to the Object inspectors tab. From there, you can use the inspectors to change anything about the selected object.
To select several objects at once, click in an empty area of the canvas and drag a selection box around the objects. If you hold Option, only objects entirely inside the rectangle are selected. You can also Command- or Shift-click an object to add it to or remove it from the selection.
To select an object that’s part of a group, table, or subgraph, click once to select the group as a whole, and then click again to select the individual objects within. The rest of the canvas dims to show that you are in group editing mode. Click anywhere outside the group to leave group editing mode.
You can also select individual objects within a group, table, or subgraph in the Sidebar. Click the disclosure triangle next to view the contents of those items, and then click to select the desired object within.
Moving Objects
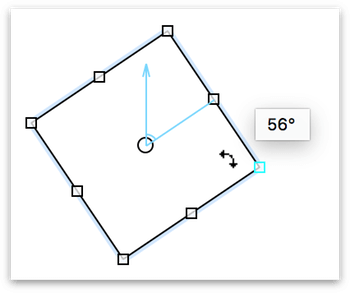
To move an object, use the Selection tool to click-and-drag the object to a new location. If you want to move a line, you might have to detach its end points from any objects they’re attached to. To move an object horizontally or vertically, hold Shift as you drag. To rotate an object, Command-drag one of its selection handles; you can also hold Shift to restrict the rotation to 15-degree increments.
If you’re using a Mac with a touch-sensitive trackpad, you can use the rotate gesture with two fingers to rotate the selected objects (be sure that Multi-Touch gestures are enabled in OmniGraffle ▸ Preferences ▸ Multi-Touch).
To move the selected object very precisely, press the Arrow keys. Hold Option or Shift to move by larger steps.
With Smart Guides enabled (Arrange ▸ Guides ▸ Smart Alignment Guides and Smart Distance Guides), you can line up objects and precisely space them on the canvas. Hold Command after you start dragging to temporarily enable or disable Smart Guides.
To drag a copy of an object instead of the object itself, hold Option as you drag.
Resizing Objects
Every object (or group of objects) on the canvas is surrounded by a bounding box, which defines its width and height. When selected, you’ll notice that the bounding box has eight selection handles around the outside. You can click and drag the selection handles to resize an object.
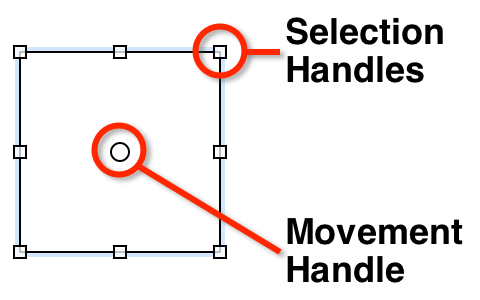
The bounding box also has an optional Movement Handle (choose View ▸ Movement Handles in the menu bar) for clicking-and-dragging objects around the canvas or to another layer. For more details about bounding boxes, see Bounding Box Basics, earlier in this guide.
To change the shape’s size, use the Selection tool to click and drag one of the resize controls. As you click and drag on one of the handles, you’ll notice that the object is anchored by the opposing handle, and the object resizes in the direction you are moving the mouse.
If you have Smart Guides enabled, they appear as you drag to help you size objects equally. Hold Command after you start dragging to temporarily enable or disable Smart Guides.
The following keys provide additional functionality when interacting with the resizing handles:
- Hold Shift while resizing to maintain the aspect ratio of the original object.
- Hold Option to resize an object with its center point being anchored.
- Hold Shift-Option while resizing to maintain the aspect ratio and resize the object based on its center point.
- Hold Command, and the resize control changes to a rotate control so you can rotate the object.
If you have objects of different sizes on the canvas, but would like them to be the same size, first select the object that has the dimensions you’d like the others to emulate, choose Arrange ▸ Size and then choose one of the resizing options.
If you select a table, the middle selection handles of each side look like miniature tables:
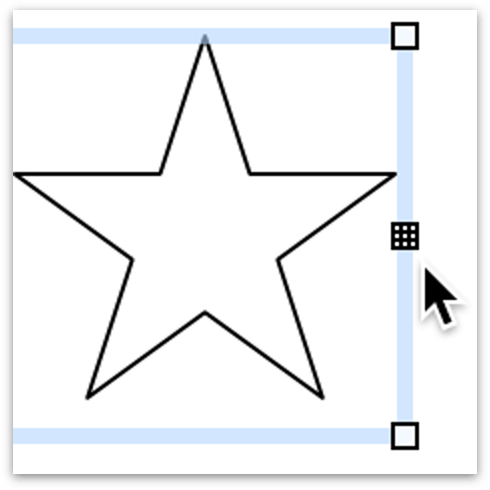
Dragging the middle table handles on the top and bottom add another row to the table; dragging the ones on either side adds another column:
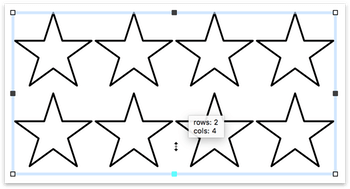
Drag the corner handles to resize the table normally.
 Creating Shapes with the Shape Tool
This tool is quite simple; use it to create shape objects—squares, rectangles, circles, and so on—based on the shape you’ve selected in the Shapes object inspector.
To create a shape:
- Click-and-drag on the canvas until you get the size you want.
- Hold Shift while dragging to make a shape of equal width and height (a perfect square, a perfect circle, and so on).
Once you have created a shape, you can select it and change its attributes with the Object, Type, and Properties inspectors.
 Connecting Objects with the Line Tool
Use the Line tool to make logical connections between objects. Connected objects stay connected unless you disconnect them, no matter how much you move them around or change them.
To create a new line:
- Select the Line Type in the Line inspector. You can choose from Straight, Curved, Orthogonal, or Bézier.
- Set the line’s stroke width and color in the Stroke inspector.
- Click where you would like the source of the line; this can be an object (to which the line will stay attached) or an empty spot on the canvas (so the beginning of the line remains unattached).
- Click as many empty spots on the canvas as you like to give the line midpoints.
- End the line at an object by clicking the object (to which the line will stay attached), or end the line without connecting to an object by double-clicking on the canvas; this can be changed in the Drawing Tools preferences (OmniGraffle ▸ Preferences ▸ Drawing Tools ▸ Line Editing).
To draw a straight line, hold Shift while drawing the line. This restrains the line so that you can draw perfectly straight lines horizontally and vertically. After clicking on the canvas to start drawing the line, if you hold Shift and then move the mouse pointer slightly up- or downward, the line snaps to a 45-degree angle.
Hold Option while drawing a line to prevent it from connecting to objects.
When two objects are connected by a line, the object at the source is considered the parent of the object at the destination. This defines the objects’ relationship in the outline view and when you use automatic layout.
Lines can have line labels attached to them. Click a line with the Text tool to create a new text label. Or, drag an existing blob of text to the line until the line is highlighted, then drop it to attach it as a label.
 Creating and Editing Text with the Text Tool
Use the text tool to add a label to an object, to edit the label on an object, or to create a new shape with text inside.
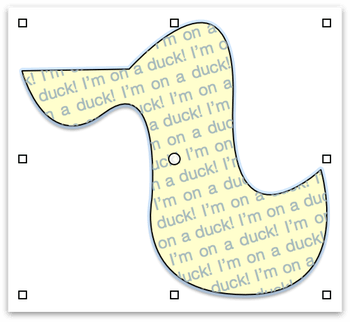
Click a shape to start editing its text. While you are in text editing mode, the top ruler becomes a text ruler, and you can use standard macOS text editing commands (for example, you can use the arrow keys to move the insertion point around).
Click or drag in an empty area of the canvas to create a new shape with settings particularly suited to containing text. A single click creates an object that expands horizontally to fit the text you enter; a drag creates an object of a specific width. Remember that the objects you create in this way are not fundamentally different from other shapes; they just start with certain settings in the Text inspector which make them convenient for containing text.
Click a connection line to add a new label to it. This label is just like the object created when you click an empty area of the canvas, except it is attached as a line label.
Text inside objects can be found by macOS’s Spotlight search feature, in case you need to find your OmniGraffle diagrams that contain certain words.
 Drawing Shapes with the Pen Tool
Use this tool to create custom shapes, such as the duck shown earlier. We’ve included a lot of nice shapes in the Lines and Shapes inspector and on the stencils, but perhaps you would like to draw your own.
To start a new shape, click anywhere on the canvas. Each subsequent click adds a new point to the shape, until you double-click or press Return to make the final point. At any step along the way, instead of just clicking, click and drag to create a point with Bézier handles. While creating a shape, you can press Delete to remove the last point you added. To learn more about Bézier curves, see Altering Shapes with the Point Editor Tool, later in this chapter.
Once you have created a shape, you can select it with the Selection tool and edit its points, adjust existing handles, add handles to points without them, or change the shape’s attributes with the Object, Type, and Properties inspectors.
 Altering Shapes with the Point Editor Tool
Use the Point Editor tool to expose and manipulate the vector points of lines drawn with the Line tool, or shapes drawn with the Pen Tool.
Everything you draw and create in OmniGraffle is defined by a series of vector points. For example, the simplest thing you can draw in OmniGraffle—a straight line (using the Line tool)—has two points: a red one at its source and a green one at its destination.
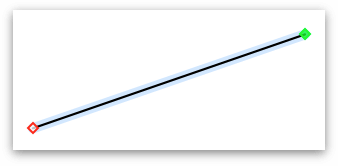
After drawing a a line or a shape created with the Line or Pen tools, respectively, you can use the Point Editor tool to view and manipulate the path’s vector points. The path’s vector points appear as tiny blue diamonds along the path, while also hiding the selection handles of the object’s bounding box. This makes it really easy for you to access the points that make up a shape and bend them to your will.
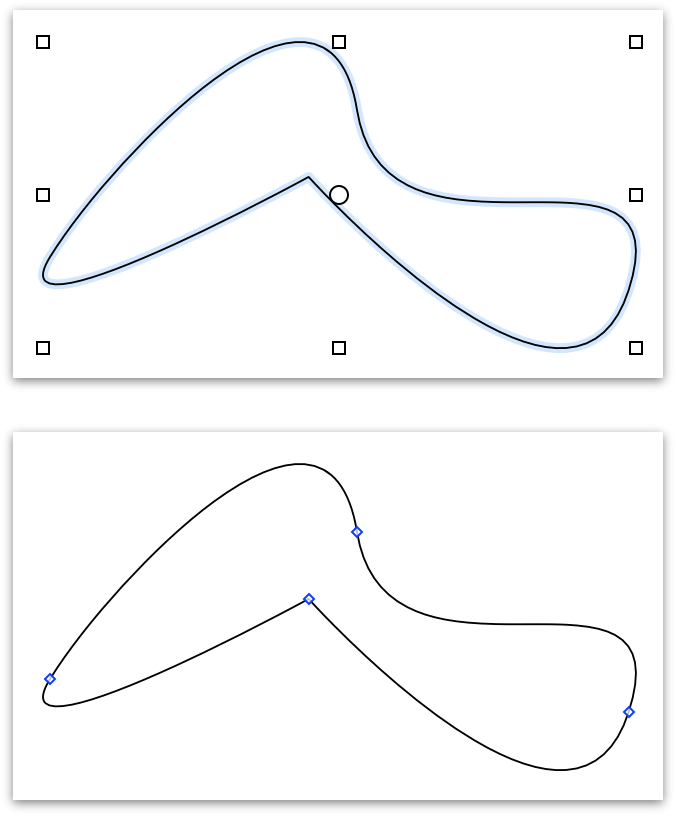
You can use the Point Editor tool to:
-
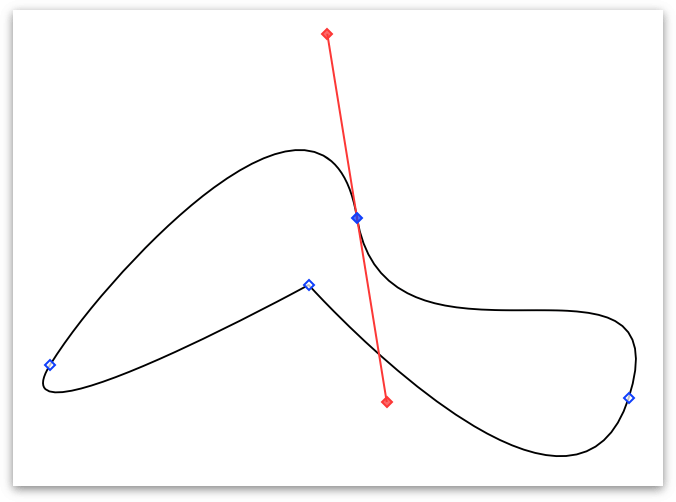
Select individual vector points; selected points are solid blue:
-
If a vector point has red Bézier control handles extending from it, you can use the Point Editor tool to drag the handles and alter the shape of the curve:
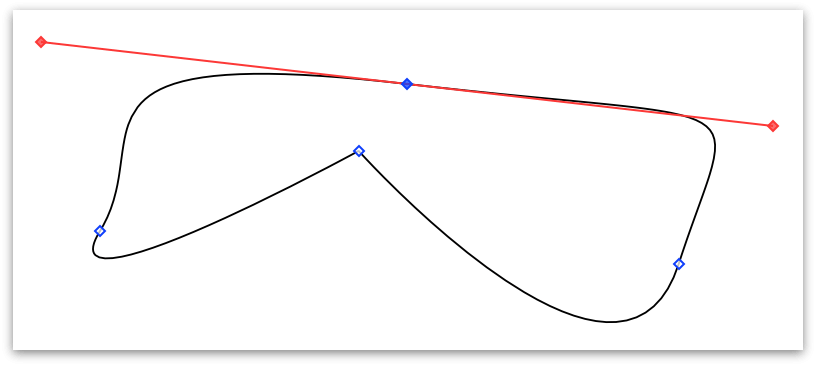
In OmniGraffle Standard, you can use the following key combinations to work with Bézier curves as long as the shape was drawn with the Pen tool:
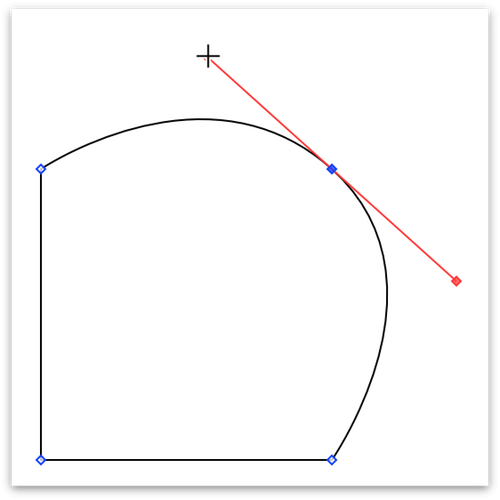
- Command-drag on a vector point to extend the Bézier’s control handles.
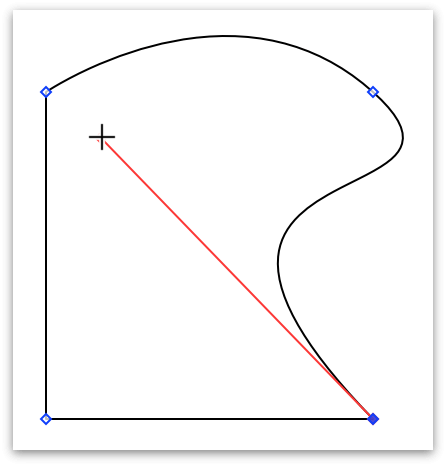
- Option-Command-drag on a vector point to extend only one of the Bézier’s control handles.
- Hold the Option key while dragging on a control handle to work with just one side of the curve at a time.
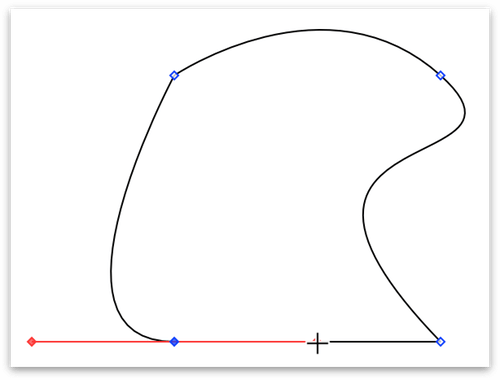
- Hold the Shift key while dragging on a control handle to constrain the handle’s angle of rotation to 45-degree increments.
-
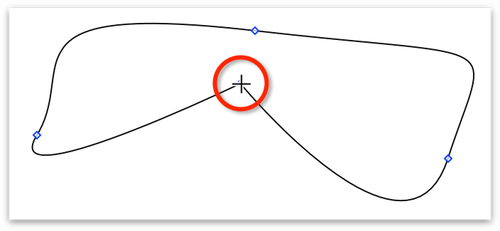
Click-and-drag a vector point to move the vector point or change its position along the path:
-
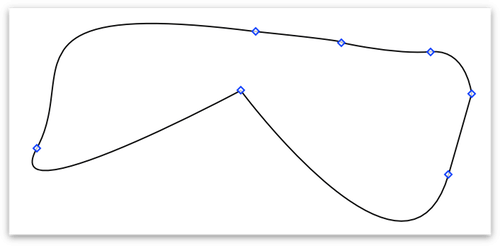
Double-click on the path to add another vector point:
-
Select a vector point and press Delete to remove the point from the object’s path:
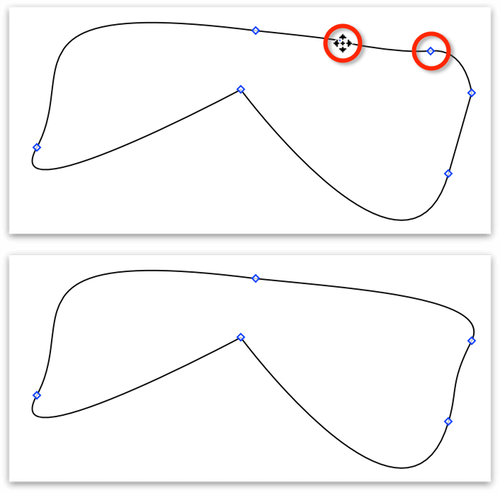
If you have OmniGraffle Pro, you can use the Point Editor tool to view and manipulate the vector points of any shape you draw, including those you create with the Shape tool.
If you have OmniGraffle Pro, you can use the Point Editor tool to convert standard vector points into Bézier curves:
-
Command-drag on a vector point to extend the Bézier’s control handles in both directions:
-
Option-Command-drag on a vector point to extend only one of the Bézier’s control handles:
-
Hold the Option key while dragging on a control handle to work with just one side of the curve at a time.
-
You can also add the Shift key while dragging on a control handle to constrain the handle’s angle of rotation to 45-degree increments.
 Creating Artboards with the Artboard Tool (PRO)
 Rapidly Creating Structure with the Diagram Tool
The Diagram tool is for rapidly creating new objects on the Canvas. This tool is especially fun if you have Auto layout turned on (Canvas Inspectors ▸ Diagram Layout, and then make sure Auto layout is checked).
With nothing selected, click any empty spot on the Canvas to create a new generic shape there and select it. Once you have a shape selected, try some of these combinations:
- Click any empty spot on the canvas to create a new shape connected to the original one.
- Hold Option to create a sibling (connected to the same parent as the selected shape) instead.
- Hold Shift to add an aunt (essentially reversing the connection line of the new object).
- Hold Command to create a completely disconnected shape.
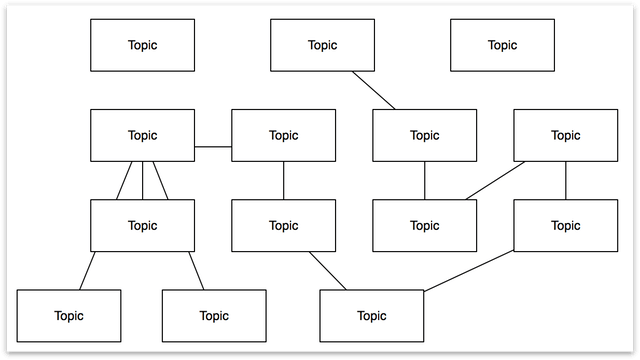
If you already have an object on the Canvas, first select it with the Selection Tool so that you can use it as a starting point for creating more connected shapes, and then switch to the Diagram Tool by pressing and holding the d key.
Once you get the hang of the modifier keys, you can create really complex diagrams with just a few clicks.
 Replicating Styles with the Style Brush Tool
Use this tool to capture an object’s styles and apply (paint) those onto another object.
When using the Style Brush, you’ll notice the following three states:
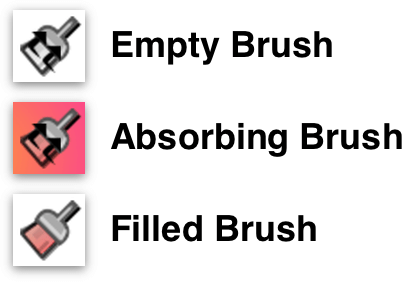
- When you first select the Style Brush, the bristle end of the brush is see-through and has arrows showing that it is ready to absorb a style.
- When you move the Style Brush over a styled object, you can see the styles through the brush end.
-
Click the styled object with the Style Brush to absorb its styles. After absorbing the styles, the arrows go away and the bristle end of the brush reflects the style it has absorbed.

-
To apply an absorbed style to another object, move the filled Style Brush over the object and then click on the object to apply the style.

Once the brush contains a style, you can continue clicking other objects on the canvas to replace their styles as well. If you want to absorb the style of a different object, press the Option key and the absorption arrows return to the bristle end of the Style Brush to indicate that the brush can pick up a different style.
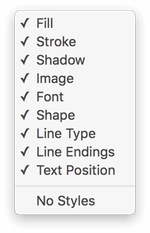 The tool’s popup menu contains a list of styles that can be absorbed; select whichever ones you like, and the brush will only absorb or apply those styles. For example, if you only select Fill, you can apply a certain fill style to objects without affecting any of their other styles.
 Duplicating Objects with the Rubber Stamp Tool
Use this tool to replicate objects.
When you first select the Rubber Stamp tool, the stamp is empty, ready and waiting for you to click an object that you’d like to duplicate. You’ll know that the Rubber Stamp is empty by the empty upwards-pointing triangle in its base. After clicking to absorb an object, the triangle points downward and has a black fill.
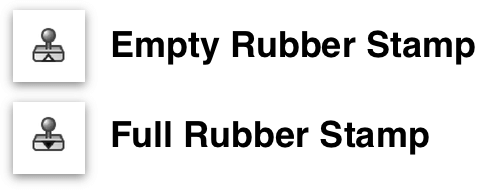
Once the stamp contains an object, each click on the canvas creates a new copy of the object.
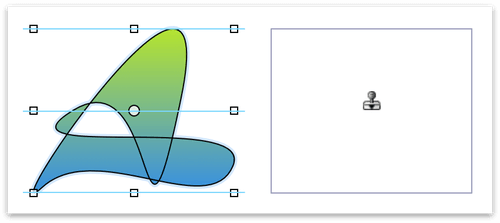
If you hold the Shift key down, the Rubber Stamp tool will align the soon-to-be-pasted object along the centerline (either horizontally or vertically) of the original or previously pasted copy.
To reset the contents of the stamp, select Clear Contents from the tool’s popup menu; you can then grab a new object. You can also Option-click a different object to replace the stamp’s contents.
 Adding and Adjusting Connections with the Magnet Tool
Use this tool to add magnets to a shape or to edit a shape’s existing magnets. To view the available magnets for the objects on your Canvas, choose View ▸ Magnets.
Magnets are special spots on a shape that attract connection lines. If there are no magnets on a shape, all lines connect to the shape’s center by default. If there is at least one magnet, each connected line is attracted to the nearest one. You can also connect lines directly to magnets, to make sure they stay connected to the same magnet regardless of where the shape is moved.
If you want to place magnets in very specific places on a shape, click the Magnet Tool and then click anywhere on the object.
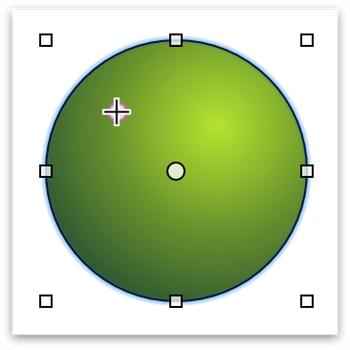
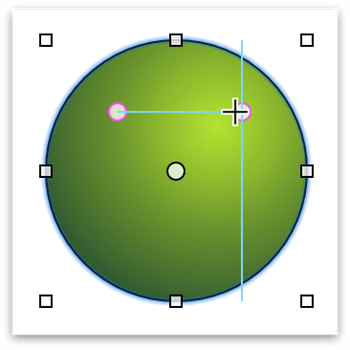
To change a magnet’s position on the object, click and drag an existing magnet to another location. If an object has more than one magnet, Smart Guides will appear so you can align the magnets as well.
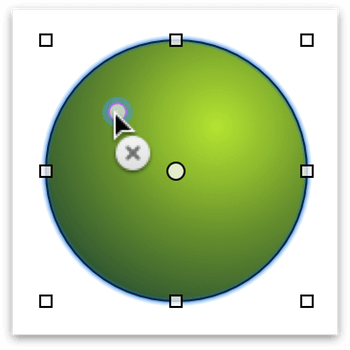
To delete a magnet, Option-click on the magnet you would like to remove, and then click on the × that appears beneath the mouse pointer.
To learn more about the magnet presets and locations, see Changing the Way Objects Connect with the Connections Inspector.
 Taking a Closer Look at the Canvas with the Zoom Tool
Use the Zoom tool to get a closer (or more distant) look at the Canvas. Click anywhere on the canvas to center on that point and double the zoom percentage. Option-click to zoom back out.
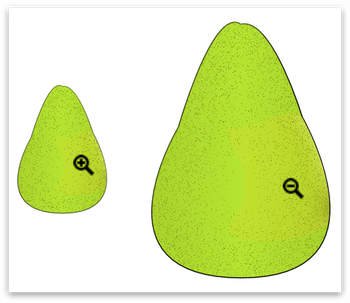
-
Click and drag a box across the canvas to specify the area of your canvas that you would like to have zoomed into the window. This is particularly helpful when you need to zoom in on an object when working with the Point Editor tool so you can zoom in on a particular vector point.
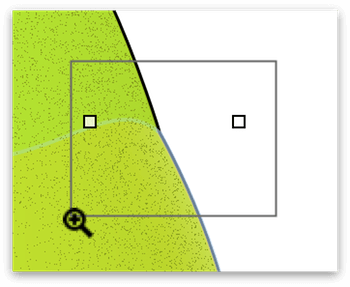
-
If you Option-drag, the rectangle is centered on the spot where you start dragging. This is particularly useful for when you need to focus on a single element on the canvas.
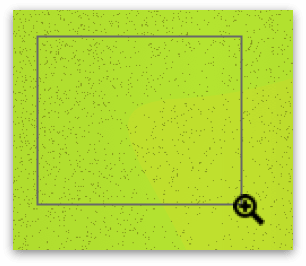
-
While dragging, press and hold Shift to move the zoom selection area around instead of resizing it.
- Shift-click the zoom tool in the Tool Palette to return to 100 percent zoom, or actual size.
- With the Zoom tool selected, press and hold Command, and then two-finger swipe up or down on a trackpad to zoom in or out on the canvas. Similarly, if you are using a scroll wheel mouse, press and hold Command, and then use the scroll wheel to zoom in or out on the canvas.
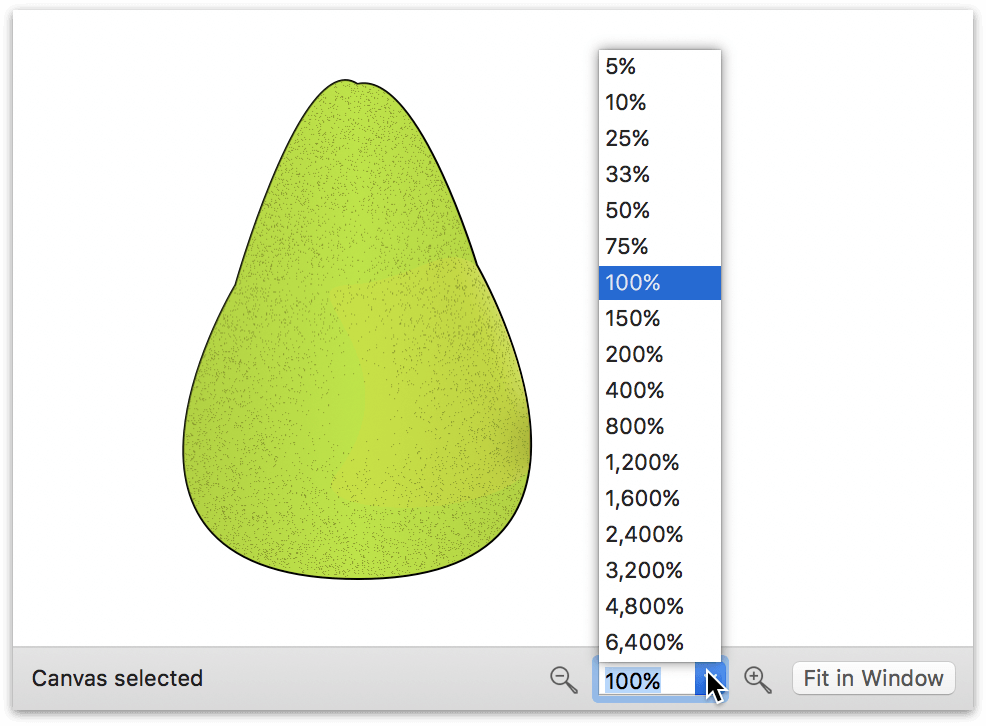
You can always zoom to a specific percentage with the Zoom controls, just beneath the canvas.
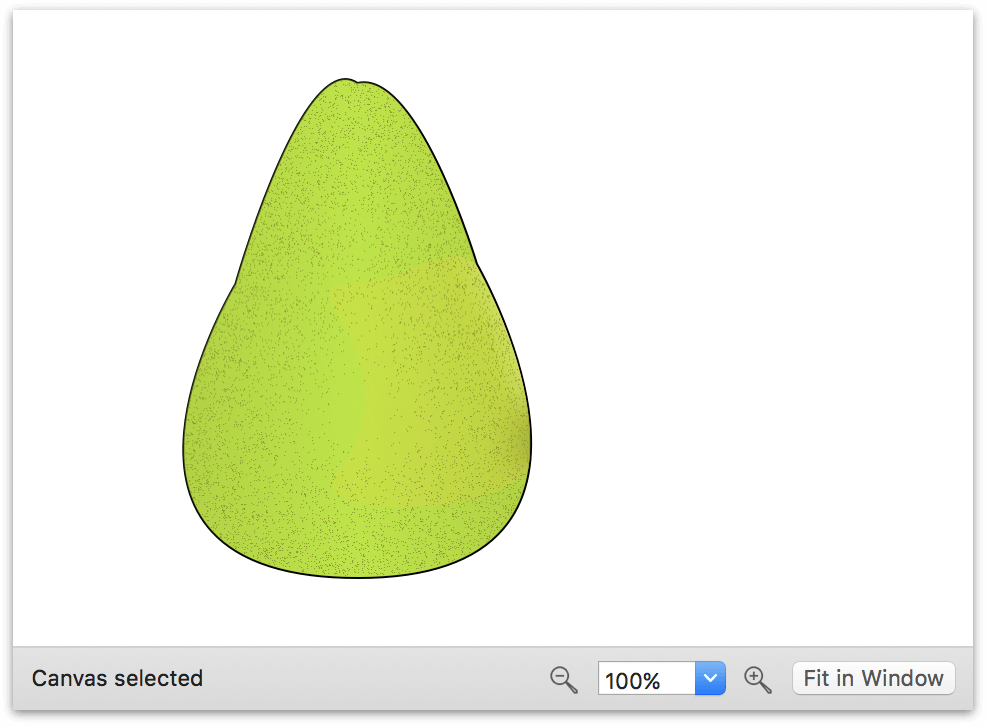
The Zoom menu displays your current zoom level, as well as options for zooming to pre-specified magnifications. Click  to zoom out on the canvas, or click
  to zoom in on the canvas. You can also use the zoom magnification pop-up menu to select a preset zoom level, or you can double-click in the menu and enter a value of your choosing.

The Fit in Window button to zoom in or out on the canvas so that everything on the current canvas appears in the window. When clicked, the Fit to Window button turns gray to indicate that the view state of the canvas is set so that it always fits within the window. To turn off Fit to Window, click the button a second time.
If your Mac has a Multi-Touch–capable trackpad, you can use it to change the zoom level using the pinch gesture. To enable Multi-Touch, go to OmniGraffle ▸ Preferences ▸ Multi-Touch and turn on Enable Multi-Touch trackpad gestures. Now you can pinch open to zoom in, or pinch close to zoom out. Multi-Touch zoom makes it much easier for you to zoom-in and -out on the objects on the canvas.
 Moving the Canvas Around with the Hand Tool
Use this tool to drag your view of the canvas around, to see part of the canvas that is out of sight.
You’ll mostly use the Hand tool when you’re zoomed in on the canvas and want to move to a different location. For this, use the Hand tool’s quick access key, the Space Bar, to switch the mouse pointer to a hand, and then click and drag to move the canvas around.
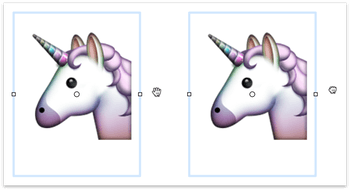
As you drag, you’ll notice that the open hand changes to a clutched fist to indicate that you’re grabbing onto and moving the canvas.
 Activating Scripted Objects with the Action Browse Tool (PRO)
Use the Action Browse Tool to click interactive objects and invoke their assigned action. Interactive objects are created by assigning actions using OmniGraffle Pro’s Action inspector (Command–2).
Use of the Action Browse Tool can only be used on objects that have an action assigned. The way to tell if an object has an action assigned is to select the Action Browse Tool and then mouseover the objects on the canvas. If an object doesn’t have an action assigned, nothing happens. However, if the object does have an action assigned, the object’s highlight slowly pulses, and an icon appears over the upper-right corner of the object to convey the type of action assigned.
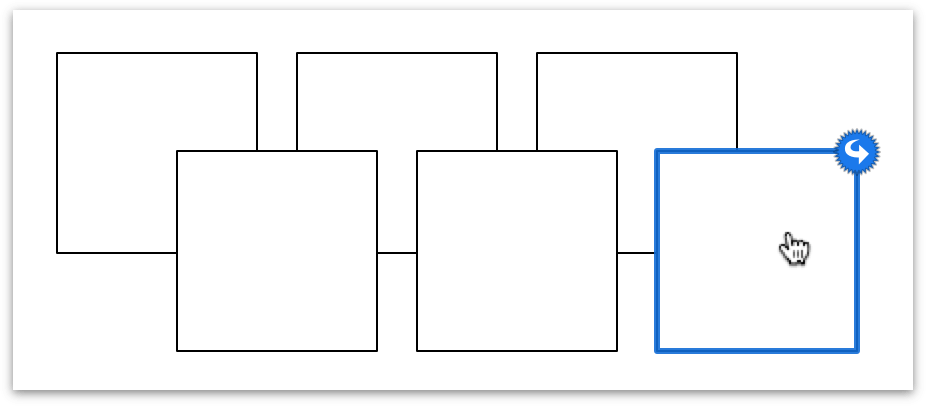
To invoke the action, click on the object with the Action Browse Tool. For information about creating interactive objects, see #making-objects-interactive-with-the-action-inspector-pro.
While the Actions inspector is only available in OmniGraffle Pro, OmniGraffle Standard users can still use the Action Browse Tool to interact with files created with OmniGraffle Pro.
