Using OmniGraffle in Presentation Mode (PRO)
After creating your design—whether it’s a prototype for an app or website, or a series of posters to promote an upcoming event—chances are you’ll want to present that design to management or to a client. Fortunately for you, we have built in Presentation Mode to OmniGraffle.
This chapter explains how to get the most from Presentation Mode, and provides you with tips and tricks for presenting from within OmniGraffle.
Presentation Basics
When you enter Presentation Mode, either by choosing View ▸ Start Presentation, or by pressing Option-Command-P, OmniGraffle takes over your entire screen. While in Presentation Mode:
- The Action Browse tool
 is sticky; you cannot choose another tool in the Toolbar.
 - The Toolbar and Inspectors bar are inaccessible.
- The Sidebar and menu bar are hidden from sight but remain available if you move your mouse to the left or top edge of the screen, respectively.
Each canvas in your OmniGraffle document is a slide in your presentation. To navigate through your presentation, you’ll use the arrow keys on your keyboard as follows:
- Use the Up (↑) and Down (↓) Arrow keys on your keyboard to go back or forward through the canvases in your document, respectively.
-
Use the Left (←) and Right (→) Arrow keys to select the previous or next artboard on the current canvas, respectively.
- If you press the Left or Right Arrow keys while on a canvas that does not have an artboard, the presentation goes backward or forward through the canvases, respectively, to find and select an artboard.
- If your document does not contain artboards, nothing happens when you press the Left or Right Arrow keys.
When you select an artboard, the objects on that artboard zoom in to fill the entire screen. To zoom back out to see everything on the canvas, press the Up (↑) Arrow key, or press the Down (↓) key to proceed to the next canvas/slide.
Move your mouse to the left side of the screen to bring in the Sidebar. The Sidebar only reveals canvases and artboards while presenting; you cannot access individual layers or objects in the Sidebar.
Not all menu options are available while in Presentation Mode. For example, you cannot view the rulers or set alignment guides while presenting. The menu bar goes back into hiding when you move the mouse away.
To exit Presentation Mode, you can either press Option-Command-P or Escape.
Using the Zoom Commands in Presentation Mode
While presenting, you can use the following keyboard shortcuts for adjusting the magnification level of objects onscreen:
- Zoom to Actual Size (Option-Command-0)
- Zoom In (Shift-Command->)
- Zoom Out (Shift-Command-<)
Configuring OmniGraffle’s Presentation Preferences
To customize the settings for Presentation Mode, you’ll use the Presentation preferences, accessed by choosing OmniGraffle ▸ Preferences, and then choose the Presentation tab.
You can choose one of the following options to specify whether objects on the canvas receive a highlight (border) around the object:
- Highlight objects by pointing — Places a colored highlight around objects that you mouse over.
- Highlight objects by clicking — Places a colored highlight around objects that you click.
- Don’t highlight objects — Objects on the canvas do not receive a highlight.
You can adjust the width of the highlight border using the Width slider.

Beneath the Highlight Behavior options, the Show link badge when highlighted preference has been turned on by default. This option applies to objects that are assigned an Action using the Action inspector. If an object has an action assigned, its Action badge is displayed in Presentation Mode.
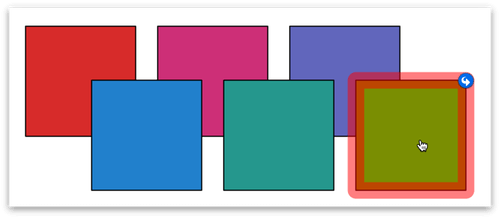
You can change the default highlight color by clicking  to open the Colors window. You can change the color to anything you’d like, or you can set it so that the highlight surrounding an object always matches macOS’s highlight color (set in System Preferences ▸ General ▸ Highlight color); for example:
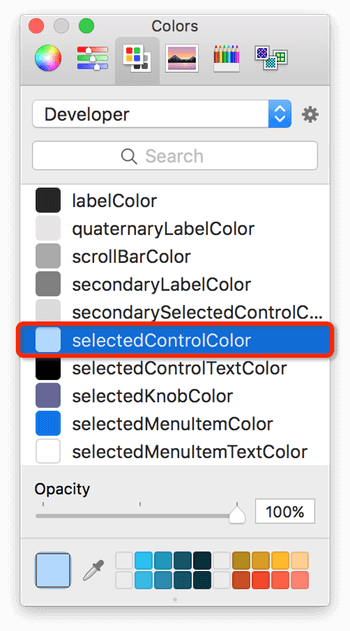
- Under Highlight Appearance, click to open the Colors window.
- At the top of the Colors window, click the third tab, Color Palettes.
- In the pop-up menu, choose Developer.
- Scroll down in the list of color options and choose selectedControlColor.
Now whenever you give a presentation from within OmniGraffle—such as when you’re demoing an app prototype—the objects you hover over are highlighted with your system’s default selection color.