Chapter 1
Credits
PLCrashReporter
Except as noted below, PLCrashReporter is provided under the following license:
Copyright © 2008–2013 Plausible Labs Cooperative, Inc. All rights reserved.
Permission is hereby granted, free of charge, to any person obtaining a copy of this software and associated documentation files (the “Software”), to deal in the Software without restriction, including without limitation the rights to use, copy, modify, merge, publish, distribute, sublicense, and/or sell copies of the Software, and to permit persons to whom the Software is furnished to do so, subject to the following conditions:
The above copyright notice and this permission notice shall be included in all copies or substantial portions of the Software.
THE SOFTWARE IS PROVIDED “AS IS”, WITHOUT WARRANTY OF ANY KIND, EXPRESS OR IMPLIED, INCLUDING BUT NOT LIMITED TO THE WARRANTIES OF MERCHANTABILITY, FITNESS FOR A PARTICULAR PURPOSE AND NONINFRINGEMENT. IN NO EVENT SHALL THE AUTHORS OR COPYRIGHT HOLDERS BE LIABLE FOR ANY CLAIM, DAMAGES OR OTHER LIABILITY, WHETHER IN AN ACTION OF CONTRACT, TORT OR OTHERWISE, ARISING FROM, OUT OF OR IN CONNECTION WITH THE SOFTWARE OR THE USE OR OTHER DEALINGS IN THE SOFTWARE.
Additional contributions have been made under the same license terms as above, with copyright held by their respective authors:
Damian Morris damian@moso.com.au
Copyright © 2010 MOSO Corporation, Pty Ltd. All rights reserved.
HockeyApp/Bitstadium
Copyright © 2012 HockeyApp, Bit Stadium GmbH. All rights reserved.
The protobuf-c library, as well as the PLCrashLogWriterEncoding.c file are licensed as follows:
Copyright © 2008, Dave Benson. All rights reserved.
Licensed under the Apache License, Version 2.0 (the “License”); you may not use this file except in compliance with the License. You may obtain a copy of the License at http://www.apache.org/licenses/LICENSE–2.0 Unless required by applicable law or agreed to in writing, software distributed under the License is distributed on an “AS IS” BASIS, WITHOUT WARRANTIES OR CONDITIONS OF ANY KIND, either express or implied. See the License for the specific language governing permissions and limitations under the License.
Chapter 2
Importing from an Older Version of OmniOutliner for iPad
Because OmniOutliner 2 is a brand new app, it doesn’t share data with older versions of the app that you may have installed on your iPad.
The easiest way to bring files from an older version of OmniOutliner for iPad is to set up OmniPresence sync with an Omni Sync Server account, and then sync both versions to the same cloud folder.
If you have a sync account set up for your previous version of OmniOutliner already, you’ll want to use the same login information when you set it up for OmniOutliner 2 for iPad. If you’re starting fresh with a new account, you’ll need to set it up in both versions.
OmniPresence Sync in OmniOutliner for iPad 1.x
To check your sync settings in OmniOutliner 1.x, go to the document browser and choose Cloud Setup from the toolbar popover.
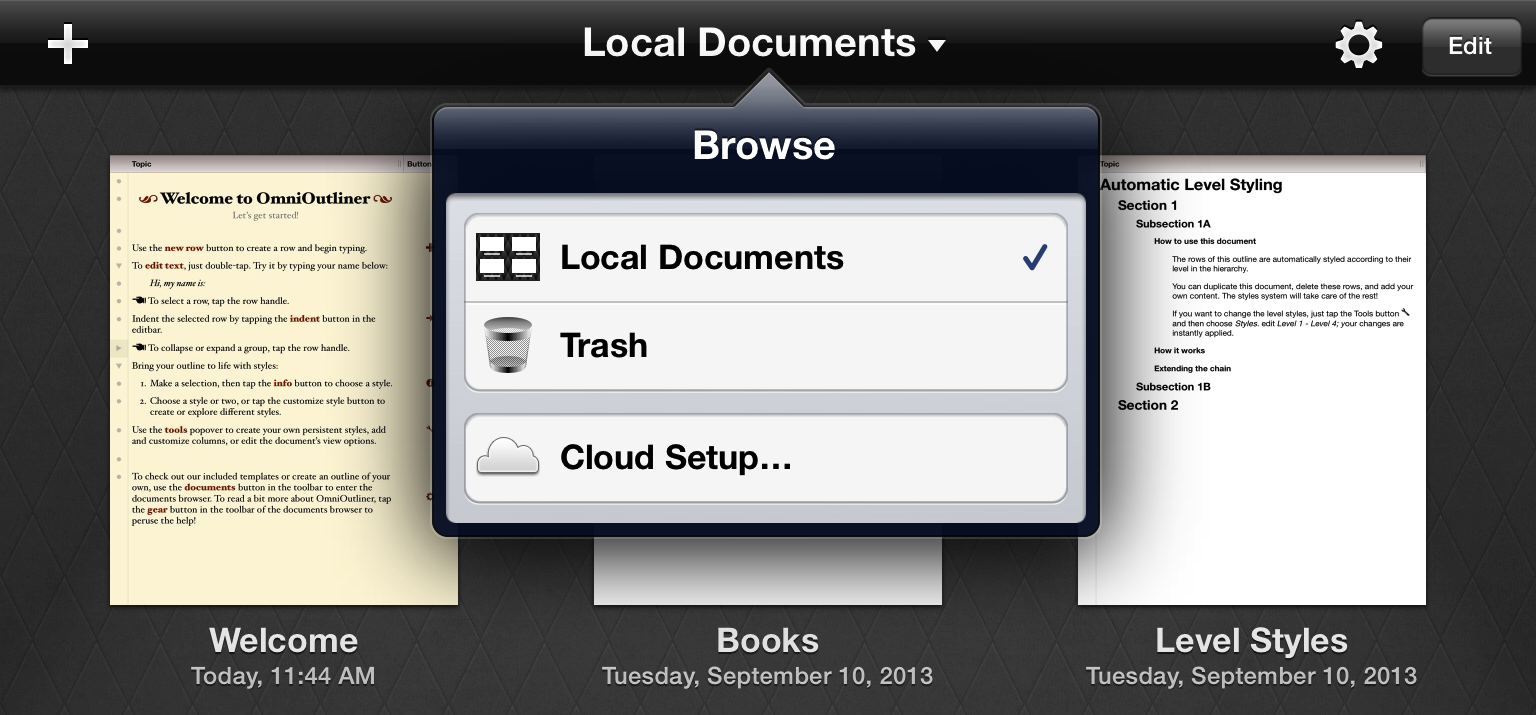
If you need to set up a new cloud account this is where to do it (you can also check your existing setup info here). Follow the onscreen prompts or refer to Syncing with OmniPresence in the in-app help for more detailed instructions.

If you have a cloud account already set up that you would like to use to migrate your data, make sure all the files you want to transfer are in your OmniPresence folder, then tap the sync icon in the toolbar. After using the same account information to set up cloud sync in OmniOutliner 2, your files will be available there as well.
Other Import Options
If you would prefer not to migrate your documents using OmniPresence Sync, other options are available.
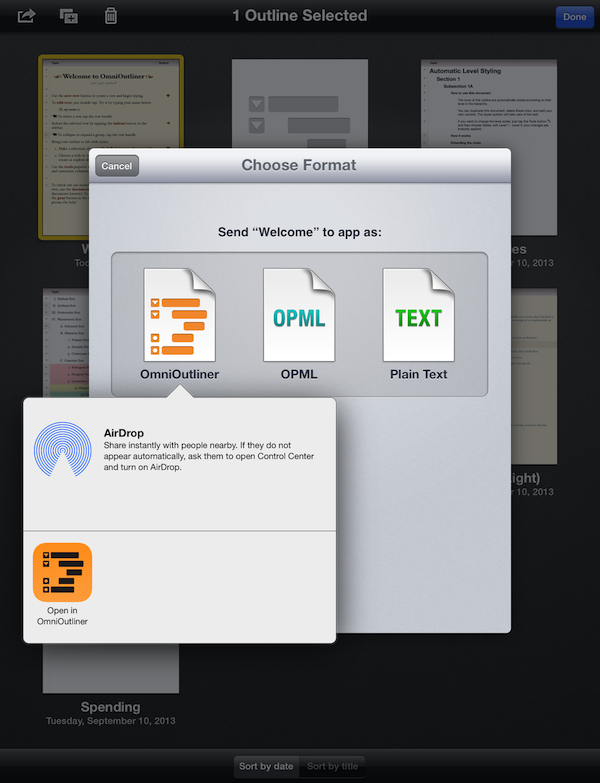
- With OmniOutliner 1.x and OmniOutliner 2 both installed on your iPad: Select individual documents in OmniOutliner 1.x and use Send to App from the Share button in the document browser toolbar to send them to OmniOutliner 2.
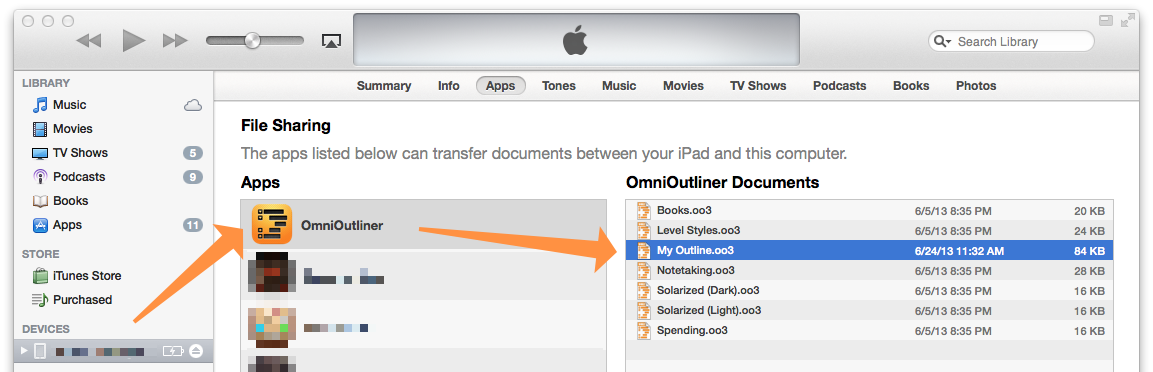
- Using iTunes 11 for Mac: Connect your iPad with OmniOutliner 1.x to your Mac, and follow these instructions to transfer Outliner documents to your computer. When you’re ready, use the same instructions to bring them from there to your iPad with OmniOutliner 2.
Chapter 3
Keyboard Shortcuts
If you have paired a Bluetooth keyboard with your iPad, you can use the following keyboard shortcuts with OmniOutliner 2 for iPad. These are the same keyboard shortcuts you’ll find in OmniOutliner for Mac, so you should feel right at home.
Editing
| Command | Keyboard Shortcut |
| Cut | Command-X |
| Copy | Command-C |
| Paste | Command-V |
| Copy Style | Option-Command-C |
| Paste Style | Option-Command-V |
Controlling How Paste Works
In OmniOutliner’s Settings, you’ll find an option for pasting styled text. When viewing the contents of a folder or when you’re on OmniOutliner’s home screen, tap the gear menu in the upper-right corner and then tap Settings.
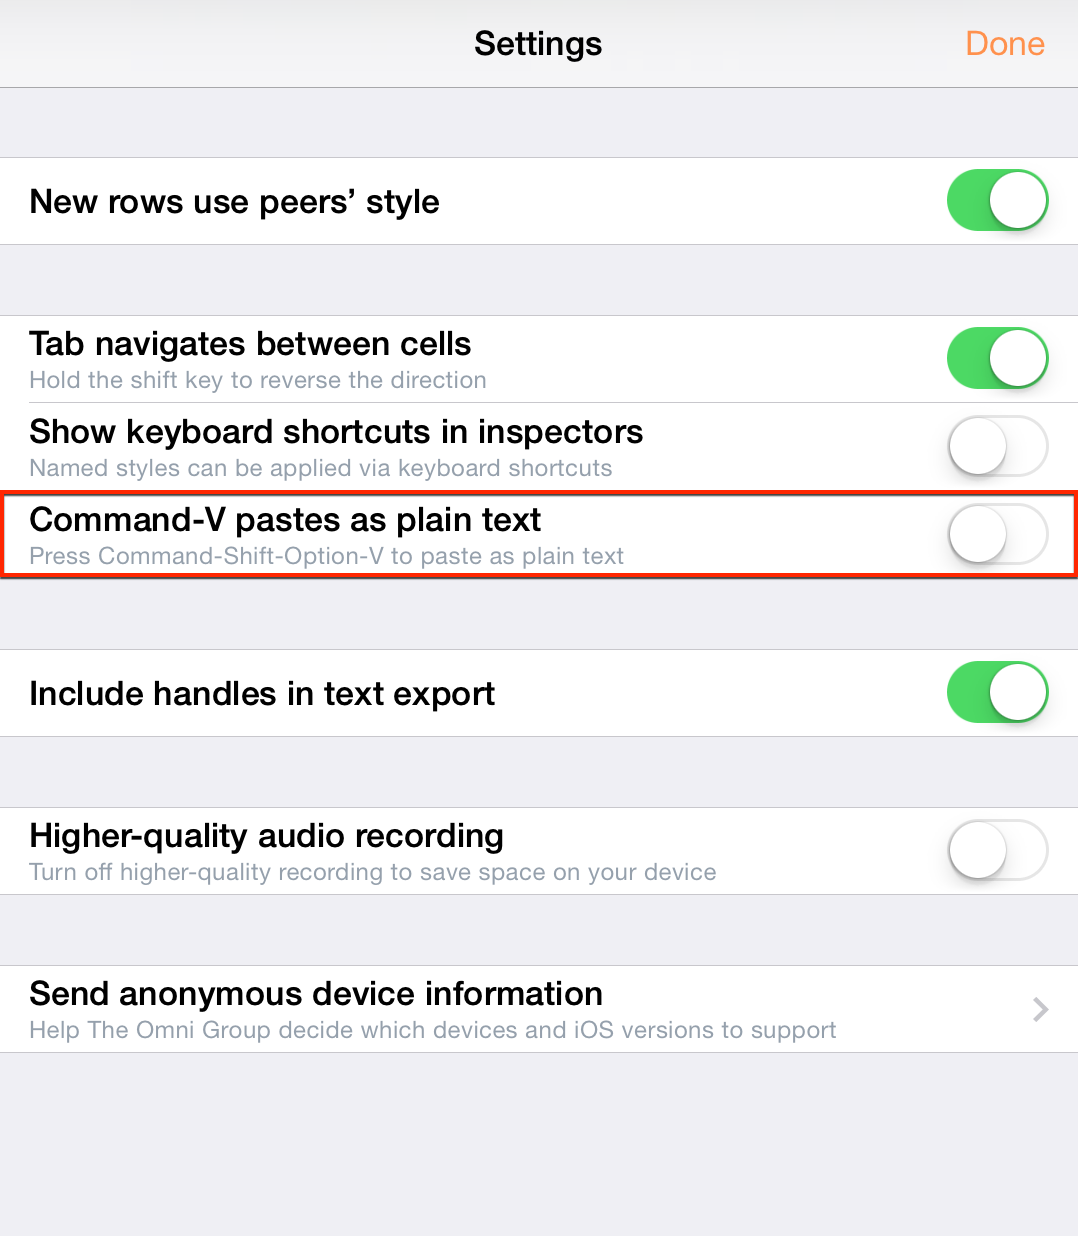
When the switch is off, you can use Option-Shift-Command-V to Paste Plain text. When the switch is on, you can use Option-Shift-Command-V to Paste with original styles. Meantime, Command-V will always paste as plain text.
It’s worth noting, too, that this setting does not affect the Paste and Paste Plain options found in the contextual menu when you tap in a row or cell. For more details on how those options work, see Creating a New OmniOutliner Document.
Styles
| Command | Keyboard Shortcut |
| Bold | Command-B |
| Italic | Command-I |
| Underline | Command-U |
| Clear custom style | Control-Command-Delete |
| Increase font size | Command-+ |
| Decrease font size | Command-– |
| Toggle first named style | Control-1 |
| Toggle second named style | Control-2 |
| Toggle third named style | Control-3 |
| Toggle forth named style | Control-4 |
| Toggle fifth named style | Control-5 |
| Toggle sixth named style | Control-6 |
| Toggle seventh named style | Control-7 |
| Toggle eighth named style | Control-8 |
| Toggle ninth named style | Control-9 |
| Toggle tenth named style | Control-0 |
| Split row at cursor | Control-Return |
| Insert line break | Option-Return |
| Toggle editing current row | Command-Return |
Reorganize
| Command | Keyboard Shortcut |
| Move row up | Control-Command-↑ |
| Move row down | Control-Command-↓ |
| Move row left | Control-Command-← |
| Move row right | Control-Command-→ |
| Indent row | Command-] or Tab |
| Outdent row | Command-[ or Shift-Tab |
| Add row | Return |
| Add row above | Shift-Return |
| Add child | Shift-Command-] |
| Add aunt | Shift-Command-[ |
| Group | Option-Command-G |
| Ungroup | Option-Command-U |
| Duplicate | Command-D |
| Toggle editing note | Command-' |
| Select all | Command-A |
| Deselect all | Shift-Command-A |
| Back delete | Delete |
| Forward delete | fn-Delete |
| Move to next cell | Tab |
| The Tab key can be used to either indent/outdent, or to navigate between cells. | |
View
| Command | Keyboard Shortcut |
| Expand all rows | Control-Command-9 |
| Collapse all rows | Control-Command-0 |
| Expand selected rows | Command-9 |
| Collapse selected rows | Command-0 |
| Expand selected rows completely | Option-Command-9 |
| Collapse selected rows completely | Option-Command-0 |
| The following commands only work when you already have a row selected: | |
| Scroll to First Row | Command-↑ |
| Scroll to Last Row | Command-↓ |
| Move selected row up | u |
| Move selected row down | d |
| Move left | l |
| Move right | r |
| Edit row | e |
| Toggle status | Spacebar |
| Group | Option-Command-G |
| Ungroup | Option-Command-U |
| Select row above | ↑ |
| Select row below | ↓ |
| Expand selected row(s) | → |
| Collapse selected row(s) | ← |
| Add row above to selection | Shift-↑ |
| Add row below to selection | Shift-↓ |
Find
| Command | Keyboard Shortcut |
| Find | Command-F |
| Select previous match | ↑ |
| Select next match | ↓ |
| Select all matches | Command-A |
| Only works when in row selection mode. | |
Chapter 4
Create a New OmniOutliner Document
Let’s say that you want to keep a running list of your favorite movies of all time. OmniOutliner is the perfect tool for something like this. You can quickly create a list and organize and style it in a multitude of ways.
Tip
If you have purchased TextExpander for your iPad, you can use TextExpander to create a library of abbreviation shortcuts for snippets of text that you use frequently, such as addresses, URLs, and standard replies. Tap that abbreviation and it automatically expands to the full snippet.
To get started, tap Add (the plus sign, +) in the toolbar.

Next, Choose a Template. You can choose from one of the sample templates, but in this case, select the Default template since you’ll want to have some liberty over the appearance of your list.
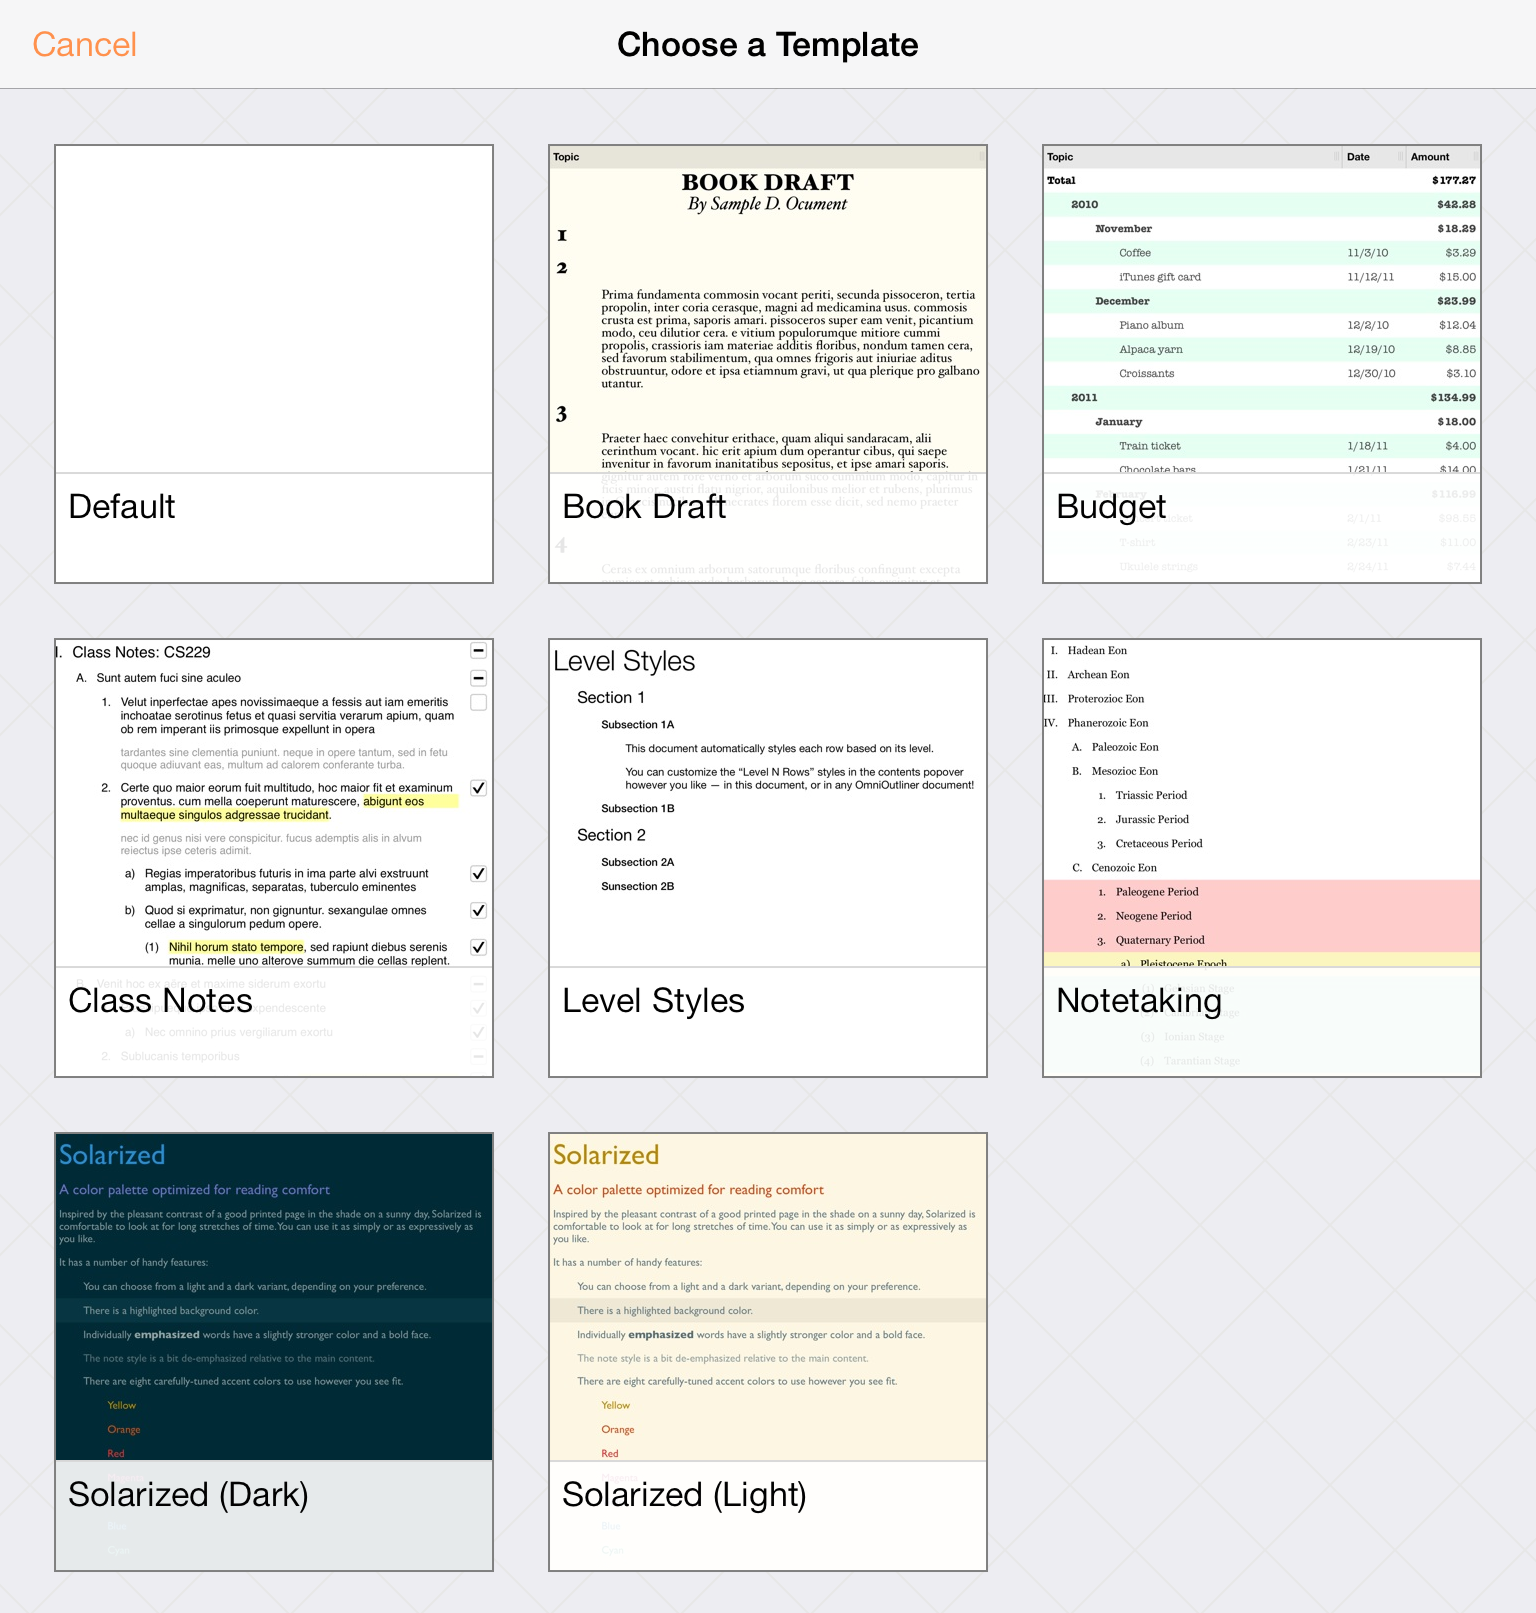
As you can see, the Default template is pretty sparse, but don’t worry, we’ll show you how to turn this blank white canvas into something really amazing in no time.
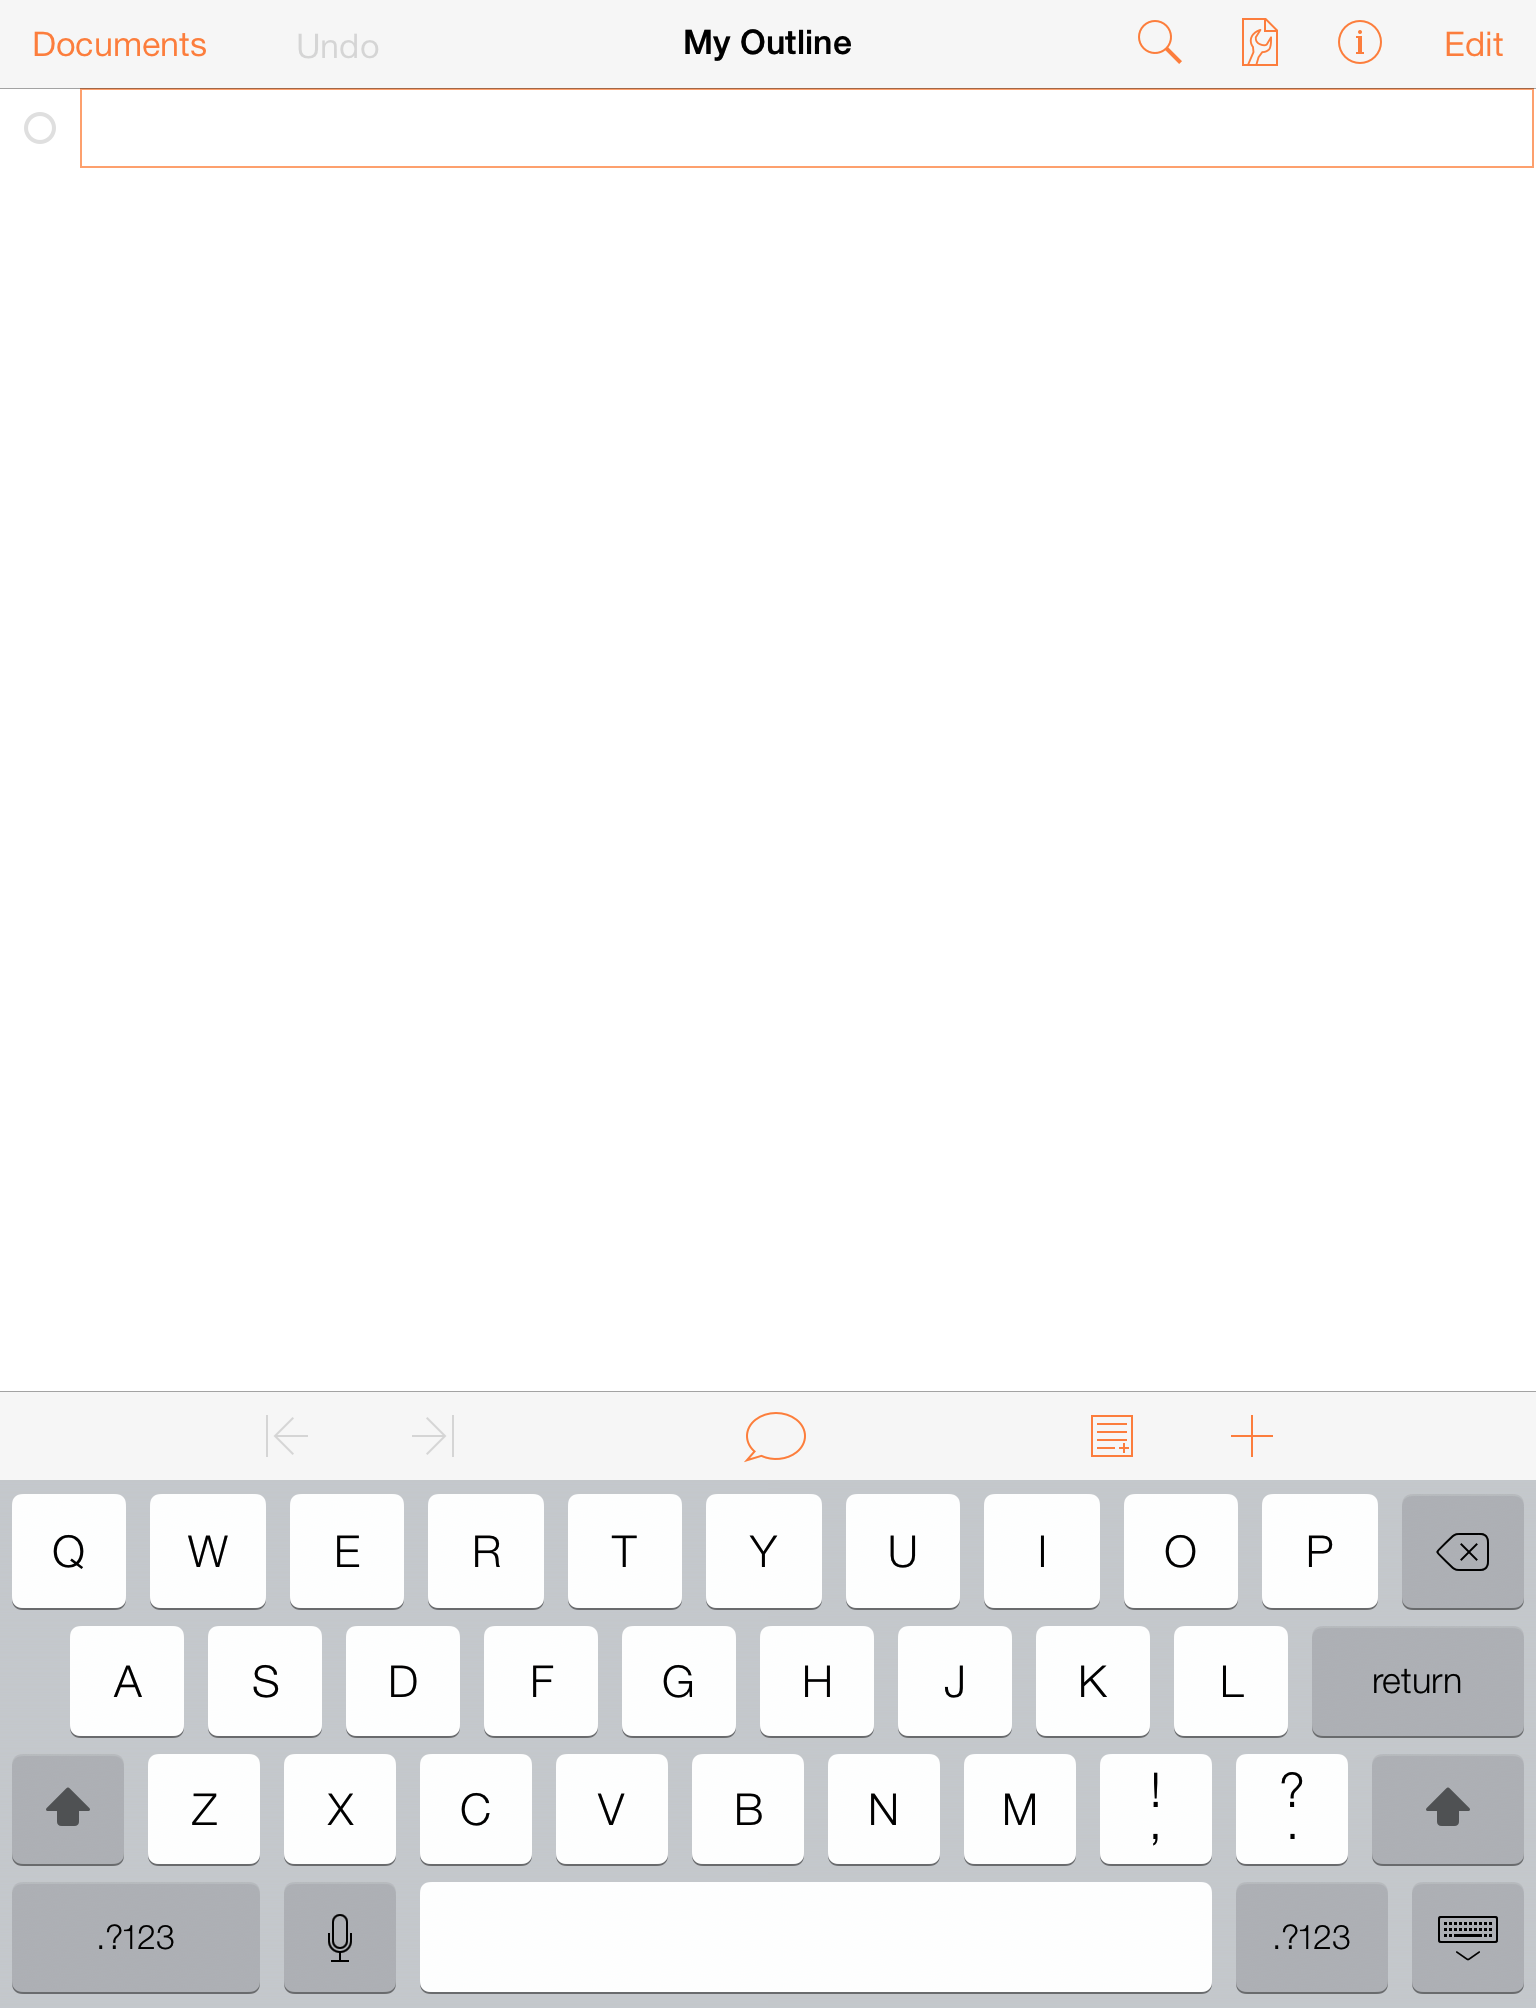
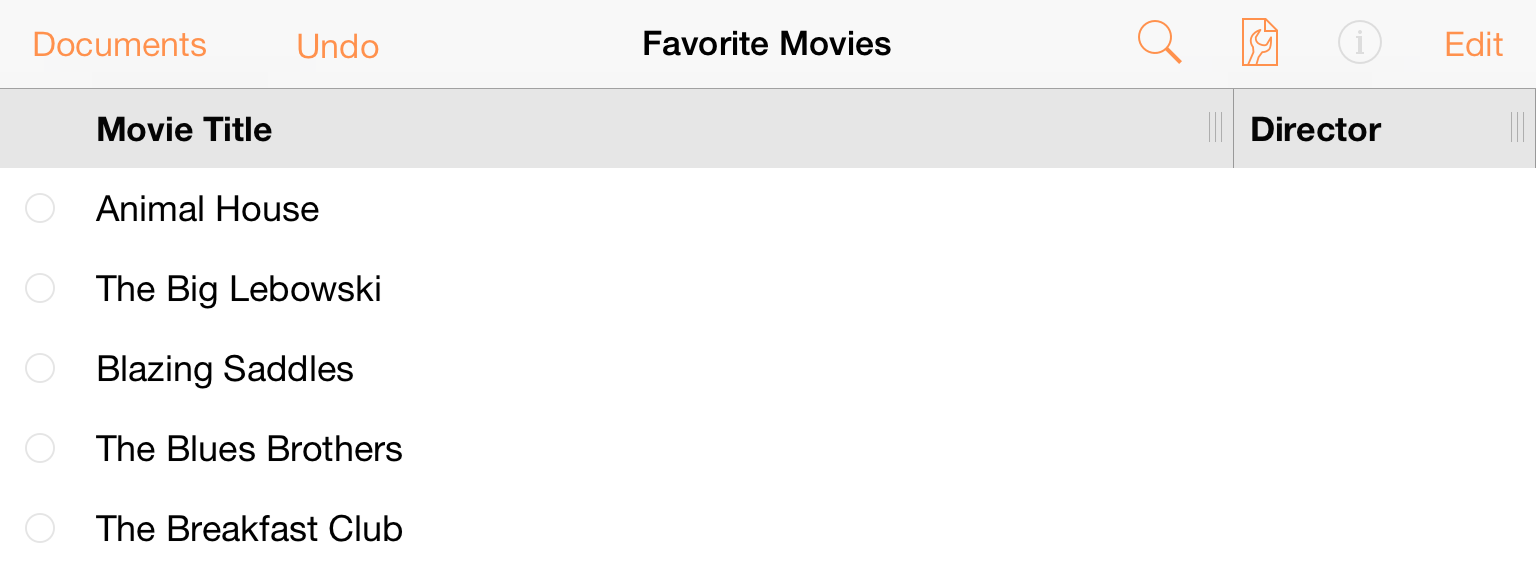
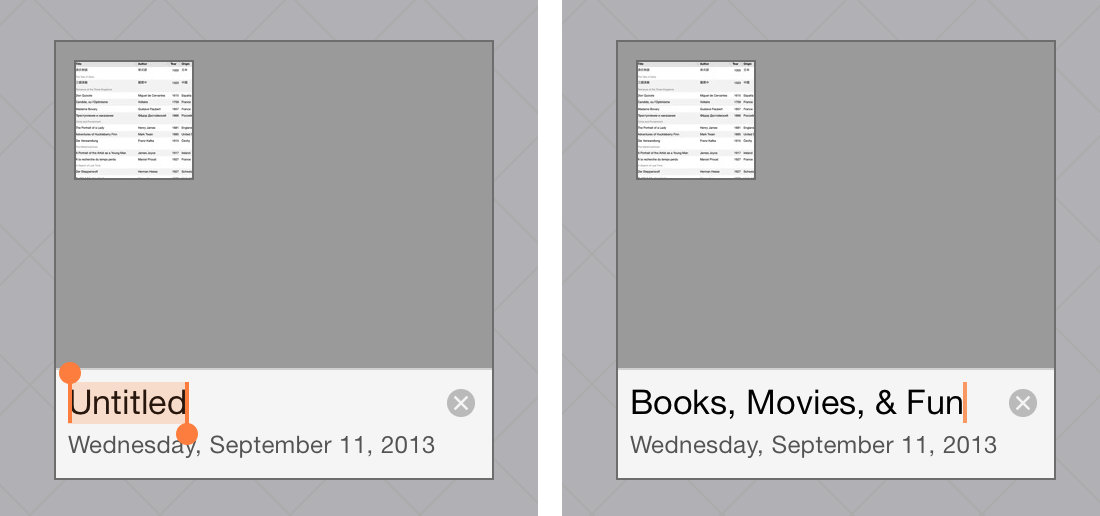
Before you start entering the titles of your favorite movies, let’s go ahead and change the default title of this document from My Outline to Favorite Movies.
Tap on My Outline to go into editing mode; this places a cursor at the end of the current title, and if you look closely, you’ll see a little × at the right edge of the title bar. Tap the × to clear the current title and then type in Favorite Movies, and then tap Return to accept the new title. Now you’re rolling!


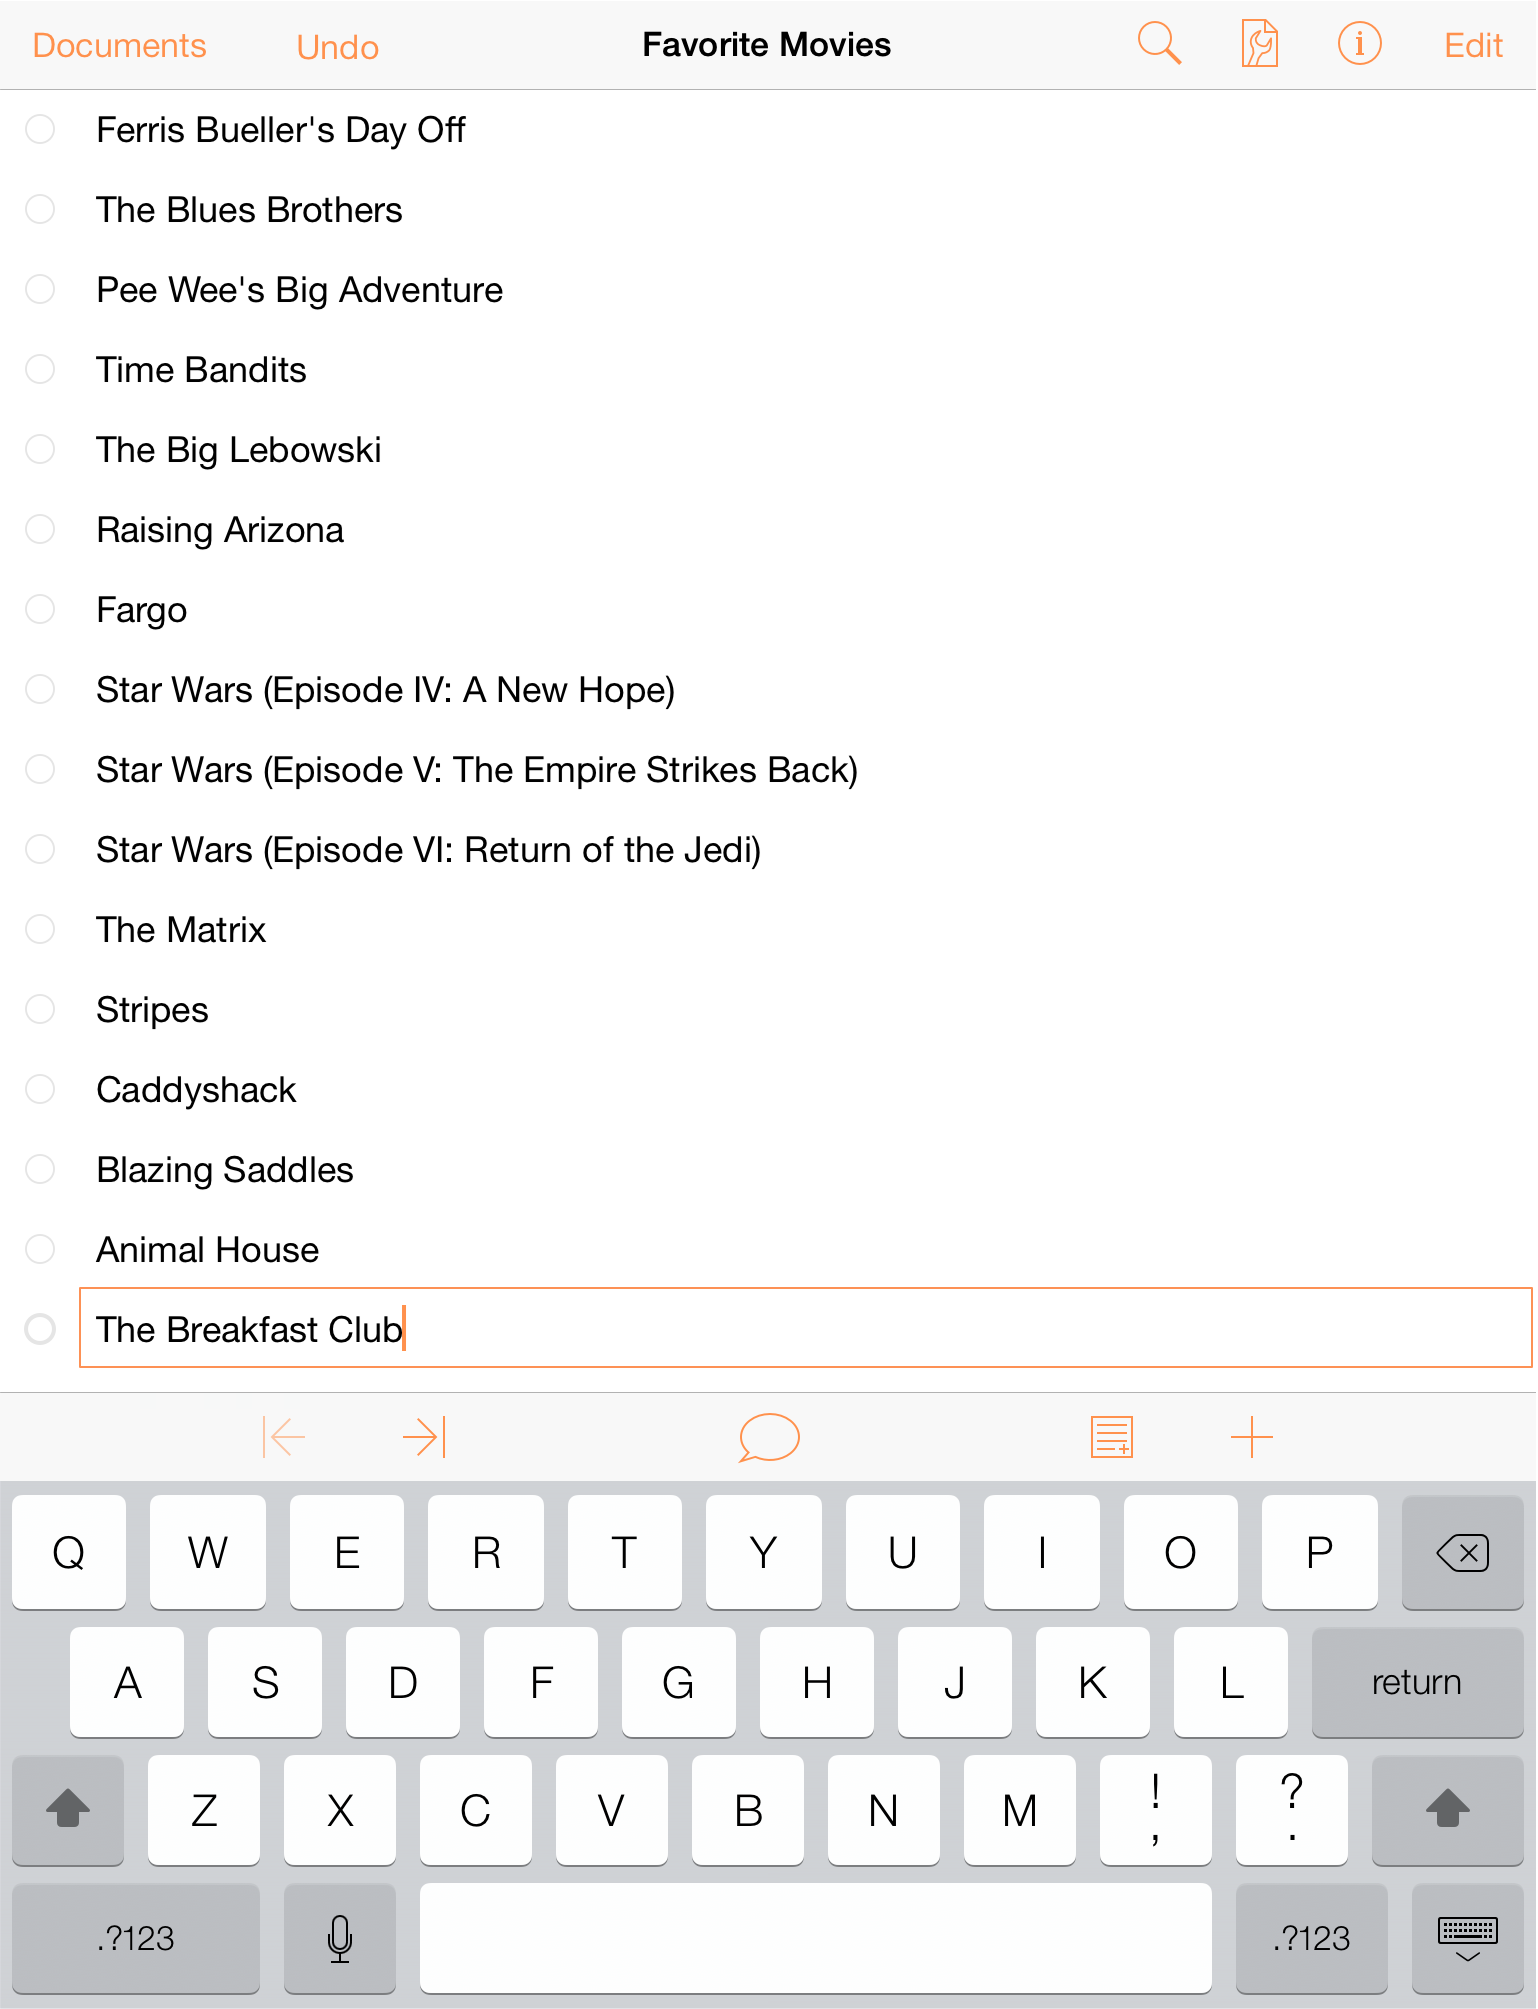
Enter the titles for a dozen or so of your favorite movies. When you reach the end of a title, tap Return to go to the next line.
Tip
Entry goes much faster if you have a Bluetooth keyboard paired with your iPad. In fact, we’ve added many of the keyboard shortcuts common in OmniOutliner for Mac to OmniOutliner 2 for iPad.As you can see, the titles are a bit disorganized, so let’s go ahead and organize these alphabetically. To move a line, press and hold on the Row Handle, and then drag and drop the line in a new location.
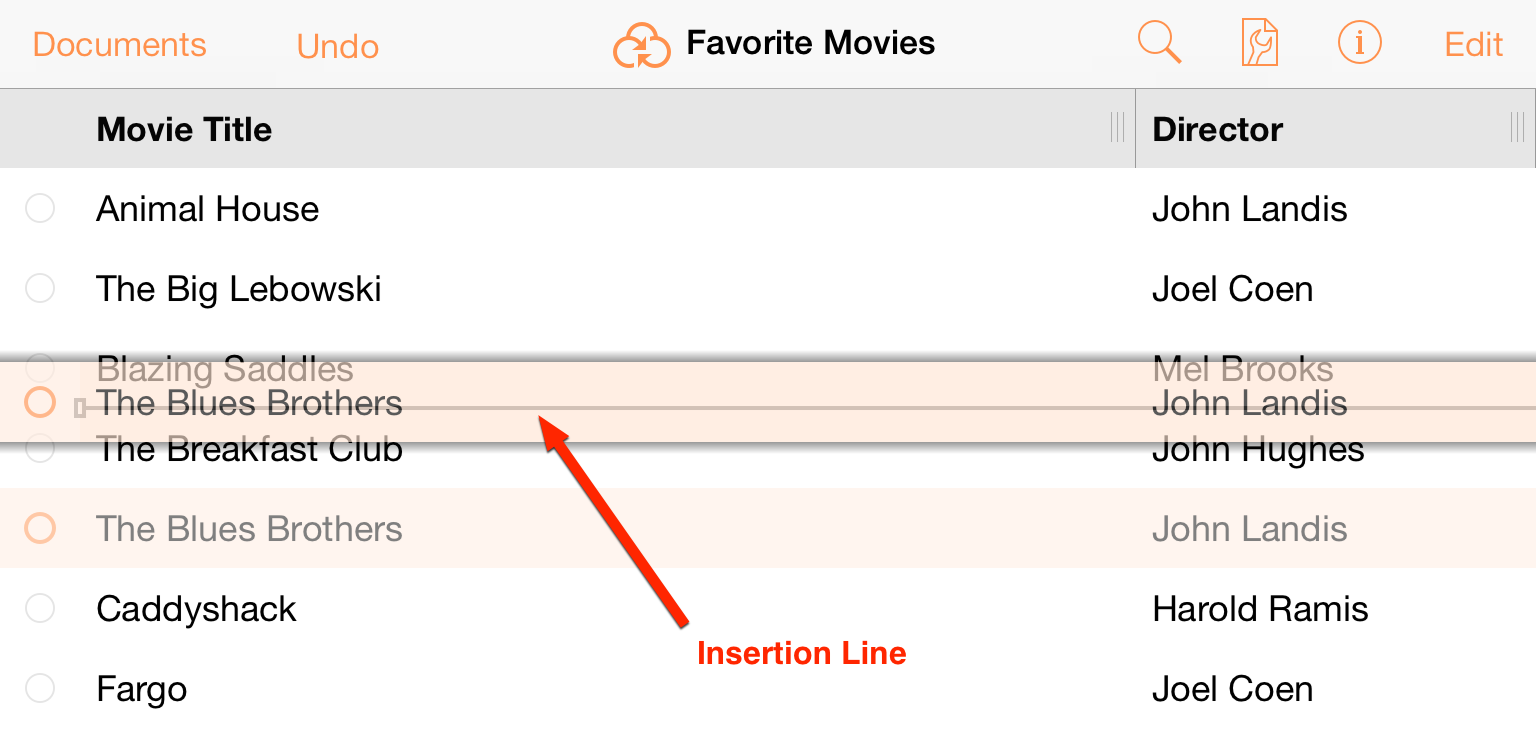
When you select a line, you’ll notice that it takes on a grayish-orange highlight, and that there’s a drop shadow behind the row. This is your indication that the line is selected and ready to move. As you move the lines around, an insertion line appears to indicate where the line will be placed when you release your finger.
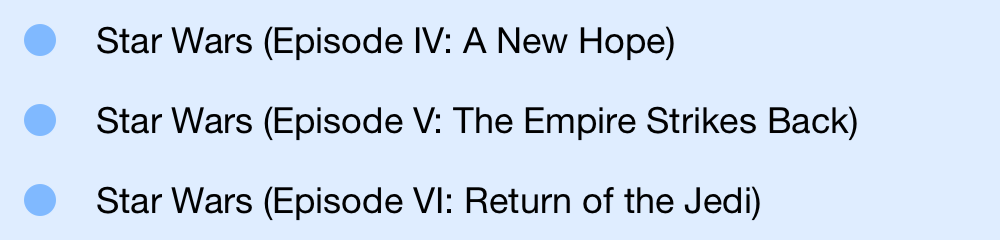
With your movie titles in alphabetical order, let’s add a little more depth to the organization. There are three Star Wars movies (and only three Star Wars movies), so let’s group these together.
Tap Edit in upper-right corner of the navigation bar, and then tap to select each of the three Star Wars movies.
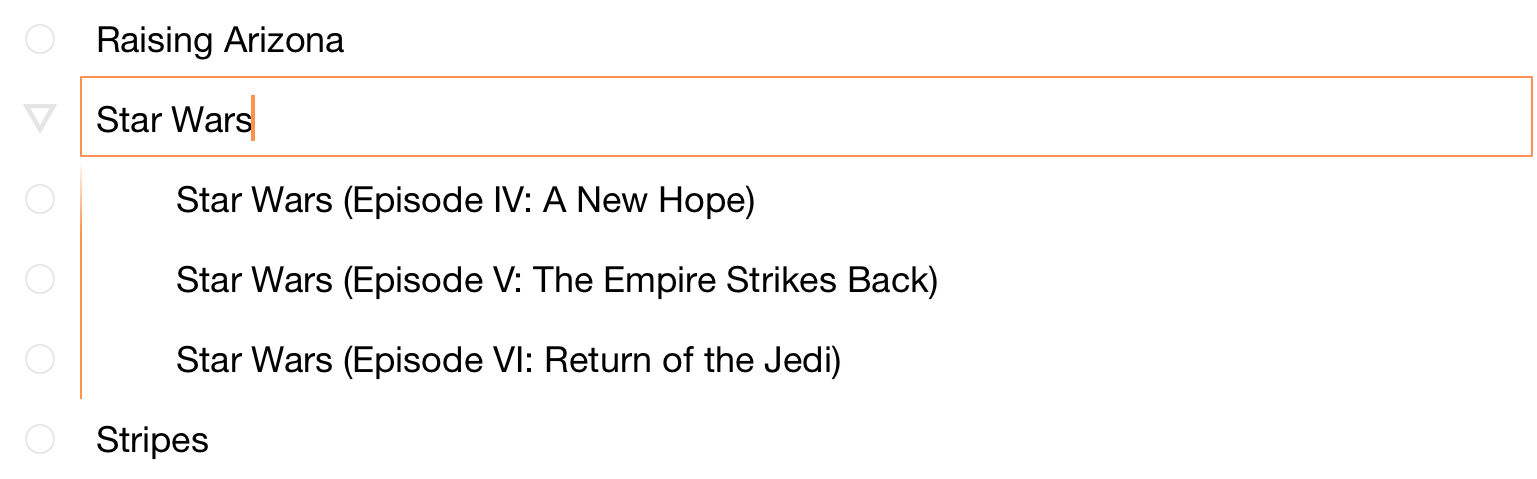
With the three movies selected, tap Group in the toolbar at the bottom of the screen. The three rows are indented and a new row is inserted above at the Aunt level; enter Star Wars to name the group.

Notice how the three movies are indented. If you tap the disclosure triangle to the left of Star Wars, the three movies are hidden from view until you tap the triangle once more.
Now let’s add a new column to the list so you can tack on the director’s name to each film. In the toolbar, tap Contents and then tap New Column at the bottom of the Columns tab. Enter Director in the Name field for the column.
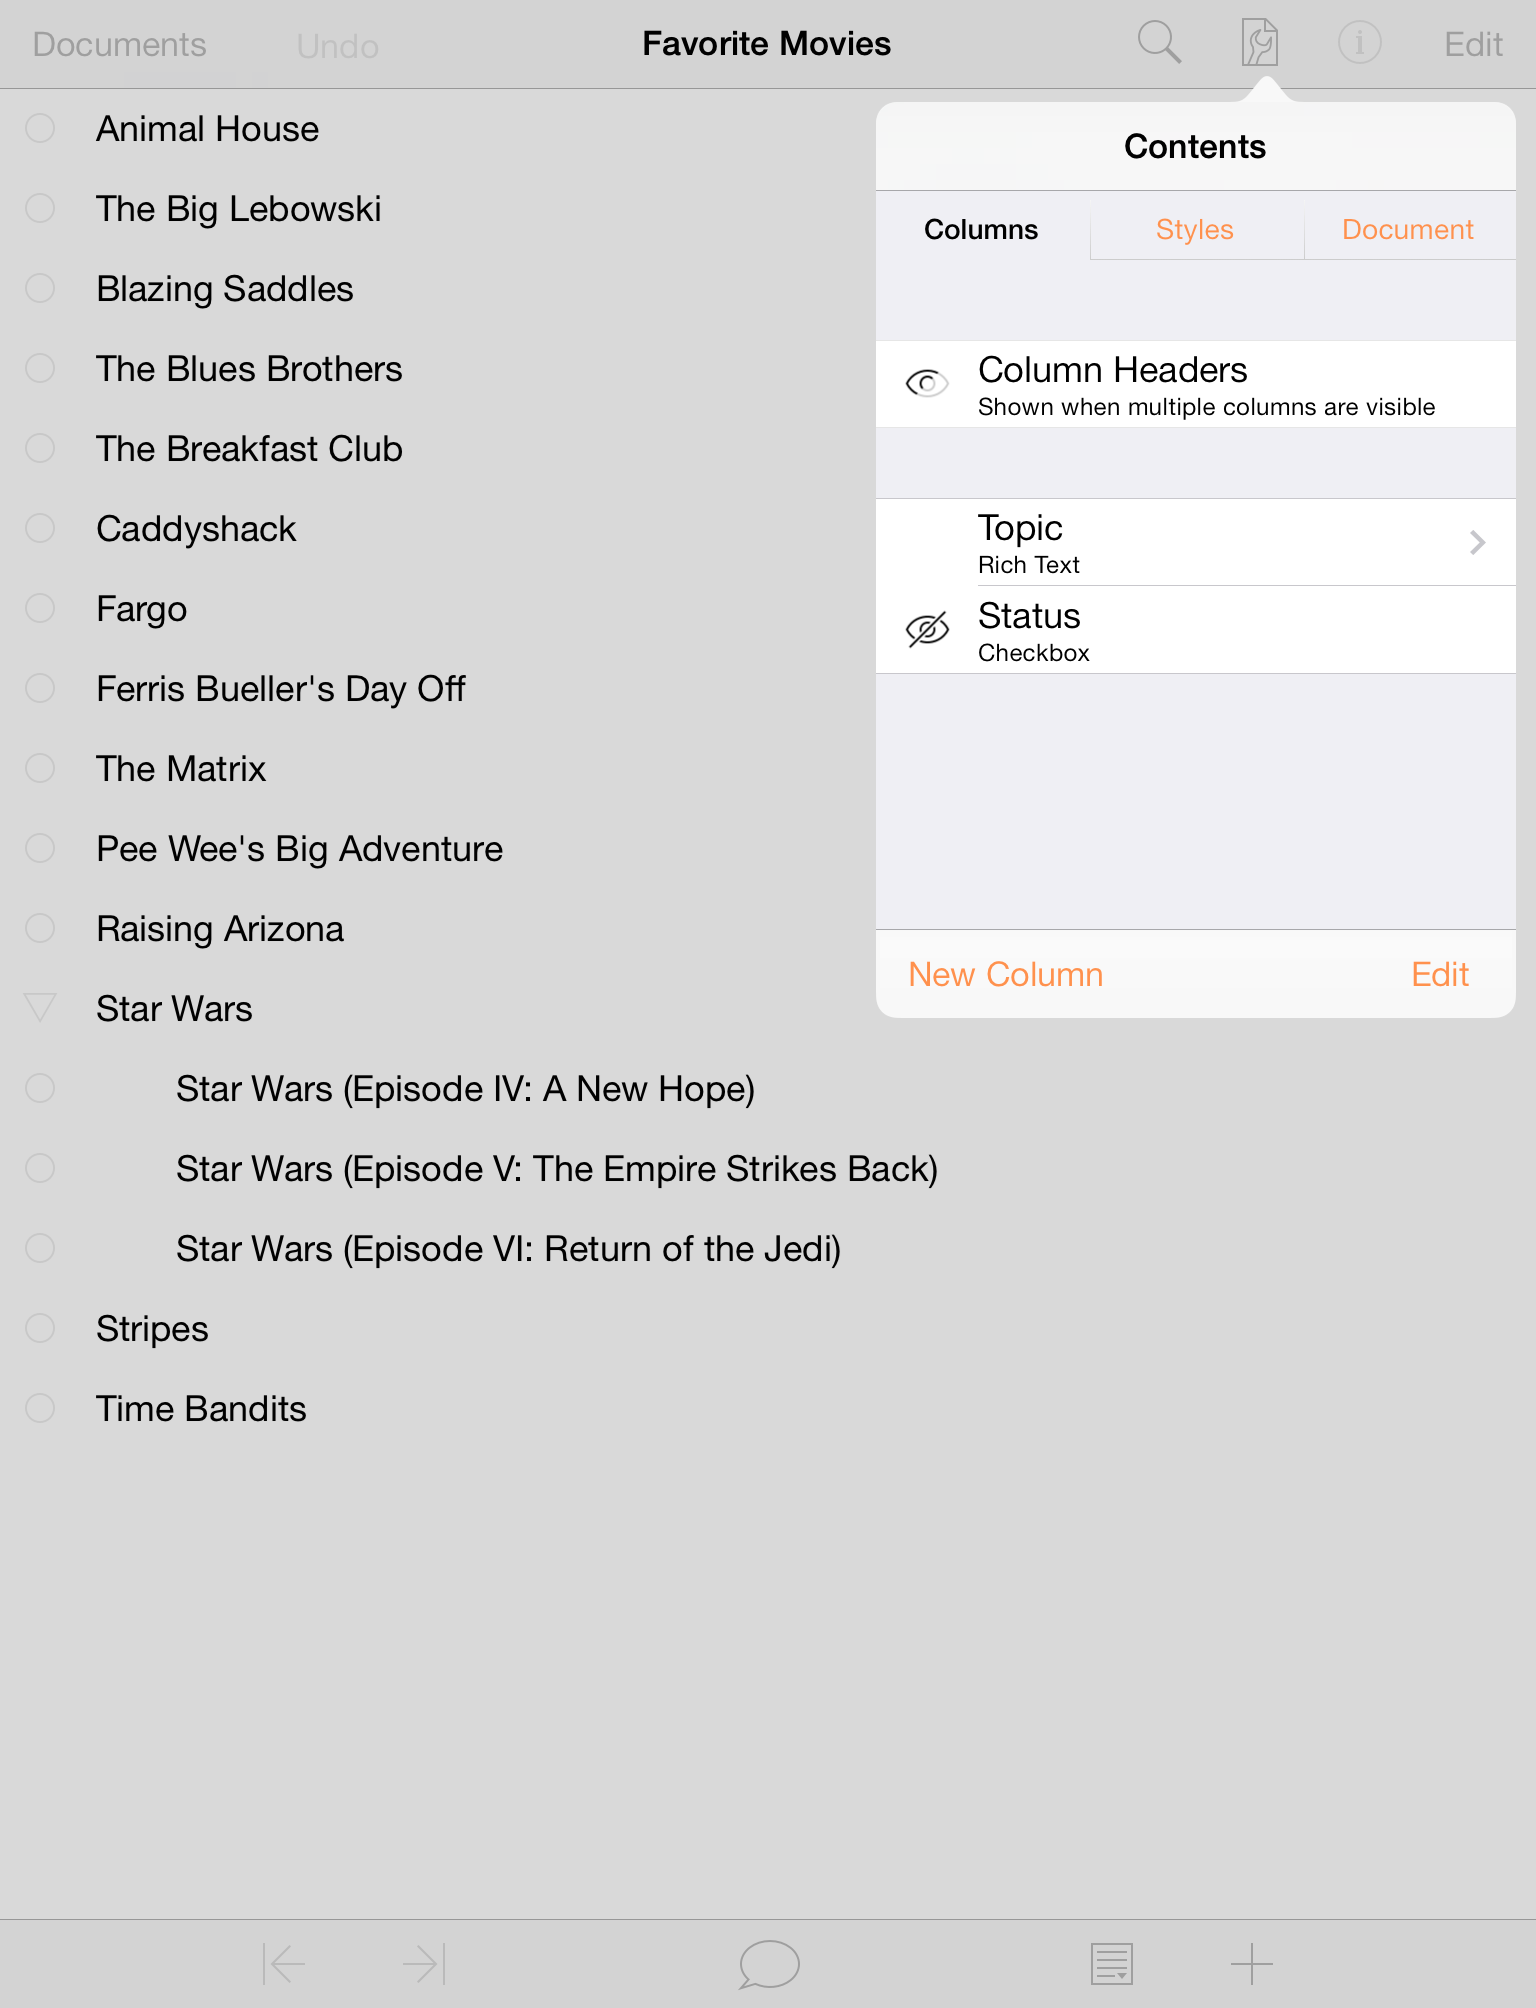
In navigation bar of the Contents popup, tap < Columns to see the list of columns in your document. Rename the first column by tapping Topic; delete the current column name and give it a new one, such as Movie Title. Your document should appear as follows:
You’ll notice, too, that each column has a resizing handle at its right edge. You can press and drag these left or right to make the column as narrow or wide as you’d like. The text within that column will wrap to fit within the column width.
Enter the director’s names in the Director column. Don’t tap Return after entering a director’s name; that creates a new row (and if that happens, just tap Undo).
Tip
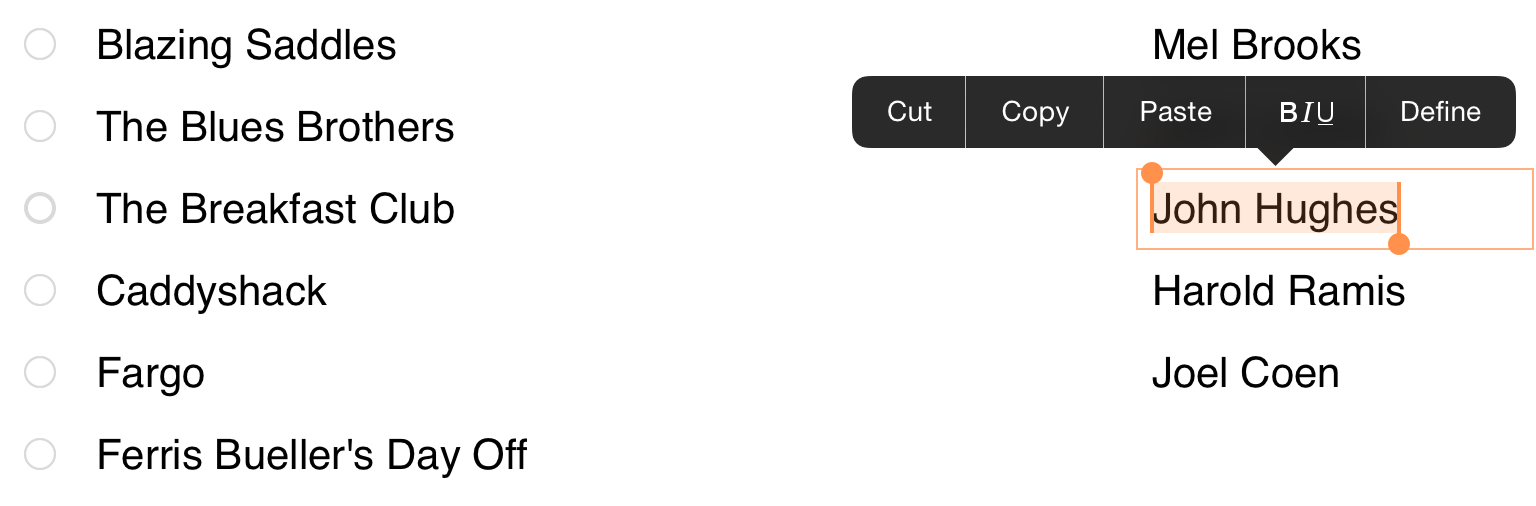
If you have a Bluetooth keyboard paired with your iPad, press the Down Arrow key to move downward through the cells in the Director column.To make entry of the directors’ names go faster, you can Copy the text in one cell and then Paste it in another if you find that there are any duplicates. To copy some text, double-tap on the word, and use the selection handles (or tap Select All in the contextual menu) to select the words you need. With the text selected, tap Copy to copy the text to the pasteboard.
Next, double-tap in the cell where you want to paste the text. You'll notice that there are two different “paste” options in the contextual menu: Paste and Paste Plain:
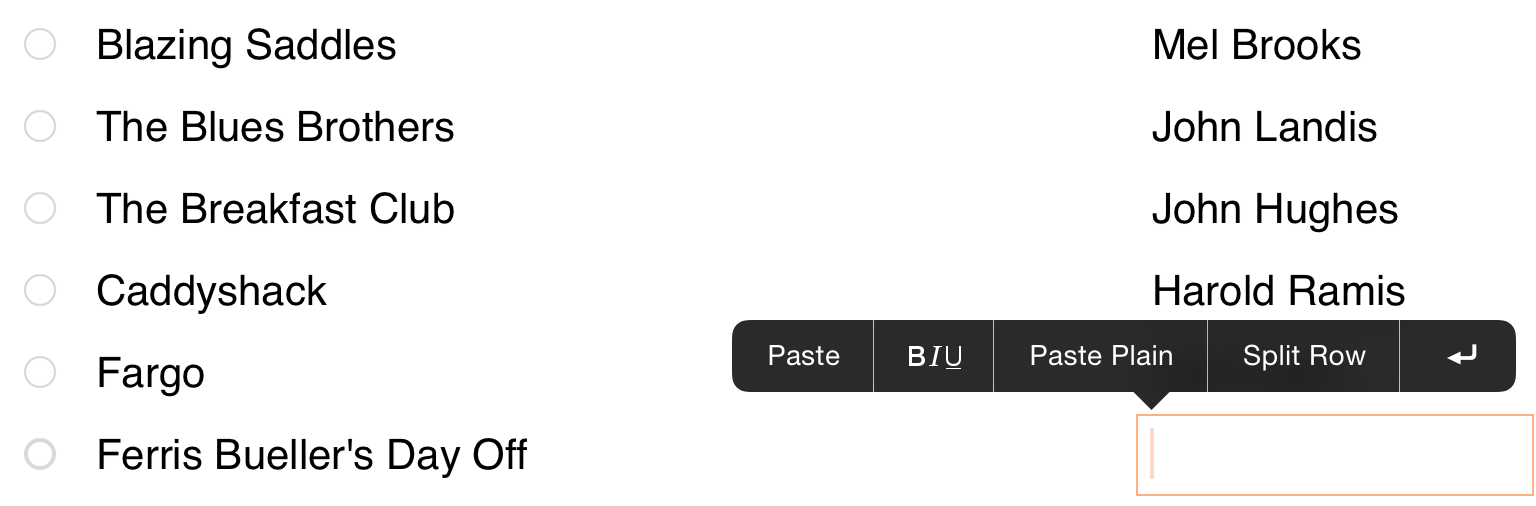
- Paste takes whatever is on the clipboard and pastes that into the cell, exactly as copied—styles and all.
- Paste Plain takes whatever is on the clipboard and pastes that into the cell, but without any styles that may have been applied. For example, if you copy some orange-colored text and choose Paste Plain, the text is pasted in, but it won't be orange. Instead, the pasted text picks up the style (or styles) used in that particular cell.
Tap Paste to place the text on the clipboard into the cell.
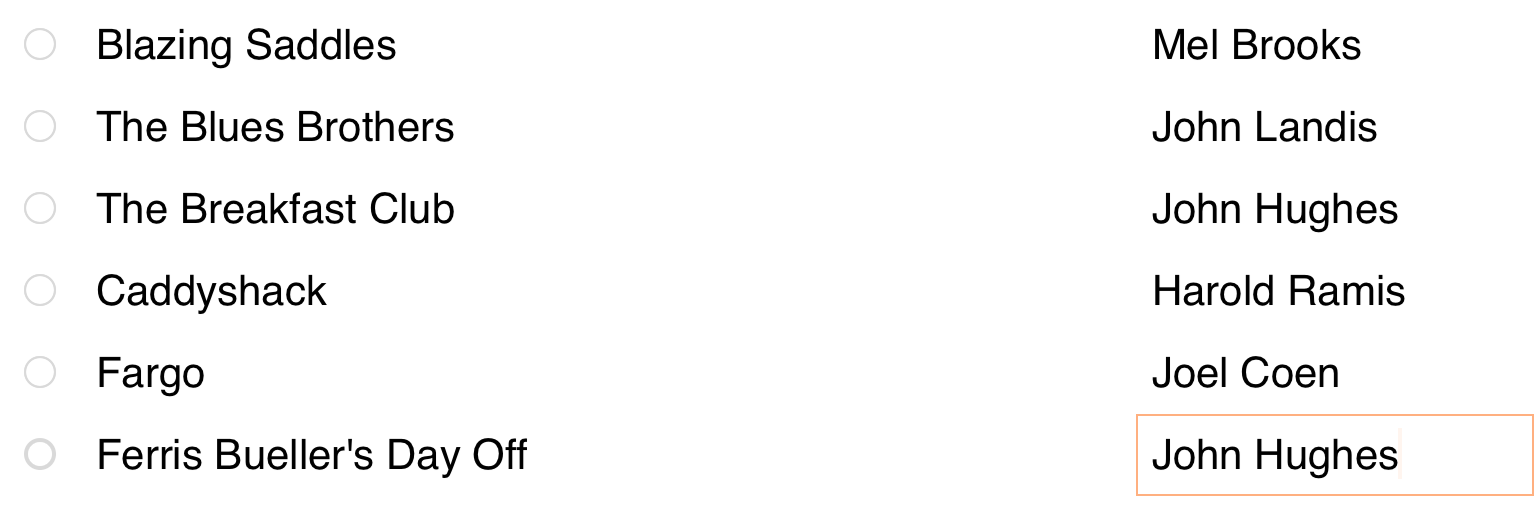
When you’ve finished filling in the Director column, your document should appear as follows:
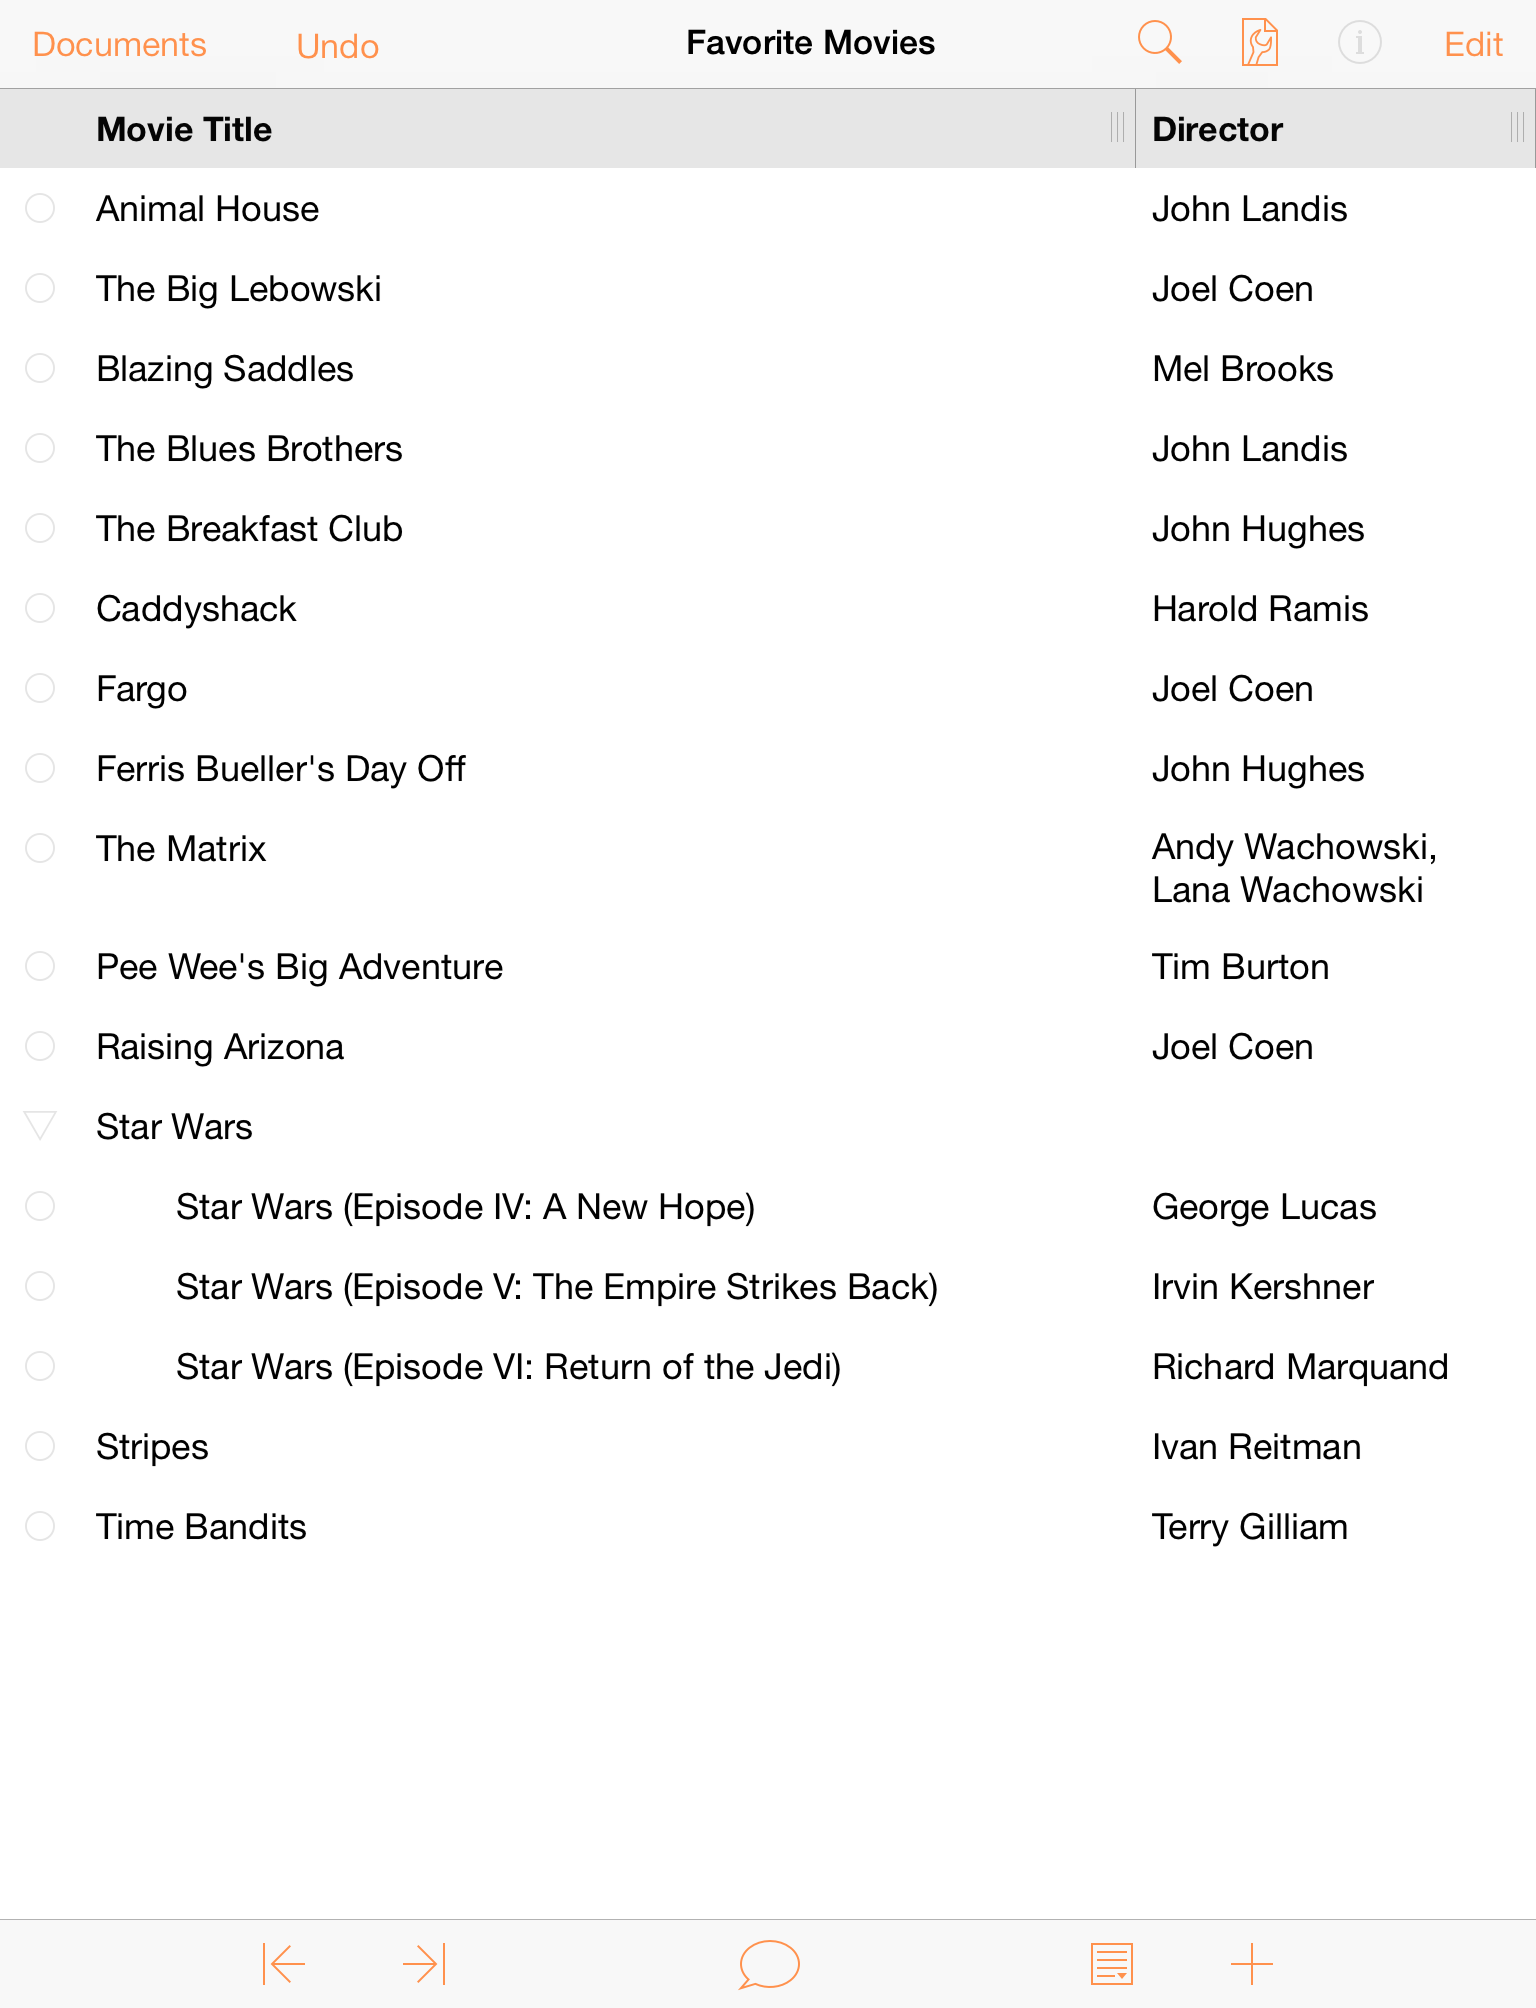
Tip
Not sure who directed your favorite movie? Search on IMDb to discover all kinds of details about the movies in your list.
Of course, there’s plenty more that you could do with a document such as this. You could add notes about each movie, or another column for the year the movie was released or for your own star rating. Take some time now to explore in OmniOutliner and see what you can do. And always remember, tap Undo to revert recent changes.
When you’ve finished, tap Documents in the navigation bar to save your changes and add the Favorite Movies document to your Local Documents folder.
Chapter 5
Getting Help
When you’re in need of help—whether you’re trying to figure out how styles work, or if you’re having some other issue with OmniOutliner—it’s good to know that the Support Humans at The Omni Group are always available to lend you a hand.
The OmniOutliner Website
The OmniOutliner website is always a good place to find the latest information about OmniOutliner.
Forums
The Omni Group maintains online forums for all of our products, and you’re invited! Come share your questions and ideas with other users and Omni staff.
Email Support
If you’re stuck, if you have a good idea for the next version of OmniOutliner, or if you just want to let us know how we’re doing, go ahead and send us an email. Choose Help ▸ Contact Omni from the menu bar to conjure up a message addressed to us, or just send us an email with your thoughts. We take support pretty seriously, so you can expect a prompt response actually typed by human hands.
Release Notes
For really meticulously detailed information about what has changed in each minor version of OmniOutliner, be sure to read the Release Notes by tapping the Settings menu on OmniOutliner’s Location screen.
Chapter 6
Add a Cloud Account
To work on a project shared between multiple OmniOutliner users, start by tapping Settings and selecting Cloud Setup in the popup menu.
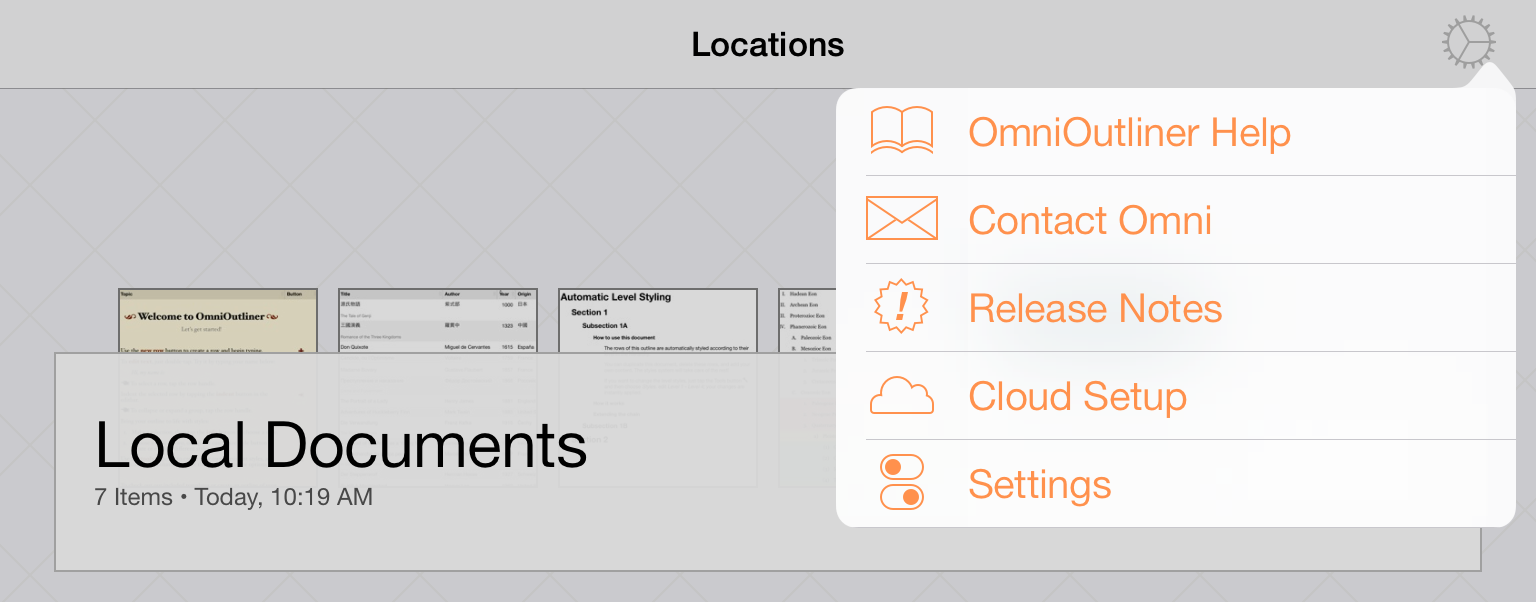
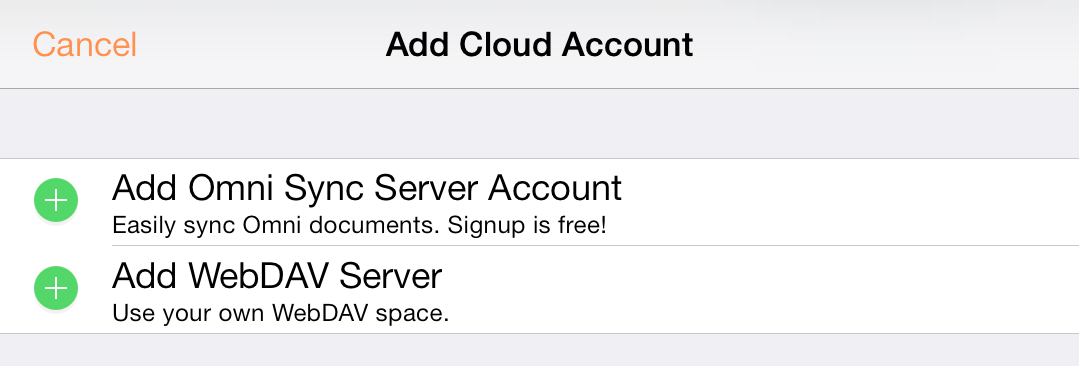
You’ll see the Add Cloud Account screen, from which you can choose either Add Omni Sync Server Account or Add WebDAV Server.
You can create a free Omni Sync Server account online at:
For Omni Sync Server Accounts
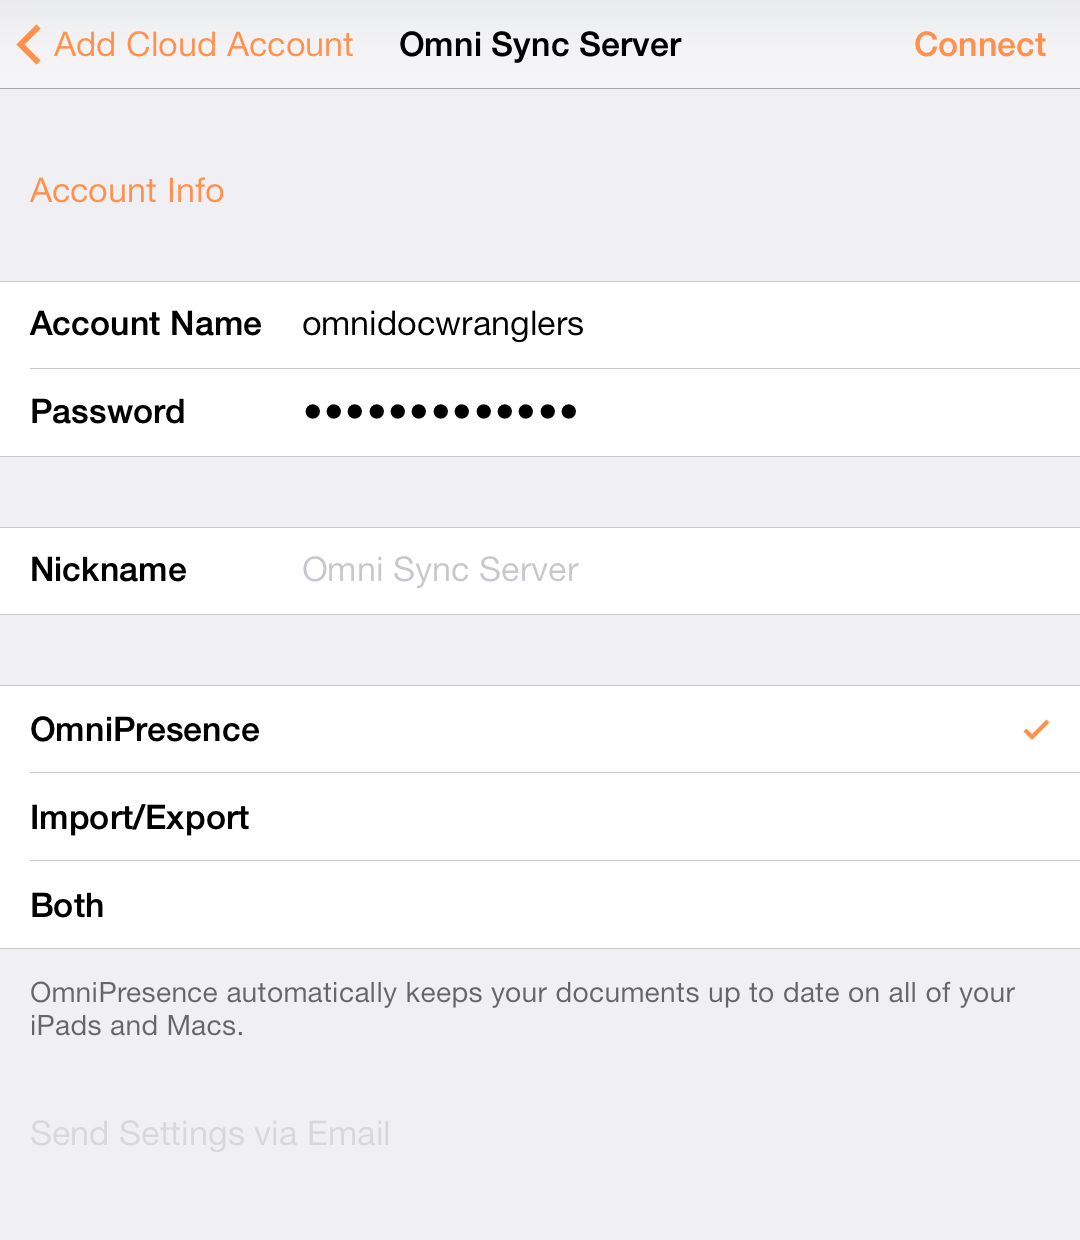
On the Account Info screen that appears:
- Enter your Account Name
- Enter the Password for your account
- Optionally, enter a Nickname that will be used as the name for your synced folder
- Choose one of the following options:
- OmniPresence — syncs files using OmniPresence.
- Import/Export — only imports and exports files.
- Both — uses both of the above methods.
- Tap Connect to authenticate with the Omni Sync Server
The next message you’ll see is Testing Server for Compatibility along with a progress bar. When your credentials have authenticated, you’re taken back to OmniOutliner’s main screen and you’ll see a new folder for your synced files.
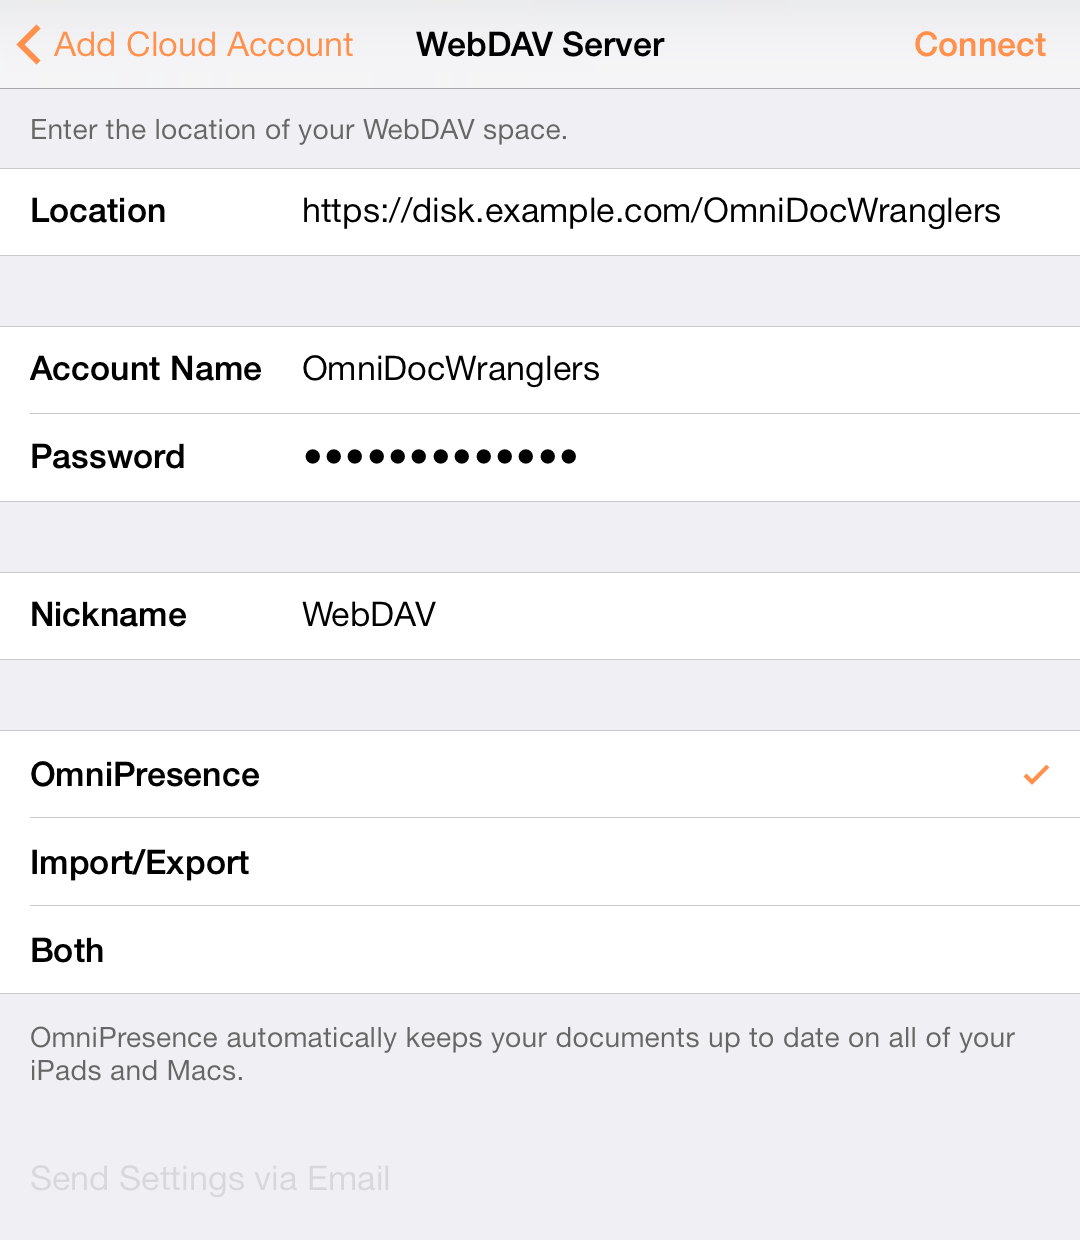
For WebDAV Server Accounts
On the Account Info screen that appears:
- Enter the URL for the Location of your WebDAV Server
- Enter your Account Name
- Enter the Password for your account
- Optionally, enter a Nickname that will be used as the name for your synced folder
- Choose one of the following options:
- OmniPresence — syncs files using OmniPresence.
- Import/Export — only imports and exports files.
- Both — uses both of the above methods.
- Tap Connect to authenticate with the Omni Sync Server
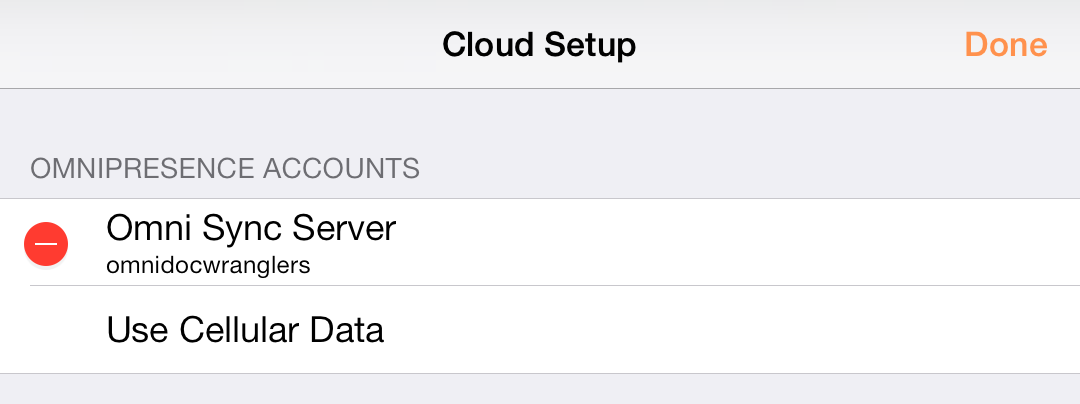
Additional Setup for Cloud Accounts
After you’ve created a Cloud Account, tap on Settings (the gear icon) in the navigation bar and then choose Cloud Setup. From here, you can see the details about the various accounts you’ve setup, opt to Use Cellular Data, or to add another cloud account.

To remove an account, tap Edit; a delete handle appears to the left of the account name. If you tap the delete handle, the account name slides to the left and a Delete button appears on the right edge; tap that to delete the account. A quicker way to do this is to just swipe left across the account name to bring up the Delete button. If you change your mind before deleting the account, tap Done and the Delete button goes away.
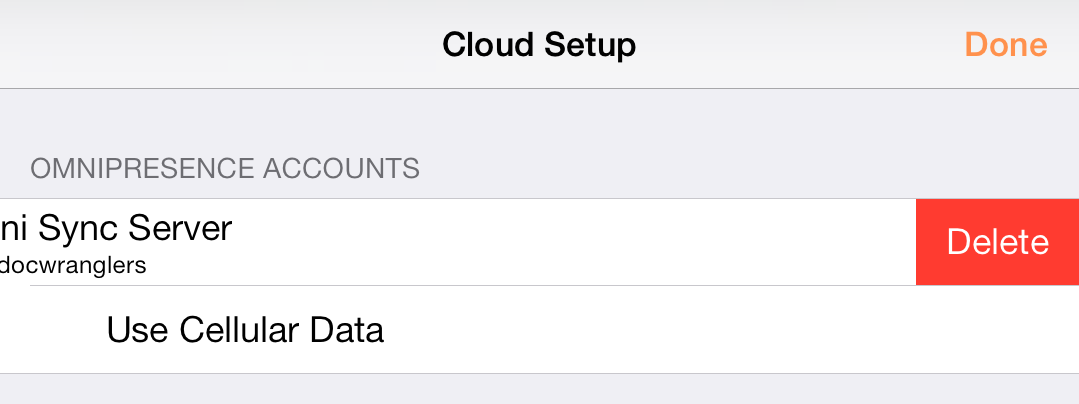
Warning
Undo will not restore an account that you delete. If you delete one (or all) of your Cloud Accounts, you will need to set those up all over again.
Chapter 7
OmniOutliner for iPad User Interface Tour
Part I: Using the Document Editor
The document browser is the place to view, create, and manage your outlines.
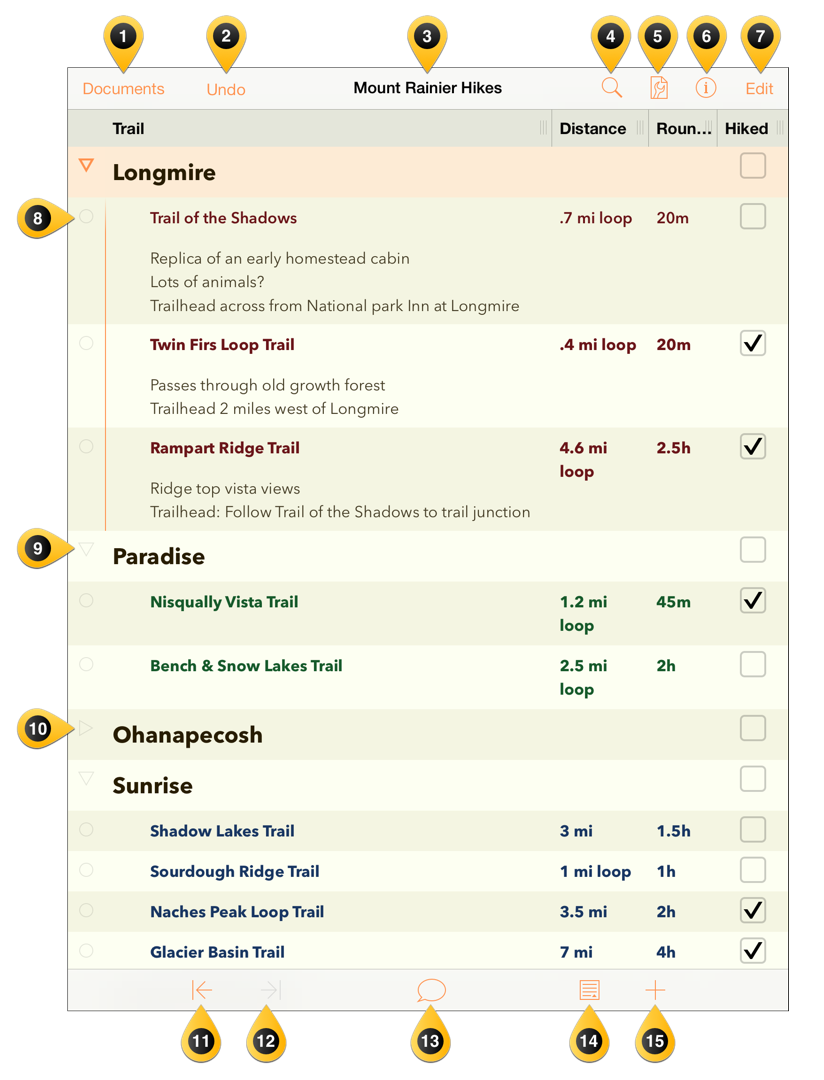
Documents — tap here to exit the current document and view other documents in the current folder.
Undo/Redo — tap to Undo the last change, or press and select Redo from the popup menu to replicate the previous task.
Document Title — tap here to change the name of the current Outliner document. New files are named My Outline by default, so be sure to change the title to something that’s specific to the project you’re working on.
Find — tap here to search within the current document. The search field is dynamic, which means that OmniOutliner starts to look for results as soon as you start typing. When you see the item you’re looking for, just tap it in the results and you’re taken to that location in your Outliner file.
Contents — tap here to add more depth to the contents of your document. Options include:
- Columns — Add and remove columns, configure its style properties, and specify the type of content that can go into the column (such as rich text or a checkbox for things you want to tick off).
- Styles — Apply a theme for your document, as well as for the individual rows and notes.
- Document — Set the zoom level, assign a background color, as well as set an optional color for alternating rows.
Tip
You’ll also find the Expand All and Collapse All buttons in Document settings. This comes in handy for big documents when you want to either see every fine detail or just the main rows.Text Style — select a row and tap here to set the text styles for that row. Tap Customize style to set the type size, specify the font and color of the text, add a background color, set a numbering style, change the alignment and more.
Edit — tap here to bring up the editing controls along the bottom of the screen. Tap a Row Handle to select the row, and then use the controls at the bottom of the screen to Cut, Copy, Delete, Group, or Move the items you’ve selected. When you’re finished, tap Done in the upper-right.

Row Handle — tap and hold on these to drag rows around in your outline. These come more into play when using the Edit features in OmniOutliner; when you tap a row in Edit mode, the empty circle fills to indicate that the row has been selected for some action. To deselect the row, tap it again.
Disclosure Triangle (Open) — items that are grouped together have a disclosure triangle as their Row Handle. A disclosure triangle is open when it points downward…
Disclosure Triangle (Closed) — …and a closed disclosure triangle points to the right; tap to open the row and see what’s hiding inside.
Outdent — tap to reduce the indent level of a selected row; Outdent isn’t available if a row is not indented.
Indent — tap to indent the row.
Record — tap to open the voice recorder and start recording. The Record button changes to an audio level indicator with a pause button on the left and a checkmark to the right. Tap Pause to stop recording and the circle fills with red to indicate that recording has stopped. Tap the Pause button again to continue recording, or tap the Checkmark button to finish and save the recording to a new row in your document.


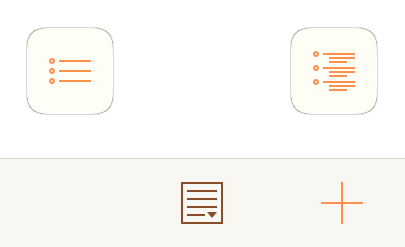
Notes — tap to add a note, if one doesn’t exist. If there is already a note attached to this particular row, a single tap to the Notes button will hide or show the existing note. If you touch and hold the Notes button, you’ll notice that two buttons fly out. The one on the left hides all Notes in your document, while the one on the right reveals all Notes.
- Add/Plus — tap here to create a new row directly beneath and at the same level as the current row and start entering some text. Similar to the Notes button, if you touch and hold the Add button, four additional buttons fly out:
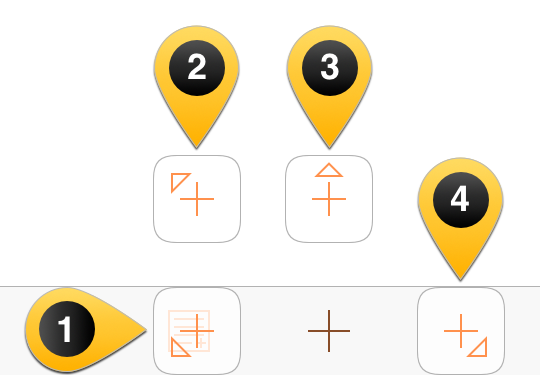
- Insert New Aunt Below — Inserts and outdents a new row at the next highest level. For example, if you select a Level 1 Row and tap this button, a new row appears at the bottom of your document. However, if you select a nested row (Level 2 or deeper), the new row is inserted beneath the current row, but at the next highest level.
- Create Parent — Inserts a new row at the current level, and converts the selected row into a Aunt element. The new row, an Aunt, gains a disclosure triangle in the left column, which you can tap to hide or show its children.
- Insert New Sibling Above — Inserts a new row above the selected row.
- Insert New Child Below — Inserts an indented row beneath the selected row to create a group.
Part II: Working with Documents and Templates
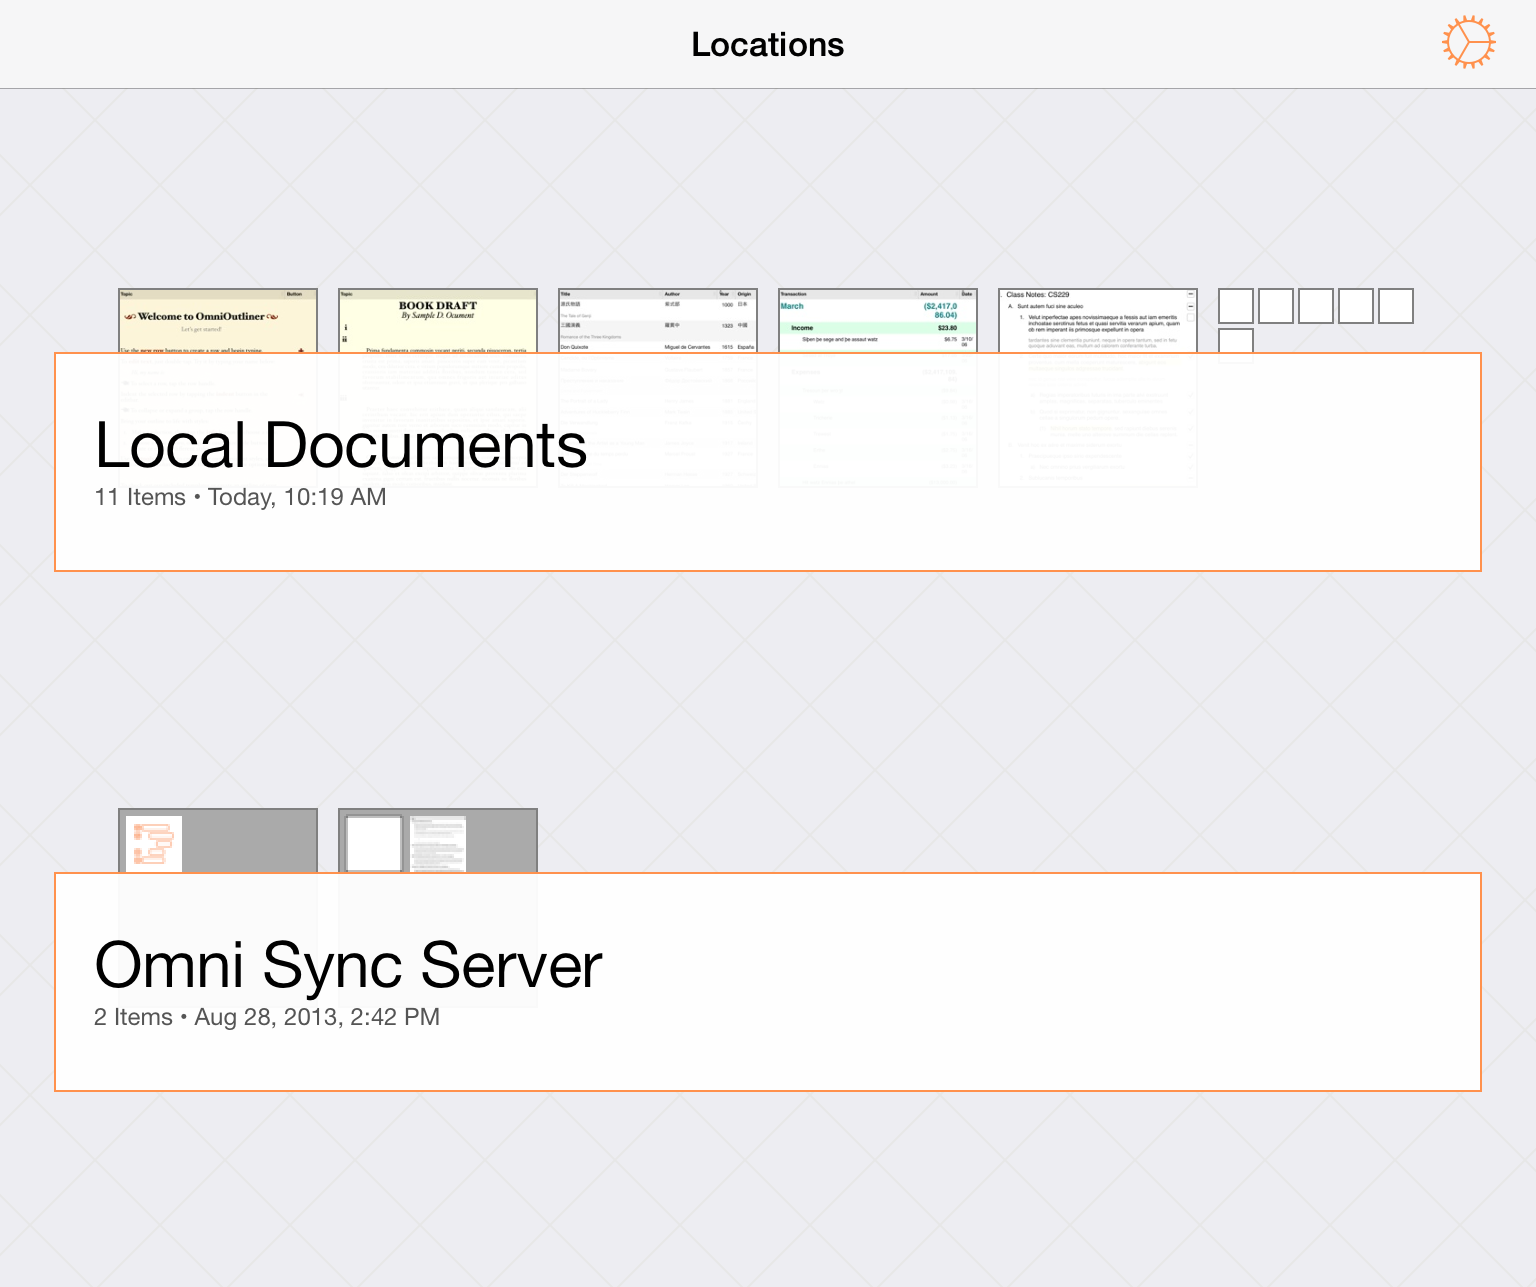
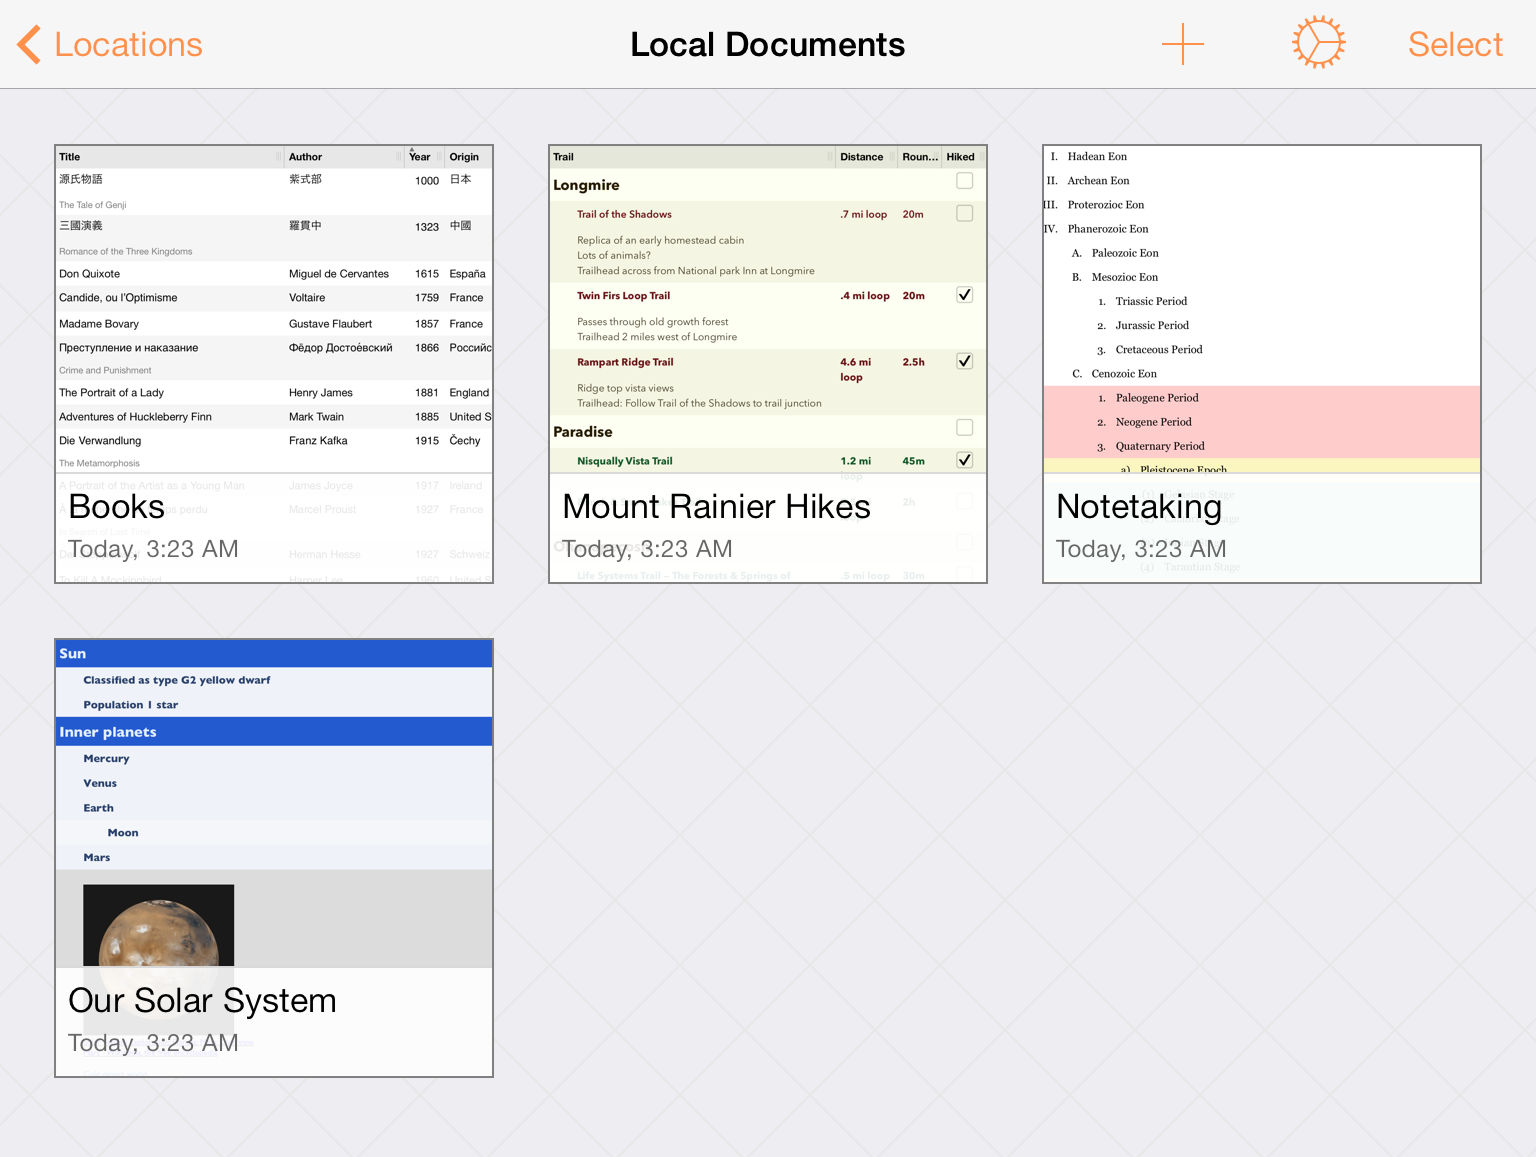
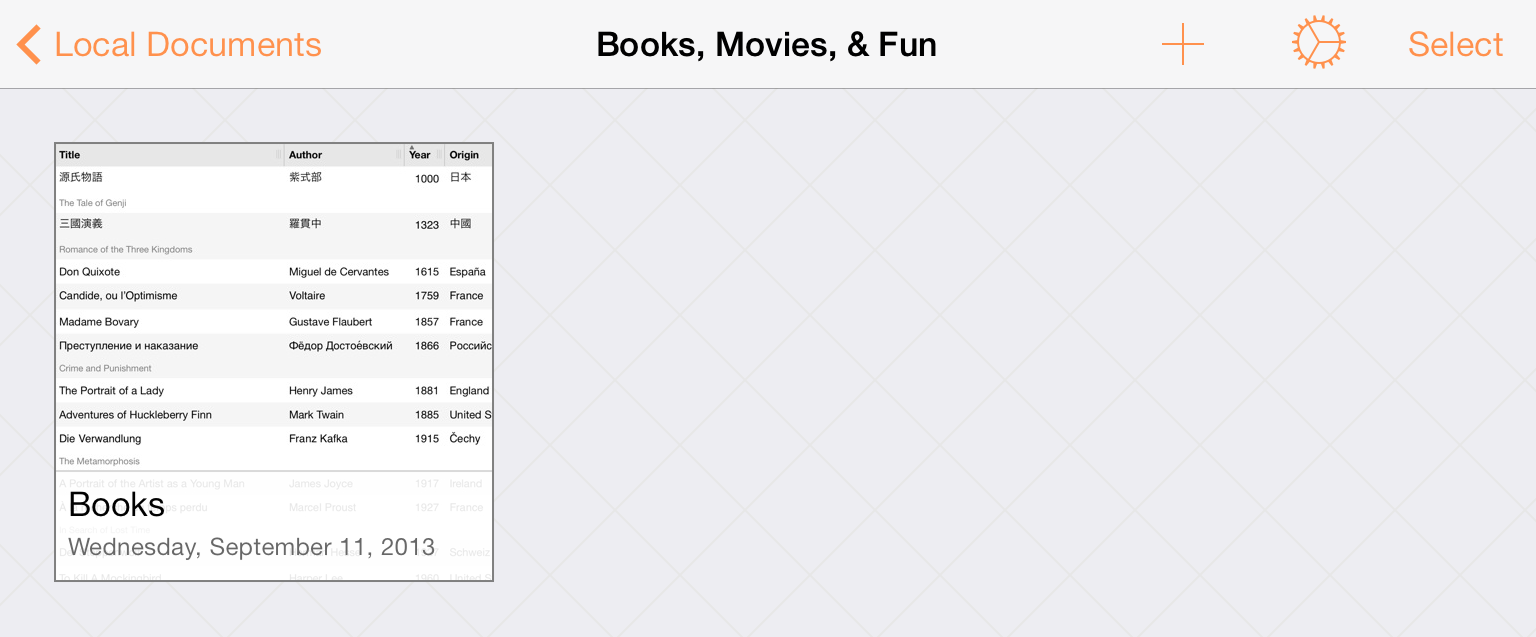
When you first open OmniOutliner, you’re taken to the Locations screen which is the place you go to access all of your documents. There is a Local Documents folder, which we’ve preloaded with some sample OmniOutliner files that you can use as inspiration for the documents you’ll create.
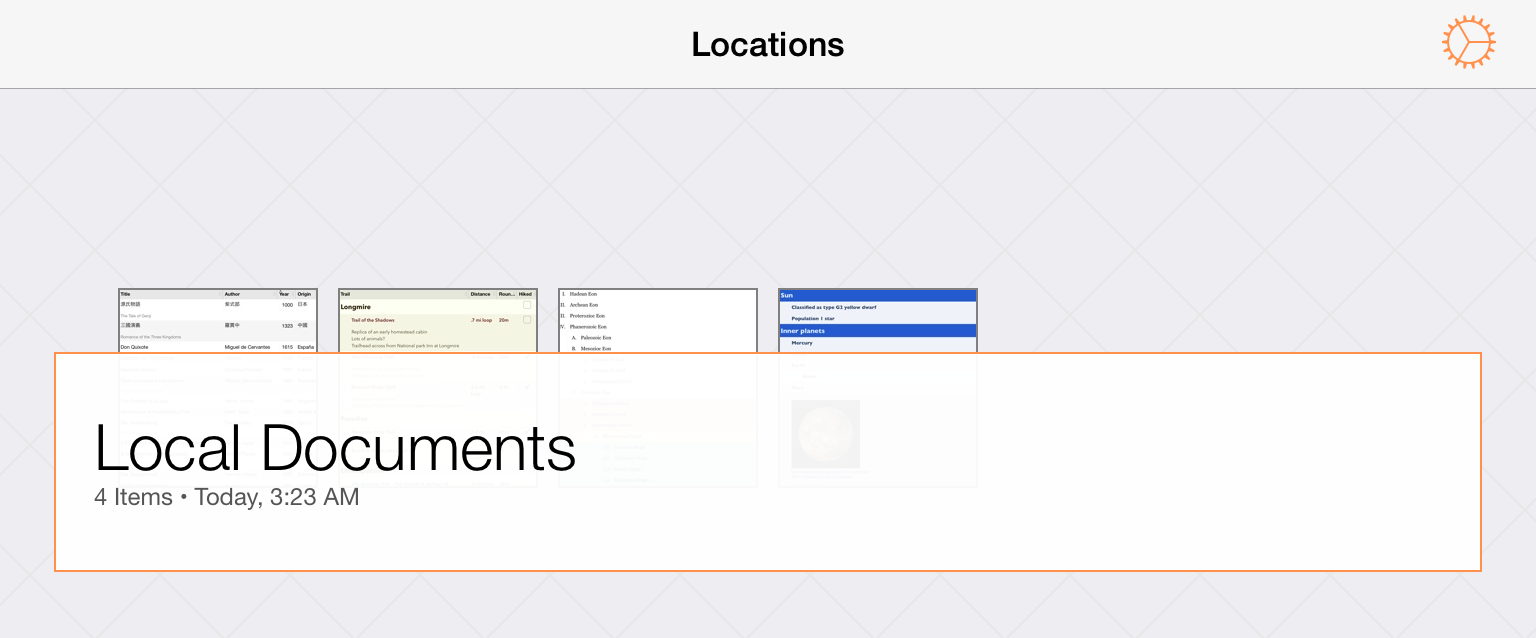
Tap the Local Documents folder to see what’s inside:
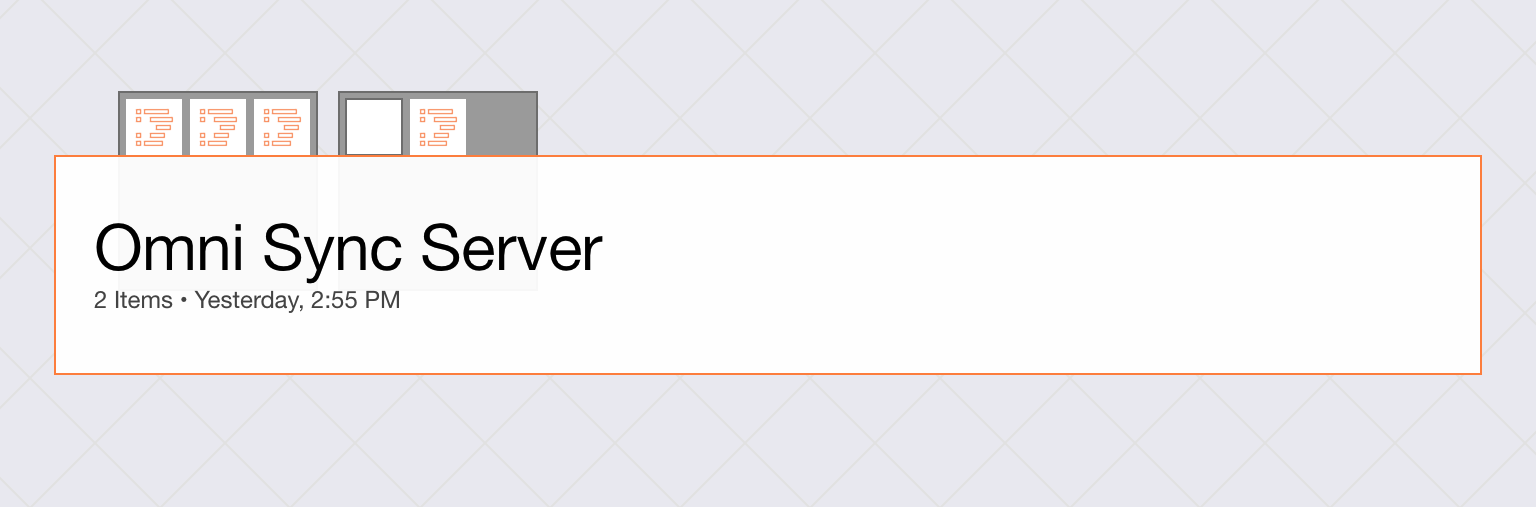
When you configure a Cloud Account, such as a free Omni Sync Server account (or connect to any WebDAV service you’re subscribed to), you’ll also see a folder on the Locations screen for any compatible file sharing servers to which you’ve connected OmniOutliner.
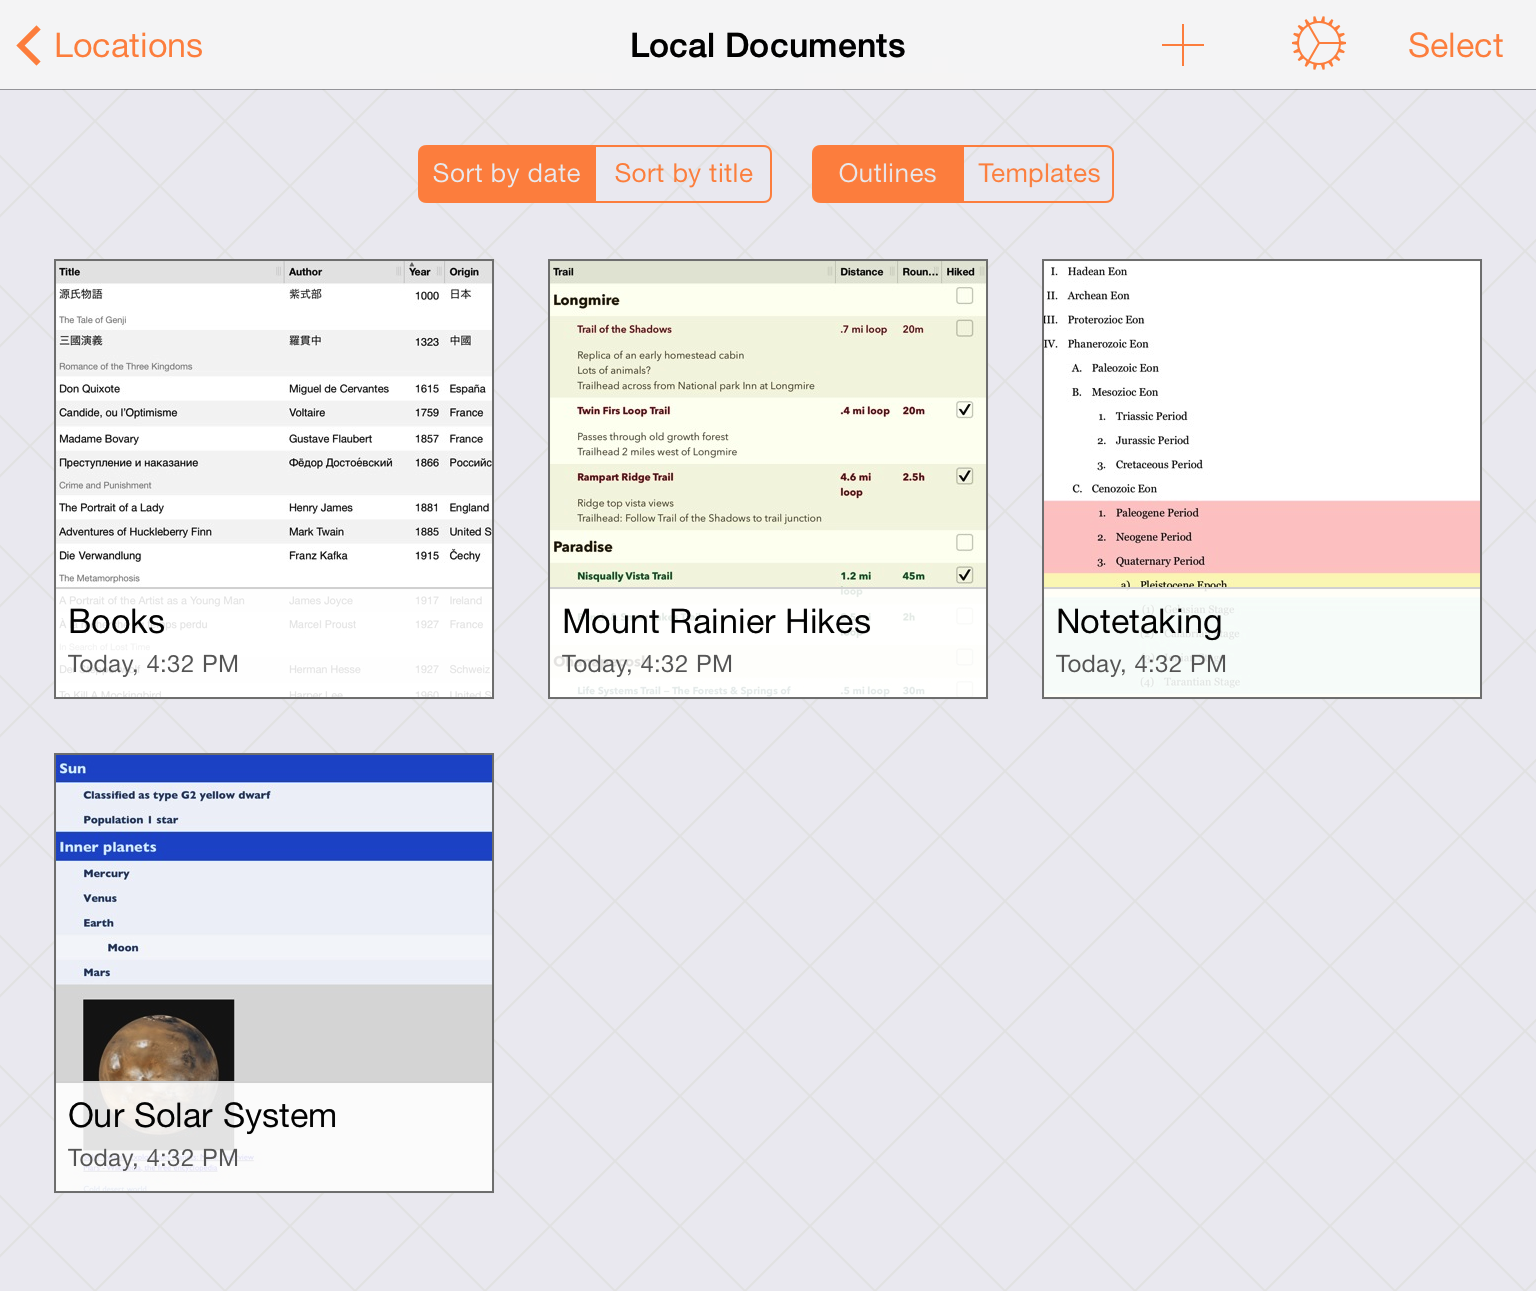
If you pull down while viewing the contents of a folder, you’ll discover the super secret Document Organizer. By default, OmniOutliner sorts your files by the date created and displays any Outline documents in that folder. You can opt to sort by Title instead, or view the available Templates as well.
To help you better organize your files, can also move files to other folders or create subfolders that contain similar documents. Tap Select, and then choose the file (or files) you would like to move. Tap the folder icon (Move) in the navigation bar to move a file to another folder, or to create a new subfolder containing the selected files.
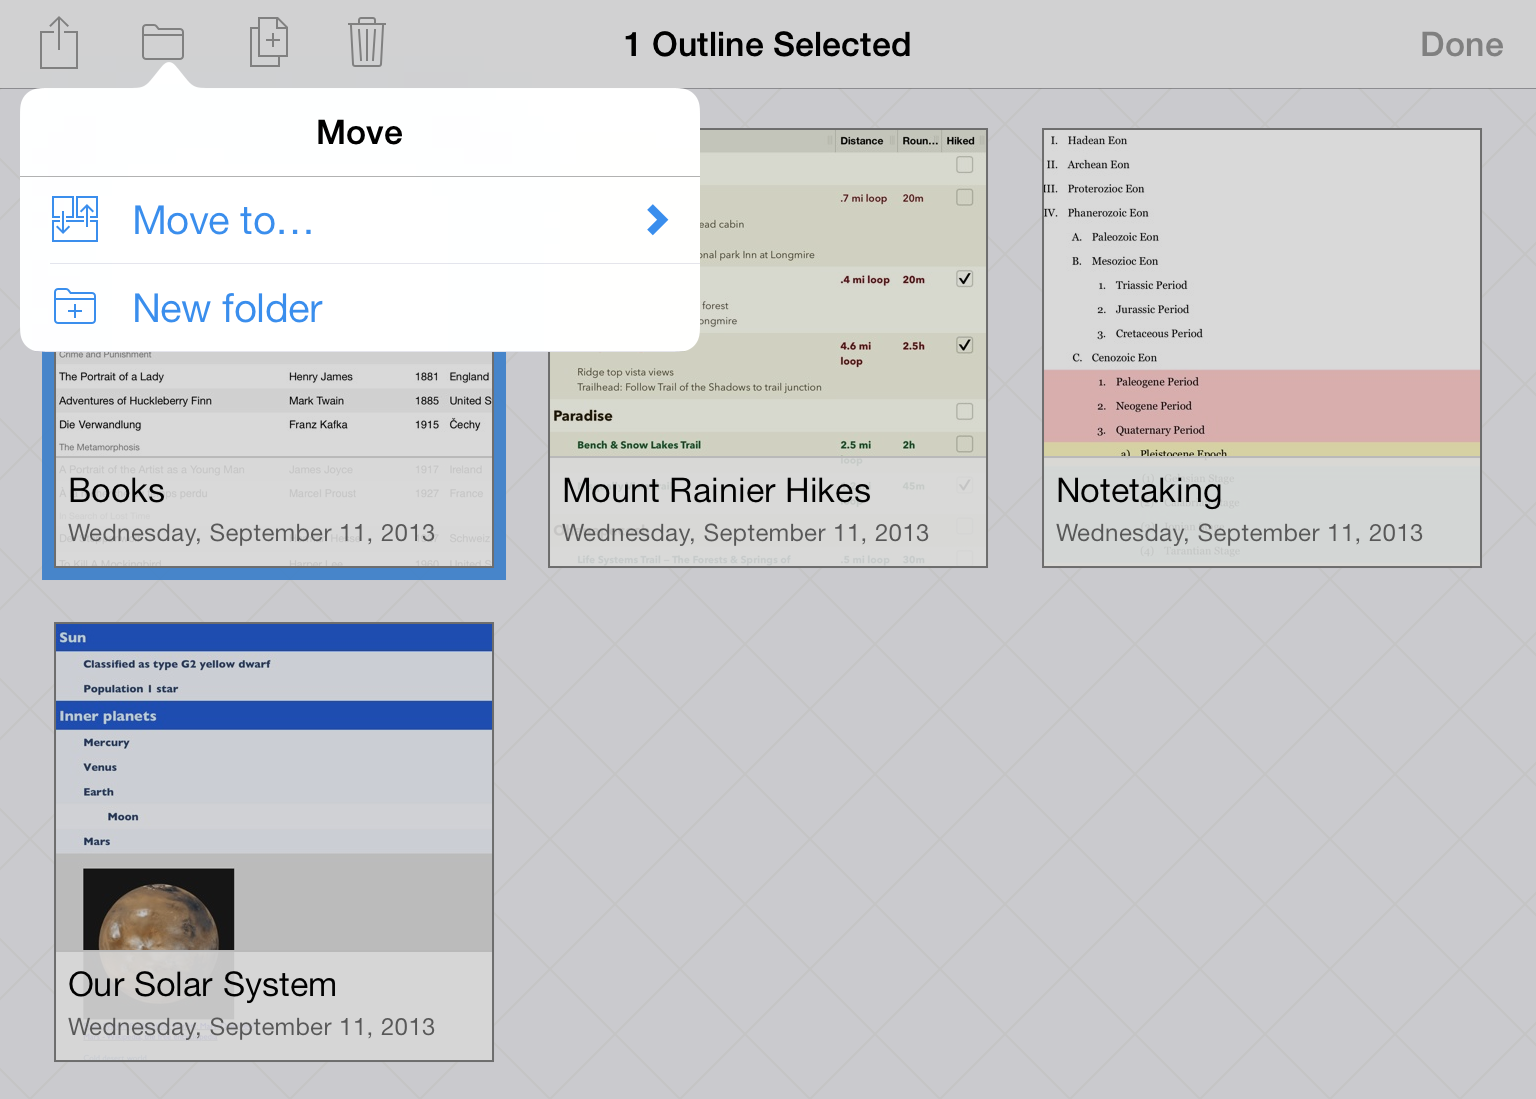
Tap New Folder to create a new folder containing the selected file. The file is moved out of the current folder into a new Untitled subfolder. Enter a new name for the folder and tap Done.
Subfolders have a dark gray background and show mini icons for the files contained within. To open a file within a subfolder, tap the folder to open it, and then tap the file.
Note
If you move all of the files out of a subfolder, that subfolder disappears automatically.
To create a new document, go to the Locations screen, select the folder in which you’d like to store the file, and then tap the Add button (the + sign) in the navigation bar.
See Using the Document Editor for more details on the document editor itself, or work through the Create a New Document tutorial.
Part III: Sending, Sharing, and Creating Templates from Documents
Every now and then you’ll find the need to share some document you’ve created in OmniOutliner with someone else. But all of the files are on your iPad, how are you going to do this?
When you open a folder, such as your Local Documents folder, tap Select in the navigation bar, and then select the file (or files) that you want to share. This places a blue highlight around the file to let you know which files you’ve selected to do something with.
Now tap the Actions button in the navigation bar and select from one of the following options:
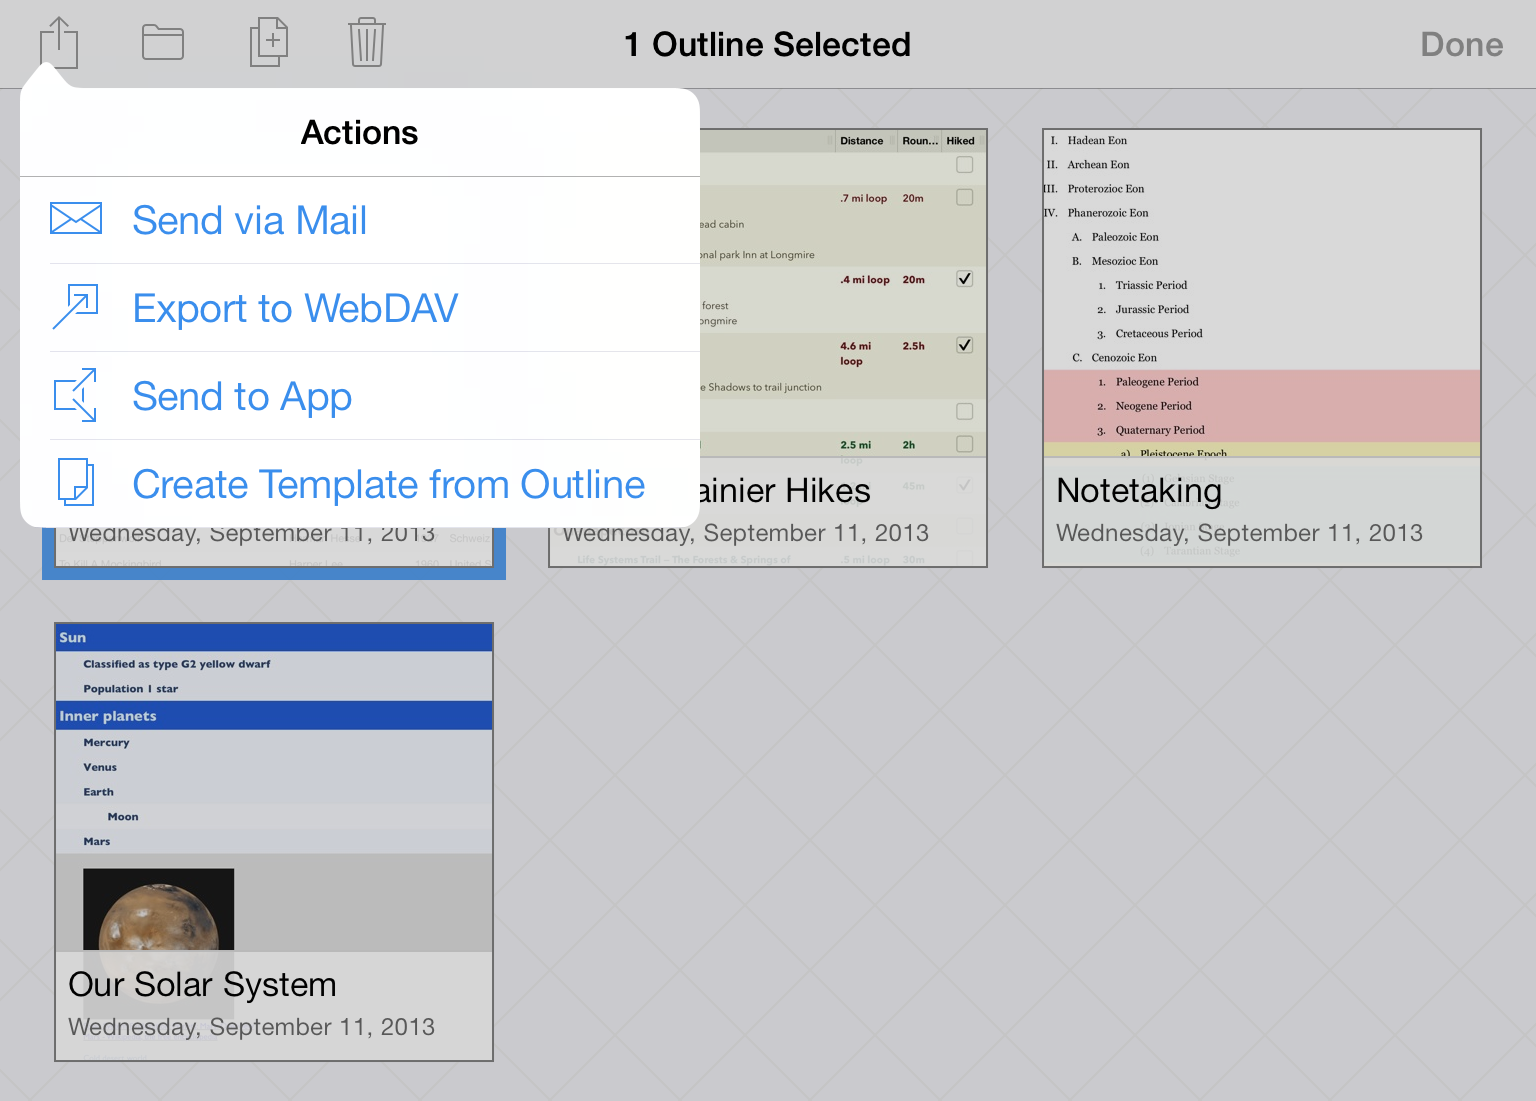
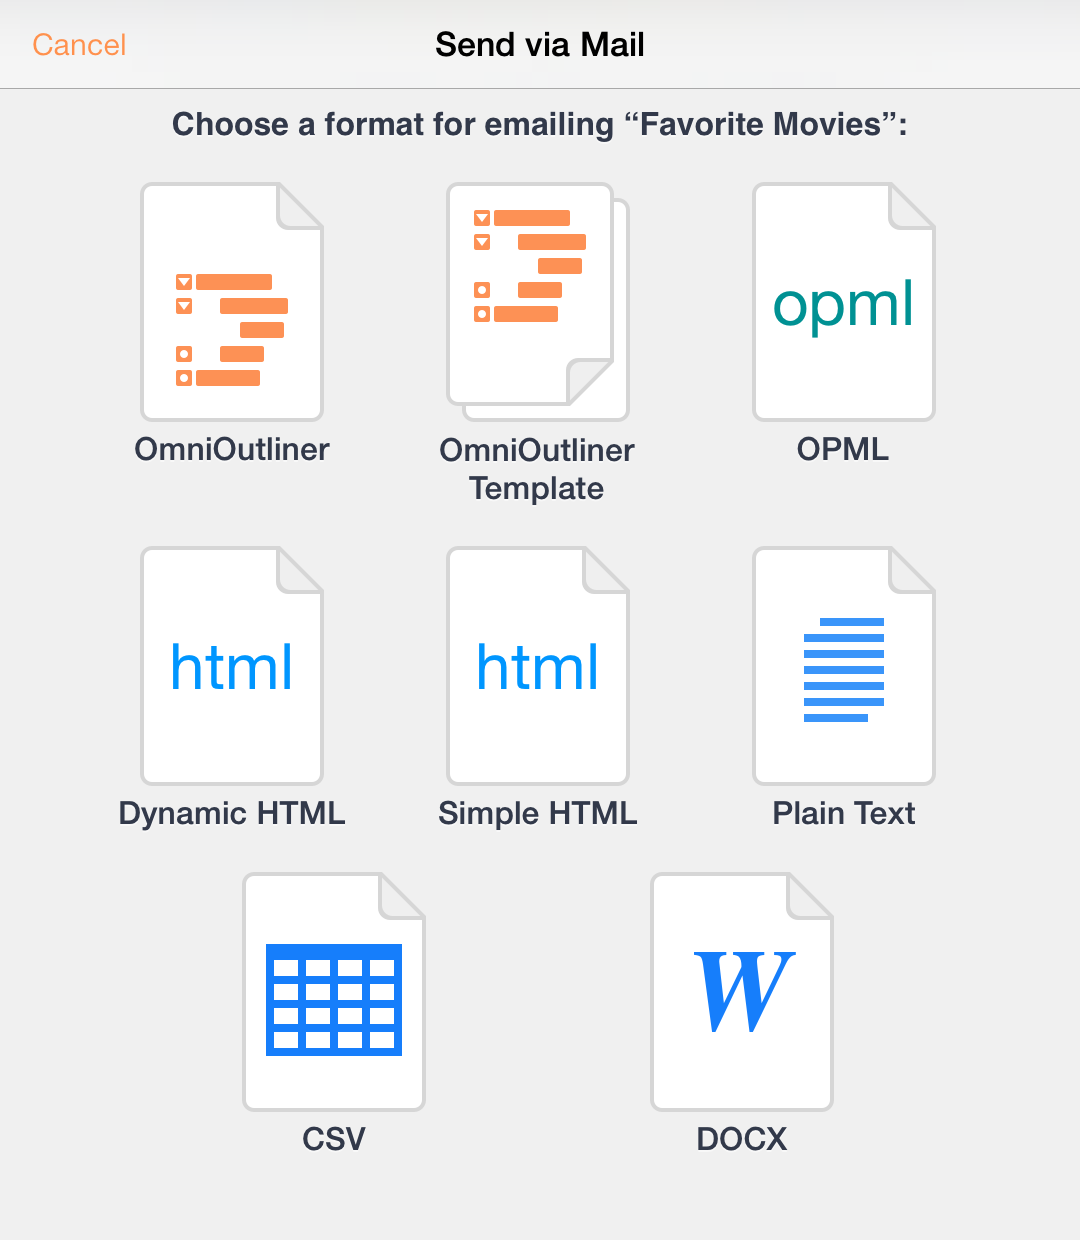
Send via Mail — lets you choose a document format for the file you want to email, and then queues up an email message for your to send.
Export to WebDAV — lets you move the file over to a WebDAV share. If you haven’t already configured a WebDAV Cloud Account, you’ll need to do that before you can export the file.
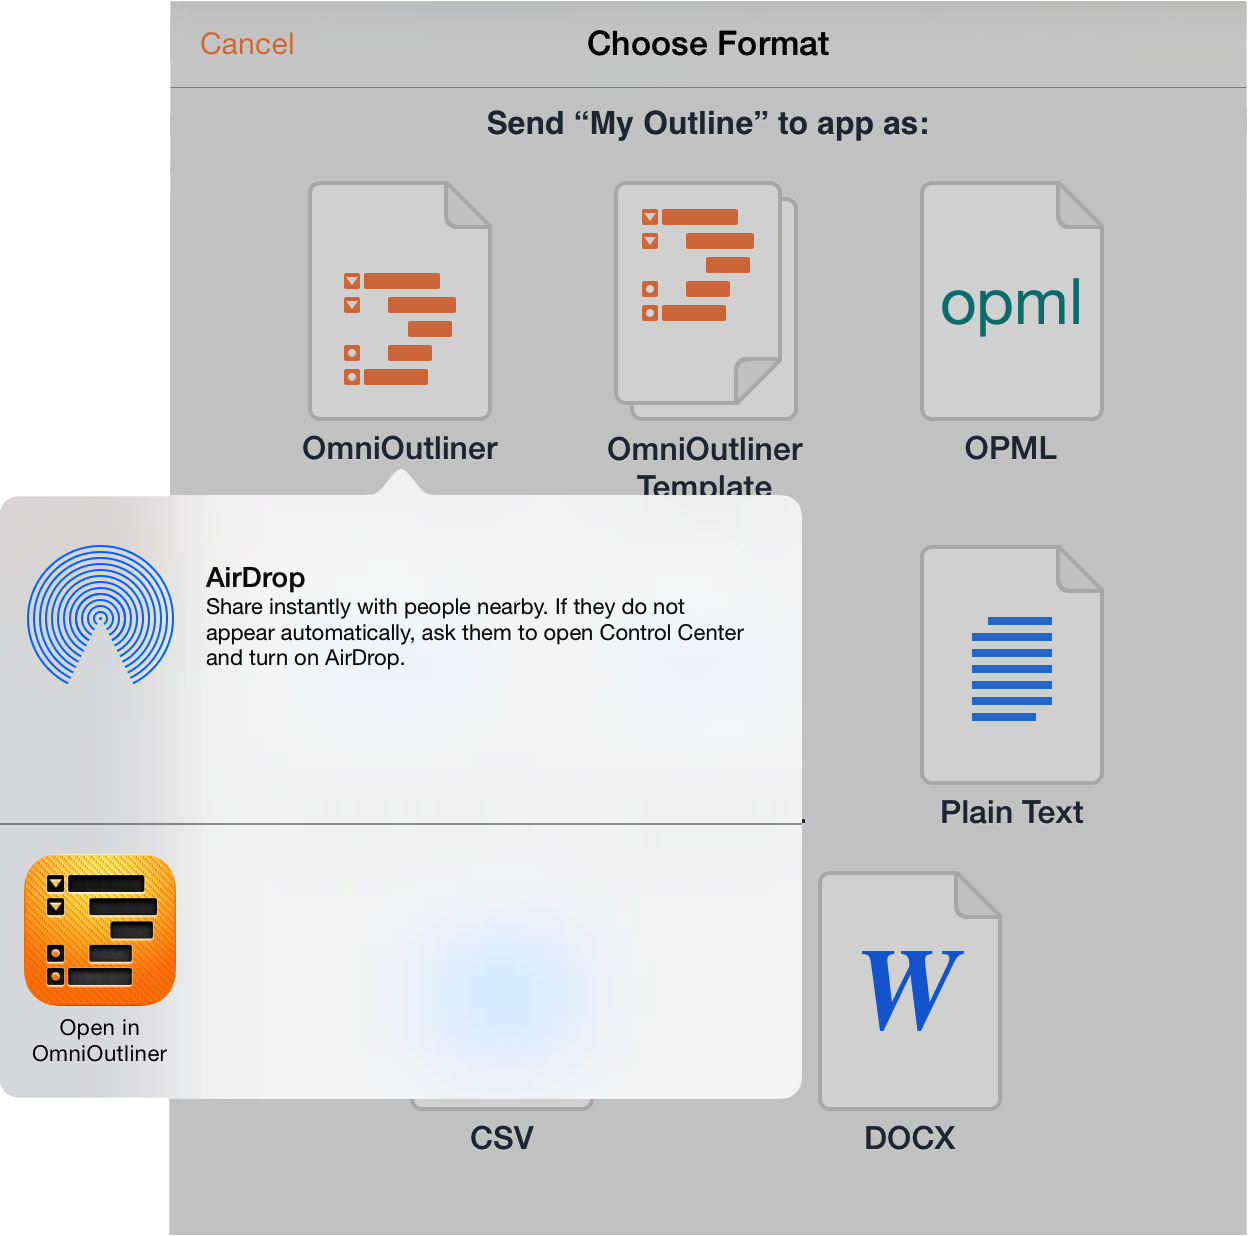
Send to App — lets you open the file in a compatible app on your iPad, or, if you are on a Wi-Fi network with someone you know, you can share the file with another iOS 7 device using AirDrop.
Create Template from Outline — turns the selected document into a template, which you can later use as the basis for a new document. All of the content—as well as any styles, images, or media you’ve added—remains in the template file; you’ll just need to enter new content over what’s there.
Part IV: Taking Out the Trash
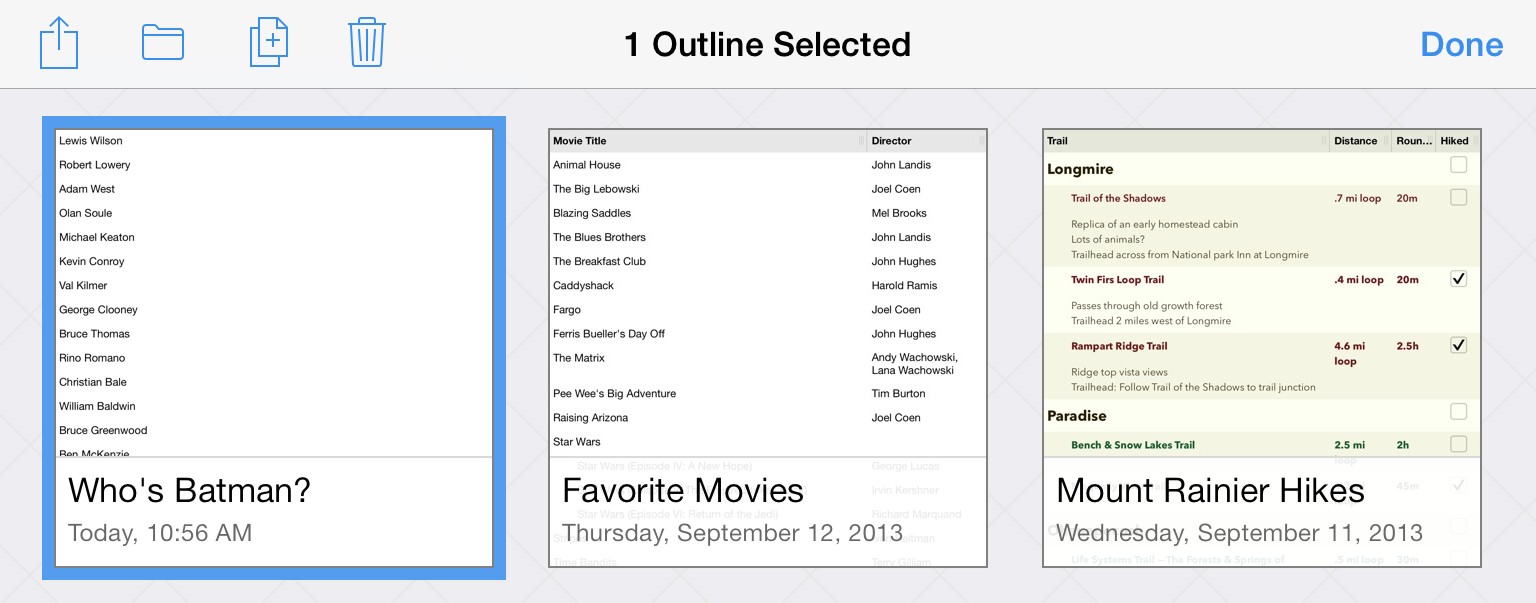
Every now and then, you’ll find that it’s time to do a little housecleaning in OmniOutliner. That list of actors who’ve played Batman is no longer relevant, so it’s time to dump that document into the trash and purge it from your iPad (or from your synced Cloud Account, if you have one of those configured) forever.
Fortunately, deleting files from OmniOutliner is just as easy as it is to find someone to play Batman. When viewing a folder of documents, tap Select in the navigation bar at the top of the screen. Then tap on the document you’d like to delete; you’ll see that the file now has a blue highlight around it.
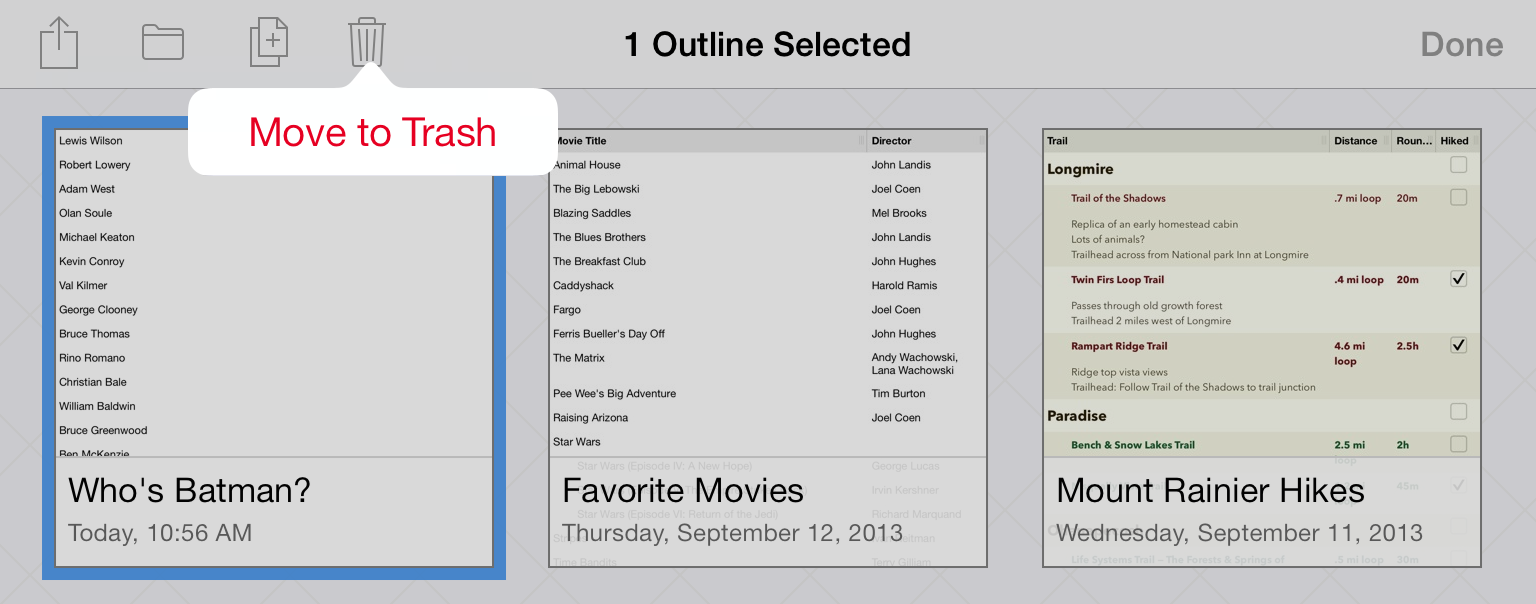
Tap the Trashcan in the navigation bar to move the document to the Trash.
If you tap Locations in the navigation bar, you’ll see a Trash folder in your list of OmniOutliner folders. Right now, the file is still on your iPad.

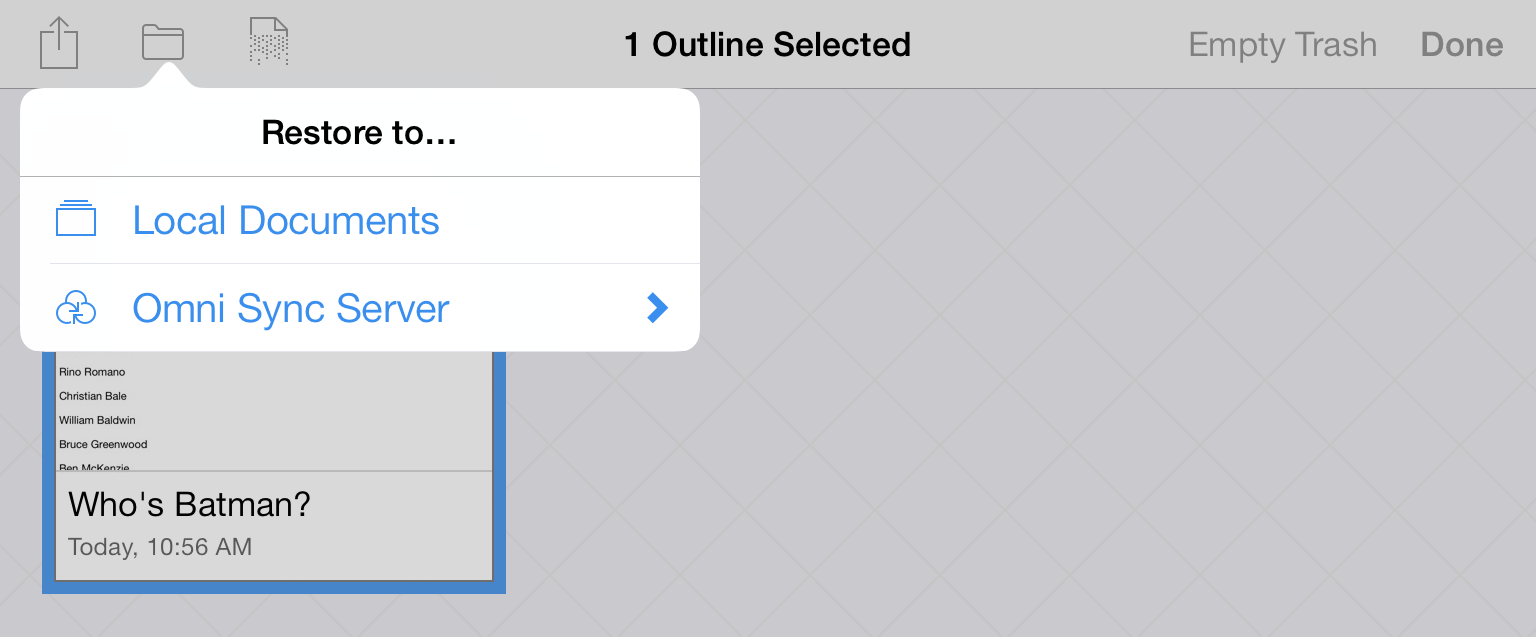
If you open the Trash folder and then either tap the Restore button in the navigation bar or tap on the file, you’ll get a popup menu with options to restore the file to your Local Documents folder or, if you have set up a Cloud Account, to a synced file share.
Finally, if you really are sure that you no longer need this file, you can either tap the Shredder icon to delete the file, or tap Empty Trash.
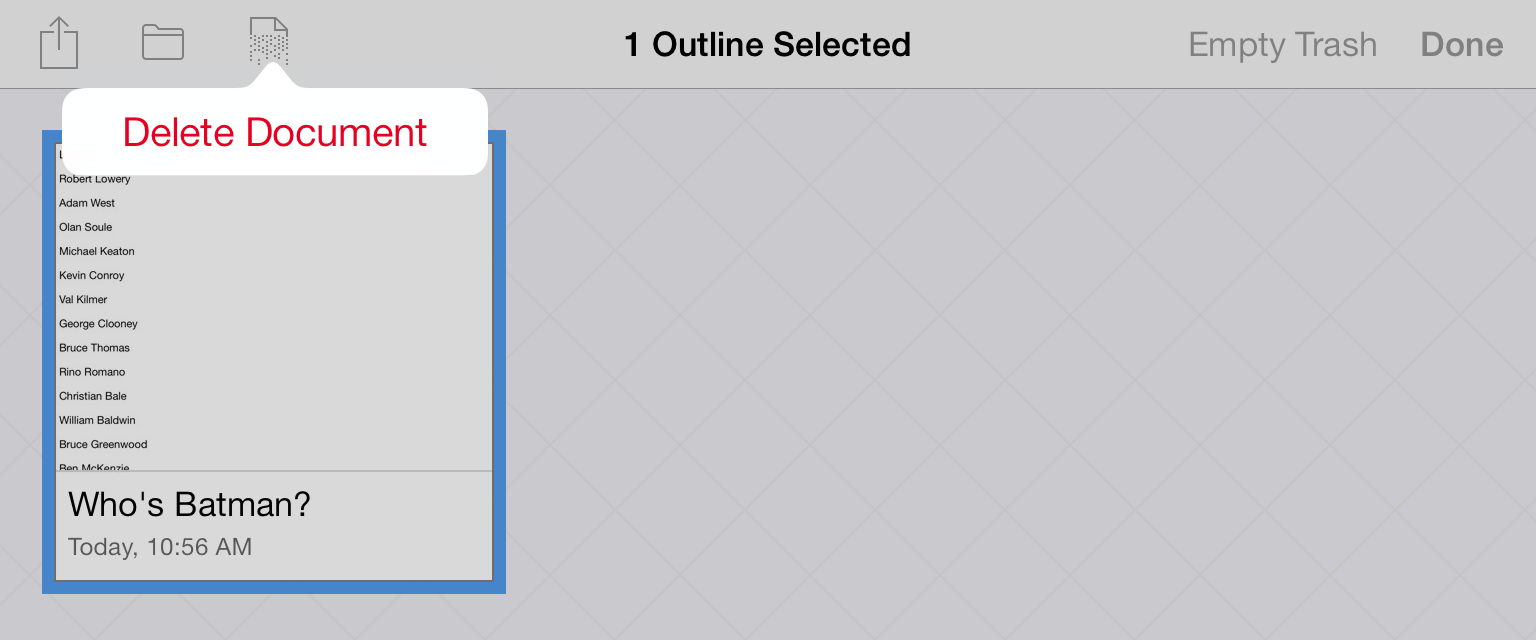
The difference here is that tapping the Shredder icon only deletes selected files whereas tapping Empty Trash will delete everything in the Trash folder, regardless of whether any files have been selected.