OmniOutliner for iPad User Interface Tour
Part I: Using the Document Editor
The document browser is the place to view, create, and manage your outlines.
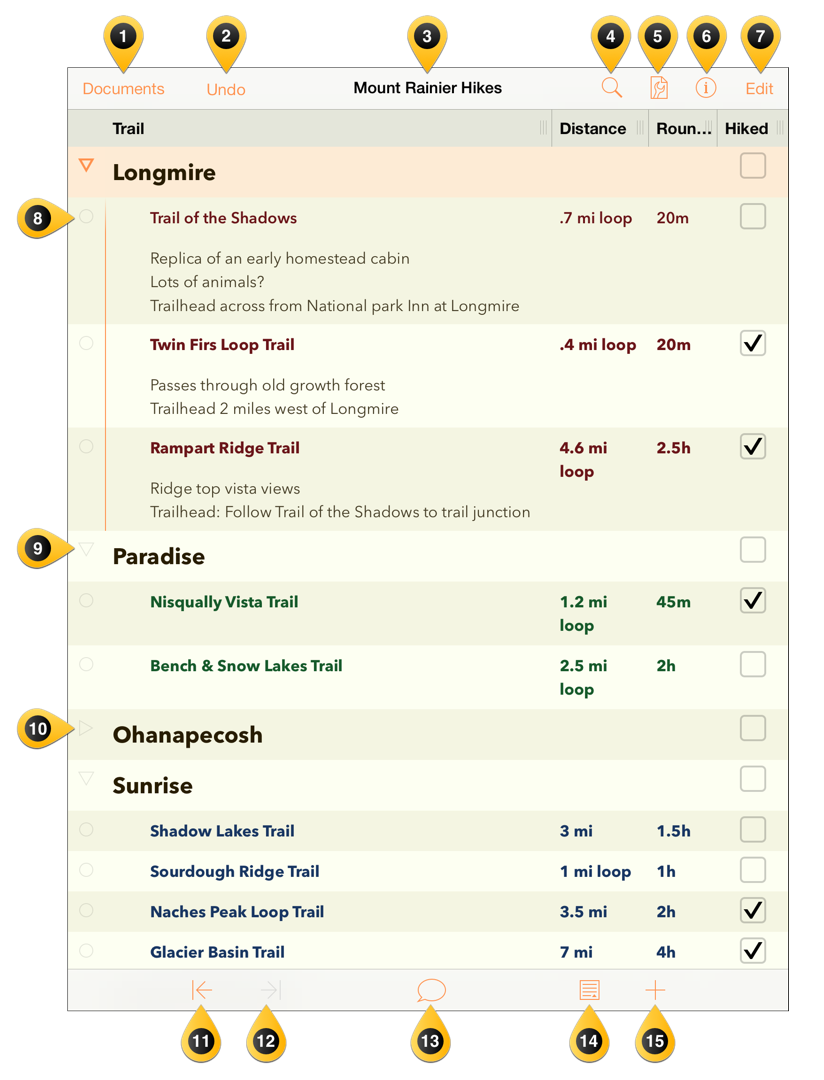
Documents — tap here to exit the current document and view other documents in the current folder.
Undo/Redo — tap to Undo the last change, or press and select Redo from the popup menu to replicate the previous task.
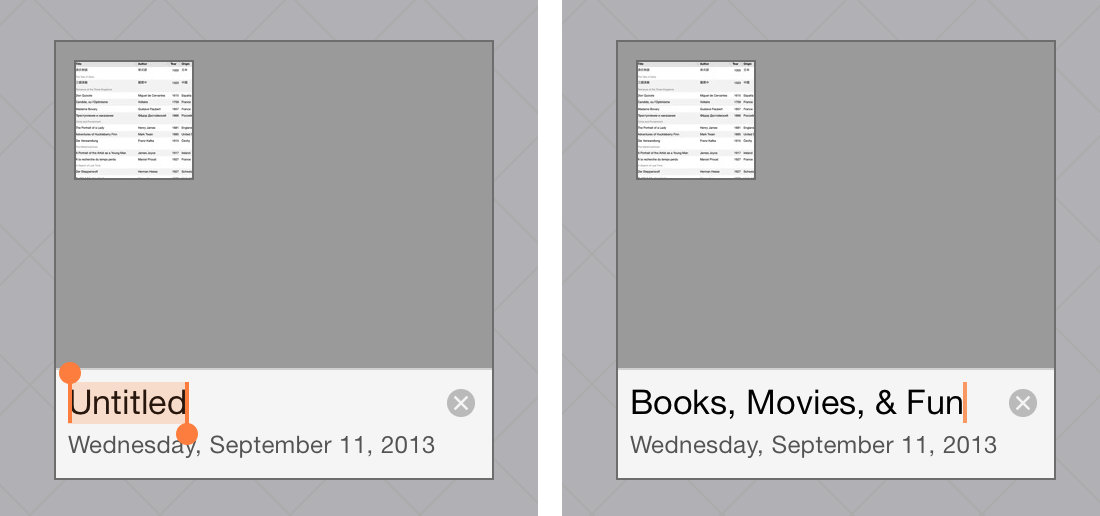
Document Title — tap here to change the name of the current Outliner document. New files are named My Outline by default, so be sure to change the title to something that’s specific to the project you’re working on.
Find — tap here to search within the current document. The search field is dynamic, which means that OmniOutliner starts to look for results as soon as you start typing. When you see the item you’re looking for, just tap it in the results and you’re taken to that location in your Outliner file.
Contents — tap here to add more depth to the contents of your document. Options include:
- Columns — Add and remove columns, configure its style properties, and specify the type of content that can go into the column (such as rich text or a checkbox for things you want to tick off).
- Styles — Apply a theme for your document, as well as for the individual rows and notes.
- Document — Set the zoom level, assign a background color, as well as set an optional color for alternating rows.
Tip
You’ll also find the Expand All and Collapse All buttons in Document settings. This comes in handy for big documents when you want to either see every fine detail or just the main rows.Text Style — select a row and tap here to set the text styles for that row. Tap Customize style to set the type size, specify the font and color of the text, add a background color, set a numbering style, change the alignment and more.
Edit — tap here to bring up the editing controls along the bottom of the screen. Tap a Row Handle to select the row, and then use the controls at the bottom of the screen to Cut, Copy, Delete, Group, or Move the items you’ve selected. When you’re finished, tap Done in the upper-right.

Row Handle — tap and hold on these to drag rows around in your outline. These come more into play when using the Edit features in OmniOutliner; when you tap a row in Edit mode, the empty circle fills to indicate that the row has been selected for some action. To deselect the row, tap it again.
Disclosure Triangle (Open) — items that are grouped together have a disclosure triangle as their Row Handle. A disclosure triangle is open when it points downward…
Disclosure Triangle (Closed) — …and a closed disclosure triangle points to the right; tap to open the row and see what’s hiding inside.
Outdent — tap to reduce the indent level of a selected row; Outdent isn’t available if a row is not indented.
Indent — tap to indent the row.
Record — tap to open the voice recorder and start recording. The Record button changes to an audio level indicator with a pause button on the left and a checkmark to the right. Tap Pause to stop recording and the circle fills with red to indicate that recording has stopped. Tap the Pause button again to continue recording, or tap the Checkmark button to finish and save the recording to a new row in your document.


Notes — tap to add a note, if one doesn’t exist. If there is already a note attached to this particular row, a single tap to the Notes button will hide or show the existing note. If you touch and hold the Notes button, you’ll notice that two buttons fly out. The one on the left hides all Notes in your document, while the one on the right reveals all Notes.
- Add/Plus — tap here to create a new row directly beneath and at the same level as the current row and start entering some text. Similar to the Notes button, if you touch and hold the Add button, four additional buttons fly out:
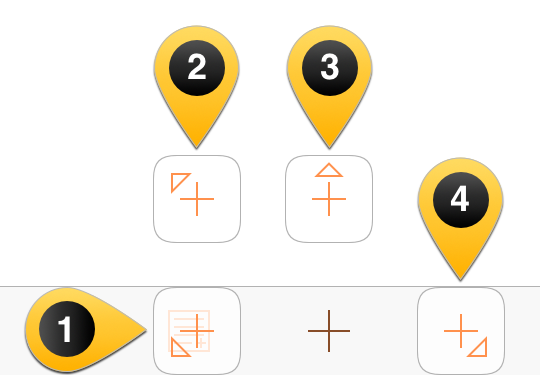
- Insert New Aunt Below — Inserts and outdents a new row at the next highest level. For example, if you select a Level 1 Row and tap this button, a new row appears at the bottom of your document. However, if you select a nested row (Level 2 or deeper), the new row is inserted beneath the current row, but at the next highest level.
- Create Parent — Inserts a new row at the current level, and converts the selected row into a Aunt element. The new row, an Aunt, gains a disclosure triangle in the left column, which you can tap to hide or show its children.
- Insert New Sibling Above — Inserts a new row above the selected row.
- Insert New Child Below — Inserts an indented row beneath the selected row to create a group.
Part II: Working with Documents and Templates
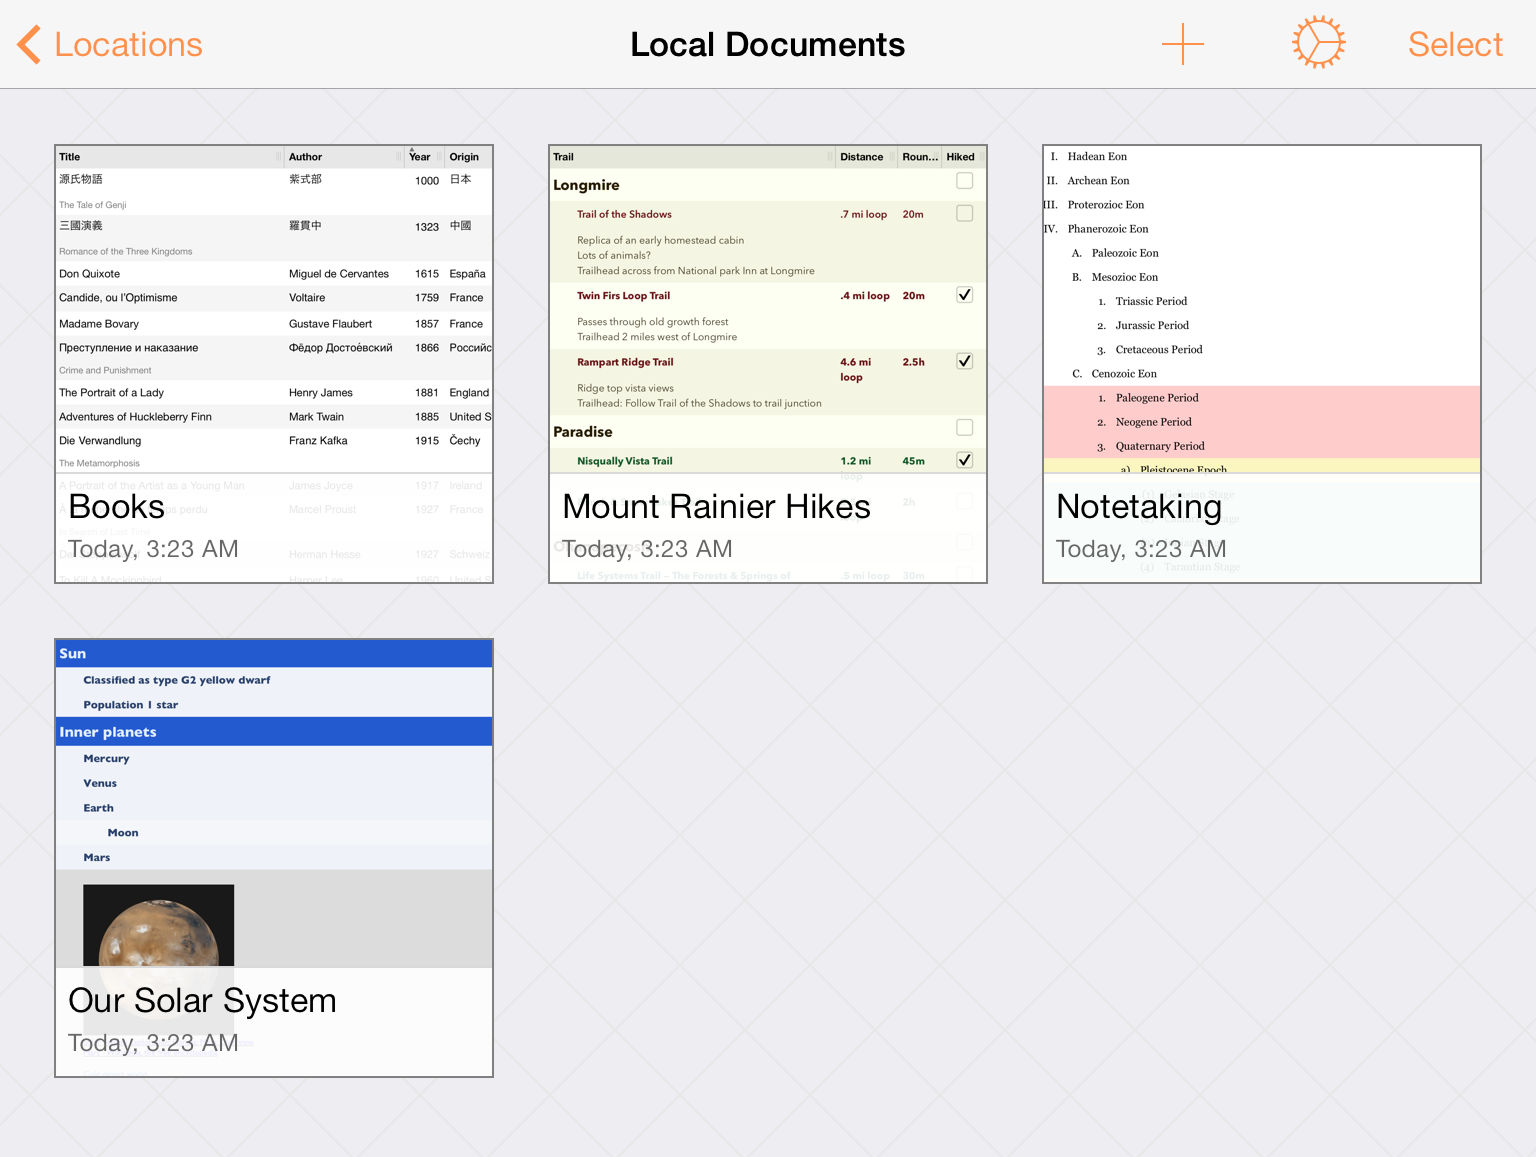
When you first open OmniOutliner, you’re taken to the Locations screen which is the place you go to access all of your documents. There is a Local Documents folder, which we’ve preloaded with some sample OmniOutliner files that you can use as inspiration for the documents you’ll create.
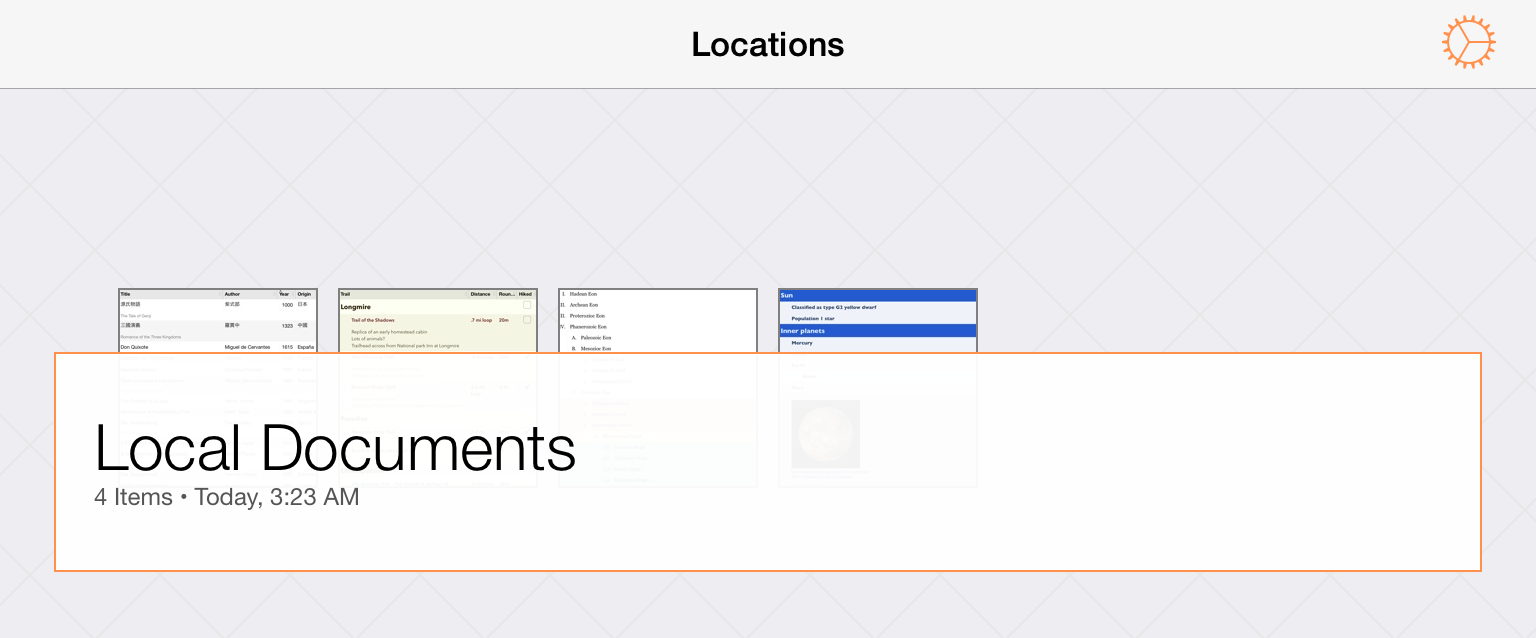
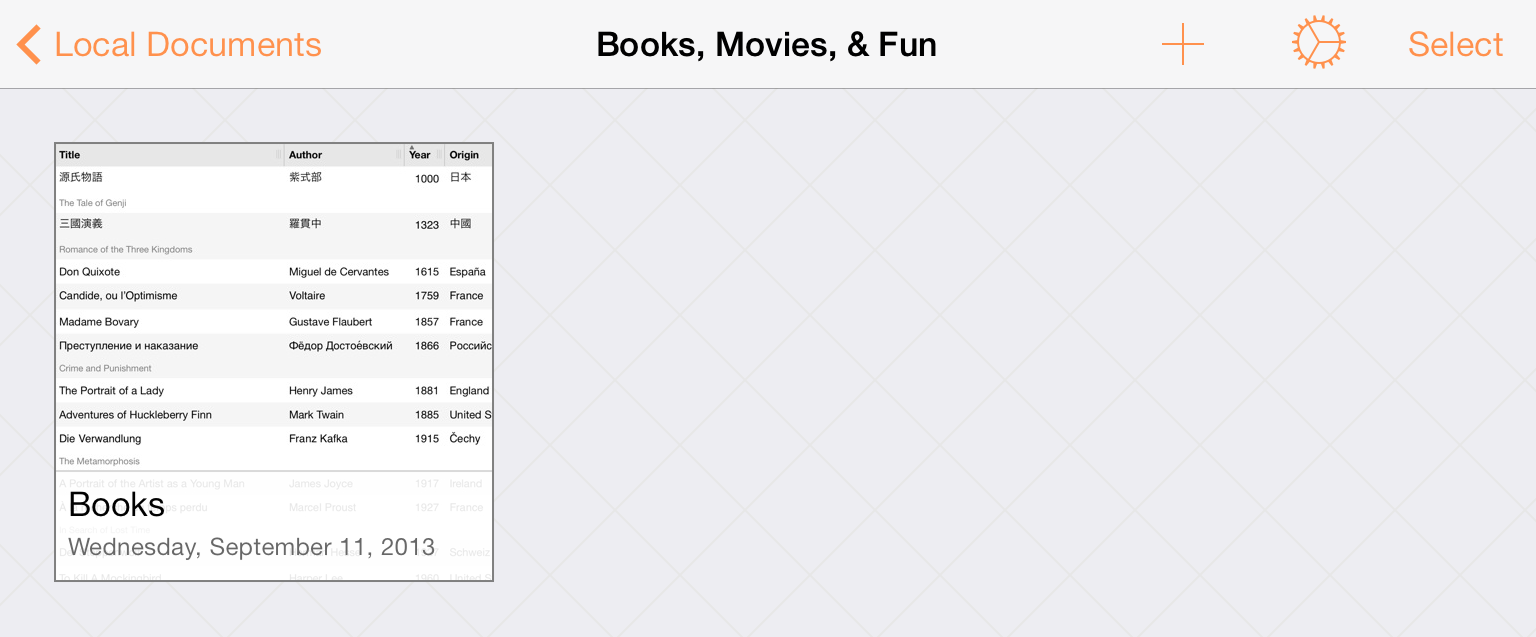
Tap the Local Documents folder to see what’s inside:
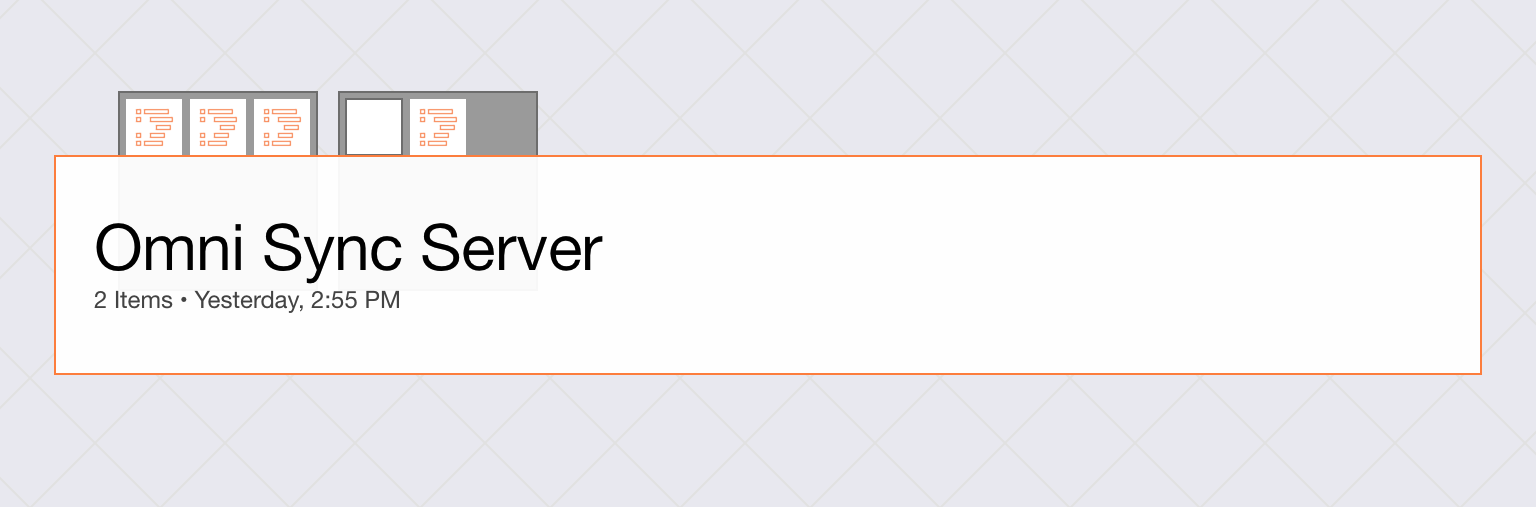
When you configure a Cloud Account, such as a free Omni Sync Server account (or connect to any WebDAV service you’re subscribed to), you’ll also see a folder on the Locations screen for any compatible file sharing servers to which you’ve connected OmniOutliner.
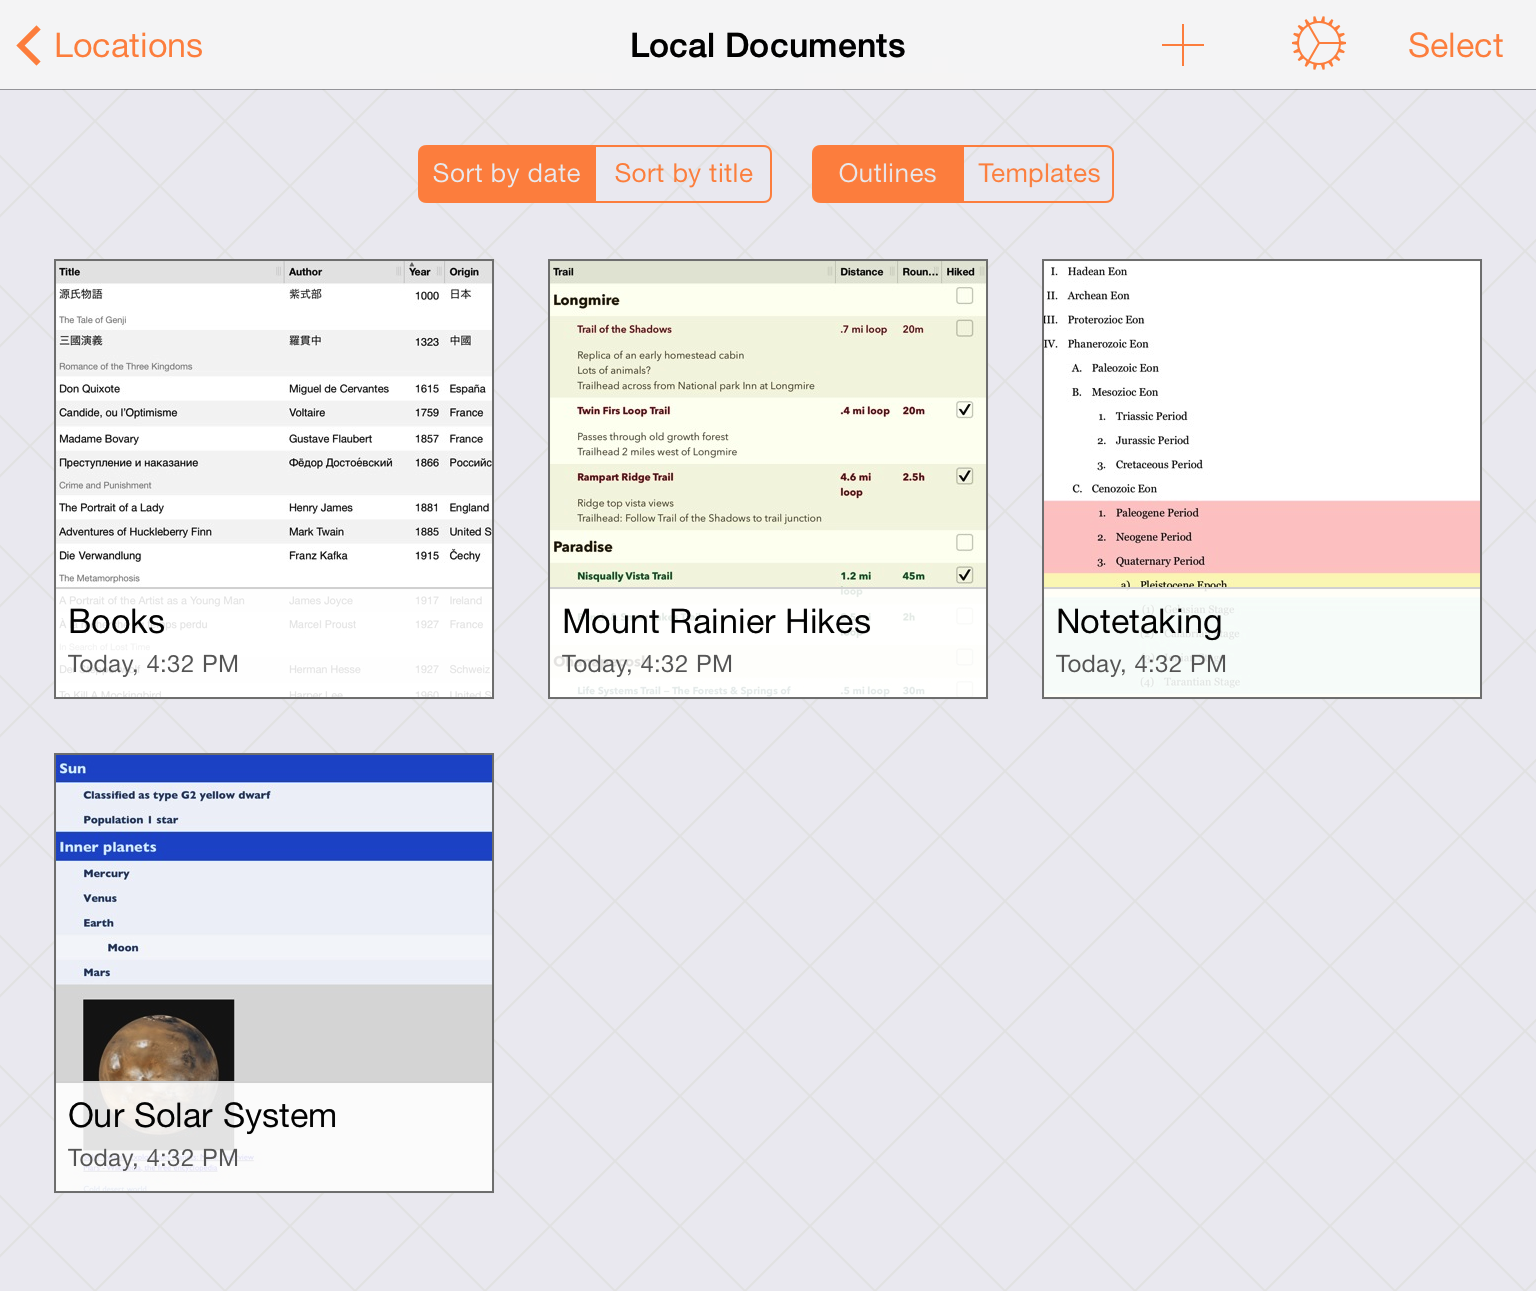
If you pull down while viewing the contents of a folder, you’ll discover the super secret Document Organizer. By default, OmniOutliner sorts your files by the date created and displays any Outline documents in that folder. You can opt to sort by Title instead, or view the available Templates as well.
To help you better organize your files, can also move files to other folders or create subfolders that contain similar documents. Tap Select, and then choose the file (or files) you would like to move. Tap the folder icon (Move) in the navigation bar to move a file to another folder, or to create a new subfolder containing the selected files.
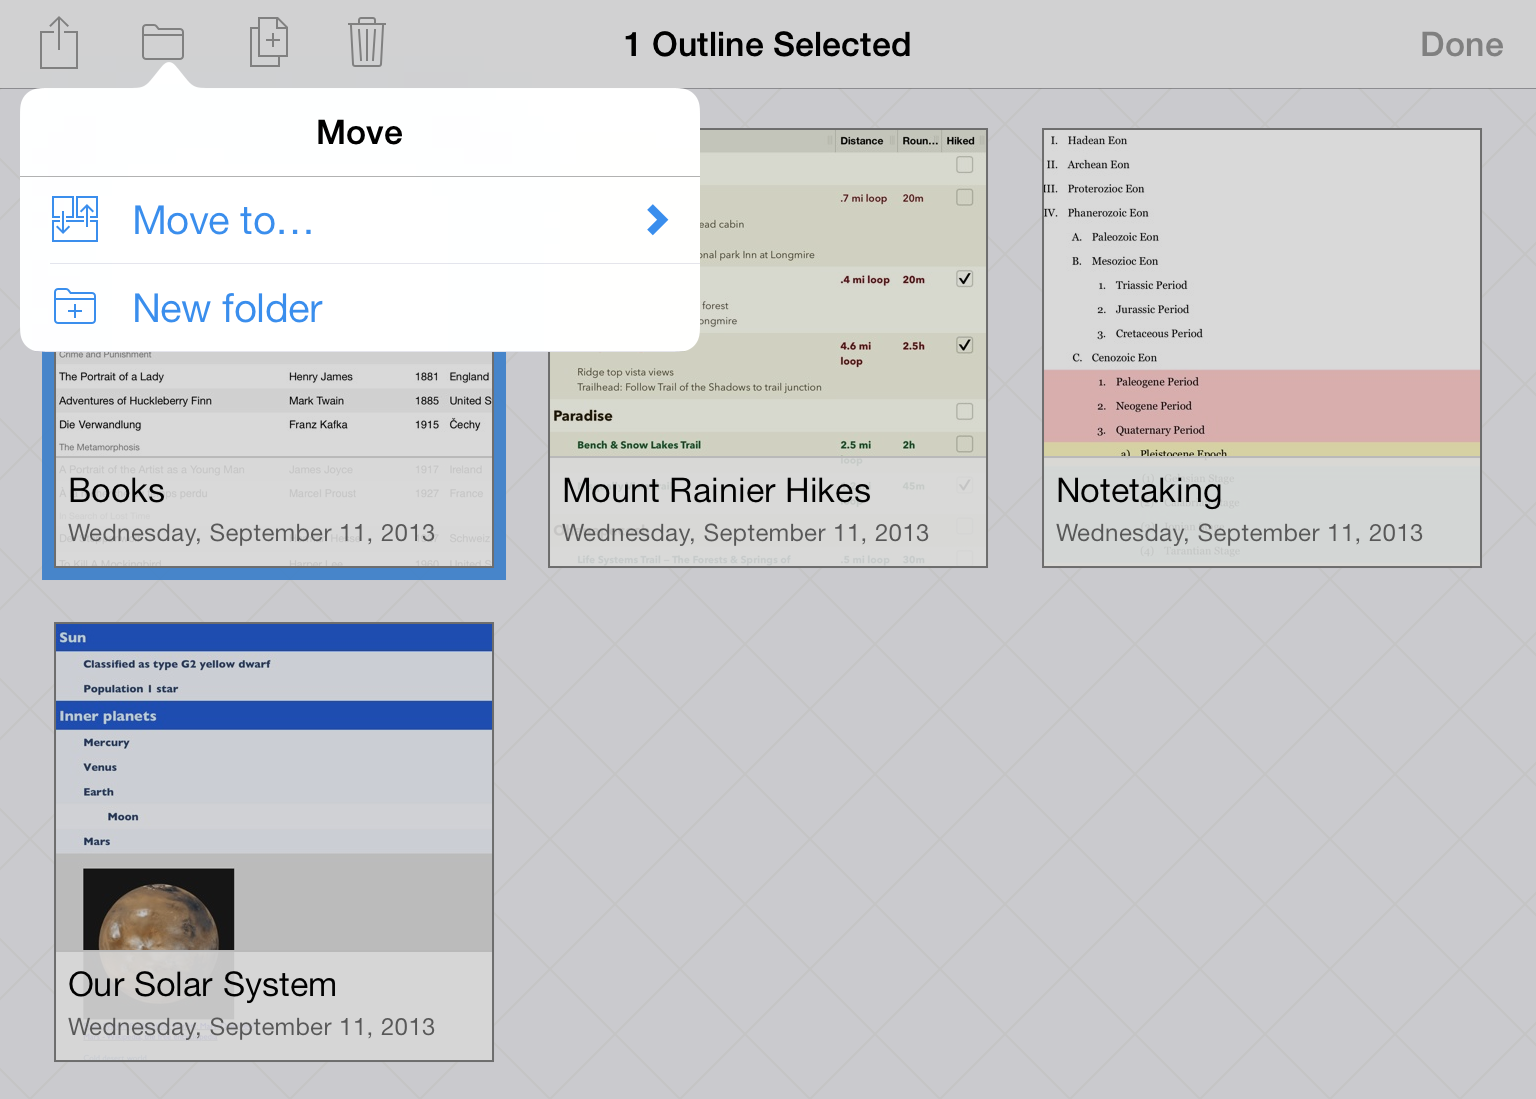
Tap New Folder to create a new folder containing the selected file. The file is moved out of the current folder into a new Untitled subfolder. Enter a new name for the folder and tap Done.
Subfolders have a dark gray background and show mini icons for the files contained within. To open a file within a subfolder, tap the folder to open it, and then tap the file.
Note
If you move all of the files out of a subfolder, that subfolder disappears automatically.
To create a new document, go to the Locations screen, select the folder in which you’d like to store the file, and then tap the Add button (the + sign) in the navigation bar.

See Using the Document Editor for more details on the document editor itself, or work through the Create a New Document tutorial.
Part III: Sending, Sharing, and Creating Templates from Documents
Every now and then you’ll find the need to share some document you’ve created in OmniOutliner with someone else. But all of the files are on your iPad, how are you going to do this?
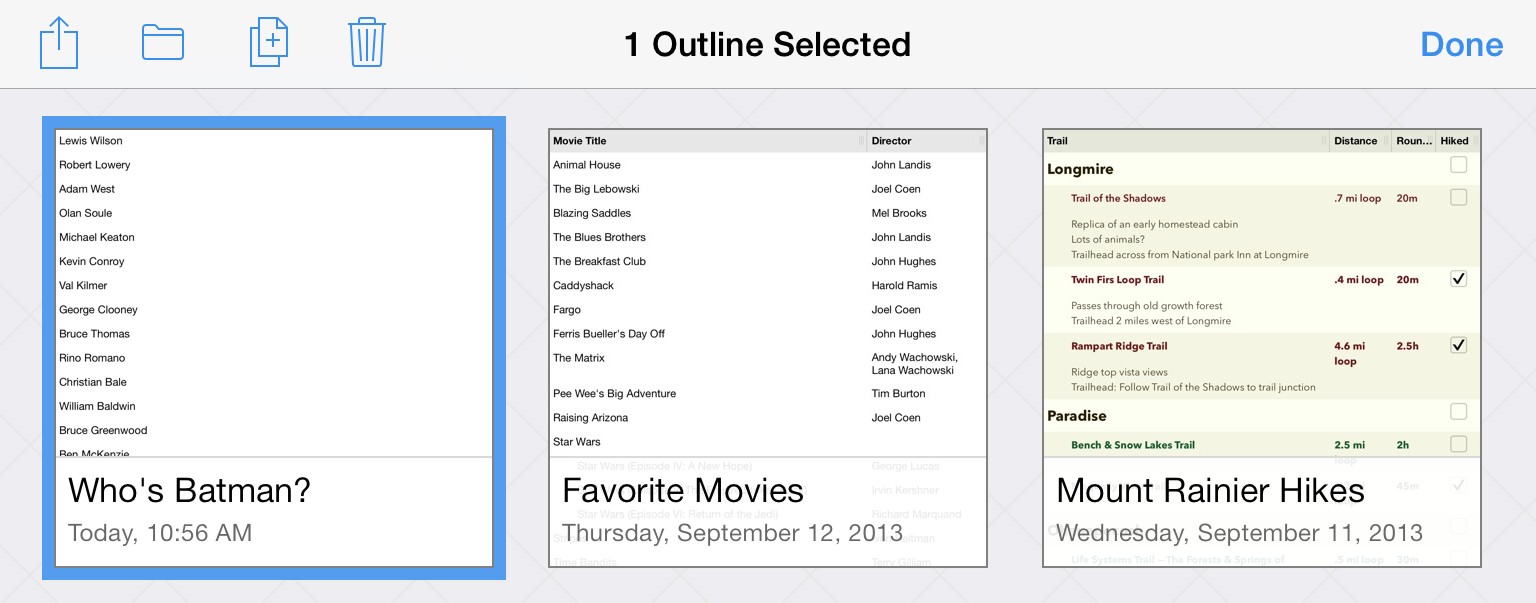
When you open a folder, such as your Local Documents folder, tap Select in the navigation bar, and then select the file (or files) that you want to share. This places a blue highlight around the file to let you know which files you’ve selected to do something with.
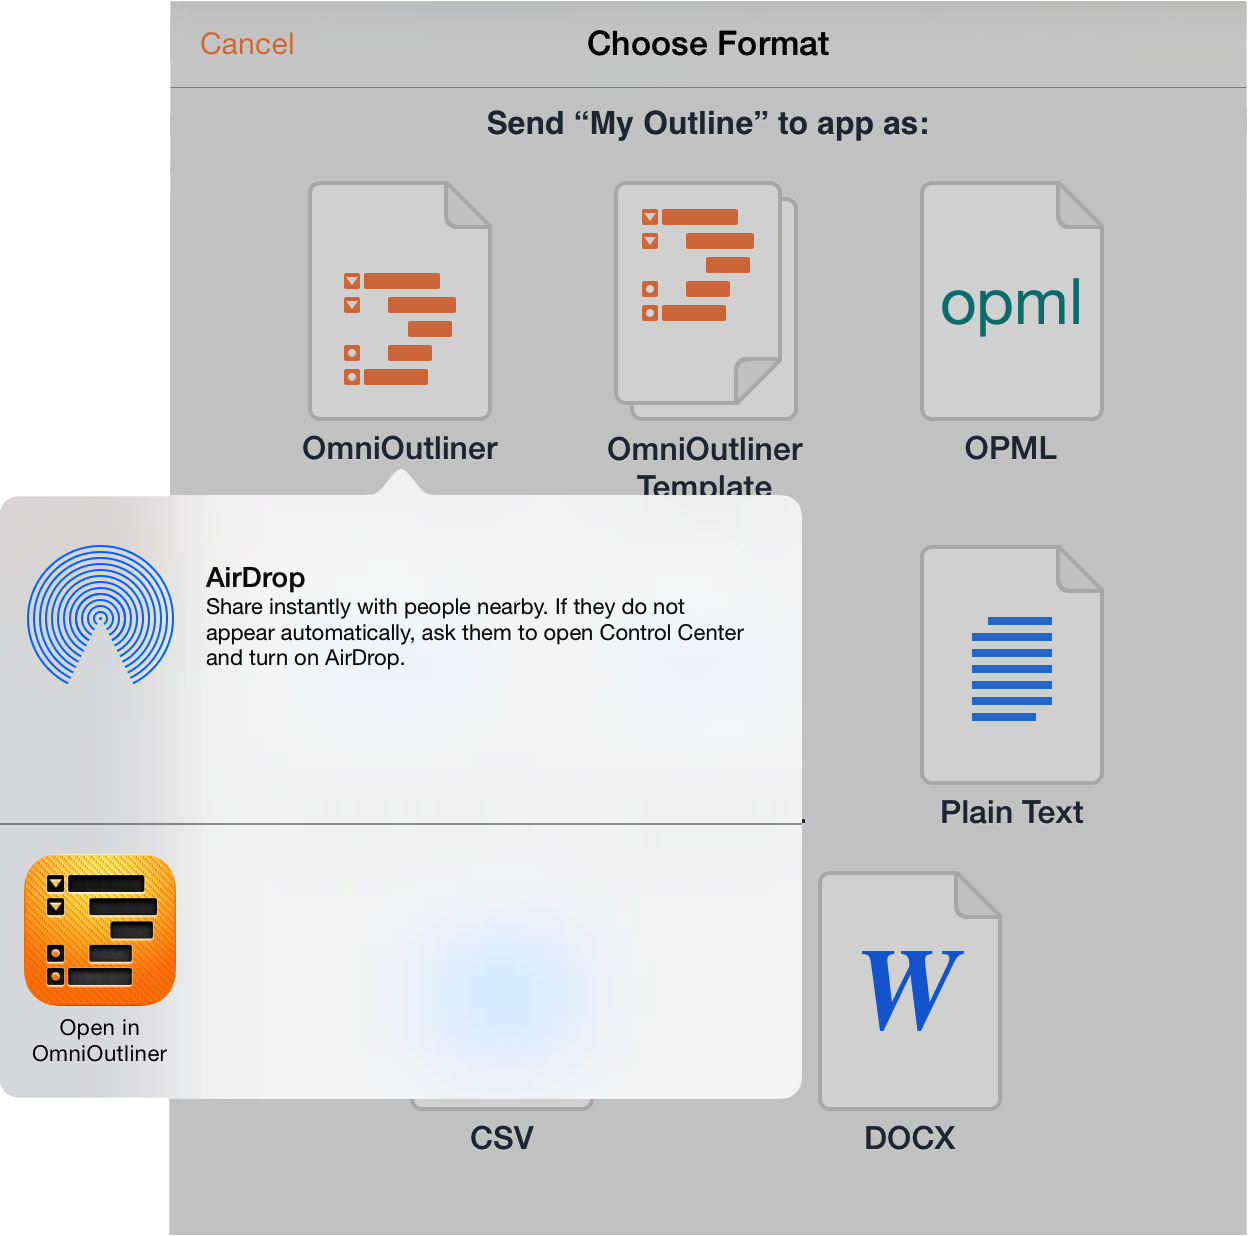
Now tap the Actions button in the navigation bar and select from one of the following options:
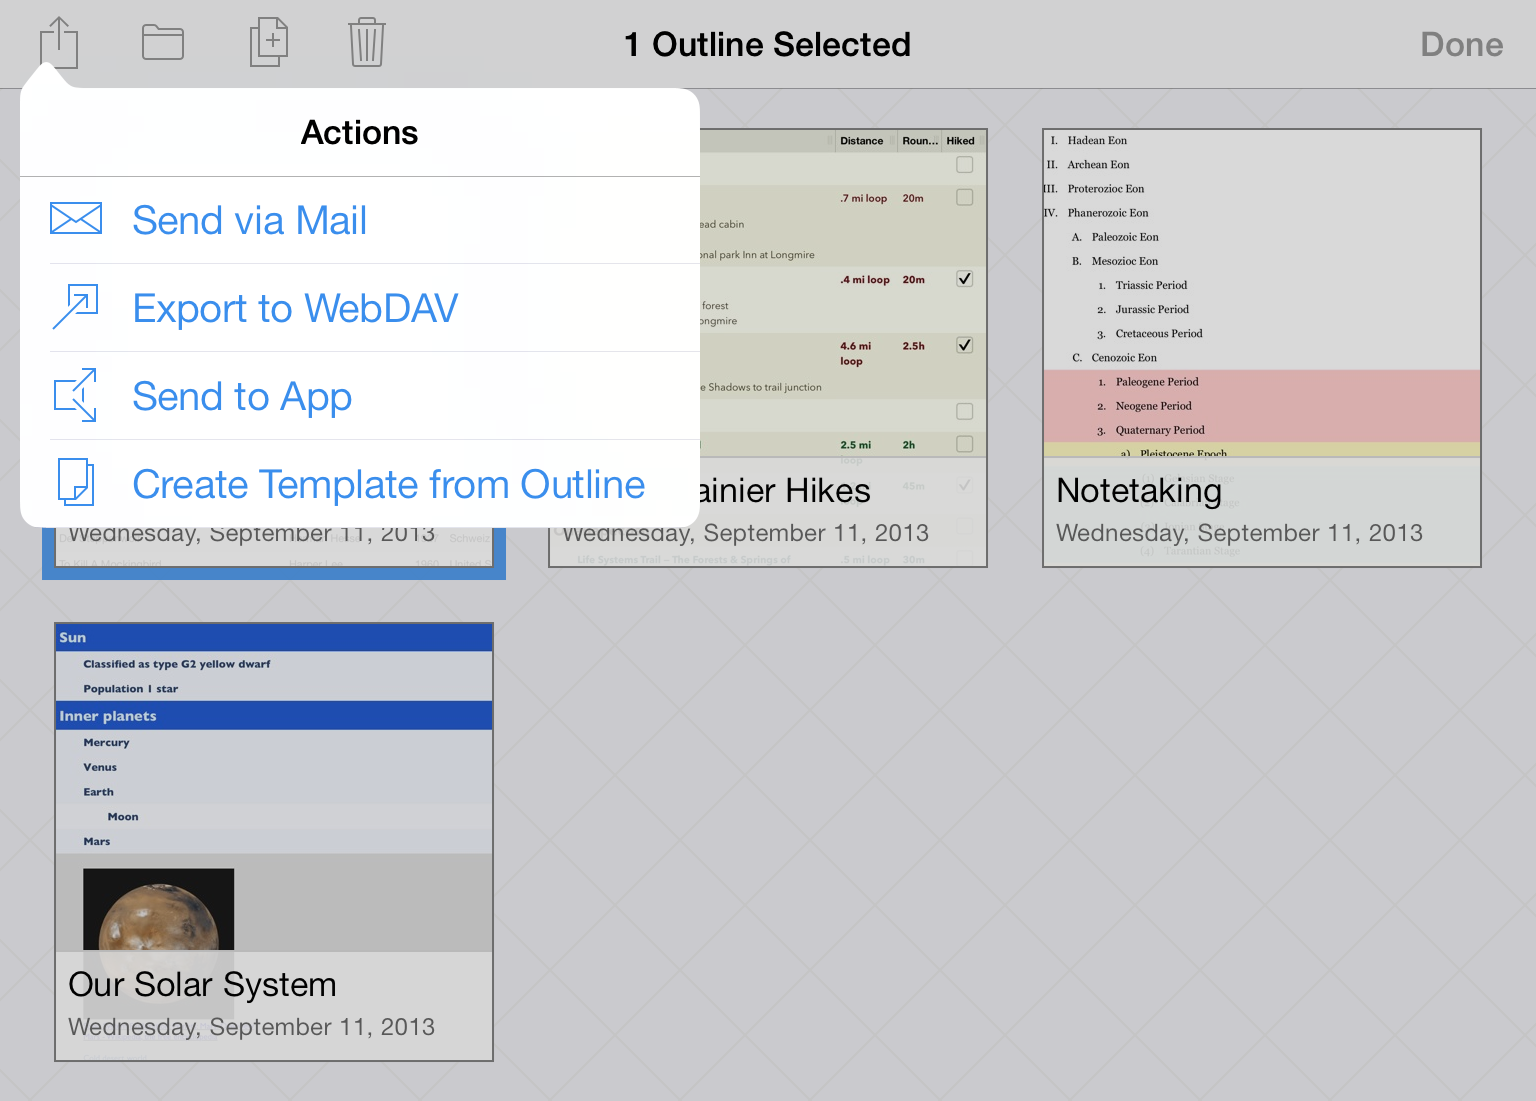
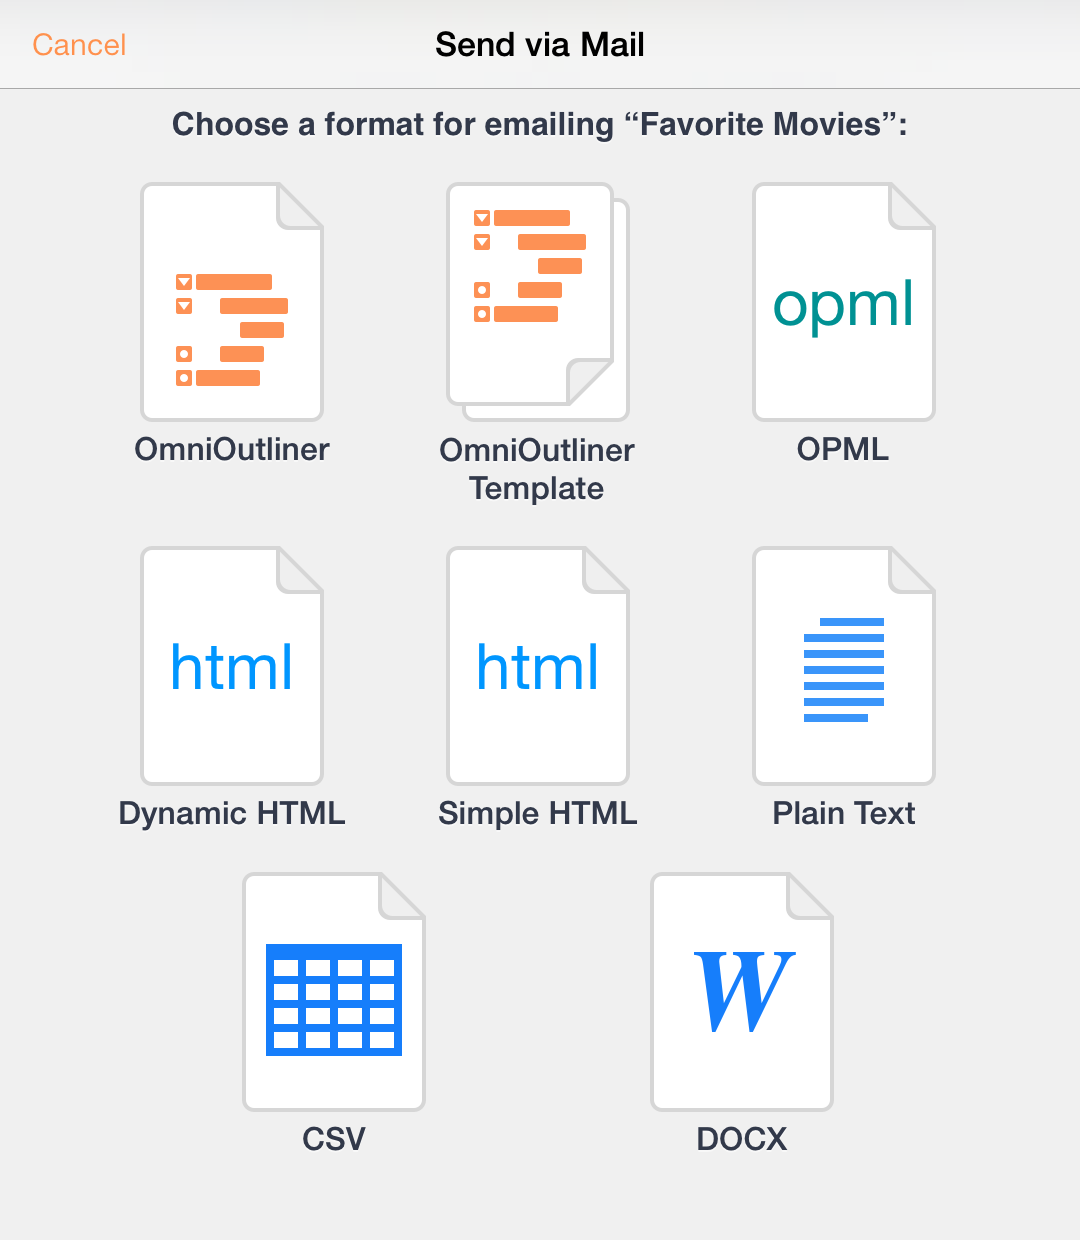
Send via Mail — lets you choose a document format for the file you want to email, and then queues up an email message for your to send.
Export to WebDAV — lets you move the file over to a WebDAV share. If you haven’t already configured a WebDAV Cloud Account, you’ll need to do that before you can export the file.
Send to App — lets you open the file in a compatible app on your iPad, or, if you are on a Wi-Fi network with someone you know, you can share the file with another iOS 7 device using AirDrop.
Create Template from Outline — turns the selected document into a template, which you can later use as the basis for a new document. All of the content—as well as any styles, images, or media you’ve added—remains in the template file; you’ll just need to enter new content over what’s there.
Part IV: Taking Out the Trash
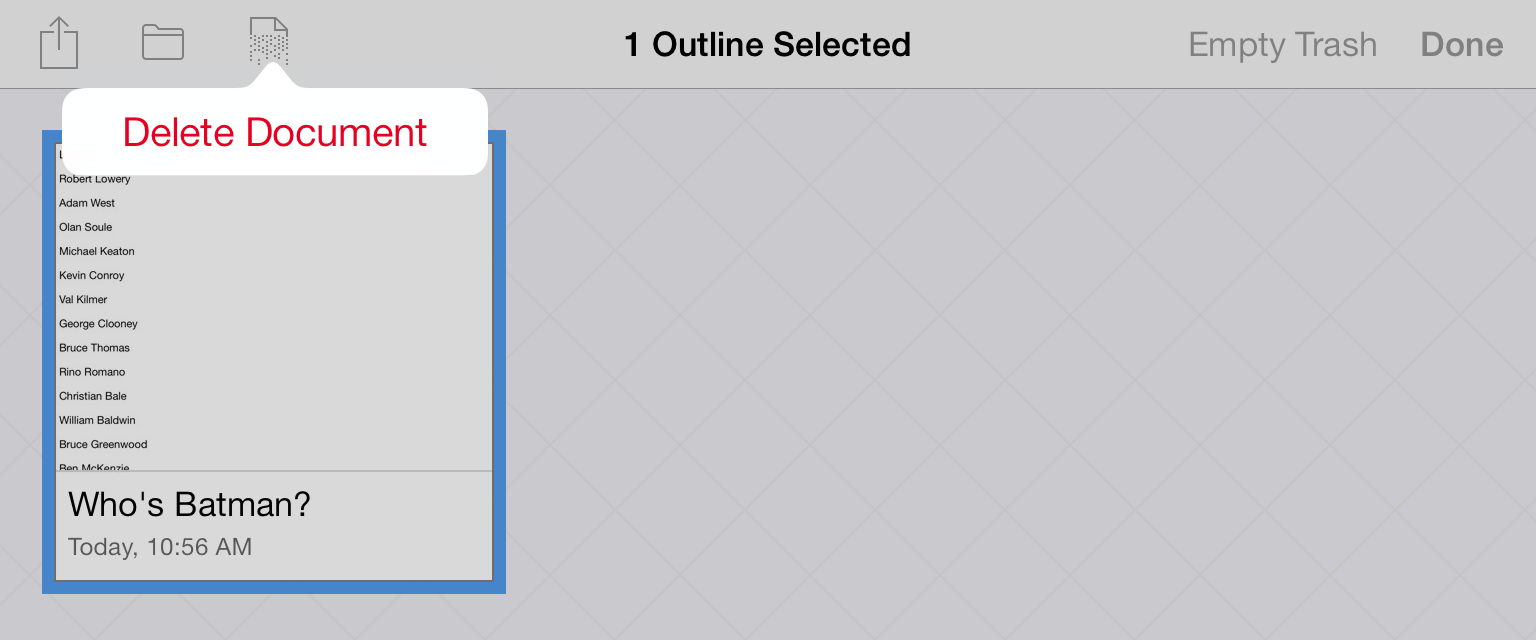
Every now and then, you’ll find that it’s time to do a little housecleaning in OmniOutliner. That list of actors who’ve played Batman is no longer relevant, so it’s time to dump that document into the trash and purge it from your iPad (or from your synced Cloud Account, if you have one of those configured) forever.
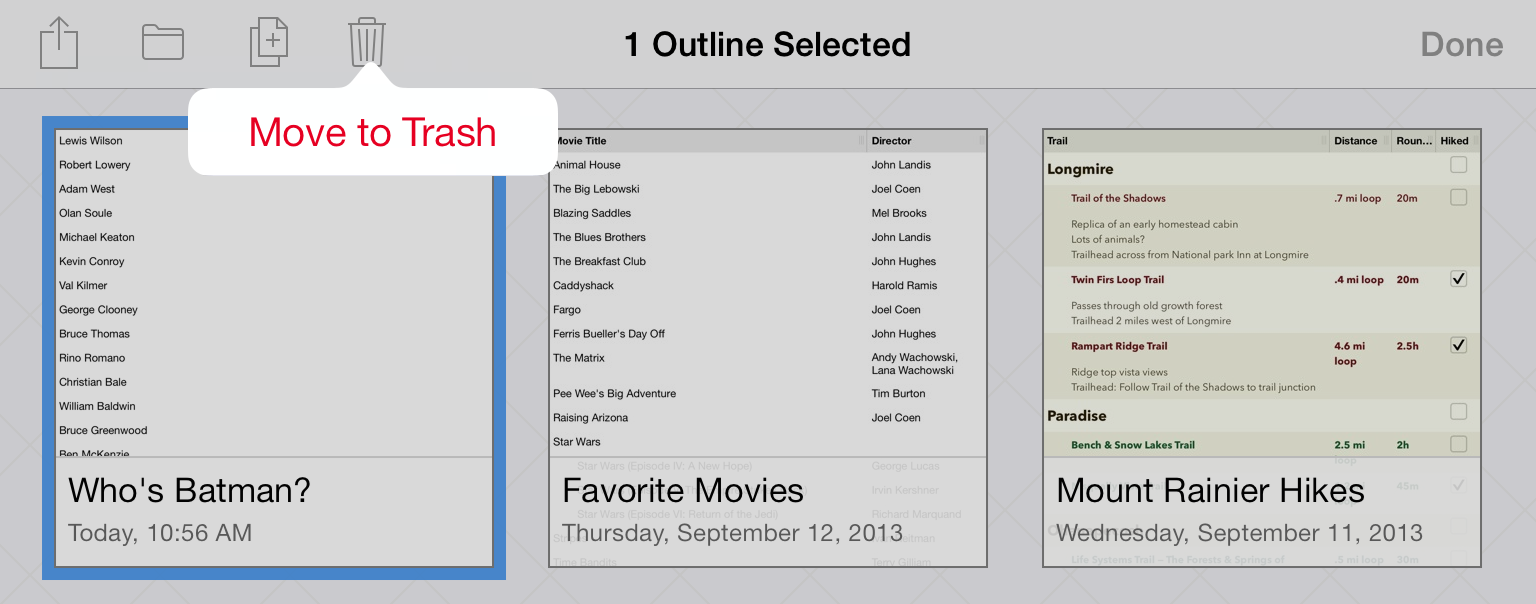
Fortunately, deleting files from OmniOutliner is just as easy as it is to find someone to play Batman. When viewing a folder of documents, tap Select in the navigation bar at the top of the screen. Then tap on the document you’d like to delete; you’ll see that the file now has a blue highlight around it.
Tap the Trashcan in the navigation bar to move the document to the Trash.
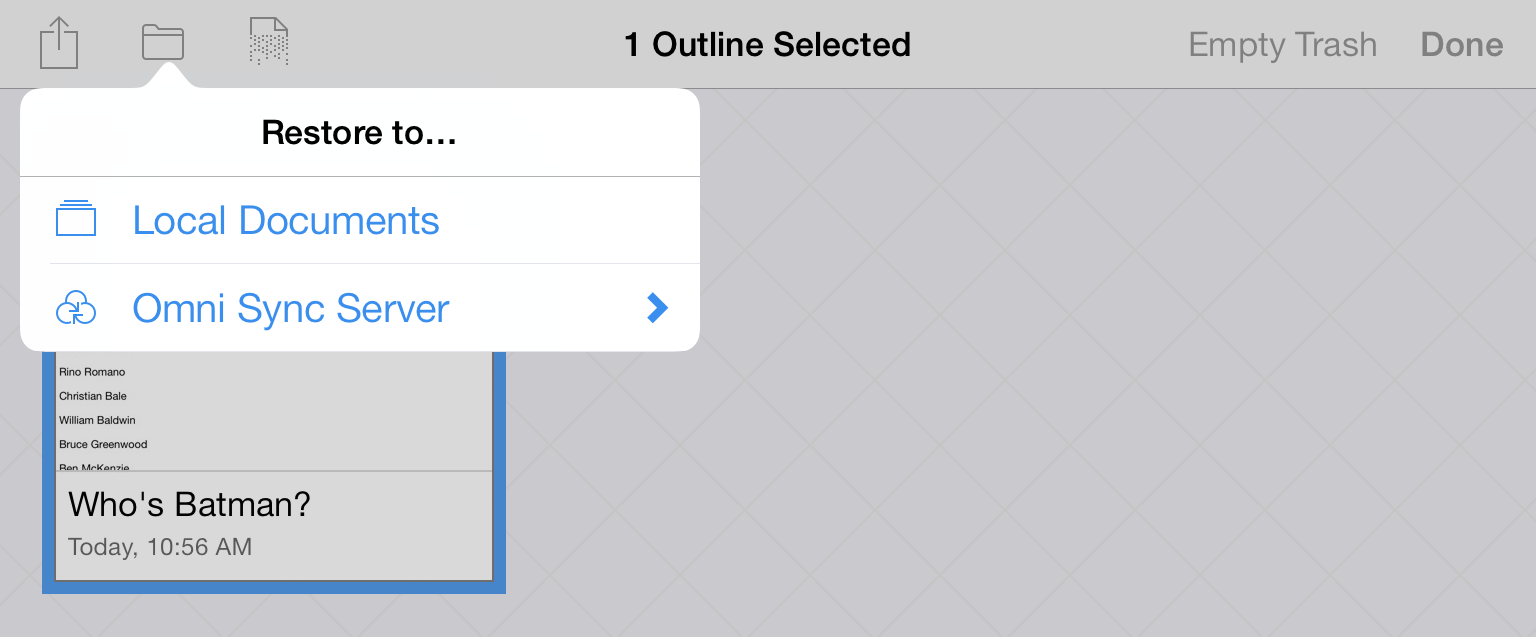
If you tap Locations in the navigation bar, you’ll see a Trash folder in your list of OmniOutliner folders. Right now, the file is still on your iPad.

If you open the Trash folder and then either tap the Restore button in the navigation bar or tap on the file, you’ll get a popup menu with options to restore the file to your Local Documents folder or, if you have set up a Cloud Account, to a synced file share.
Finally, if you really are sure that you no longer need this file, you can either tap the Shredder icon to delete the file, or tap Empty Trash.
The difference here is that tapping the Shredder icon only deletes selected files whereas tapping Empty Trash will delete everything in the Trash folder, regardless of whether any files have been selected.