Welcome to OmniOutliner 2.3 for iOS!
That’s right folks, we said OmniOutliner 2.3 for iOS! Since we last met, your friends at The Omni Group have been busy working on Universal versions for all of our apps. If you have an iPhone, iPad, iPad mini, or iPod touch (5th Generation) that runs iOS 8 or higher, then your day just got a zillion times better.
When Apple introduced the iPhone 6 and iPhone 6 Plus, we knew it was finally time to bring all of our iOS apps to the larger iPhone screens. Optimized and redesigned for iOS 8, OmniOutliner 2.3 has a bunch of new features to make outlining even easier. If you’ve been a long-time OmniOutliner user, it won’t take long before you notice some of these changes:
- Outline View — The outline view now freely scrolls, so the outline column can be scrolled off the screen.
- Images — Image attachments automatically scale to fit the width of the column.
- Outline View — The indentation amount for rows now scales with the zoom level.
- New Templates — Additional templates used in OmniOutliner 4 for Mac have been added.
- Appearance — The app icon and file browser have been redesigned.
- TextExpander support — For all your text expanding needs! If you have TextExpander installed on your device, open Settings from the gear menu in the document browser to update your snippets.
- Row linking — Row links created in OmniOutliner 4 for Mac will function for jumping to other sections of the document.
- Style theming — Have one document that you wished looked like another? Turn that other document into a template and apply it to any file you would like.
- External keyboard support — Outline faster! Navigate around your document, rearrange rows, and add new content, all without touching the screen. If you use OmniOutliner for the Mac, you will already be familiar with all these shortcuts.
- Export formats — Finished with the outlining portion of your project? Export your data to a word processing app using the DOCX format for the next phase. Need to switch to a spreadsheet app? Send your data over in CSV format.
- Search — In-document searching has been moved to be a top level item in the toolbar for easier access.
- AirDrop — Easily AirDrop files between iOS 8 and OS X Yosemite (v10.10) clients.
- Templates — When you create a new document, you are presented with a list of available templates which you can start from. Easily turn an existing document into a template or create one from scratch.
- Folders — Have a lot of outlines on your iPhone or iPad? Organize them with folders, and if you’re syncing with OmniPresence, the same folders and files are visible on your other iOS devices and Mac.
For a complete list of changes we’ve made in OmniOutliner for iOS, be sure to read the Release Notes by tapping the Gear icon in the toolbar and choosing Release Notes from the list of options. You can also find OmniOutliner for iOS’s release notes on our Support website.
Created with love,
The Omni Group
How This Documentation is Organized
This wonderful manual that you have before you (either in OmniOutliner itself, online, or in iBooks on your Mac or iOS device—or both) has been assembled in such a way that you’re provided with a complete tour of OmniOutliner.
You’ll start out with an overview of OmniOutliner’s interface. Don’t skip over this chapter, as you’ll find many nuggets of information and fine details about OmniOutliner that you might otherwise miss. And, if you do decide to skip this chapter and later find yourself wondering, “Hey, what’s that doohickey do?”, you can always come back here to discover what it’s all about.
To help guide you through the documentation and better learn all the things you need to know about OmniOutliner, here’s a list of all of the chapters in this book:
- Chapter 1, A Quick Tour of OmniOutliner 2.3
- This brief chapter provides you with a quick overview of OmniOutliner 2.3’s user interface. Not sure what a certain button does? This chapter is your guide to the basics.
- Chapter 2, Adding a Cloud Account
Whether you’ve just started using OmniOutliner for iOS, or if you’ve been using it alongside OmniOutliner for Mac, it’s important for you to keep a backup of your outlines in the cloud. OmniOutliner uses our own cloud service to synchronize files with your free Omni Sync Server account or to another WebDAV server of your choosing. Once synchronized, you can access your outlines in OmniOutliner on any iOS 8-compatible device or on your Mac (if you’ve purchased OmniOutliner for Mac). It’s pretty cool; you should check it out.
This chapter walks you through the process of setting up a cloud account in OmniOutliner for iOS and discusses how get the best performance out of Omni Sync Server.
- Chapter 3, Managing Files with the Document Browser
- Since OmniOutliner is a document-based application, you’ll need a way to manage the outlines on your devices. This chapter provides an overview of the Document Browser, which is what you use to manage the outlines you create with OmniOutliner.
Note
Chapters 4 and 5 make up a two-part tutorial on using OmniOutliner for iOS. You’ll learn how to create new outlines and get familiar with the Editing tools before jumping in to the basics of styling an outline and creating a template.
- Chapter 4, Creating a New OmniOutliner Document
- If you need to learn the basics of using OmniOutliner, this chapter is for you. This chapter takes you—step-by-step—through the process of creating a new outline in OmniOutliner.
- Chapter 5, Working with Templates and Styles
- Following on the heels of the previous chapter, here you’re taken deeper still into OmniOutliner’s style model. You will create a new outline for use in building your own template that you can apply as a theme to the outlines you create.
- Chapter 6, Importing from an Older Version of OmniOutliner for iPad
- If you have the original version of OmniOutliner for iPad (version 1.x), this chapter guides you through the process of using iTunes 12 to transfer your OmniOutliner files for use with OmniOutliner for iOS.
- Chapter 7, Keyboard Shortcuts
- If you have used OmniOutliner for Mac, you know just how essential keyboard shortcuts are to making your outline work move along swiftly. You will be happy to know that we have brought most of OmniOutliner for Mac’s keyboard shortcuts over to OmniOutliner for iOS. So drag out that Bluetooth keyboard and get it paired with your favorite iOS device, and then check out this chapter.
- Chapter 8, Getting Help
- There’s no shame in admitting that you need help. In fact, that’s what we’re here for. If you ever get stuck when working on something in OmniOutliner, or if you have a problem with the app’s license, or you just want to tell our Support Humans and the DocWranglers what an awesome job they’re doing, feel free to get in touch. This chapter points you to all of the resources we have available: Support Humans, Support Articles, Videos, and Documentation.
Using This Book
One of the beauties of having OmniOutliner’s documentation available in electronic form is that it’s always available whenever you need it. We have put all of the documentation on our website where it can be searched, bookmarked, and printed (either to paper or saved as a PDF). And we’re continuing the ongoing trend of creating EPUB versions of the documentation and making them freely available on the iBooks Store.
Get the Ebook
![]() Our preferred method of delivering the Help docs is via the iBooks Store in EPUB3 format. The documentation there is the same documentation you’ll find on our website and bundled within the app.
Our preferred method of delivering the Help docs is via the iBooks Store in EPUB3 format. The documentation there is the same documentation you’ll find on our website and bundled within the app.
The advantage to getting the EPUB version of the docs is that whenever we update the docs for a new version of OmniOutliner, you’ll receive a notification in iBooks telling you that there’s an update waiting for you. And the big win of EPUB over PDF is that any notations or bookmarks you make in the book carry forward to new versions of the documentation.
Tell Us What You Think
We’re constantly working on updates for our documentation. Whether it’s CSS work, correcting the occasional typo (yeah, they do sometimes slip through), or adding details or clarification for a specific feature based on something we’ve heard from a customer, we’re always trying to make our documentation better and more useful for you.
If you have any specific comments you’d like to send us about the documentation, please do. You can drop us an email message via our Support queue, or you can ping us on Twitter; we’re @OmniWranglers.
Finally, we’d like to thank you for taking the time to read the docs.
A Quick Tour of OmniOutliner for iOS
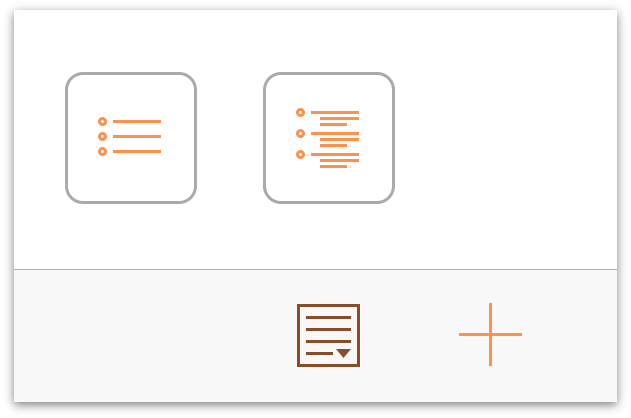
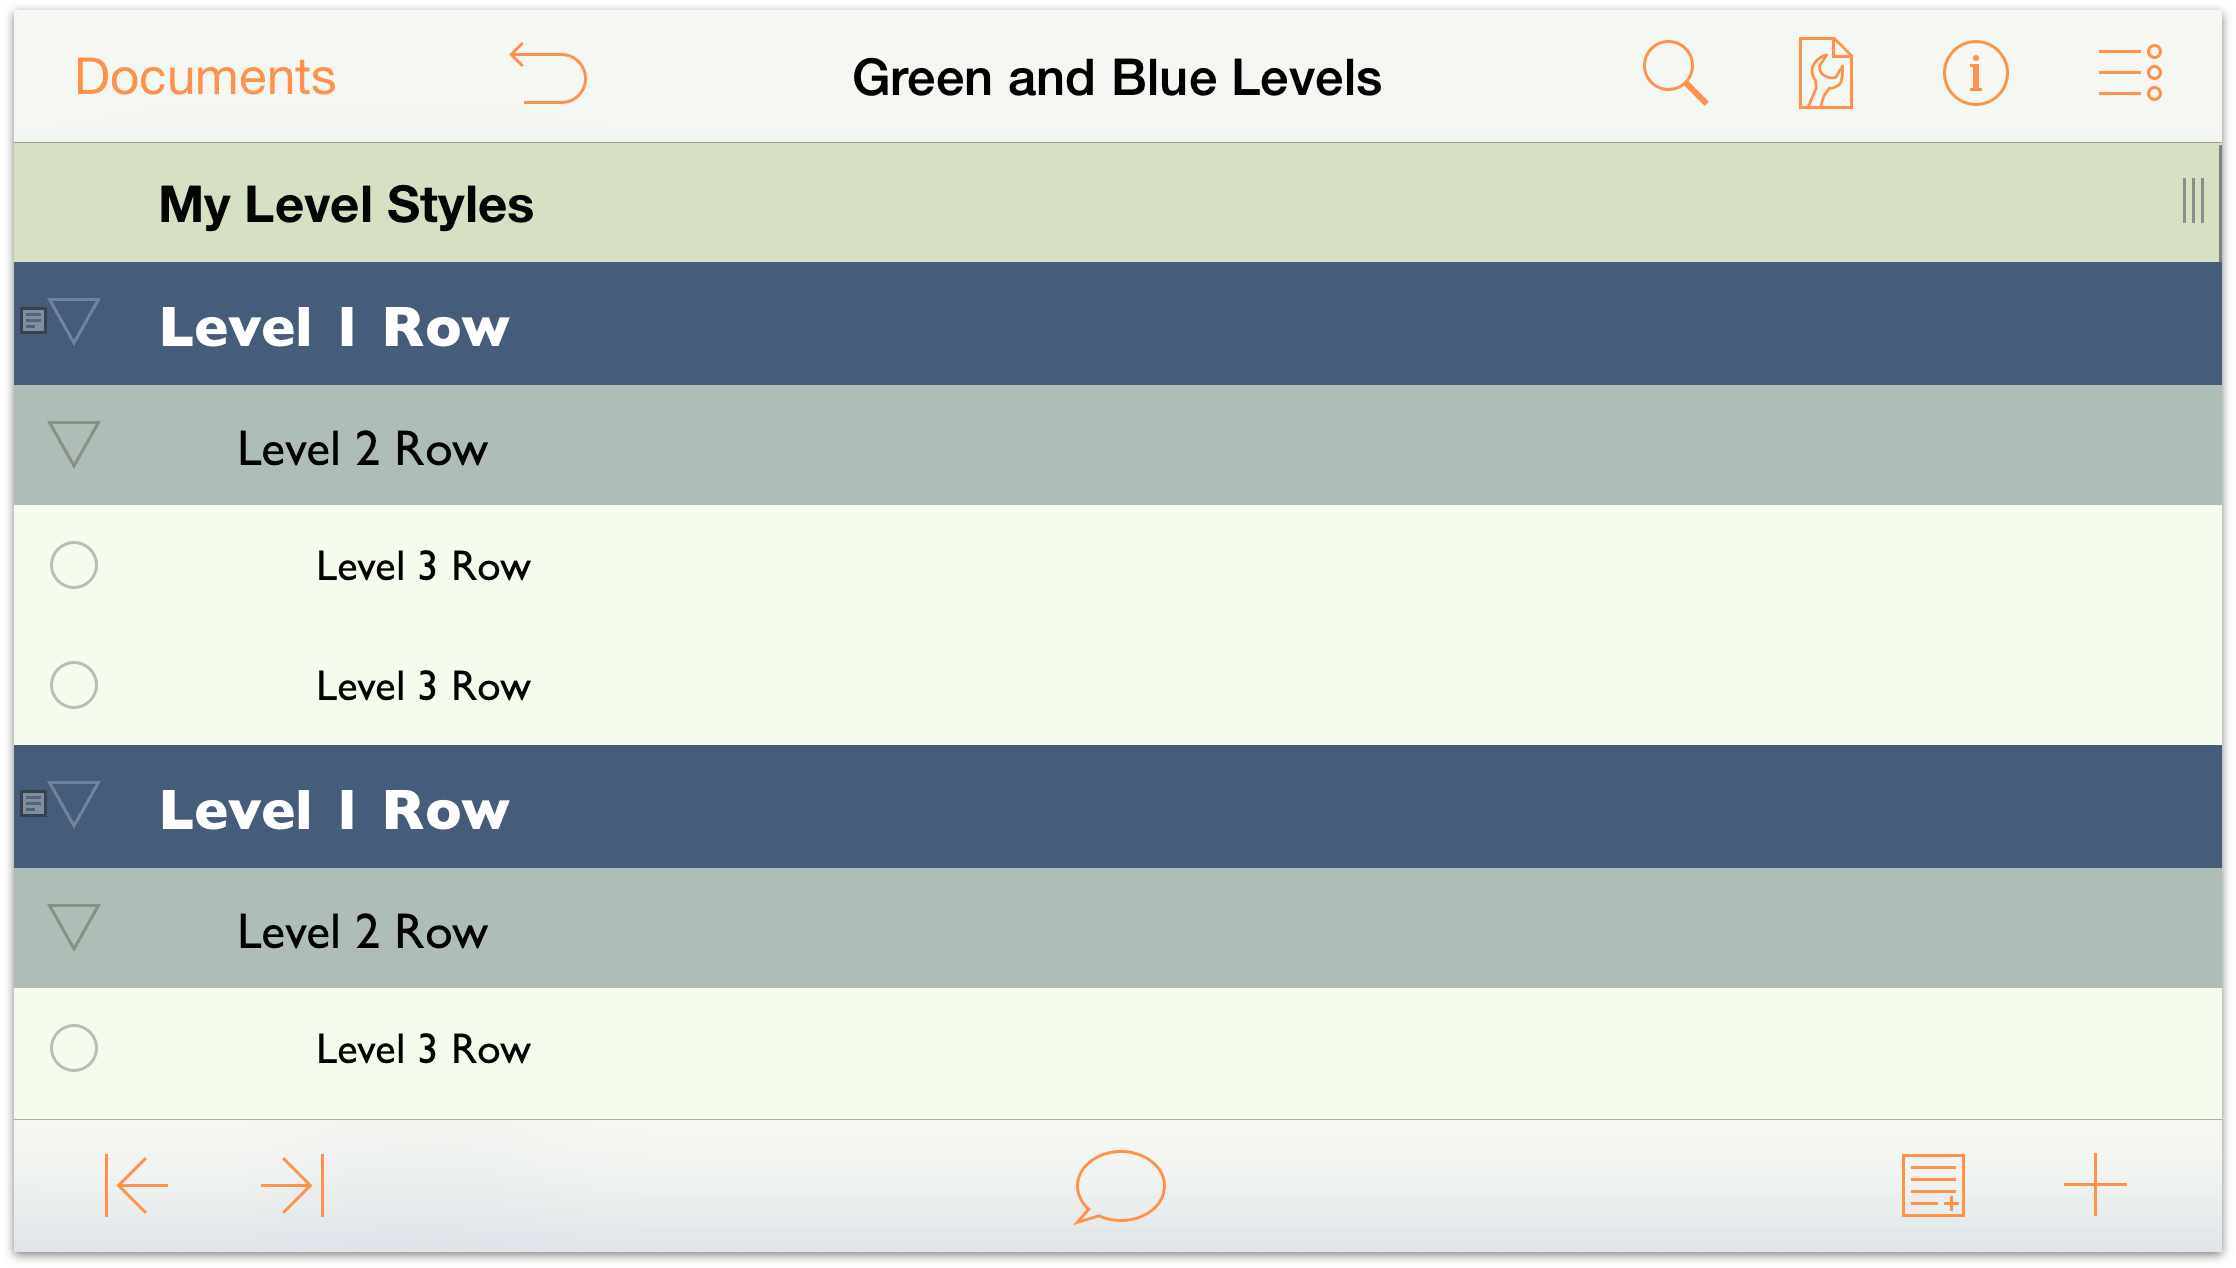
The document editor is the place to view, create, and manage your outlines.
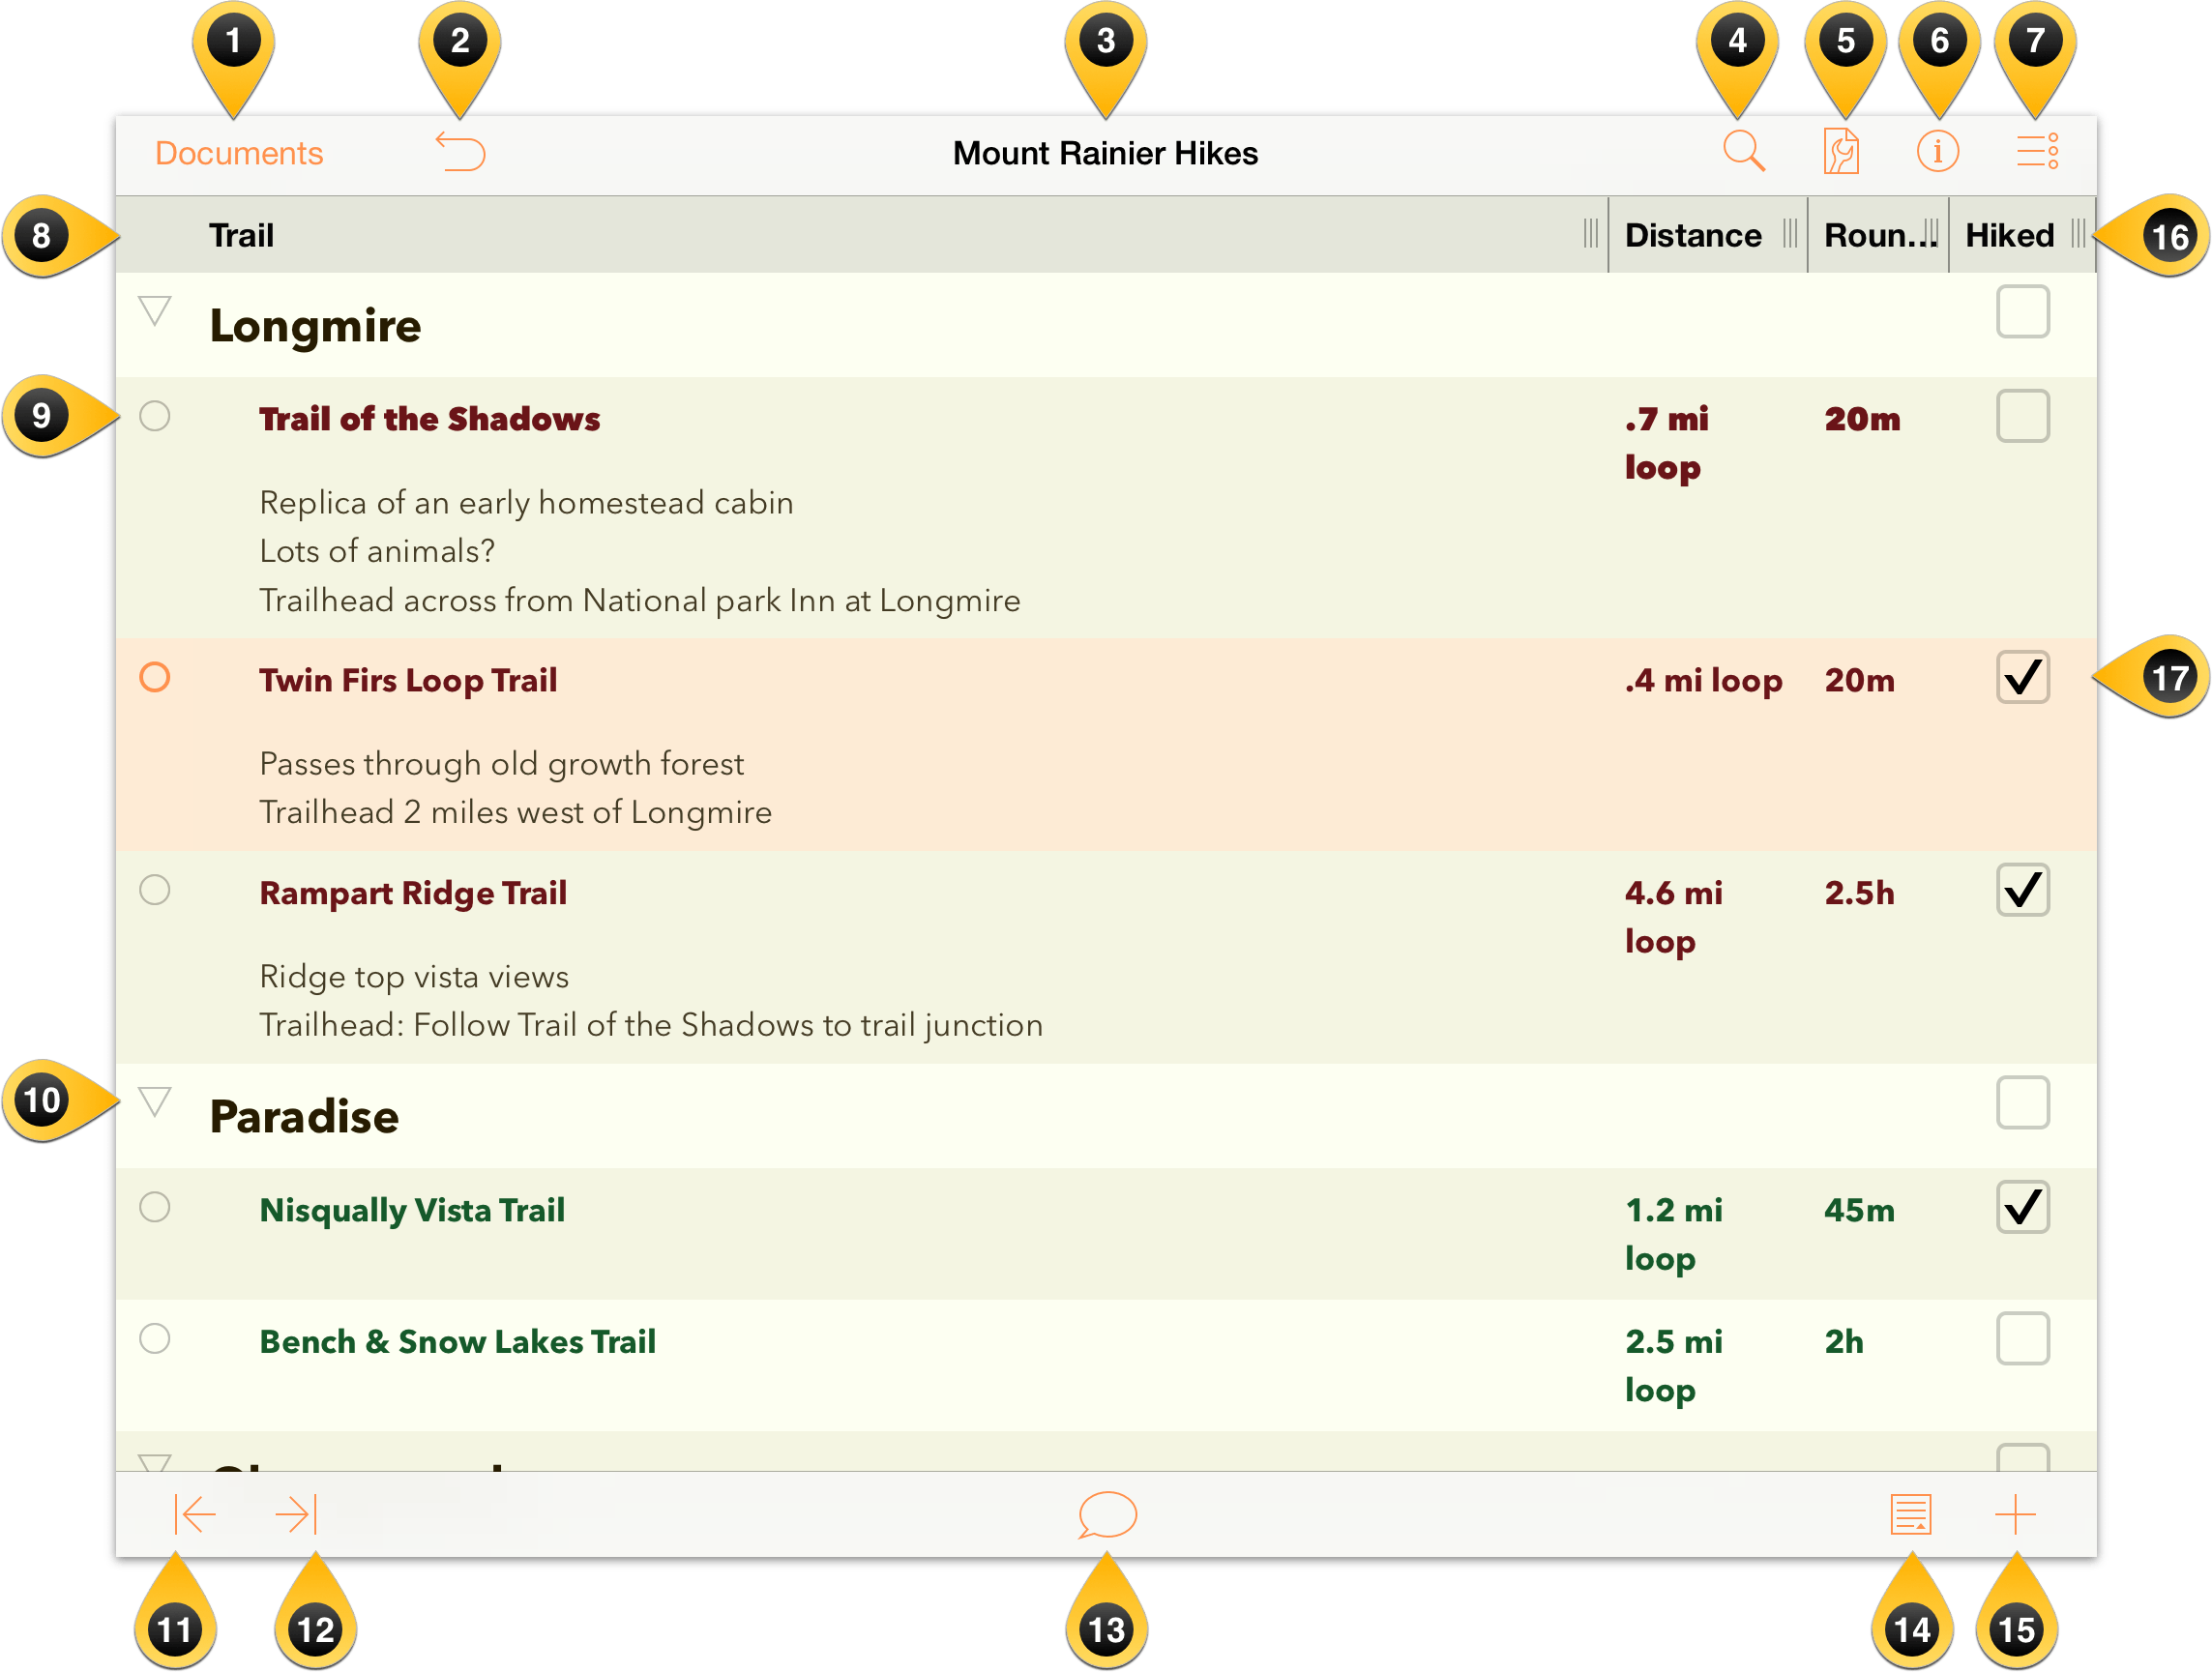
Documents — tap here to exit the current document and view other documents in the current folder.
Undo/Redo — tap to Undo the last change, or press and select Redo from the popup menu to replicate the previous task.
Document Title — tap here to change the name of the current Outliner document. New files are named My Outline by default, so be sure to change the title to something that’s specific to the project you’re working on.
Find — tap here to search within the current document. The search field is dynamic, which means that OmniOutliner starts to look for results as soon as you start typing. When you see the item you’re looking for, just tap it in the results and you’re taken to that location in your Outliner file.
Contents — tap here to add more depth to the contents of your document. Options include:
- Columns — Add and remove a column, configure its style properties, and specify the type of content that can go into the column (such as rich text or a checkbox for things you want to tick off).
- Styles — Apply a theme for your document, as well as for the individual rows and notes.
- Document — Set the zoom level, assign a background color, as well as set an optional color for alternating rows.
Tip
You’ll also find the Expand All and Collapse All buttons in Document settings. This comes in handy for big documents when you want to either see every fine detail or just the main rows.Text Style — select a row and tap here to set the text styles for that row. Tap Customize style to set the type size, specify the font and color of the text, add a background color, set a numbering style, change the alignment and more.
Edit — tap here to bring up the editing controls along the bottom of the screen. Tap a Row Handle to select the row, and then use the controls at the bottom of the screen to Cut, Copy, Delete, Group, or Move the items you’ve selected. When you’re finished, tap Done in the upper-right.

Column Headers — hidden by default with a single-column outline, you can add columns and rename column headers to further define the content of your outline.
Row Handle — tap and hold on these to drag rows around in your outline. These come more into play when using the Edit features in OmniOutliner; when you tap a row in Edit mode, the empty circle fills to indicate that the row has been selected for some action. To deselect the row, tap it again.
Disclosure Triangle — items that are grouped together have a disclosure triangle as their Row Handle. A disclosure triangle is open when it points downward and a closed when it points to the right; tap to open the row and see what’s hiding inside.
Outdent — tap to reduce the indent level of a selected row; Outdent isn’t available if a row is not indented.
Indent — tap to indent the row.
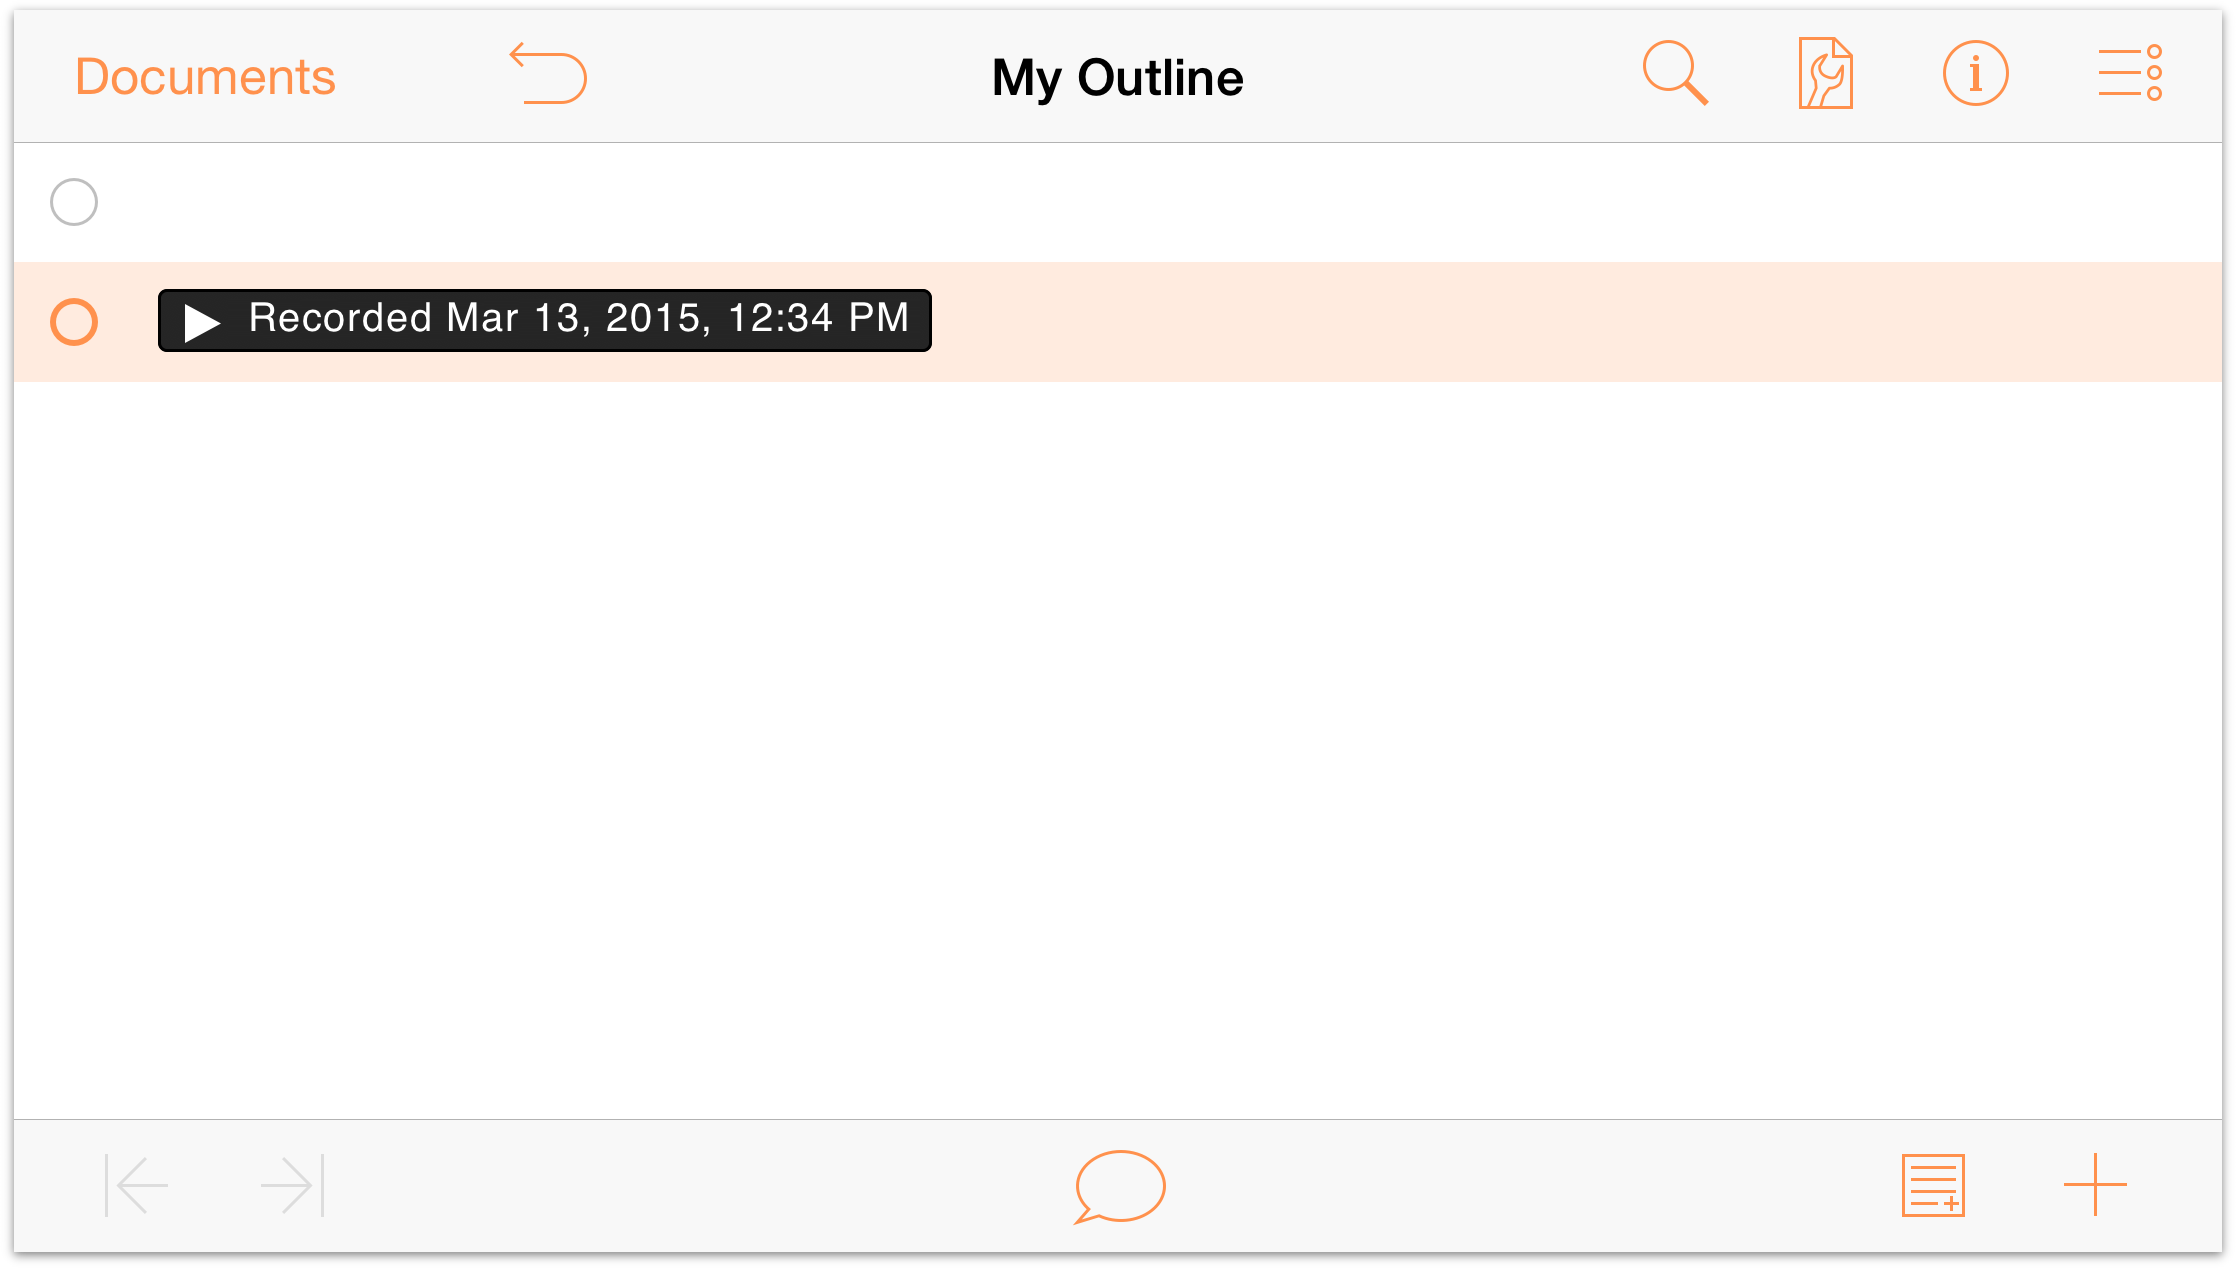
Record — tap to open the voice recorder and start recording. The Record button changes to an audio level indicator with a pause button on the left and a checkmark to the right. Tap Pause to stop recording and the circle fills with red to indicate that recording has stopped. Tap the Pause button again to continue recording, or tap the Checkmark button to finish and save the recording to a new row in your document.


Notes — tap to add a note, if one doesn’t exist. If there is already a note attached to this particular row, a single tap to the Notes button will hide or show the existing note. If you touch and hold the Notes button, you’ll notice that two buttons fly out. The one on the left hides all Notes in your document, while the one on the right reveals all Notes.
- Add/Plus — tap here to create a new row directly beneath and at the same level as the current row and start entering some text. Similar to the Notes button, if you touch and hold the Add button, four additional buttons fly out:

- Insert Parent
 — Inserts a new row at the next-highest level from the selected row.
 - Insert Above
 — Inserts a new row above and at the same level as the selected row.
 - Insert Child
 — Inserts a new row beneath and at one level lower than the selected row.
 - Insert Aunt
 — Inserts a new row beneath and one level higher than the selected row.
- Insert Parent
- Column Width Handles — drag these left or right to adjust the width of a column.
- Status Checkboxes — use status checkboxes for things like checking things off as you complete them, or to indicate a binary state for items in your outline.
As you can see, there’s more than meets the eye when it comes to a quick glance at OmniOutliner for iOS. You will learn more about how to master OmniOutliner while working through the step-by-step tutorials in Chapter 4 and Chapter 5.
But before you jump ahead to those chapters, be sure to read the next two chapters so you can learn how to configure OmniOutliner to sync your files, as well as all the fine details of how to use the Document Browser.
Adding a Cloud Account
By default, OmniOutliner stores files locally on your iOS device. As mentioned in Managing Files with the Document Browser, your files are saved in the Local Documents folder on the device. But now that OmniOutliner works across iOS devices, you should consider storing your files in the cloud. When you do, your files are accessible on your iPad, iPhone, iPod touch (5th Generation), and also on your Mac if you use OmniOutliner there, too.
You can add as many cloud accounts as you’d like. For example, you could add cloud accounts for personal- or work-use, a group-accessible account for your book club...pretty much whatever you need. The only real limitation is the amount of available storage space on your iOS device.
Creating an Omni Sync Server Account
If you plan to use Omni Sync Server with OmniOutliner, you will need to set up a free account if you don’t already have one. You can create a free Omni Sync Server account online at:
Just go to that page, enter your email address, and click Sign Up. We’ll send you an email with instructions on how to set up your Omni Sync Server account.
Tip
When setting up your Omni Sync Server account, don’t forget to set a strong password; you do want to keep those nefarious SkrYpt K1dD0z3 from brute-forcing their way into your files, don’t you?
When everything is ready to go with your Omni Sync Server account, return to the Locations screen in OmniOutliner and then follow along.
For Omni Sync Server Accounts
If you have an Omni Sync Server account, follow these steps to configure a cloud account:
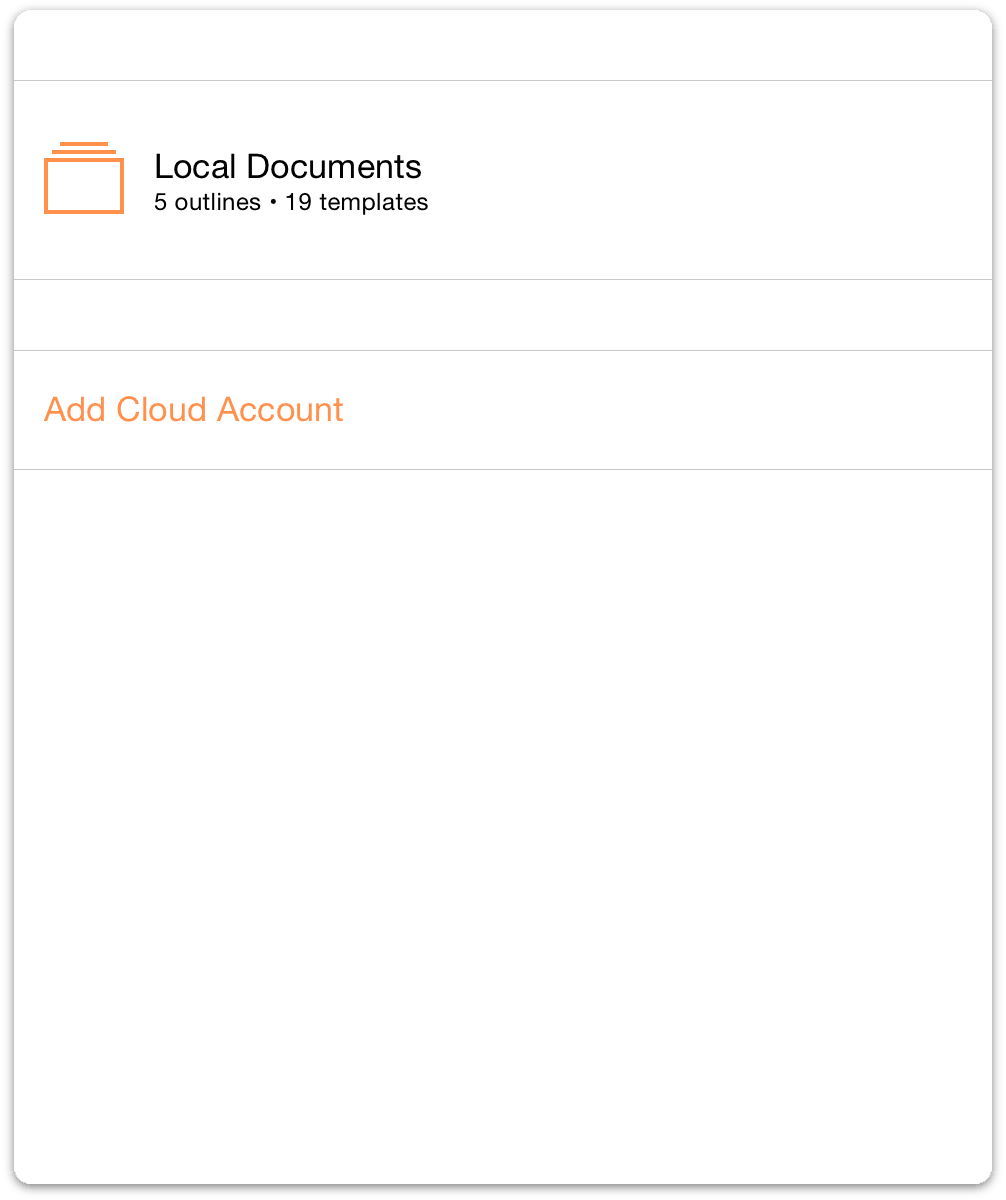
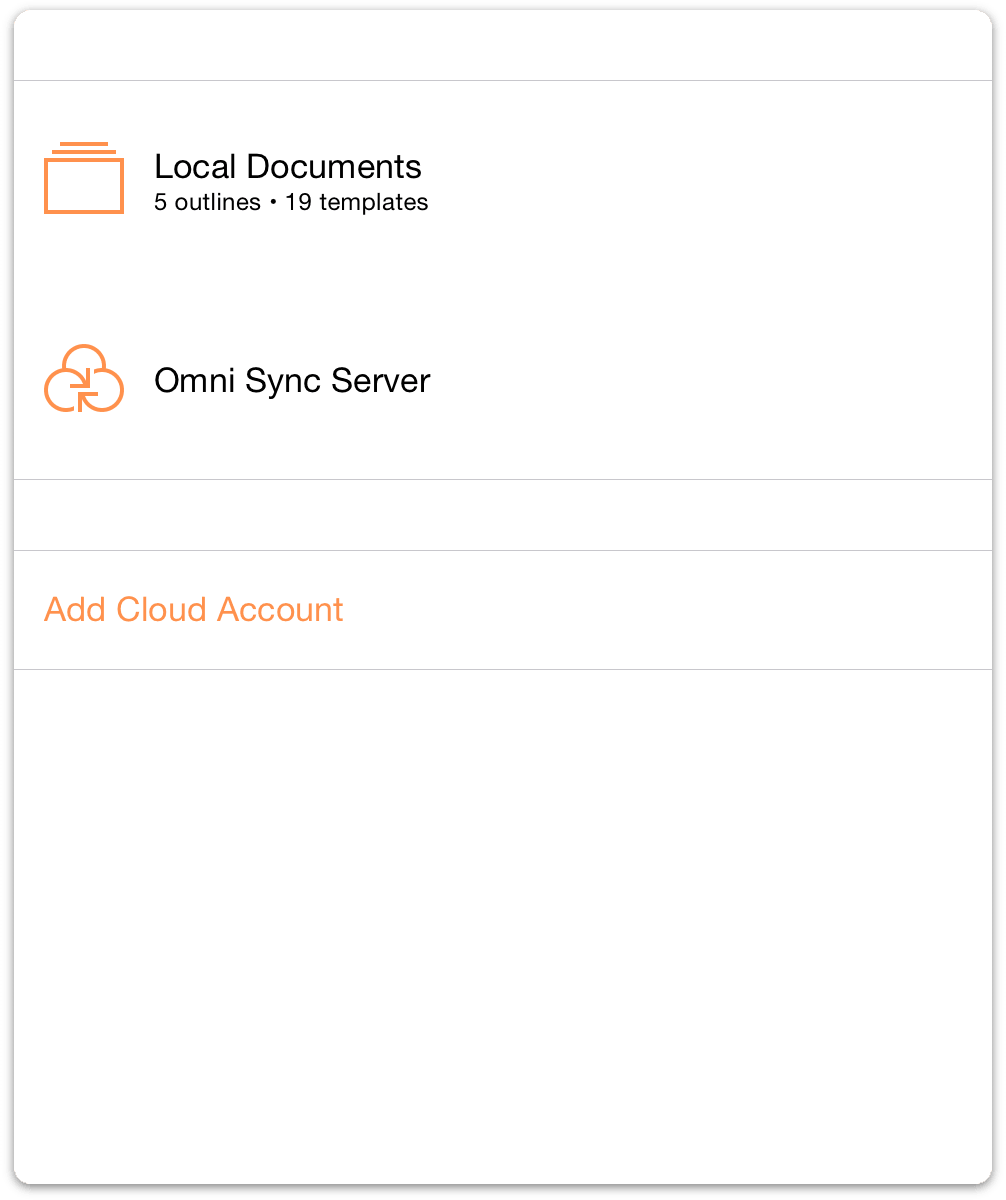
- To create a Cloud Account, start on the Locations screen and tap Add Cloud Account.
- Next, choose the type of cloud account you would like to use; you can choose between Add Omni Sync Server Account or Add WebDAV Server.
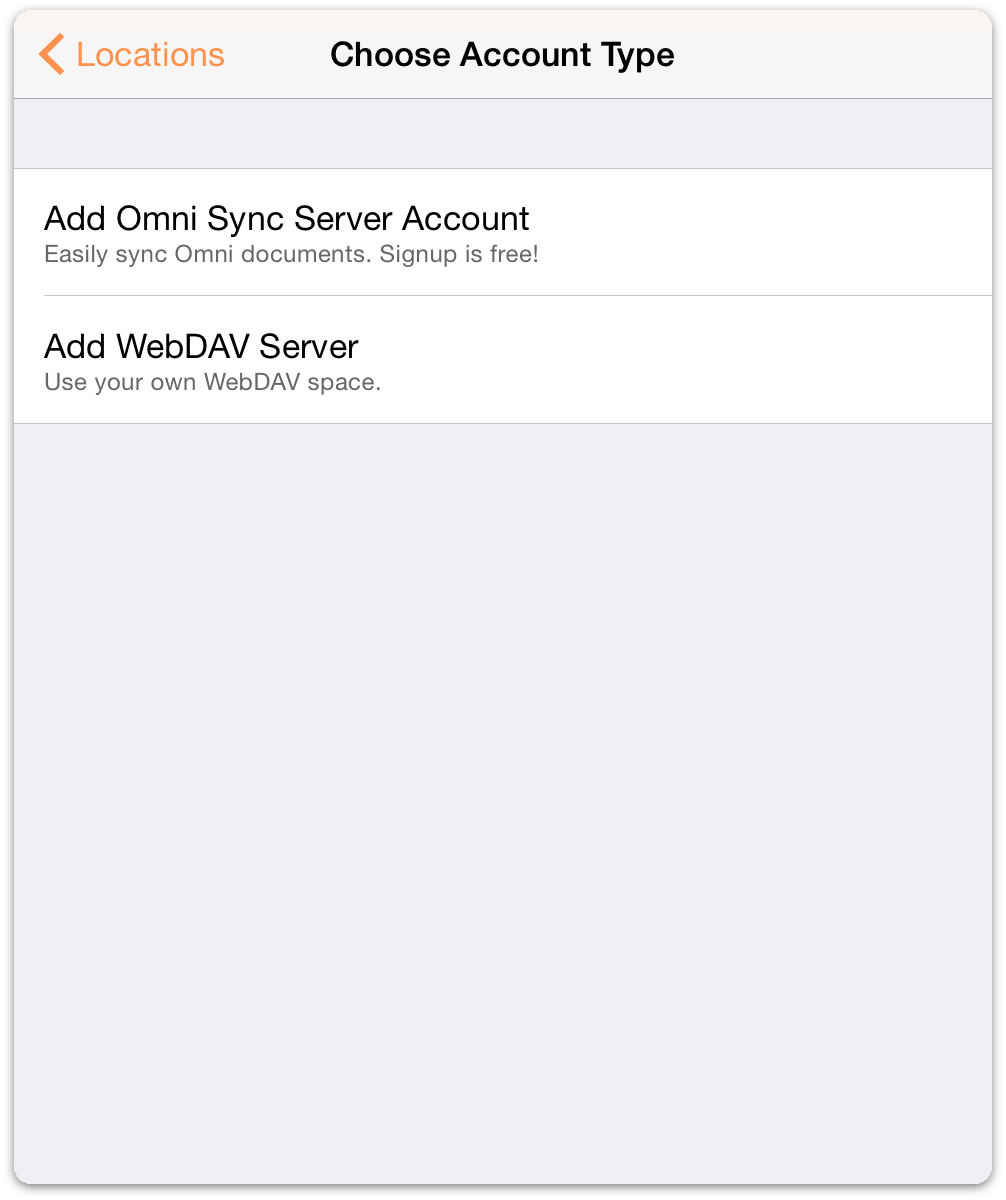
The difference between the two is that we host and maintain Omni Sync Server, whereas you would need to find a third-party WebDAV server (or host your own) and entrust them to maintain and backup the server.
Warning
OmniPresence, the application layer between OmniOutliner and Omni Sync Server, does not support DropBox or Apple’s iCloud service.
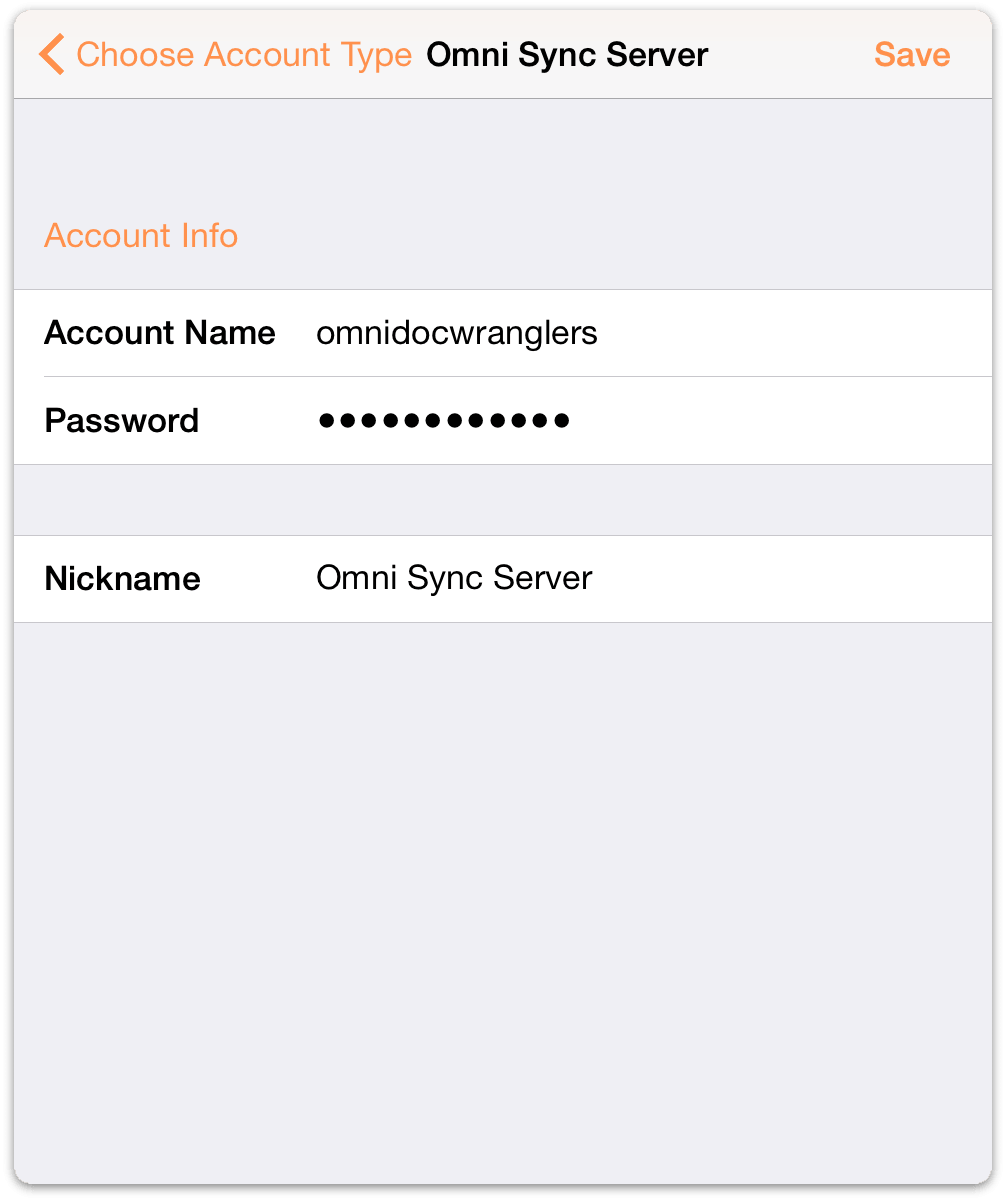
On the Account Info screen that appears:
- Enter your Account Name
- Enter the Password for your account
- Optionally, enter a Nickname to be used as the name for your synced folder
- Tap Save to authenticate with Omni Sync Server
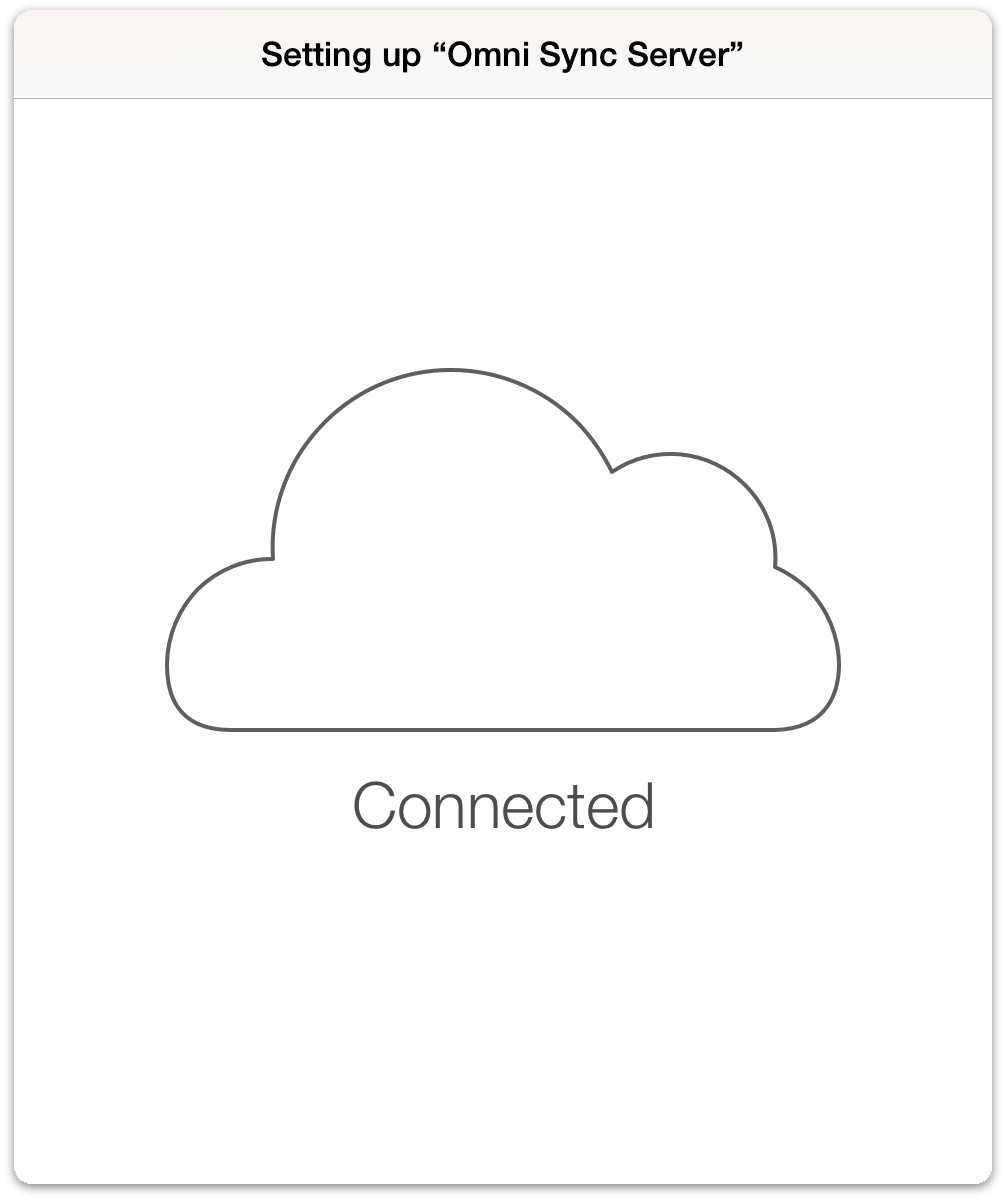
The next message you’ll see is Testing Server for Compatibility along with a progress bar. If everything checks out okay, OmniOutliner lets you know that it has successfully connected to Omni Sync Server.

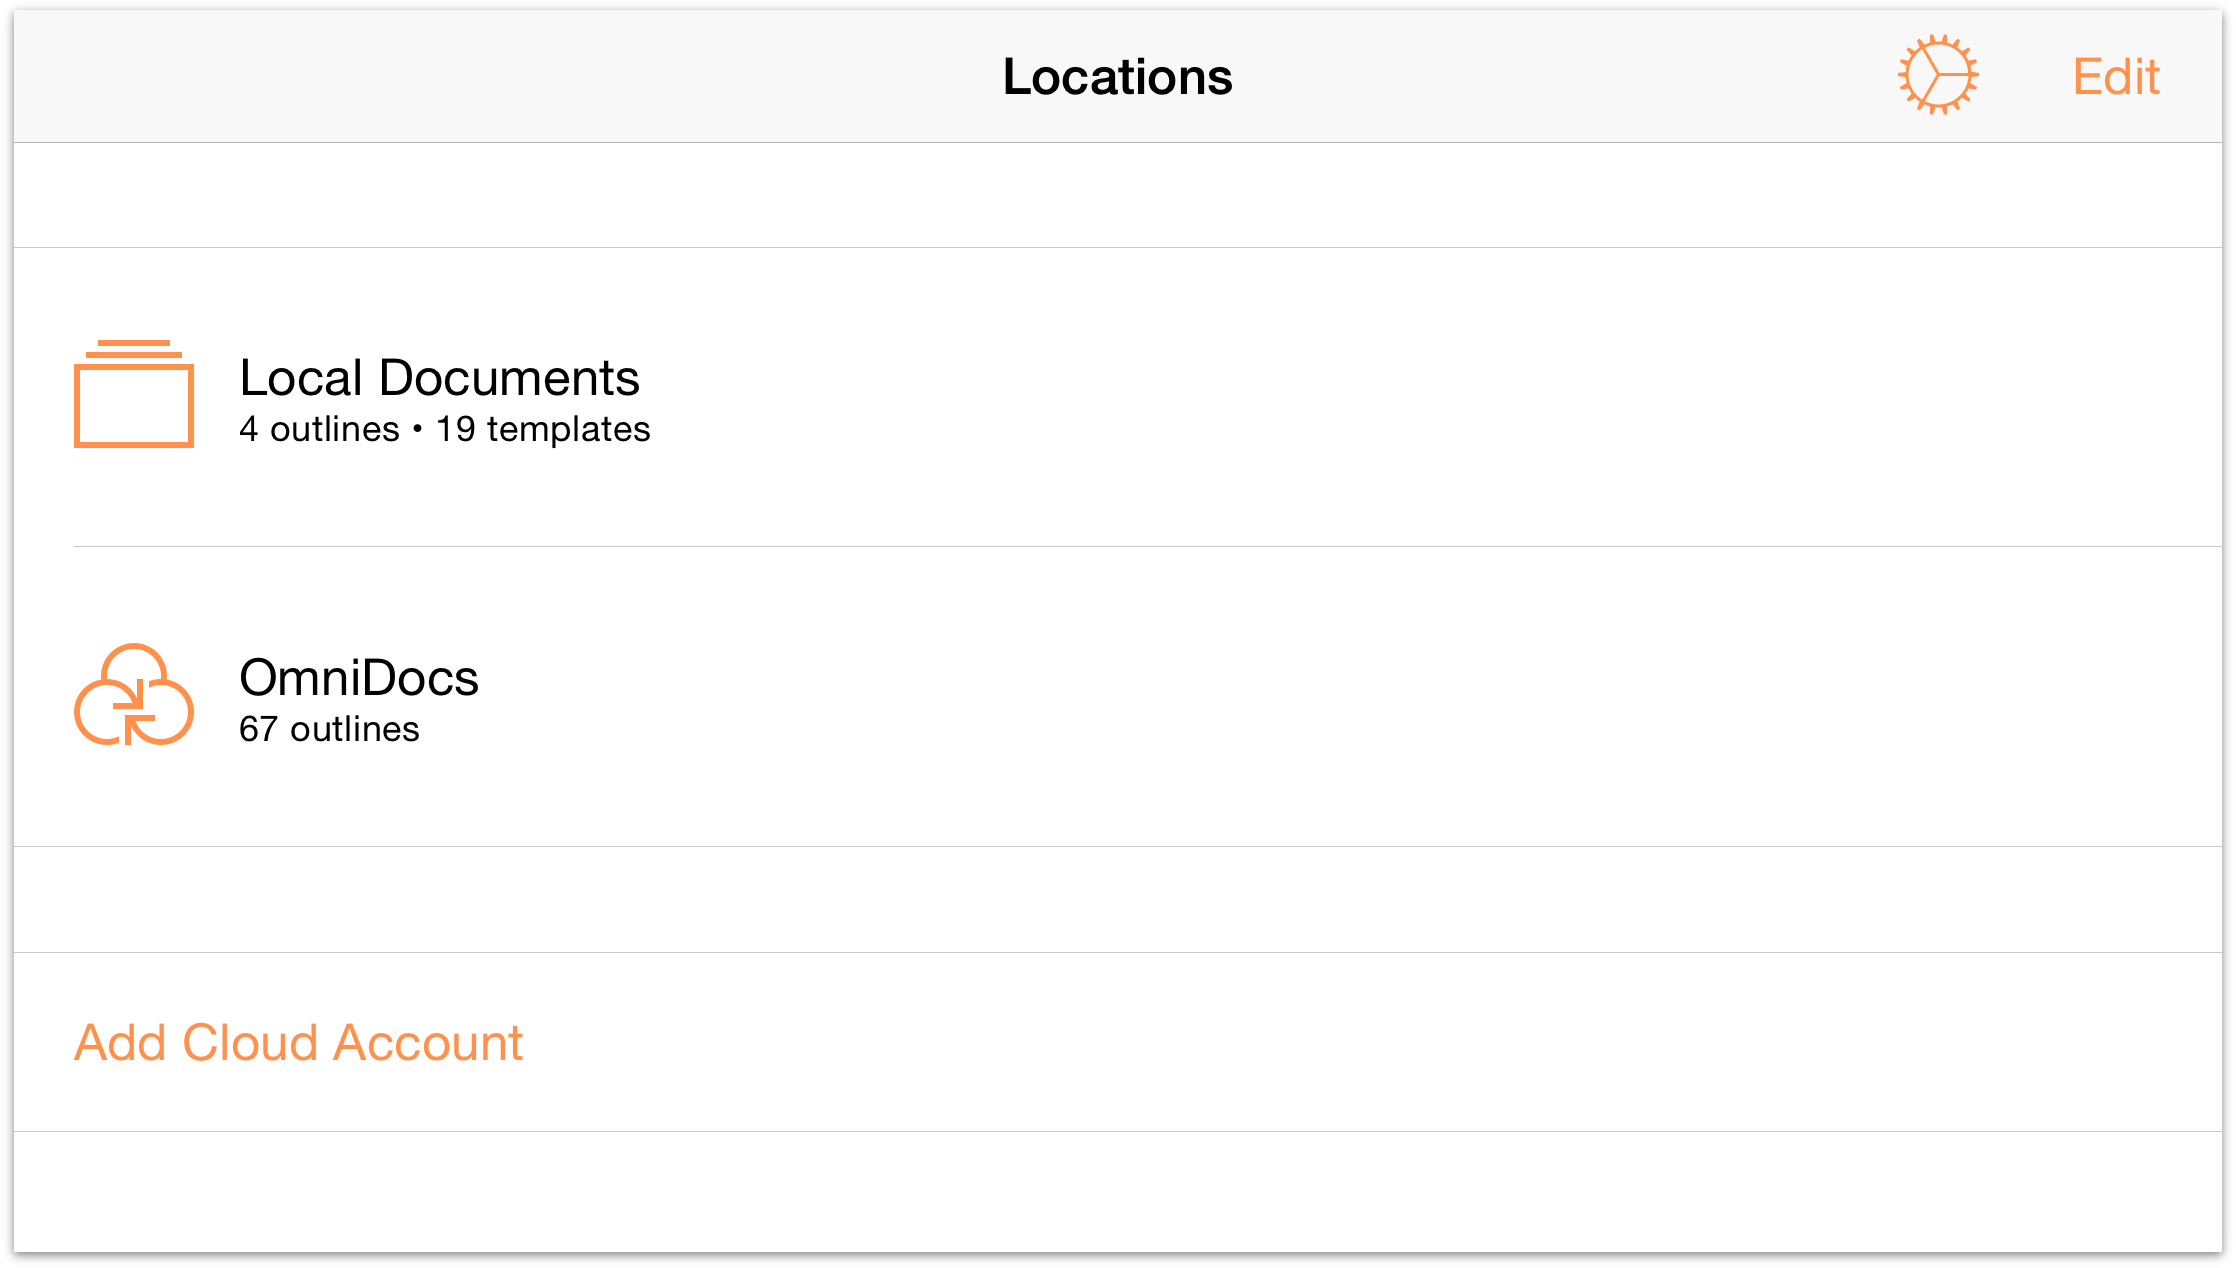
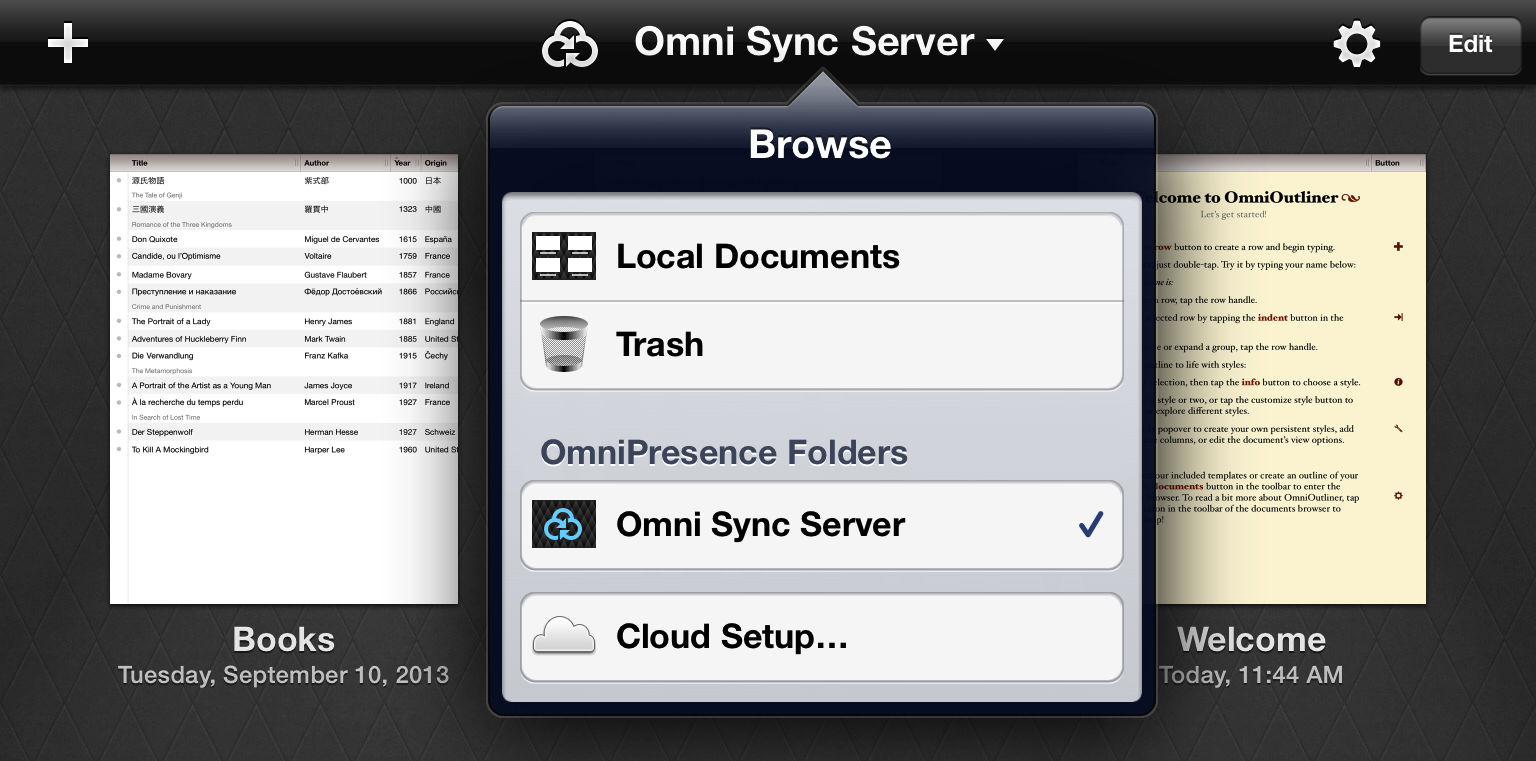
When your credentials have authenticated, you’re taken back to OmniOutliner’s Locations screen where you’ll see a new folder for your synced files.
To access the files within a document folder, just tap the folder of your choice, and then tap the file you would like to work on.
For WebDAV Server Accounts
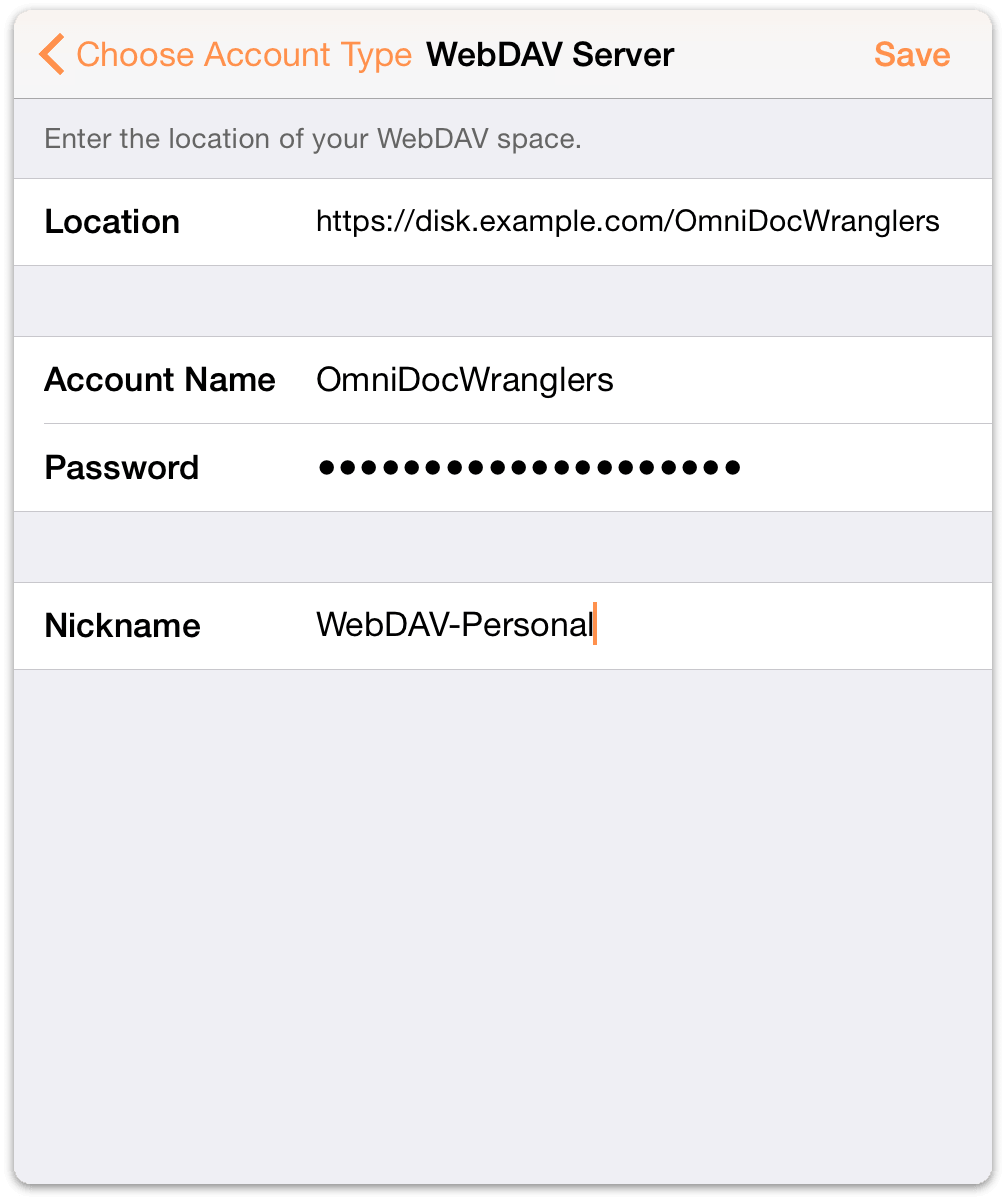
On the Account Info screen that appears, follow these steps:
- Enter the URL for the Location of your WebDAV Server
- Enter your Account Name
- Enter the Password for your account
- Optionally, enter a Nickname to be used as the name for your synced folder
- Tap Save to authenticate with the WebDAV server
As with connecting to Omni Sync Server, OmniOutliner informs you that it is Testing Server for Compatibility, and displays the Connected screen when it has connected to the WebDAV server successfully.
Monitoring OmniPresence
When you have configured OmniOutliner to use either type of cloud account (Omni Sync Server or WebDAV), you’ll notice an OmniPresence icon in the toolbar.
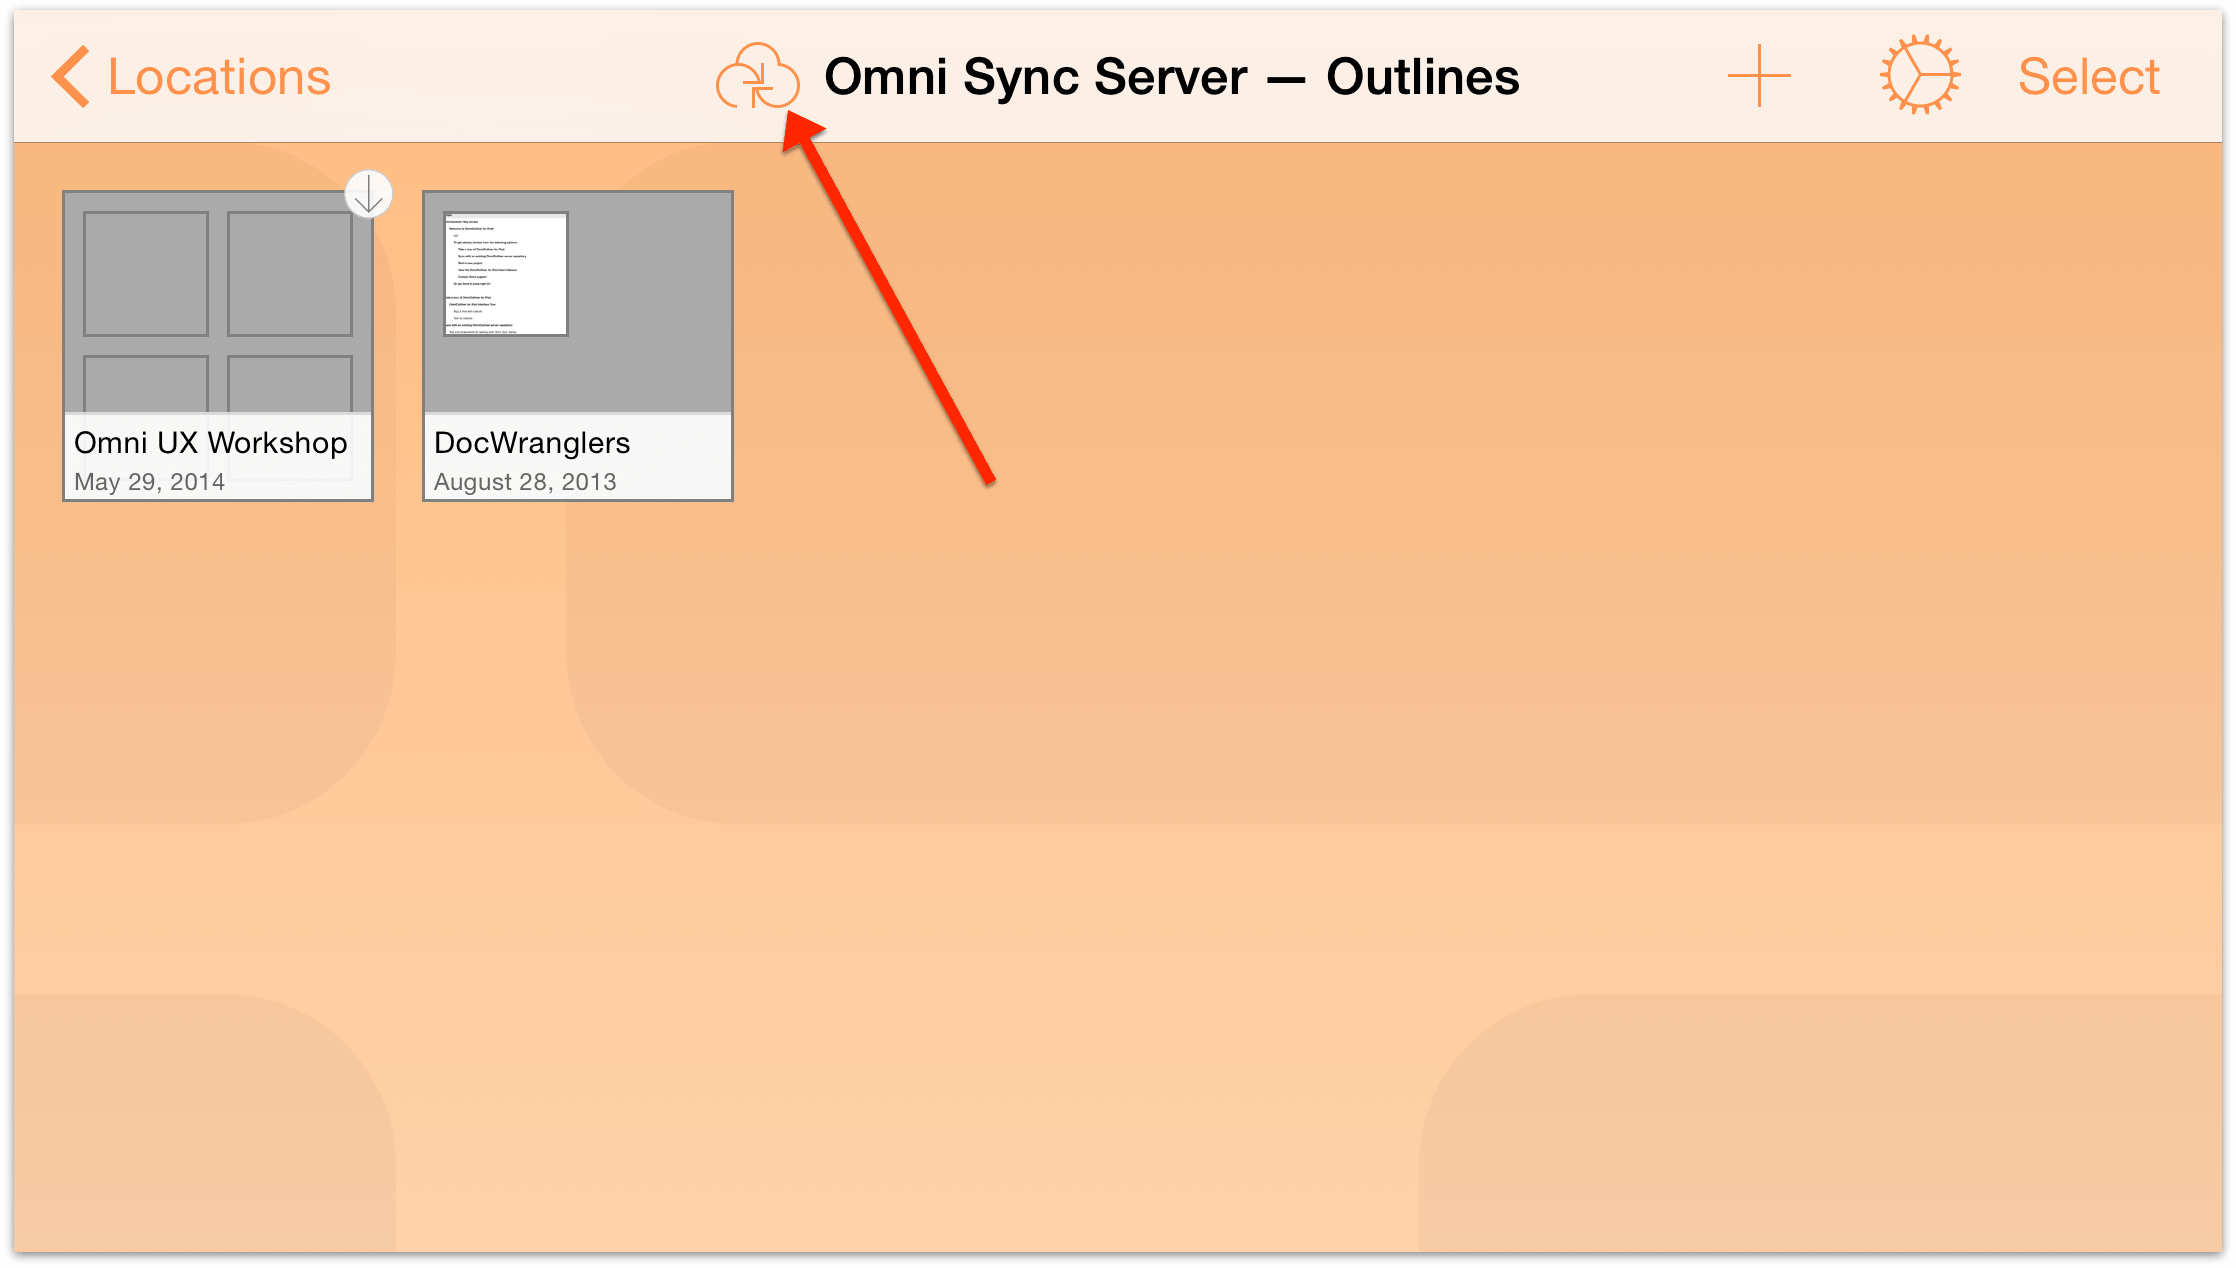
Keep an eye on this icon to monitor OmniPresence’s sync status:
 — denotes that OmniPresence is active and ready to sync files to the server.
 — denotes that a sync is currently in progress.
 — denotes that your iOS device does not have access to an active Wi-Fi or cellular network.
 — denotes that there was an error when trying to sync your files. You may see this icon if someone else is working on the same file, or if a connection cannot be made to the sync server you are using. Try tapping the OmniPresence icon again and if you get the same error icon, please contact our Support Humans for assistance.
OmniPresence checks in with your active sync servers every minute or so, and saves any updates you’ve made to the server. OmniPresence also saves a version of your file to the server whenever you close a file or switch from OmniOutliner to another app on your device. Alternately, you can tap the OmniPresence icon to force an update to the server at any time.
Deleting a Cloud Account
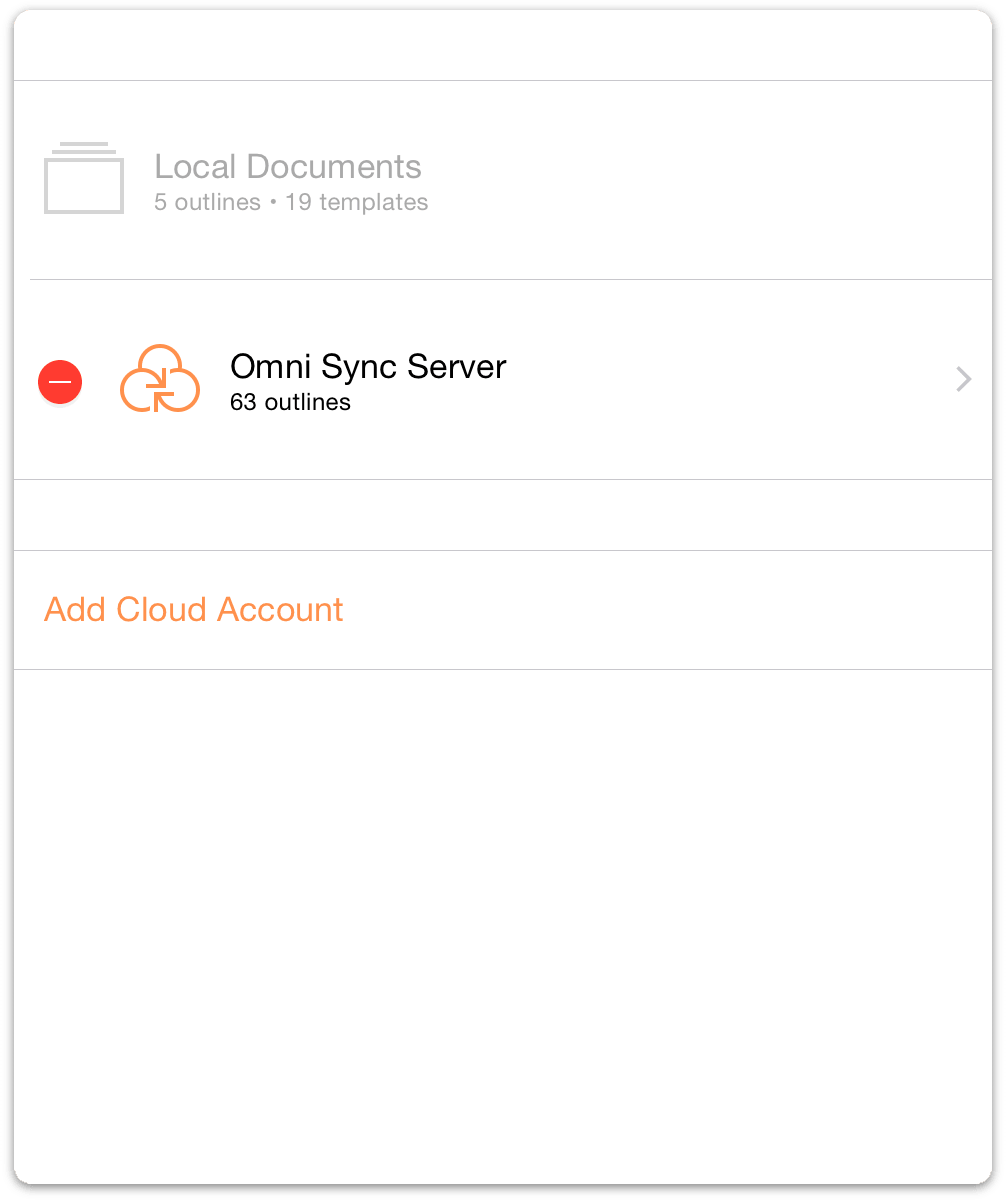
To remove an account, tap Edit; a delete handle appears to the left of the account name. If you tap the delete handle, the account name slides to the left and a Delete button appears on the right edge; tap that to delete the account.
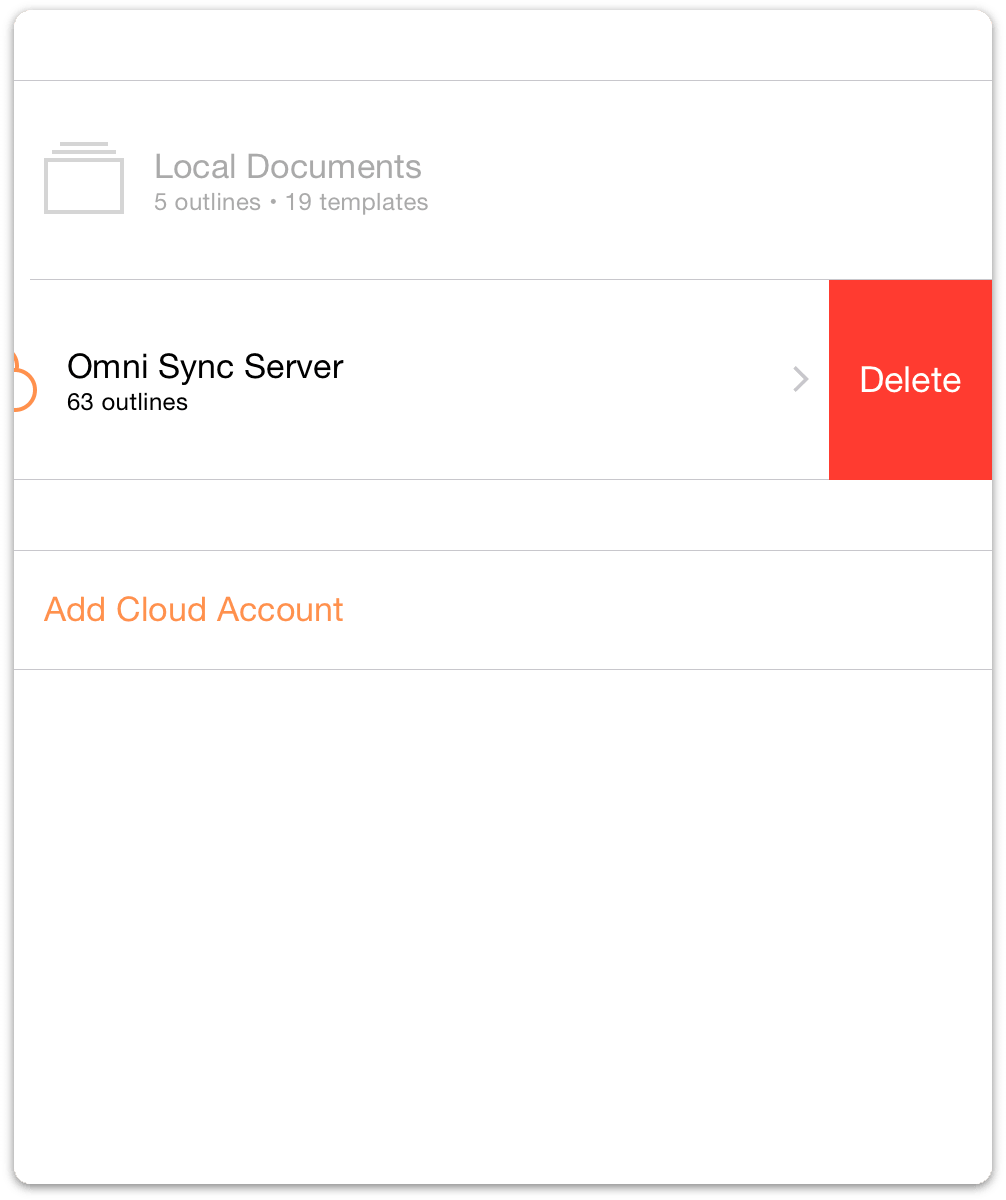
A quicker way to do this is to swipe left across the account name to bring up the Delete button. If you change your mind before deleting the account, tap Done and the Delete button goes away.
Warning
Undo does not restore an account that you have deleted. If you delete one (or all) of your Cloud Accounts, you will need to set those up all over again.
Managing Files with the Document Browser
In developer circles, OmniOutliner is known as what’s called a document-based application, which in non-nerdy language means: “This app creates and manages files.” And as a file-creating application, we need to provide a way for you to manage and organize your files. We call this the Document Browser.
Note
If you are familiar with the Mac, think of our Document Browser is analogous to the Finder. You use the Document Browser to organize and access your OmniOutliner documents.
This chapter provides you with an overview of OmniOutliner’s Document Browser, and shows you how to manage the files you create. You’ll learn how to create subfolders, move files around between the Local Documents folder and a folder in the cloud, as well as sharing and trashing files that you no longer need.
Let’s go!
Getting Acquainted with the Document Browser
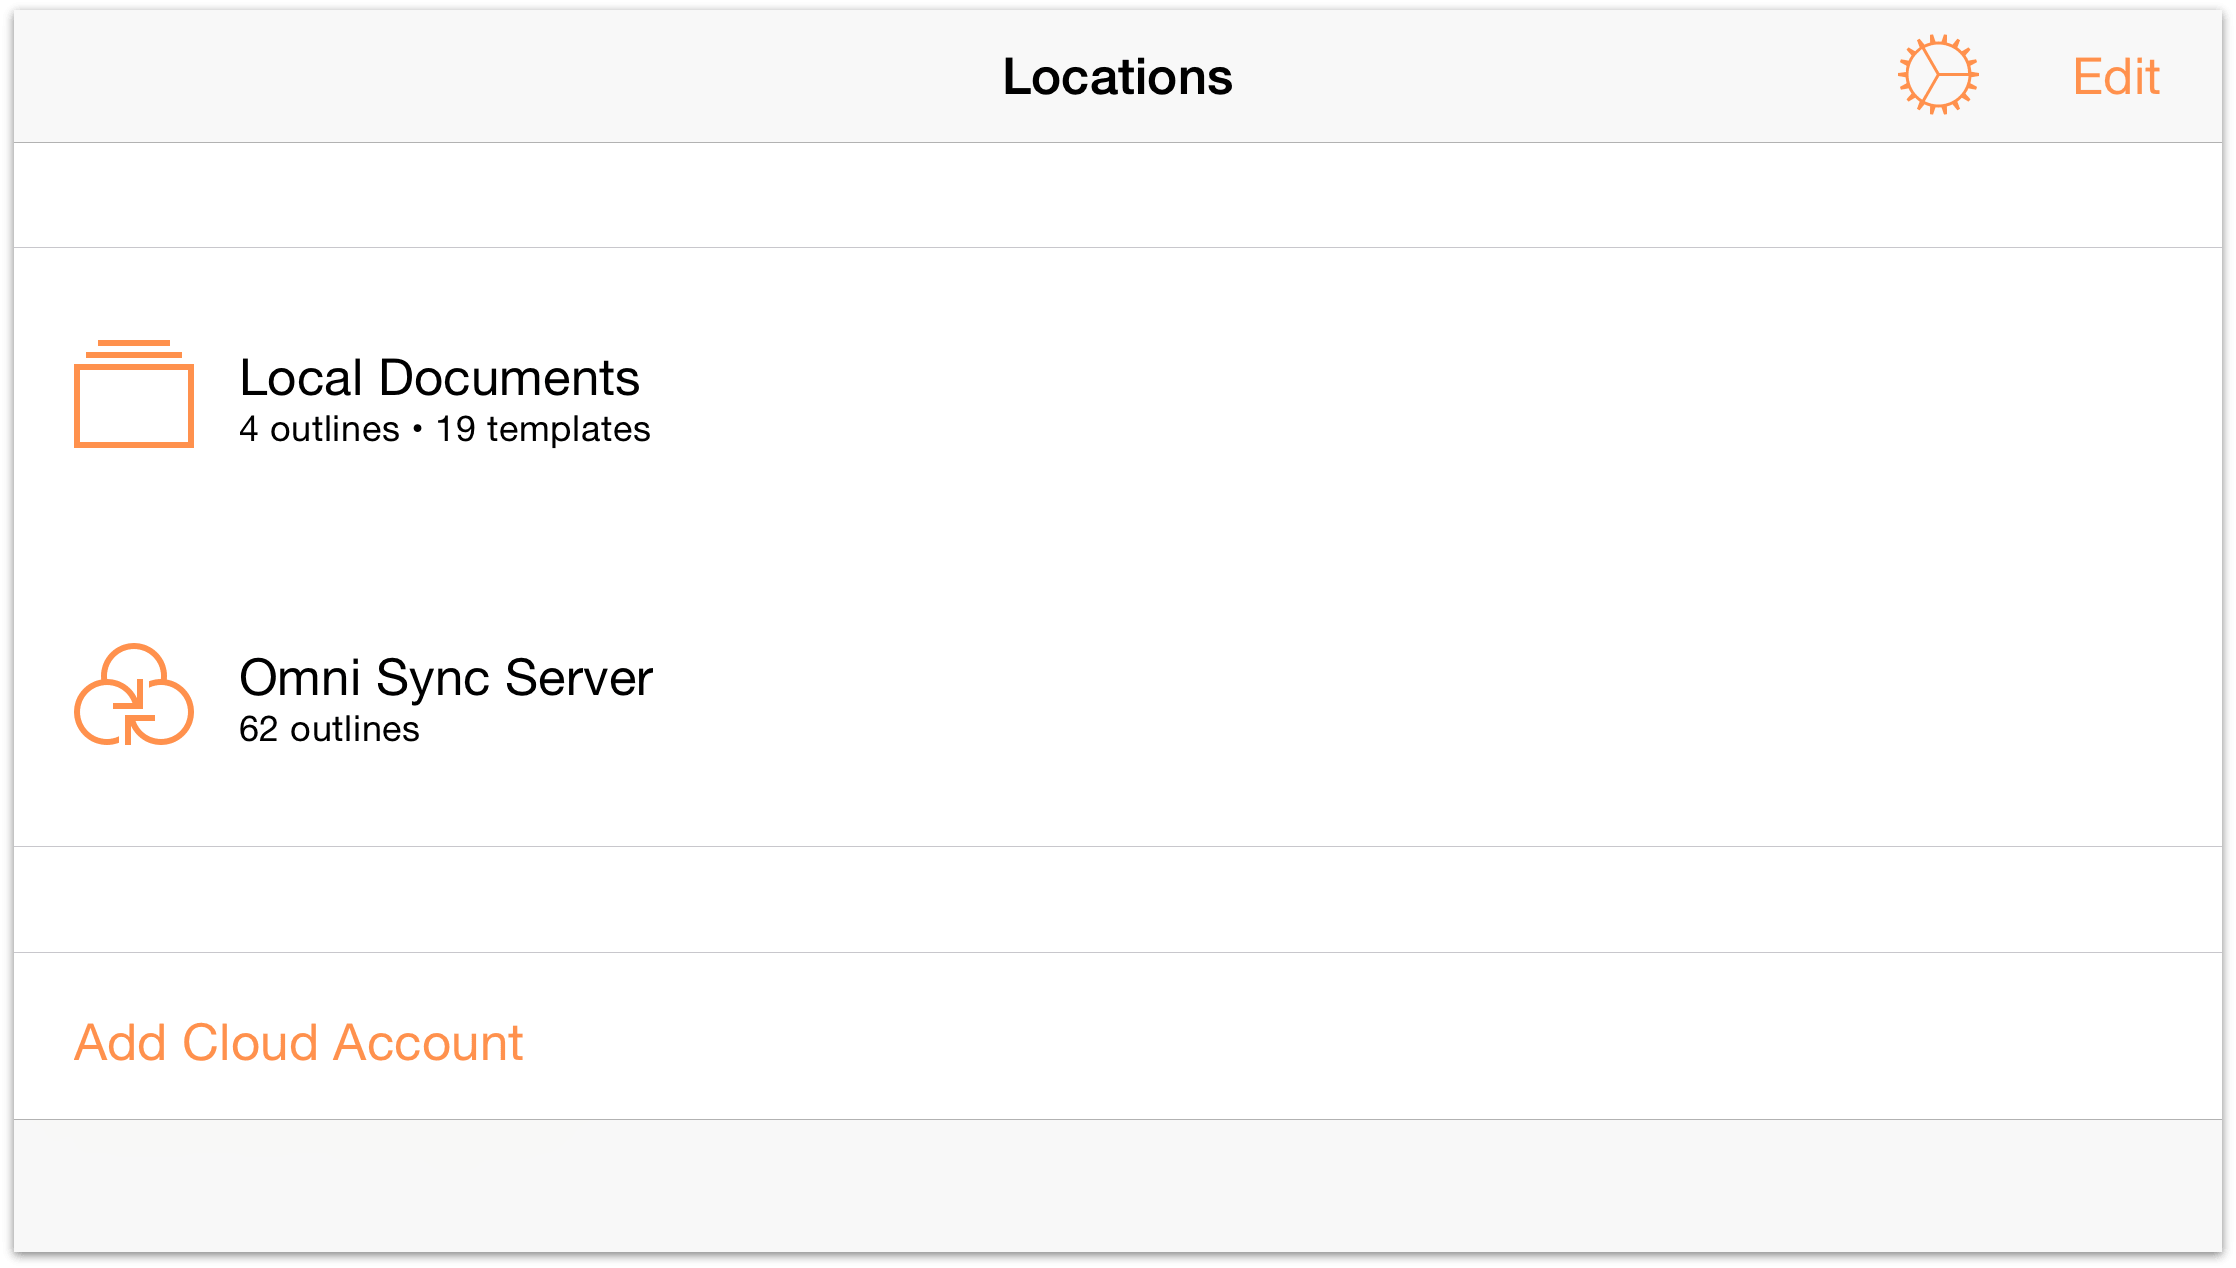
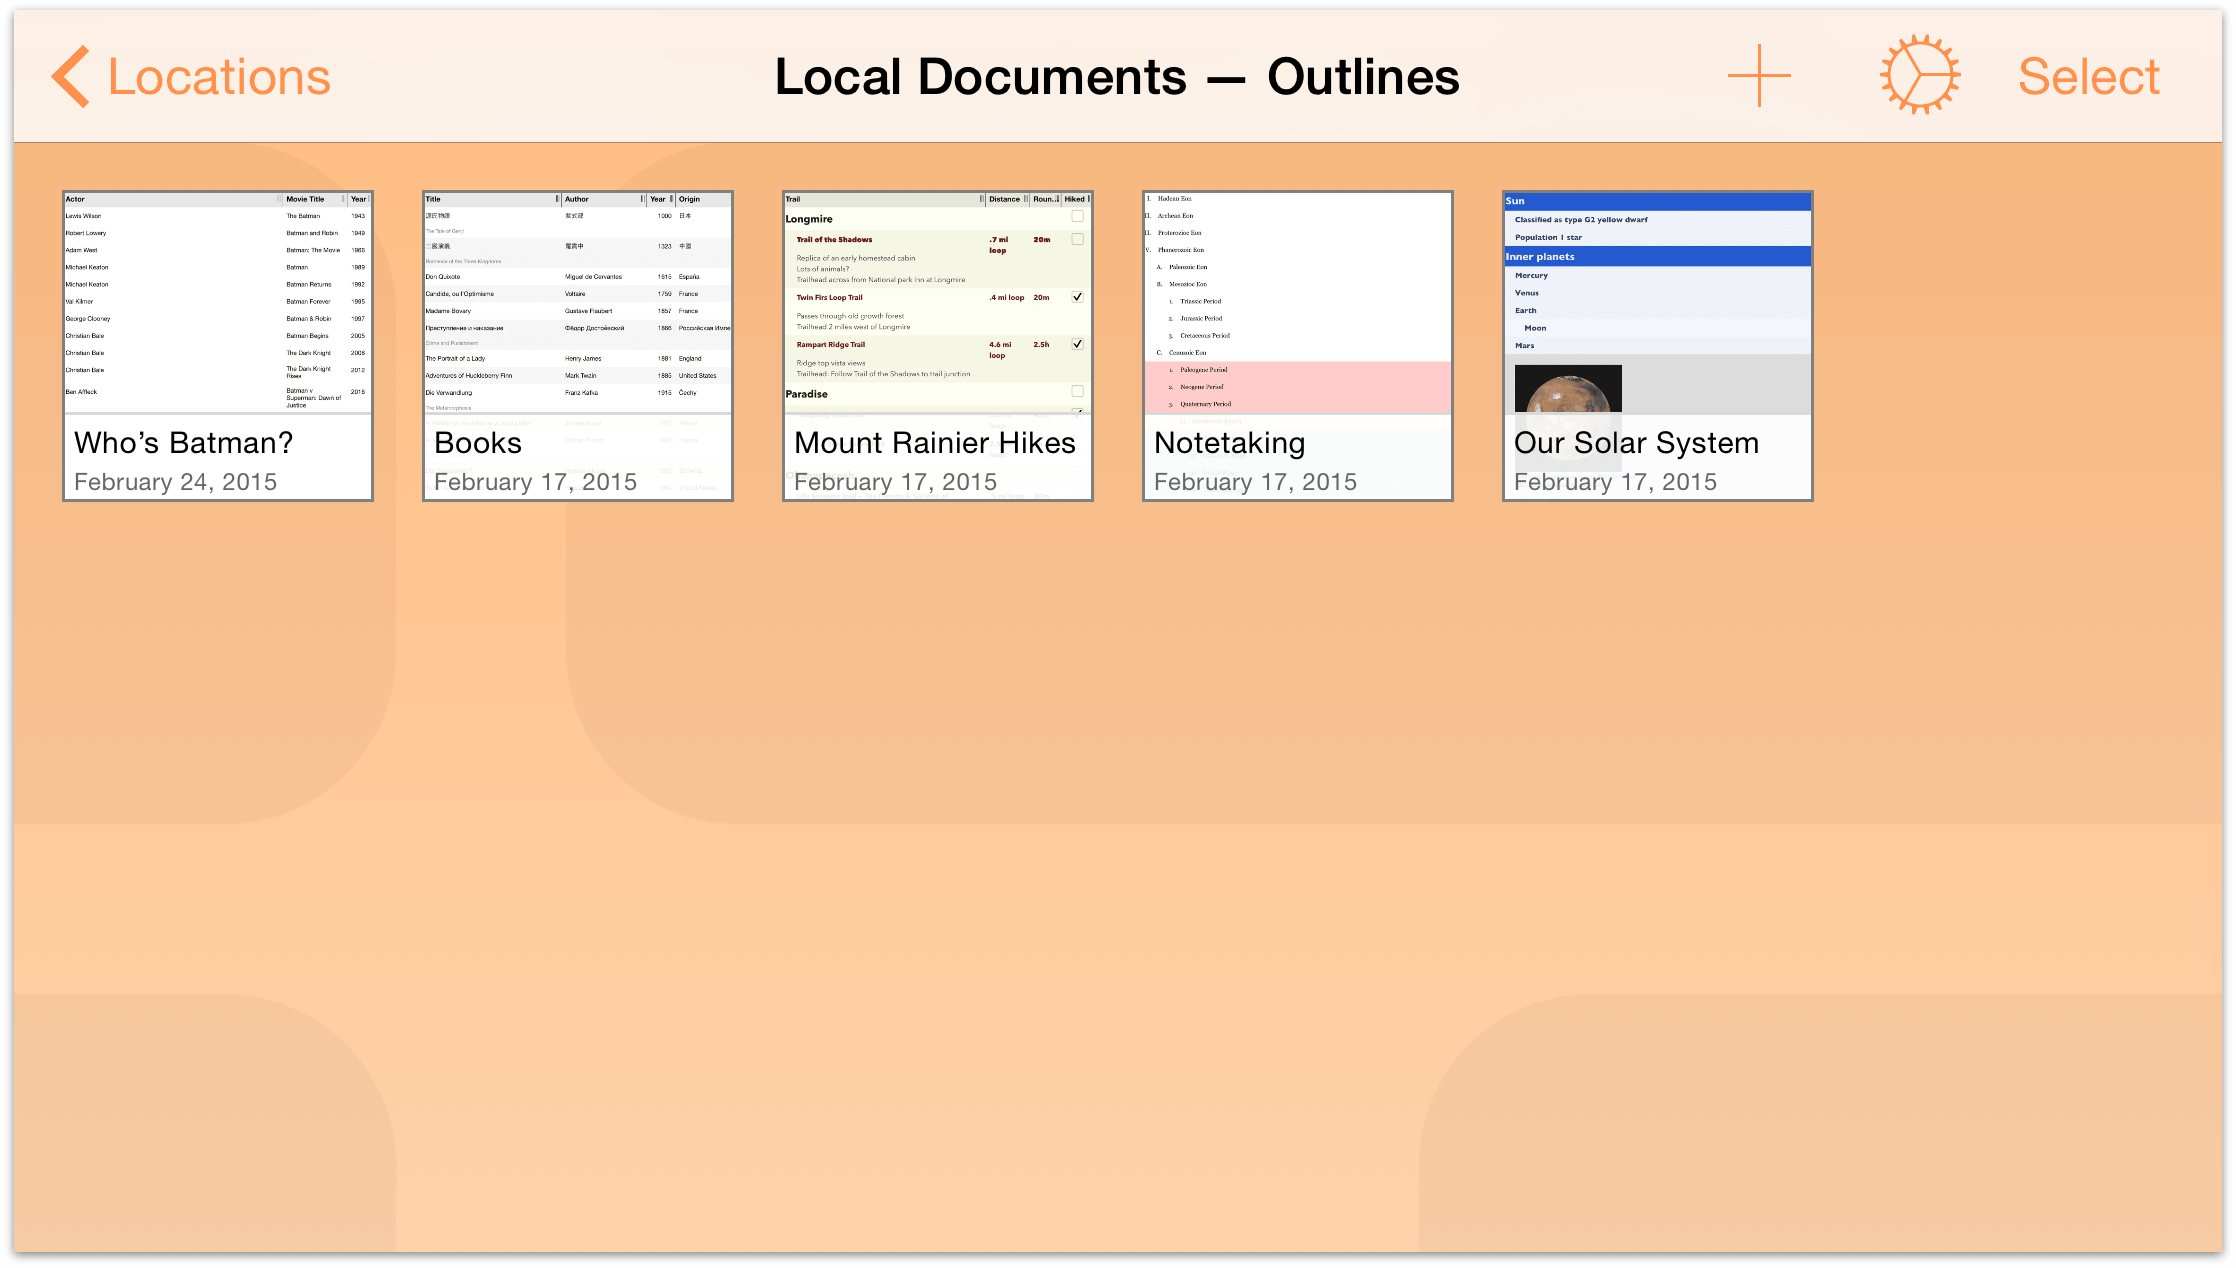
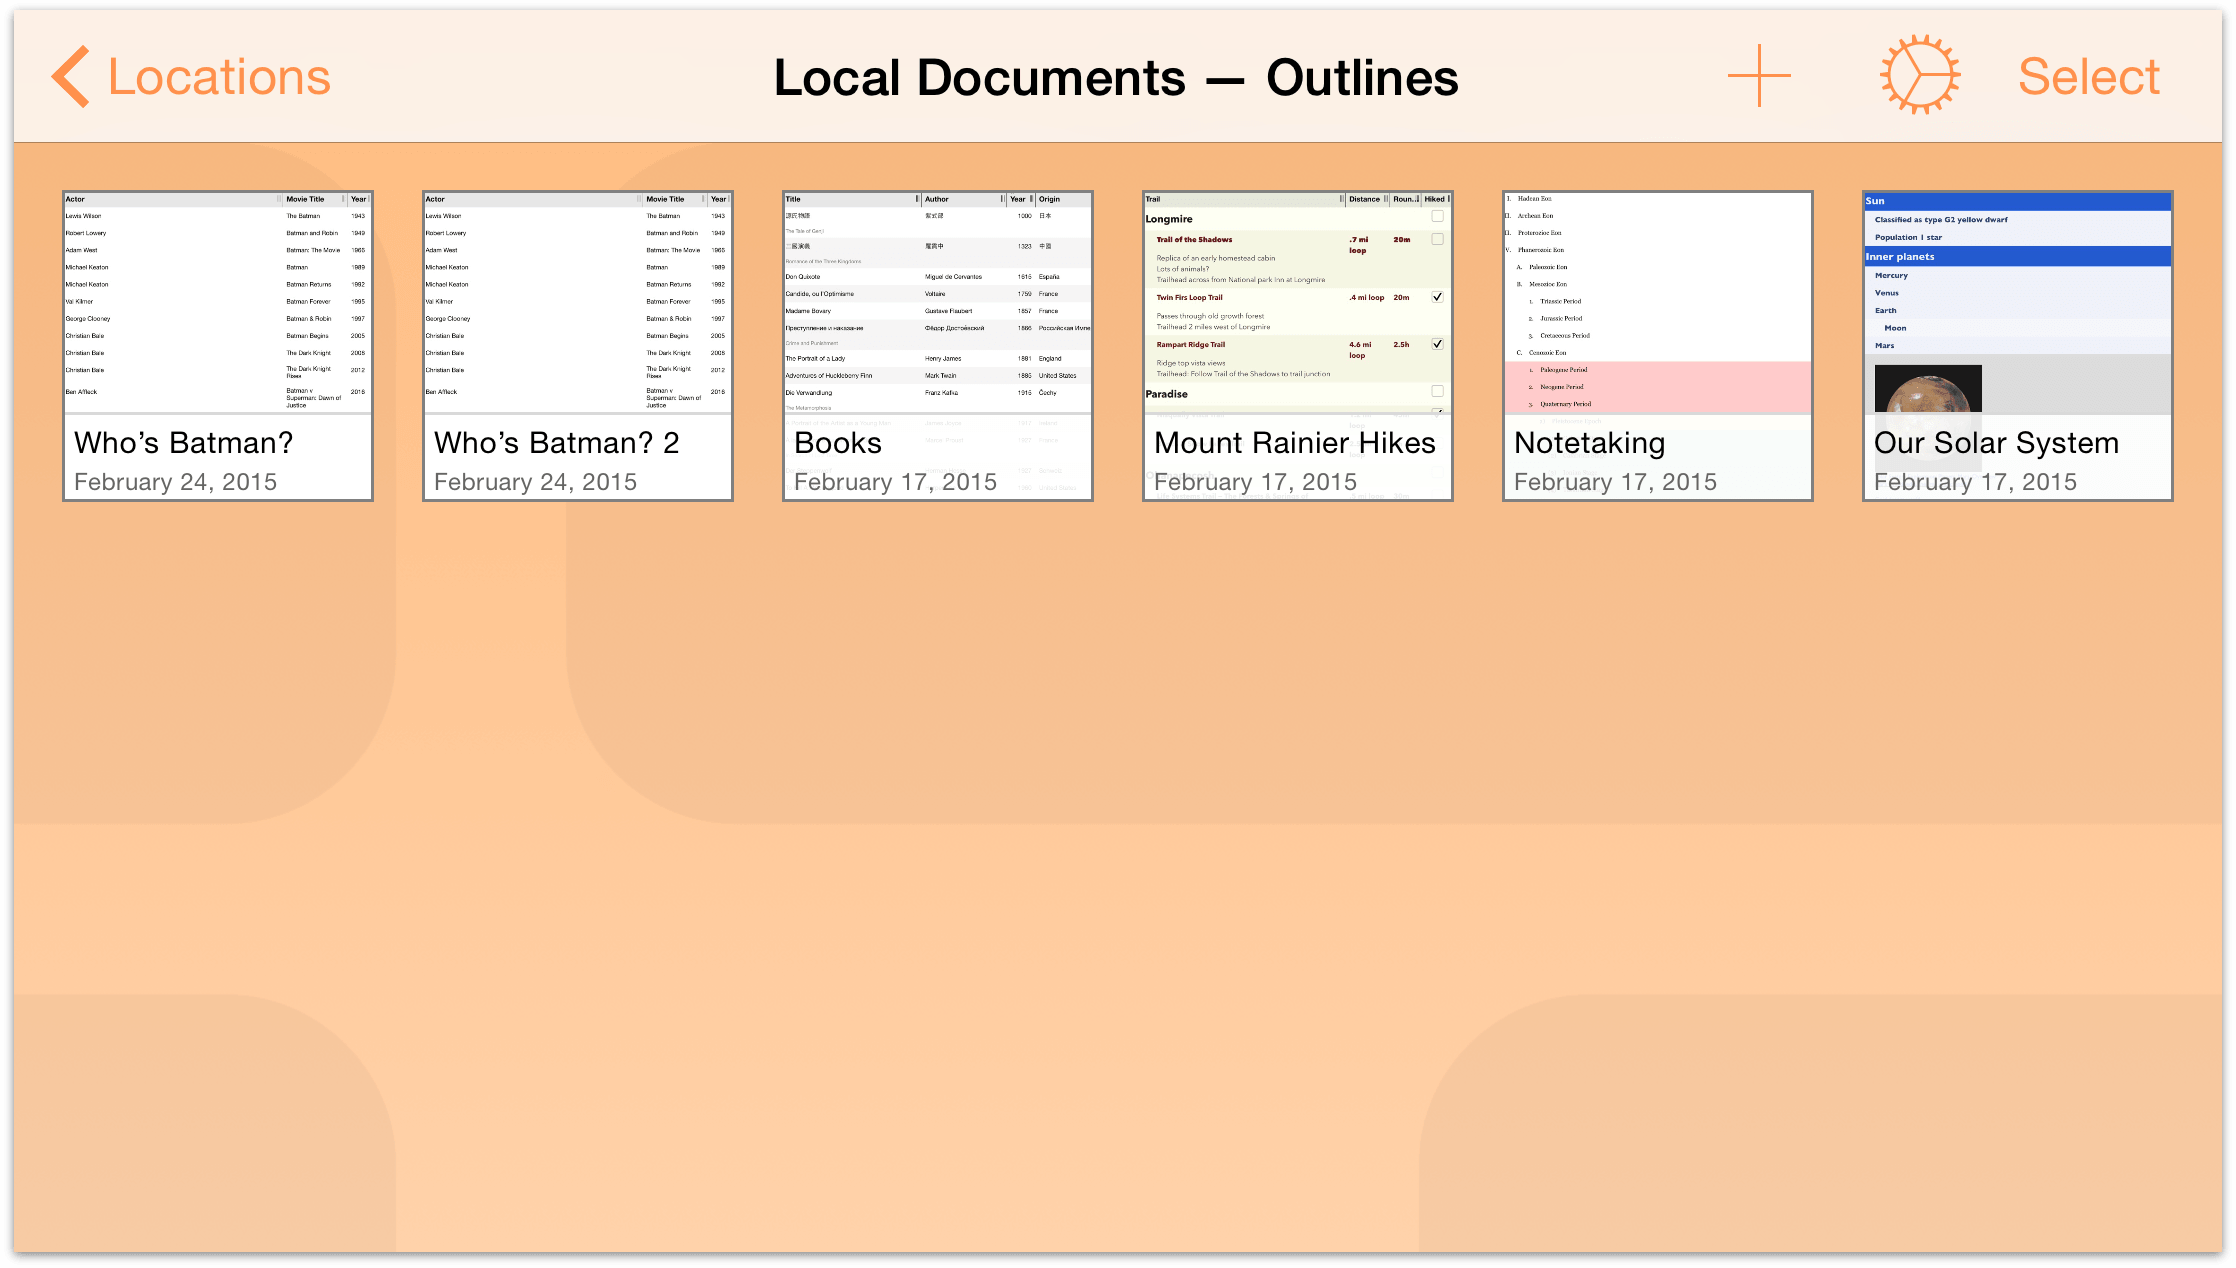
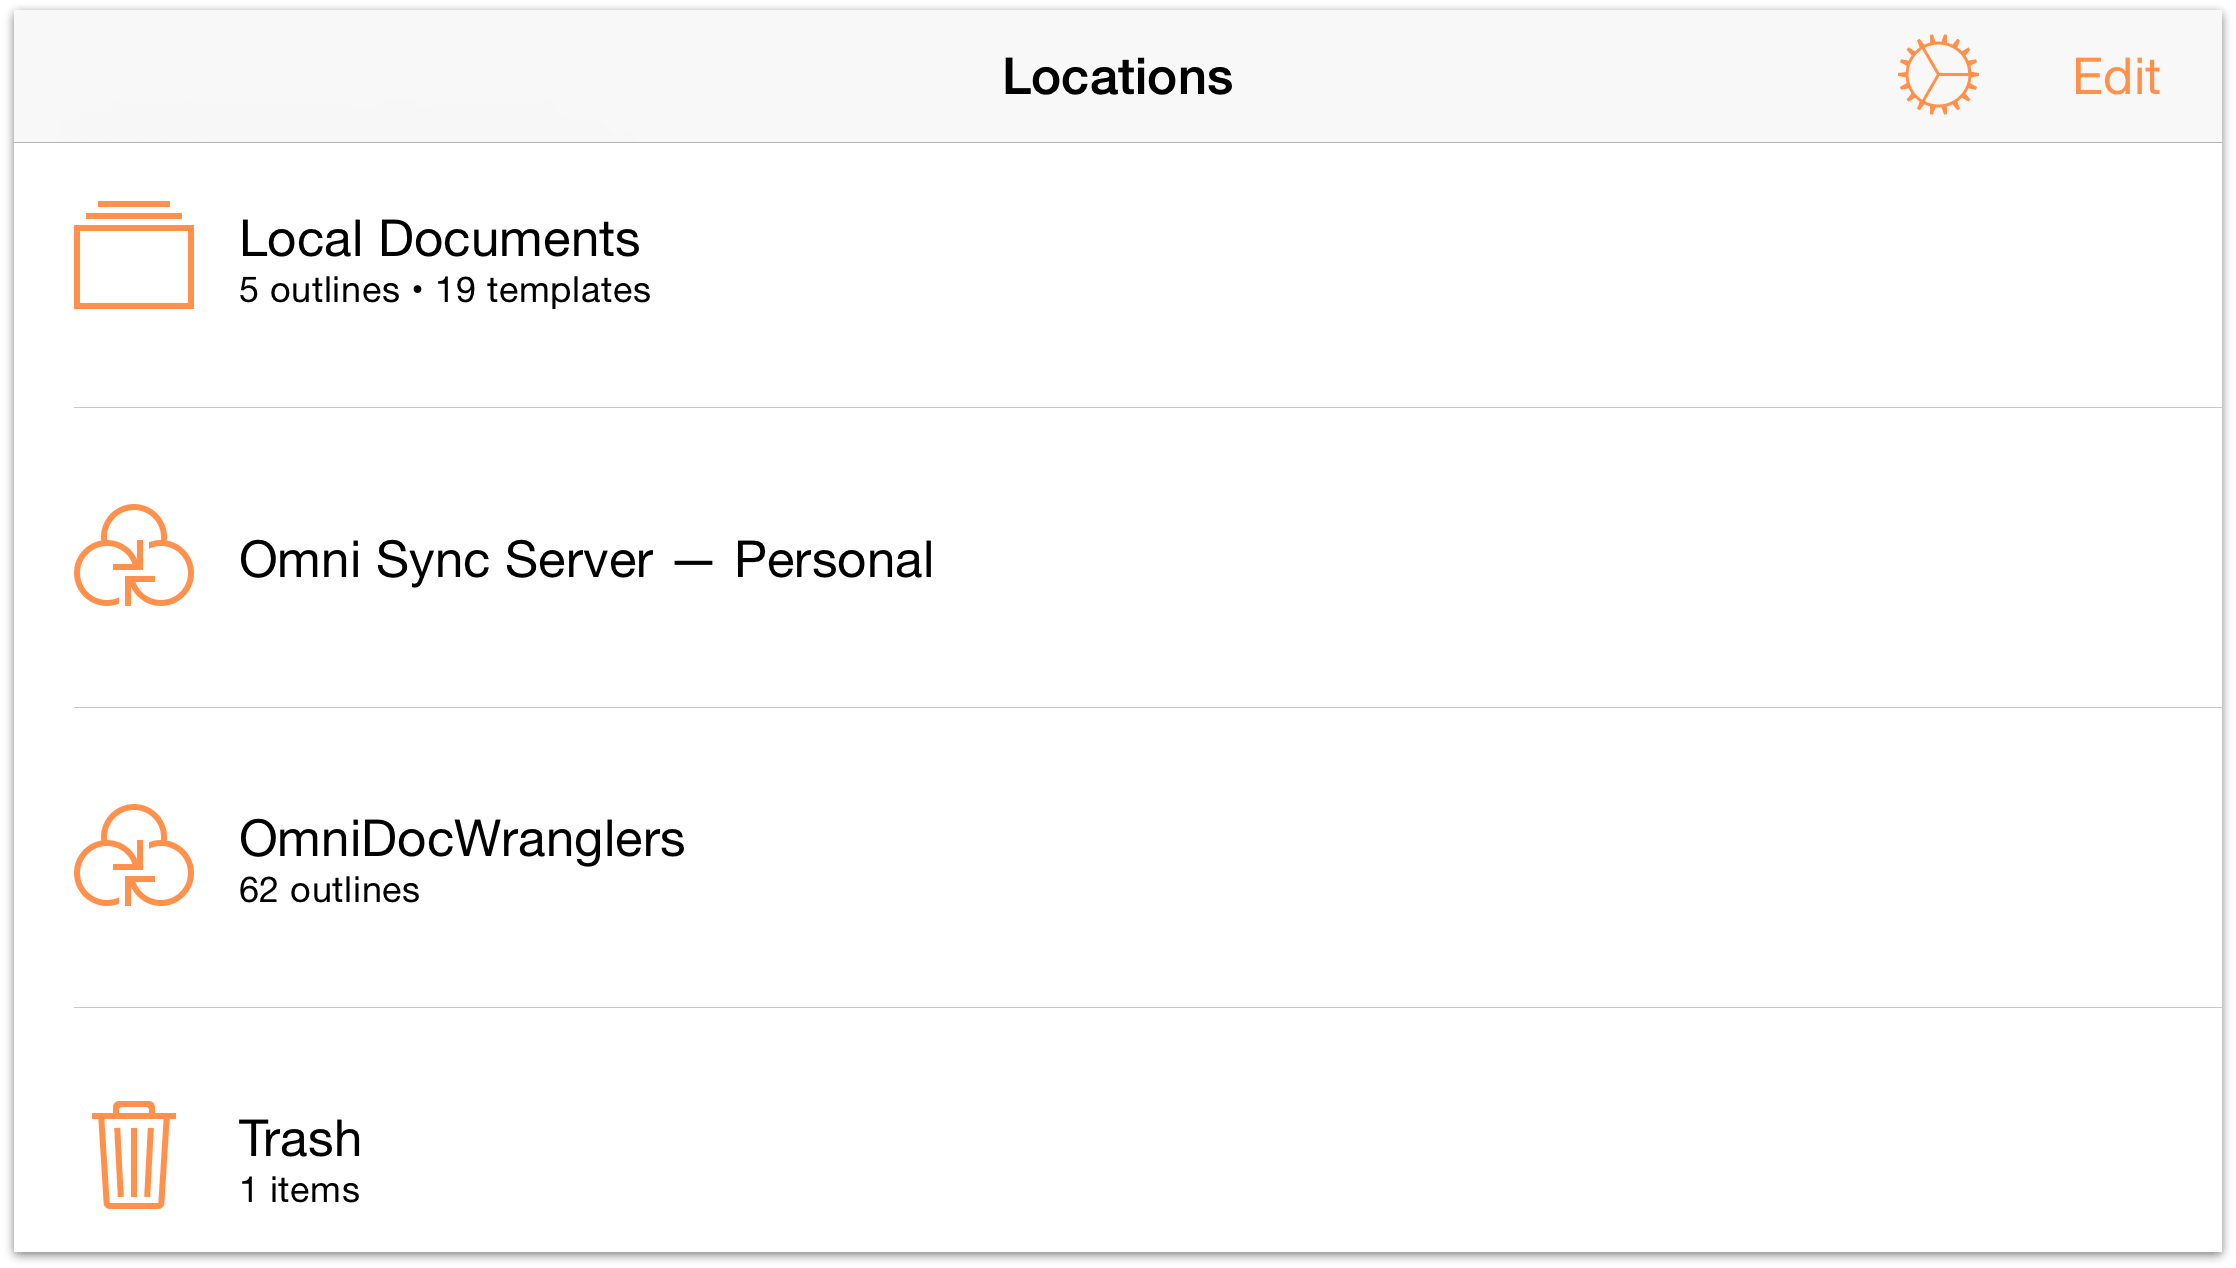
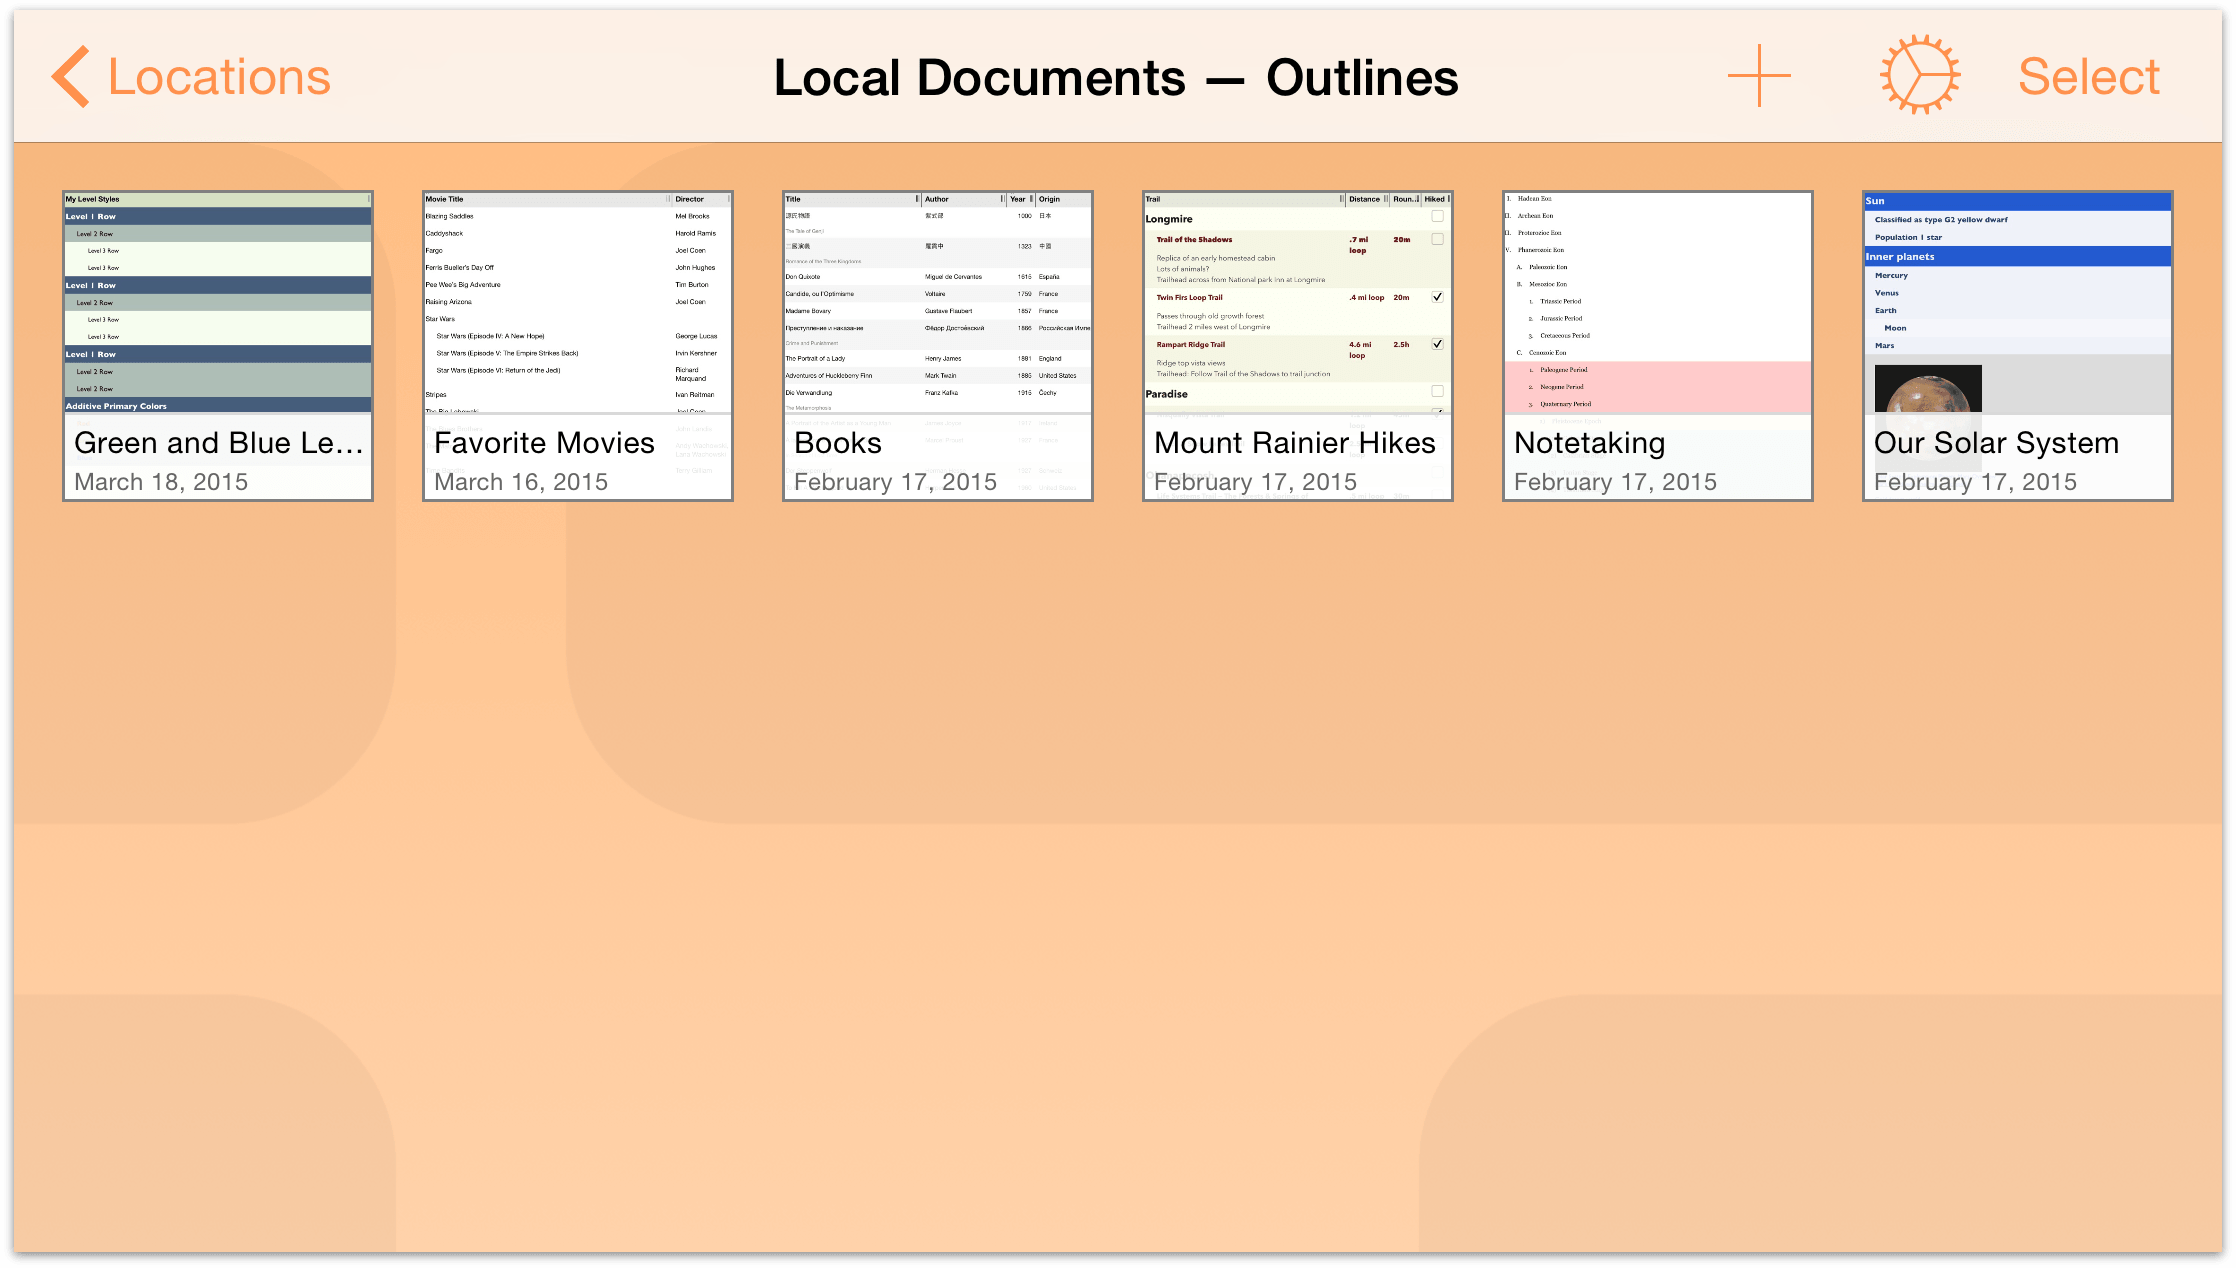
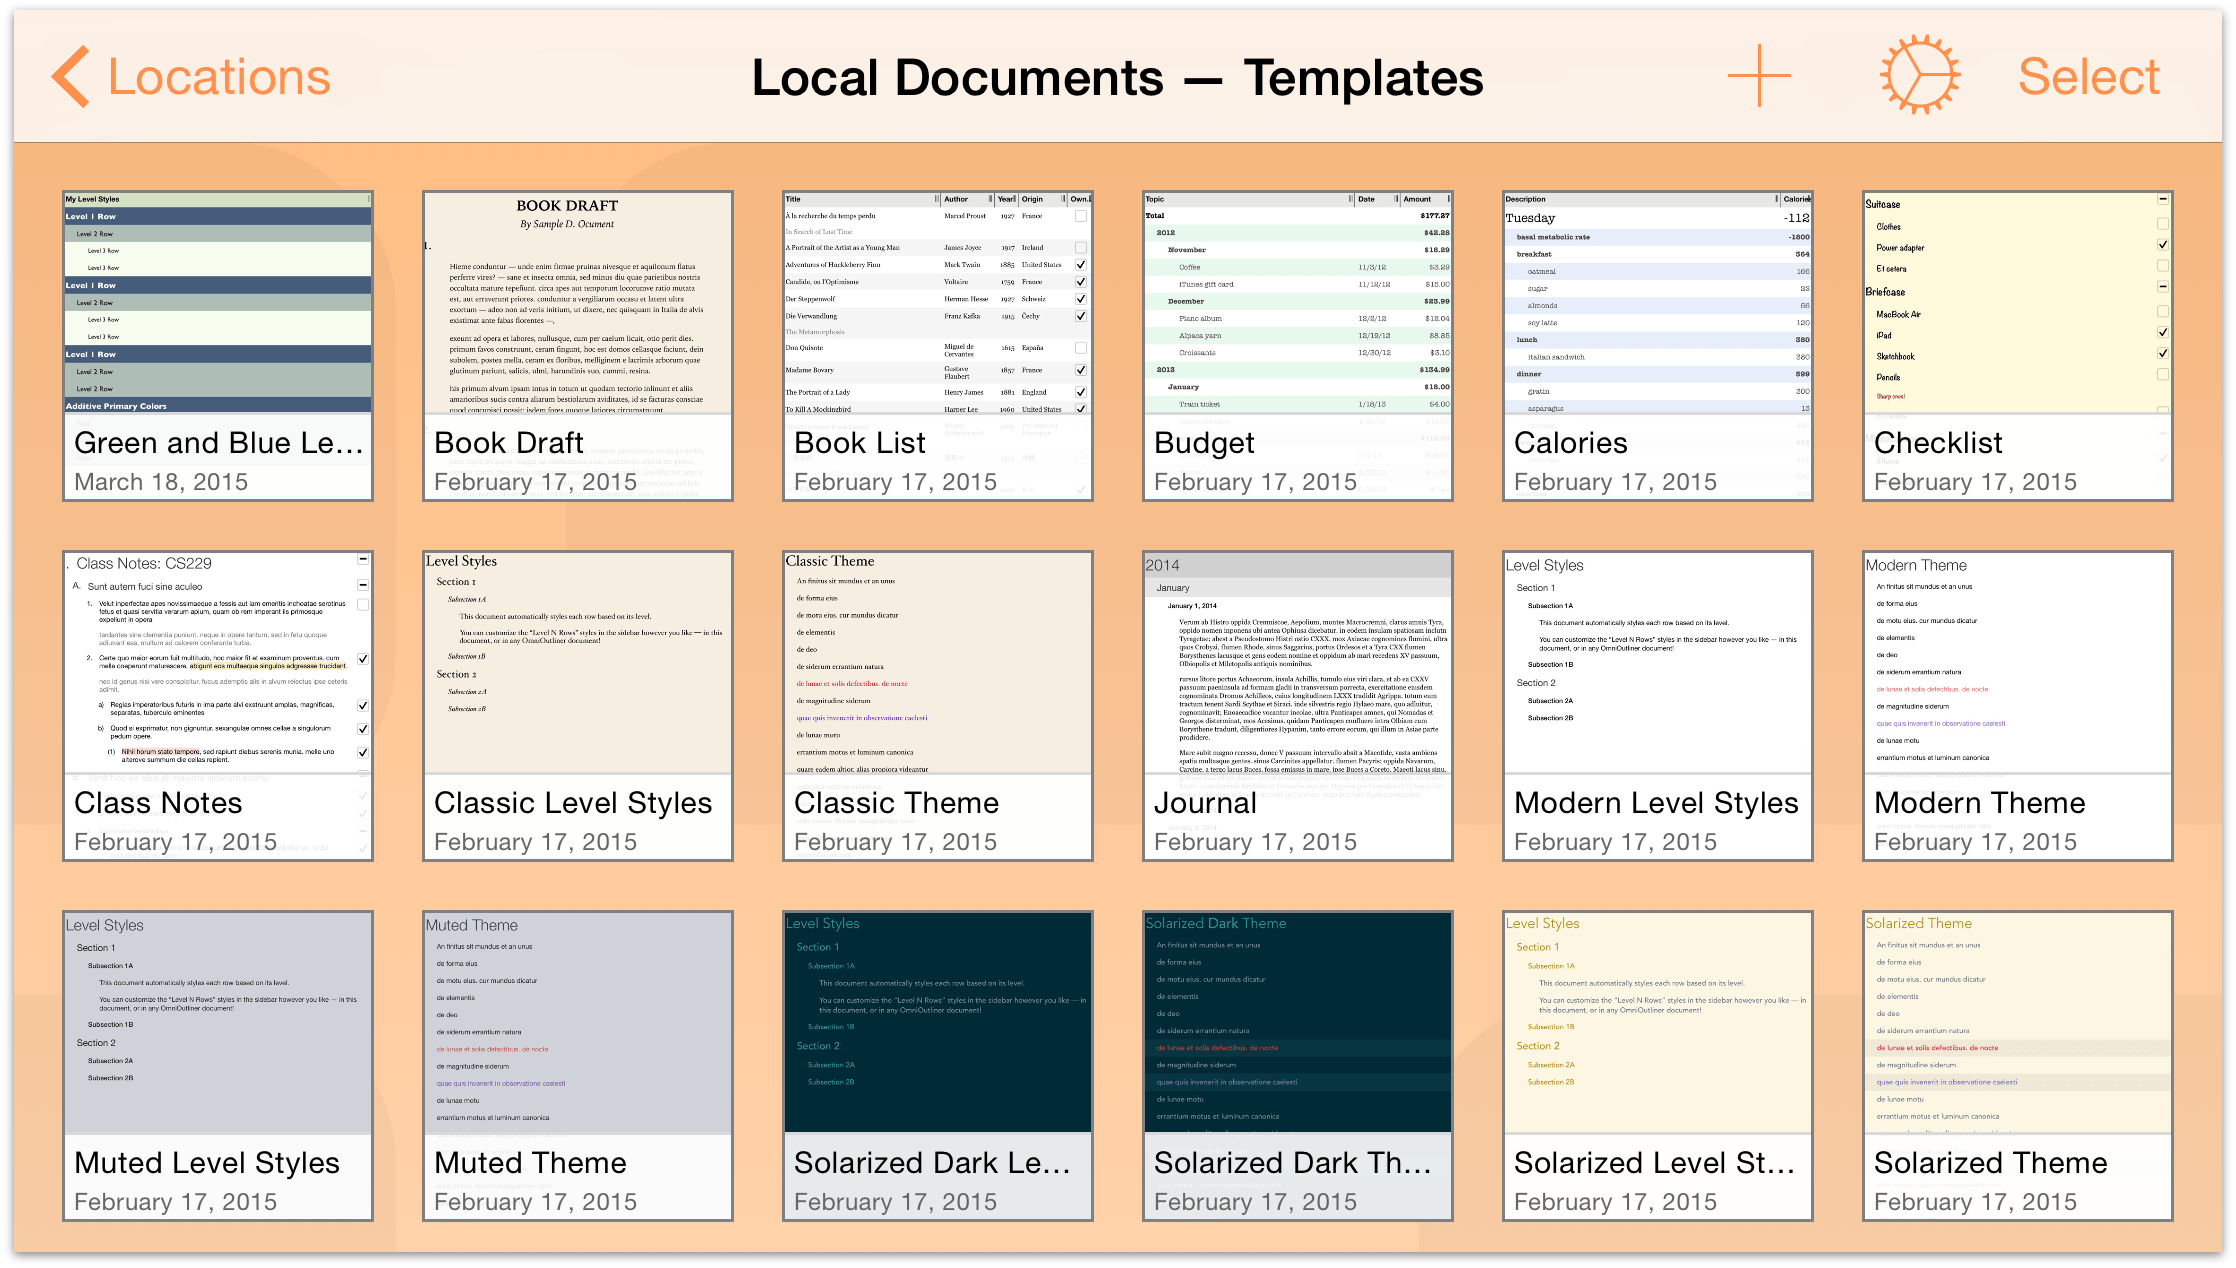
When you first open OmniOutliner, you’re taken to the Locations screen which is the place you go to access all of your documents. There is a Local Documents folder, which we’ve preloaded with some sample OmniOutliner files that you can use as inspiration for the documents you’ll create.
Note
When you configure a Cloud Account, such as a free Omni Sync Server account (or connect to any WebDAV service you’ve subscribed to), you’ll also see a folder for that as well. See Adding a Cloud Account for details on how to set up a Cloud Account.
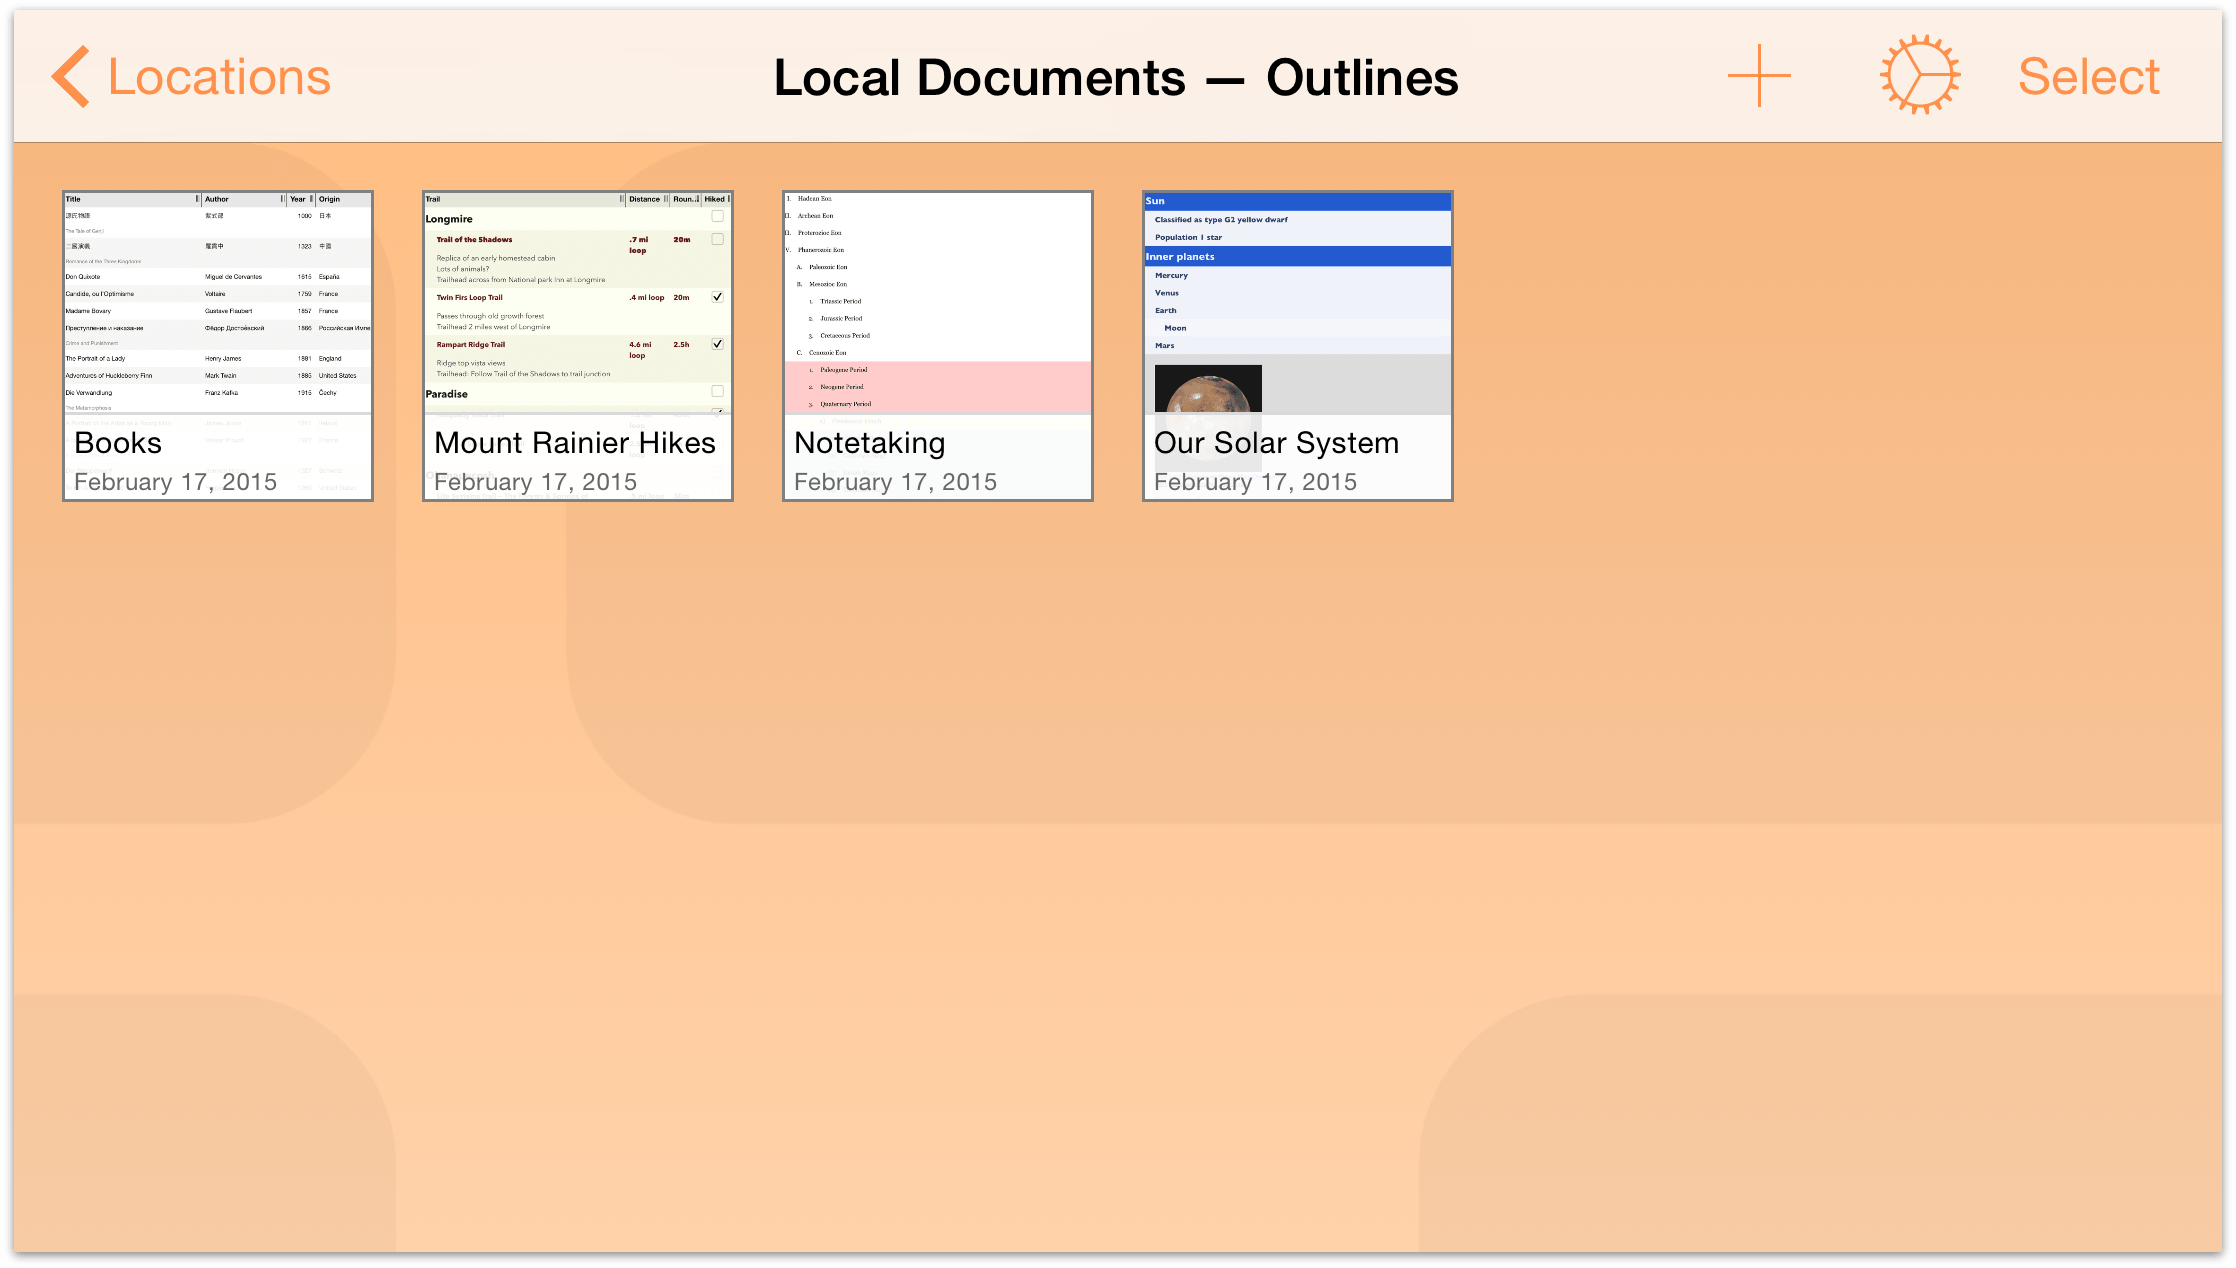
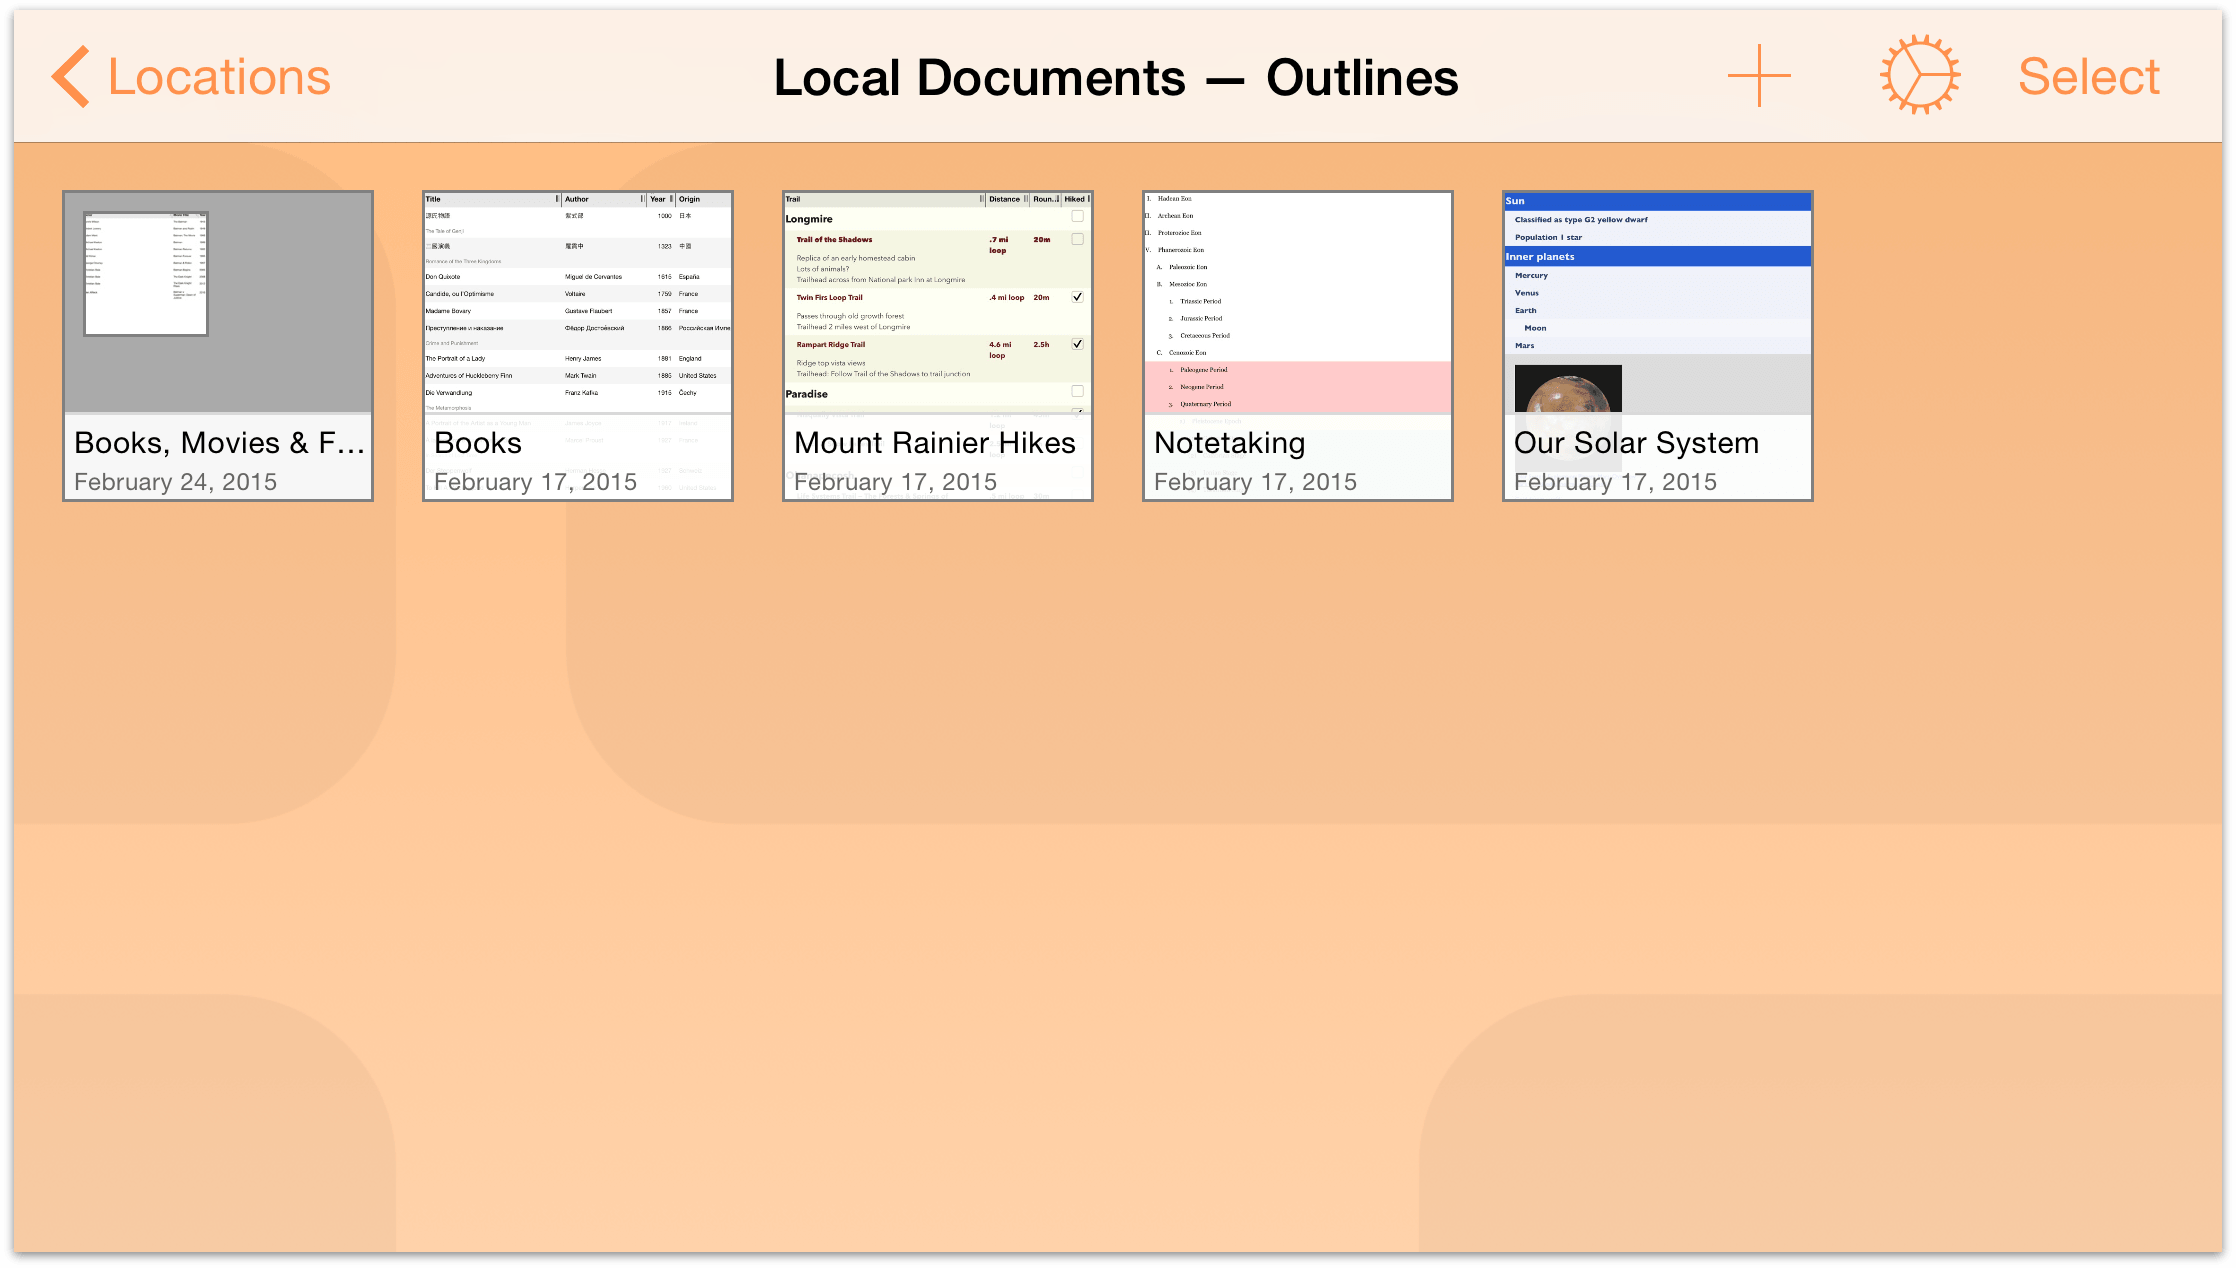
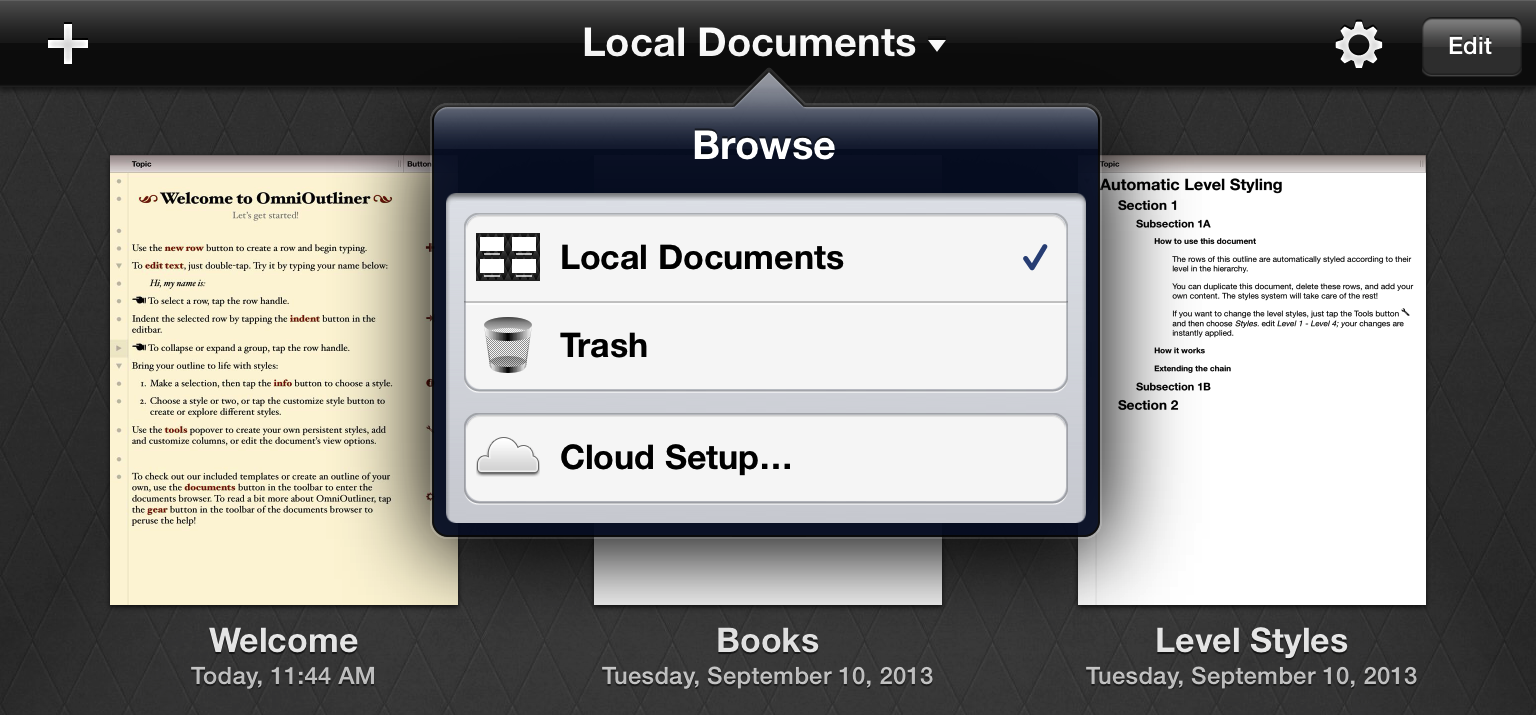
Tap Local Documents to see what’s inside this folder:
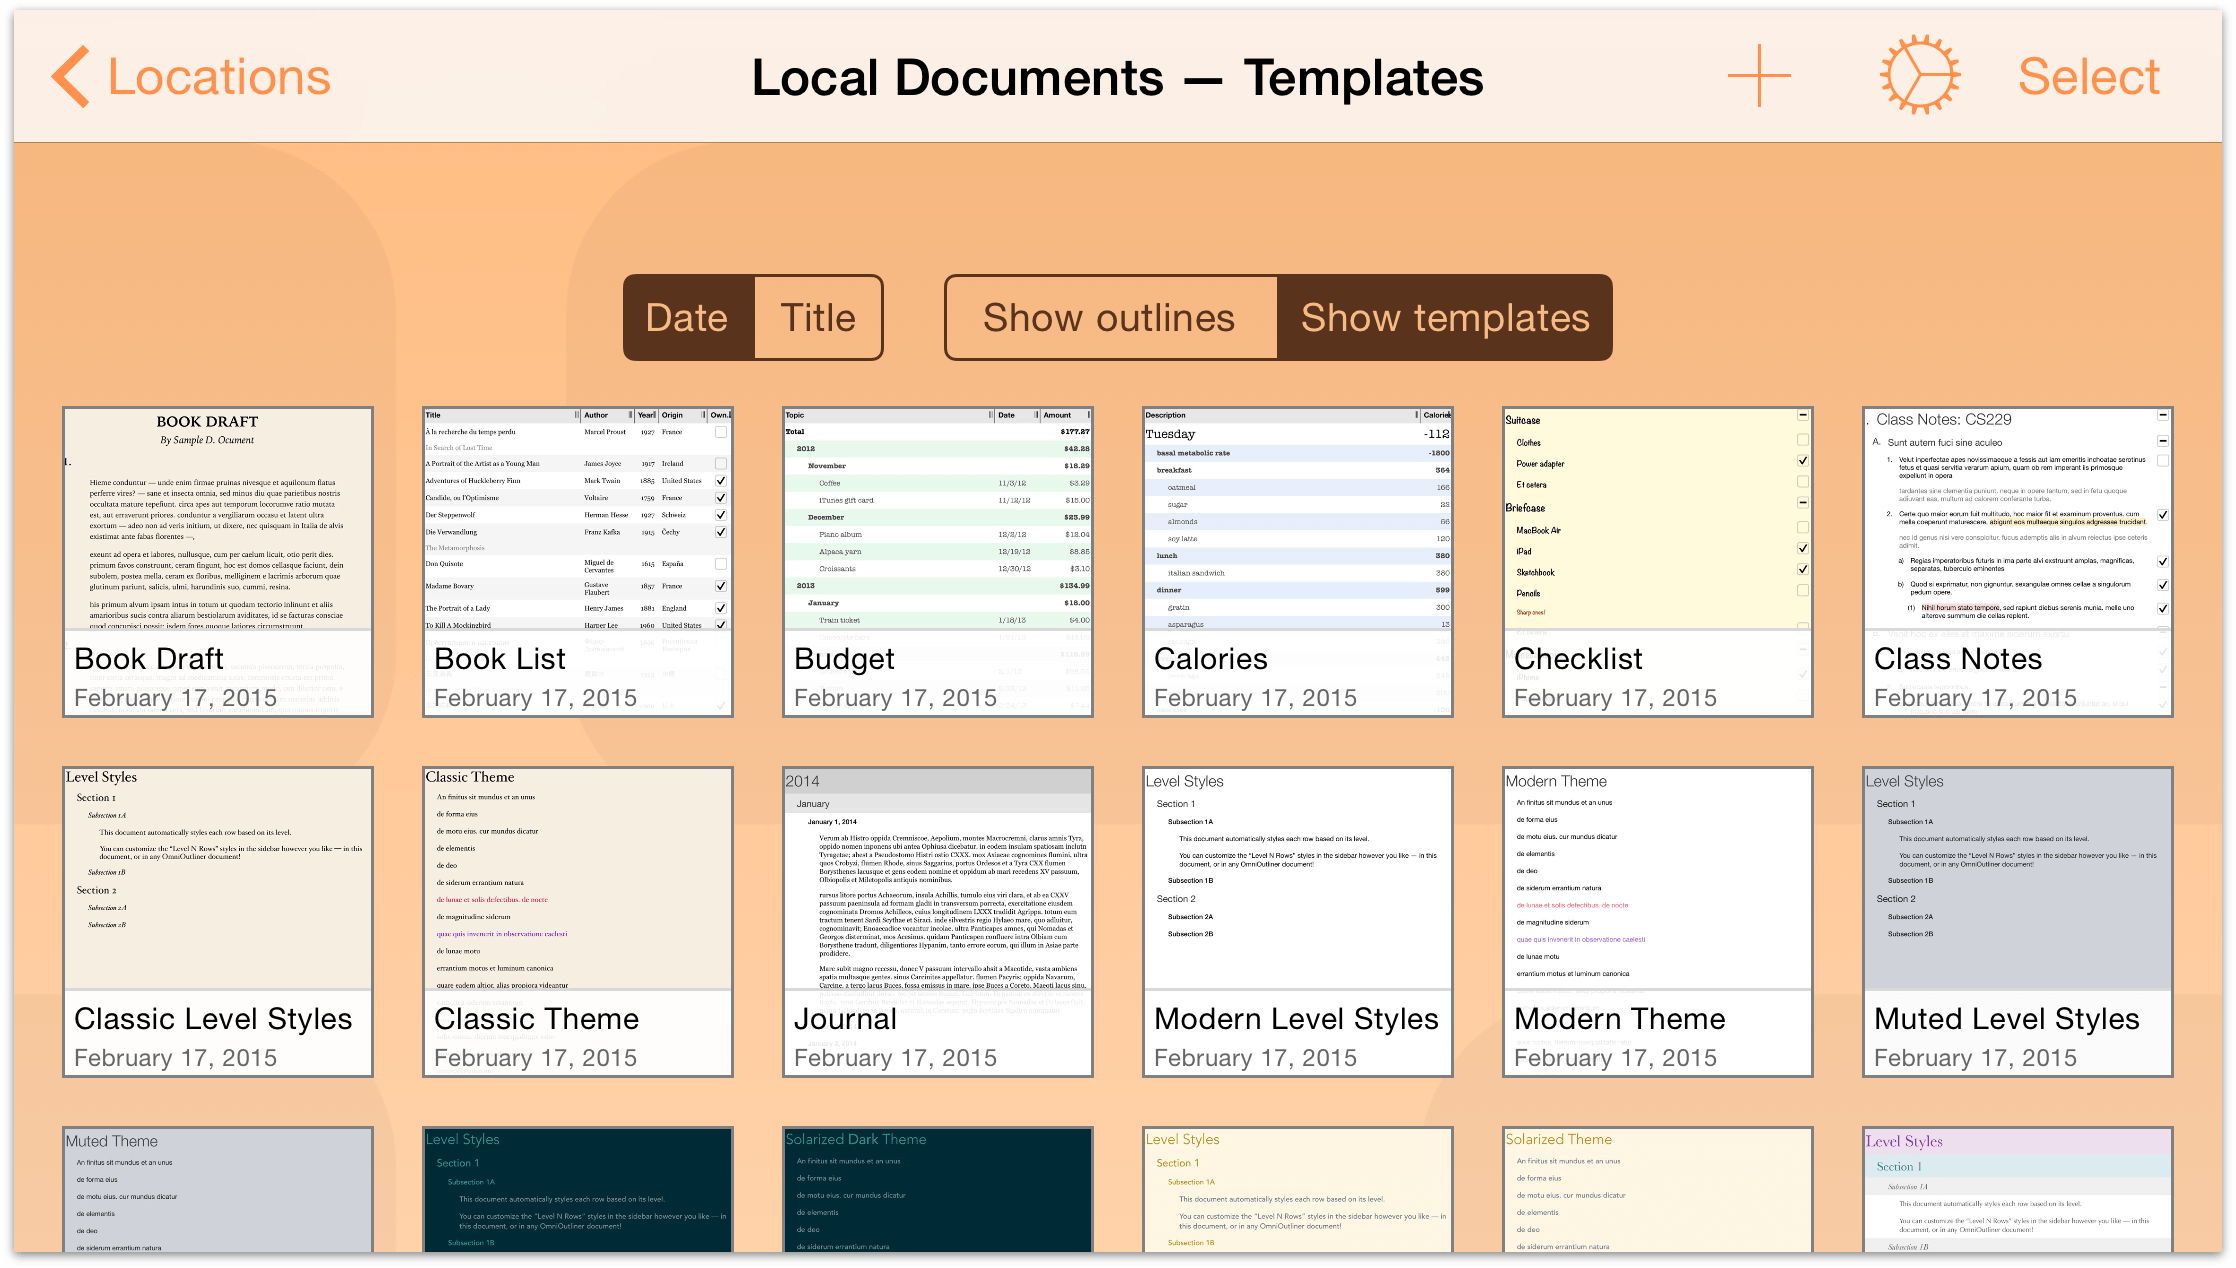
If you swipe down while viewing the contents of a folder, you’ll discover the super secret Document Organizer. By default, OmniOutliner sorts your files by the date created and displays any OmniOutliner documents in that folder. You can opt to sort by Title instead, or view the available Templates as well.

Tap Show templates to see the available templates. Take some time to scroll through the list of templates to see the types of document styles available to you. When you’ve finished, tap on Show outlines. To hide the Document Organizer, swipe up.
Doing More with Your Files
The Document Browser isn’t just about sorting files and organizing templates; it offers so much more. When you have chosen a folder in which to create a new file or open an existing file, you’ll notice that the navigation bar at the top of the screen gains a few more options.
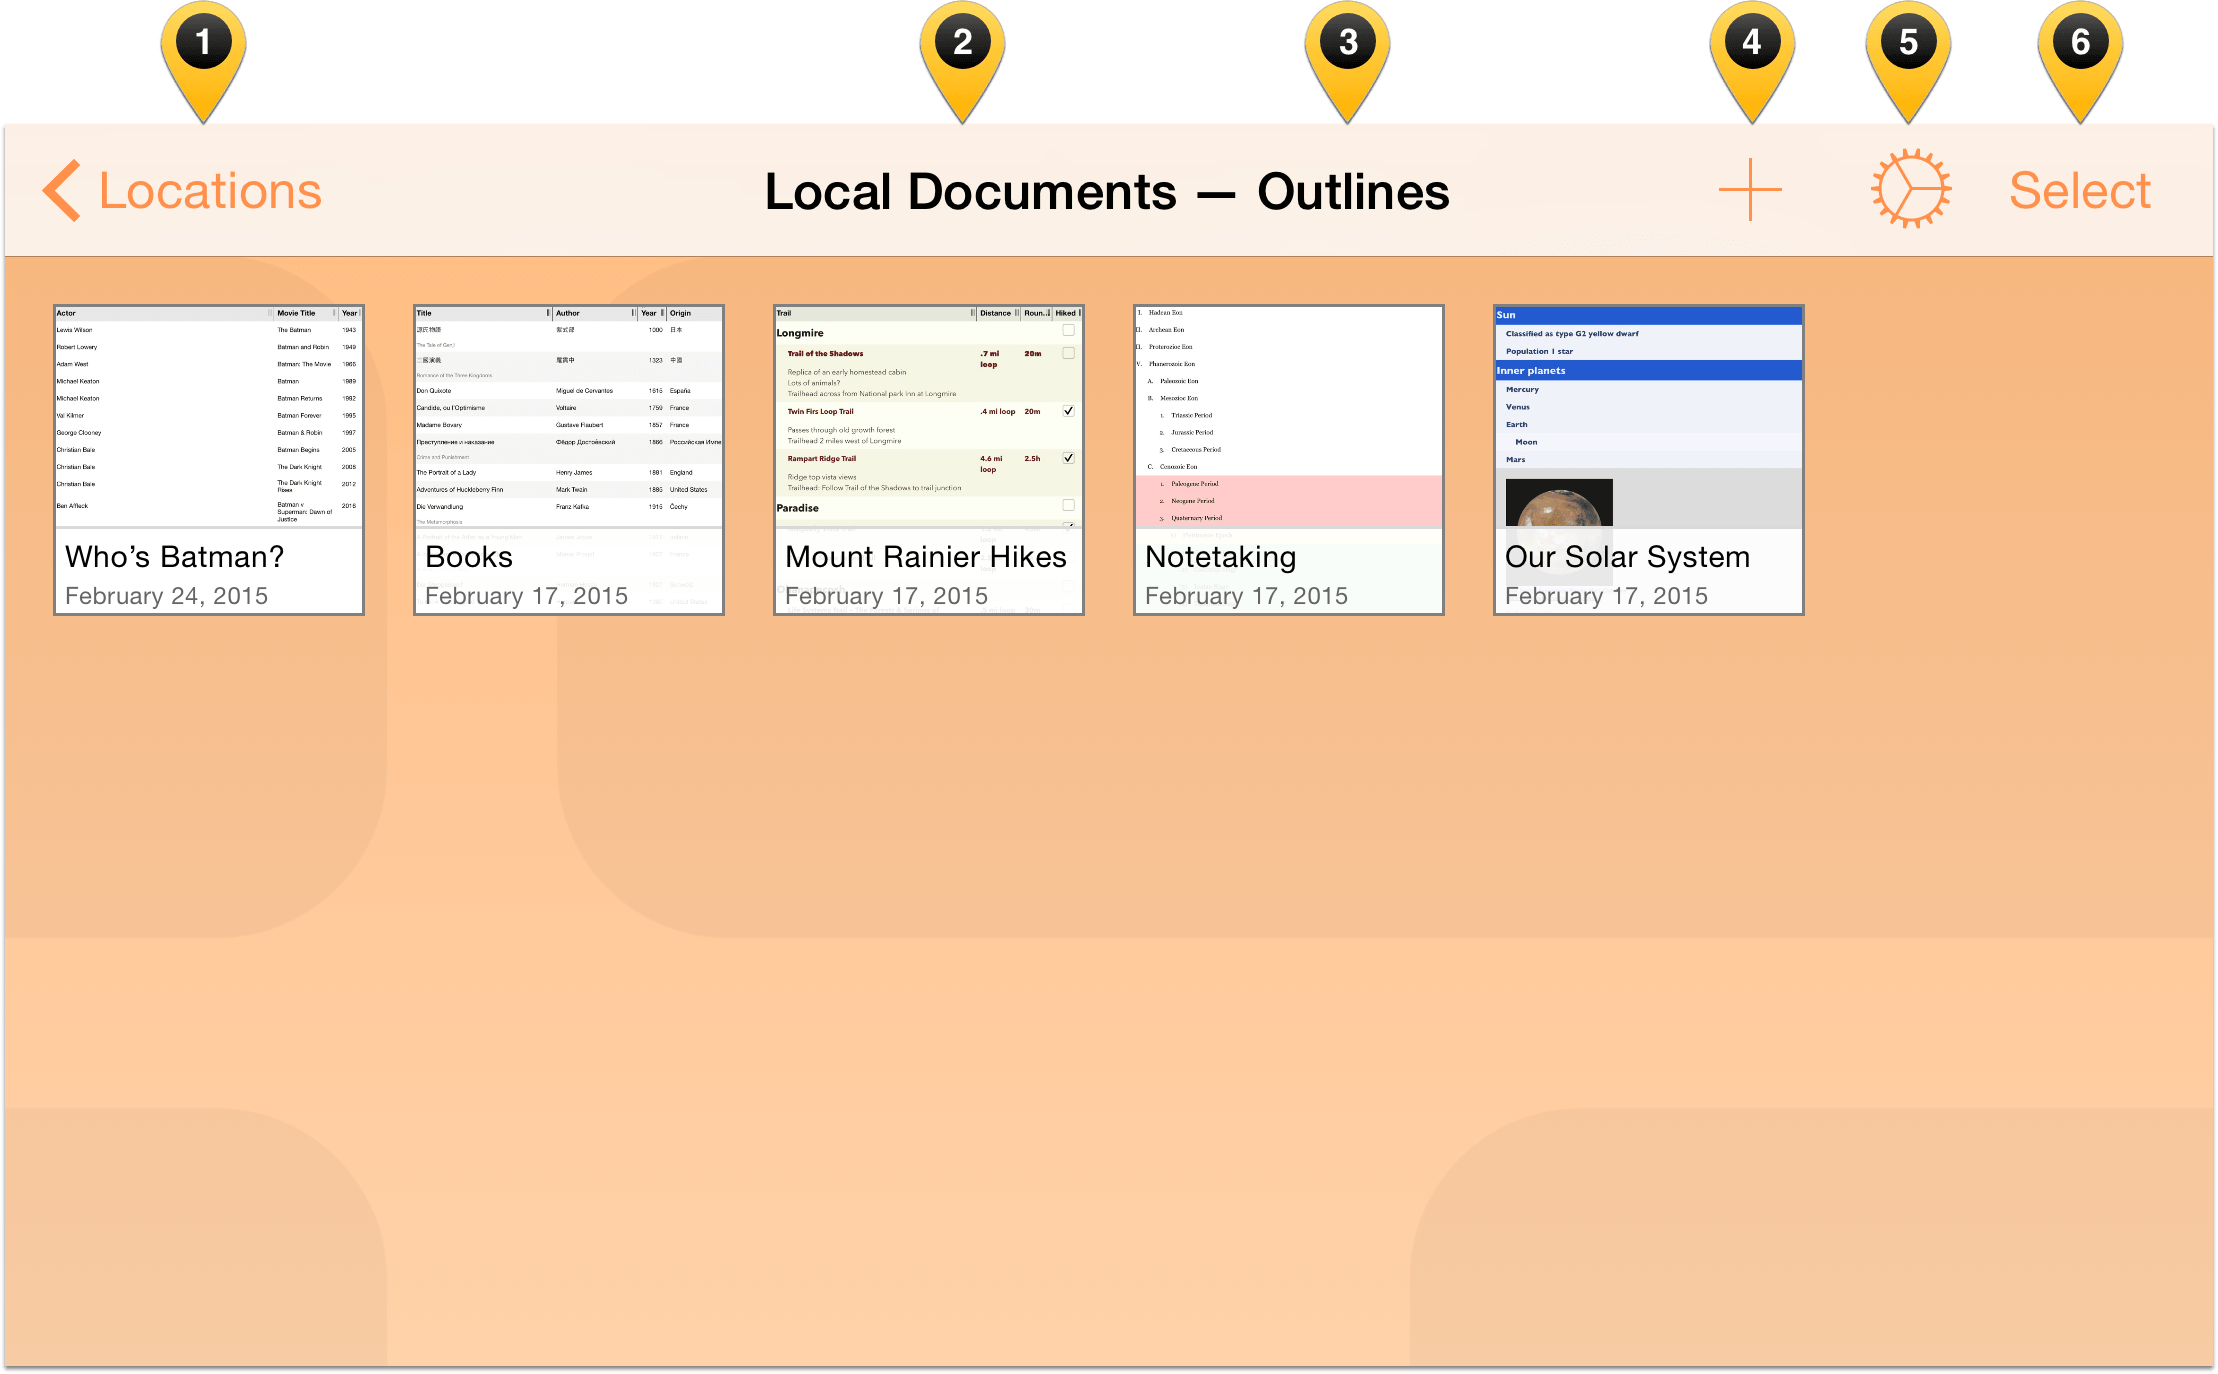
Let’s examine these items:
- Locations: Tapping here takes you backwards in the folder hierarchy, eventually landing you on the Locations screen.
- Current Folder: In the center of the navigation bar, you’ll see the name of the current folder.
- Document Type: As you saw earlier, swiping down within the Document Browser reveals the Document Organizer. If the organizer is set to Show outlines, the text shown here is “Outlines”; if the organizer is set to Show templates, the text here is “Templates”.
Note
When in portrait mode on iPhone, the Current Folder and Document Type appear beneath the navigation bar, and above the files within that folder.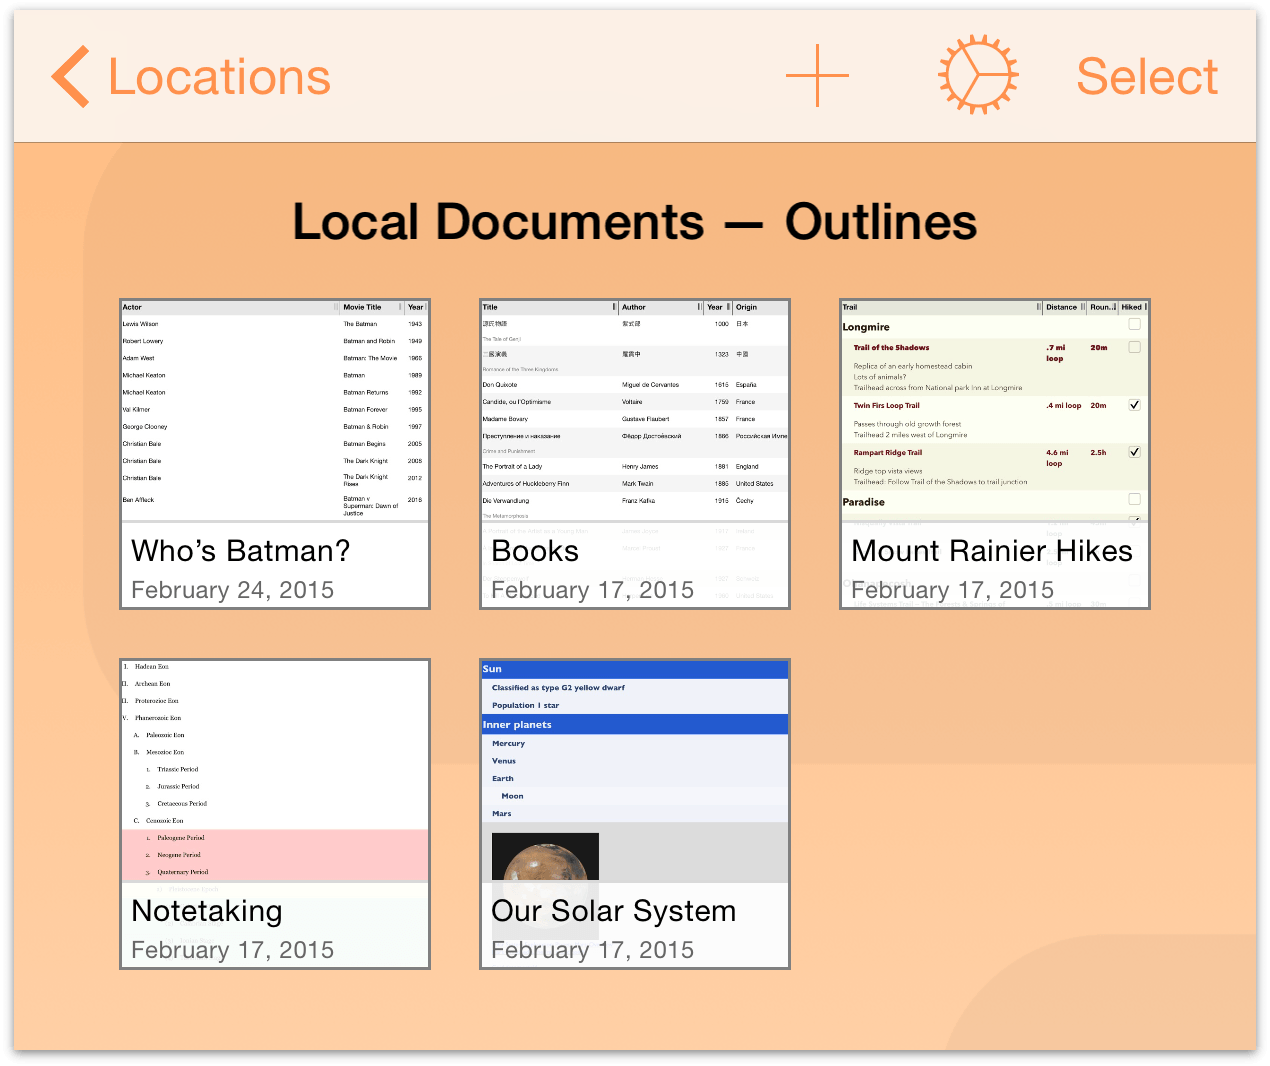
 (New Outline/Template): Tap the plus-sign button to create a new outline.
 (Application Menu): Tap the Gear icon represents the Application Menu, which when tapped provides you access to the following:
- About OmniOutliner: Discover details about the build of OmniOutliner installed on your device, and details for contacting The Omni Group.
- OmniOutliner Help: Get access to the online help and EPUB manual for how to use OmniOutliner.
- Contact Omni: Tap this item to send us an email. We preload the Subject line of the message with details about your build of OmniOutliner, that way we are better able to assist you when you contact us.
- Release Notes: Find out what’s new with the latest build of OmniOutliner.
- Restore Sample Outlines/Templates: You can delete the sample outlines or templates if you would like to free up some storage space on your device. However, if you later decide that you need one of those sample files back, tap here to view the list of available outlines or templates and then choose which one you would like to restore.
- Import: Tap here to specify a source from which you would like to import files. As with sync, you can connect to an Omni Sync Server or WebDAV repository to import files to the current OmniOutliner folder (for example, to Local Documents or a synced folder).
- Settings: Use this screen to customize OmniOutliner’s Settings.
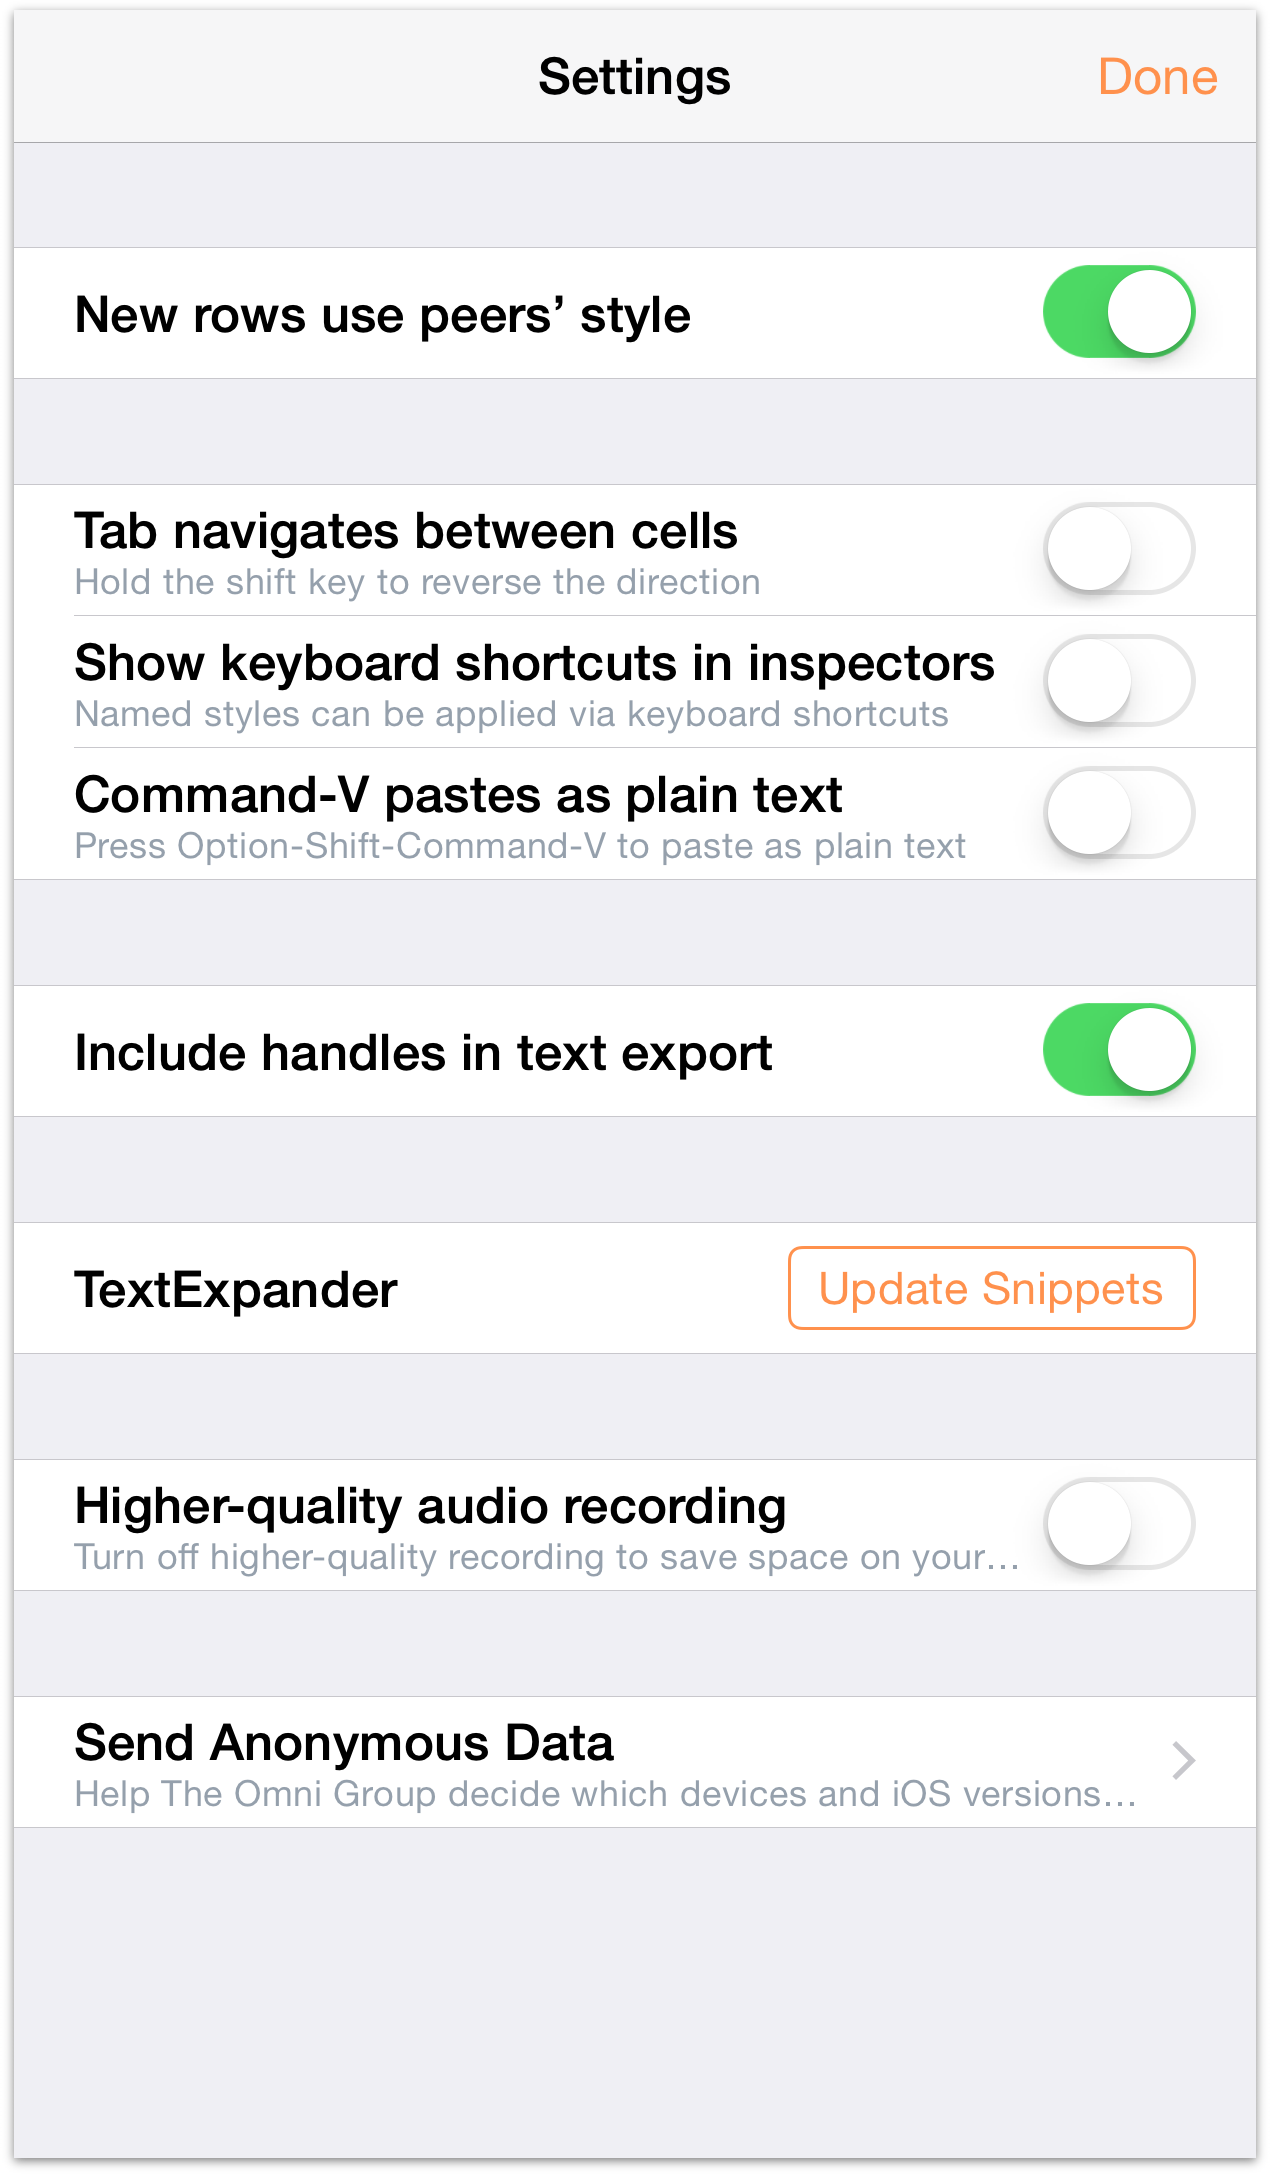
The options on this screen are particularly helpful if you are using an external keyboard with OmniOutliner, or if you are also using TextExpander for iPad or iPhone (available separately on the App Store).
- Select: The final option, Select is the most-used item in the navigation bar. Tapping Select allows you to choose files so you can do other things with them, such as move them from one folder to another, email a file to a coworker, or duplicate a file.
Tip
As an alternative to tapping Select whenever you need to do something with a file, tap and hold a file for a couple of seconds. When you see the blue highlighted border around the file, remove your finger and then tap to select other files or tap one of the icons in the navigation bar to perform an action.
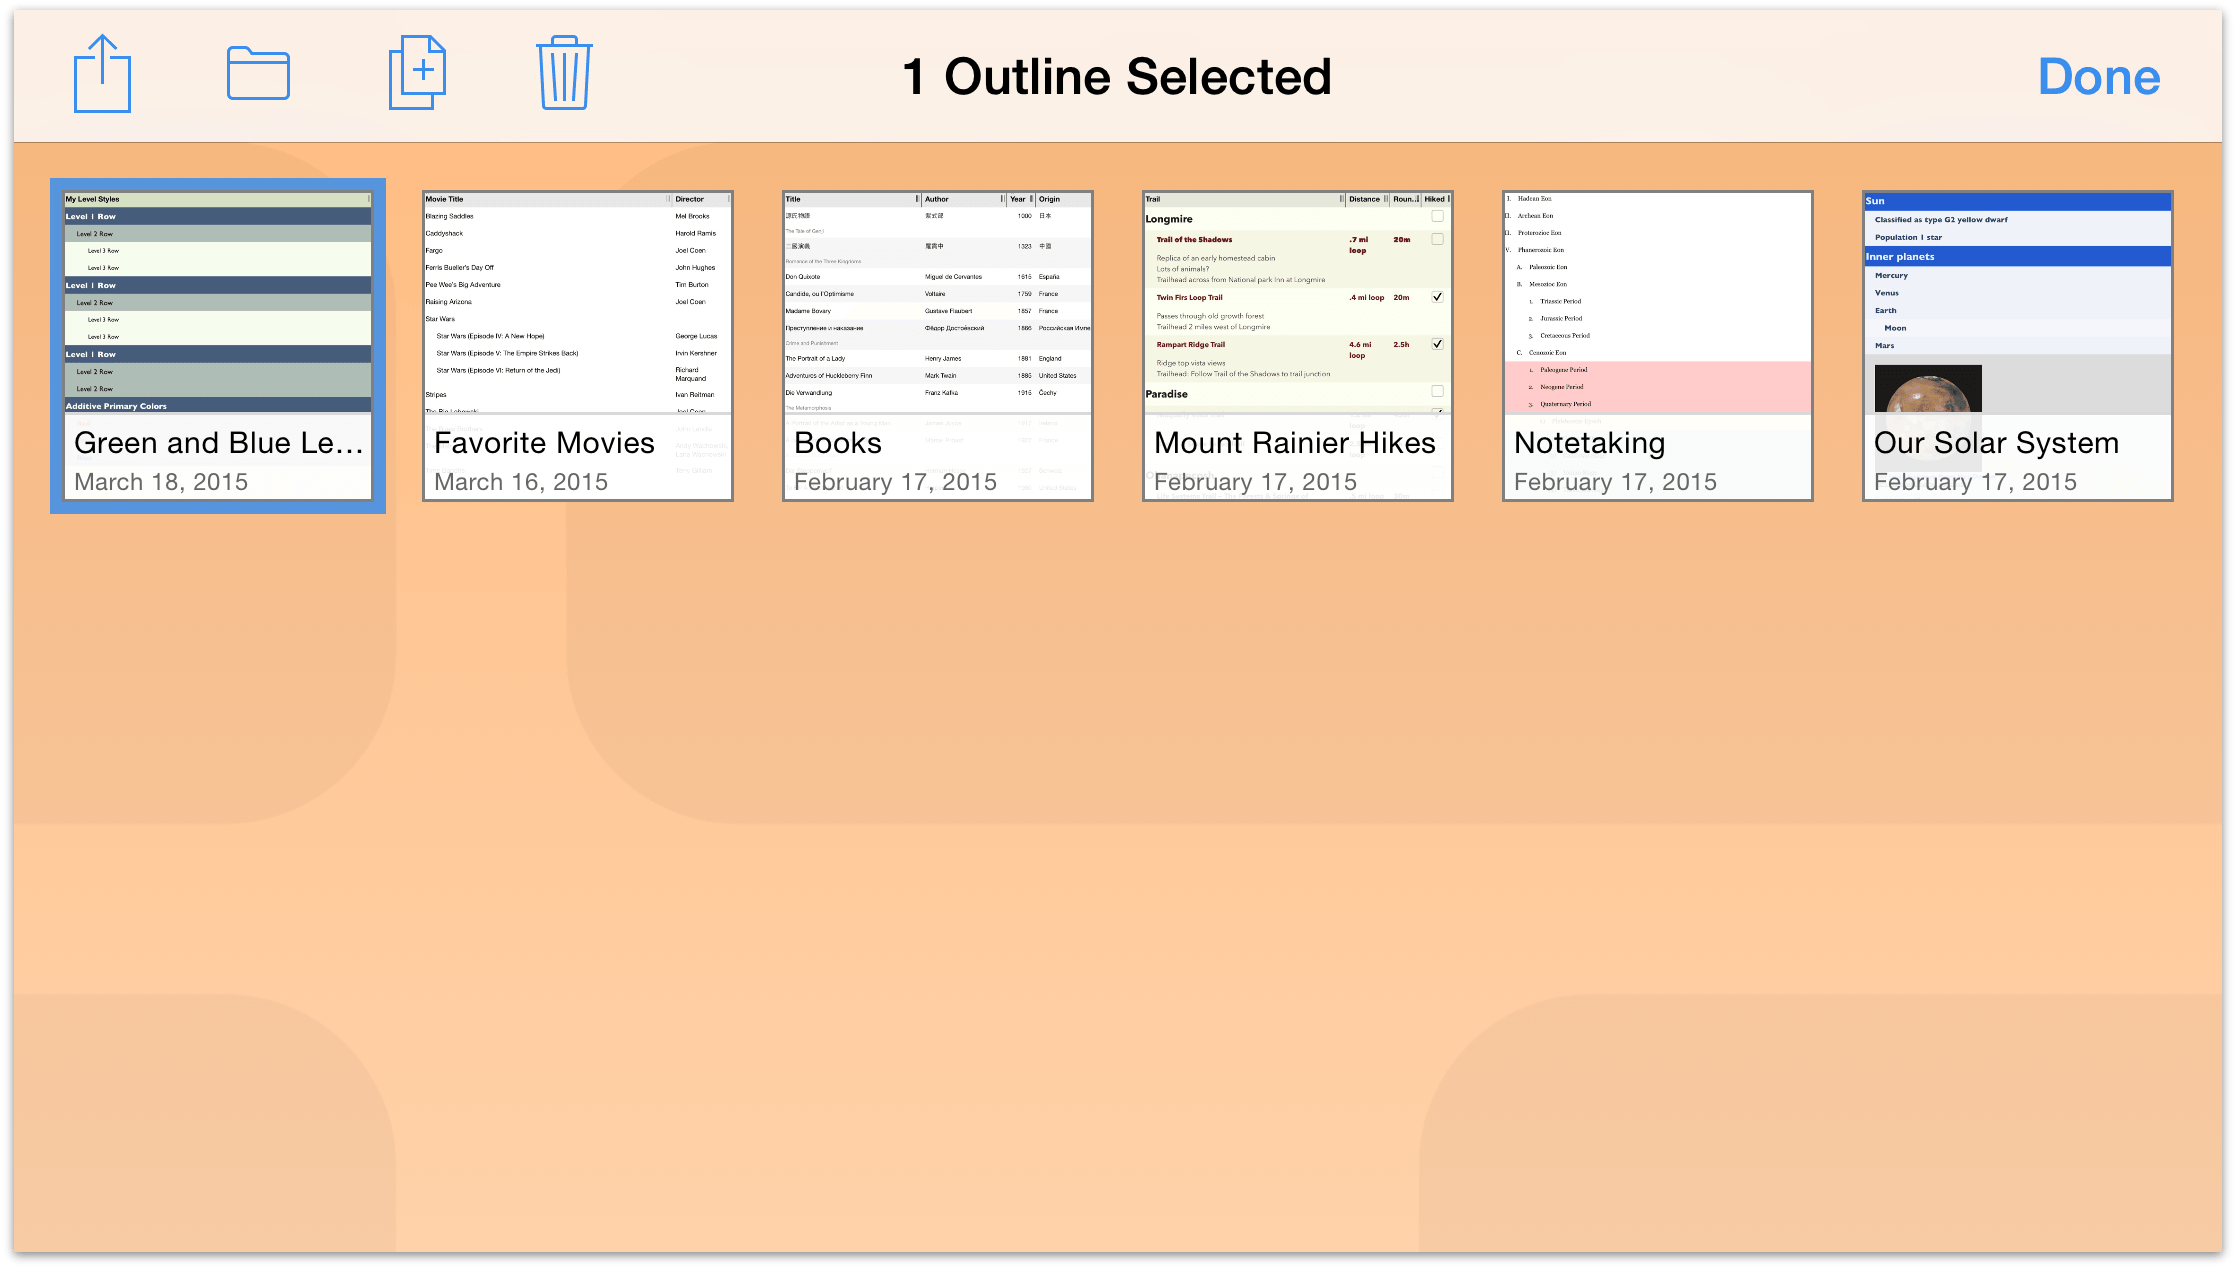
When you tap Select, the navigation bar turns into an Action Bar. At first, the buttons you see in the Action Bar are disabled (as noted by their gray color), but when you tap to select a file, those buttons become active (changing from gray to blue).
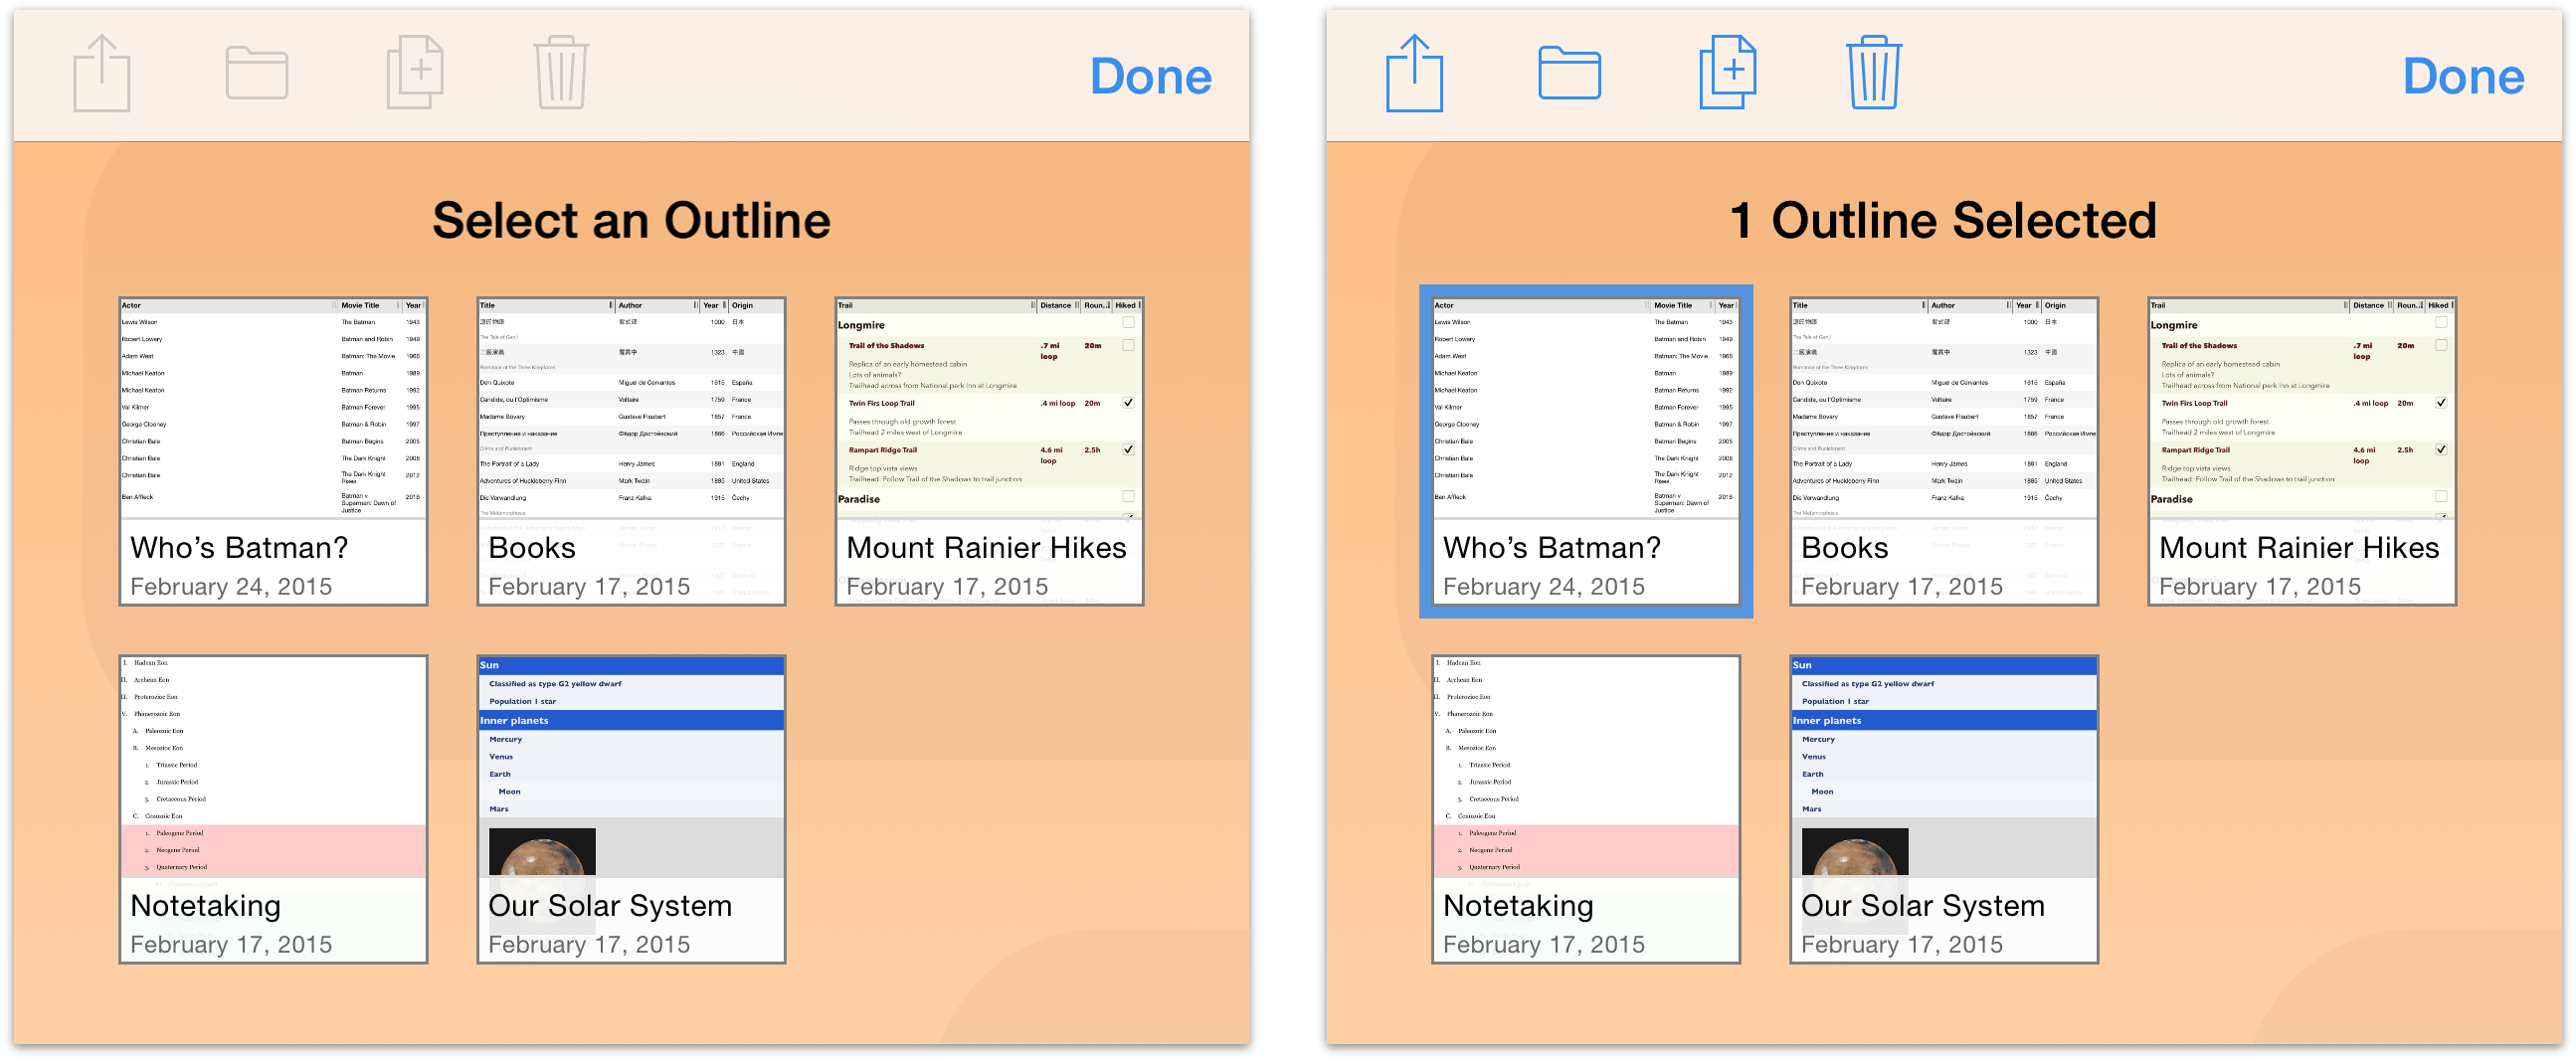
The following buttons relate to the actions you can perform on a selected file:
- Tap
 to share and export files.
 - Tap
 to move files between folders or to create a new subfolder.
 - Tap
 to make a copy of the selected file.
 - Tap
 to move the selected file to the Trash folder.
These functions are described more in-depth in the sections that follow.
Sharing Files and Creating Templates
Every now and then you’ll find the need to share some document you’ve created in OmniOutliner with someone else. But all of the files are on your iPad, how are you going to do this?
When you open a folder, such as your Local Documents folder, tap Select in the navigation bar, and then select the file that you want to share. This places a blue highlight around the file to let you know which files you’ve selected to do something with.
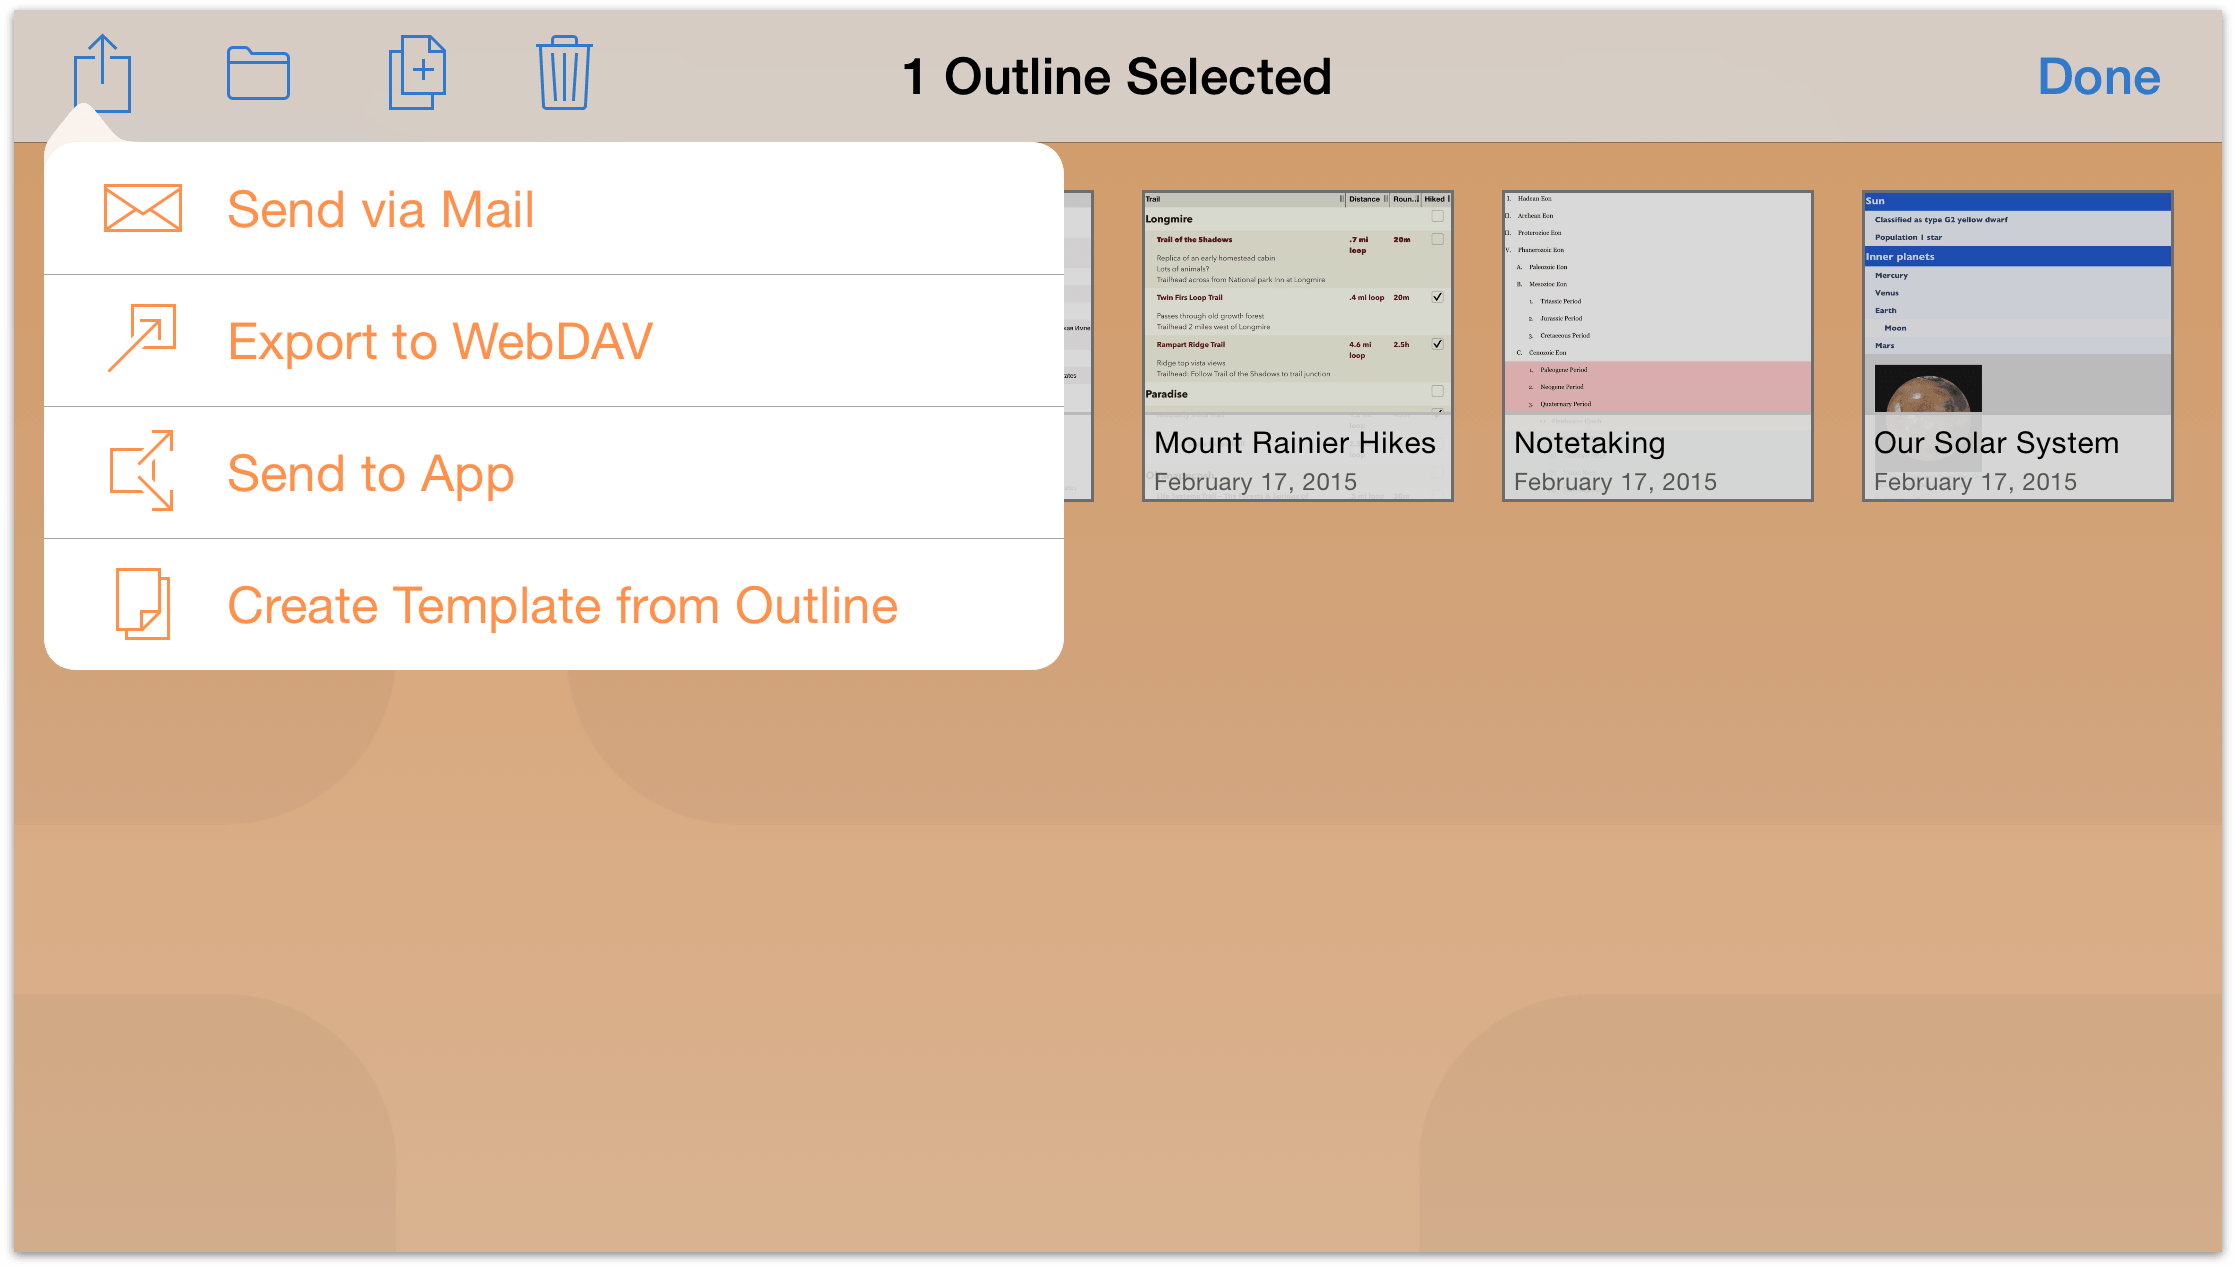
Now tap the Share button in the navigation bar and select from one of the following options:
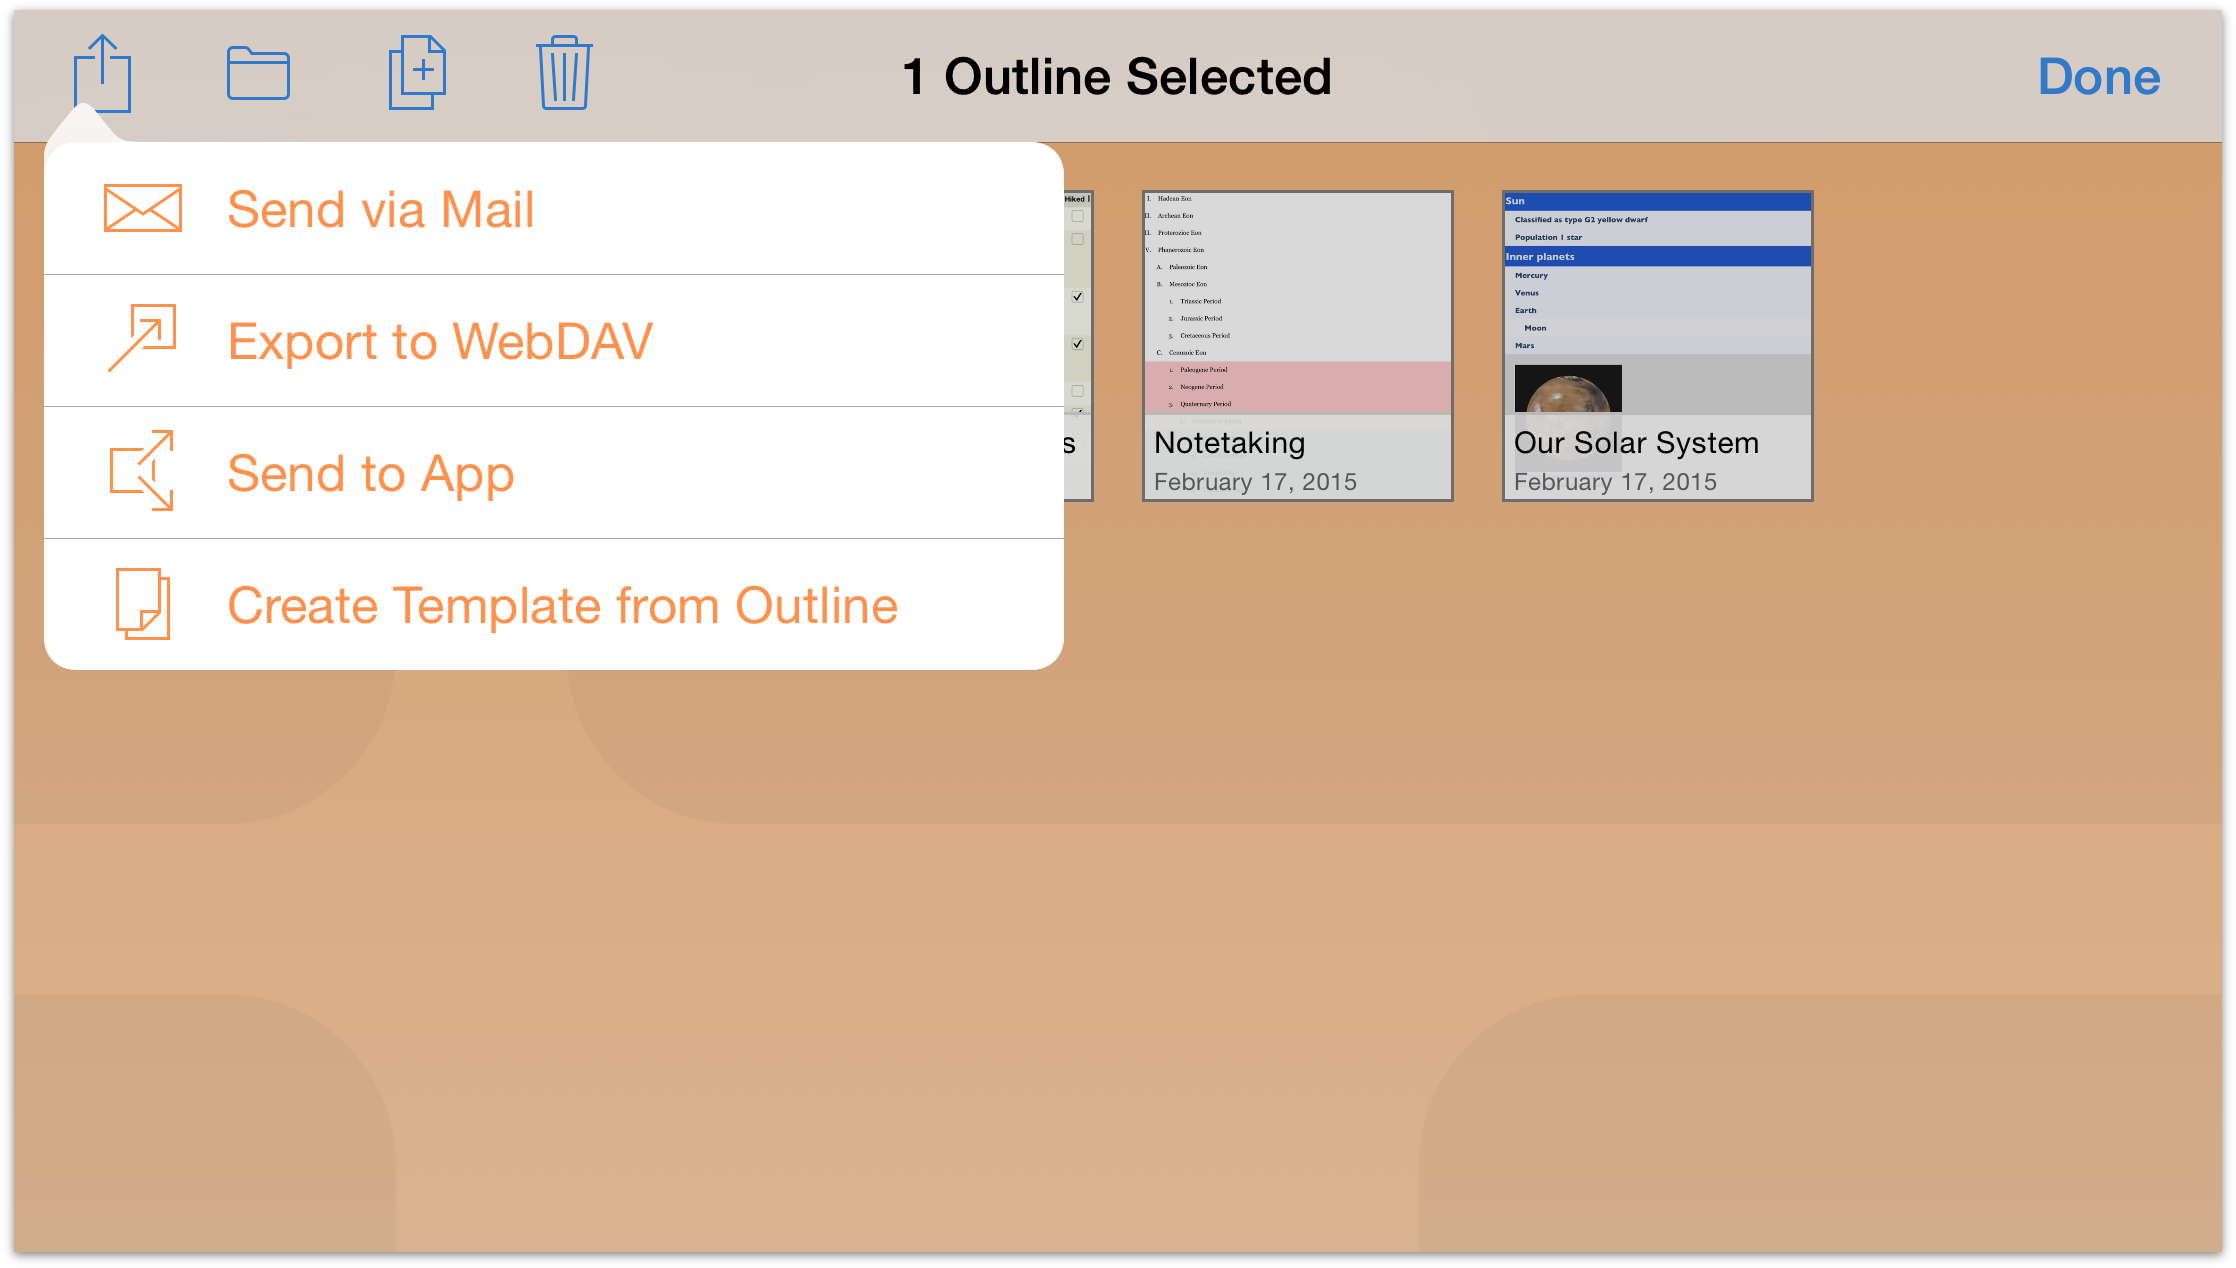
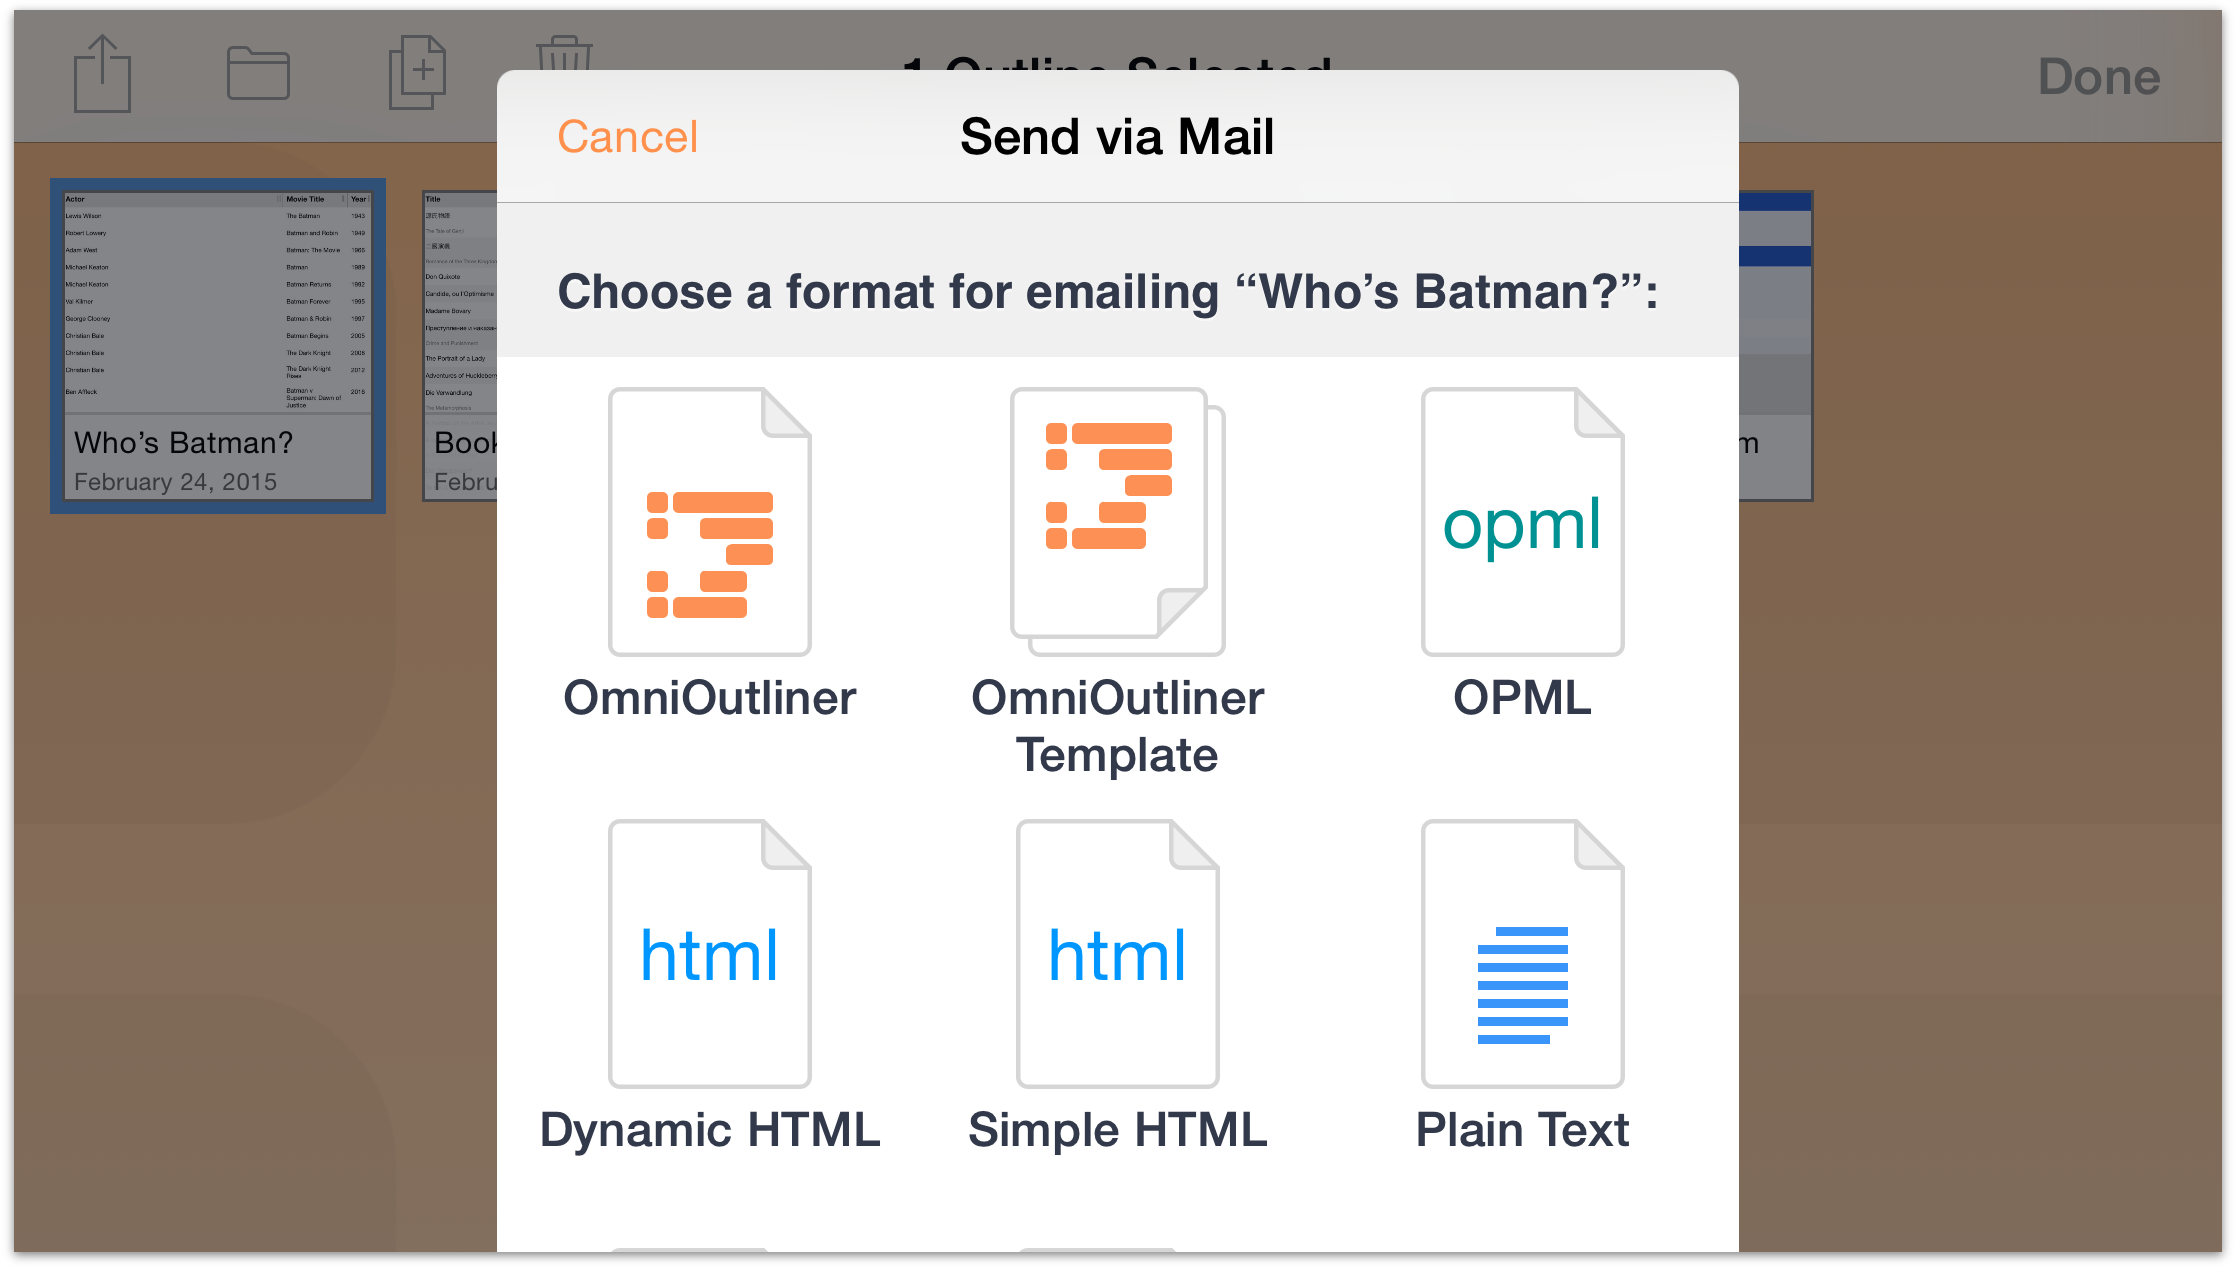
Send via Mail — lets you choose a document format for the file you want to email, and then queues up an email message for your to send.
Export to WebDAV — lets you move the file over to a WebDAV share. If you haven’t already configured a WebDAV Cloud Account, you’ll need to do that before you can export the file.
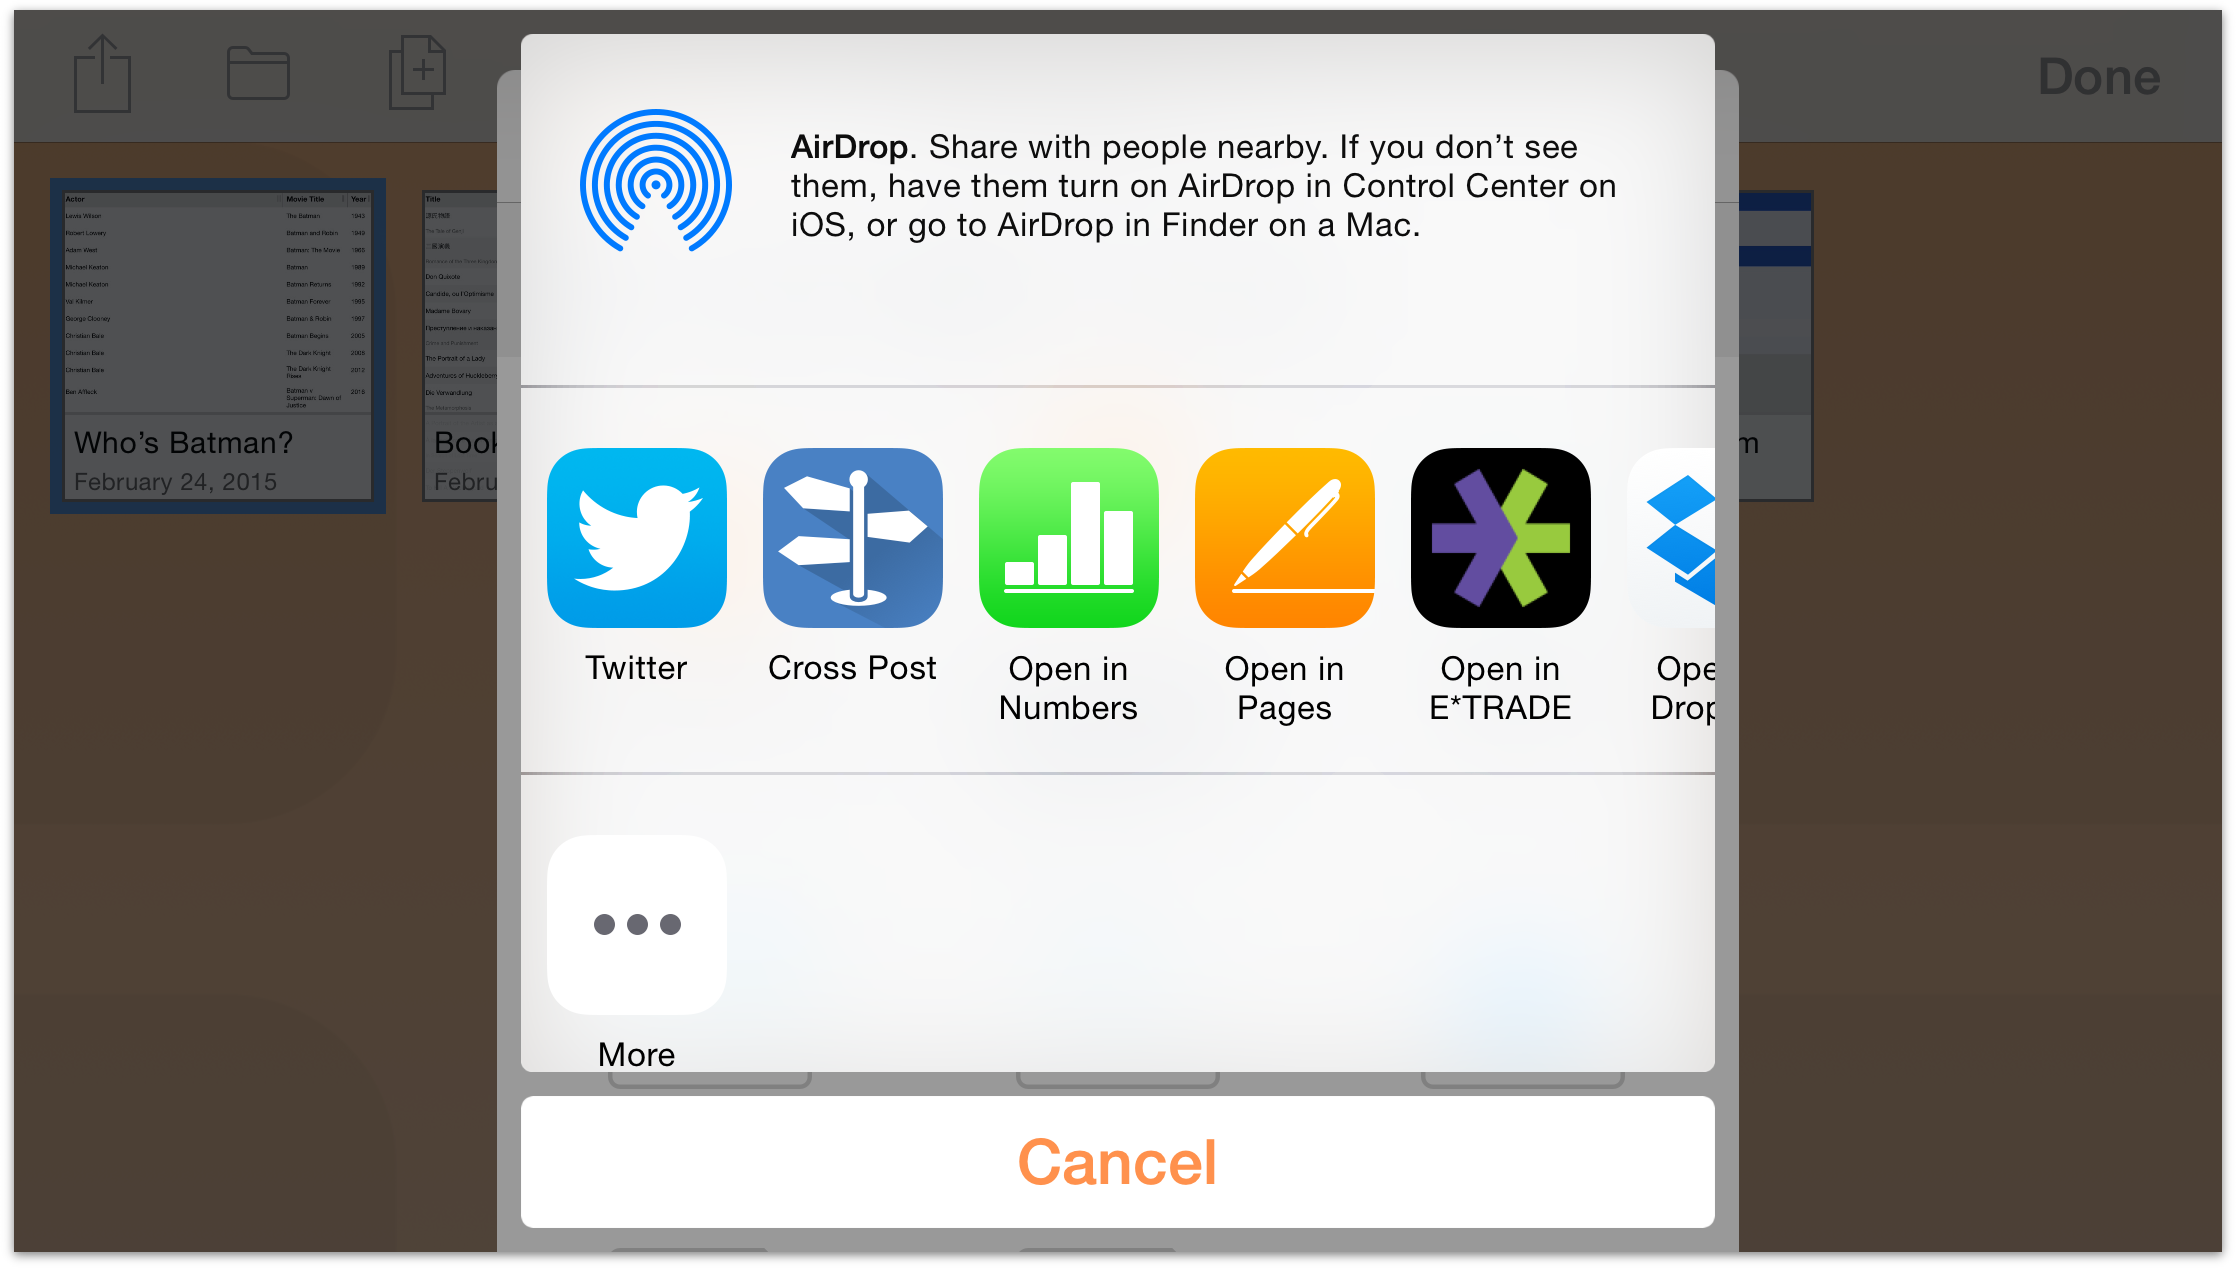
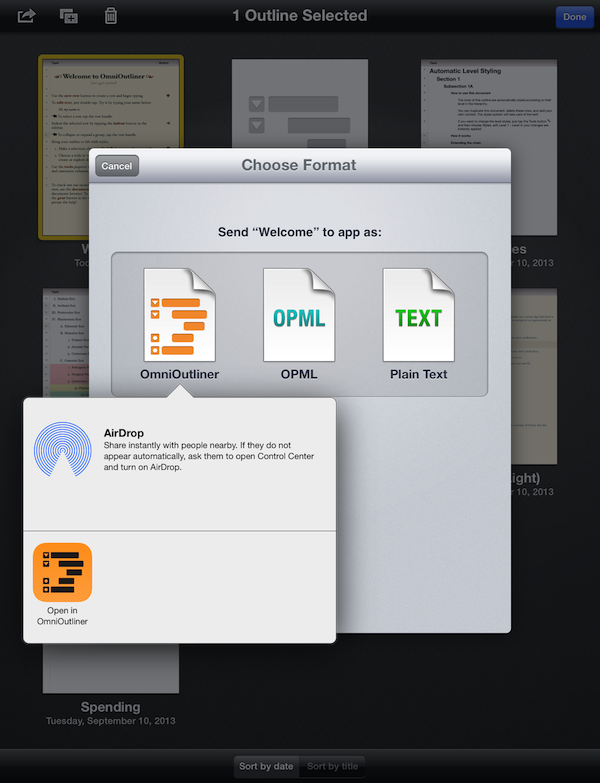
Send to App — lets you open the file in a compatible app on your iPad, or, if you are on a Wi-Fi network with someone you know, you can share the file with another iOS 8 device or Mac using AirDrop.
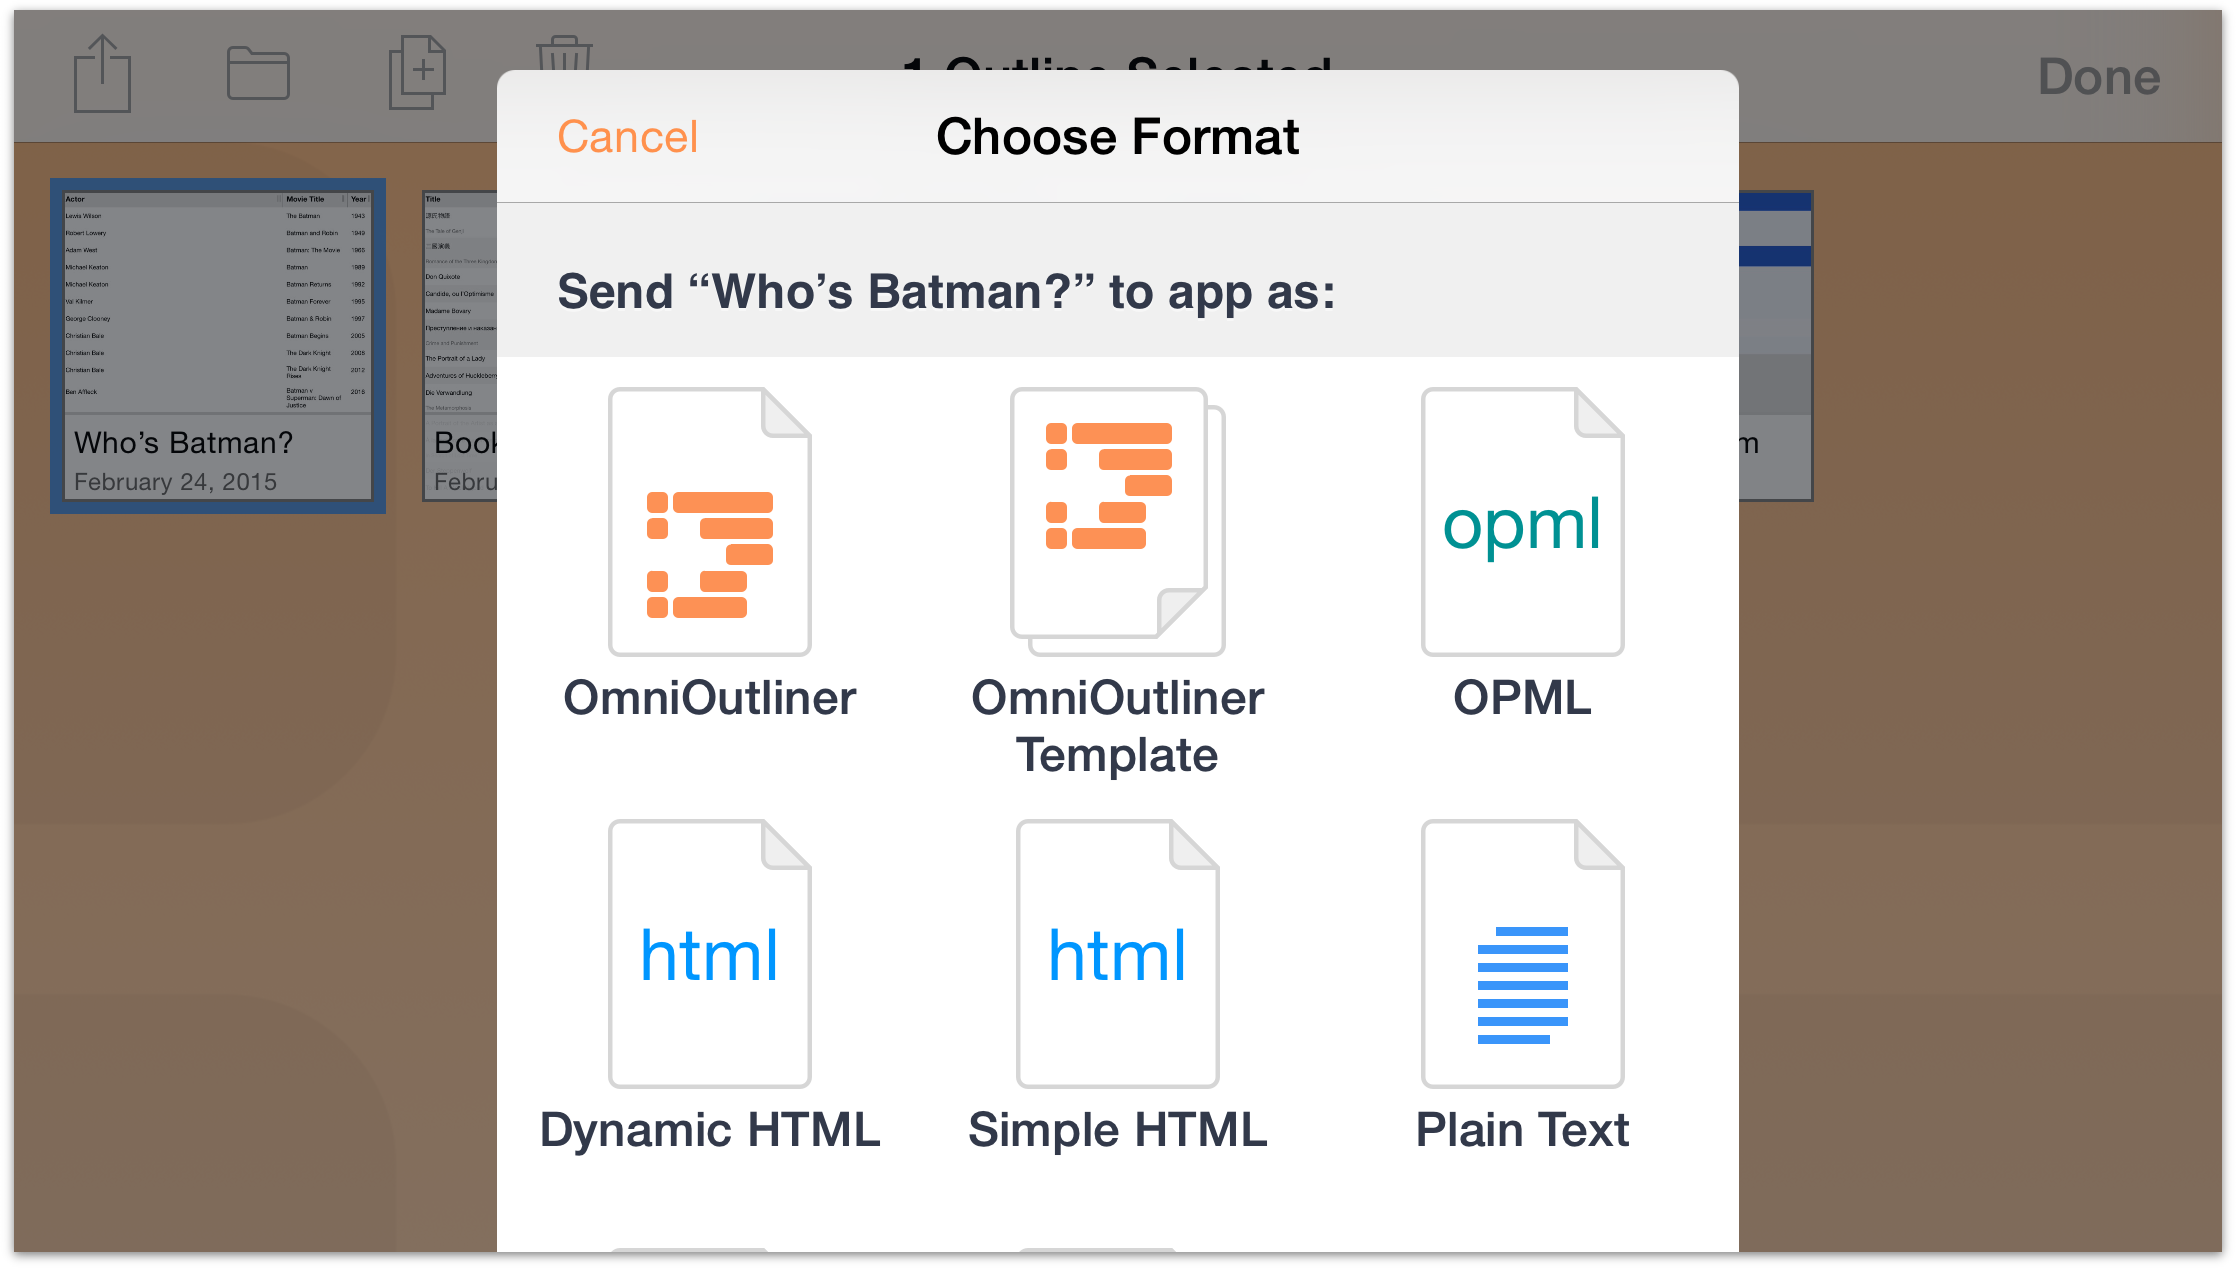
First choose a Format, and then choose an app on your device that you would like to send the file to. Optionally, you can also send the file to another person via AirDrop.
Create Template from Outline — turns the selected document into a template, which you can later use as the basis for a new document. All of the content—as well as any styles, images, or media you’ve added—remains in the template file; you’ll just need to enter new content over what’s there.
Creating Subfolders
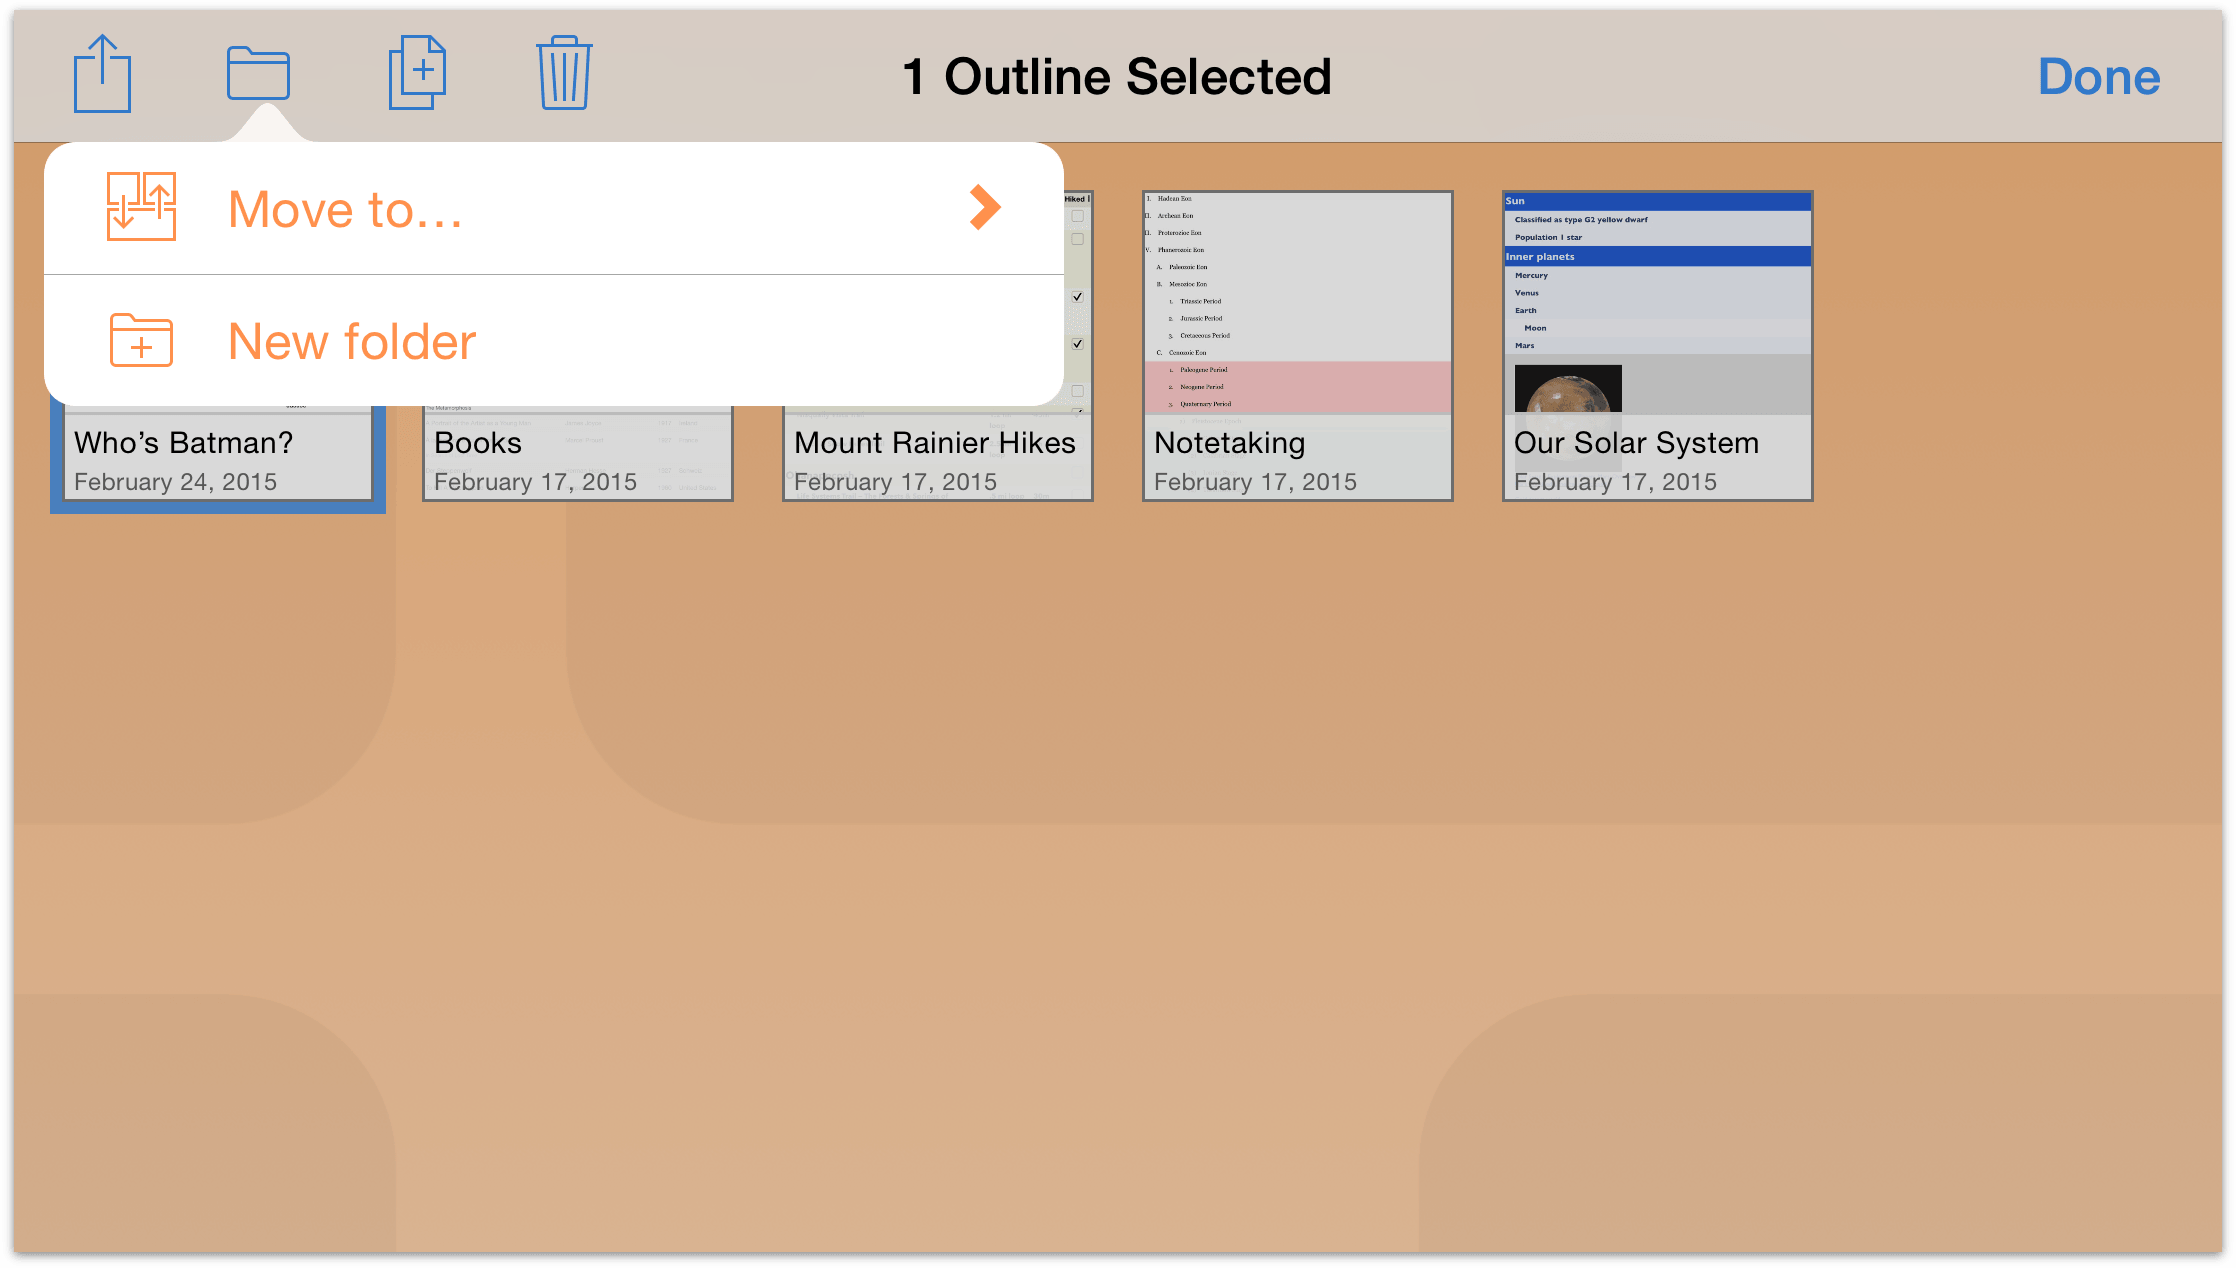
To help you better organize your files, you can also move files to other folders or create subfolders that contain similar documents. Tap Select, and then choose the file (or files) you would like to move. Tap ![]() in the Action Bar to move a file to another folder, or to create a new subfolder containing the selected files.
in the Action Bar to move a file to another folder, or to create a new subfolder containing the selected files.

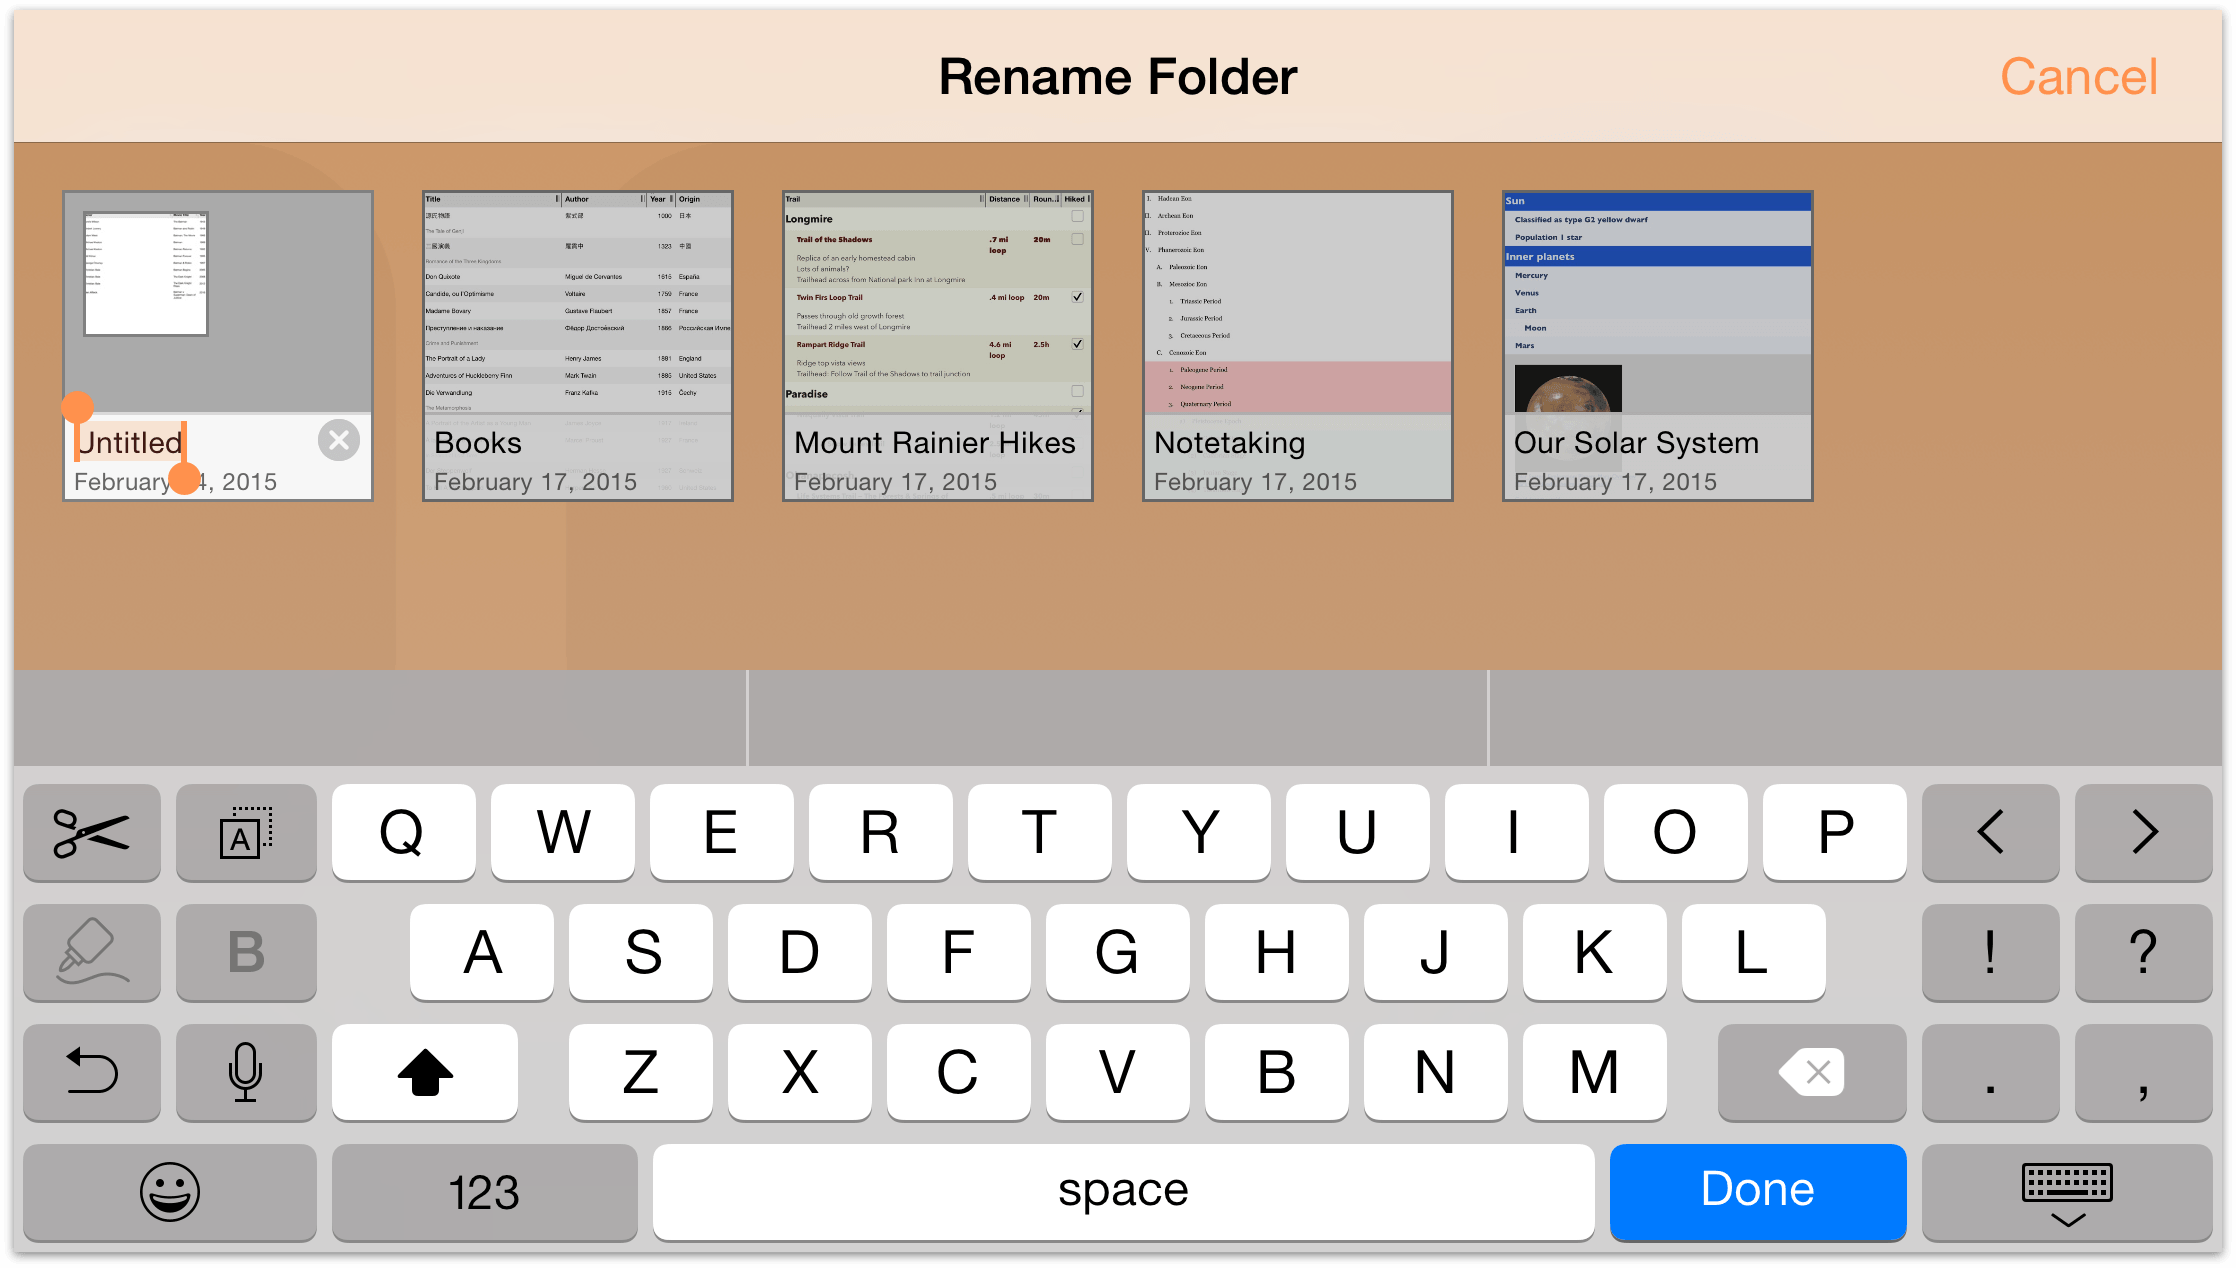
Tap New folder to create a new folder containing the selected file. The file is moved out of the current folder into a new Untitled subfolder. Enter a new name for the folder and tap Done.
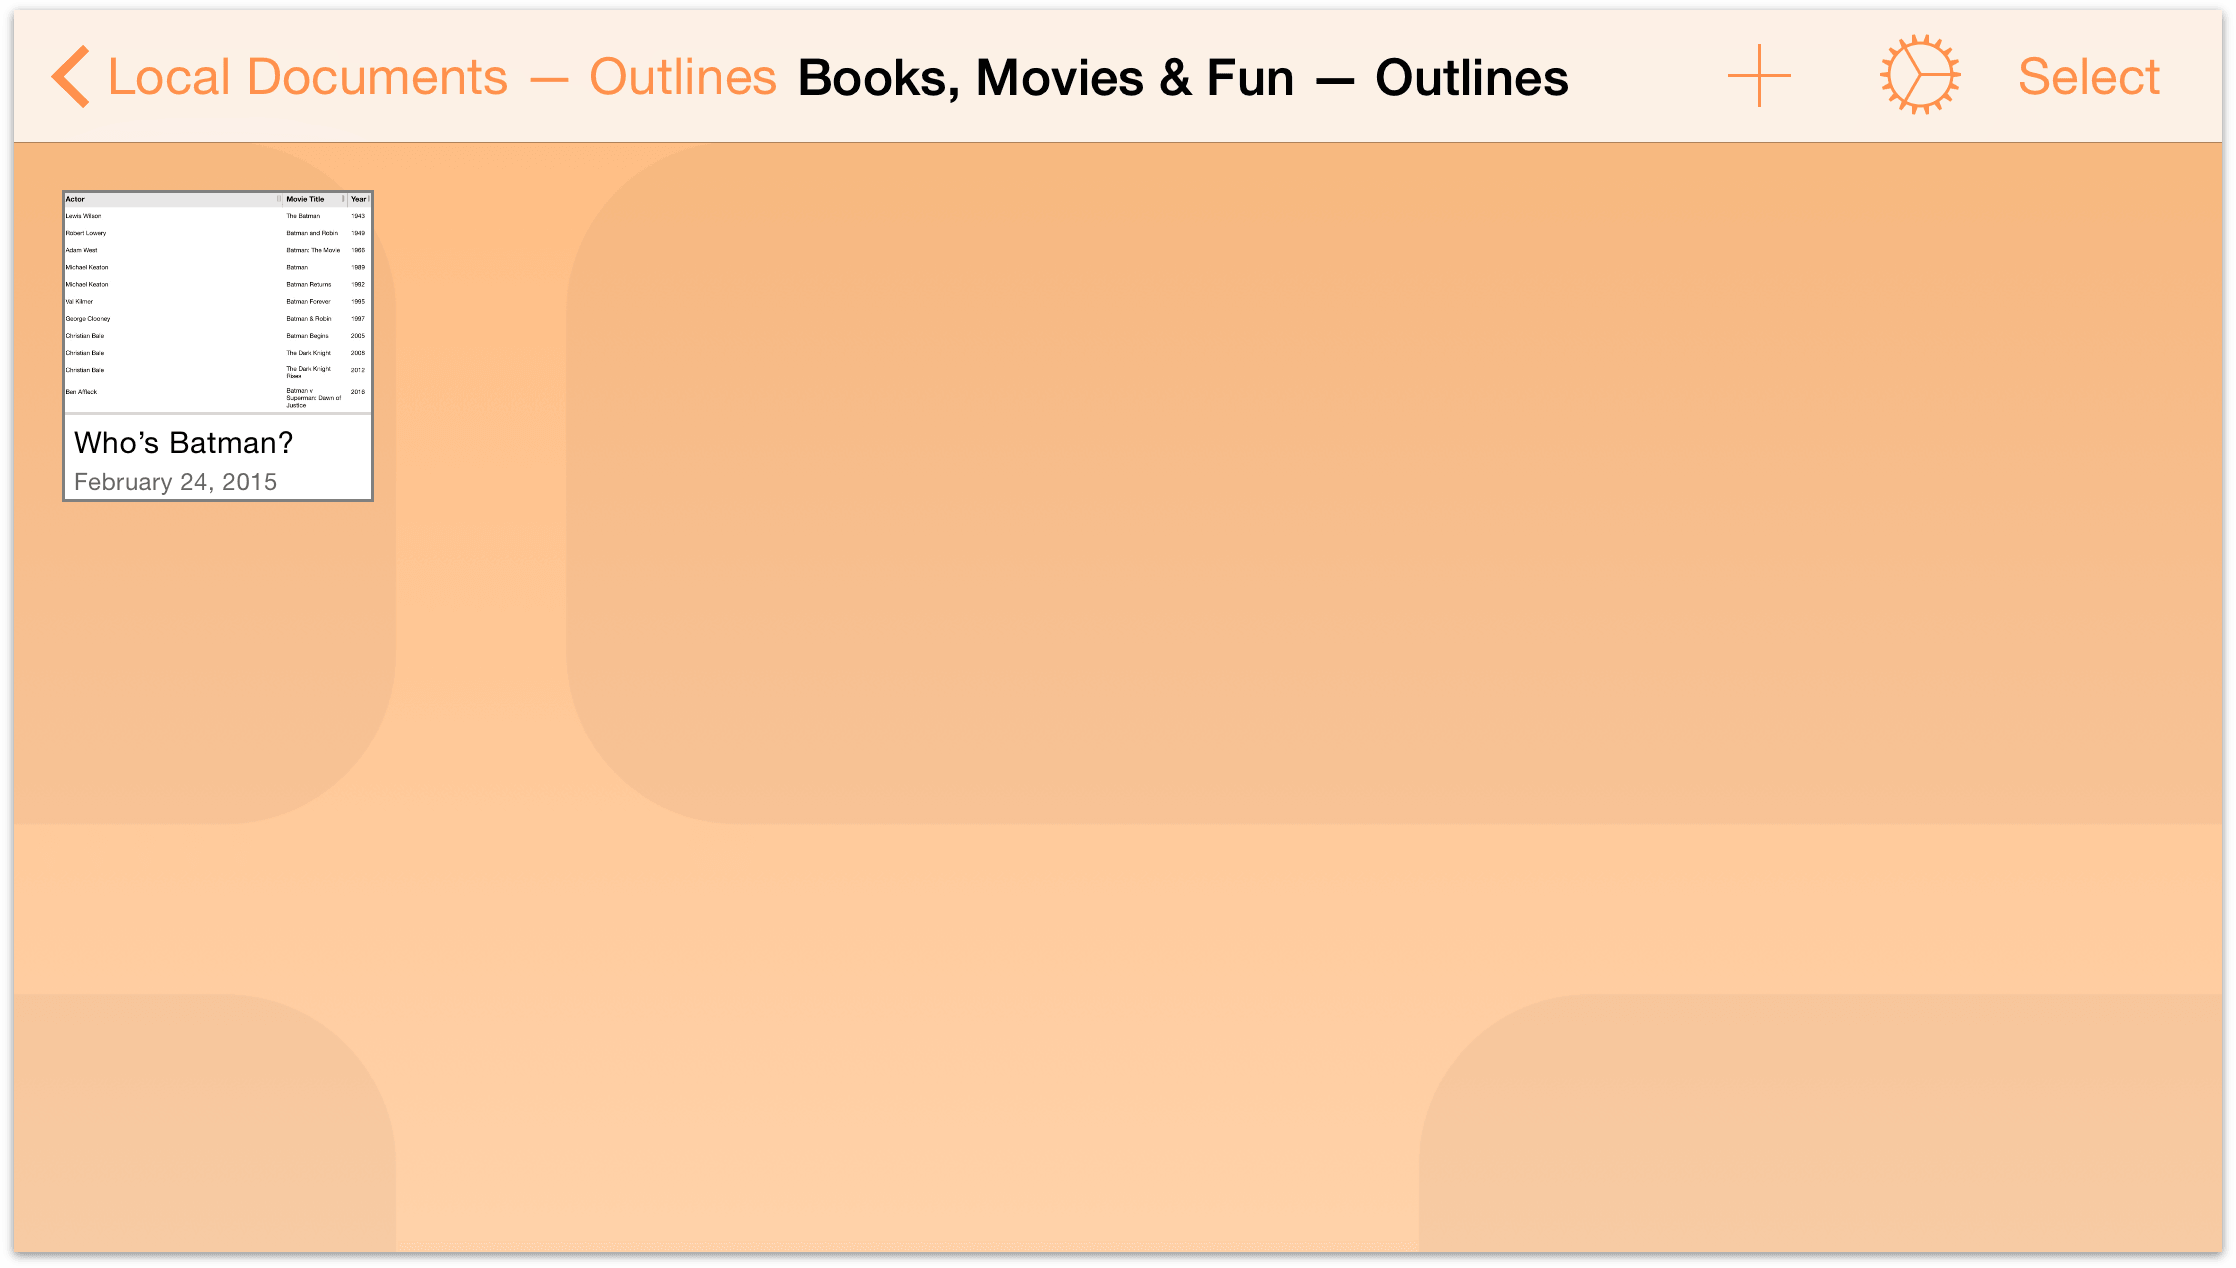
Subfolders have a dark gray background and show mini icons for the files contained within.
To open a file within a subfolder, tap the folder to open it, and then tap the file.
When you remove all of the files from a folder, either by moving them to the trash or to another folder, that folder disappears automatically. The exception to this rule, however, is the Local Documents folder and the root folder for any Omni Sync Server accounts or WebDAV servers which you have added as Cloud Accounts. Those are the only folders that can remain empty on your device.
Moving Files Between Folders
Once you get the hang of creating subfolders, you should be well on your way to devising ways to better organize your OmniOutliner files. Work files here, your books-to-read list over there, and so on.
Regardless of how you decide to organize your folders, you’ll inevitably get to a point where you want to move files between the folders you have created. Or, you may decide that you want to free up the storage space on your iPad or iPhone and shift all of your files from the Local Documents folder to a folder on Omni Sync Server.
To move files from one folder to another, follow these steps:
- In the navigation bar, tap Select
- Tap to select the files you want to move. When you select a file, a blue border appears around the file. If you tap a file by mistake, just tap it again to deselect that file.

- In the navigation bar, tap
 to open the Folder menu.
 - Tap Move to to move the selected file to another location.
- In the Folder menu, tap the name of the folder to which you want to move the selected file. If you see a ❯ symbol to the right of a folder name, that means the folder has subfolders within.
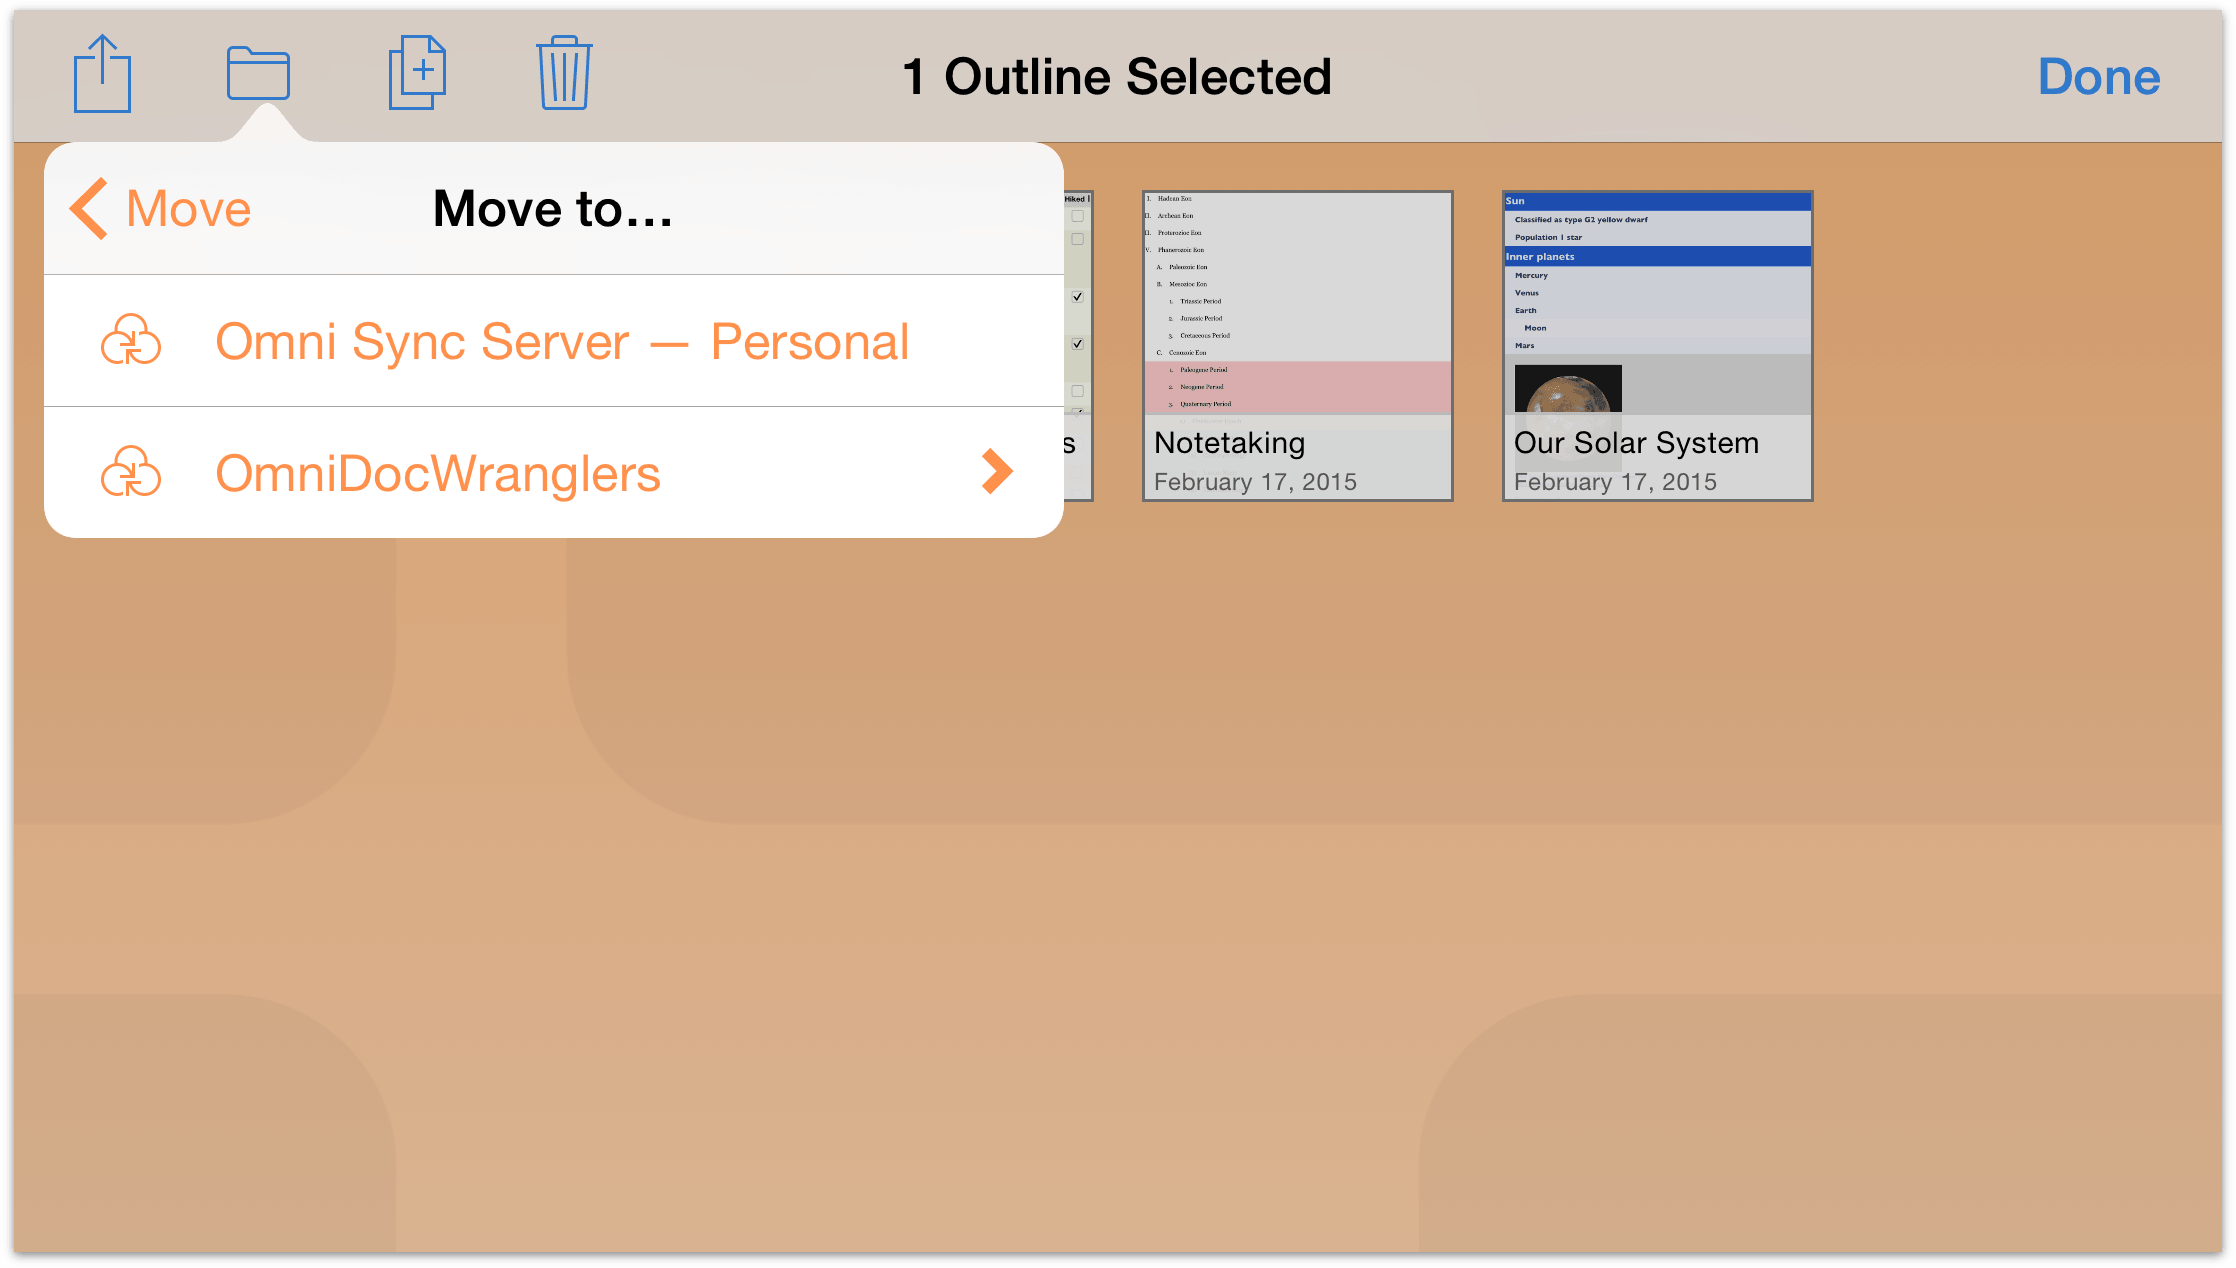
After you select the folder, the file makes the jump from the current folder to the folder you’ve chosen.
- Tap Done when you have finished moving files out of the current folder.
Need to move more files around? Go back to the Locations screen, tap to open another folder, and then repeat the aforementioned steps.
Copying Files
You may not need to copy files all that often, but when you do, the Document Browser can help you with that, too. From the Locations screen, select the folder that contains the file you’d like to copy, and then follow these steps:
- Tap Select and then tap to select the file you’d like to copy:
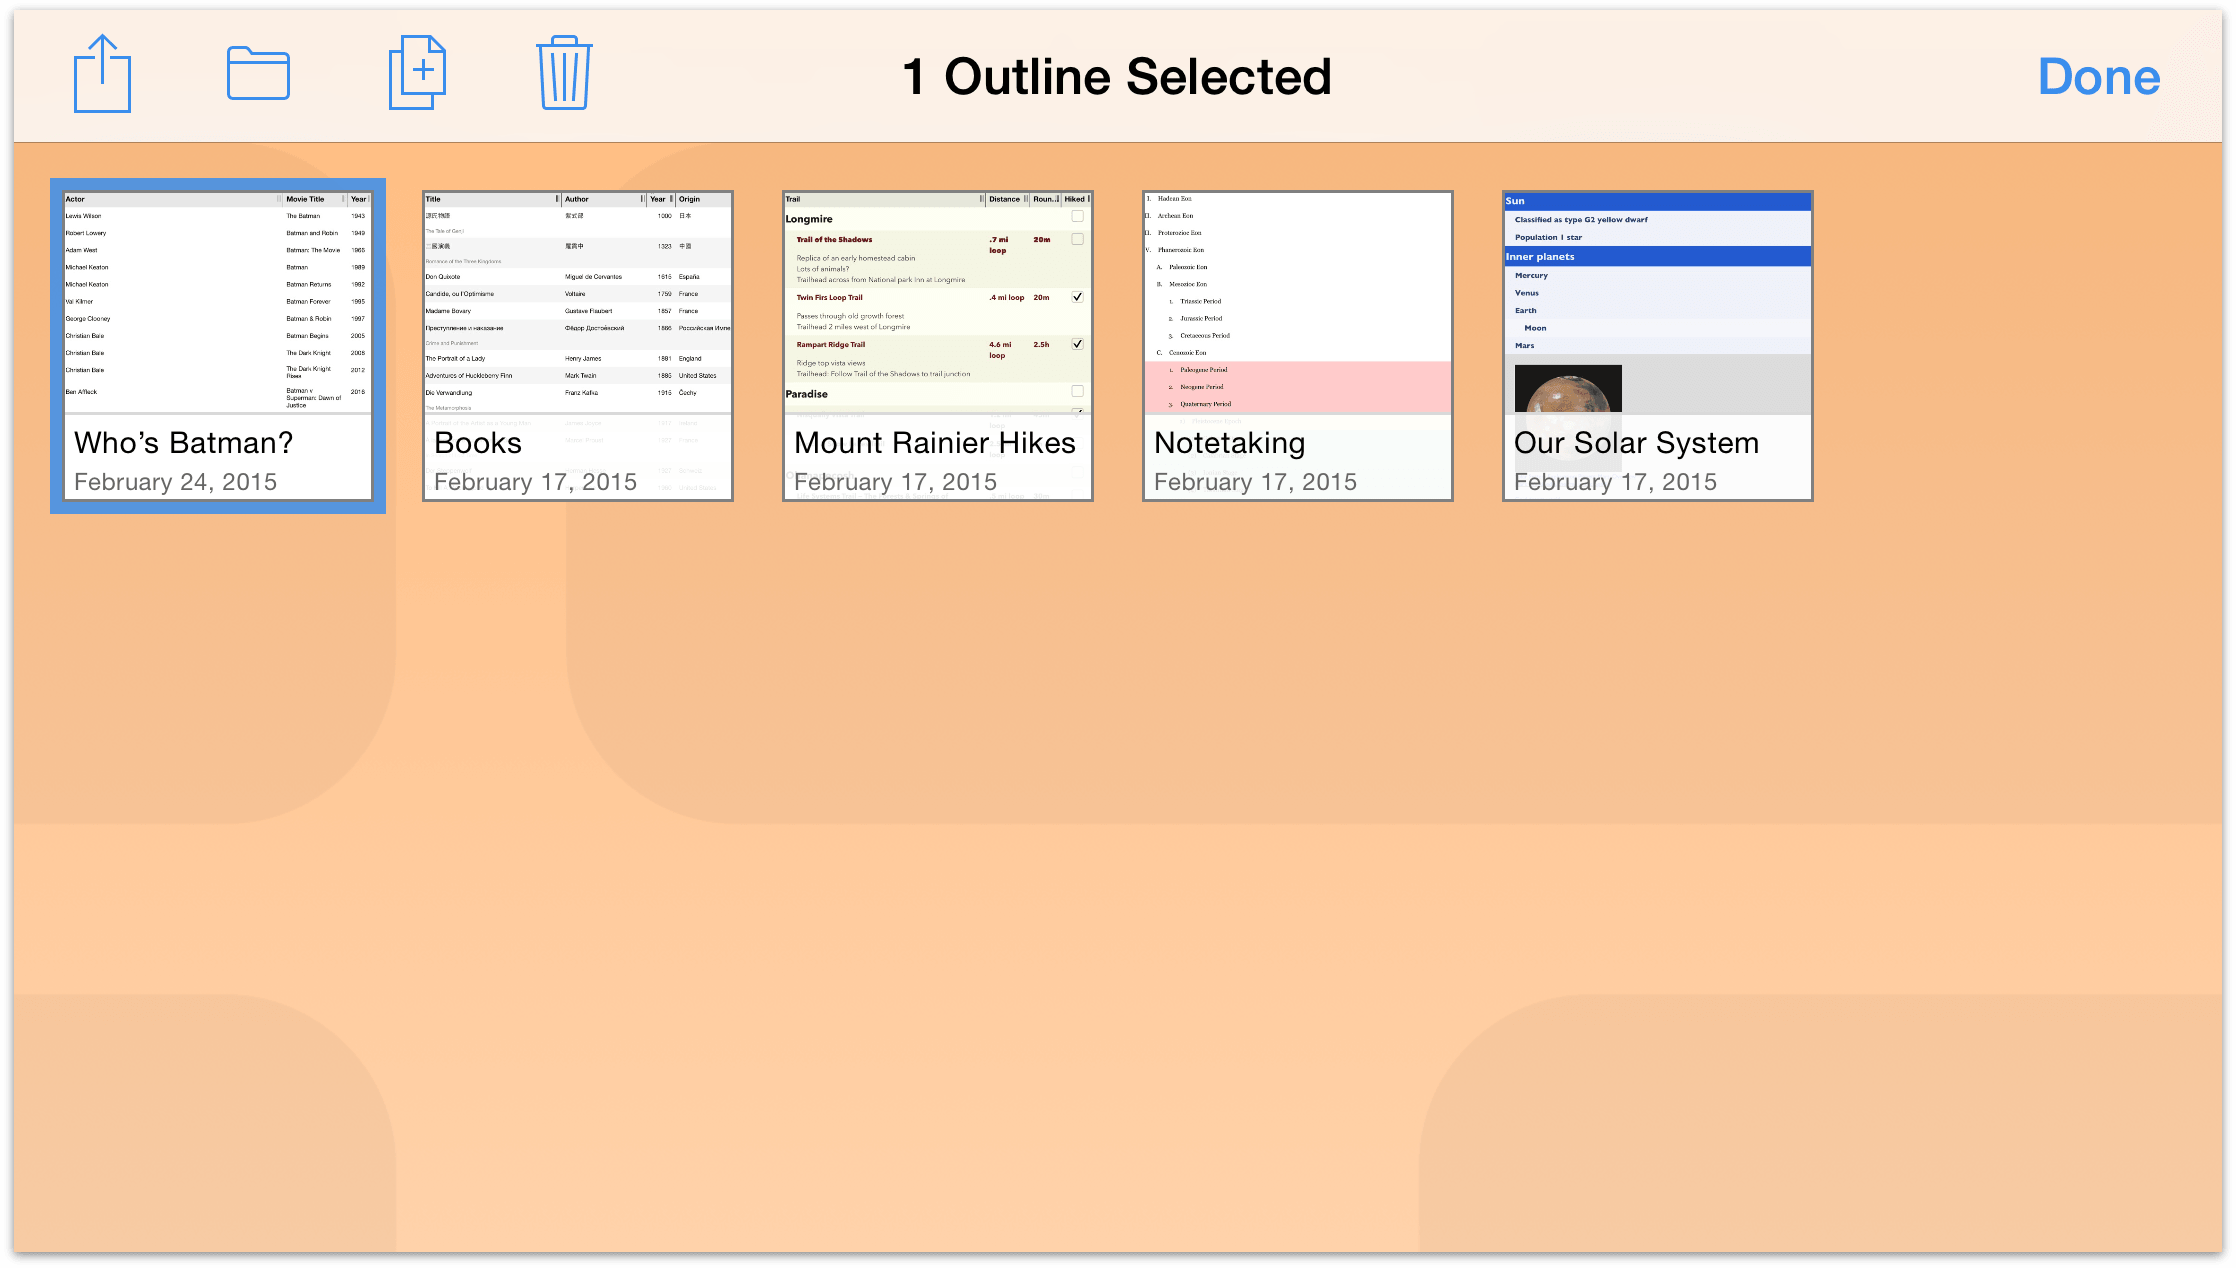
- In the Action Bar, tap
 . OmniOutliner makes a copy of the selected file and places it next to the original, adding a number to the filename; for example, a copy of Who’s Batman? would be named Who’s Batman? 2.
After copying the file, chances are that you will want to rename that file to something more unique and fitting of its purpose. For example, that file might be better suited to keeping track of who played Robin in the Batman movies.
Start by tapping the filename of the file icon. The keyboard on your device comes into view so you can edit the filename. You can also tap the × to clear out the old title before you start entering a new title.
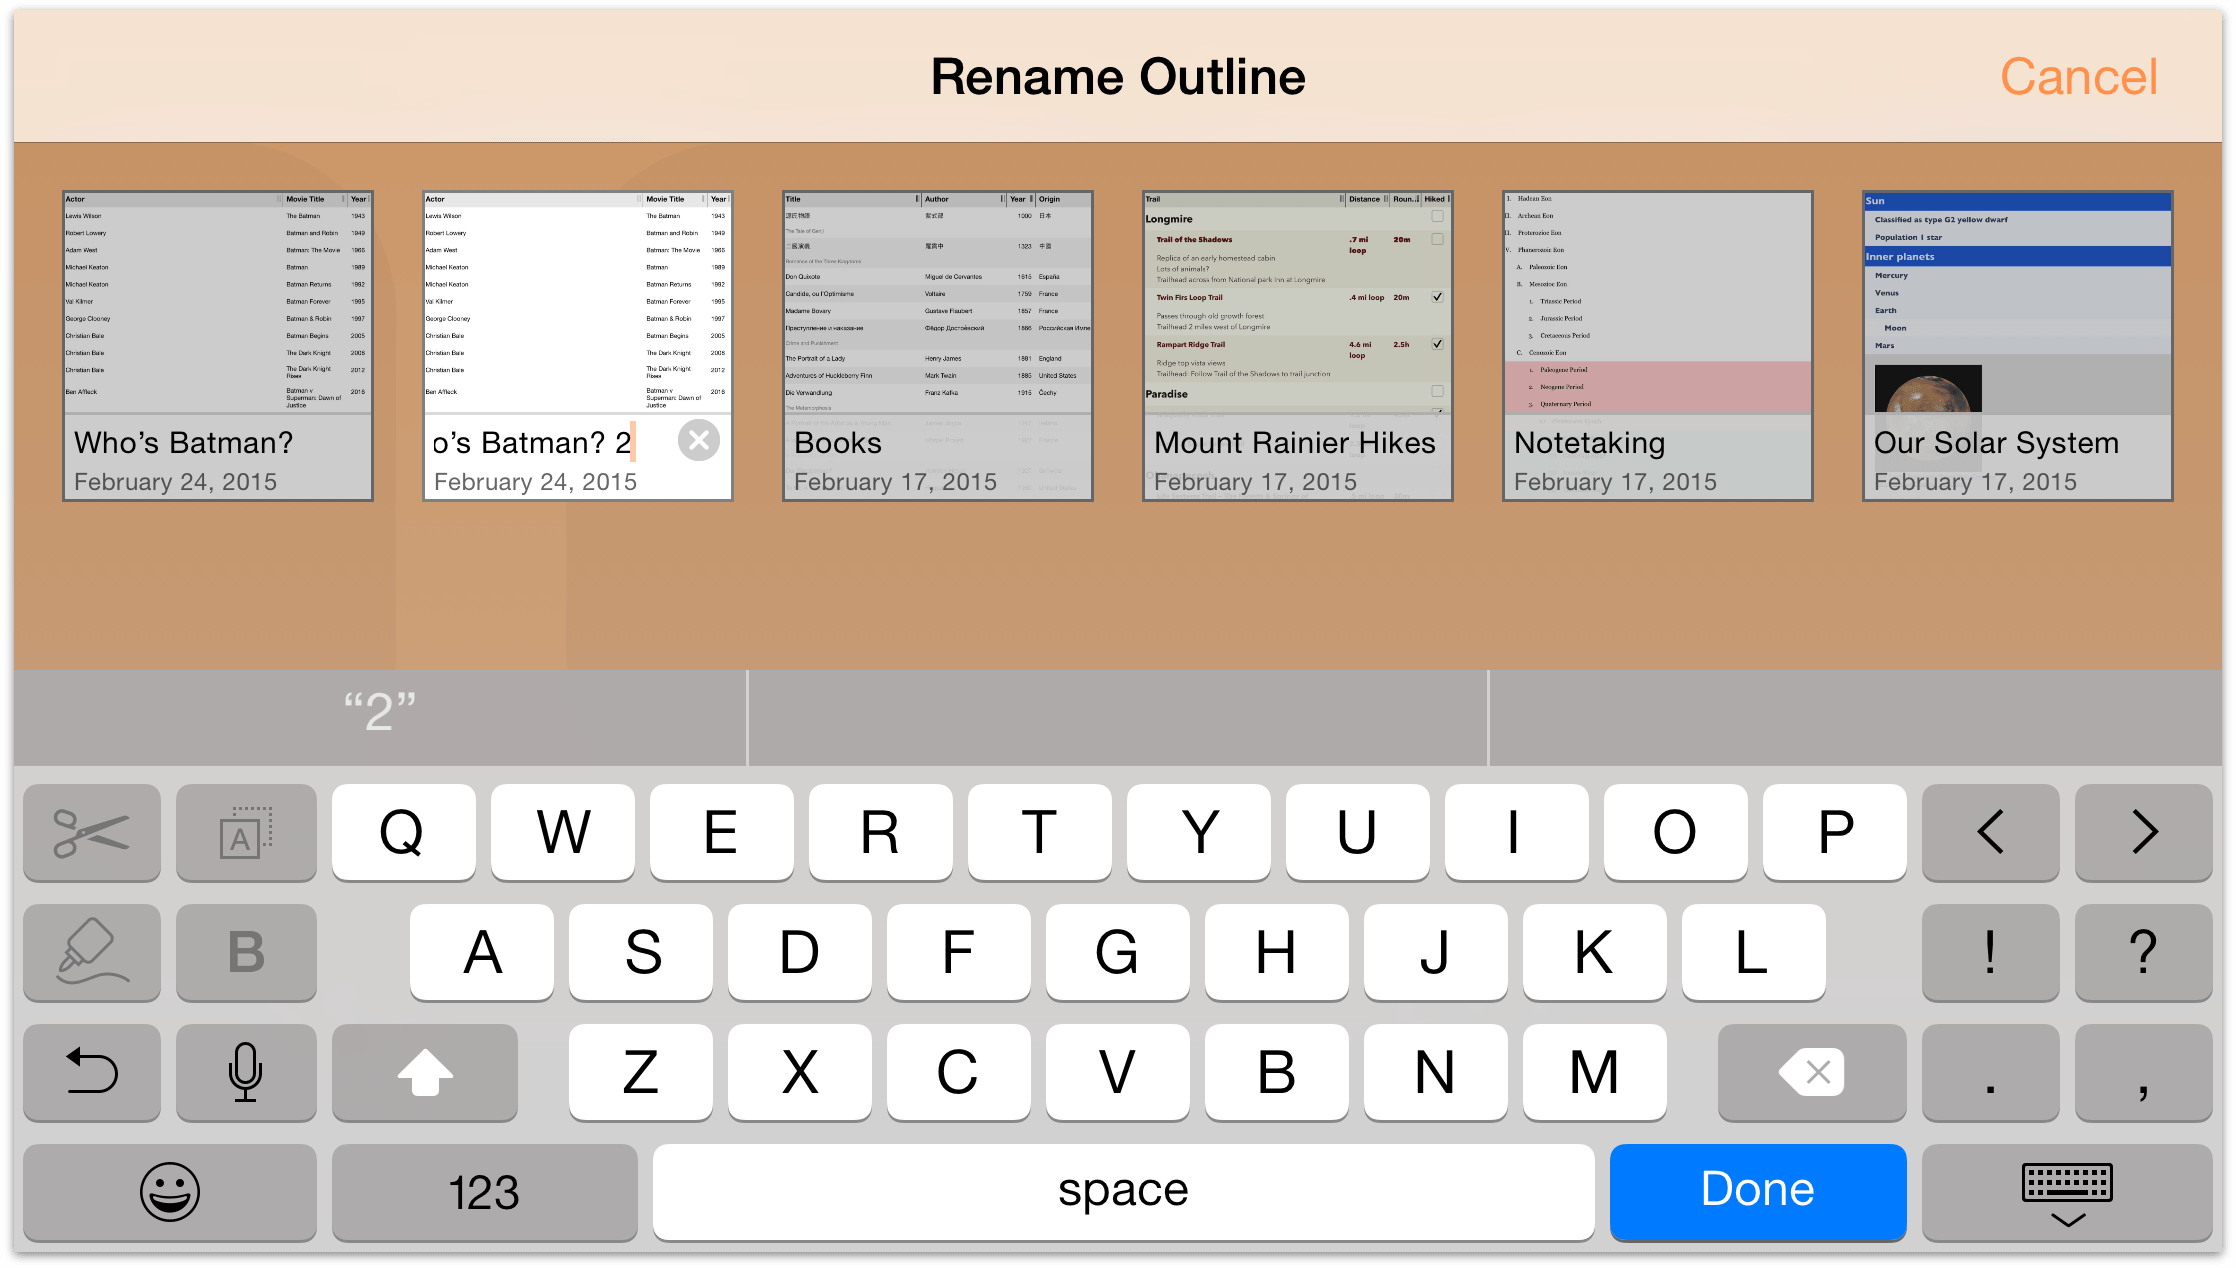
-
When you have finished entering the new filename, tap Done to accept the name.

Taking Out the Trash
Every now and then, you’ll find that it’s time to do a little housecleaning in OmniOutliner. That list of actors who’ve played Batman is no longer relevant, so it’s time to dump that document into the trash and purge it from your device forever (or from your synced Cloud Account, if you have one of those configured).
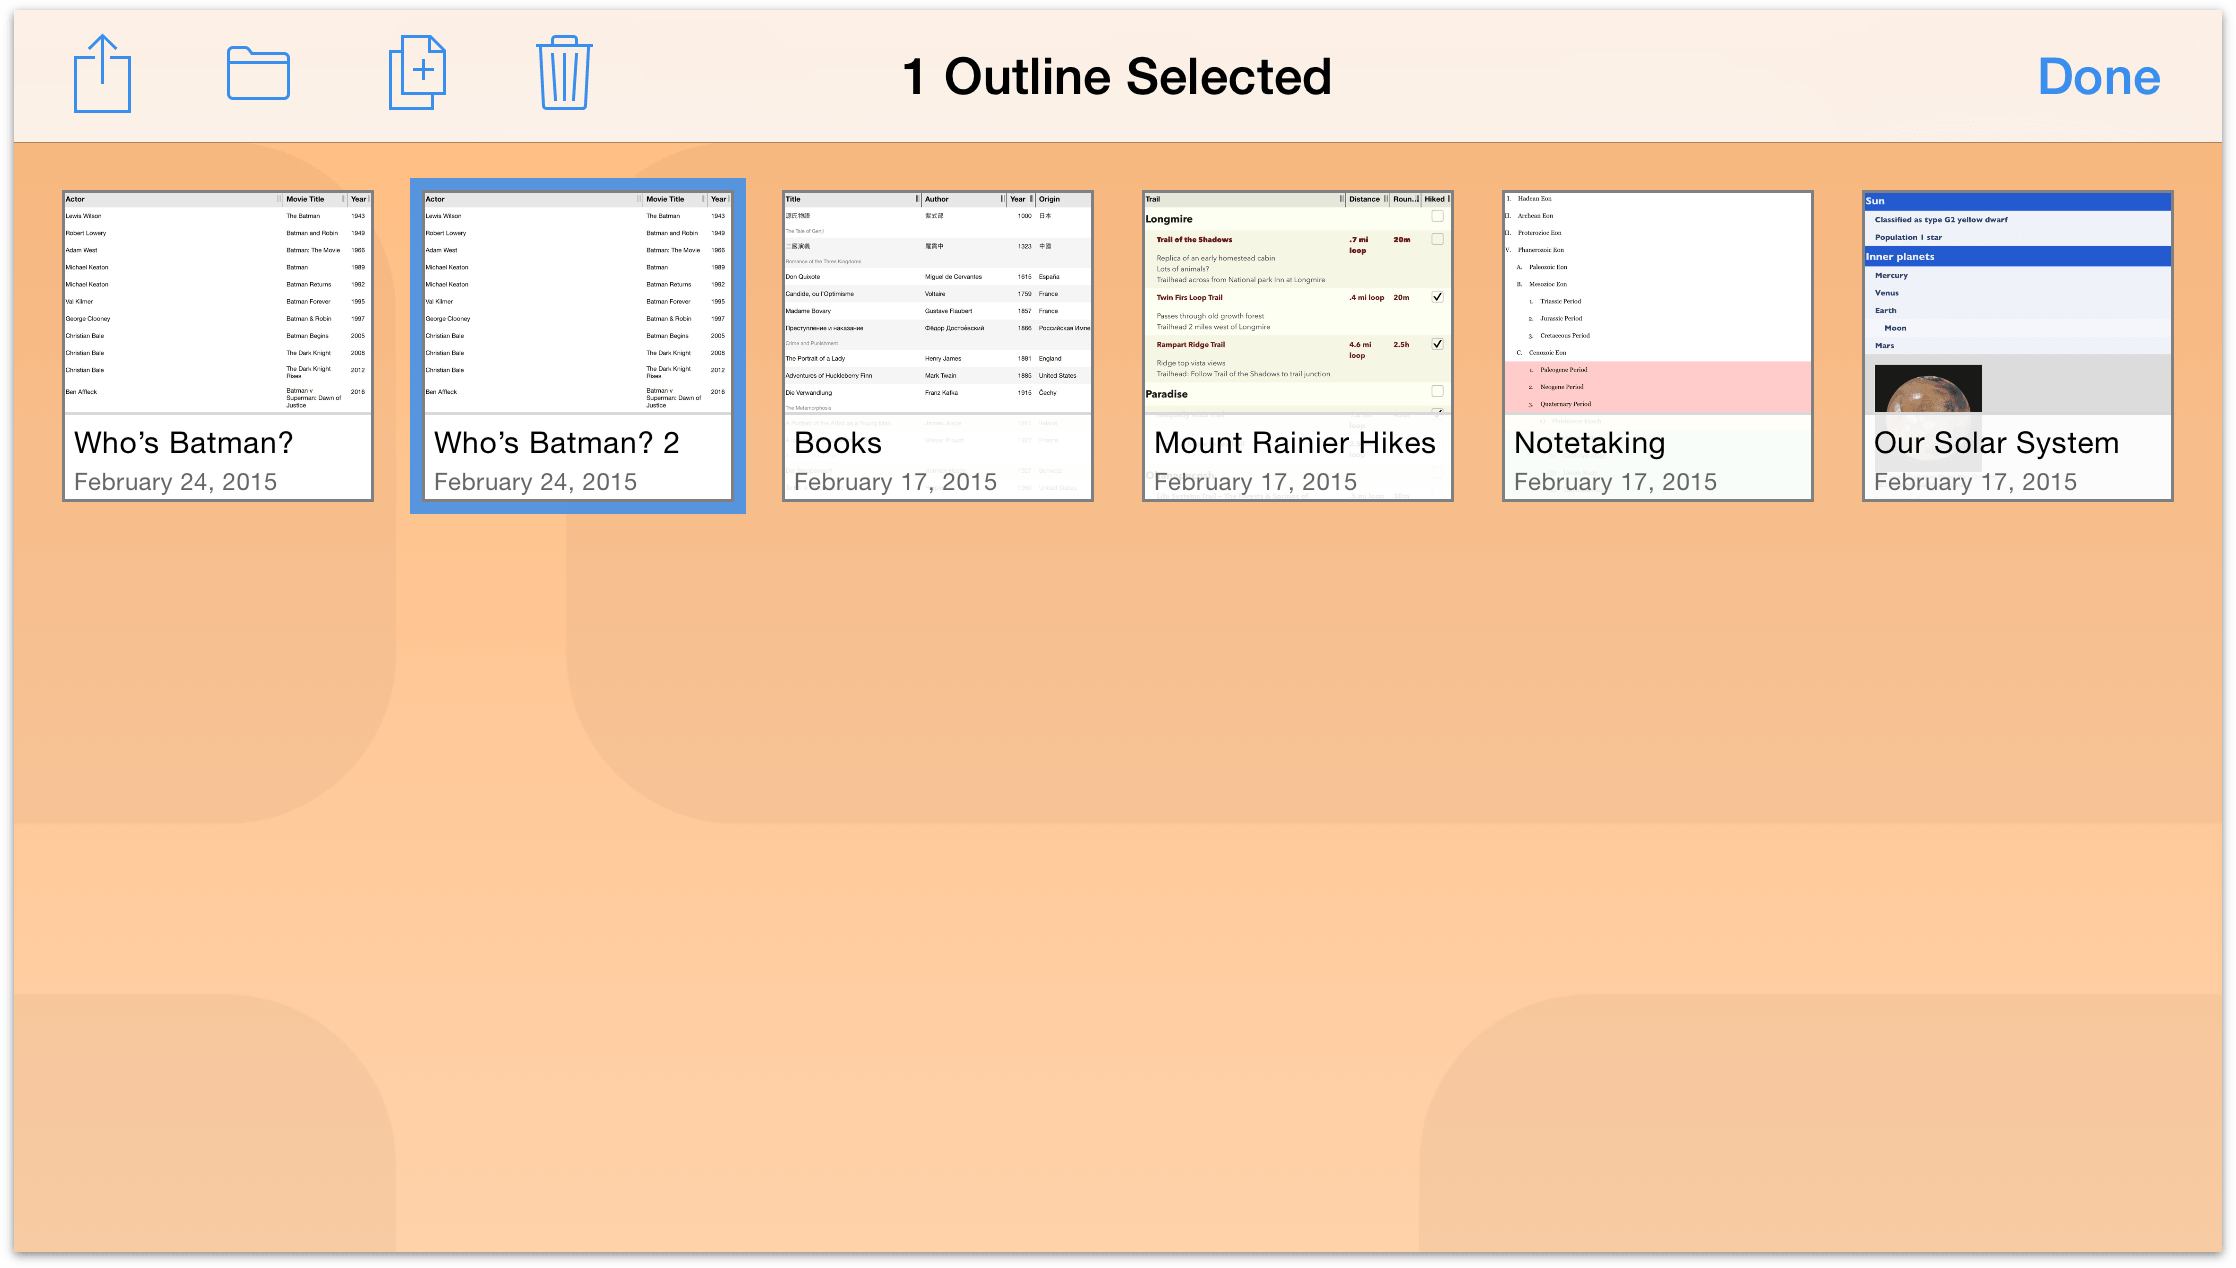
Fortunately, deleting files from OmniOutliner is just as easy as it is to find someone to play Batman. When viewing a folder of documents, tap Select in the navigation bar at the top of the screen. Then tap on the document you’d like to delete; you’ll see that the file now has a blue highlight around it.

Tap the Trash icon in the navigation bar to move the document to the Trash.
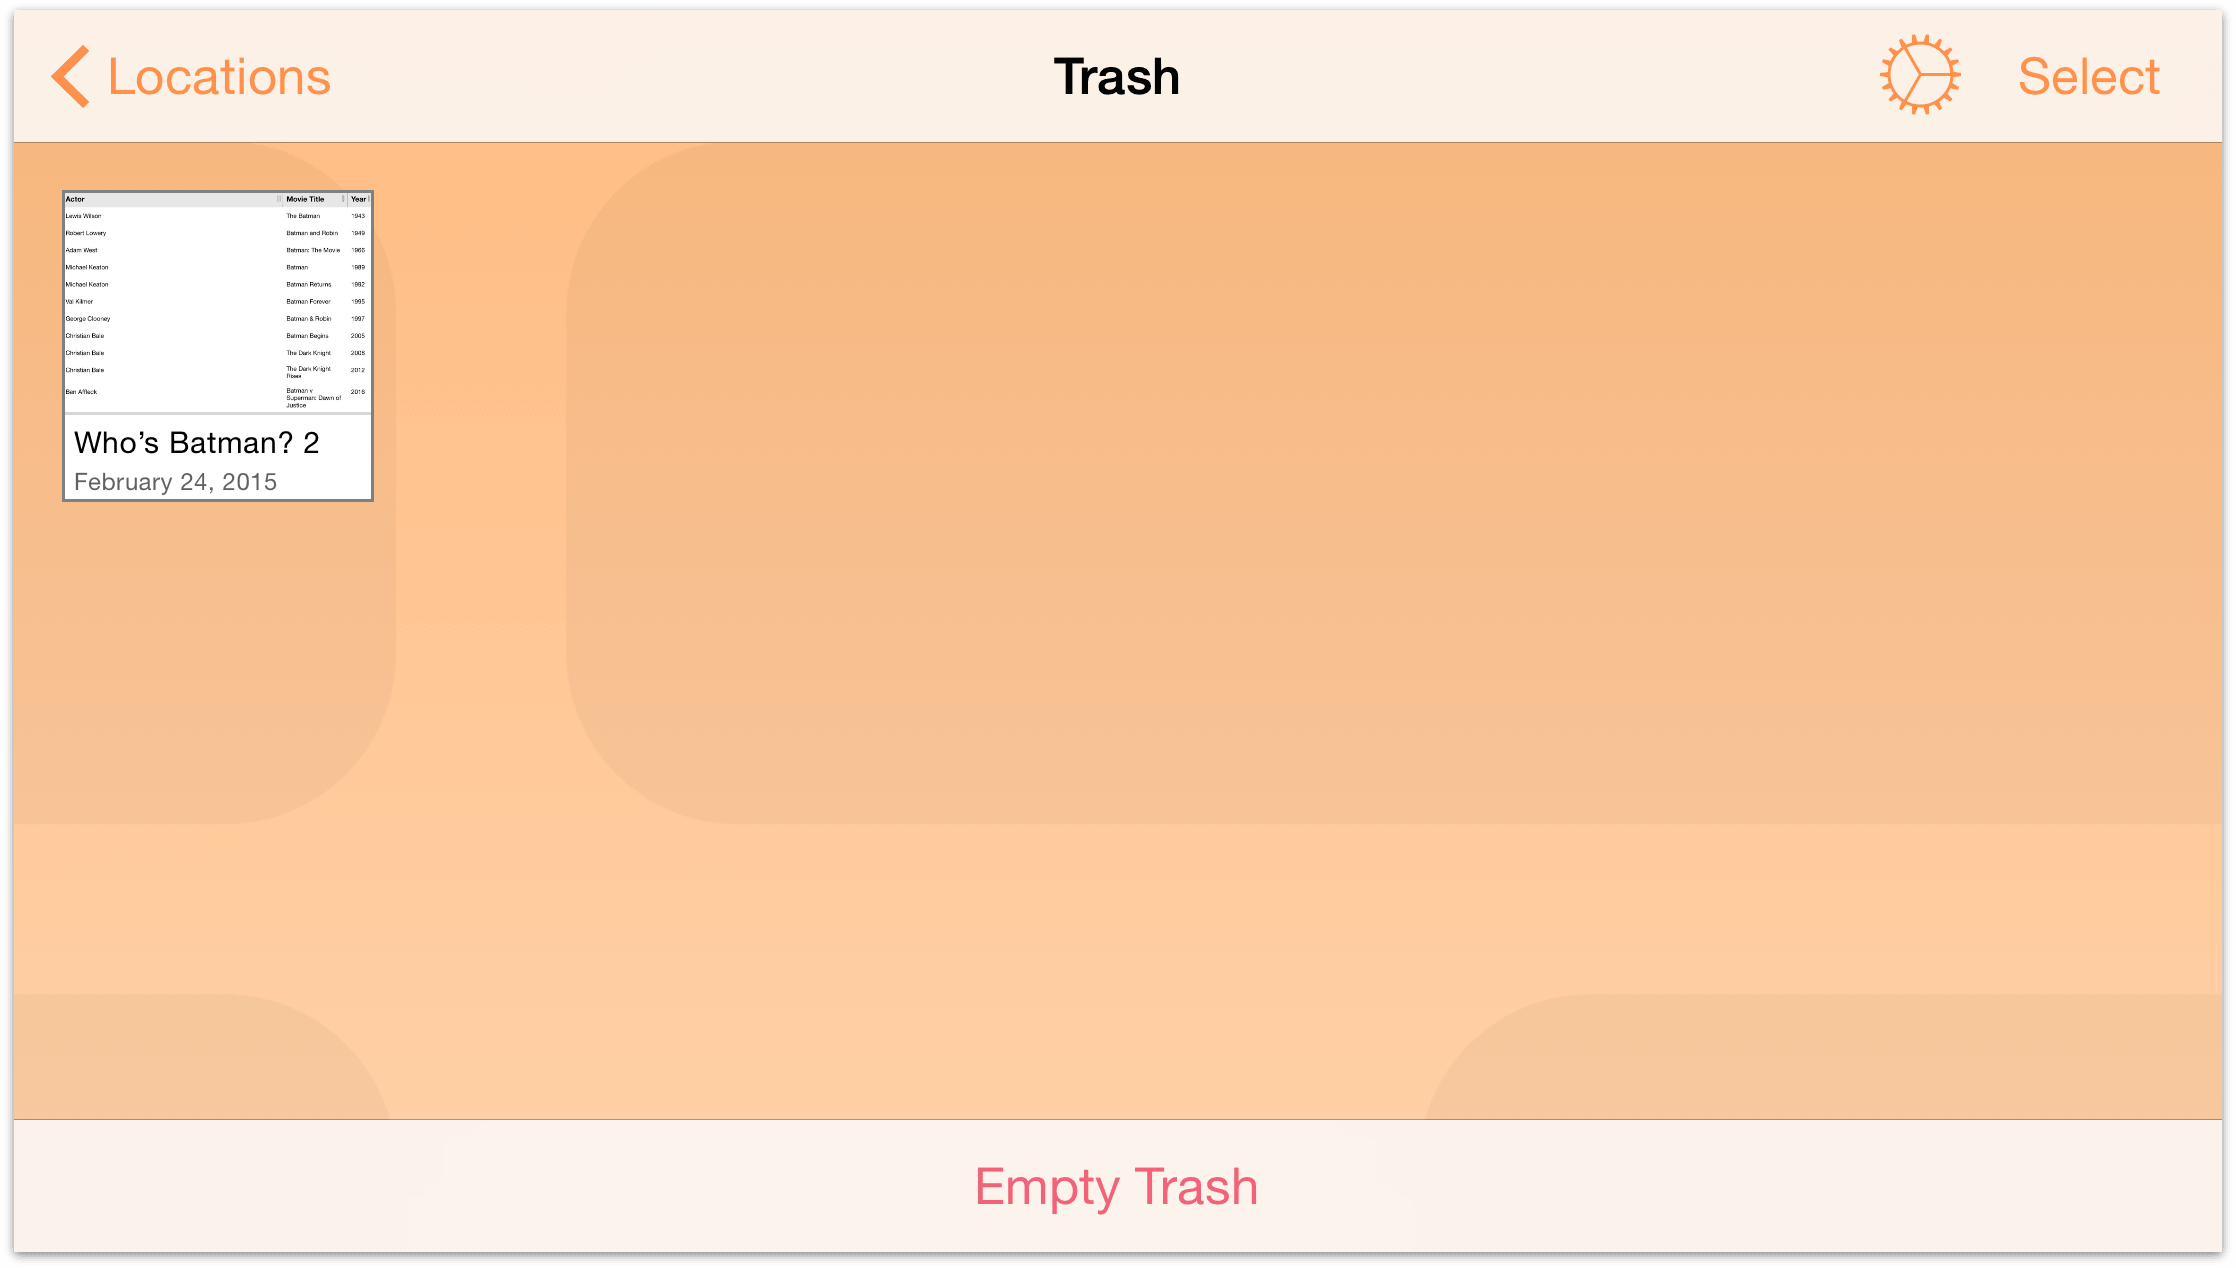
If you tap Locations in the navigation bar, you’ll see a Trash folder in your list of OmniOutliner folders. Right now, the file is still on your device.
Tap to open the Trash folder and then either tap the Restore button in the navigation bar or tap on the file, you’ll get a popup menu with options to restore the file to your Local Documents folder or, if you have set up a Cloud Account, to a synced file share.
Finally, if you really are sure that you no longer need this file, you have a couple options for emptying the trash:
- Tap Empty Trash at the bottom of the screen to permanently remove all of the files in the Trash folder.
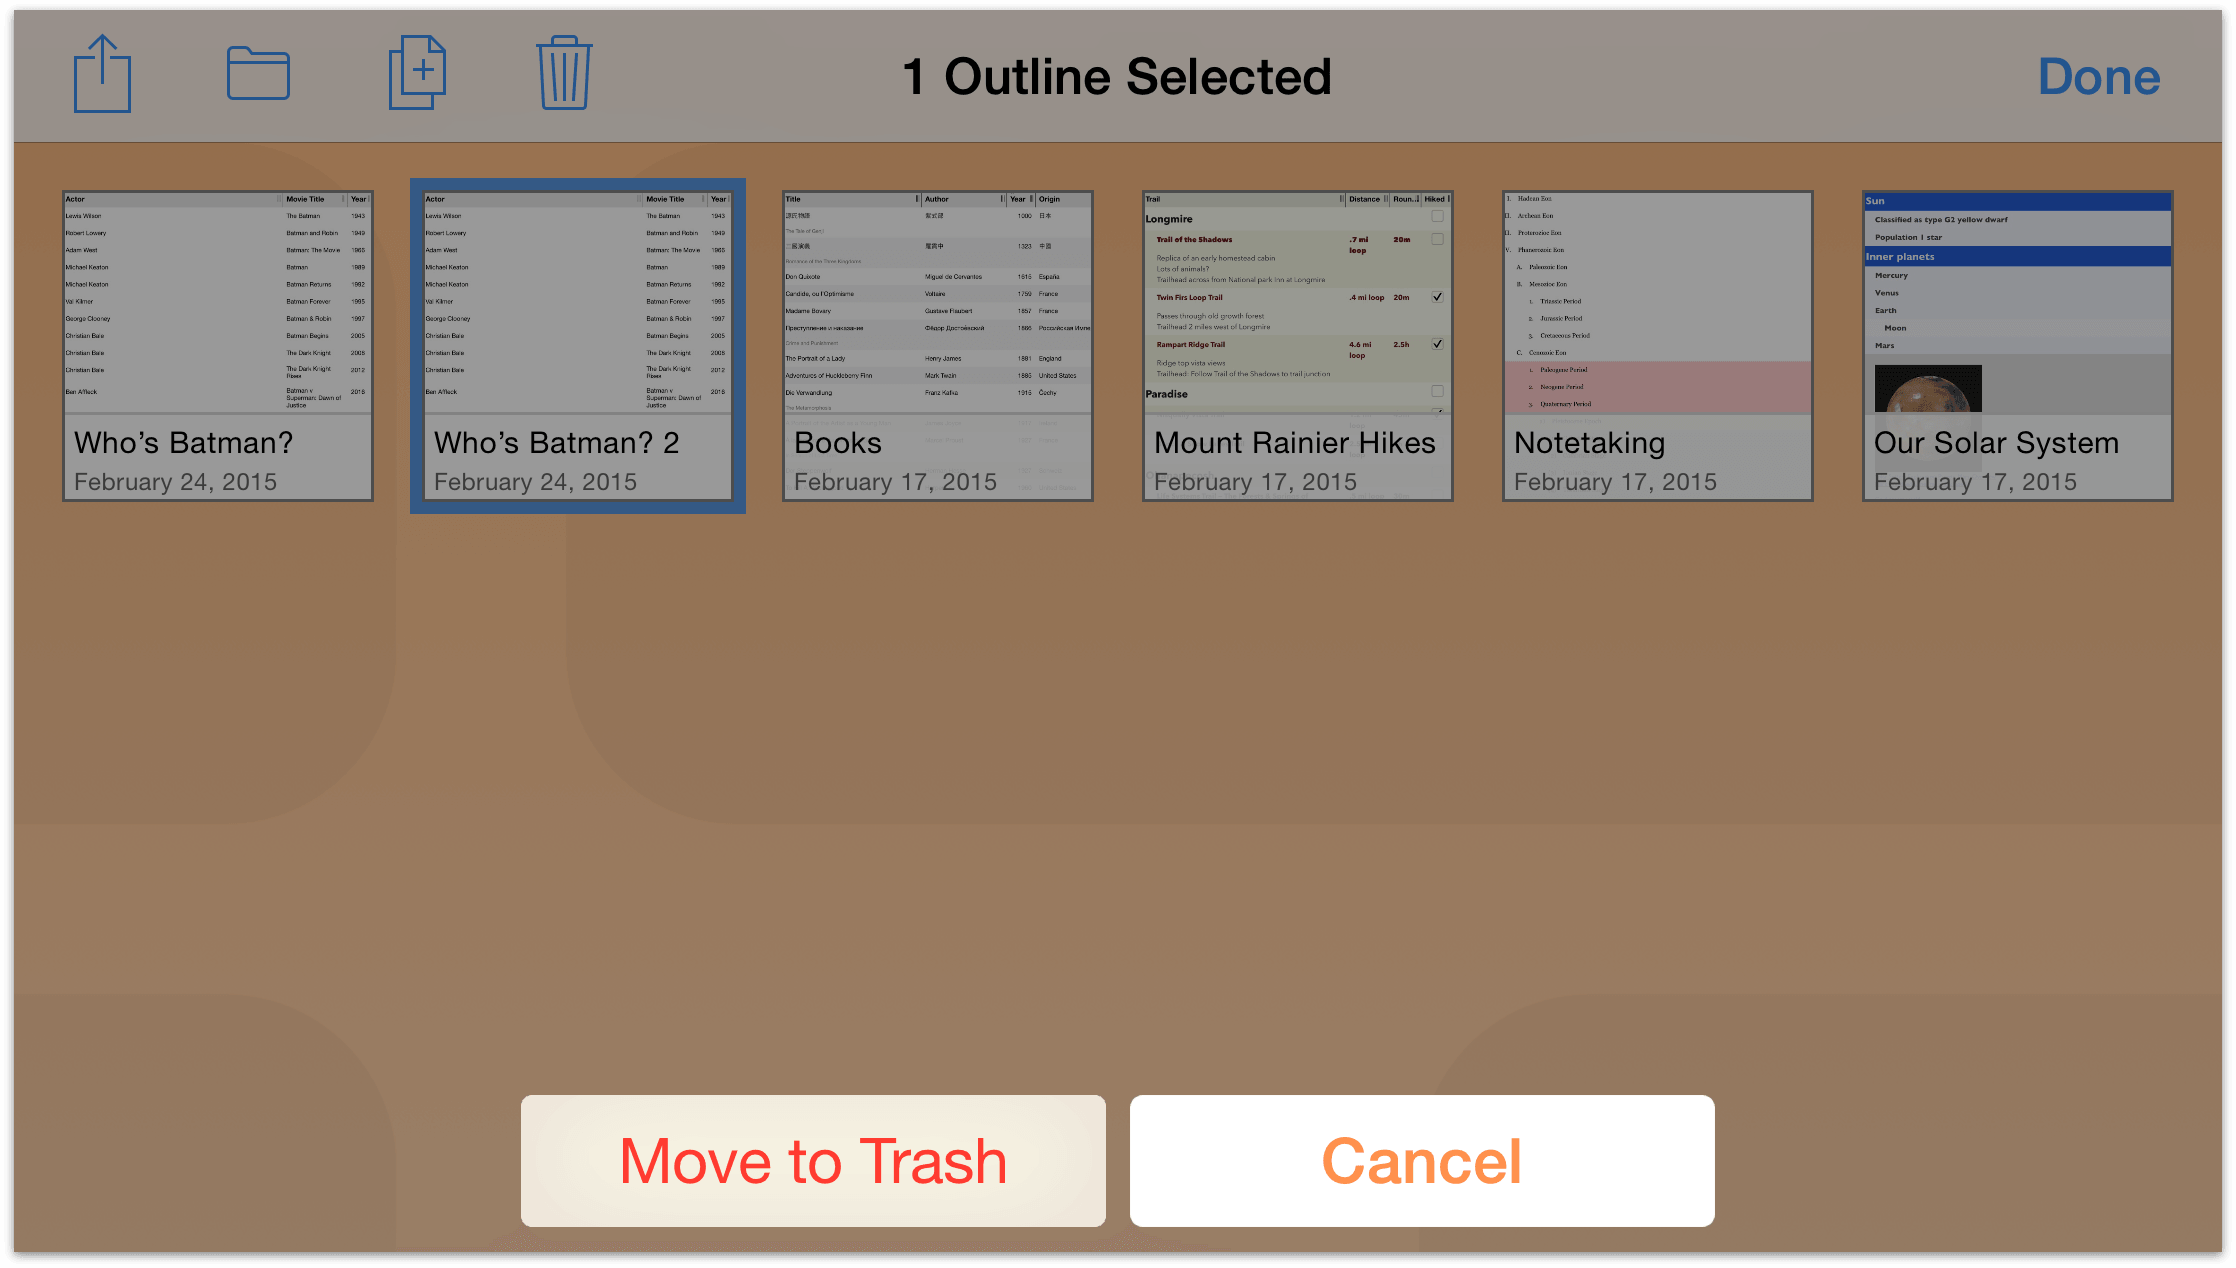
- If you have multiple files in the Trash but you think you might not want to get rid of all of them just yet, you can select the only the files you know need trashing. Tap Select in the Action Bar, and then tap to select the files you want to delete. Next, tap the
 (shred), and then tap Delete Document at the bottom of the screen to delete the selected file.
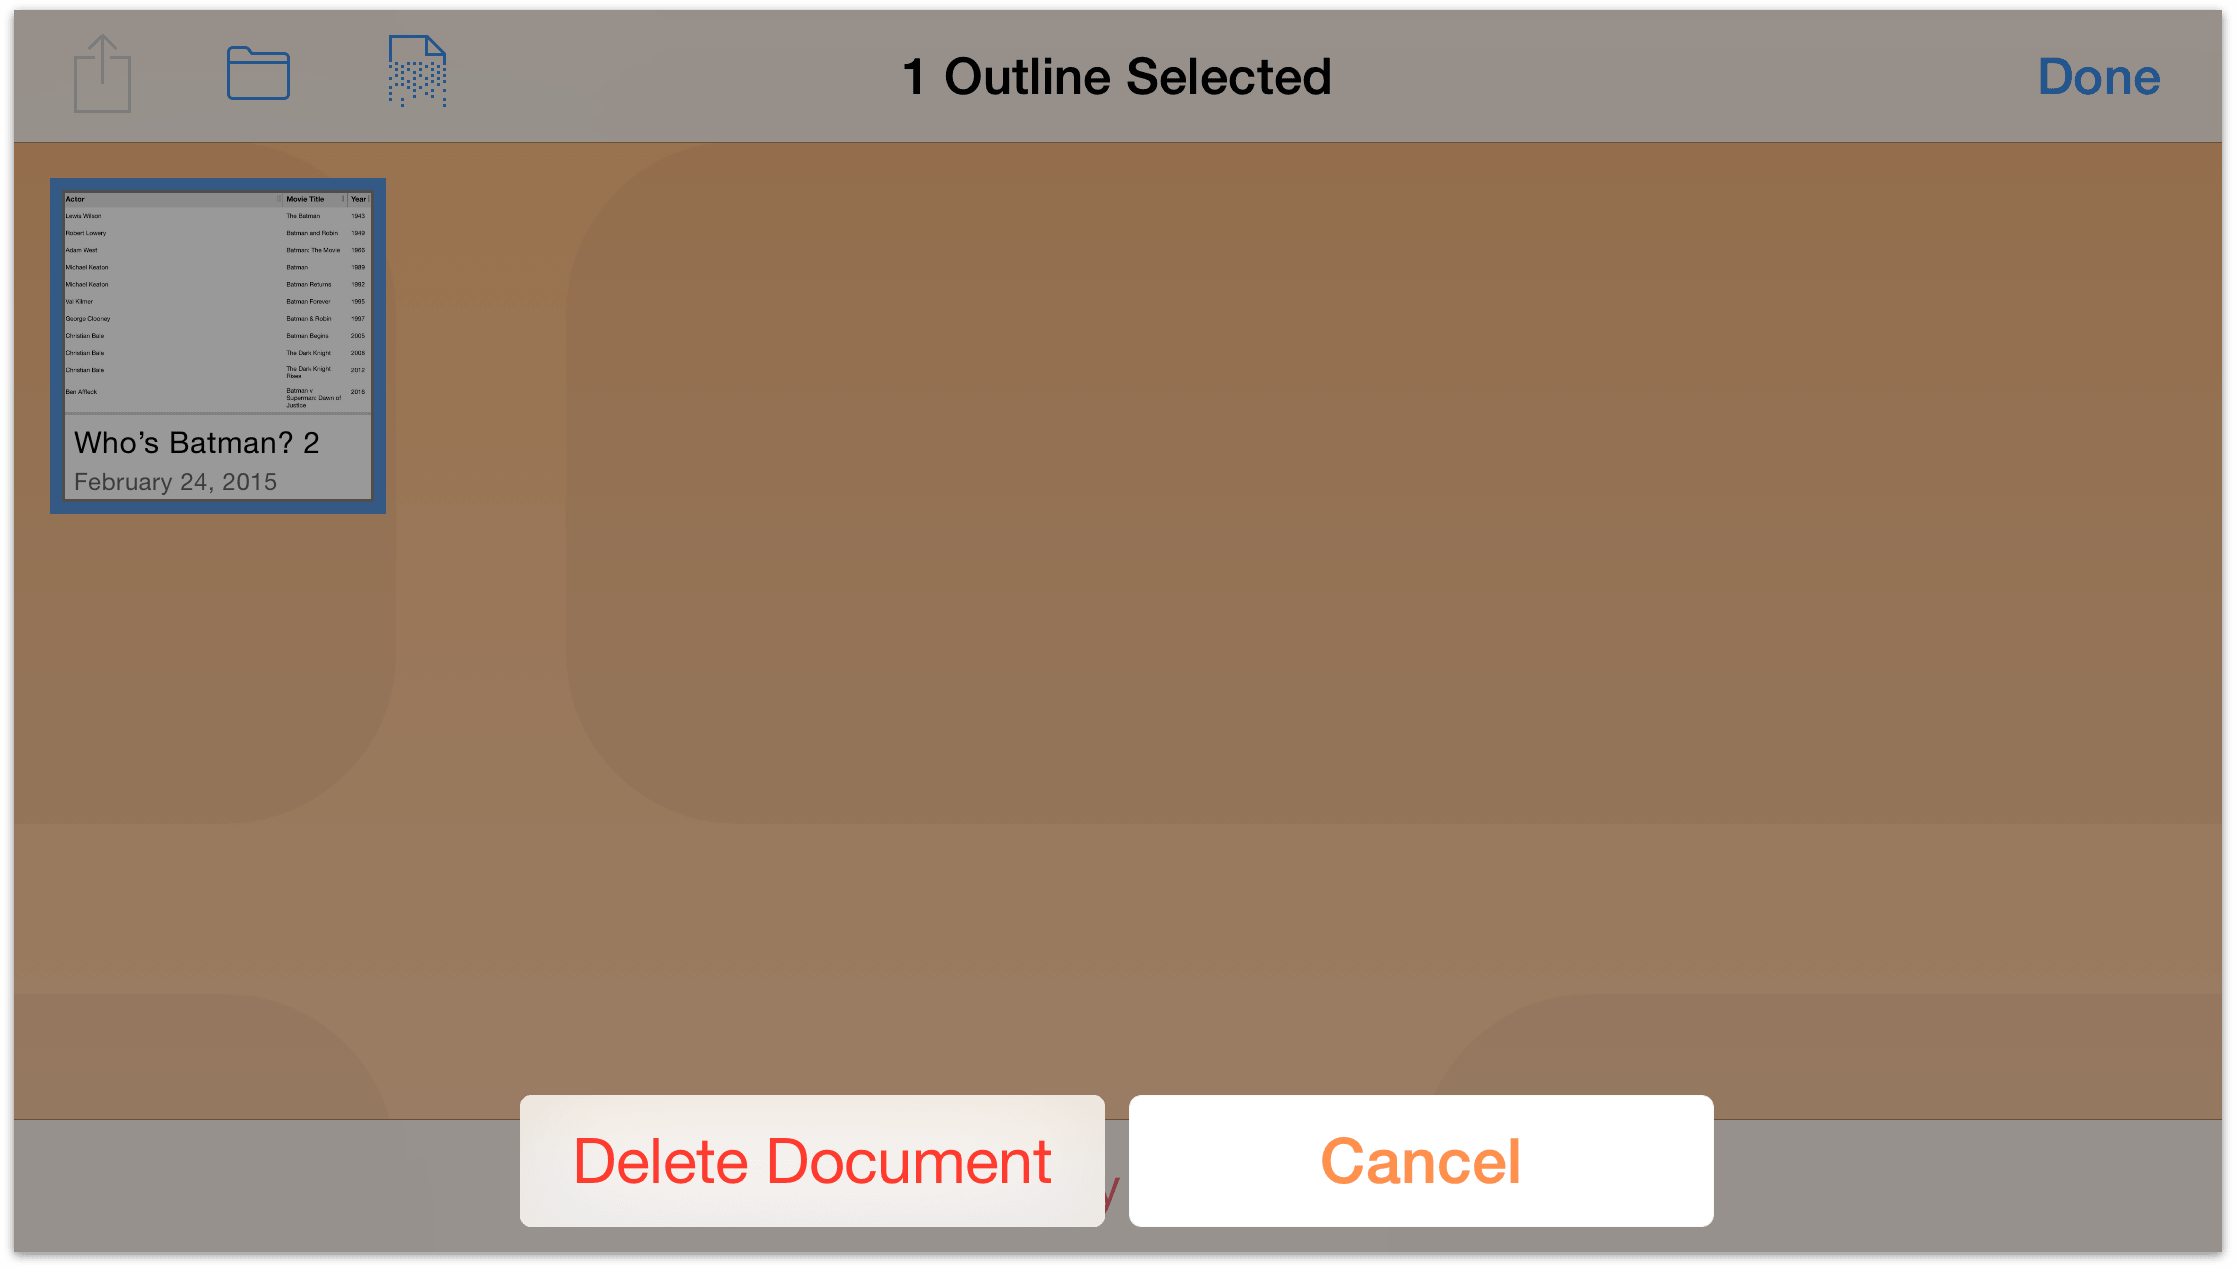
The difference here is that tapping Delete Document only deletes selected files whereas tapping Empty Trash deletes everything in the Trash folder, regardless of whether any files have been selected.
Now that you have a firm grasp on how to use the Document Browser, it’s time to expand your horizons and start working on your first OmniOutliner document.
Before moving on, though, take some time to practice moving and copying files, and try creating a few subfolders to organize your files. It’s also worth noting that you can move a file out of the Trash and back into another folder, so go ahead and try that after duplicating one of the templates.
Catch you in the next chapter.
Creating a New OmniOutliner Document
OmniOutliner is a great tool for organizing lists of information. Whether you need to create a shopping list, detail the chapters and plot lines for the novel you’re writing, or organize your list of favorite movies, OmniOutliner makes it easy for you to jot everything down quickly.
Tip
If you have purchased TextExpander for your iOS device, you can use TextExpander to create a library of abbreviation shortcuts for snippets of text that you use frequently, such as addresses, URLs, and standard replies. Tap that abbreviation and it automatically expands to the full snippet.
The best way to learn OmniOutliner is to just jump right in and create something. This chapter takes you through the process of creating your first document in OmniOutliner—your list of favorite movies. Along the way, you will learn about OmniOutliner’s interface, discover some “hidden” tap gestures, as well as how to add columns and edit column headings.
By the end of chapter you should be well on your way to mastering your outlines with OmniOutliner—so let’s get started.
Building Outlines (Out of Nothing At All)
Whenever you create a new document in OmniOutliner, the place to start is the Locations screen. To create a new file, you have to first select a location (a folder) in which to save the file. You can choose from the Local Documents folder, or a synced folder in the cloud.
Note
Tap Add cloud account to give OmniOutliner access to files you have stored in the cloud. You can sync to Omni Sync Server or to a WebDAV server. For more details, see Adding a Cloud Account.
OmniOutliner for iOS does not support or provide access to iCloud Drive.
- On the Locations screen, tap Local Documents to open that folder. This is where you will create and store your list of favorite movies.
To get started, tap
(Add) in the navigation bar at the top of the screen.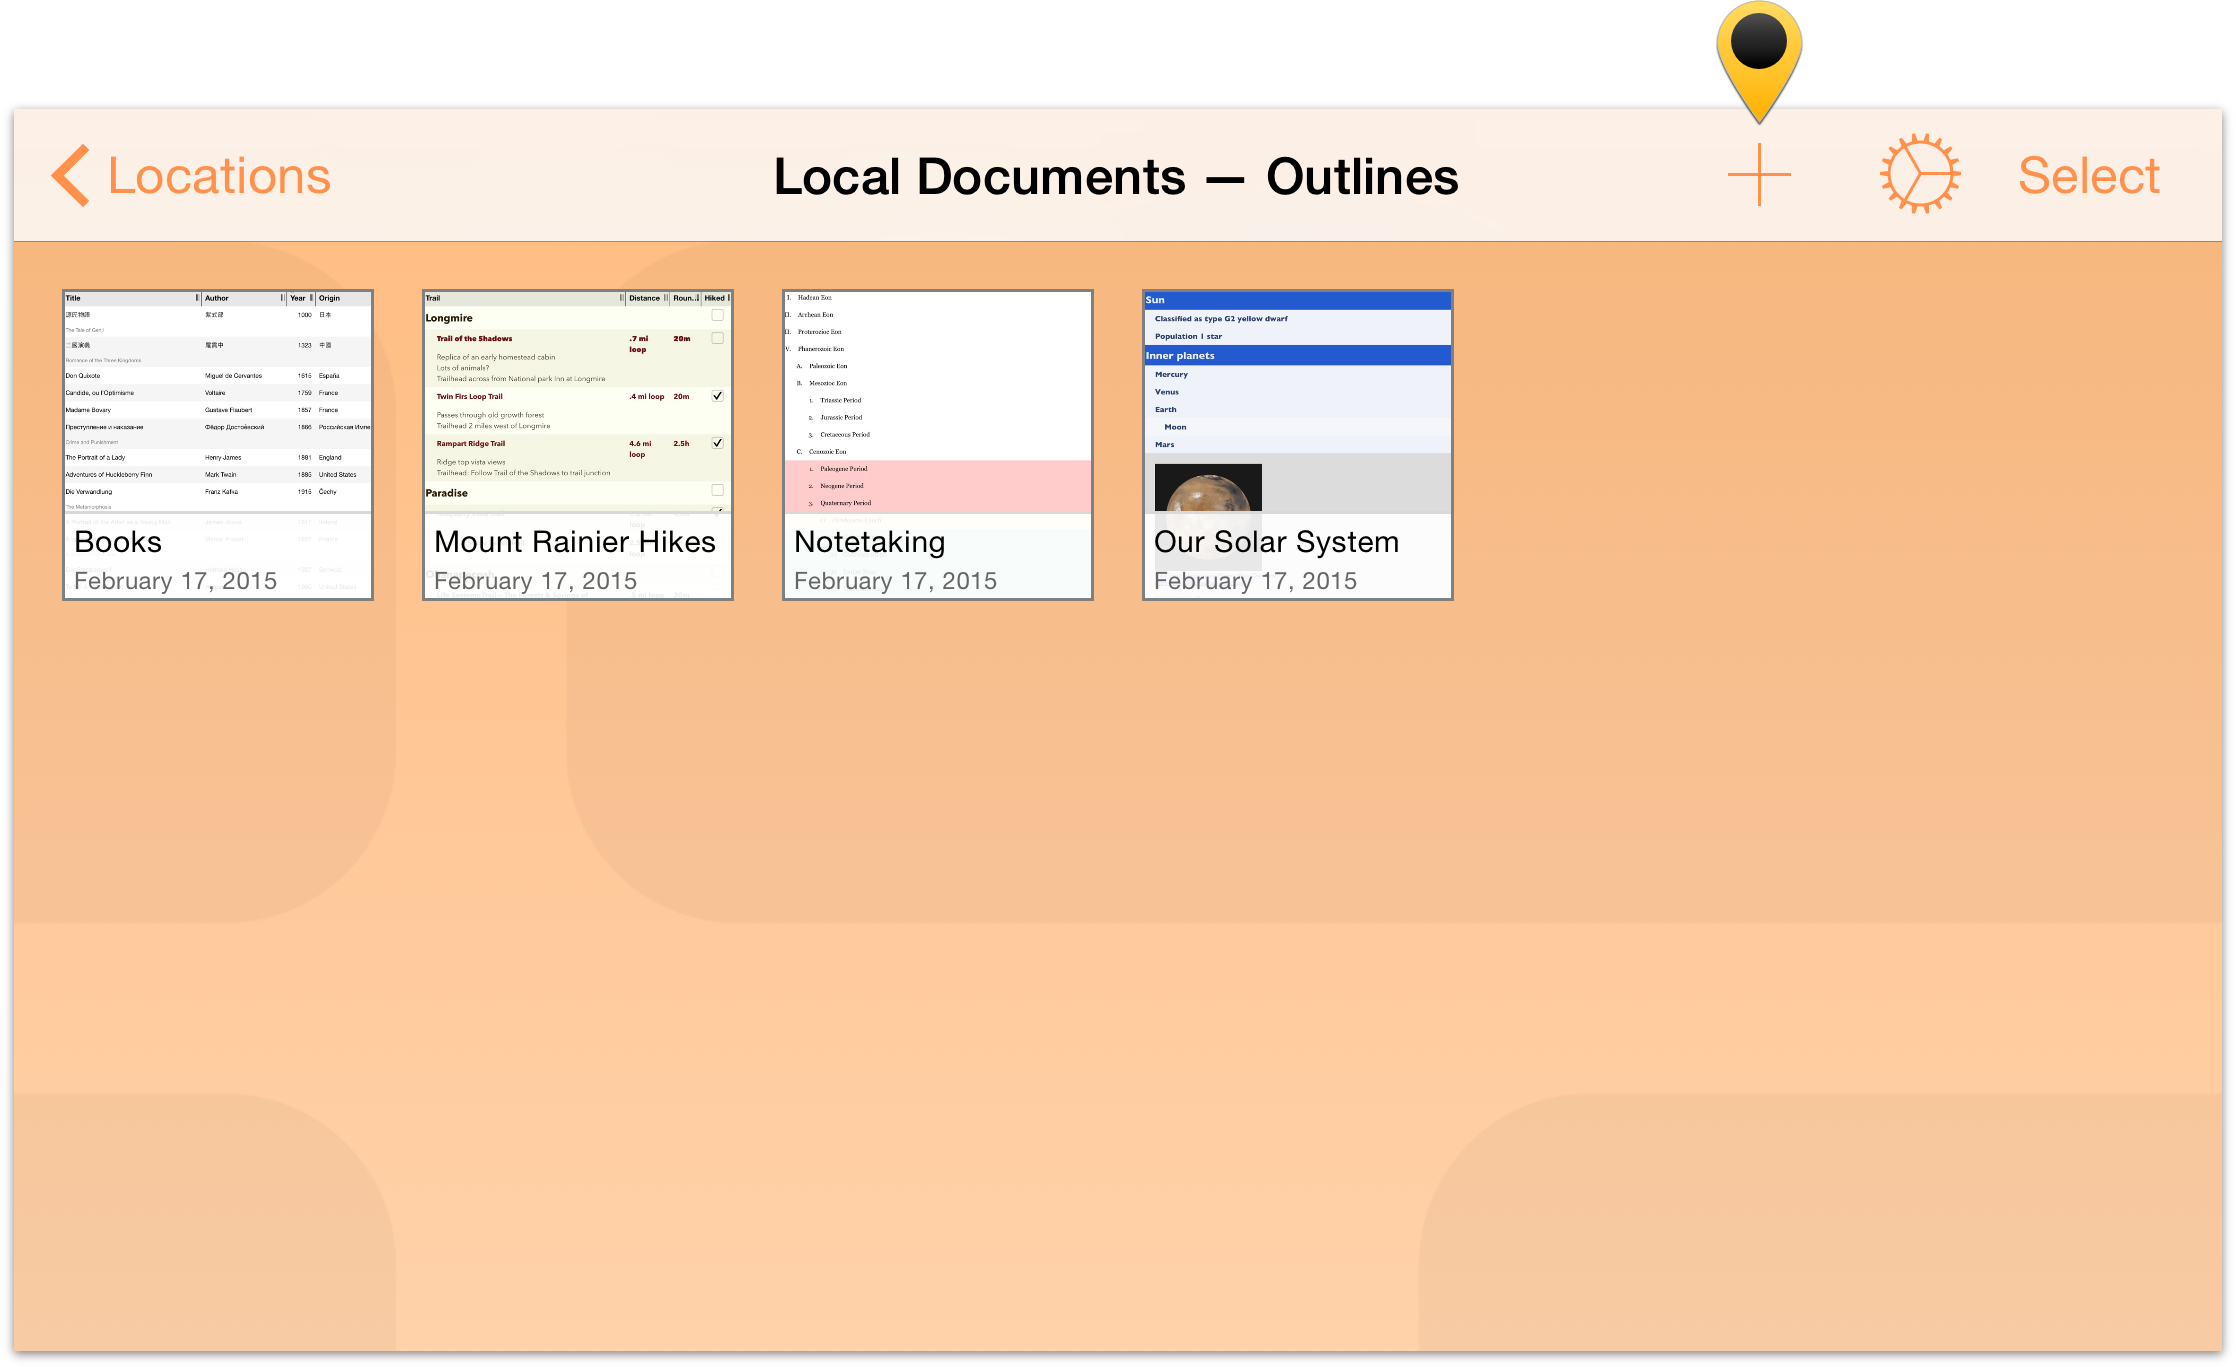
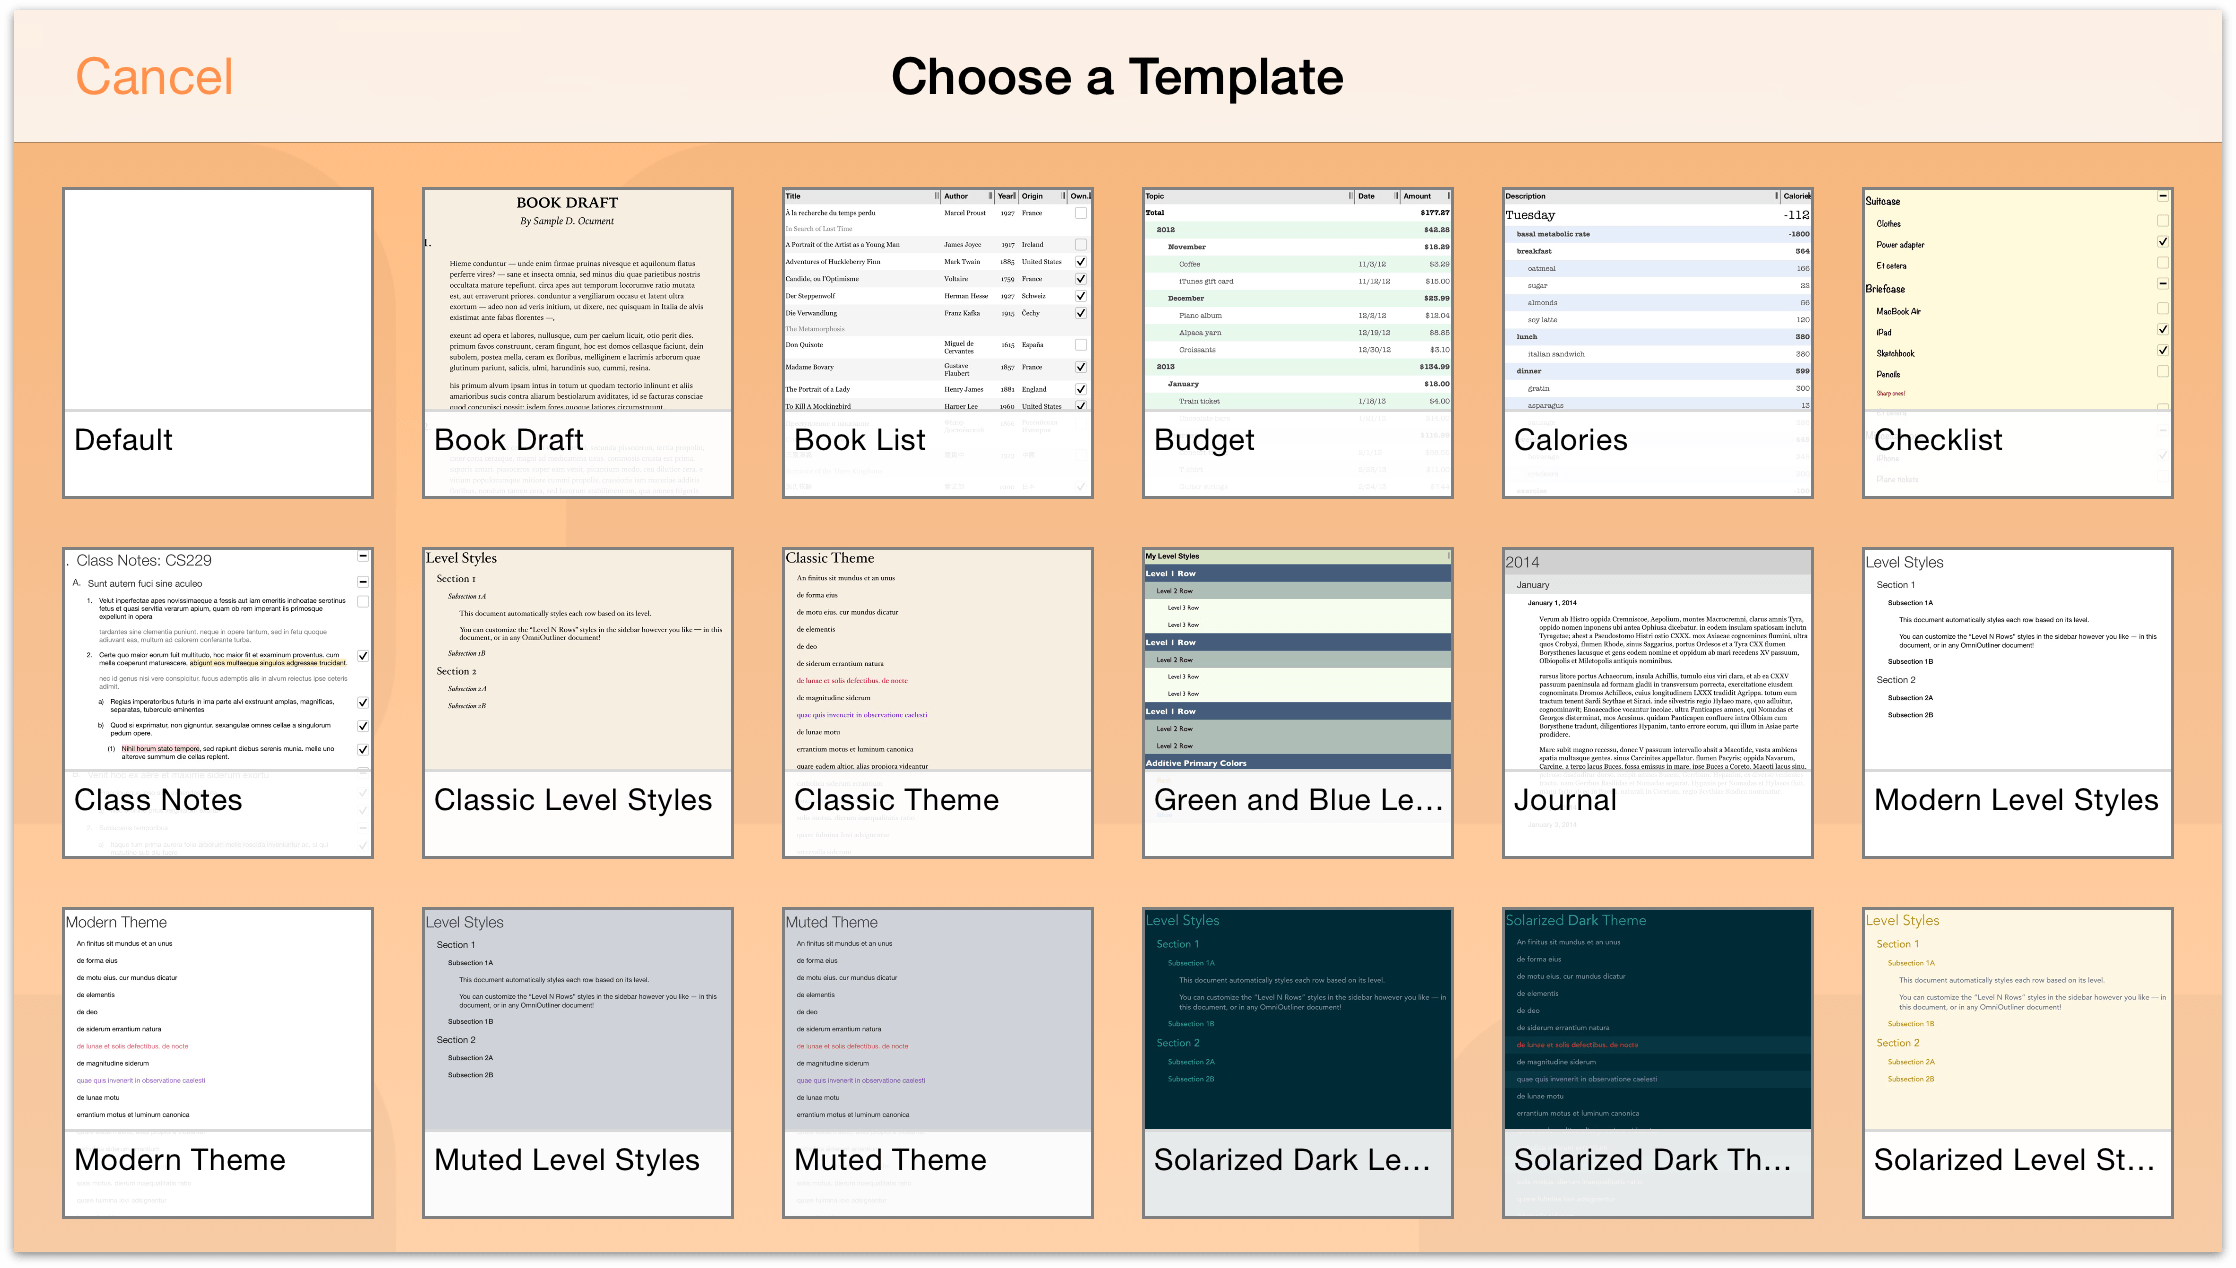
Next, Choose a Template. You can choose from one of the sample templates, but in this case, select the Default template since you’ll want to have some liberty over the appearance of your list.
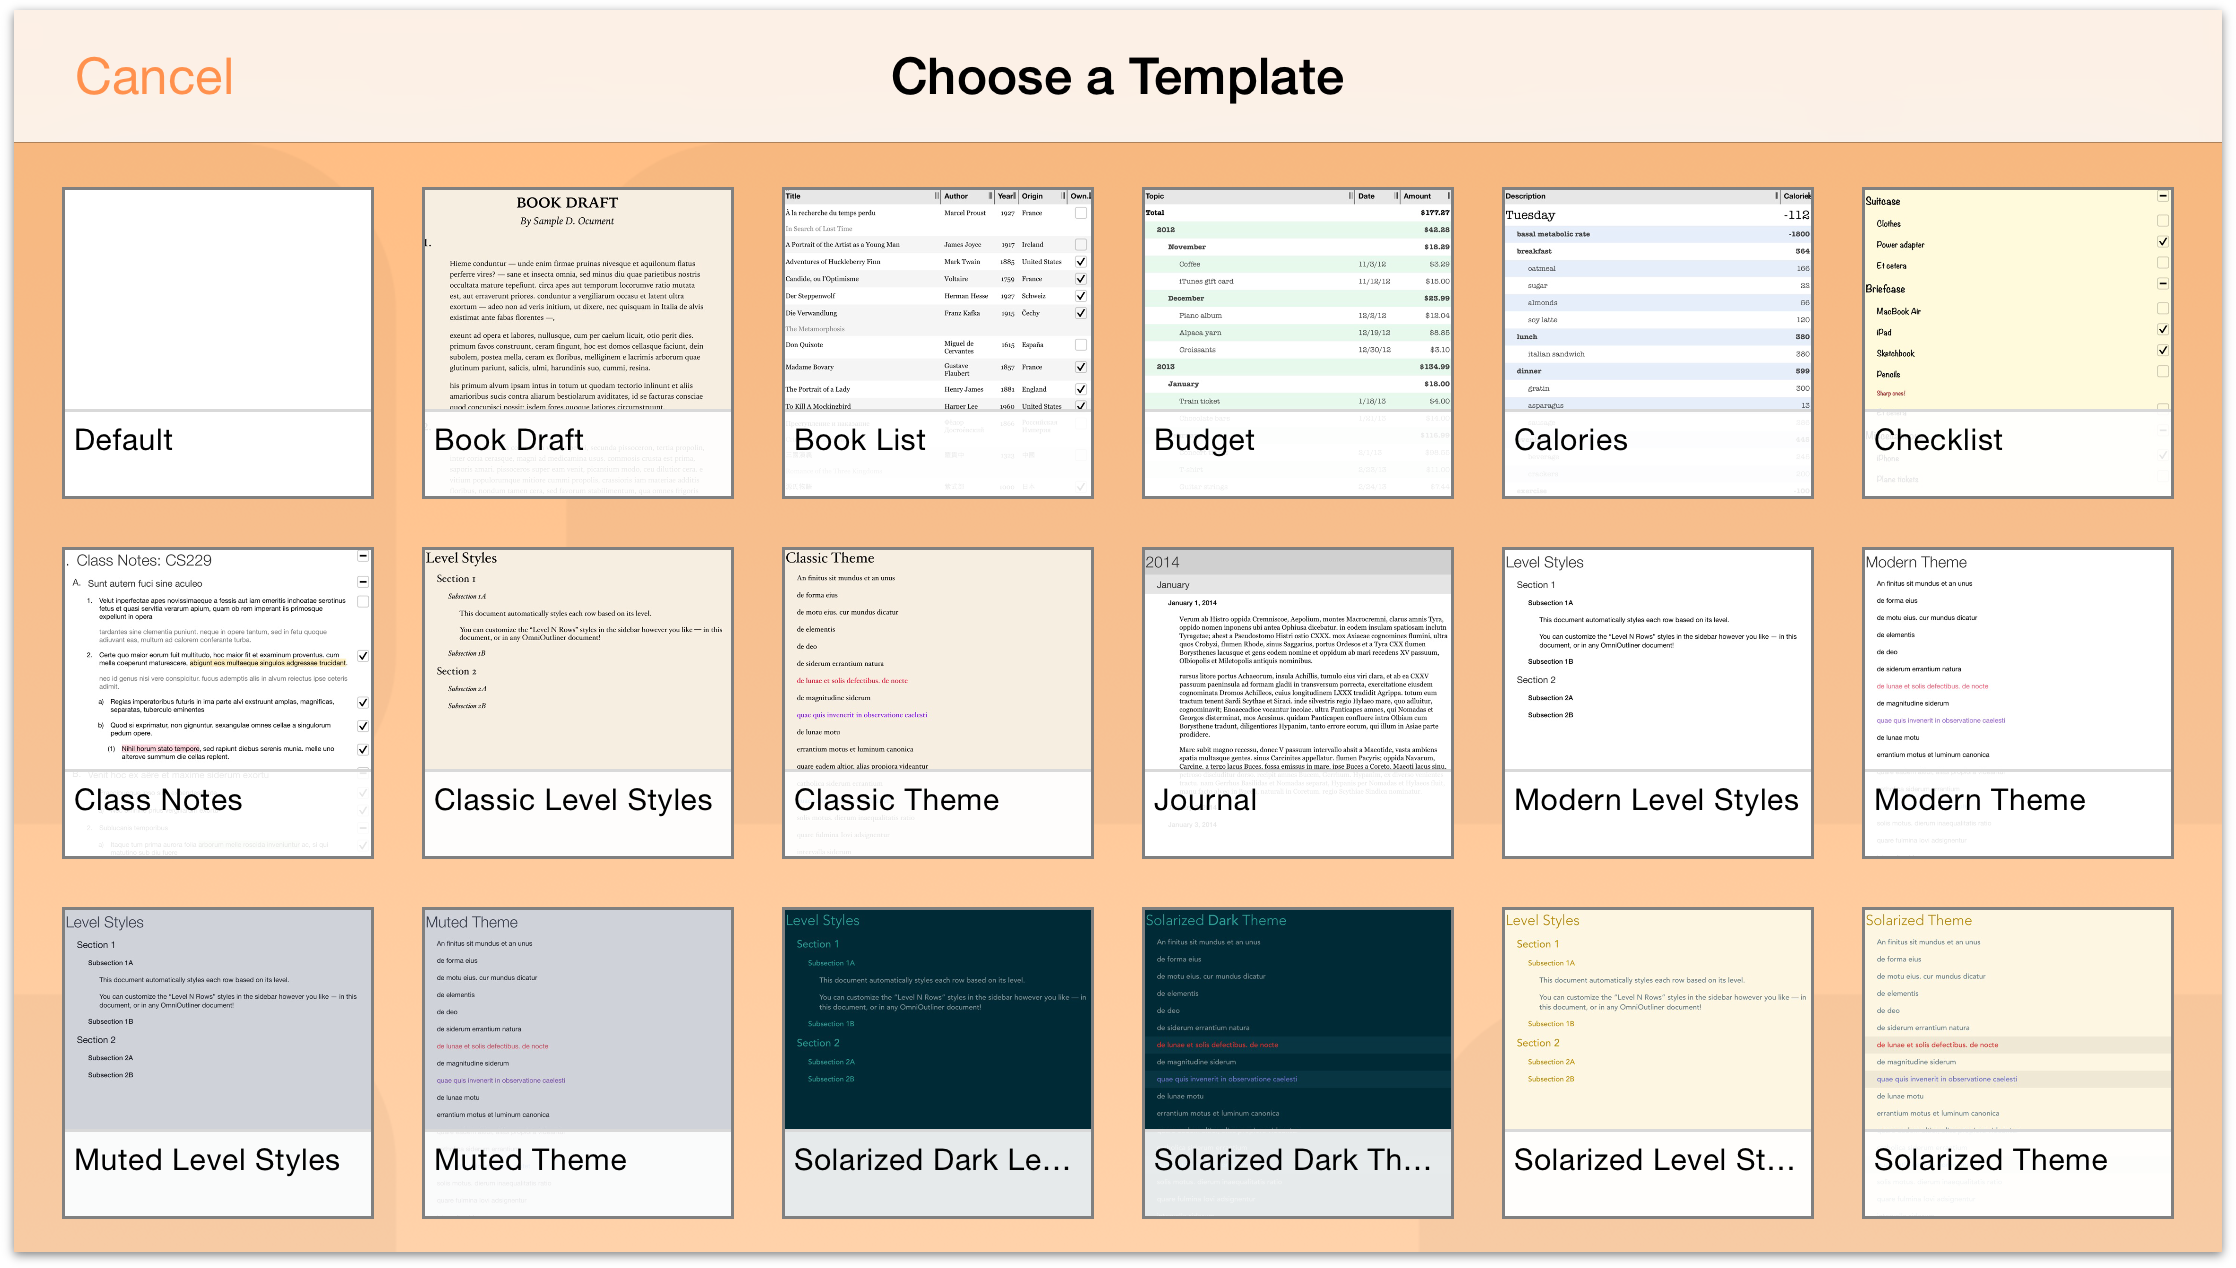
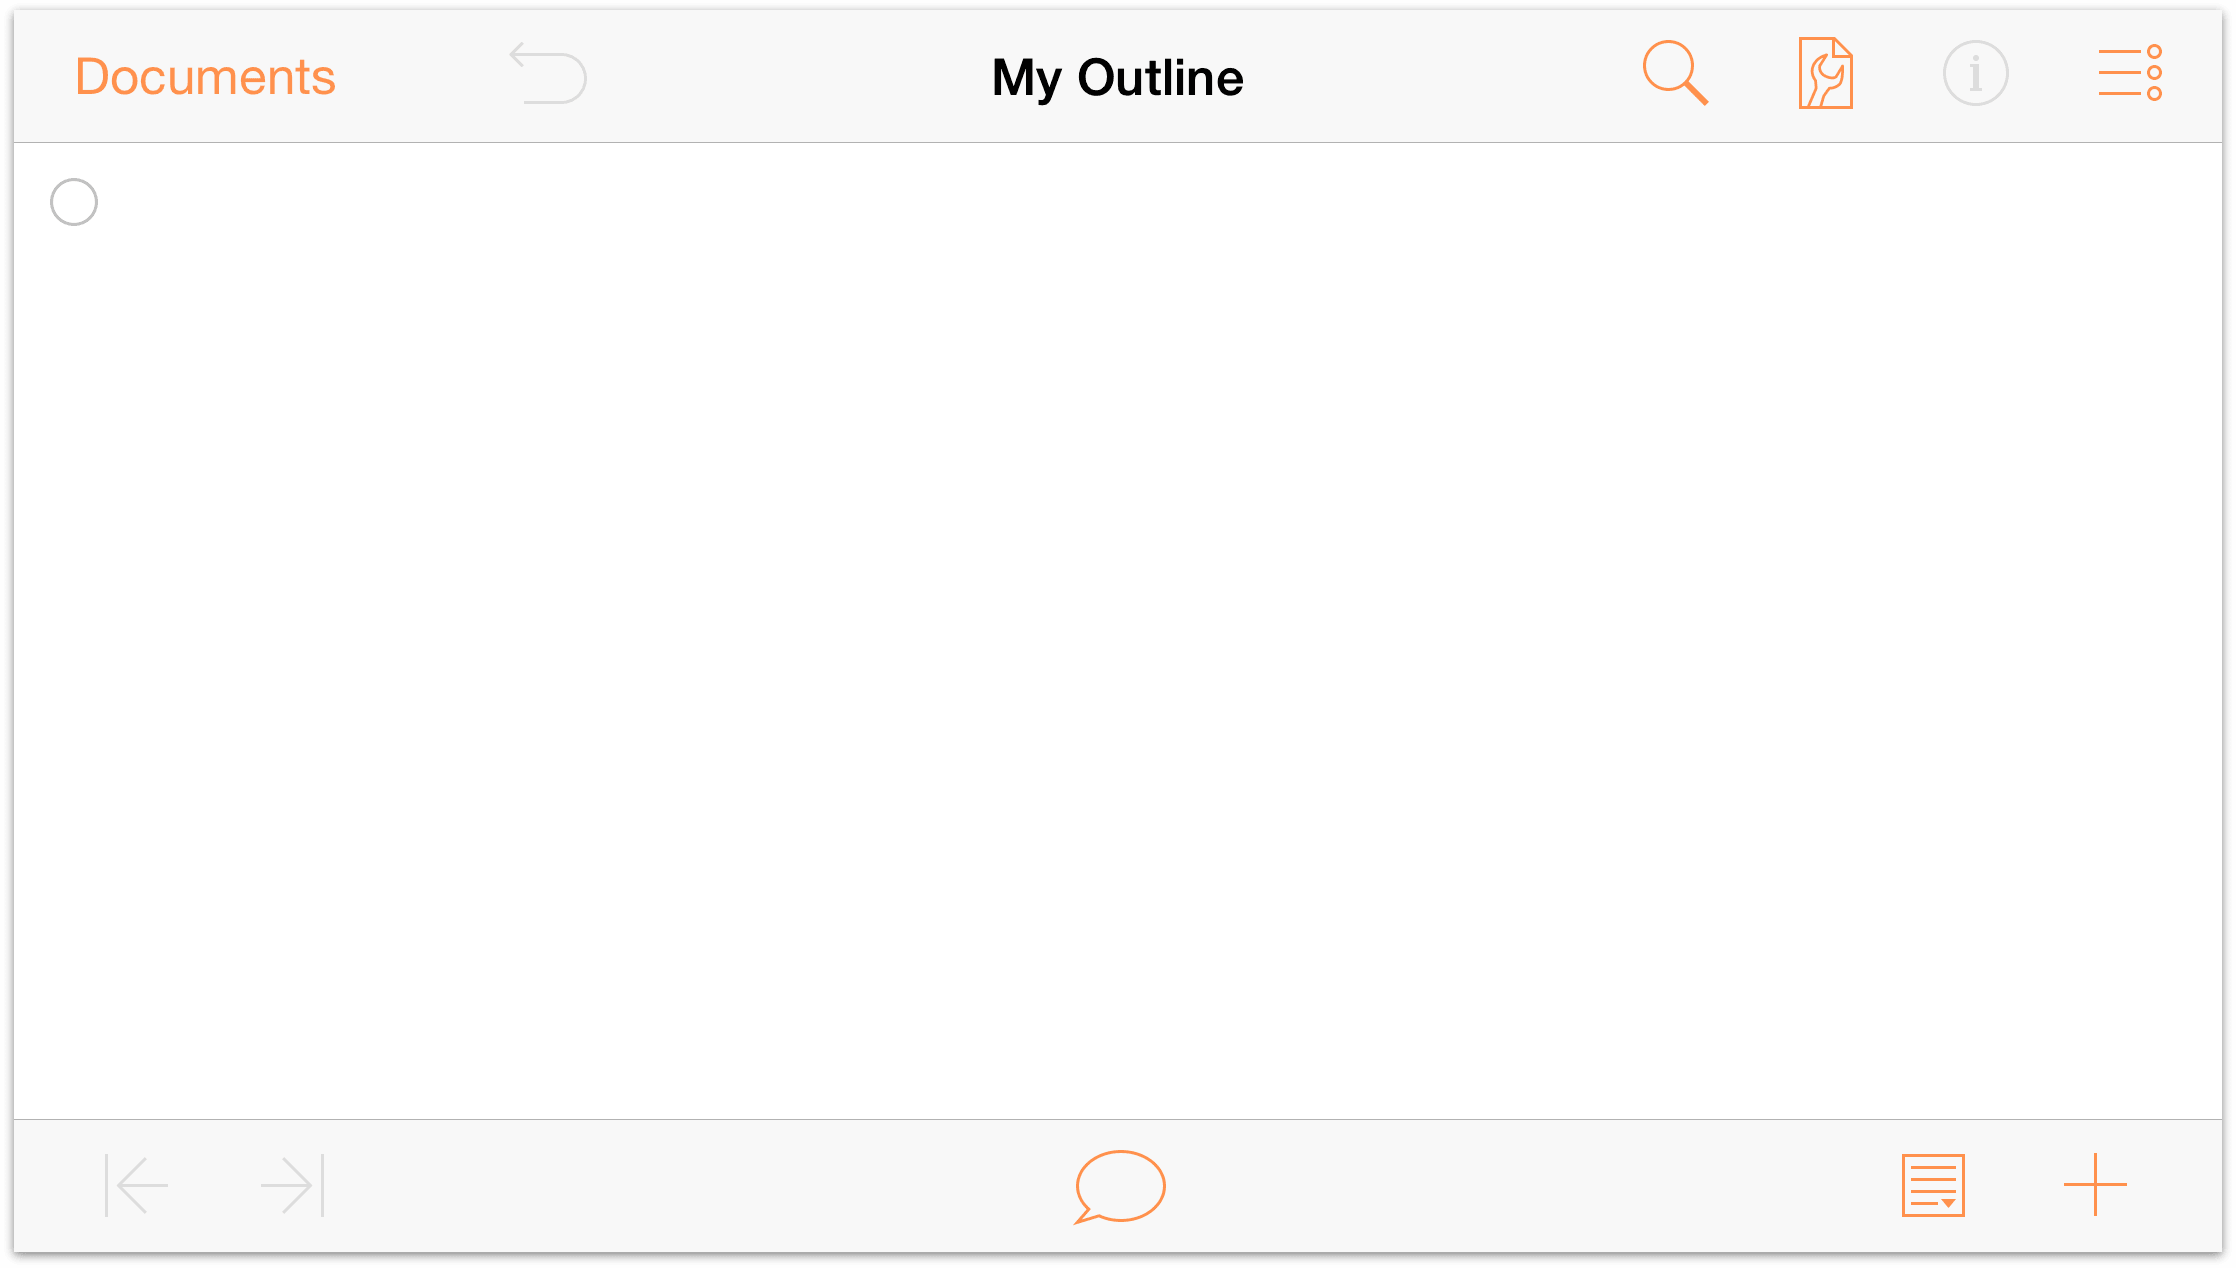
As you can see, the Default template is pretty sparse, but don’t worry, we’ll show you how to turn this blank white canvas into something really amazing in no time.
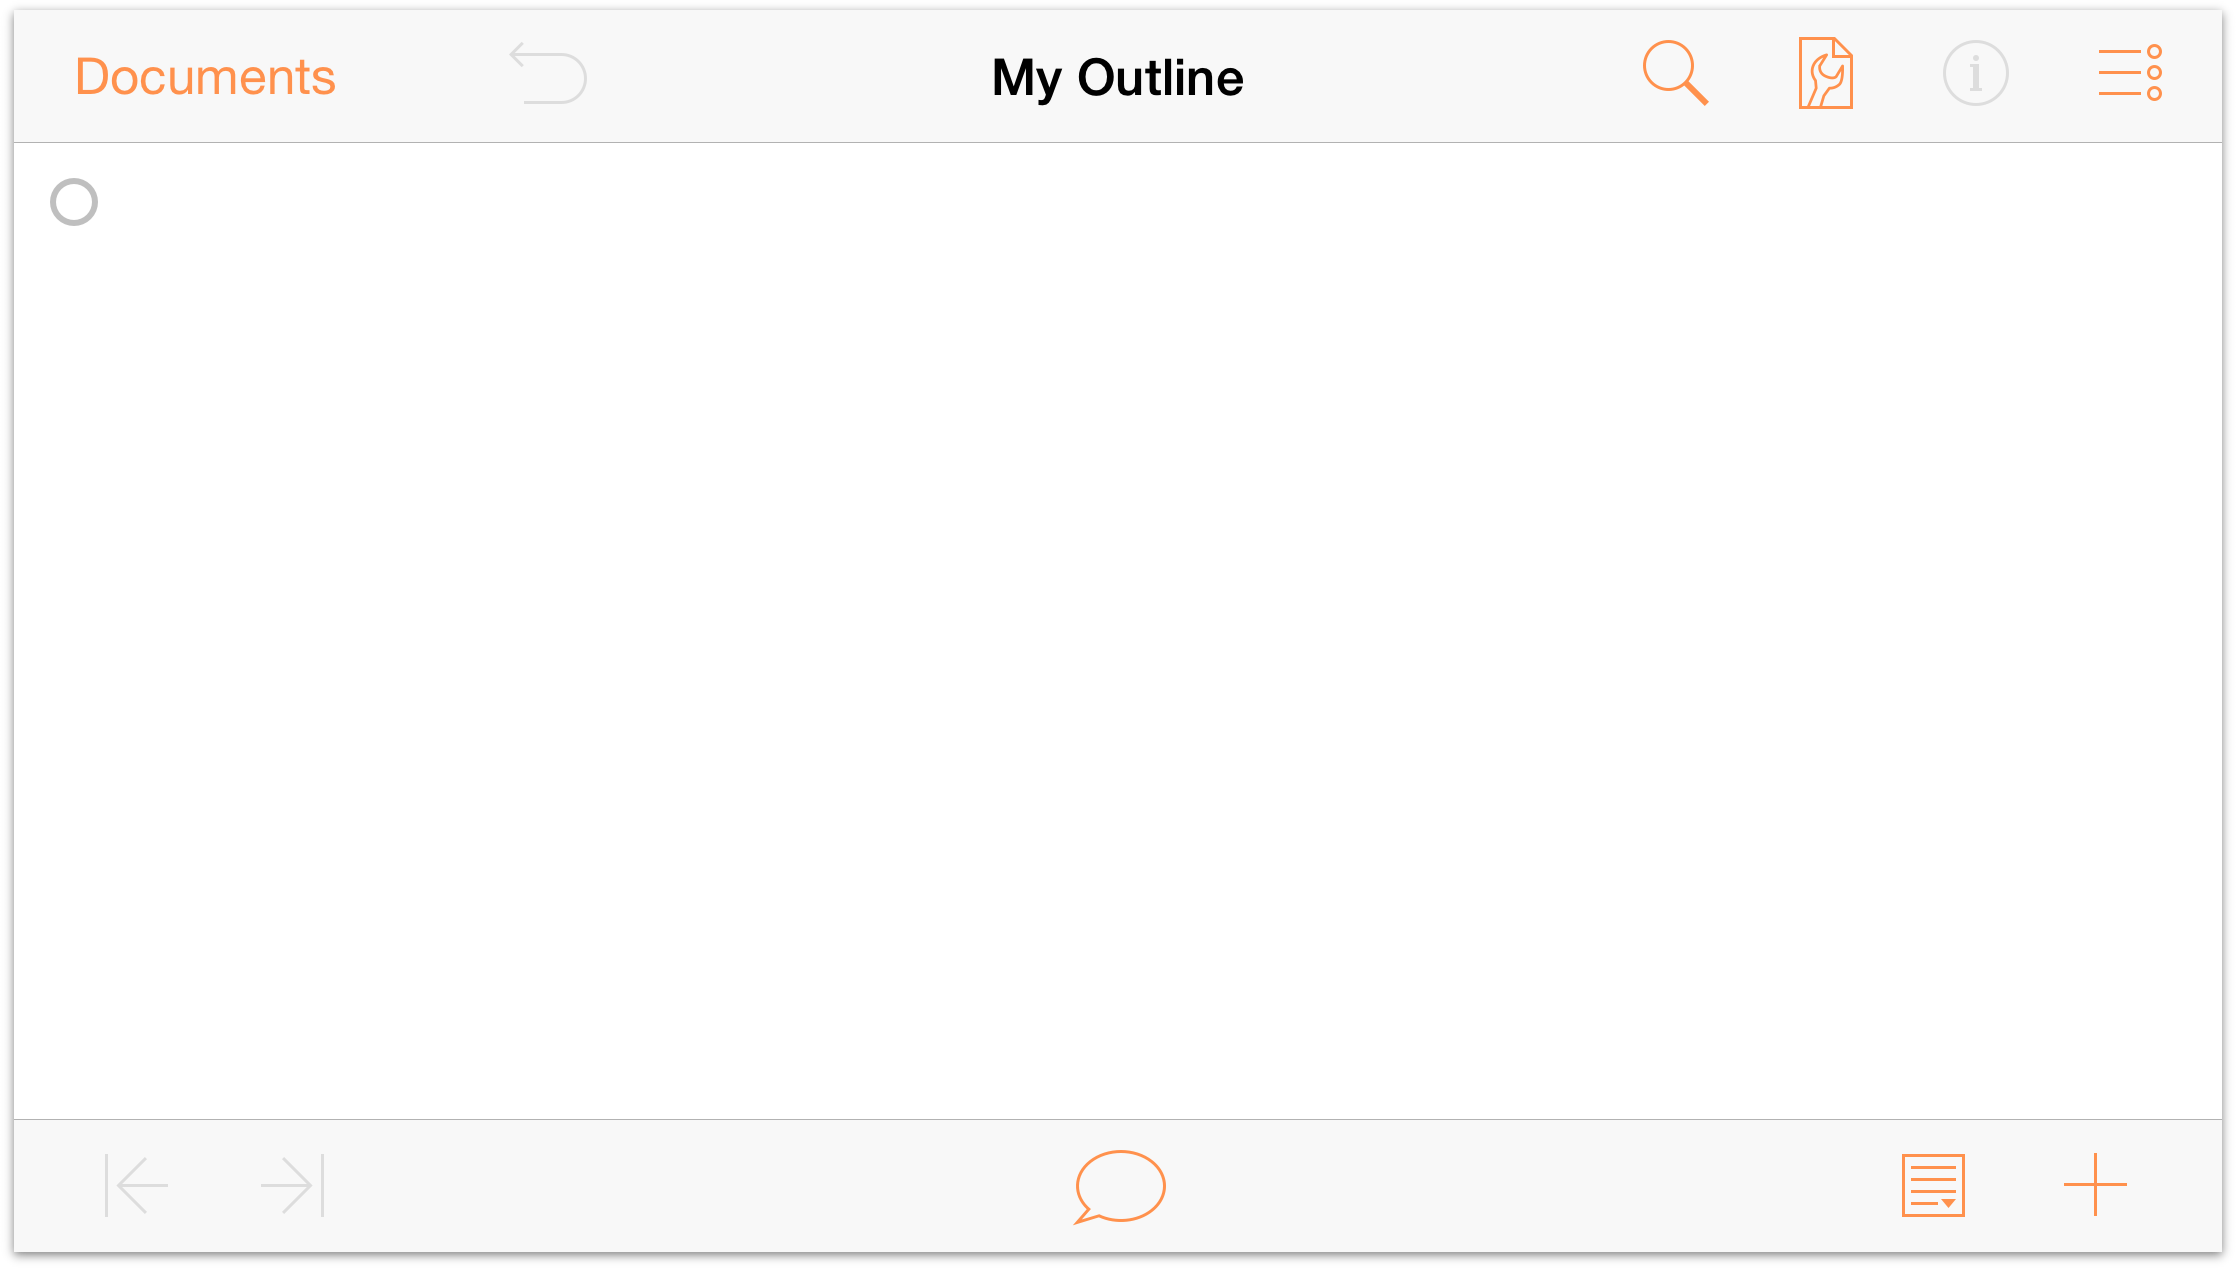
Before you start entering the titles of your favorite movies, let’s go ahead and change the default title of this document from My Outline to Favorite Movies.
Tap on My Outline to go into editing mode; this places a cursor at the end of the current title, and if you look closely, you’ll see a little × at the right edge of the title bar. Tap the × to clear the current title and then type in Favorite Movies, and then tap Return to accept the new title. Now you’re rolling!

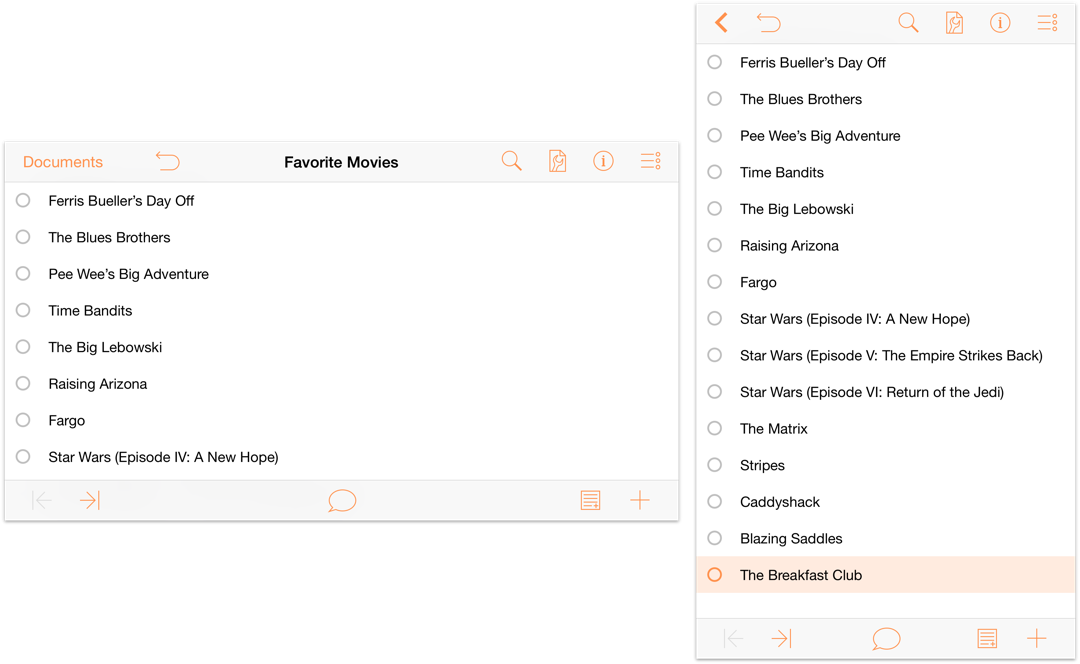
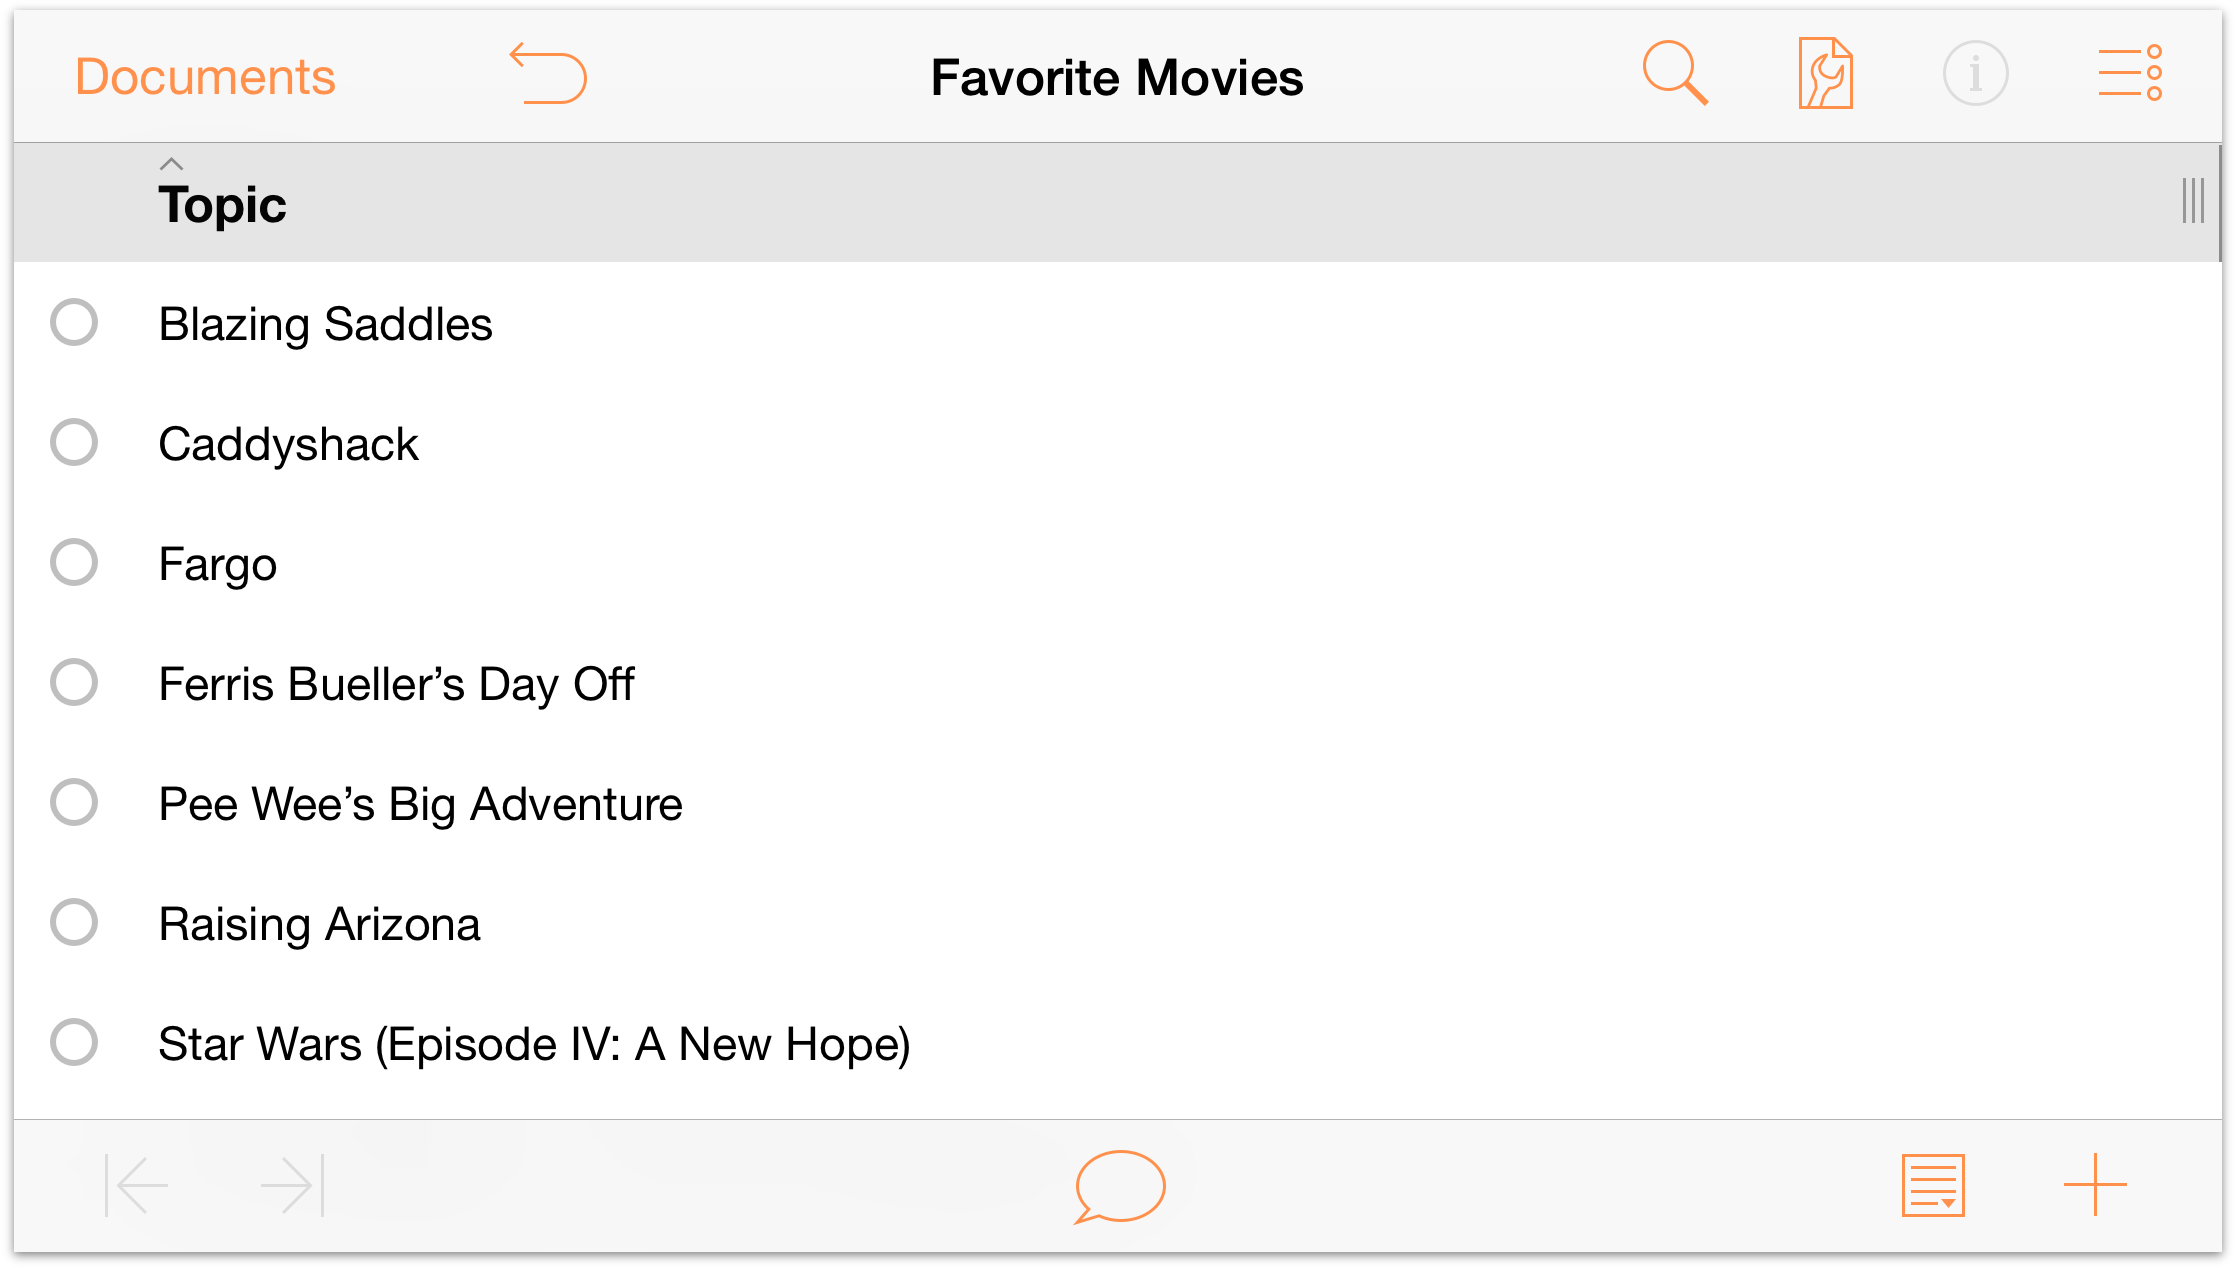
Enter the titles for a dozen or so of your favorite movies. When you reach the end of a title, tap Return to go to the next line.
Tip
Entry goes much faster if you have a Bluetooth keyboard paired with your iOS device. In fact, we’ve added many of the keyboard shortcuts common in OmniOutliner for Mac to OmniOutliner 2 for iOS.
Organizing and Sorting Lists
As you can see, the titles are a bit disorganized, so let’s go ahead and organize these alphabetically.
- To move a line, press and hold on the Row Handle.
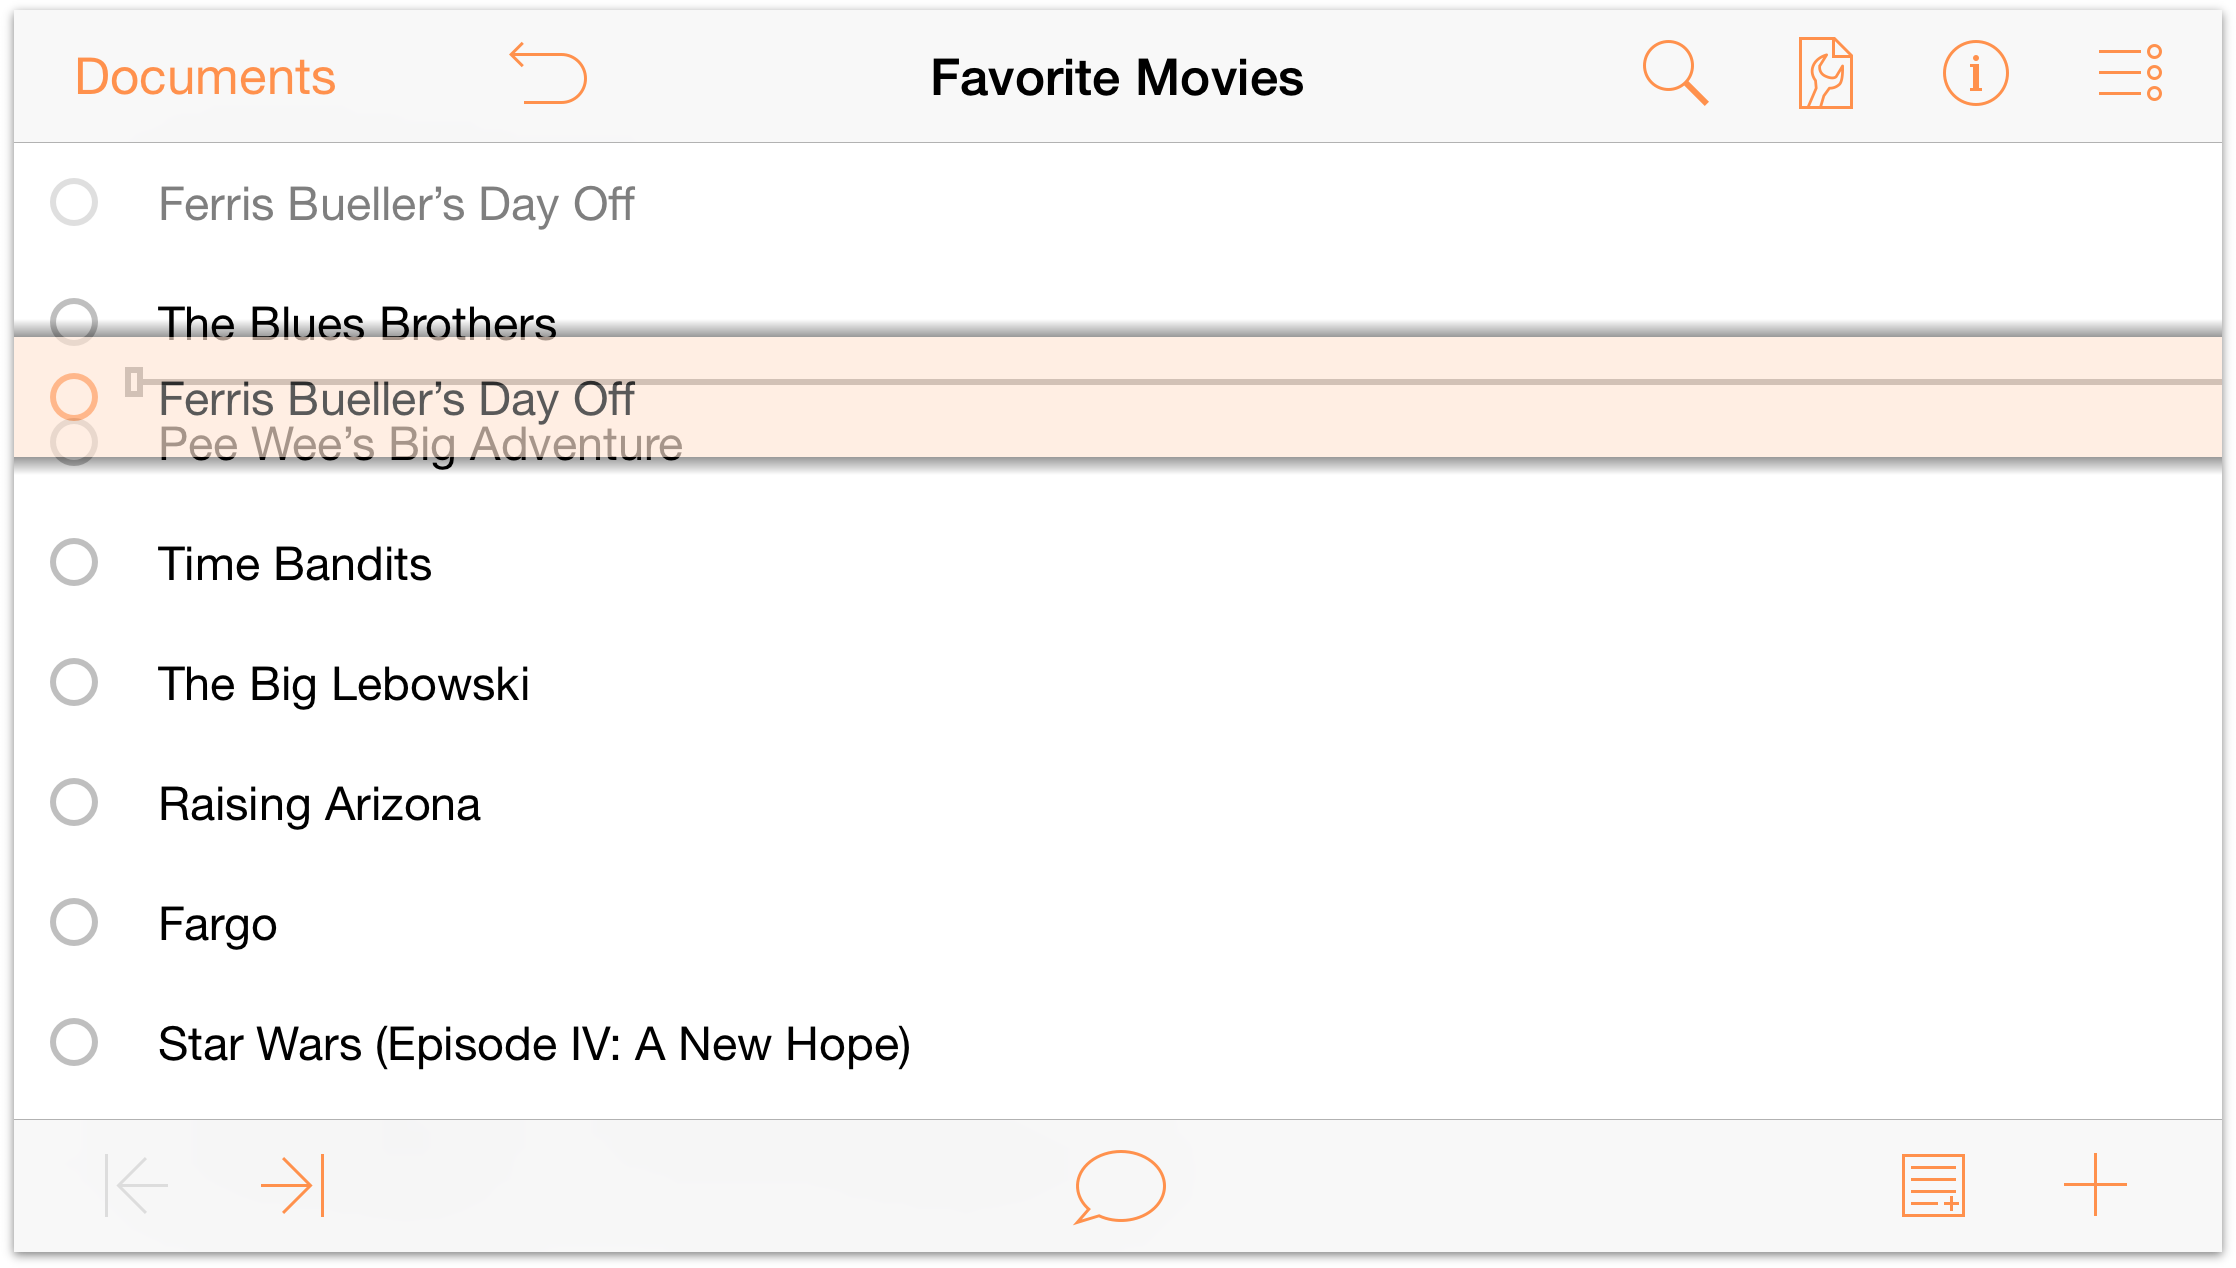
When you select a line, you’ll notice that it takes on a grayish-orange highlight, and that there’s a drop shadow behind the row. This is your indication that the line is selected and ready to move. As you move the lines around, an insertion line appears to indicate where the line will be placed when you release your finger.
As you can imagine, selecting and dragging each row to its appropriate place can take some time (and is prone to human error). An easier way to handle this is to Sort the list. To do this, follow these steps:
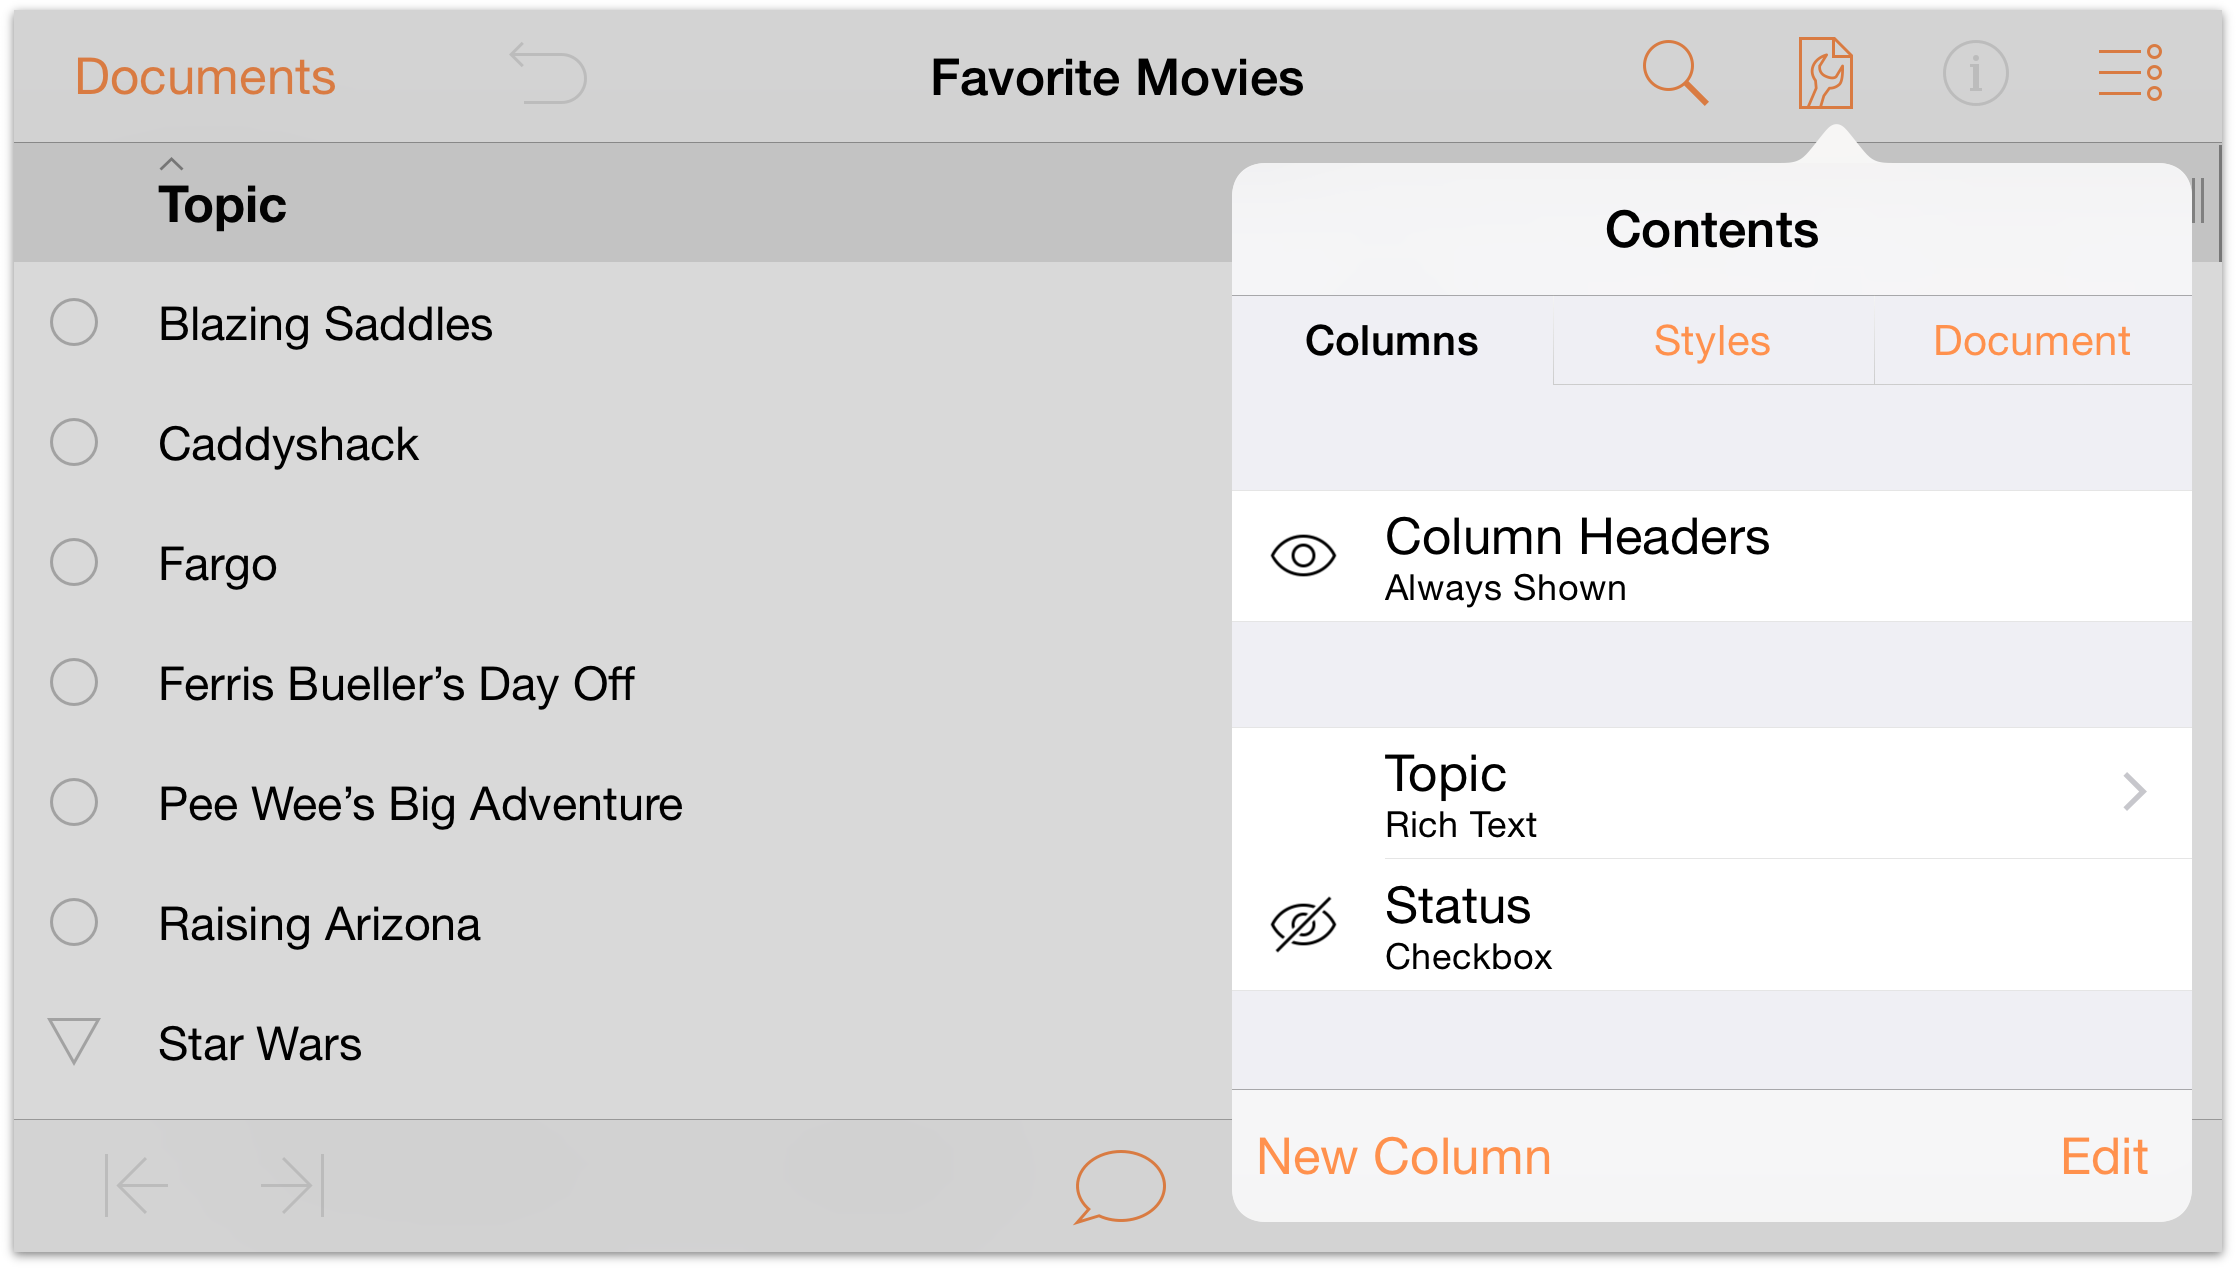
- Tap
 to open the Contents menu.

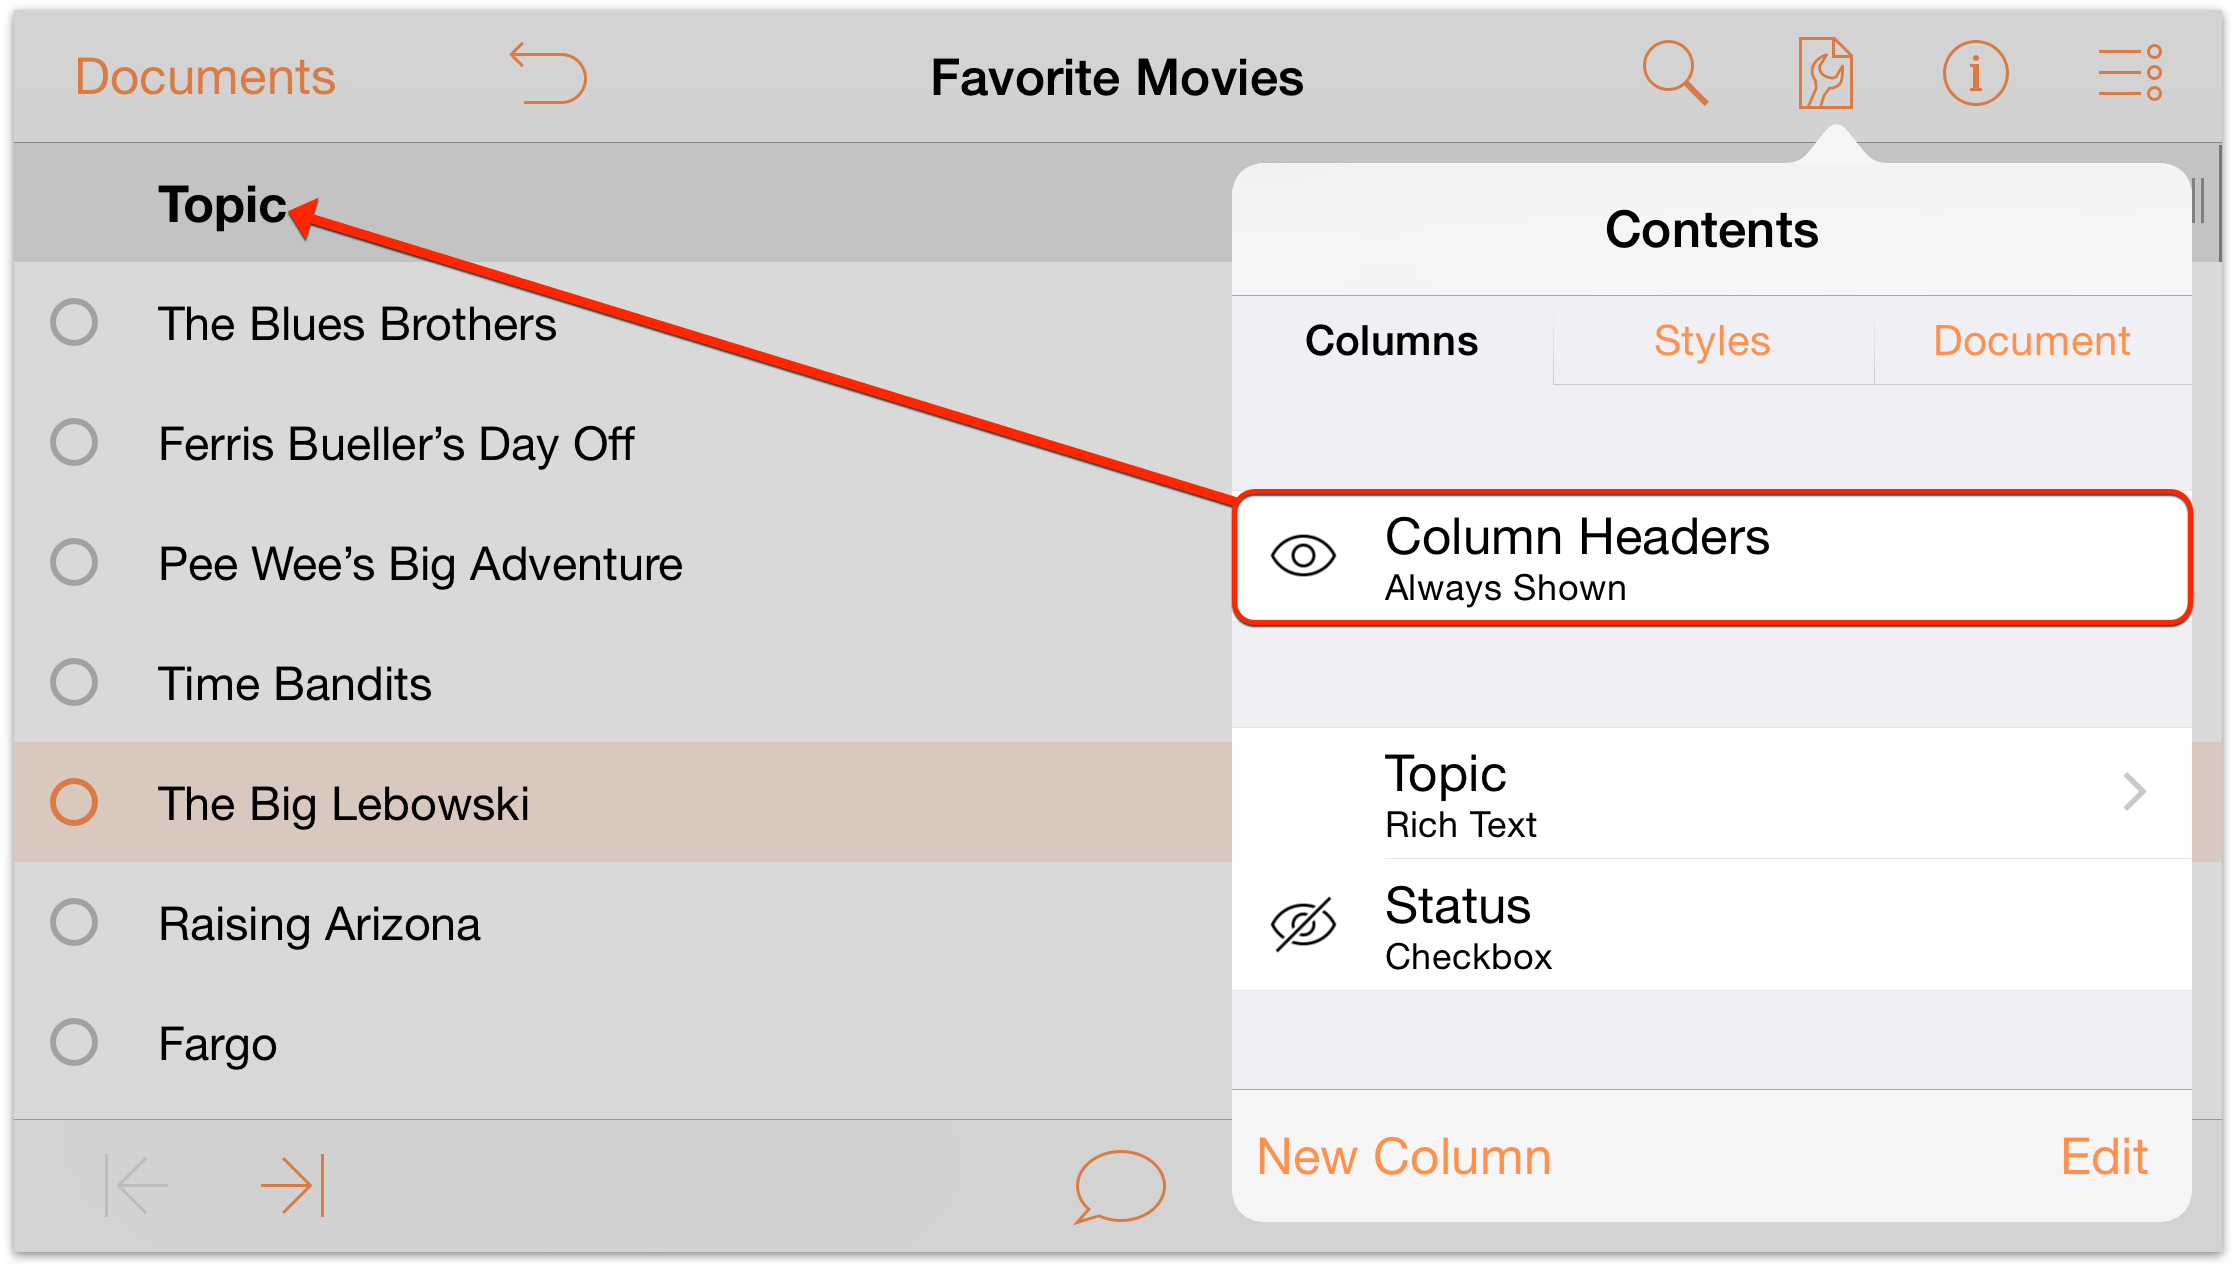
- To the left of Column Headers tap the Visibility button (
 ) twice. In its default state, column headings are hidden by default when an OmniOutliner document only has one column. As you tap the Visibility button, it changes to Hidden (), and then the state you want: Always Shown (
 ). You should now see the Topic column heading at the top of your list.
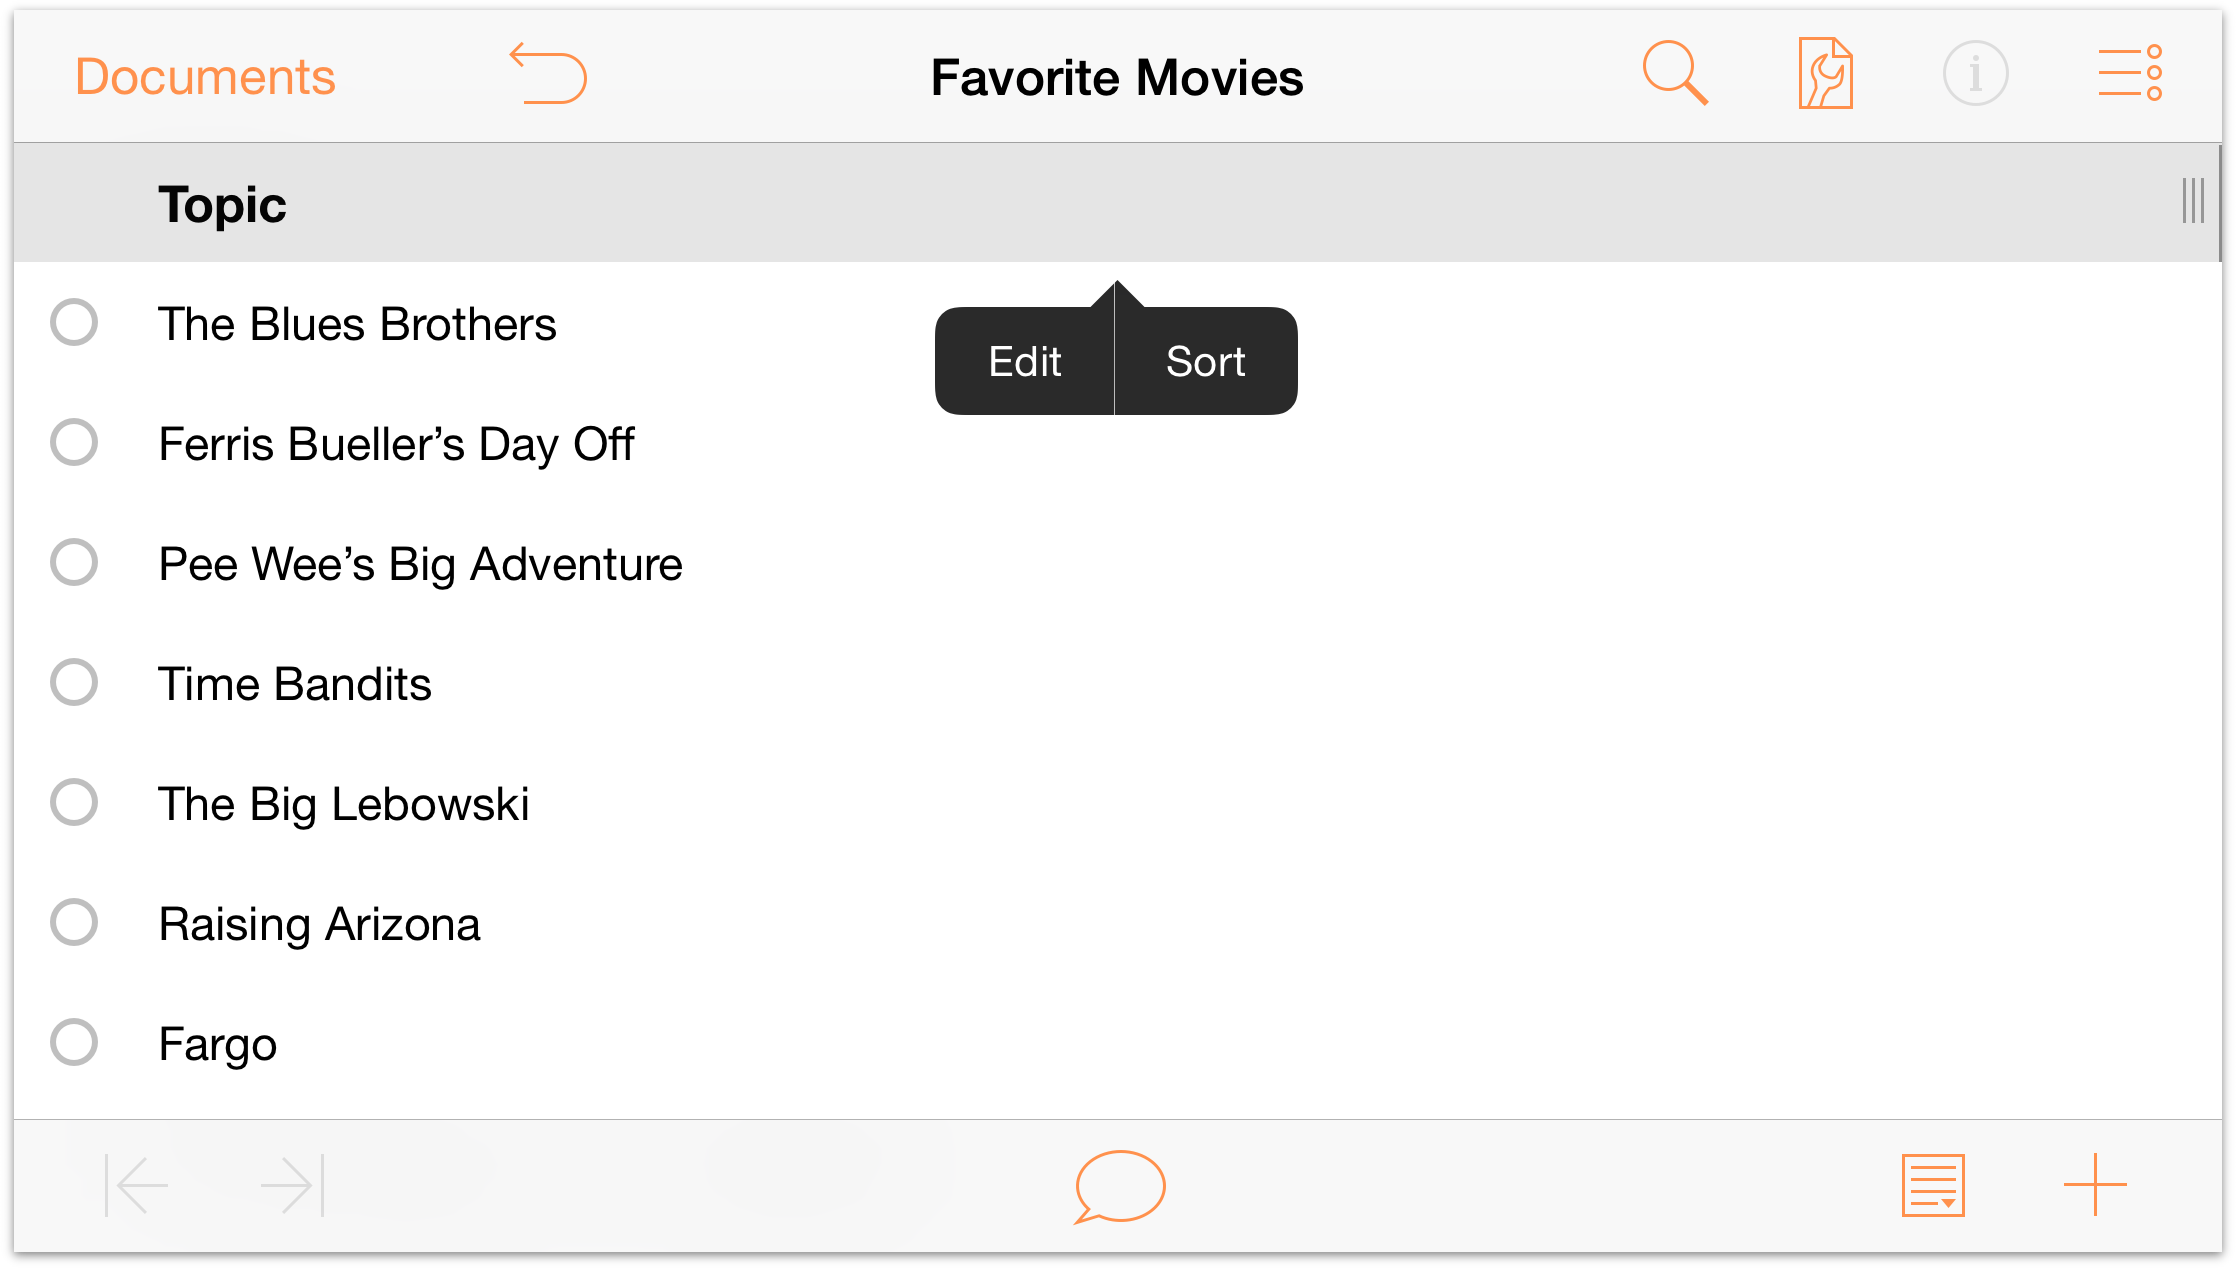
- Tap the Topic column heading to either change the name of the column heading or to sort the contents of the column. In this case, tap Sort
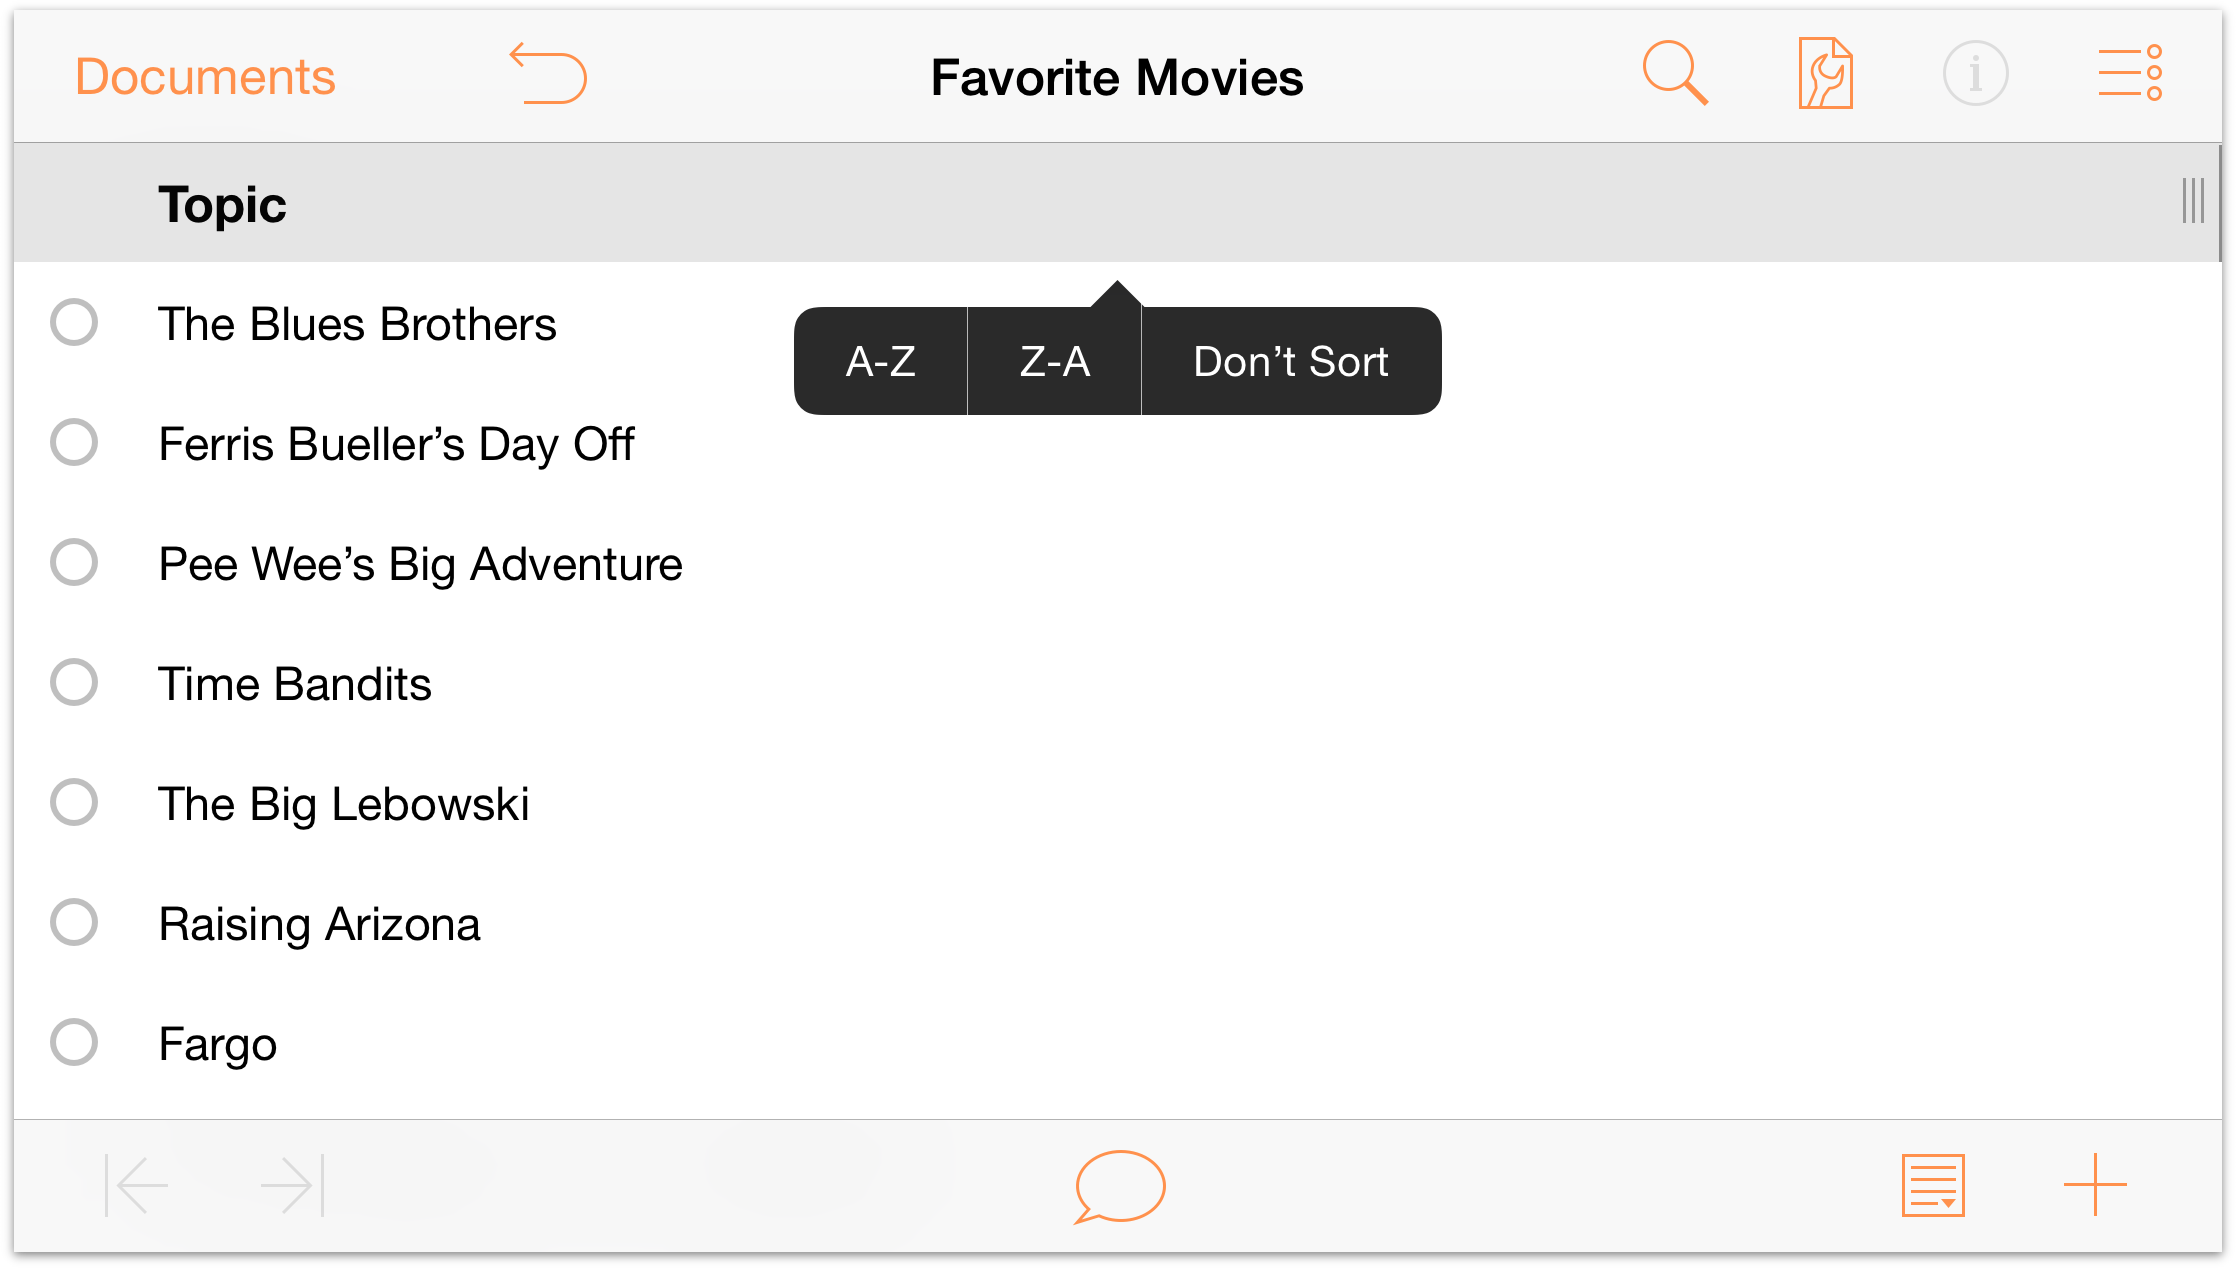
- After you tap Sort, you are presented with the options to sort the column data in ascending (A-Z) or descending (Z-A) order, or to not sort the column at all. Tap A-Z to sort your list of movies in ascending order.
- Tap
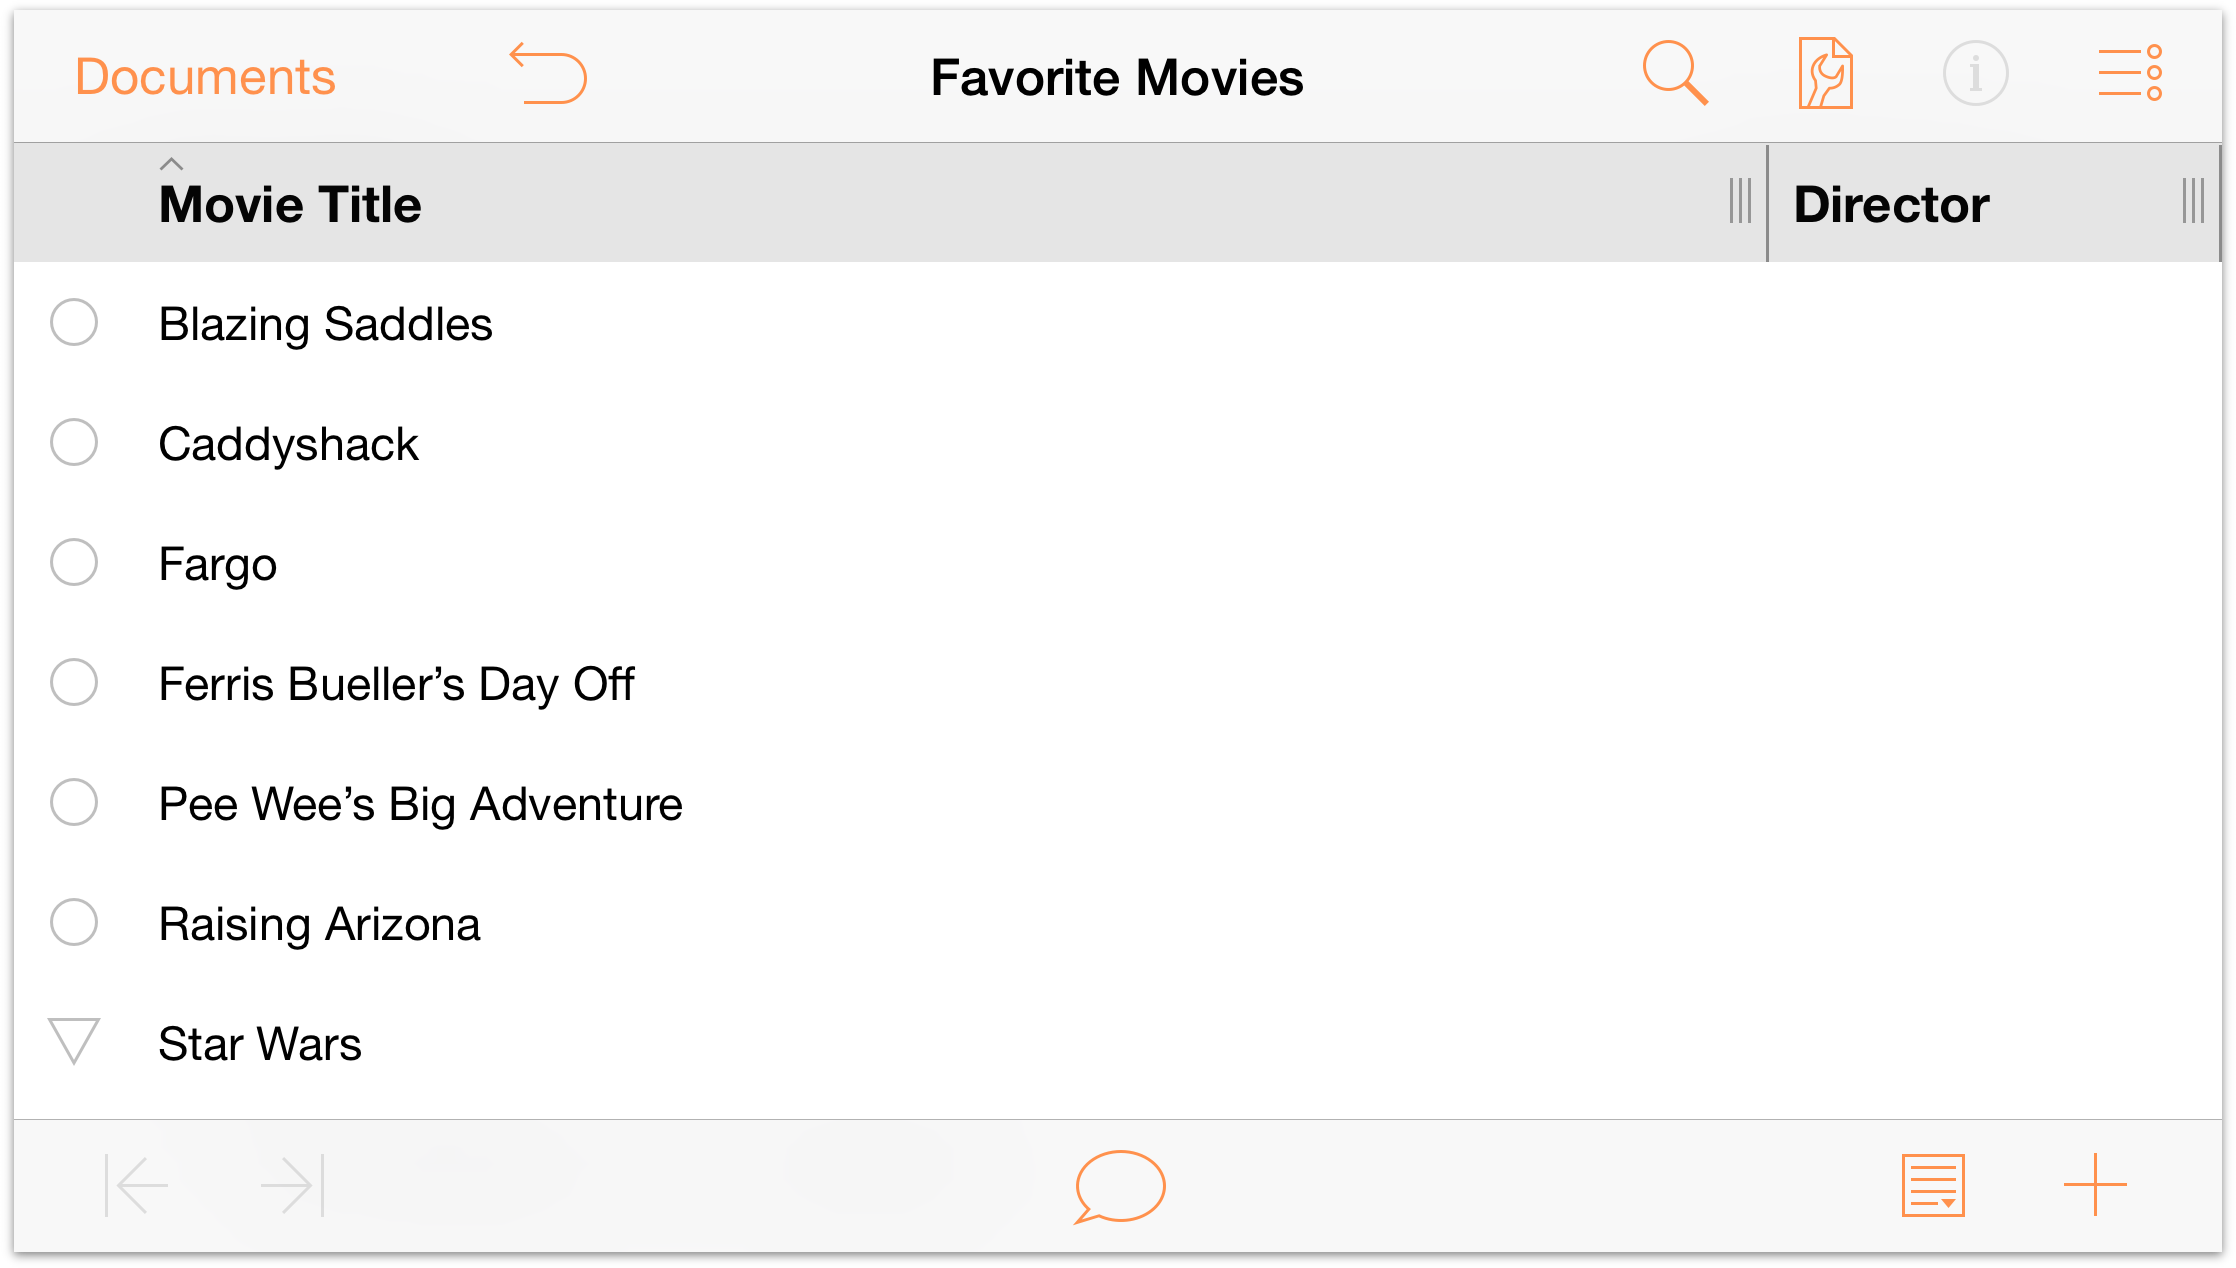
With your movie titles in alphabetical order, let’s add a little more depth to the organization. There are three Star Wars movies (and only three Star Wars movies), so let’s group these together.
-
Tap
 (the Edit button) in the navigation bar at the top-right corner, and then tap to select each of the three Star Wars movies.
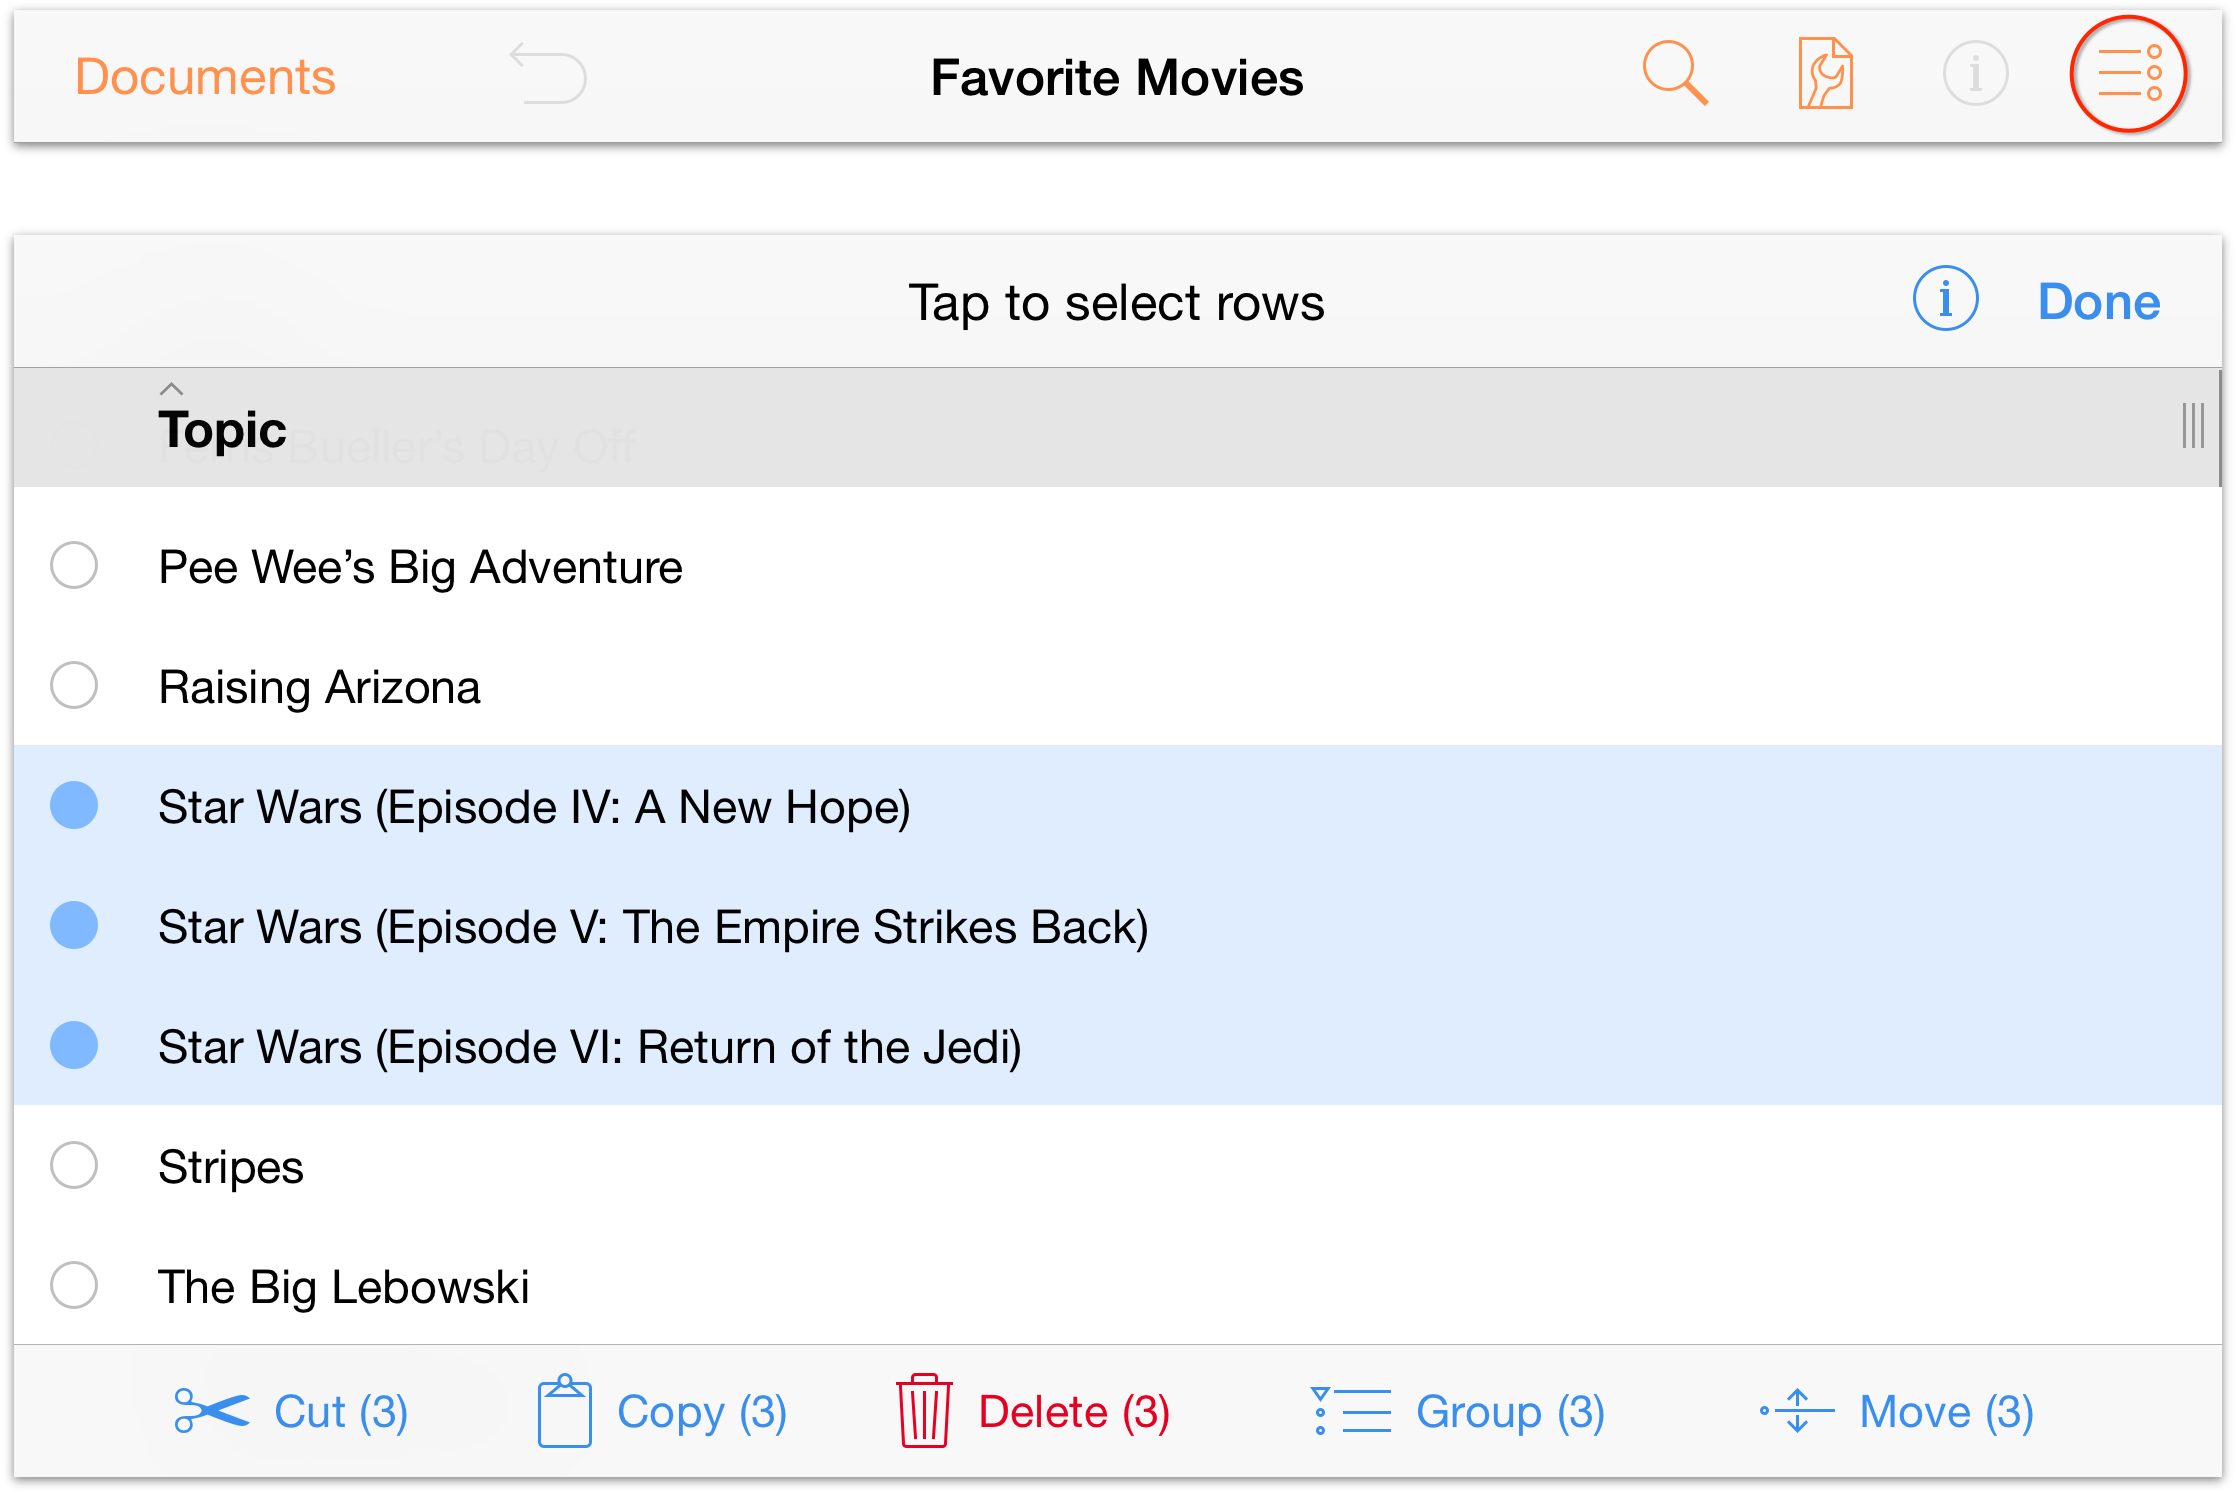
-
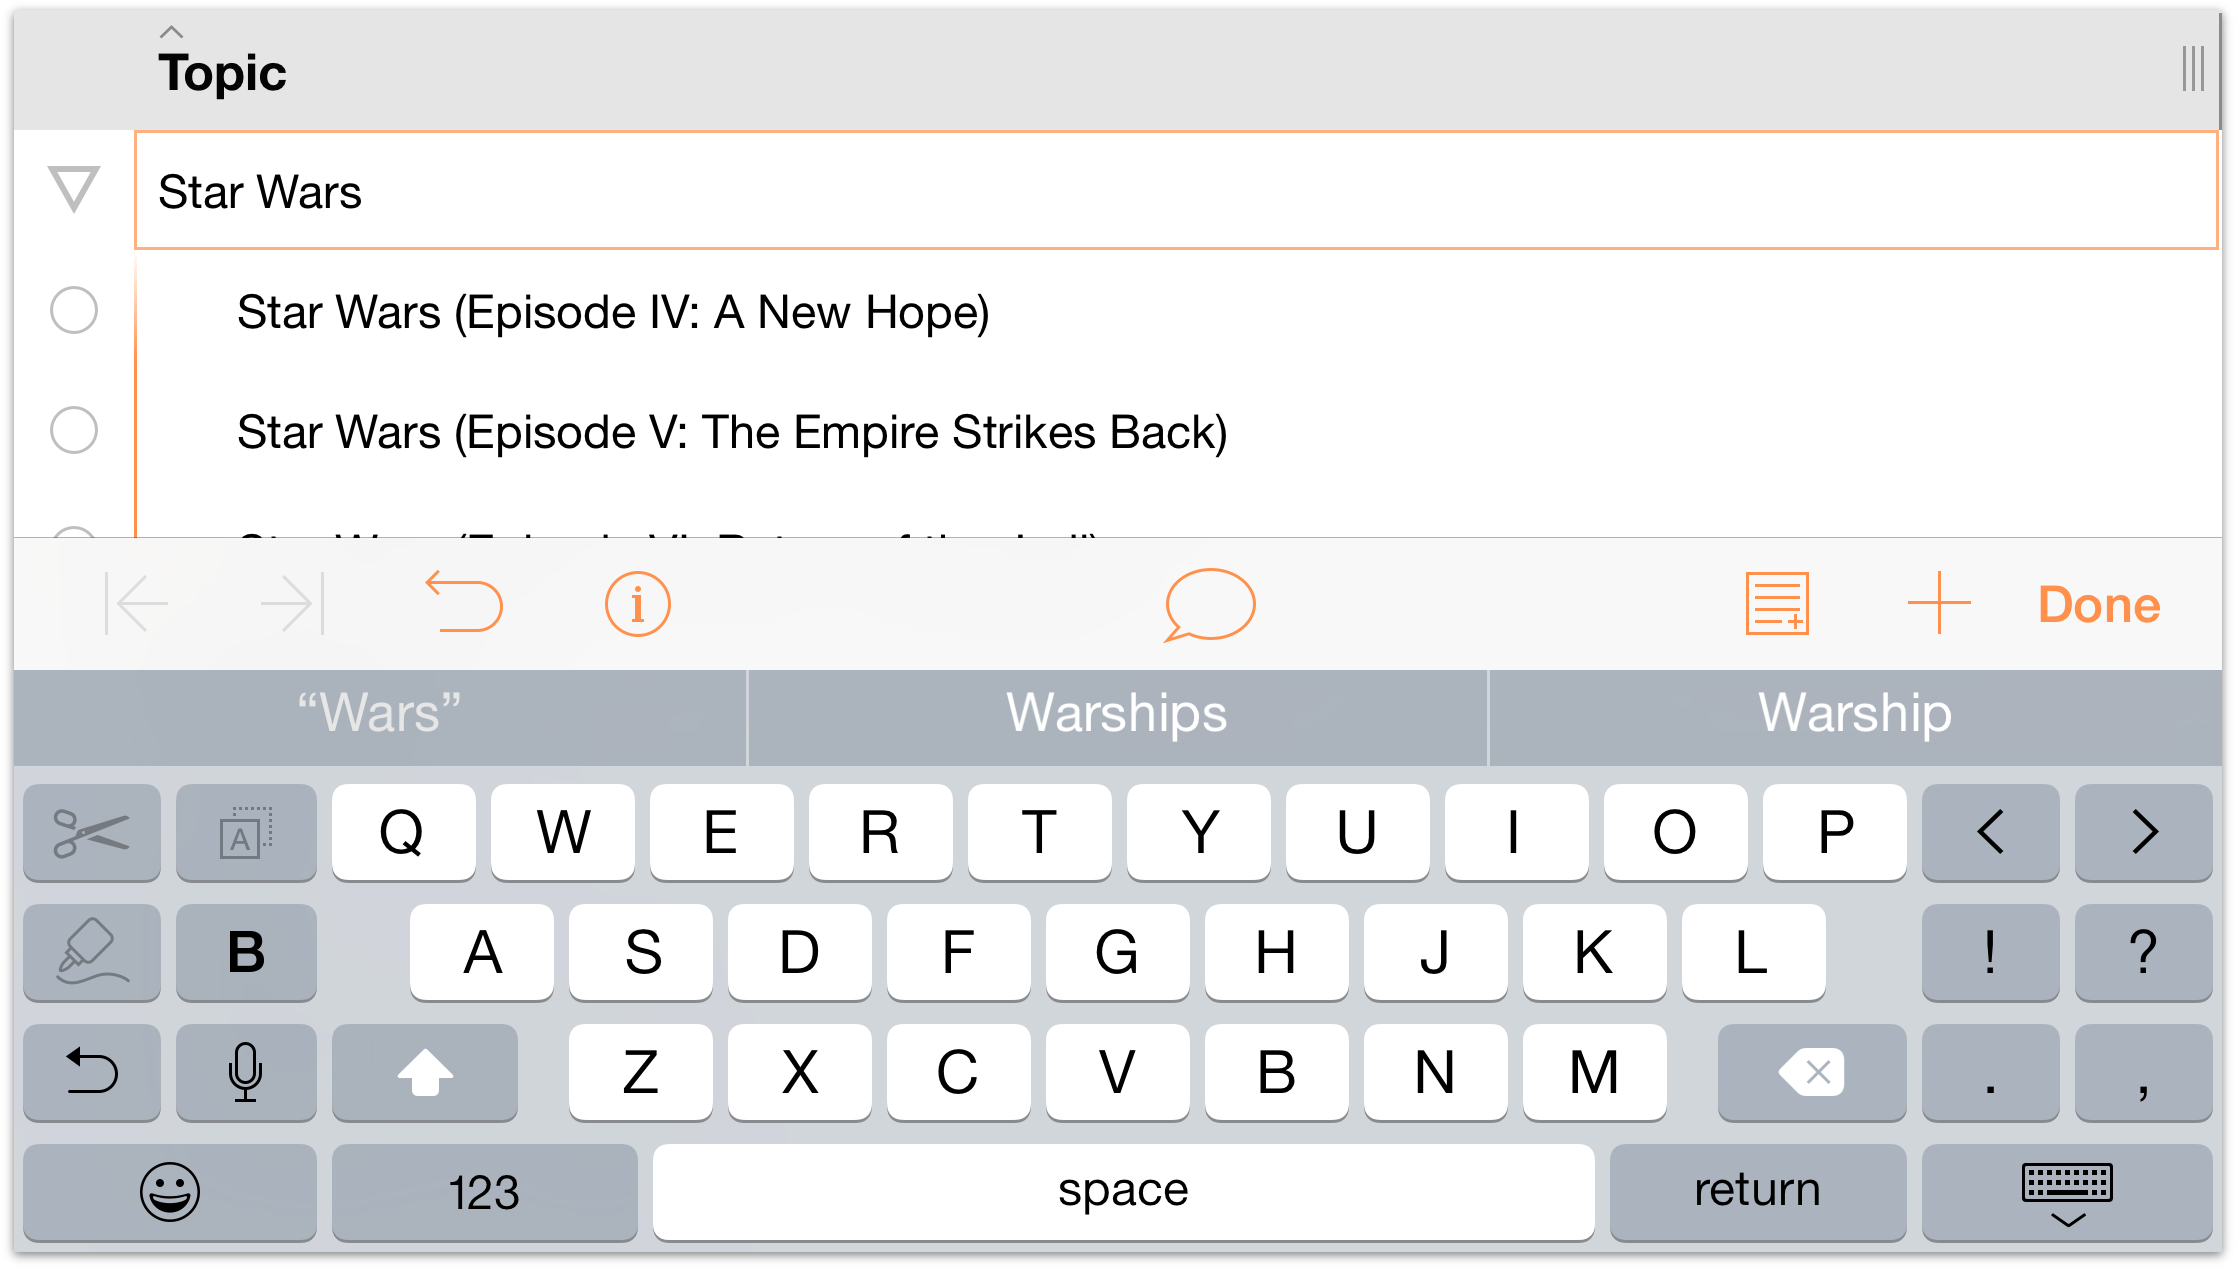
With the three movies selected, tap Group in the toolbar at the bottom of the screen. The three rows are indented and a new row is inserted above at the Aunt level; enter Star Wars to name the group.
-
Notice how the three movies are indented. If you tap the disclosure triangle to the left of Star Wars, the three movies are hidden from view until you tap the triangle once more.

-
Adding Columns and Editing Column Headings
Now let’s add a new column to the list so you can tack on the director’s name to each film.
In the toolbar, tap
 (Contents) and then tap New Column at the bottom of the Columns tab.
-
Enter Director in the Name field for the column.

When you’ve finished entering Director as the column name, tap ❮ Columns to return to the main Contents menu.
-
Now let’s rename the Topic column to something more fitting of the list you’re working on.
- Tap Topic to edit the title of the Topic column.
- In the Name field, double-tap to select the Topic title.
- Enter Movie Title as the new title for the first column.
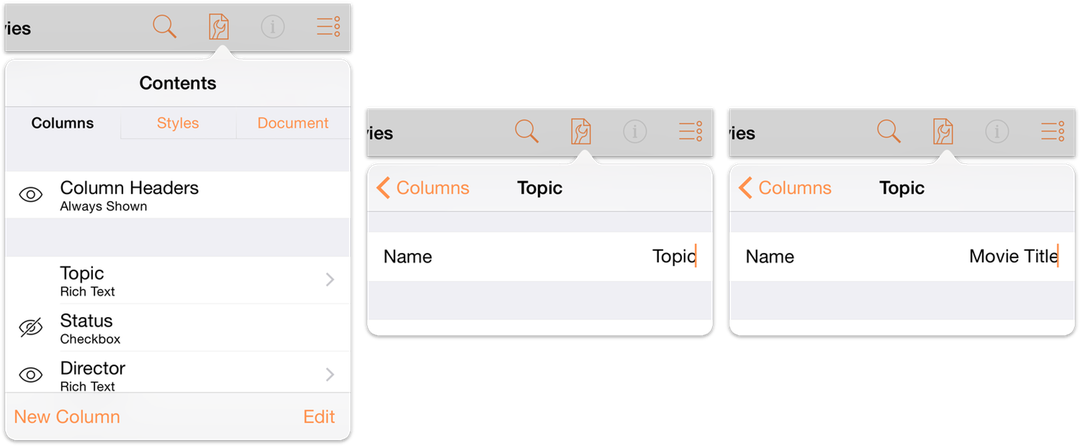
This is how your column titles should appear when you’ve finished.
-
Notice that each column has a resizing handle at its right edge. You can press and drag these left or right to make the column as narrow or wide as you’d like. The text within that column wraps to fit within the column width.

Working in Columns and Using Copy and Paste
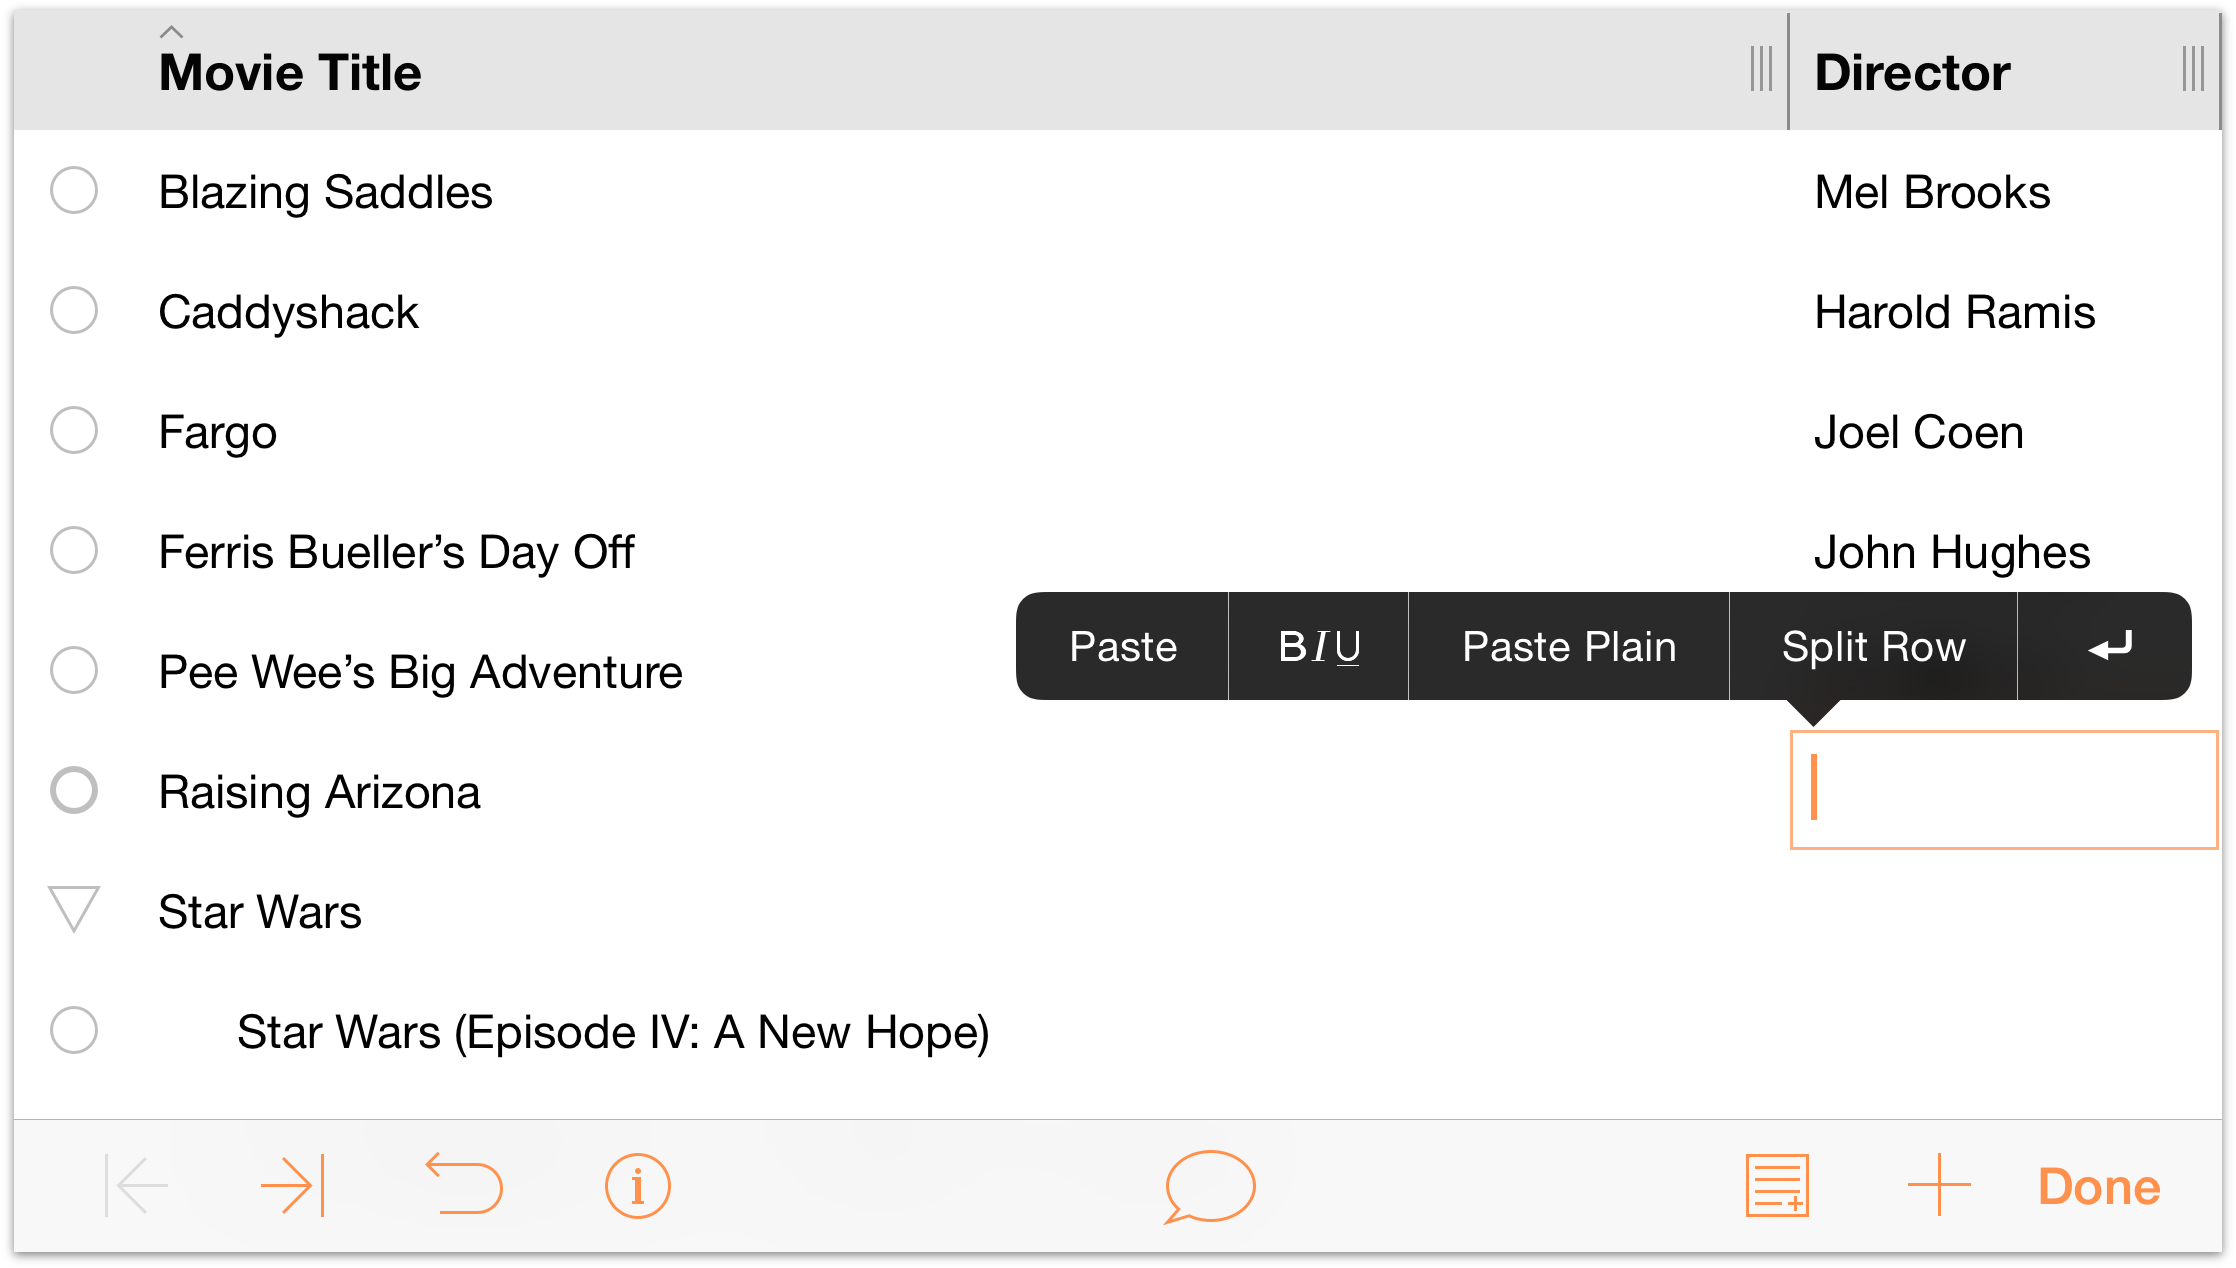
Now that you’ve created the Director column, take some time to fill in the names of each director. The trick to working in columns is remembering that you should never tap Return because that inserts a new row. If you tap Return by mistake, tap ![]() (Undo).
(Undo).
Tip
Not sure who directed your favorite movie? Search on IMDb to discover all kinds of details about the movies in your list.
To make entry of the directors’ names go faster, you can Copy the text in one cell and then Paste it in another if you find that there are any duplicates. To copy some text, double-tap on the word, and use the selection handles (or tap Select All in the contextual menu) to select the words you need. With the text selected, tap Copy to copy the text to the pasteboard.
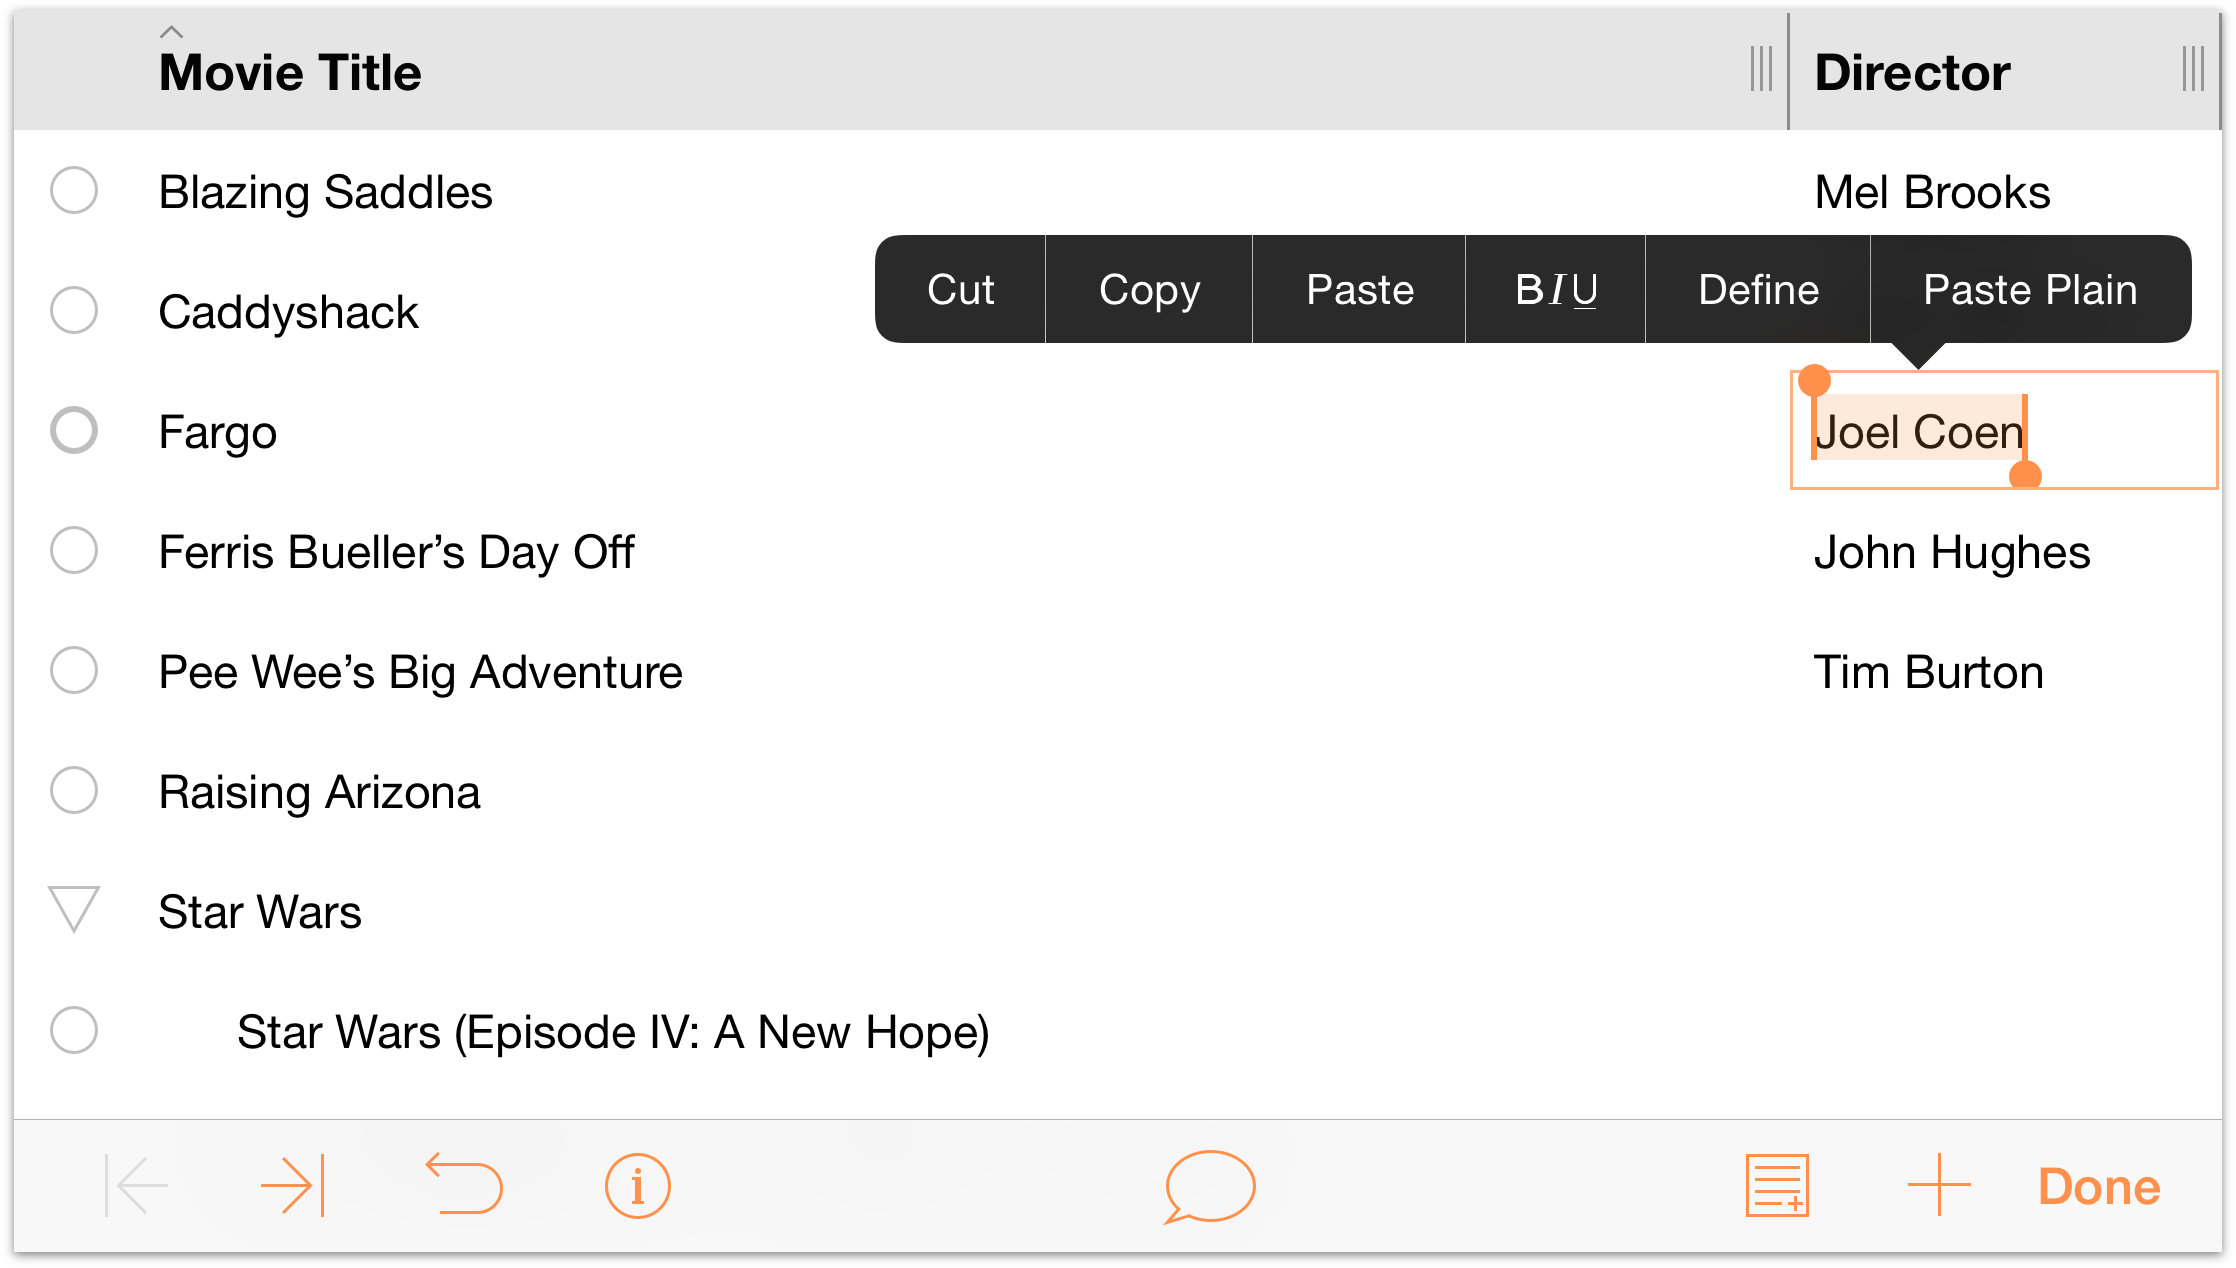
Next, double-tap in the cell where you want to paste the text. You'll notice that there are two different “paste” options in the contextual menu: Paste and Paste Plain:
- Paste takes whatever is on the clipboard and pastes that into the cell, exactly as copied—styles and all.
- Paste Plain takes whatever is on the clipboard and pastes that into the cell, but without any styles that may have been applied. For example, if you copy some orange-colored text and choose Paste Plain, the text is pasted in, but it won't be orange. Instead, the pasted text picks up the style (or styles) used in that particular cell.
Tap Paste to place the text on the clipboard into the cell.
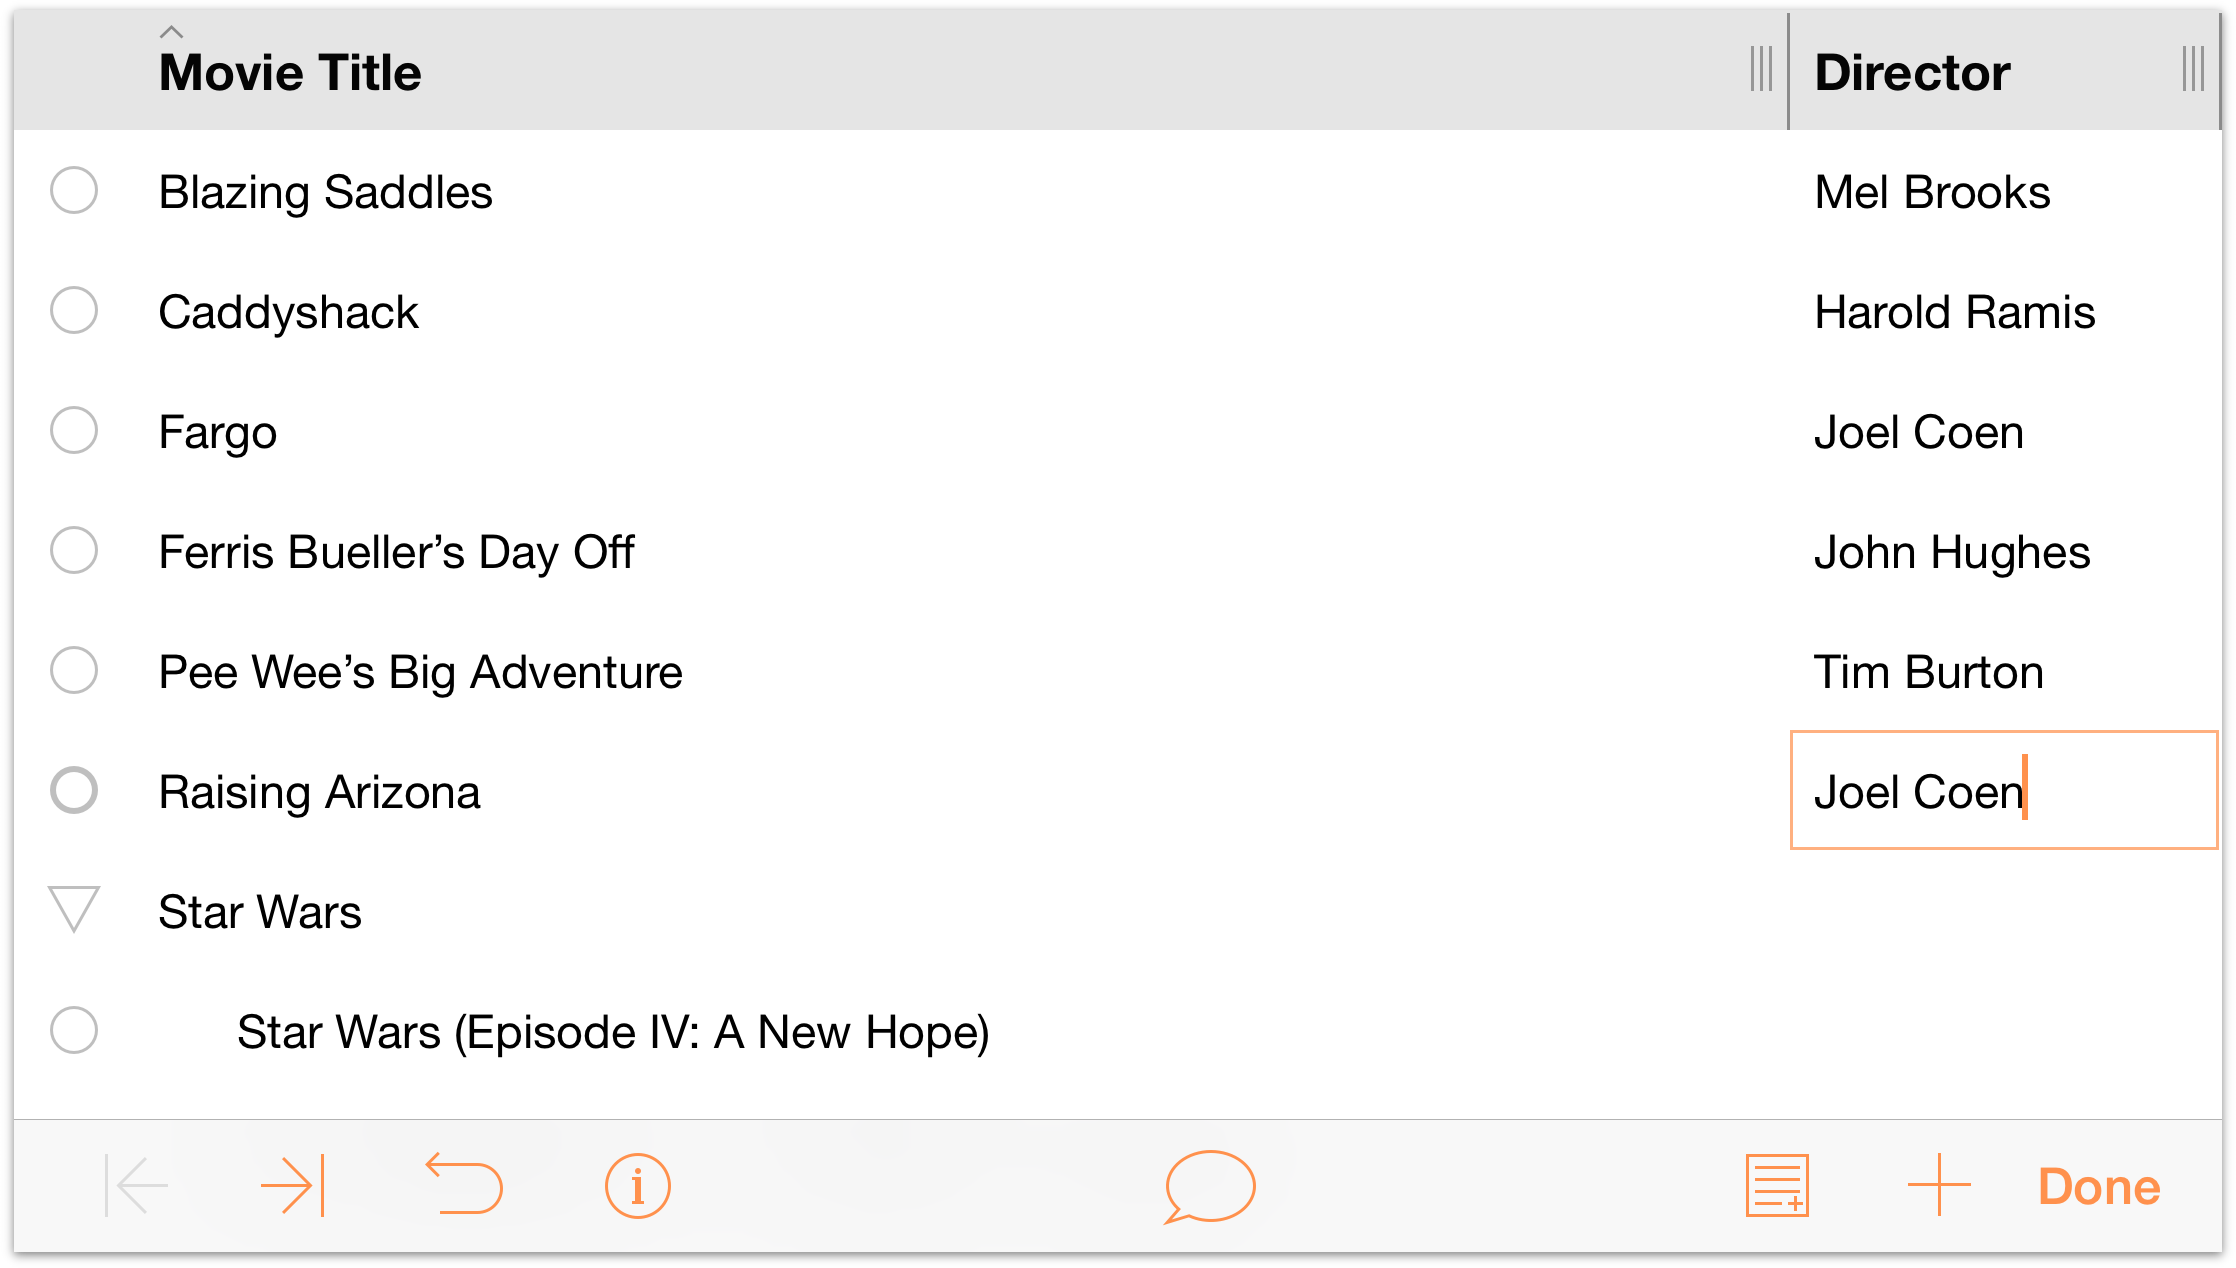
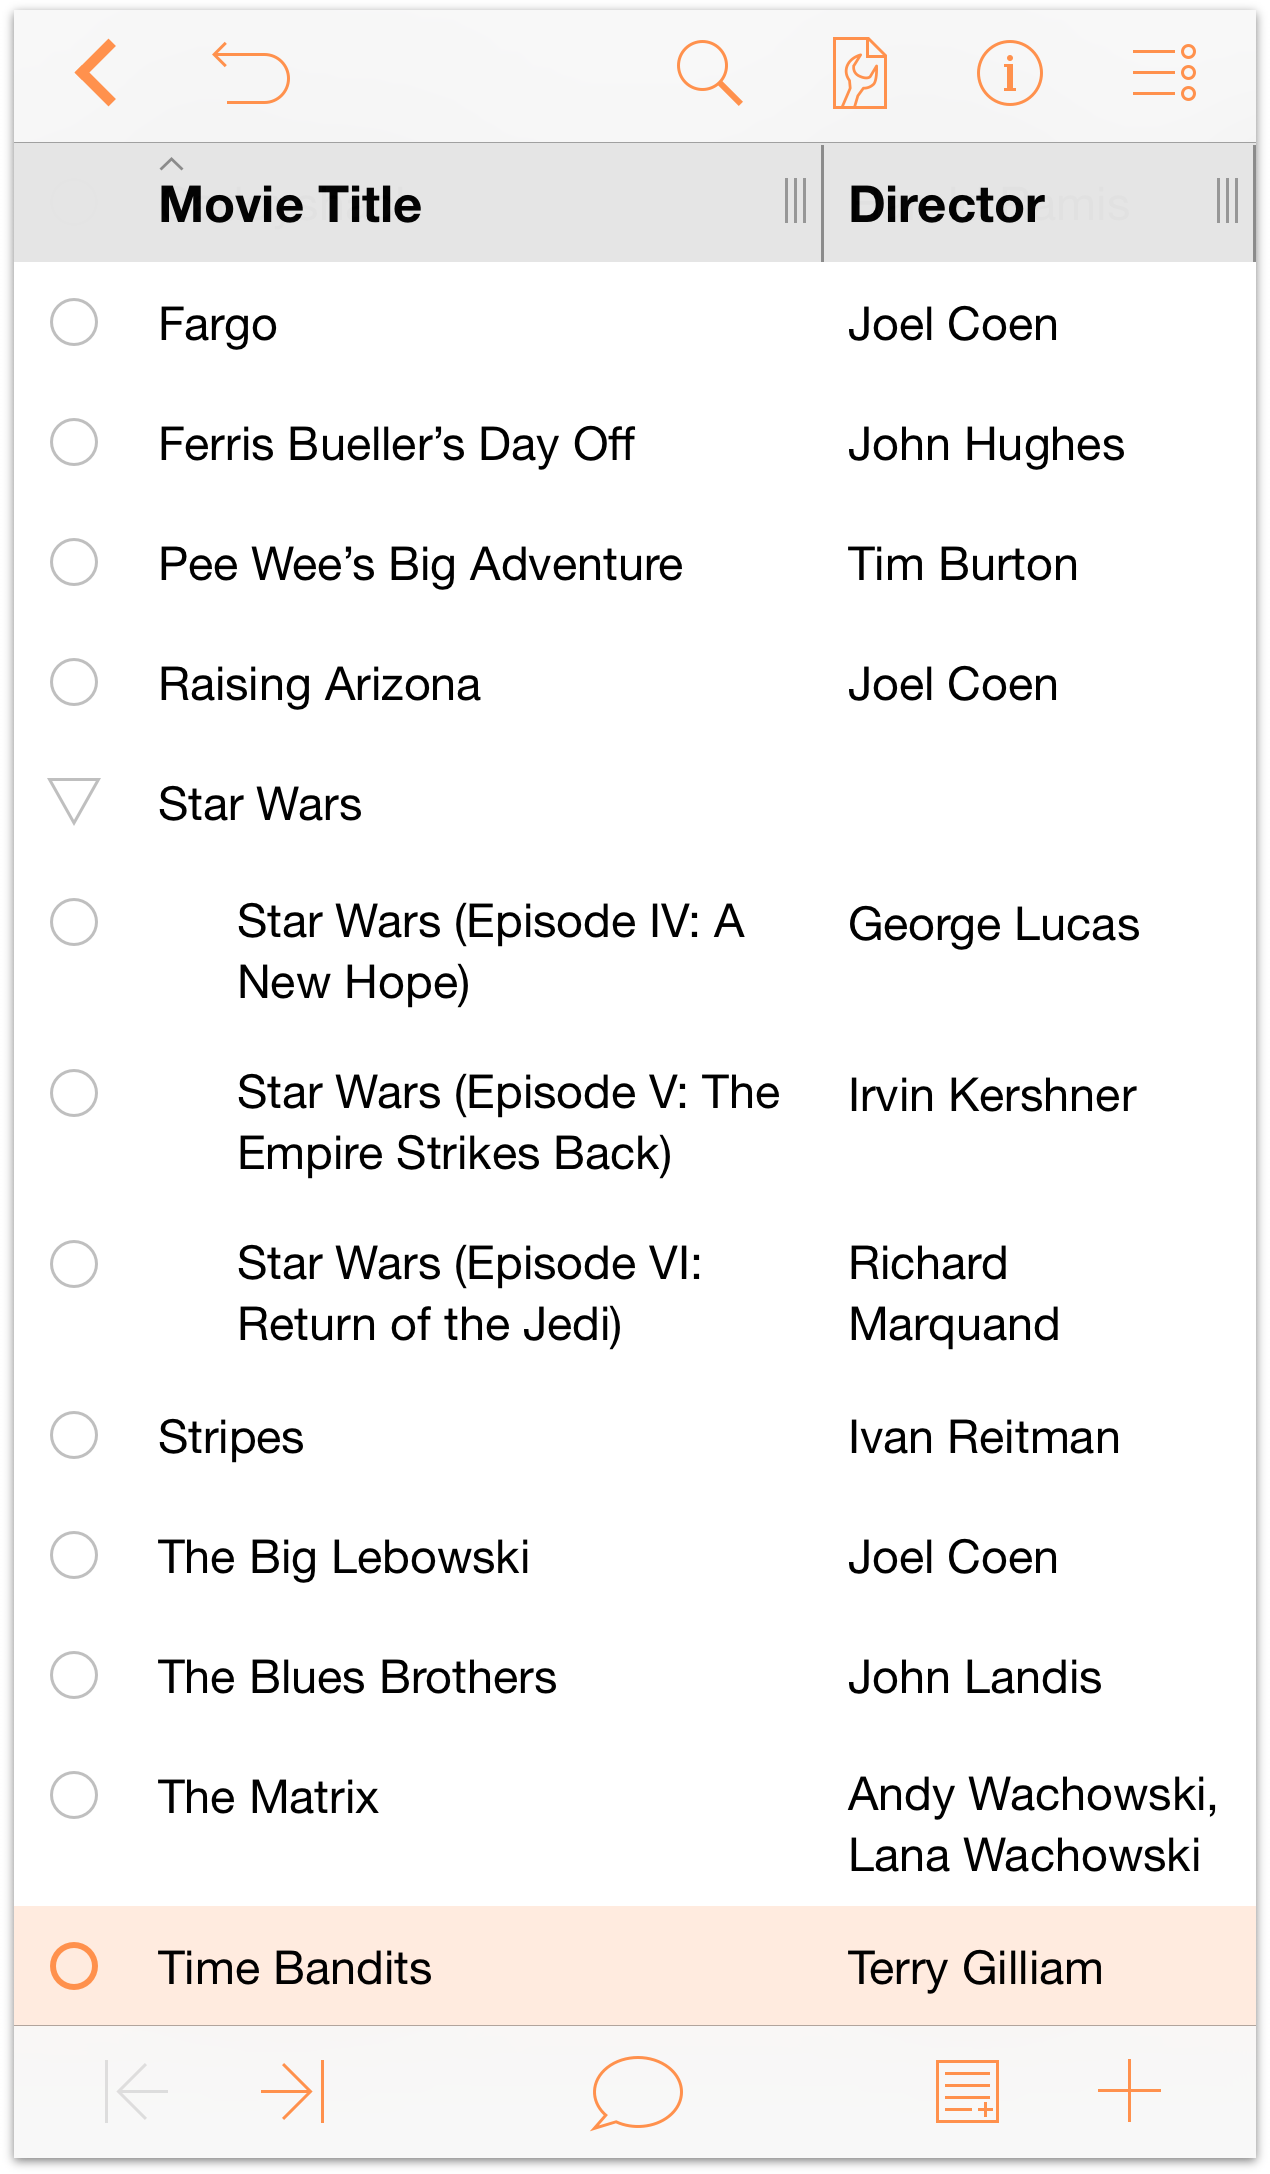
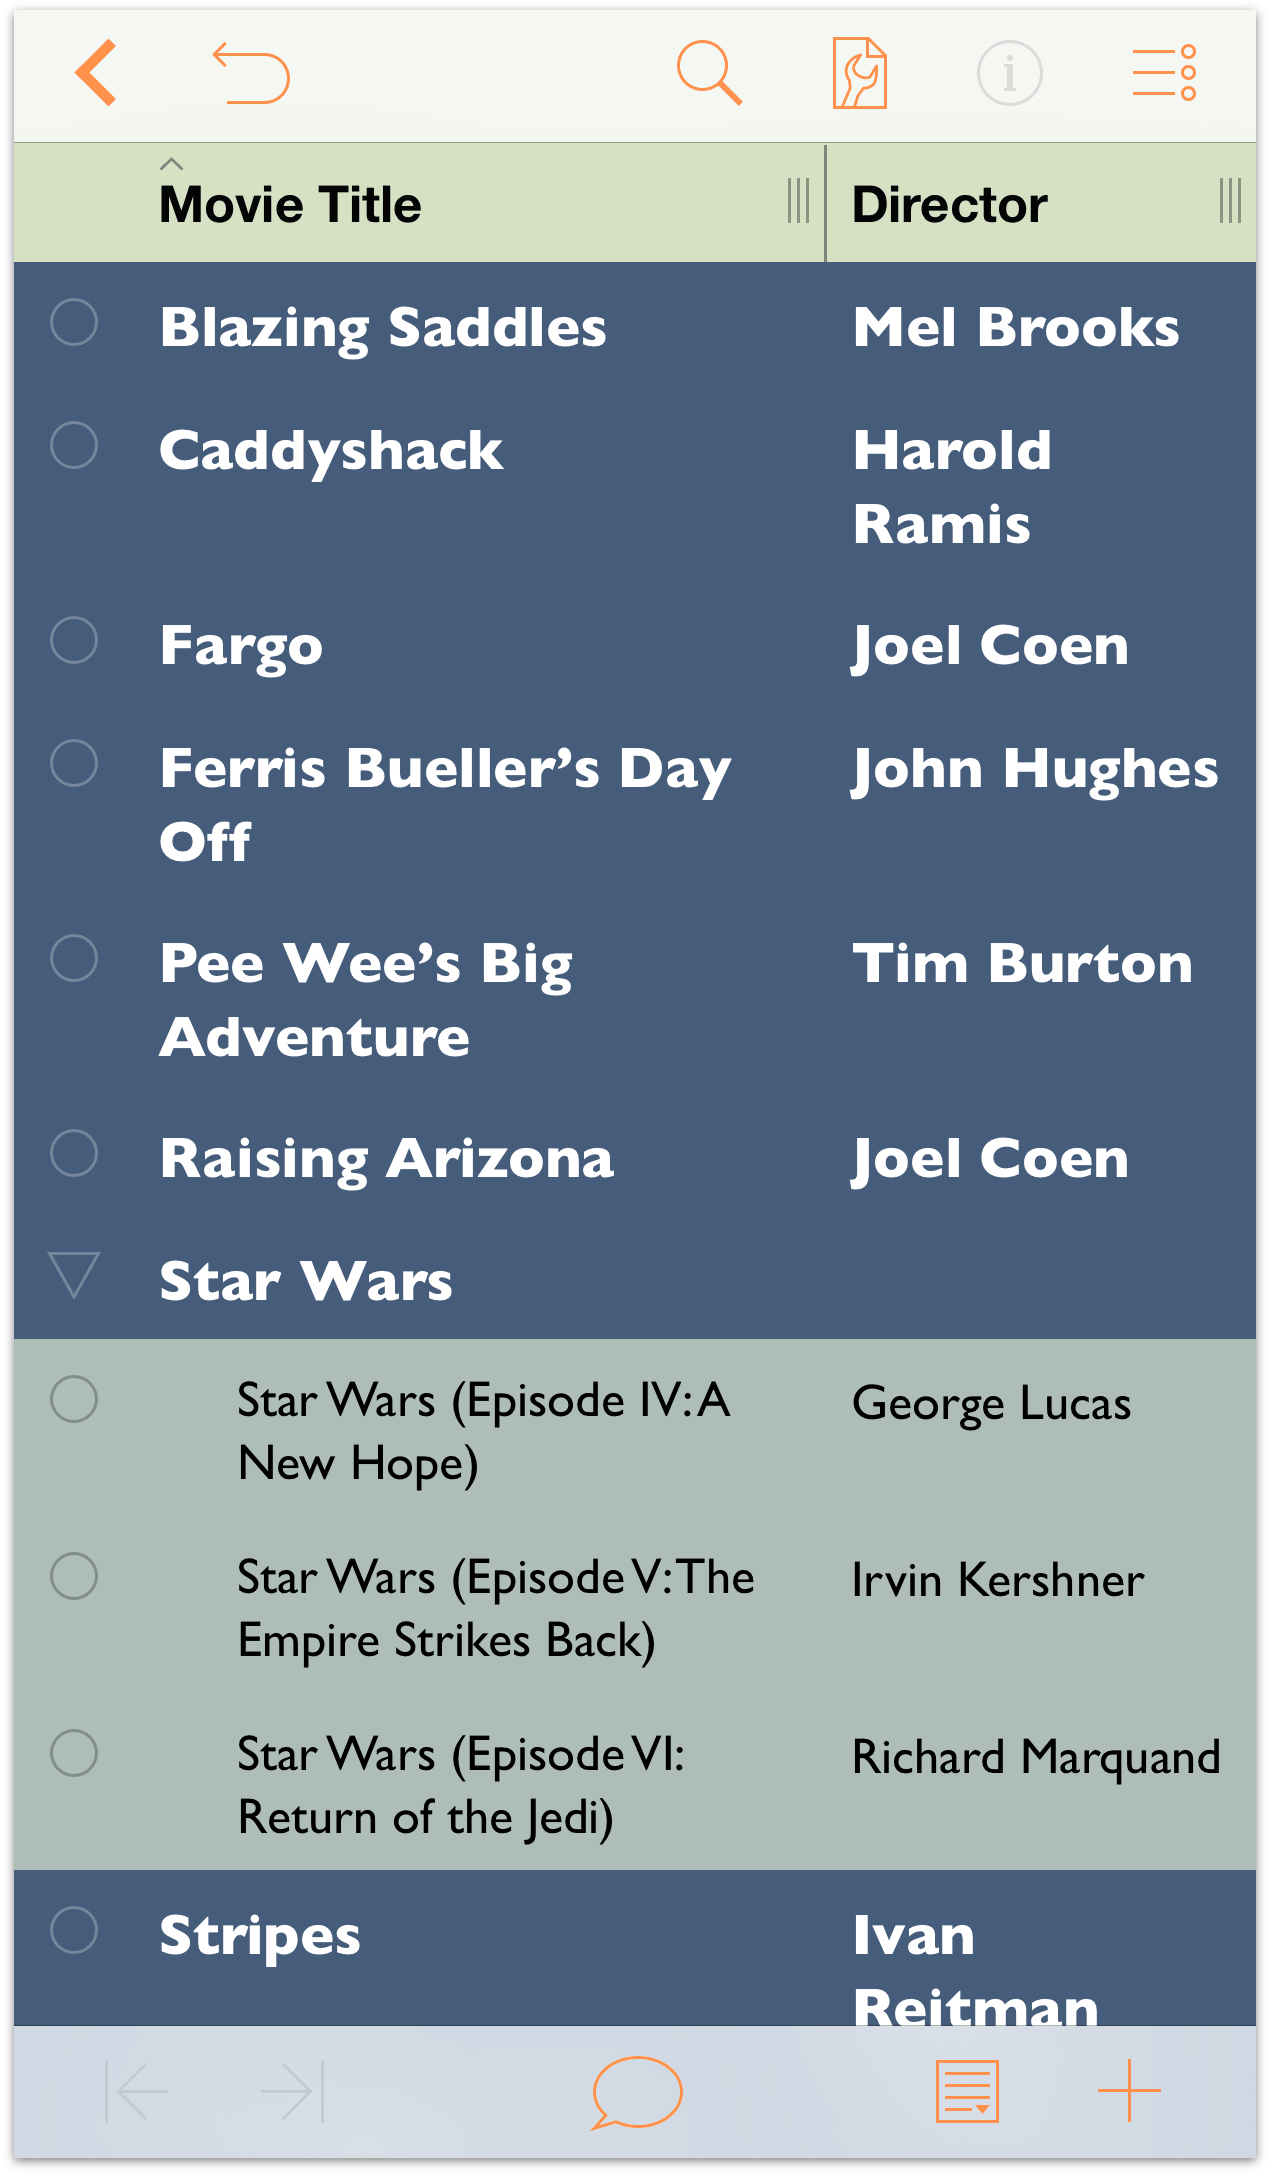
When you’ve finished filling in the Director column, tap Done; your document should appear as follows:
Note
When you rotate your iOS device between Portrait (tall) and Landscape (wide), OmniOutliner adjusts the column widths to fit within the screen orientation. However, if your document has more than two columns, the additional columns may appear off screen. To see their content, try rotating your iOS device to Landscape or swipe from the right edge of the screen to bring additional content into view.
Of course, there’s plenty more that you could do with a document such as this. You could add notes about each movie, or another column for the year the movie was released or to add your own star rating. Take some time now to explore in OmniOutliner and see what you can do. And always remember, tap Undo to revert recent changes.
When you’ve finished, tap Documents in the navigation bar to save your changes and add the Favorite Movies document to your Local Documents folder.
When you are ready, go to the next chapter, Working with Templates and Styles, to learn about how to apply a template (or theme) to an outline, and how to create your own styles to add your signature touch to the outlines you create.
Working with Templates and Styles
In the previous chapter, Creating a New OmniOutliner Document, you learned how to create a new OmniOutliner document. In the process, you saw how to add and organize the content, and how to add additional columns and change the column headings.
This chapter takes you to the next level—no pun intended—of learning in OmniOutliner by showing you how to create your own template. The chapter wraps up by showing you how to apply the styles from one template to your outline of favorite movies that you created in the previous chapter.
There’s a lot of ground to cover, so let’s get started!
Working in OmniOutliner
The best way to lay the foundation for a new template is to start with an outline that has minimal content. So, to get started, you’ll create a new document, enter some text, learn how to move rows around, and organize rows into groups. While this might sound pretty basic, it’s important to learn the fundamentals of working in OmniOutliner.
Follow these steps:
- From the Locations screen, tap to select the Local Documents folder.
When asked to Choose a Template, tap to select the Default template.
The reason why we’re starting out with the Default template is because it is pretty sparse. It has a plain white background, and the only styles it contains are basic font styling. It’s the perfect starting point for creating a template of your own.
- Tap to open the Contents menu.
- To the left of Column Headers, tap (the eye icon) twice to always show the column headings.

- Tap the Topic column heading once, and then tap Edit in the contextual menu that appears. This opens the Contents menu to the Columns pane so you can edit the column heading. Change the name from Topic to My Level Styles.
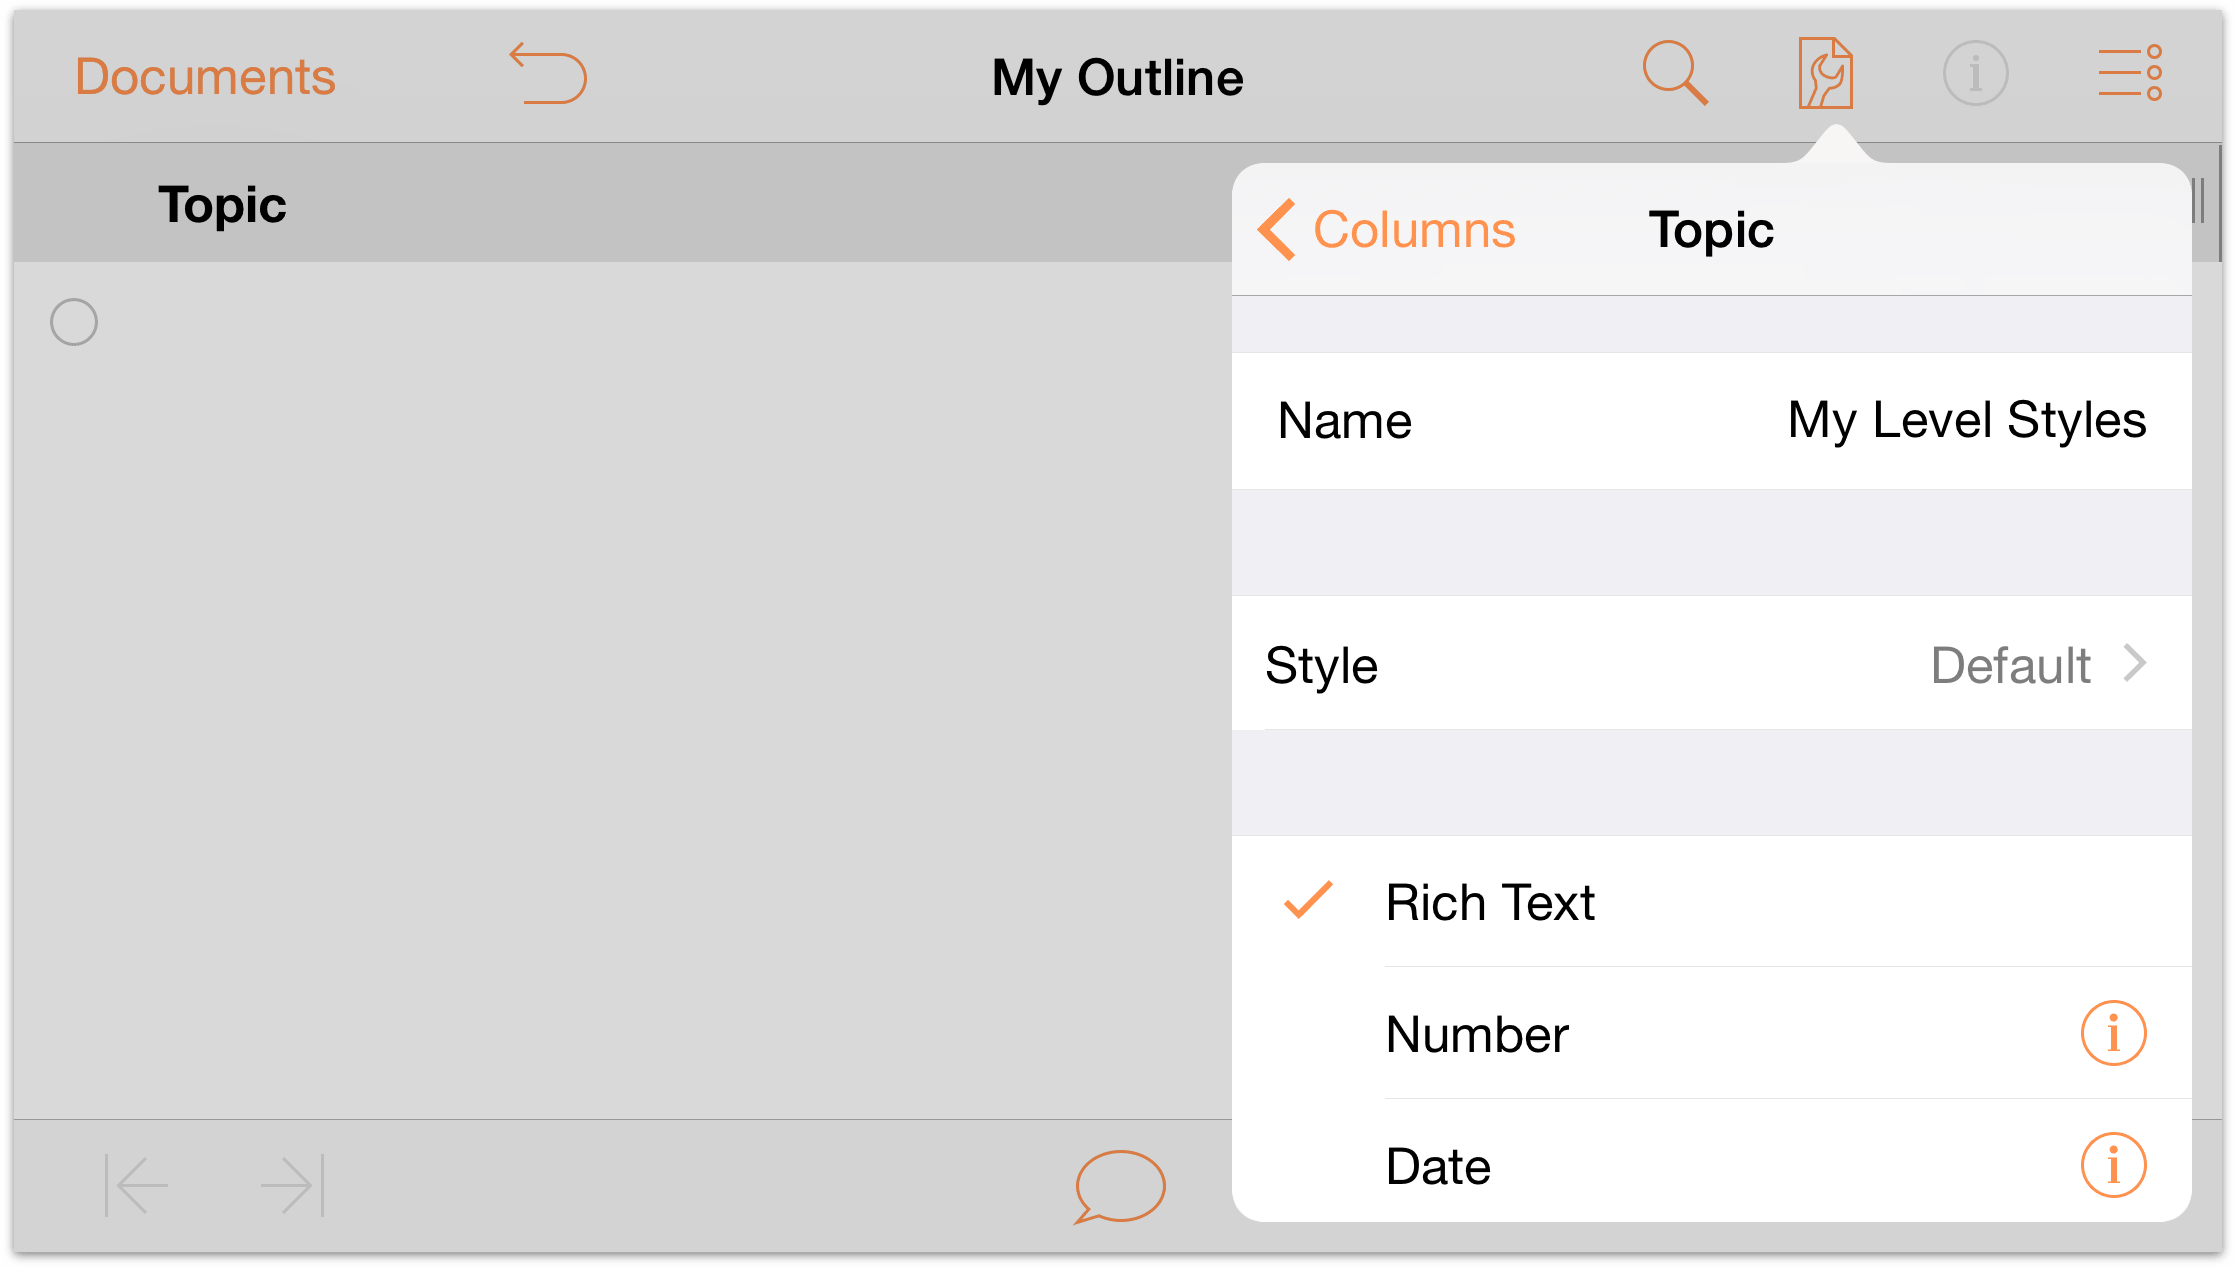
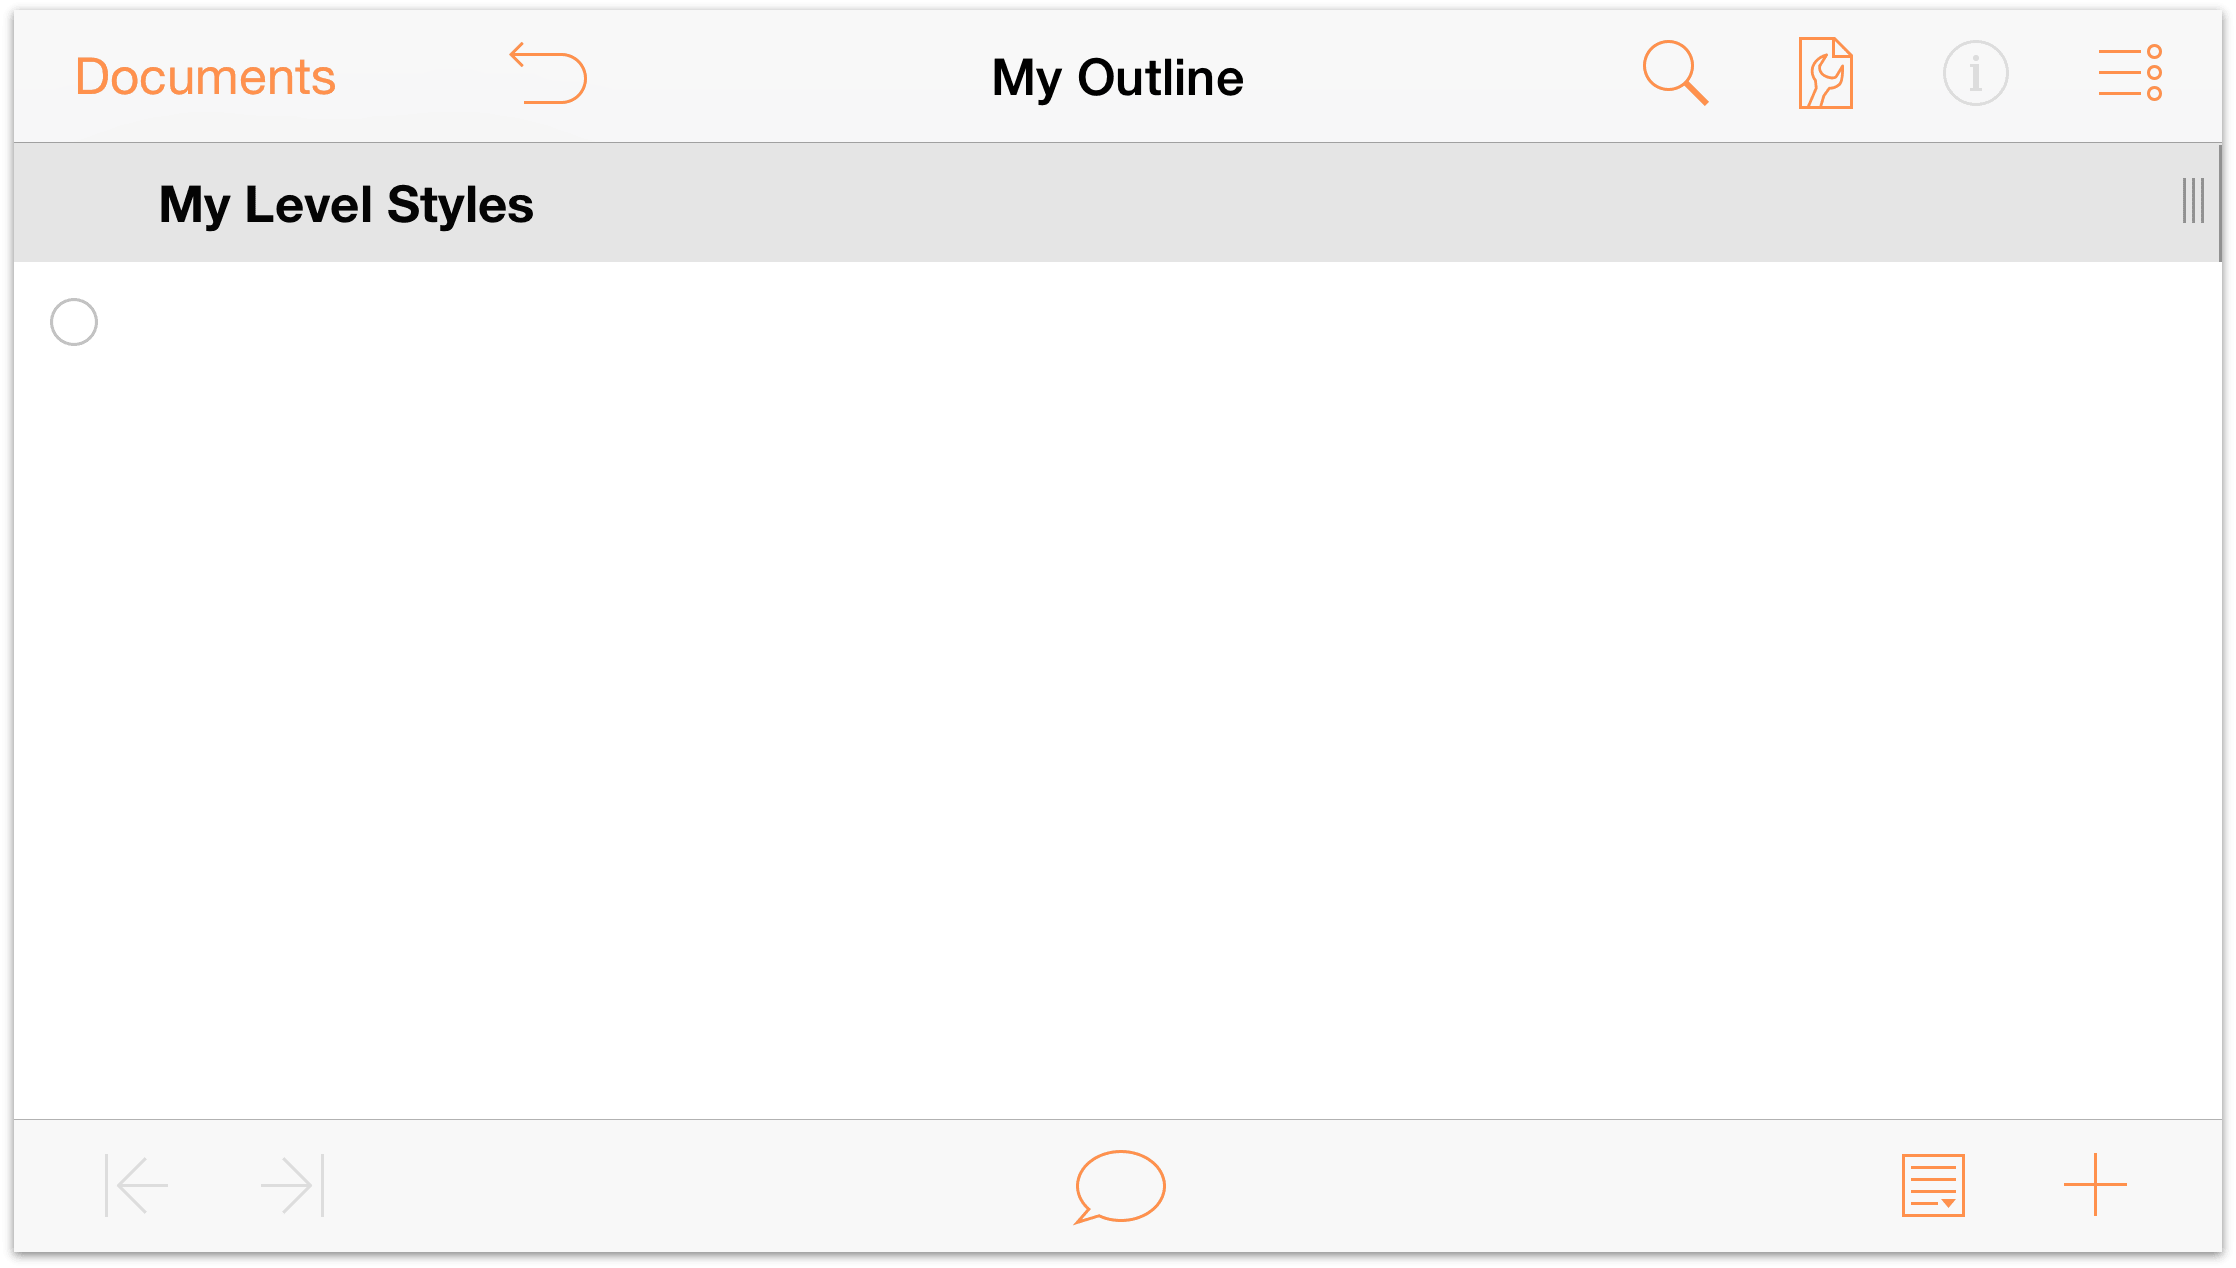
- Tap on the outline area to dismiss the Contents menu. When you do, you’ll see that the new column heading has been applied.
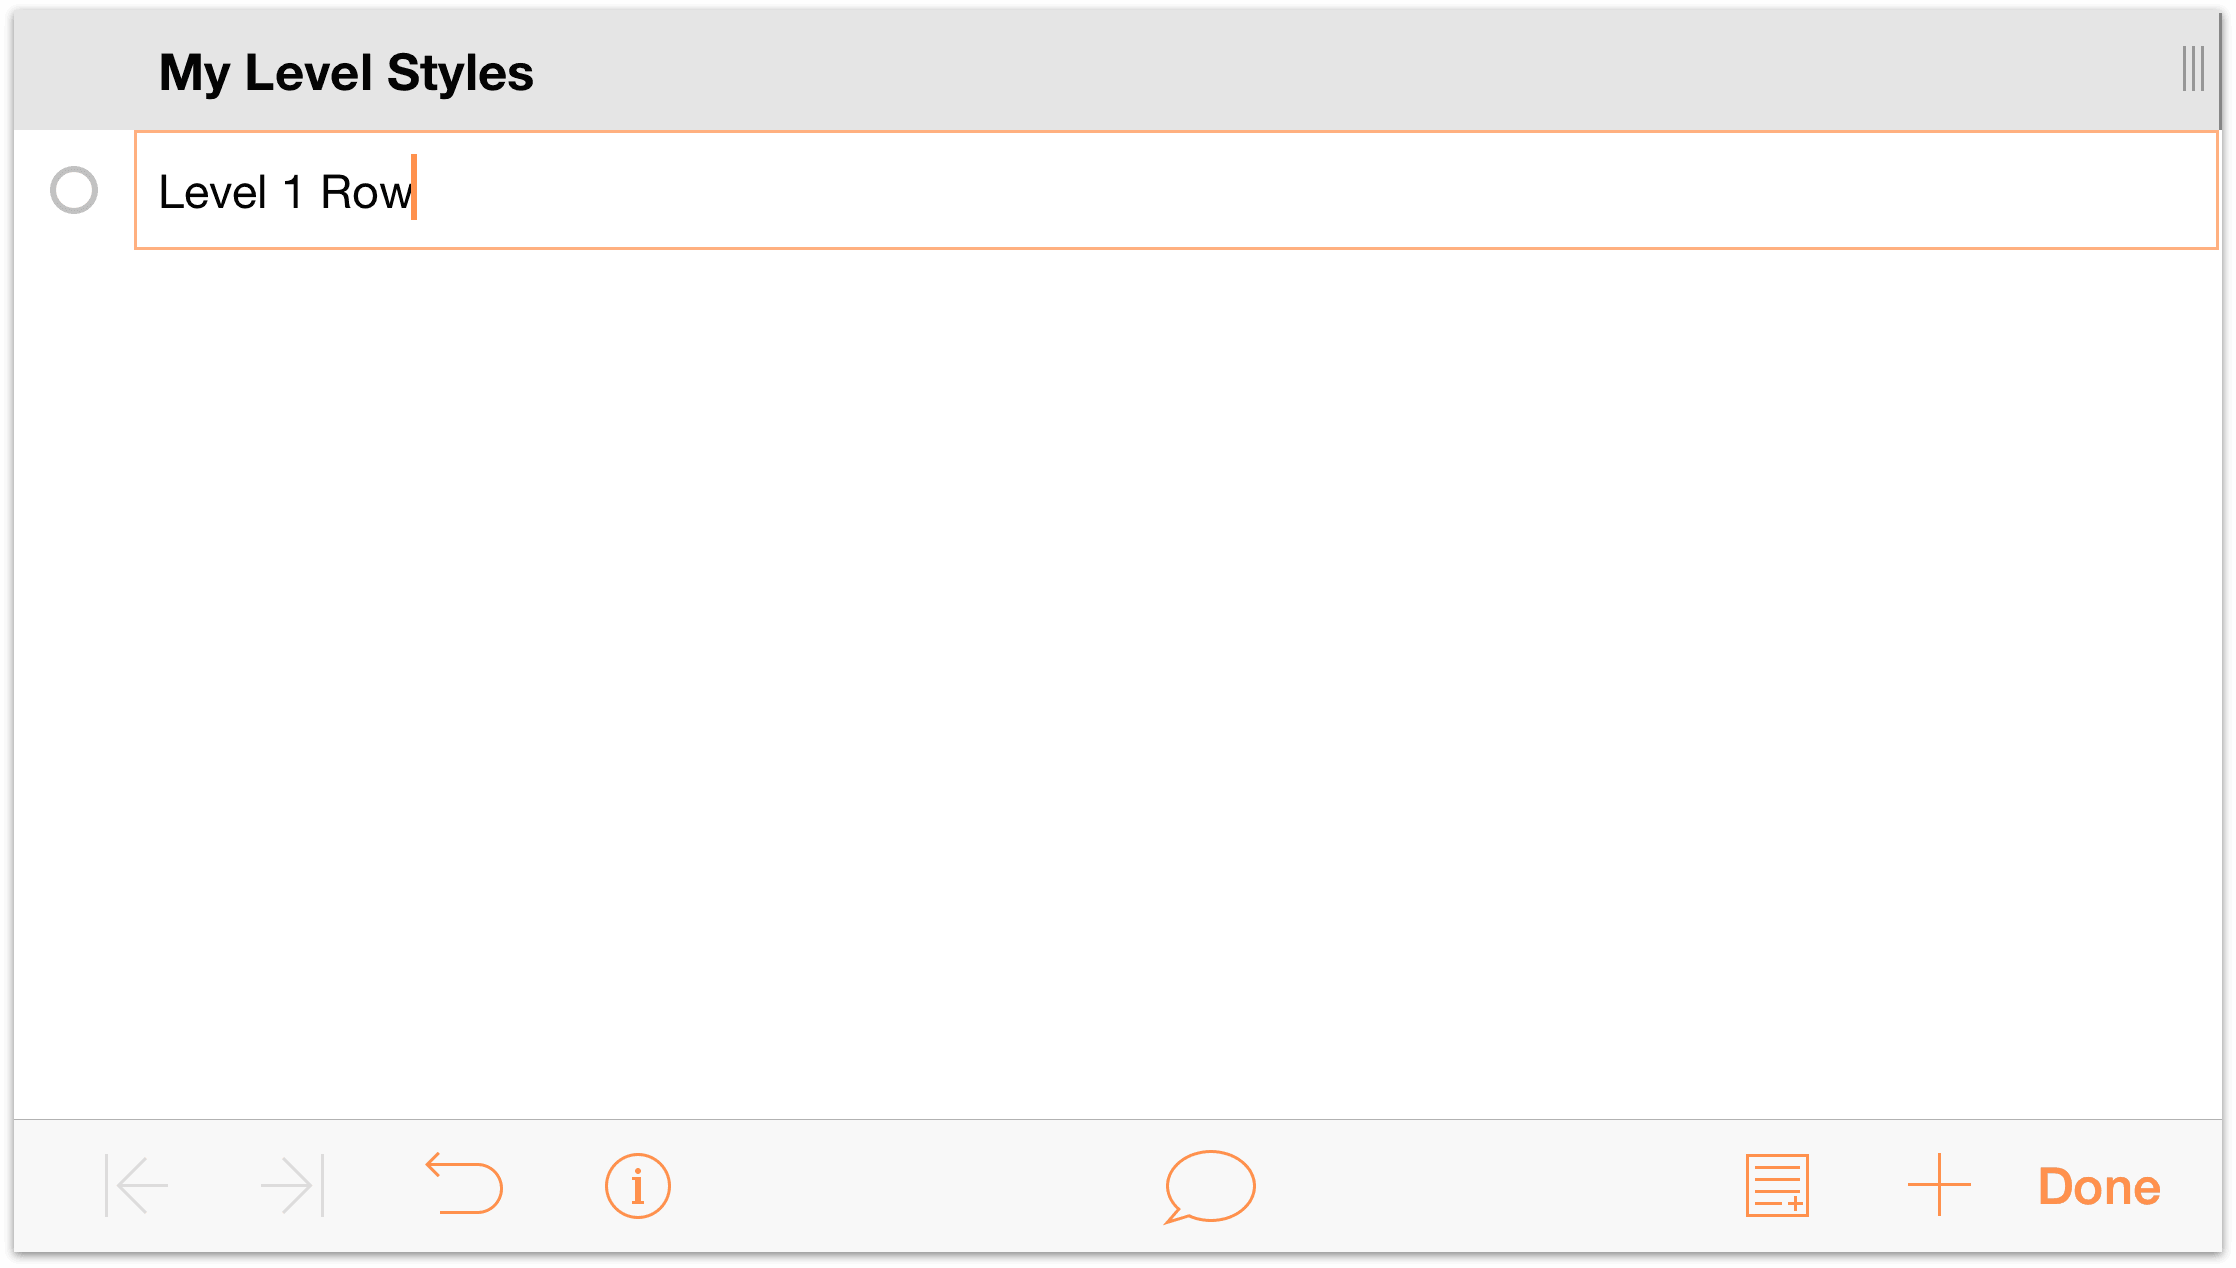
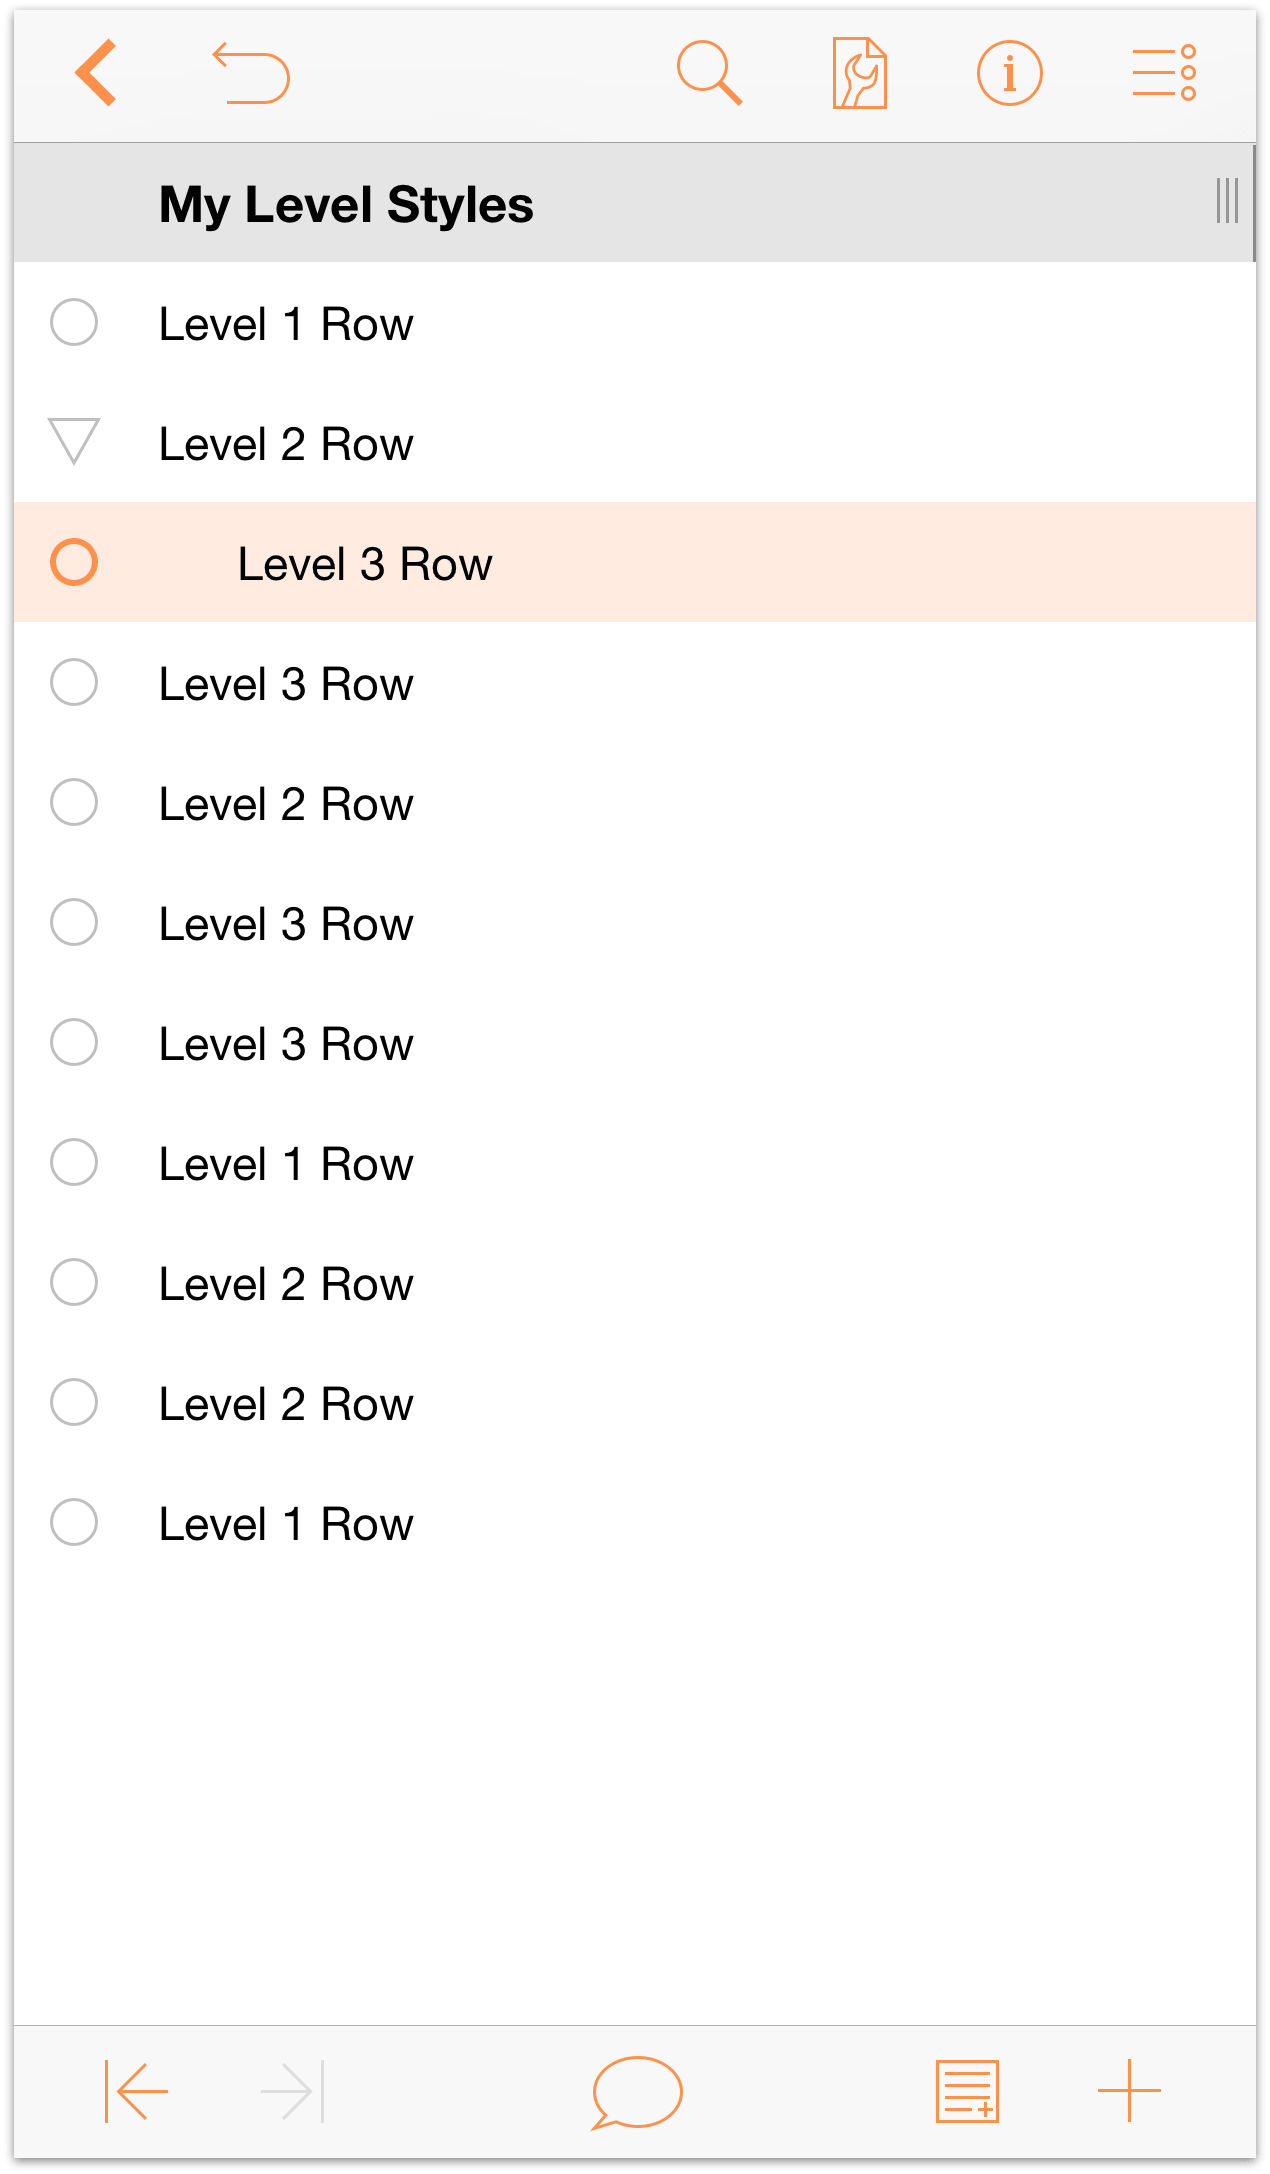
To enter text on the rows of your outline, double-tap on the row beneath the My Level Styles heading and enter Level 1 Row. Pressing Return at the end of the first line moves you down to the next row.
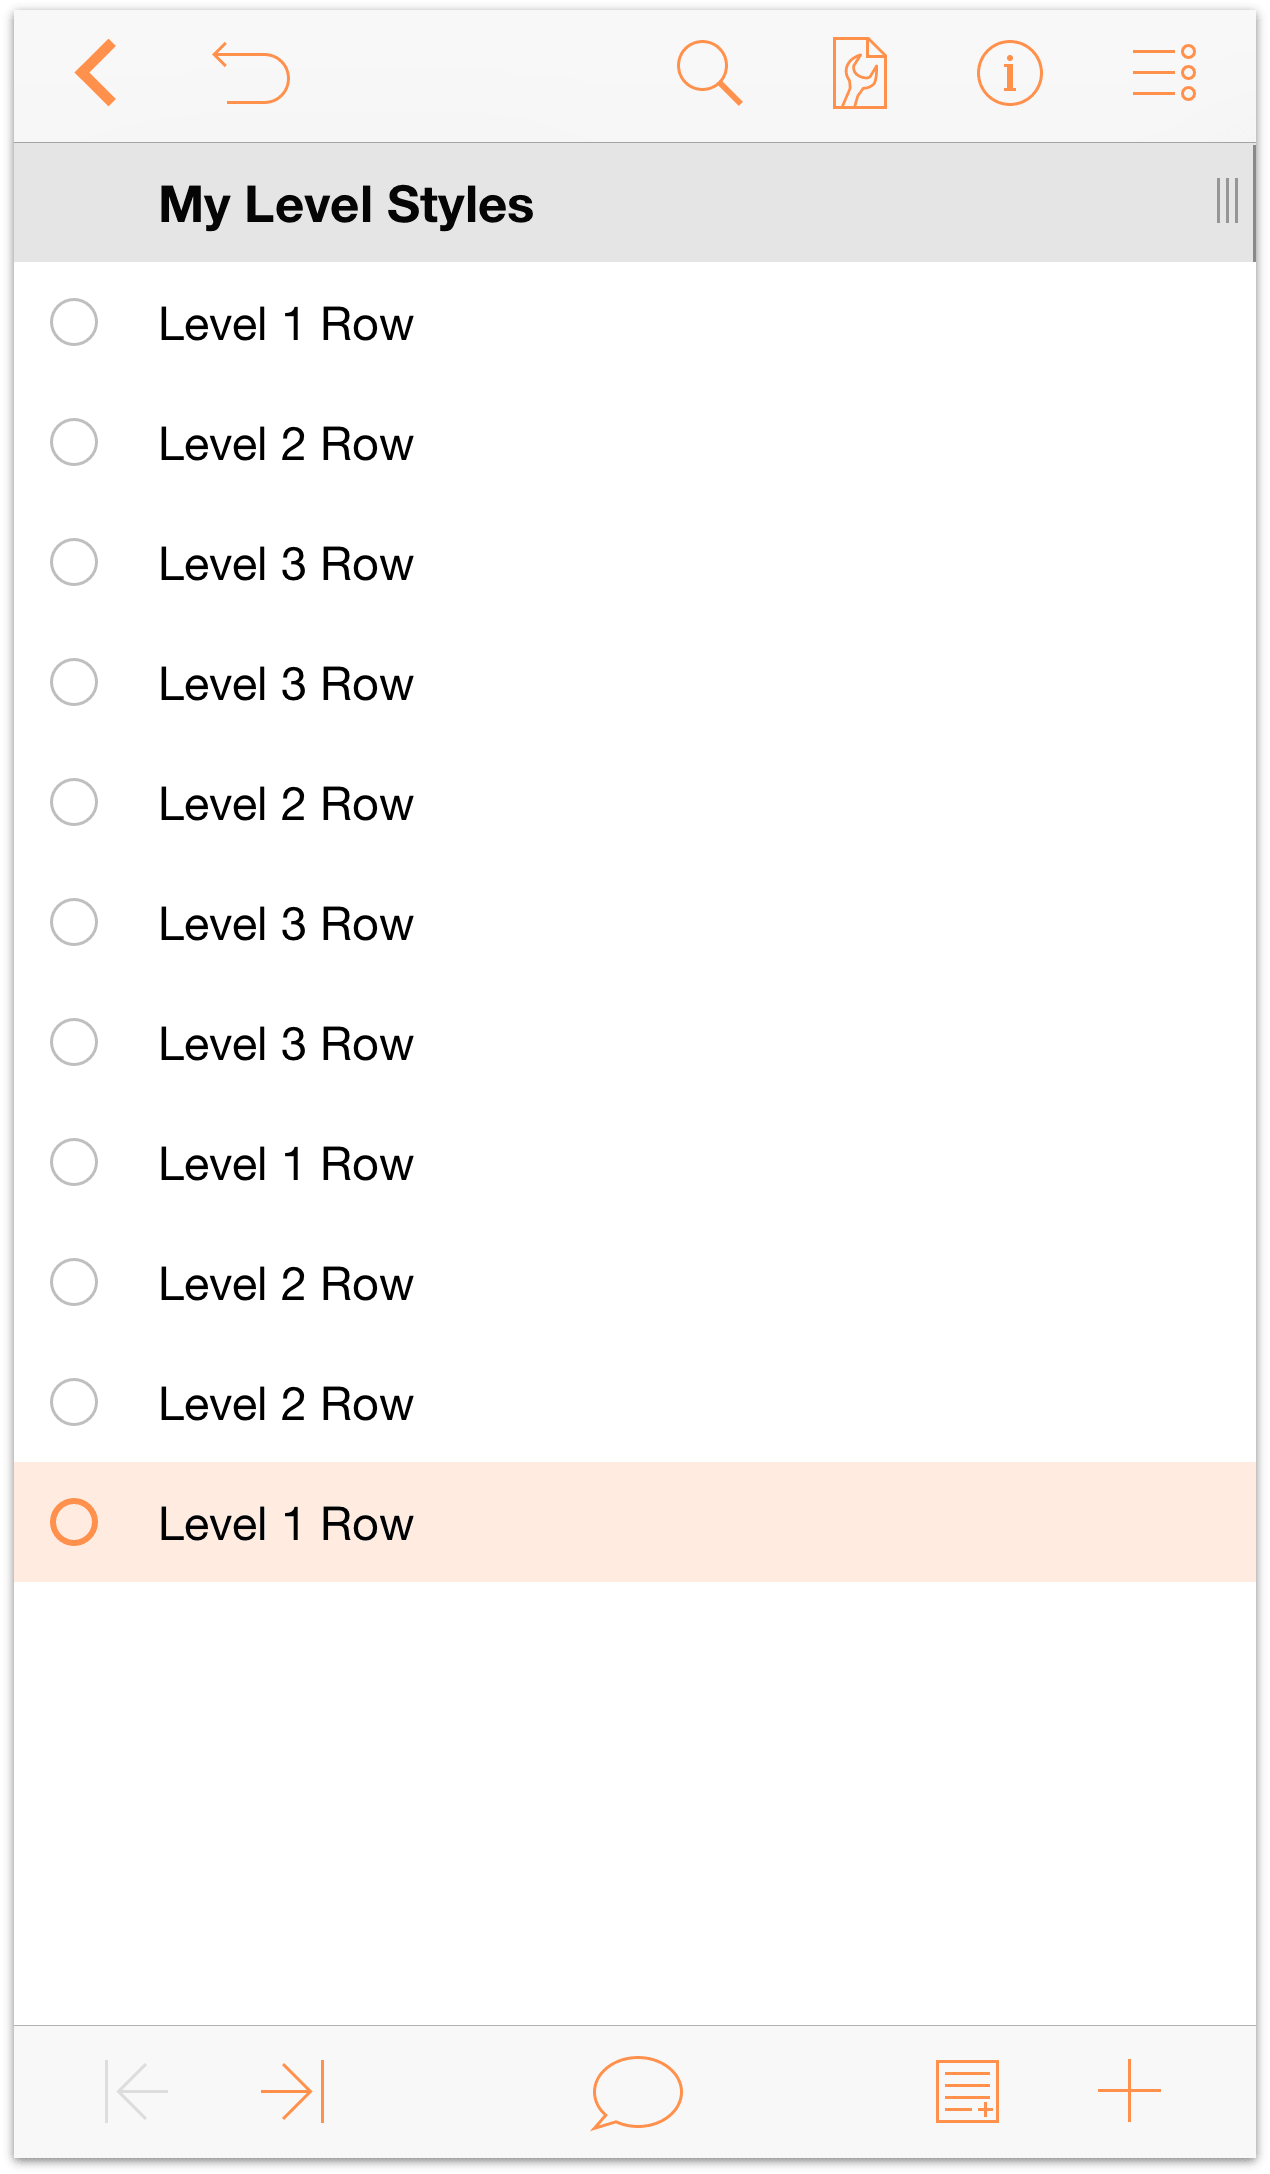
As you’ll notice, the rows get row handles (the open circles along the left edge of the row) by default. Now add more rows by entering the following on the next and subsequent rows:
- Enter Level 2 Row and press Return
- Enter Level 3 Row and press Return
- Enter Level 3 Row and press Return
- Enter Level 2 Row and press Return
- Enter Level 3 Row and press Return
- Enter Level 3 Row and press Return
- Enter Level 1 Row and press Return
- Enter Level 2 Row and press Return
- Enter Level 2 Row and press Return
- Enter Level 1 Row
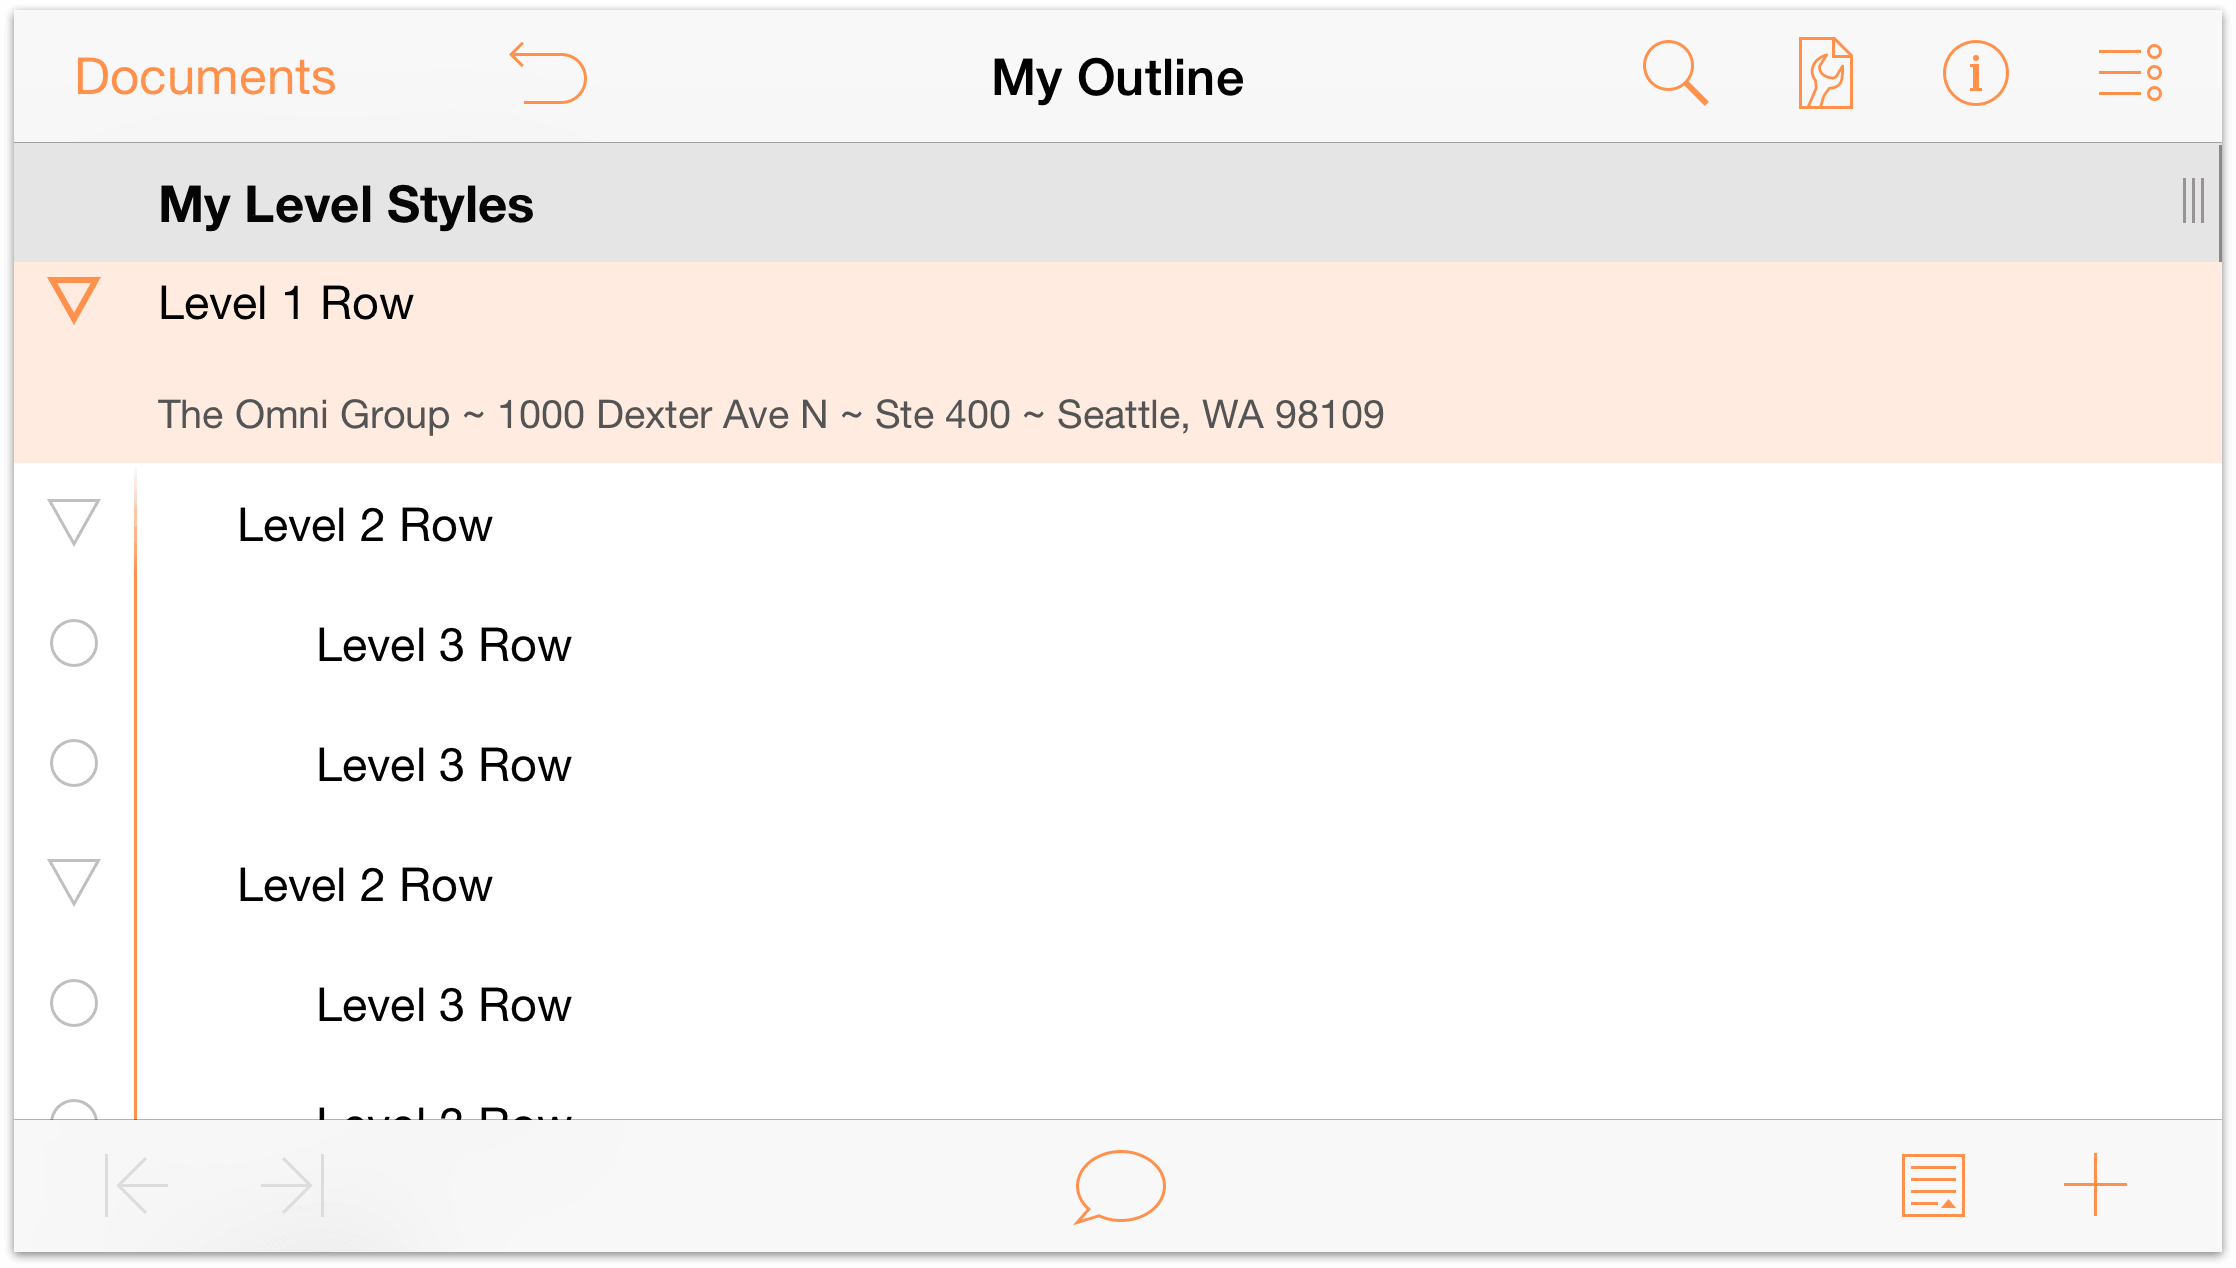
Your document should look like the following:
Now let’s add some depth to the outline by indenting the rows. Tap a row handle to select a row.
- Tap to select the first Level 3 Row.
In the toolbar at the bottom of the screen, tap
 (the Indent button) to indent that row one level. Your outline should appear as follows:
Repeat that process for all other Level 3 Rows. When finished, your outline should appear as follows:
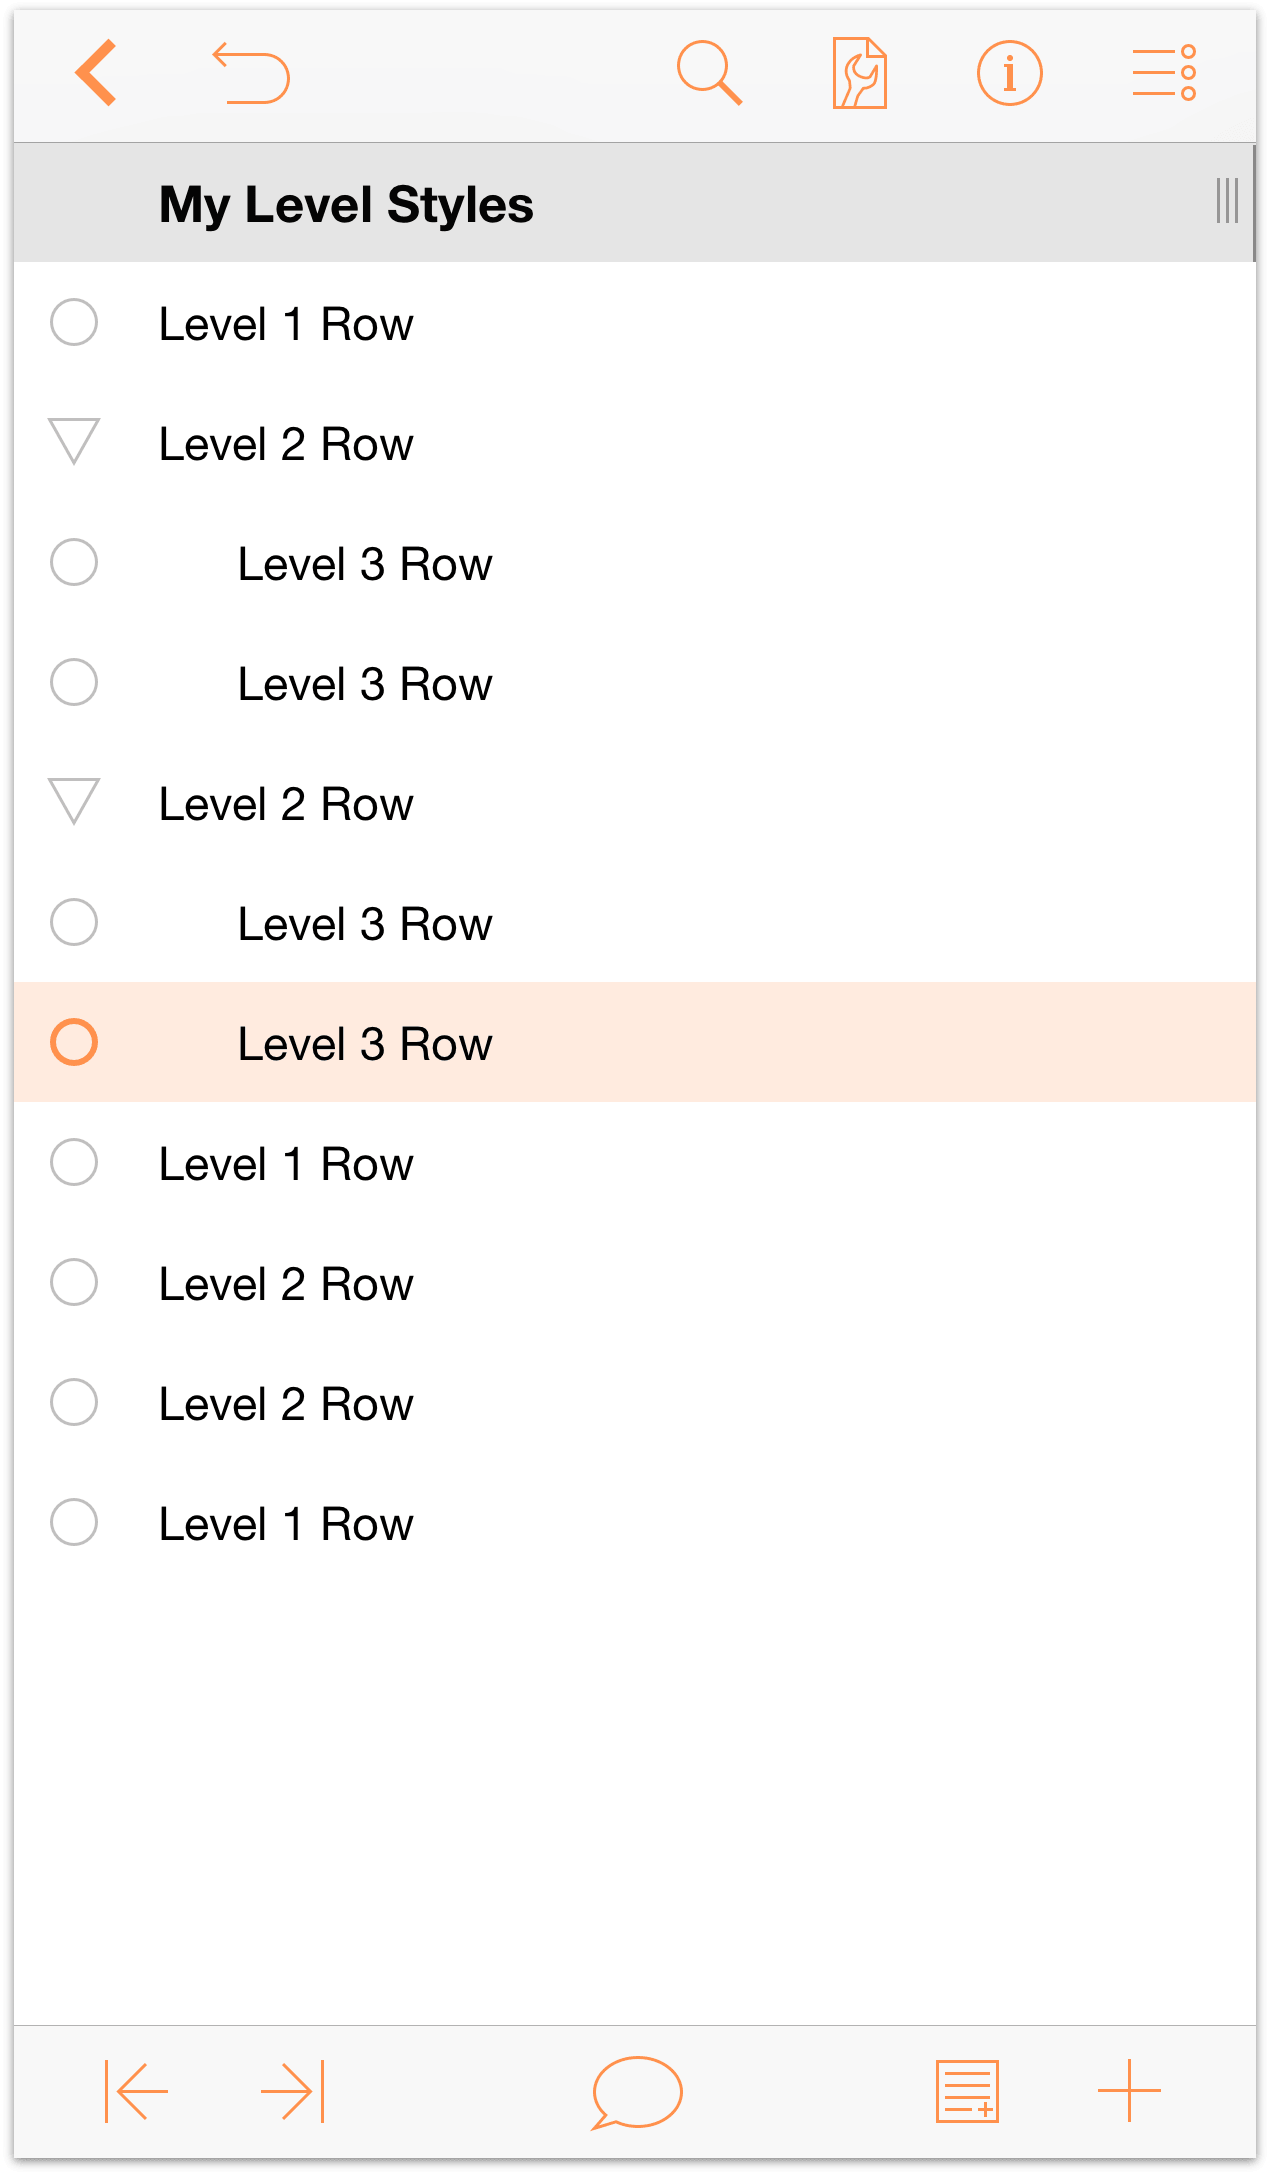
Notice how the row immediately preceding the Level 3 Rows have gained a disclosure triangle as their row handle. When pointing downward, a row is Expanded. When pointing to the right, the row is Collapsed.
Now, repeat the indentation process with all of the Level 2 Rows:
- Tap to select each Level 2 Row.
- Tap
 to indent that row one level.
Your document should look like this:
As you can see, the Level 2 Rows are children of the Level 1 Rows, and the Level 3 Rows are children of the Level 2 Rows, making them grandchildren of the Level 1 Rows. Indentation adds hierarchical depth to your outlines, making it easy for you to organize lists of information quickly.
If you look at the opposite side of the toolbar at the bottom of the screen, you’ll notice a couple more buttons; let’s examine these:
- Notes
 — With a row selected, tap this button to add a Note.
 Insert Row
 — When you quickly tap this button, OmniOutliner inserts beneath the current row a new row at that same level. However, if you press and hold this button, four additional buttons fly out.
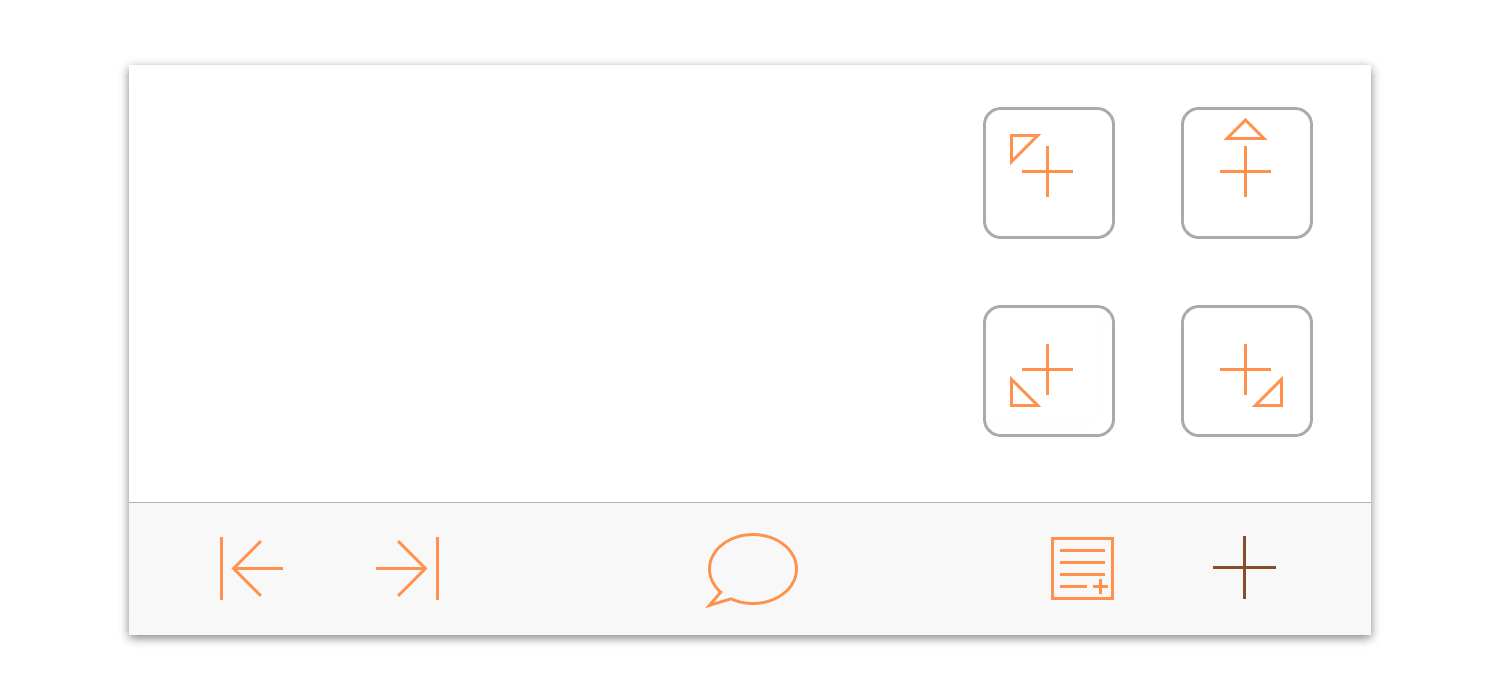
These additional buttons are as follows:
- Insert Parent — Inserts a new row at the next-highest level from the selected row.
- Insert Above — Inserts a new row above and at the same level as the selected row.
- Insert Child — Inserts a new row beneath and at one level lower than the selected row.
- Insert Aunt — Inserts a new row beneath and one level higher than the selected row.
- Insert Parent
Before moving on to the next section, one final bit of text entry you should do is to add some text to the Notes for the Level 1 Rows. Tap to select the first Level 1 Row, and then tap ![]() to add a Note.
to add a Note.
It doesn’t really matter what you enter as the Note—it could be your address, or the name of your favorite Rush album—just as long as you have some text in place that you can style later in this tutorial. Copy and paste this text as a Note to the other Level 1 Rows. When you’ve finished, your document should look something like the following:
![]() When there are Notes in your outline, OmniOutliner places a tiny Note icon to the left of the row handle. You may also notice that the Add Note button in the bottom toolbar has changed slightly.
When there are Notes in your outline, OmniOutliner places a tiny Note icon to the left of the row handle. You may also notice that the Add Note button in the bottom toolbar has changed slightly.
Now the Add Note button is only available when you have selected a row that does not have a Note. Instead, the Hide Note button (![]() ) is available when a Note is visible, or the Show Note button (
) is available when a Note is visible, or the Show Note button (![]() ) is available when Notes are hidden. If you press and hold the button, two additional buttons “fly out” from the Notes button. These allow you to Hide and Show all Notes in your outline, respectively.
) is available when Notes are hidden. If you press and hold the button, two additional buttons “fly out” from the Notes button. These allow you to Hide and Show all Notes in your outline, respectively.
This now gives you enough content to use as placeholder text for the document you’ll eventually turn into a template.
Organizing Your Content
OmniOutliner helps you create detailed lists, and to go with that, it includes some powerful features for helping you organize the content in your outline. Here we’ll show you how to move whole sections around using the Move tool and how to create Groups to add depth to your content.
There are a few ways you can reorganize the content in your outline. The most frequent—and often misused—way is with Cut and Paste. In many cases, you don’t want to Cut the content from your document, you just want to move it to another location in the outline, and for that, there’s the Editing toolbar.
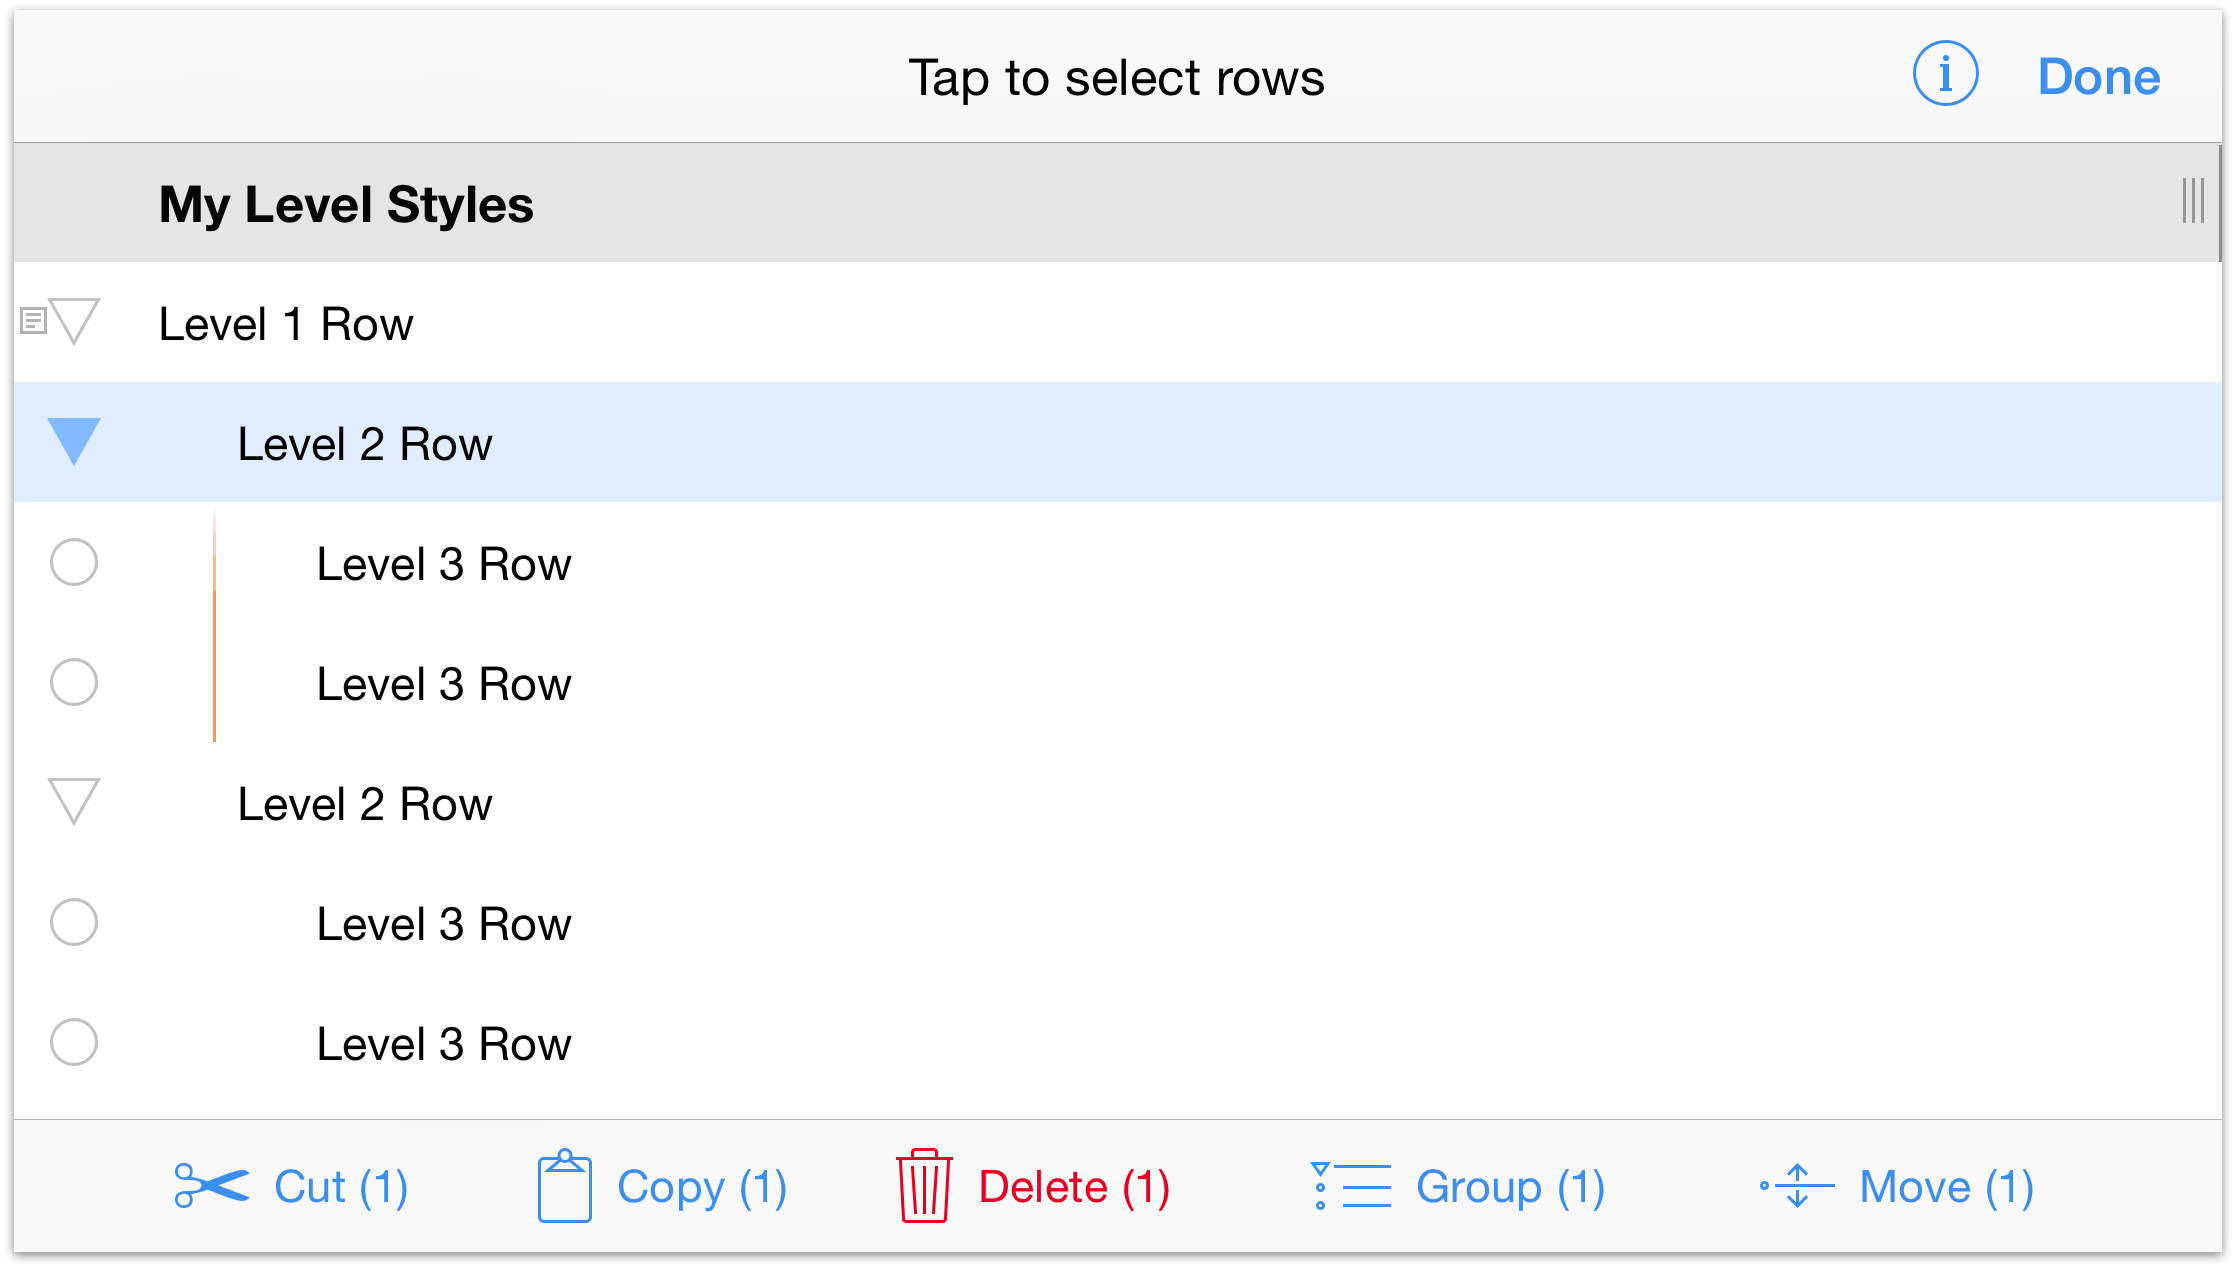
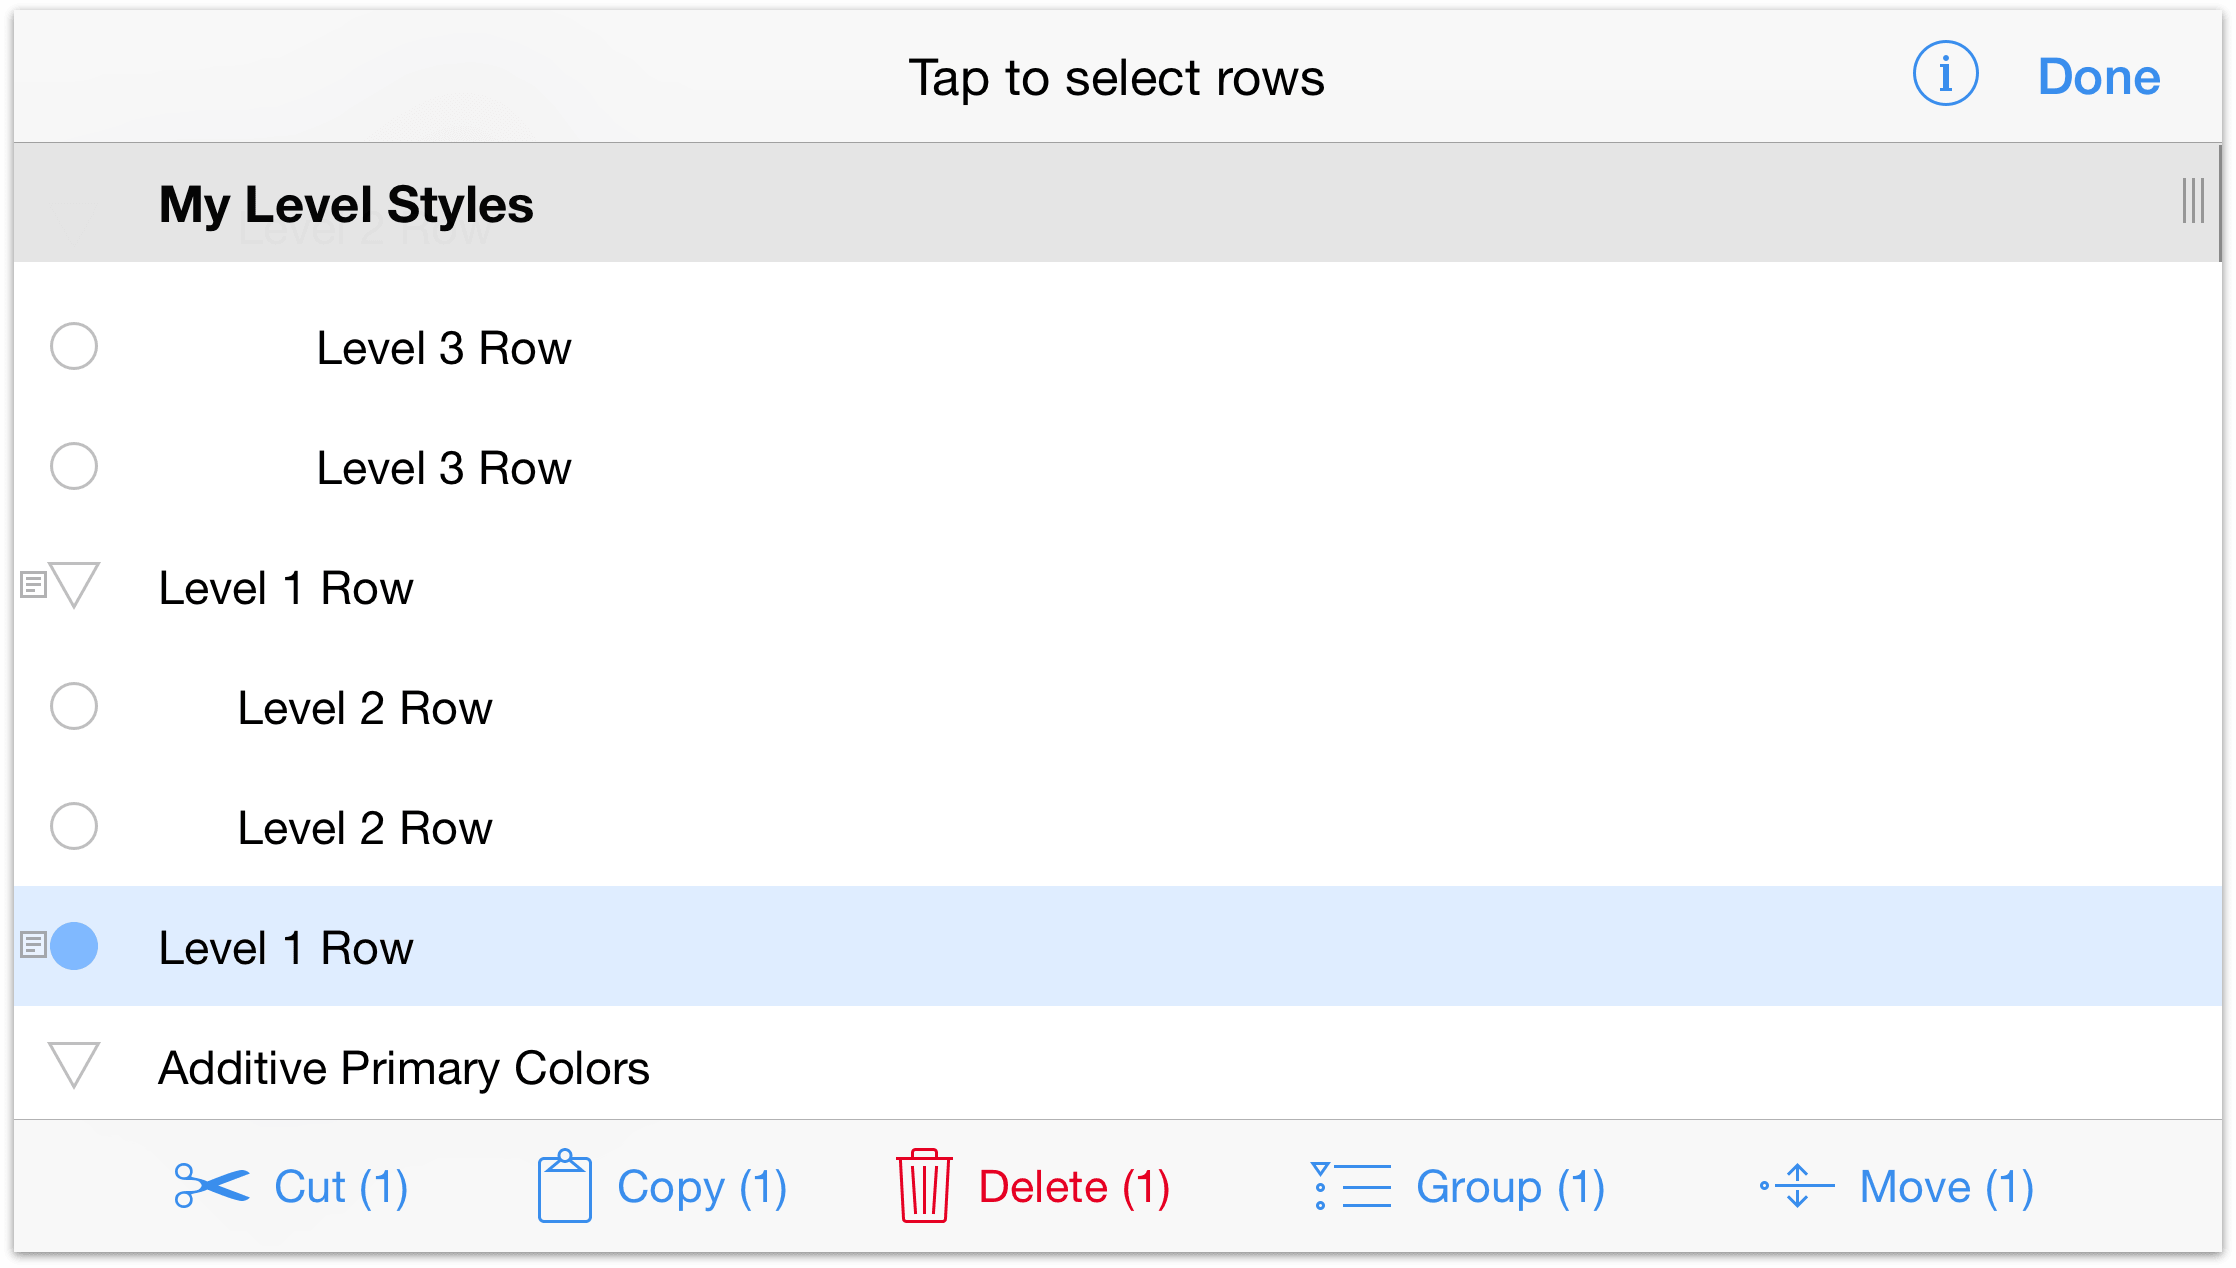
To access the Editing toolbar, tap ![]() and then select the row (or rows) on which you’d like to work. Rows you select are highlighted in blue; to deselect a row, just tap it again.
and then select the row (or rows) on which you’d like to work. Rows you select are highlighted in blue; to deselect a row, just tap it again.
The Editing Tools include:
- Cut — Removes the selected row(s) from the outline and moves to the clipboard so you can paste them in another location.
- Copy — Copies the selected row(s) and places the content on the clipboard so you can paste the content to another row.
- Delete — Deletes the selected row(s). Delete is very different from Cut, in that the content is permanently gone, whereas Cut places the content on the clipboard so you can use it again. If you delete something by accident, tap Undo.
- Group — Takes the selected rows (you must select two or more rows to make a Group), indents them one level and adds a parent row above in which you can enter some sort of descriptive text for the group.
Move — The row(s) you select can be moved to another location in your outline. Tap on the row where you would like to move the selected row, and choose to move it Above, Below, or Inside that row.
Above and Below places the row you’re moving at the same level as the row you have selected. Inside moves the line to that location, but makes it a child to the selected row.
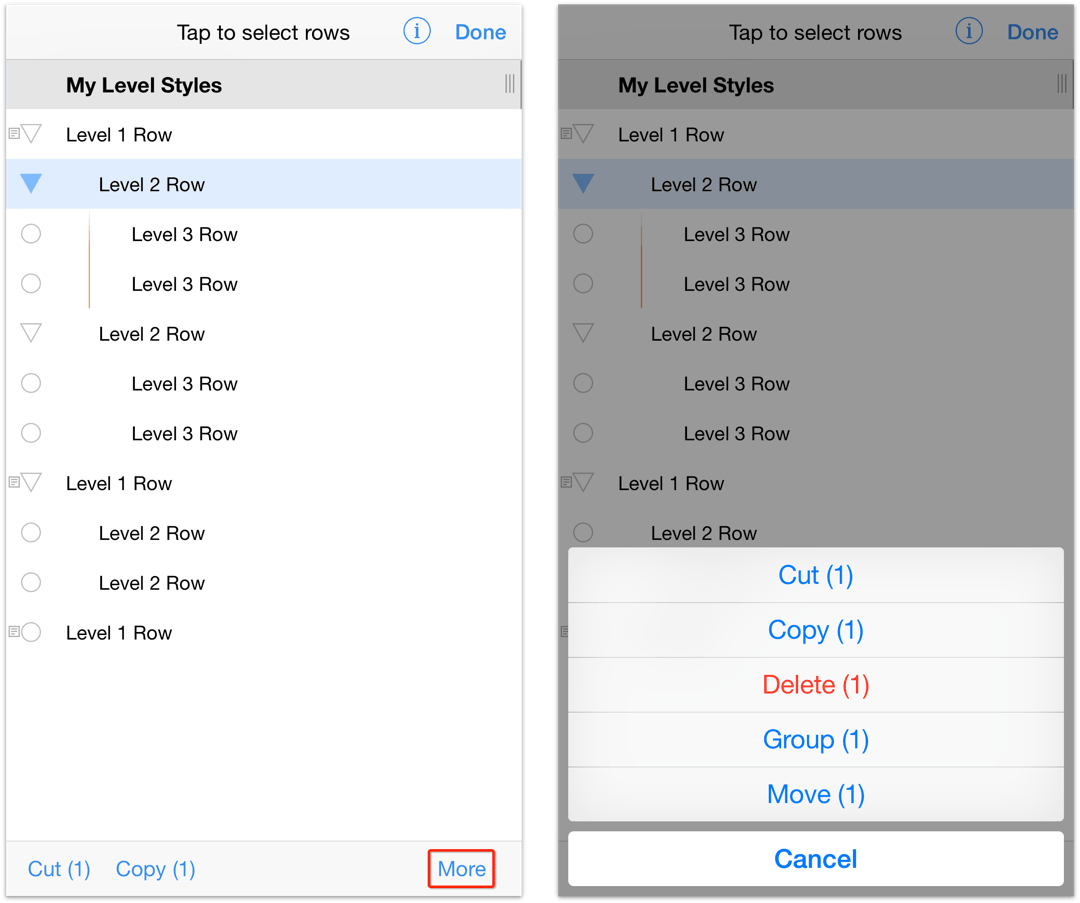
Where’d the Editing Tools Go in Portrait Mode?
If you are using OmniOutliner on an iPhone or iPod touch in portrait mode, you’ notice that the Editing toolbar looks significantly different than it does when your device is rotated to landscape mode.
Notice that your only options are Cut, Copy, and something called More. If you tap More, you can access all of the other Editing tools.
Creating a Group
Sometimes when you’re working on an OmniOutliner document, you’ll find a bunch of rows that you’d like to group together. These rows can follow one another or be non-contiguous, but all you know is that they belong together. For this, you’ll want to group the rows together using Group tool.
To show you how this works, go ahead and tap to select the last row in the document (Level 1 Row), and then tap ![]() . This adds a new row directly beneath the Level 1 row.
. This adds a new row directly beneath the Level 1 row.
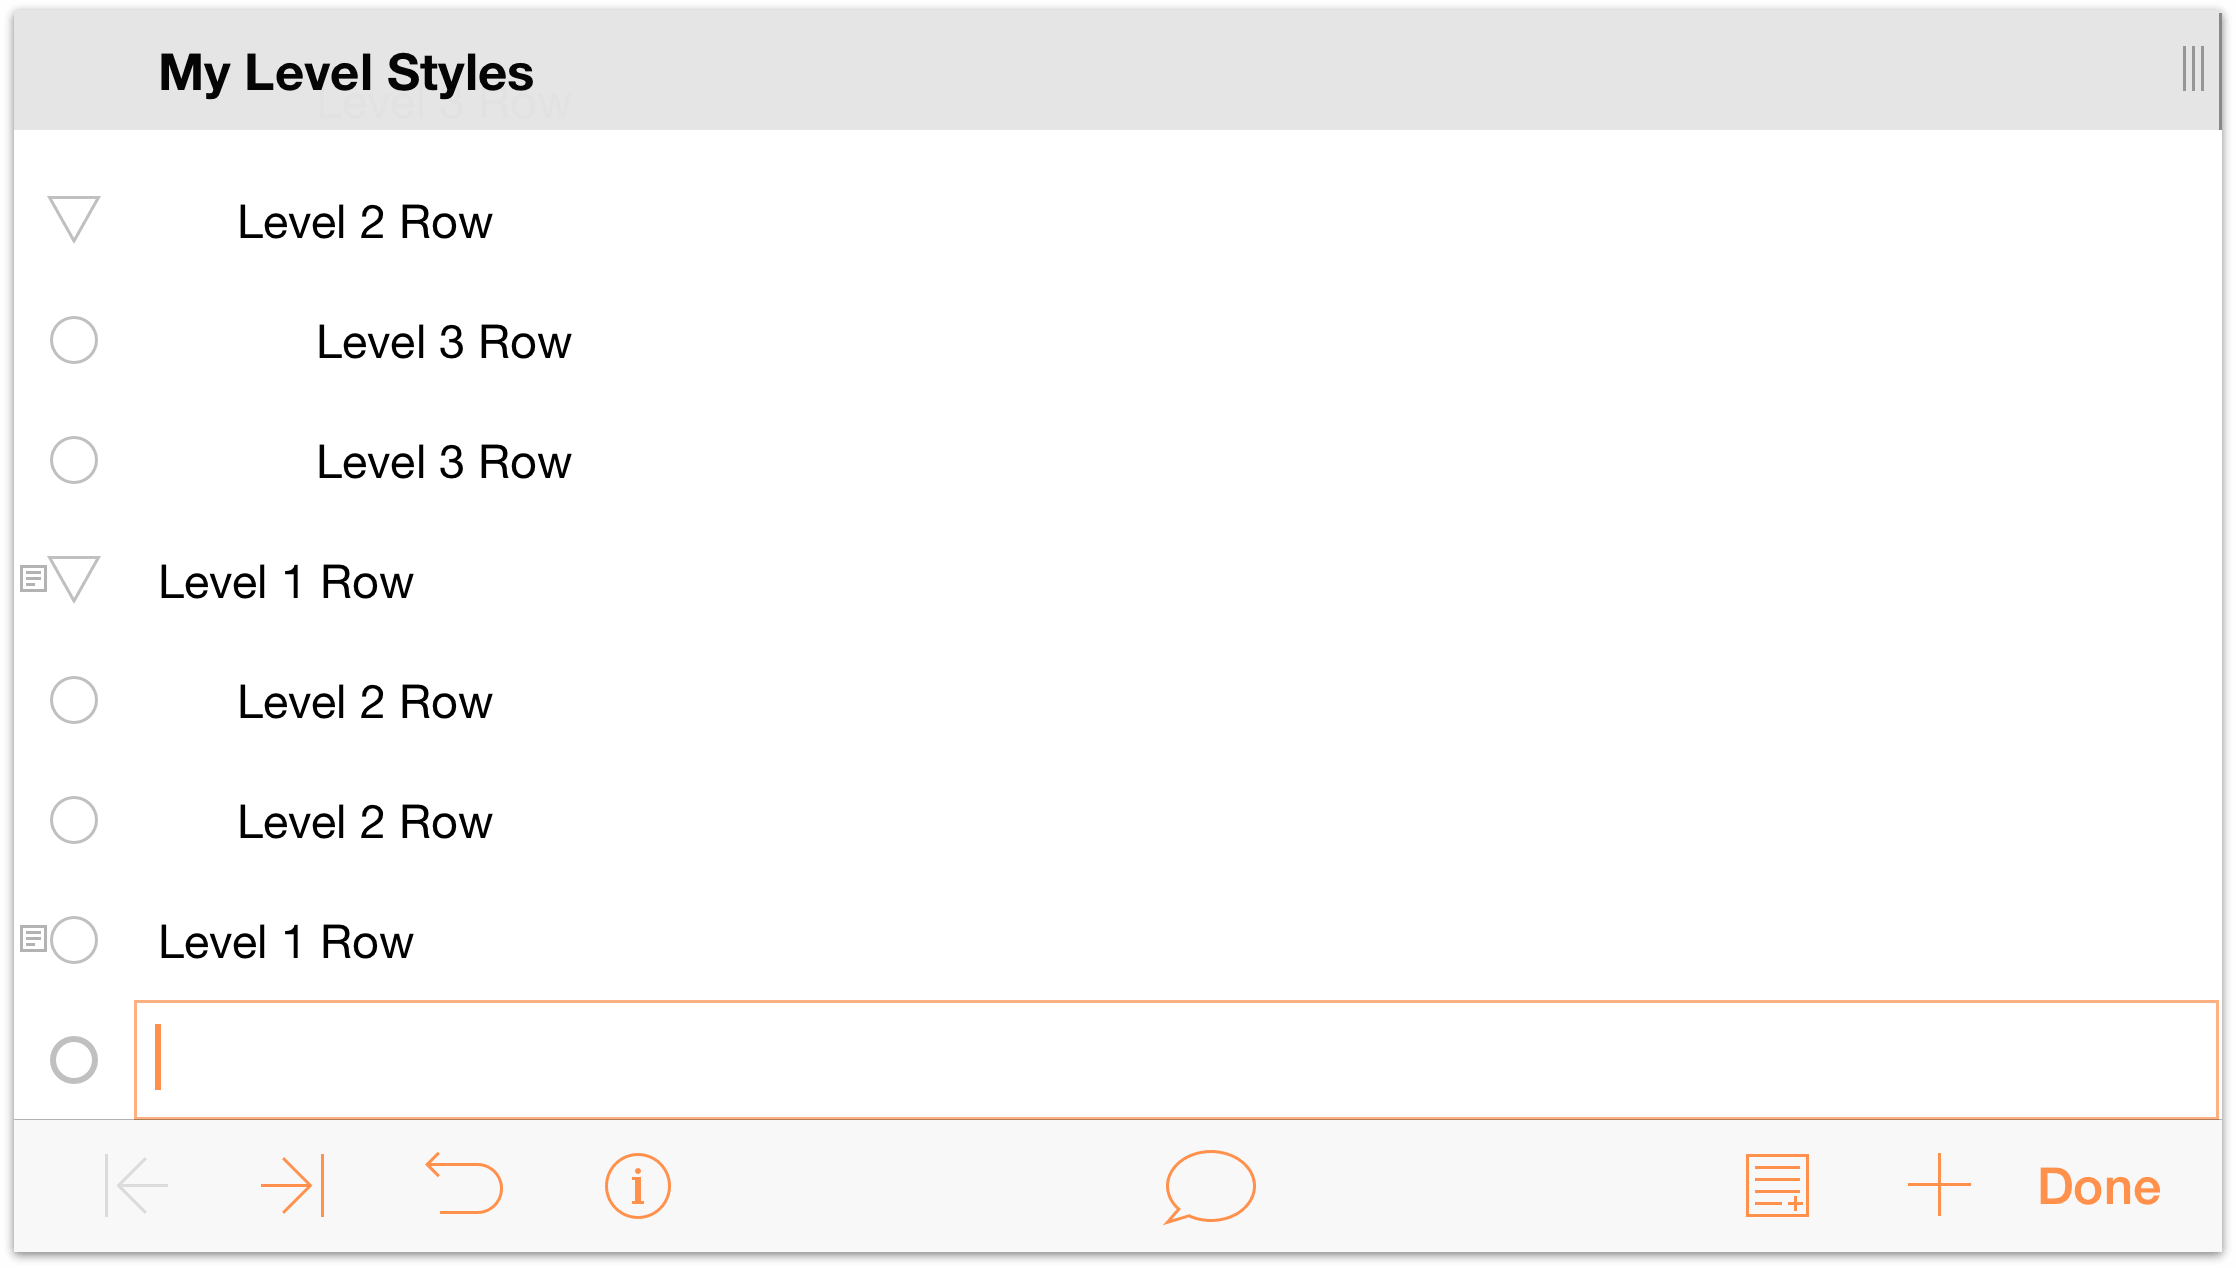
Enter the following:
- Red and press Return.
- Green and press Return.
- Blue, and then tap Done.
Your document should look like this:
To create a group from these rows, do the following:
- In the navigation bar, tap
 .
. - Tap the row handles to select the Red, Green, and Blue rows.
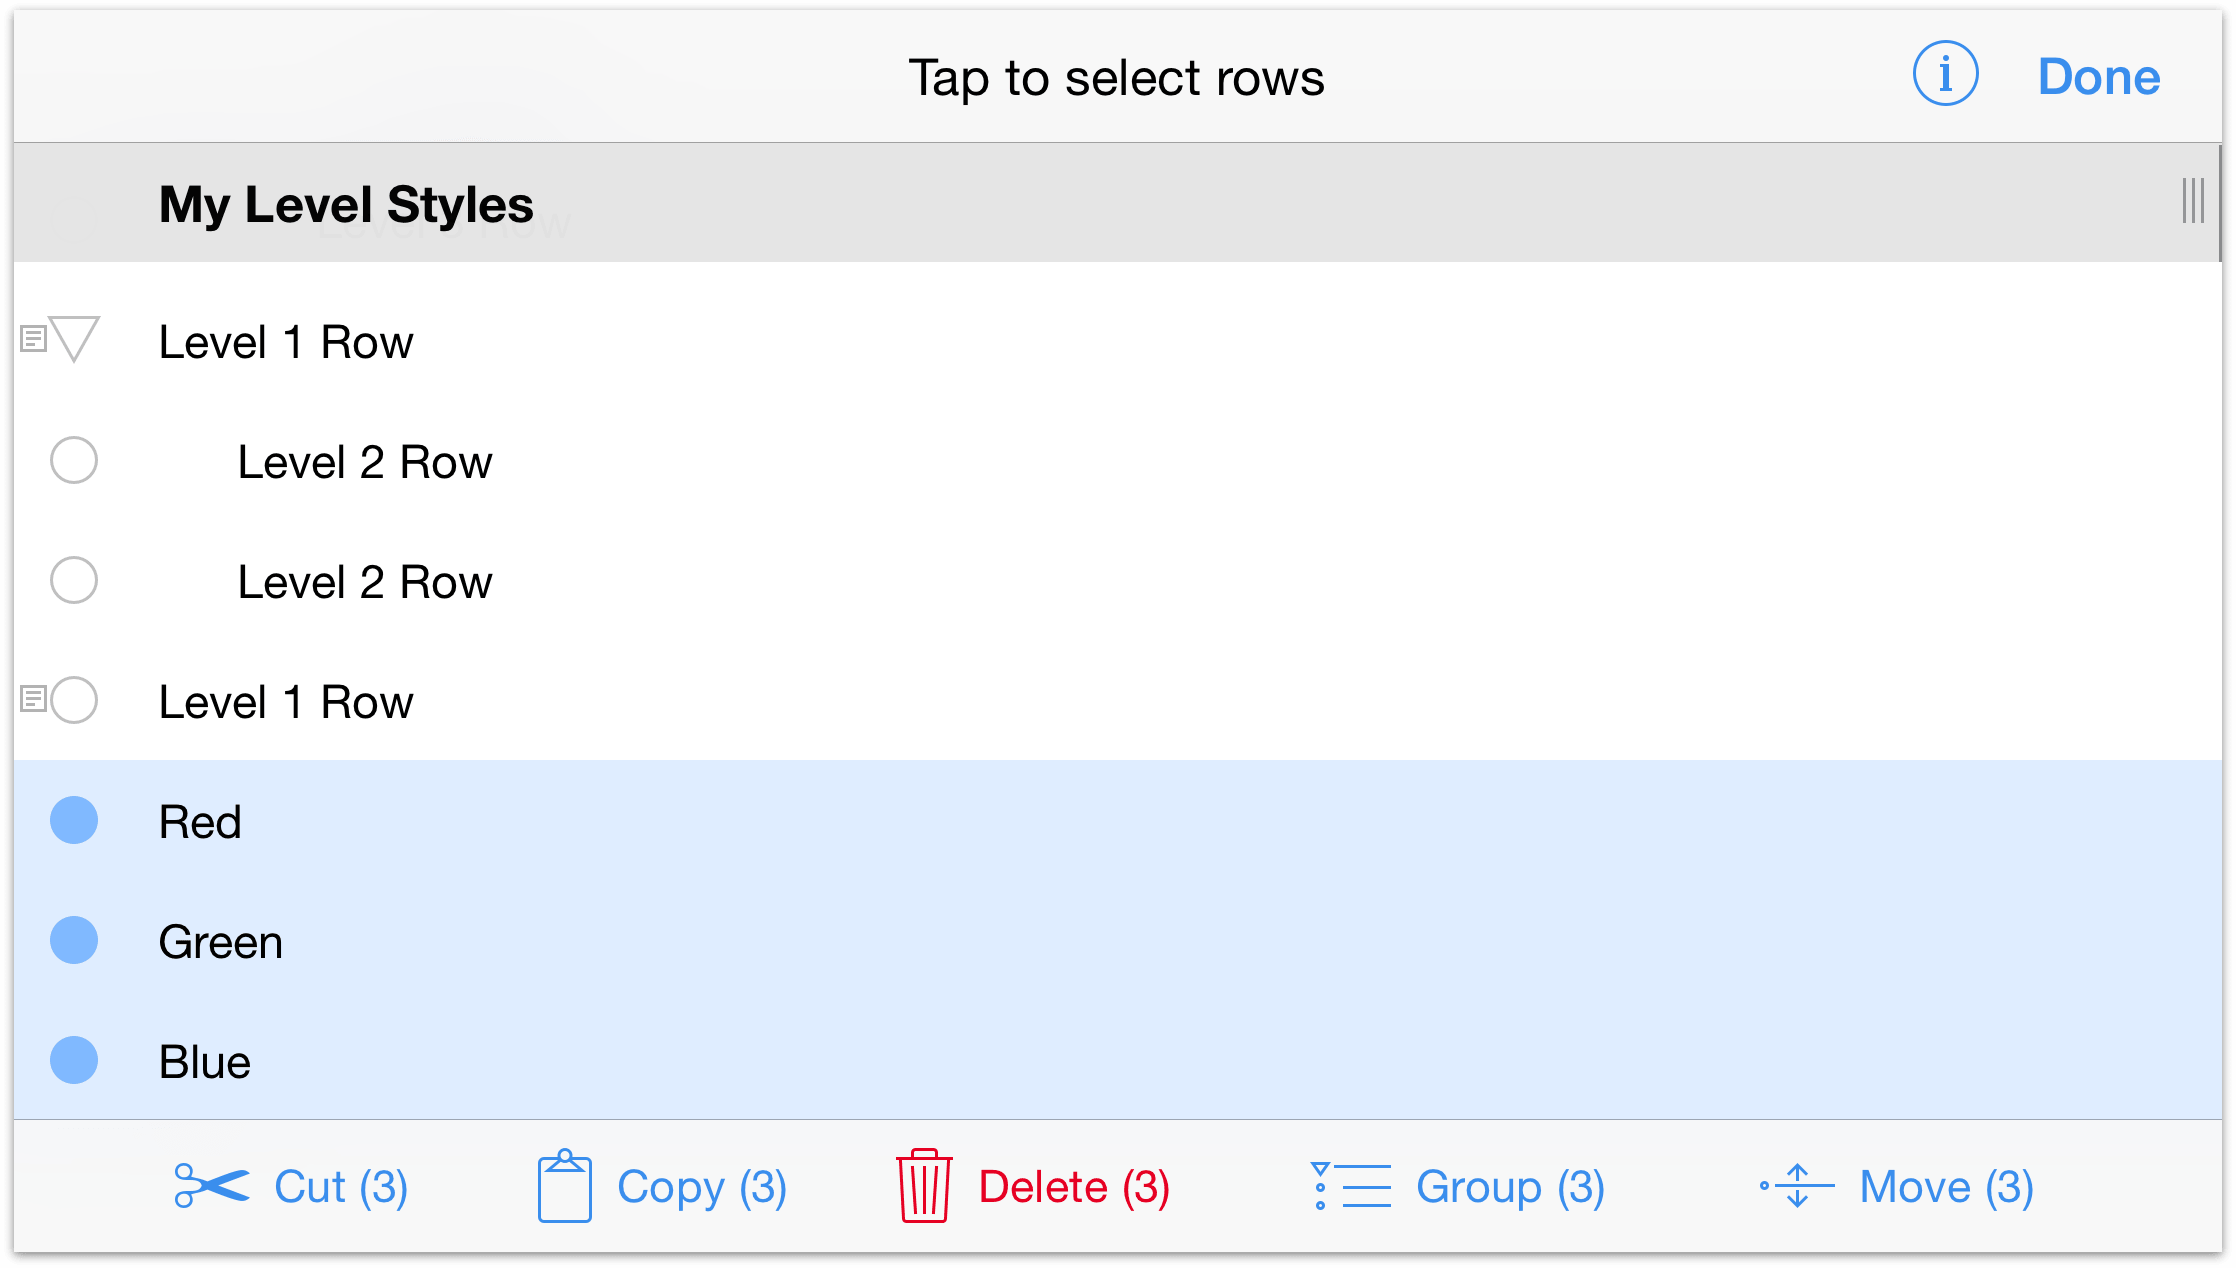
- Tap Group. When you tap the Group button, the Red, Green, and Blue rows are indented as children beneath an empty Level 1 Row.
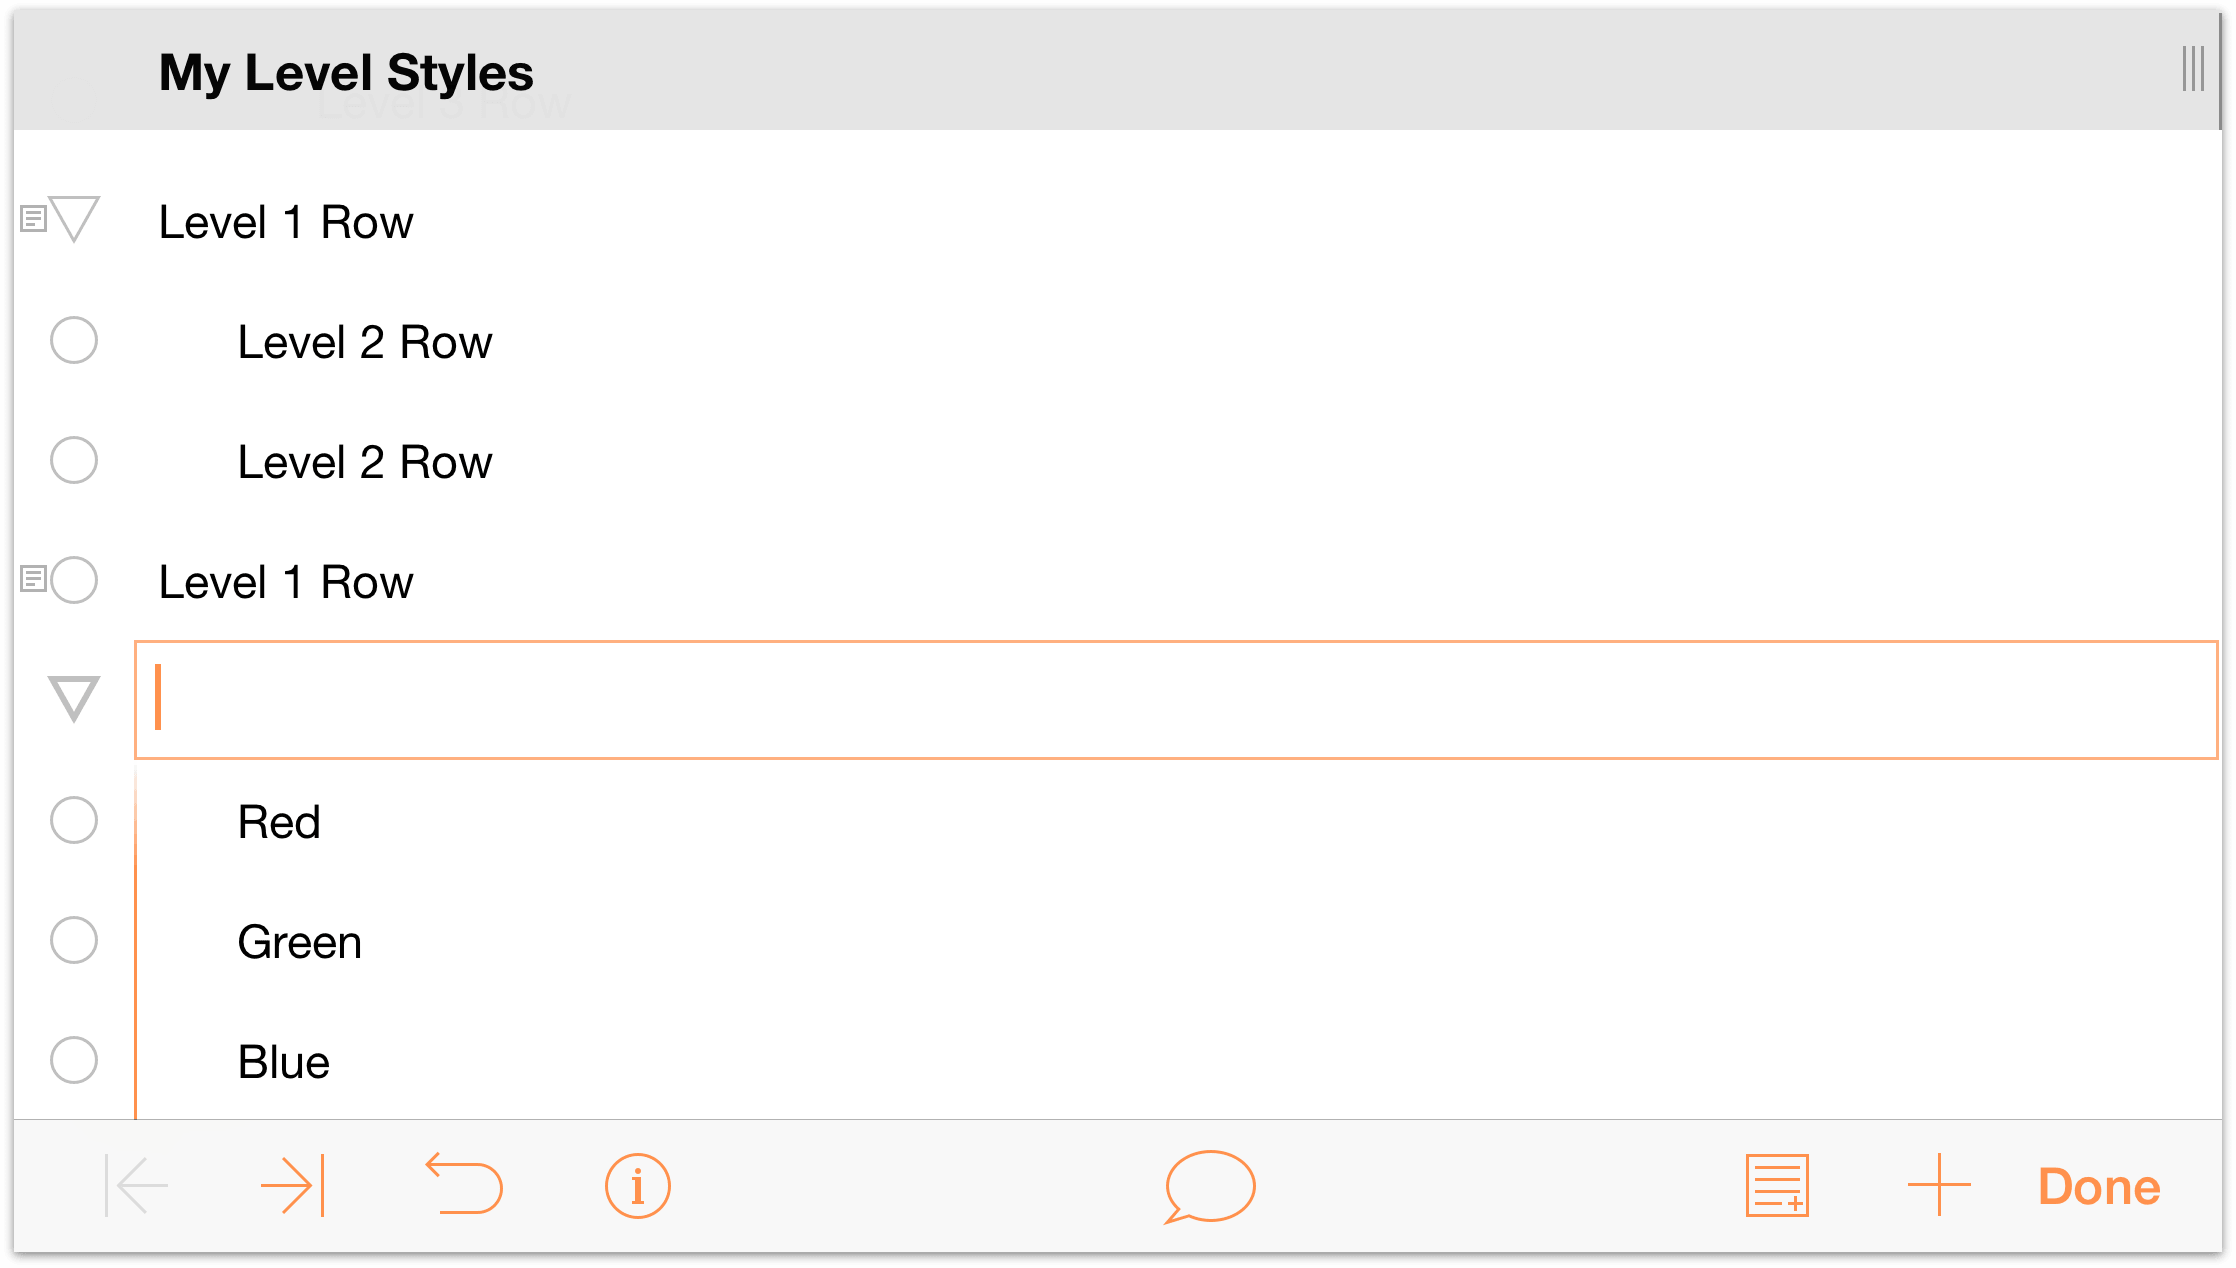
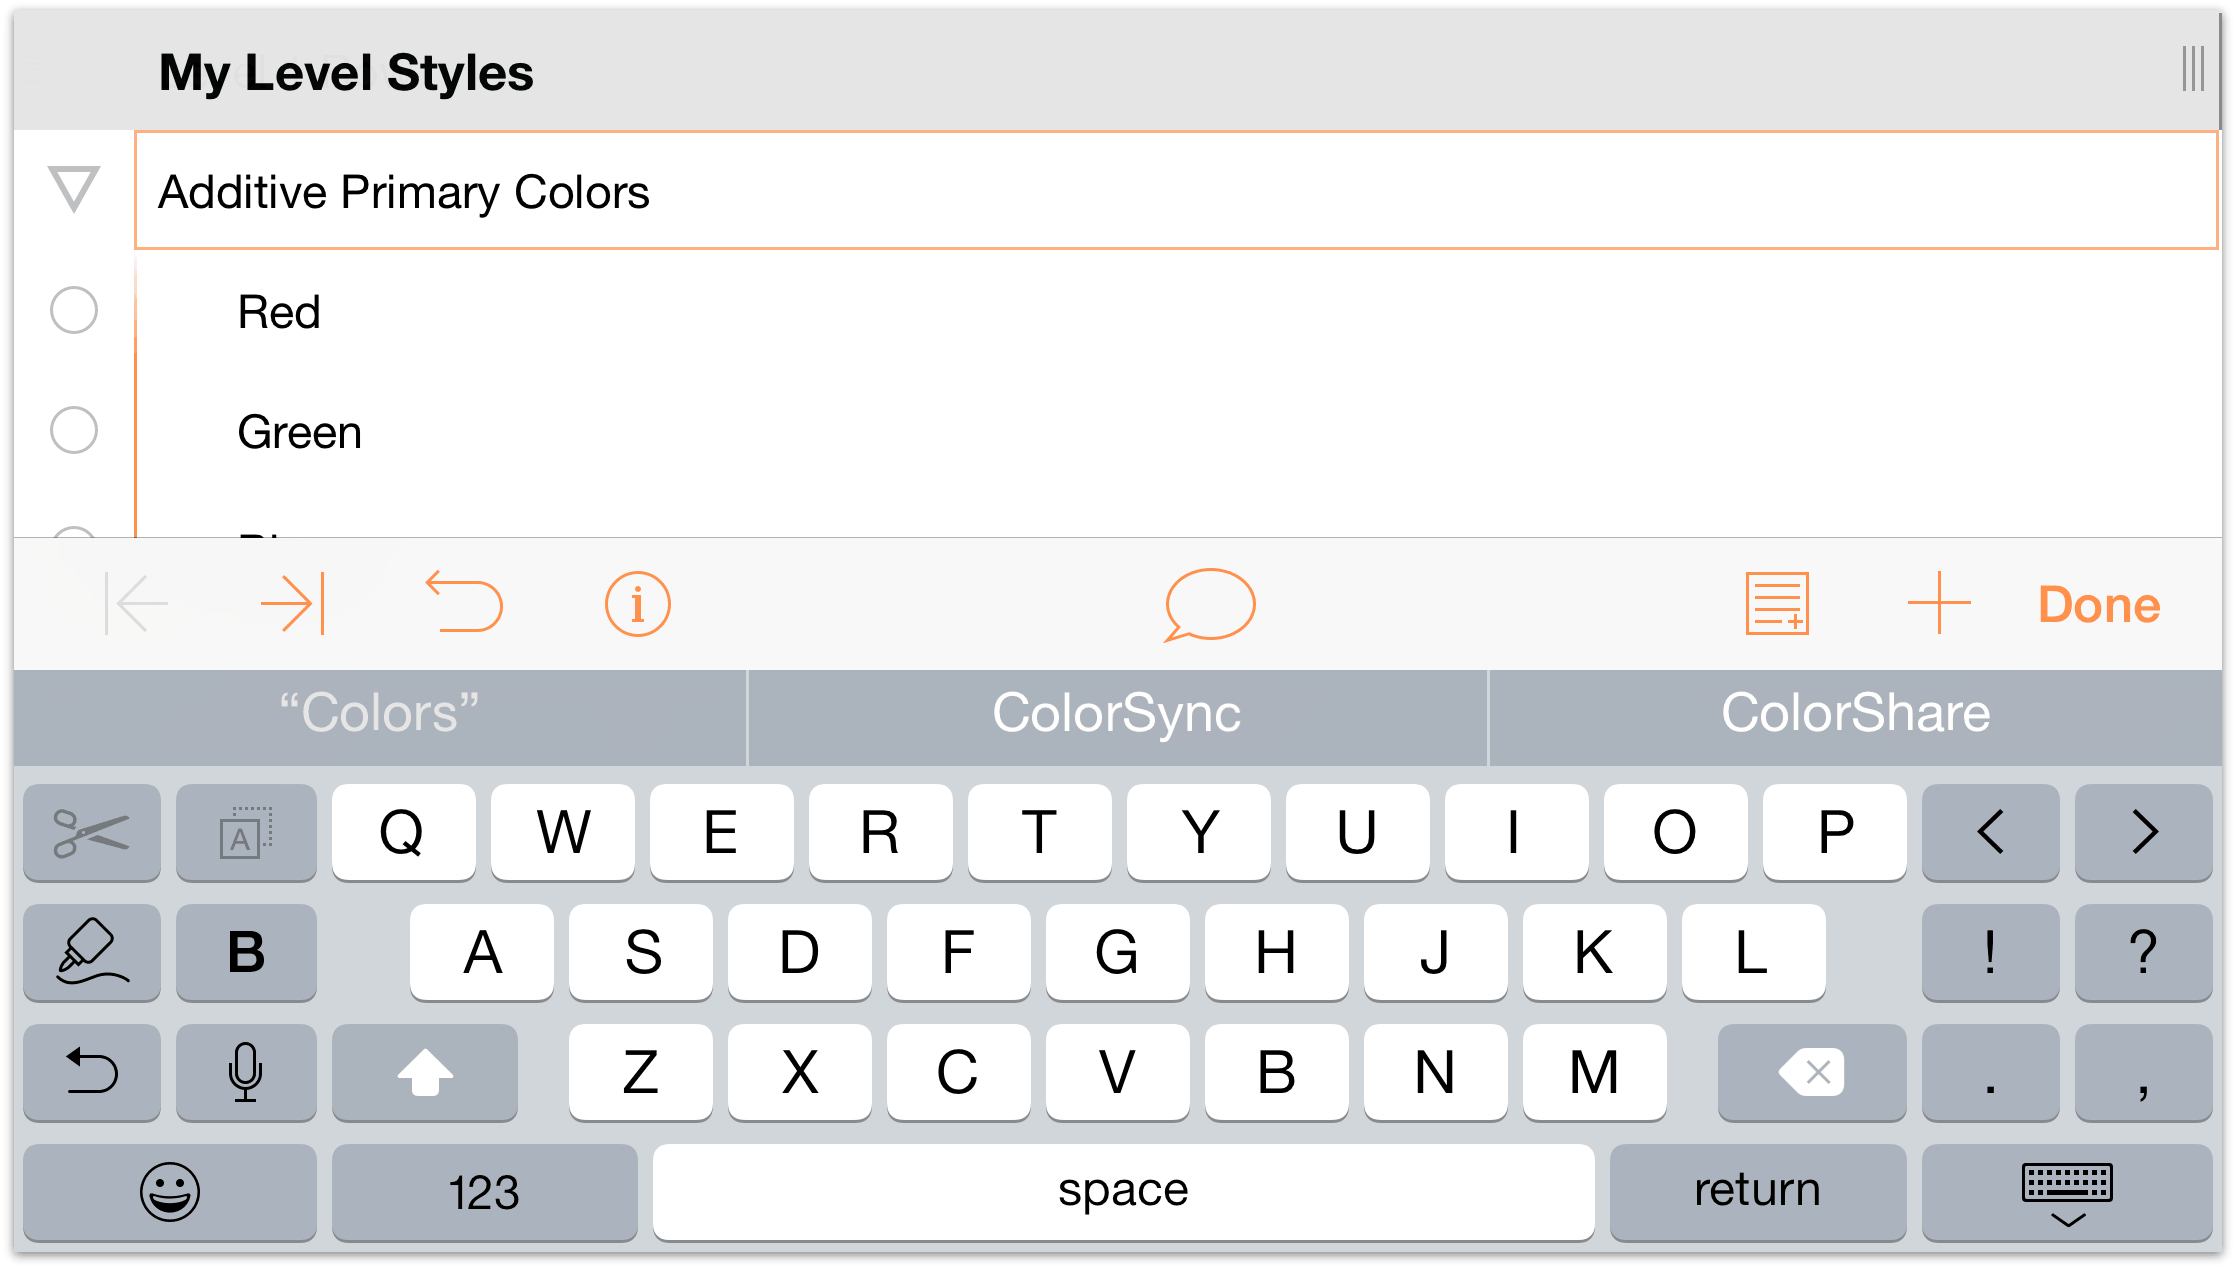
- In that new row, enter Additive Primary Colors, and then tap Done.
Note
OmniOutliner for iOS does not have an Ungroup option as part of the Editing tools. If you need to ungroup some rows, use the Editing tools to select and move the rows Below the parent row. Then, if needed, delete the old parent row.
Moving Rows within Your Outline
As you start to organize your list of information, you’ll undoubtedly find the need to move things around. After all, that’s why you’re making lists anyway, right? To track and organize all of the fine details.
OmniOutliner offers two options for moving rows around within your outline.
- You can press and hold on a row and then drag it to where you’d like it in the outline.
- Or you can use the Editing tools to select and move the rows. This is particularly useful if you have multiple rows (contiguous or non-contiguous) that you need to move.
- Start by tapping
 to access the Editing tools.
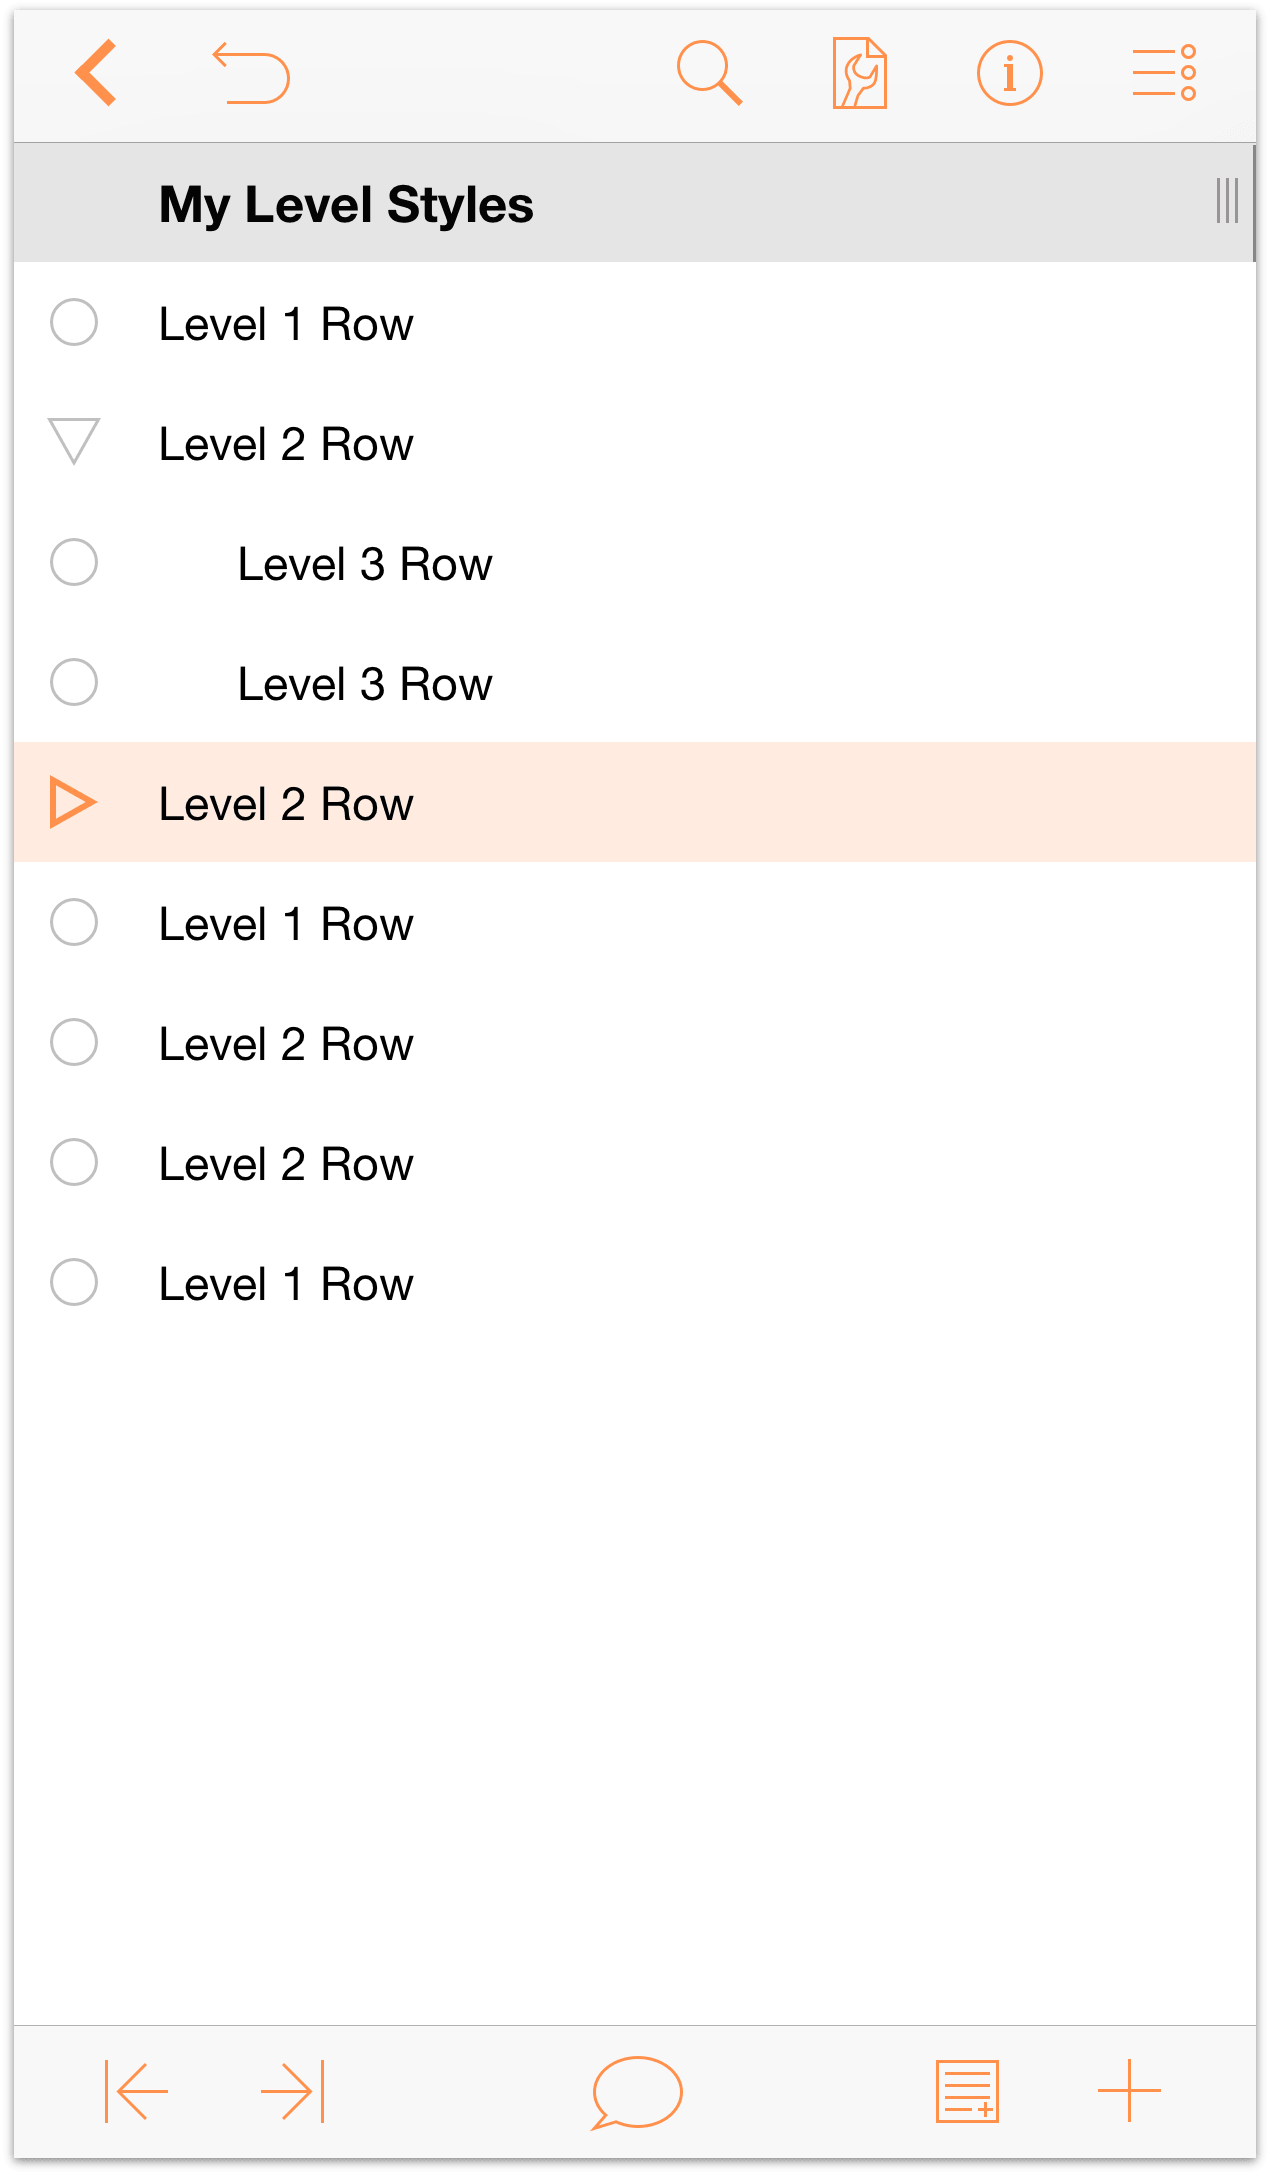
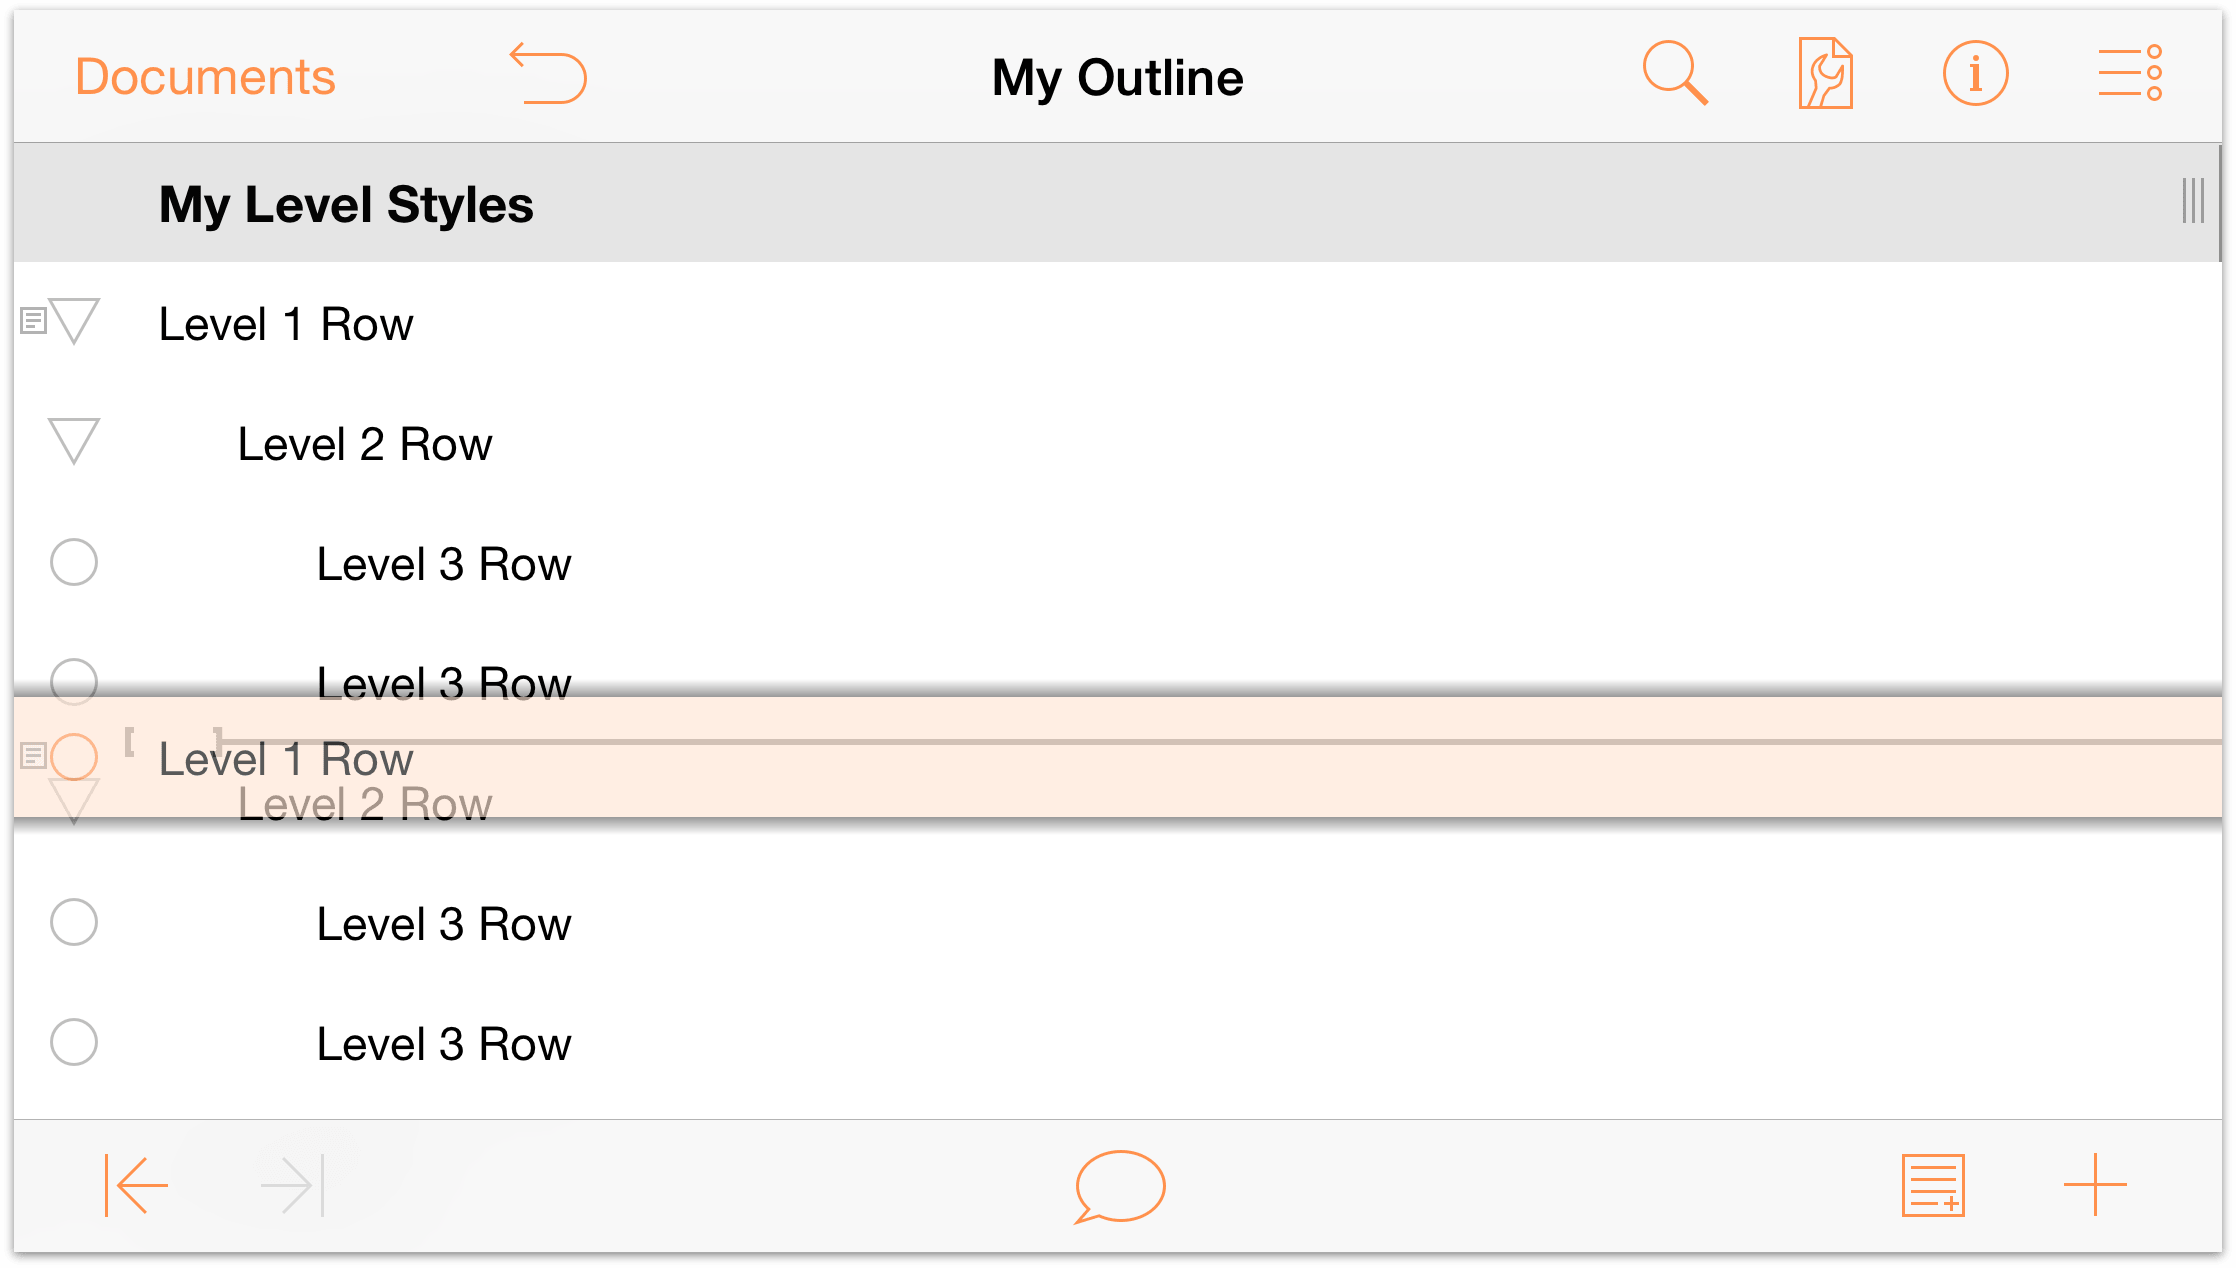
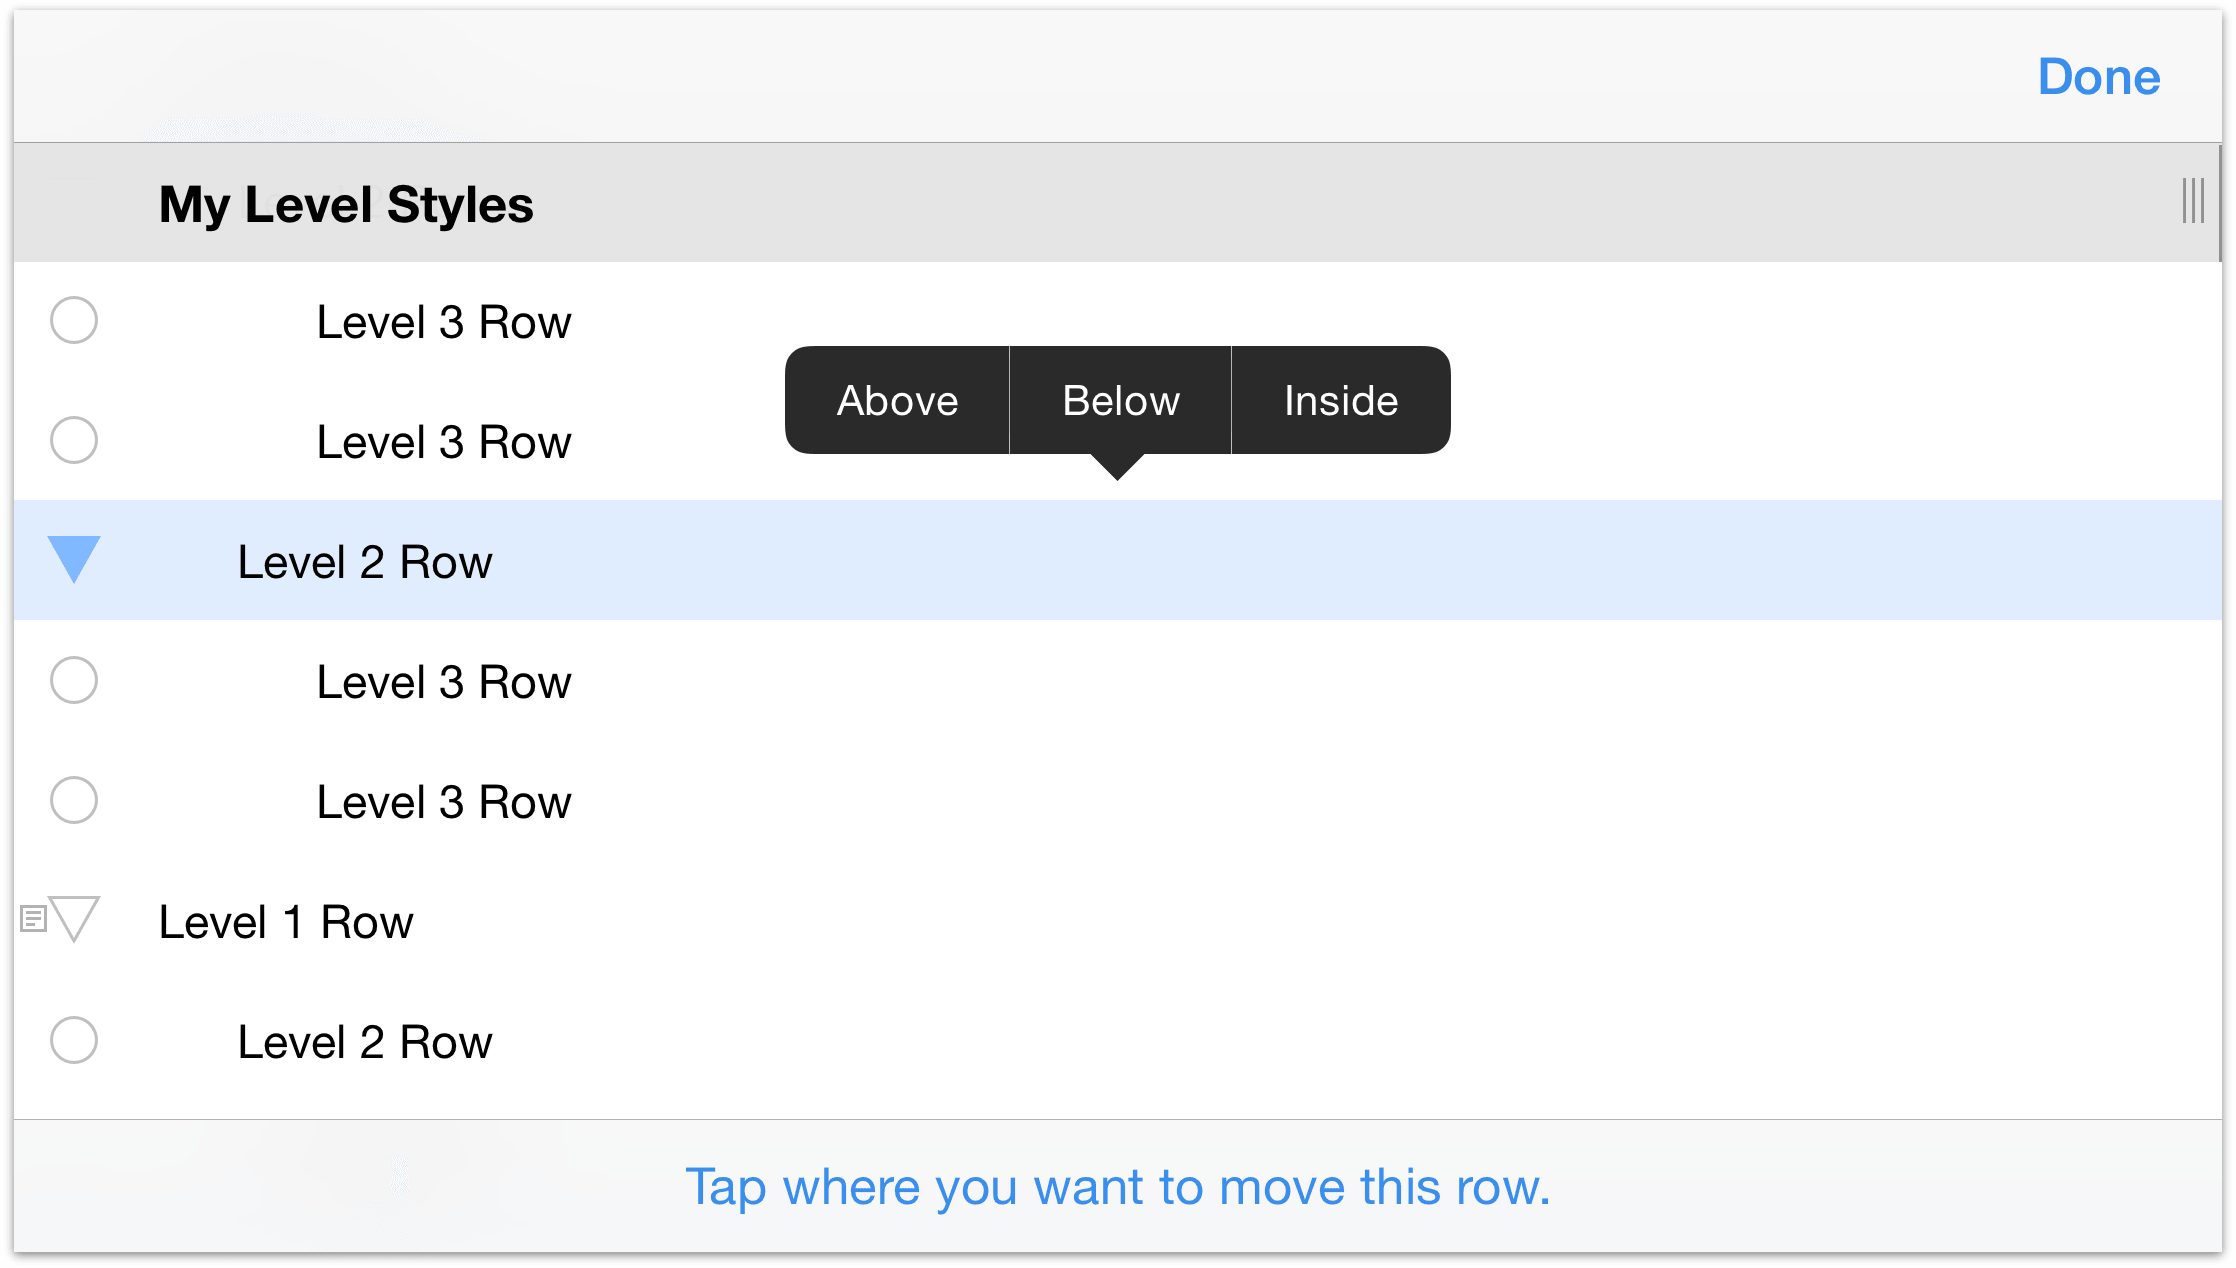
 - Tap to select very last Level 1 Row in the outline (the one above Additive Primary Colors), and then tap Move in the Editing toolbar.
As the note at the bottom of the screen says, “Tap where you want to move this row.”. Scroll up in the outline and then tap to select the second Level 2 Row.
The row you tap highlights in blue, and a context menu appears above the row with options to insert the row you’re moving Above, Below, or Inside the row you have chosen.
Tap Above, which inserts the Level 1 Row above the Level 2 Row.
- Start by tapping
After inserting the Level 1 Row, you’ll notice that it and the Level 2 Row are on the same level.
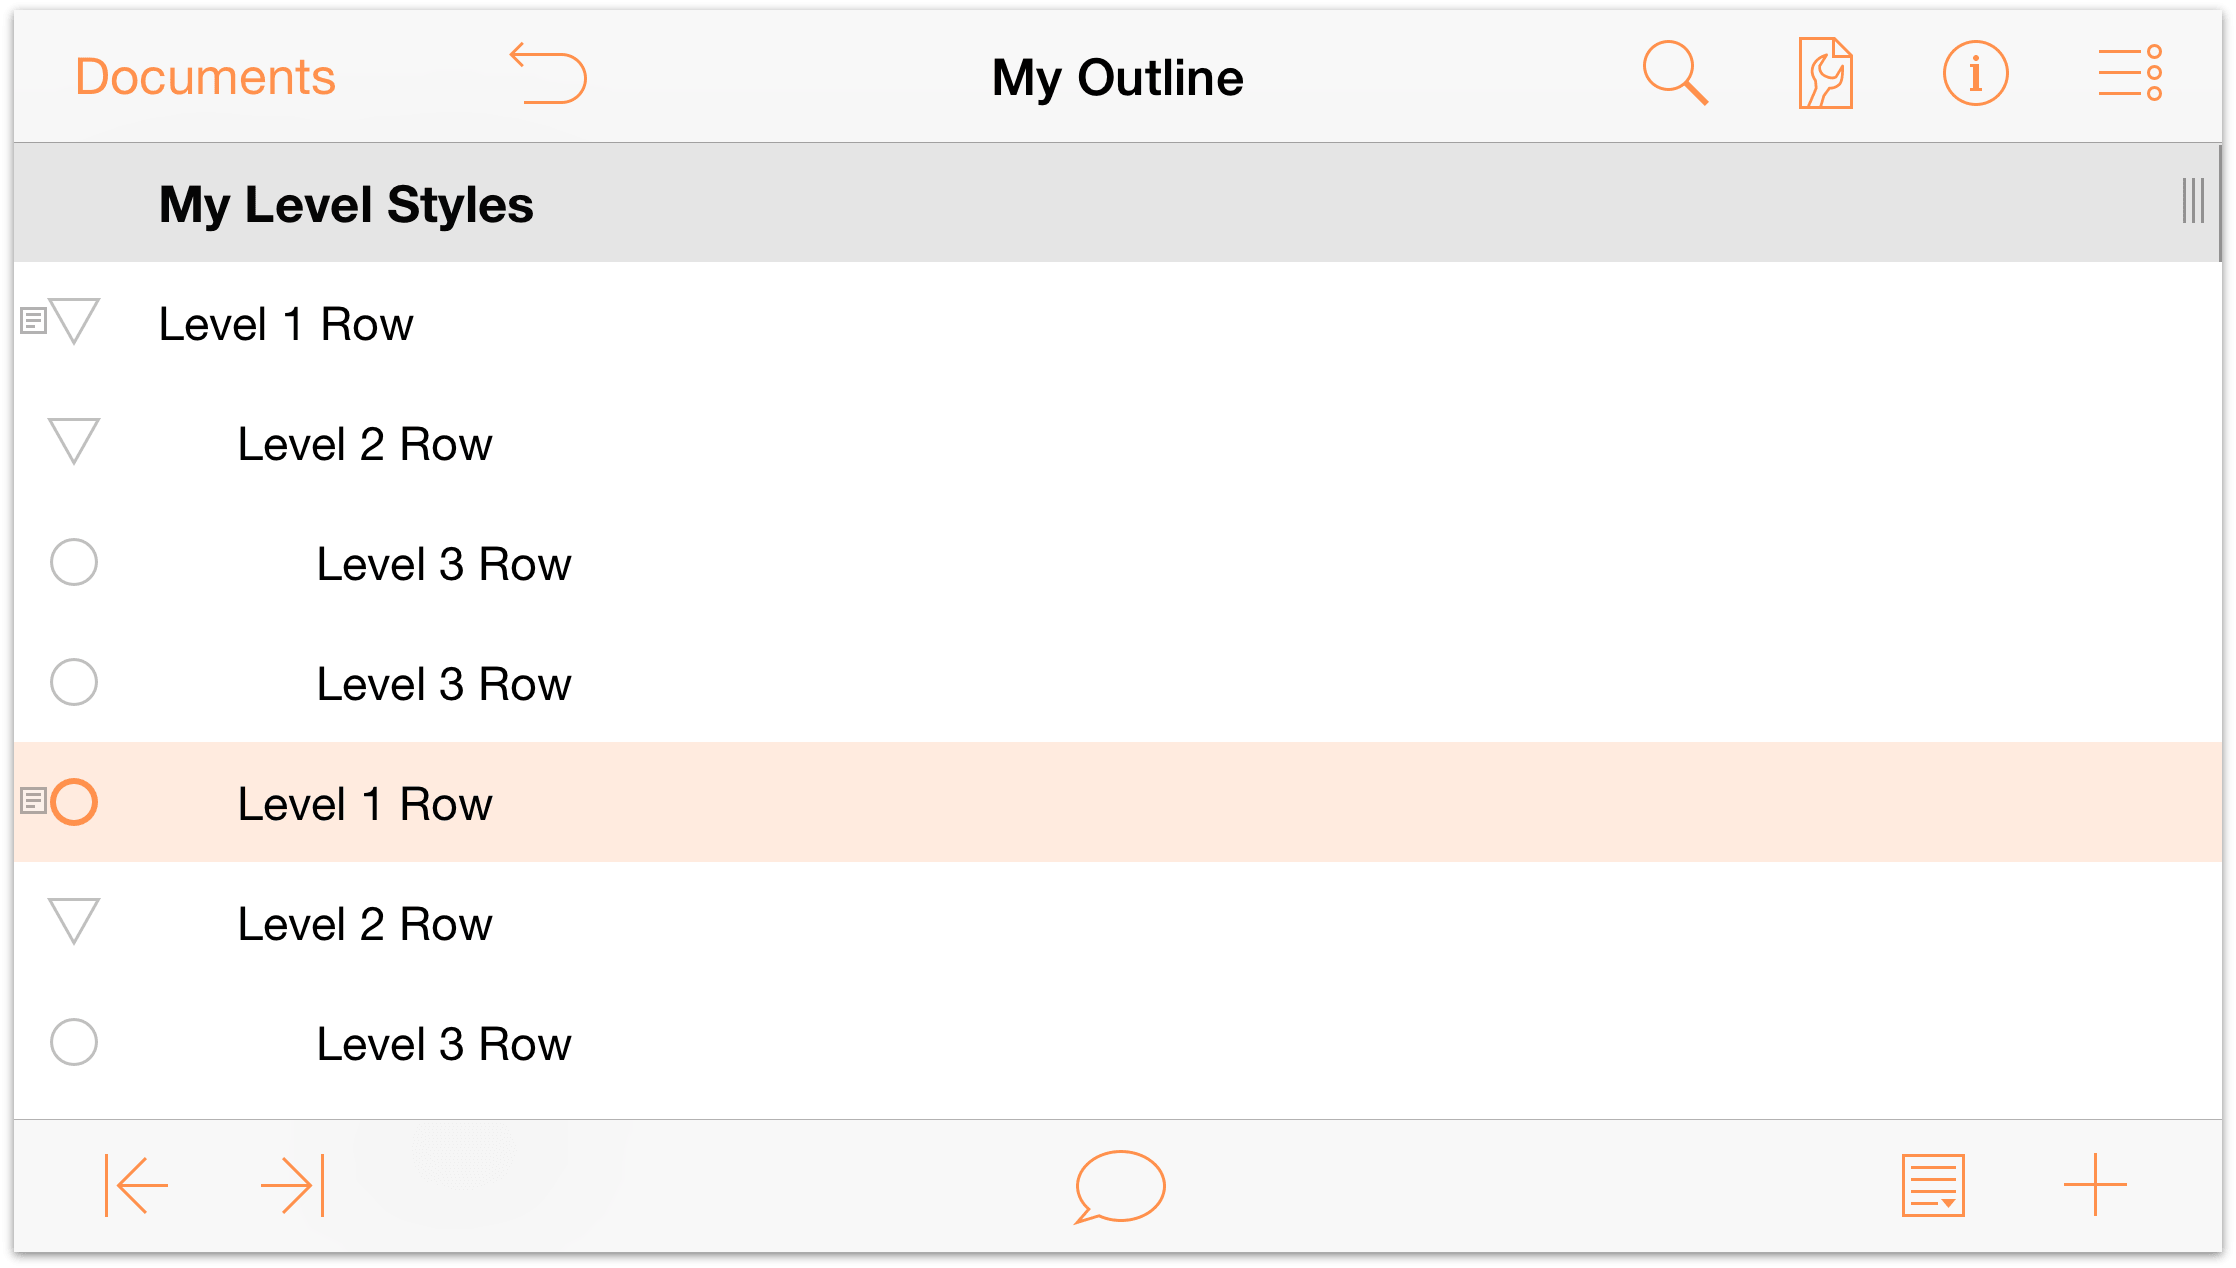
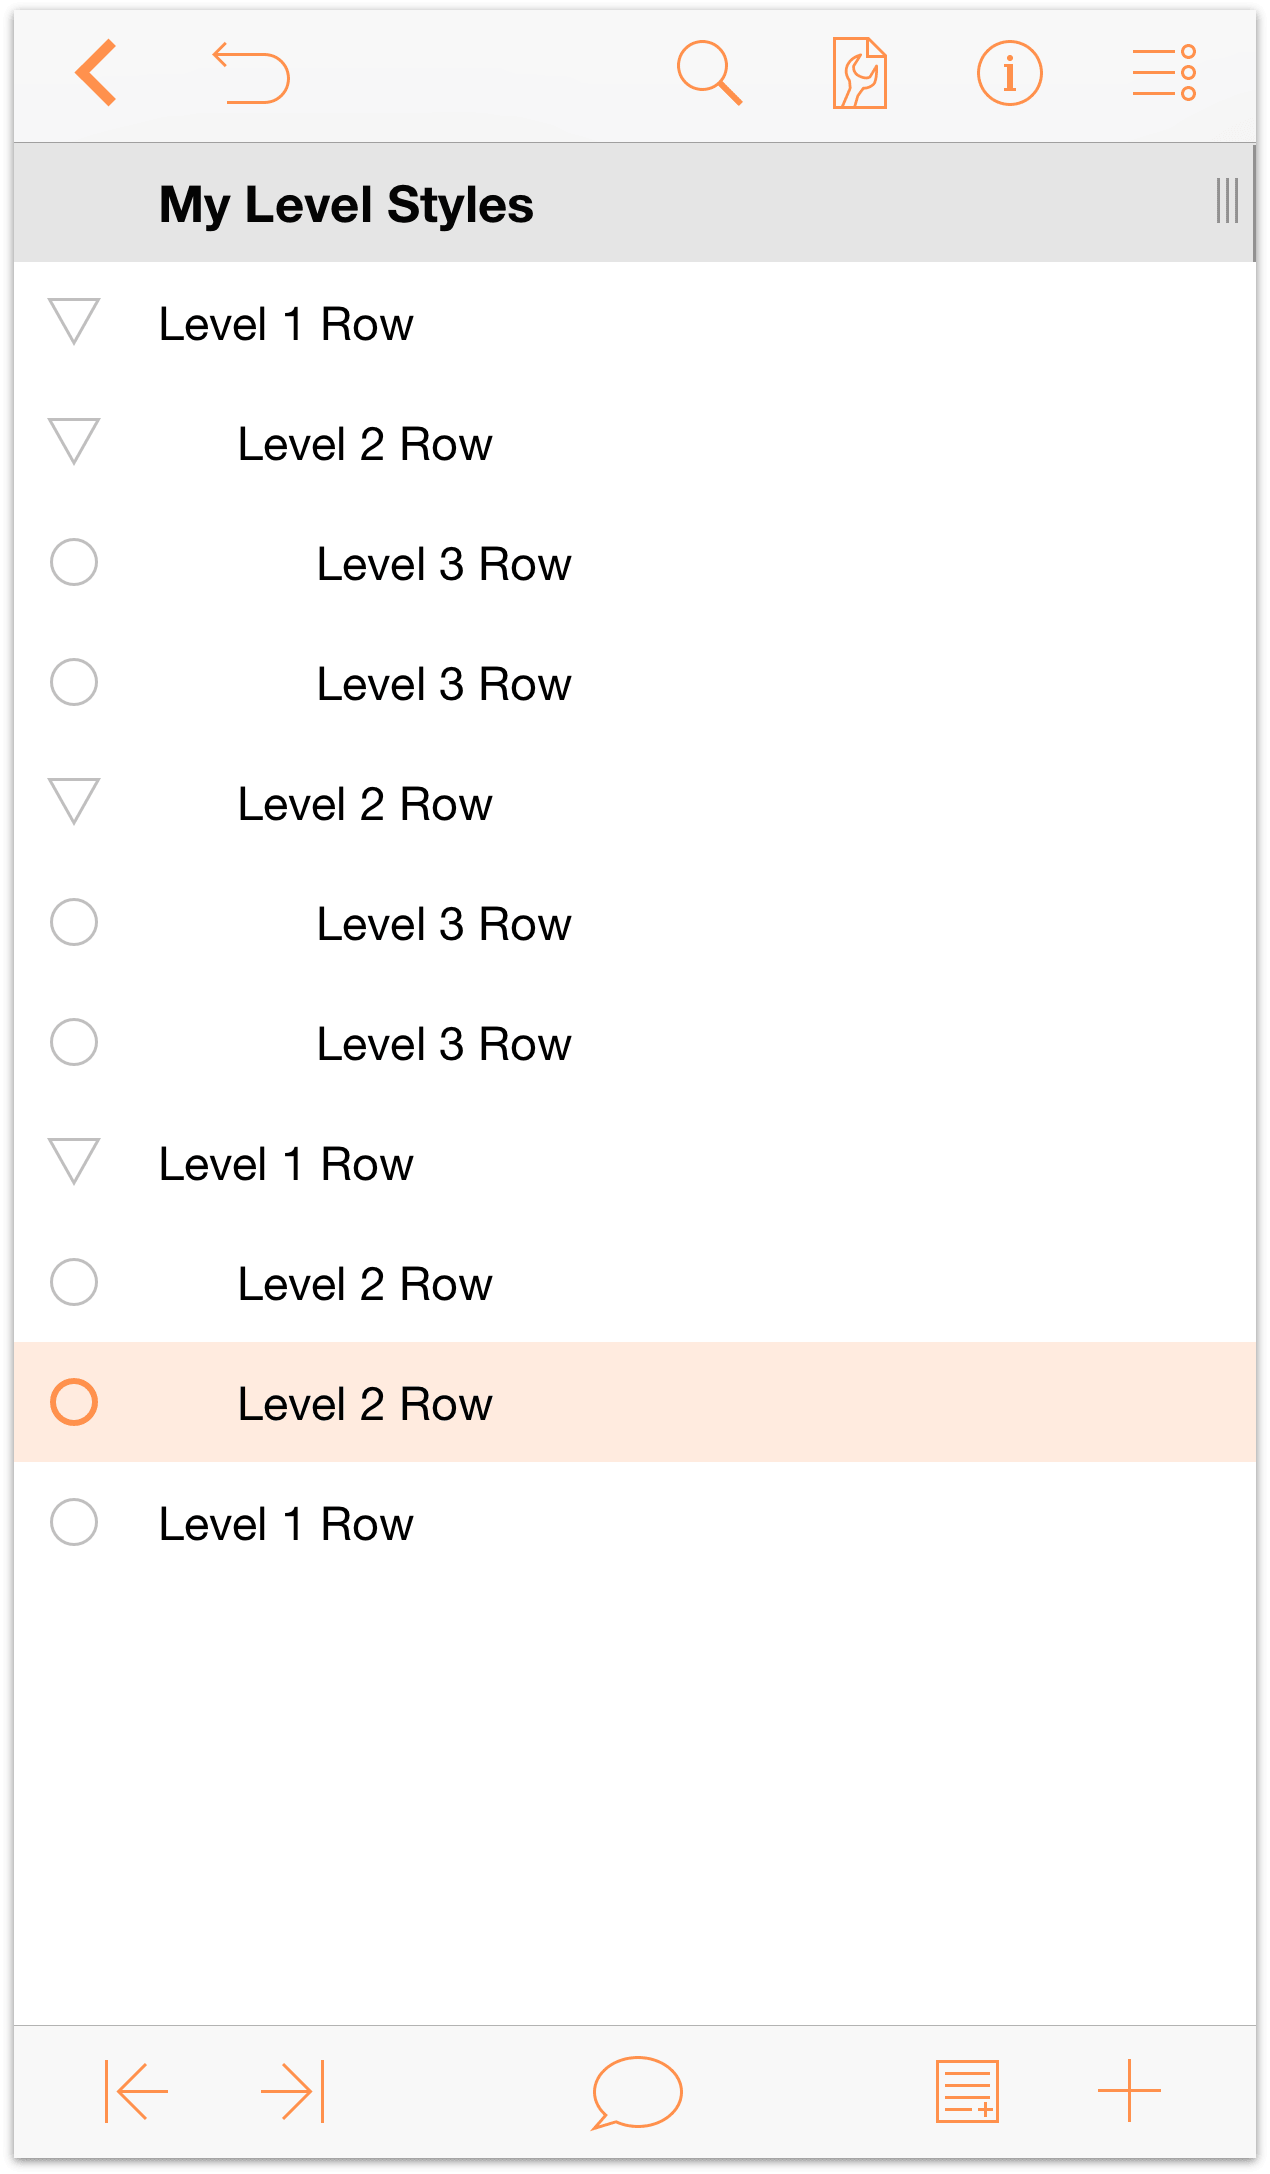
To make this outline more uniform, let’s turn the Level 2 Row (and its children) child rows of the Level 1 Row. Tap to select the Level 1 Row, and then tap ![]() . This moves the Level 1 Row out one level and, in the process, turns the Level 2 Row and the two Level 3 Rows its children.
. This moves the Level 1 Row out one level and, in the process, turns the Level 2 Row and the two Level 3 Rows its children.
As you can see, both the Level 1 Row and Level 2 Row have a disclosure triangle as their row handle. Tap the disclosure triangles to familiarize yourself with how these work.

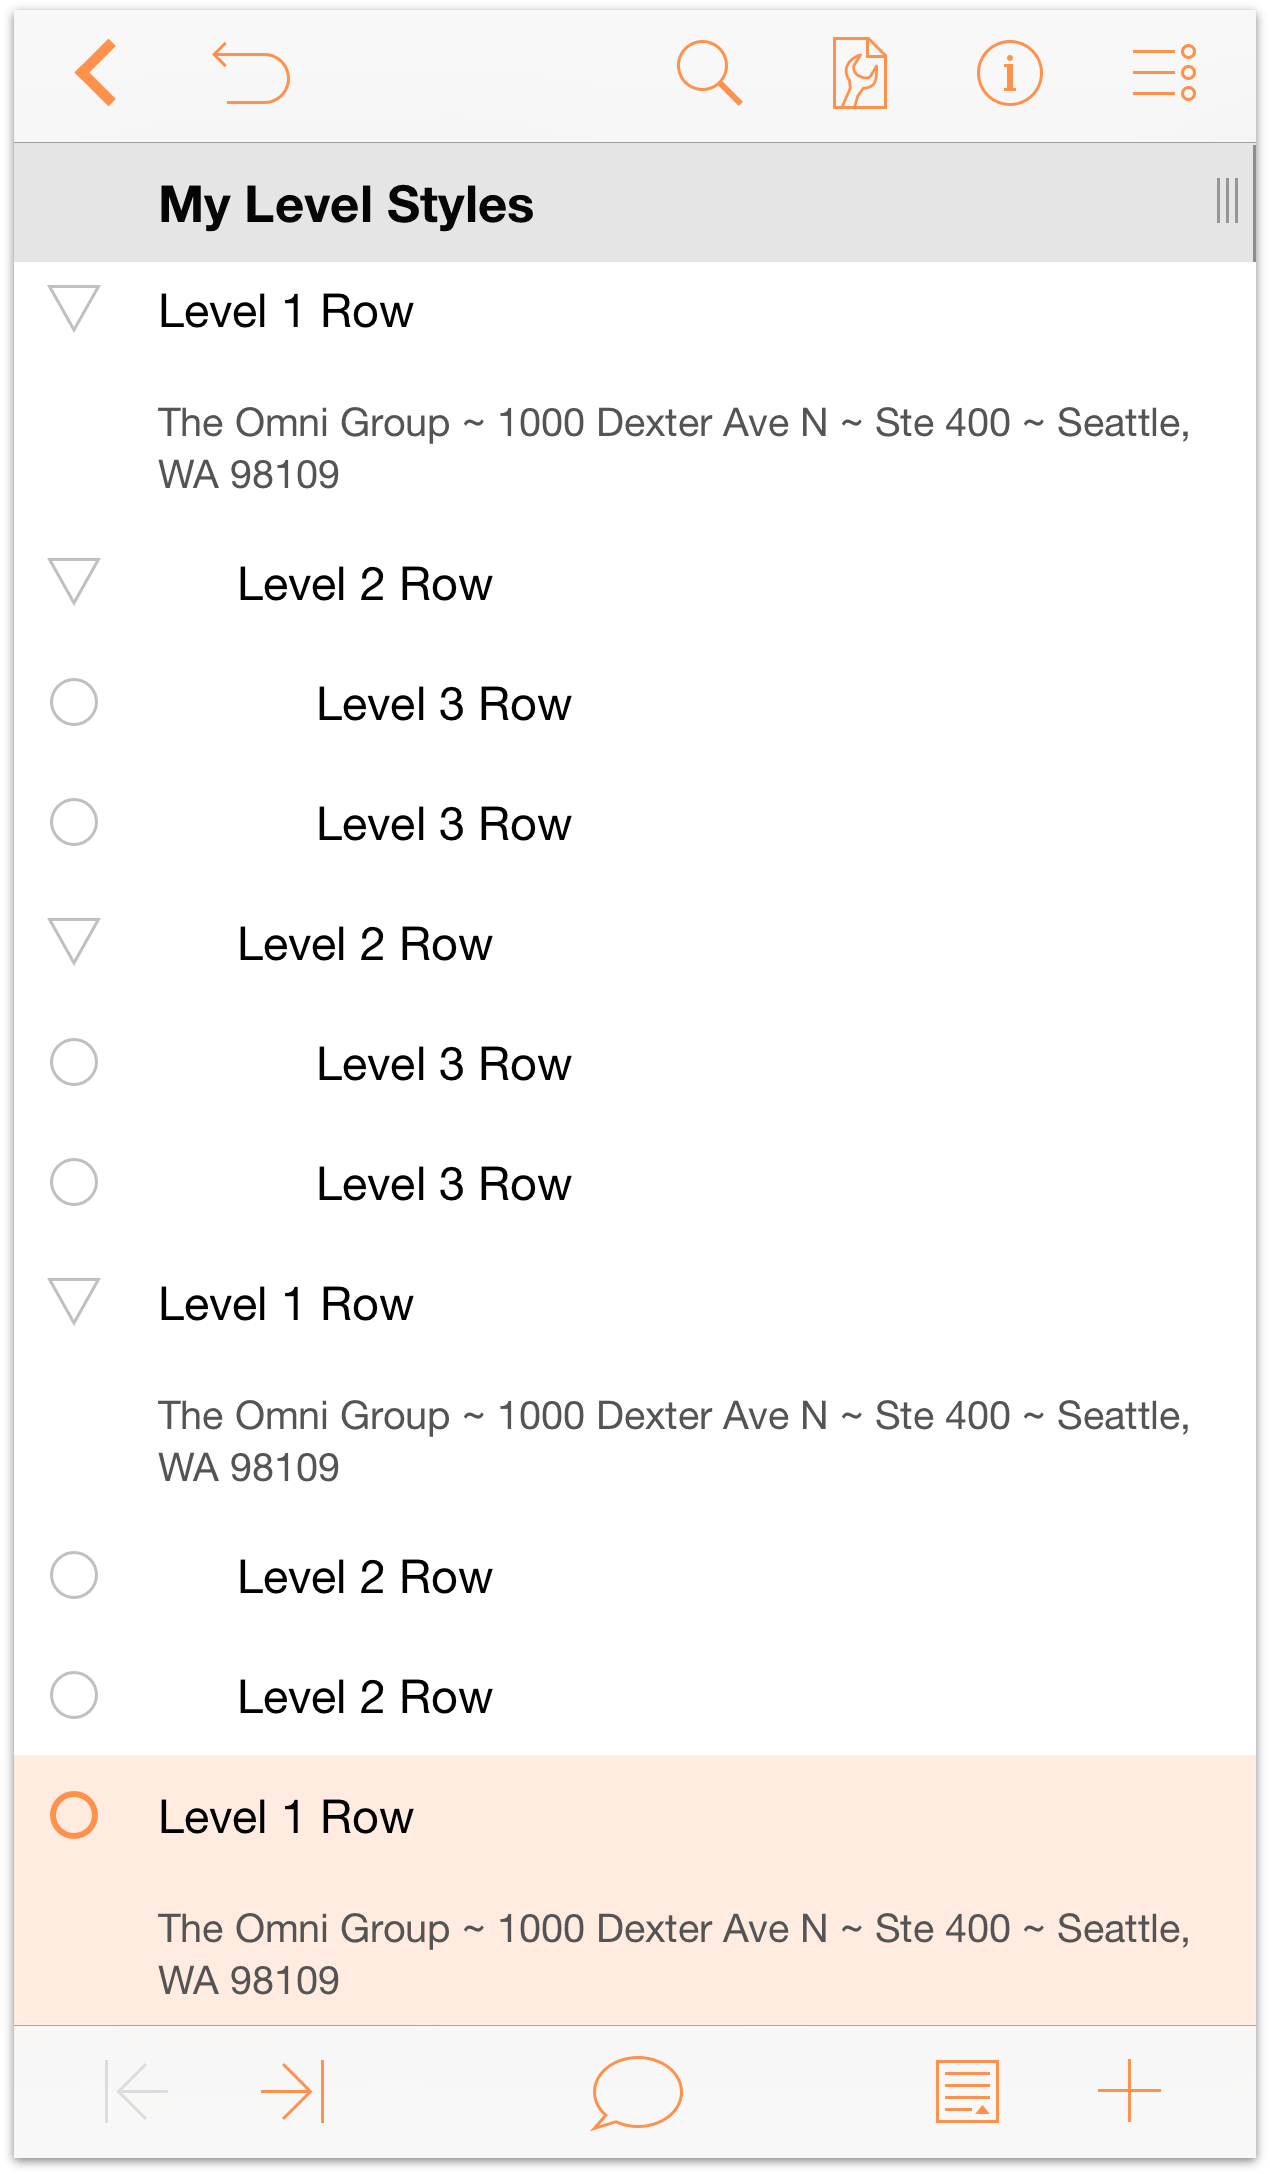
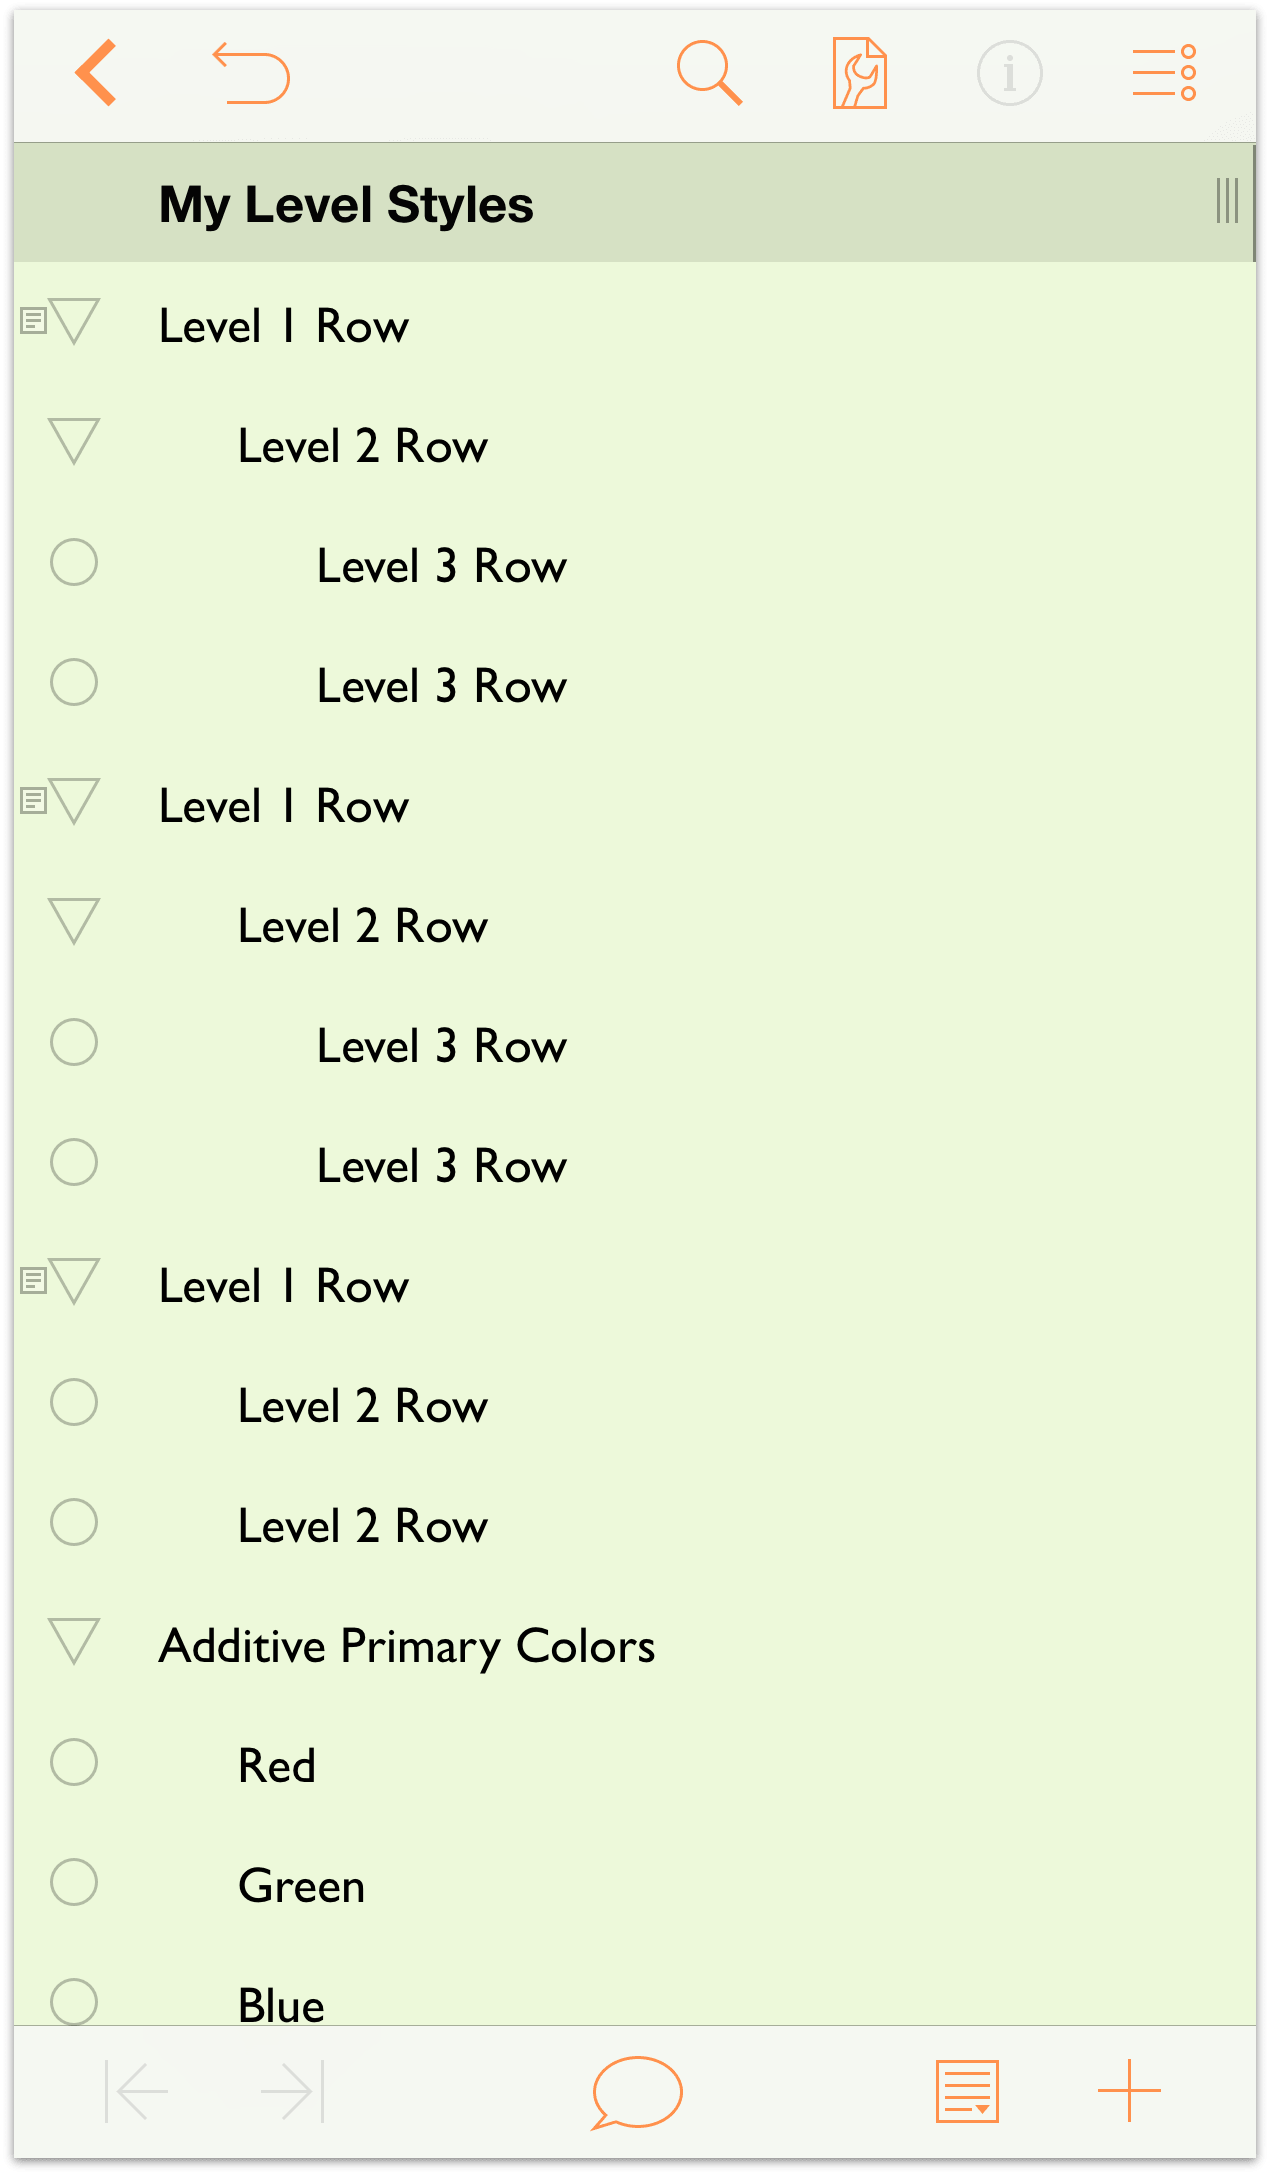
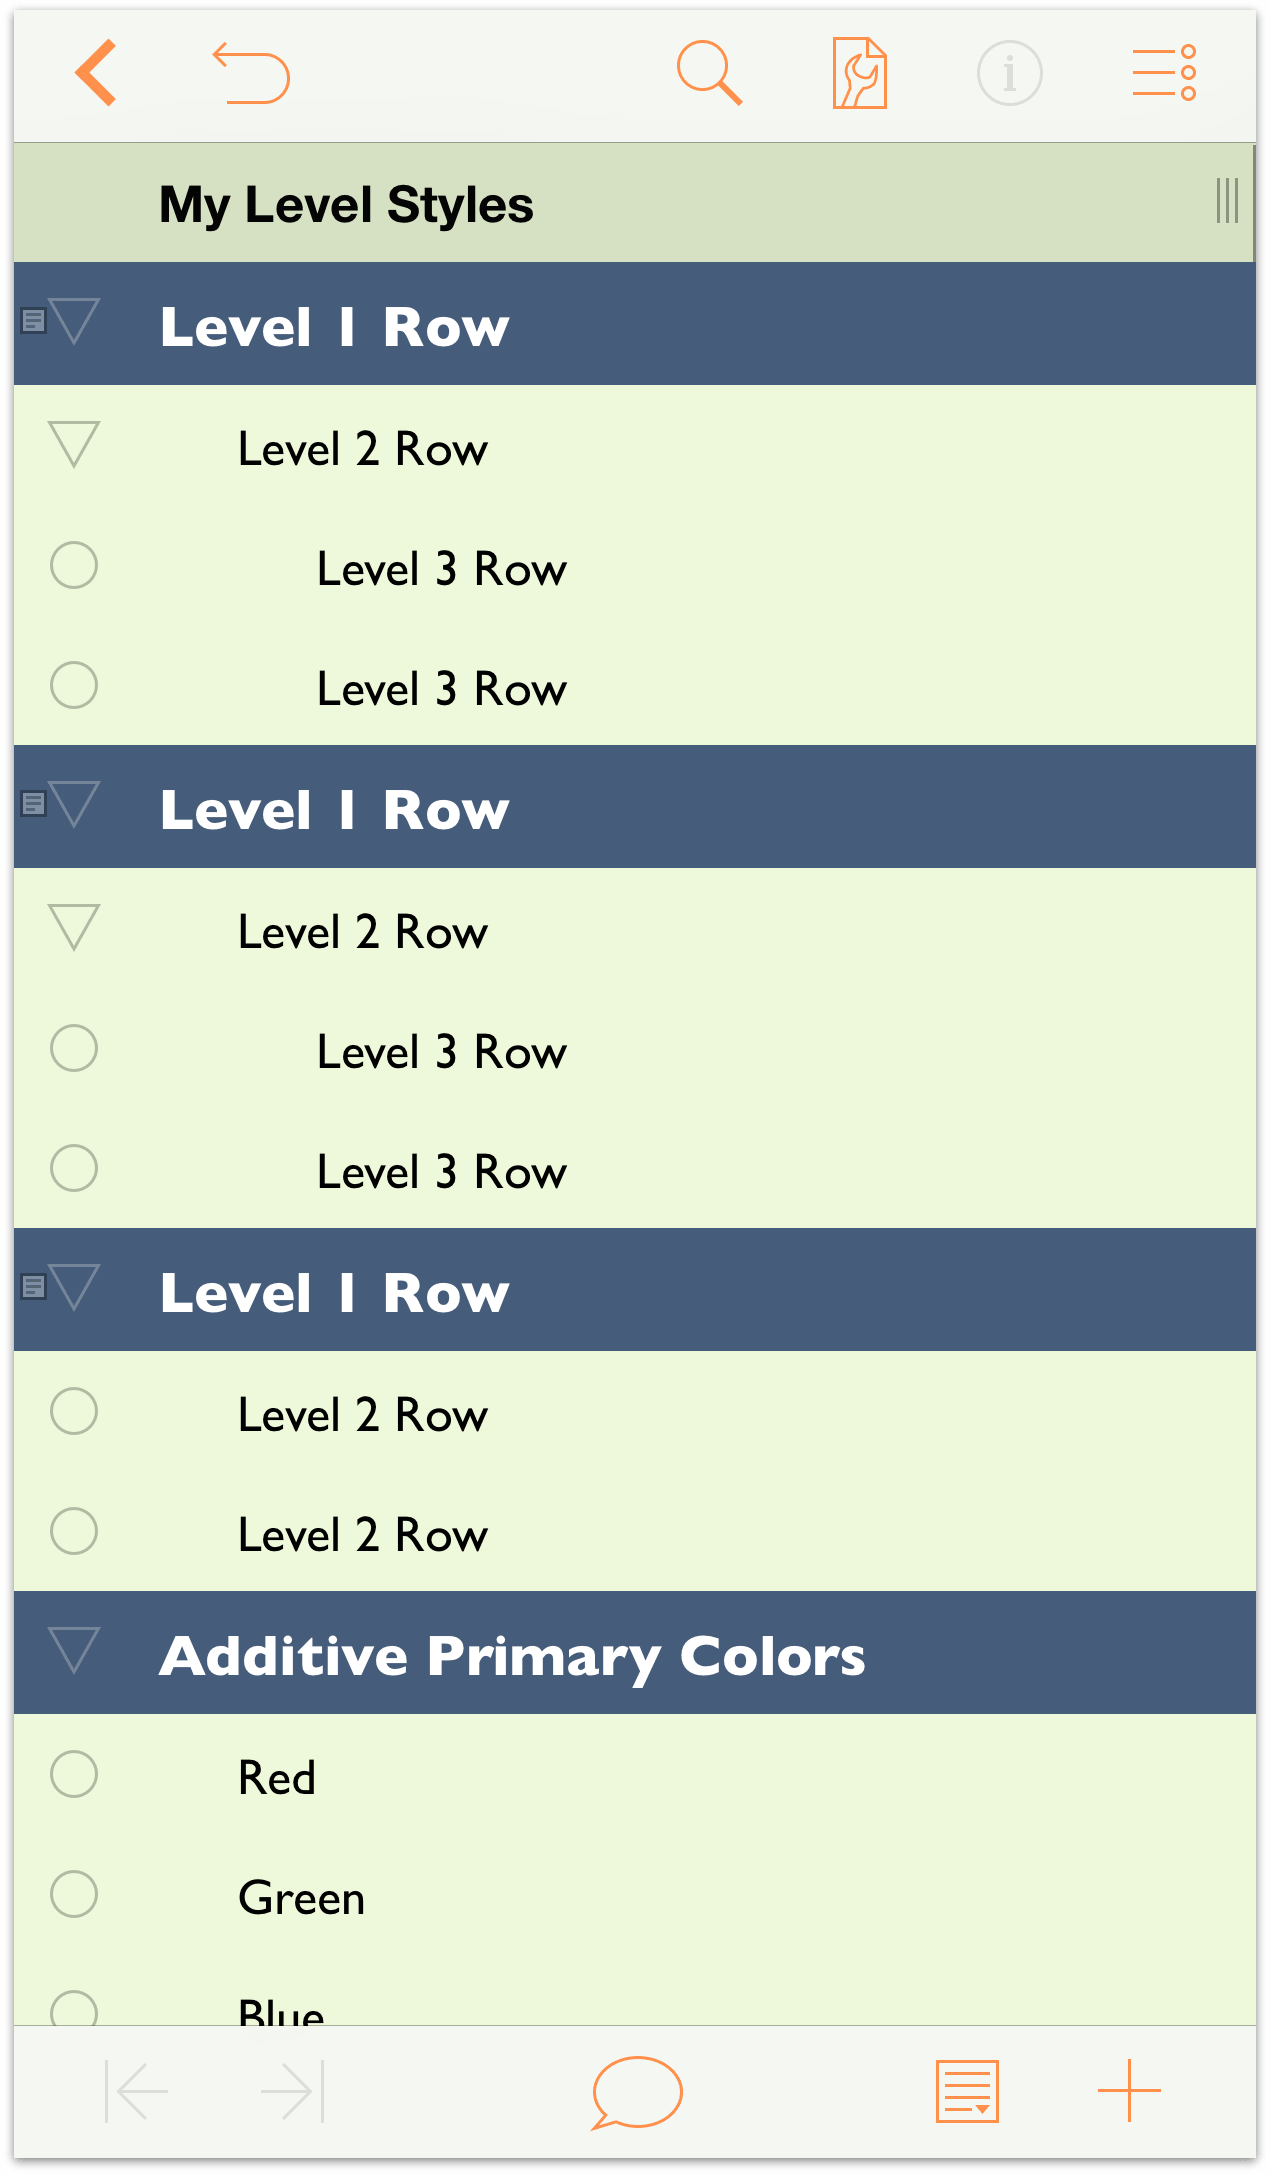
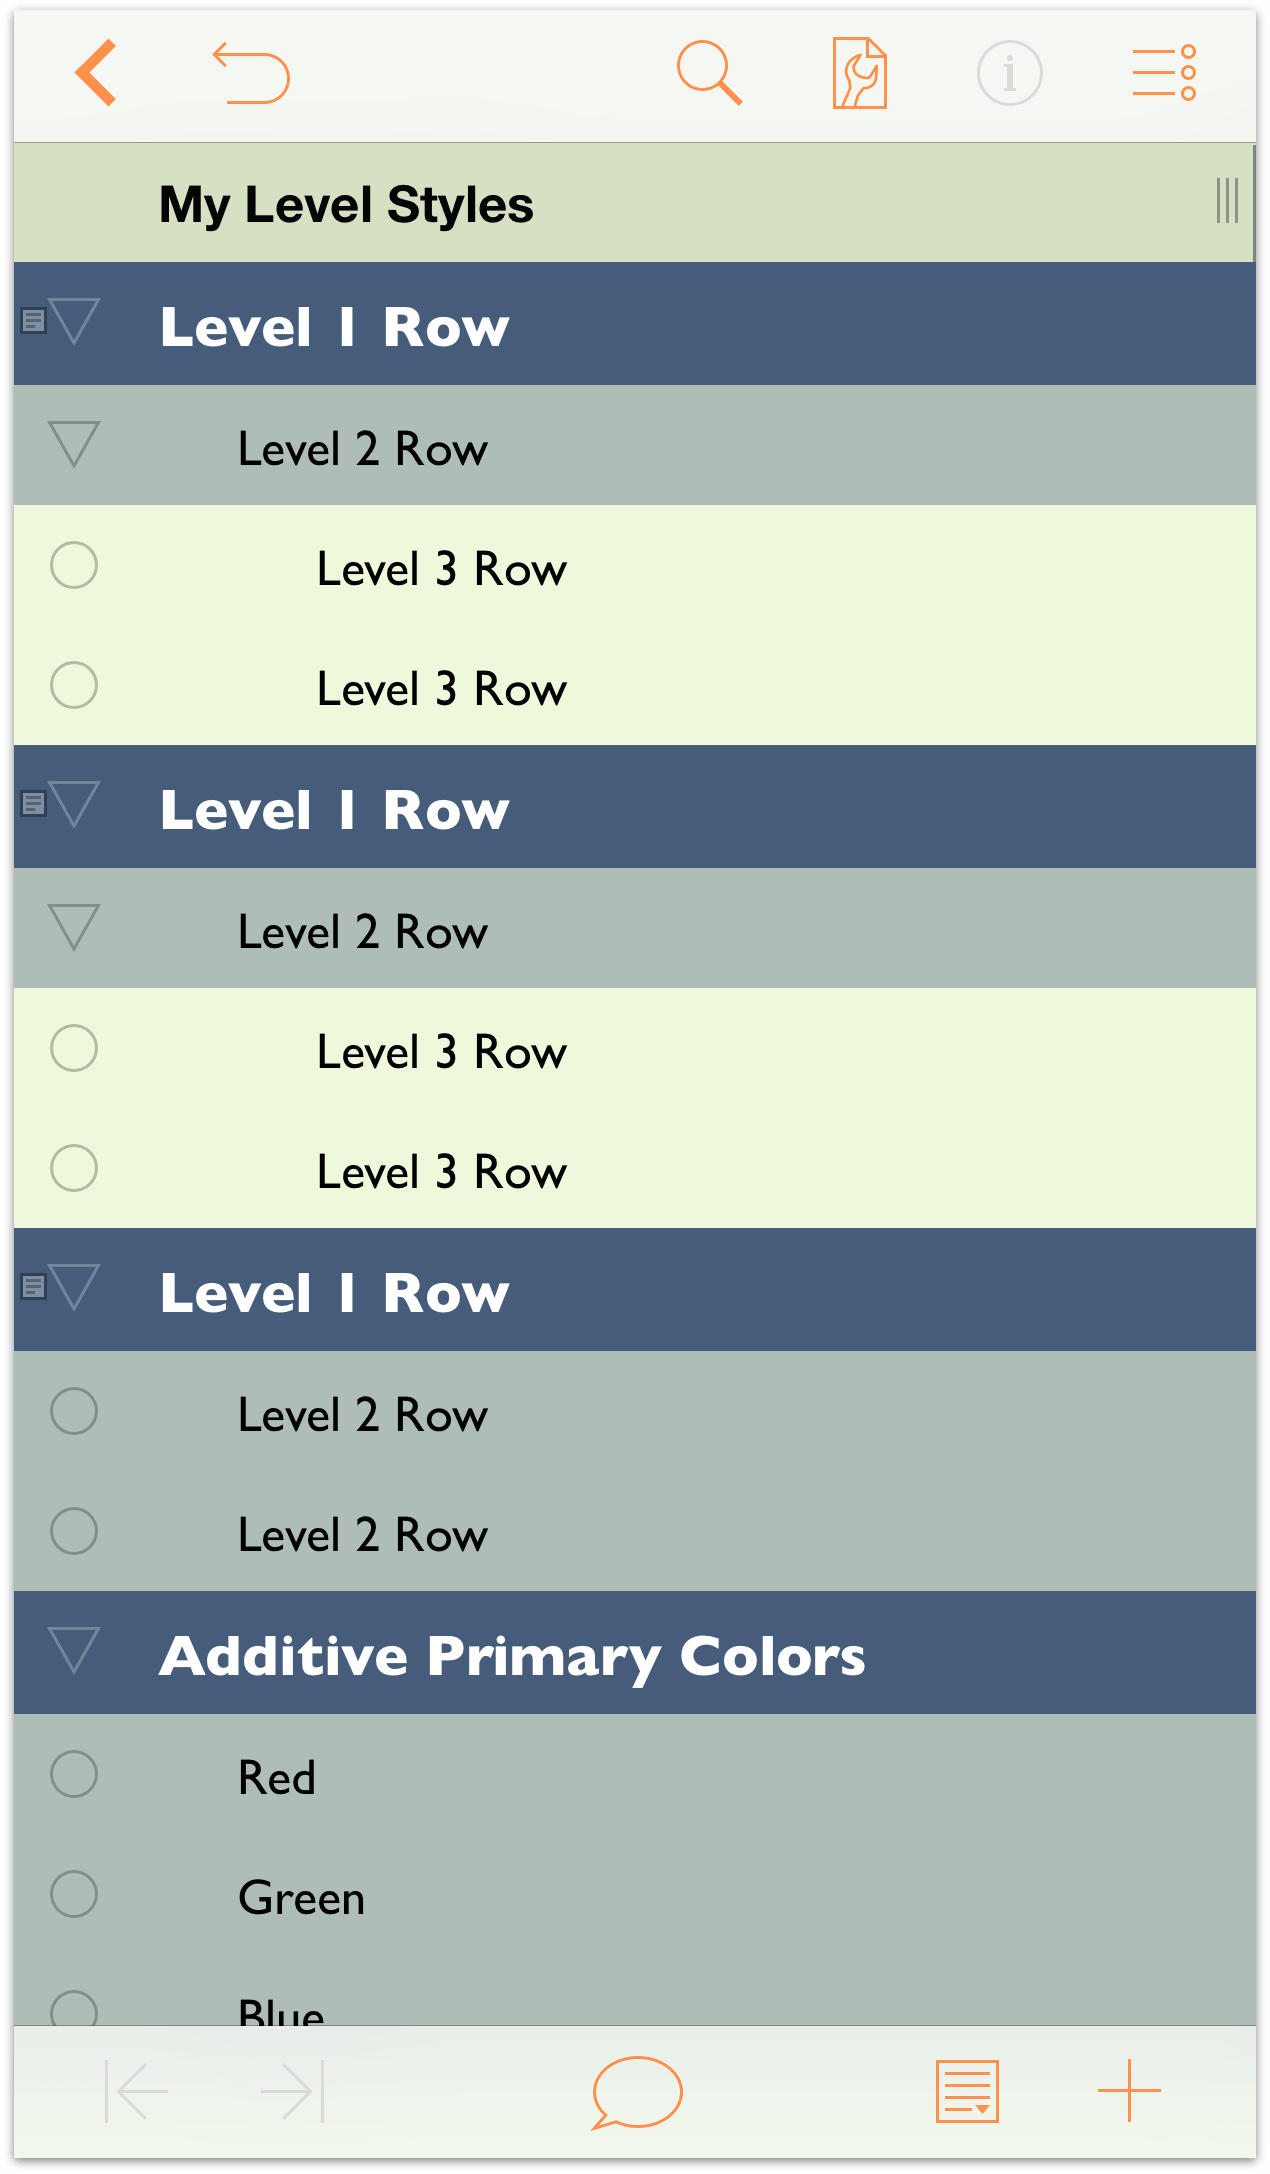
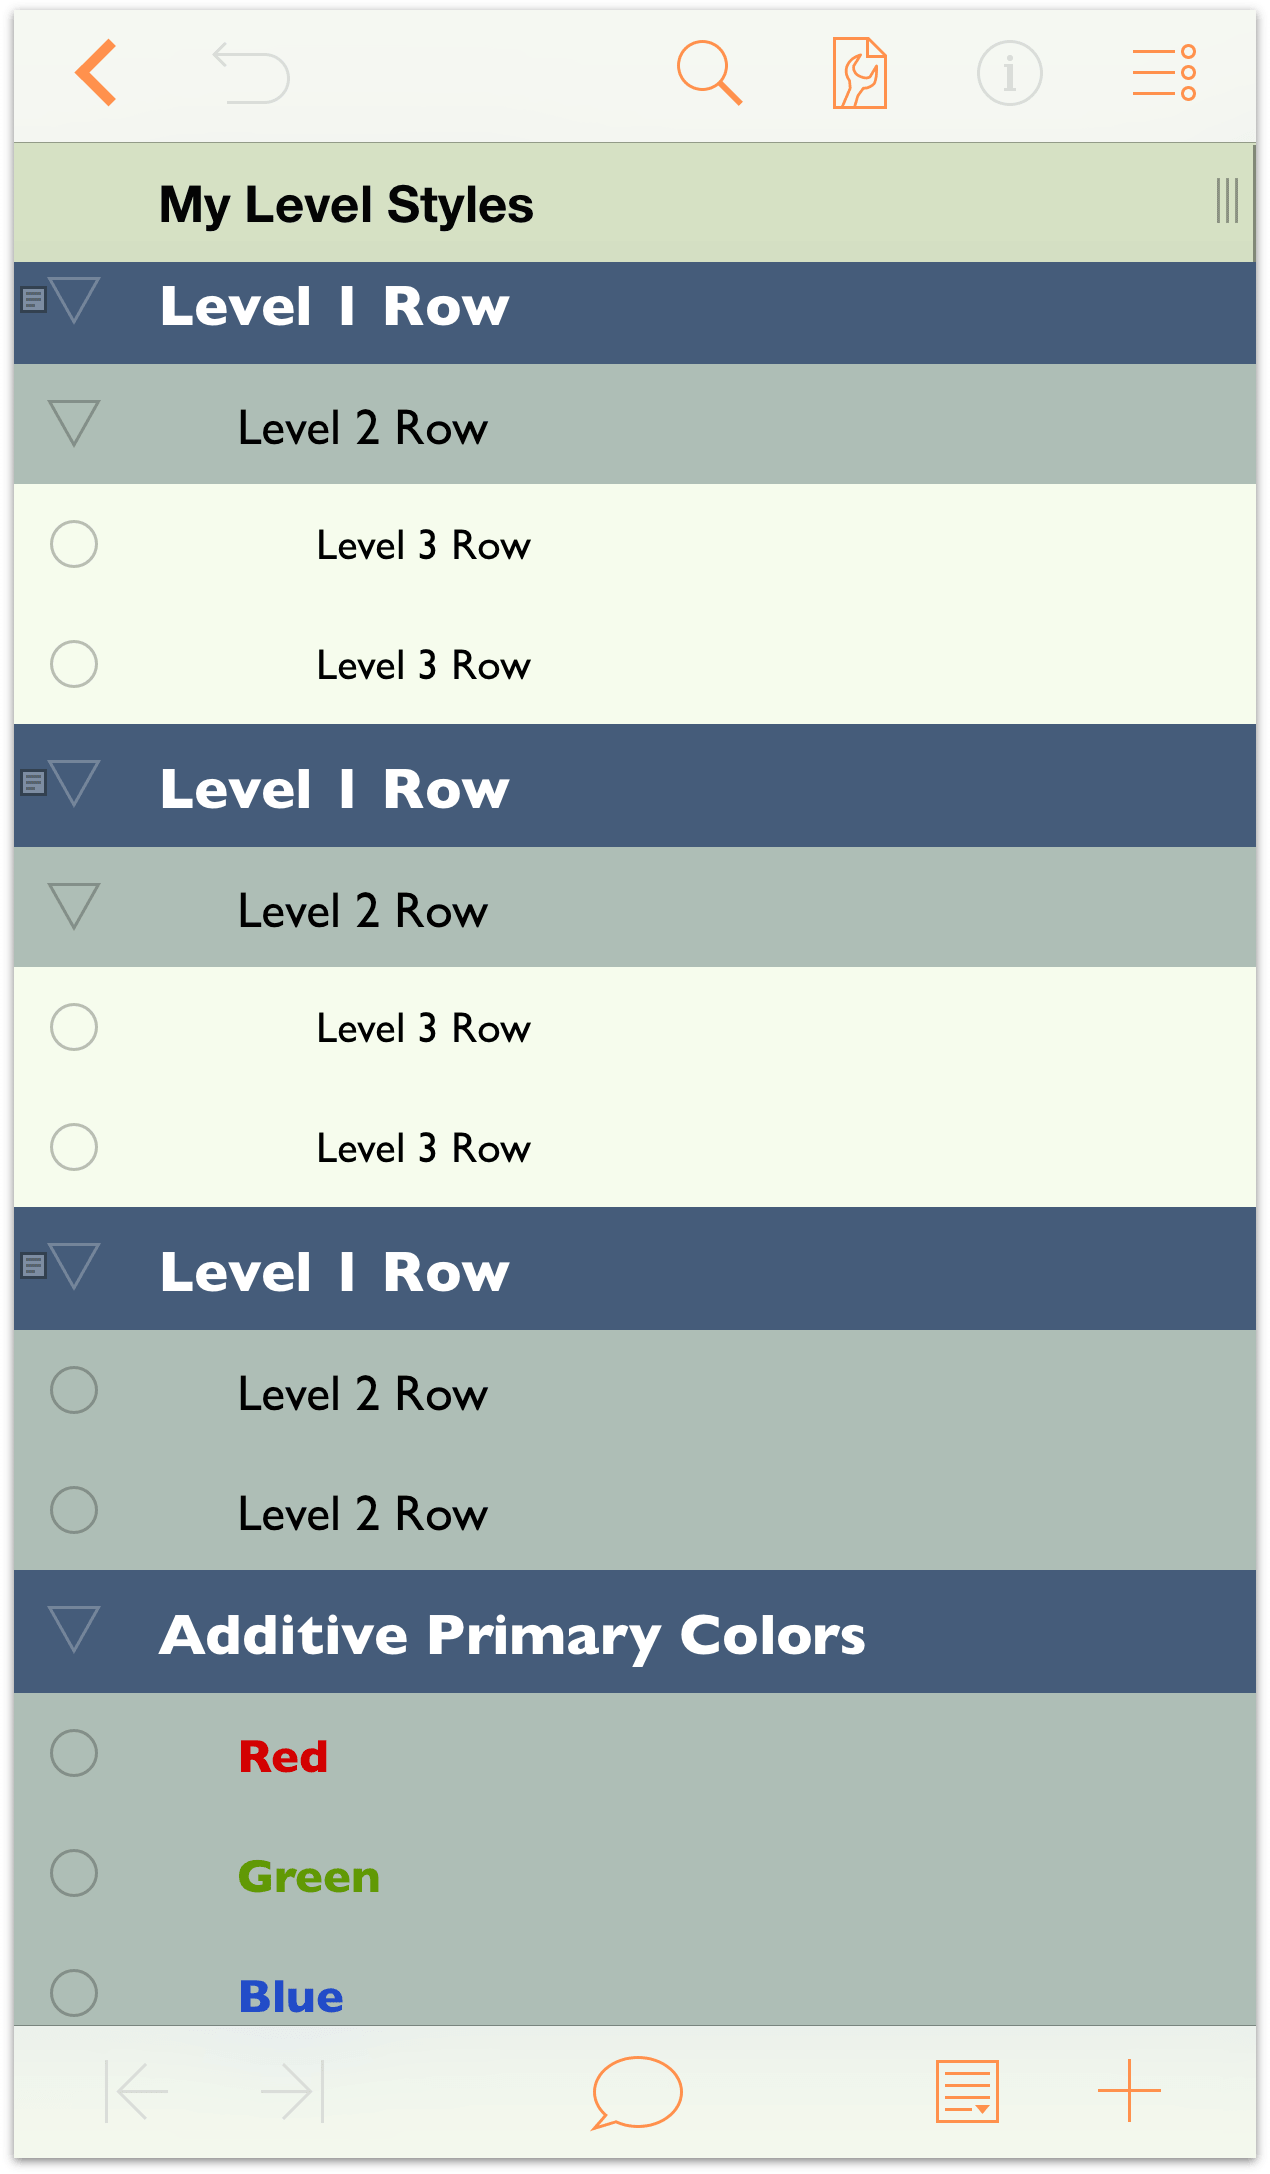
Now that you’re familiar with how to group and move rows around, along with how to indent and outdent rows, it’s time to move on to the fun stuff—styling your outline! Your outline should look similar to the following image. Each Level 1 Row has at least one Level 2 Row nested underneath, and most (but not all) of the Level 2 Rows have Level 3 Rows as children. Toward the bottom of the outline, there’s also the list of Additive Primary Colors, to which you’ll assign a styles to color the text.

Note
If you’re looking for a place to take a break, this might be a good time to do that. The remainder of this tutorial takes you through the process of styling the document before saving a version of it as a template which you can reuse later on. We won’t lie, it gets pretty intense, and you’ll want to pay close attention to the things you’re doing. So go ahead, take a walk around the office, grab a coffee, or go pet your cat, and then come back and be prepared for some fun.
Styling Your Outline
One of the many things that makes OmniOutliner such a fantastic outlining tool is the ability to style everything in your document. You can apply different fonts, increase or decrease the type size, set a background color for the Whole Document and individual row levels, and more.
It’s time to take things to the next level by showing you how to create styles for your content. There’s a lot that’s involved here, but before this goes too far, it’s important to understand OmniOutliner’s style layering model.
Understanding OmniOutliner’s Style Model
OmniOutliner’s styles stack upon one another. The base layer of styles for your document is the Whole Document style. This is the foundation of your document, and the various Level styles you set can adopt, amend, and even override the Whole Document styles.
On iOS, you access the Styles pane via the Contents menu, which opens when you tap ![]() .
.
OmniOutliner has two types of styles:
Structural Styles reside in the top portion of the Styles pane, and consist of the Whole Document style, styles for the various numbered Level Rows (Level 1 Row, Level 2 Row, and so on), as well as styles for Column Titles, Notes, and the main Topic column.
Named Styles are found in the lower portion of the Styles pane, and can be applied to anything in your outline. When applied, a Named Style amends the existing Level Style with its own properties. For example, you could apply a Heading named style on top of a Level 1 Row style to make the text bigger or change the font. All of the templates come with some pre-defined Named styles, which you can use, delete, or edit to suit the needs of your outline.
The styles you set for the various Level Rows, headings, and text all stack on top of the styles you designate for the Whole Document. This is very much like the web’s Cascading Style Sheets (CSS), if you’ve ever used that for web design.
Using the Contents Menu on iOS
On iPad (in any device orientation) and iPhone 6 Plus when in landscape orientation, the Contents menu appears as a popup whenever you tap ![]() .
.
However, on other iOS devices—and when holding the iPhone 6 Plus in portrait orientation—the Contents menu appears on a screen of its own, sliding in and out from the bottom of the screen.
If you use an iPhone 6 Plus, you may find it easier to work with the Contents screen in portrait mode rather than in the popup menu. Chances are you will still need to scroll through the styles list, but it’s nice to see that list in a less-constrained environment.
Setting the Whole Document Styles
Now it’s time to get to work on building out the styles for what will evolve into a new template you can use in OmniOutliner. Before you get started, take some time to think about how you would like your template to look:
- What colors should it have?
- What fonts and font styles are needed?
- Does it need status checkboxes?
- What about columns and layout?
- Are row handles necessary?
All of these—and more—can factor into how you design and create the template. As noted earlier, however, the Whole Document styles set the foundation for the rest of your template, so that’s where we’ll start.
- Tap
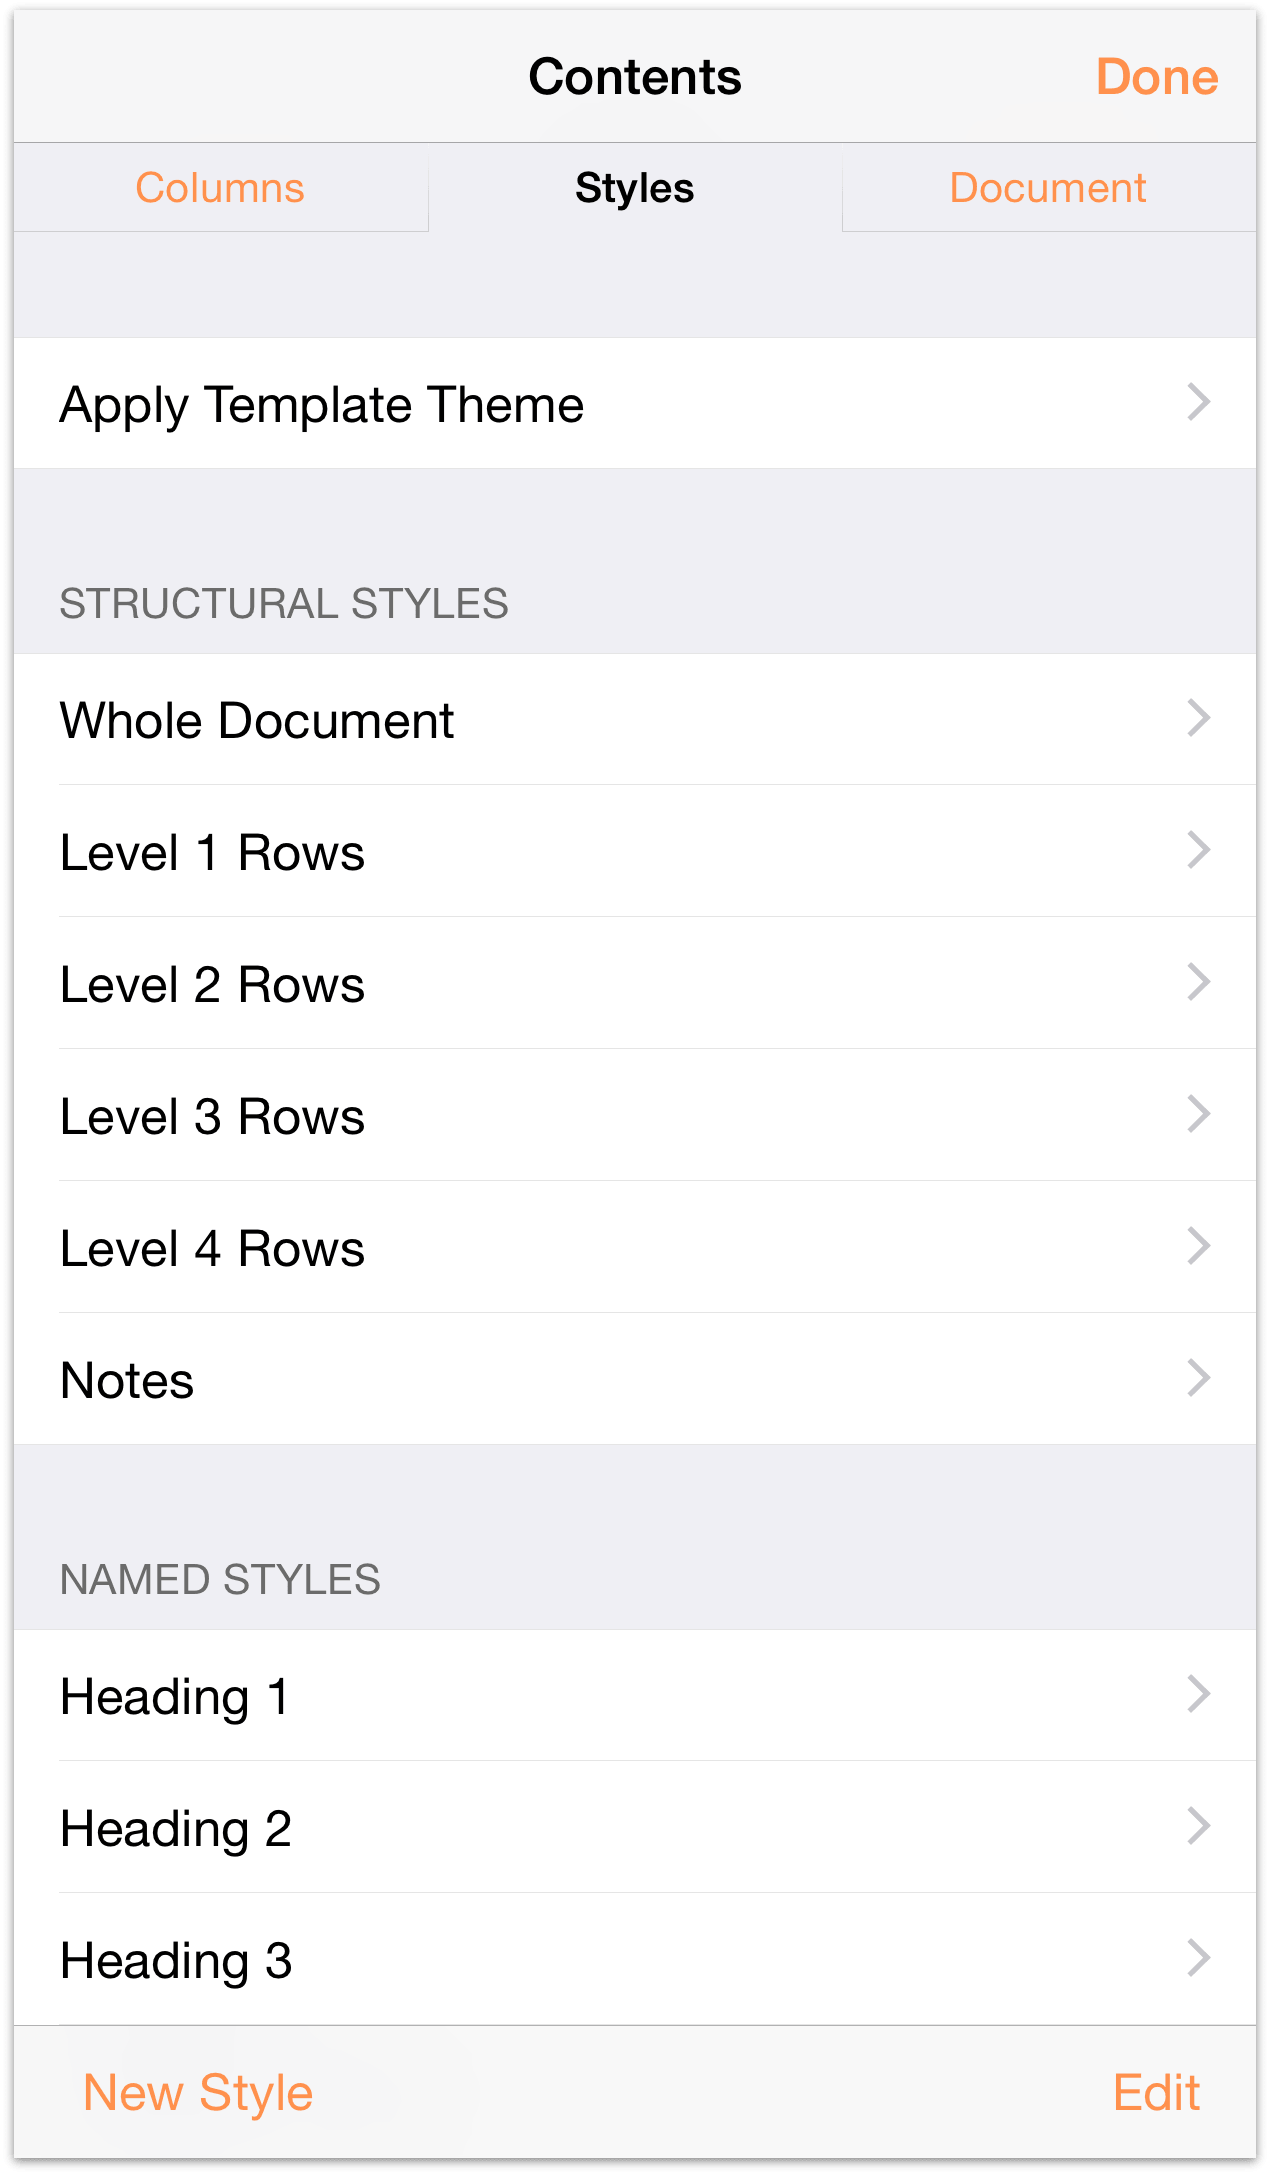
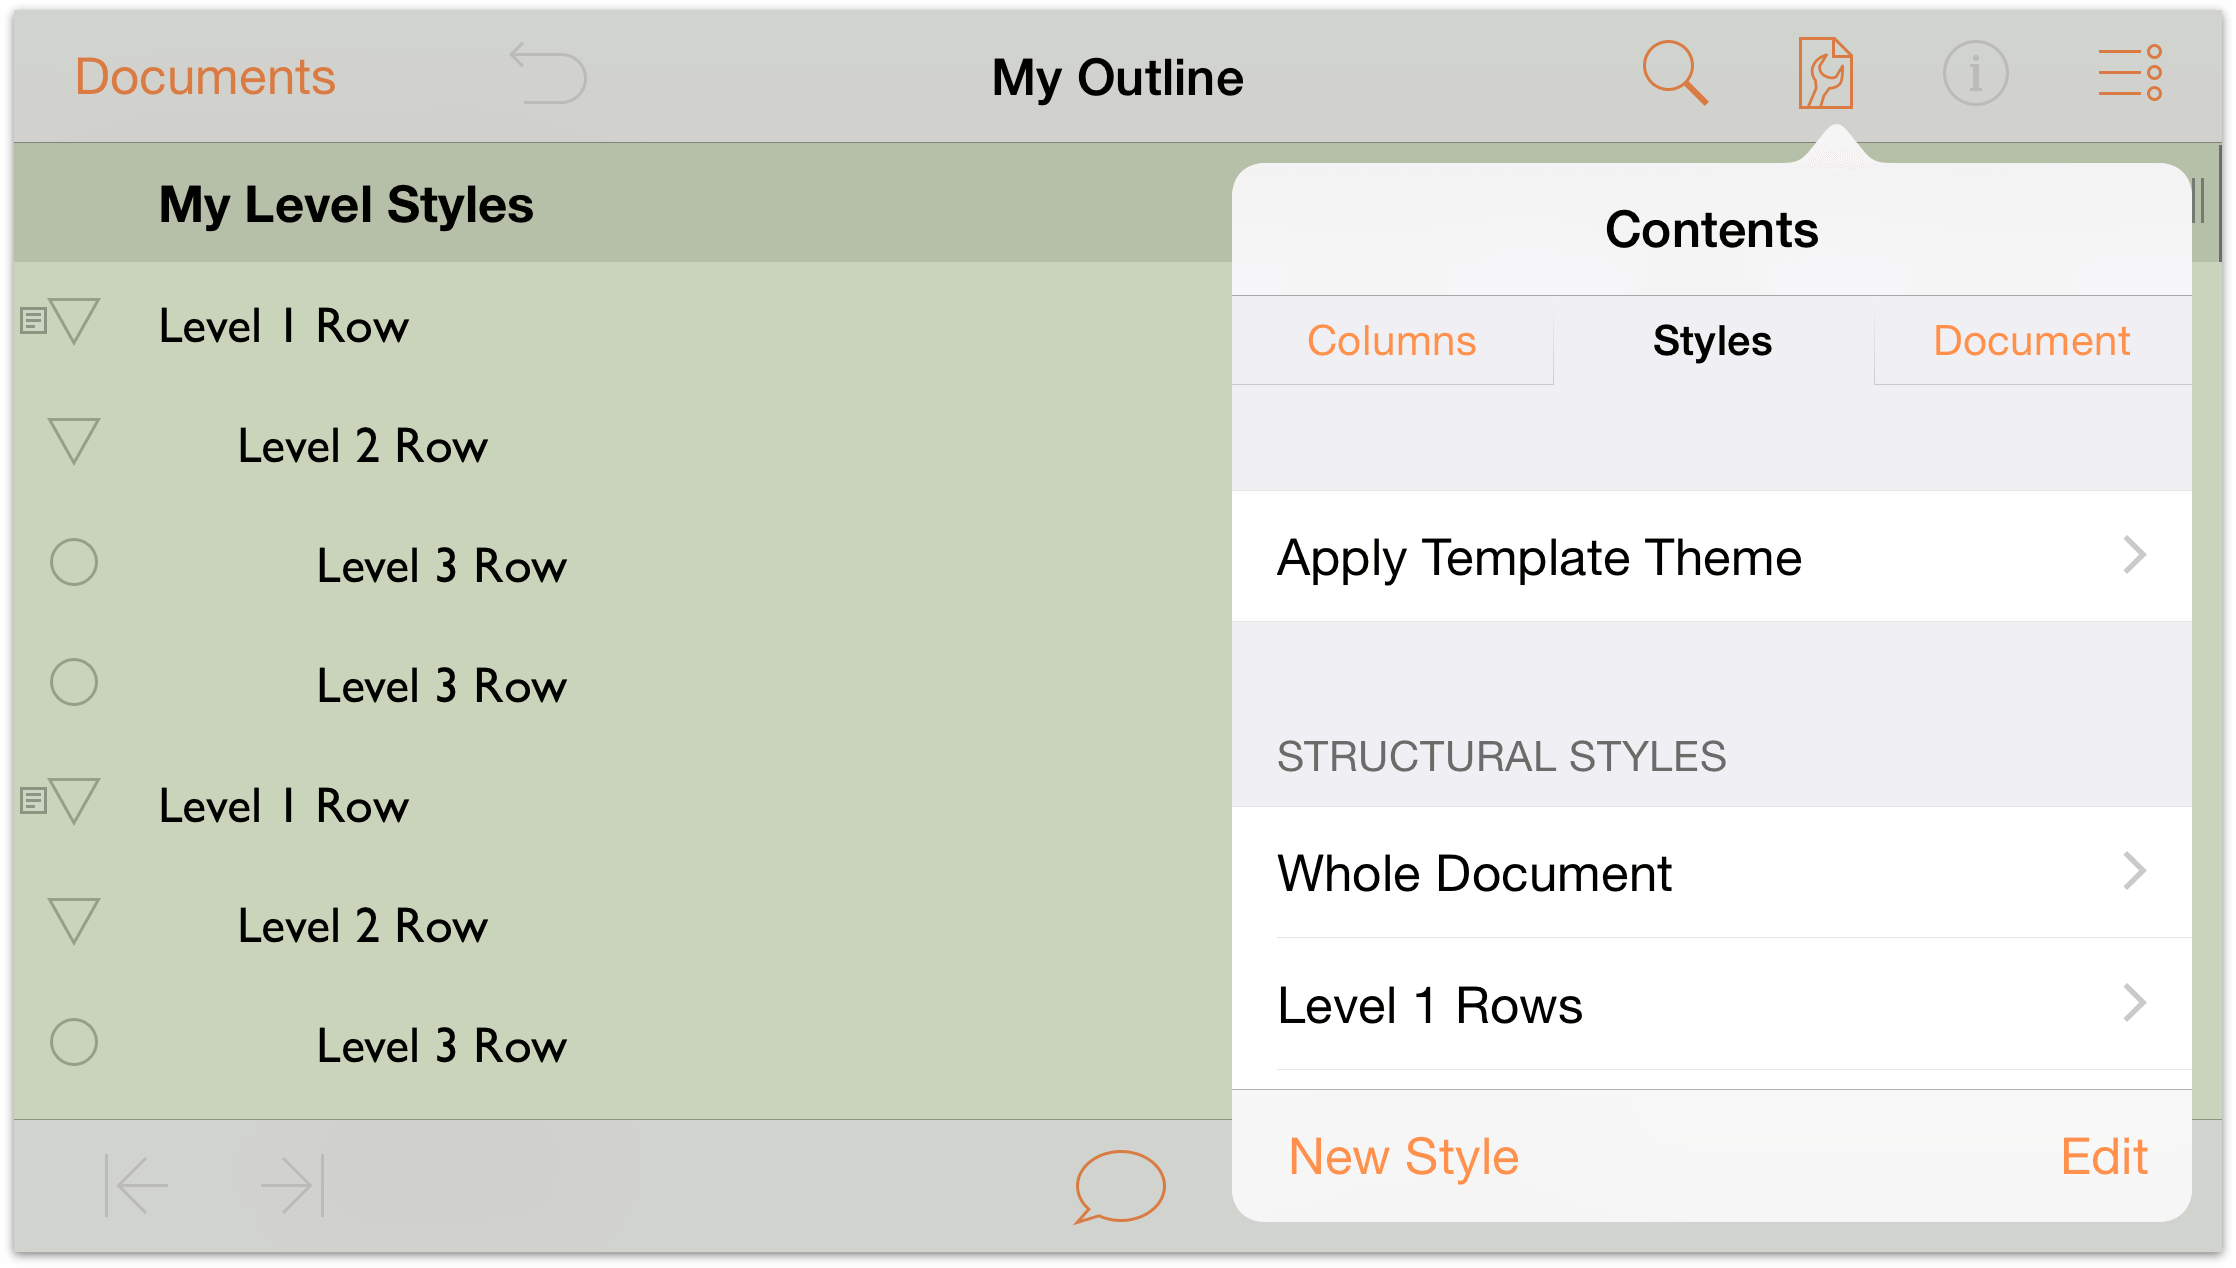
 , and then tap Styles to view the Styles pane.
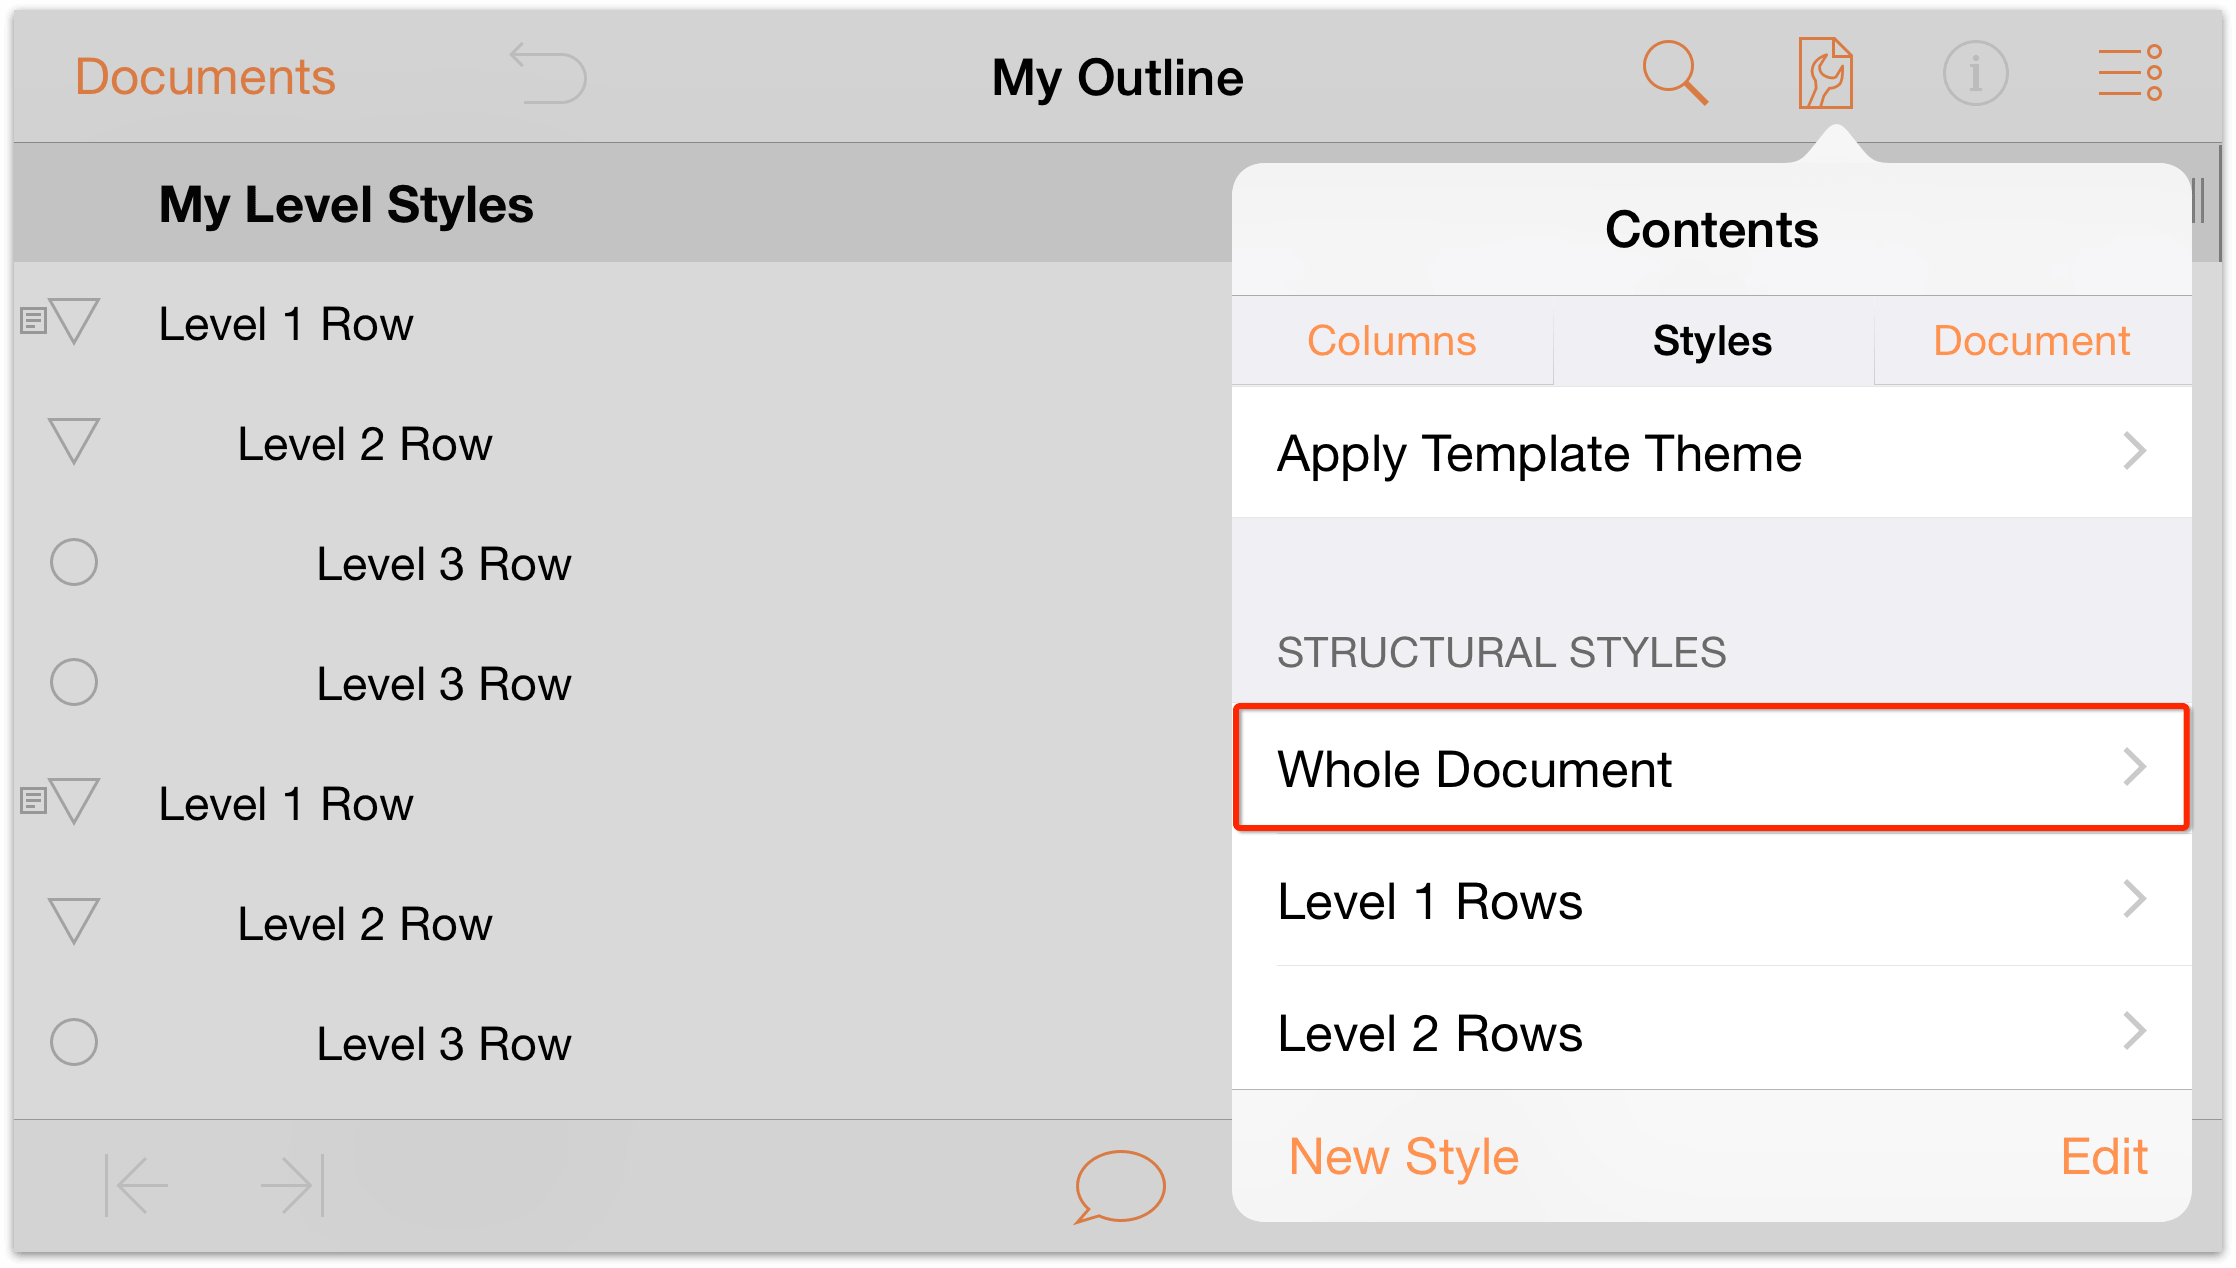
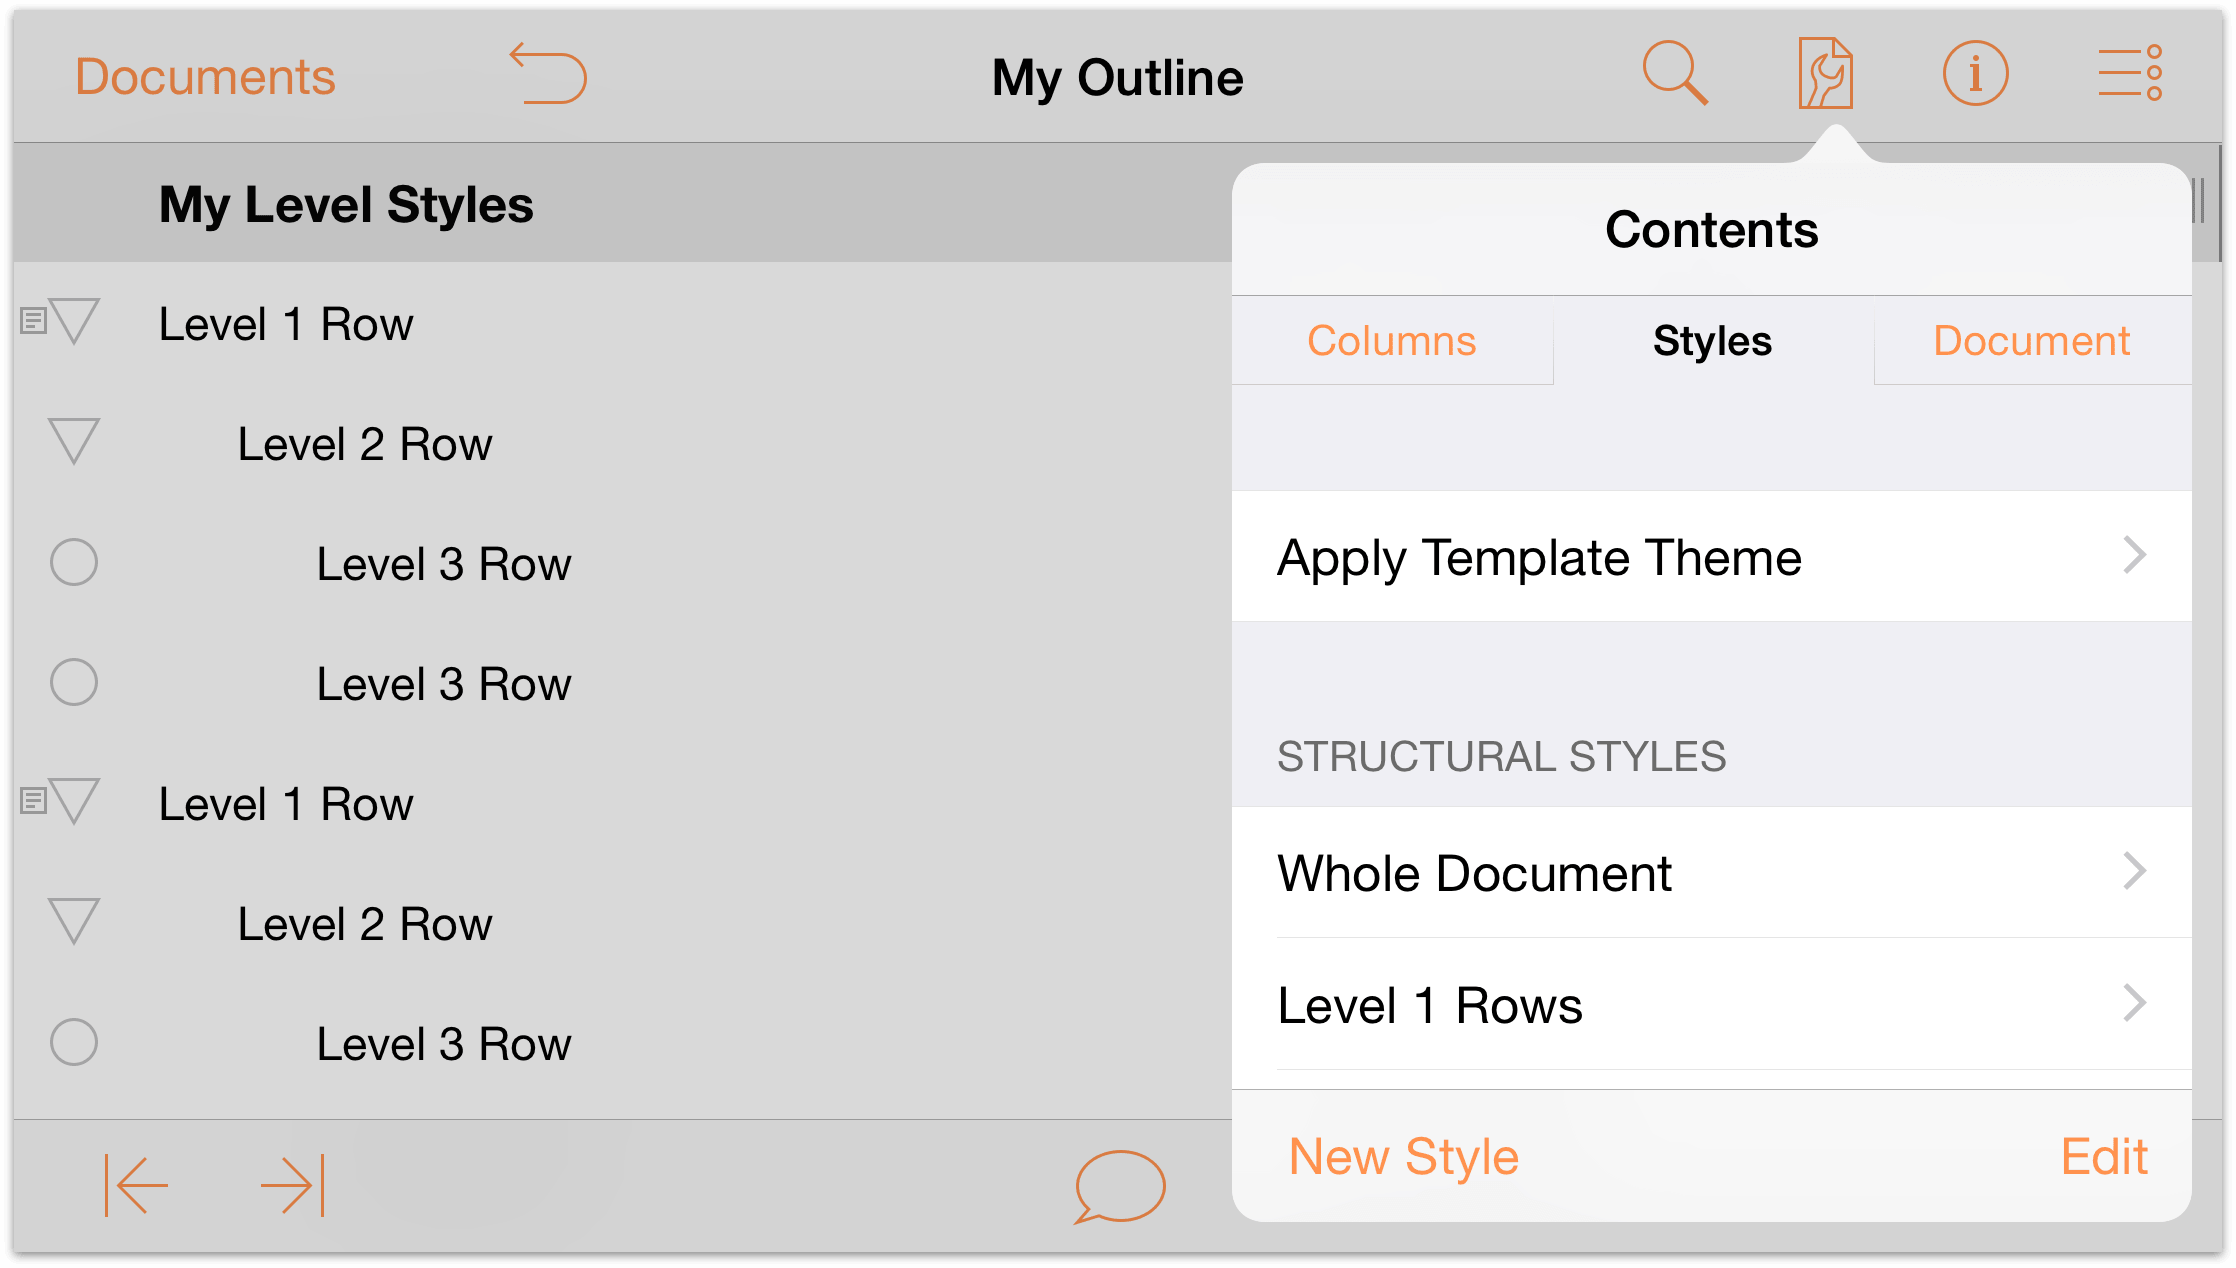
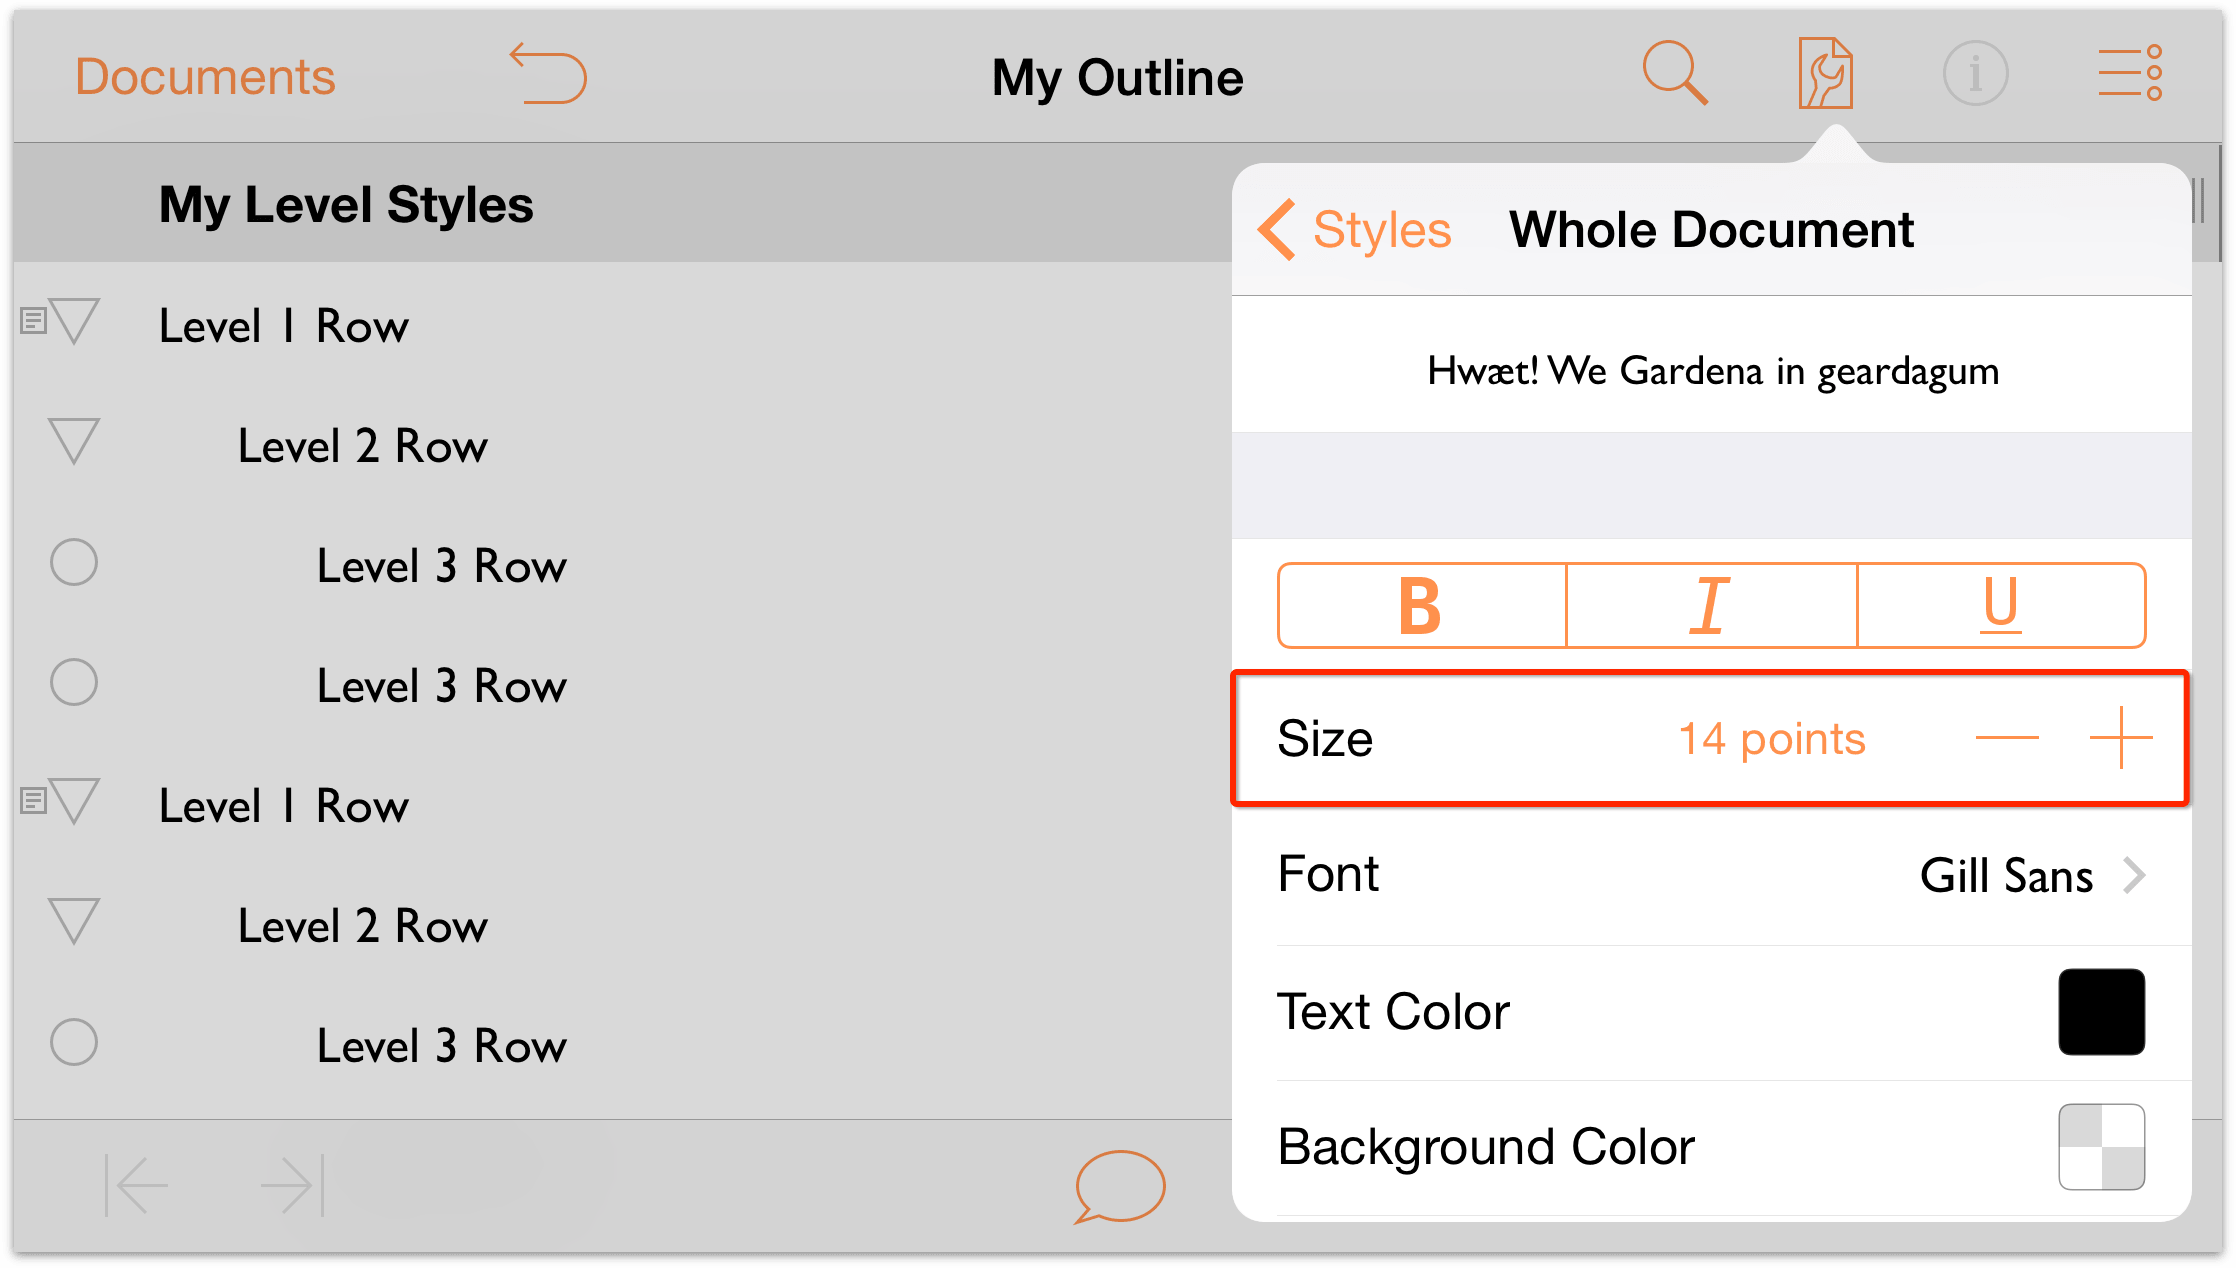
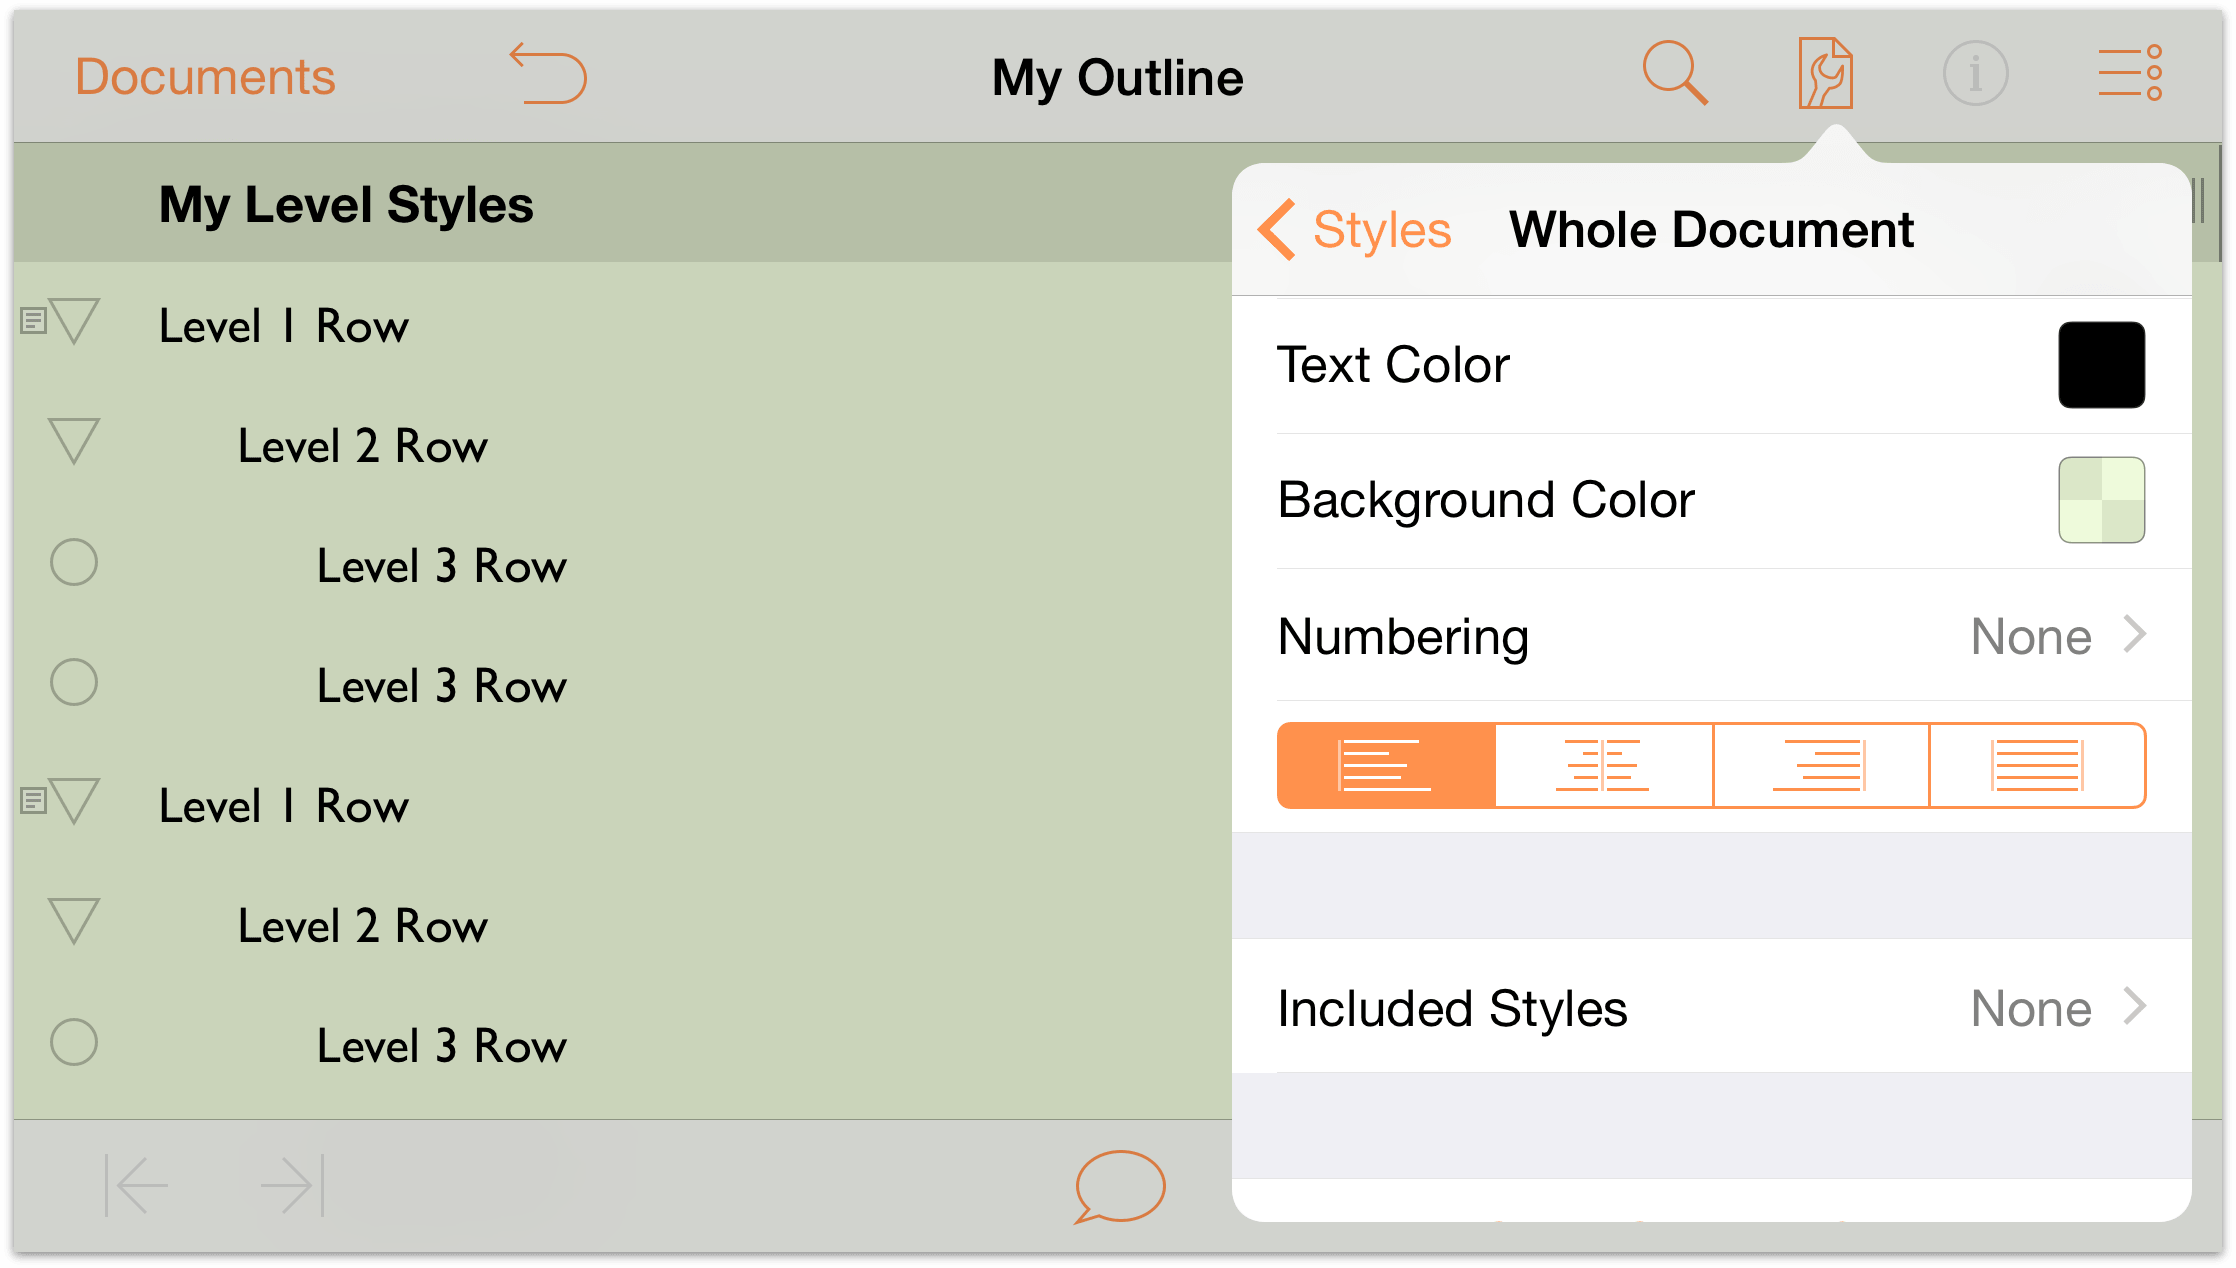
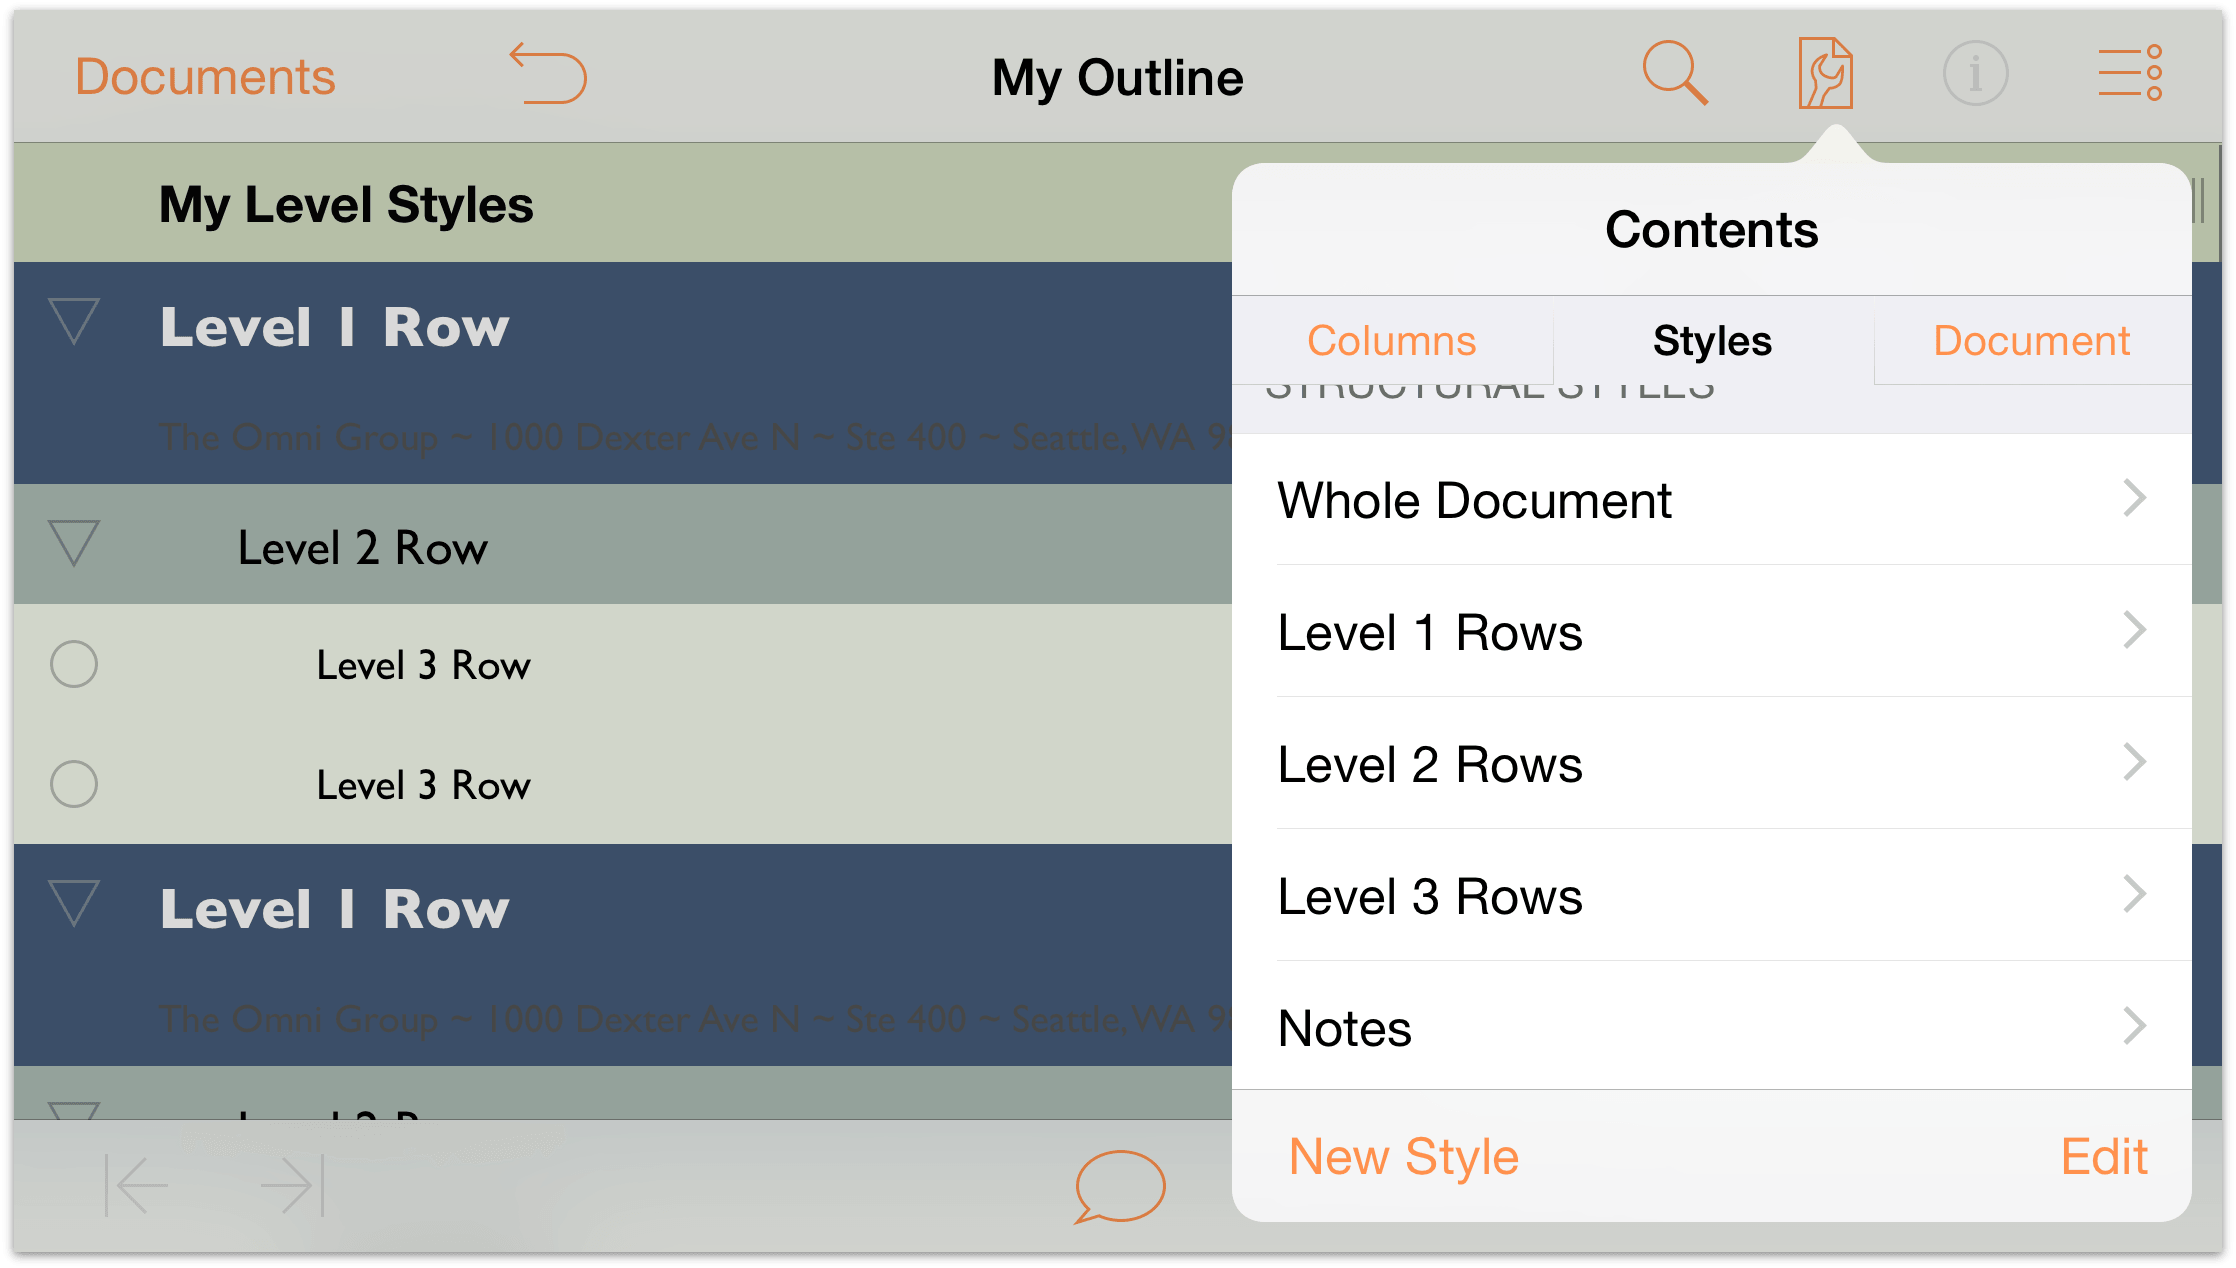
- Under Structural Styles, tap Whole Document to view the Whole Document styles.
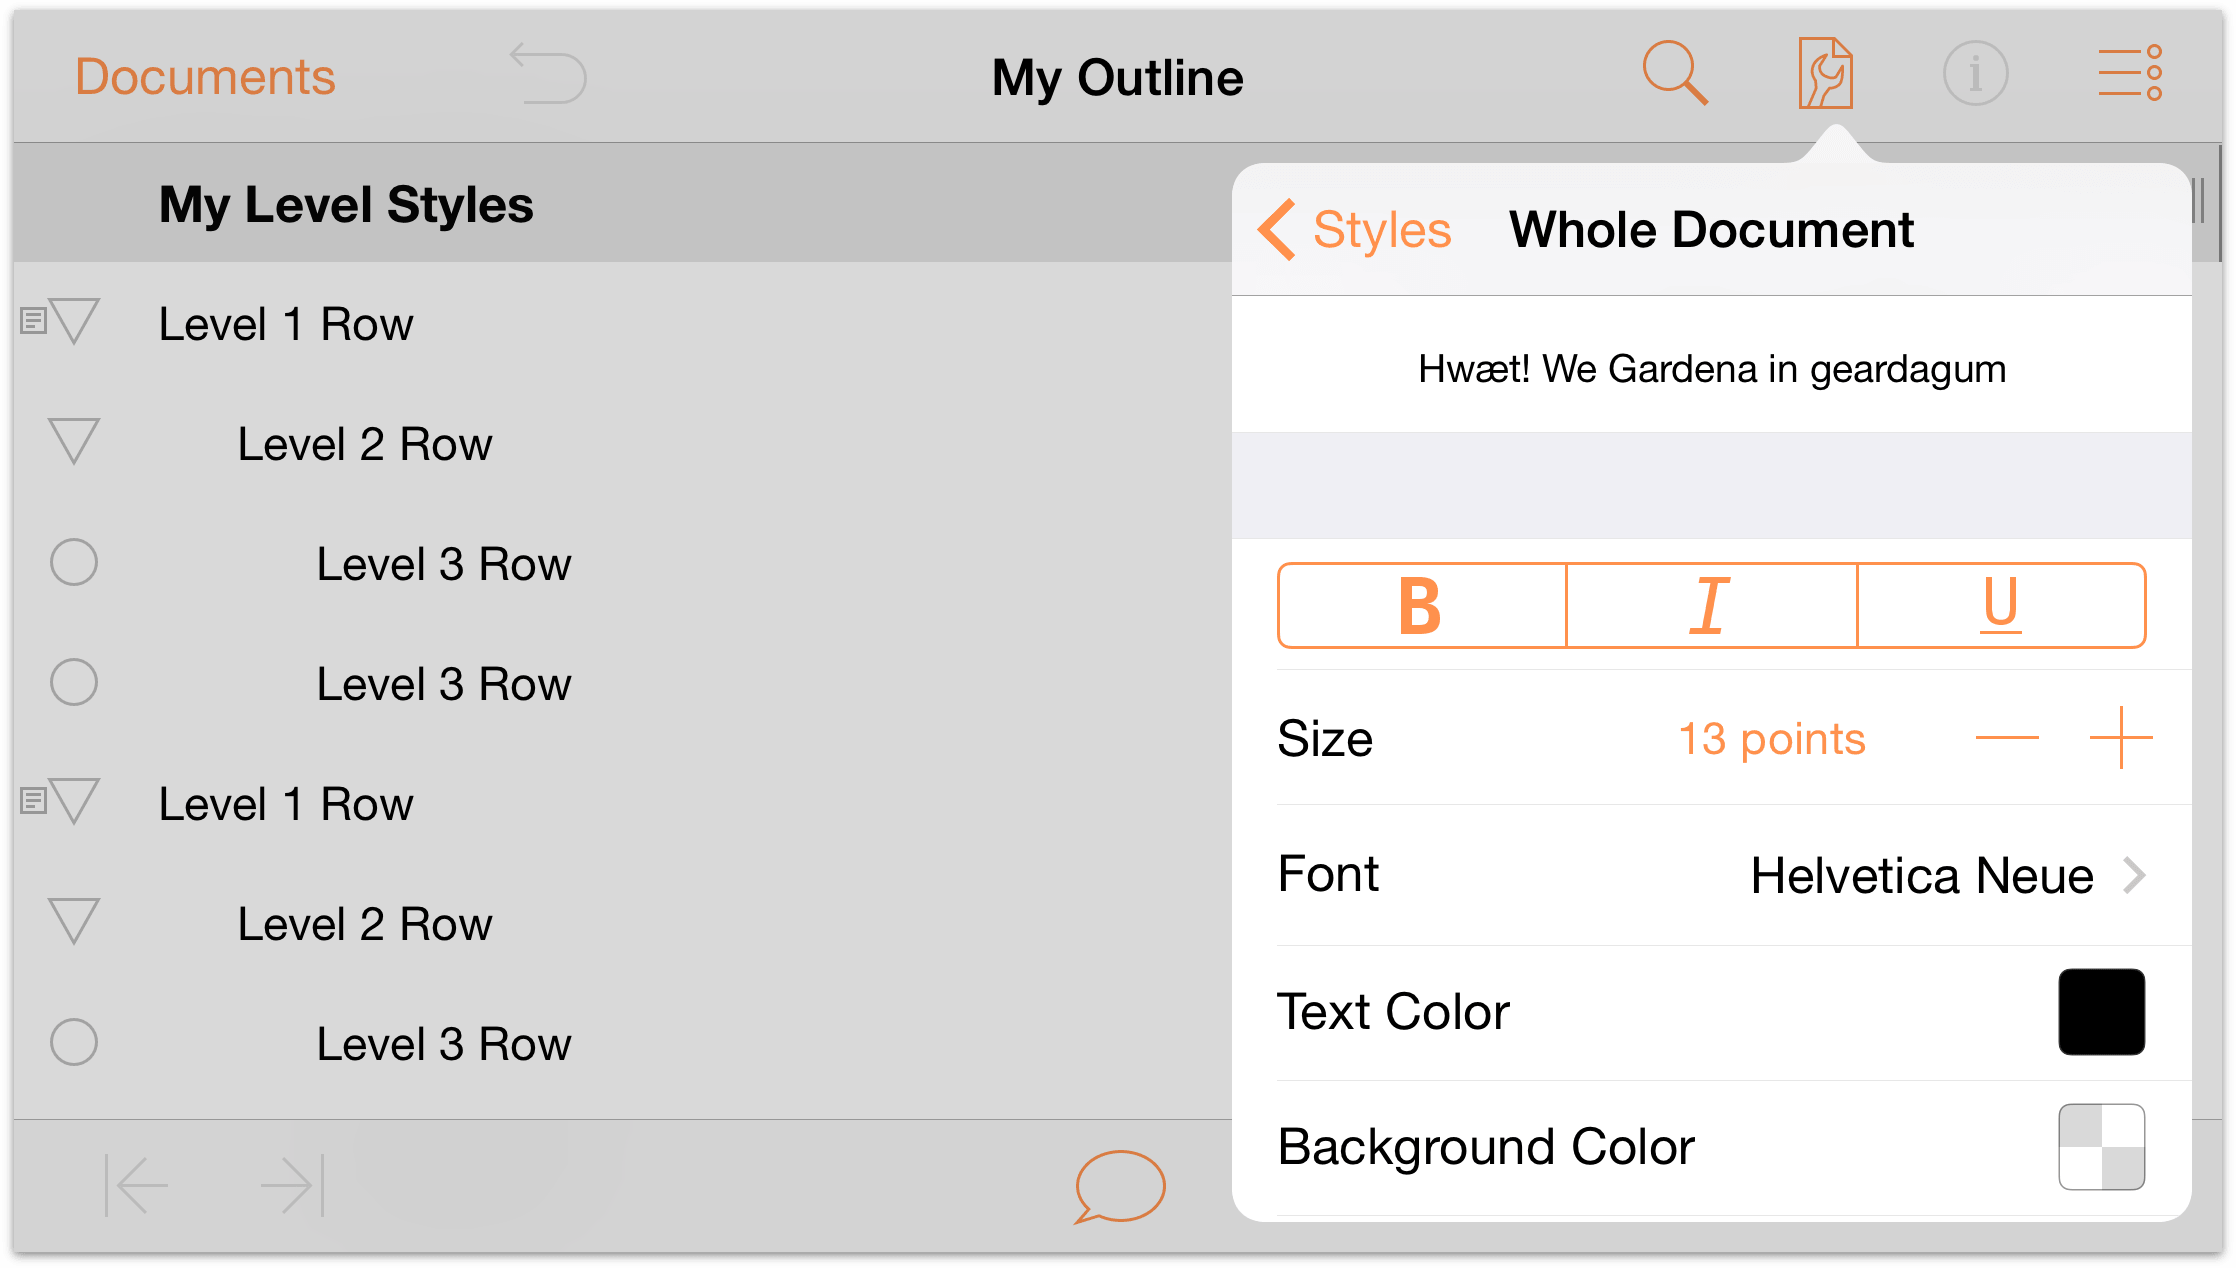
To set a base font for the document, tap Font, and choose Gill Sans; notice how all of the text in the outline changes to the new font selection.
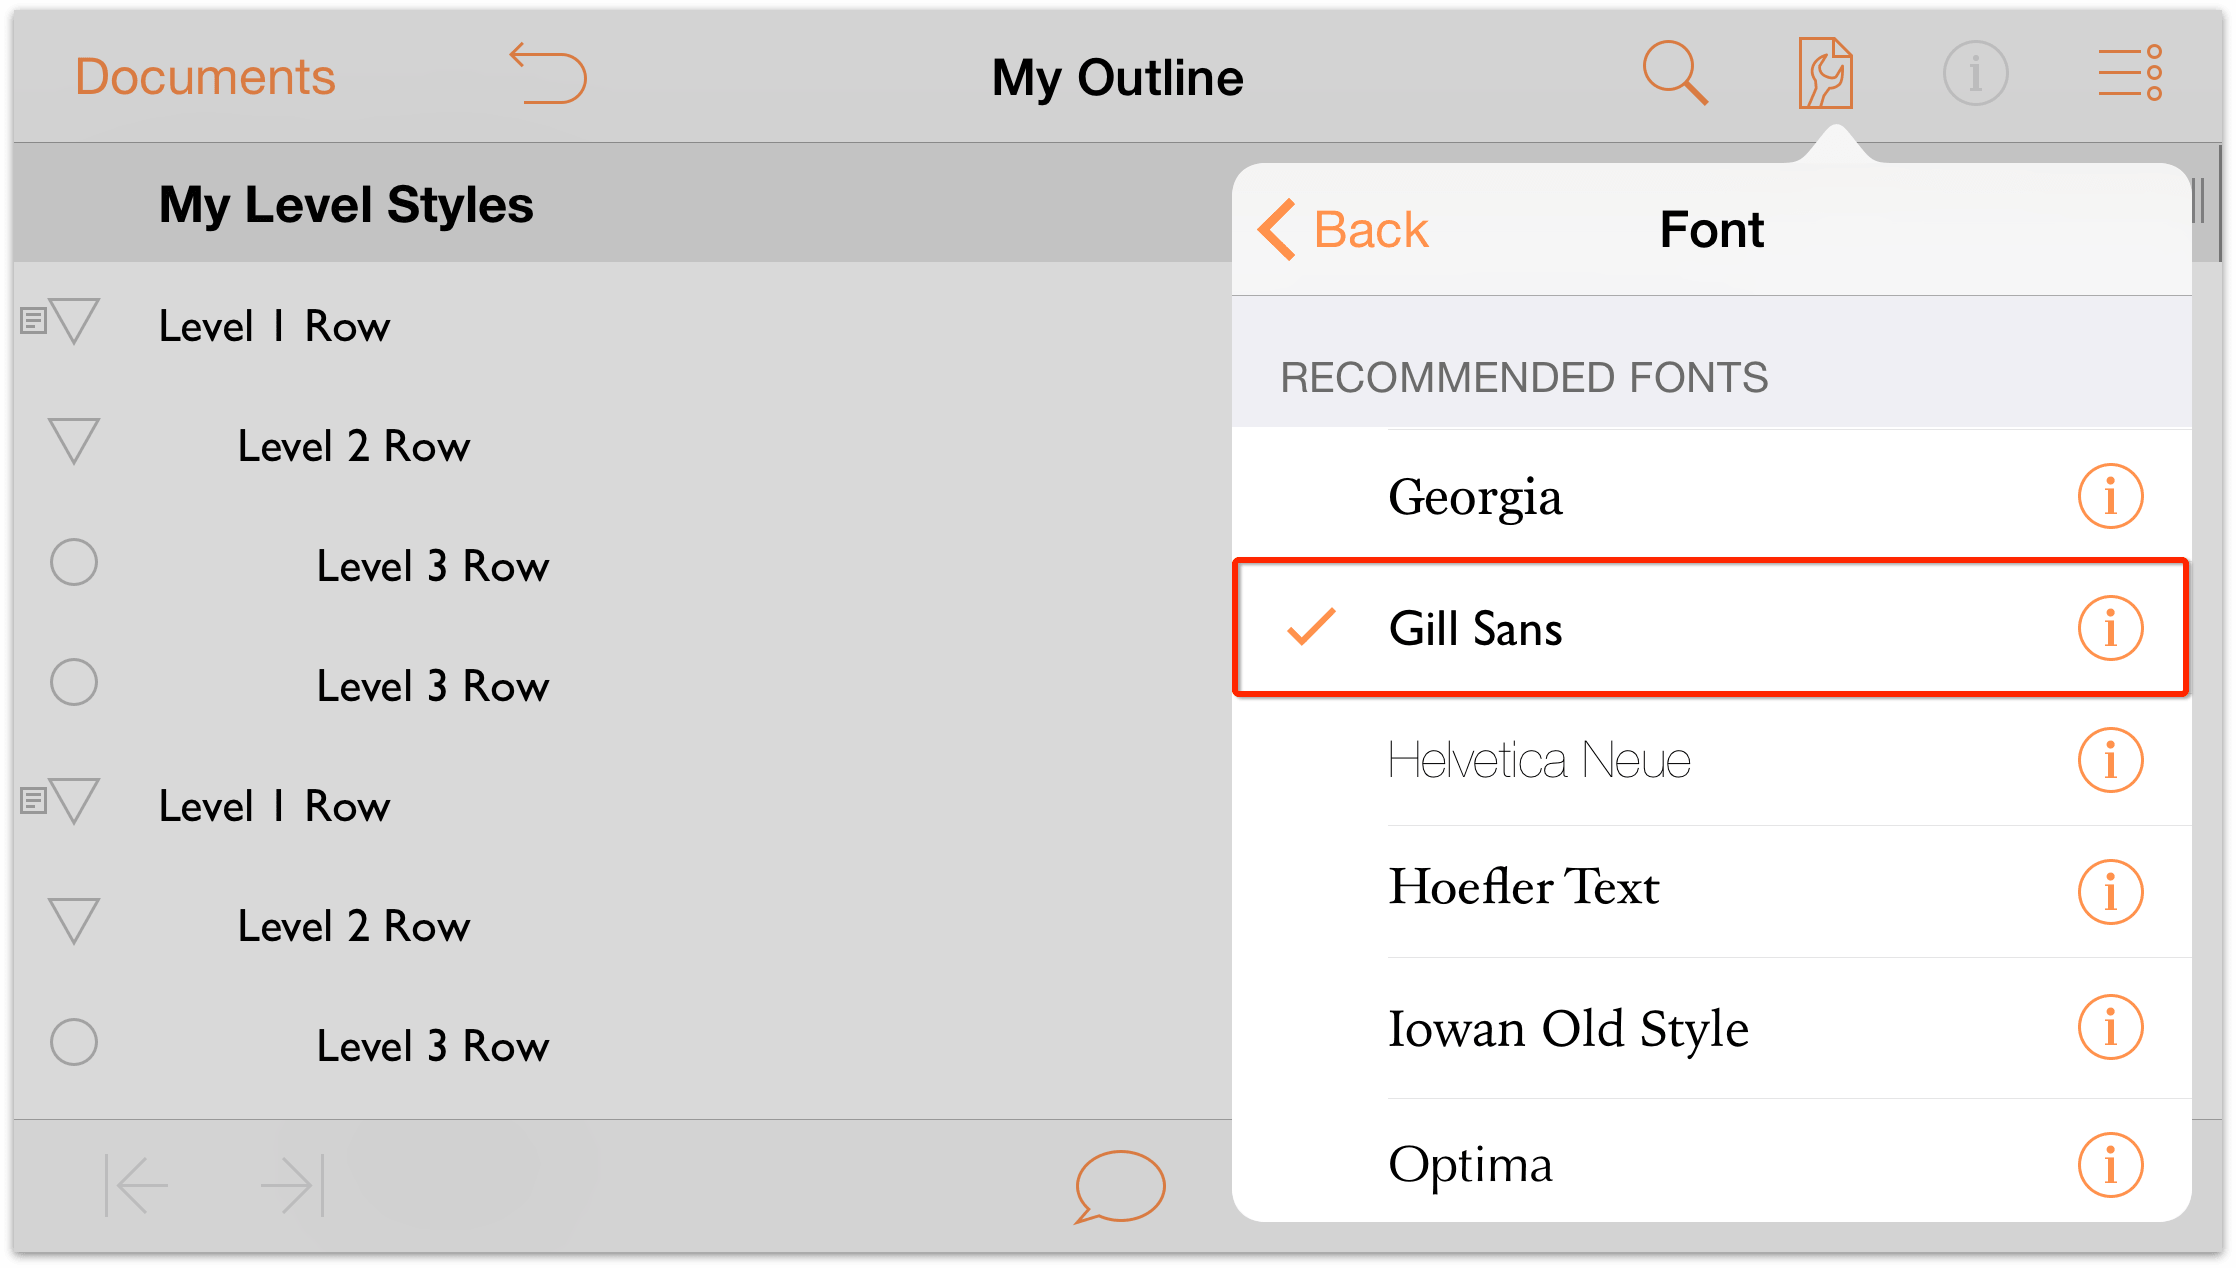
- Tap Back to return to the Whole Document styles view.
- In the Size selector, tap
 once to increase the base font size to 14 points.
Now let’s set a background color for the Whole Document. Scroll down in the menu until you see Background Color. Tap
 to open the color pickers.
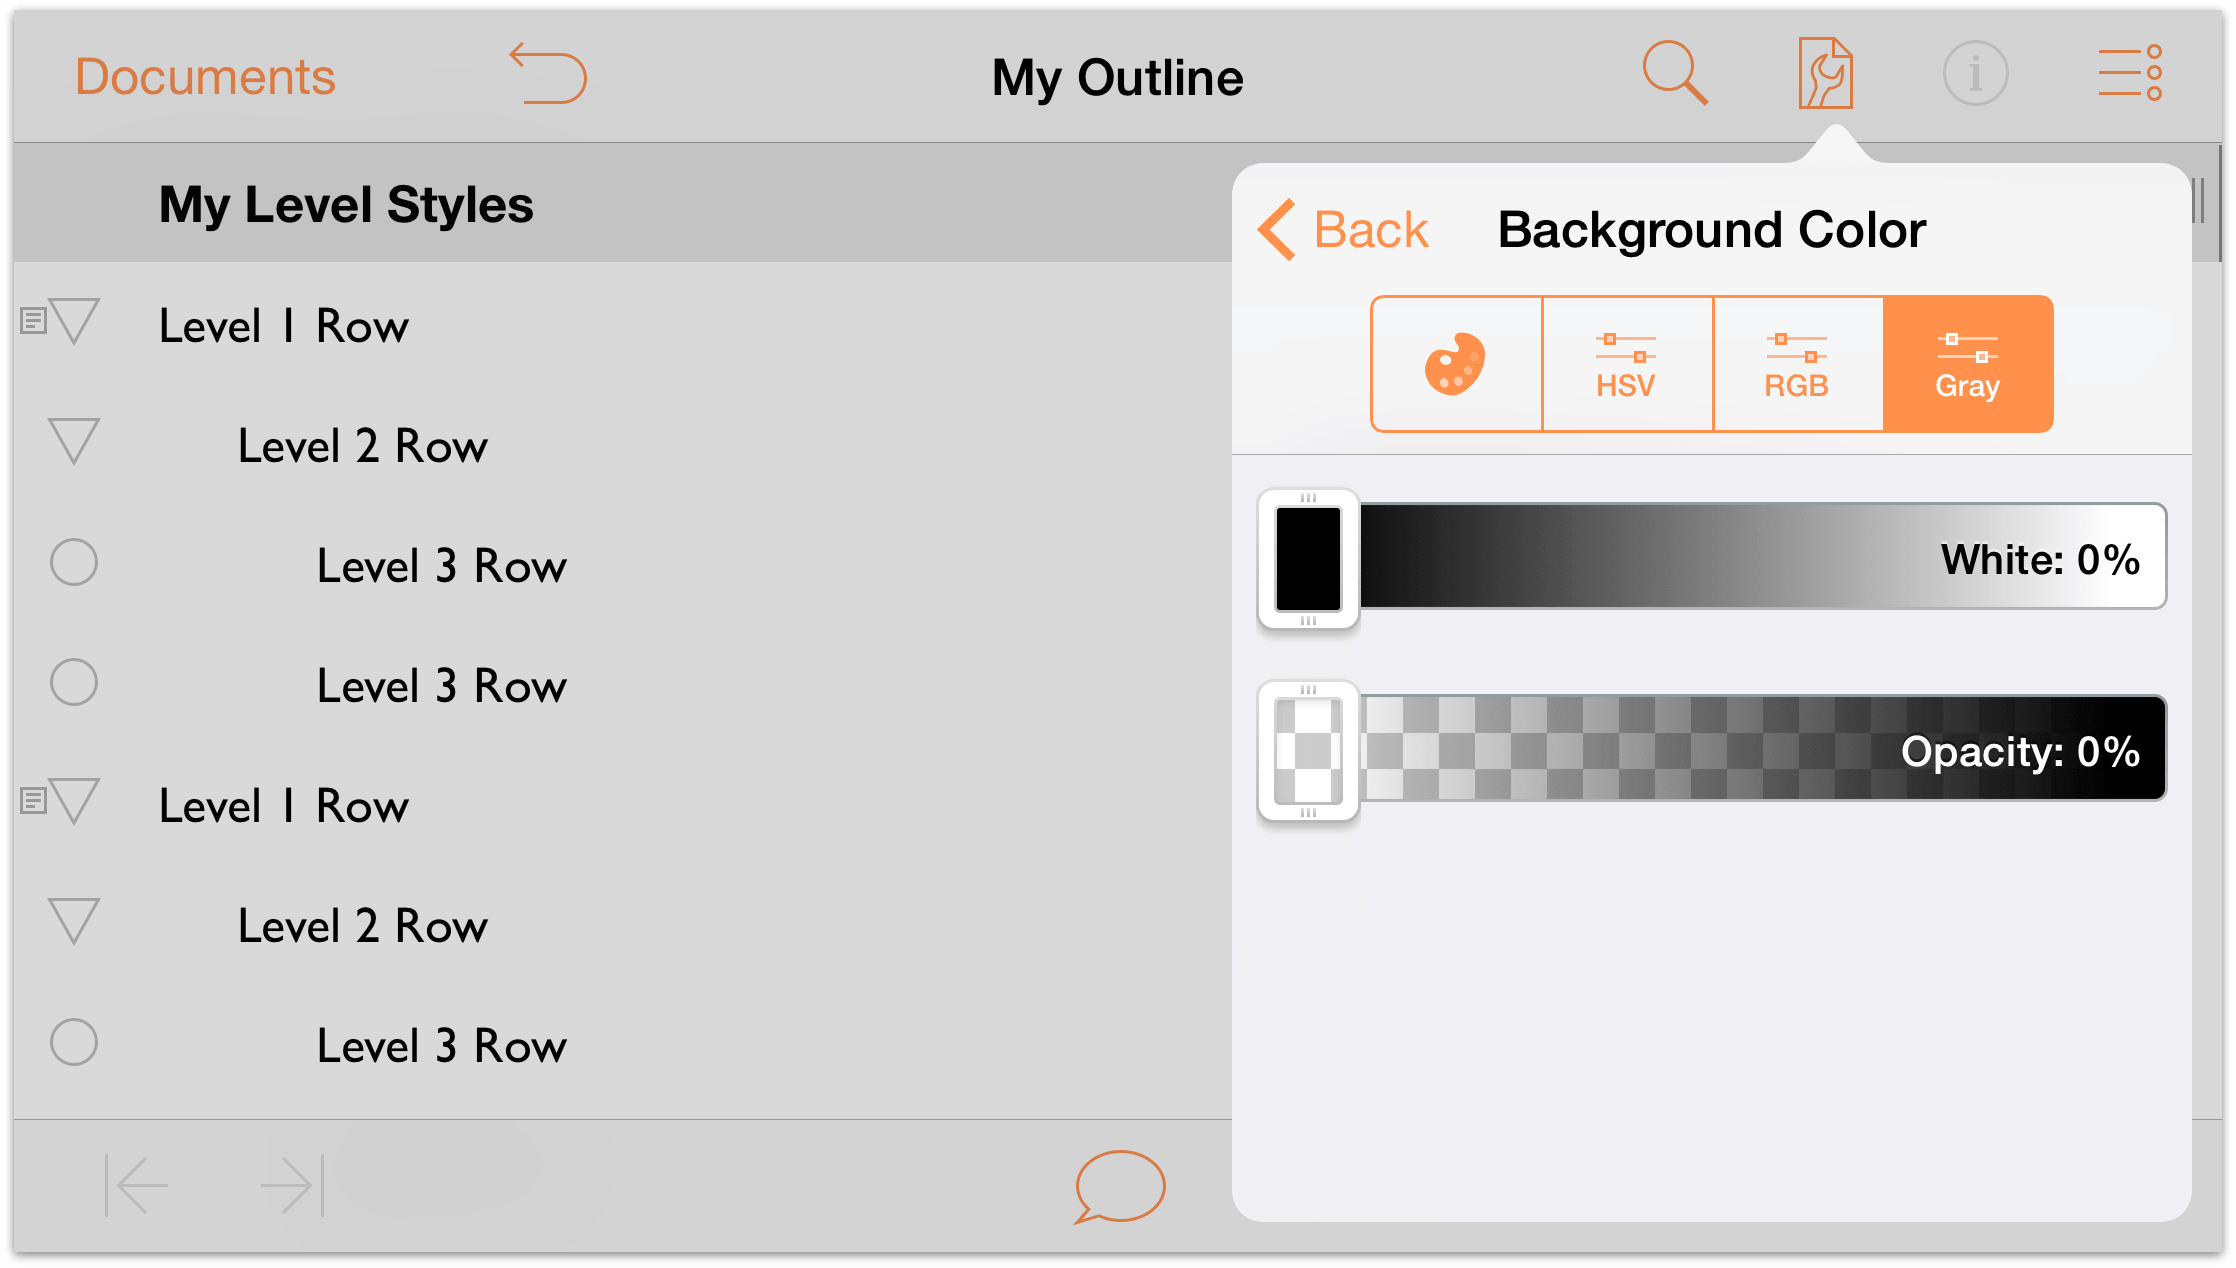
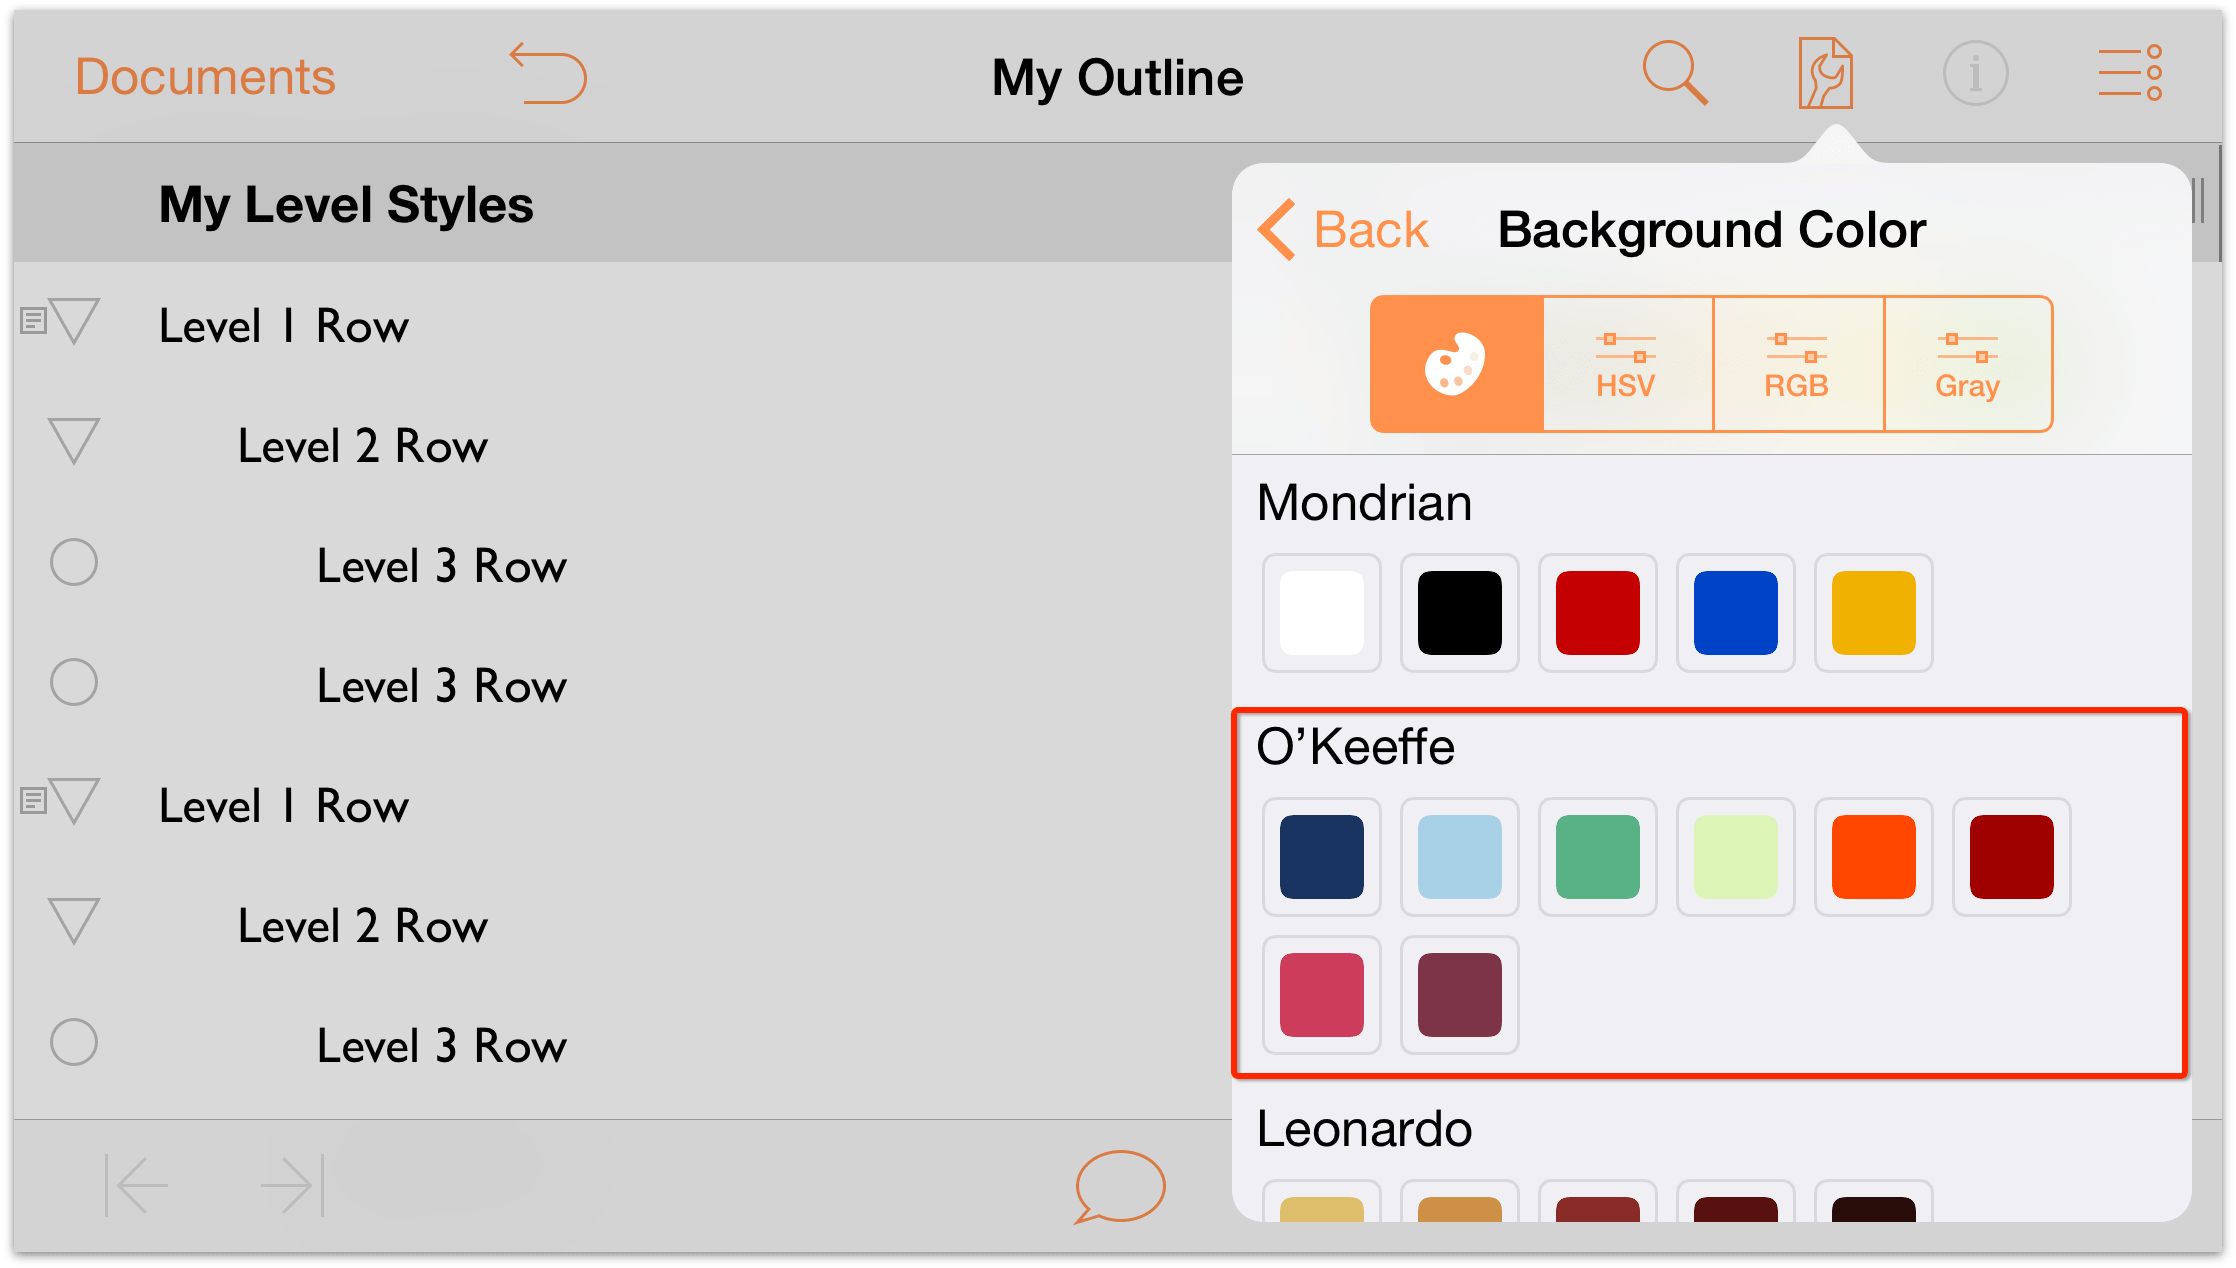
Along the top of the Background Color pane you’ll see the following row of buttons:

Tap the first button to view the available Color Palettes. The Color Palettes are based on the prominent colors used by some artists whose names you might recognize. For this tutorial, we’ll use the O’Keeffe palette; however, if you see another that’s more appealing, feel free to use that.
Tap the fourth tile in the top row to apply a light green color as the Background color.
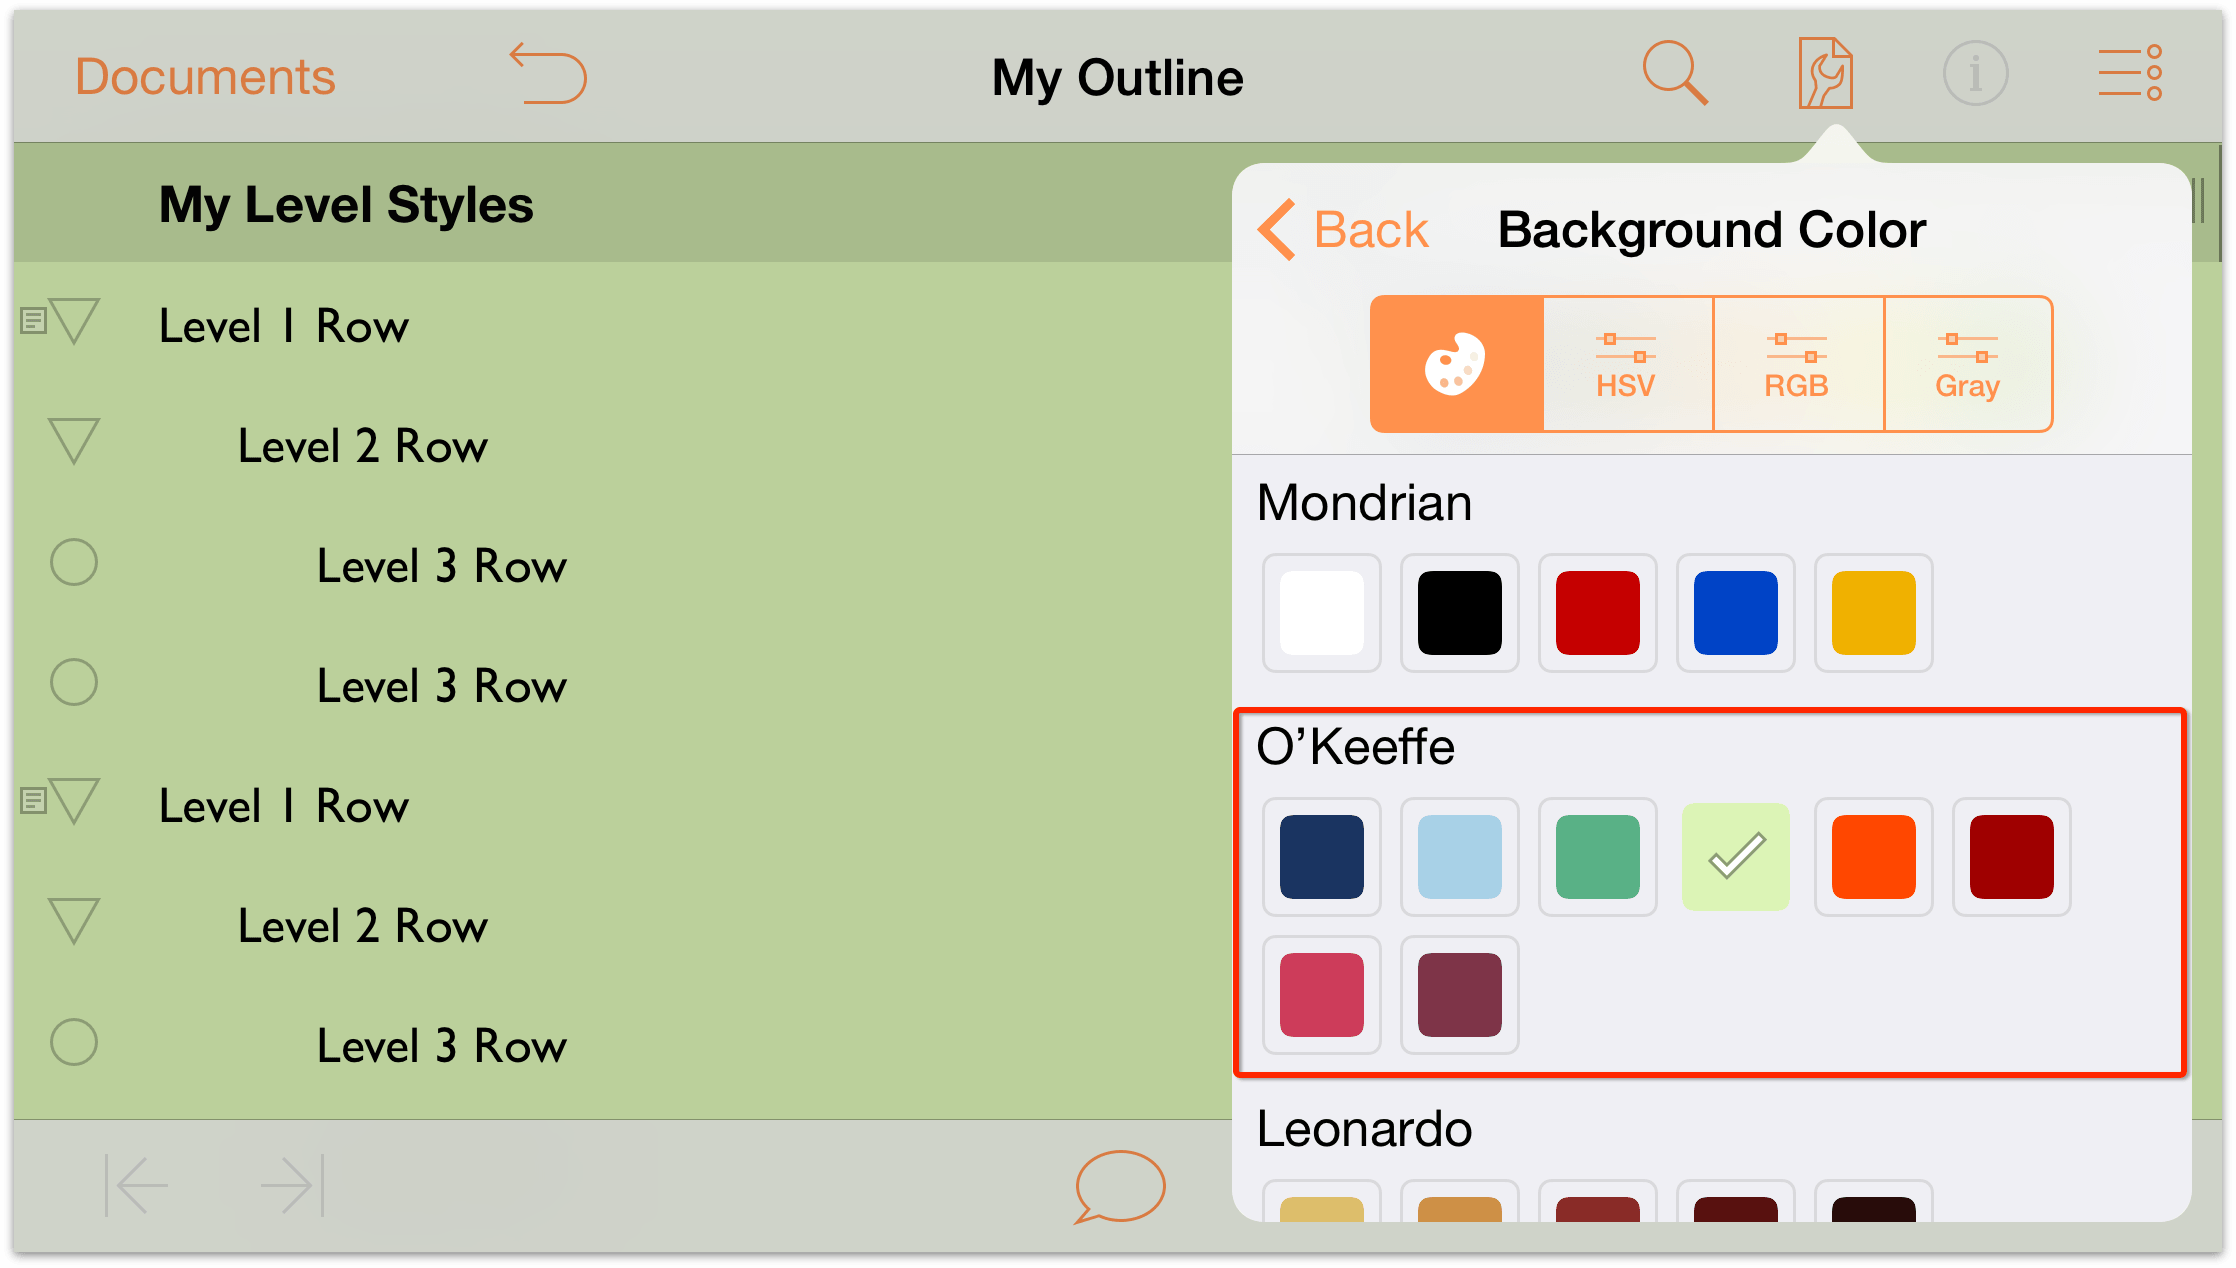
Notice how the green background color also spreads beneath the Column Header row, which looks a shade darker. This is because the Column Header row sits on a higher layer above the background. And judging from its appearance, it looks like the Column Header row has its own background color, but with some opacity to let the background color pop through.
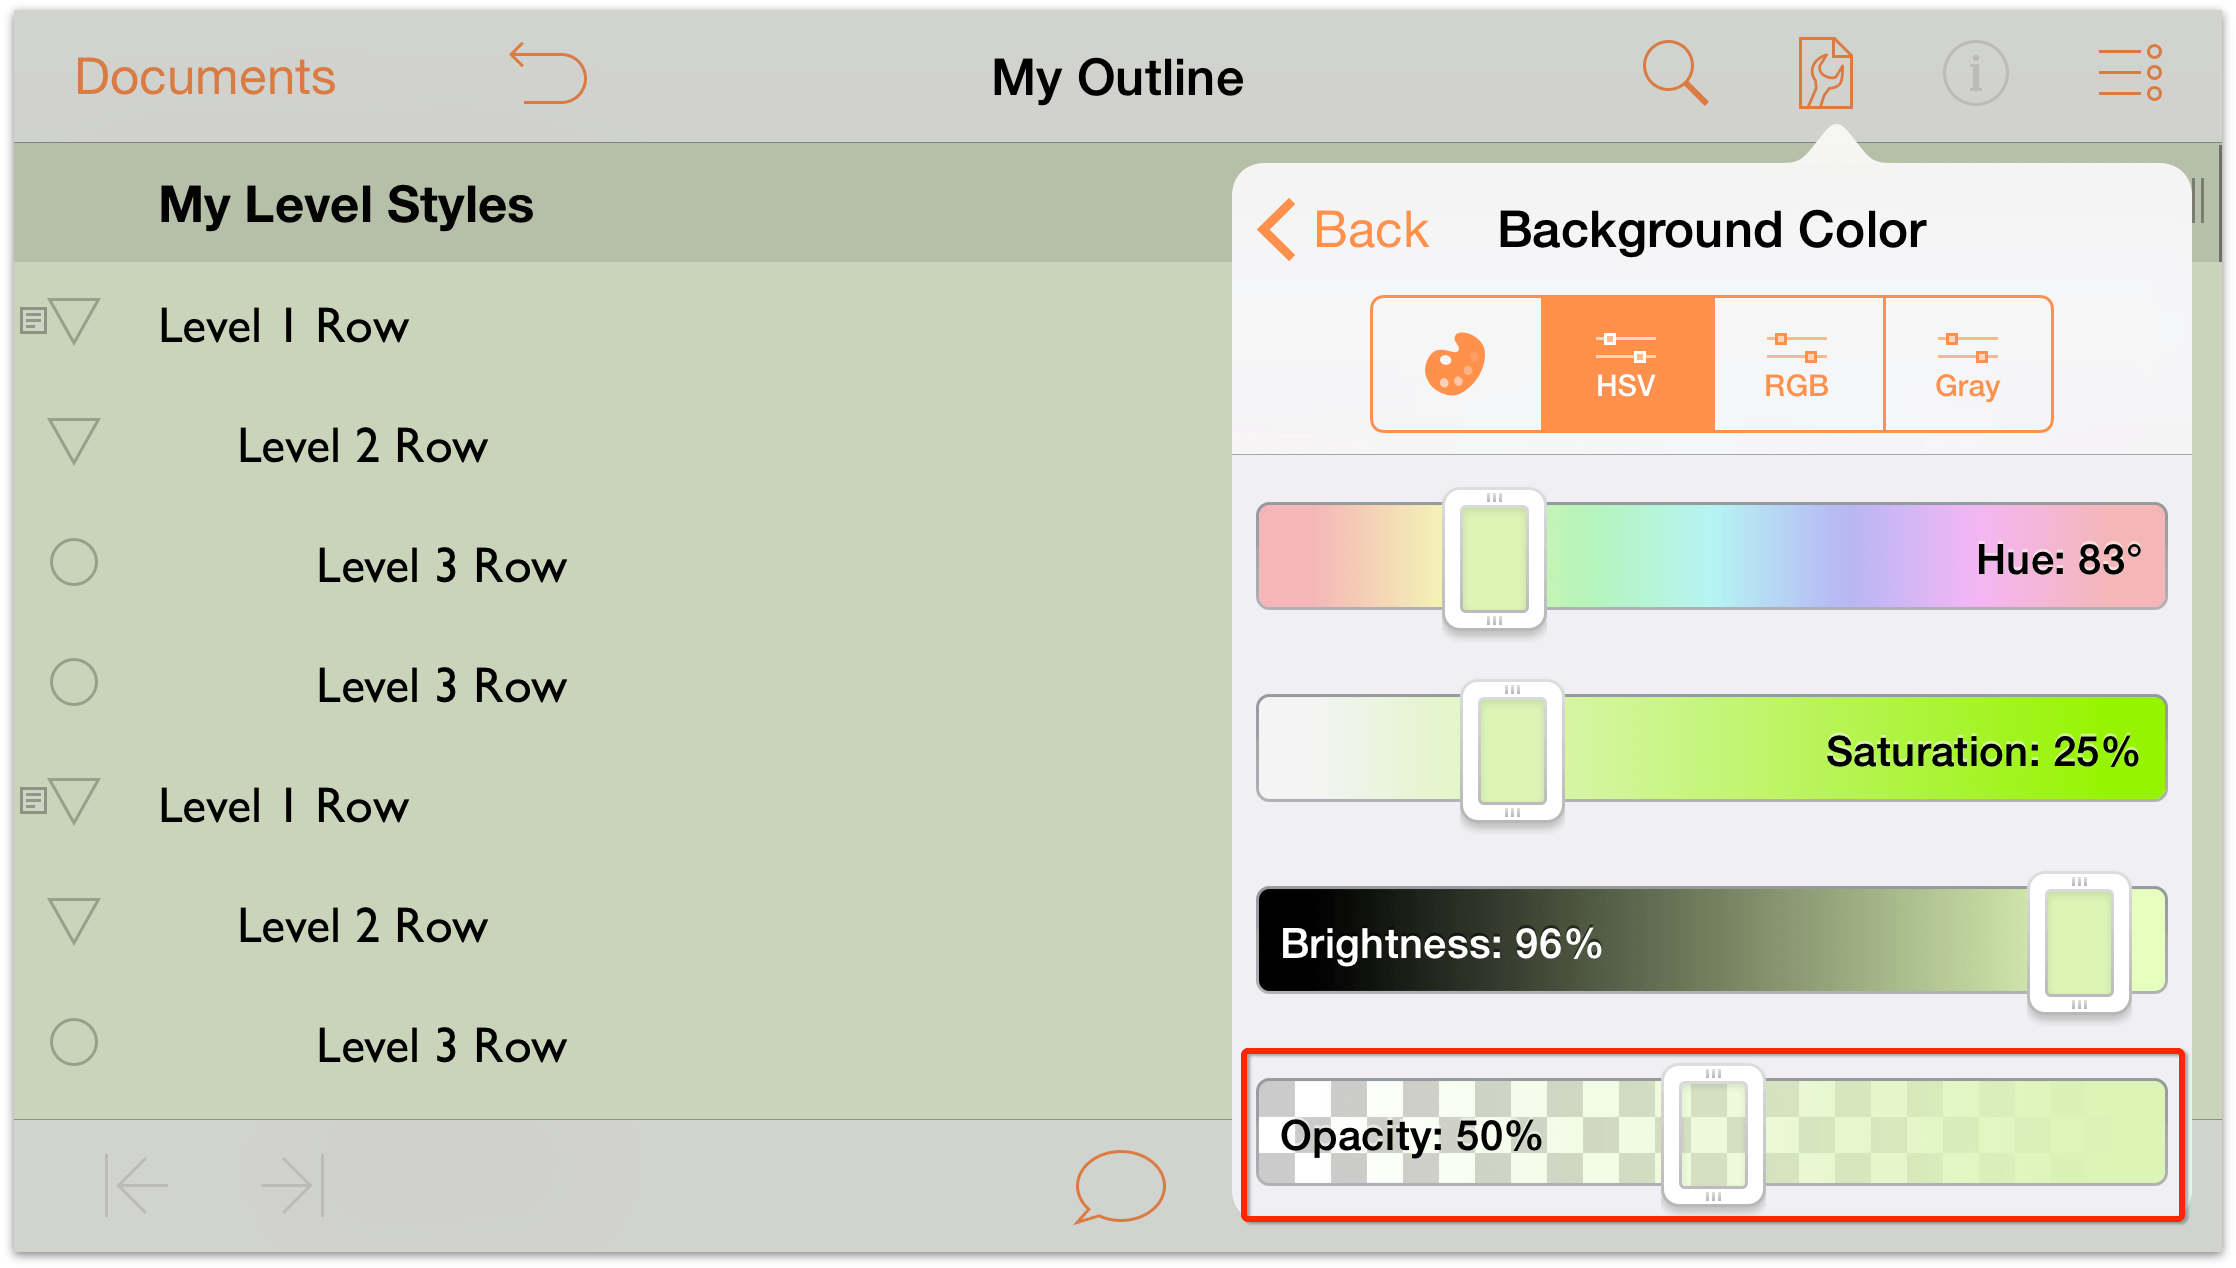
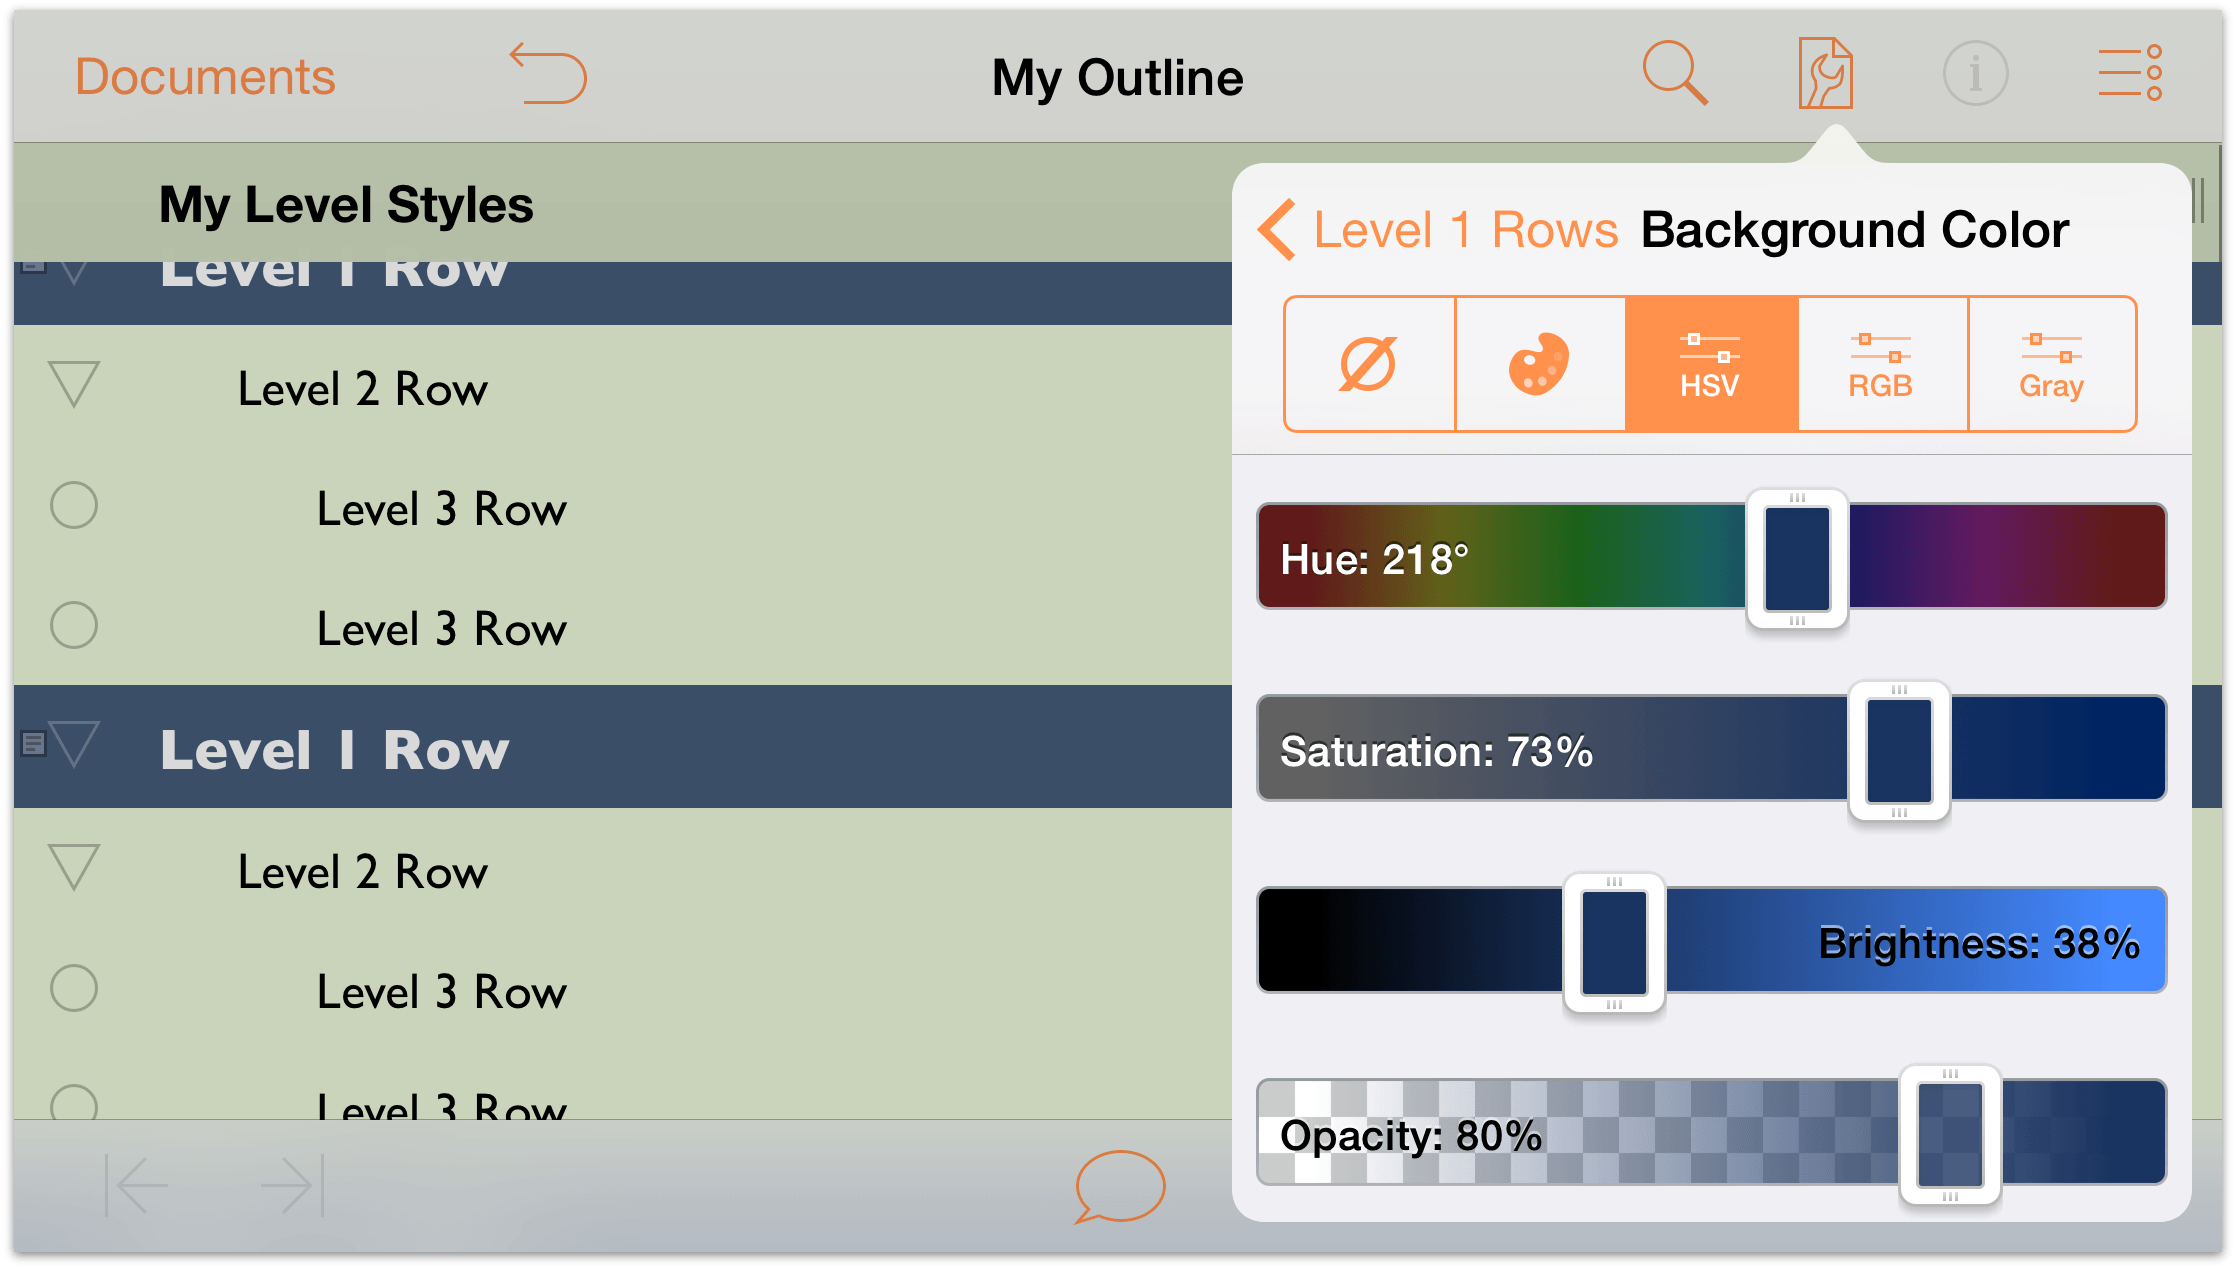
And speaking of opacity, that green background color is a little darker than we’d like, so let’s change that. Tap the HSV button in the color controls. You’re presented with four different sliders which you can use to adjust the Hue, Saturation, Brightness, and Opacity.
Tap and drag the Opacity slider to the left and set the background color’s opacity to 50%.
- At the top of the menu, tap Back to return to the Whole Document styles.
Scroll down in the menu, and tap the Align Left button.
The outline now has a light green background, and its default font type and size is 14 point Gill Sans.
Setting the Row Level Styles
Now it’s time to turn our attention to the row levels. With the Whole Document styles set, we’ll use the same font (Gill Sans), but set different sizes for each row style. We’ll also add a background color to a couple of the rows so you can see how to layer colors on top of the background color specified in the Whole Document style.
Let’s get started!
Tap
 , and then tap to choose the Styles pane.
Under Structured Styles, tap to choose the Level 1 Rows styles.
Note
At the top of the Styles pane, you’ll see a bar that spans the width of the pane. This is a preview of the styles. As you change the style settings for the Level 1 Row, keep an eye on this preview so you can see how the rows will eventually look.-
In the Style pane, do the following:
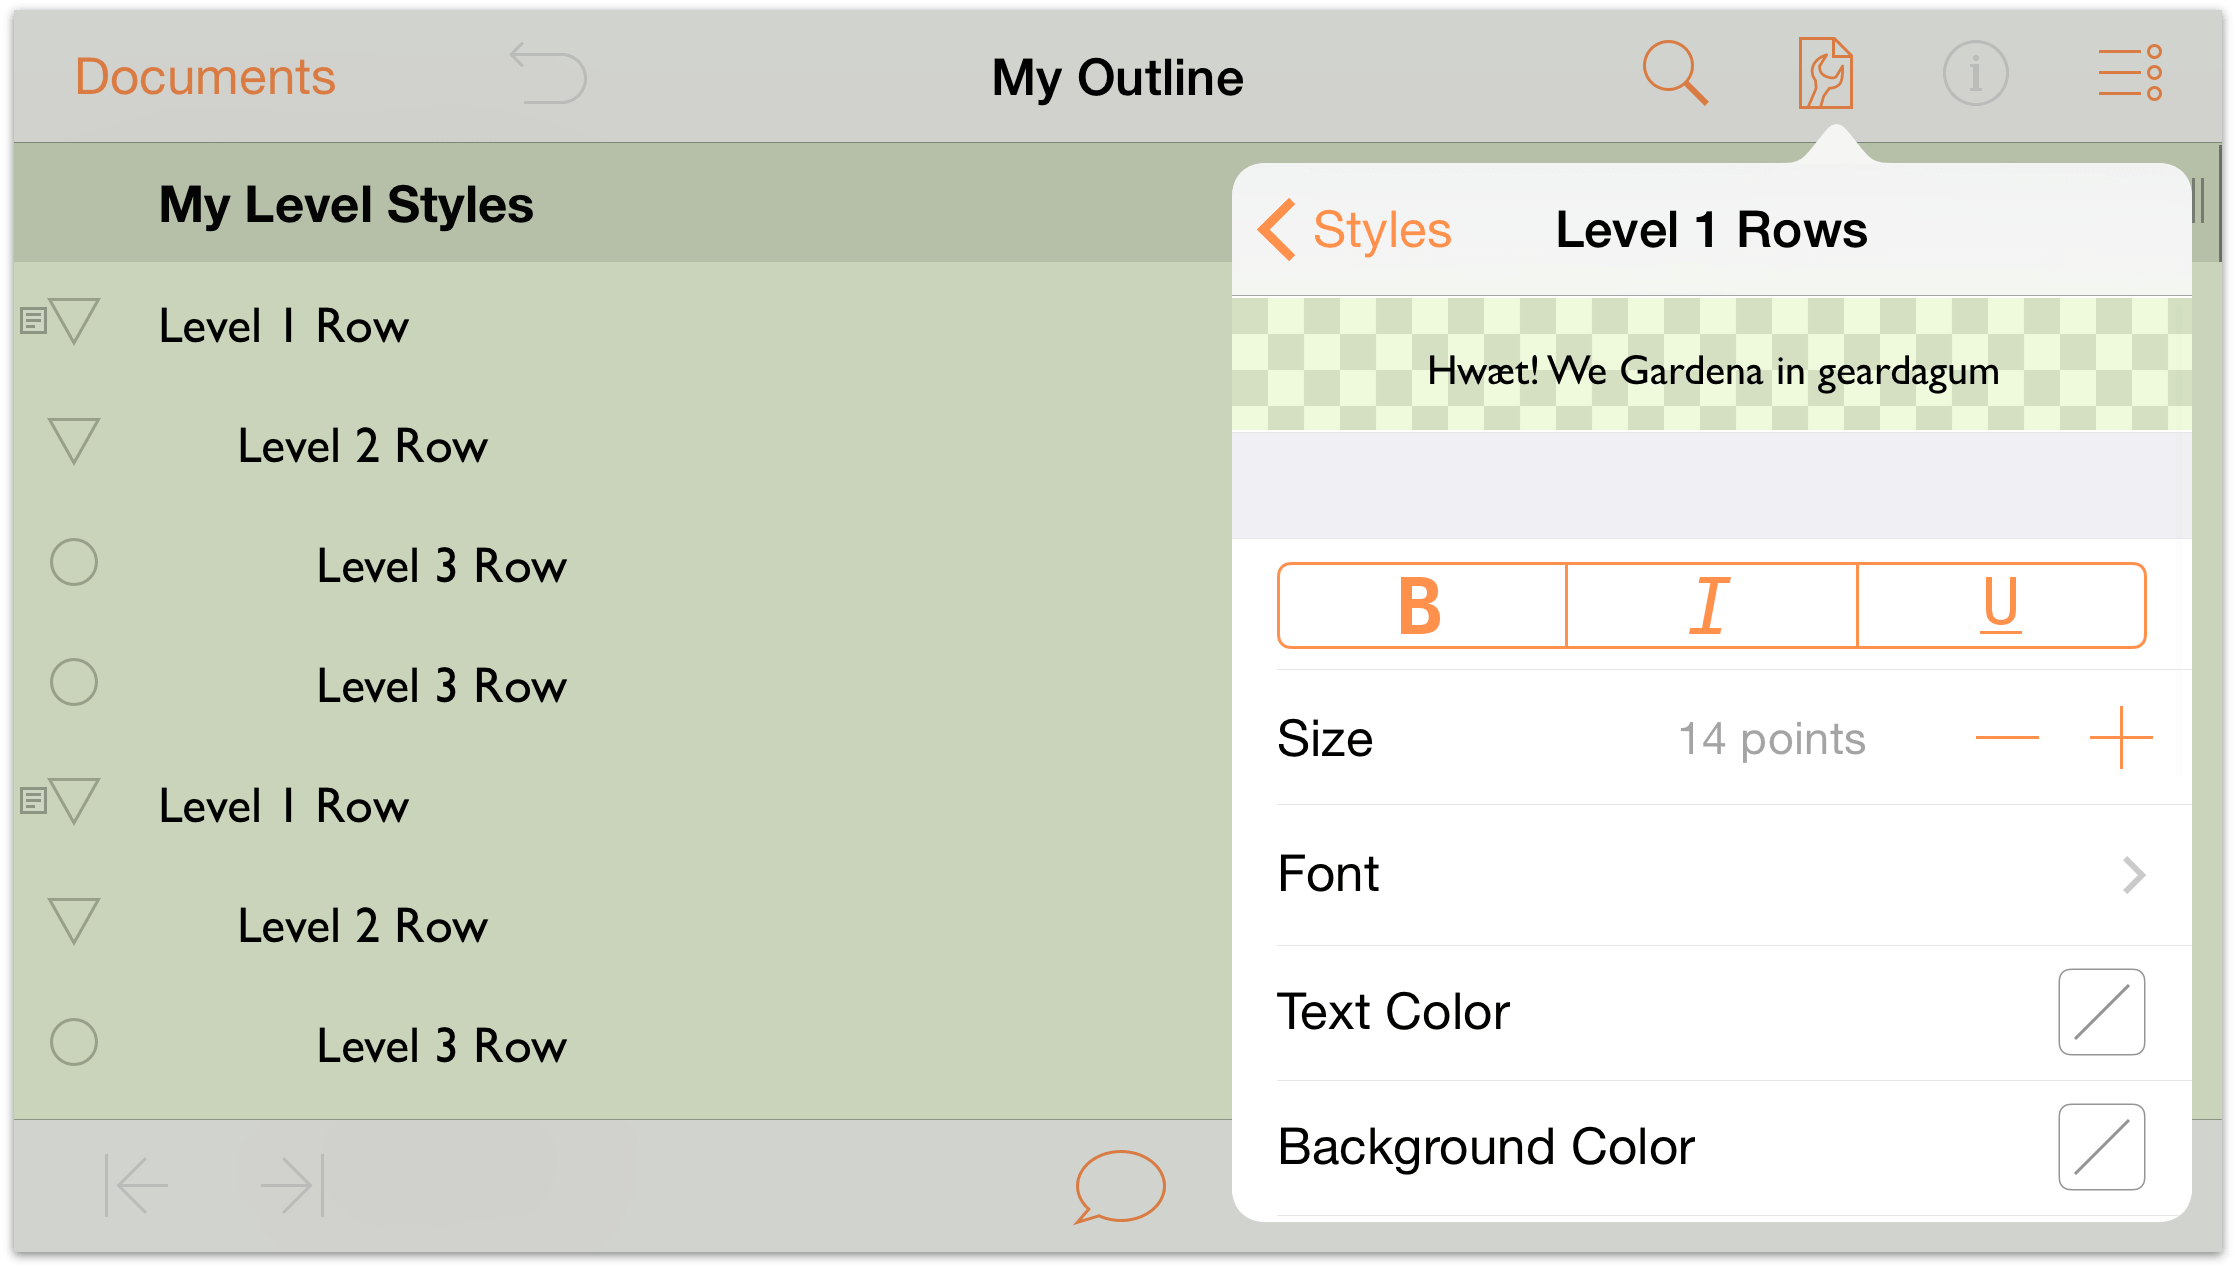
- In the row of buttons, tap B to make all Level 1 Row text bold.
- Size: Increase the type size to 16 points.
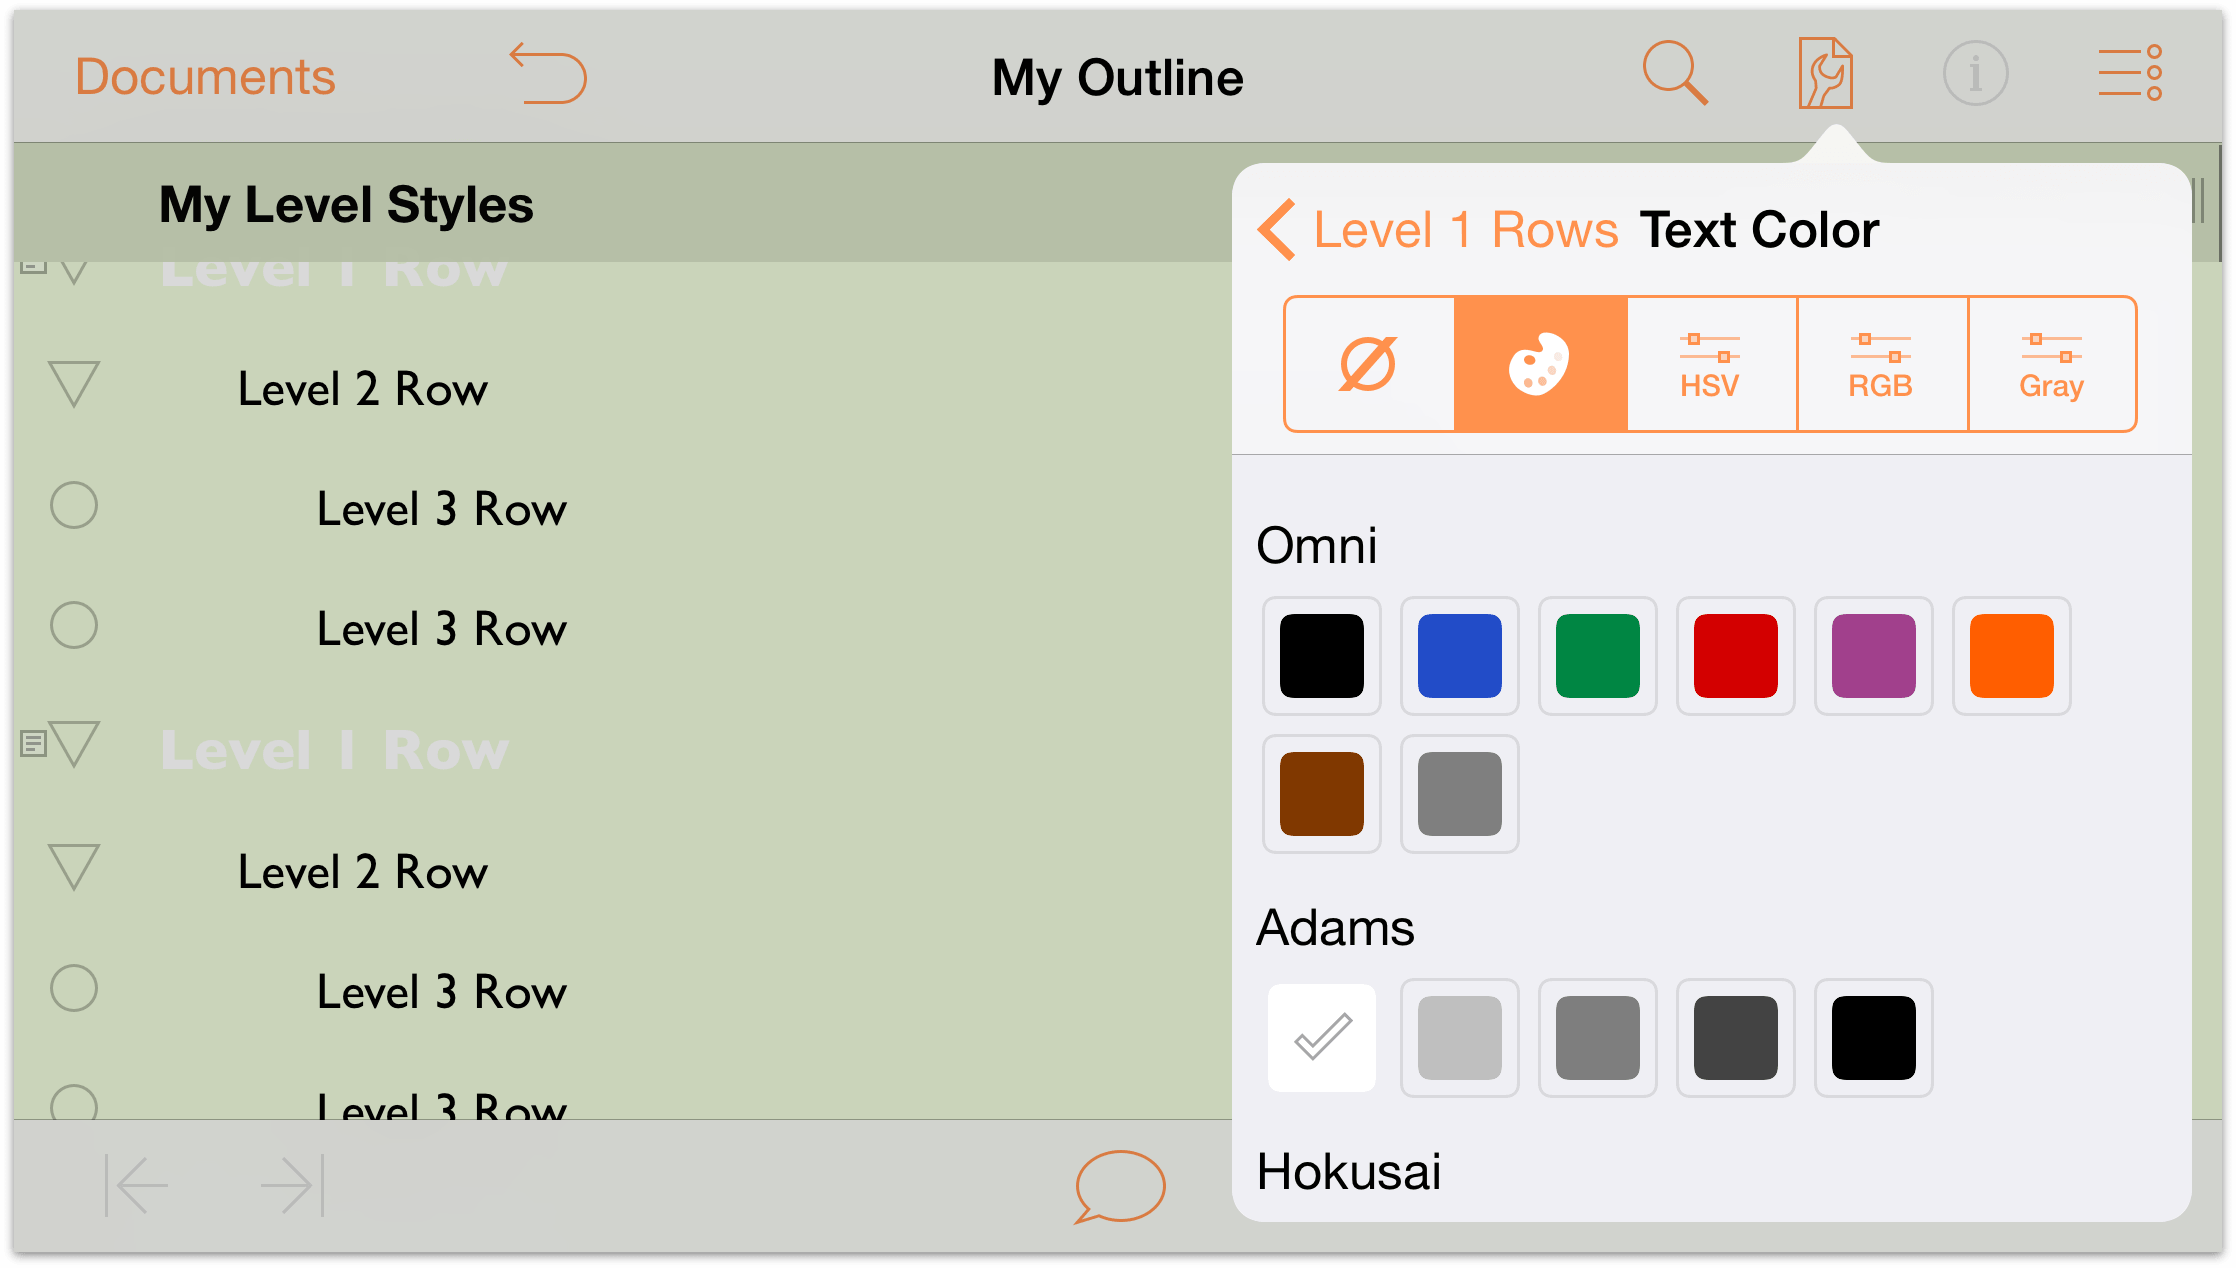
Text Color: Change the color to White.
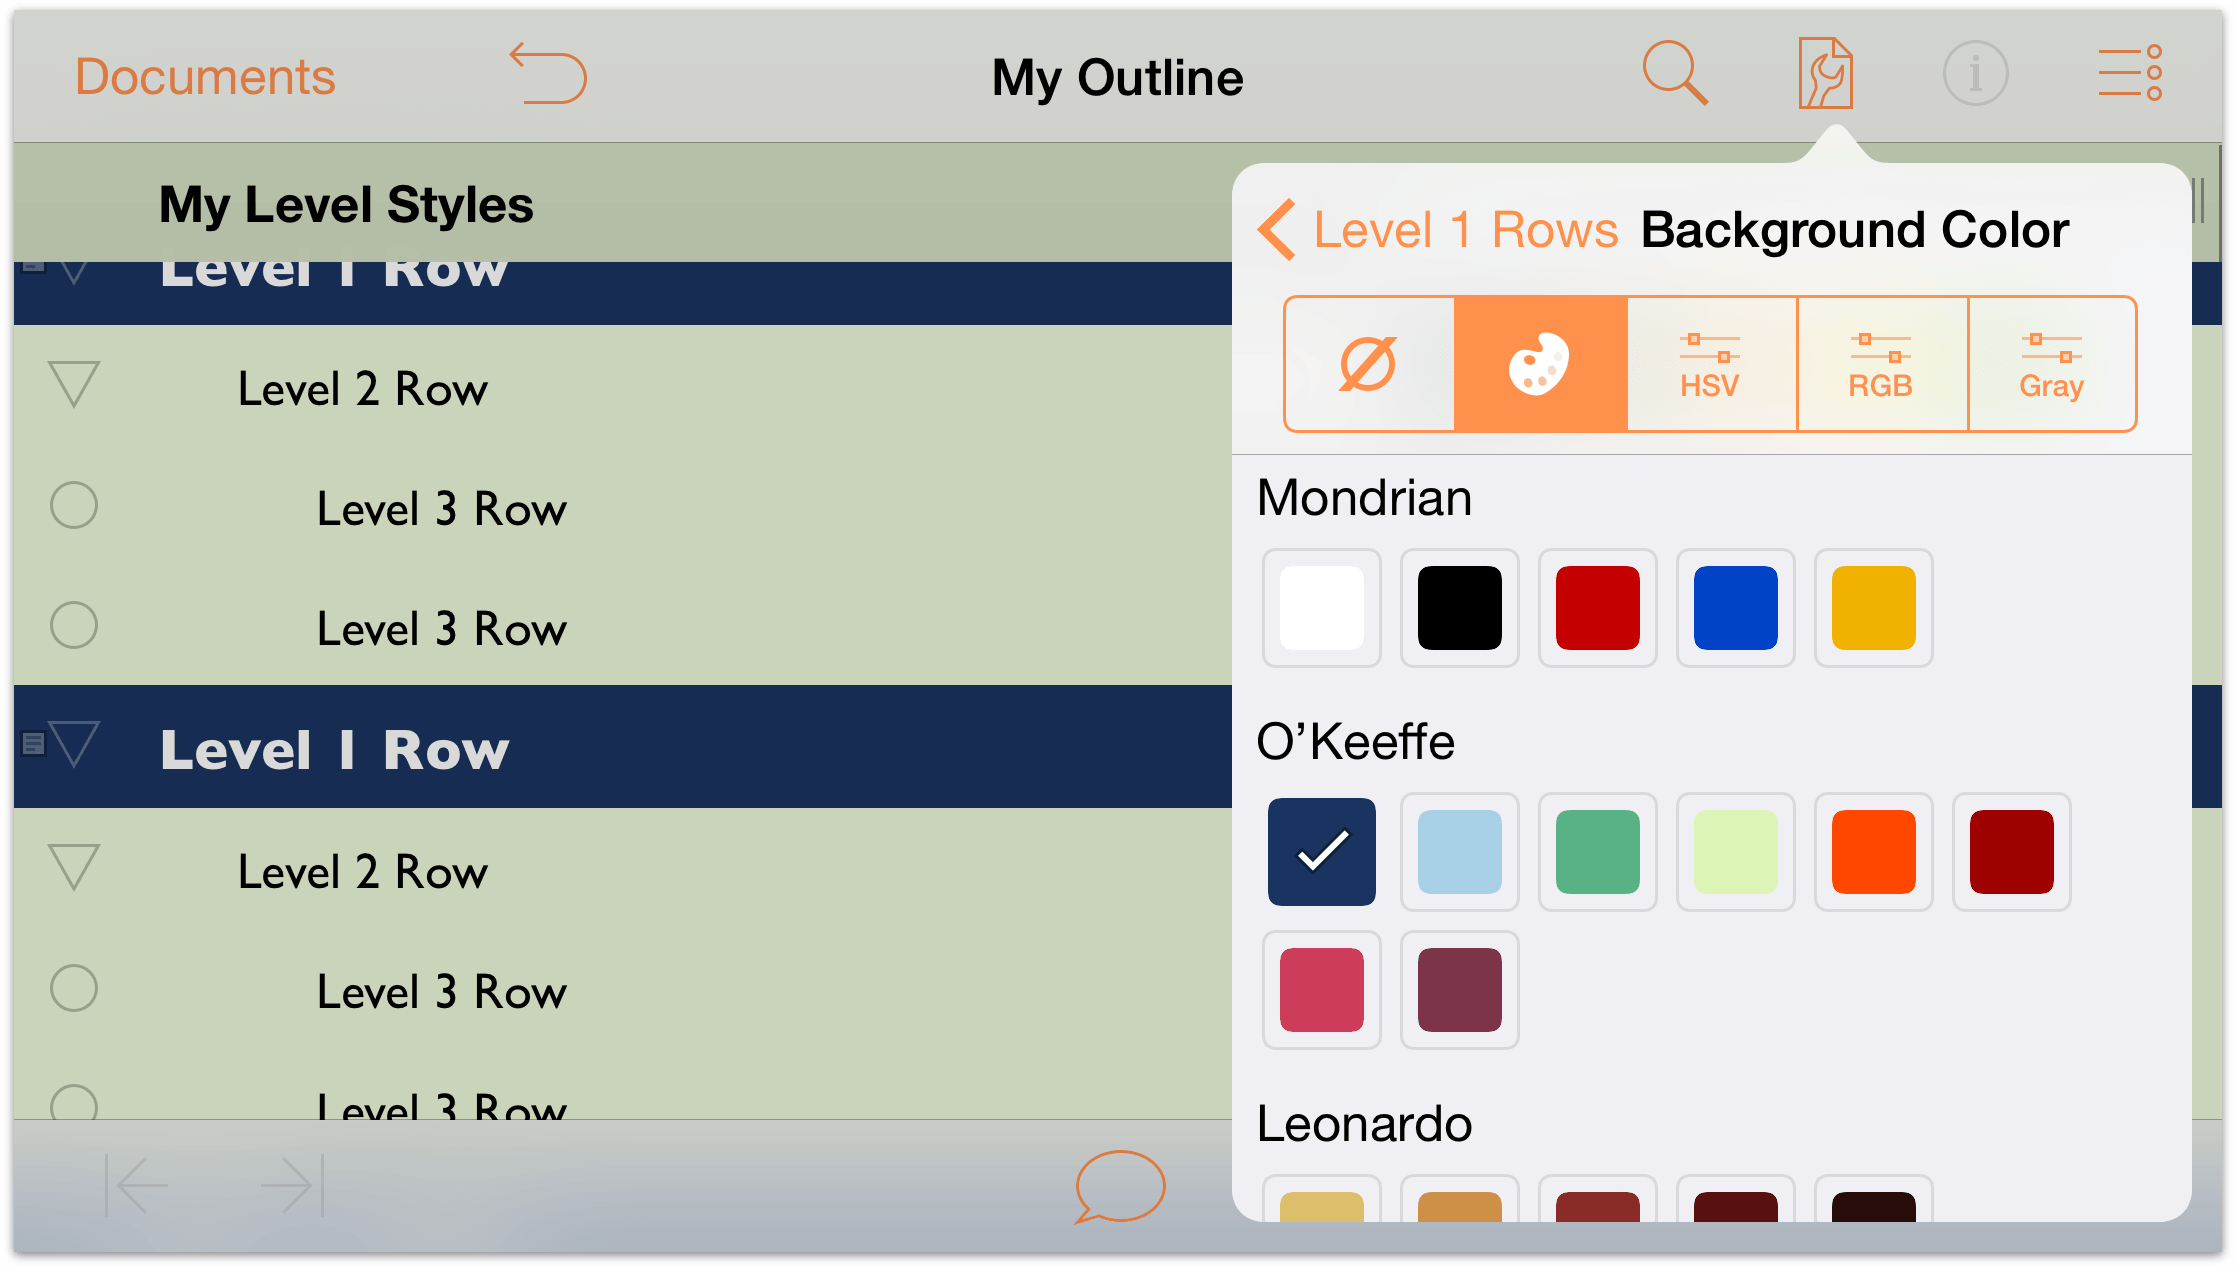
Background Color: Change the background color of the Level 1 Rows to the dark blue color under the O’Keeffe palette.
While in the Color pane, tap to choose the HSV color controls and set the background color’s Opacity to 80%.
At the top of the Contents pane, tap Level 1 Rows to return to the Level 1 Rows style pane and review your changes.
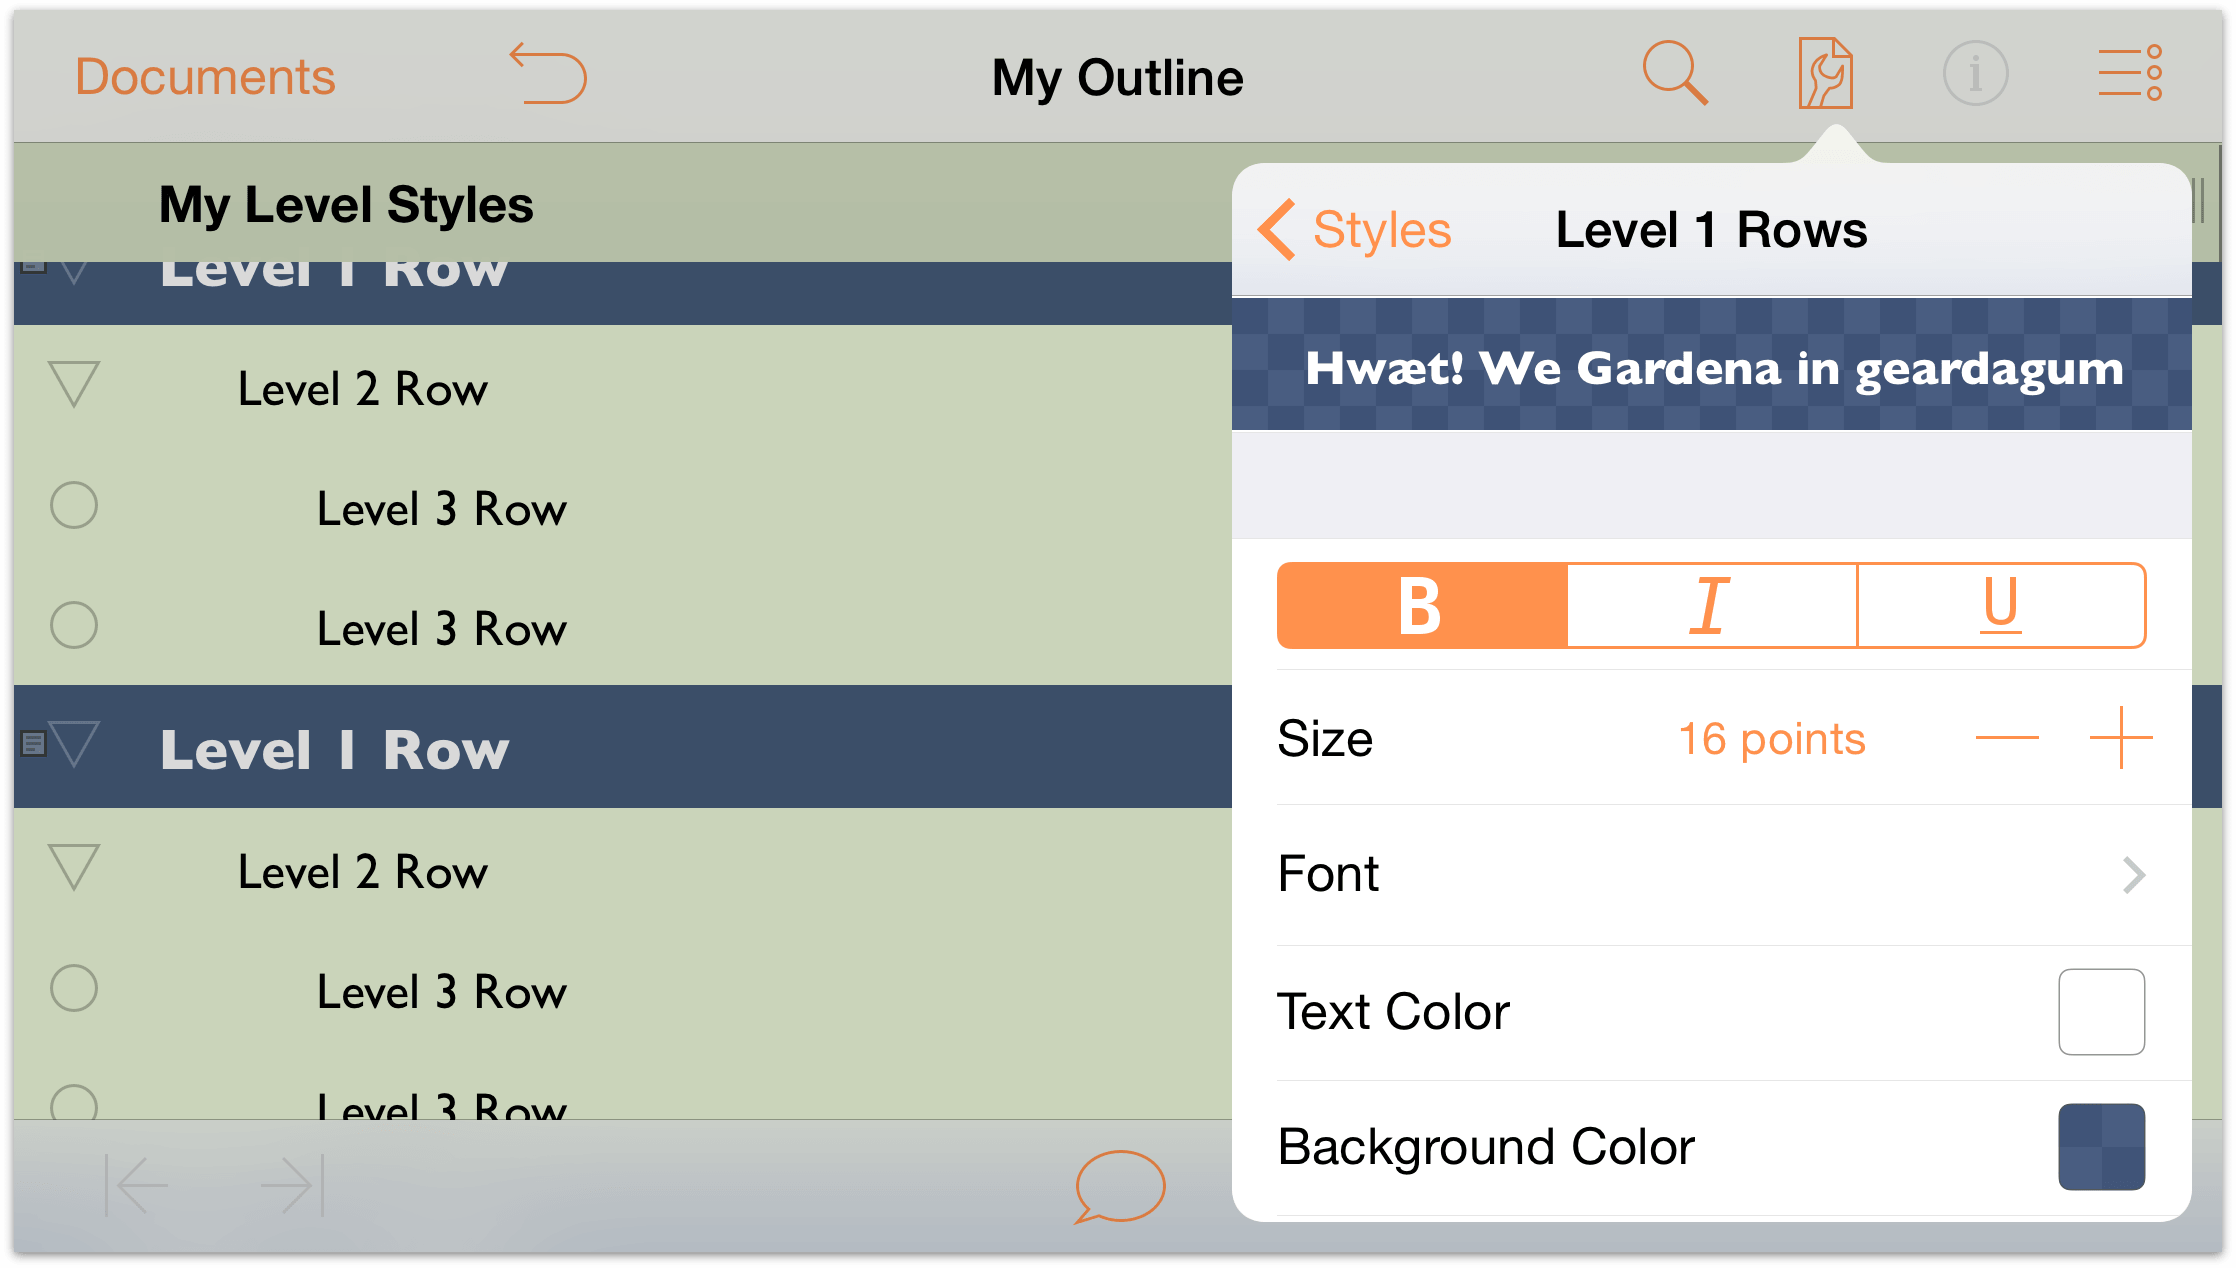
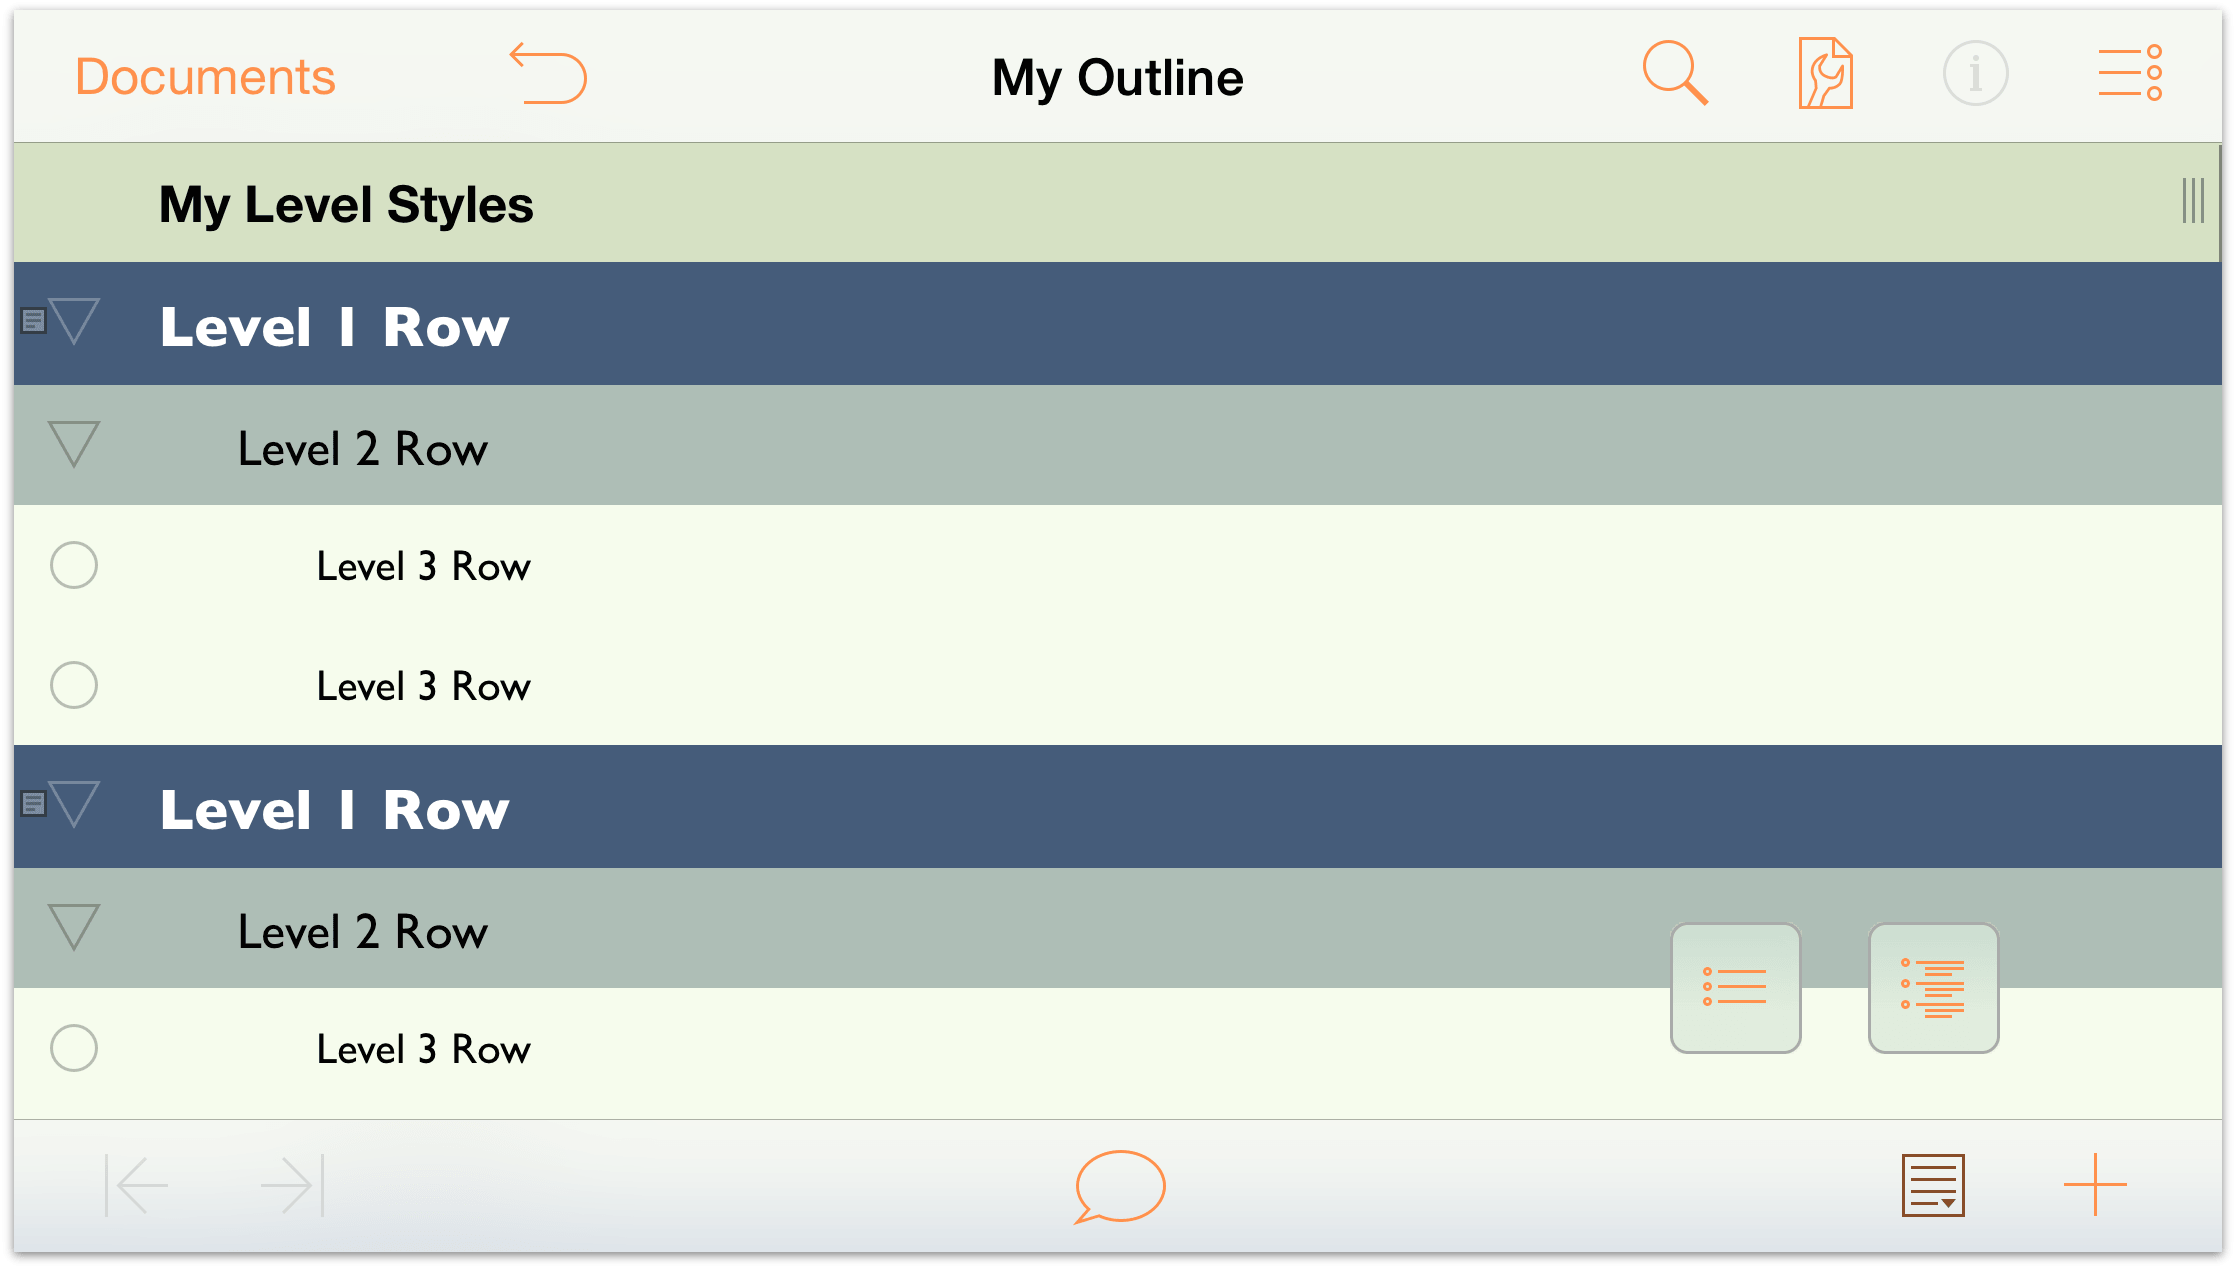
Your document should look similar to the following:
-
At the top of the menu, tap Styles to return to the listing of styles. Under Structural Styles, tap to choose Level 2 Rows.
In the Level 2 Rows styles pane, make the following changes:
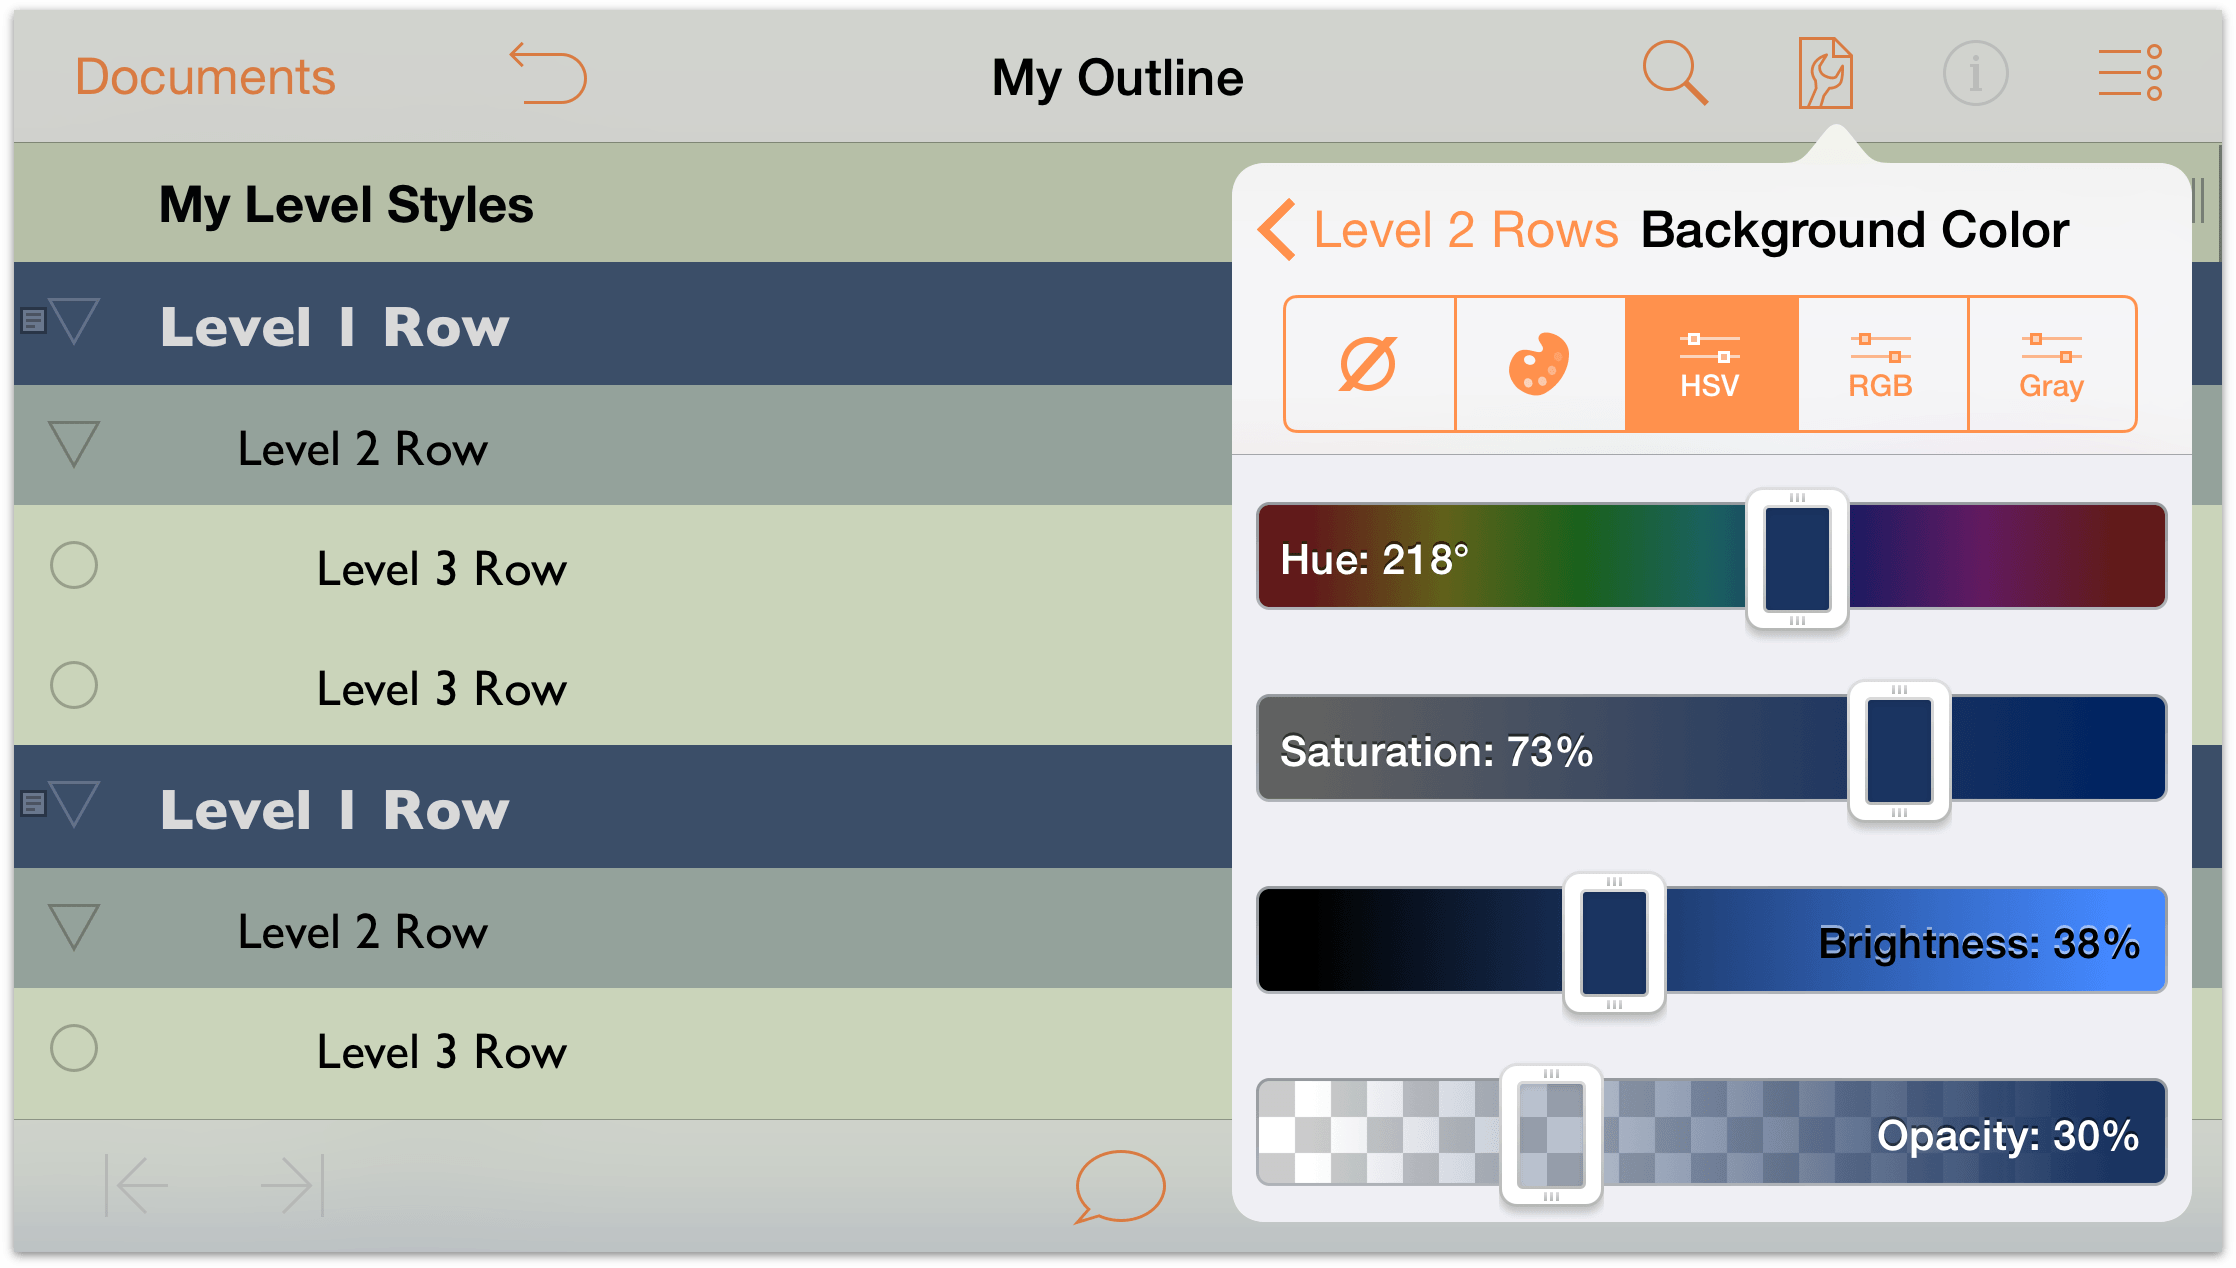
- Background Color: Change the background color to the same dark blue color found in the O’Keeffe palette, and change its opacity in the HSV controls to 30%.

The Level 2 Rows style pane should be similar to the following:
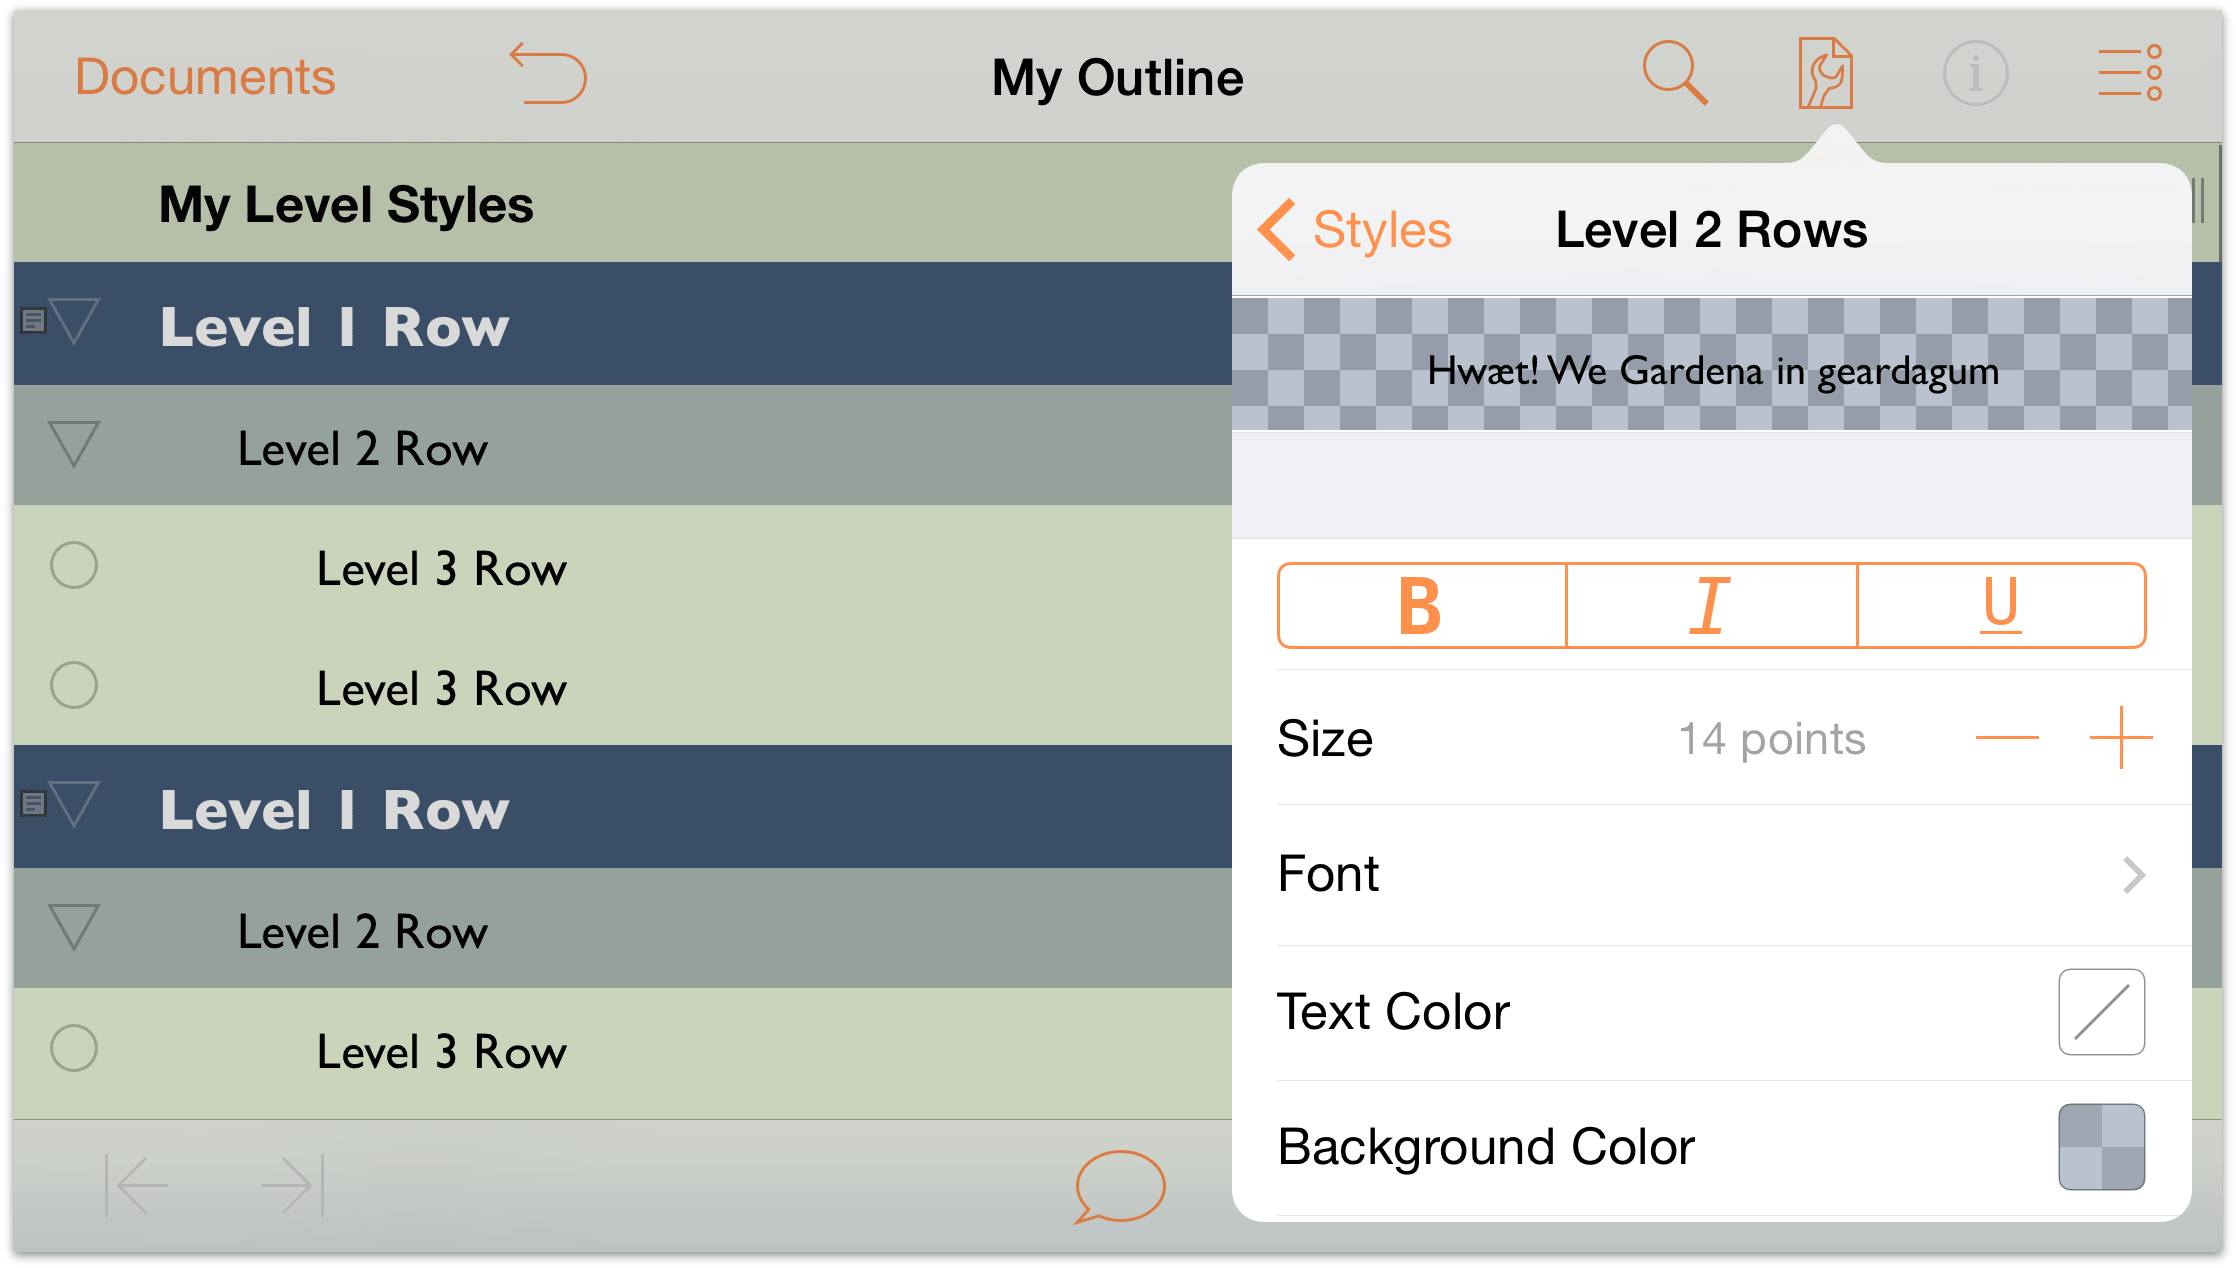
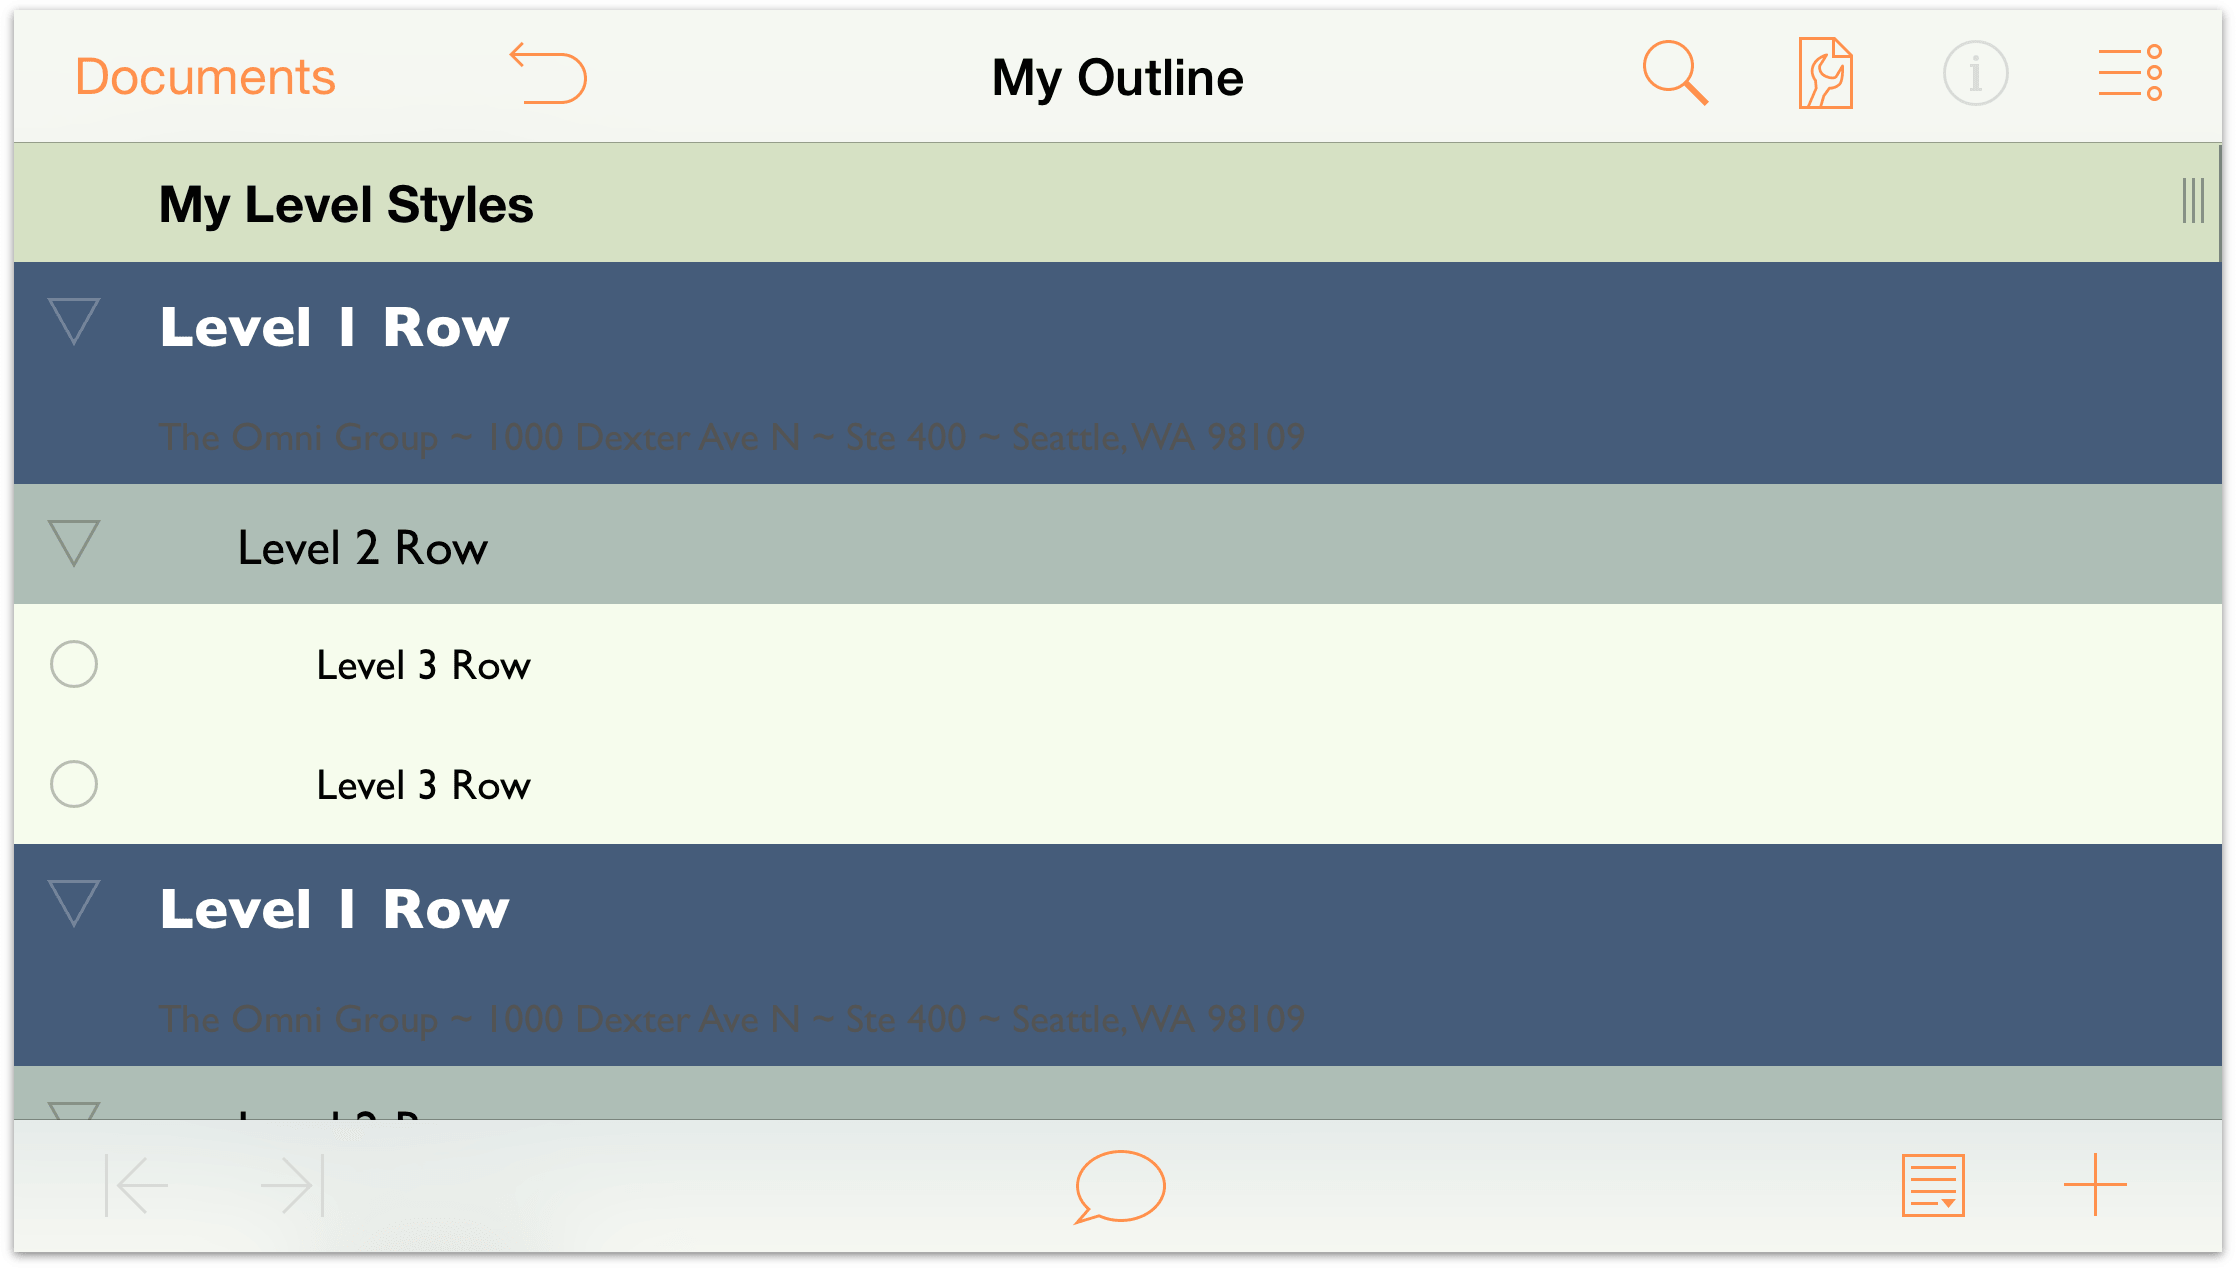
And your outline should look similar to the following:

Notice how giving the Level 2 Rows’ background color a 30% opacity makes the color look bluish-green. By setting the opacity at a lower percentage, the background color you set for the Whole Document style starts to bleed through.
Tip
Use color opacity—available in the HSV, RGB, and Gray color panes—to blend row colors with the Whole Document’s background color. You can get really creative with just two colors and differing levels of opacity.- Background Color: Change the background color to the same dark blue color found in the O’Keeffe palette, and change its opacity in the HSV controls to 30%.
- At the top of the menu, tap Styles to return to the listing of styles. Under Structural Styles, tap to choose Level 3 Rows.
In the Level 3 Rows style pane, make the following changes:
- Size: Change the type size to 12 points.
- Background Color: Under the Adams color palette, choose the White color swatch. Then, tap HSV and change the Opacity to 50%. This gives the Level 3 Rows a light-whitish-green background color.
The Level 3 Rows style pane should be similiar to the following:

And your outline should look similar to the following:
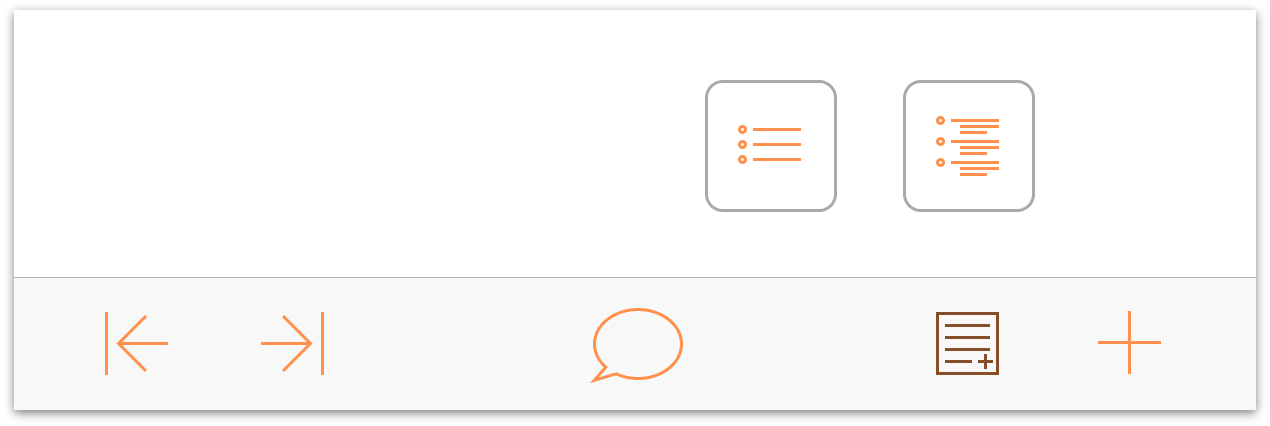
Now let’s take a look at the Notes you added to the Level 1 Rows earlier in the chapter. Start by tapping ![]() in the toolbar at the bottom of the screen. When you do, two additional buttons fly out. The button on the left hides all Notes, and the one on the right reveals all Notes; tap the right button to expand all Notes.
in the toolbar at the bottom of the screen. When you do, two additional buttons fly out. The button on the left hides all Notes, and the one on the right reveals all Notes; tap the right button to expand all Notes.
Ew, that doesn’t look good at all! The color of the Note text is black, and against that dark blue background, they are totally unreadable. We’ll need to fix that.
Let’s get back to work!
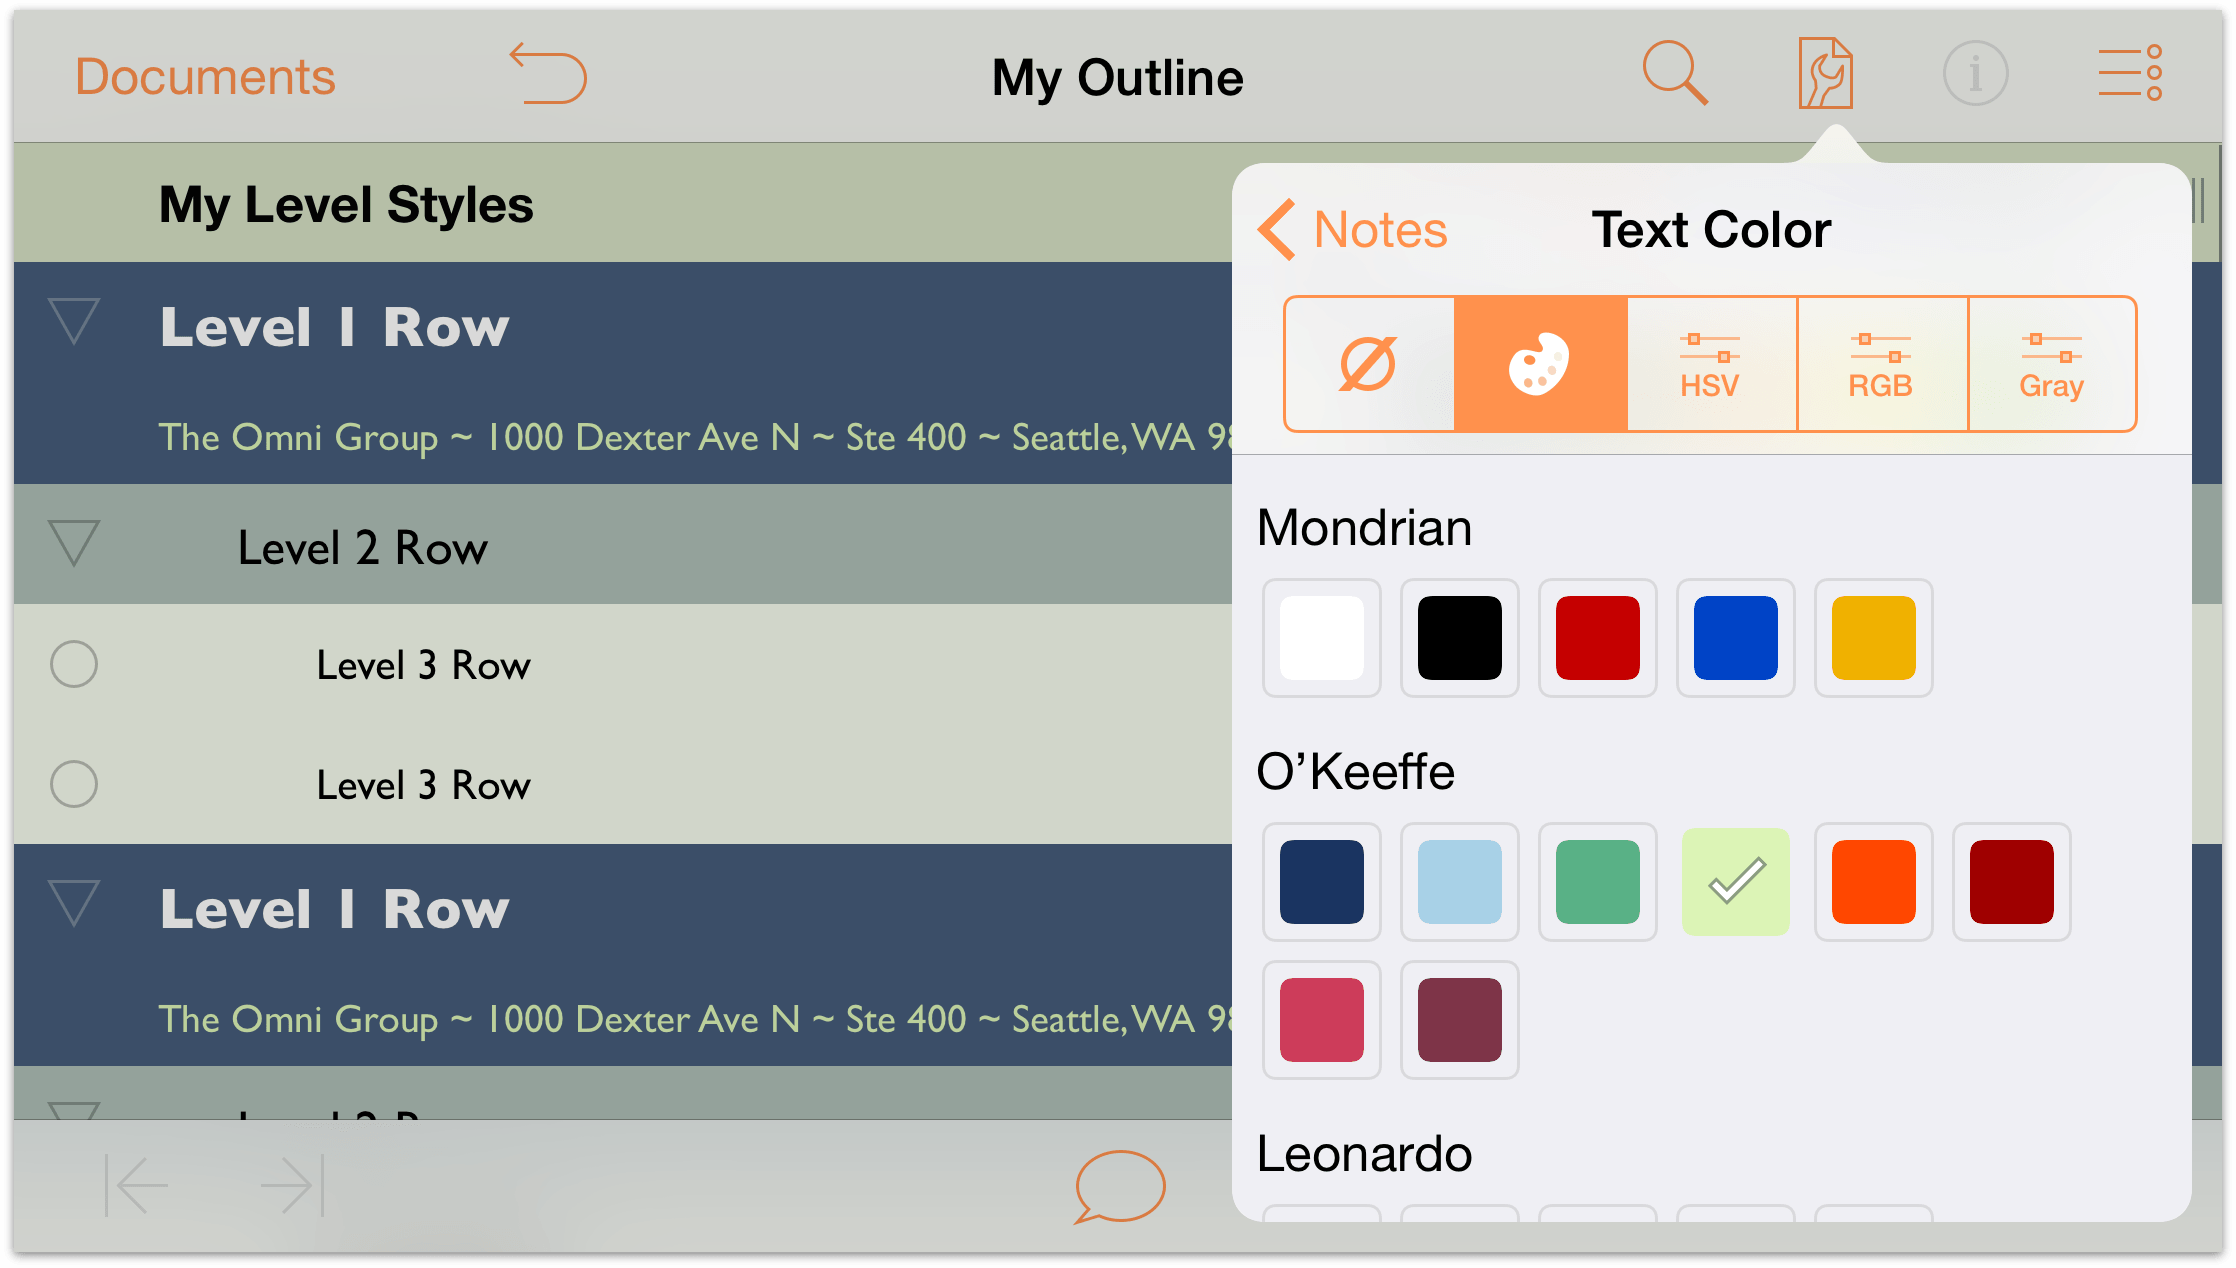
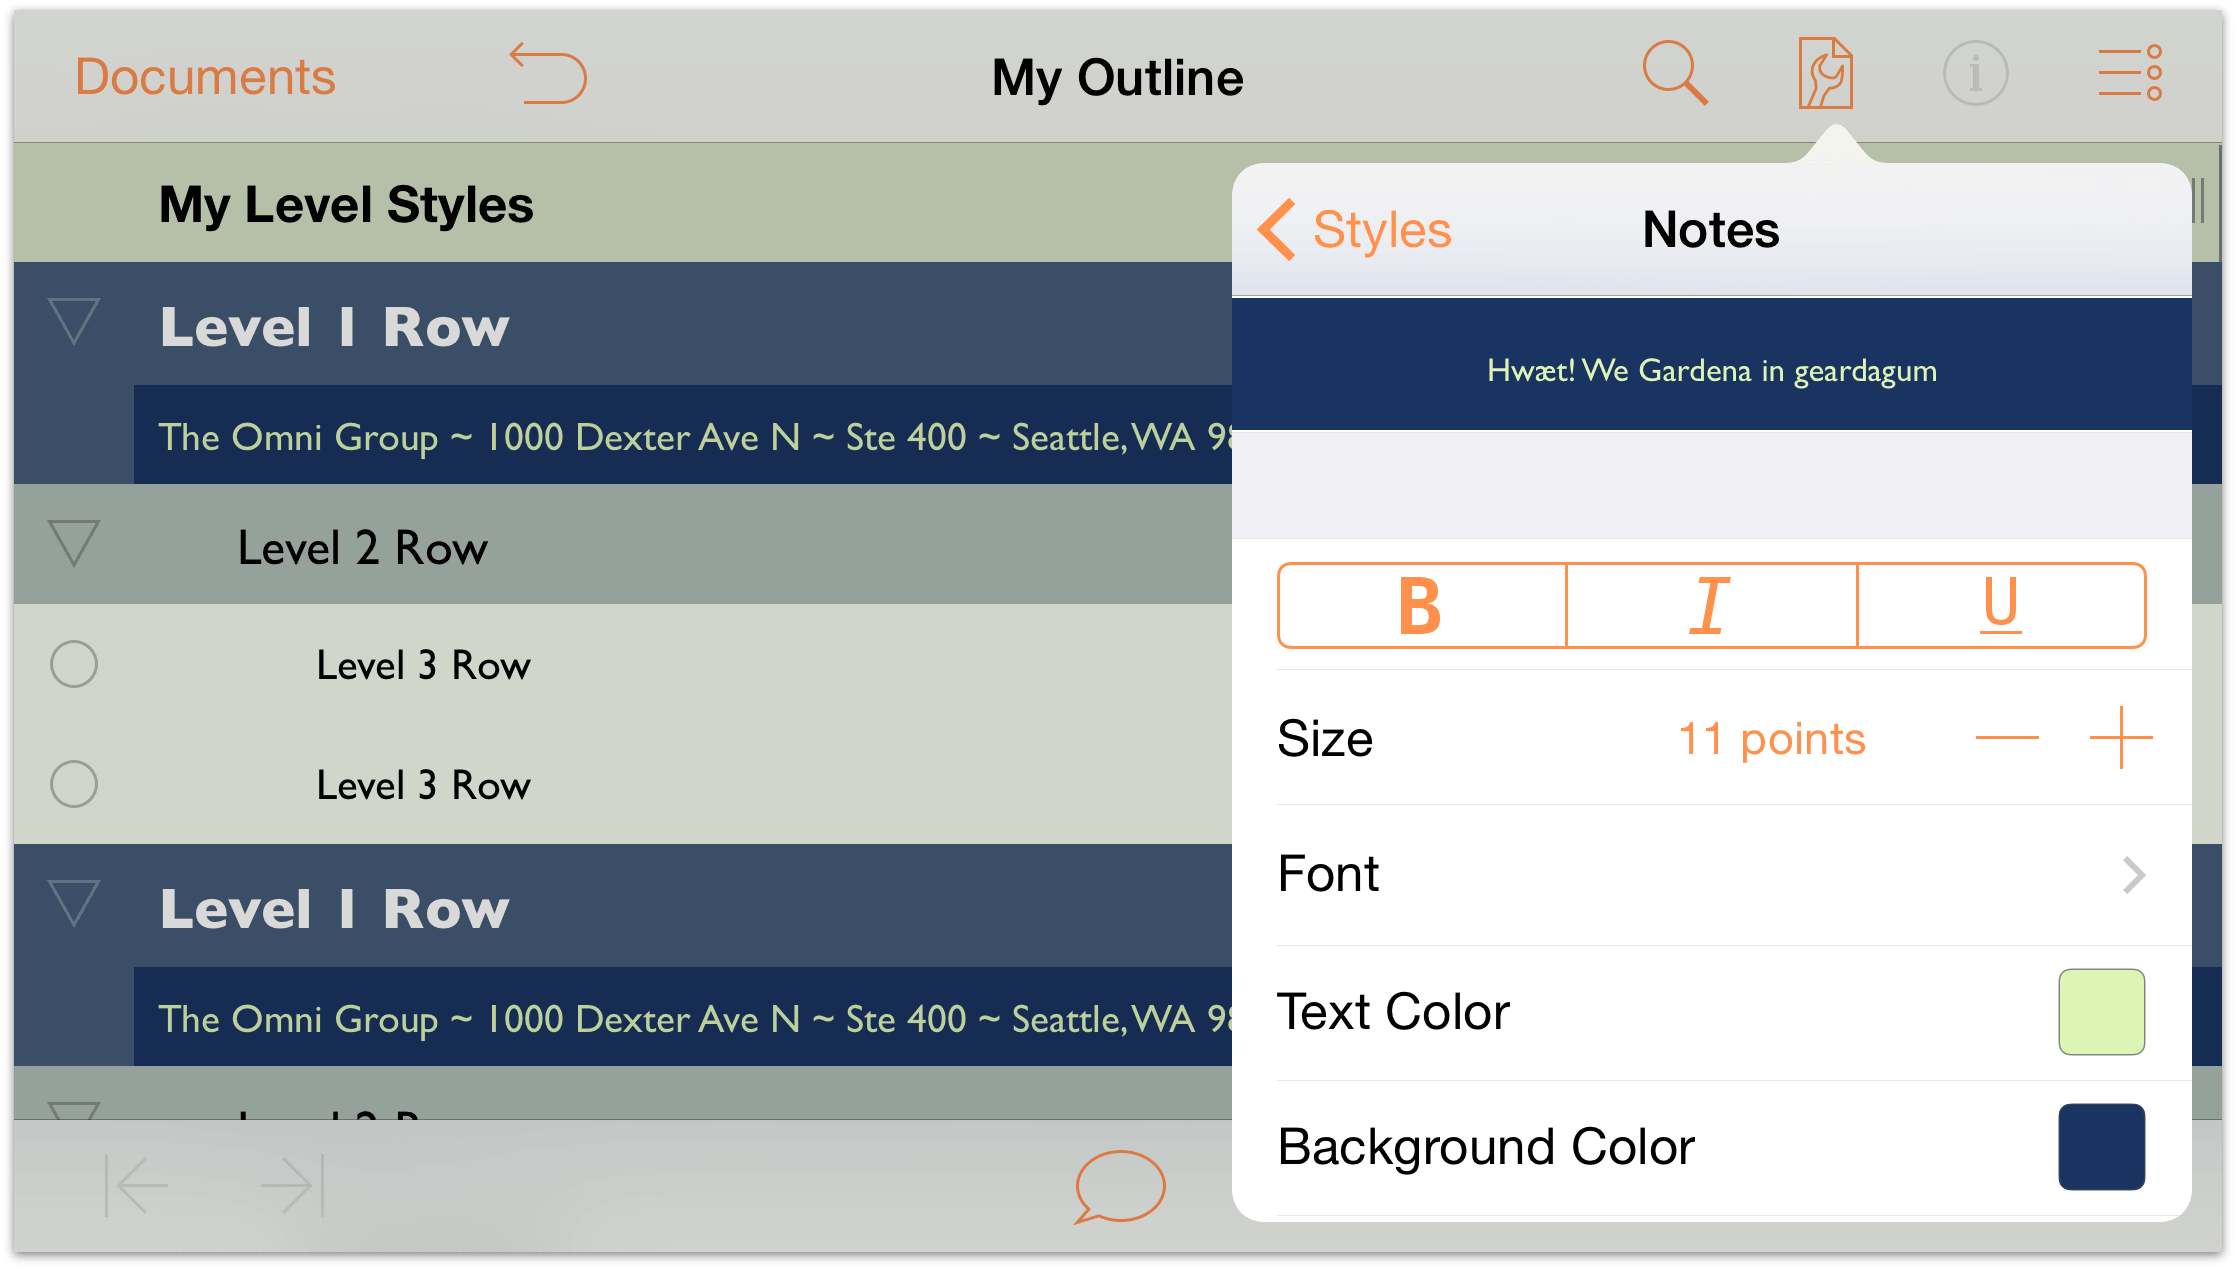
At the top of the menu, tap Styles to return to the listing of styles. Under Structural Styles, tap to choose Notes.
In the Notes style pane, make the following changes:
Text Color: Change the text color to the same light green color from the O’Keeffe palette that you used for the Whole Document’s background color, but don’t change its opacity.
Ah, that looks better already!
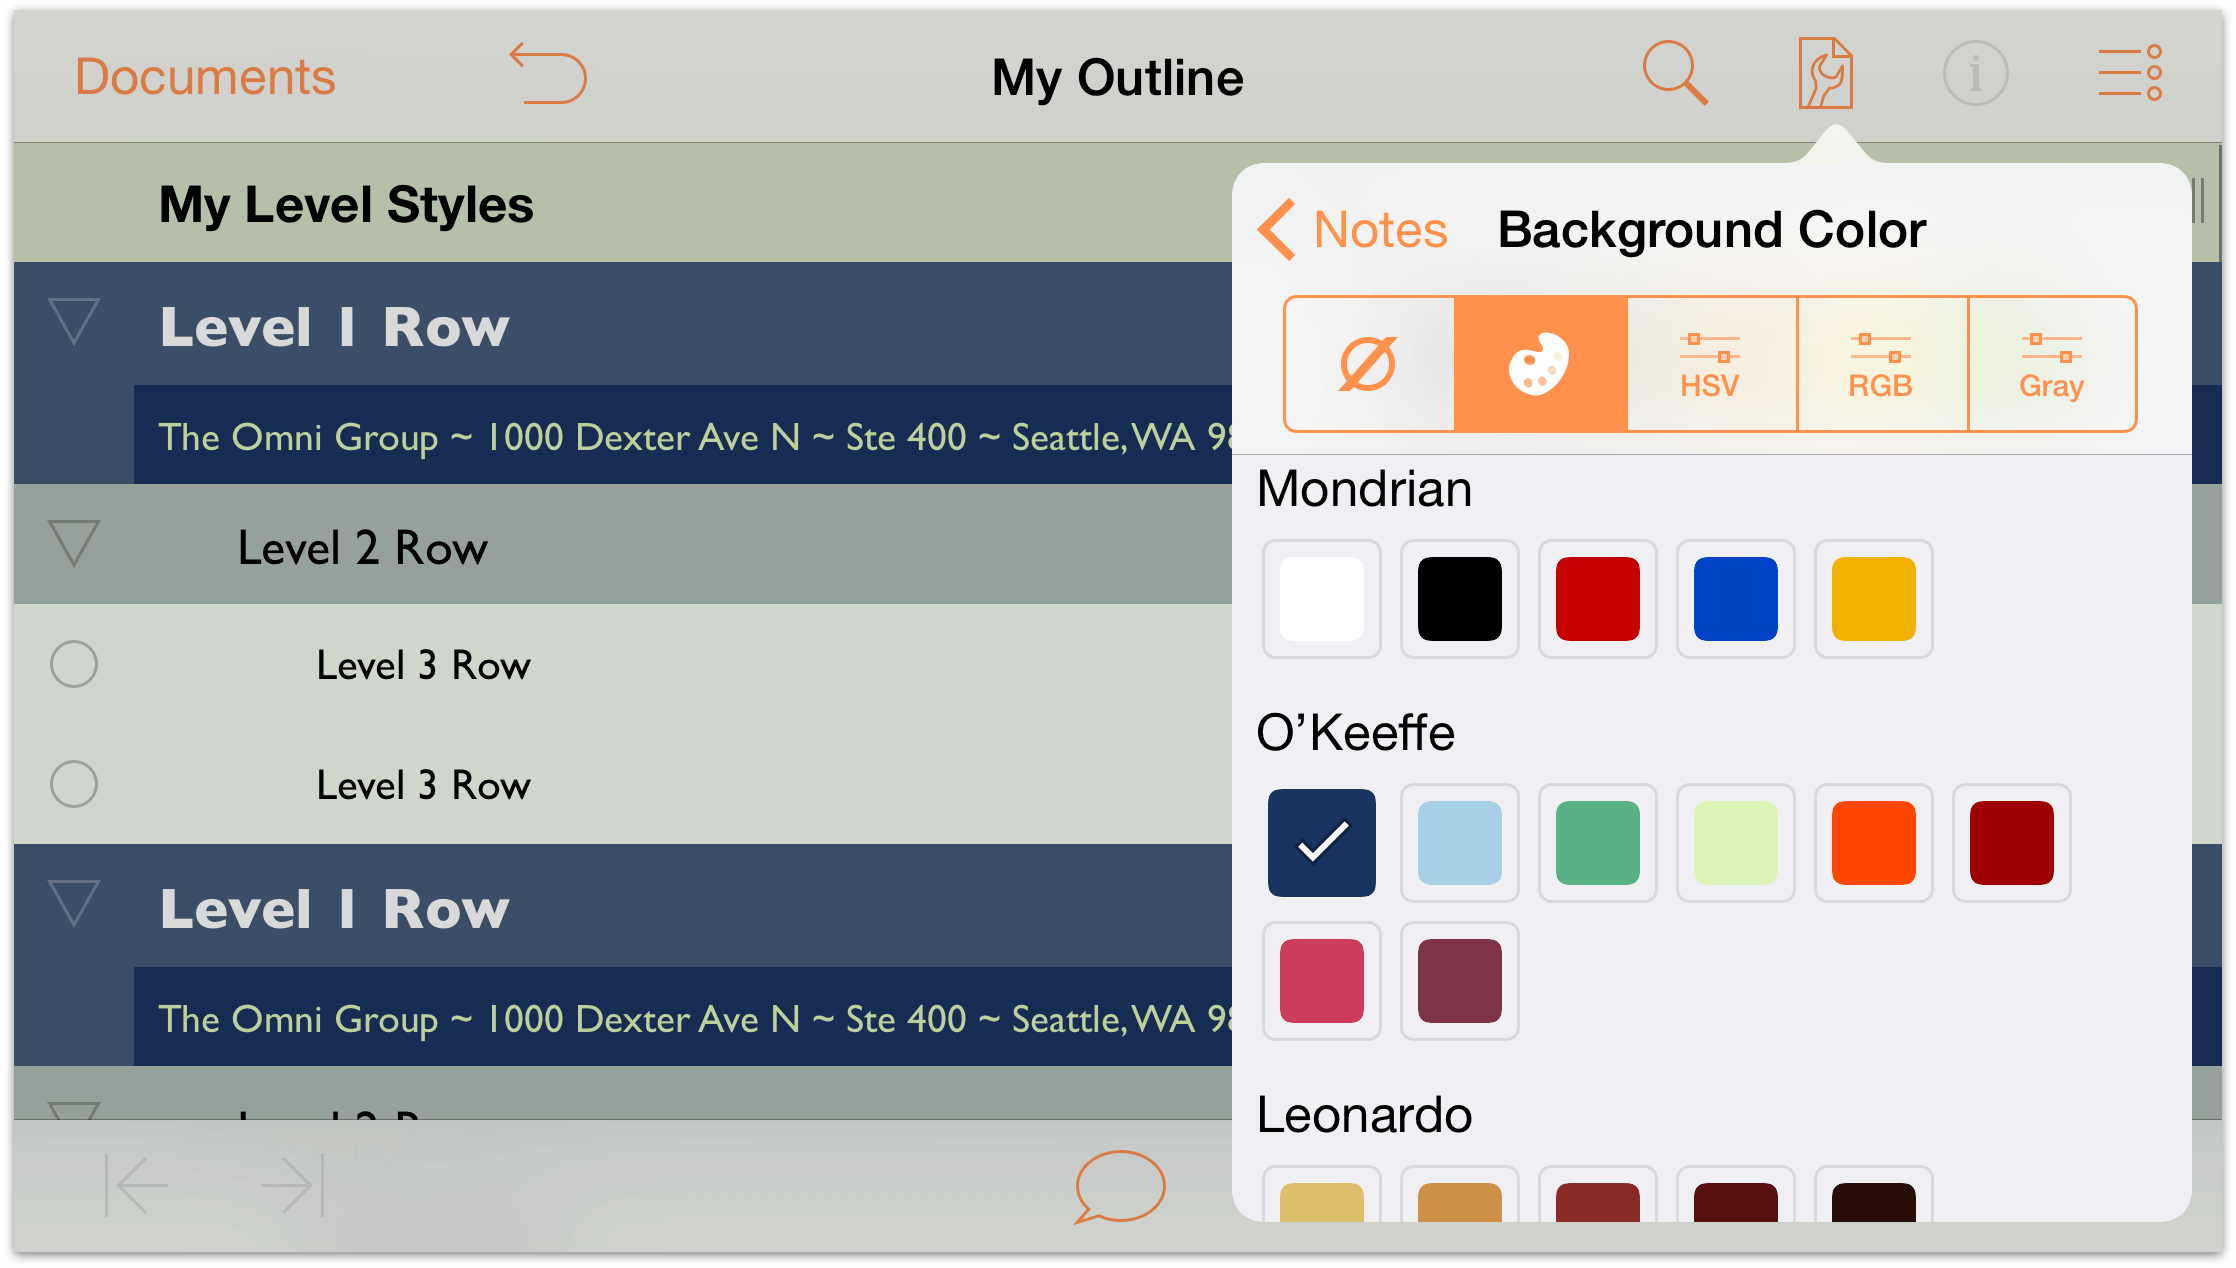
Background Color: Change the Background Color to the same dark blue color from the O’Keeffe palette that you used as the background color for the Level 1 Rows. As before, don’t adjust the color’s opacity; you want this to be darker so the Notes really stand out against everything else in the outline when revealed.
The Notes style pane should be similar to the following:
And your outline with the Notes revealed should look similar to the following:
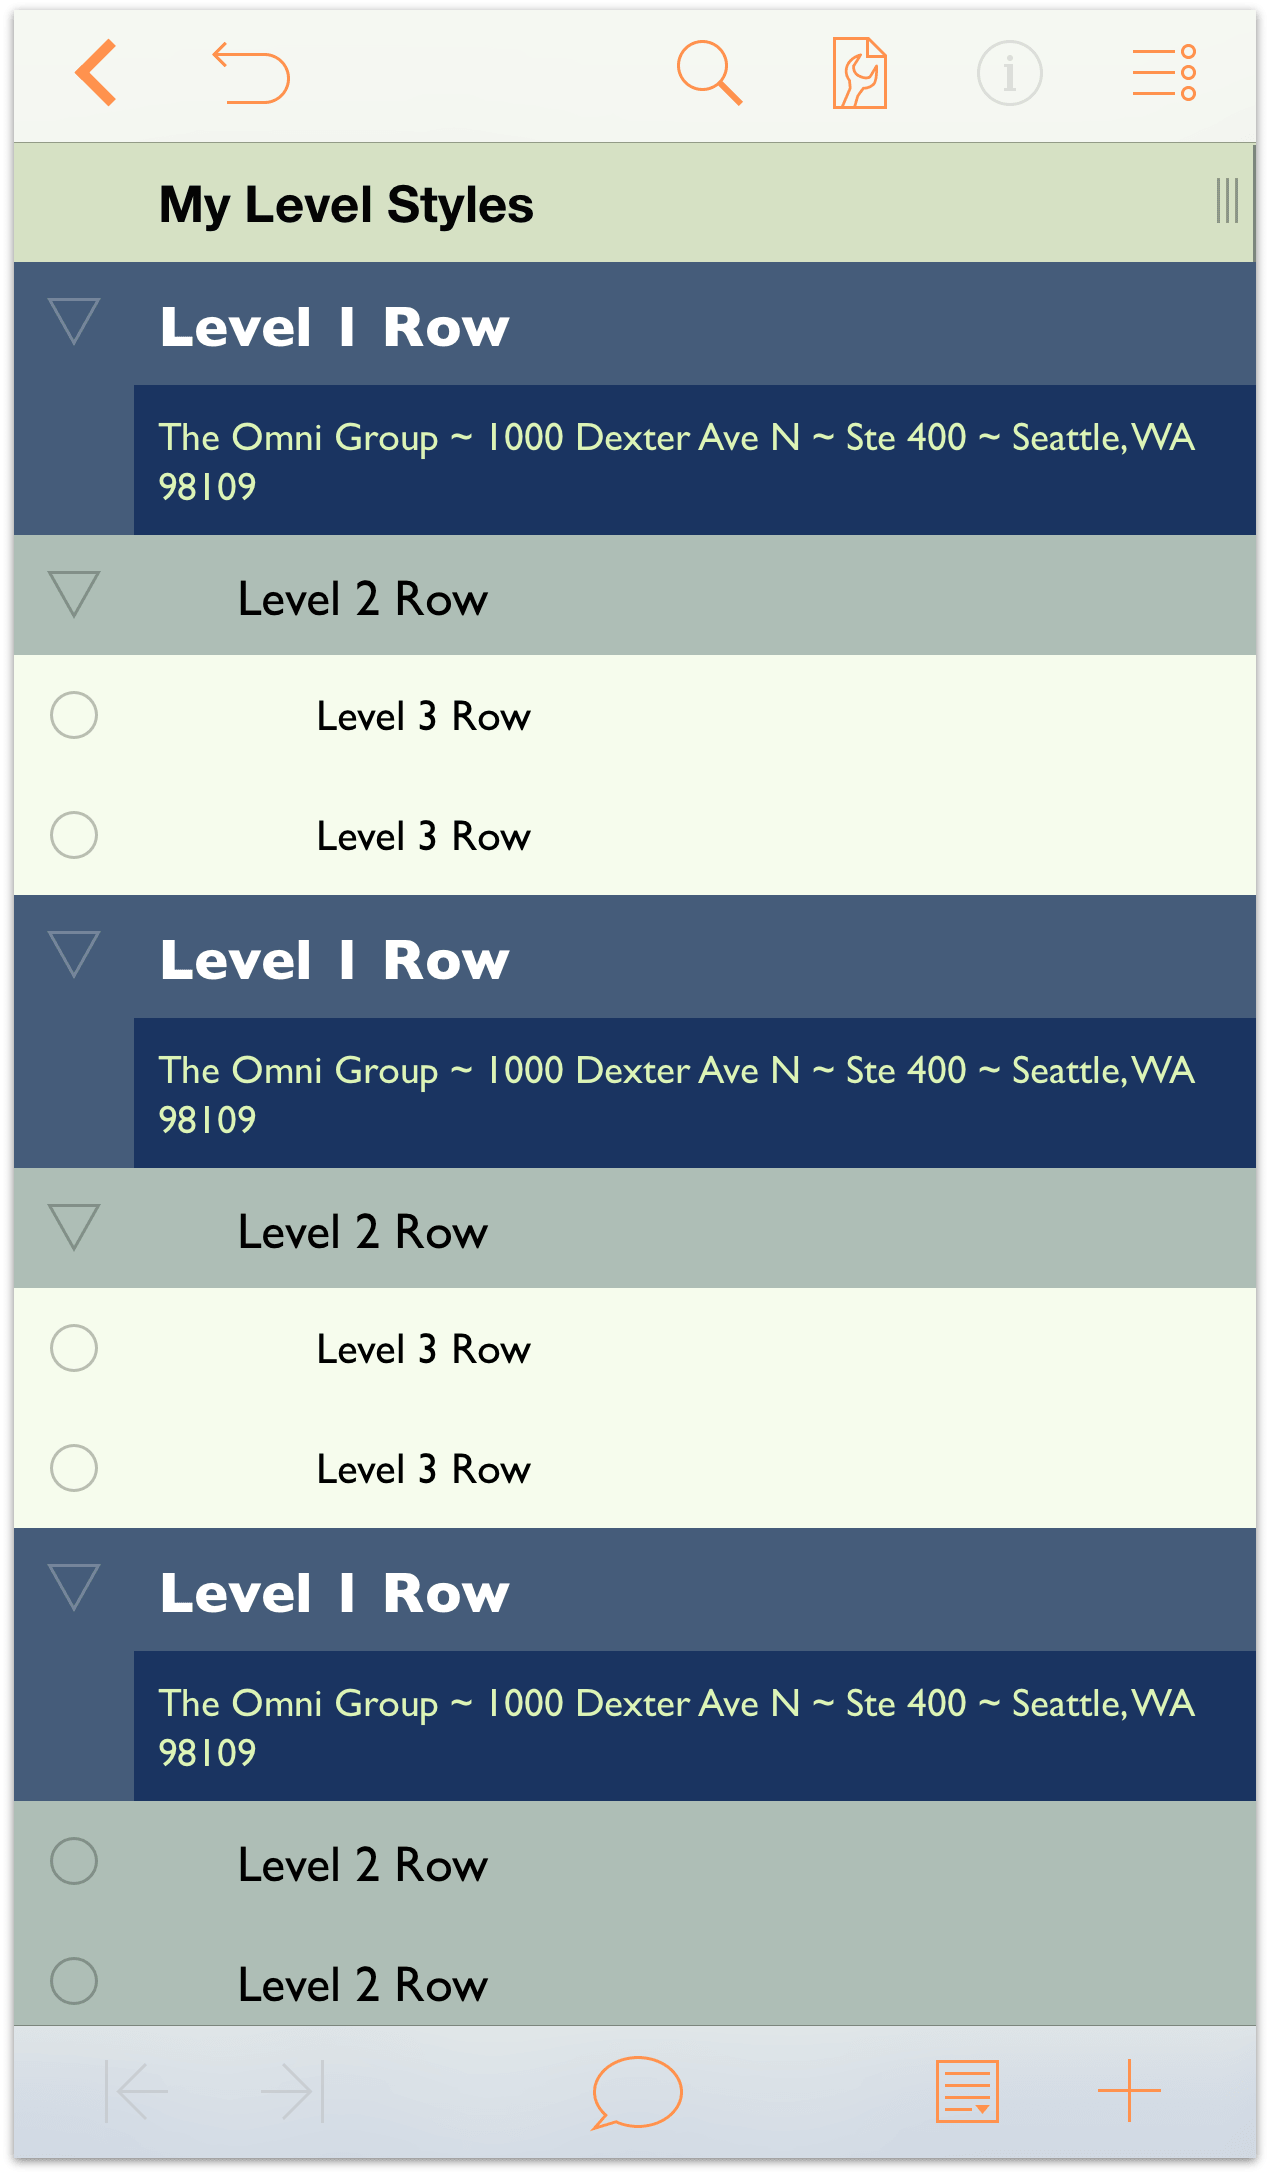
Much better!
Creating New Named Styles
Finally, let’s create some new Named Styles that we can use on the Red, Green, and Blue text under the Additive Primary Colors row.
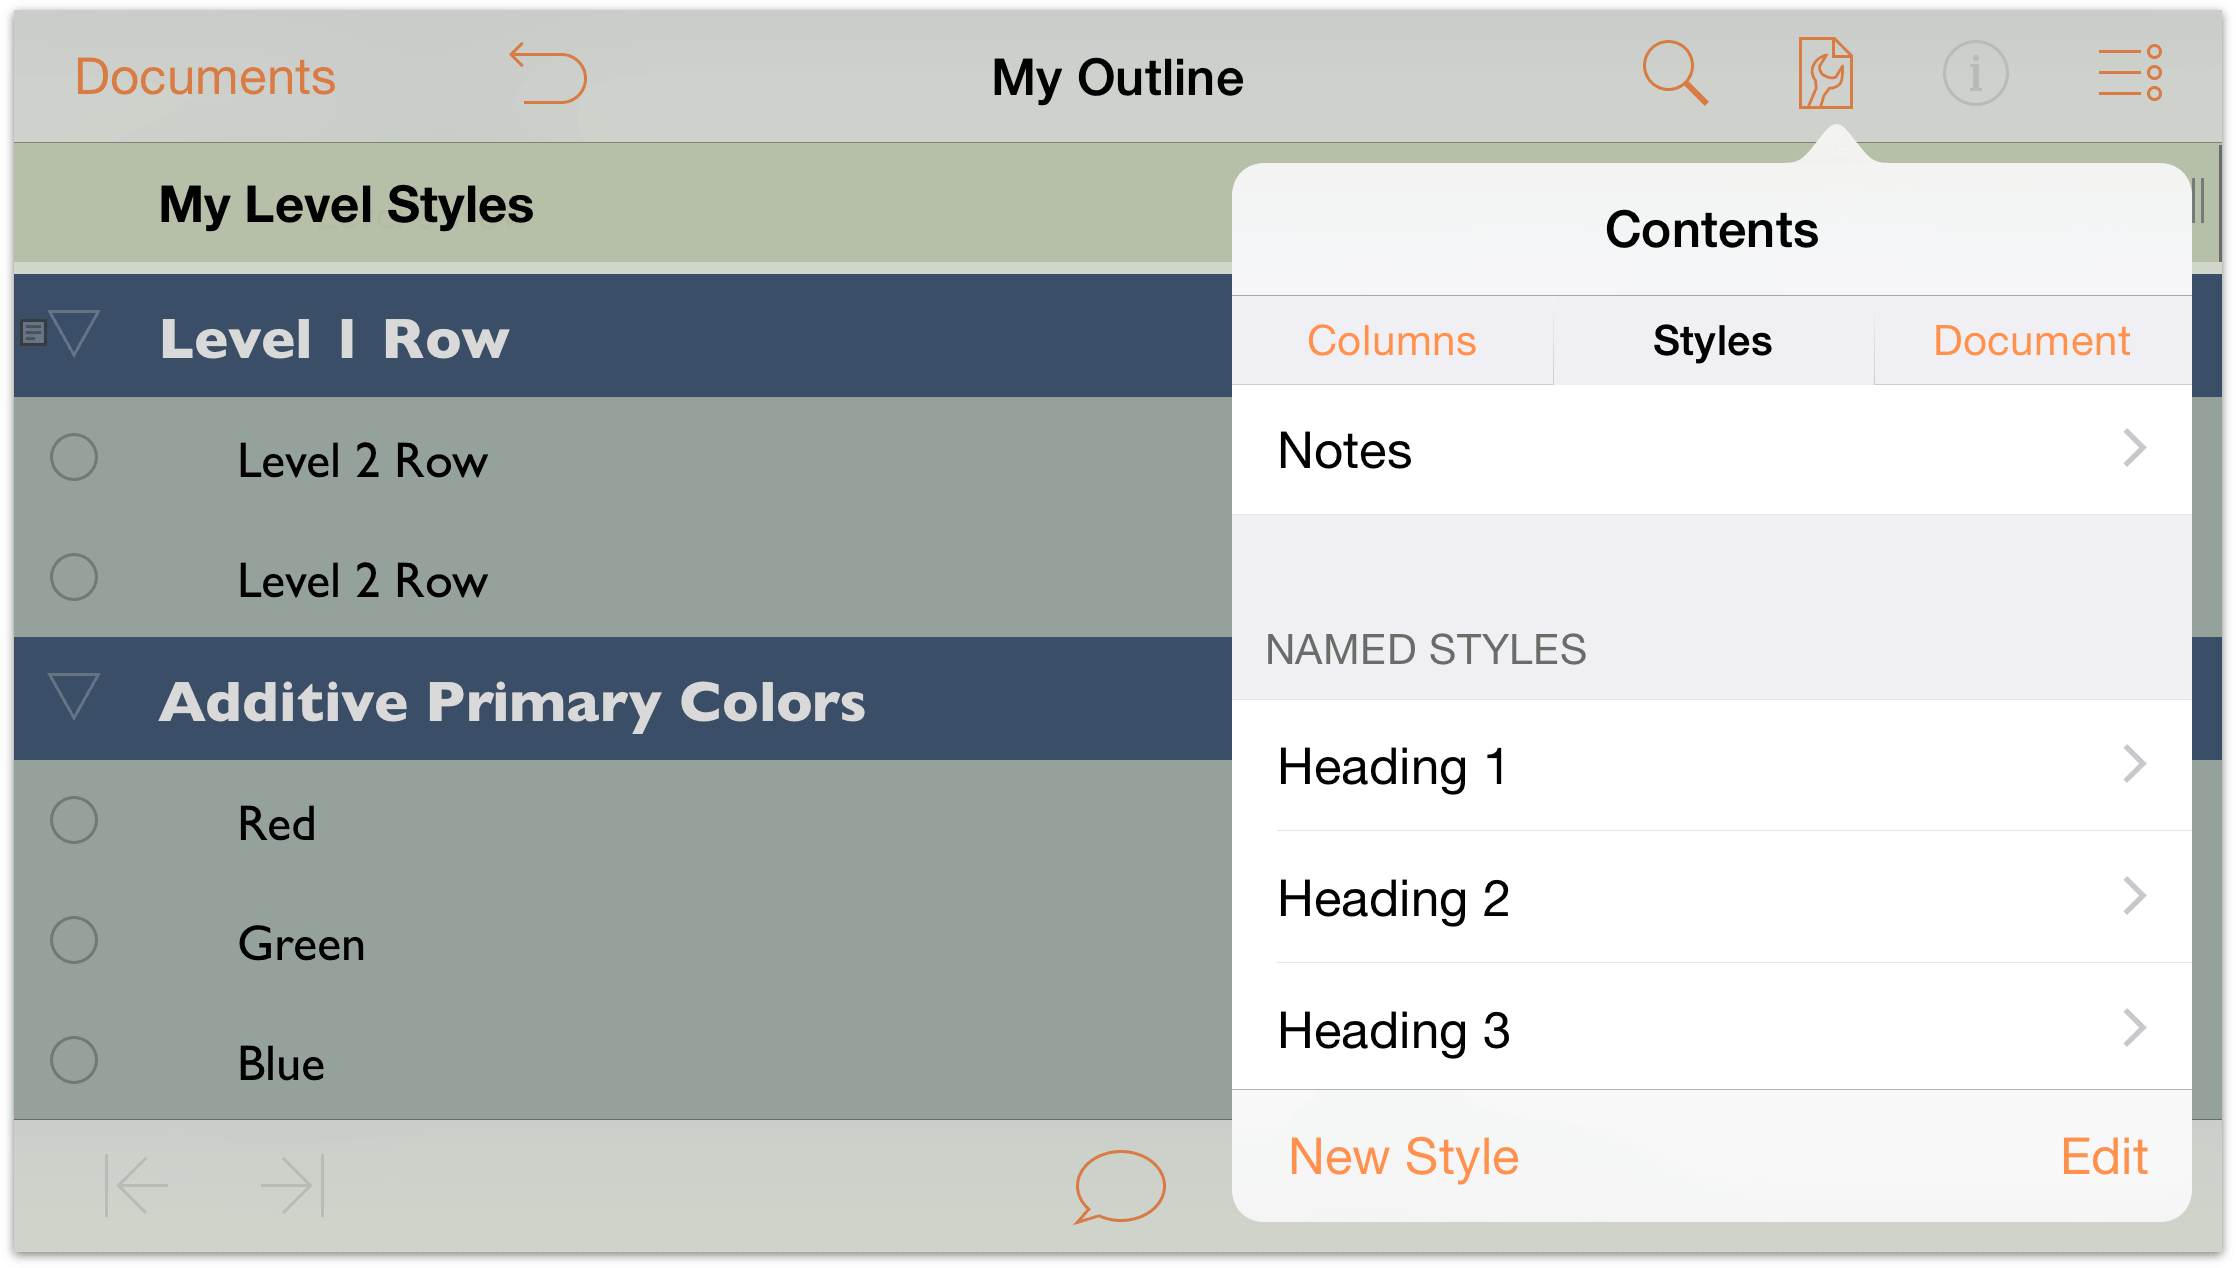
Start by deleting the Named Styles that already exist in the template; follow these steps:
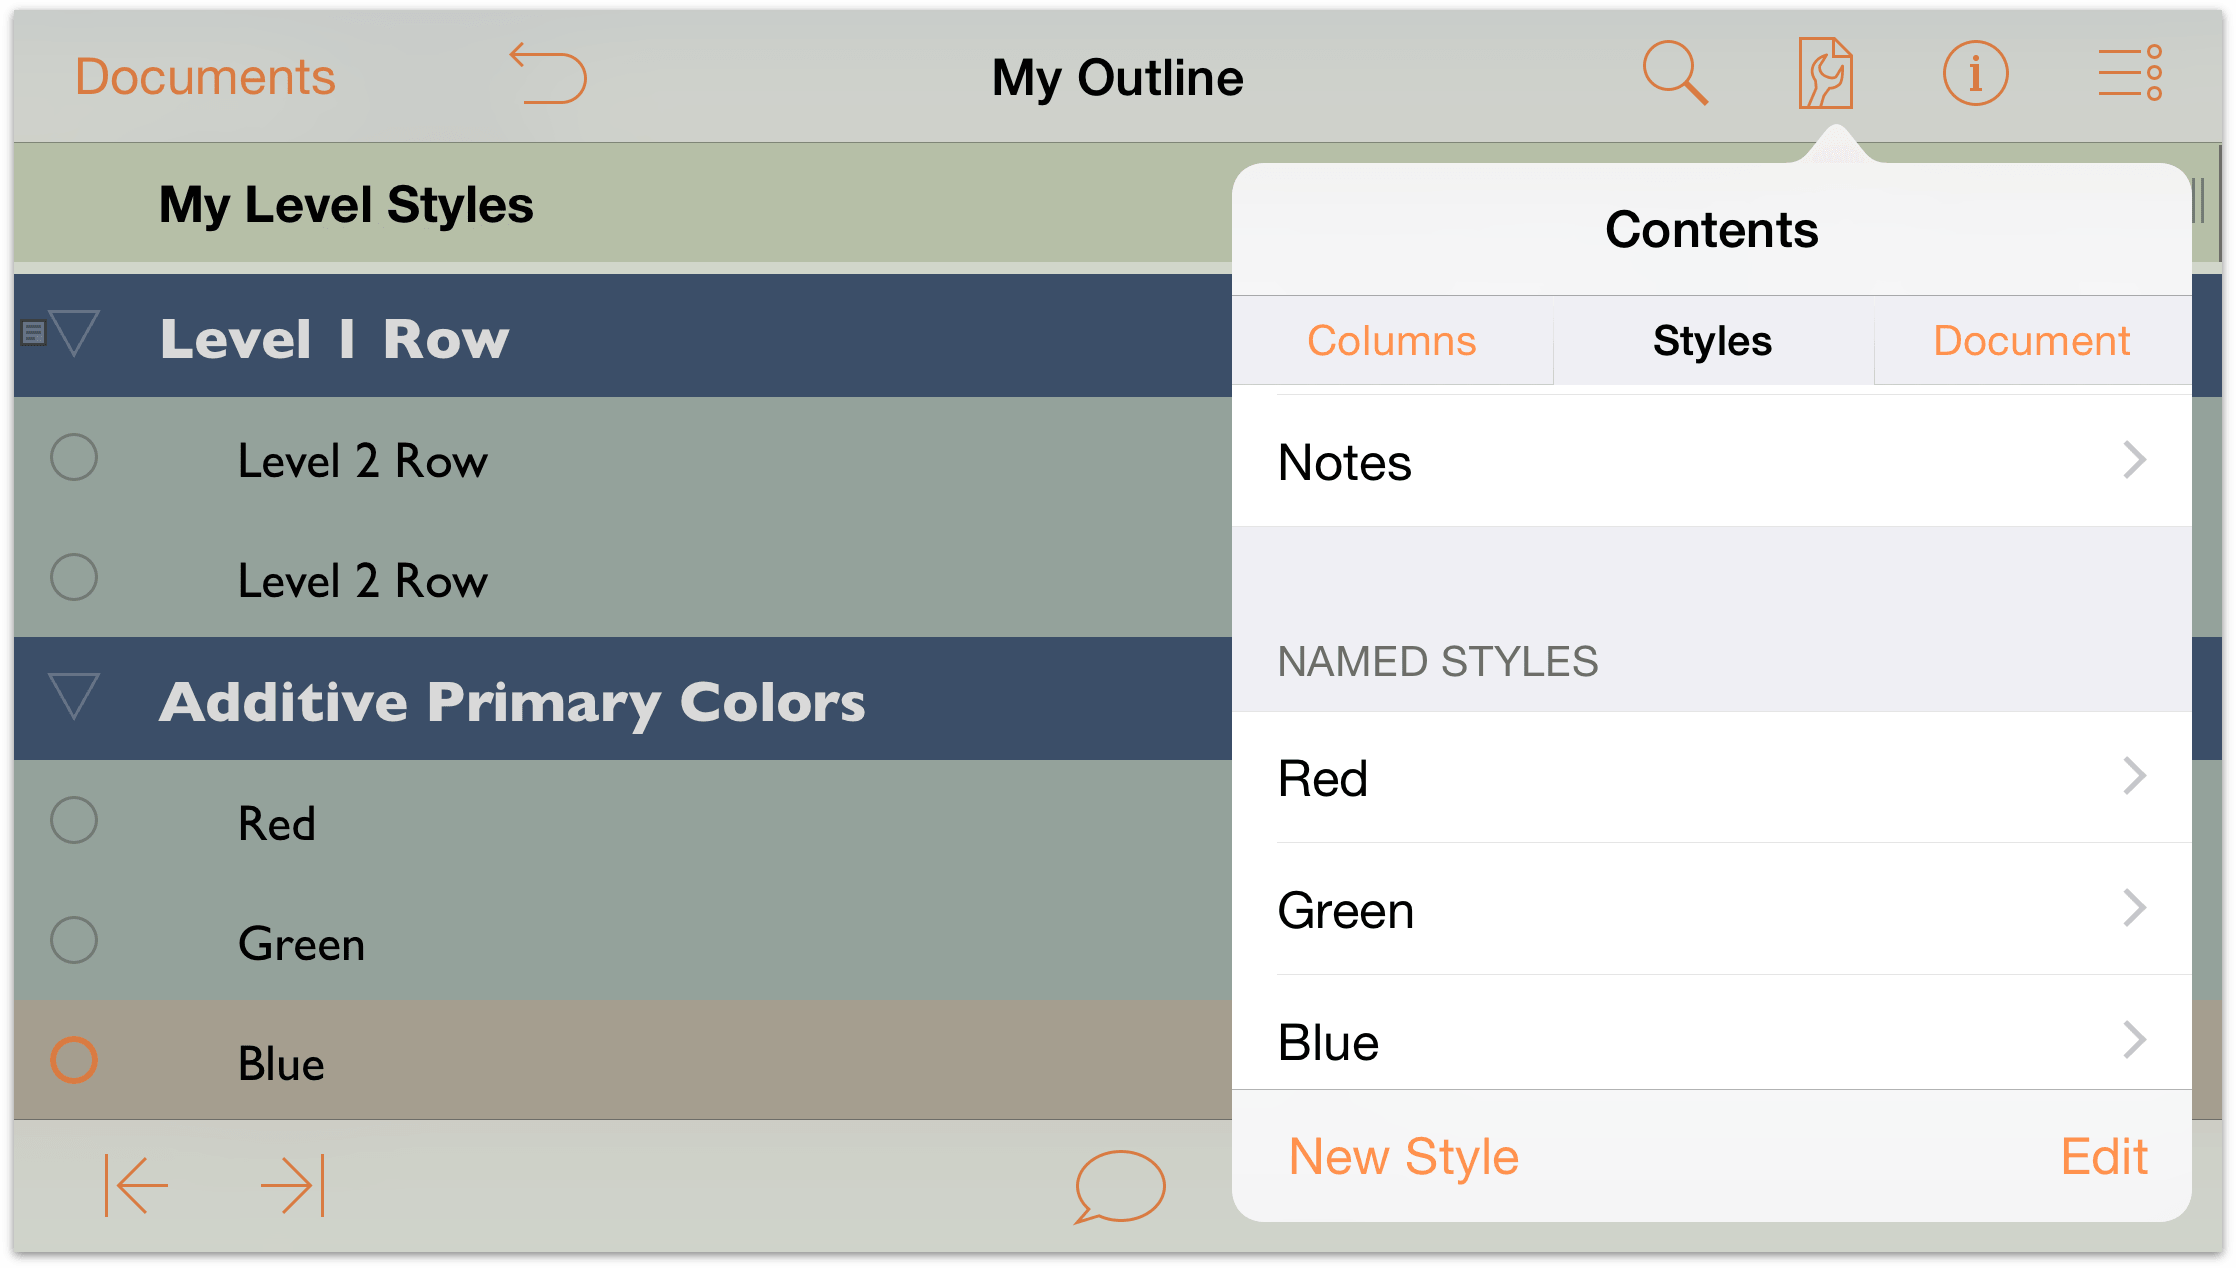
Tap
 and then tap Styles to see the list of styles. Scroll through the list until you find the section of Named Styles.
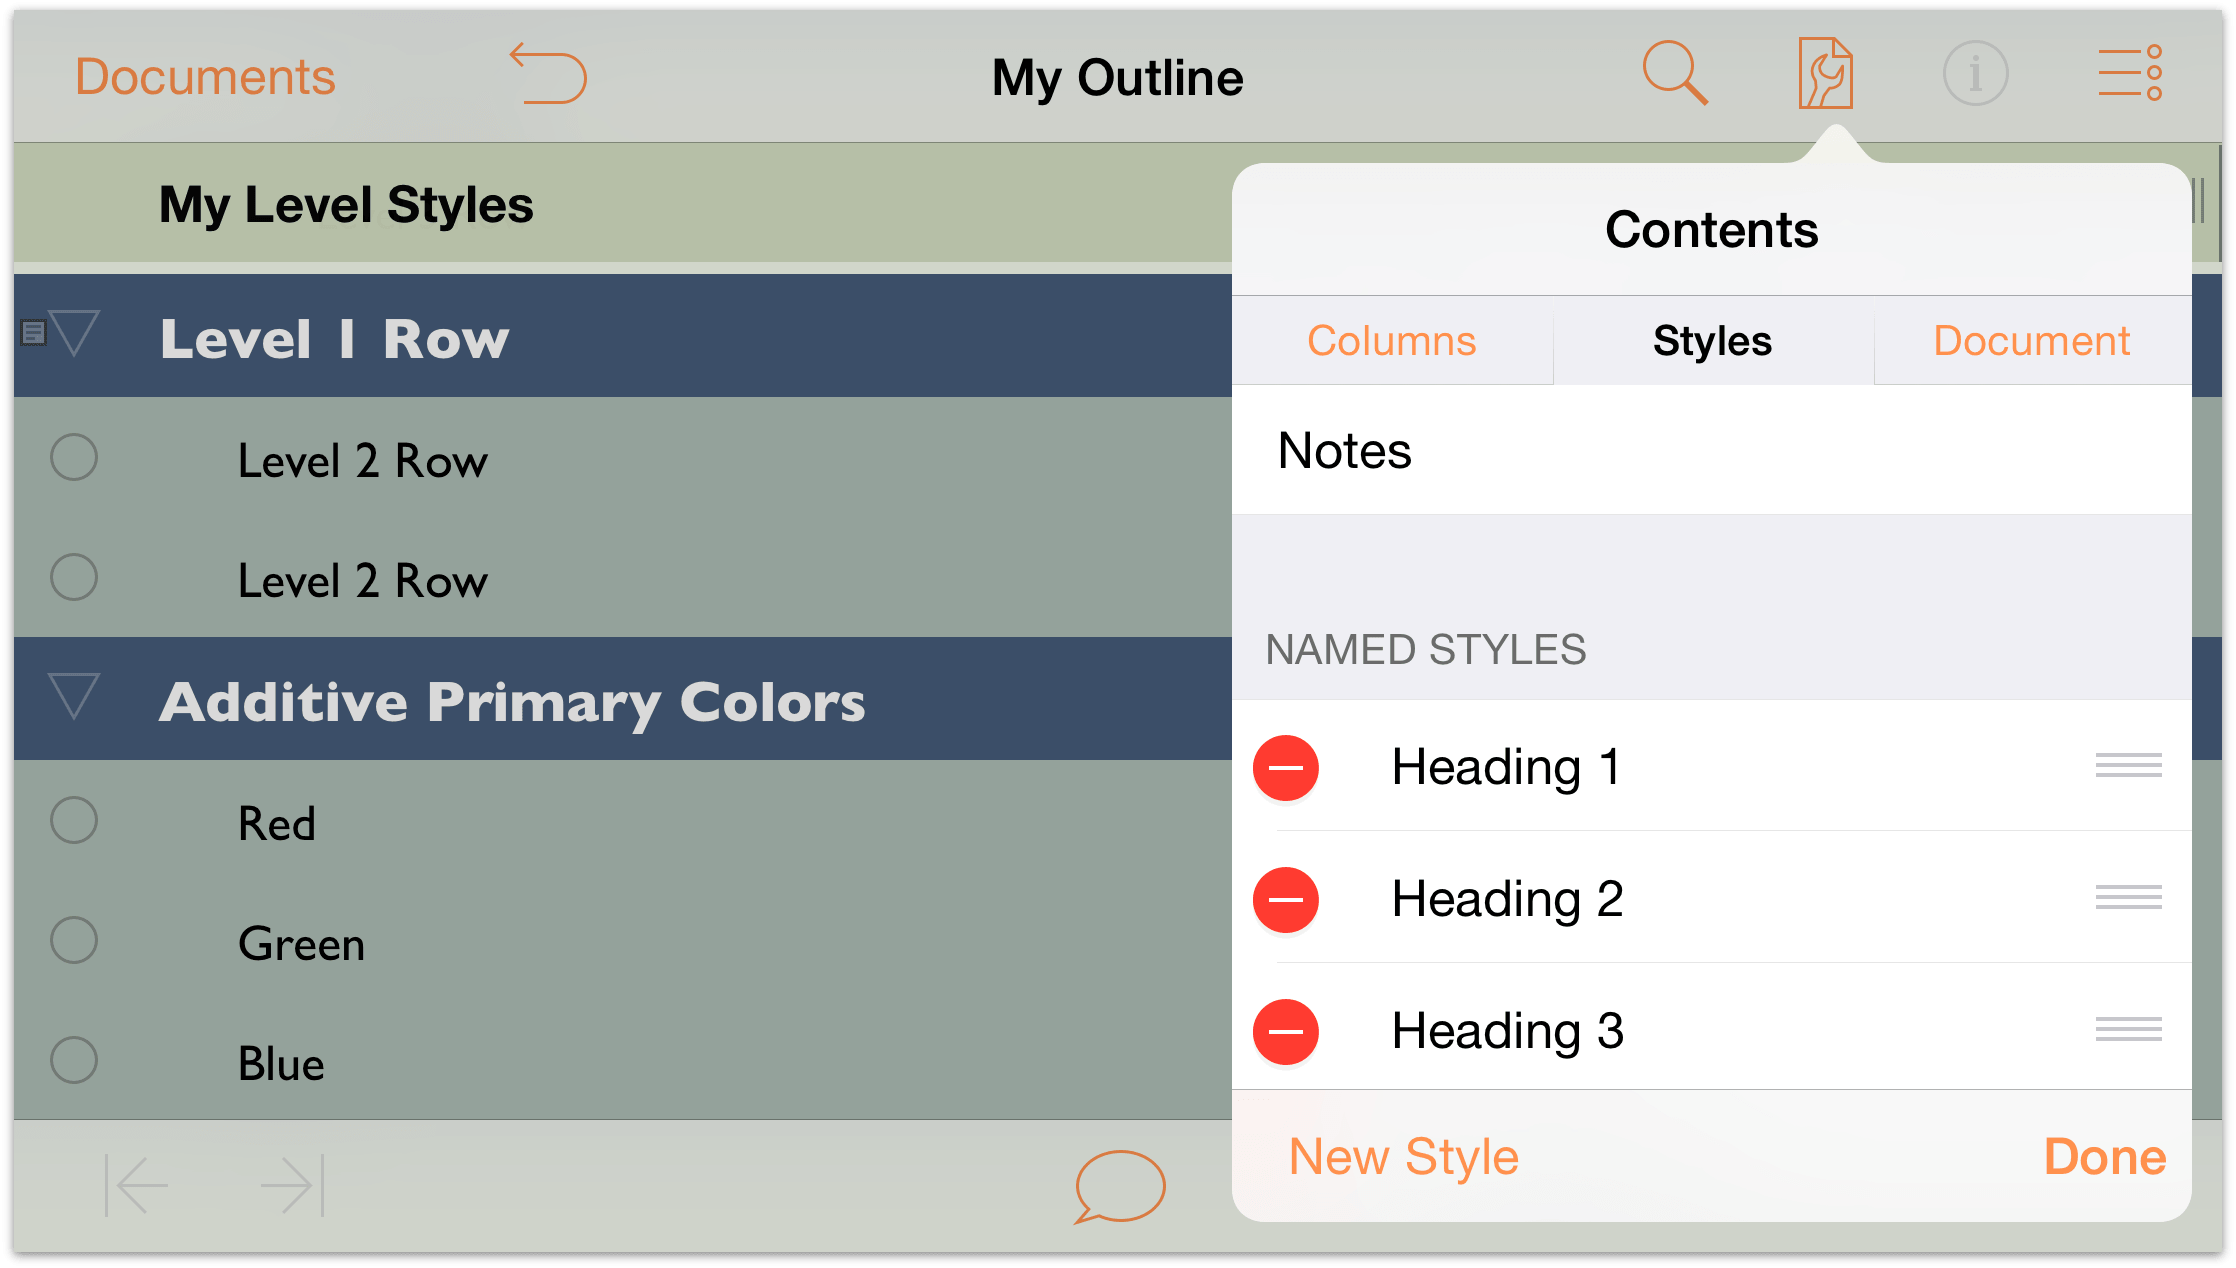
At the bottom of the Contents menu, tap Edit.
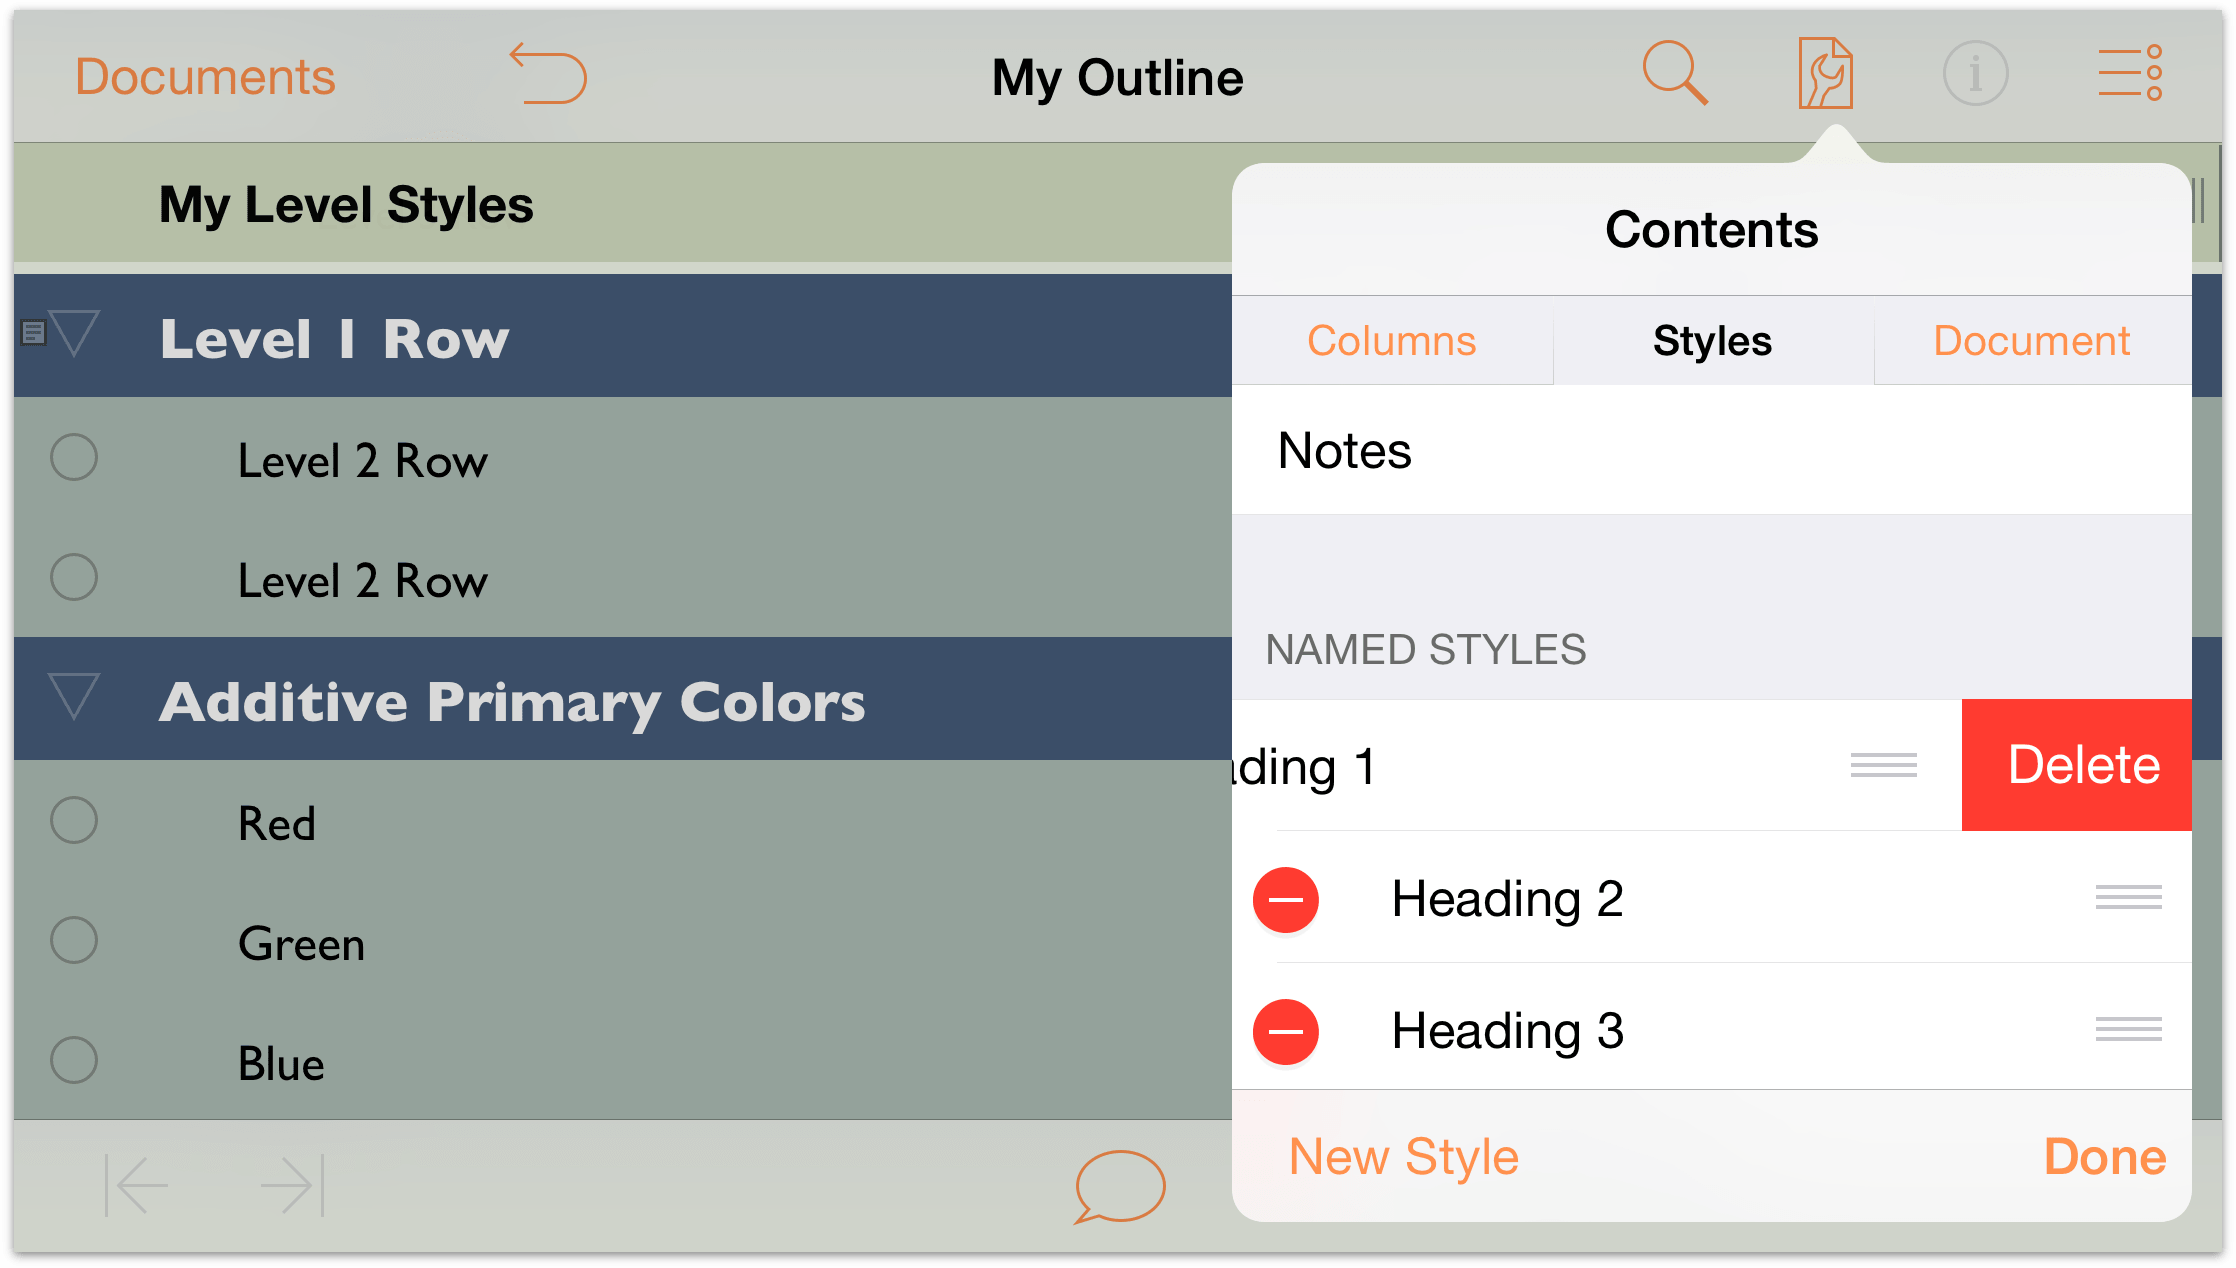
The Named Styles gain a red circle with a minus sign along the left edge. Tap this button twice to reveal the Delete button on the right edge.
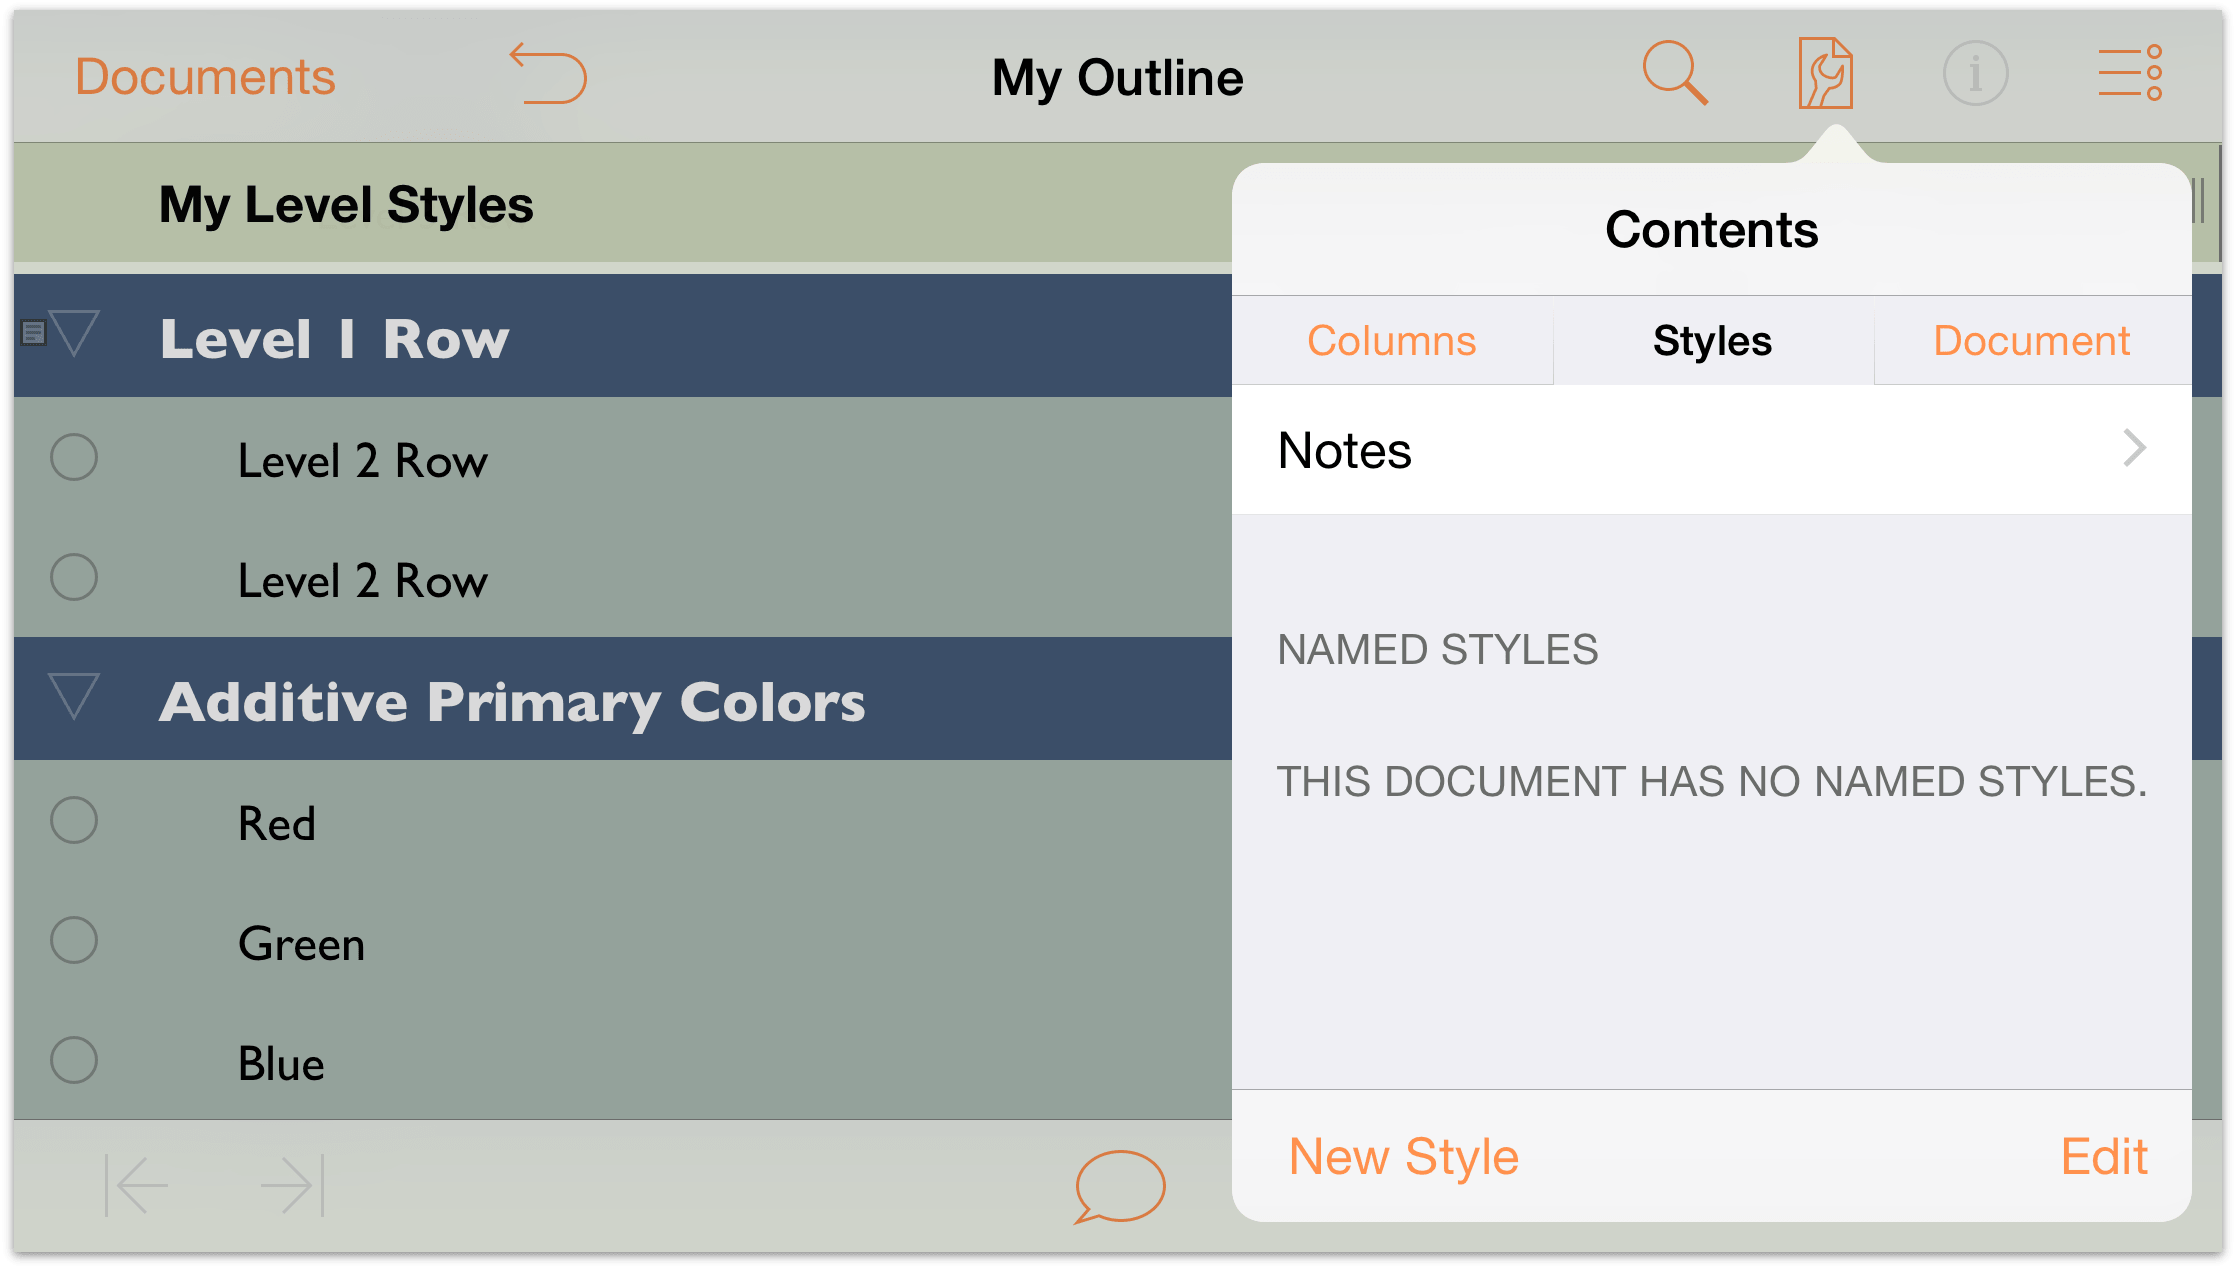
Tap Delete, and then repeat the process for all of the Named Styles.
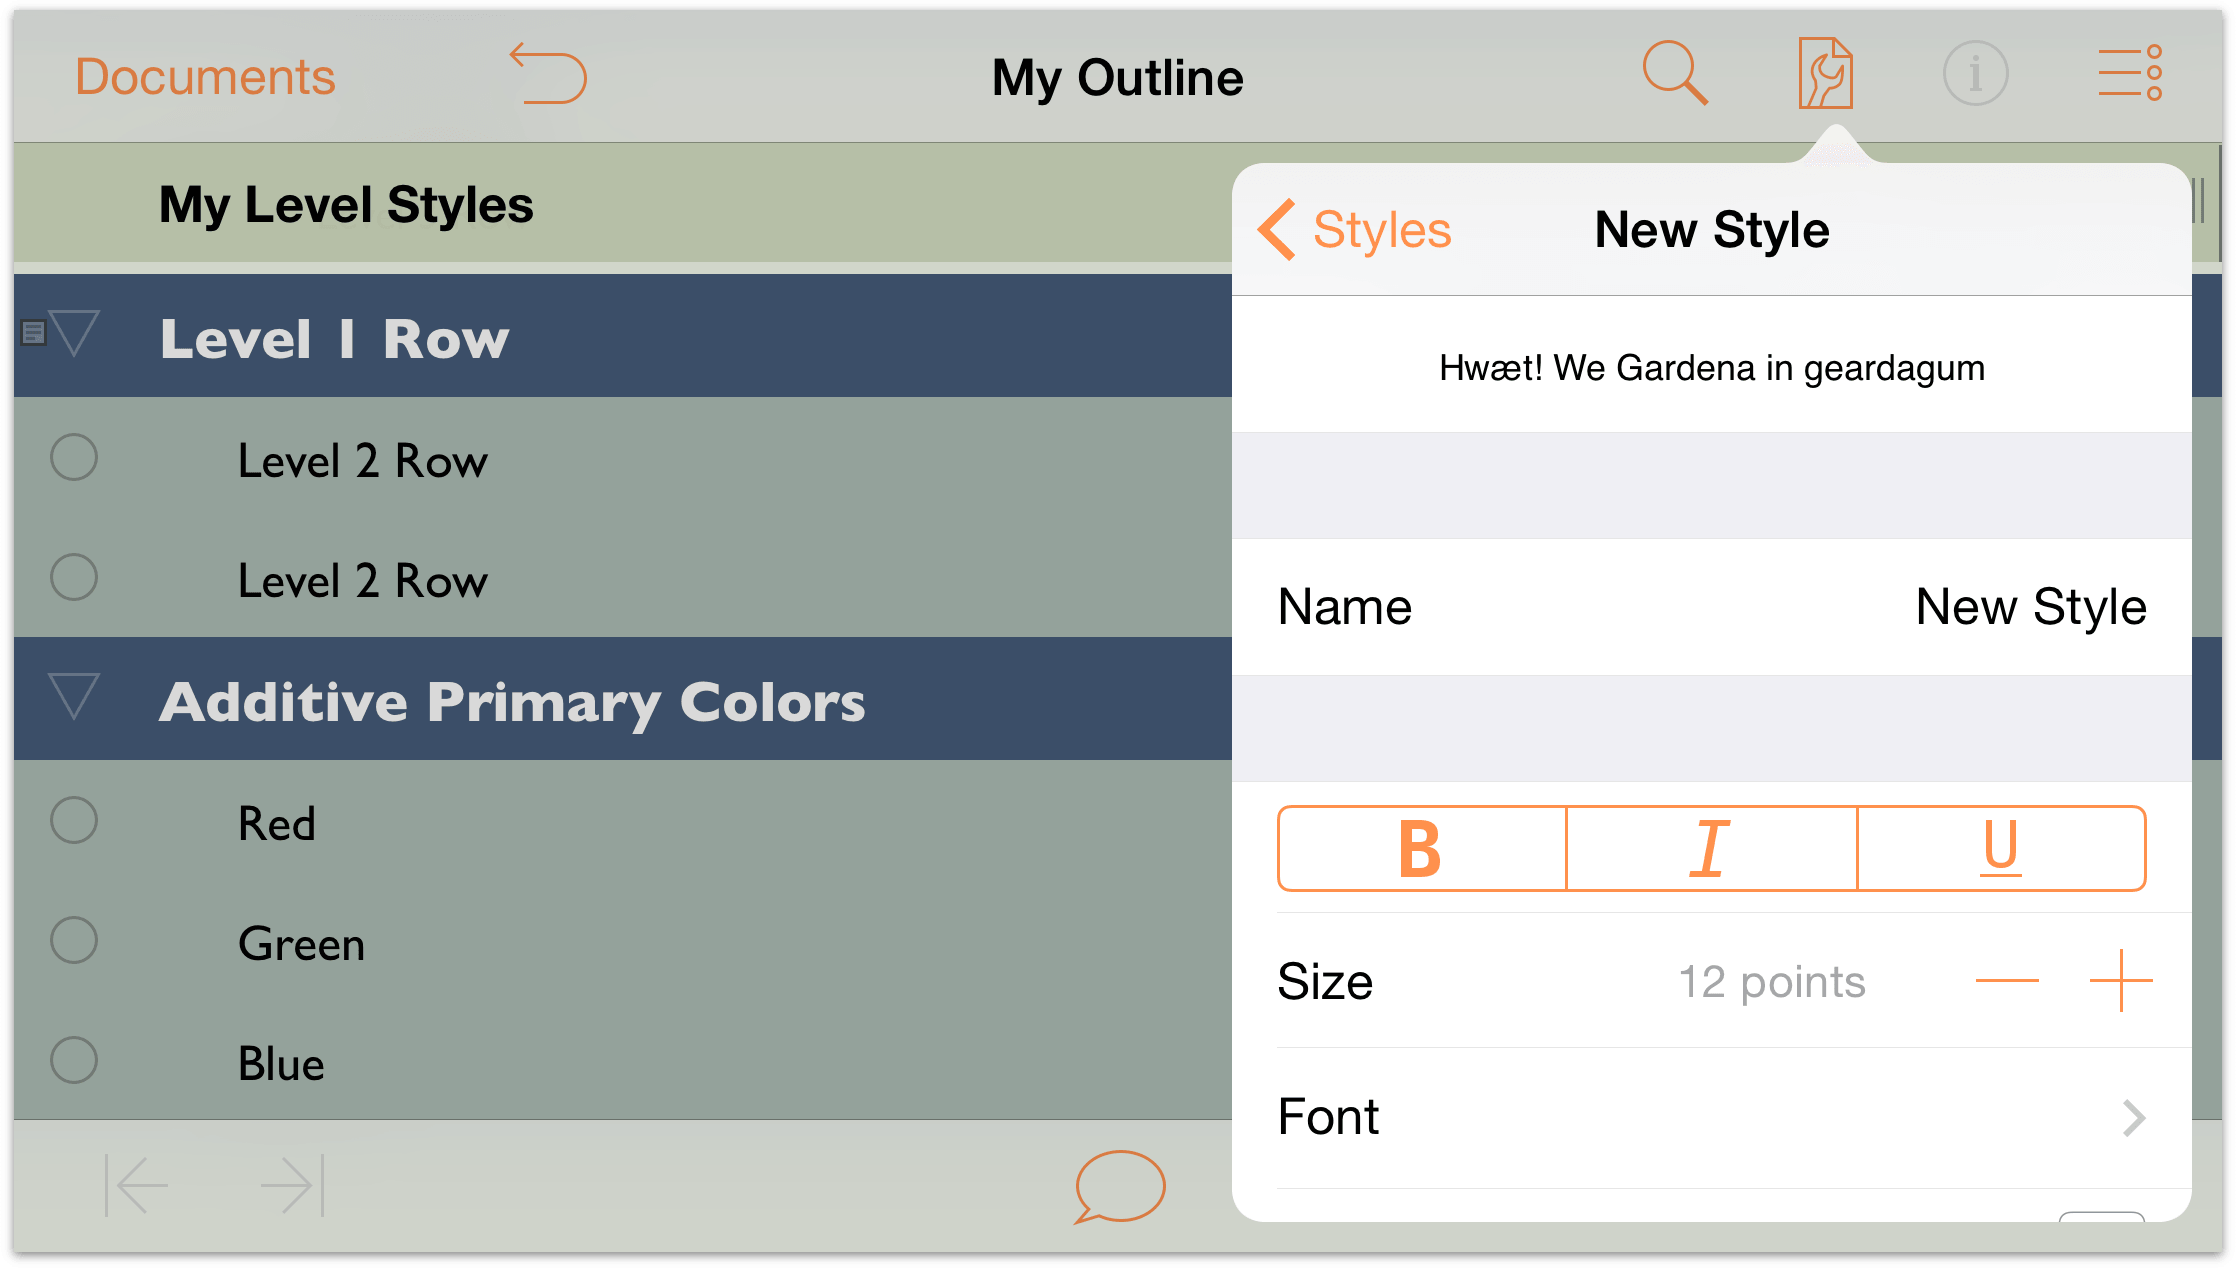
When you have finished, your outline should have no Named Styles in its repertoire. A clean slate, so to say. Time to replenish your Named Styles by creating three new ones. Start by tapping New Style at the bottom of the Styles pane.
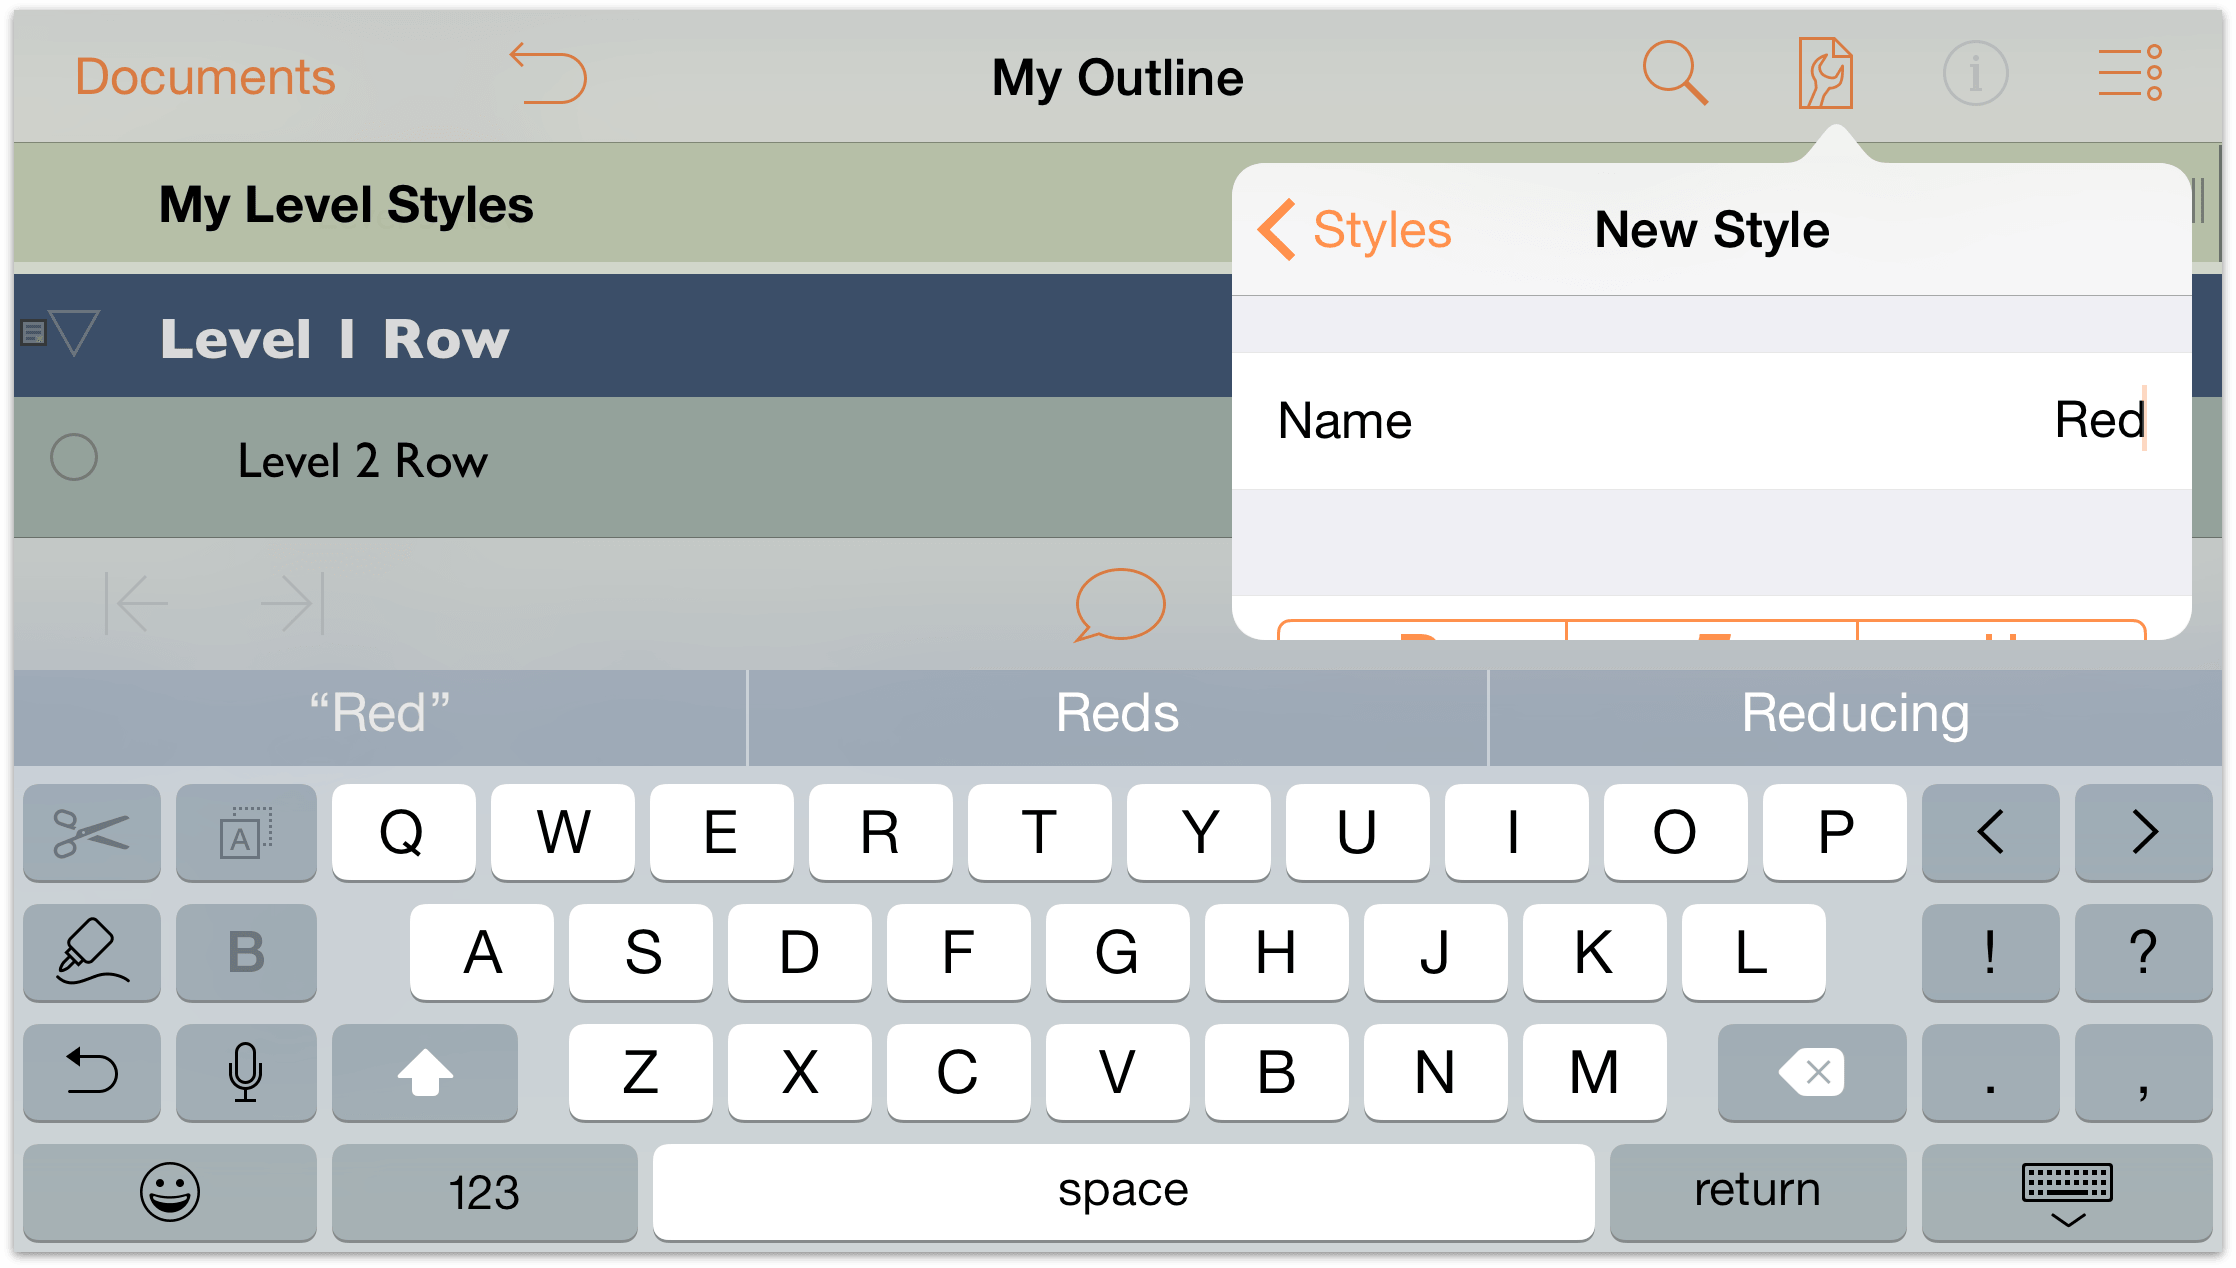
In the Name field, tap to select New Style, and enter Red as the name of this new Named Style.
Tap Styles at the top of the menu to return to your list of available styles.
Tap to select the Red Named Style so you can change its settings.
-
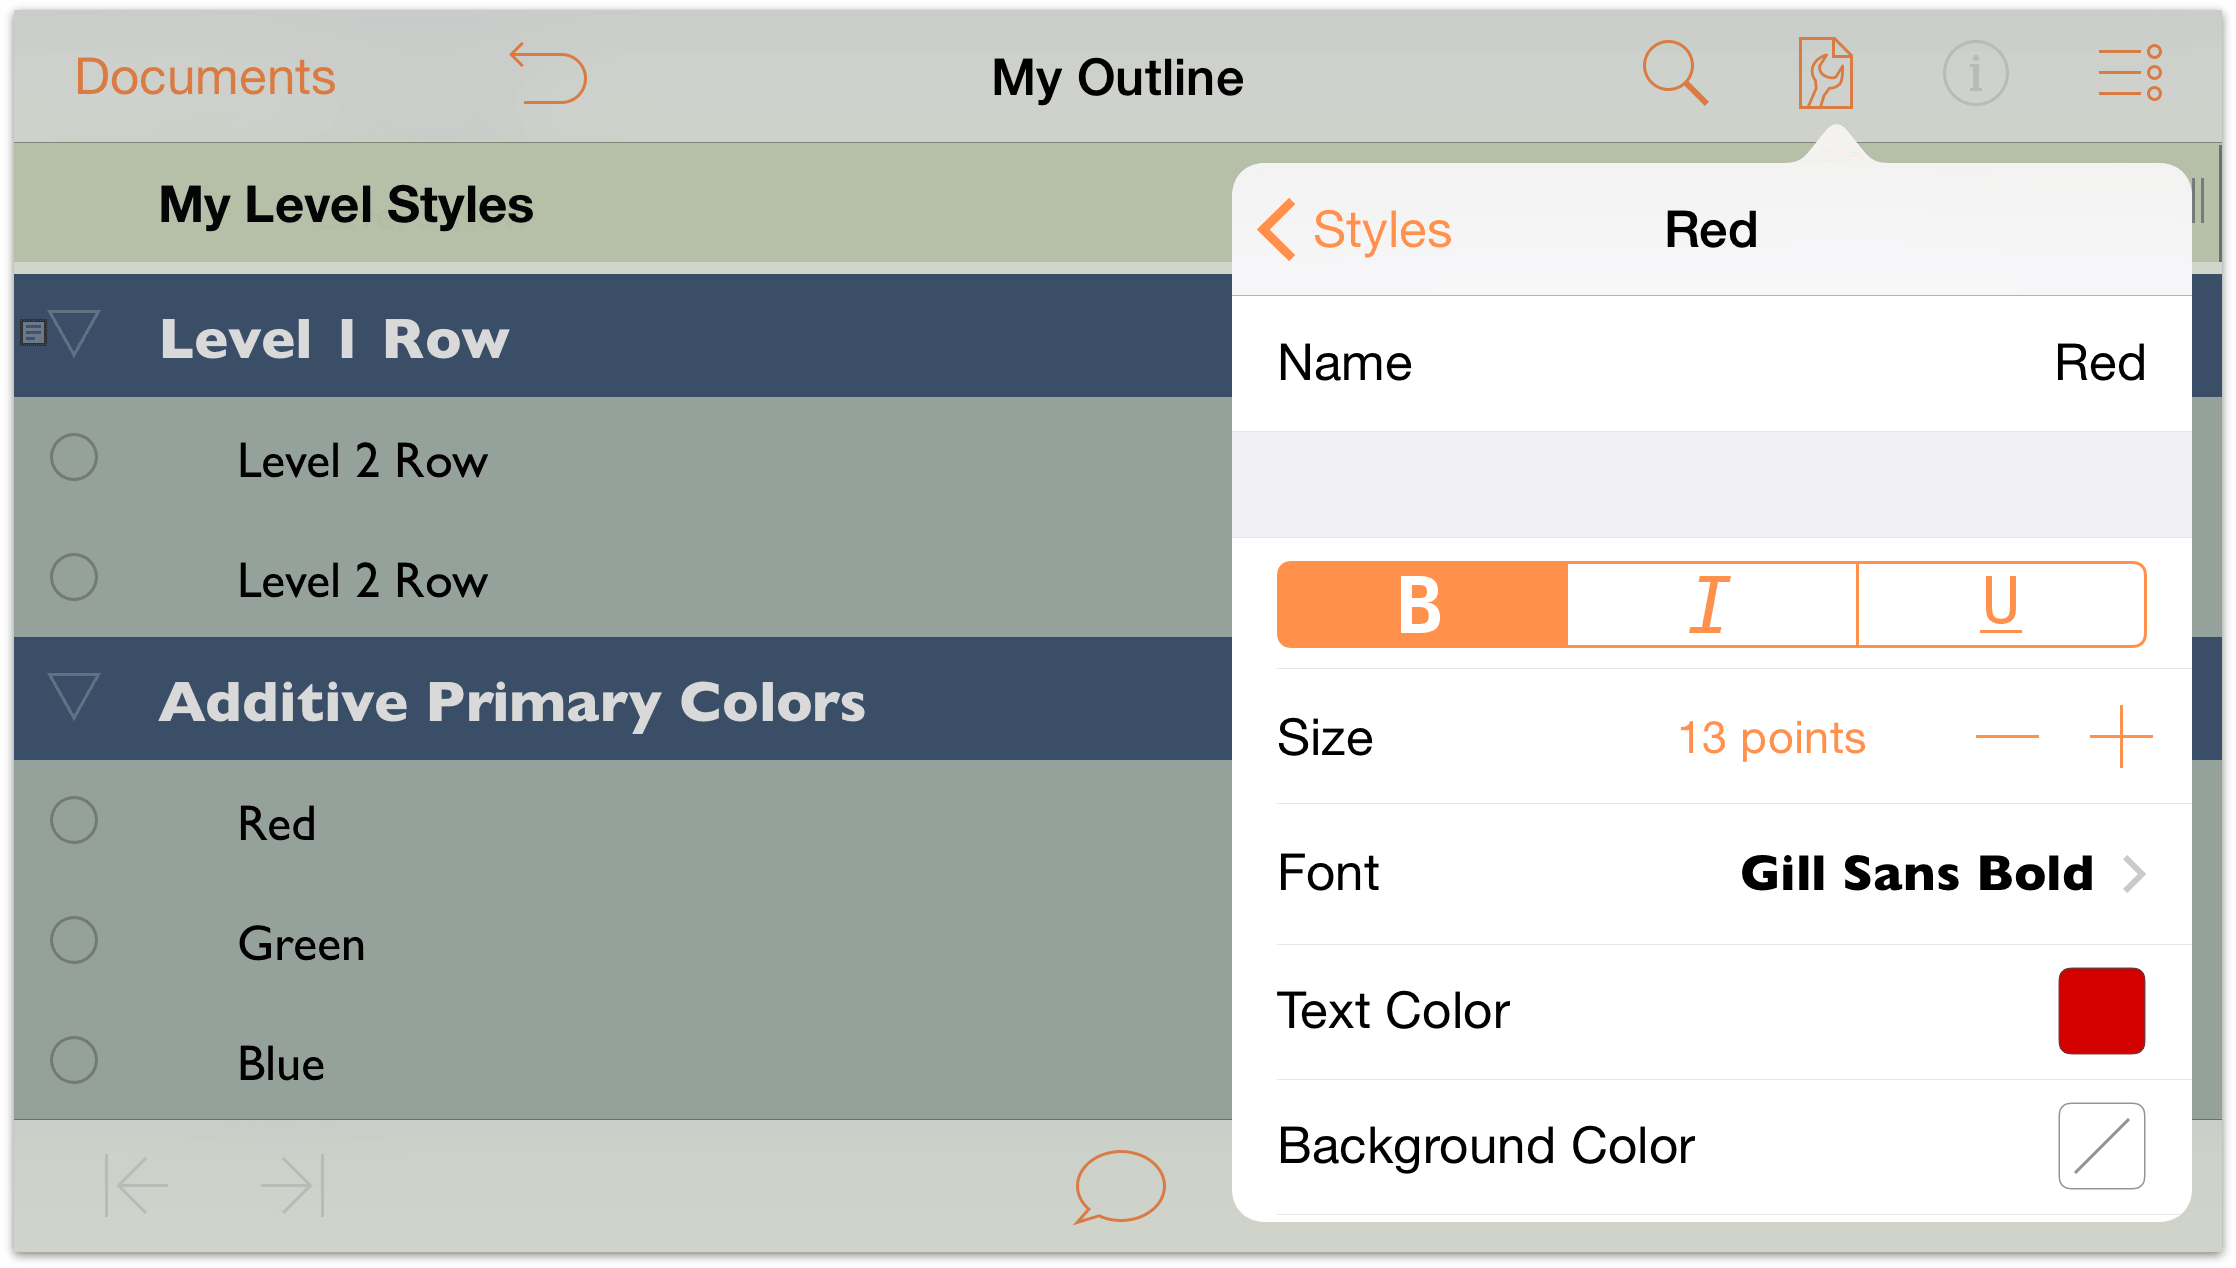
Make the following changes to the Red style:
- Change the font to 13 point Gill Sans Bold.
- Change the Text Color to red, either using the preset color palettes or blend your own using the HSV or RGB controls.
When you have finished, the Red styles pane should look similar to the following:
-
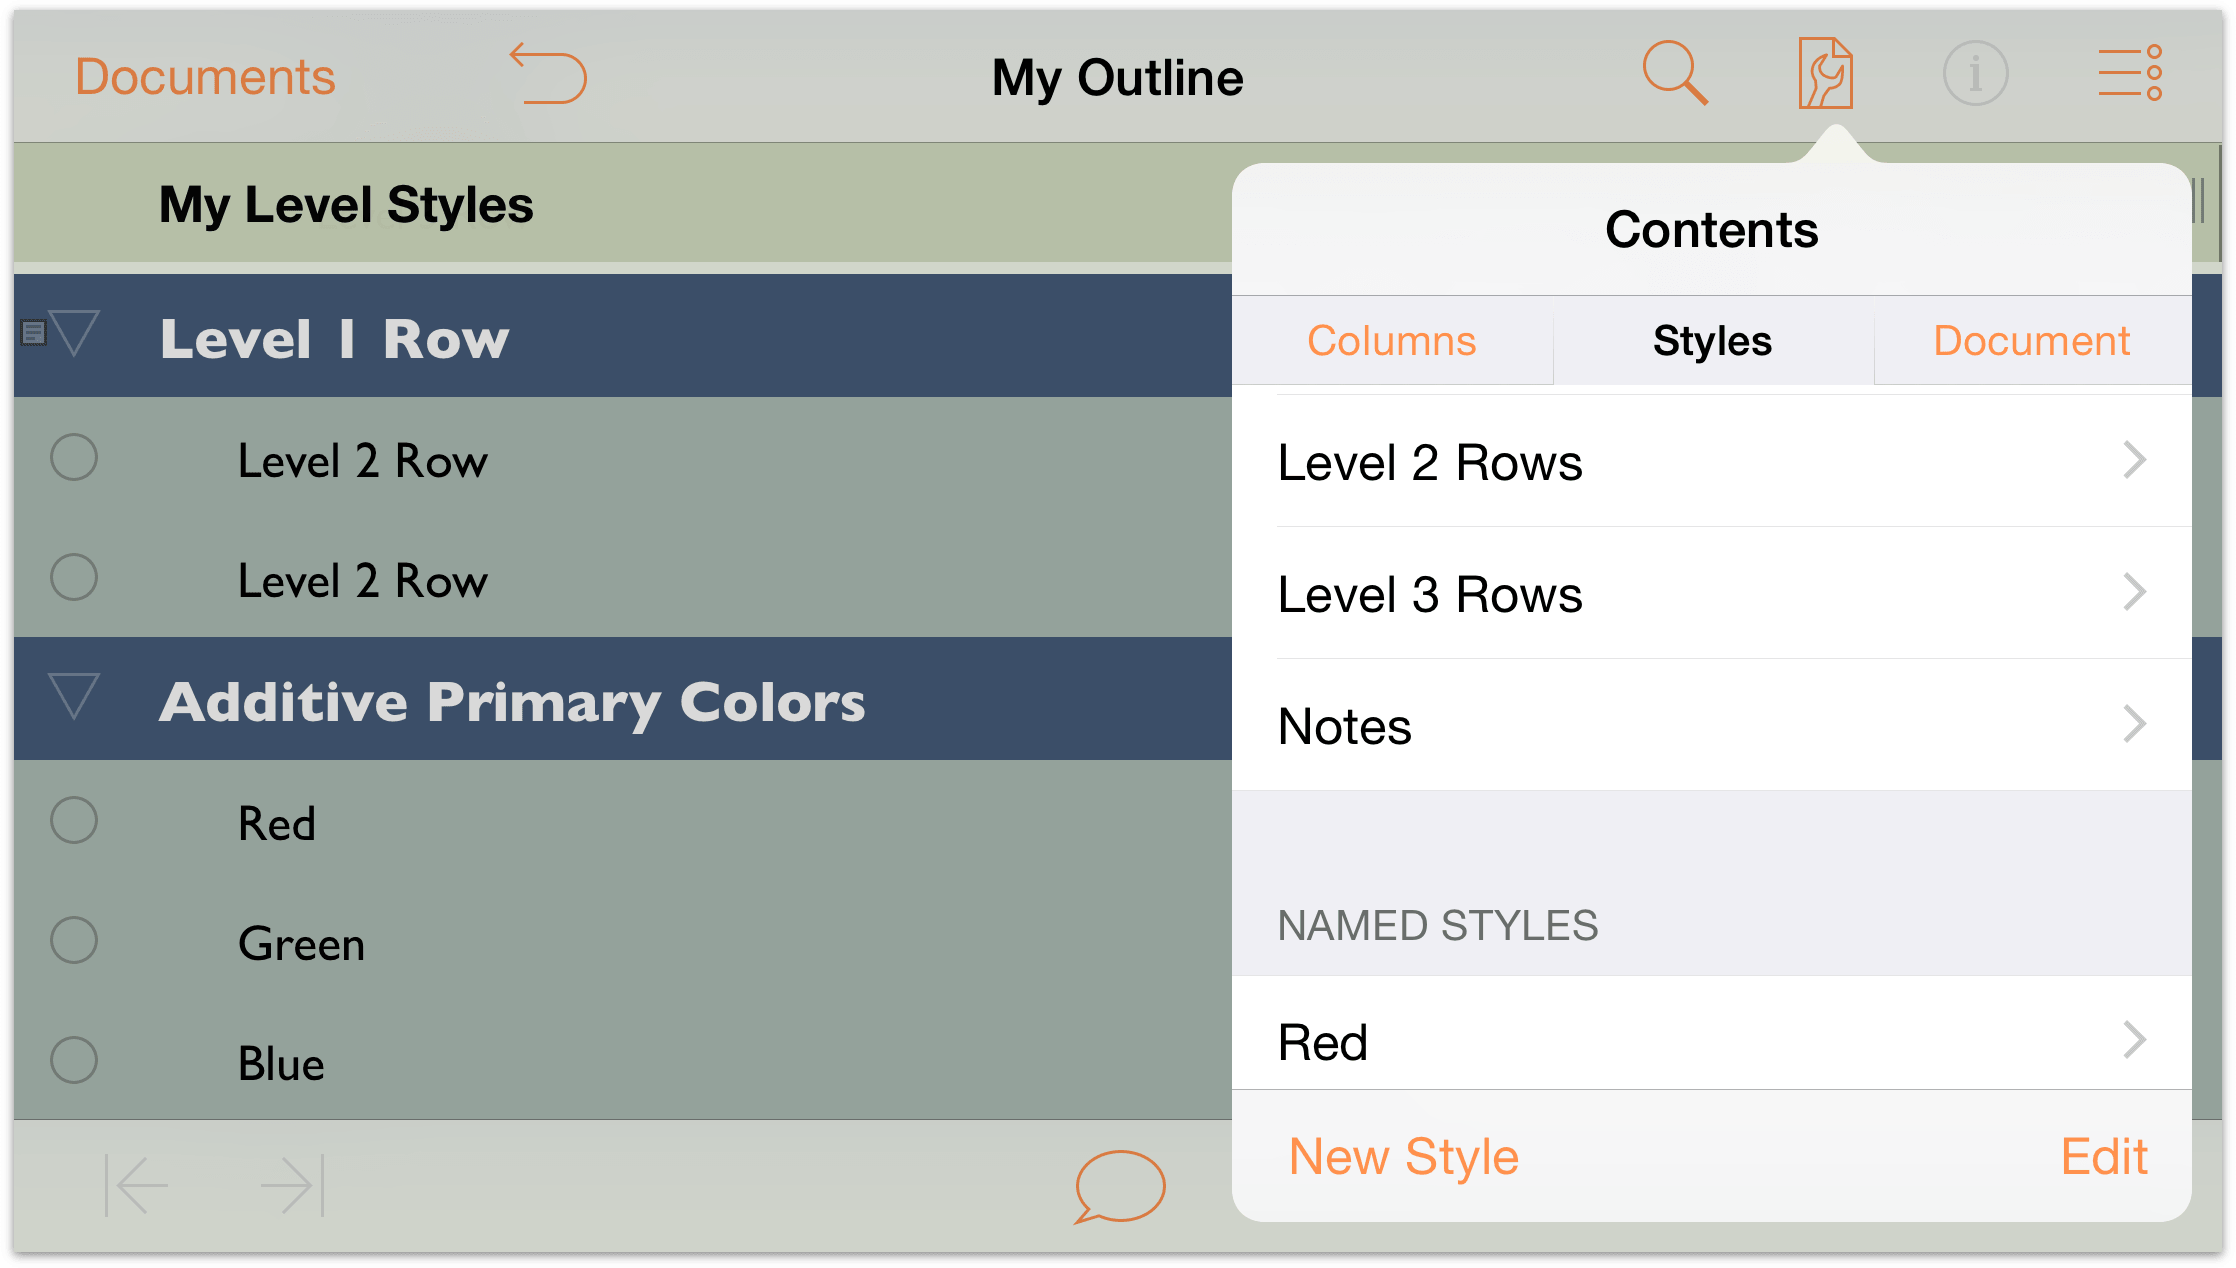
Now repeat Steps 4 through 7 and add two more Named Styles: Green and Blue. Your list of Named Styles should appear as follows:
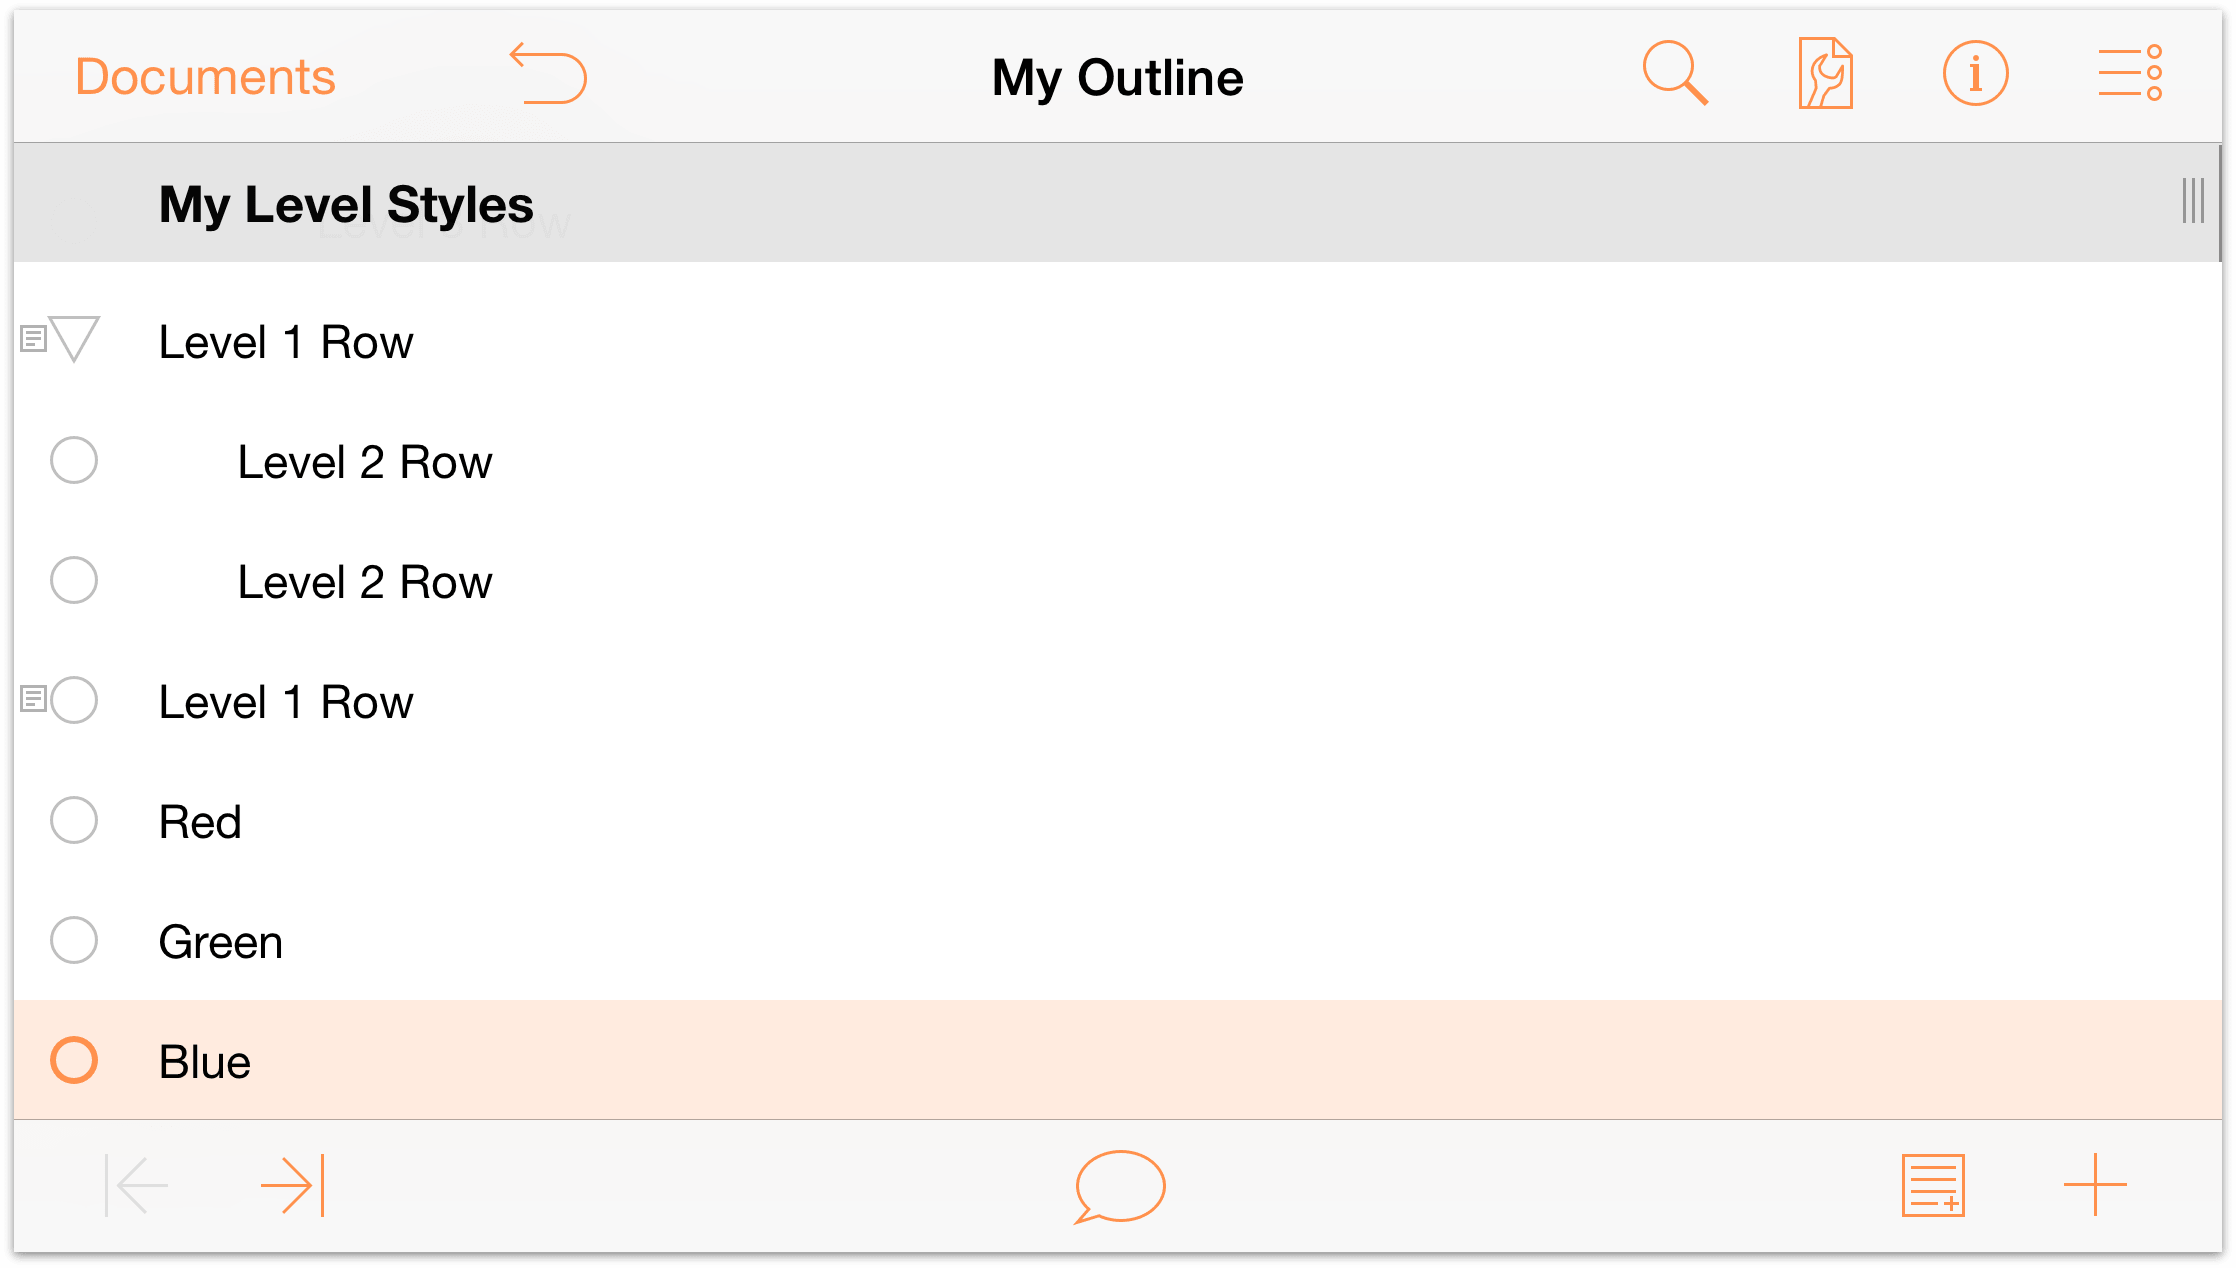
To apply a Named Style, first tap to select the row that you want to style, and then tap
 to open the Info menu.
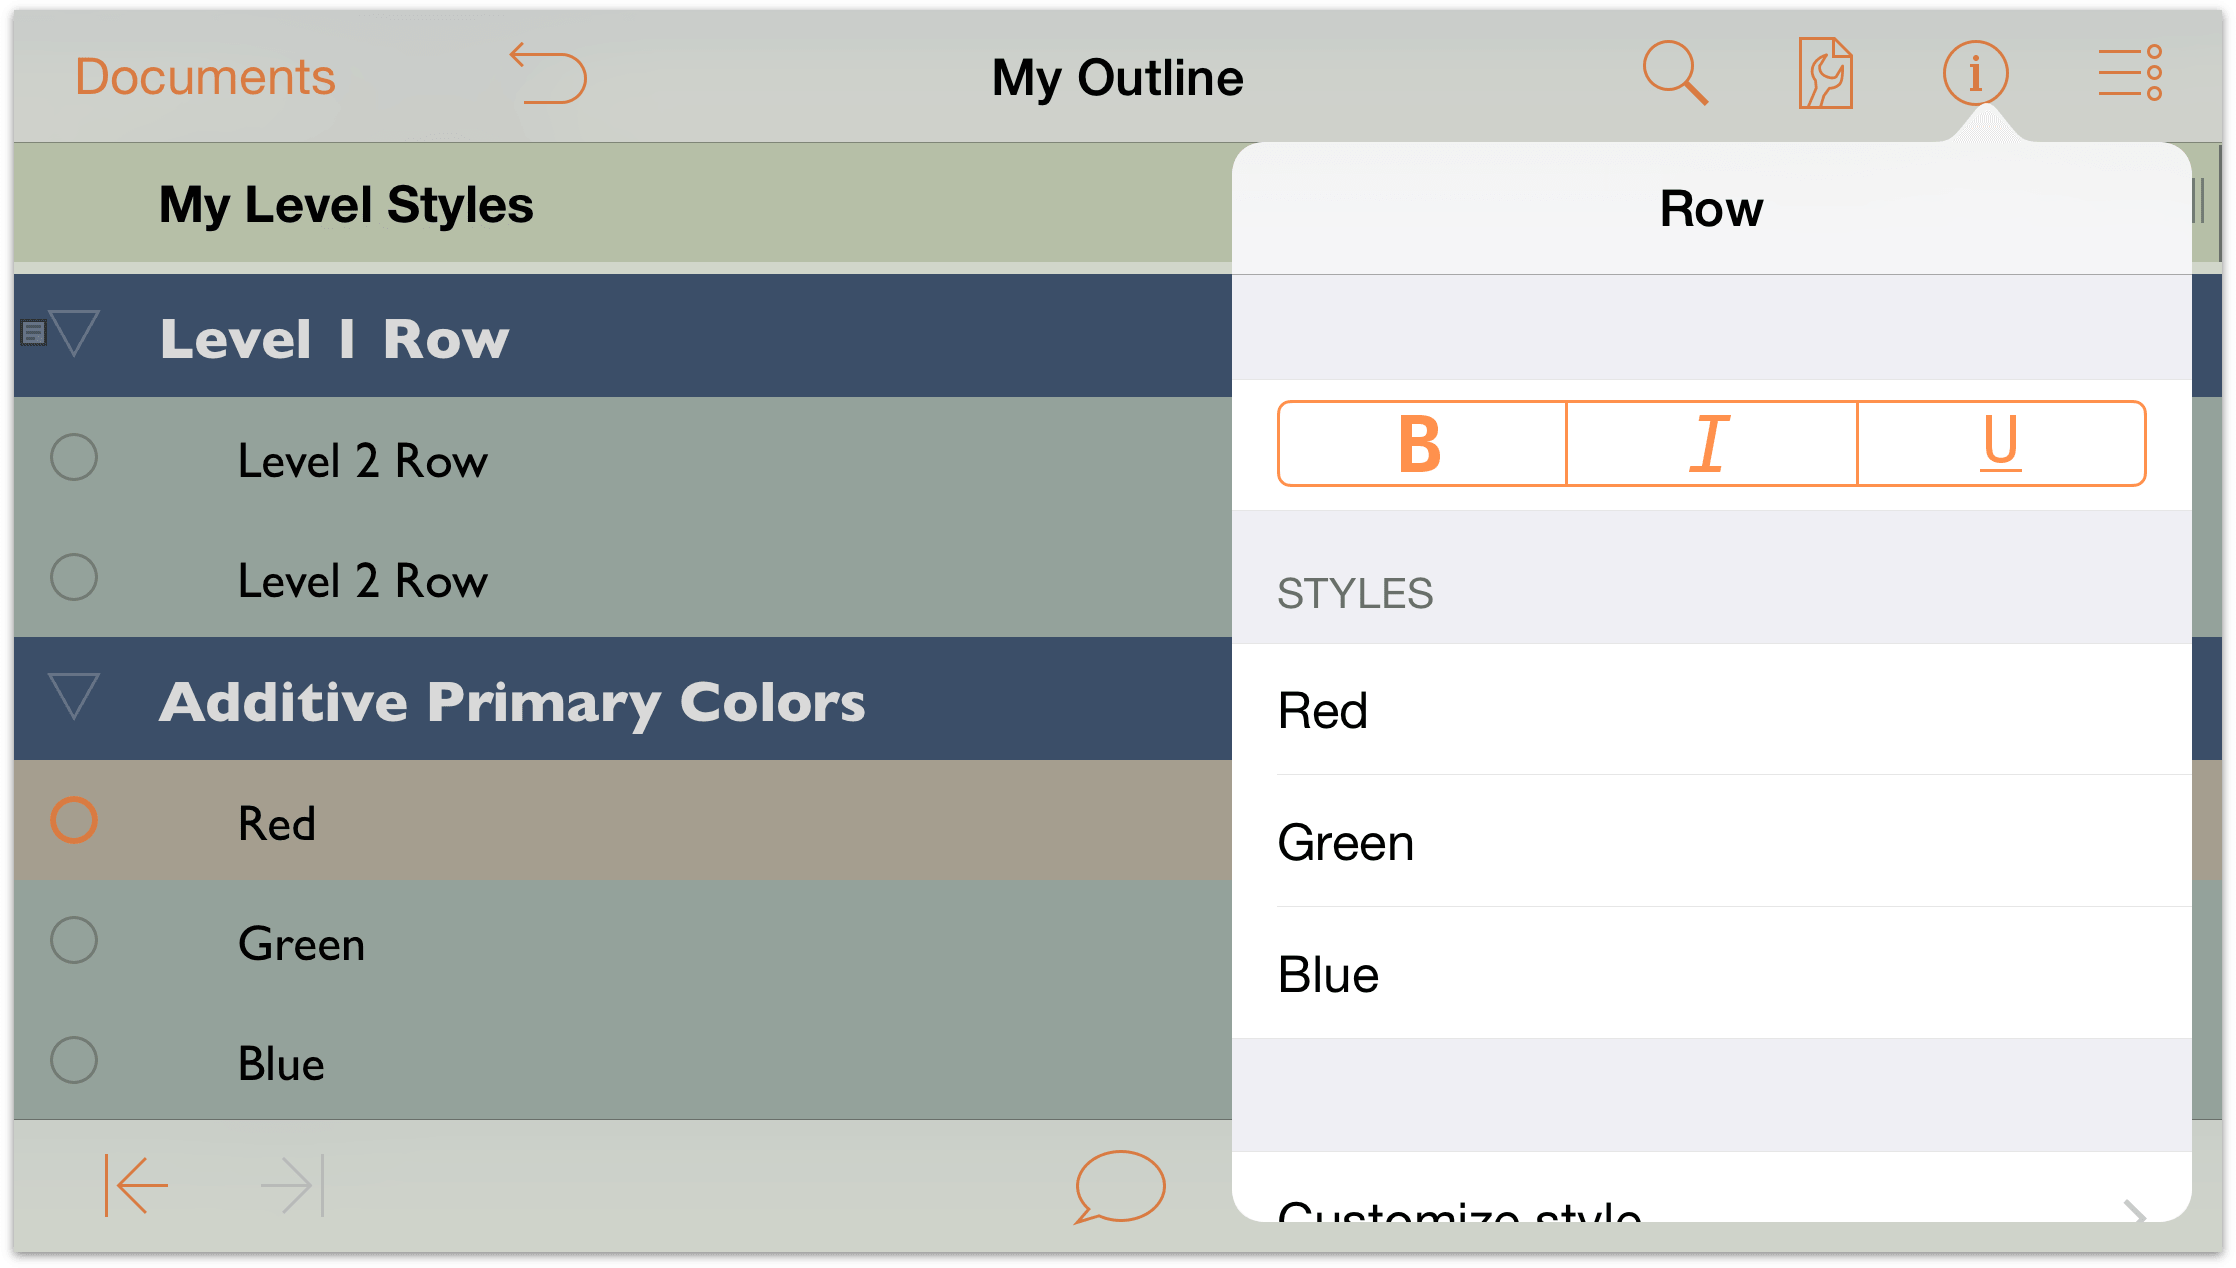
In the list of Styles, tap the Red Named Style to apply its properties to the selected row.

Repeat Steps 9 and 10 to apply the Green and Blue Named Styles to their respective rows. When you have finished, your outline should look similar to the following:
Creating and Using a Template
Up to now, you’ve done a lot of work on this one OmniOutliner document, and it’d be a shame to have to redo all of that design work again. When you find a design that you really really like, you can save the OmniOutliner file as a template and then later create new documents with that template, or apply its styles as a “theme” to an existing document.
Before you create the template, the first thing you should probably do is change the name of the file from My Outline (OmniOutliner’s default filename for new outlines) to something more appropriate, such as Green and Blue Levels.
To change the name of the outline you have been working on:
- Tap the filename at the center of the navigation bar at the top of the screen.
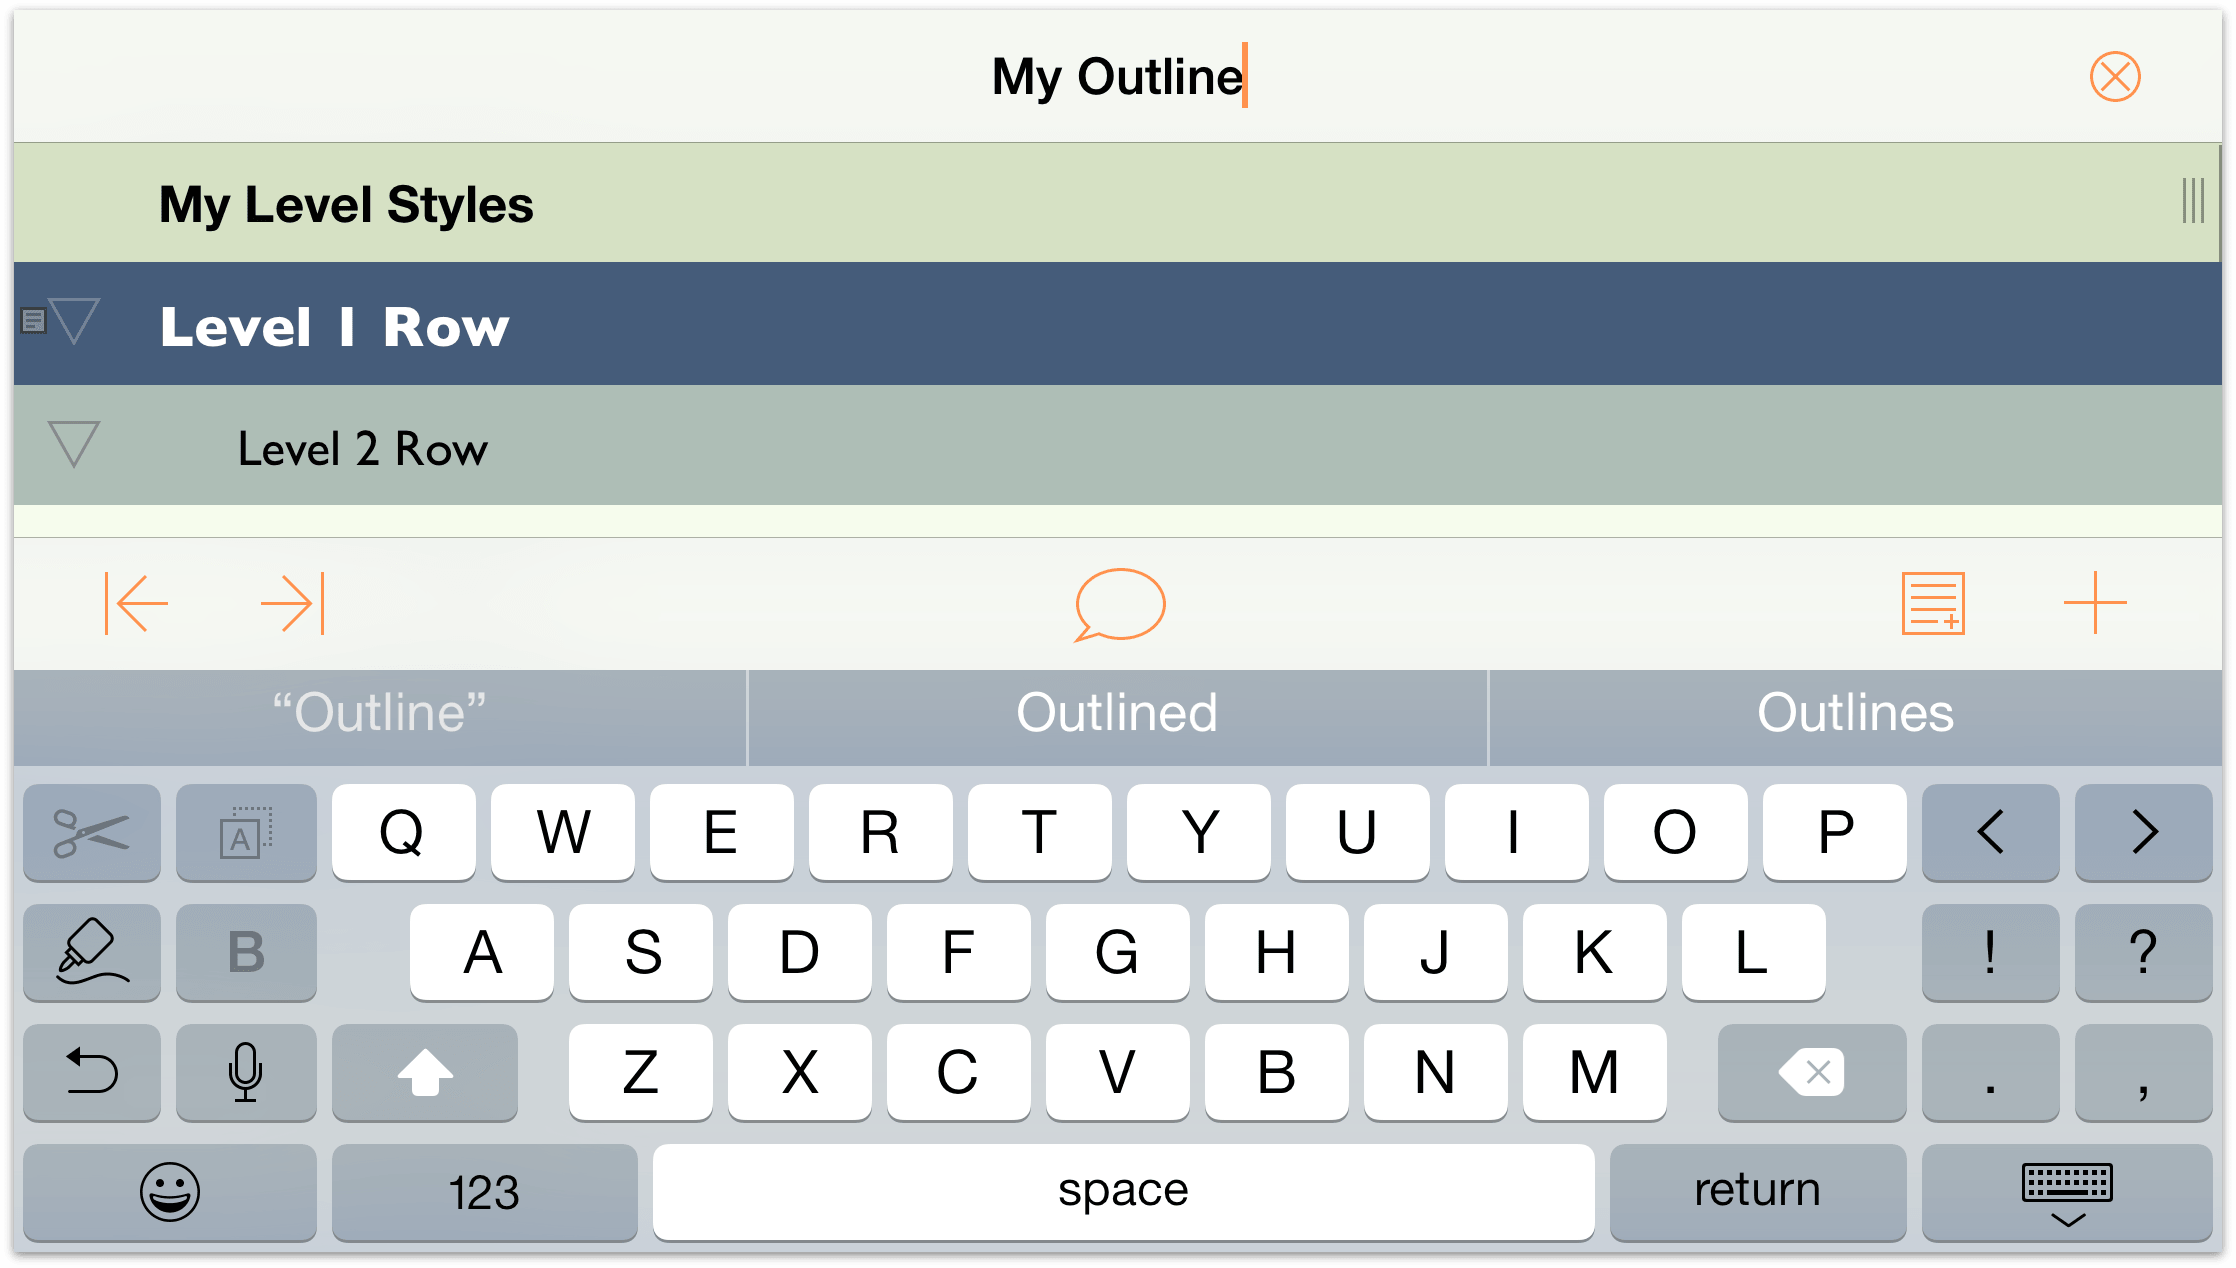
- Delete the name My Outline and enter Green and Blue Levels as the new filename.
Here’s what you need to do to create the template:
- In the navigation bar, tap Documents to save and close the outline you have been working on. This returns you to the Local Documents folder.
- In the navigation bar, tap Select.
- Tap to highlight the Green and Blue Levels file.
- In the navigation bar, tap , and then tap to choose Create Template from Outline in the menu that appears.
That’s it. After you tap Create Template from Outline, OmniOutliner saves a version of the file as a template and places it in the Local Documents — Templates folder.
Applying a Template as a Theme
As noted earlier in this chapter, the first thing you do when creating a new outline is to choose a template. But what if you already have a document that you would like to style like something else? Fortunately, you can apply the styles from a template—its theme—to another document you’re working on.
- Open the Favorite Movies outline you created in the previous chapter.
- Tap
 to open the Contents menu, and then tap the center tab, Styles, to view the Styles menu.
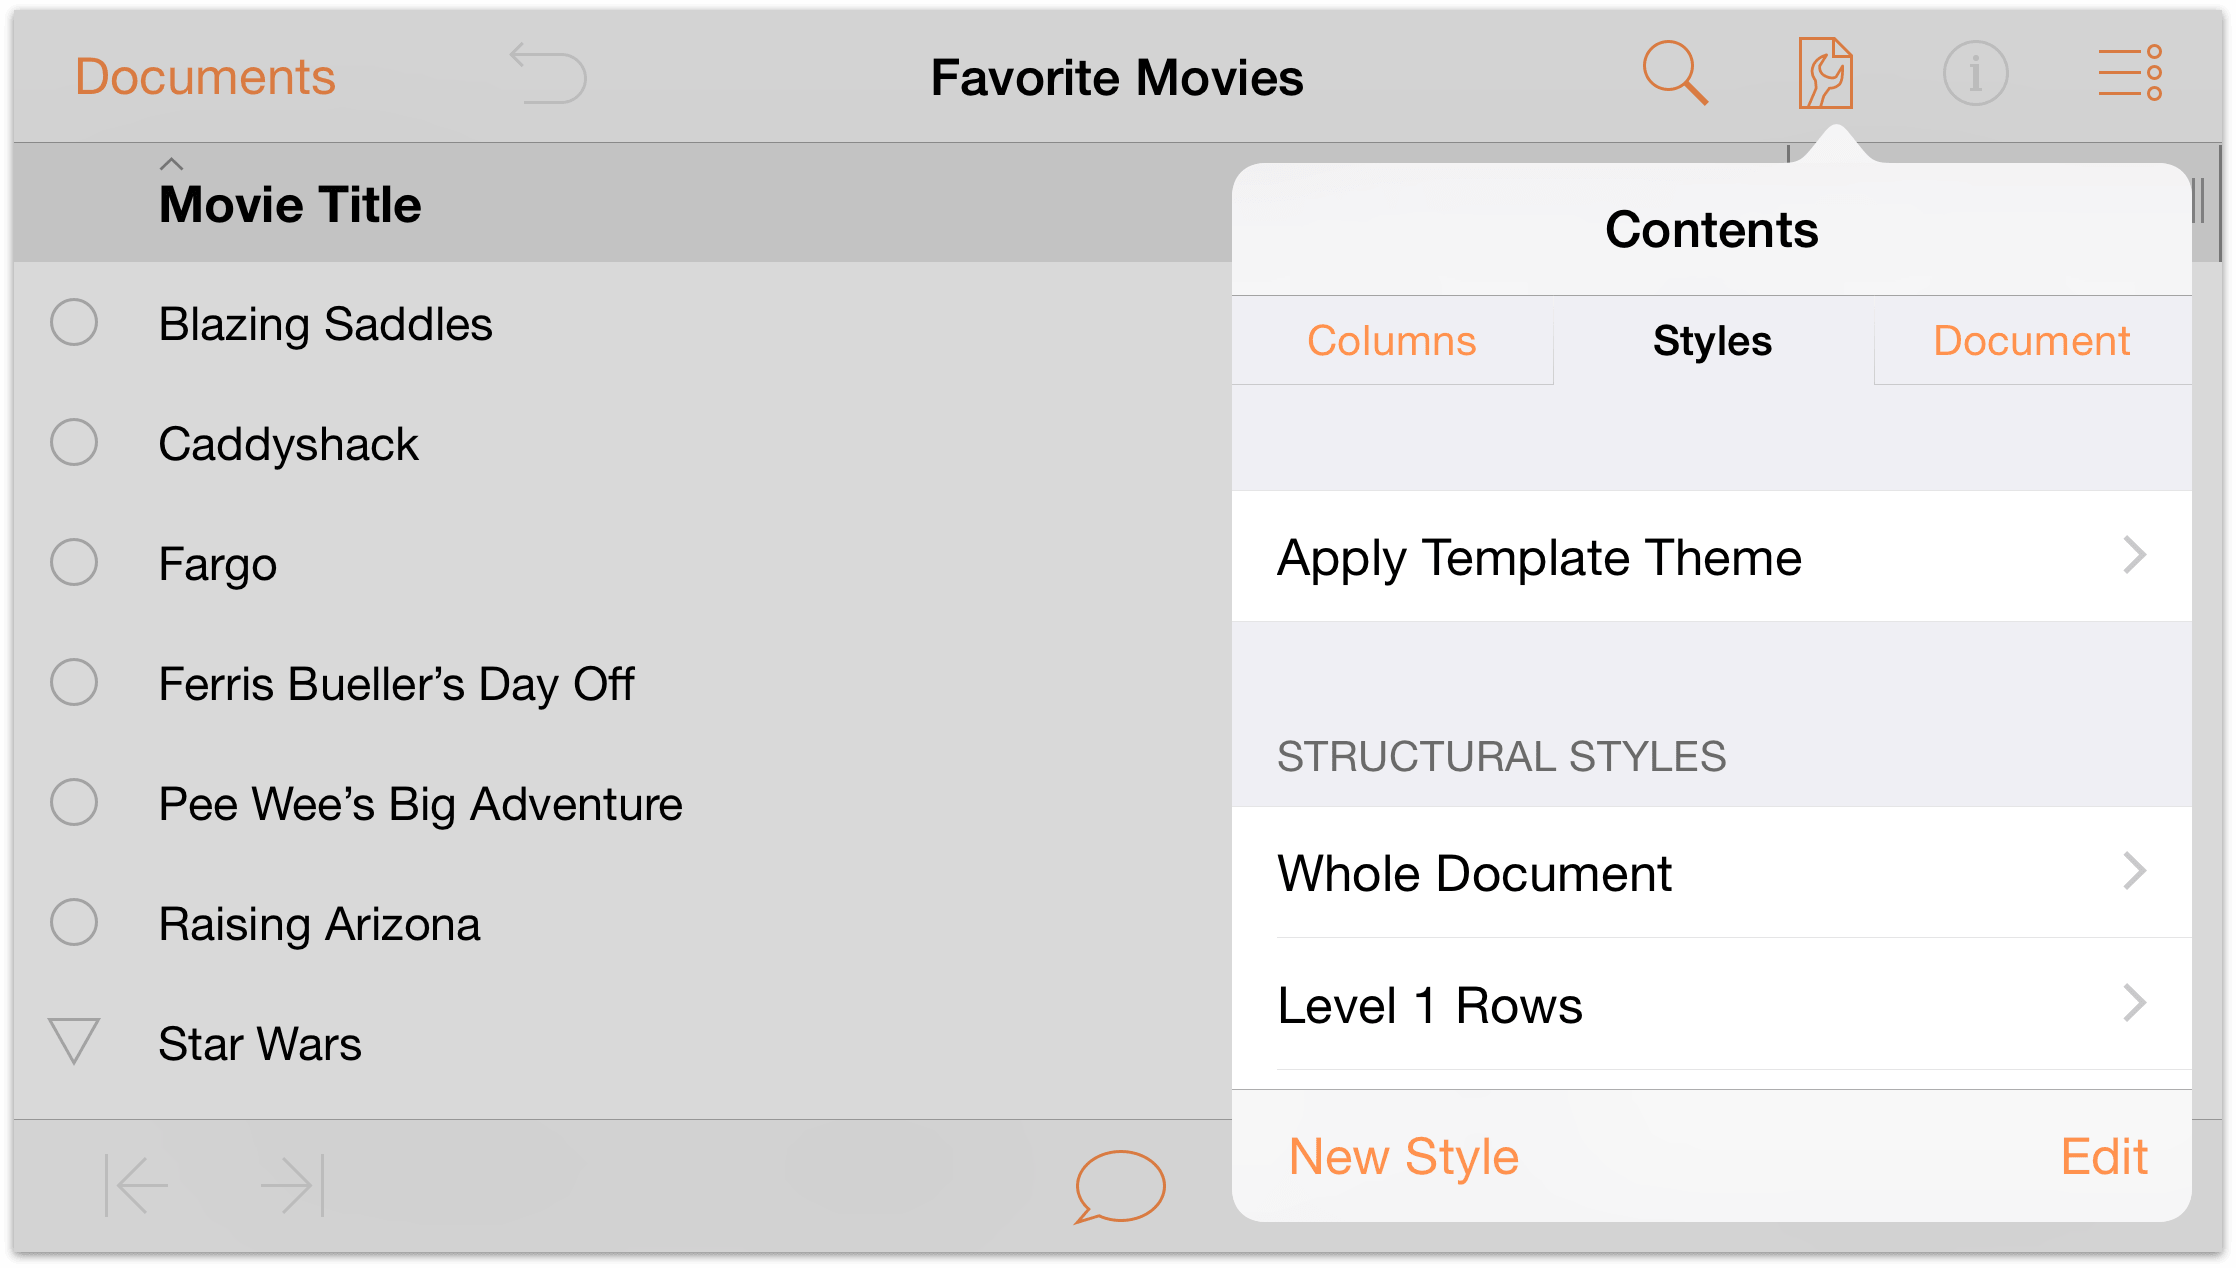
Tap Apply Template Theme, swipe up to scroll through the list of Templates and Themes, and then tap to select the Green and Blue Levels template.
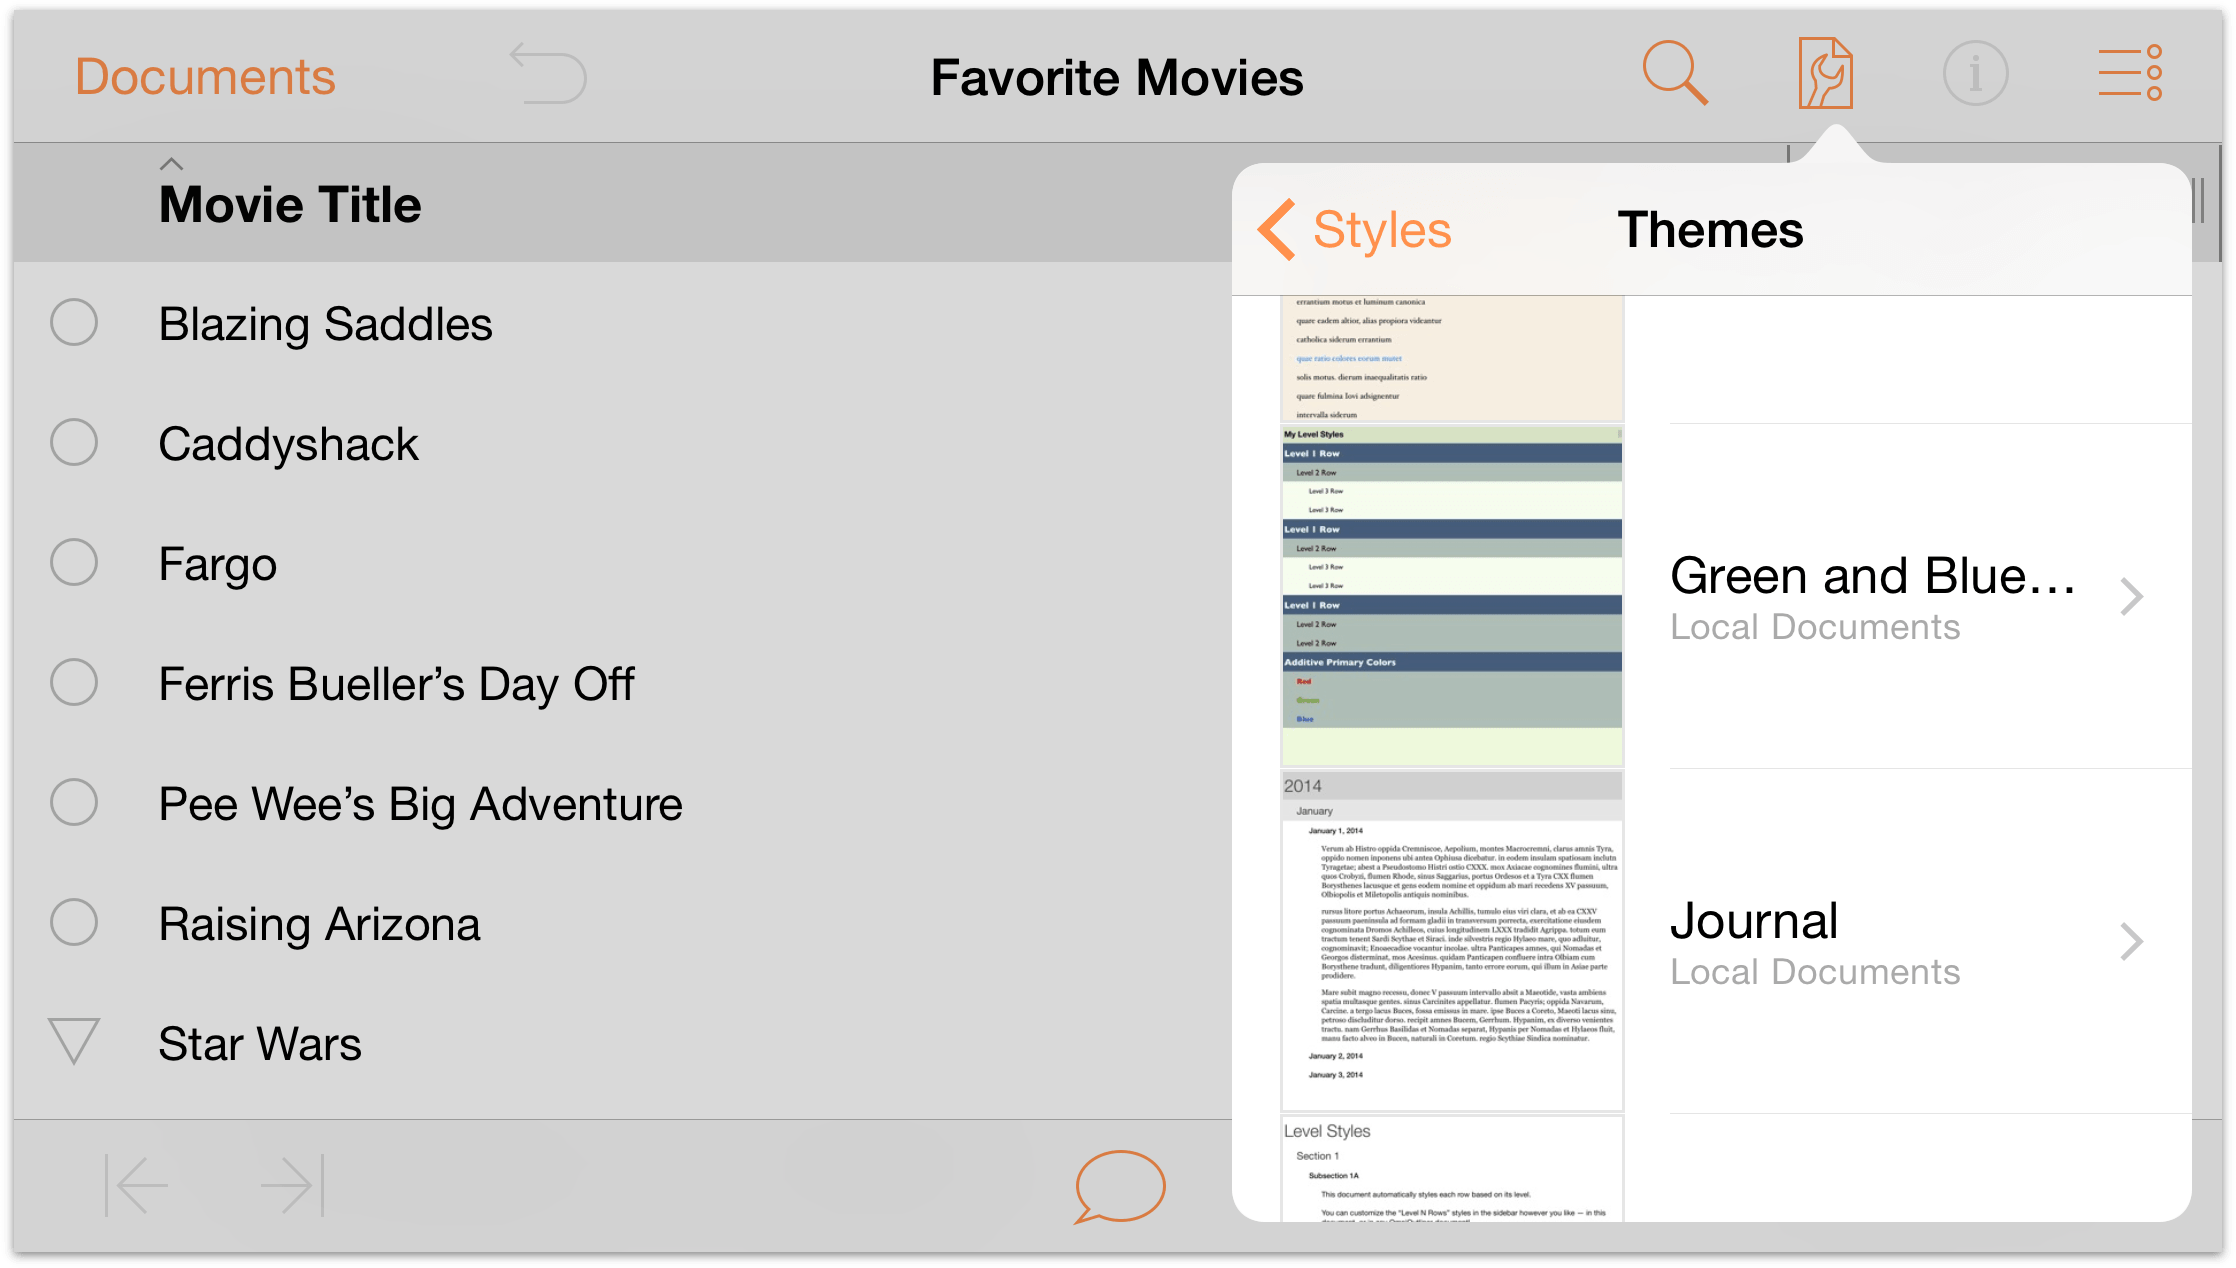
When you tap to select a Template or Theme, OmniOutliner provides you with a preview of how an outline might appear with that style applied.
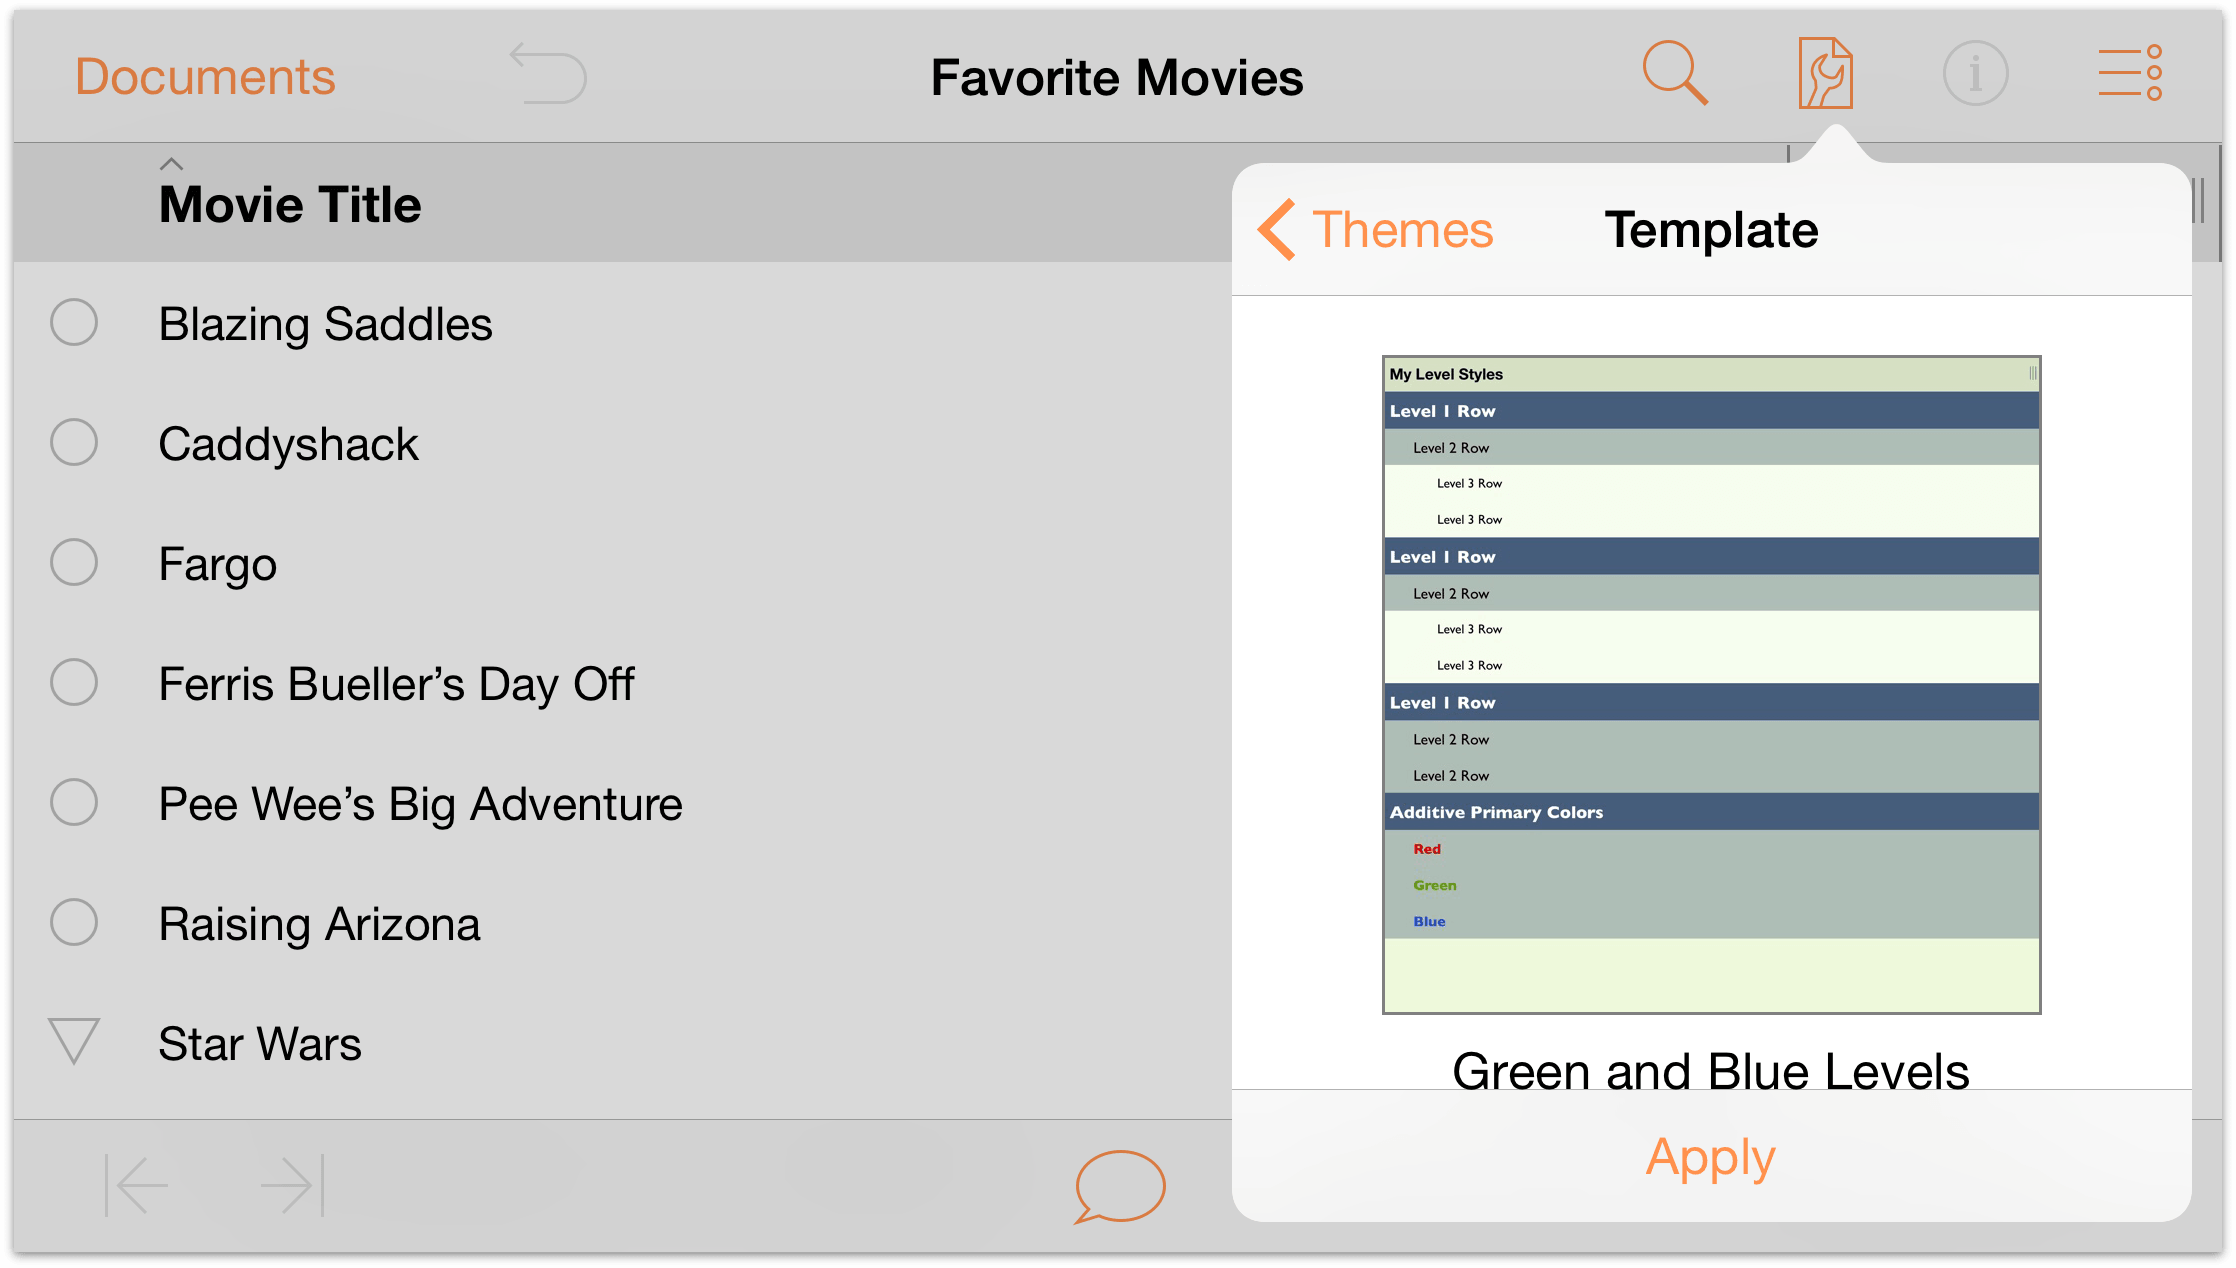
- Tap Apply to apply the chosen theme to the document.
The document takes on all of the characteristics of the Green and Blue Levels template you created without overwriting all of the content on the rows.
Keep this in mind when you’re working on a document and looking for creative ways to style the content. If you don’t like the way a particular theme looks, you can always tap ![]() to undo the theme and revert back to the previous styling.
to undo the theme and revert back to the previous styling.
Where to Go From Here
This tutorial took you through the process of taking the most basic OmniOutliner template (Default) to create a new template from scratch. Along the way, you learned how to create hierarchical lists of information on different rows, how to move and organize your content, and also how to create groups.
Take some time now to explore everything that OmniOutliner has to offer and create some new styles of your own.
Importing from an Older Version of OmniOutliner for iPad
OmniOutliner 2 doesn’t share its data with the v1.x version you may have installed on your iPad.
The easiest way to bring files from OmniOutliner v1.x to OmniOutliner 2 for iOS is to set up OmniPresence sync with an Omni Sync Server account, and then sync both versions to the same cloud folder.
If you have a sync account set up for OmniOutliner v1.x, you’ll want to use the same login information when you set it up for OmniOutliner 2 for iOS. If you’re starting fresh with a new account, you’ll need to set it up in both versions.
OmniPresence Sync in OmniOutliner v1.x
To check your sync settings in OmniOutliner v1.x, go to the Document Browser and tap the Local Documents menu in the toolbar. If you only see the Local Documents and Trash folders in this menu, you will need to set up a cloud account to sync your files.
Tap Cloud Setup from the toolbar. Follow the onscreen prompts or refer to Syncing with OmniPresence in the in-app help for more detailed instructions.
If you already have a cloud account set up that you would like to use to migrate your data, make sure all the files you want to transfer are in your OmniPresence folder, then tap the sync icon in the toolbar. After using the same account information to set up cloud sync in OmniOutliner 2, your files will be available there as well.
Other Import Options
If you prefer not to migrate your documents using OmniPresence and Omni Sync Server, other options are available.
- With OmniOutliner v1.x and OmniOutliner 2 for iOS both installed on your iPad: Select individual documents in OmniOutliner v1.x and use Send to App from the Share button in the document browser toolbar to send files to OmniOutliner 2.
- Using iTunes 12 for Mac: Connect your iOS device with OmniOutliner v1.x to your Mac, and follow these instructions to transfer Outliner documents to your computer:
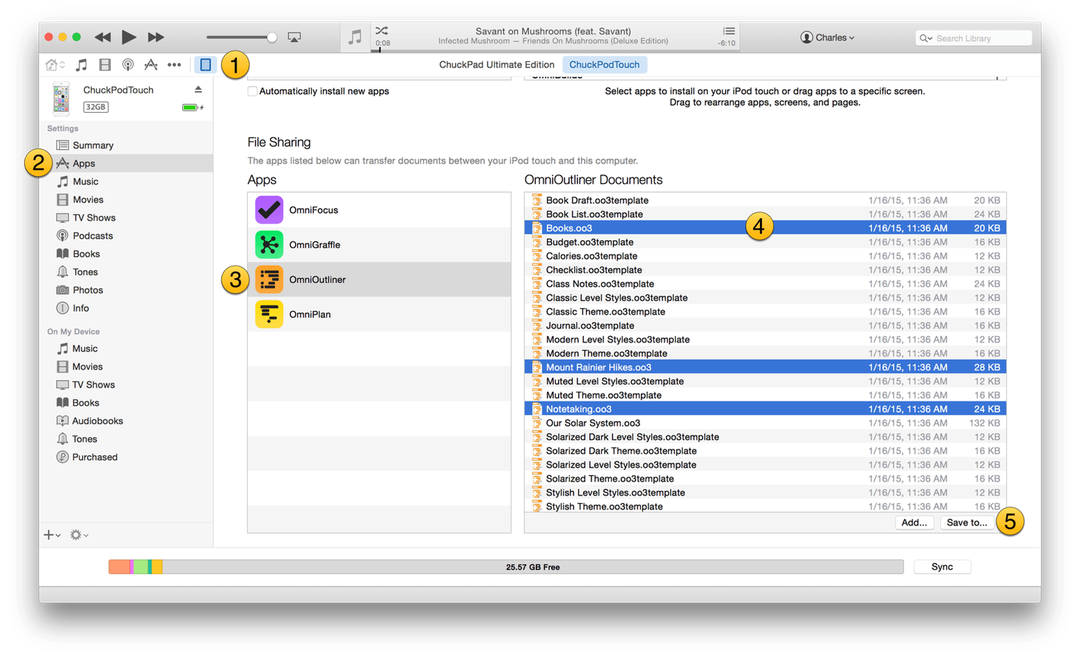
- Choose your iOS device; information about the device shows up in the Device sidebar on the left of the iTunes window.
- Under Settings, choose Apps.
- Scroll down on the right side of the iTunes window until you see the File Sharing section. Choose OmniOutliner in the list.
- Command-click to select the OmniOutliner Documents you would like to save to your Mac.
- Click Save to and choose a location on your Mac to where you can temporarily save the files you have selected.
To transfer the files you’ve saved to your Mac into OmniOutliner 2 for iOS, repeat Steps 1-4 in the previous list, but instead of clicking Save to, click Add. Use the window that appears to choose the files you want to restore in OmniOutliner 2 for iOS and then click Add.
Note
If you encounter any problems with this, feel free to contact our Support Humans for additional assistance.
Keyboard Shortcuts
If you have paired a Bluetooth keyboard with your iOS device, you can use the following keyboard shortcuts with OmniOutliner 2 for iOS. These are the same keyboard shortcuts you’ll find in OmniOutliner for Mac, so you should feel right at home.
Editing
| Command | Keyboard Shortcut |
| Cut | Command-X |
| Copy | Command-C |
| Paste | Command-V |
| Copy Style | Option-Command-C |
| Paste Style | Option-Command-V |
Controlling How Paste Works
In OmniOutliner’s Settings, you’ll find an option for pasting text. When viewing the contents of a folder or when you’re on OmniOutliner’s home screen, tap the gear menu in the upper-right corner and then tap Settings.
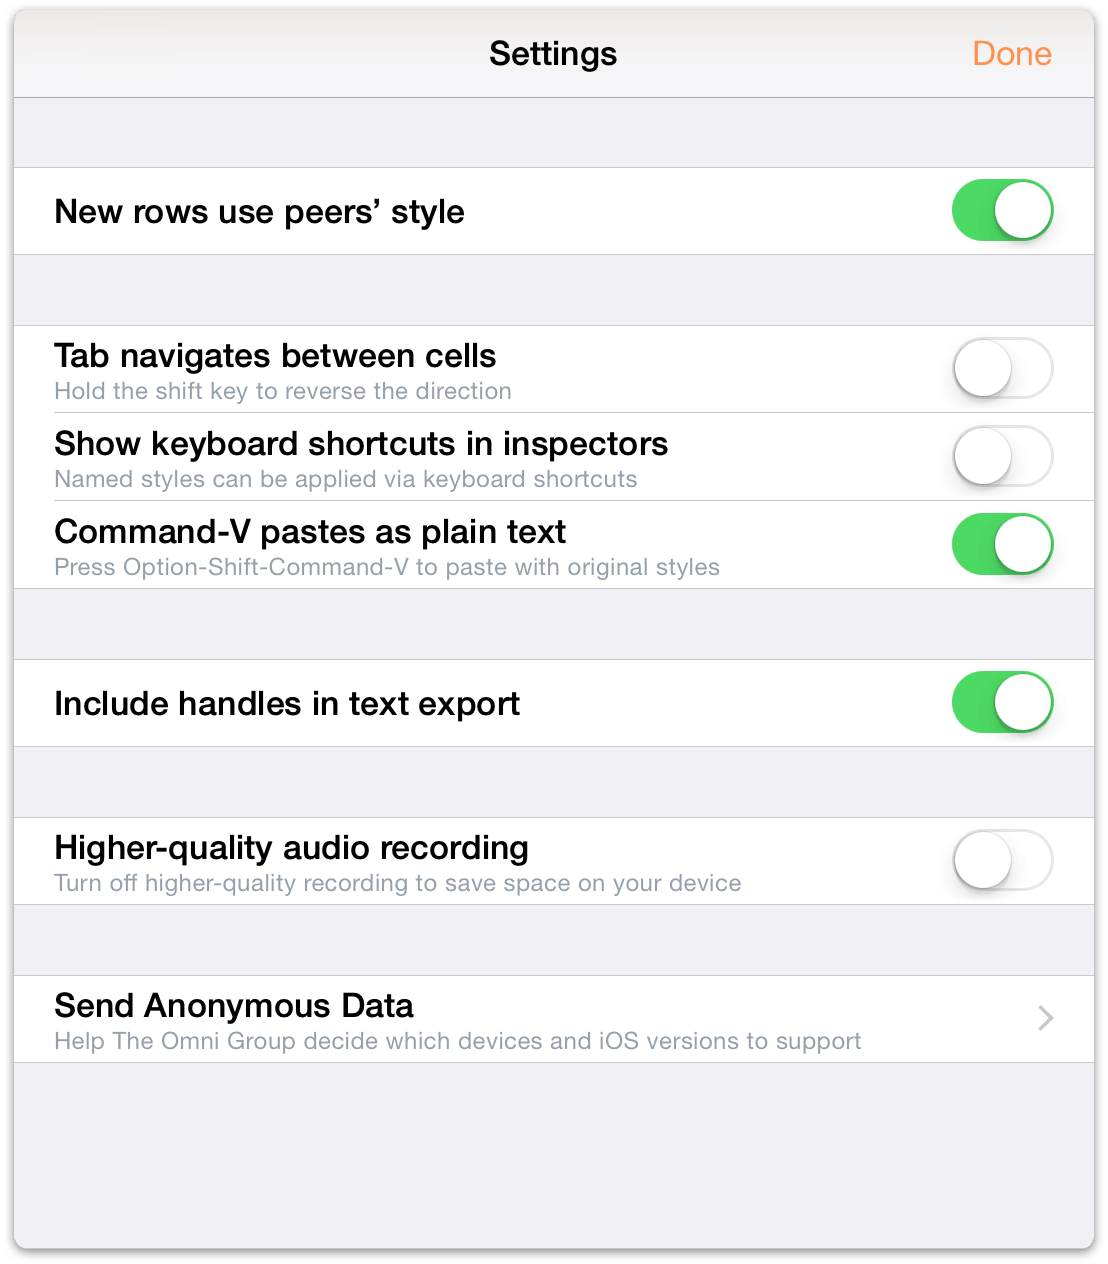
When the switch is on, Command-V pastes the contents of the clipboard as plain text. When the switch is off, Command-V pastes the contents of the clipboard with original styles. One little trick to keep in mind, however, is that Option-Shift-Command-V always pastes using the opposite method of Command-V (i.e., styled text when the switch is on, and plain text when the switch is off).
It’s worth noting, too, that this setting does not affect the Paste and Paste Plain options found in the contextual menu when you tap in a row or cell. For more details on how those options work, see Creating a New OmniOutliner Document.
Styles
| Command | Keyboard Shortcut |
| Bold | Command-B |
| Italic | Command-I |
| Underline | Command-U |
| Clear custom style | Control-Command-Delete |
| Increase font size | Command-+ |
| Decrease font size | Command-– |
| Toggle first named style | Control-1 |
| Toggle second named style | Control-2 |
| Toggle third named style | Control-3 |
| Toggle forth named style | Control-4 |
| Toggle fifth named style | Control-5 |
| Toggle sixth named style | Control-6 |
| Toggle seventh named style | Control-7 |
| Toggle eighth named style | Control-8 |
| Toggle ninth named style | Control-9 |
| Toggle tenth named style | Control-0 |
| Split row at cursor | Control-Return |
| Insert line break | Option-Return |
| Toggle editing current row | Command-Return |
Reorganize
| Command | Keyboard Shortcut |
| Move row up | Control-Command-↑ |
| Move row down | Control-Command-↓ |
| Move row left | Control-Command-← |
| Move row right | Control-Command-→ |
| Indent row | Command-] or Tab |
| Outdent row | Command-[ or Shift-Tab |
| Add row | Return |
| Add row above | Shift-Return |
| Add child | Shift-Command-] |
| Add aunt | Shift-Command-[ |
| Group | Option-Command-G |
| Ungroup | Option-Command-U |
| Duplicate | Command-D |
| Toggle editing note | Command-' |
| Select all | Command-A |
| Deselect all | Shift-Command-A |
| Back delete | Delete |
| Forward delete | fn-Delete |
| Move to next cell | Tab |
| The Tab key can be used to either indent/outdent, or to navigate between cells. | |
View
| Command | Keyboard Shortcut |
| Expand all rows | Control-Command-9 |
| Collapse all rows | Control-Command-0 |
| Expand selected rows | Command-9 |
| Collapse selected rows | Command-0 |
| Expand selected rows completely | Option-Command-9 |
| Collapse selected rows completely | Option-Command-0 |
| The following commands only work when you already have a row selected: | |
| Scroll to First Row | Command-↑ |
| Scroll to Last Row | Command-↓ |
| Move selected row up | u |
| Move selected row down | d |
| Move left | l |
| Move right | r |
| Edit row | e |
| Toggle status | Spacebar |
| Group | Option-Command-G |
| Ungroup | Option-Command-U |
| Select row above | ↑ |
| Select row below | ↓ |
| Expand selected row(s) | → |
| Collapse selected row(s) | ← |
| Add row above to selection | Shift-↑ |
| Add row below to selection | Shift-↓ |
Find
| Command | Keyboard Shortcut |
| Find | Command-F |
| Select previous match | ↑ |
| Select next match | ↓ |
| Select all matches | Command-A |
| Only works when in row selection mode. | |
Getting Help
When you’re in need of help—whether you’re trying to figure out how styles work, or if you’re having some other issue with OmniOutliner—it’s good to know that the Support Humans at The Omni Group are always available to lend you a hand.
The OmniOutliner Website
The OmniOutliner website is always a good place to find the latest information about OmniOutliner.
Forums
The Omni Group maintains online forums for all of our products, and you’re invited! Come share your questions and ideas with other users and Omni staff.
Email Support
If you’re stuck, if you have a good idea for the next version of OmniOutliner, or if you just want to let us know how we’re doing, go ahead and send us an email. Choose Help ▸ Contact Omni from the menu bar to conjure up a message addressed to us, or just send us an email with your thoughts. We take support pretty seriously, so you can expect a prompt response actually typed by human hands.
Release Notes
For really meticulously detailed information about what has changed in each minor version of OmniOutliner, be sure to read the Release Notes by tapping the Settings menu on OmniOutliner’s Location screen.
Credits
PLCrashReporter
Except as noted below, PLCrashReporter is provided under the following license:
Copyright © 2008–2013 Plausible Labs Cooperative, Inc. All rights reserved.
Permission is hereby granted, free of charge, to any person obtaining a copy of this software and associated documentation files (the “Software”), to deal in the Software without restriction, including without limitation the rights to use, copy, modify, merge, publish, distribute, sublicense, and/or sell copies of the Software, and to permit persons to whom the Software is furnished to do so, subject to the following conditions:
The above copyright notice and this permission notice shall be included in all copies or substantial portions of the Software.
THE SOFTWARE IS PROVIDED “AS IS”, WITHOUT WARRANTY OF ANY KIND, EXPRESS OR IMPLIED, INCLUDING BUT NOT LIMITED TO THE WARRANTIES OF MERCHANTABILITY, FITNESS FOR A PARTICULAR PURPOSE AND NONINFRINGEMENT. IN NO EVENT SHALL THE AUTHORS OR COPYRIGHT HOLDERS BE LIABLE FOR ANY CLAIM, DAMAGES OR OTHER LIABILITY, WHETHER IN AN ACTION OF CONTRACT, TORT OR OTHERWISE, ARISING FROM, OUT OF OR IN CONNECTION WITH THE SOFTWARE OR THE USE OR OTHER DEALINGS IN THE SOFTWARE.
Additional contributions have been made under the same license terms as above, with copyright held by their respective authors:
Damian Morris damian@moso.com.au
Copyright © 2010 MOSO Corporation, Pty Ltd. All rights reserved.
HockeyApp/Bitstadium
Copyright © 2012 HockeyApp, Bit Stadium GmbH. All rights reserved.
The protobuf-c library, as well as the PLCrashLogWriterEncoding.c file are licensed as follows:
Copyright © 2008, Dave Benson. All rights reserved.
Licensed under the Apache License, Version 2.0 (the “License”); you may not use this file except in compliance with the License. You may obtain a copy of the License at http://www.apache.org/licenses/LICENSE–2.0 Unless required by applicable law or agreed to in writing, software distributed under the License is distributed on an “AS IS” BASIS, WITHOUT WARRANTIES OR CONDITIONS OF ANY KIND, either express or implied. See the License for the specific language governing permissions and limitations under the License.