Printing from OmniOutliner
Whether you’ve finished working on your OmniOutliner document, or if you’re in the process of checking styles and formatting prior to submitting an outline, one of the things you’ll eventually want to do is print your outline. When it comes to printing, OmniOutliner has a few tricks up its sleeve that can make the printed form even more amazing.
To print, choose File ▸ Print or use the standard keyboard shortcut, Command-P. This opens the standard Mac print dialog box, but as mentioned, we’ve added a few OmniOutliner-specific things to the print panel.
This chapter takes you through the intricacies of the Print Sheet, and shows you how to customize the printed output of your OmniOutliner document.
Print Sheet Basics
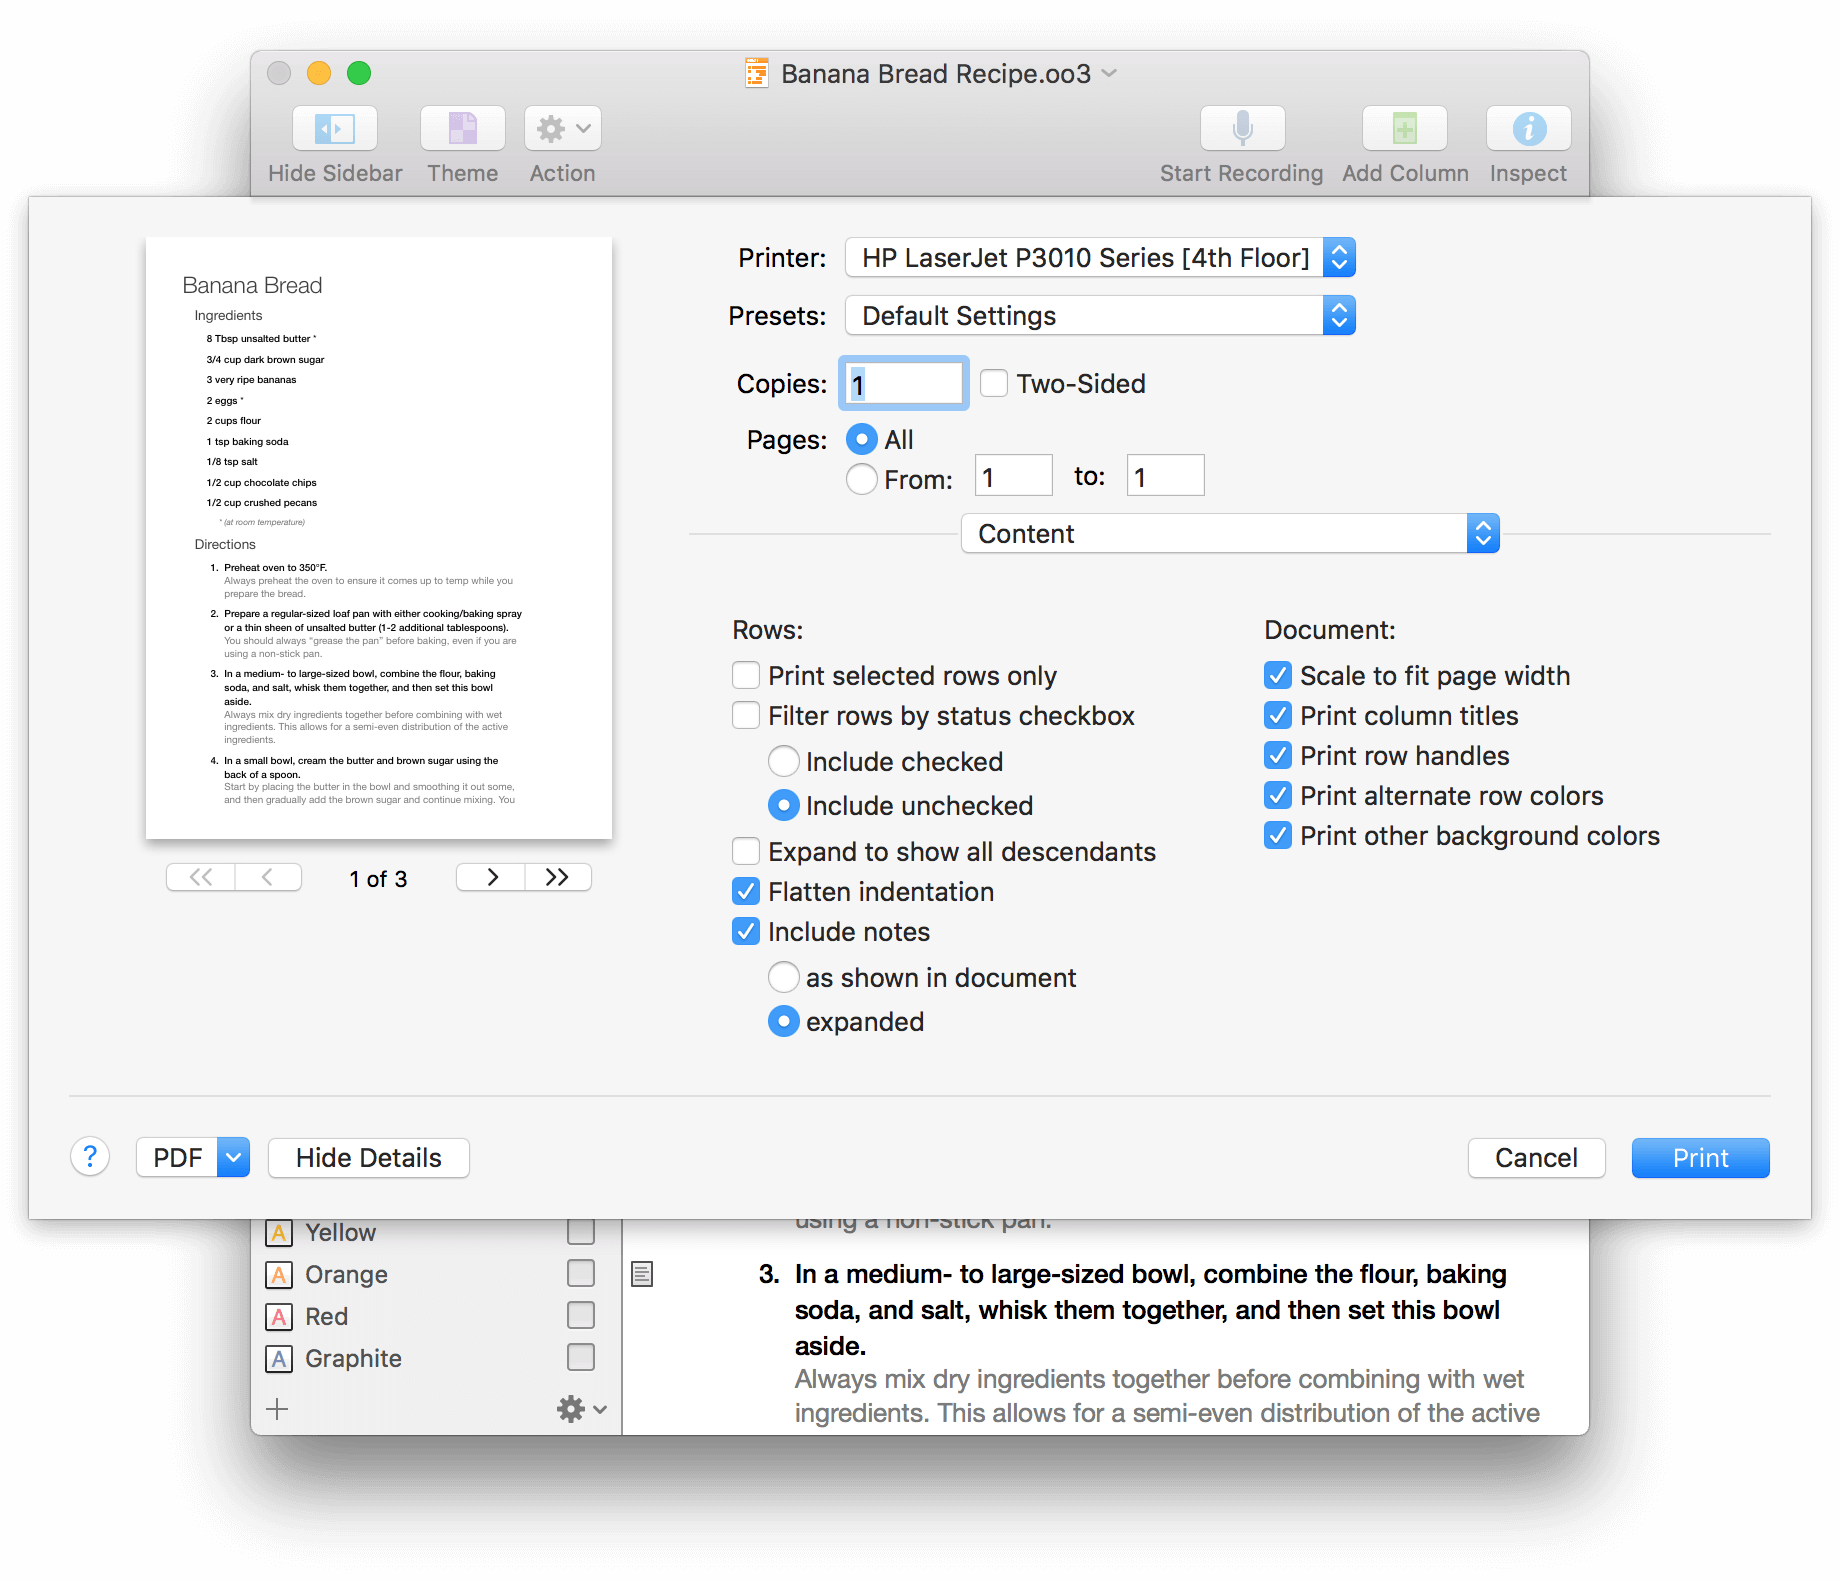
When you choose File ▸ Print (Command-P), OmniOutliner’s print sheet appears; it has three sections:
- Print Preview on the left
- Printer Settings at top-right
- Printing Options at right beneath the centered popup menu
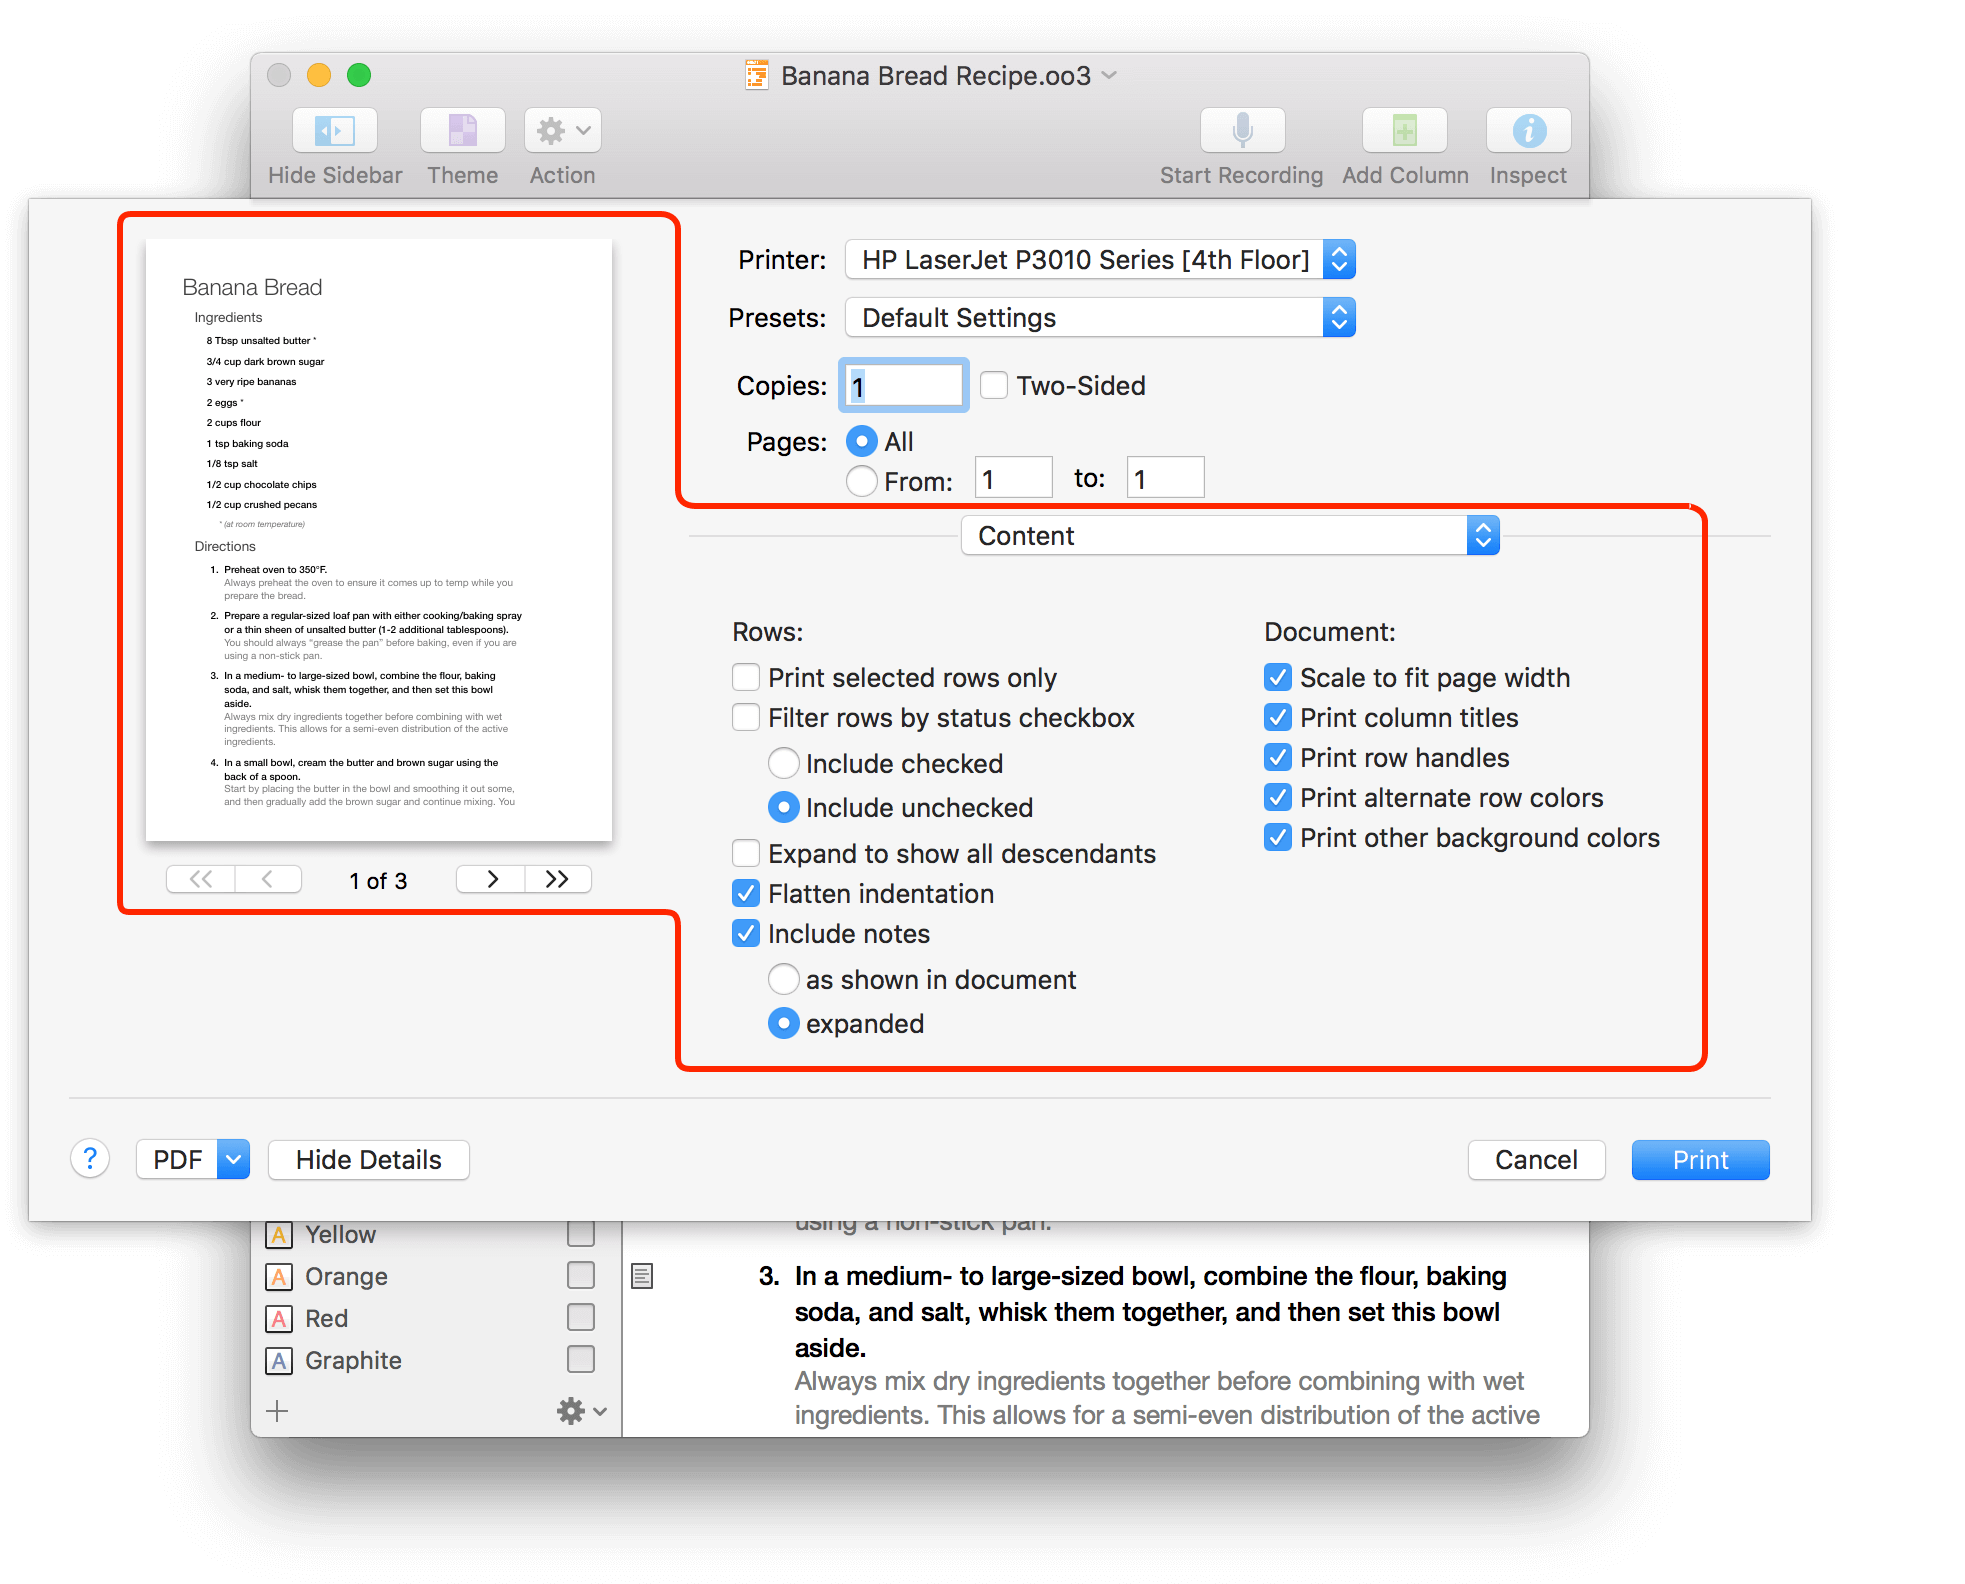
The Printer Settings area lets you choose a printer on your local network, any presets, define how many copies to make and whether to print on both sides of the paper, and whether to print the entire document or a specific page range. Regardless of what the popup menu is set to, the Printer Settings section never changes.
By default, the popup menu is set to Content, revealing the document-specific printing options. The Printing Options section changes based on the option you have selected in the popup menu. The changes you make in the Printing Options section affects how the Print Preview appears.
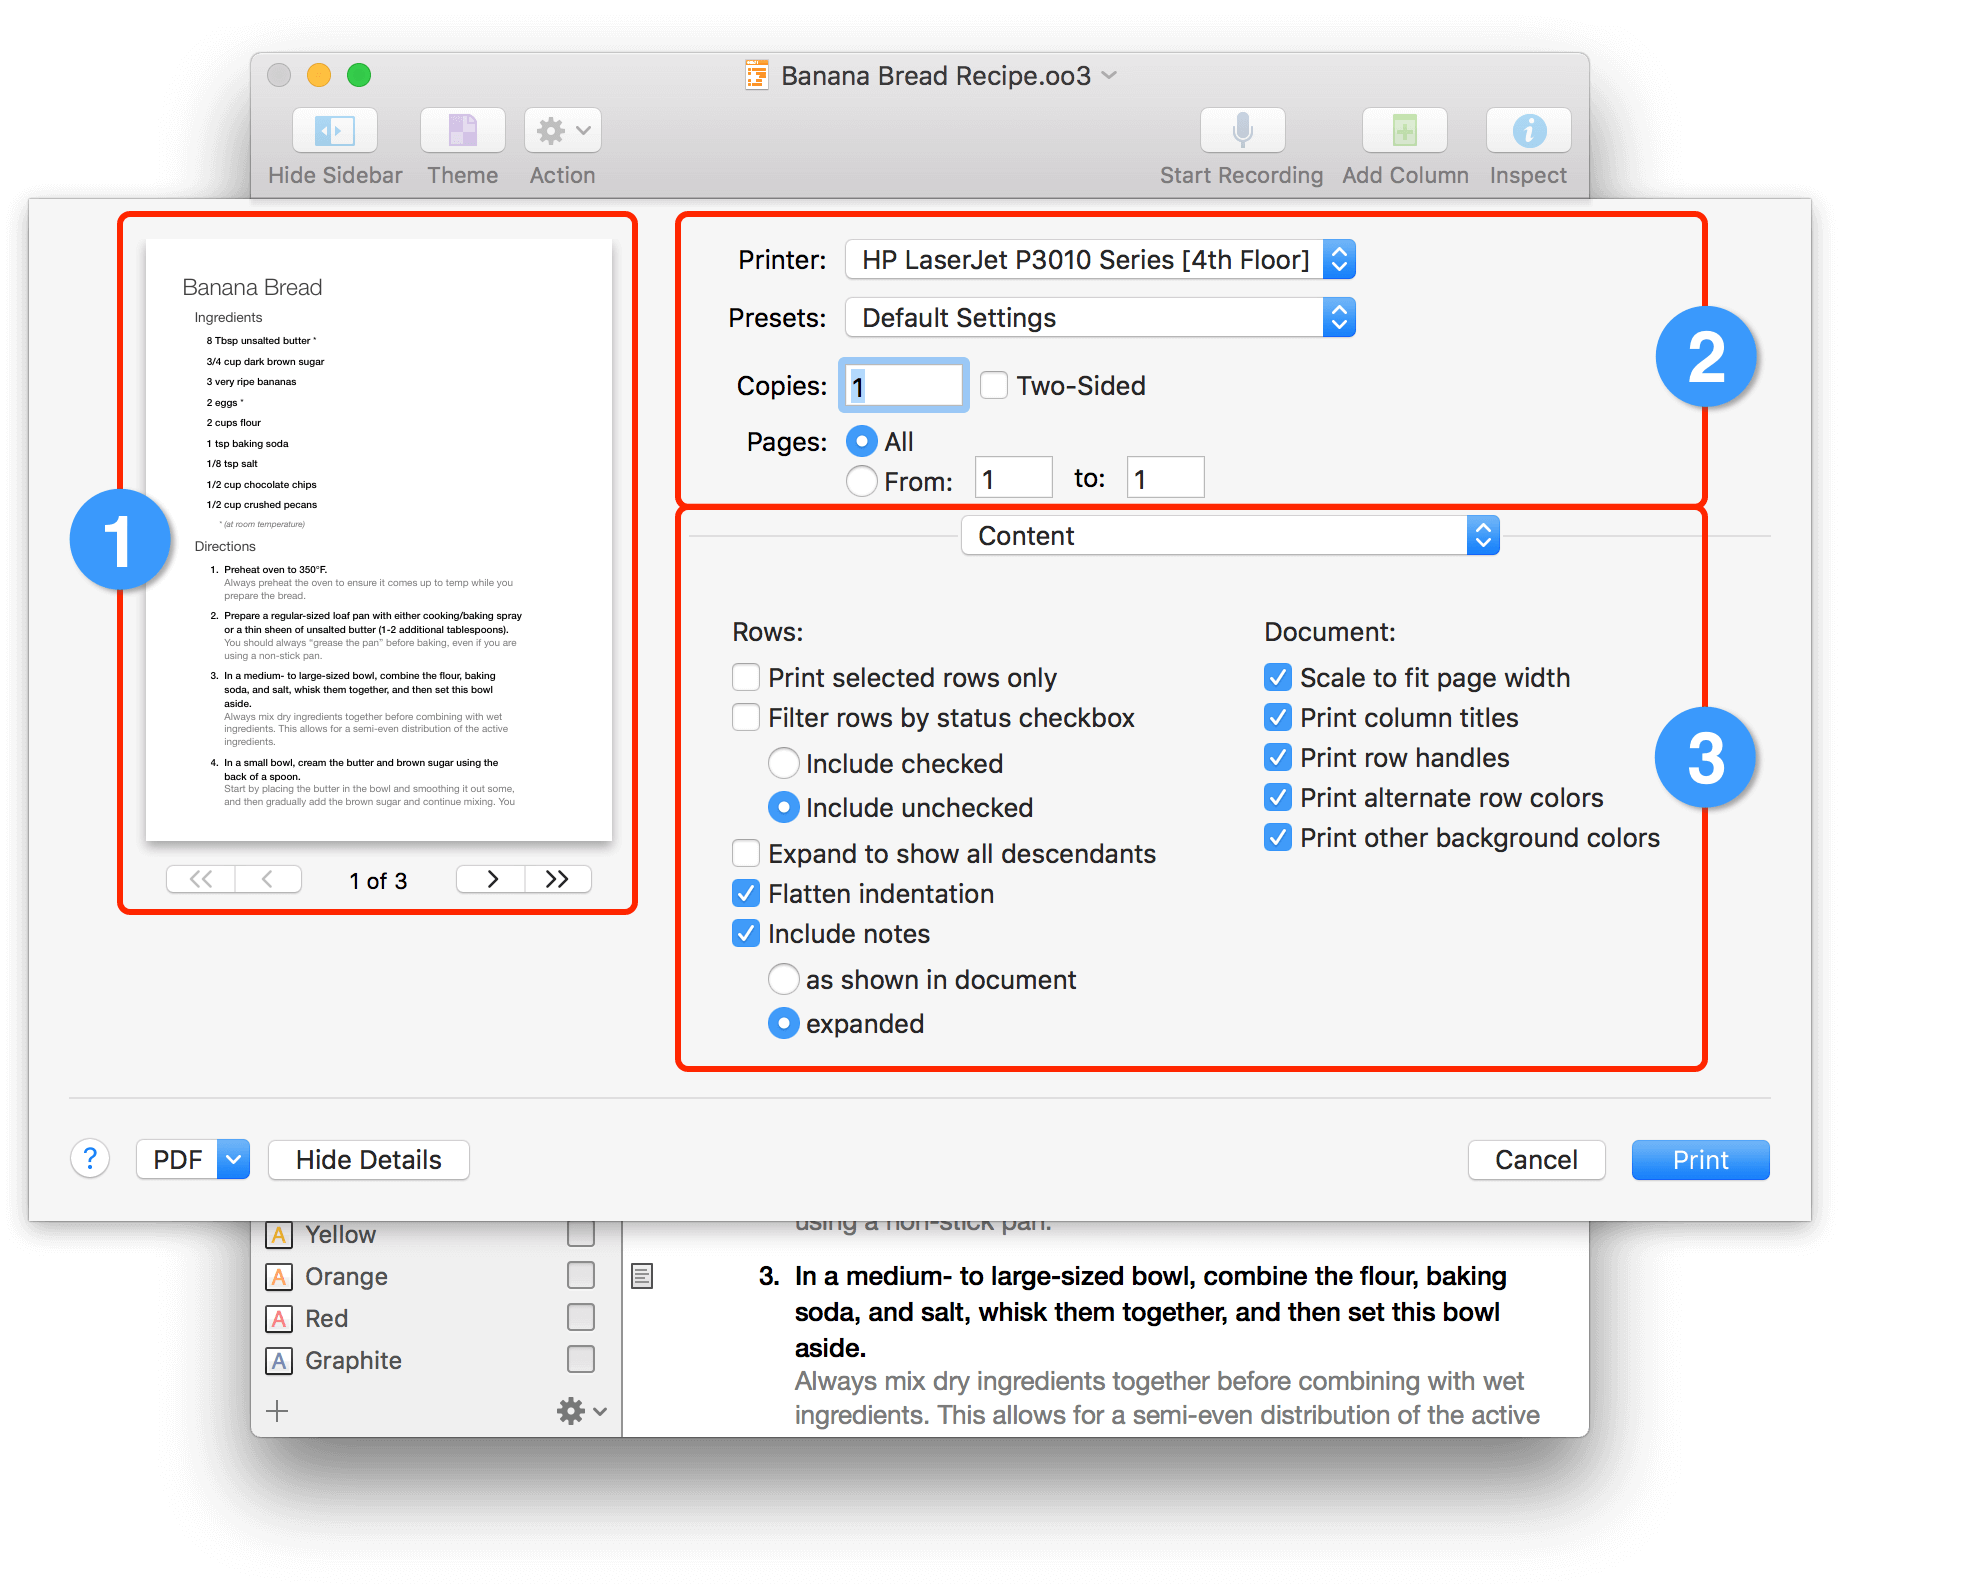
OmniOutliner’s Printing Options
As noted by the popup menu beneath the print settings section, we have customized the Print sheet with a bunch of options specific to OmniOutliner.
On the left side of the printing panel, you’ll see an exact replica of your OmniOutliner document, showing you how it will look when printed. You can use the arrow buttons beneath the preview to page through your document so you can verify that everything is in order.
As you toggle the various options on or off, the Print Preview changes accordingly. The only exception to this is the Include notes option. If you would like the Notes in your outline to be printed, you need to make sure that they are visible in the document by choosing View ▸ Show All Notes (Control-Command-'). If you don’t want to print all of the Notes, you can select specific rows and choose View ▸ Show Note (Option-Command-') to reveal the Note for that row.
Tip
If you have previously revealed all of the Notes in your outline, you can also show or hide specific notes. To do this, select the row with the Note you want to hide, and choose View ▸ Hide Note (Option-Command-') to hide the Note. This is particularly helpful when you have a bunch of Notes in an outline, but want to hide certain ones before printing or generating a PDF.
OmniOutliner prints only the visible columns in your document. If you don’t want to print a particular column, choose View ▸ Columns and then choose from the submenu the column you want to hide. This “unchecks” that column in the menu. You can also Control-click on a column heading and then choose Hide from the contextual menu. To later make the column reappear in your document, choose View ▸ Columns ▸ Show All Columns.
Pro Tip
If you have OmniOutliner Pro, you can add manual page breaks using the Styles inspector.
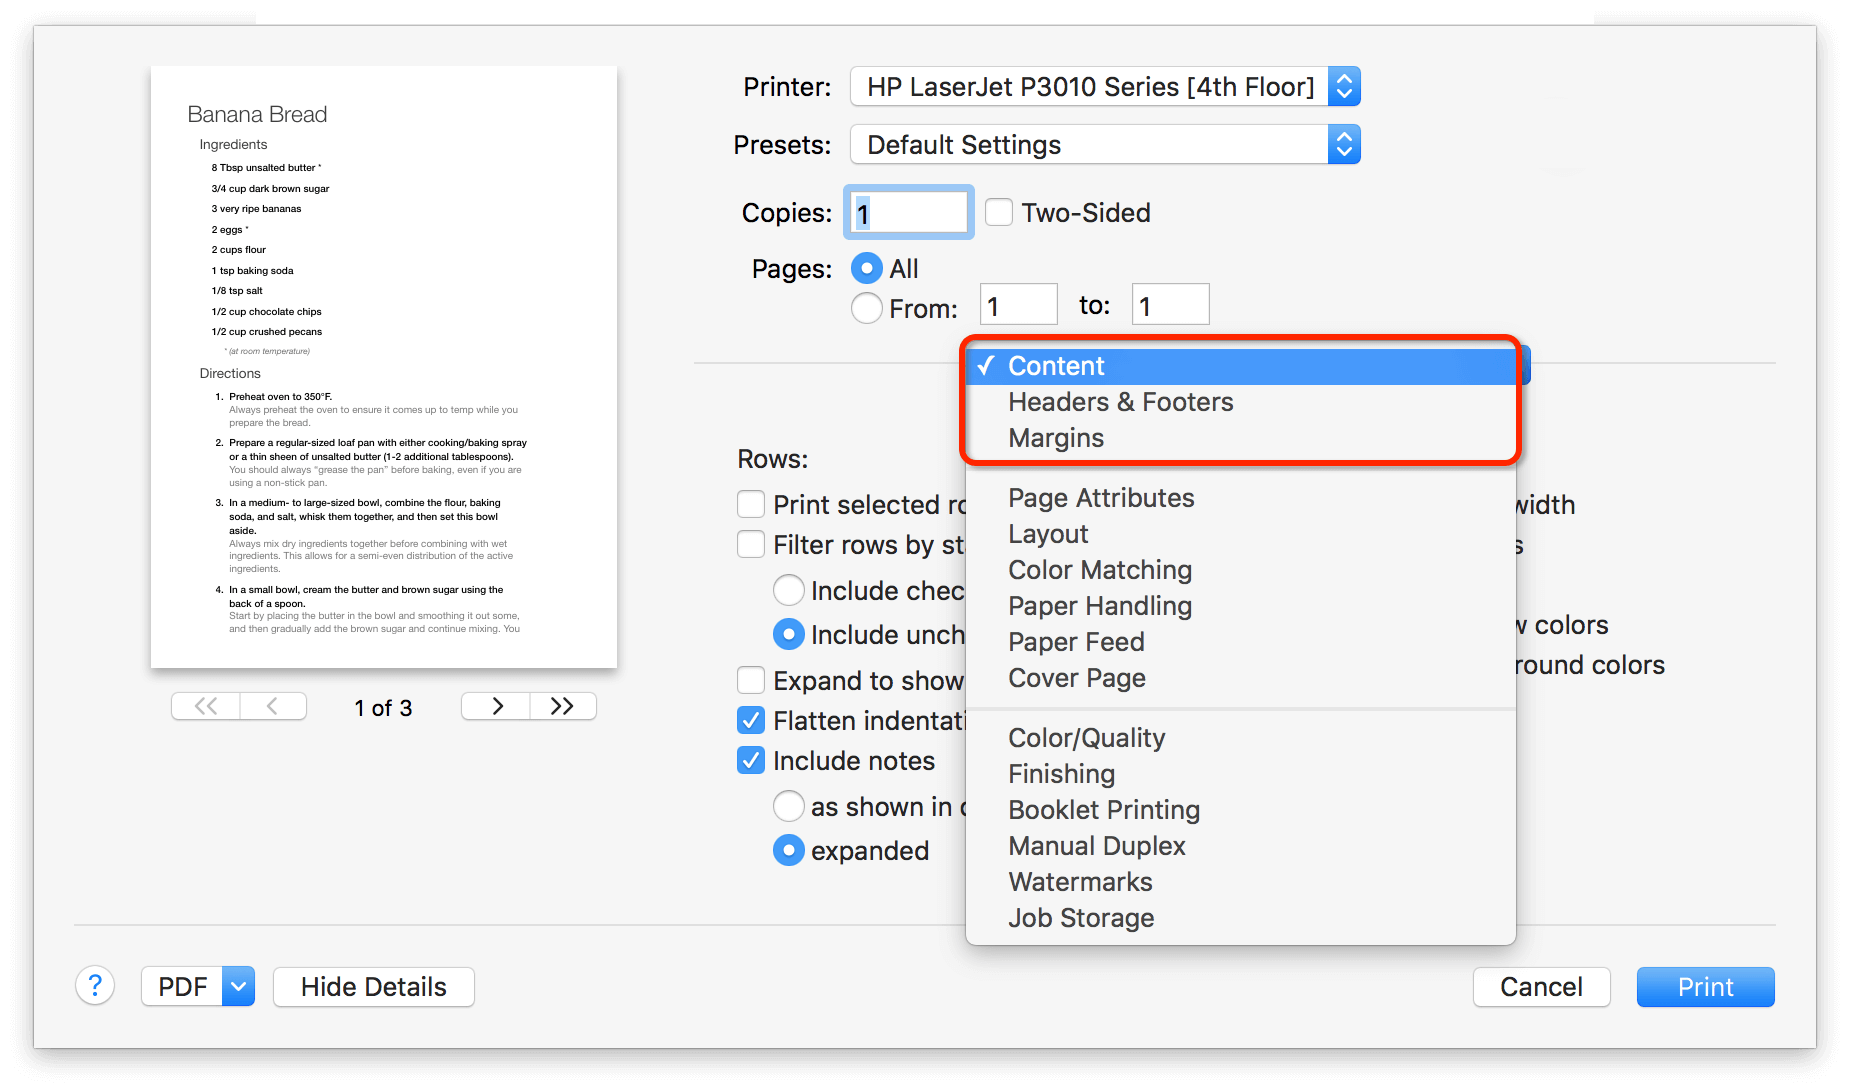
Other Printing Options Available Through the Popup Menu
If you click the popup menu, you’ll see a whole bunch of other printing options, but the ones we want to focus on are Headers & Footers and Margins.
Applying Headers and Footers to Your Outline
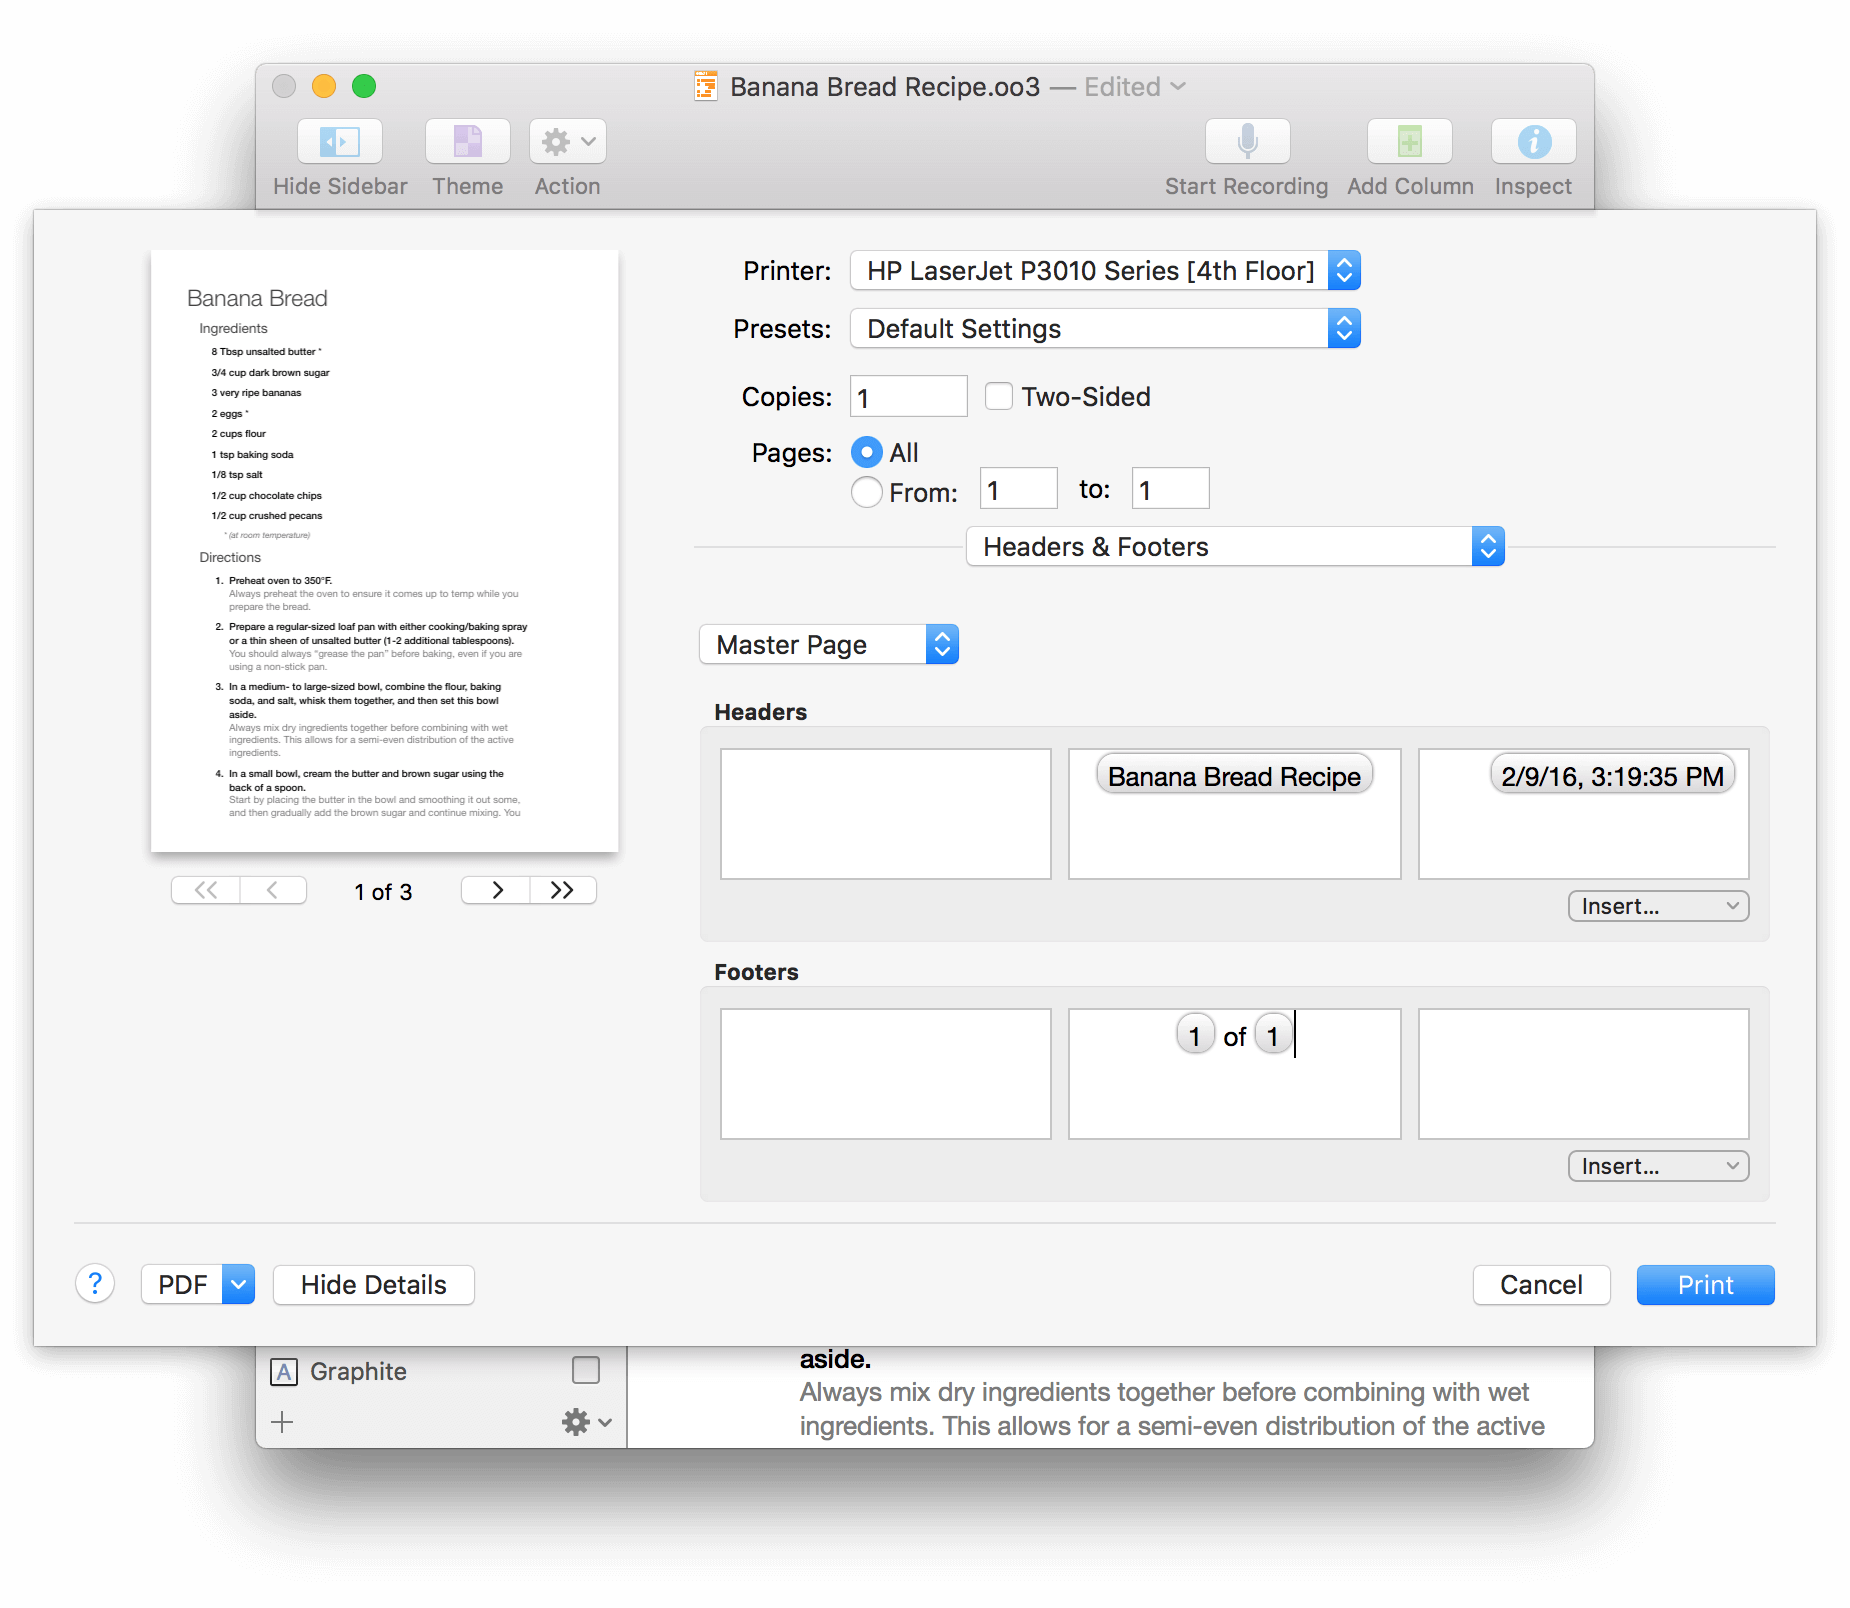
The Headers & Footers print settings gives you the ability to add details about your OmniOutliner document to the top and bottom of the printed page. The six boxes (three each for Headers and Footers) represent the left, center, and right positions on the page. Use the popup just above the Headers section to apply the headers and footers to the Master Page, First Page, Odd Pages, or Even Pages. Use the Insert popup just below the right-most box to insert one or more of the following:
- Page Number
- Section Title
- Last Modification Time
- Page Count
- Document Title
- Document Name
- Print Time
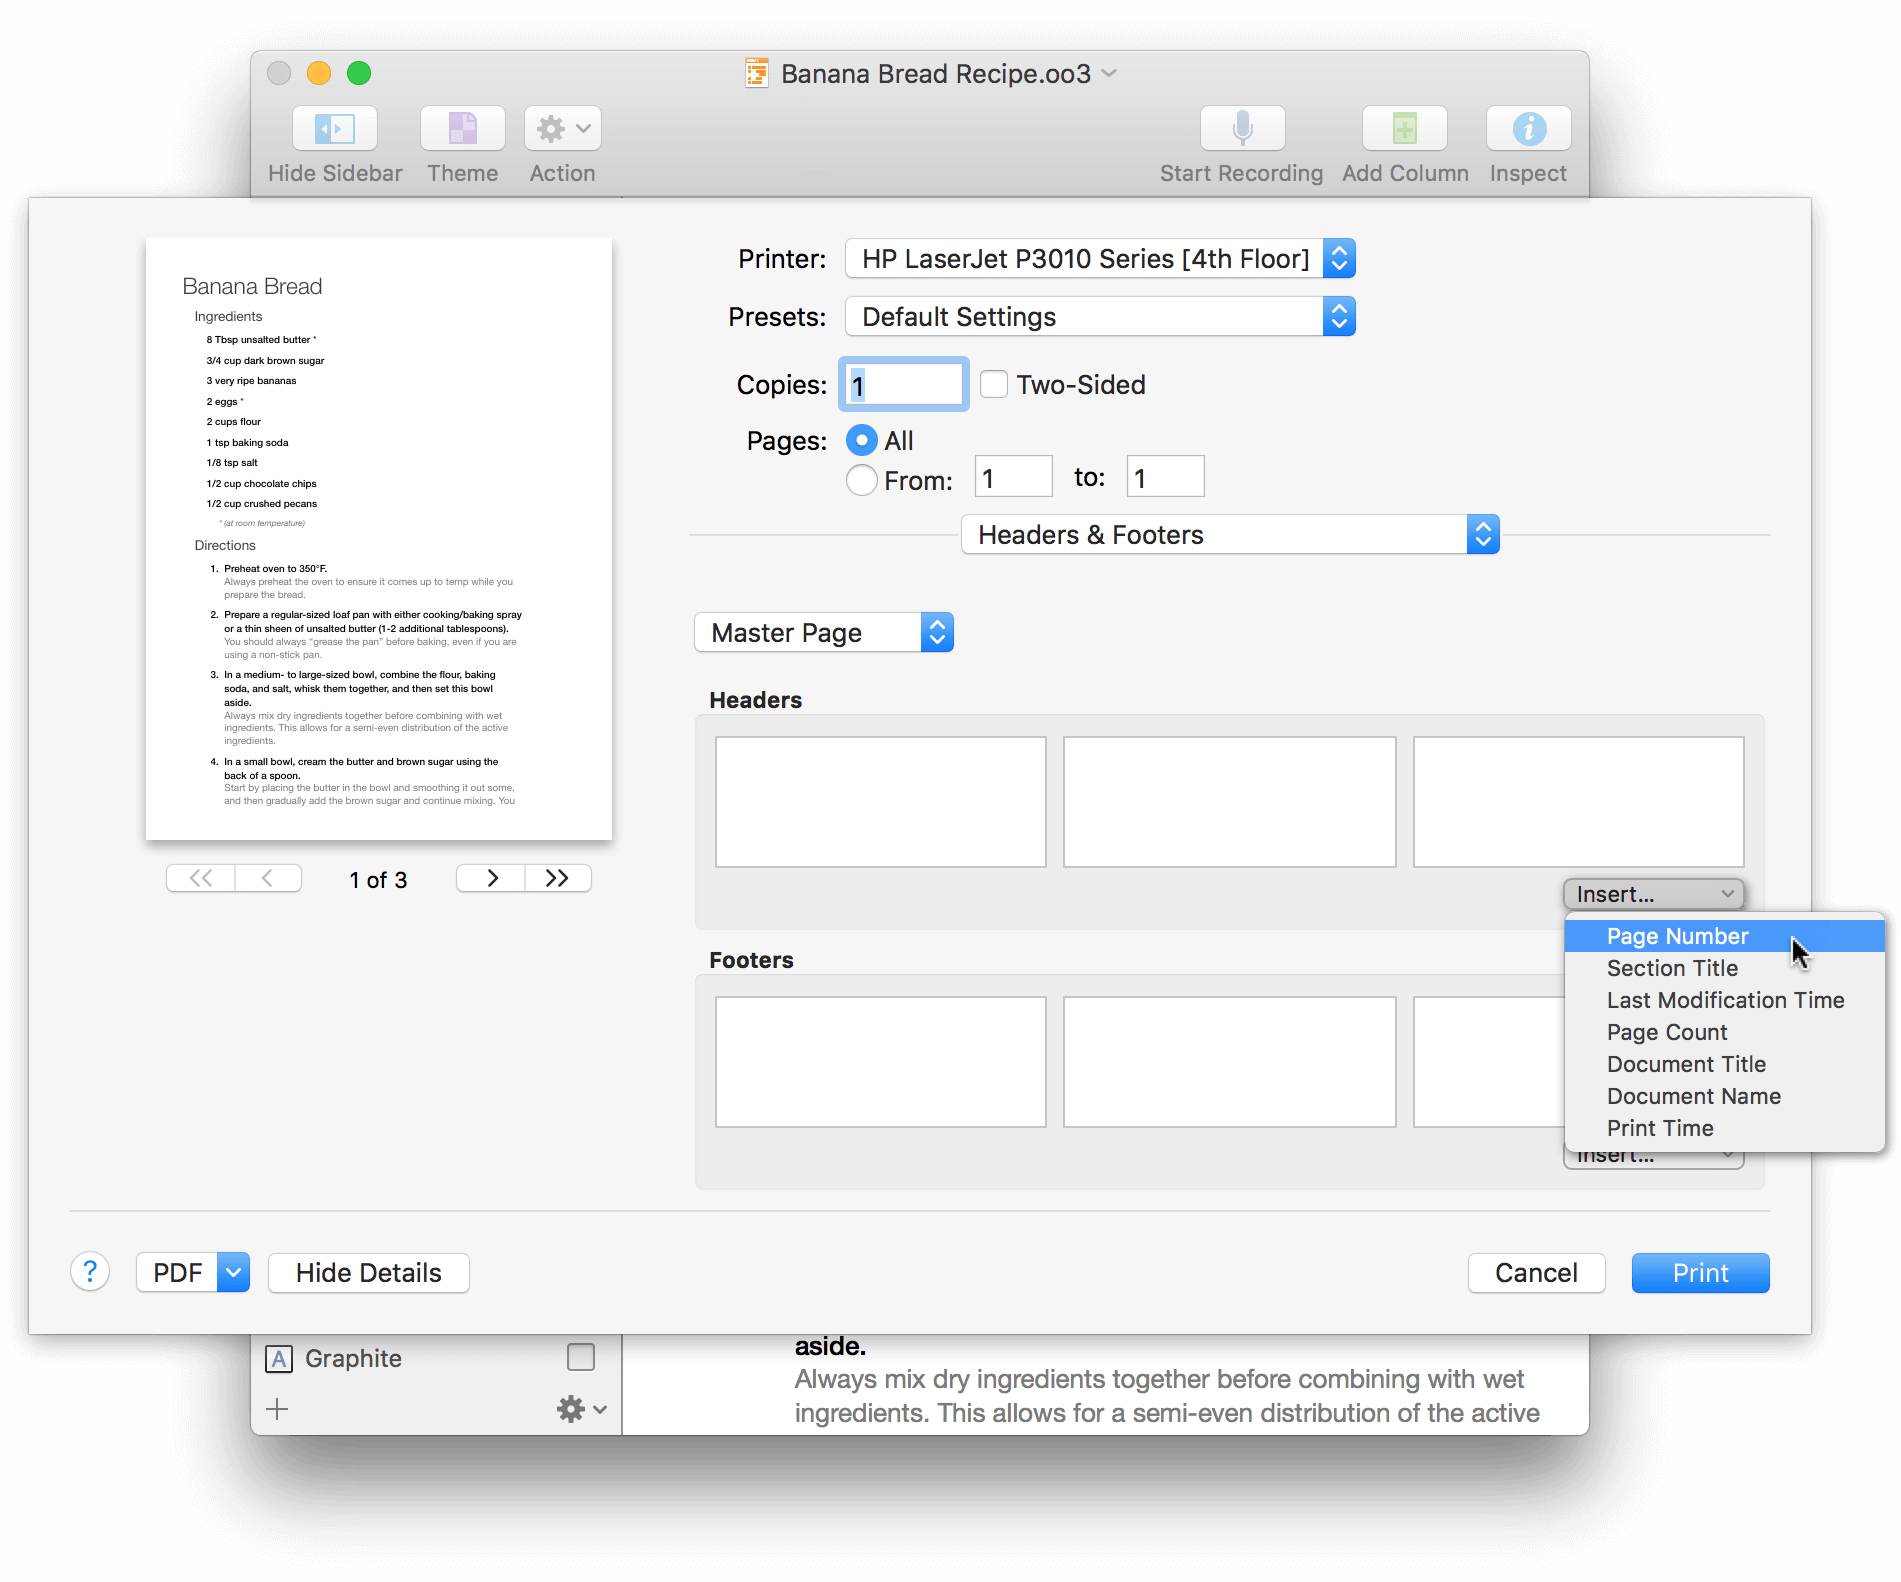
Just click inside one of the six boxes and choose the option from the Insert menu. For example, the following image inserts the Document Title and Print Time in the center and right boxes of the Header, respectively. For the Footer, the center box uses a combination of Page Number and Page Count (with “ of ” added in between), which would print as 1 of 3 or 2 of 3, and is particularly useful for long documents.
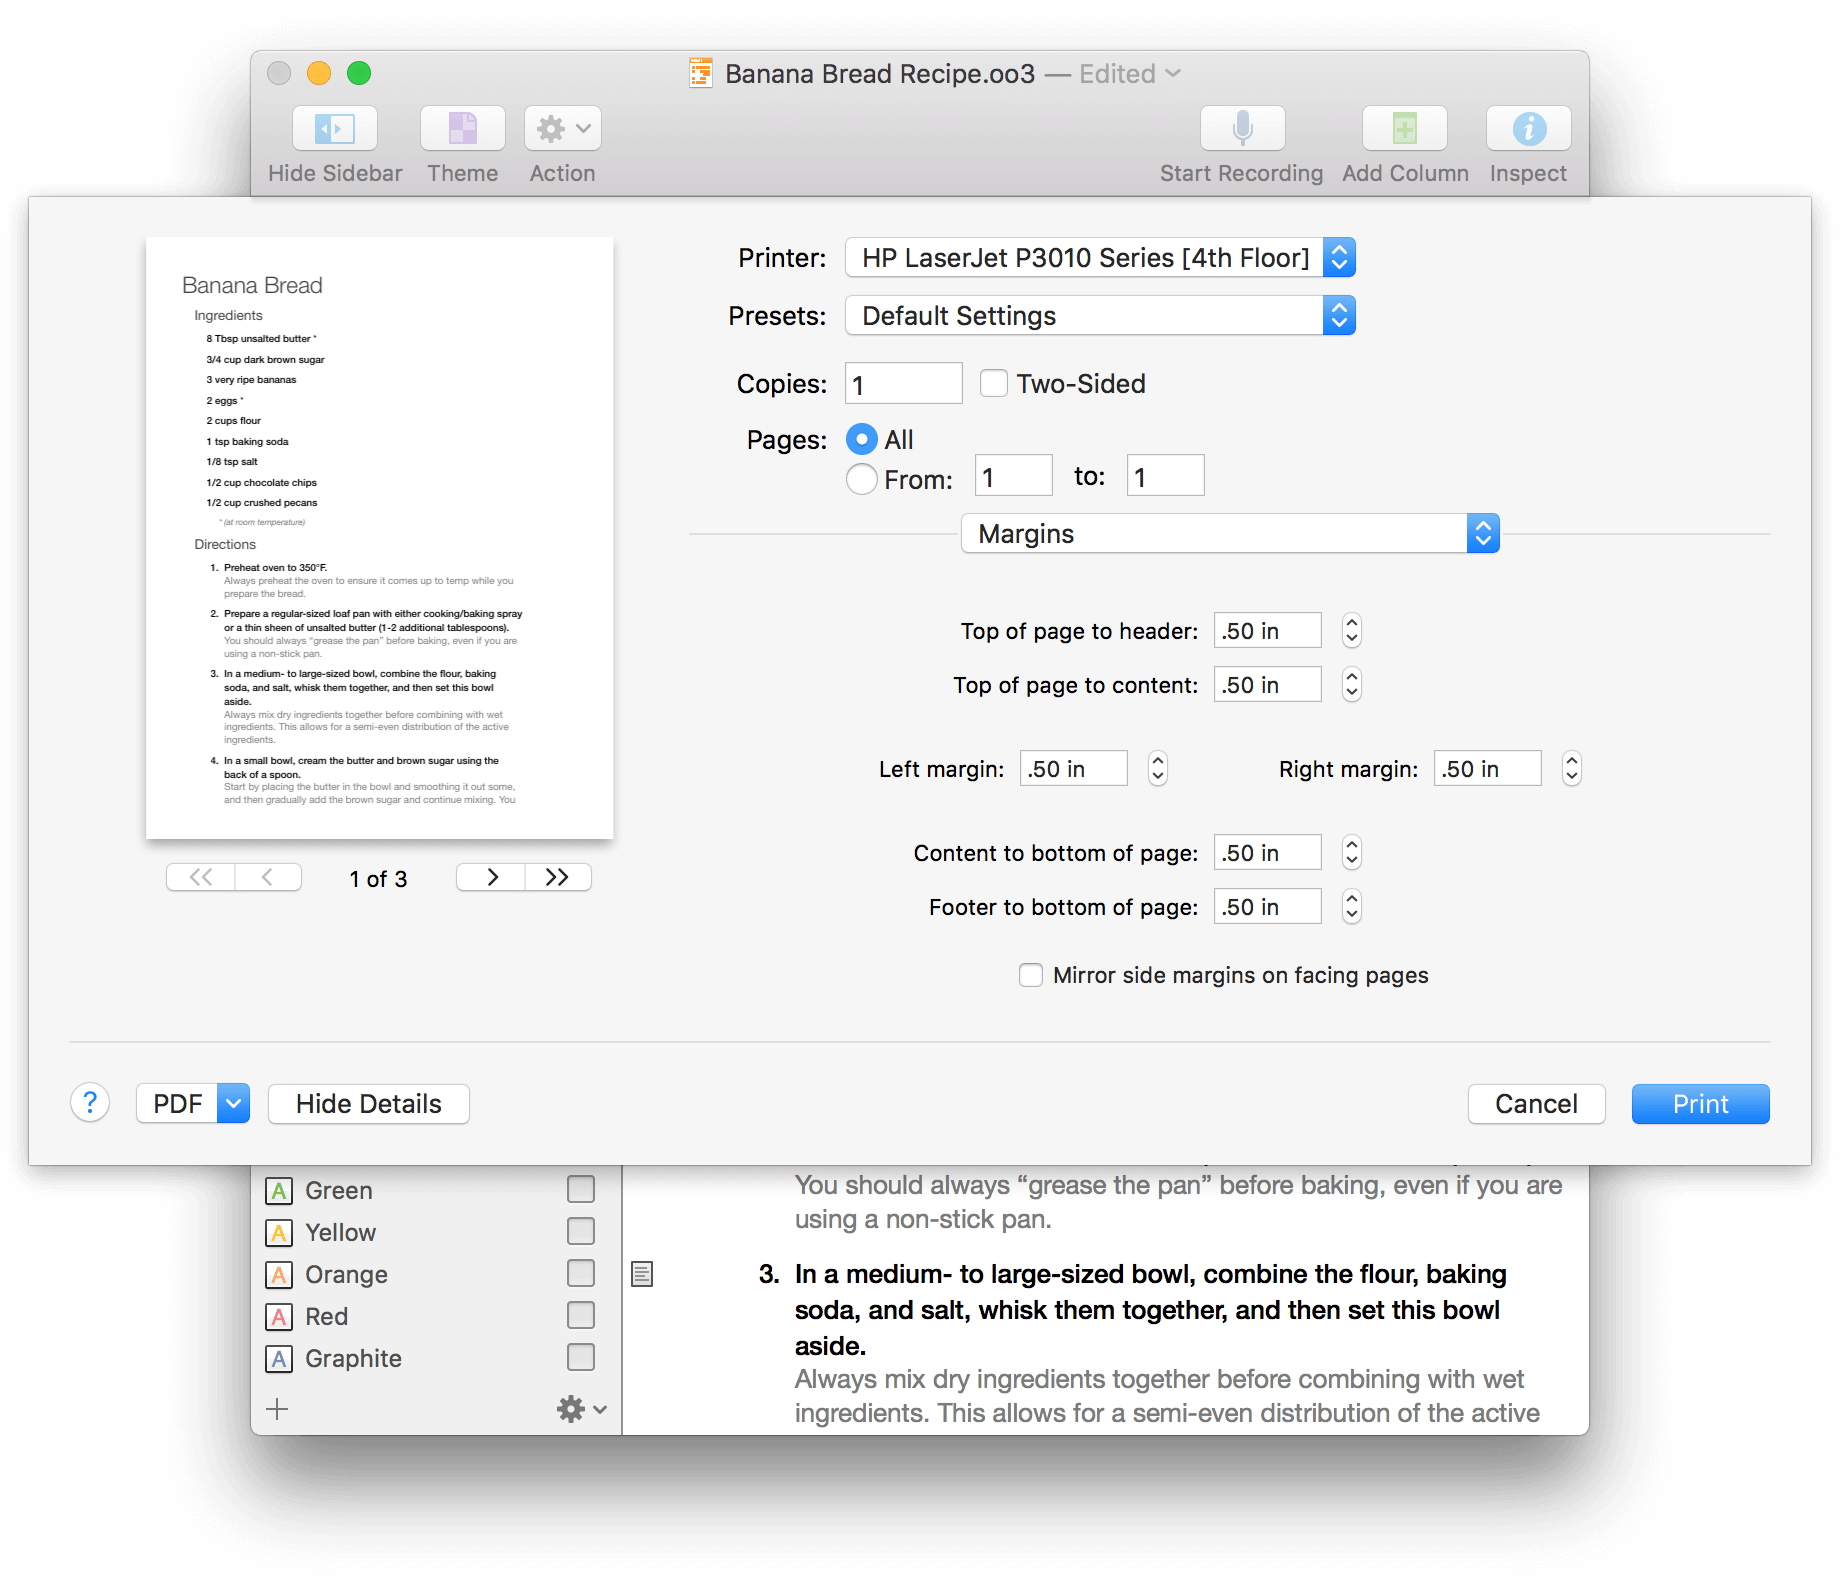
Setting the Page Margins
Use the Margins print options to control how the contents of your document appears within the bounds of a printed page. The Top and Bottom controls let you set the distance from the edge of the page to any Headers or Footers you’ve applied, and from the Headers and Footers to the actual content. To adjust any of the margin values, you can either click in the box and enter something different, or use the little arrows off to the right to increase or decrease the value.
When you have finished setting all of the Printing Options for your document, click Print to print the file.