Using the Sidebar
Along the left edge of OmniOutliner’s window is the Sidebar. The Sidebar lists the Contents of your outline along with the Styles you’ve used. At the top of the Sidebar, you’ll also find a Search field that makes it easy for you to sift through your outlines and find the information you’re looking for.
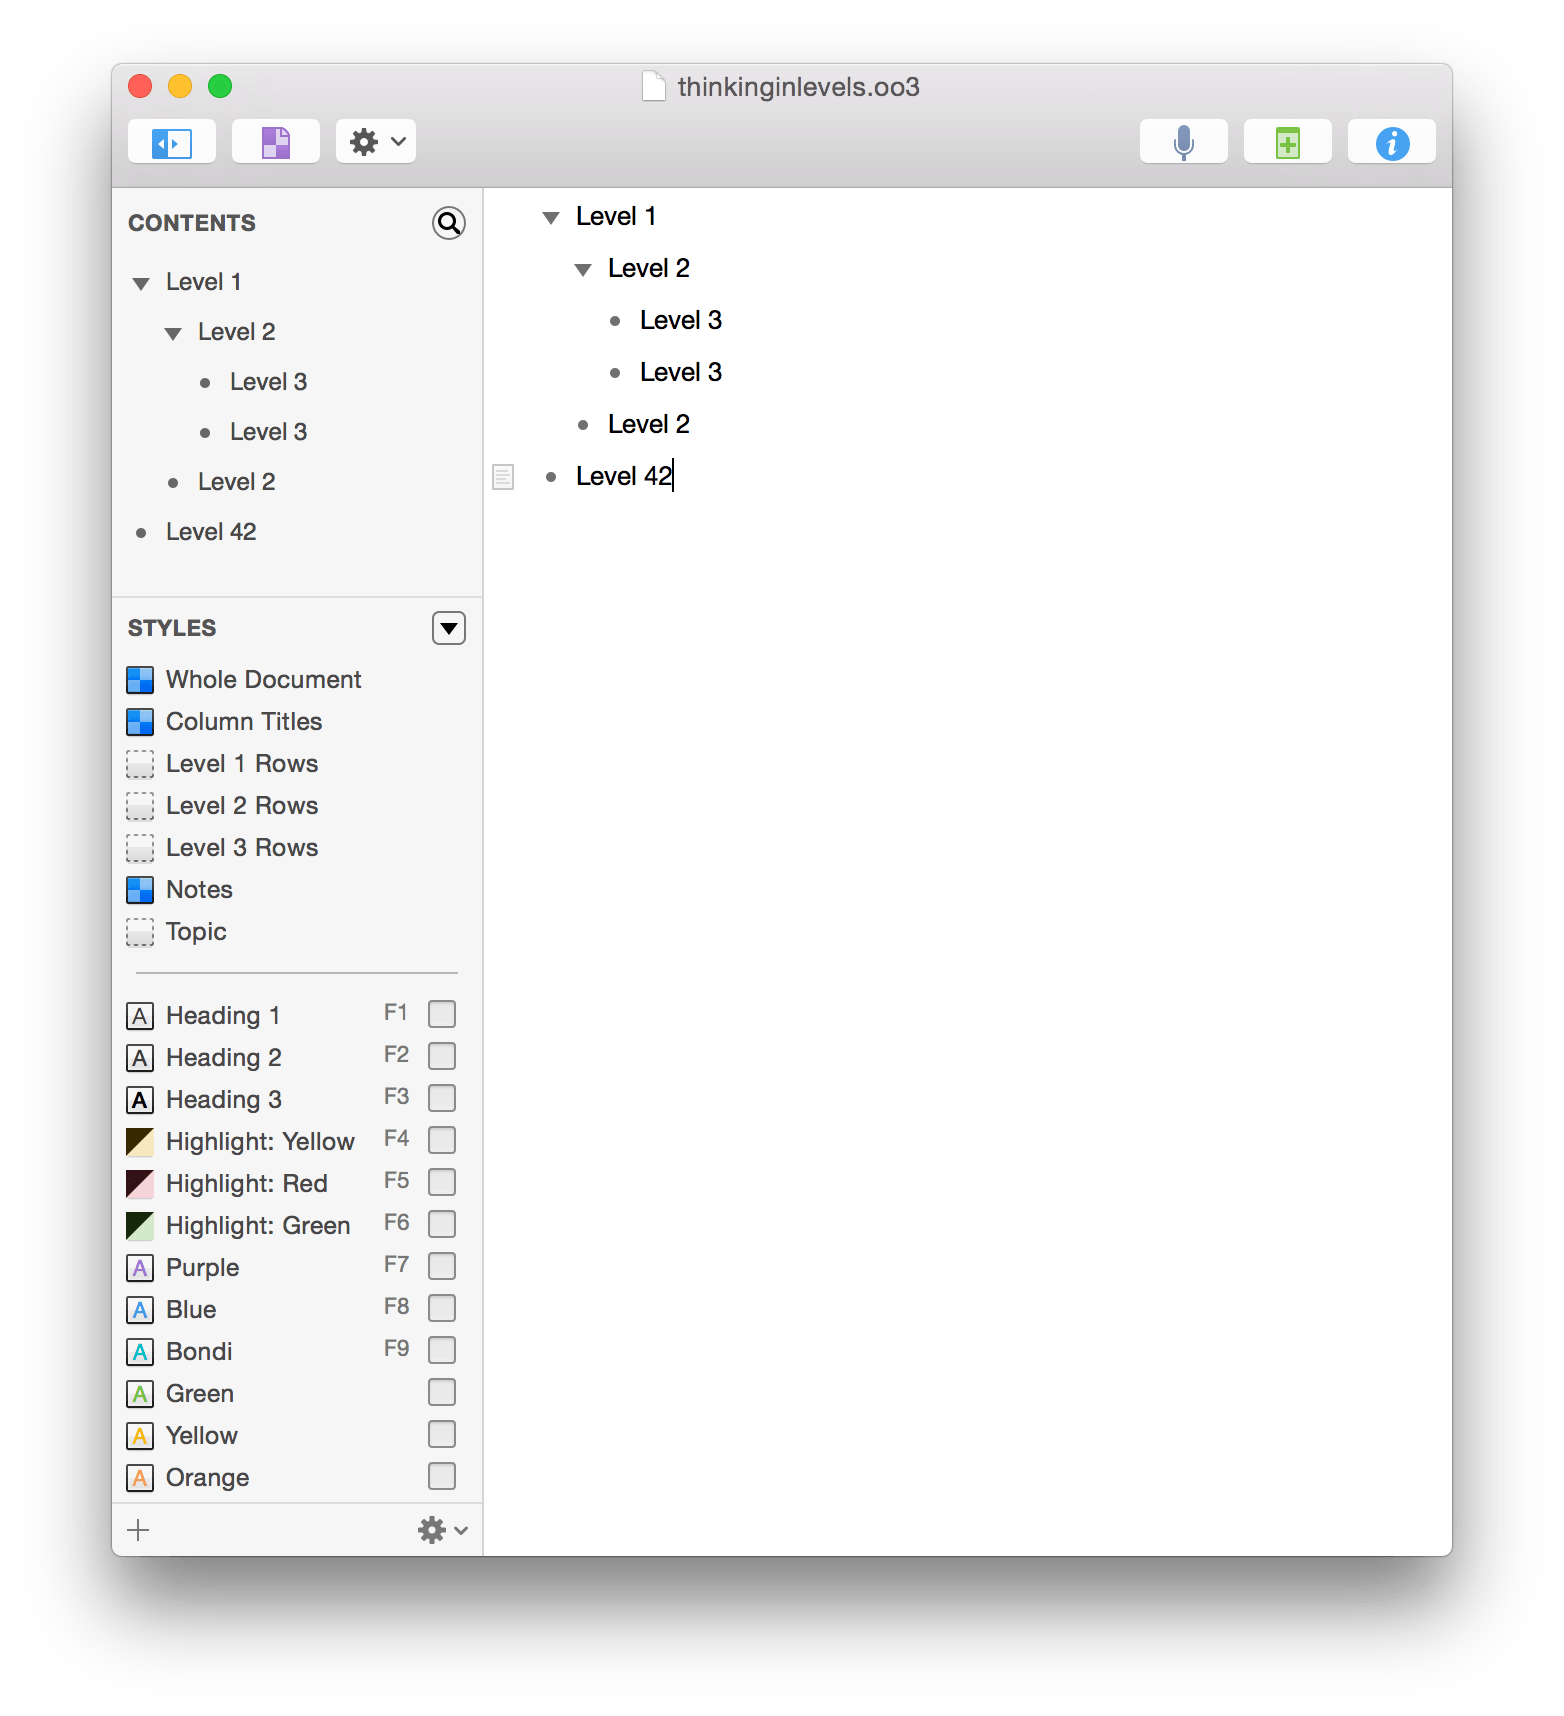
The Sidebar is open by default, but you can hide and show it again by choosing View ▸ Hide/Show Sidebar (Option-Command–1), or by clicking the Sidebar button in the toolbar. The Contents and Styles sections are independently scrollable within the Sidebar, so they can handle all of the content and styles you throw at them.
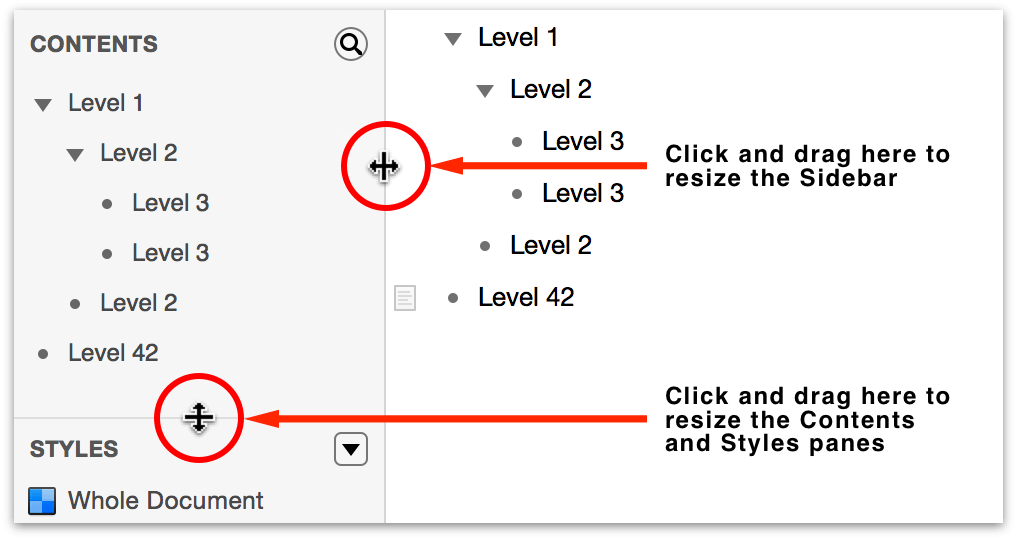
If you mouse over the right edge of the Sidebar, or the split line between the Contents and Styles sections, you’ll notice that the mouse pointer changes to a resizing handle. Click and drag the resizing handles to resize the sections of the Sidebar, or the Sidebar itself.
The Contents Pane
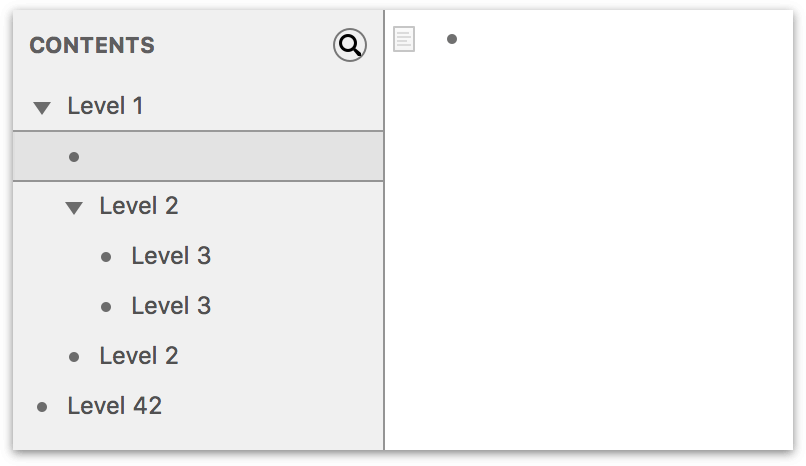
The upper half of the Sidebar displays the Contents of your outline in a collapsable, scrollable pane.
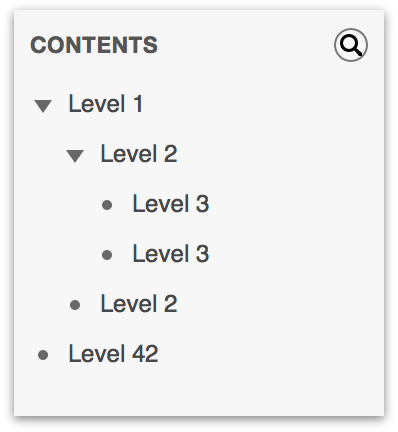
Rows with children have a disclosure triangle on the left edge. To view the child rows, click the disclosure triangle to flip open the list. Option-click a disclosure triangle to open or close all of the rows within.
Focusing on the Contents of an Outline
When you have a long outline, such as an outline for a book or research paper, there are times when you just want to focus on one particular section without getting distracted by everything else. Fortunately, OmniOutliner provides a couple different ways for you to do that.
-
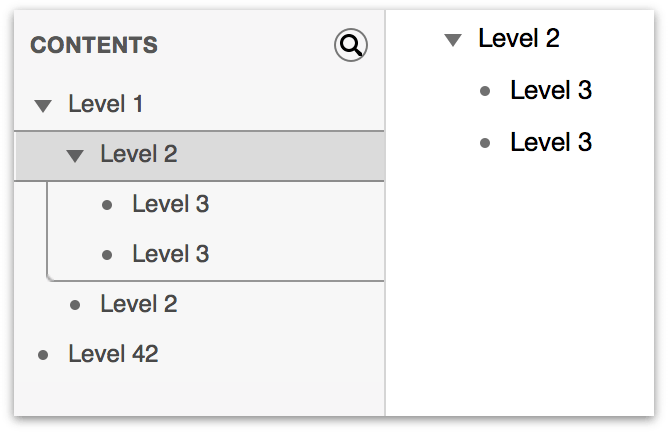
In the Sidebar, you can click to highlight a section of your outline: When you click to select a section of the document’s Contents, the Outline view changes to Focus on just that row and any of its children.
-
Alternatively, while entering text in your outline, you can choose View ▸ Focus (Shift-Command-F).
OmniOutliner retains a history of the rows you’ve focused on, and you can step back through that history by choosing View ▸ Unfocus (Option-Shift-Command-F). To bring your entire document back into view, choose View ▸ Unfocus All, or just click the Contents heading in the sidebar.
Note
Optionally, you can Control-click on rows in the Contents pane to open a contextual menu that contains the Focus, Unfocus, and Unfocus All options.
Adding Sections and Subsections to your Outline in the Contents View
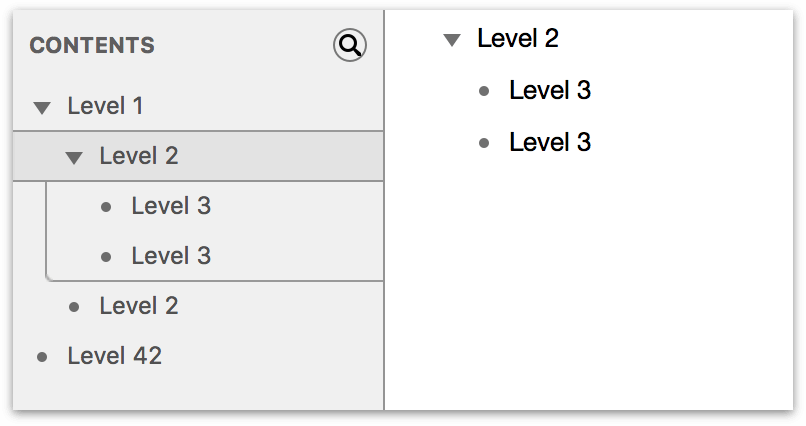
If you select a section in the Contents list, OmniOutliner does two things: First, it focuses on that section—making that section and any subsections the only thing you’ll see in the Outline View to the right—and, the focused sections receive a gray highlight around them:
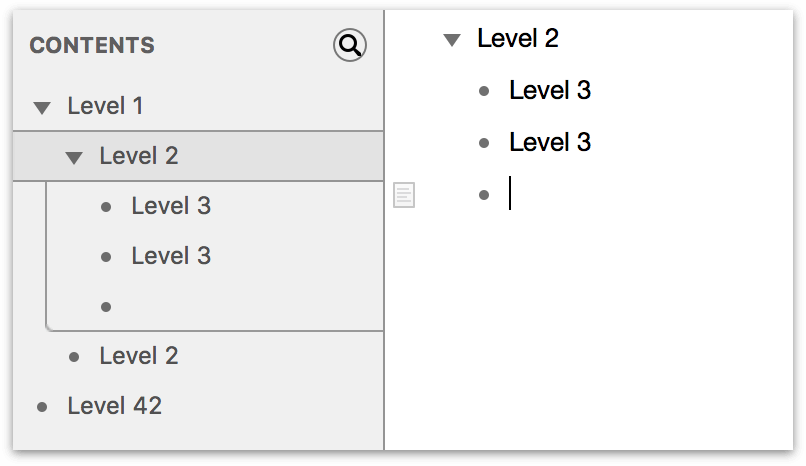
If you wanted to add another subsection to the section you selected, press Return. A new subsection appears at the end of the list, and the cursor is placed in the Outline View so you can enter some text for that section.
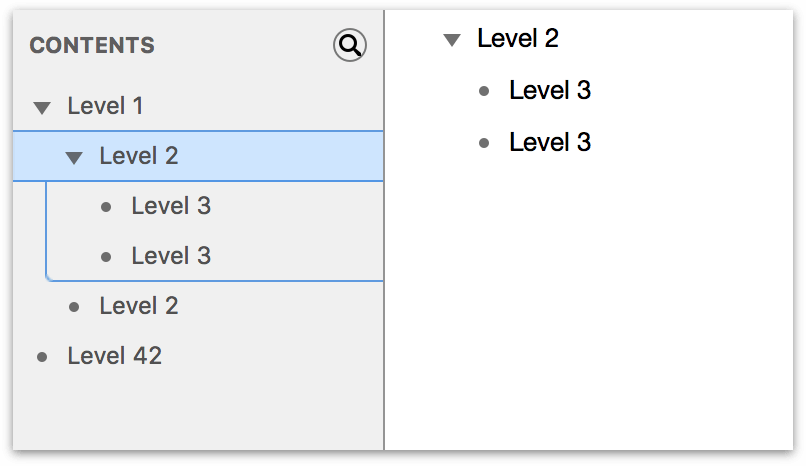
But what if you wanted that new subsection to come before the other subsections? If you click the section a second time, a blue highlight is placed around the section and its subsections.
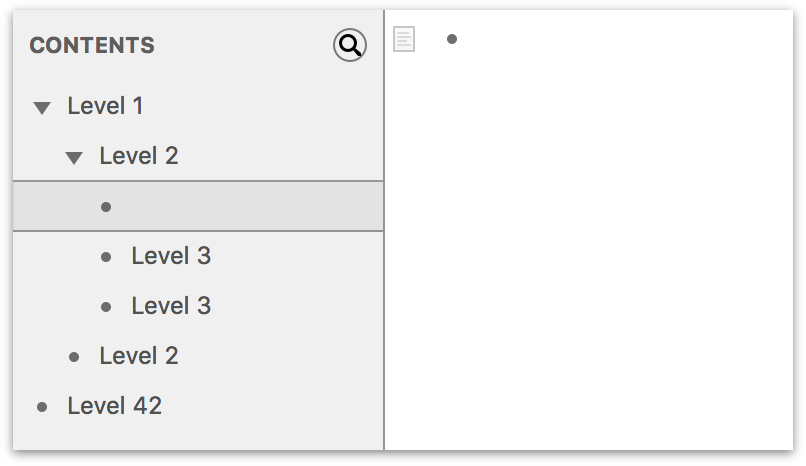
Pressing Return inserts a new subsection at the top of the subsection list:
Note
Notice, that the new subsection receives the Focus so you can enter text on that row.
Similarly, if you wanted to add another section at the same level, but above the currently selected section, press Shift-Return:
Searching Within Your Outline
If you have a long document, OmniOutliner’s integrated search field can save the day when you need to find something that’s buried many levels deep in your outline. At the top of the Contents pane, you’ll see a little magnifying glass icon ( ); click that to reveal the search bar. You can also get to the search field by choosing Edit ▸ Find ▸ Show Search (Option-Command-F).
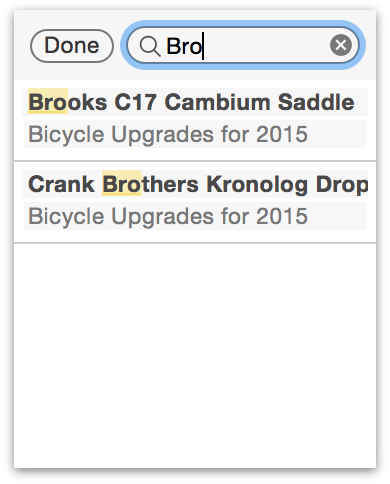
OmniOutliner starts and adjusts the search criteria with every character you type, and the search results appear underneath the search bar. Click the item you’re looking for, and OmniOutliner highlights the row in the outline.
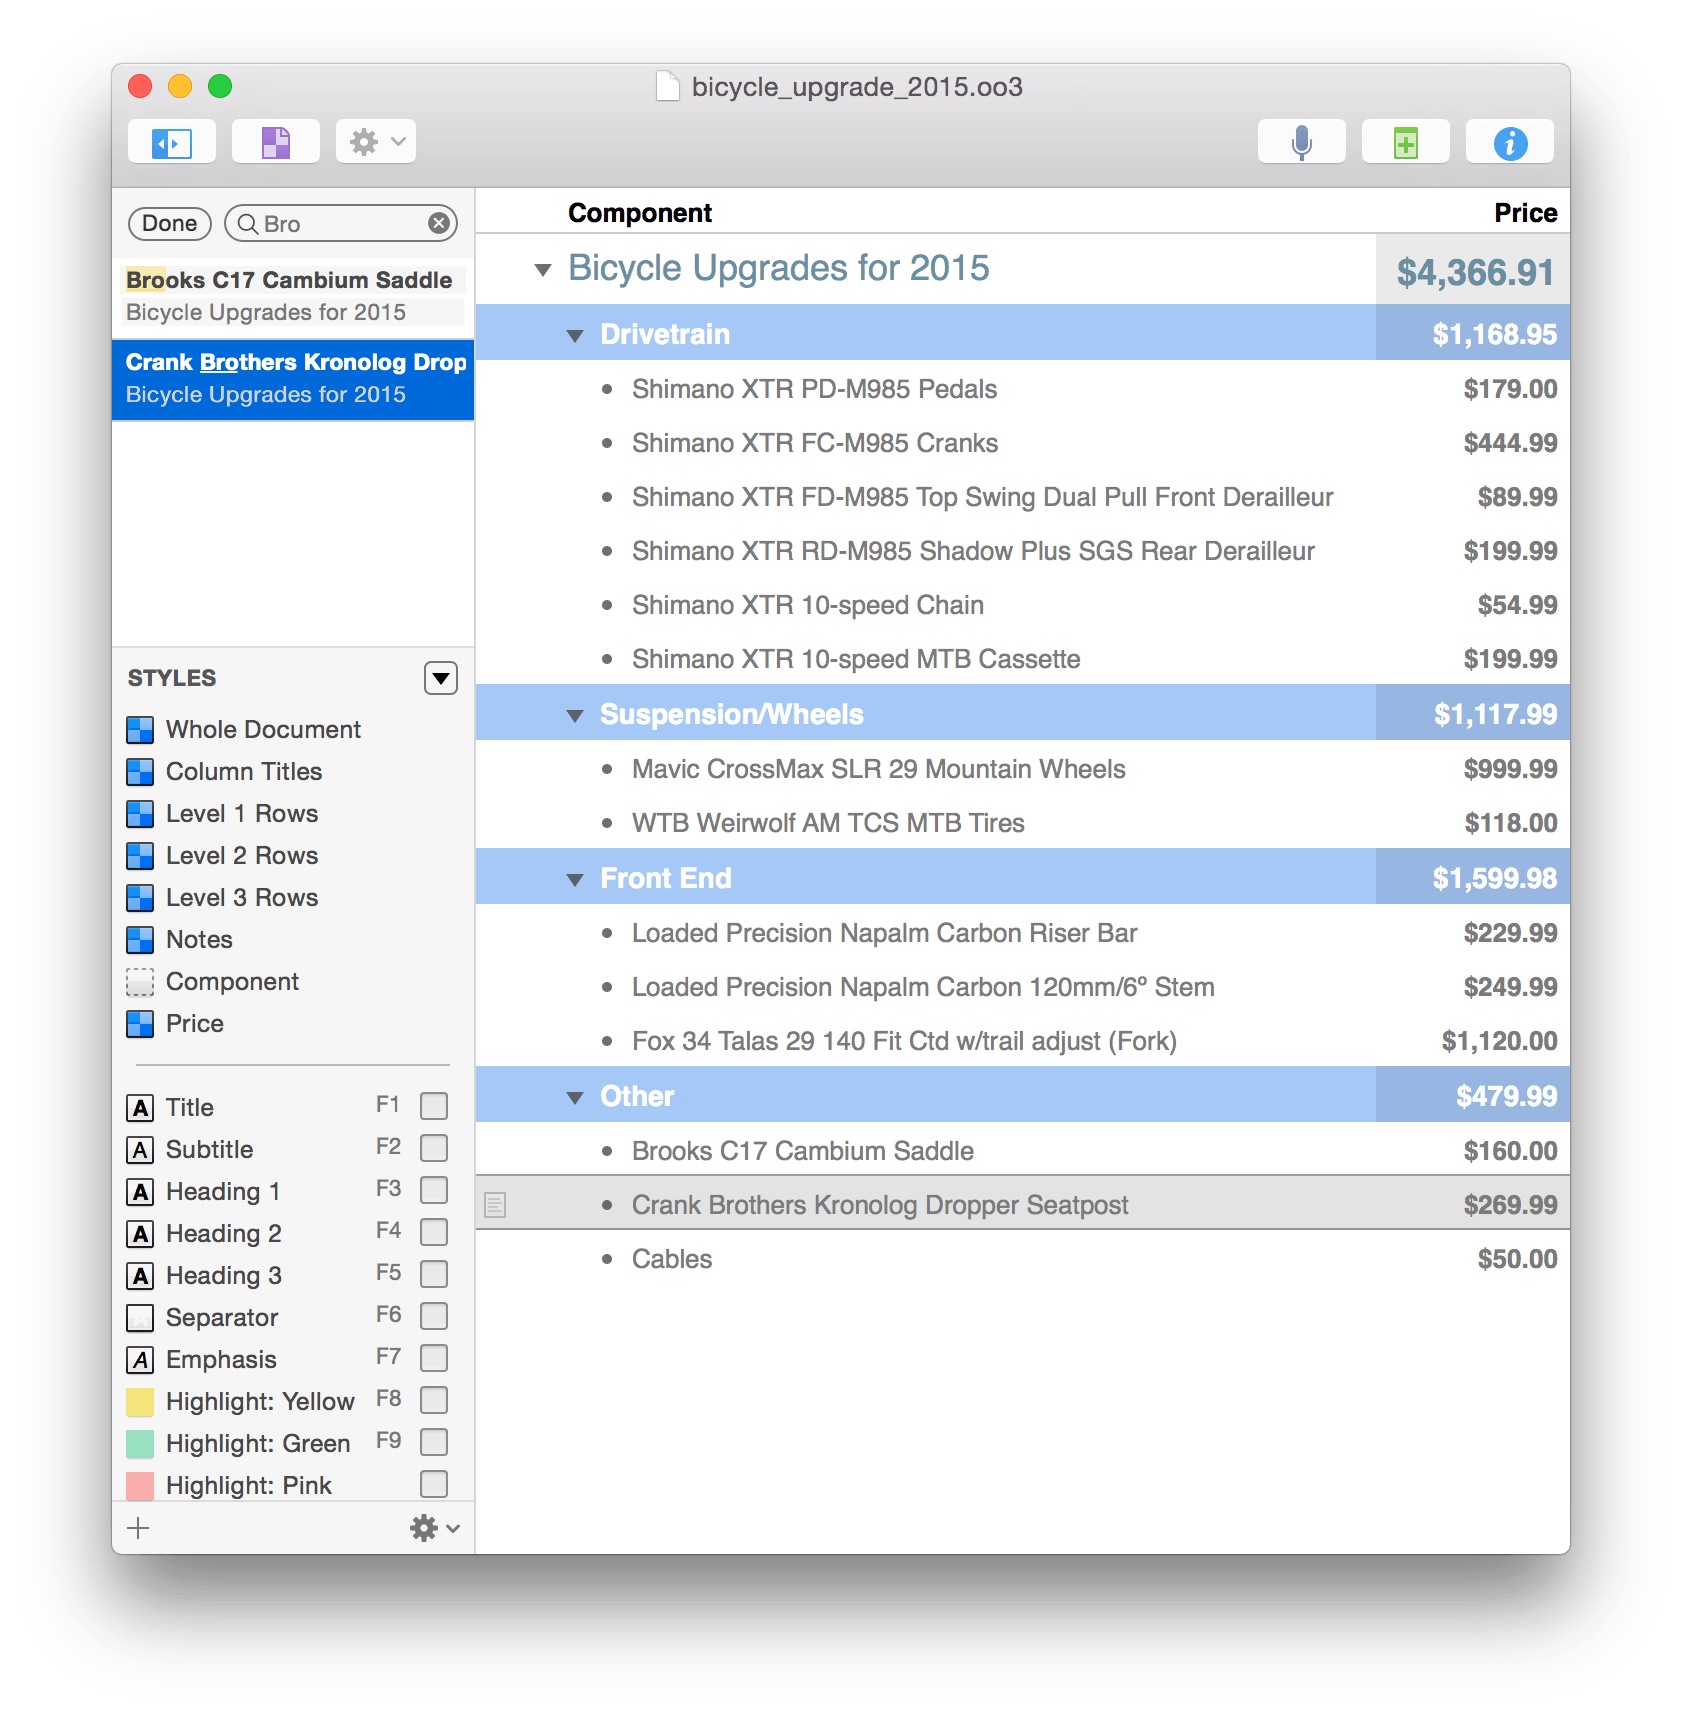
To clear the search field, press Escape or click the little  at its right edge. When you’ve finished searching, click Done and the Contents pane reverts back to its former state of showing you everything in your outline. If you were previously focused on a particular row or section of your document, OmniOutliner restores the Contents pane and the Outline view to where you were when you cancelled the search. Optionally, you can choose Edit ▸ Find ▸ Hide Search (Option-Command-F) to make the search field go away.
The Styles Pane
The lower half of the sidebar is the Styles pane. Just like the Contents pane, the Styles pane is independently scrollable within the sidebar. It also has a special flippy button (known as the Hide/Show Styles button) which, when clicked, hides and reveals the Styles pane.
When you click the Hide/Show Styles button, everything in the Styles pane goes into hiding, and the flippy button escorts itself to the bottom-right corner of the sidebar. Click the flippy button again and the Styles pane reappears. This is particularly useful for when all you’re doing is working on your outline and you just want to focus on that in the Contents pane.
The area above the split shows the styled ( ) or unstyled (
 ) elements in your document, including a Whole Document item. The area below the split provides you with some Named styles, such as headings, highlights, and a rainbow of text colors you can apply to the contents of your document.
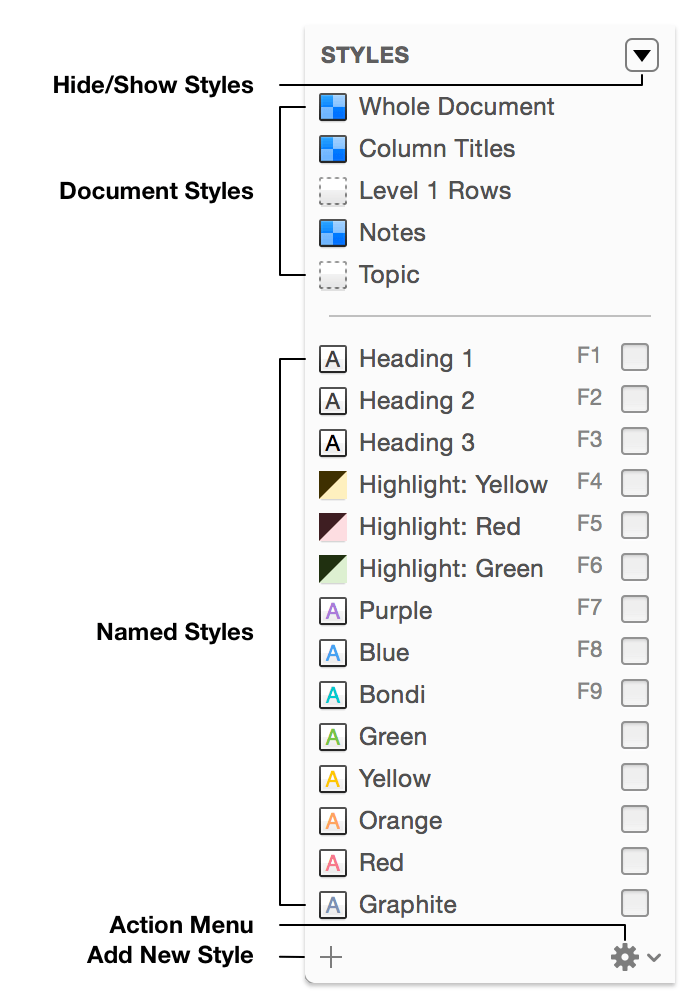
The Styles themselves are separated into two distinct categories—Document Styles and Named Styles:
Document Styles, located at the top of the Styles pane, list all of the stylable elements in your OmniOutliner document. This includes a Whole Document item, Column Titles, Notes, a Topic column, and styles for the various rows in your document. Row styles are numbered according to their indentation level, and only appear in the list as they are created in the outline.
Named Styles, located beneath the style separator line, mainly consist of the predefined styles included with the template you started from. Named Styles can be edited by first selecting the style name in the Styles pane and using the Style inspector to adjust the style attributes. To create a new Named Style, click the Add button (+) at the lower-left corner of the Styles pane. You can delete Named Styles by first selecting the style in the Styles pane, and then choosing Delete Style from the Action menu at the bottom of the sidebar.
To familiarize yourself with the Styles pane:
- Click the flippy Hide/Show Styles button a few times so you get the hang of how this works.
- Click the Add (+) button to create a new Named style.
- Click the Action button to open a mini-menu for creating new Named styles, duplicating or deleting a style, copying and pasting style properties, and for clearing styles from a selection.
By now you’ve probably been wondering what all of those little colored squares are that appear next to the styles in the Styles pane. We call these little squares Style Swatches, and very soon, you’ll see how powerful Style Swatches can be.

Style Swatches provide you with a visual representation of the style:

- Style Swatches with a two-toned blue checkerboard pattern means that there are a multitude of style properties for that element.

- An empty Style Swatch with a dashed border means there are no styles for that particular row or column. These elements automatically adopt the Whole Document style for the template you’ve chosen.

- A Style Swatch that’s split diagonally with a darker shade on the upper half means that the style applies a transparent background color to the selection.
 and
and 
- Solid squares with a letter A inside are text-specific styles, such as the font and its color.
Note
For more details on how to create and apply Document and Named Styles, be sure to download the free tutorial, Working in OmniOutliner from the iBooks Store or from our website.