OmniOutliner Preferences
To open OmniOutliner’s Preferences window, choose OmniOutliner ▸ Preferences, or Command-Comma (⌘-,). There are six preference panes that you can use to further customize OmniOutliner 5 to suit your needs, and your work style.
Each preference pane includes a Reset  and Help
  button so you can revert back to the default settings, or get to this Help page quickly from within the app.
General Preferences
Use the General Preferences pane to make changes that apply across the board for everything you do in OmniOutliner.
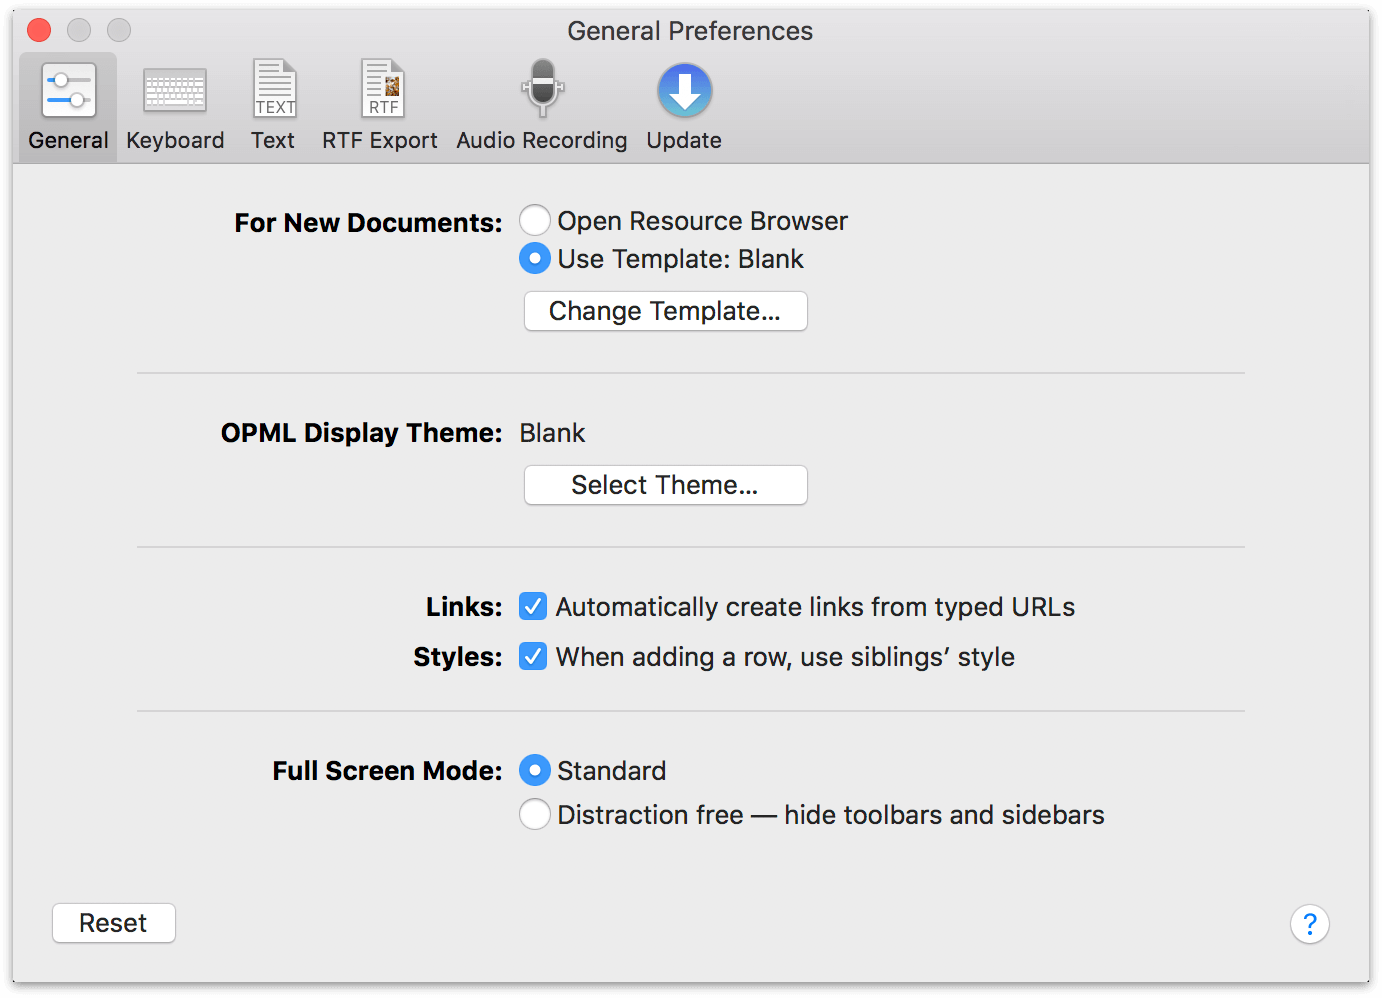
Options in General Preferences include:
- For New Documents
-
Choose what happens when you create a new document, by either choosing File ▸ New or using the Command-N keyboard shortcut. You can choose between opening the Resource Browser (where you can choose a template for a new document, or open a recently edited document or template), or creating a new document based on the default template.
If you want to change the default template, click Change Template and select a different template from the browser.
- OPML Display Theme
- Choose the theme that applies to .opml files when opened in OmniOutliner. Unlike theming for OmniOutliner files (where text and row styles are applied and saved), this preference is purely visual. Style settings are not retained within .opml files.
- Links
- Turn on or off the ability to make hyperlinks (a URL such as https://www.omnigroup.com) clickable. If you uncheck this option, the URLs you enter are rendered as Rich Text and clicking them will not open the URL in your default web browser.
- Styles
- Turn on or off the setting for a new row to adopt the style from that row’s sibling. When this is checked and you add a new row (by pressing Return or Shift-Return), that new row adopts the styles of the row you were previously in. When unchecked, any new rows you create revert to the default styles from the theme you’ve chosen.
- Full Screen Mode
- This preference switches between the Standard full screen mode, with the Toolbar and Sidebars visible at all times, and Distraction Free mode, which hides the Toolbar and Sidebars unless you move the mouse cursor to the edges of the screen.
Use View ▸ Enter Full Screen (Control-Command-F) to make the current window occupy your entire screen (use the same command to leave full screen mode when you’re finished).
Alternatively, click the green Zoom button  in the upper left of the window to enter or leave full screen mode.
Keyboard Preferences
Use the Keyboard Preferences to adjust how OmniOutliner reacts when you press certain keys.
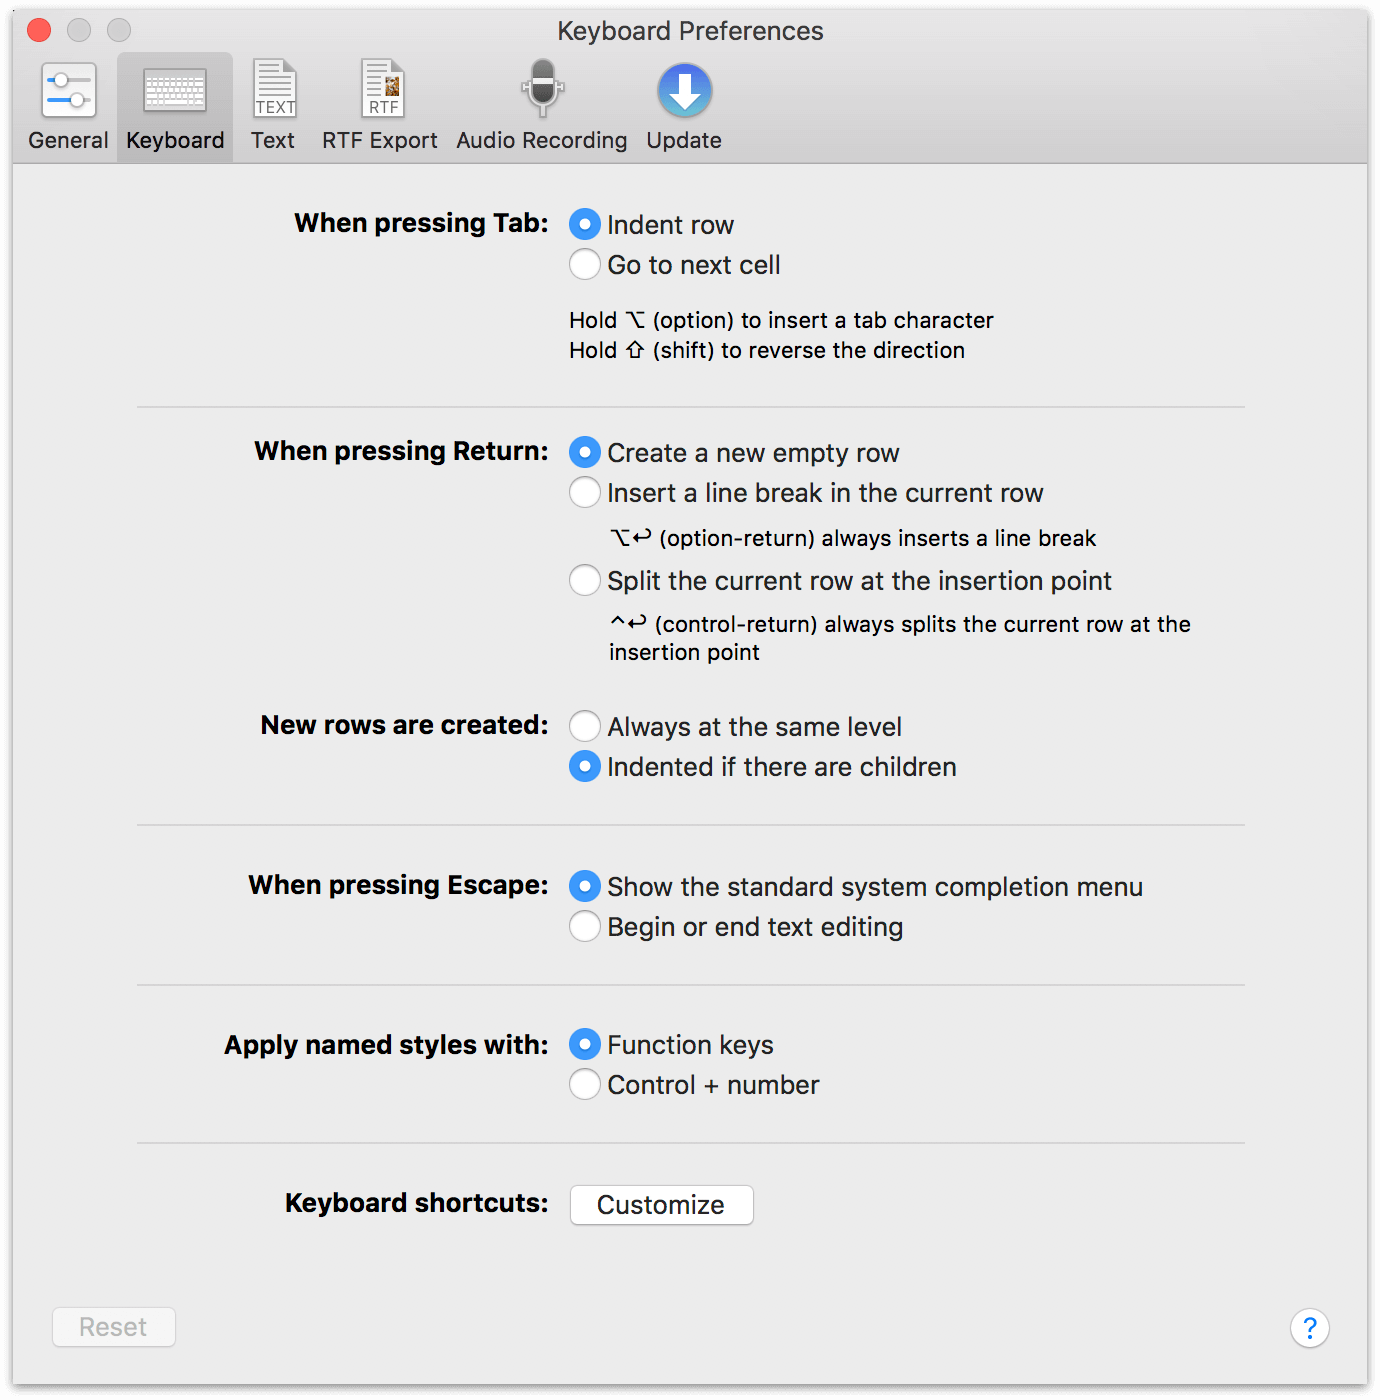
These options are as follows:
- When pressing Tab
- By default, pressing Tab indents a row. You can change this to Go to next cell by switching the radio buttons. Holding the Option key inserts an actual Tab character, while pressing Shift-Tab outdents the current row.
- When pressing Return
-
By default, pressing Return creates a new empty row. You can change this to Insert a line break in the current row by switching the radio buttons; however, pressing Option-Return always inserts a new line in the current row.
Similarly, with Split the current row at the insertion point set, you can split the current row into two rows at the cursors position by pressing Return. Even when this option is turned off, you can press Control-Return to split a row in two.
- New rows are created
- By default, new rows are Indented if there are children when you press Return. If you switch the radio button to Always at the same level, new rows are created at the same level as the line your cursor is on when you press Return.
- When pressing Escape
-
There are two options for what happens when you press the Escape key. By default, pressing the Escape key opens the system-wide completion menu. This comes in particularly handy when you aren’t quite sure how to spell something. You can just type in the first few characters of the word, press Escape, and a popup menu appears with a list of possible options. To accept one of the options, you can click it with your mouse, or use the Down Arrow key to move the highlight to the word you need and then either press Tab or Return to accept that option.
Use the other option, Begin or end text editing, for times when you’re doing quick entry and need to move around in your outline, editing rows and column cells more efficiently. Pressing Escape after entering some text in a row will highlight that row. Press Escape again places the cursor at the end of the line so you can continue typing.
- Apply named styles with
-
By default, you can use one of the Function keys to apply one of the Named styles to the current row. (Named styles are found in the lower portion of the Styles section of the Sidebar.) To use the function keys (F1 through F9), you’ll need to press and hold the fn key and then press a numbered function key to apply the style. For example, to apply the Heading 1 named style in the default Blank template, use fn-F1.
You can change this to Control + number by switching the radio buttons in the preference pane. This can make it easier for you to apply named styles since using the fn key along with the various function keys can be a little awkward.
- Keyboard shortcuts
- Click Customize to open the Keyboard Shortcuts window, where you can set up custom keyboard shortcut sets for the OmniOutliner controls you use most frequently, or assign shortcuts that map more closely to familiar workflows.
The Keyboard Shortcuts Window
Keyboard shortcuts make it easy for you to quickly access menu options without having to use a mouse. Click the Customize button in Keyboard preferences or choose OmniOutliner ▸ Keyboard Shortcuts to open the Keyboard Shortcuts window, where you can create, import, and export sets of keyboard shortcuts customized for your needs.
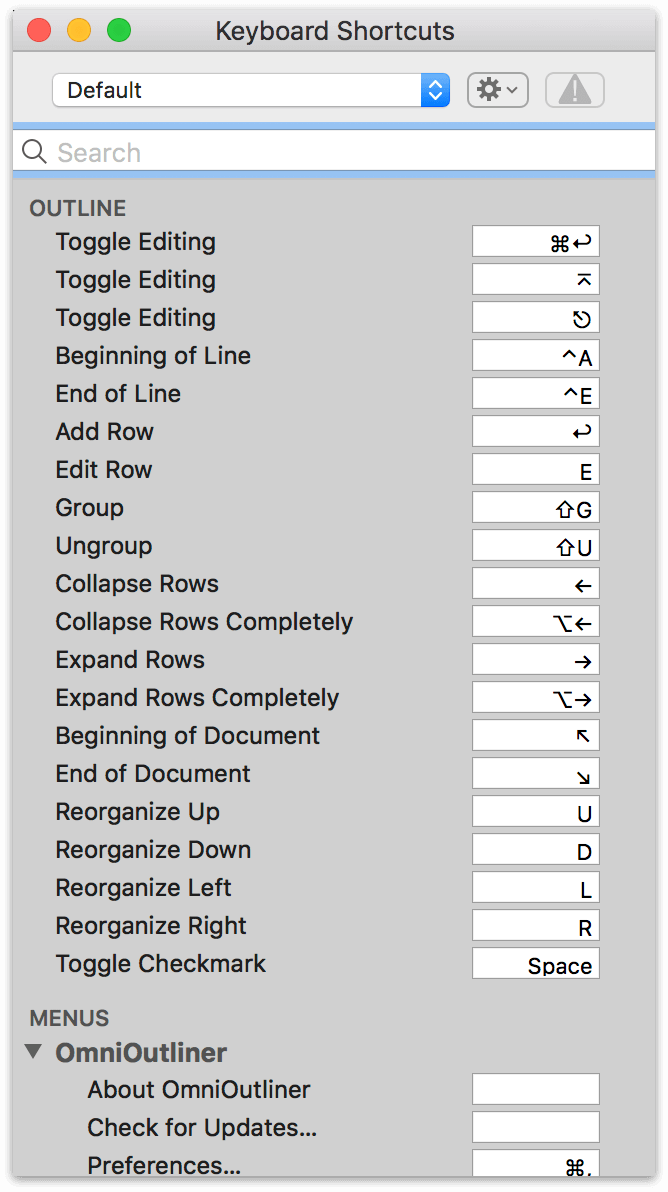
The Keyboard Shortcuts window is divided into two sections:
- Outline — lists commands used when navigating and manipulating the outline in OmniOutliner.
- Menus — lists the menus found at the top of the screen, along with each menu item found in that menu or submenu.
You can hide and show each section by clicking to the right of those sections (the Hide button text appears on mouseover). You can also expand and collapse the menu subsections by clicking the disclosure triangles to the left of each section.
Keyboard shortcuts for Outline commands can be a single letter or number without the use of special key combinations (such as the Control, Option, Shift, or Command keys).
Use the Search field to search for a command or Menu option. This makes it easy for you to see how the assigned keyboard shortcuts relate to each other, and to reassign or set keys, if desired.
Editing OmniOutliner's Keyboard Shortcuts
To change a keyboard shortcut, just click the field to the right of a command or Menu item and enter a new shortcut. The changes are automatically available for use, without requiring you to quit and restart OmniOutliner.
If you enter a shortcut that is used by another command or Menu item, the Keyboard Shortcuts window displays a warning symbol within both shortcut fields, and the normally-grayed out warning button at the top of the window becomes available. This makes it easy for you to identify, and correct, the conflict.
Pressing the Warning button at the top of the Keyboard Shortcuts window focuses on the conflicting items, and a revert arrow is placed to the right of the item that’s causing the conflict. Clicking the revert arrow changes that particular item back to its default keyboard shortcut, or no shortcut if none was previously assigned.
To remove a keyboard shortcut for an item, click the field to the right of a Tool or Menu item and press the Delete key. This removes the keyboard shortcut for that item, which can be useful if the revert arrow sets the key binding to a conflicting value.
The moment you make a change to the Default keyboard set, the name of the current keyboard set used in the drop-down menu becomes editable. By default, OmniOutliner places your user account name in the field, but you can change this to whatever you’d like.
If you later decide that you want to change the name of a keyboard set, click the Action menu next to the drop-down menu and choose the Rename option from the menu. Enter a new name, and press Return to apply it.
Sharing Keyboard Sets
After changing some keys and setting the name for your new keyboard set, you can export your keyboard set by clicking the Action menu and choosing Export Shortcuts. When you export a keyboard set, OmniOutliner uses the name of the set by default, paired with a .outliner-shortcuts file extension.
Similarly, you can also import a keyboard set, using one of the following methods:
-
Click the Action menu and choose Import Shortcuts. In the sheet that slides down, locate and select the .outliner-shortcuts file you’d like to import, and then click Open to add that keyboard set to the Keyboard Shortcuts drop-down menu.
-
Use the Finder to locate and then double-click the .outliner-shortcuts file. The Keyboard Shortcuts window will open with that shortcuts file already selected in the popup menu.
Text Import and Export Preferences
OmniOutliner offers the ability to import or export raw text files. To assist with this, the Text Import and Export Preferences lets you view (or change) the characters used to represent elements when exporting an OmniOutliner document.
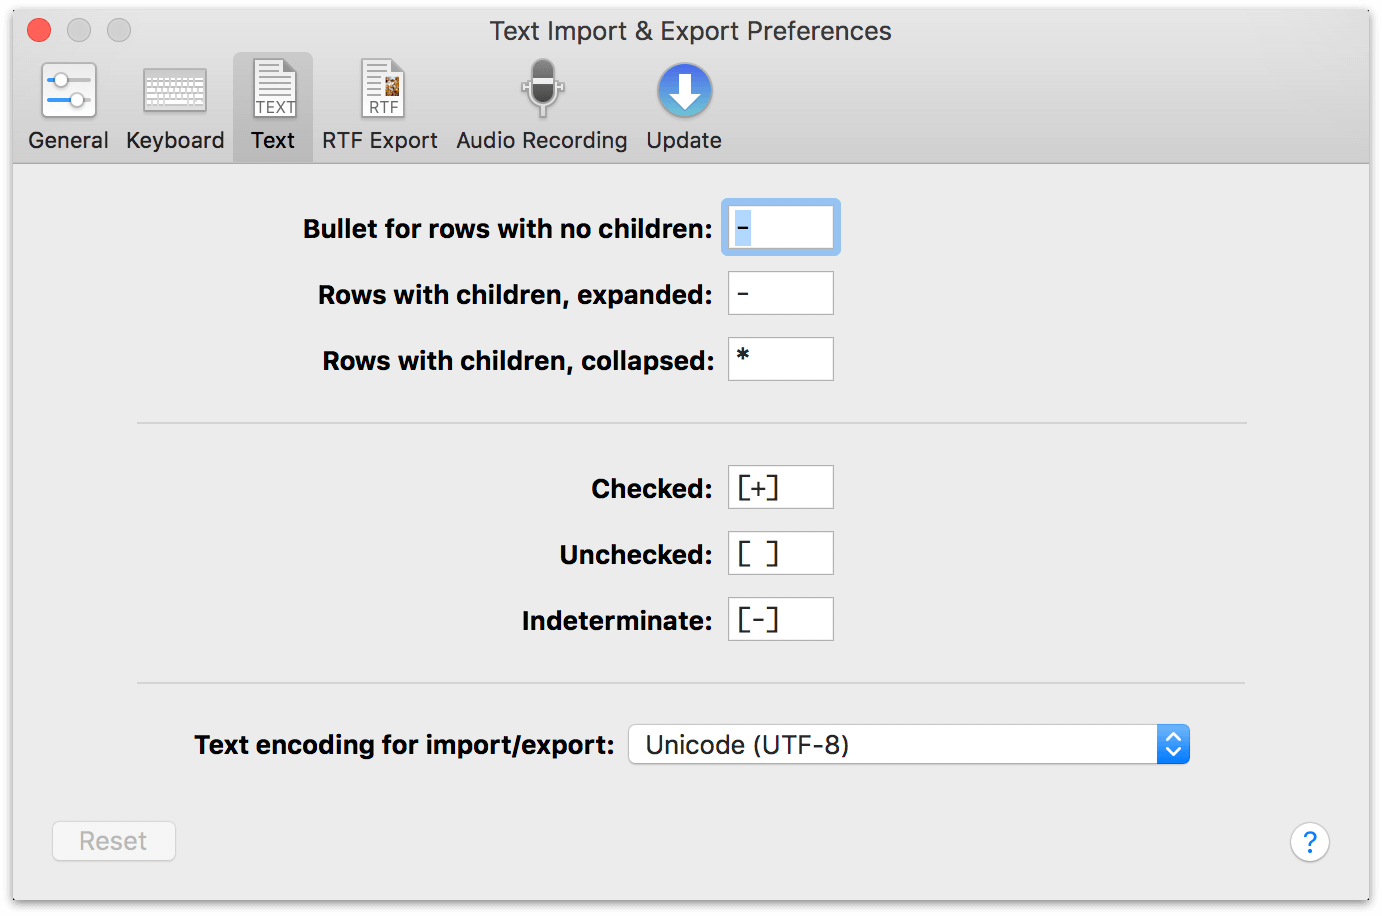
The document elements you have control over include Bullets, Checkboxes, and Spacing, and there’s also a popup menu that lets you select the text encoding type for importing and exporting operations.
RTF Export Preferences
Similar to the Text Import and Export Preferences, OmniOutliner can also export documents to Rich Text Format (RTF). As such, we’ve preset some characters and sizes based on the object types for Bullets and Checkboxes, and have set Spacing for indents and the distance between columns.
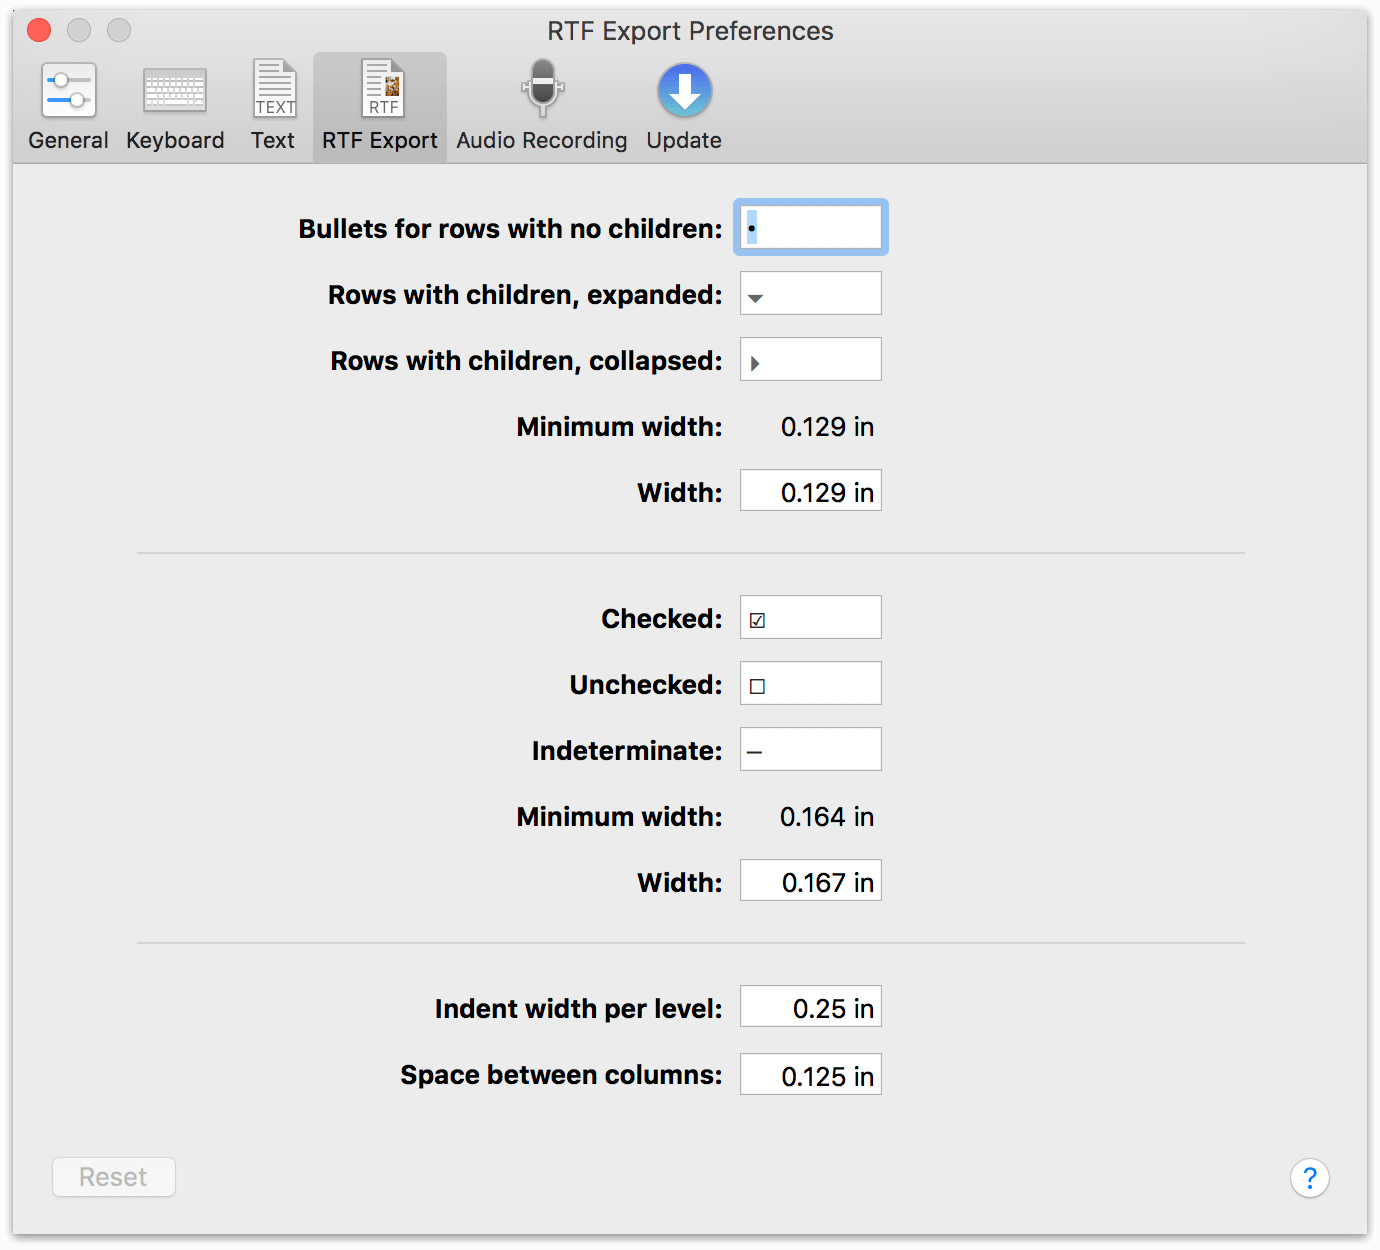
You can use the defaults or change these up however you see fit, based on your own document export needs.
Audio Recording Preferences
Use the Audio Recording Preferences to see which microphone you’re using for recording, change the compression level, or to access the temporary recording folder.
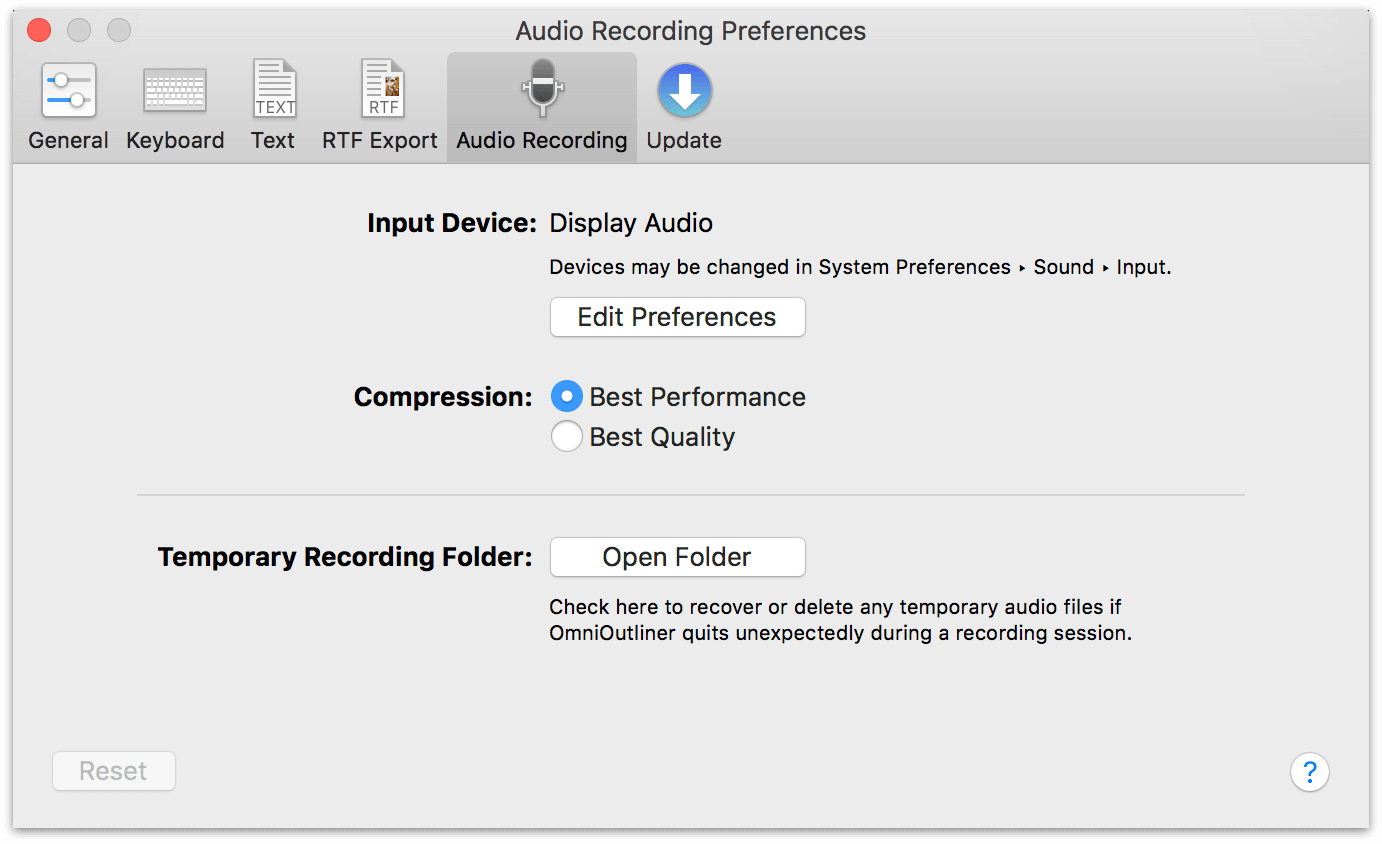
As you record audio, OmniOutliner creates a temporary file in which to dump the audio bits you’re recording. When you’ve finished recording, that temporary file goes away and moves into your OmniOutliner document. However, if OmniOutliner quits unexpectedly while you are recording, all hope is not lost. The temporary recording is still there, and the easiest way to get to it is from this Audio Recording preference pane. Just click the Open Folder button, and you’ll be whisked away to a new Finder window that’s open to the where the temporary file is stored. You can then drag that into OmniOutliner, or dump it in the trash if you want to start over from scratch.
Automatic Software Update Preferences
There’s nothing worse than out-of-date software, and one way to ensure that you’re always using the latest and greatest version of OmniOutliner is with the Automatic Software Update Preferences.

You can choose to check for updates either Daily (the default), Weekly, or Monthly, or if you’re really impatient you can click Check Now....
If you’d like to help us improve future versions of OmniOutliner for you and others, you can choose to send us anonymous information about your system when you check for updates to the app. Click Learn more about what kind of information is sent to see a list of exactly what info is collected, and learn how it’s used.
If you’ve purchased your copy of OmniOutliner through the Mac App Store, you can disregard this preference pane as you will be notified in the App Store app when a new update is available. However, we still offer Mac App Store customers the option to send us anonymous system information when updating.