Using the Project Editor
After creating a new project, you'll be faced with OmniPlan's Project Editor. However, the best way to get to know the Project Editor is to open one of the sample projects in the Local Documents folder.
Before we get going, there are a couple things that will make any project manager who's working with OmniPlan happy:
Landscape Mode — Don't be afraid to rotate your device to work on your project in Landscape Mode.
Pinch to Zoom — Most projects have many overlapping tasks, so when you need to view your entire project, use the vertical pinch gesture to zoom in or out.
Changing Time Scale — Pinch horizontally to change the view's time scale on the fly, or tap the date header of the Gantt chart to choose a scale from among granular options (including the ever-handy Scale to Fit Project).
AirPlay Mirroring — Need an even bigger screen to work on your project? If you have an Apple TV, you can turn on AirPlay Mirroring by swiping up from the bottom of the screen.
The Project Editor is where you will spend the majority of your time. Whether you're creating a new project or trying to see one to fruition, the Project Editor is where everything comes together in OmniPlan.


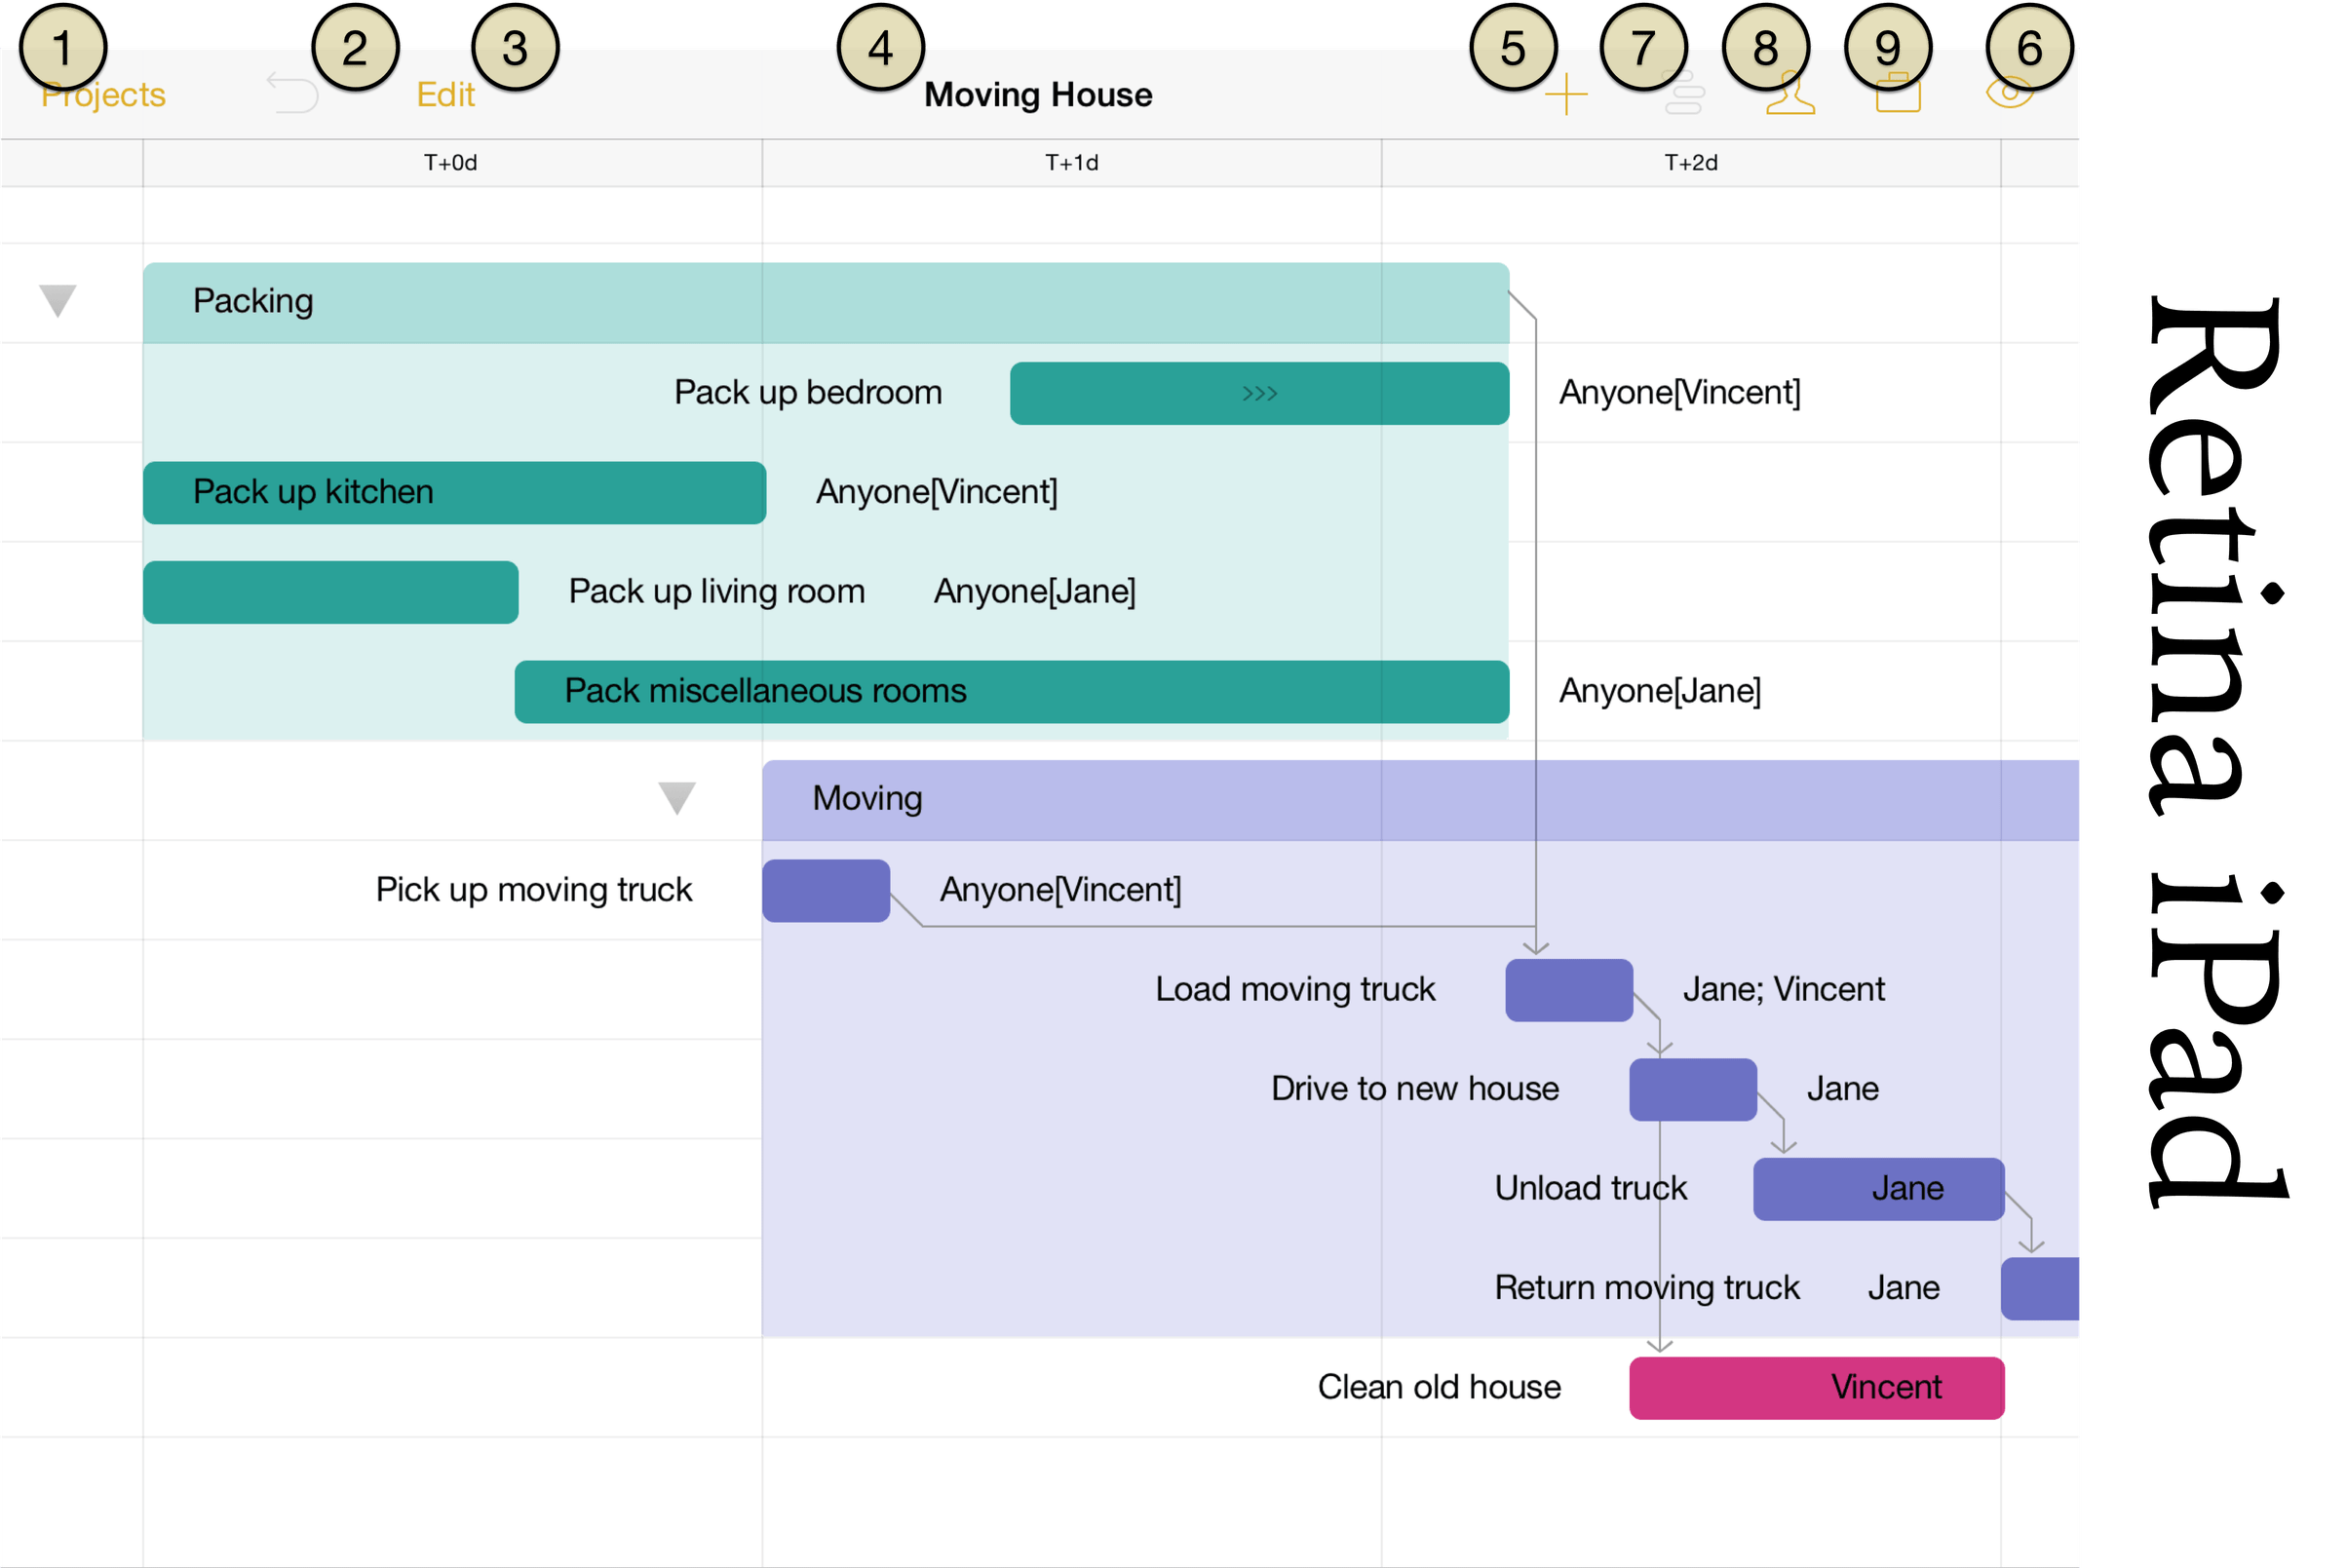
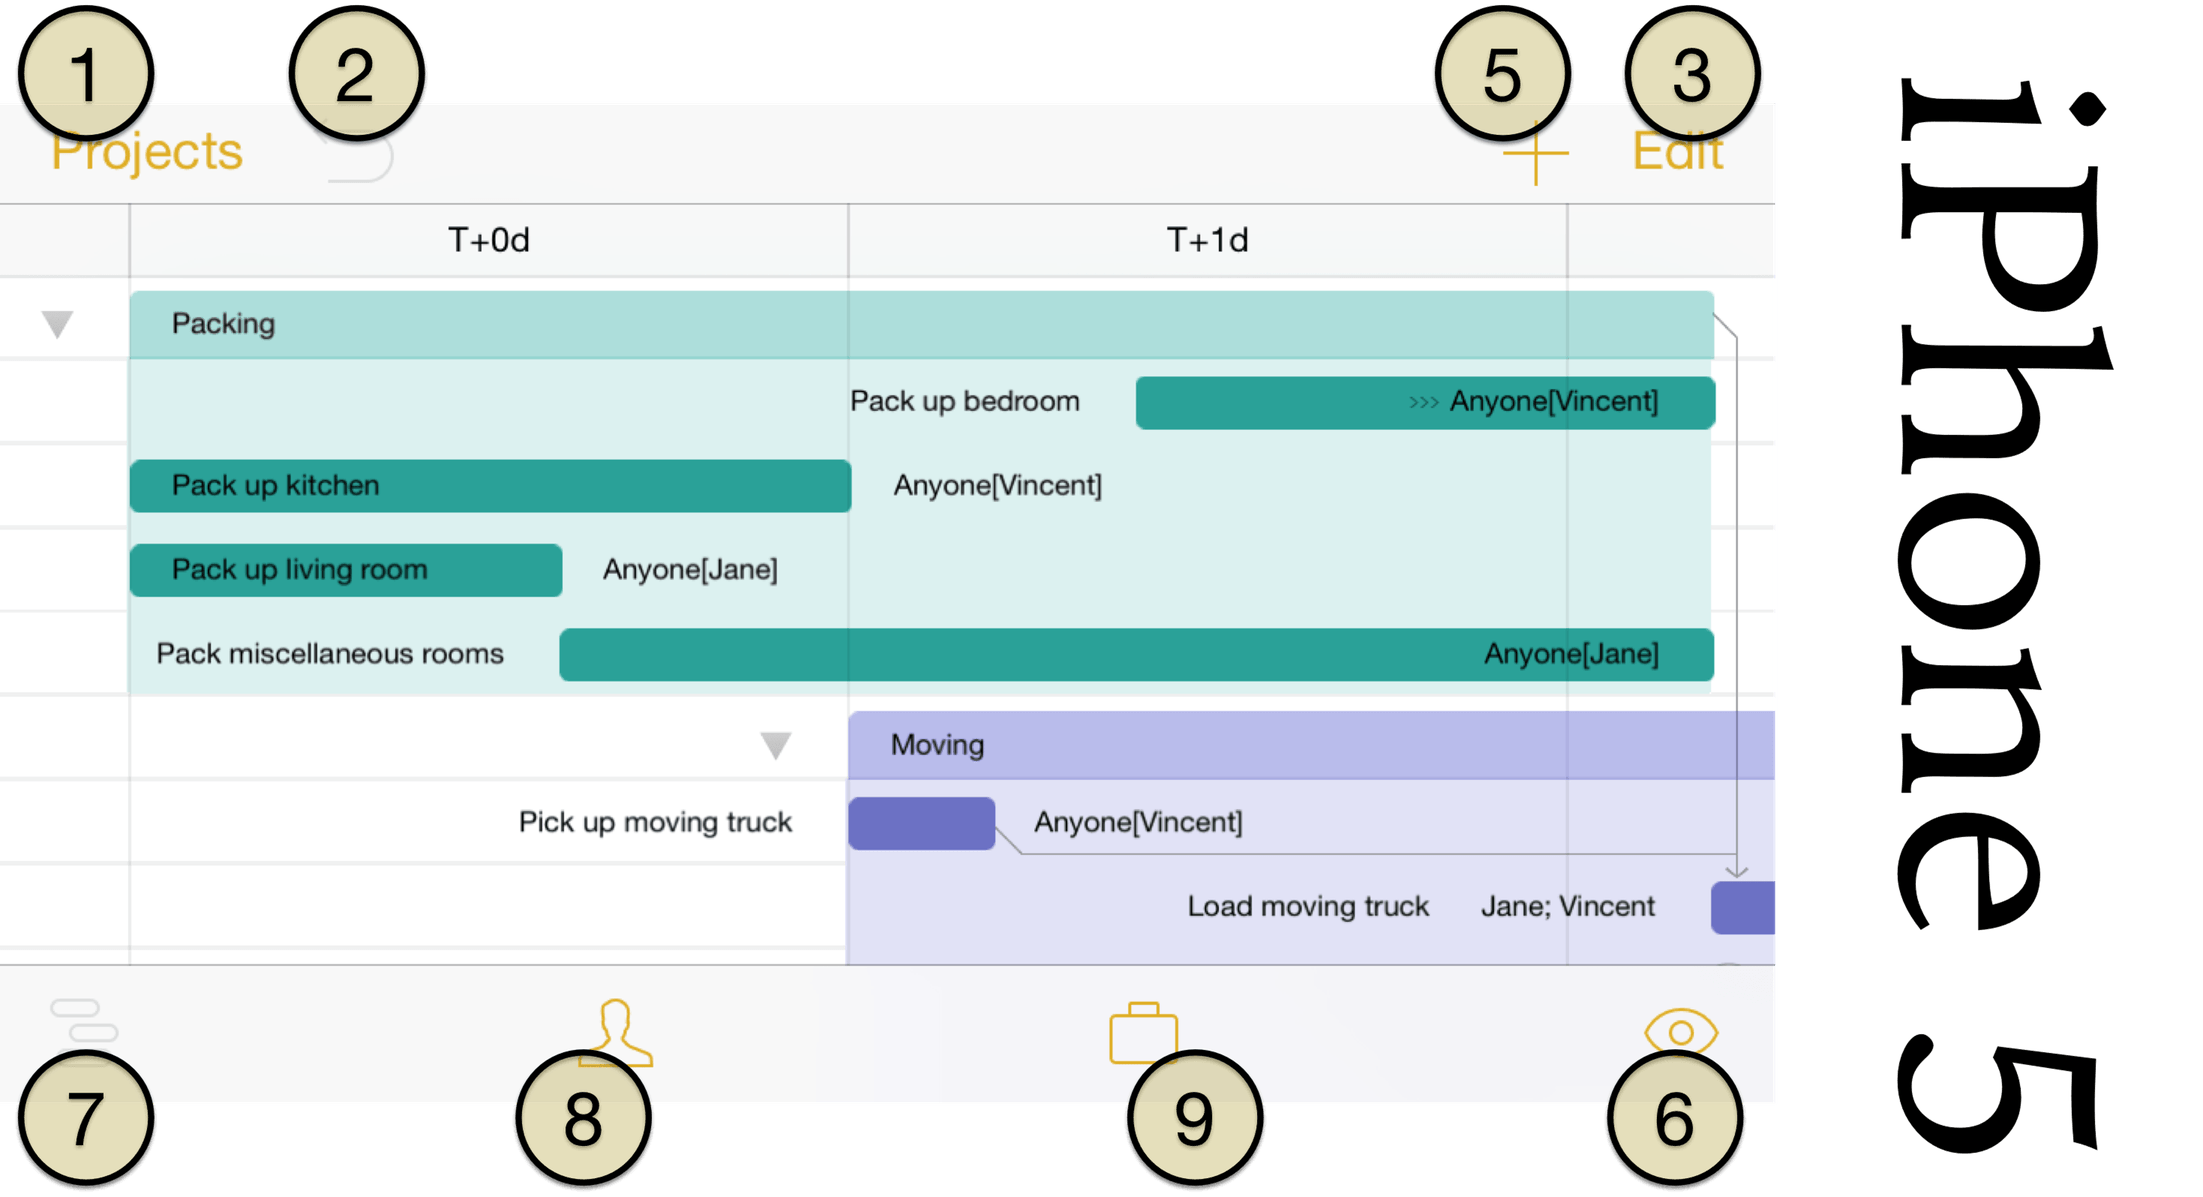
Projects — tap to exit the project you're working on and return to the current project folder.
Undo/Redo — tap to undo or redo the previous change.
Edit — with a task, milestone, or group selected, tap Edit to enter edit mode and reveal the editing controls at the bottom of the screen. In edit mode, multiple items can be selected by tapping them to perform various actions:
Cut — Delete the selected item or items and copy them to be pasted later. Paste by tapping Done to exit edit mode and touching and holding an item on the Gantt chart to reveal the contextual menu. When pasted, the copied items will appear below the one selected.
Copy — Copy the selected item(s) to be pasted later.
Delete — Delete the selected item(s) from the Gantt chart.
Group/Ungroup — With multiple items selected, Group creates a group containing those items. With a group selected, Ungroup removes the grouping container (but not the tasks inside it).
Move — Move the selected item or items elsewhere in the Gantt chart.
To move an item or items in edit mode, tap to select them, then tap Move. To choose their destination, tap another row. A contextual menu appears that provides three location options: Above the chosen row, Below it, and Inside. Choosing Inside converts the chosen row into a group (if it isn't one already) and adds the items to be moved as tasks inside it.
Connect/Disconnect — With multiple items selected, this command connects them with finish → start dependencies (if they're not already connected) or removes dependencies between them (if they're currently connected).
Project Title — the name of the project.
Add — tap to add a new task to the project. If you touch and hold, a popover menu appears giving you the option to add a new Task, Milestone, or Group.
View — this popover lets you set a project filter, turn on change tracking, check for violations, and view baselines and critical paths.
Task Inspector — with a task or group selected, tap to open the Task Inspector. There are three tabs in the inspector: Task Info, Scheduling, and Assignments.
Resources Inspector — lets you assign resources (Staff, Equipment, Materials, or a Group) to a task.
Project Inspector — use the Project inspector to set the parameters for your project.
The Project Inspector
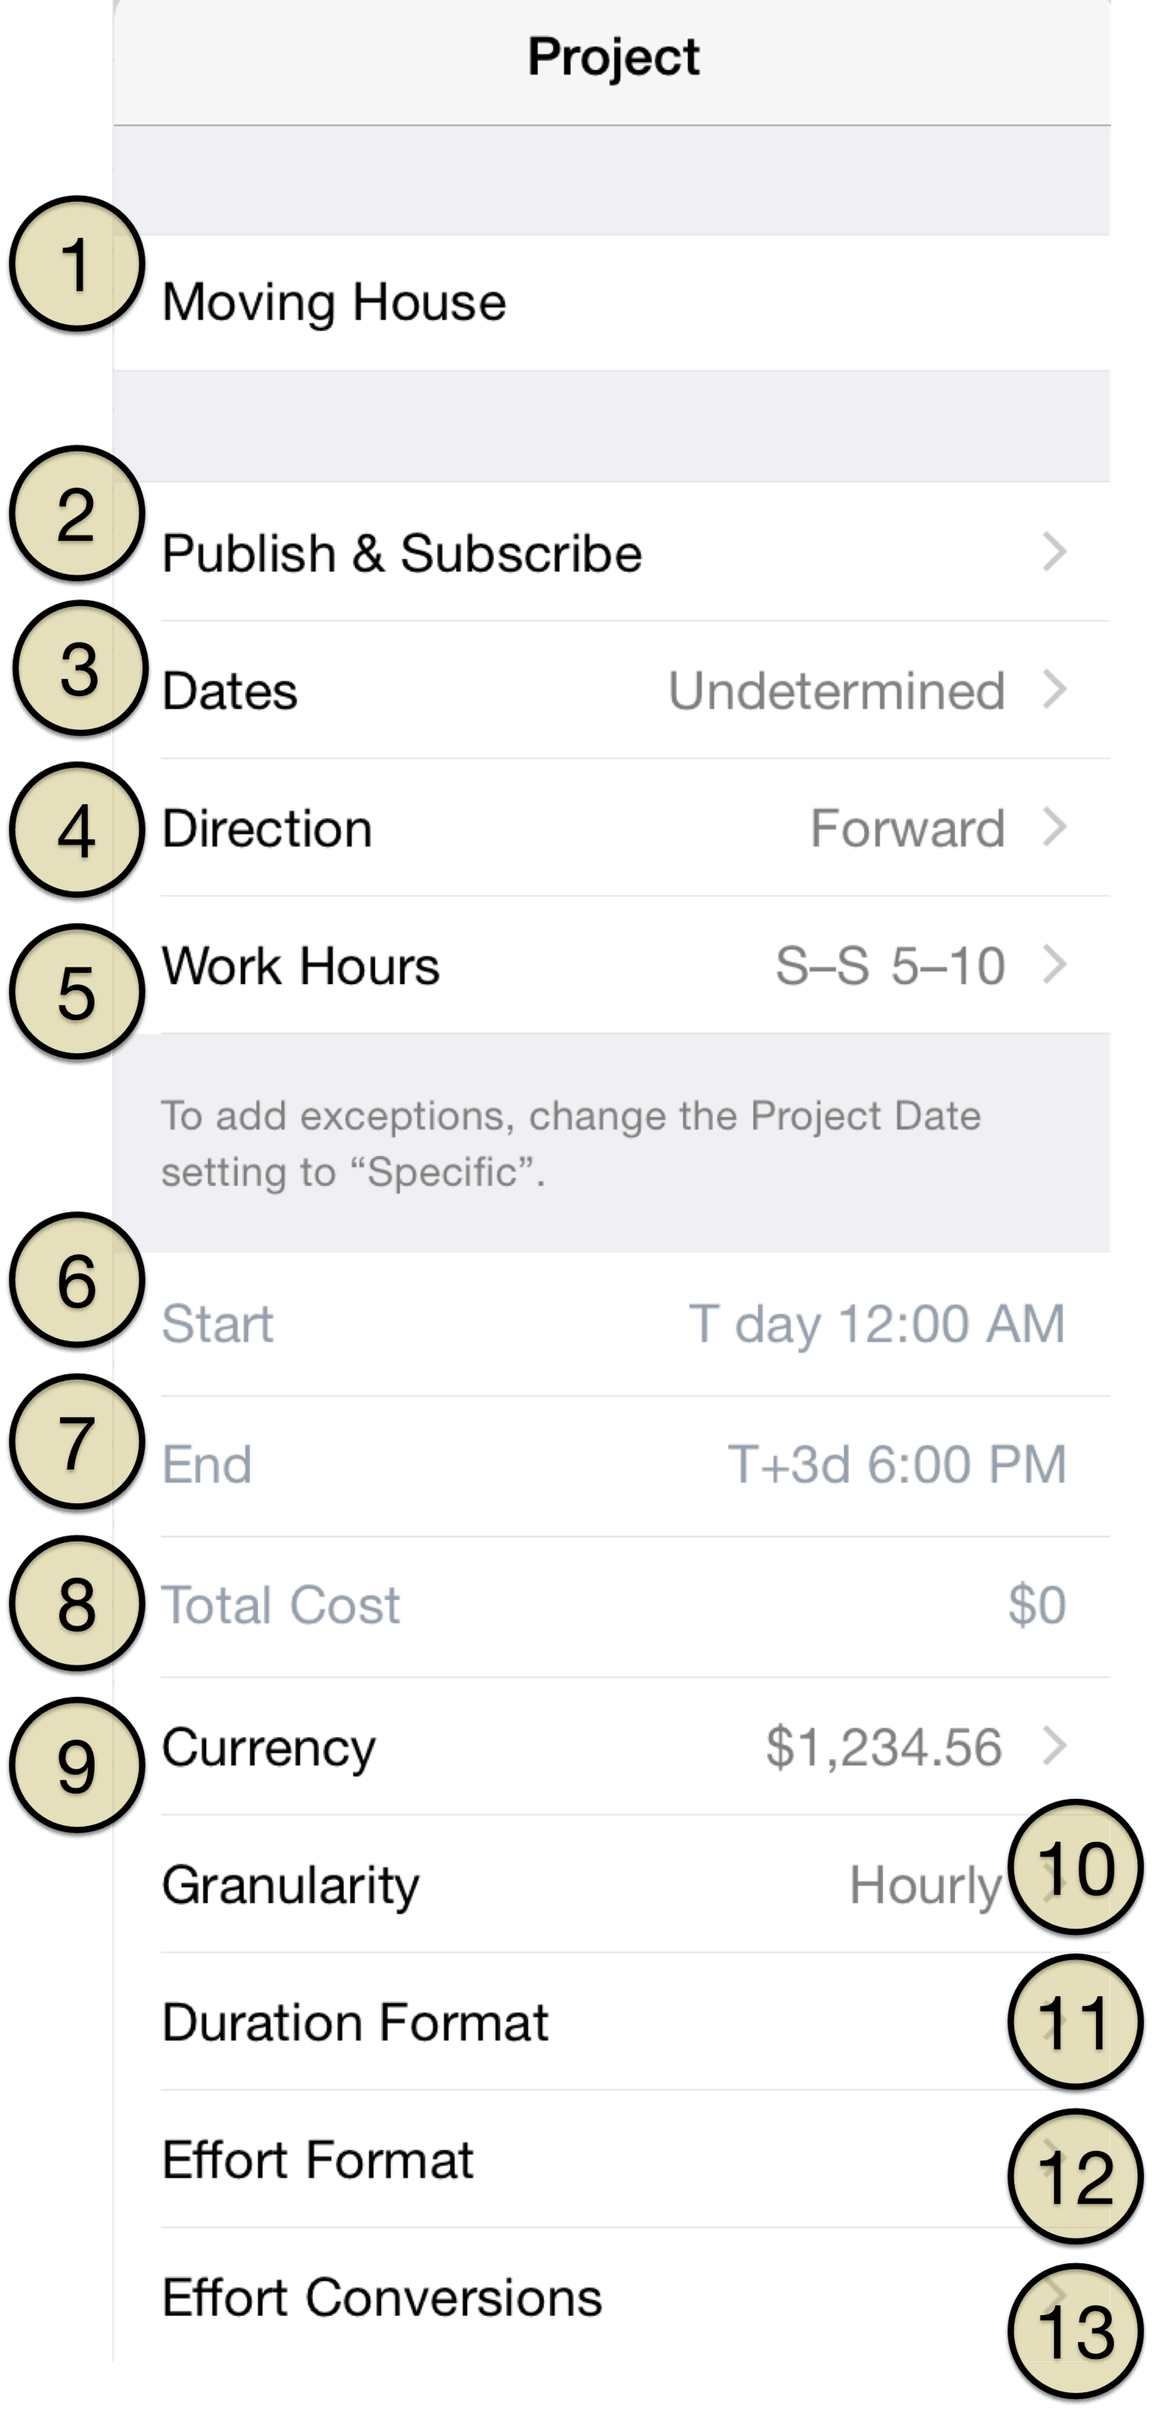
The Project Inspector contains tools for fine-tuning the details of your project's structure and operating parameters.

Project Title — as an alternative to tapping the project header, you can edit the project's name here.
Publish and Subscribe — configure the sync settings for this particular project. If you are using Omni Sync Server, you can specify an auto- update interval so that other members of your team can view and edit the project in OmniPlan on their iOS device or Mac.
Dates — choose from Undetermined or Specific, which basically means your project can start or end on a random or specific date, respectively.
Direction — depending on your project type, choose from Forward from Fixed Start or Backward from Fixed End. Projects typically have a definitive start or end date (and sometimes both), so choose whichever is appropriate for your project.
Work Hours — specify the expected working hours.
Start Date — this option is only available if you have set a Specific start date for your project, rather than an Undetermined date.
End Date — this option is only available if you have set a Specific end date for your project, rather than an Undetermined date.
Total Cost — check here to see the total cost for your project.
Currency — set the currency type for your project's expenses and costs.
Granularity — choose from Exact, Hourly, or Daily to specify how precisely to schedule task start and end times.
Duration Format — check here to see how long it will take to work through all of the tasks in your project. This popover contains a set of switches so you can toggle on or off Years, Months, Weeks, Days, Hours, Minutes, and Seconds.
Effort Format — choose which units should be displayed when working with durations. This popover contains a set of switches so you can toggle on or off Years, Months, Weeks, Days, Hours, Minutes, and Seconds.
Effort Conversions — choose how many hours to count as one day, week, month, or year.
With an overview of the Project editor and Project Inspector wrapped up, now let's move on to a tutorial for putting a project together from the very beginning.
