Tutorial V: Maintaining the Project
Step 14: Set the Baseline
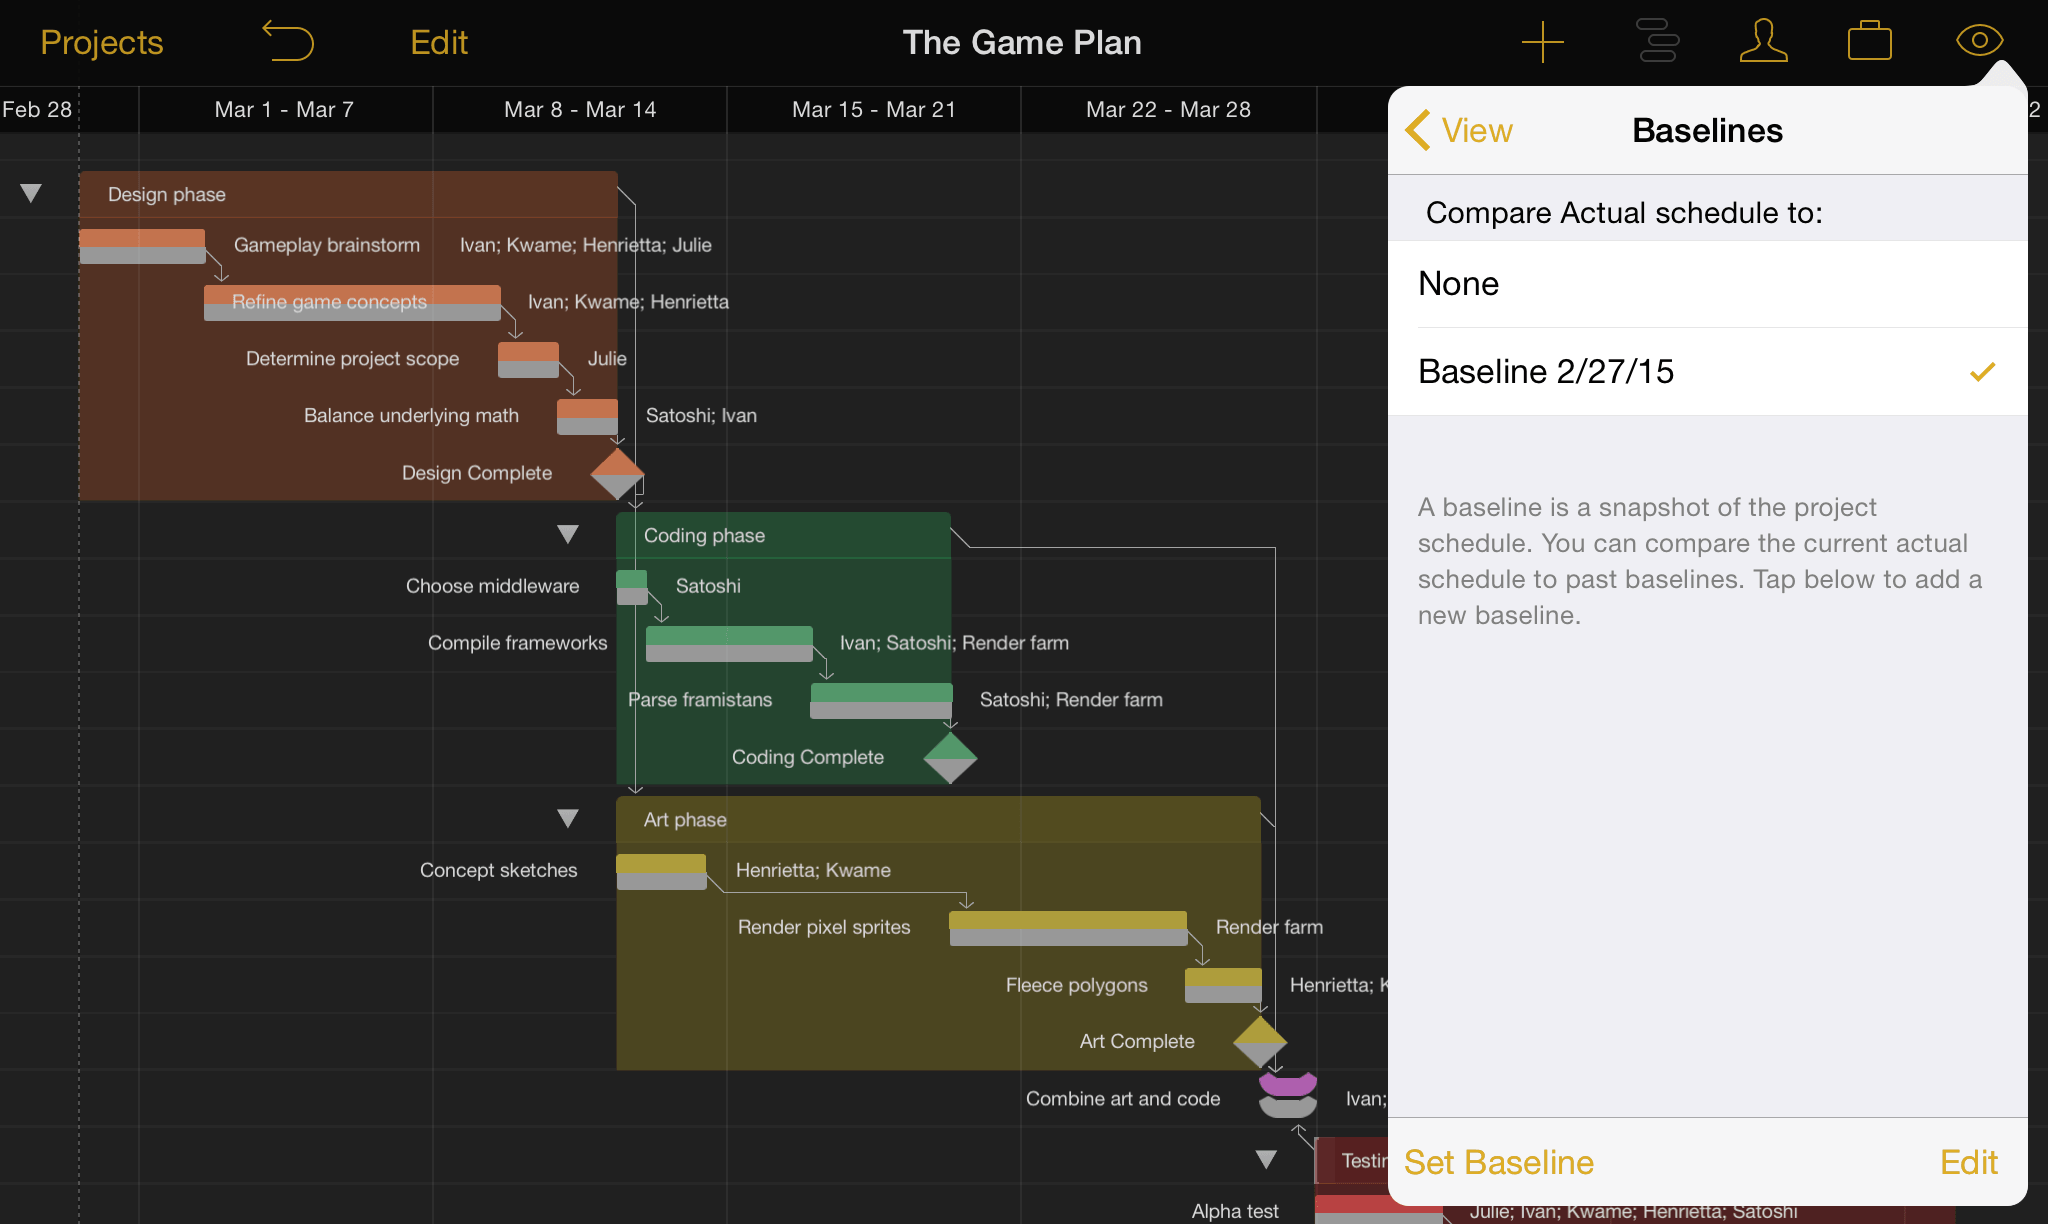
With tasks set and resources assigned and leveled, the state the project is in now may be a glimpse at its fate in the best of all possible worlds – one where unforeseen hindrances don't bog down progress, and where optimistic estimations rule the day.
This is the world that is captured when we set a baseline for progress, a feature used to compare how the project is actually doing against initial expectations, so milestones and resource allocation can be adjusted accordingly.
To set a baseline, open the view inspector and tap Baselines. Tap Set Baseline and enter a name (the current date is the default); it's now selected for comparison, and can be compared against subsequently set baselines as the project progresses.
Step 15: Update Task Completion
As work on the project begins, you can track progress against the baseline you've set by tapping a task currently in progress and moving the slider along to the task's completion percentage (this can be edited in the task inspector as well).
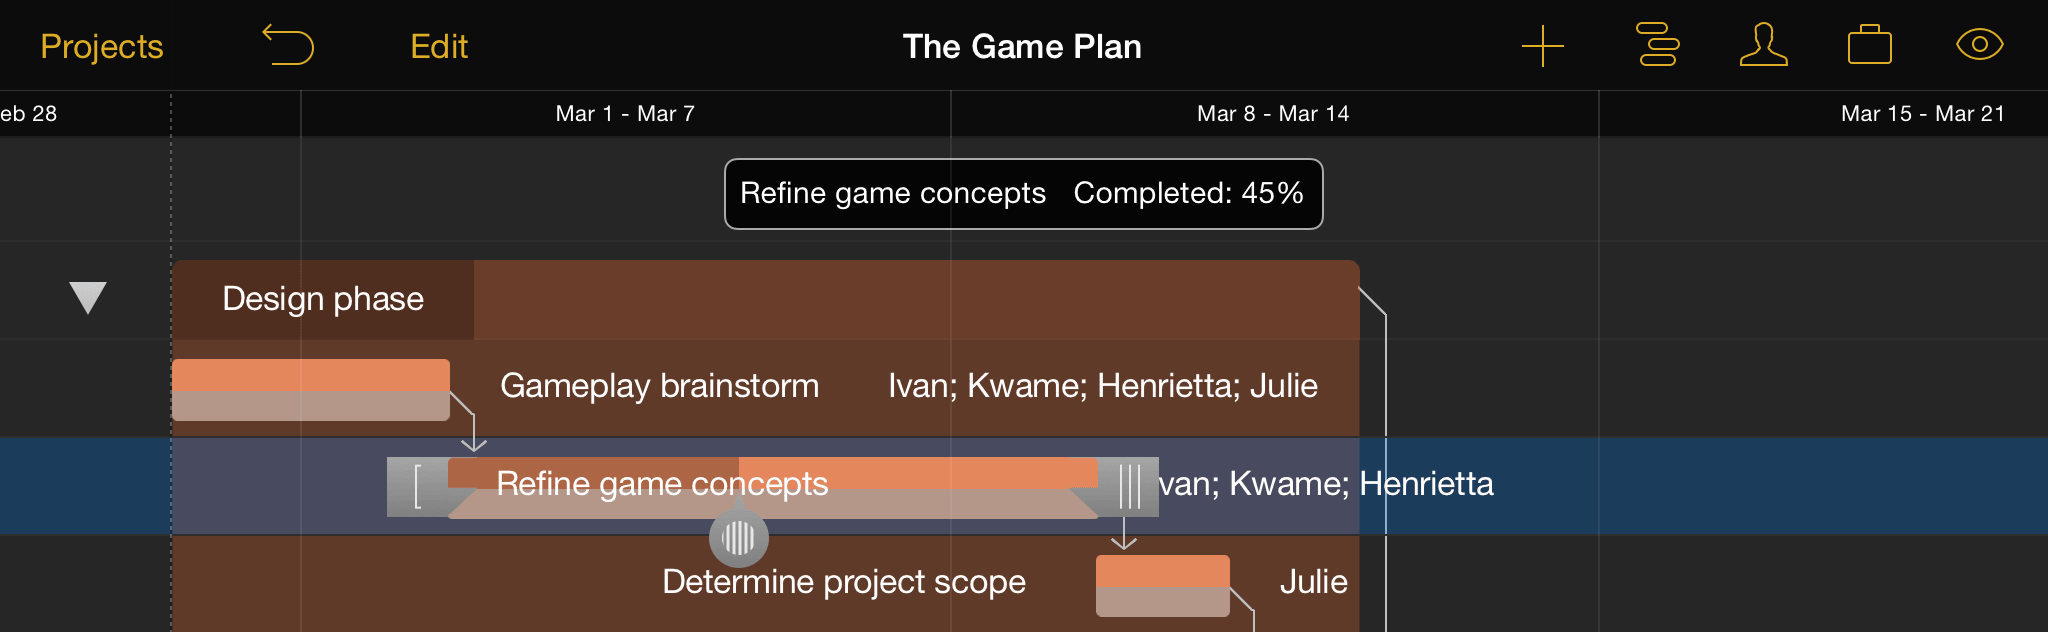
If a task is behind schedule, update the expected duration and level resources again to compensate for the additional time needed.
Step 16: Resolve Violations
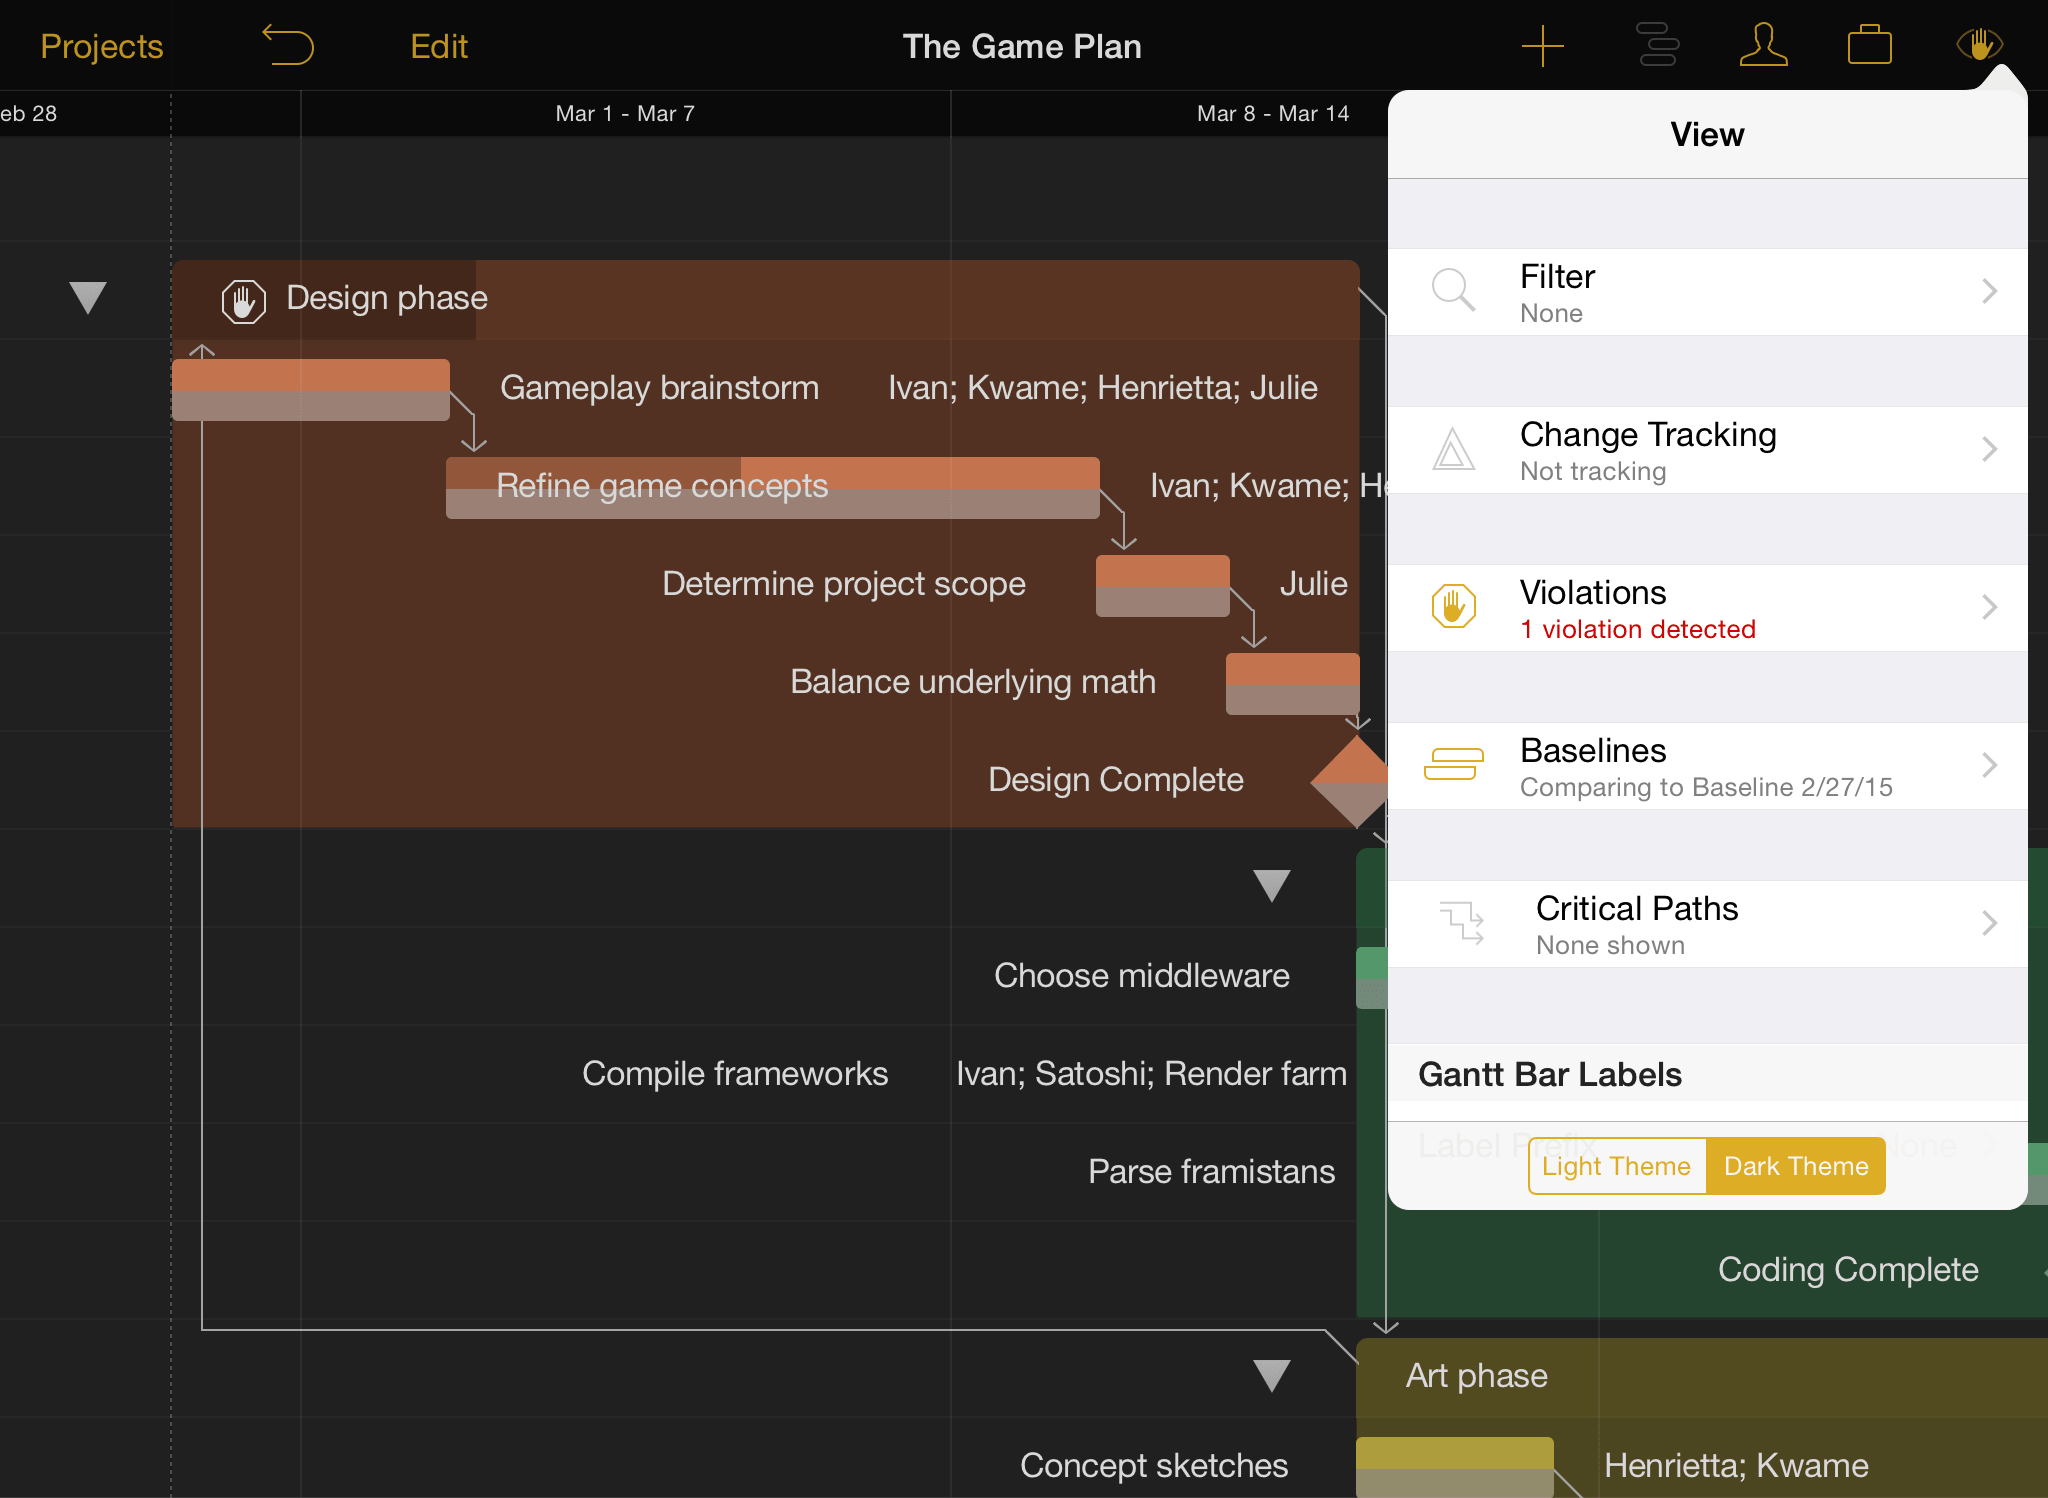
Occasionally situations will emerge that break the rules of logic you've set up for your project. When one of these occurs, OmniPlan will let you know with an indicating a violation related to the adjacent task.
Violations can be fixed by opening the view inspector and tapping Violations. You'll find a description of the problem and a command to tap that should resolve it.
Step 17: Split Tasks
Whether because a key collaborator is on vacation or another part of the project has taken priority, suspending work on a particular task can be very helpful. When you want a resource or team member to devote time to something other than the task they're currently assigned to, splitting the task into parts around the "time out" period is an ideal solution.
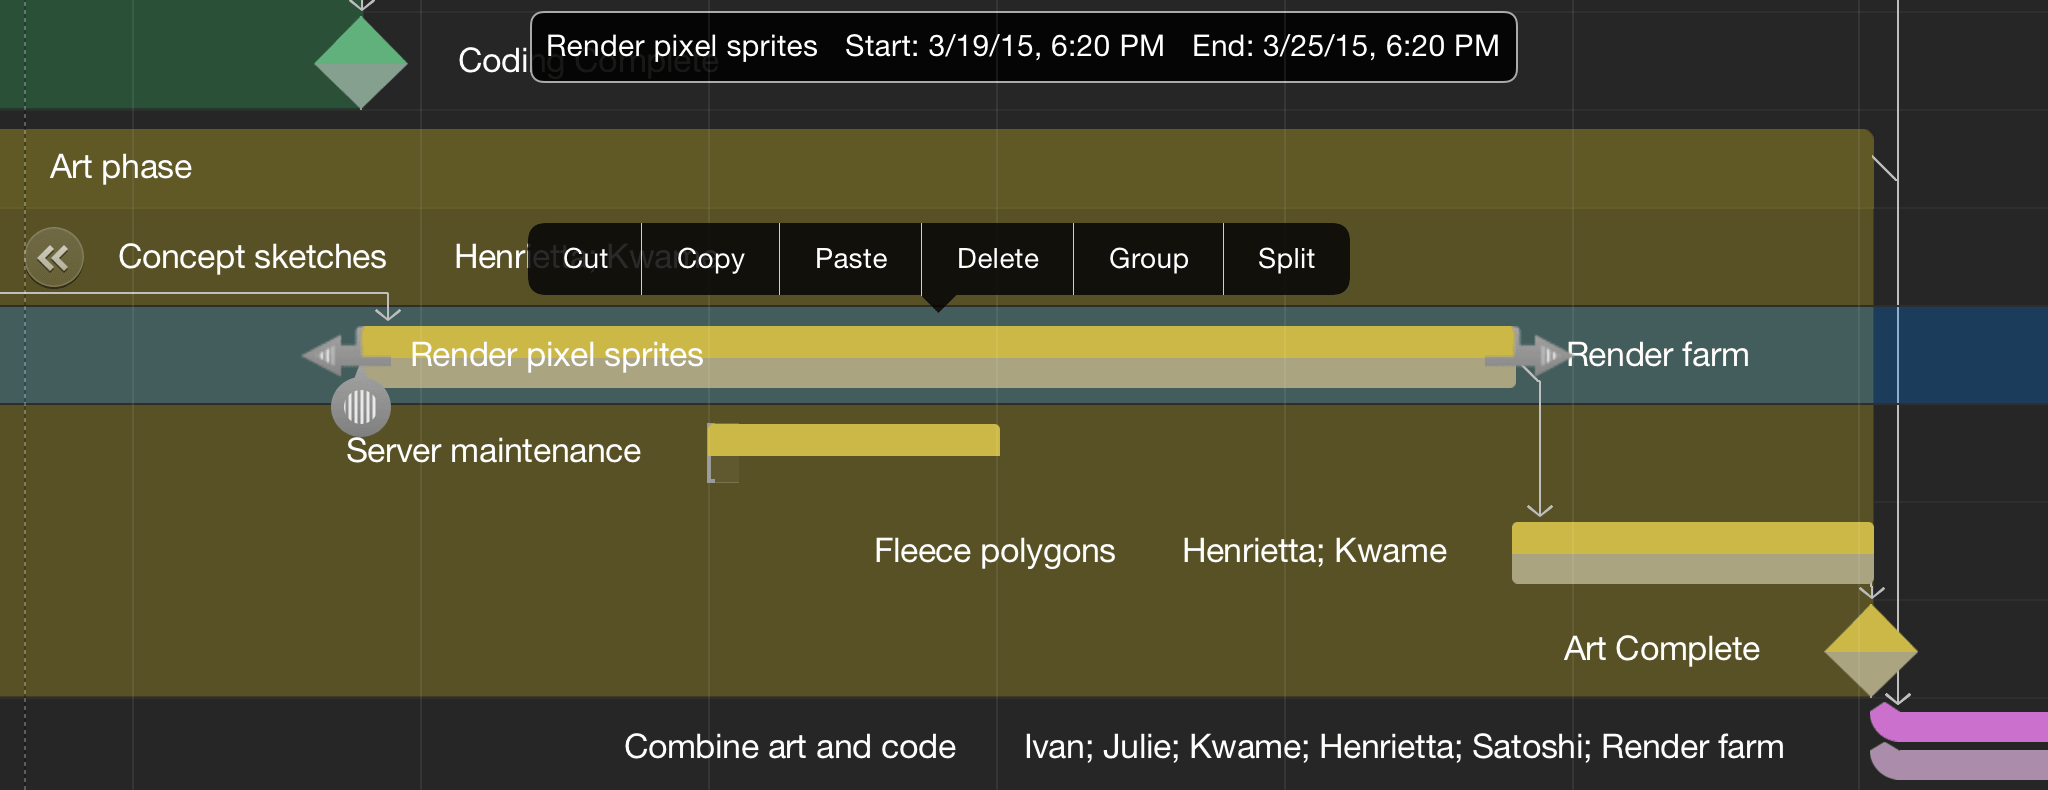
To split a task, press and hold it in the Gantt view until the contextual menu appears, then tap the right arrow and choose Split. You'll be asked to choose the duration of each segment of the task, and the date and time you want the task to resume after the break. If the resource will be absent during the split, remember to indicate this on its schedule in the resource inspector.
Note
The schedules of individual resources (usually workers) can be customized to account for personal vacation or sick days by selecting the resource in the resource inspector and choosing Calendar.
After splitting a task it's always a good idea to level to be sure the split is the most efficient way to manage the task at hand given the project's available resources and time constraints.
Warning
A split task may mysteriously re-merge after leveling. If this isn't what you want, make sure that Allow Splitting is turned on in the resource inspector's Leveling submenu.