Getting Synced
To work on a project accessible for editing by multiple OmniPlan users, start by tapping Manage Server Repositories on the Locations screen.

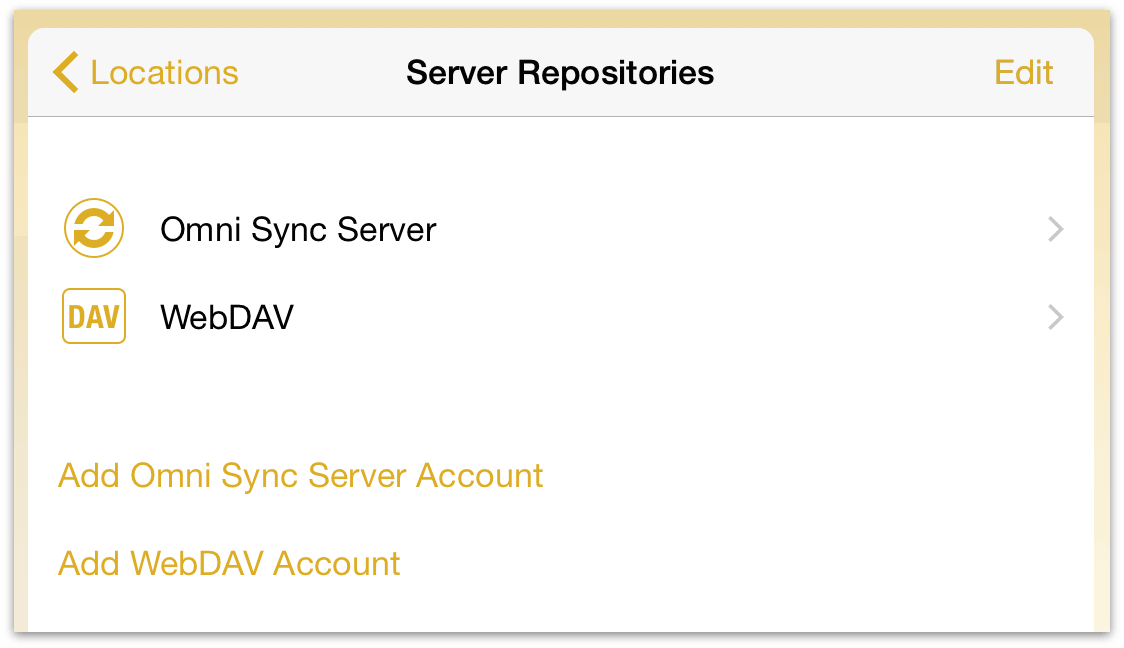
You’ll see the OmniPlan Server Repositories screen, from which you can choose either Add Omni Sync Server Account or Add WebDAV Account.

You can create a free Omni Sync Server account online at:
Note
Sync in the form of publishing and subscribing to a shared server repository (the process described in this chapter) is available in OmniPlan 2 for iOS and OmniPlan 3 for Mac with the Pro upgrade.
For Omni Sync Server Accounts
On the Server Details screen that appears:
Enter your Username.
Enter the Password for your account.
Set the default Path (or folder) to use. By default, OmniPlan uses the root directory (as denoted by the slash, / ), but you can change this to another folder; for example, using /OmniPlan assumes you have a folder named OmniPlan at the root level of your Omni Sync Server directory.
Optionally, enter a Description that will be used on the Locations screen as the name for your synced folder.
Tap Connect to authenticate with Omni Sync Server.
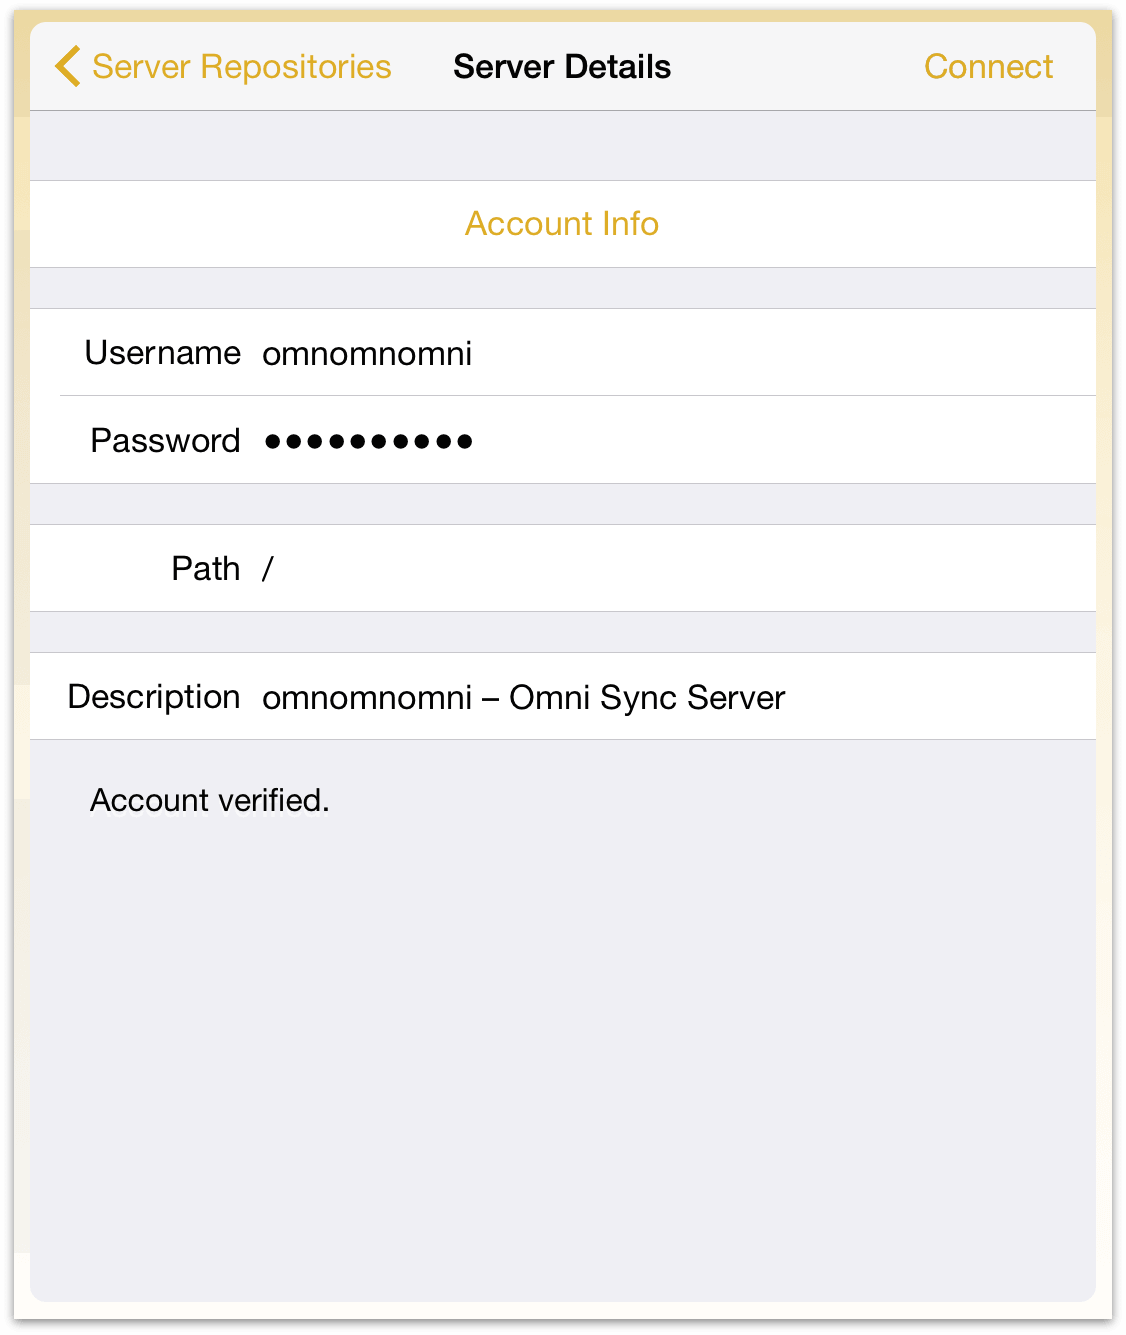
When you tap Connect you’ll see Checking account... at the bottom of the window. When your account information has been validated, the text changes to Account verified and the Omni Sync Server folder is added to OmniPlan on your device.
For WebDAV Server Accounts
On the Server Details screen that appears:
Enter the Address (in the form of a URL) for your WebDAV server.
Enter your Username.
Enter the Password for your account.
Optionally, enter a Description that will be used as the name for your synced folder.
Tap Connect to authenticate with your WebDAV server.
When you tap Back, you’ll see a list of your available server repositories.
To remove an account, tap Edit; a delete handle appears to the left of the account name. If you tap the delete handle, the account name slides to the left and a Delete button appears on the right edge; tap that to delete the account. A quicker way to do this is to just swipe left across the account name to bring up the Delete button. If you change your mind before deleting the account, tap Done and the Delete button goes away.
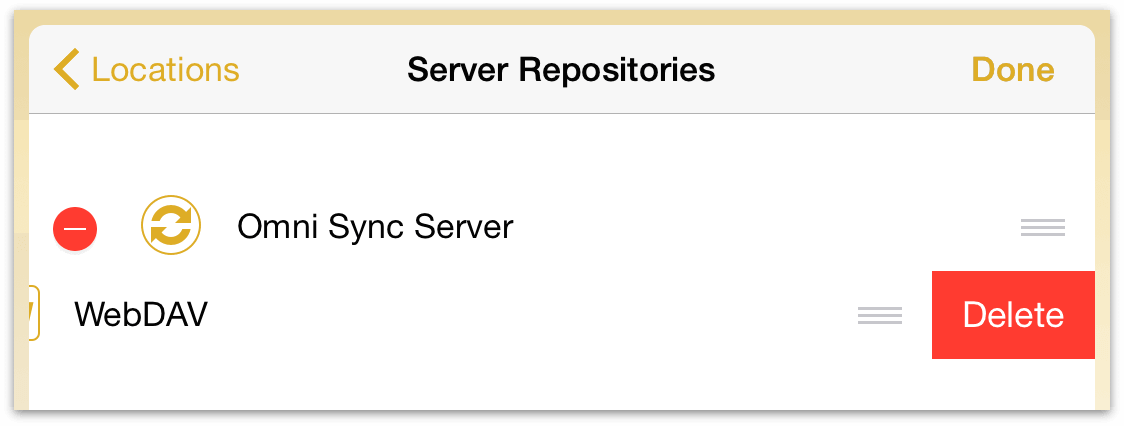
Warning
Undo will not restore an account that you delete. If you delete one (or all) of your repository accounts, you will need to set those up all over again.
When you tap Done, you’re returned to the Locations screen where you’ll see the Local Documents folder along with any synced services you’ve added to OmniPlan.
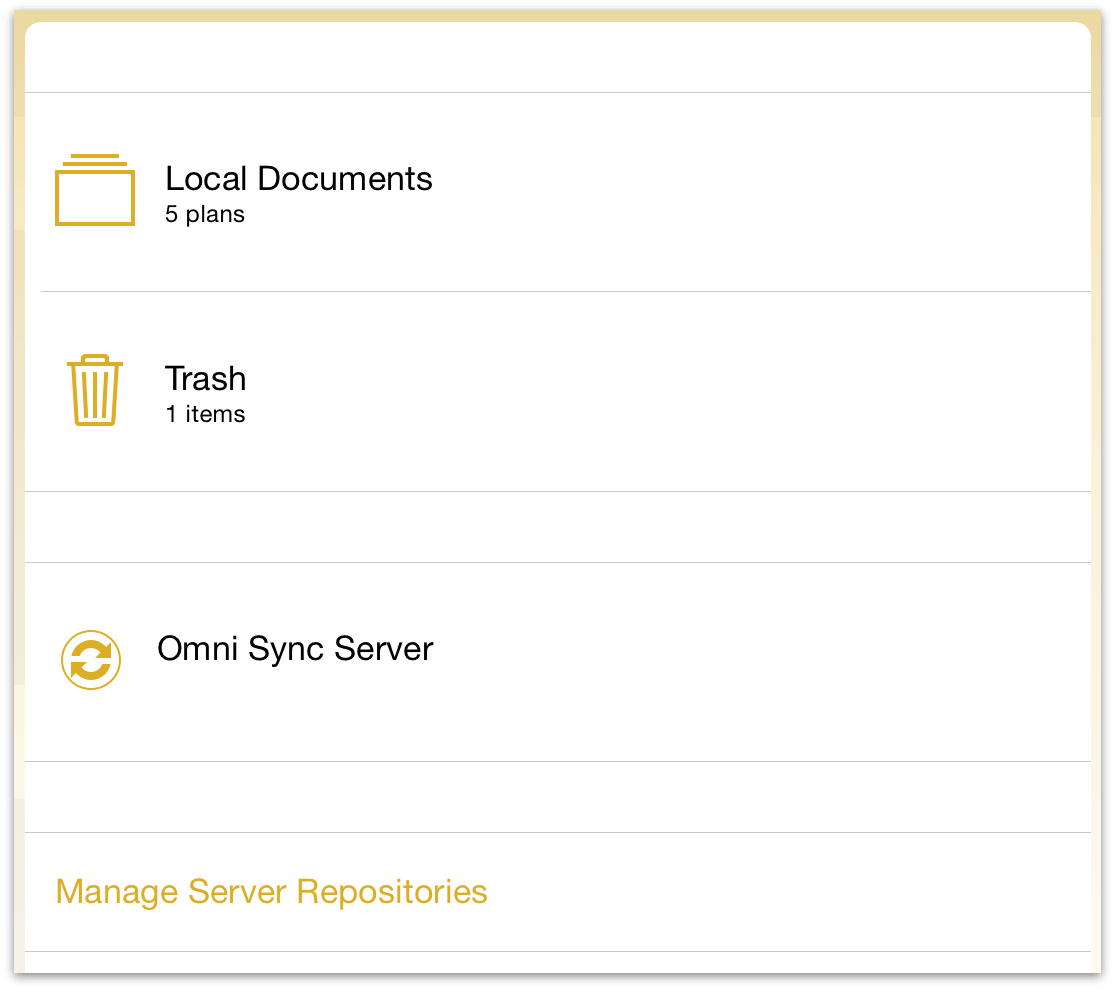
If you tap on a synced folder, such as the Omni Sync Server folder, you’ll see a list of files which you can import from the server.
Note
Syncing to a server repository has a special meaning within OmniPlan; it’s not just a way to access files from multiple devices. For more on how to collaborate with OmniPlan, see the Collaboration and Sharing section of the tutorial.