Preferences
Use OmniPlan > Preferences (Command-,) to customize aspects of keyboard navigation, set how date formats are displayed, and manage templates for new document creation and reporting.
General
Use the General preferences to customize the way the Tab and Return keys work to navigate through your OmniPlan documents.
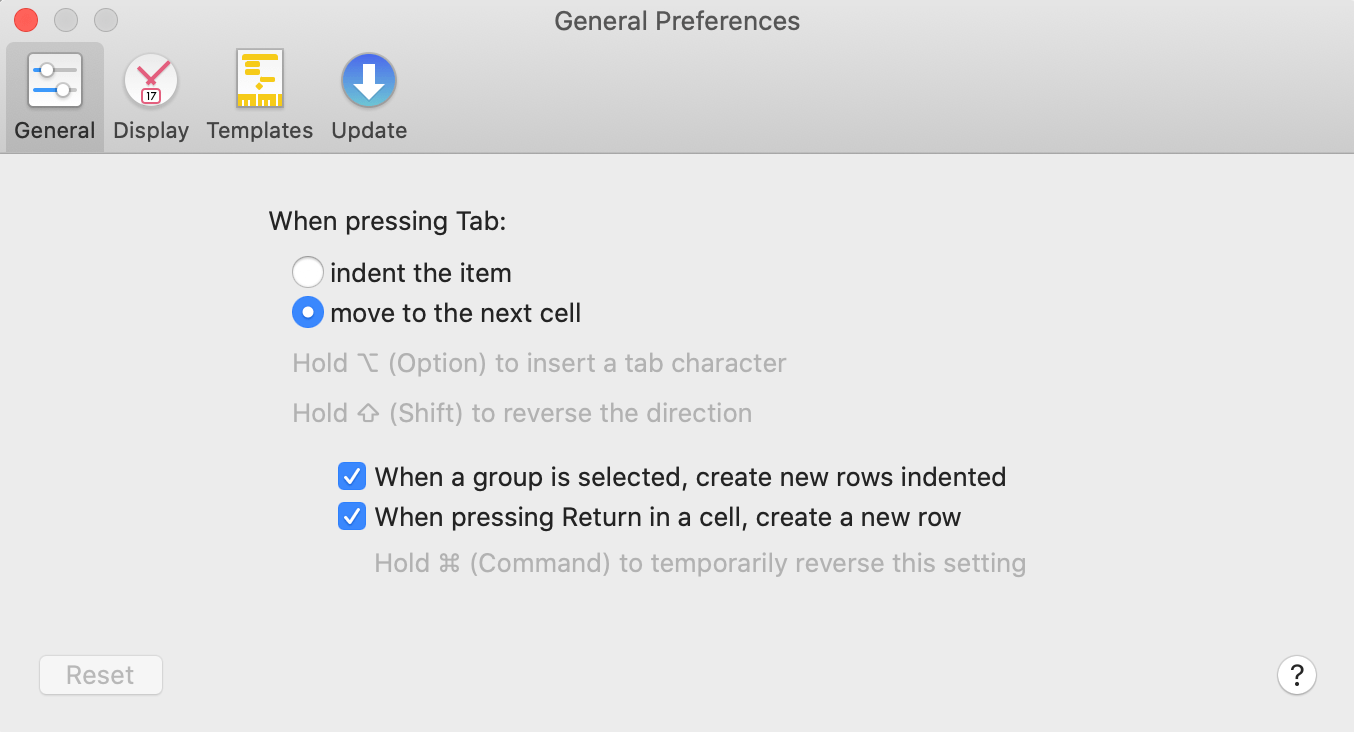
When pressing Tab—You can set the Tab key to do one of two things:
- Indent the currently selected item in the outline, thus making it a child of the item above it. Pressing Shift-Tab outdents the selected item.
- Move to the next cell in the outline. Pressing Shift-Tab moves to the previous cell.
Either way, the Indent and Outdent commands in the Structure menu (and their keyboard shortcuts, Command-[ or Command-] by default) will always work.
You can also always press Option-Tab to type a tab character at the insertion point.
When a group is selected, create new rows indented—When a group task or resource is selected and this preference is turned on, creating a new item automatically adds it as a child of the group. If this preference is turned off, the new item is added beneath the group as a peer of it.
When pressing Return in a cell, create a new row— If this preference is turned on, while editing the contents of a cell, a new item is created immediately upon pressing Return. Otherwise, editing ends and the current item becomes selected.
Whether this setting is on or off, pressing Return while not editing a cell always creates a new item.
You can hold Command while pressing Return to temporarily change the setting; for example you could press Command-Return to finish editing and create a new item, even if the setting was turned off.
Display
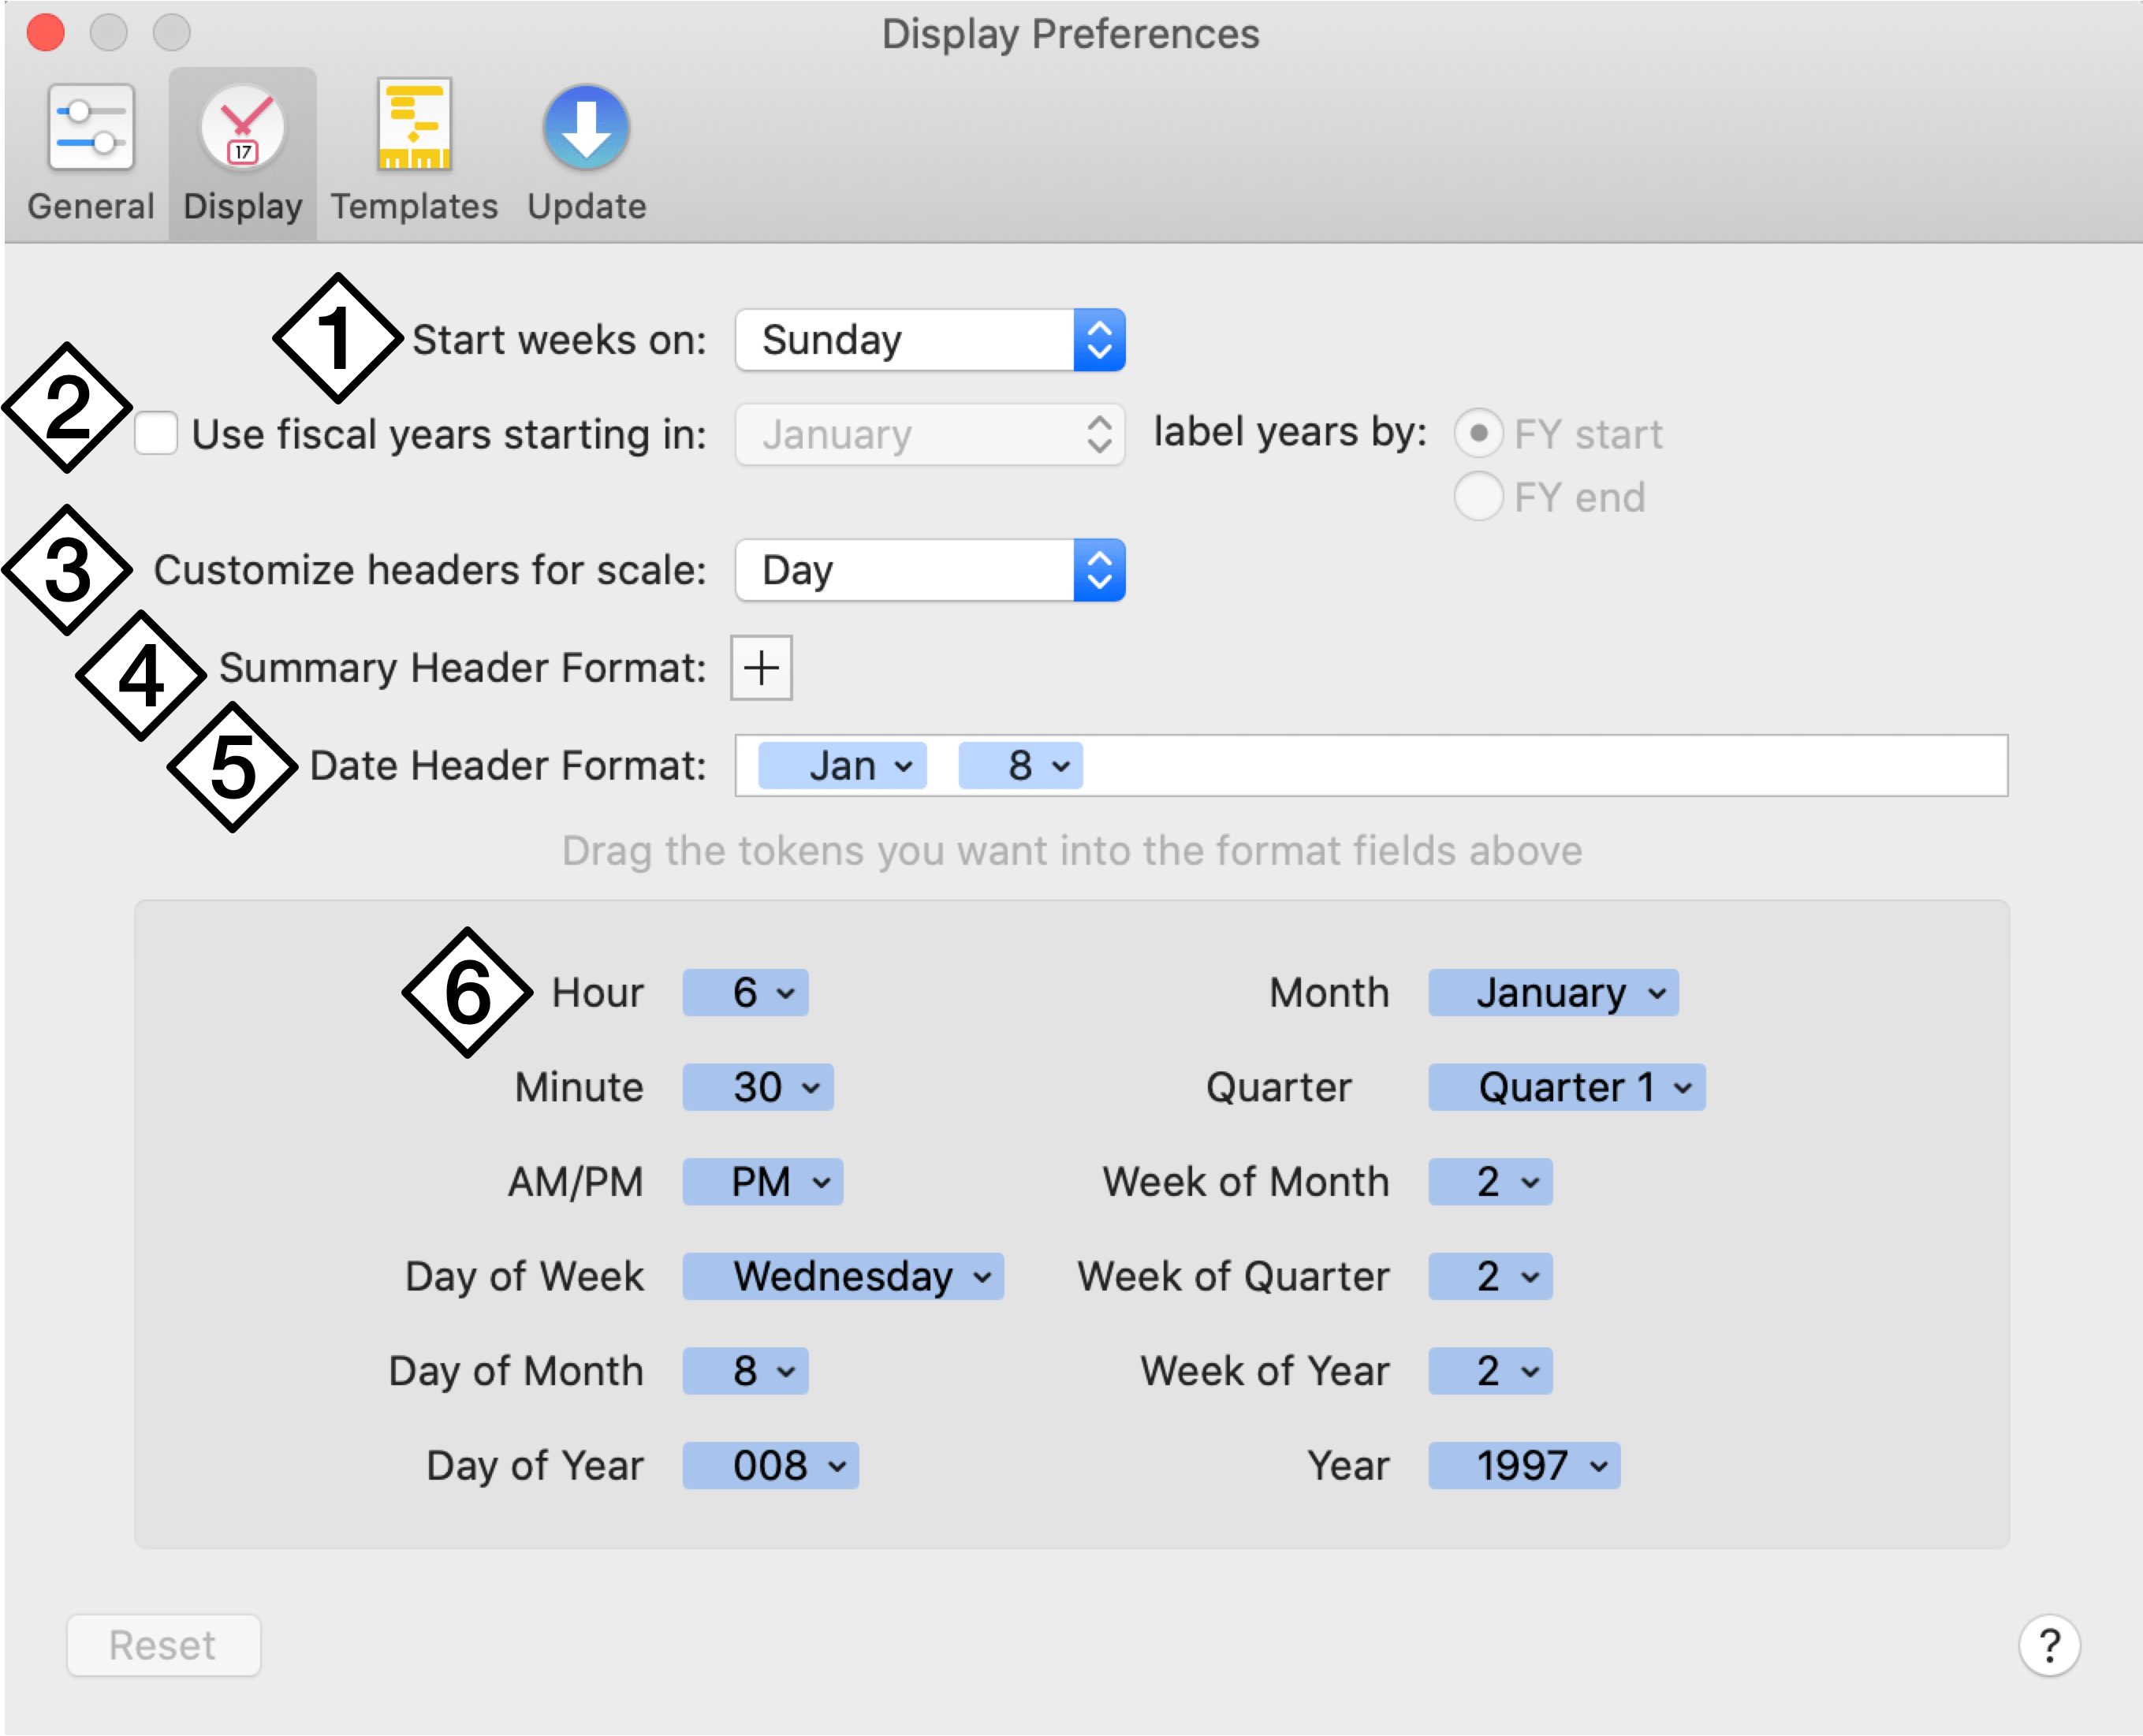
Use the Display preferences to control how times and dates are displayed throughout OmniPlan.
-
Choose which day OmniPlan should consider as the first day of the week.
-
Turn on fiscal years and specify when they start or end. Using fiscal years changes the way quarters (Quarter 1, Quarter 2, etc.) of your year are calculated and displayed in the date headers of the Gantt chart.
-
This pop-up menu determines which chart header scale you’ll be editing below. The different time scales appear in the headers of the Gantt chart, resource timeline, and work week chart, depending on the zoom scale.
-
Click the plus button to add a summary header to the current scale. This makes an extra layer of date headers above the normal one in the Gantt chart and the resource timeline. This extra layer gives you more room to show, for instance, the week above the day, or the month above the week. The summary header format can be customized in the same way as the regular date header format, by dragging tokens from the box below and by typing directly into the field. To get rid of the summary header, click the minus button to the right of the field.
-
Assemble a date format by dragging tokens from the box below, and type spaces or characters wherever you want them to appear. Some tokens offer information about the date at the beginning or end of a week or quarter. This is so that you can, for example, create a week format which indicates the first and last days of the week. Here we have a format that displays the short name of the month, followed by the date.
-
Tokens can be dragged to the format field above to construct a date format. Click the triangle on the right side of a token to change the display of the token. For example, you can choose to display the month as a full word (January), an abbreviation (Jan), a two-digit number (01), or a one-digit number (1).
Available date tokens include:
- Hour
- Minute
- AM/PM
- Day of Week
- Day of Month
- Day of Year
- Month
- Quarter
- Week of Month
- Week of Quarter
- Week of Year
- Year
Templates
Use the Templates preferences to manage the templates that you can use as the source for a new document. Three come built-in with OmniPlan, and you can create your own from a currently open document by choosing File > Save as Template.
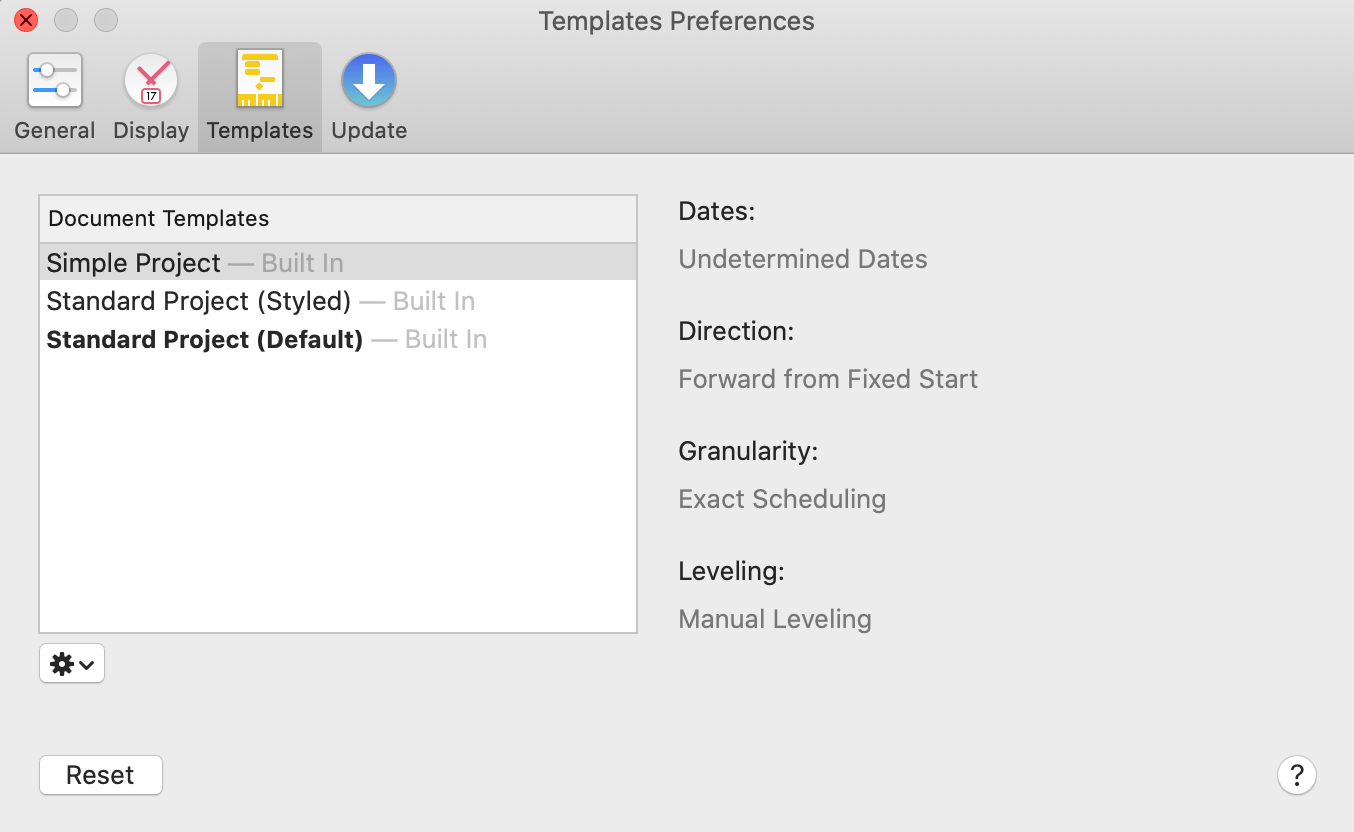
The window on the left lists the templates currently available, including those built in (indicated by grey Built In text next to their entries) and any custom templates you have created. The space on the right displays important attributes of the currently selected template.
From the gear menu below the list, you can:
-
Edit: Open the selected template file to modify it. You can also double-click the template’s name in the list to edit it. When you save your changes, the template is updated.
-
Edit a Copy: Modify a copy of the selected template file. Select this command, type a title for the new template, then change the document and save it as usual.
-
Make Default: Use the selected template when making new documents by importing files (where the New Project Assistant isn’t presented). The template’s entry in the list changes to bold type.
-
Rename: Change the title of the selected template.
-
Move to Trash: Get rid of the selected template by putting it in the trash. From there, you can still recover it if you need it. Otherwise, it will be deleted the next time you empty the trash.
Built-in templates cannot be edited or deleted. To modify a built-in template, select it in the list and choose Edit a Copy from the gear menu.
Reports (Pro)
With OmniPlan Pro, use the Reports preferences to manage existing reporting templates and create new ones.
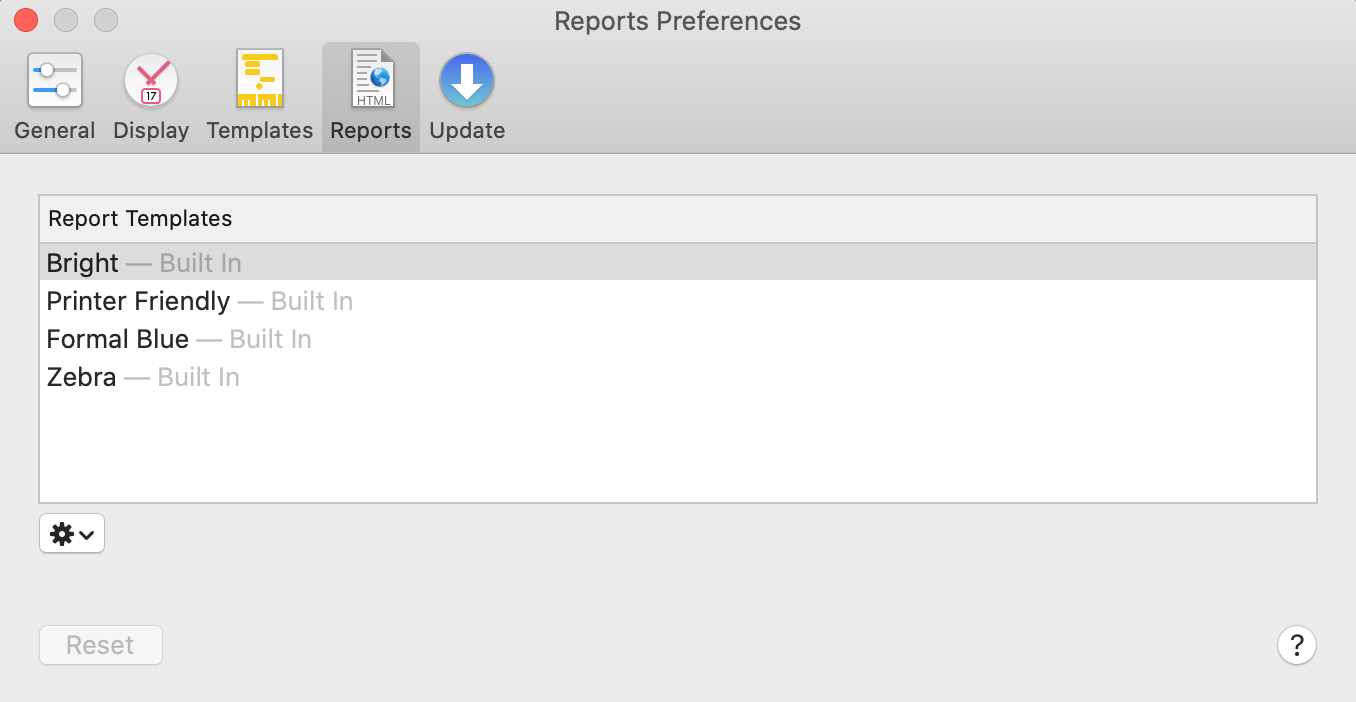
Several templates are included with the app, but if you would prefer to customize the presentation of your project when generating reports, you can create a new copy of a template using the gear menu on this pane, save the copy in a folder you designate, and edit the HTML and CSS to suit your needs.
Template integration with OmniPlan’s custom data types is done via tokens. A guide to setting up your own custom reporting templates is available in the Customizing Report Templates (Pro) section of the Reporting and Printing chapter, along with a reference list of the tokens used to fetch specific data from OmniPlan.
Update
Use the Update preferences to set how OmniPlan checks for new and updated versions of itself.
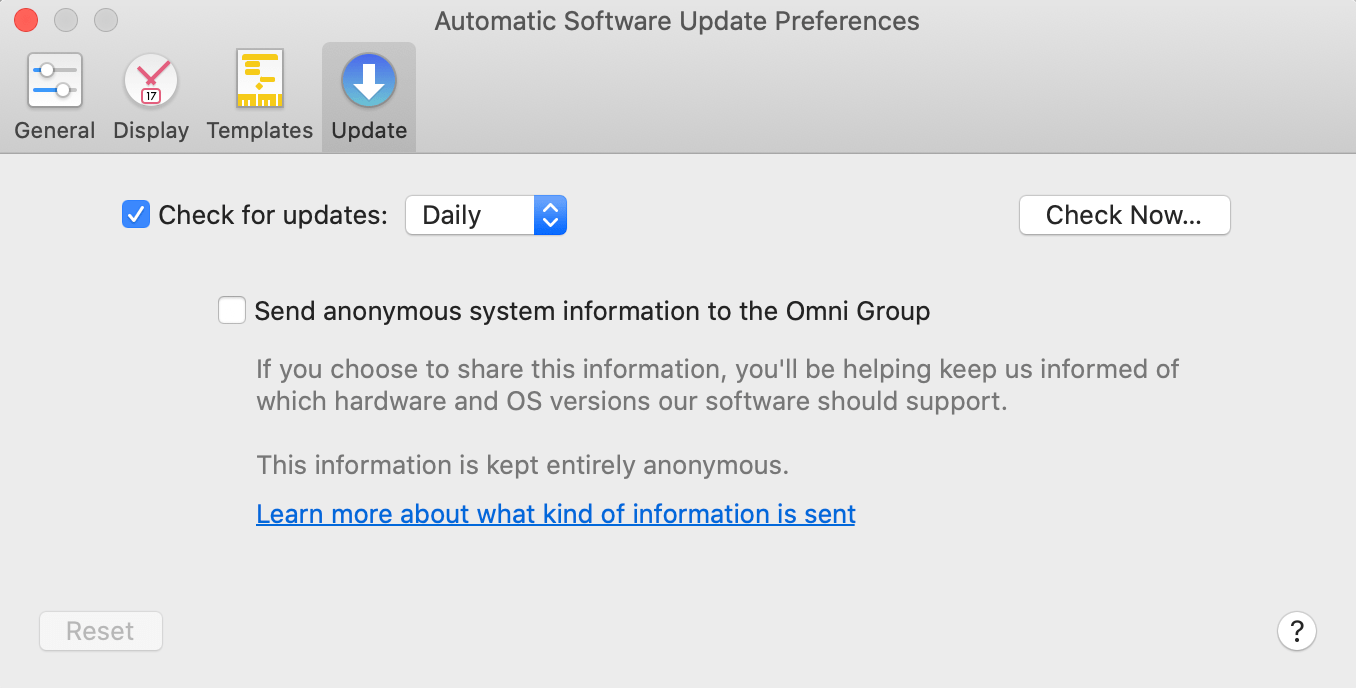
If the Check for Updates checkbox is selected, you will be notified when there is a new version of OmniPlan ready for you to use. Click Check Now to look for the newest version right away.
You can select the Send anonymous system information to the Omni Group checkbox to volunteer some information about your computer’s configuration when you check for updates. For details about what kind of information we collect and how we use it, click the Learn More link on the preference pane.
The Update Preferences pane is not present if you purchased OmniPlan 4 from the Mac App Store. When there is a new version of OmniPlan 4 available, the Mac App Store will alert you to download and install itc.