Configuring your Project
When initially setting up your project there are many factors that might come into play. This chapter delves into the details of OmniPlan’s custom configuration for projects.
Setting a Start or End Date
If you know when the project is going to start or end, you can enter a date in the Project Information inspector. All of the working hours and work schedule exceptions as set up in the calendar view can then be applied properly, and real dates appear in the interface. When your project has a start date, the tasks are scheduled from that point on as soon as possible. When your project has an end date, they are scheduled from that date backwards, as late as possible. You can change a task’s dates and direction in the Task Schedule Inspector.

Note
Setting a project's start or end date defines the project's direction: whether the schedule is built forward from a start date, or backward from an end date. In the former case all tasks in the project are scheduled for completion as soon as possible (ASAP), while in the latter case all tasks are scheduled as late as possible (ALAP). Changing the direction of individual tasks is covered in the Task Schedule Inspector section.
While tasks in most projects are scheduled for completion as soon as possible, it can be helpful to plan a project with a defined "ship date" from that date backward to help determine when work on it should begin.
If you don’t know when the project will start or end, you can mark the start date undetermined in the Project Information inspector. For the purposes of applying the work week, the project is assumed to start on the first day of the week. The normal work week for the project and for the individual resources is respected, but work schedule exceptions such as holidays are ignored.

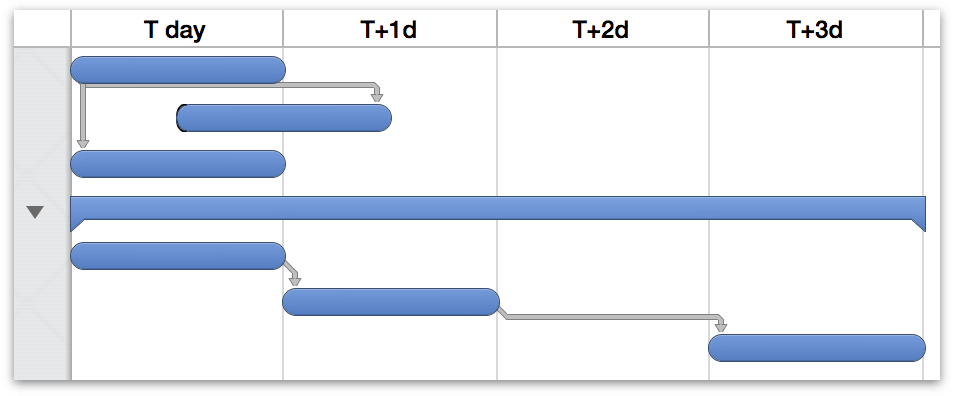
In a project with an undetermined date, all dates are represented in the format “T day”, for the first day of the project, or “T + x”, where x is some time duration. For example, “T+2w 1d” means 2 weeks and 1 day after the start of the project.
When you change the start or end date of an existing project from an undetermined date to a real date, the project may shift as the new position of weekends, off-days, and other exceptions are taken into account.
Customizing Display of Time and Currency
You can use the Project Formats inspector to define how your project displays units of time and currency.
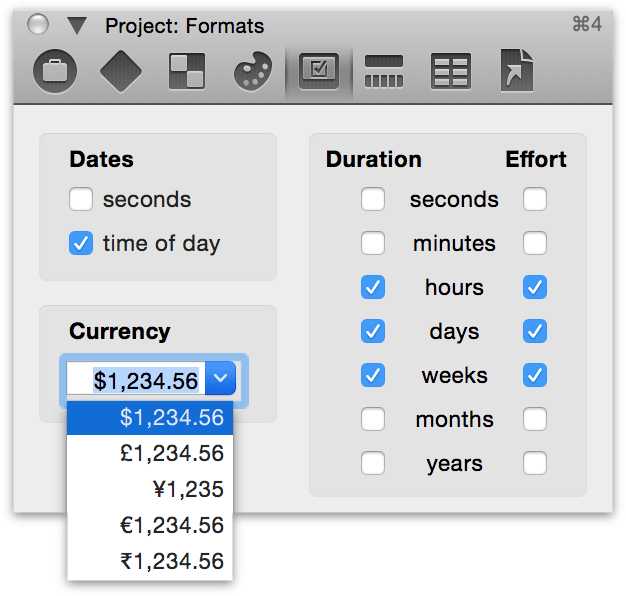
Use the Dates section to choose whether to include seconds, the time of day, or both in your displayed dates.
Choose a standard Currency format from the list, or just type the number 1234.56 in the format of your choice.
Time Units selected here are used to display durations and effort amounts. You can plan in hours, days, or whatever works best for you. Note that, in duration fields, if you enter a number without any units, OmniPlan assumes that you mean the smallest unit that is enabled here. Units of time (Duration and effort) are designated throughout OmniPlan by the abbreviations below:
- s — second
- m — minute
- h — hour
- d — day
- w — week
- mo — month
- y — year
If you want to go further than just customizing the display of durations, you can force OmniPlan to schedule in whole hours or whole days with the scheduling granularity setting in the Project Information inspector. Note that the date headers in the Gantt chart and resource timelines can also be customized with the Display preferences.
Setting Definitions of Work Time Units
When you’re not using a standard 40 hour work week or eight hour work day, you can customize your project’s standard units of work-per-time using the Project Unit Conversions inspector.
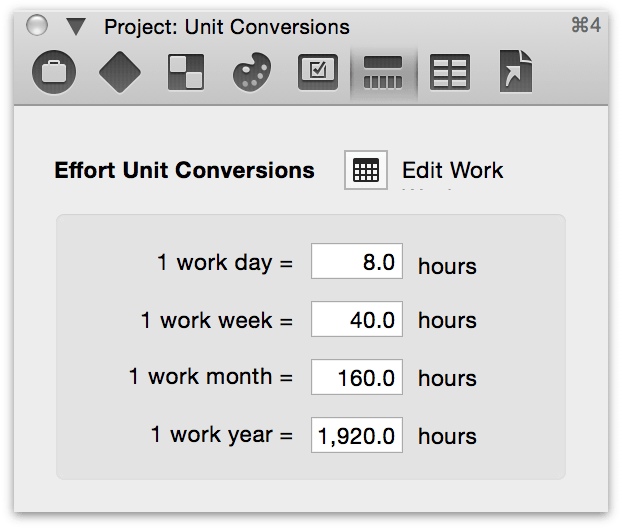
Your work day may be any number of hours. These conversion factors determine how to add up hours into the larger units.
The effort conversion factors don’t actually change the working hours for the project, just the way durations are entered and displayed. To change the working hours, visit the work week section of the Calendar view.
Duration Approximation
Choosing how task durations are expressed in terms of time units and their granularity affects not only the visual appearance of tasks in the Gantt chart, but also how they’re scheduled. You may find it more useful to provide greater or lesser degrees of specificity in assigning times to tasks in your projects.
Rounded Time Values
If a value contains a unit of time that is too small to be displayed, you may see a rounded value. For example, if you have turned off the display of minutes in the Project Formats inspector, and you have a task that starts at 9:00 and ends at 9:55, the value you see is “< 1h”. If you want to know the actual value, you can turn on the smaller units in the Project Formatting inspector, or just check the start and end times. If you want to edit the value to conform to your units, you can just delete the greater-than or less-than sign and the value updates.
Scheduling Granularity
Taking the duration rounding a step further, you can use the Granularity control on the Project Information inspector to force OmniPlan to round every duration up to the nearest whole hour or day. This setting is not just for display purposes, but actually changes how exact OmniPlan should be about scheduling tasks.
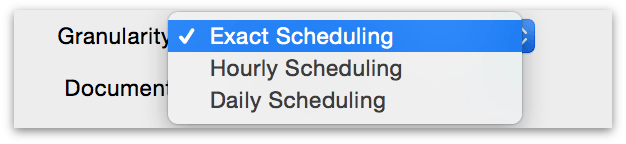
By default, OmniPlan uses Exact Scheduling: if you have a task with an effort of 58 minutes, starting at 8:00, then it is drawn exactly 58 minutes long on the Gantt chart, dependent tasks start at 8:58, leveling makes the resource begin working on the next task at 8:58, and so on. The start and end times of tasks are exact down to the second.
With Hourly Scheduling, start and end times happen at the next whole hour mark. A task starting at 8:00 with an effort of 58 minutes (or even 1 minute), ends at 9:00; successor and resource leveled tasks begin at 9:00, and so on.
With Daily Scheduling, start and end times are always pinned to the beginning or end of work days. The 58-minute task ends at the end of the day, successor and resource leveled tasks begin on the next day, and so on.
Regardless of the granularity setting, OmniPlan doesn’t forget any of the values you enter. You can still specify task effort and resource units with any amount of precision, and OmniPlan stores those values in case you switch back to exact scheduling.
Using Notes
The task outline and the resource outline both have a Notes column, which you can use to store extra text about any item.
To edit the selected item’s note, press ⌘-’ or click the Note icon note in the Notes column.
Once an item has a note, you can move in and out of the note field by pressing Command-’ (which hides the note after you stop editing it).
The font style of notes can be set up in the Project Styles inspector.
Using the Custom Data Inspectors
Each of the three main inspector windows (Project, Task, and Resource) has a Custom Data inspector. You can use this to keep your own information about the project or about individual tasks and resources.
Custom data is stored as key/value pairs. The Key is like a label for what type of information you are storing, and the Value is the information itself.
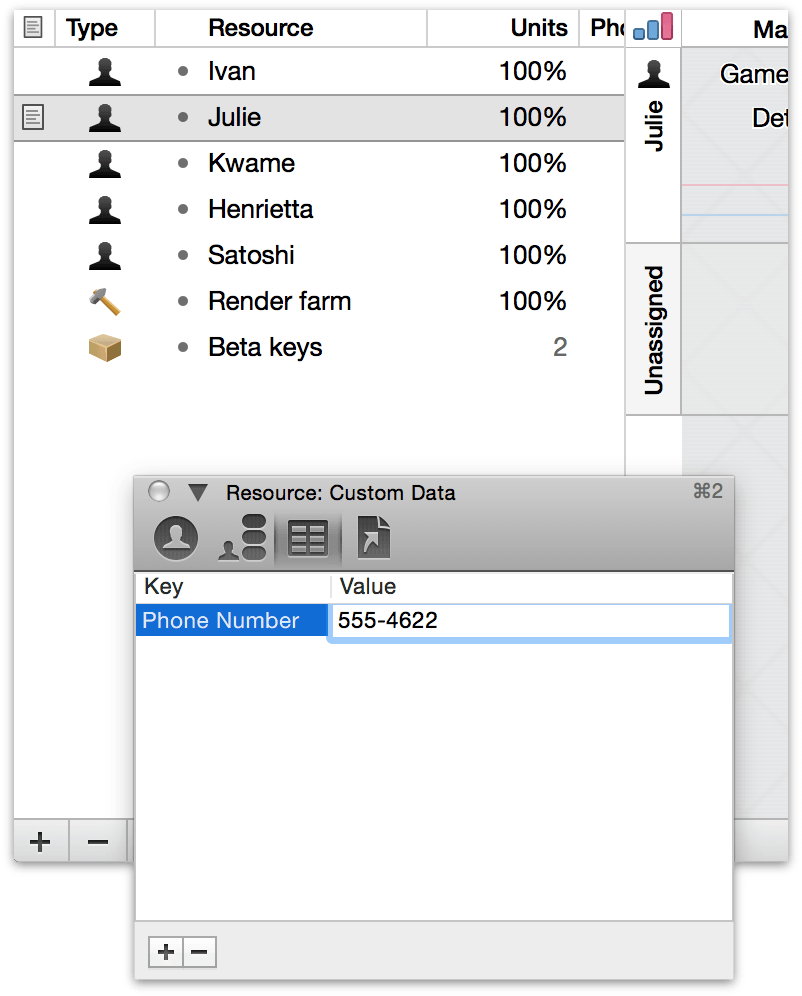
For example, here’s how you could keep track of staff members’ phone numbers:
Select a staff resource in the resource outline, and open the Resource Custom Data inspector.
Then click the plus button at the bottom of the inspector to create a new key/value pair.
Name the key “Phone Number”.
Enter a number as the value for the selected resource.
Now that you’ve created the key for this resource, every other resource has the same key, ready for you to enter a value.

You can show custom data as a column in the task and resource outlines, or as a label in the Gantt chart and resource timeline, by choosing View Options from the View menu.
Linking Files to a Project
Each of the three main inspector windows (Project, Task, and Resource) has an Attachments inspector. You can use this to keep references to files that are relevant to your project or to particular items in it.
To link a file to an item in the task outline or resource outline:
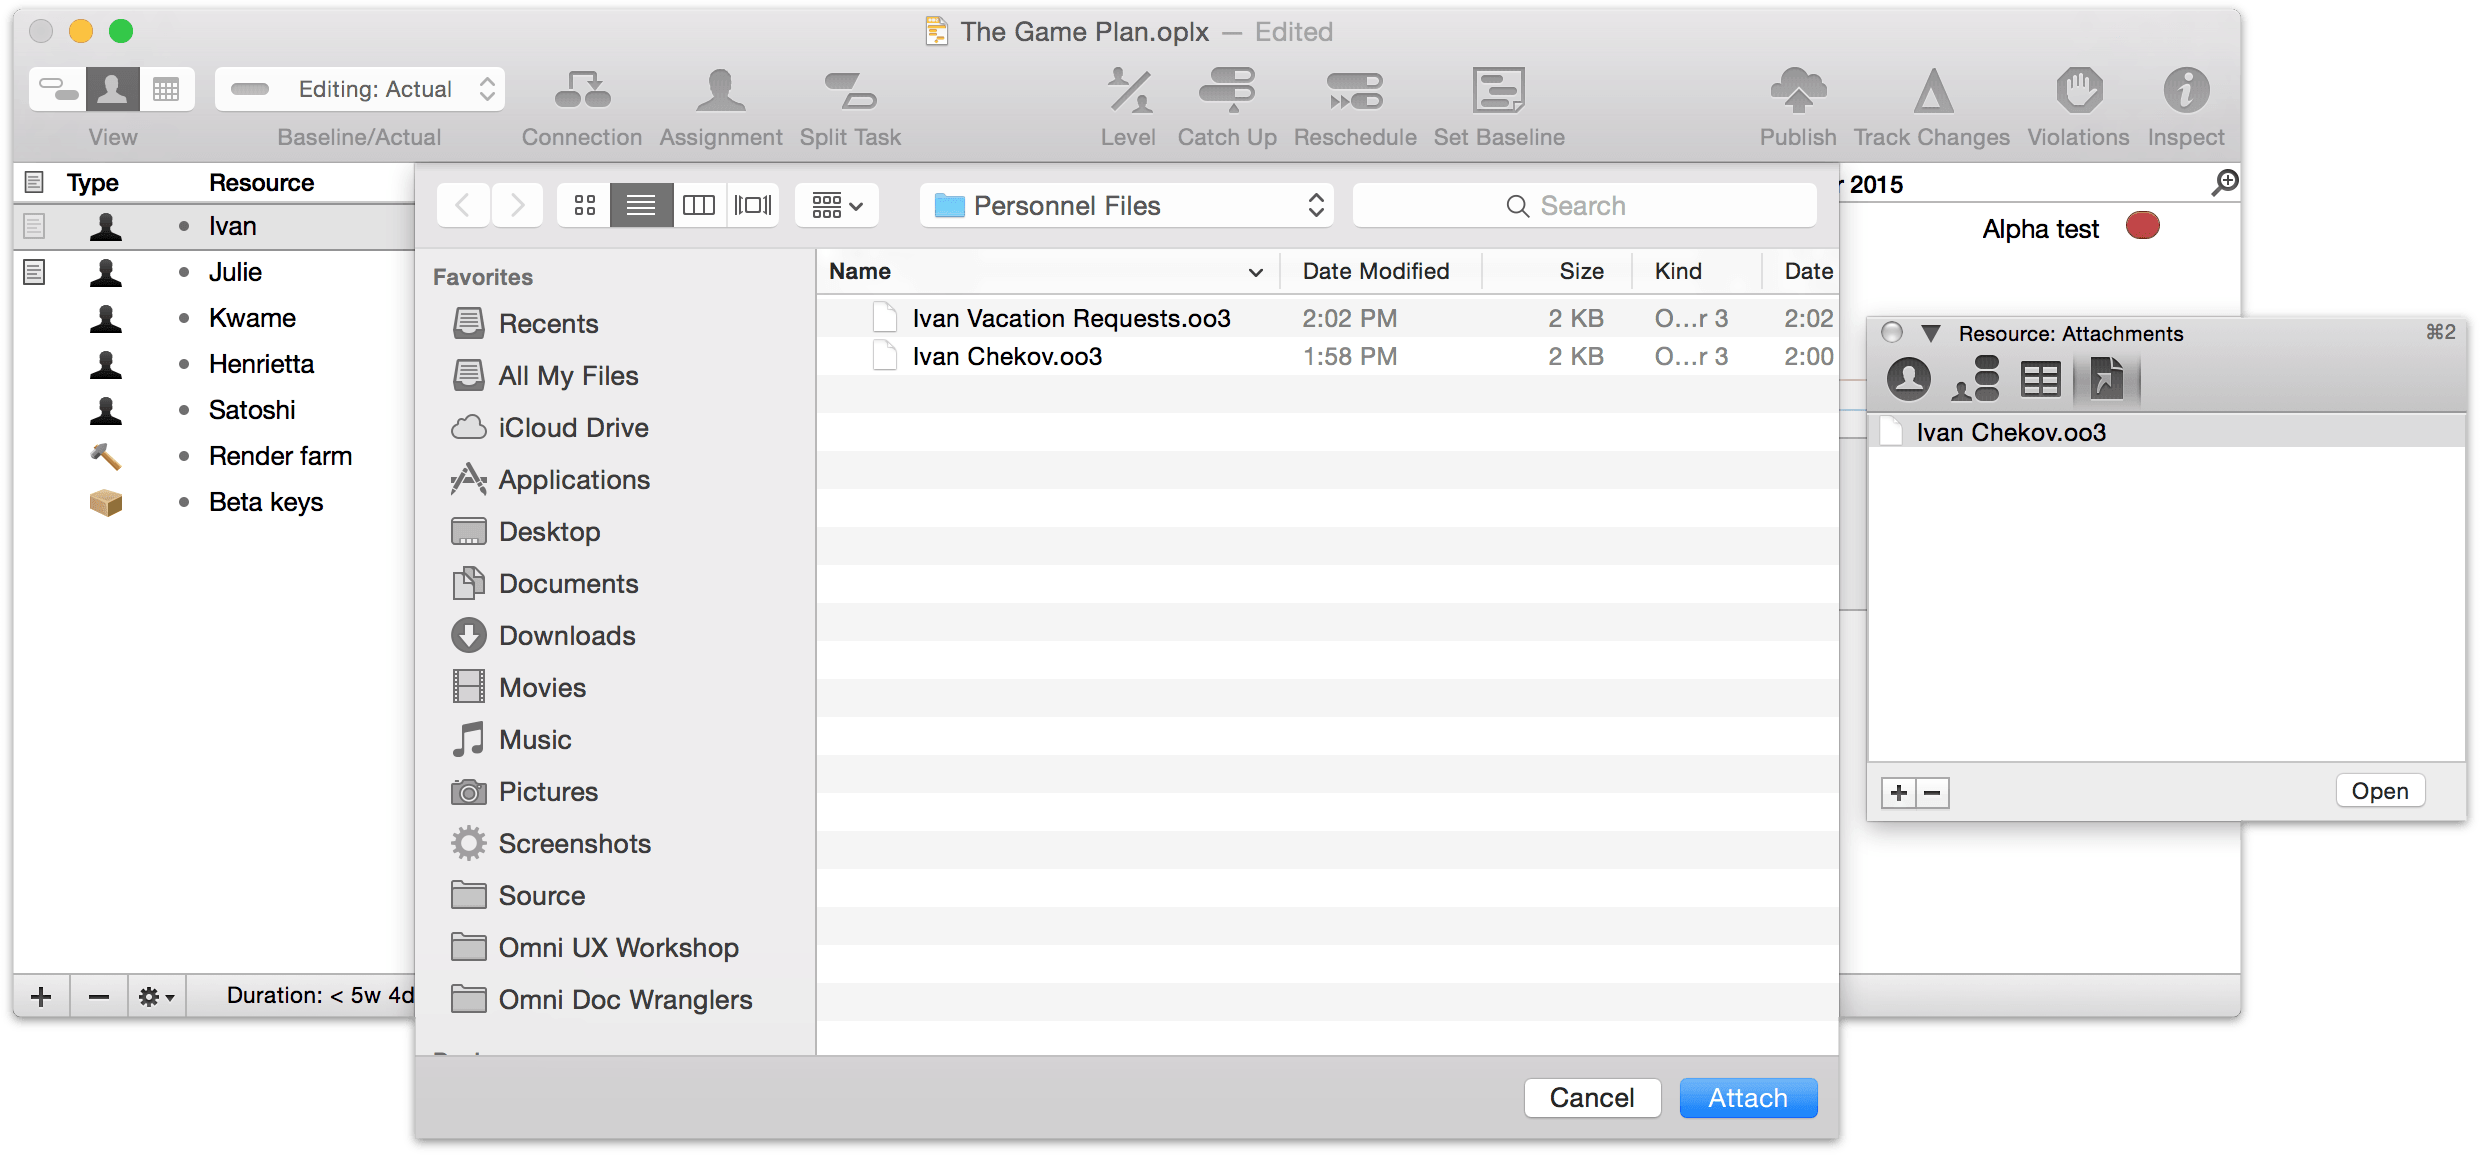
Click the item to select it.
In the Task Attachments inspector or the Resource Attachments inspector, click the plus button below the attachment list, then choose a file in the dialog that appears. If you are showing the Attachments column in the outline, you could also click the paper clip icon and choose Attach File from the pop-up menu, then choose a file. Or, easiest of all, just drag a file into the attachments list.
The file appears in the inspector’s attachments list.
To attach a file to the project itself:
In the Project Attachments inspector, click the plus button below the attachment list, then choose a file in the dialog that appears. Or, just drag a file into the attachments list.
The file appears in the inspector’s attachments list.
You can open an attached file by selecting it in the appropriate Attachments inspector and then clicking the Open button, or by choosing it from the pop-up menu in an item’s Attachment cell in the outline.
Warning
Every file attachment is a reference to the file elsewhere on your disk. If you move the files around, the references try to keep track of the new location. But if you are going to send a project to someone else, or otherwise move your project to another computer, the other files won’t automatically come along for the ride. In that case you should gather all of the attached files into one folder along with the OmniPlan file itself, and send the whole folder.
You can show attachments as a column in the task and resource outlines by choosing View Options from the View menu.
Using the Project Styles Inspector
The Project Styles inspector provides the ability to customize the appearance of your project as a whole, as well as individual elements inside it.
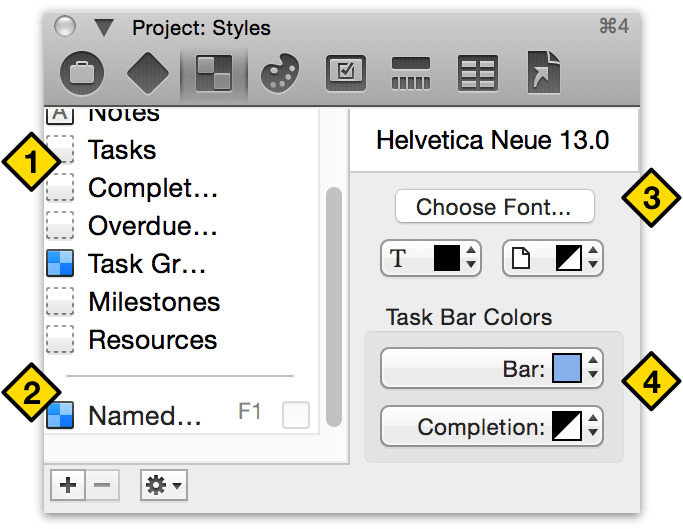
- Structural Styles — Styles that apply to all items of a certain type in the OmniPlan interface.
- Named Styles — Custom styles you can apply wherever you like.
- Font Controls — Choose a font, a color for the text, and a color for the background.
- Task Bar Color Controls — Set up colors for incomplete and complete tasks. Of course, these are only available for tasks, groups, and milestones.
Structural Styles
You can change the style of a lot of items at once, based on what they are. For example, you could change the font size for the whole project, make all resource names italic, or make all completed tasks gray.
To set up a structural style, select the one you want to change from the list in the Project Styles Inspector.
Use the style controls on the right side of the inspector to change the default style for everything of the selected type.
The following structural styles are associated with various elements of OmniPlan's interface:
- Whole Document
- Everything throughout the entire document; it can be overriden by the more specific styles listed below it.
- Column Titles
- The headers above the outline views and charts, and the sideways resource names in the resource timeline.
- Notes
- Notes attached to tasks and resources.
- Tasks
- All tasks, but not groups or milestones. Note that the Completed Tasks and Overdue Tasks styles can override this.
- Completed Tasks
- Any task whose completion is at 100%. You could, for example, make tasks’ Gantt bars turn gray when they are finished.
- Overdue Tasks
- Tasks which were scheduled to complete in the past, but are not complete. You might like to turn these bright red so that you can see where your project is getting behind.
- Task Groups
- All groups of tasks. By default, their titles are in bold text to distinguish them from single tasks.
- Milestones
- All milestones. By default they are styled the same as regular tasks.
- Resources
- All resources, how they appear in the resource outline and as assignments on the Gantt chart.
Structural styles are the most general type of style, so named styles or ad-hoc styles can override them.
Named Styles
You can make up your own styles and reuse them throughout the document.
Setting Up Named Styles
Click the plus button at the bottom of the styles list to create a new named style.
Then, while you have the named style selected, use the controls on the right side of the inspector to change its attributes.
Once the style is set up how you want it, apply it to an item in the main window by either dragging it and dropping it on the item, or by selecting the item and then pressing the appropriate function key.
You can keep applying the named style to items, and any further changes you make to the named style will get applied to every item that has it applied.
Named styles take precedence over structural styles; if a structural style and a named style are both applied to the same item, the named style wins.
Ad-Hoc Styling
If you just want to apply a style to something without any special logic or updating, you can use an ad-hoc style.
Applying Ad-Hoc Styles
In the main window, select the items, or the part of a note, you want to style.
Use the right side of the Project Styles inspector to style the selected items.
Ad-hoc styles have the highest precedence. If an item has an ad-hoc style applied to it, that style wins over any named styles or structural styles.
The Style Attributes Inspector
The Style Attributes inspector lists all of the styles applied to the selection, in order of precedence. You can drag styles from here onto other items, or click the little X to remove a style.
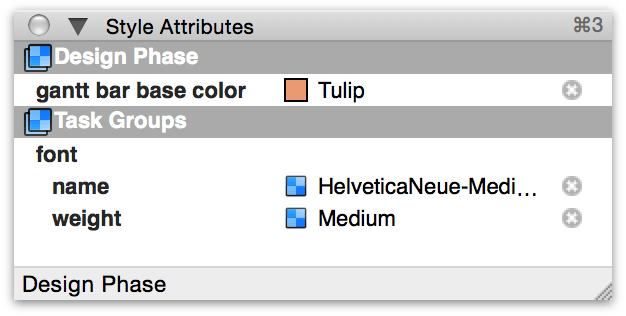
Styles specific to this task (ad-hoc styles) have the highest precedence.
Structural styles (such as the style for all tasks) come next.
The Whole Document style is the most general.
You can drag these style chits onto other items or onto entries in the Project Styles inspector to apply them there.
The Project Colors Inspector
The Project Colors inspector provides tools to customize the colors seen throughout your project, including:
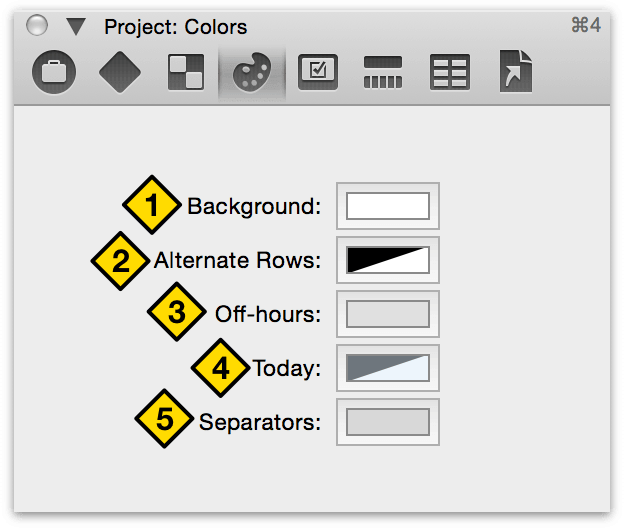
The background color of the whole document. This also affects the “Whole Document” background color in the Project Styles inspector.
A color for every other item; set this to a nice low-opacity color to keep your rows distinctive.
The color for non-working hours. Used only if you’ve set up the View Options to show off hours.
Today’s date in the chart. Used only if you have a specific start date set in the Project Information inspector.
The base color for lines between time spans (that fade in and out as you zoom).
Using Templates
A template is a file set up just right to be a starting point for a new project. For example, there might be certain resources you use for every project, a common task structure, certain named styles you like to use, and a standard set of working hours for your company. You can configure all of these things once, then create new documents from that template.
Creating a Template
Create a new document normally by choosing New from the File menu.
Set up the document however you like. Everything about a document, including its contents, the state of the Project inspector, the view options, and so on, can be saved to a template.
Once the document is ready, choose Save As Template from the File menu.
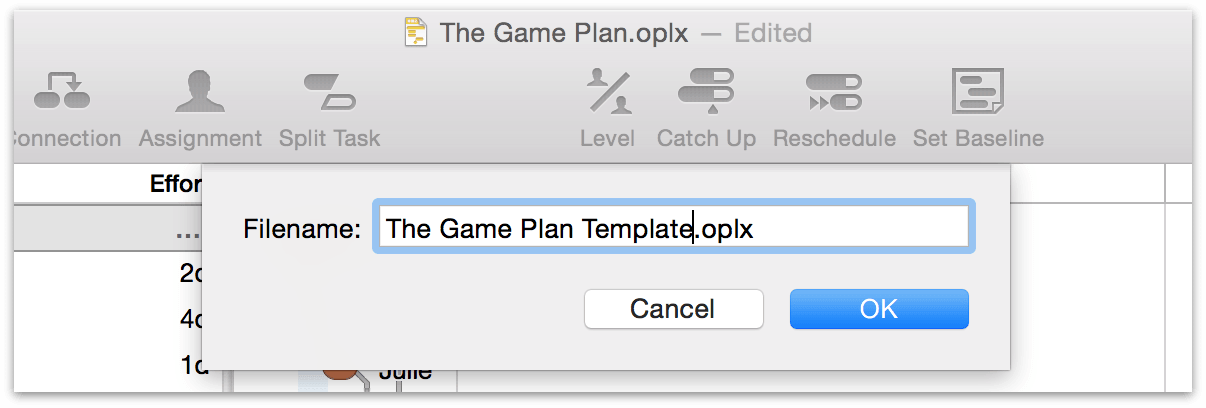
Enter a name for the template and confirm it.
When you create a document using the File ▸ New command, your new document follows the default template. To use a different template, use the File ▸ New From Template submenu instead.
Managing Templates
Choose Preferences from the OmniPlan menu, then click the Templates icon at the top of the preferences window.
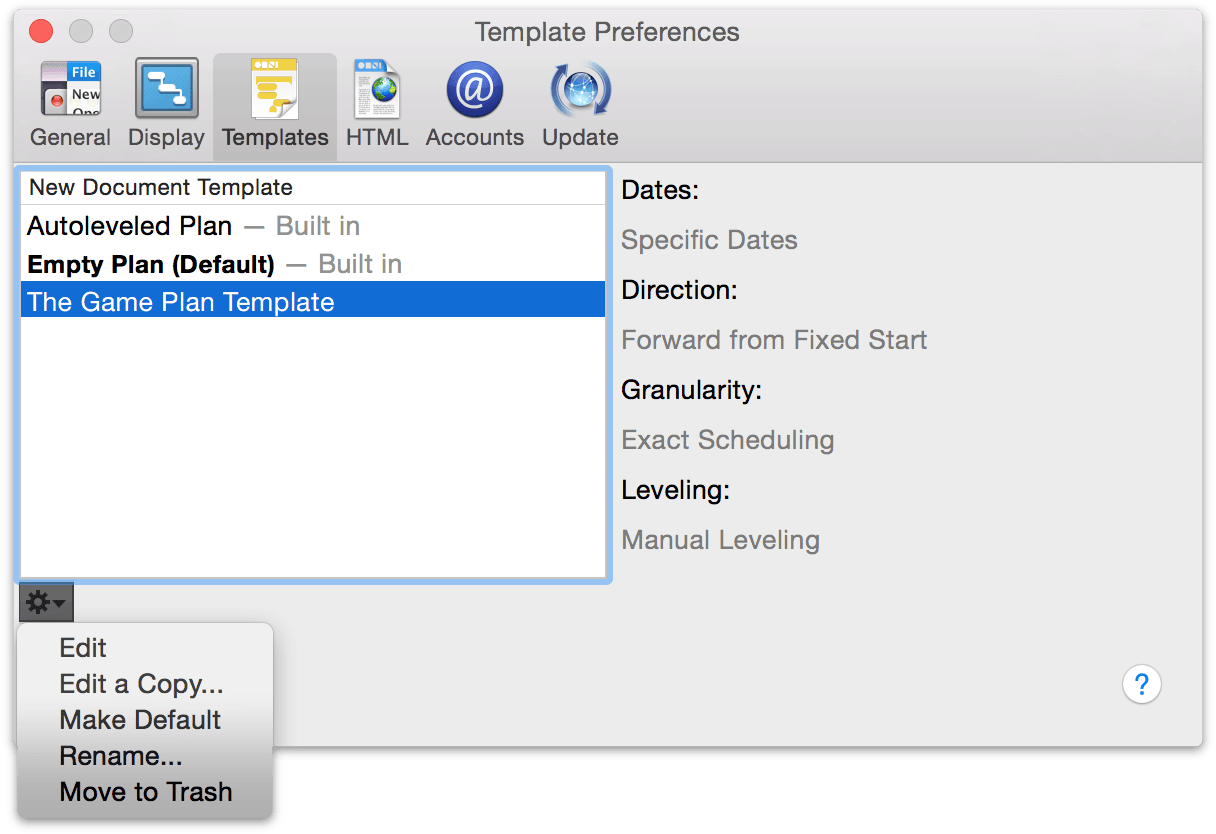
A list of available templates appears. The default template is listed in bold type; this is the template that is used when you choose New from the File menu. Unless you choose a different one, the Empty Plan document included inside the OmniPlan application is the default template.
From the action (gear) menu below the list, you can:
Edit: Change the selected template. You can also just double-click the template’s name in the list. When you save your changes, the template is updated.
Edit a Copy: Make a different version of the selected template. Select this command, type a title for the new template, then change the document and save it as usual.
Make Default: Use the selected template from now on when making new documents with the File ▸ New command. The template’s entry in the list changes to bold type.
Rename: Change the title of the selected template.
Move to Trash: Get rid of the selected template by putting it in the trash. From there, you can still recover it if you need it. Otherwise, it will be deleted the next time you empty the trash.
Note
If you'd like to reuse a specifically configured task multiple times within the same project, you can "template" tasks on the fly by selecting the task you'd like to duplicate and choosing the Project ▸ Set As Default For New Tasks menu item. Subsequently created new tasks will match the settings of the one you chose.