Maintaining your Project
The moment you’re ready to begin your project in earnest is the moment the real world starts to intrude on the ideal version of your plan. When variables begin to shift, adjusting aspects of the project to suit new circumstances is key to keeping things on track.
Resolving Violations
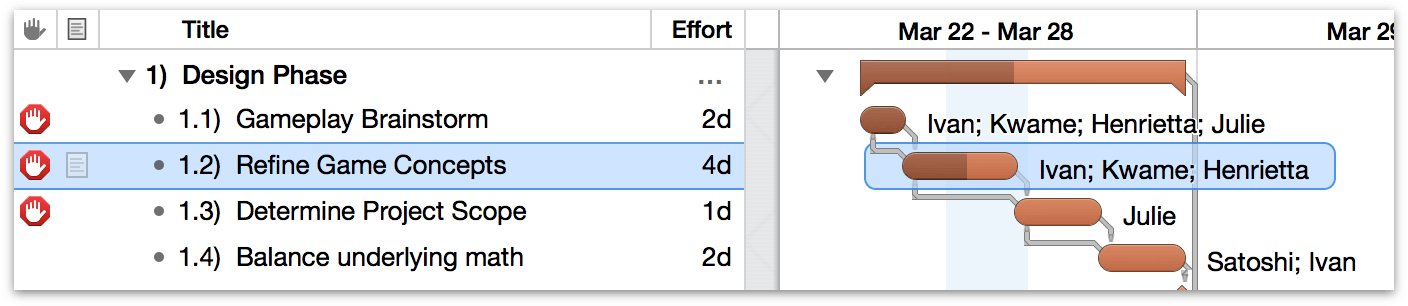
A violation is some kind of problem with the project, such as an impossible dependency loop or a task which is outside its start or end constraints. When a task has such a problem, the violation symbol appears in the Violations column of the task outline.
You can click the little violation symbol, the Violations button in the toolbar, or use the keyboard shortcut ⇧⌘V to open the Violations window.
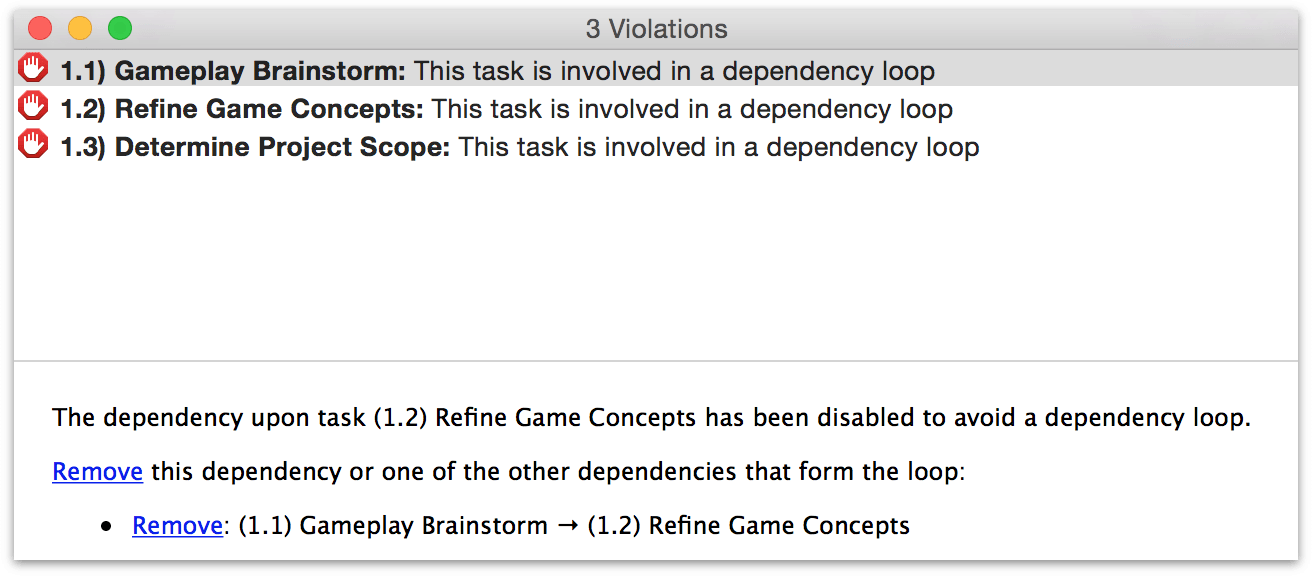
The Violations Window
This window lists all of the violations in the project, along with explanations of why they have occurred. Most violation explanations include links you can click to immediately resolve the problem (or hints for how to reconfigure the project to resolve the violation manually).
How Scheduling and Leveling Work
The Task Schedule inspector’s Scheduling method indicates how OmniPlan should determine when a task is to occur in the project.
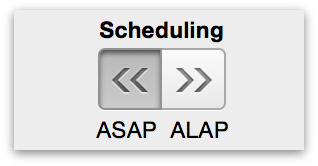
By default, new tasks are scheduled as early as constraints allow. This means the task is placed at the very earliest time possible, taking into consideration start and end constraints, and dependencies on other tasks. Resource availability is not taken into consideration, so resources may end up overutilized. Tasks can also be scheduled as late as possible or locked (with the lock icons above the Start and End dates in the Task Schedule inspector) so they are not affected.
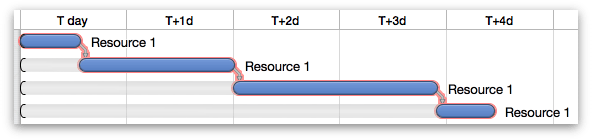
When you level the project (or whenever a change is made, if Automatically Level Resources is selected in the Project menu), OmniPlan rearranges tasks which have resources assigned, to make sure no resource is being used at more than 100% of its availability. Tasks moved back by resource leveling have their scheduling method changed to resource availability.
During leveling, OmniPlan has to make an educated decision about which task should get access to a resource first, and which tasks should be pushed back by a resource dependency. In judging which task to put first, the following criteria matter, in this order:
Requirements to end by a certain time, such as locked end dates, constraints, or being a prerequisite to a task with such a requirement.
Task Priority, as set in the Priority column of the task outline.
Position in the task outline; tasks with lower ID numbers are scheduled earlier.
Comparing the Baseline and Actual Schedules
Once you have finished setting up a project and you’re ready to start implementing it, you can set a baseline schedule. The baseline represents the original intentions of the project, for comparison with the actual schedule.
Setting the Baseline
Choose Split Schedule or Both Schedules to see the baseline and actual schedules together, so you can compare them.
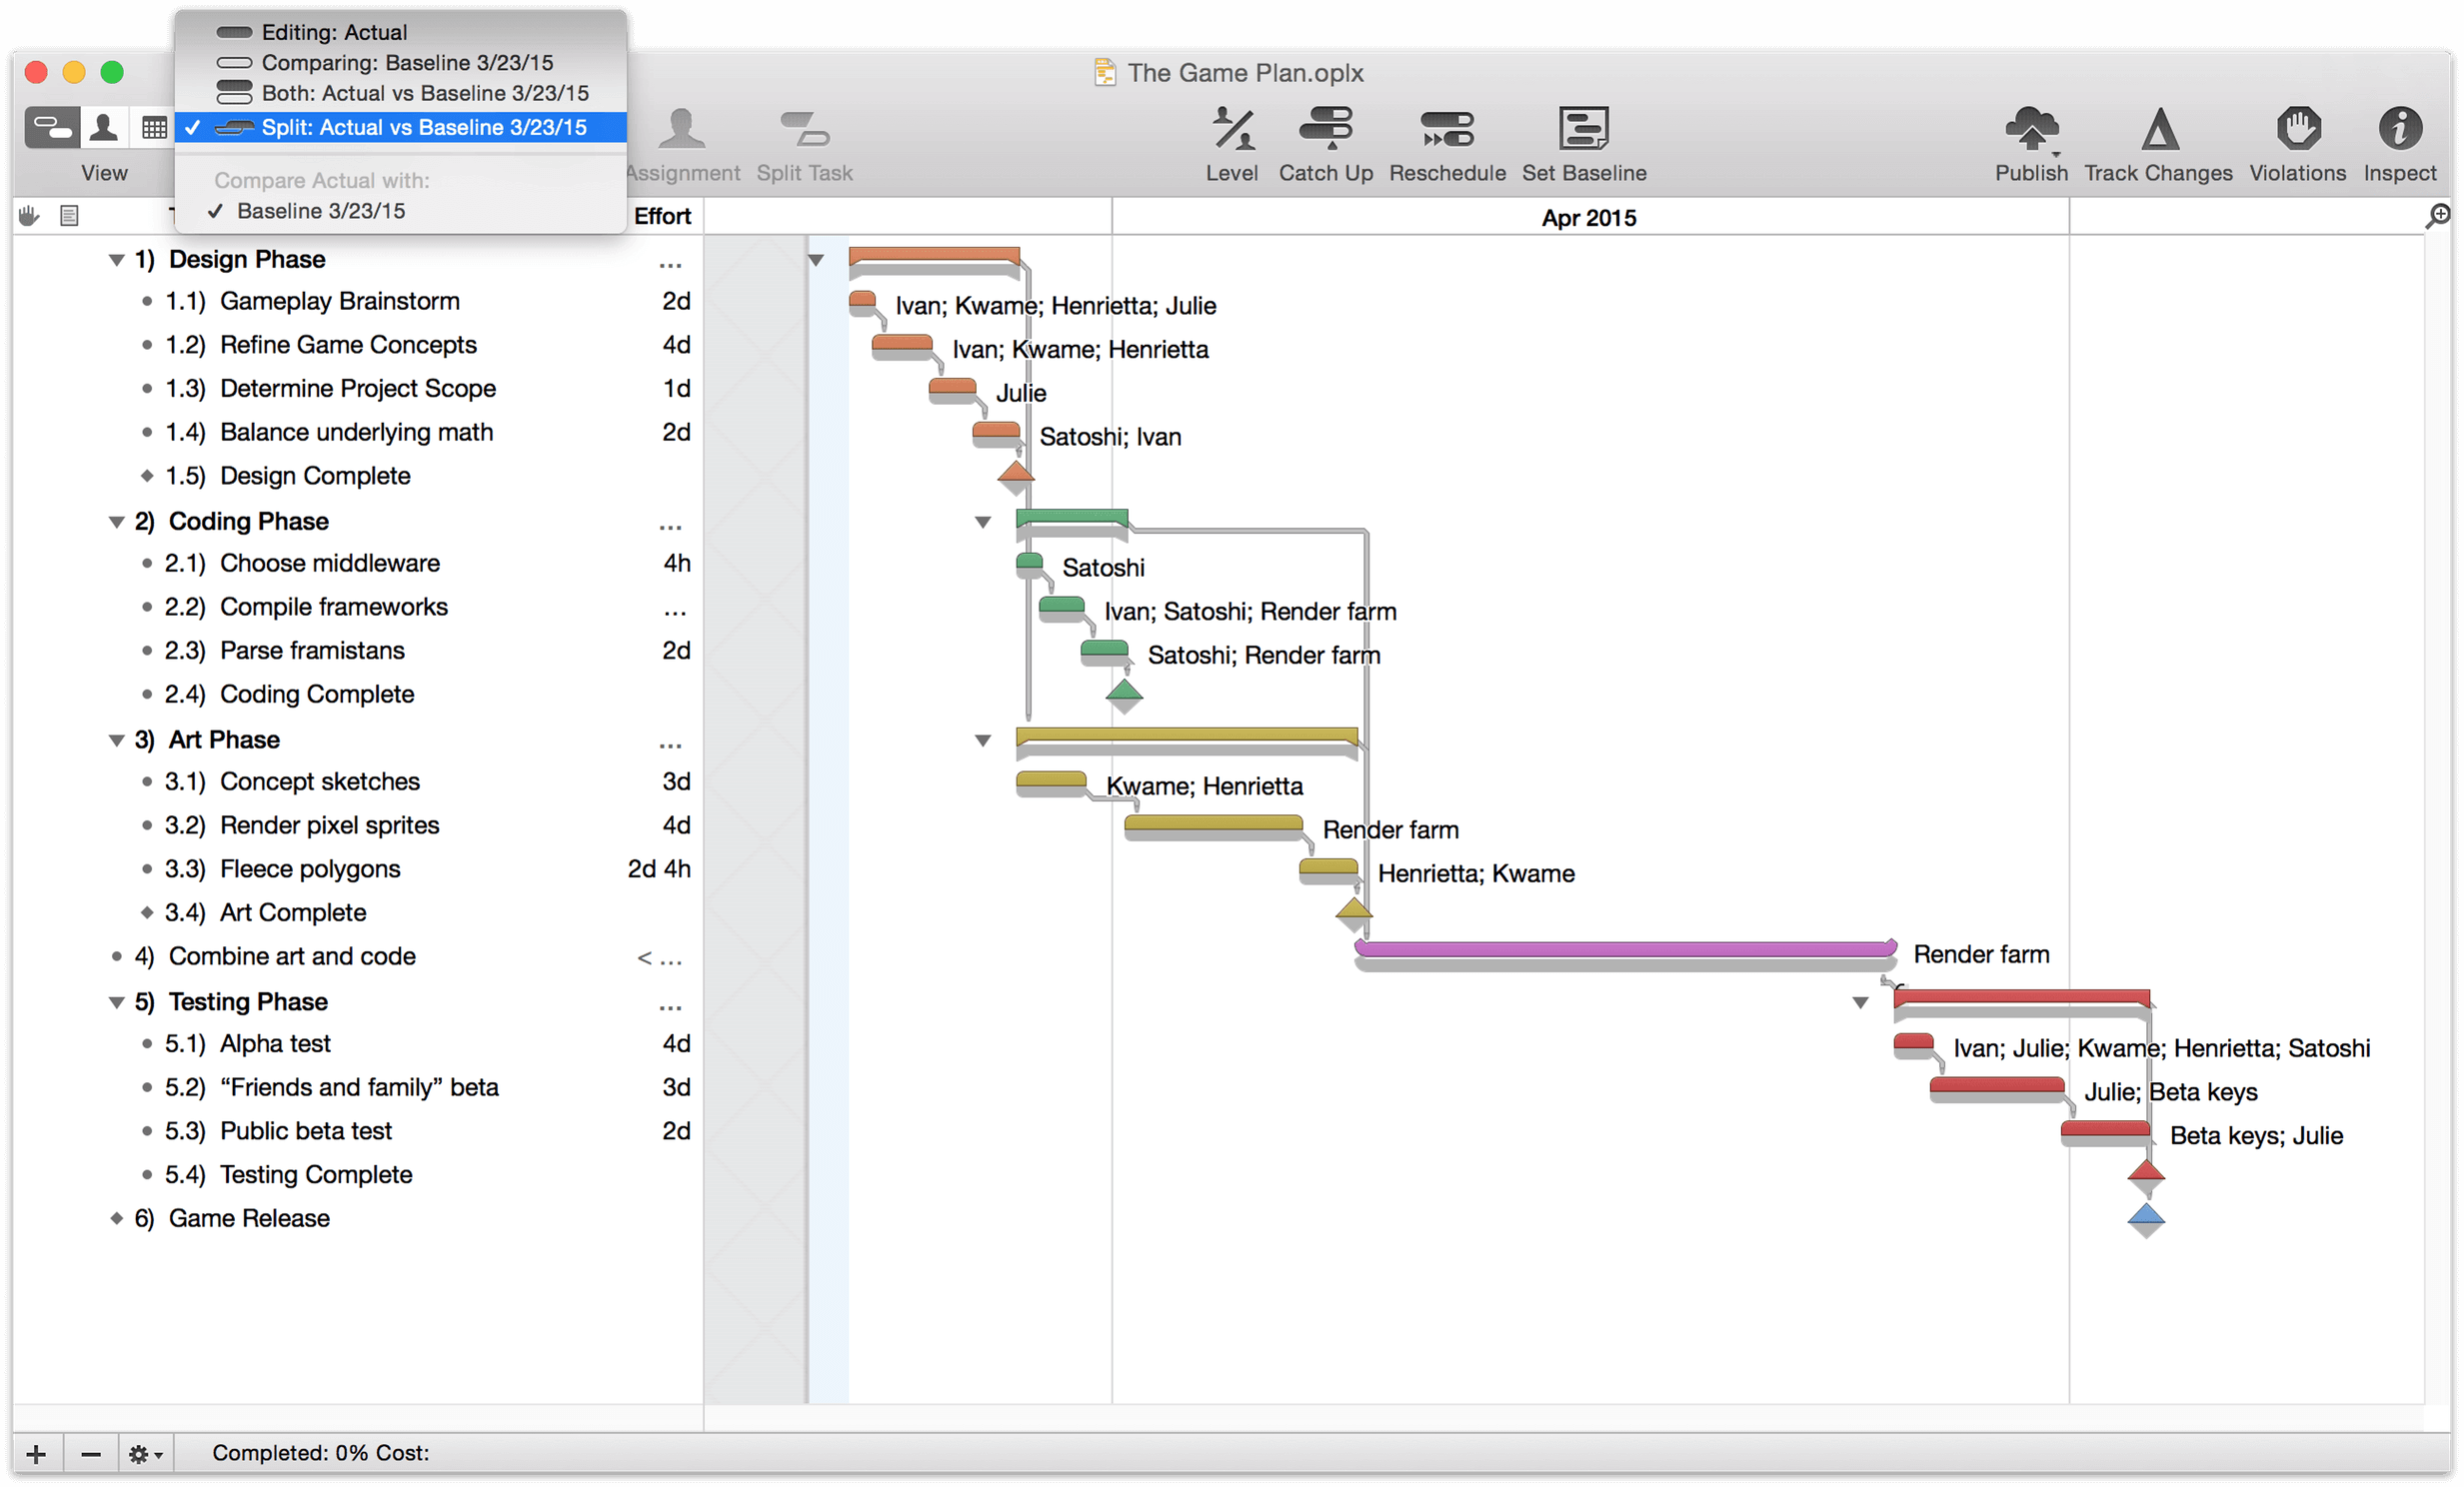
Once you click the Set Baseline button, the baseline schedule is decided and any further changes are applied to the actual schedule instead.
Revising the Baseline
To revise the baseline schedule after it’s already been set:
Select the tasks to revise.
Click the Set Baseline button.
Select the Set only on selected tasks checkbox and click OK.
The selected tasks’ Baseline schedule updates to match its Actual schedule.
You can modify individual tasks’ baseline dates in the Task Information inspector.
You can also create multiple baselines for independent tracks within the project.
Catching Up Task Completion
If everything is going according to plan, just click the Catch Up button.
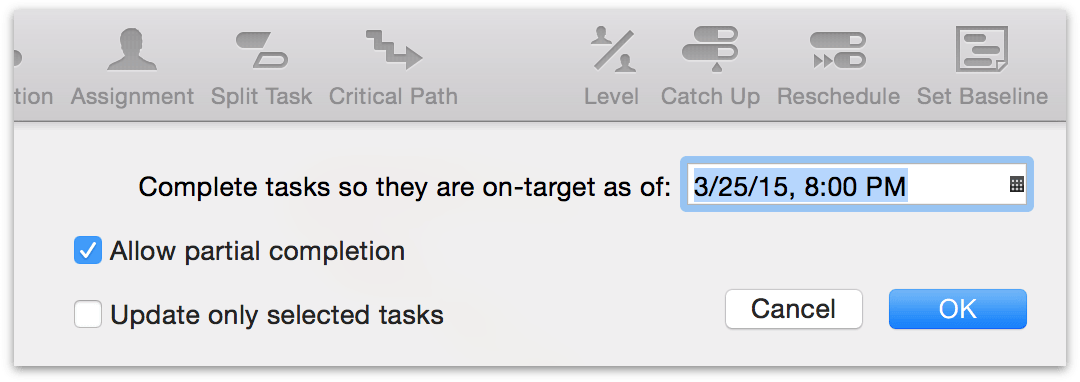
Choose a date and time (today by default), whether to allow tasks to be marked partially complete, and whether to update all tasks or just the selected ones.
The tasks’ completion percentages are updated to the specified date and time.
Rescheduling Incomplete Tasks
Some tasks are not as complete as they were scheduled to be.
Click the Reschedule toolbar button.
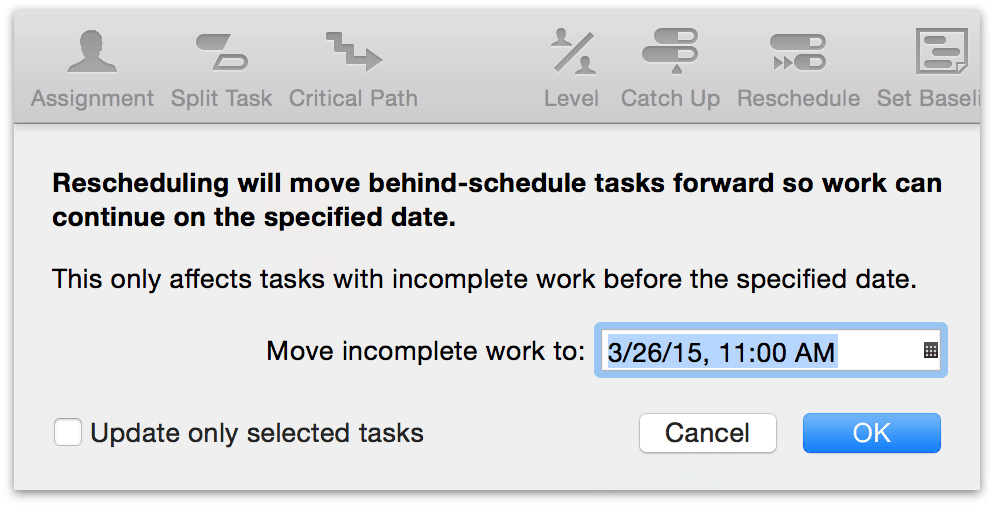
Choose a date and time to reschedule the incomplete tasks, and whether to update all tasks or just the selected ones.
The incomplete tasks move, and the whole schedule updates, so that work can continue from here.
Note that this only moves tasks with incomplete work that was scheduled for before the date you specify; tasks in the future aren’t affected.
Managing Server Repositories
You can share projects by publishing them to an OmniPlan server repository. Choose Server Repository from the OmniPlan menu to see and manage shared OmniPlan projects.
The Account menu lists your Omni Sync Server and WebDAV accounts by name (as set up in Accounts Preferences); these are the types of account that can operate OmniPlan repositories. Choose an account in the pop-up to see the projects in its repository. To add to or edit your accounts, click the Account Info button.

The list shows all projects that have been published to the repository, and the following information about them:
- Load — Indicates, by the presence of a vertical bar graph icon, whether these projects are sharing their resource load information with other projects in the repository for the purposes of leveling resources across projects.
- Last Modified — The date when the project was last modified by any user with shared access to it.
- Last Truncated — To optimize the speed of syncing on currently active projects, once a certain size threshold is exceeded in the sync log OmniPlan sets aside older changes on the server and “truncates” what is synced to only the newest set of changes. If OmniPlan sees that a project hasn’t been updated since the date the changelog was last truncated (shown here), it retrieves older changes from the archived logs on the server.
- Changelog, Total Size, File UUID — The file size of the changelog and total project respectively, and the unique ID assigned to the project on the server.
Publishing, Subscribing, and Change Tracking
Publishing and subcribing can be used to keep a project up-to-date between members of a team. Choose Configure Publishing & Subscriptions from the Project menu.
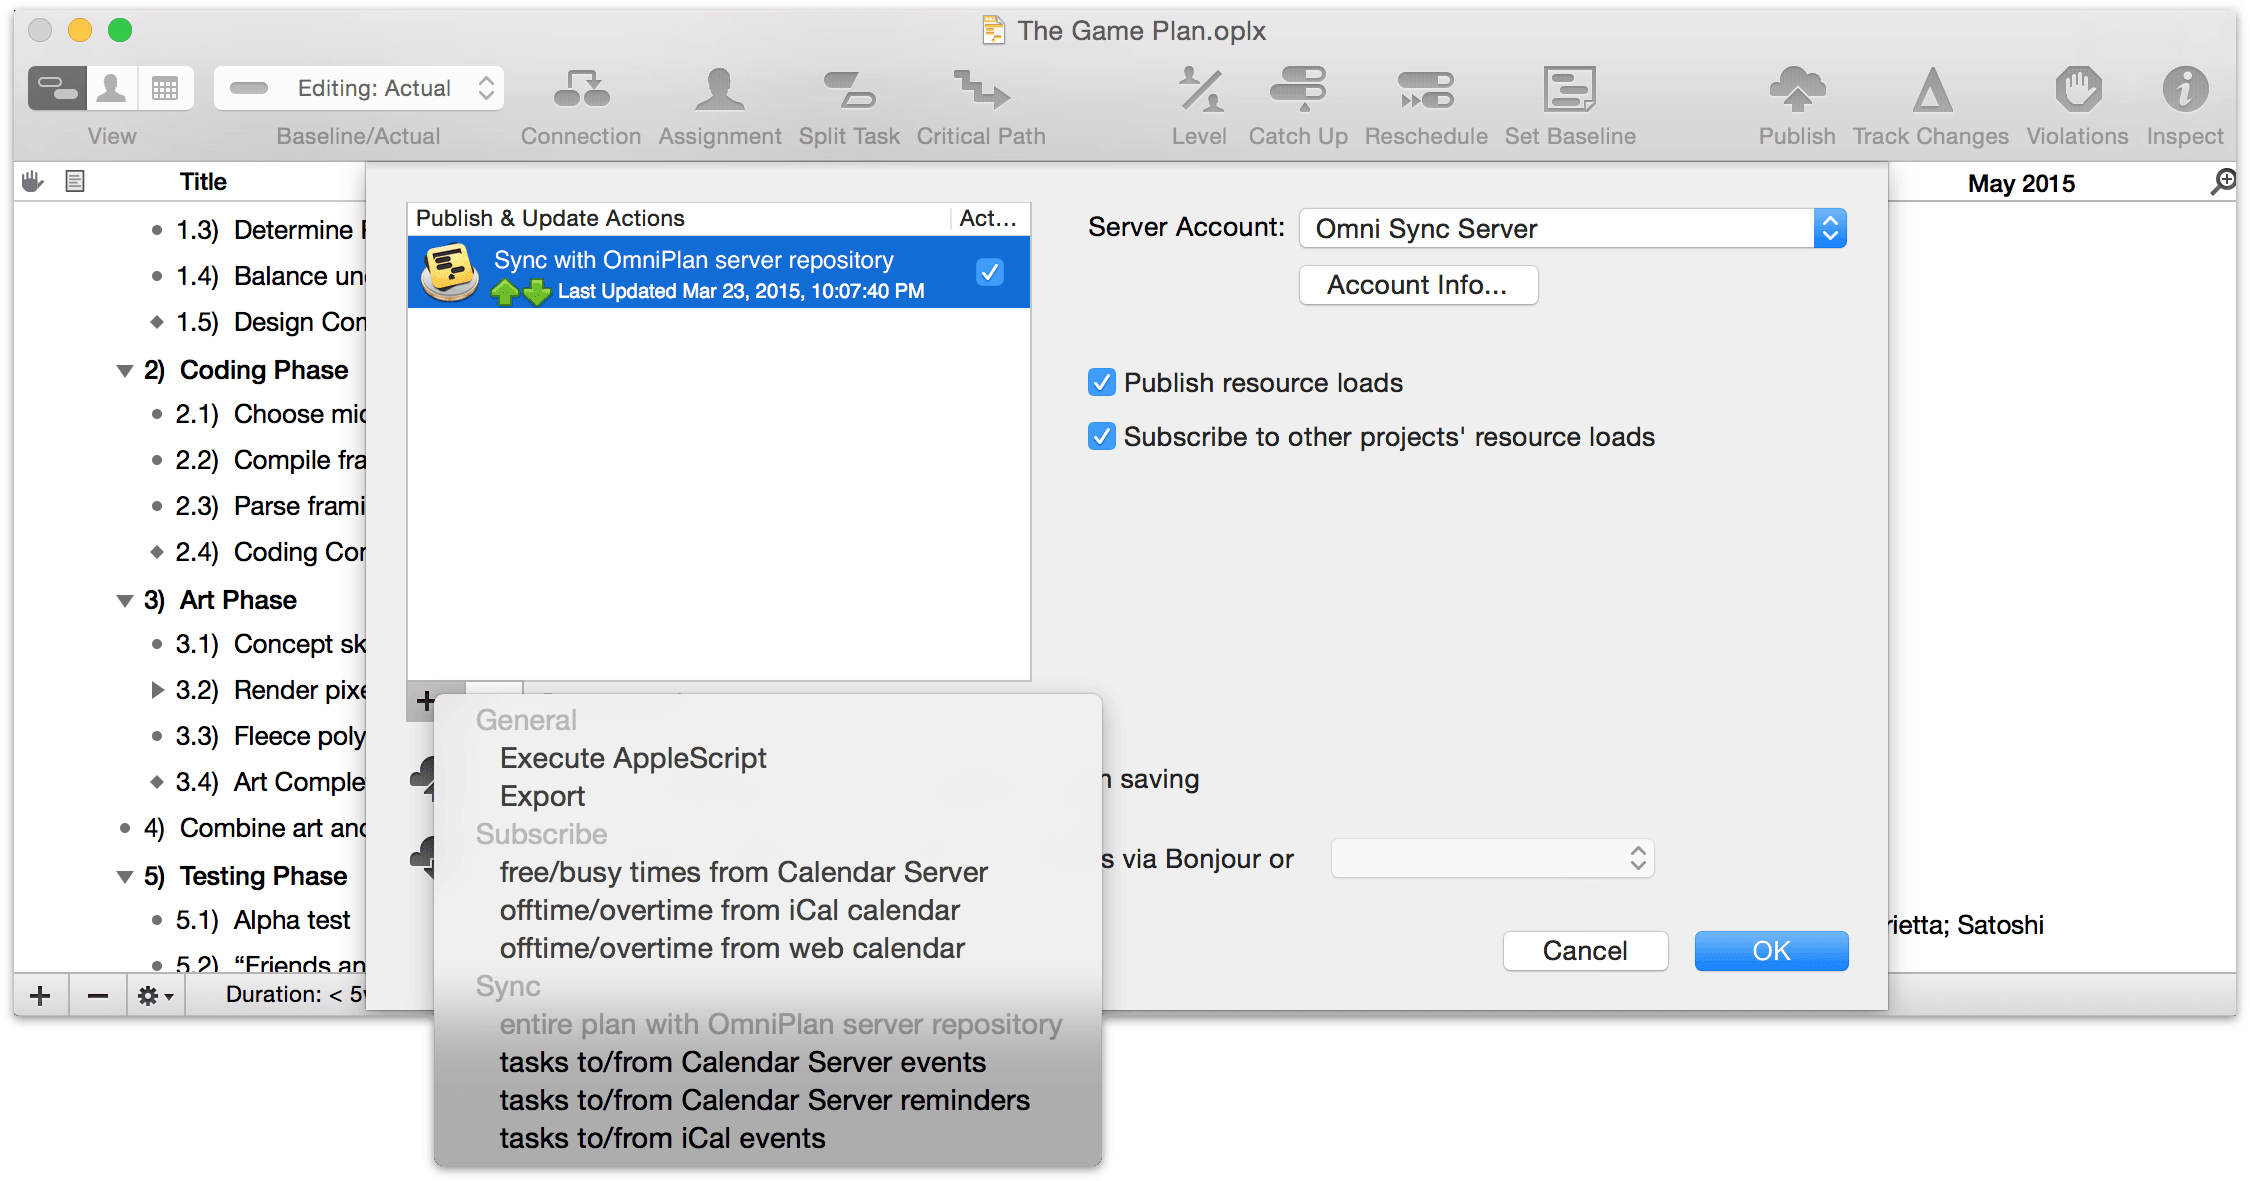
Click the Plus button below the Publish & Update Actions list to add an action. These changes can be published upon save and updated via Bonjour (or at a specified interval). If you’d rather update manually, you can choose to publish whenever the document is saved or leave both options unchecked and use the Project ▸ Update and Project ▸ Publish menu items.
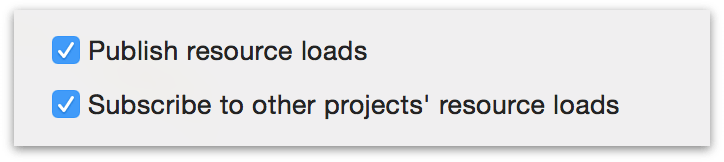
If you have resources used by multiple projects hosted on the same server repository, you can choose to share information between them to avoid resource conflicts and overloads. Choosing Publish resource loads will broadcast the resource usage of the current project to all other projects that have chosen to Subscribe to other projects’ resources. Choosing both means the current project will both give and receive load information. When a project is leveled, resources will be reallocated to reflect their usage in other projects.
Resources are recognized by OmniPlan as identical across multiple projects on a server when they share the same unique email address.
Warning
Note that making changes to the Apple system clock while using Publish or Subscribe will result in an error, and should be avoided.
General actions:
Execute a custom AppleScript upon publish or update.
Export your document with one of the export options.
Use Subscribe actions to pull in changes from others. Be sure to set up sync accounts in OmniPlan ▸ Preferences ▸ Accounts, where you can set up and configure from among CalDAV, Google, Omni Sync Server, and WebDAV account syncing options to suit the needs of your project and team.
Note that due to limitations in Calendar sync, OmniPlan is able to fetch data out approximately 11 months from the present when subscribing to free/busy times from a Calendar server.
Choose free/busy times from the Calendar Server to see available resource times and be notified of changes for particular resources or all of them.
Choose offtime/overtime from iCal calendar to choose a calendar for the whole project or an individual resource. Specify whether events are extra or off hours.
Choose offtime/overtime from web calendar and specify a URL, along with the schedule for a project or particular resource, and how events behave.
Use Sync to make changes to the project and pull in changes from others.
Choose entire plan with OmniPlan server repository to sync all tasks, resources, and calendars—everything!—on a shared server.
Choose to sync tasks to/from Calendar Server events to make changes and bring in changes from events on a calendar server.
Choose to sync tasks to/from Calendar Server reminders to make changes and bring in changes from to-do items on a calendar server.
Choose to sync tasks to/from iCal events to make changes and bring in changes from events in iCal.
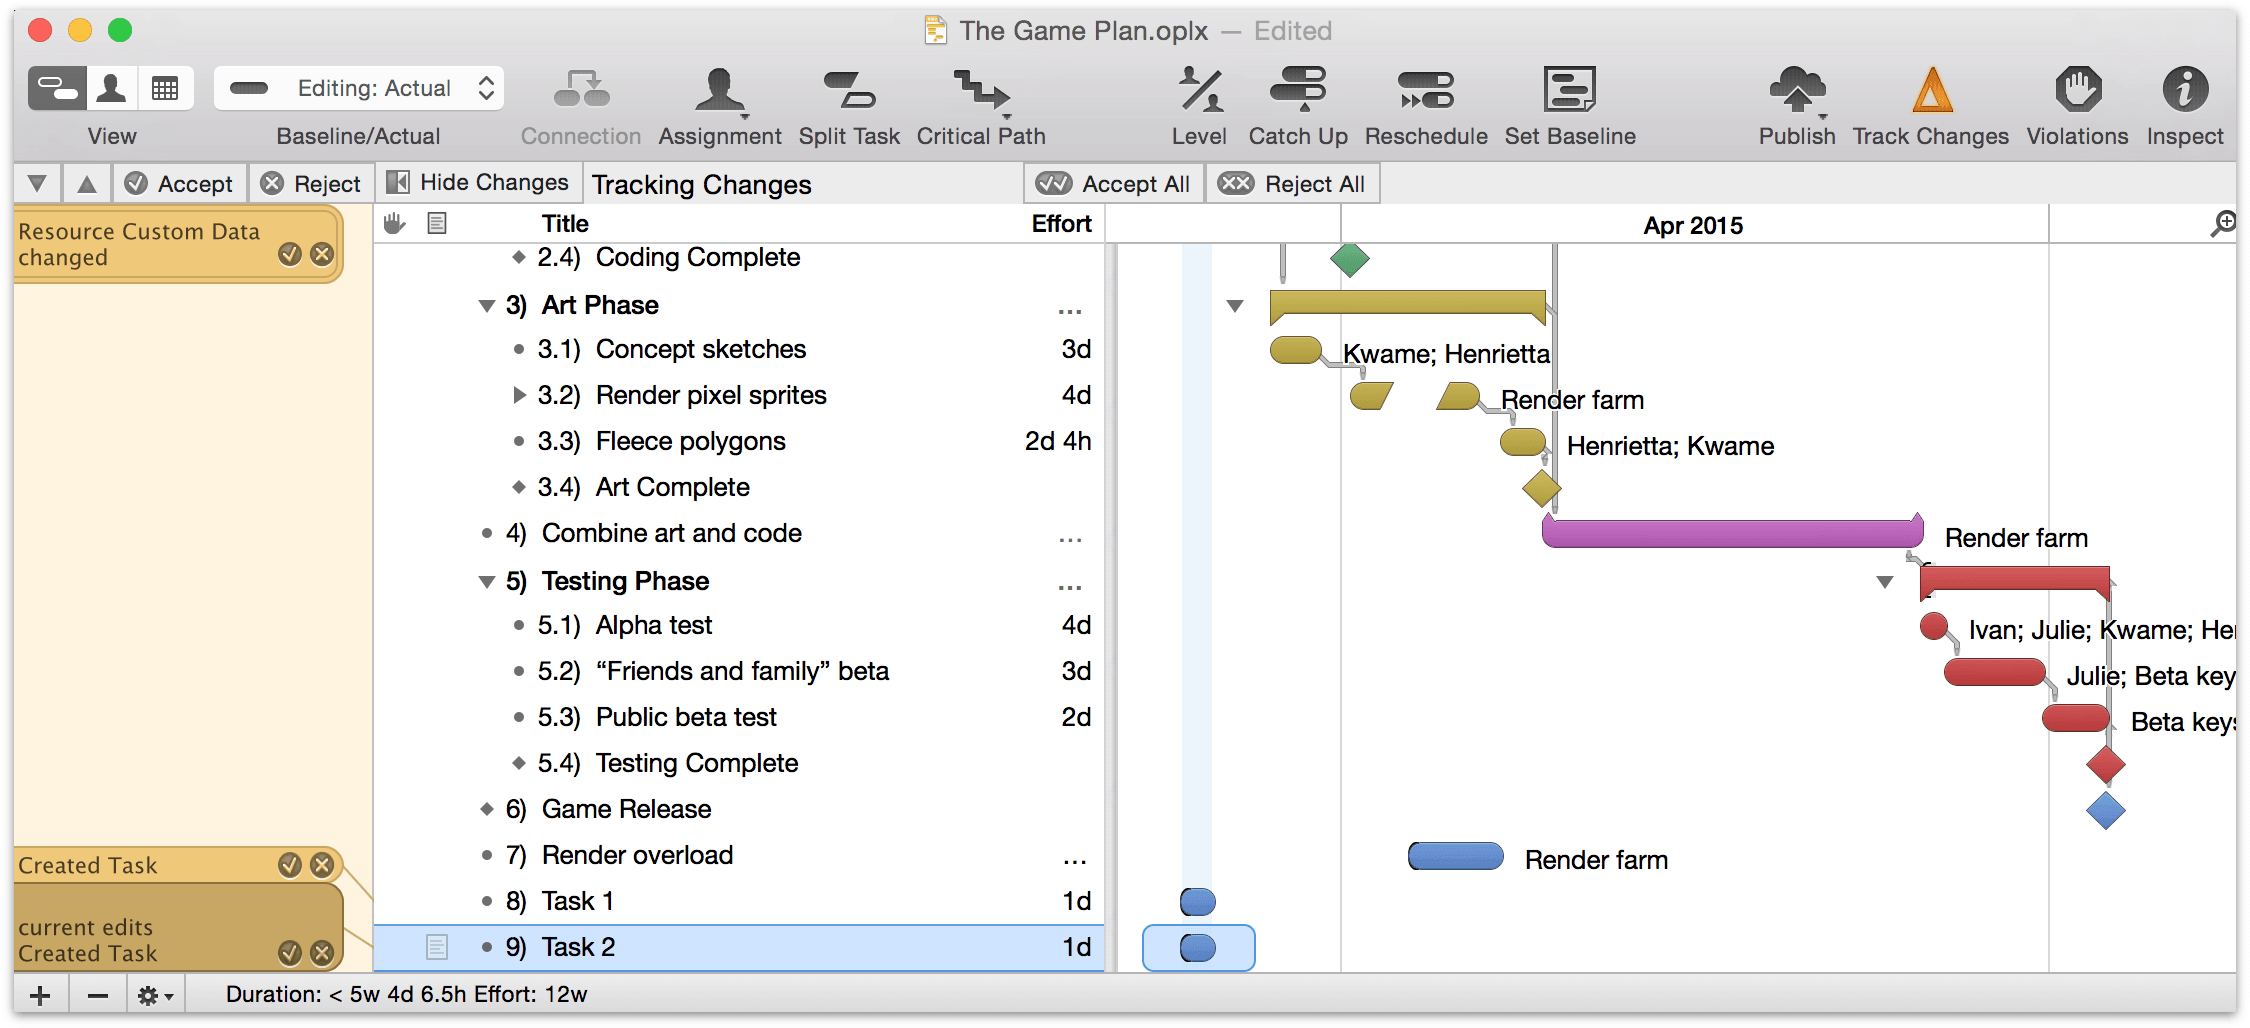
Once you’ve specified the kind or kinds of subscribing you’d like to do, you can use change tracking to see your changes and accept or reject the changes of others.
To enable change tracking, use the Project ▸ Track Changes (⌥⌘T) menu item. A sidebar appears that logs the changes you make and shows the changes of your teammates.
To accept or reject all changes, use the Accept All and Reject All buttons.
To accept or reject individual changes, use the Accept or Reject buttons on the individual changes in the list.
Balancing Resource Loads Across Projects
When multiple projects share the same personnel resources, you can ensure that they aren’t overloaded with work by sharing resource loads between projects in the same server repository.
To set up resource load sharing visit the Configure Publishing & Subscriptions screen in the Projects menu. There you can select whether this project’s loads will be published (causing other projects that subscribe to obey changes made to the current project’s resource allocation), whether the current project will subscribe to other projects (obeying their resource changes), or both. Once these settings are in place, future leveling of resources will take their use into account across all projects that publish and subscribe. For OmniPlan’s purposes a resource is designated as identical across projects by having the same email address assigned to it.
Load sharing settings of the projects on your server account can be seen by visiting the Server Repository window via the OmniPlan menu. See Managing Server Repositories for more information.
Cleaning Up Stale Usage
When sharing projects on a server, in some cases resource load sharing information for deleted projects may be left behind on the server. This happens if someone removes a project that is sharing resource loads using a version of OmniPlan older than v2.1, or if someone deletes the file directly from Finder or Terminal.
If OmniPlan finds unused resource load information on the server, it detects the problem and prompts that you clean it up. Until you allow it to clean up, there may be misleading resource load information shared with your active projects.
The clean way to remove a project from a server repository is by opening the Server Repository window in OmniPlan v2.1 or newer and using the Delete Project button.