Appendix E
OmniFocus Extended
OmniFocus as a standalone app is an incredibly powerful tool. Beyond what you can do with OmniFocus alone, the app interacts with other apps and services to help you get stuff done with even greater convenience and efficiency.
This appendix lists ways that OmniFocus can be used in tandem with other software to achieve your goals.
Email Capture (Mail Drop)
Mail Drop is a feature of the Omni Sync Server that lets you send emails directly to your OmniFocus Inbox. You can create multiple private send-to addresses to give access to third parties, and delete those addresses at any time. In order to use Mail Drop, you’ll need to have an Omni Account (they’re free), and OmniFocus must be configured to actively sync with that account on our server.
If you’re already using Omni Sync Server to sync OmniFocus, you can log in to the Omni Sync Server web interface and create your first Mail Drop address. After logging in, click or tap Add An Address to automatically generate the email address (a combination of your account name and a random string of characters).
If you don’t have a Omni Account yet, you can sign up in OmniFocus Settings under Omni Account. The account creation process includes instructions for configuring OmniFocus to use your new account.
When you send an email message to a Mail Drop address, the subject line of that message becomes the name of the new Inbox item. The body of the message becomes the note, which can contain text and simple HTML; attachments to the email (such as images) are added as attachments to the OmniFocus item as well.
See OmniFocus Mail Drop on the Omni support website for more details on this feature.
Workflow Automation
With some knowledge of programming, you can use callback URLs to automate conversations between OmniFocus and other apps on your iOS device. This offers the ability to set up project templates with custom data fields, for example, along with many other powerful automation possibilities.
This is an advanced feature that requires some tinkering under the hood; for help getting started integrating OmniFocus with the workflow app of your choice, see URL Schemes in OmniFocus on the Inside OmniFocus website.
Omni Automation 
OmniFocus Pro supports automating tasks in OmniFocus using JavaScript. You can create your own plug-ins or use plug-ins created by others; see the Omni Automation website for a set of sample Plug-Ins that you can use right away, or find documentation resources for creating your own.
Installing Omni Automation Plug-Ins
Once you have a plug-in that you would like to try, you will need to install it in a connected folder that OmniFocus recognizes.
If you are looking for a place to start with plug-ins, head on over to the Omni Automation website and find one you like.
First, download the plug-in file and navigate to it in the Files app. If it is zipped, tap the file to unzip it. The resulting file will have an .omnijs extension (the file format for Omni Automation Plug-Ins).
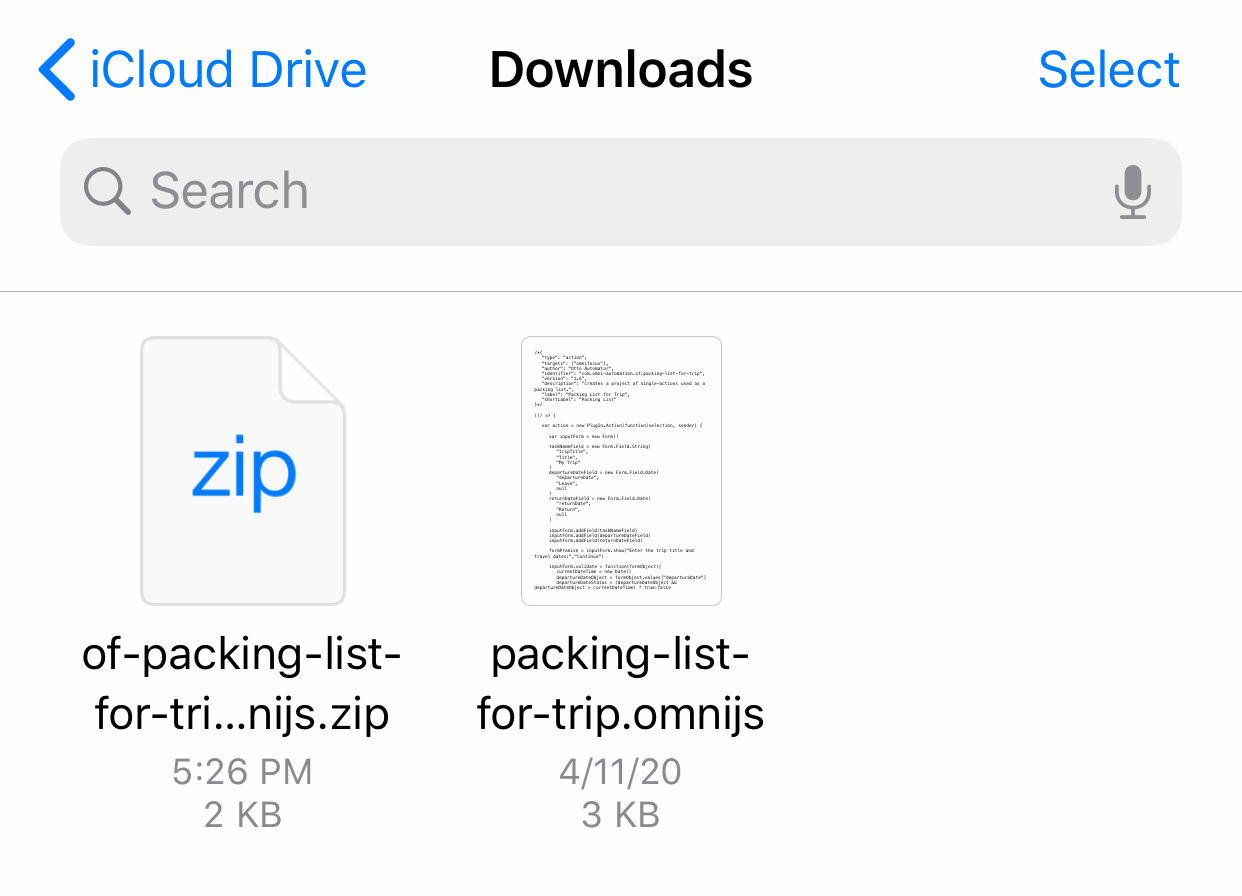
Next, tap the plug-in file, which presents an import dialog in OmniFocus:

If everything looks in order, choose an install destination from the Location menu and tap Install Plug-In. The plug-in is copied to that location and appears in the Plug-Ins management screen.
iOS might not associate the .omnijs file type with OmniFocus the first time you try to open a plug-in from the Files app. If this happens, you can use the Share menu to open the plug-in in OmniFocus instead.
- Tap and hold the plug-in file in Files until the contextual menu appears.
- Choose Share and scroll through the available Application options. If Open in OmniFocus doesn't appear, tap More and scroll until you find it.
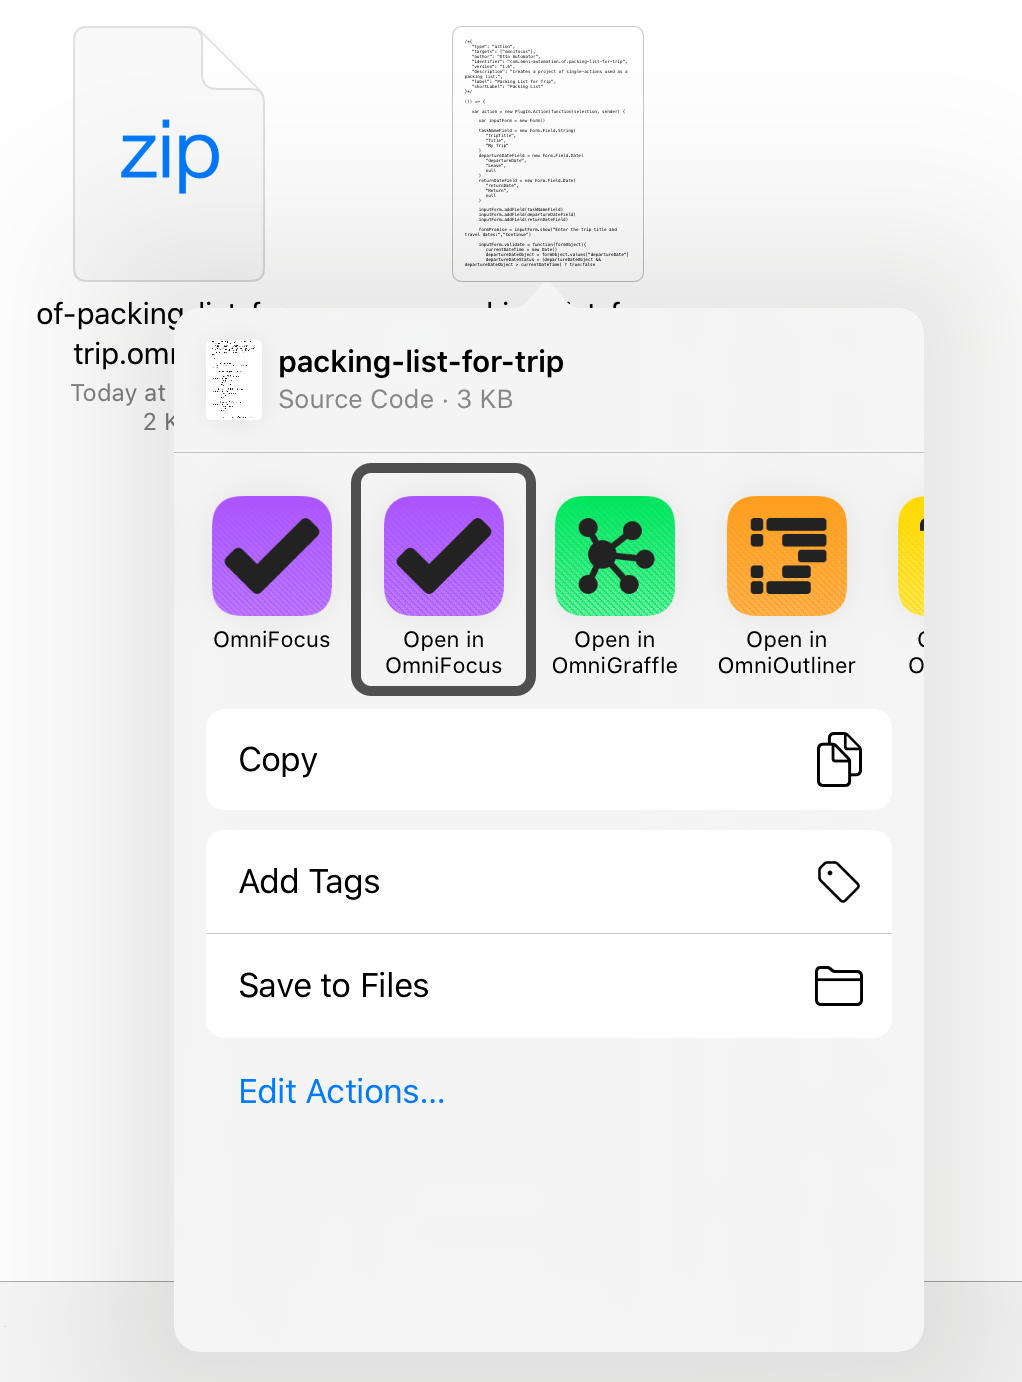
- Tap Open in OmniFocus and the plug-in import dialog appears, ready to continue the installation process.
After installing your first plug-in this way, for future installations tapping the plug-in file in Files will open the import dialog directly.
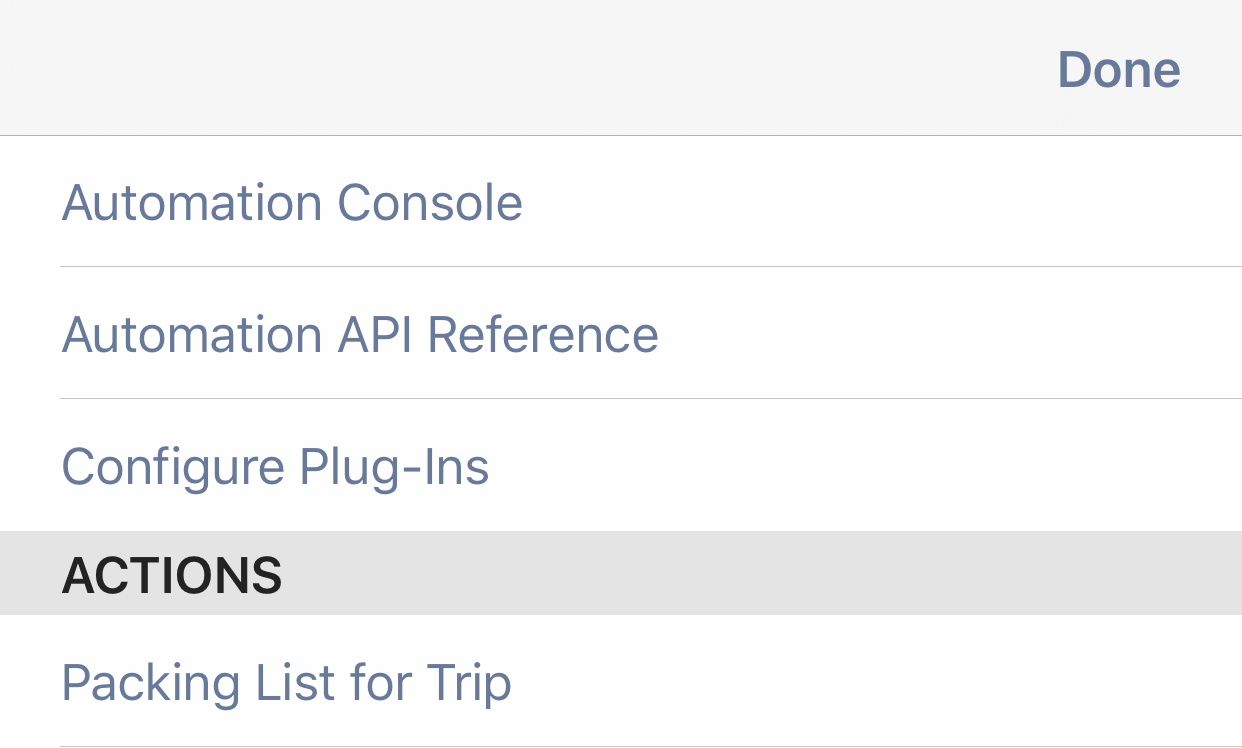
Once you have installed your first plug-in it appears as an action in the Automation menu and the Share dialog, ready to use. Tap it to run the plug-in and start experimenting with what Omni Automation can do.
Managing Plug-Ins
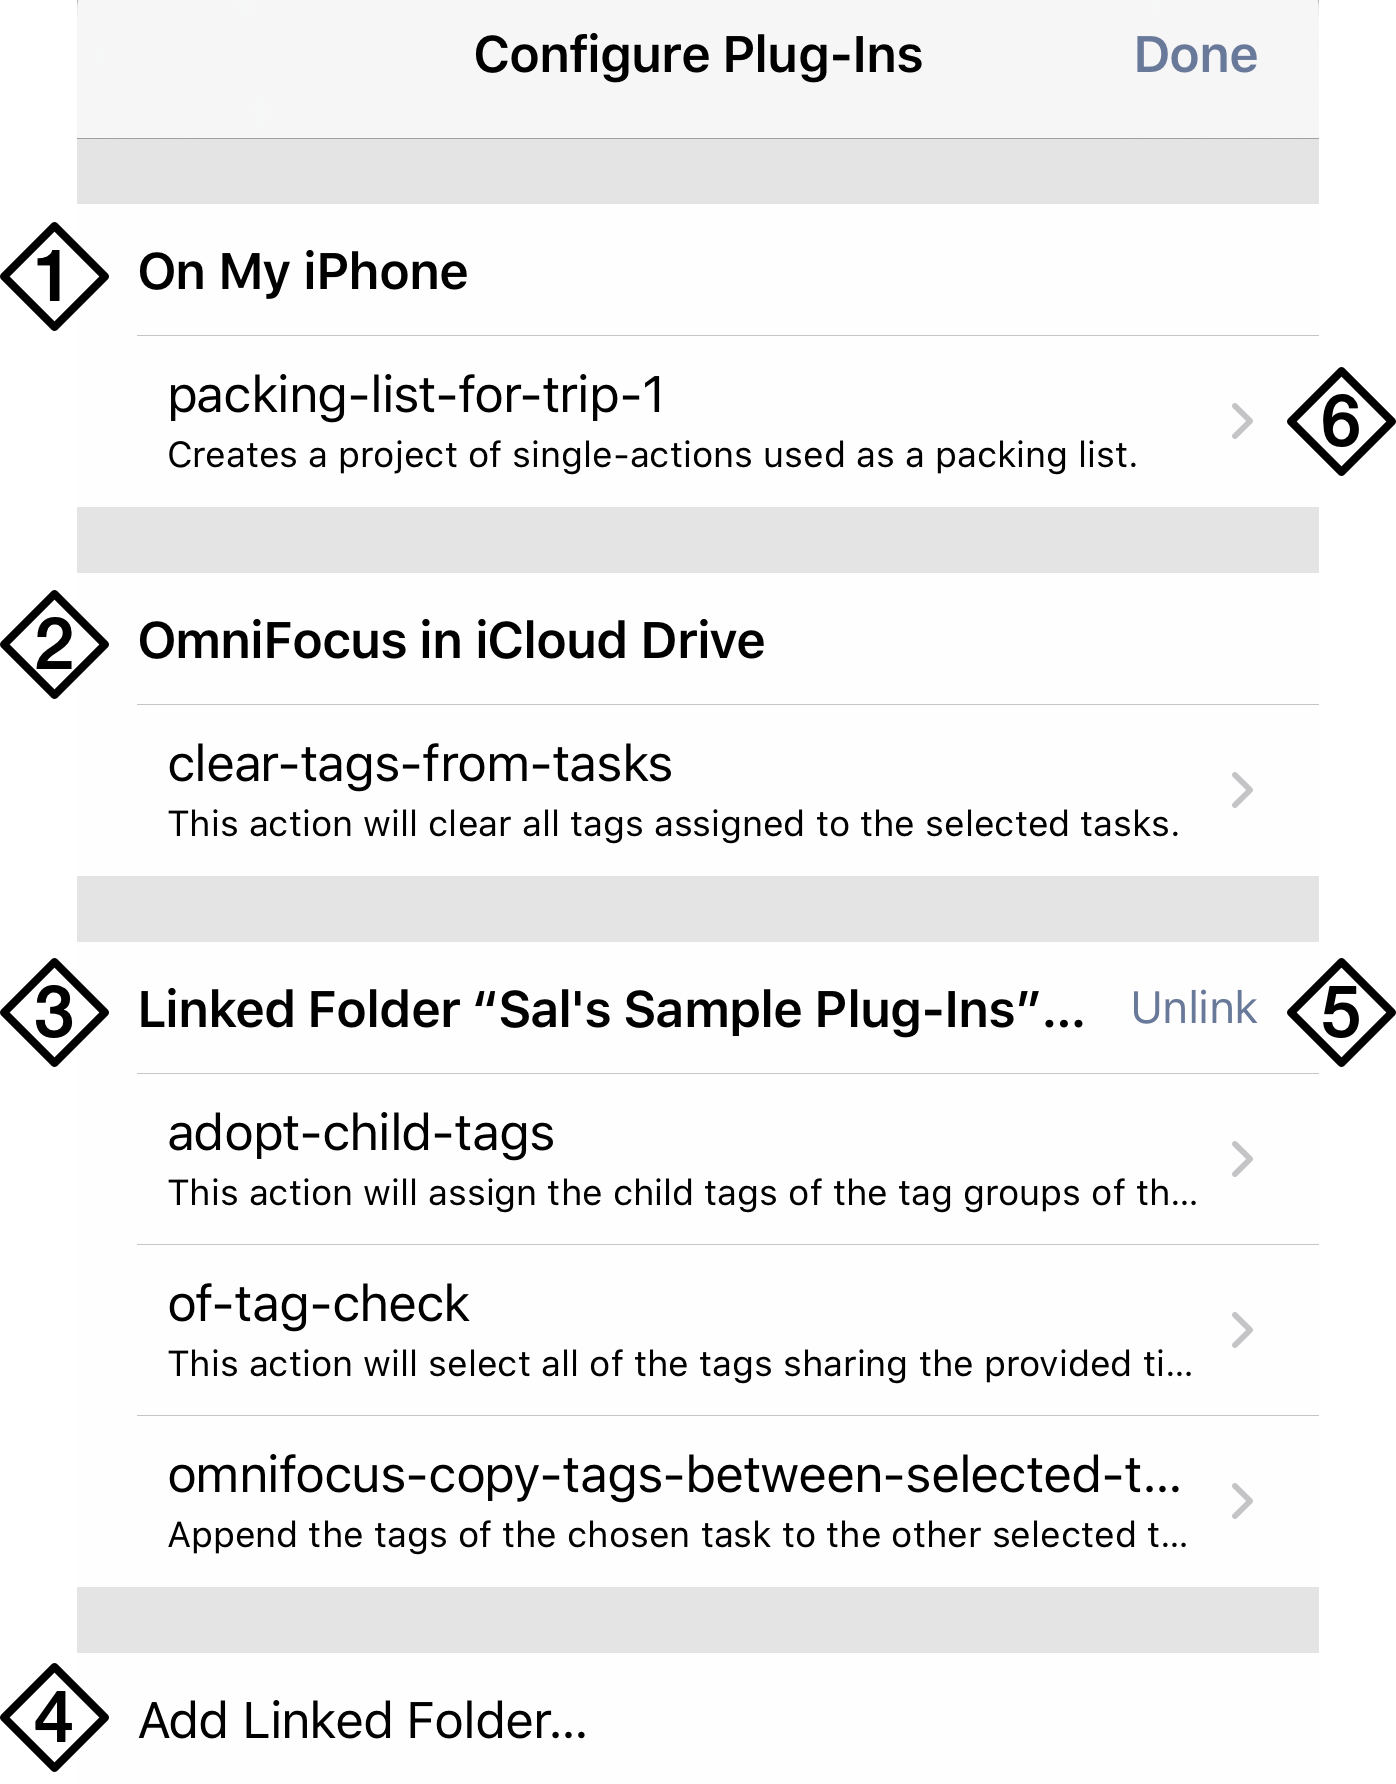
Use the Plug-Ins screen (opened with Configure Plug-Ins in the Automation menu or Automation settings) to add, remove, and organize your Omni Automation Plug-Ins and connected plug-in locations.
-
On My [Device]—This is the default local storage location for plug-ins associated with OmniFocus, a folder that lives on your device inside the OmniFocus container. Use the Files app to move plug-in files into this folder.
-
OmniFocus in iCloud Drive—With iCloud Drive set up on your device, OmniFocus can use its application folder there to sync plug-ins between your various devices and the cloud. Note that plug-in files are stored separately from your OmniFocus sync database and they must be managed separately. iCloud Drive is not capable of syncing your OmniFocus database.
-
Custom Locations—Beyond the two default storage locations above, you can link as many additional plug-in folders as you like. These are regular folders on your device or in the cloud that contain the plug-in files that you want to use in OmniFocus. Once a folder is linked, its plug-ins become available in the Automation menu.
-
Add Linked Folder—Tap to open a file browser for selecting additional plug-in folders that you would like to link to OmniFocus.
-
Unlink—Tap to remove a custom location's association with OmniFocus. This removes the folder and its contents from the Plug-Ins screen and Automation menu, but does not move or alter its contents in any way. If you change your mind, you can tap Add Linked Folder again to restore it.
-
Plug-In Info—Tap a plug-in's row to show detailed information about the plug-in, including its name, version, author, description, and information about the actions that the Plug-In contains. You can also share the plug-in from this detail view, delete it, or set up keyboard shortcuts for the plug-in's actions.
OmniFocus for the Web
OmniFocus for the Web is a browser-based companion app that works in tandem with OmniFocus for Mac and iOS to provide access to the core features of OmniFocus from any modern web browser. The app is provided as an optional subscription-based add-on to your existing OmniFocus purchase, or as part of an OmniFocus subscription package.
Learn more about subscribing to OmniFocus for the Web here.