Projects
As you work through your Inbox, some of the items will stand out as larger in scope than a simple action. Planning a vacation or move, for example, are the sort of things that could benefit from being broken down into more manageable parts. Projects to the rescue!
A Project is an item that’s made up of multiple actions. Projects are typically more complex than actions, and can include several related actions.
Understanding Project Types
Projects can be as elaborate as necessary, and you can specify the project type to be either Sequential, Parallel, or as a logical grouping of Single Actions.
Sequential Projects 
Some projects, such as building a papier-mâché pterodactyl, require one action to be completed before the next action starts. These are Sequential projects.
Sequential projects have actions that need to be completed in a predetermined order; the first item needs to be completed before you can move on to the next. Another example of a sequential project could be a checklist that an astronaut goes through during the launch sequence. Each item in the list is dependent on the previous item’s completion.
Parallel Projects 
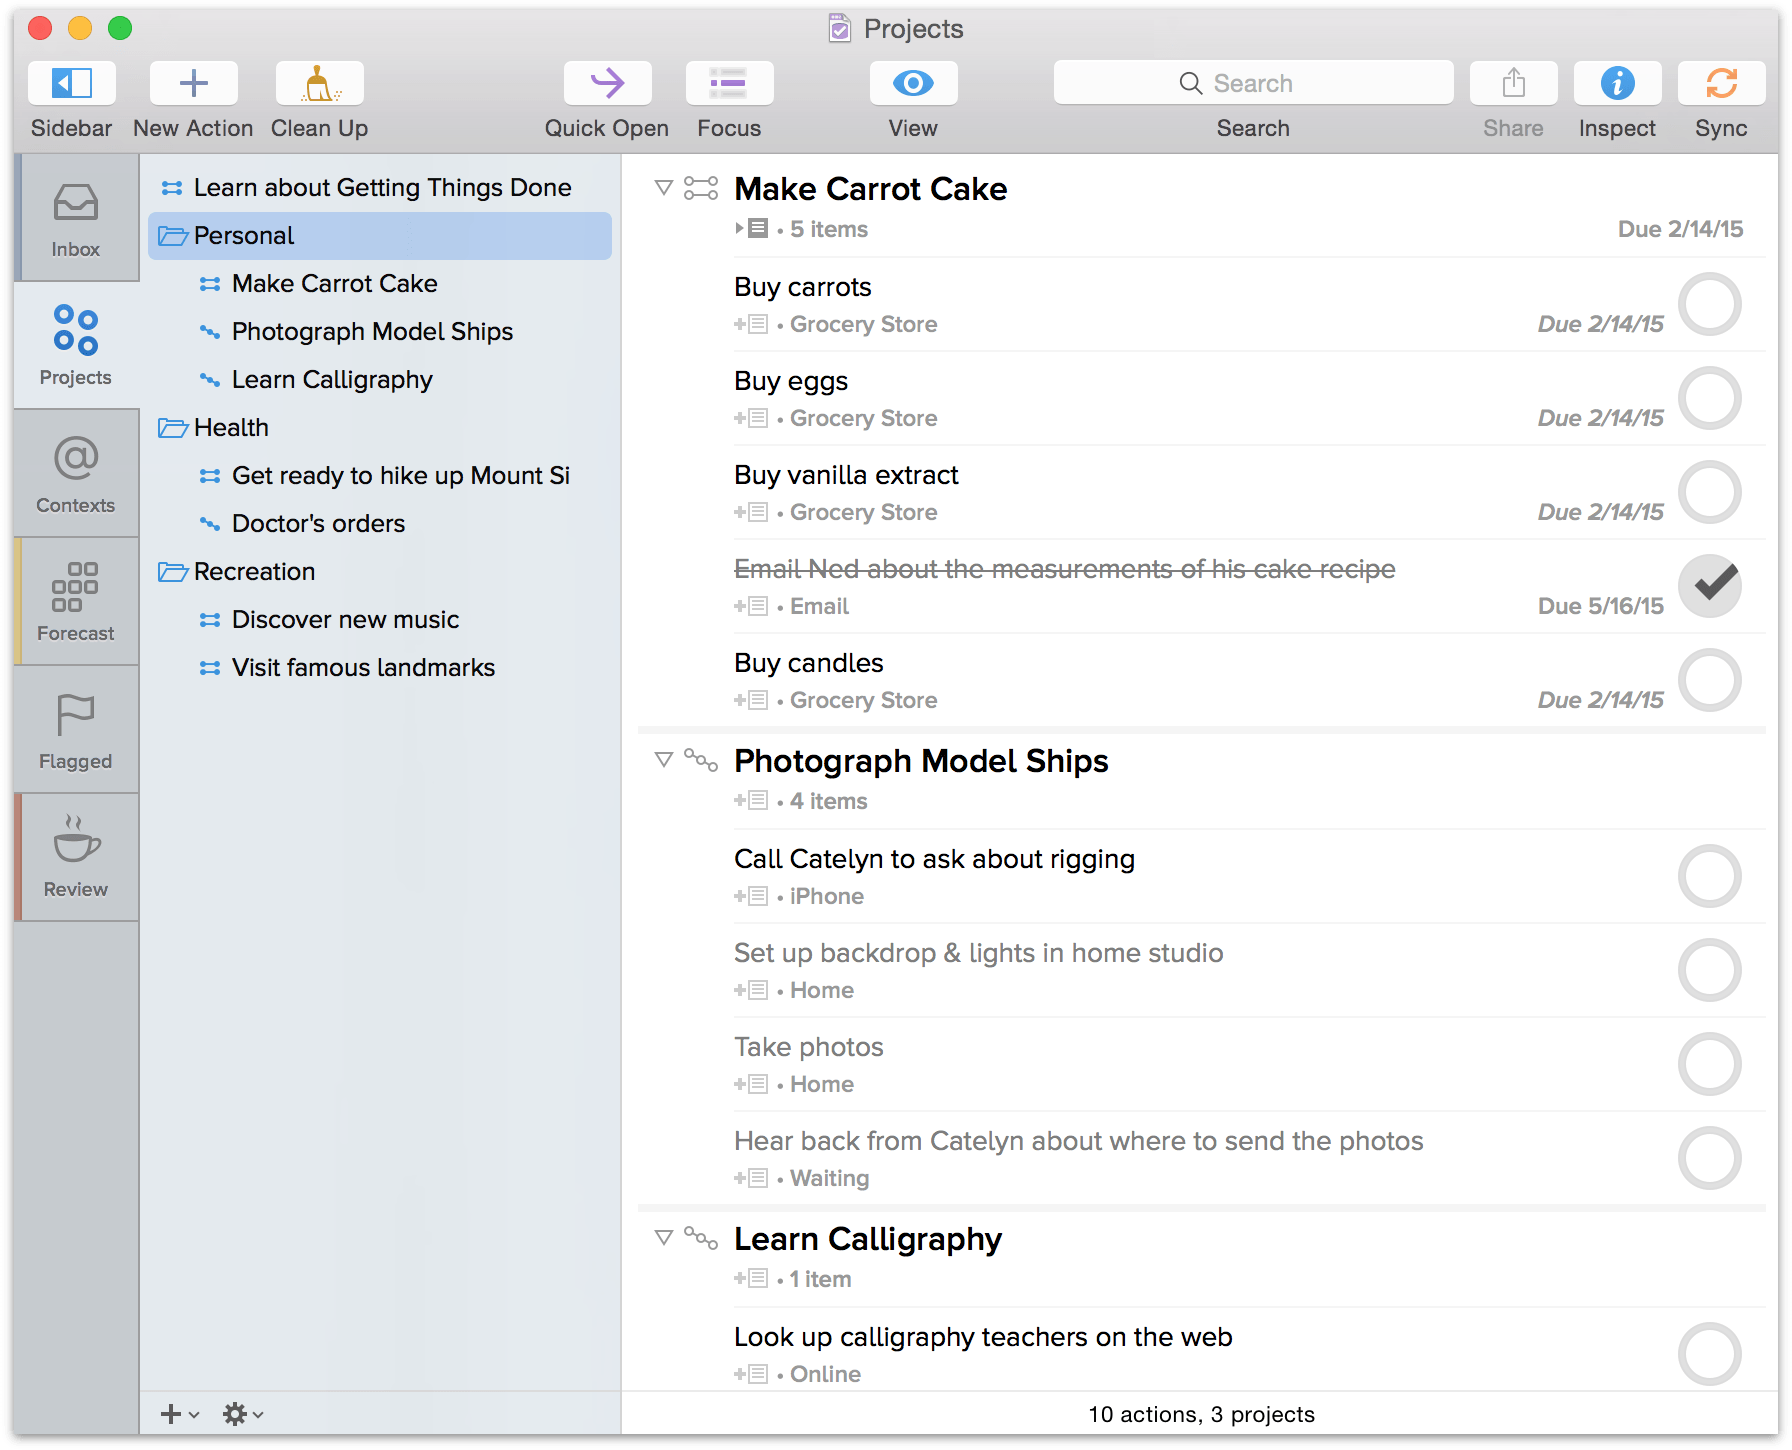
Parallel projects consist of actions that can be completed in any order, such as picking up items at a few different locations. In a parallel project, all incomplete actions are available, and the First Available is just the first one in the list.
Note
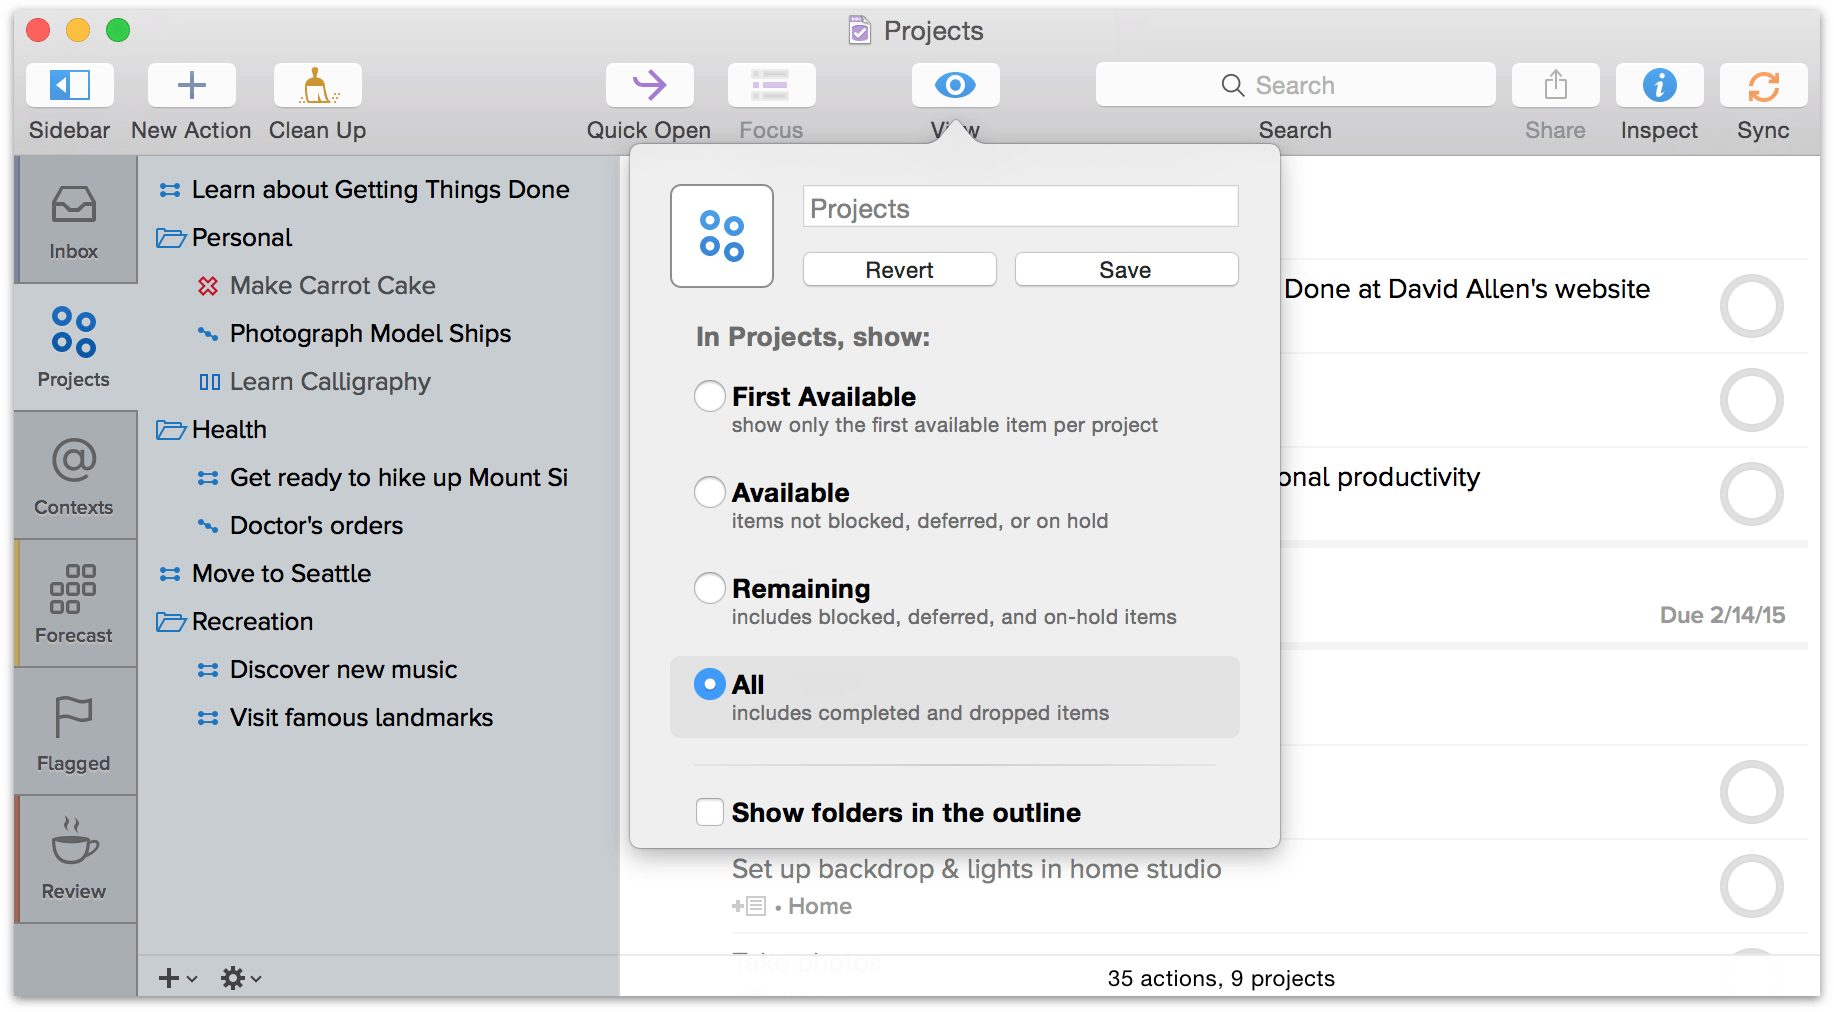
The difference between parallel and sequential projects is most visible when the View option is set to show only Available actions. (Actions beyond the first available action in a sequential project are blocked, and therefore hidden.) In other View settings the distinction is there, but more subtle: future actions in a sequential project have their titles in gray text instead of black.
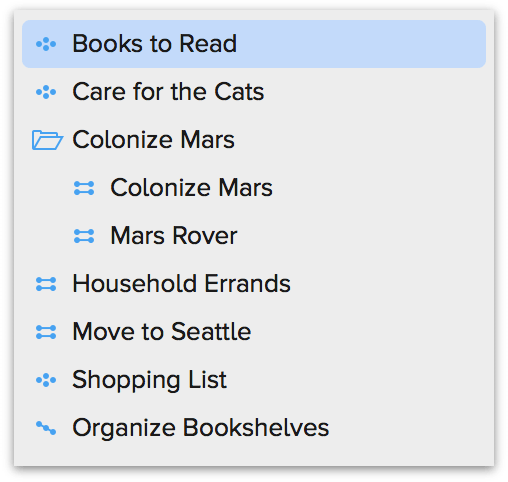
When viewing the Projects perspective, each project has an icon to its left that indicates the project type. These icons allow you to quickly scan a list of projects and tell which project is which type.
If you find yourself using one type more often than the other, you can change the default setting in OmniFocus ▸ Preferences ▸ Organization.
Single Action Lists 
The final project type, Single Actions, isn’t really a project—it’s a list of loosely-related actions that aren’t interdependent. A Shopping List project is a good example of a Single Action list because it contains a list of things that you need to pick up at the grocery store. You can gather these items and check them off as completed (or acquired) as you make your way through the store. The order in which you collect them is irrelevant—it doesn’t matter if you pick some of them up today or tomorrow; they’re just things you know that you need to grab.
A Single Action list is often more about a state you want to generally sustain (spoiled cat, non-spoiled food, functional household), rather than a state you want to achieve (ship an app, take a vacation, find a new apartment). Another way of looking at this is that Single Action lists rarely have due dates, and they rarely get checked off as completed. The items within the Single Action list may get checked off, but the project itself is ongoing.
Because of this, when setting up a Single Action list the Complete when completing last action control is unavailable in the Project inspector. This reflects its use as a container that exists regardless of whether it happens to have anything currently inside it or not. (You can still mark a Single Action project complete manually using the inspector's Status control.)
Project Status
When you think about the status of an Action or Group, the primary concern is whether the Action is complete. Projects are a bit different; they can be assigned one of four states:
- Active

By default, all new projects have their status set to Active. This means that the project is current and ongoing.
- On Hold

You can place a project On Hold at any time using the inspector, or while conducting a Review of your projects. When you place a project On Hold, what you’re essentially doing is delaying the project and its actions. If you know when the project will resume, you can adjust the schedule in the Dates inspector, or you can wait until some point in the future to adjust the schedule.
- Completed

When you change the status of a project to Completed, the project itself is marked as Completed. However, this does not affect the status of any Active actions within the project; they will remain Active until their statuses are set to Completed.
- Dropped

Every now and then, you’ll find that a project needs to be canceled or put off indefinitely. When that happens, you can set the project’s status to Dropped. When Dropped, the project and all of its actions are hidden, and won’t show up in any view setting other than All. This also notes that a project is slated for eventual archiving in a separate database.

Note
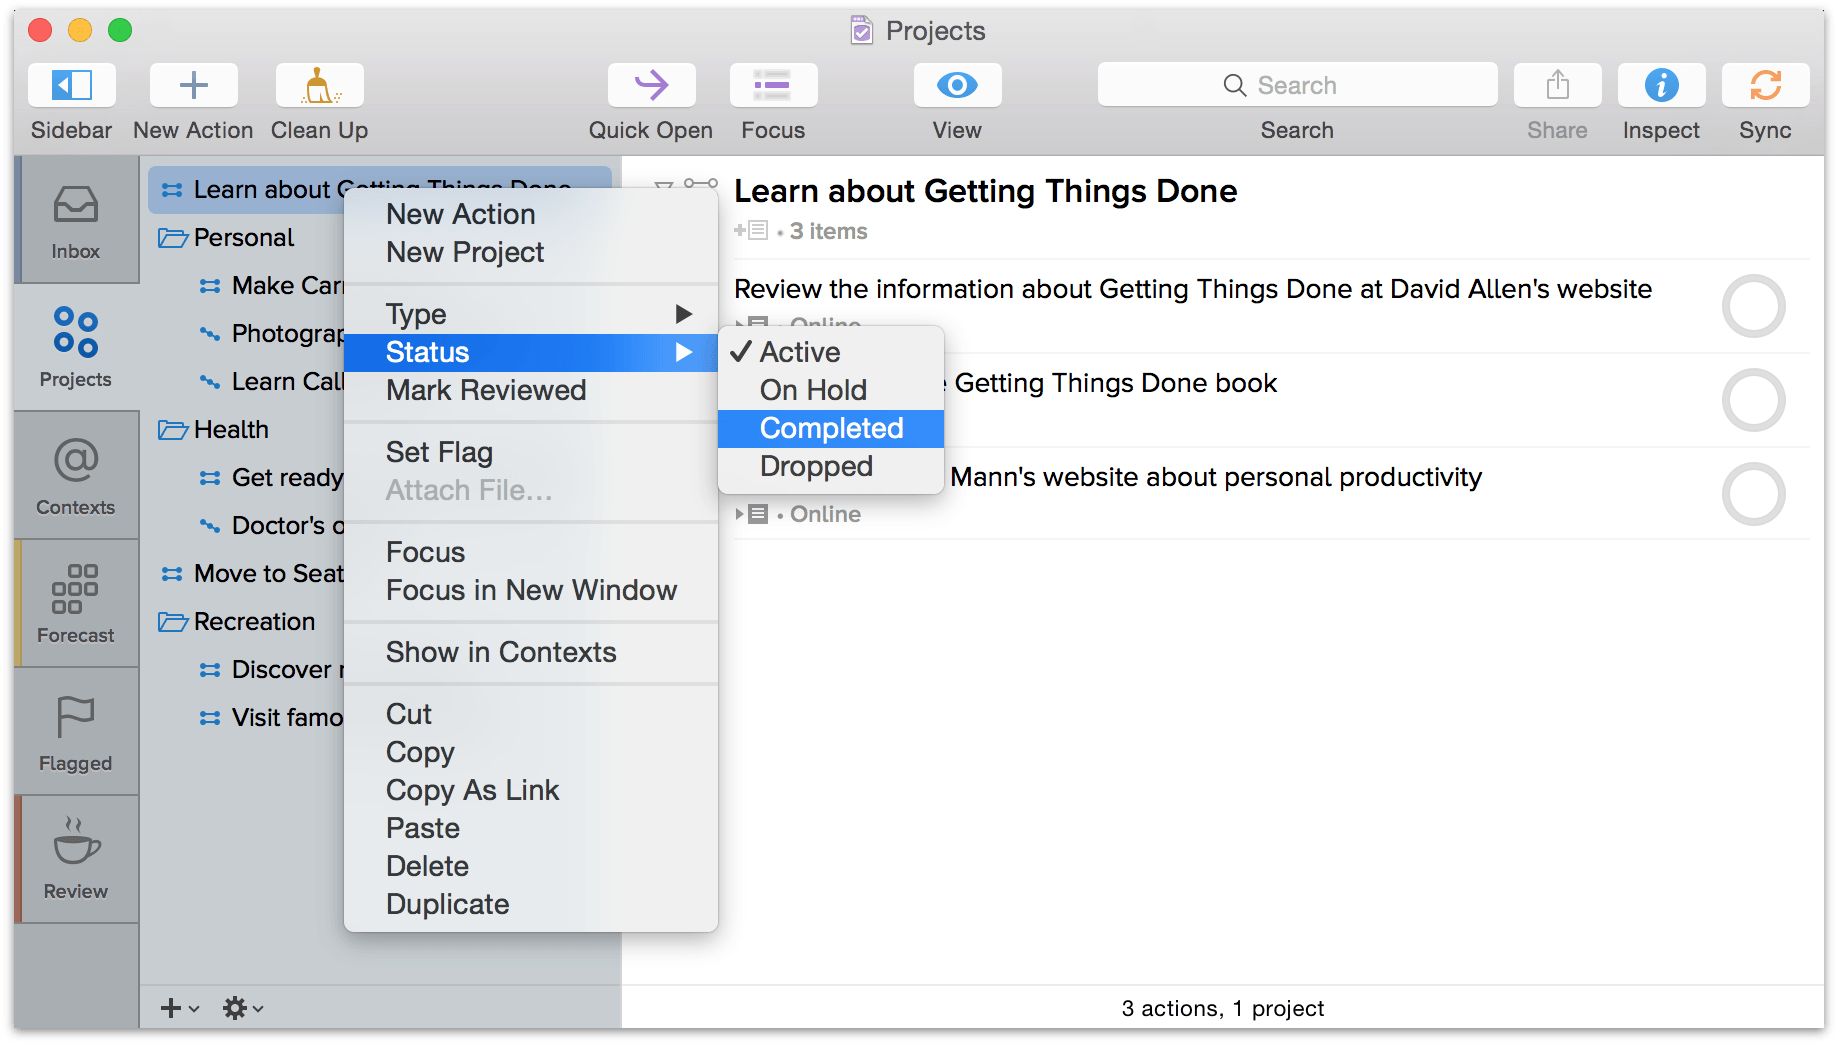
You can change a project’s status in the Project inspector, with the Action menu, or by choosing Edit ▸ Status menu.
Creating Action Groups
Groups can also be used to create a project within a project—an action group (also sometimes called a sub-project). If you find that you have an action that requires many steps of its own, you could split that action off as a separate project. However, a better solution could be to leave the action in its current project, and then move the related tasks underneath.
For example, when planning your move to Seattle, you realize that you need to make a house-hunting trip to find a place to live. You need to book your flights, rent a car, reserve a hotel room, and make appointments with real estate agents to find an apartment or that dream house in Alki Beach. You can create these tasks one by one, and then move the action into the Plan a house-hunting trip action.
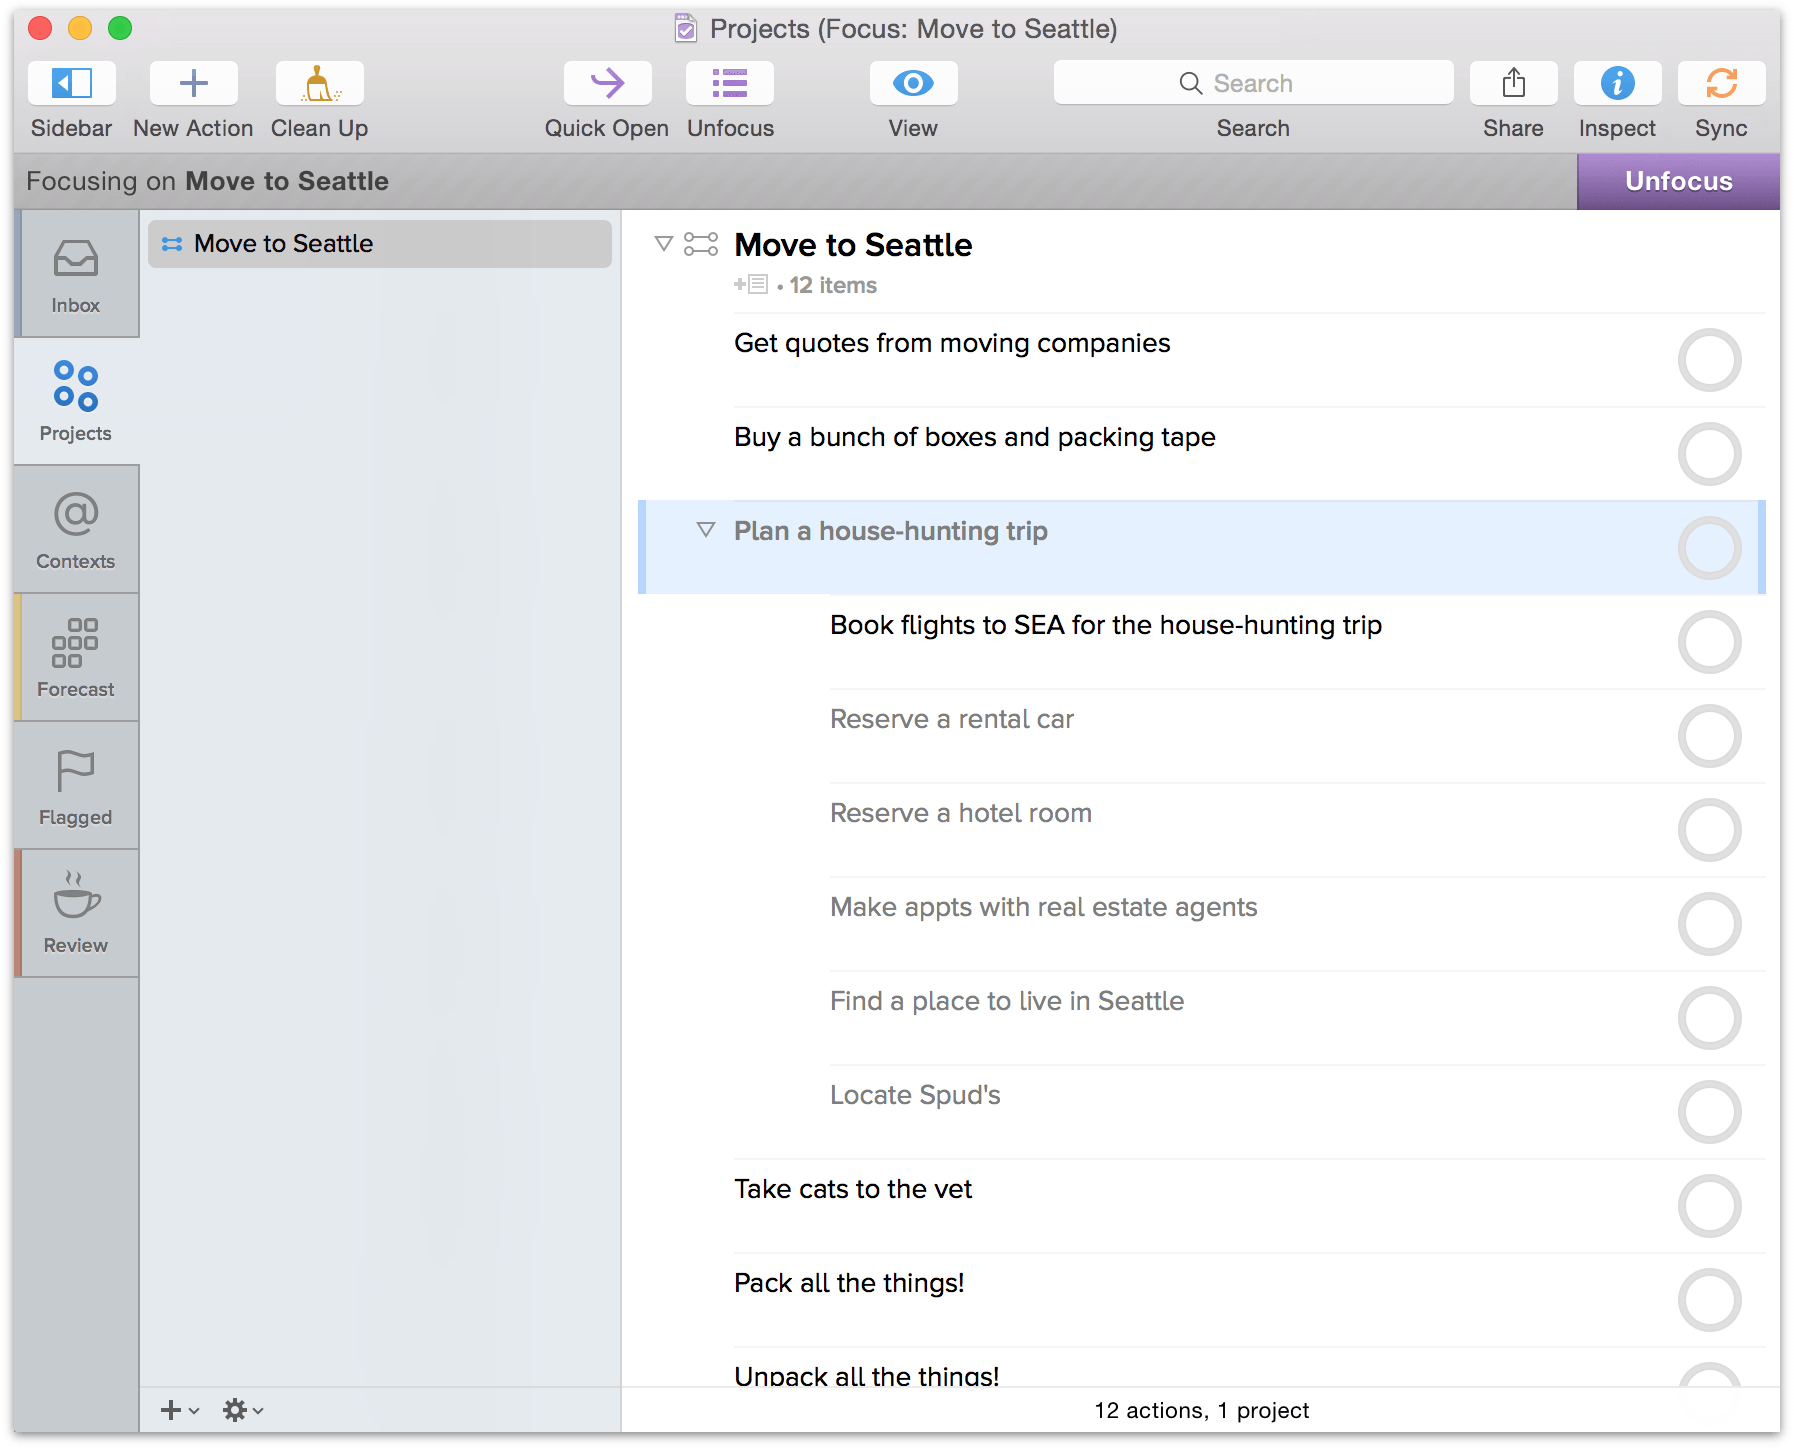
Put another way, when you create an action group you’re creating a parent-child hierarchical relationship between an action and the actions nested within it. If the desired parent and children are actions that already exist, this can be done by selecting the soon-to-be child actions and:
- Dragging them on top of the parent action so the parent action is selected and shows a vertical insertion line indented beneath it, then dropping them inside, or
- Positioning them immediately below the intended parent action in the outline and choosing Organize ▸ Indent (Command-]).
If either the group’s parent action or its child actions have yet to be created, there are two other ways to create groups.
To create a group from an existing action intended as its parent:
Create child actions from scratch by choosing Organize ▸ Add Inside (Shift-Command-]) with the intended parent action selected. A new action is created with the selected action as its parent.
To create a group from existing actions with no existing parent action:
Select the items you’d like to group and choose Organize ▸ Group (Option-Command-G). A new untitled action is created to represent the group, and the selected items are indented to become its children.
Once you’ve created that action group, you can change its type from Parallel to Sequential so that the next task only becomes available when you tick off the previous task. And when you’ve completed the final action for that subproject, the parent action can be checked off, too.
Tip
For added flexibility in creating just the right dependencies for your project, consider making an Action Group parallel within a sequential project, or vice versa.
Grouping Projects with Folders
Occasionally, you’ll find that some of your projects are similar enough that you want to keep them together so you can look at everything in one place. These projects might have different goals, timelines, or objectives, but they contribute to the greater whole. For projects such as this, you can use Folders in OmniFocus to group multiple projects together.

To create a project folder, follow these steps:
Select two or more projects in the Projects perspective:
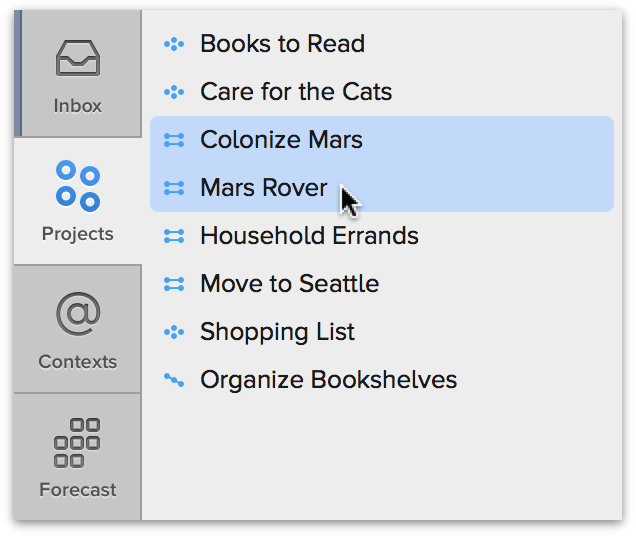
Choose Organize ▸ Group (Option-Command-G). This places the selected projects within a folder.
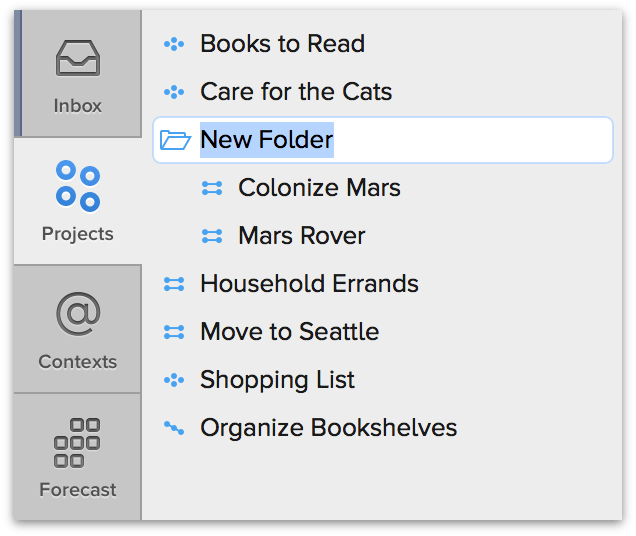
Enter a name for the folder to replace the New Folder text.
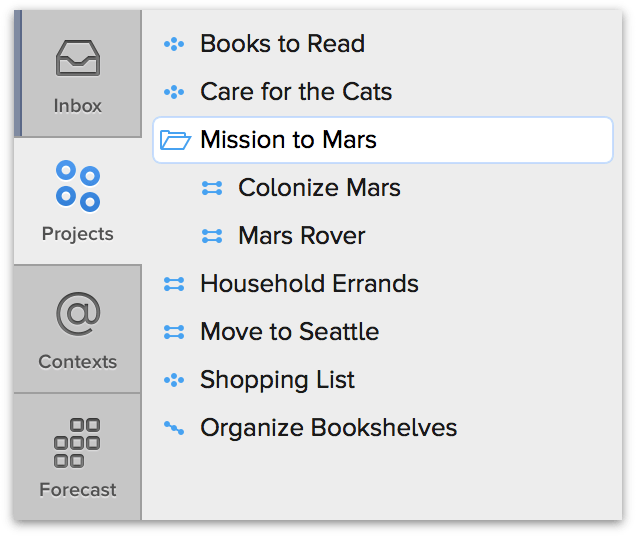
Press Return to accept the new folder name.
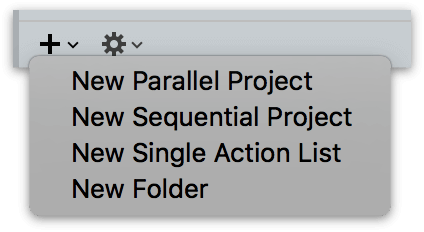
Alternatively, choose New Folder from the Plus menu beneath the projects list, or choose File ▸ New Folder while in the Projects perspective.
Tip
Folders can be created or moved inside other folders, to create a nesting hierarchy of projects that’s as deep — or wide — as you need it to be.
Marking a Project Complete
Eventually you’re going to reach the successful end of a project. When you’re sure that you’ve really accomplished “Move in to new house,” “Carve Halloween pumpkins,” or “Write pterodactyl novel,” you can mark the project complete.
Select the project and then choose Status ▸ Completed from its contextual menu, change its status in the inspector, click the Complete toolbar item, choose Edit ▸ Status ▸ Completed, or just press the Space bar. The project’s status changes to Completed, and it is filed away in your library for safekeeping.
Placing a Project On Hold
If you’re not quite sure whether you want to start (or continue) a project, you can change the project’s Status from Active to On Hold. When you place a project On Hold, the project and its actions are removed from the project list in the sidebar (if you’ve chosen to show Active projects in View options).
Every now and then, you can switch the project View option to Remaining so you can review the projects you’d like to make active, drop, or keep On Hold.
There are several ways to place a project On Hold:
Select the project in the main outline, open the Project inspector (Option-Command-I), and then change the Status to On Hold.
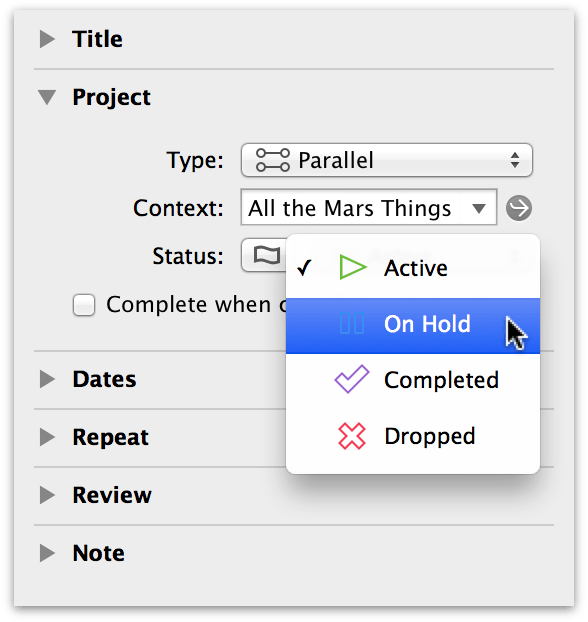
Select the project in the sidebar, and then choose Status ▸ On Hold from the gear menu at the bottom of the sidebar.
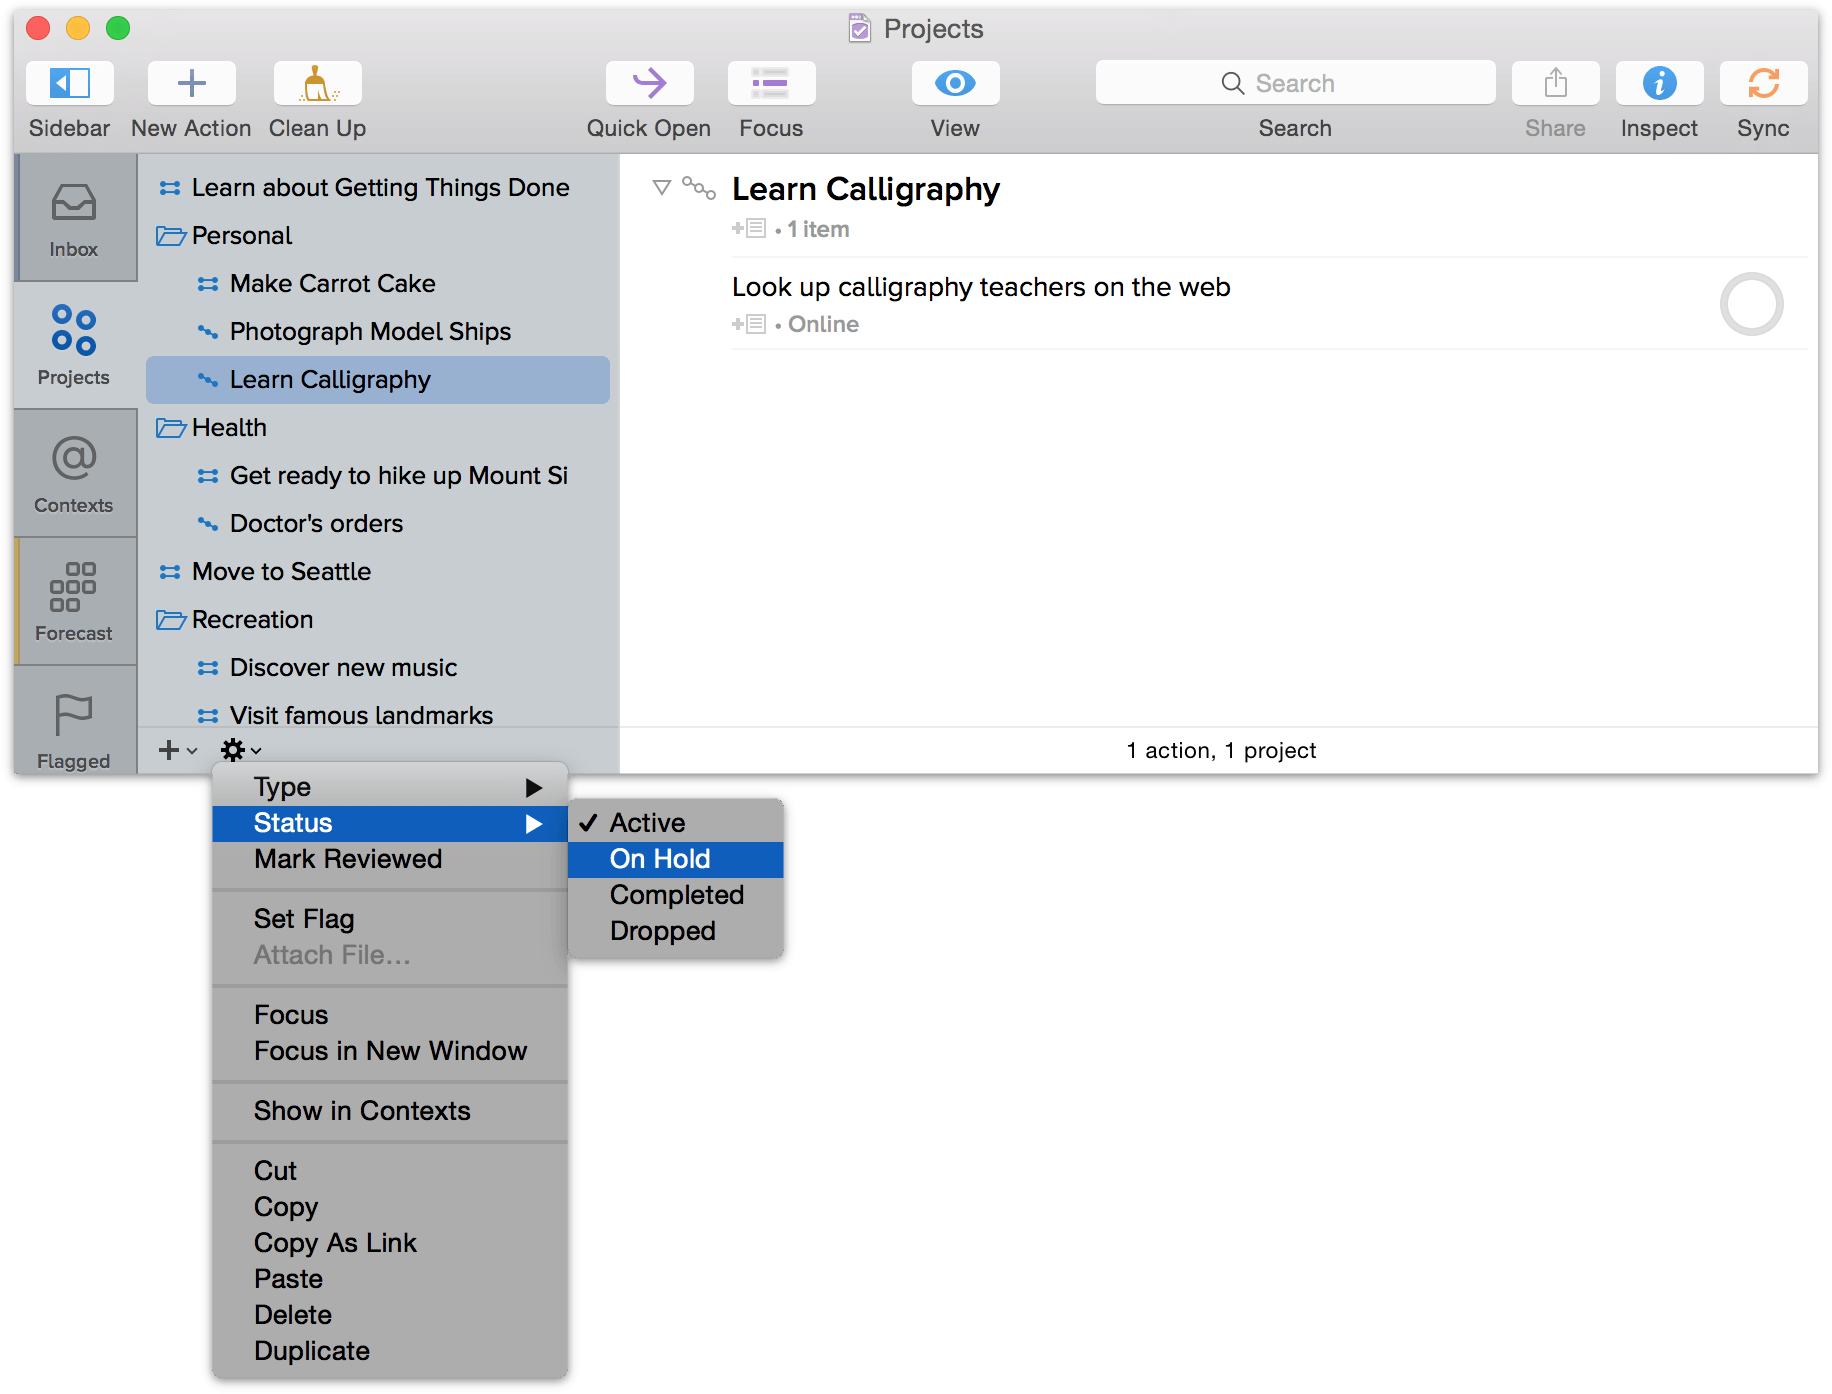
Control- or right-click the project in the main outline or in the sidebar, and then choose Status ▸ On Hold from the contextual menu.
To switch an On Hold project to Active again:
Choose Perspectives ▸ Projects (Command–2).
Click View in the toolbar, or choose View ▸ Show View Options (Shift-Command-V) to open the View options popover menu.
Choose the Remaining view option. Any projects that have been placed On Hold, have been deferred or blocked, now show up in the sidebar.
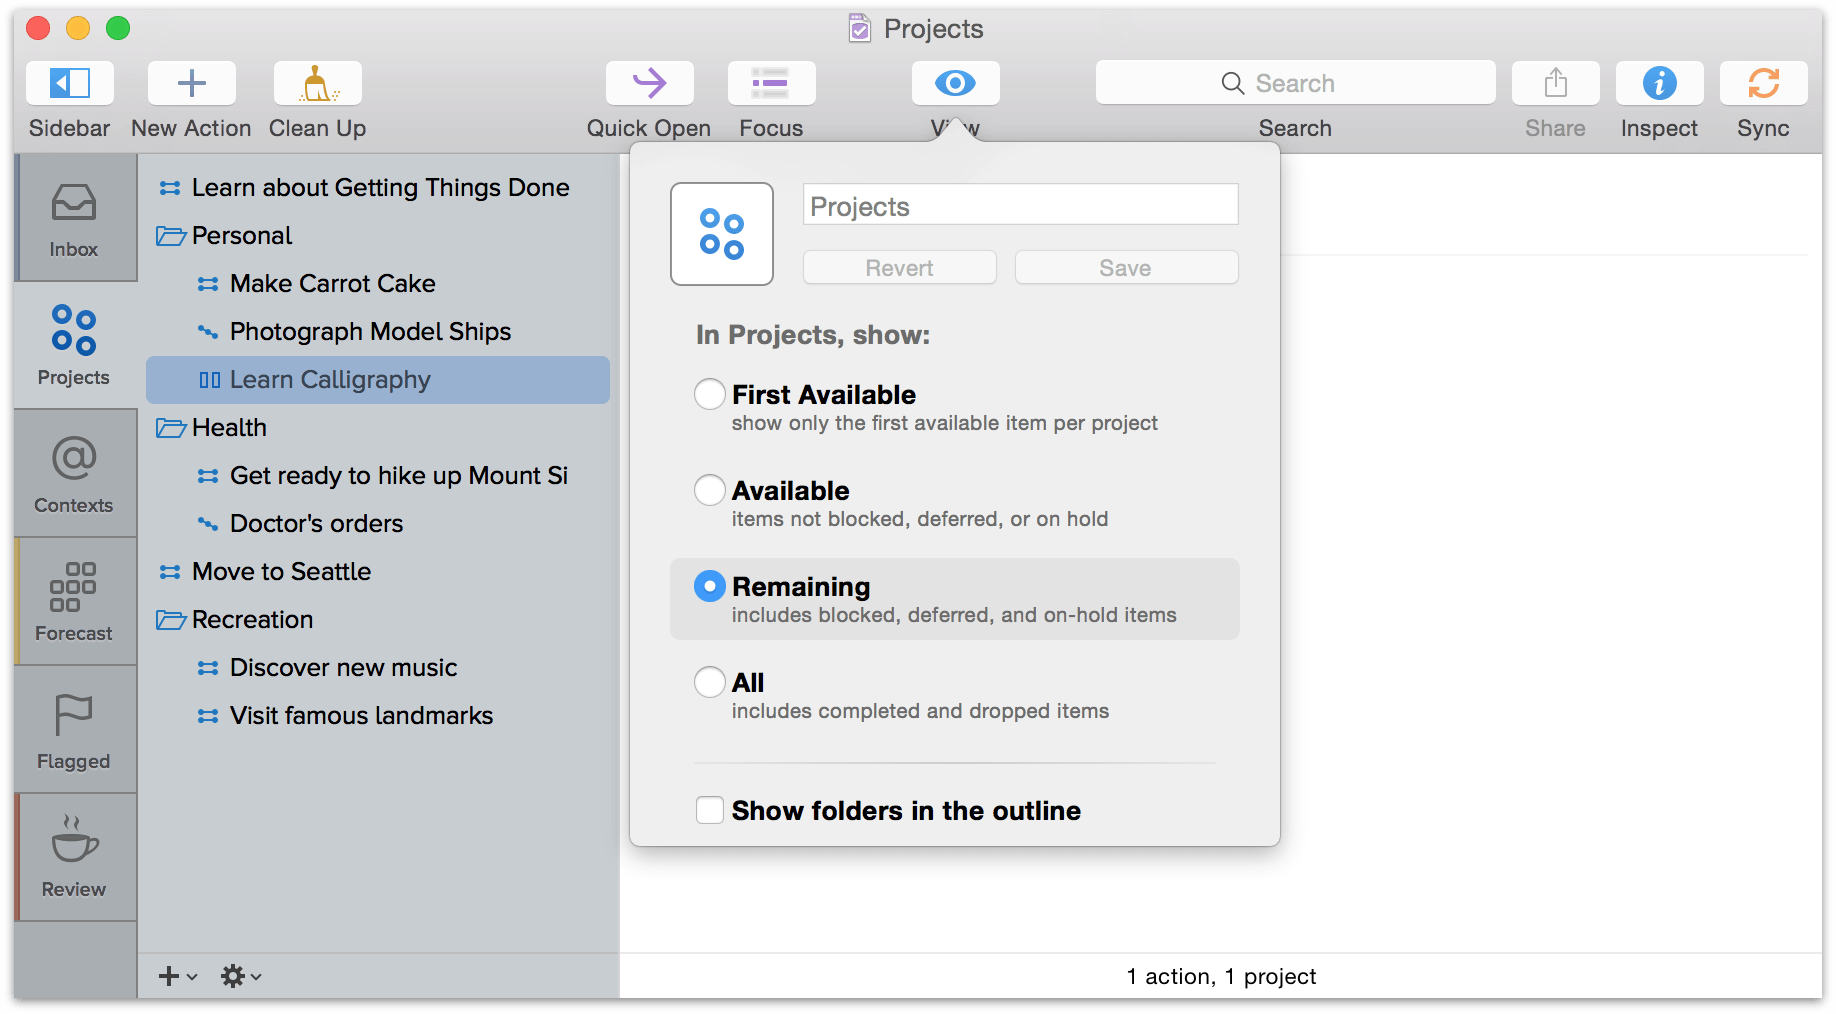
Click away from the View options popover to make it disappear.
Select the project in the sidebar, and then use one of the following techniques to set the project’s status back to Active:
- Select the project in the main outline, open the Project inspector (Option-Command-I), and then change the Status to Active.
- Select the project in the sidebar, and then choose Status ▸ Active from the gear menu at the bottom of the sidebar.
- Control- or right-click the project in the main outline or in the sidebar, and then choose Status ▸ Active from the contextual menu.
Tip
If you don’t want On Hold projects cluttering your Projects sidebar until they are active, you can leave the Projects View options set to Available, but then change the Review View options to Remaining. This way, anything that is On Hold, Deferred, or Blocked shows up in the sidebar whenever you review all of your projects, and you can decide then whether to reactivate a project or action.
Dropping a Project
If you’ve decided not to work on a project any further, you can drop it completely. It disappears from the list in the sidebar, and its actions likewise stay hidden. Of course, you could just delete the project, but then you wouldn’t have any record of it or its actions ever having existed. Keeping them around in a dropped state means you can go back and check on how often you give up on projects, check which actions you’ve completed regardless of whether they’re from still-relevant projects, and so on.
Note
When you drop a project, OmniFocus archives it away for safekeeping and, when you choose, removes the project from your main database. See Archiving and Backup for more information.
There are several ways to drop a project:
Select the project in the main outline or in the sidebar, and then choose Edit ▸ Status ▸ Dropped.
Select the project in the main outline, open the Project inspector (Option-Command-I), and then change the Status to Dropped.
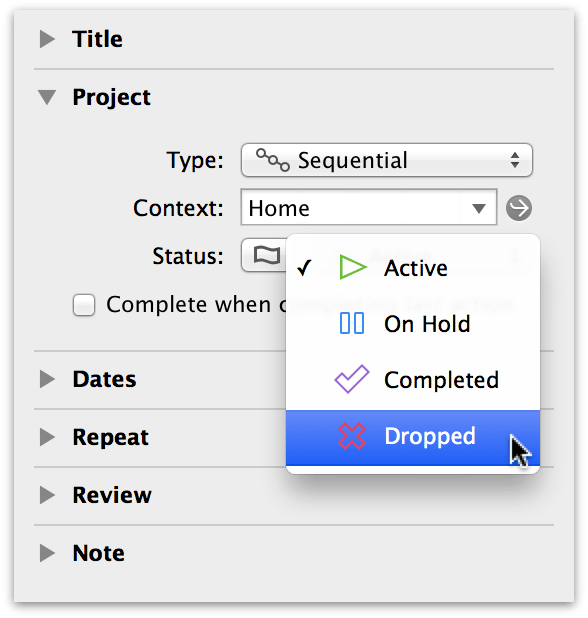
Select the project in the sidebar, and then choose Status ▸ Dropped from the gear menu at the bottom of the sidebar.
Control- or right-click the project in the main outline or in the sidebar, and then choose Status ▸ Dropped from the contextual menu.
To switch a Dropped project or folder to Active again:
Choose Perspectives ▸ Projects (Command–2).
Click View in the toolbar, or choose View ▸ Show View Options (Shift-Command-V) to open the View options popover menu.
Choose the All view option. Any projects that have been Dropped now show up in the sidebar.
Click away from the View options popover to make it disappear.
Select the project in the sidebar, and then use one of the following techniques to set the project’s status back to Active:
- Select the project in the main outline and choose Edit ▸ Status ▸ Active.
- Select the project in the main outline, open the Project inspector (Option-Command-I), and then change the Status to Active.
- Select the project in the sidebar, and then choose Status ▸ Active from the gear menu at the bottom of the sidebar.
- Control- or right-click the project in the main outline or in the sidebar, and then choose Status ▸ Active from the contextual menu.