The Perspectives Window (Pro)
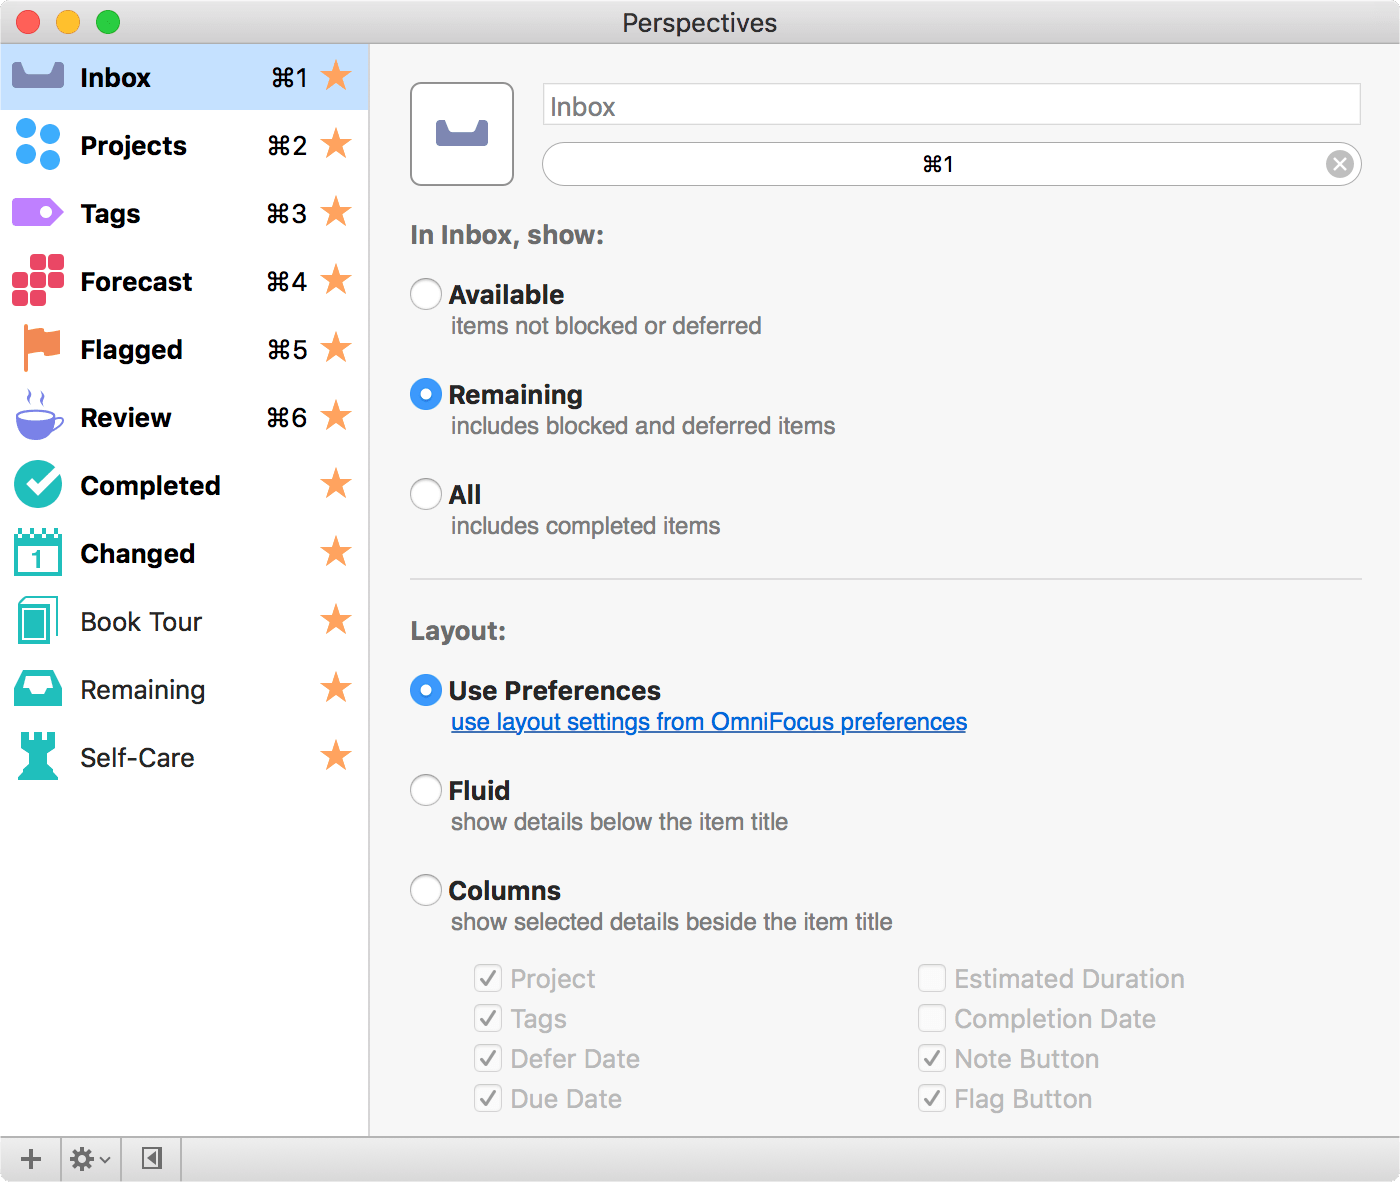
OmniFocus Pro adds the Perspectives window to OmniFocus, where you can choose which perspectives to display as tabs in the sidebar (and determine their order), and create custom perspectives that reflect views on your OmniFocus data that you want to come back to again and again.
Choose Show Perspectives (Control-Command-P) from the Perspectives menu to open the Perspectives window.
The Perspective List
On the left side of the Perspectives window you’ll see a list of your existing OmniFocus perspectives, including the built-in ones, where you can choose which ones to display as tabs in the sidebar and drag and drop to arrange them in your preferred order.
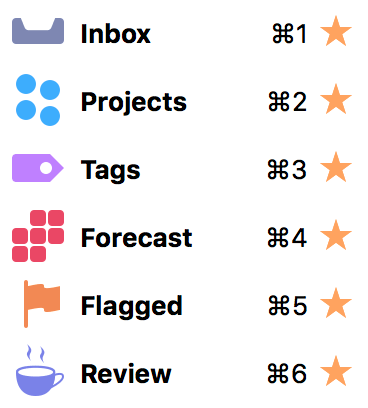
To set a perspective as a sidebar tab, click the star  next to the perspective name.
The perspective list also serves as a way to navigate between perspectives in the main OmniFocus window: double-click a perspective in the list to open it. If you find this useful, you can click Collapse  in the bottom bar to hide the Editor when all you need is the list.
The Perspective Editor
The Perspective Editor appears on the right side of the Perspectives window, and contains controls you can use to edit existing perspectives and create new ones.
The controls in the Perspective Editor are mostly identical to those found in View options for the selected perspective, with a few additional features described in the sections below.
To add a new custom perspective, choose Perspectives > Add Perspective... or click Add Perspective  in the Perspectives window’s bottom bar.
Name and Icon
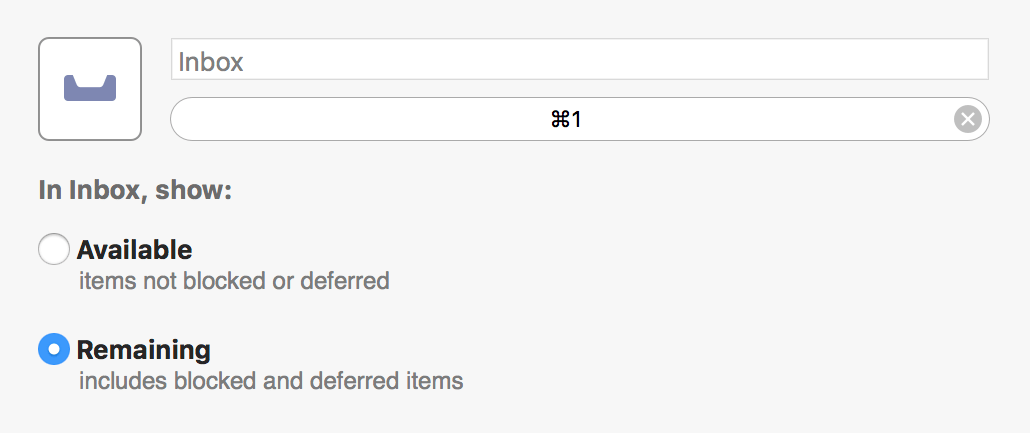
When editing a custom perspective, click the name field to enter a new name or change an existing one (the default is Untitled Perspective).
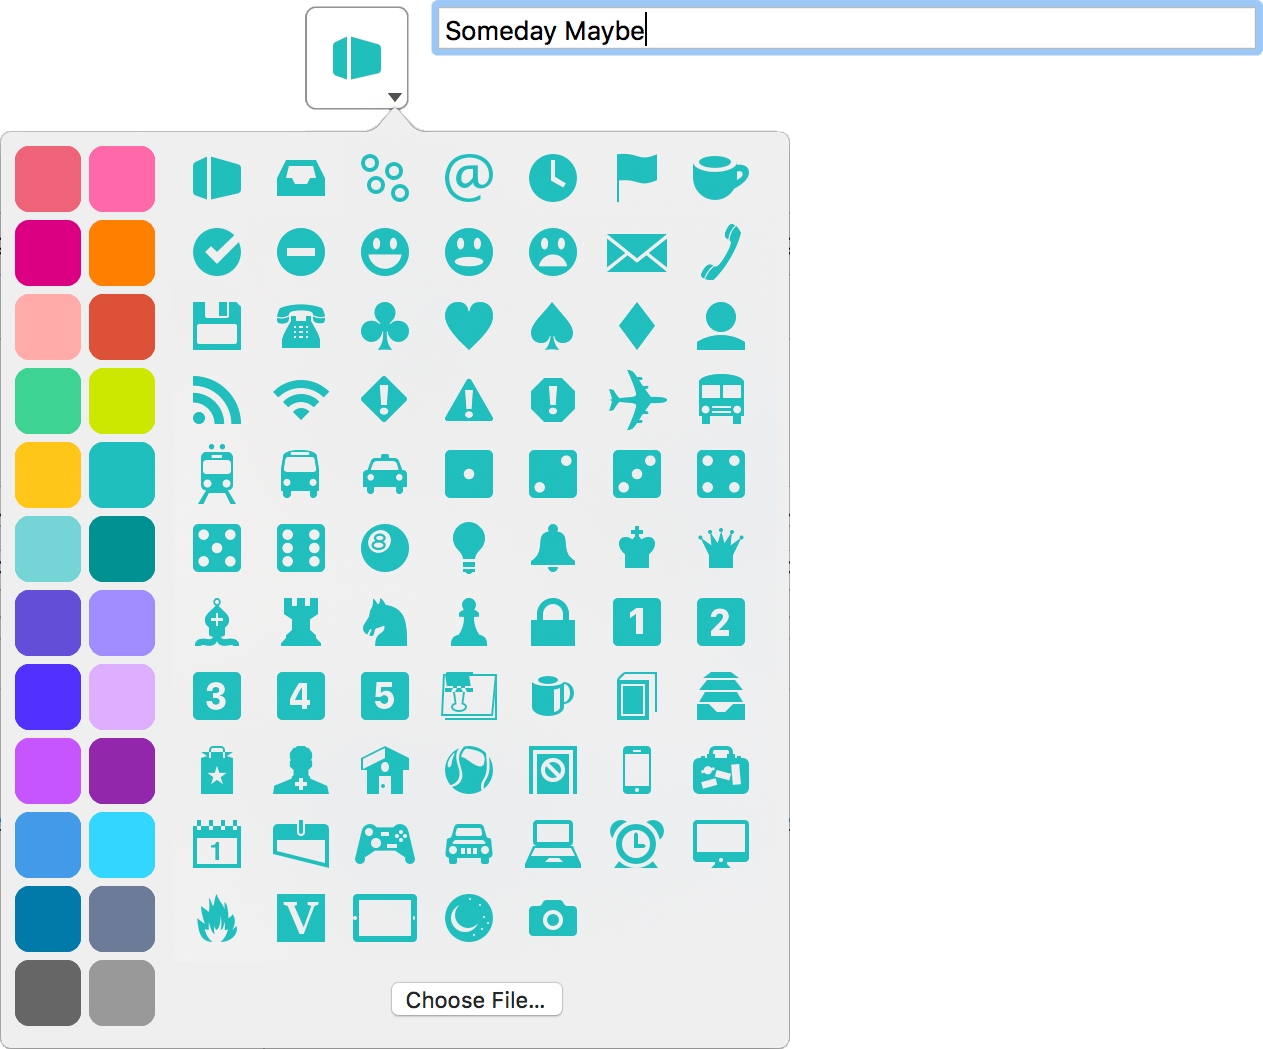
Click the down arrow in the corner of the icon well to open the icon picker, where you can choose from among a set of Omni-designed icons included with OmniFocus, or click Choose File... to add an image stored elsewhere on your Mac.
Click a color on the left side of the icon picker to choose a custom color for your perspective and its iconography throughout the app.
Shortcut Recorder
Beneath the name field is a place for you to assign a keyboard shortcut to the selected perspective.

To record a shortcut, click the button and then press the keys for the keyboard shortcut you want to use. The characters appear in the field as you type, and are saved when you’ve entered a valid combination.

Press esc to cancel recording, or click Revert  to restore the previous shortcut.
You can choose any shortcut as long as it isn’t already used, and contains a combination of one of:
- the Command key
- the Control key
and any other key. Alternatively, an unused Function key (such as F13) can be used.
Upgrade or Downgrade Perspective
Custom perspectives you create, as well as names, icons, and colors assigned to them, are synced between all of your devices that sync with your OmniFocus database.
Older versions of OmniFocus do not support all the features of perspectives created with OmniFocus 3. (These perspectives will still sync provided the database version is compatible, however they will be hidden.)
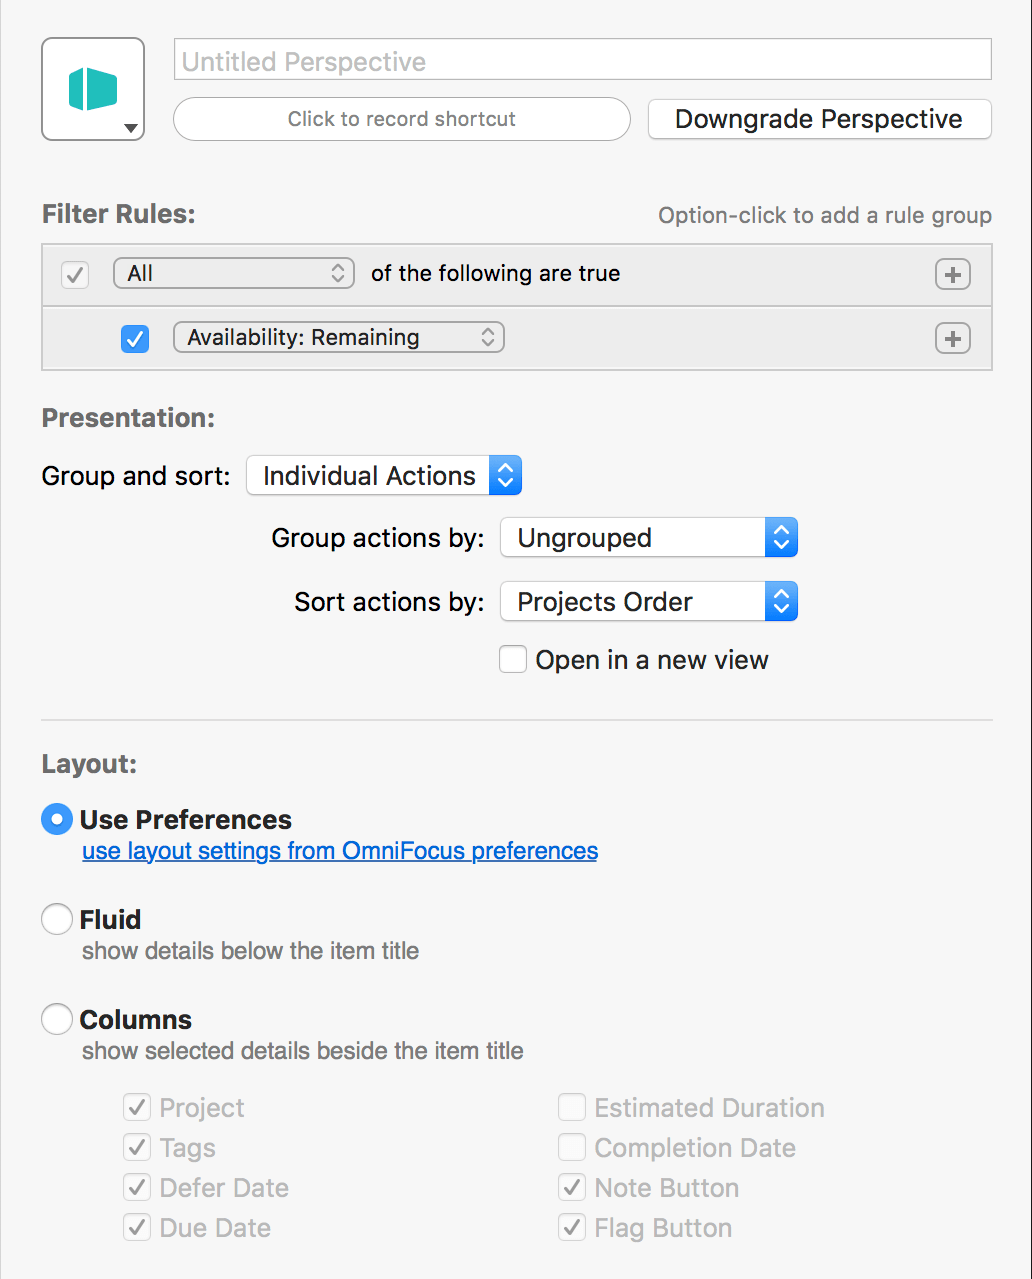
To make a perspective created with OmniFocus 3 visible in earlier versions of OmniFocus, choose Downgrade Perspective. Choosing to downgrade a perspective may remove some advanced filter rules or other features of the perspective.
Alternatively, if you are syncing a perspective created with an older version of OmniFocus to OmniFocus 3, you can choose to Upgrade the perspective to take advantage of the features described in this chapter. Existing perspective rules and presentation settings will be converted to the newer perspective format.
Perspectives created in OmniFocus 3 for Mac use the editor described in this chapter. You can still sync and use perspectives created in OmniFocus 2, which will open in the old version of the editor if you choose not to upgrade them.
Filter Rules
This section of the editor determines which items the perspective includes. Items are included by setting filters with the parameters for specific item attributes: if an item matches the filter rules, it is included in the perspective. If an item doesn’t match the rules, it won’t appear.

Filter rules are set up in hierarchy, with an All, Any, or None of the following are true operation at the top of the tree. This indicates that all, any, or none of the rules inside it must apply to items for them to be included in the perspective. (This forms the root of the hierarchy, and therefore can’t be deleted.)
By default a new custom perspective includes one Availability: Remaining rule as an example. Since it is nested beneath All of the following are true, this rule means that the perspective will only show items with an availability status of Remaining (completed and dropped items will not appear).
If you don’t want to include the default rule in your perspective, either change it to something else, deselect the checkbox to the left to turn it off, or add another rule and click Remove Rule  to delete the first one. (All custom perspectives must contain at least one rule, so you can’t delete the default rule outright.)
Click Add Rule  to add a new rule that applies to items in the perspective.
When adding a filter rule, note that it will apply based on its position in the hierarchy. All rules added beneath the root use its logic: either Any, All, or None of them must apply for items meeting those criteria to appear in the perspective.
To create additional hierarchy in the list, press option and click Add Rule Group  (with option held down, this replaces Add Rule).
As with the root operation, you can choose the condition that applies to rules in the group:
-
All of the following are true: Each of the rules in the group must be true for an item to appear in the perspective (or for it to be considered by the rules above it in the hierarchy). This corresponds to a Boolean AND operation.
-
Any of the following are true: If an item meets even one of the rules nested below Any of the following, it will be included in the perspective (provided it also meets conditions described elsewhere in the tree). This corresponds to a Boolean OR operation.
-
None of the following are true: If an item meets one of the rules nested below it, it will be excluded from the perspective regardless of any other rules applied. This corresponds to a Boolean NOT operation.
If your filter rules have several levels of hierarchy, you can drag and drop a rule elsewhere in the structure to change its effect on item visibility in the perspective.
Presentation
This section of the Editor defines how items in the perspective are displayed in the outline. You can choose from two main modes using the Group and sort setting: to view items as a list of Individual Actions, or as items hierarchically grouped within Entire Projects.
If your perspective’s filter rules exclude items of a type that would be grouped or sorted by one of the criteria listed below, it is possible to choose an option that offers no meaningful structure (such as choosing to group by Completed when the perspective is set to display only items that are Remaining).
Grouping and Sorting by Individual Actions
When displayed as individual actions, the outline contains a flat list of all items that meet the filter rule criteria, and the sidebar contains the tags list. Further refinement of grouping and sorting within the perspective offers additional options, and the option to Show project paths can be turned on or off to show or hide the project row above each item.
When grouped by individual actions, actions can additionally be grouped by:
-
Ungrouped—Actions are not grouped and presented as a flat list.
-
Tag—Actions are grouped by individual tag. If an action has more than one tag, it appears within each of its tags.
-
Tags (Combined)—Actions are grouped by tag combination. Regardless of the number of tags on an action, it appears only once (in a group named with its tag combination).
-
Project—Actions are grouped by project.
-
Due—Actions are grouped by due date, from oldest to newest. The granularity of the grouping increases as it nears the present day. Actions with no due date assigned are grouped at the bottom of the outline.
-
Defer Date—Actions are grouped by defer date, from oldest to newest. The granularity of the grouping increases as it nears the present day. Actions with no defer date assigned are grouped at the bottom of the outline.
-
Completed—Actions are grouped by completion date, from most recently completed to oldest. The granularity of the grouping increases as it nears the present day. Actions with no completion date are grouped at the bottom of the outline.
-
Dropped—Actions are grouped by dropped date, from most recently dropped to oldest. The granularity of the grouping increases as it nears the present day. Active actions are grouped at the top of the outline.
-
Added—Actions are grouped by the date they were added to OmniFocus, from newest to oldest. The granularity of the grouping increases as it nears the present day.
-
Changed—Actions are grouped by the date they were most recently edited, from newest to oldest. The granularity of the grouping increases as it nears the present day.
-
Flagged—Actions are grouped according to their flagged status, with flagged actions first, followed by unflagged actions.
When grouped by individual actions, actions can additionally be sorted by:
-
Due Date & Flagged—Actions are sorted based on their due and flagged states. Items that are both due and flagged appear first (in the order that they are due), followed by all remaining flagged items, all other due items, and finally items that are neither flagged nor due.
-
Projects Order / Tags Order—Actions are sorted within their grouping in the order they appear in the Projects perspective (or the Tags perspective, if the grouping is based on tags.)
-
Tag—Actions are sorted by tag. Actions with multiple tags appear only once, alongside other actions in the grouping with the same tag combination.
-
Flagged—Actions are sorted by flagged status, with flagged actions appearing first within their grouping.
-
Name—Actions are sorted alphabetically by name.
-
Due—Actions are sorted by due date. Actions with the earliest due (or overdue) dates appear first, followed in descending order by actions with the latest due dates, and finally by actions without due dates.
-
Defer Date—Actions are sorted by defer date. Actions with the soonest defer dates appear first, followed by more remote actions and finally actions without defer dates.
-
Added—Actions are sorted by the date they were added to OmniFocus, from newest to oldest.
-
Changed—Actions are sorted by the date they were most recently edited, from newest to oldest.
-
Completed—Actions are sorted by the date they were completed, with active actions first, followed by completed actions from newest to oldest.
-
Dropped—Actions are sorted by the date they were dropped, with active actions first, followed by dropped actions from newest to oldest.
-
Duration—Actions are sorted by estimated duration, from shortest to longest. Actions without an estimated duration appear at the bottom of the outline.
Grouping and Sorting by Entire Projects
When displayed as entire projects, the outline contains a list of projects with items that meet the filter rules organized hierarchically inside them, and the sidebar contains the projects list. Further refinement of grouping and sorting offers additional options. The Show project paths option is not available for this setting because actions are already displayed within their corresponding projects.
Items without a project that otherwise meet the filter rules are grouped into an Inbox section at the top of the outline.
When grouped by entire project, the projects within the perspective can additionally be grouped by:
-
Ungrouped—Projects are not grouped and presented as a flat list.
-
Folder—Projects are grouped into the folders that contain them. Projects outside of folders are grouped in a No Folder section at the bottom of the outline.
-
Due—Projects are grouped by due date, from oldest to newest. The granularity of the grouping increases as it nears the present day. Projects with no due date are grouped in a No Due Date section at the bottom of the outline.
-
Defer Date—Projects are grouped by defer date, from oldest to newest. The granularity of the grouping increases as it nears the present day. Projects with no defer date are grouped in a No Defer Date section at the bottom of the outline.
-
Completed—Projects are grouped by the date they were completed, from most recently completed to oldest. The granularity of the grouping increases as it nears the present day. Projects with no completion date are grouped in a No Completion Date section at the bottom of the outline.
-
Dropped—Projects are grouped by the date they were dropped, from most recently dropped to oldest. The granularity of the grouping increases as it nears the present day. Projects with no drop date are grouped in a Not Dropped section at the top of the outline.
-
Next Review—Projects are grouped by the date of their next scheduled review, from soonest to furthest. The granularity of the grouping increases as it nears the present day.
-
Added—Projects are grouped by the date they were added to OmniFocus, from newest to oldest. The granularity of the grouping increases as it nears the present day.
-
Changed—Projects are grouped by the date of their most recent edit, from newest to oldest. (This includes changes to actions within the project.) The granularity of the grouping increases as it nears the present day.
When grouped by entire project, the projects within the perspective can additionally be sorted by:
-
Projects Order—Projects are sorted within their grouping by the order they appear in the Projects perspective.
-
Name—Projects are sorted alphabetically by name.
-
Flagged—Projects are sorted by flagged status, with flagged projects appearing first. The flagged status of individual actions within projects has no effect on this sorting.
-
Due—Projects are sorted by due dates of actions within the project, from oldest to newest. (Projects containing actions with the oldest due dates appear first.) This sorting applies regardless of whether the project itself has a due date. Projects containing no due dates appear at the bottom of the outline.
-
Defer Date—Projects are sorted by defer date, from oldest to newest. Projects with no defer date appear at the bottom of the outline.
-
Completed—Projects are sorted by the date they were completed, with active projects first, followed by completed projects from newest to oldest.
-
Dropped—Projects are sorted by the date they were dropped, with active projects first, followed by dropped projects from newest to oldest.
-
Next Review—Projects are sorted by the date of their next scheduled review, from oldest to newest.
-
Added—Projects are sorted by the date they were added to OmniFocus, from newest to oldest.
-
Changed—Projects are sorted by the date they were most recently edited, from newest to oldest. (This includes changes to actions within the project.)
-
Duration—Projects are sorted by estimated duration, from shortest to longest. Projects without an estimated duration appear at the bottom of the outline.
Open in a New View
Check this box to open the perspective in a new view when you navigate to it using the perspective list or the Perspectives menu. When checked, the perspective opens either in a new window or a new tab, depending on your macOS System Preferences.
To have a perspective open by default in a new tab rather than a new window, open the macOS System Preferences' Dock pane and change the Prefer tabs when opening documents: setting to Always.
Layout
Choose a layout for the perspective. The customization settings here are identical to those available for built-in perspectives with OmniFocus Pro, meaning you have the freedom to override the defaults set up in Layout Preferences if you so choose.
Bottom Bar
The bar at the bottom of the Perspectives window contains controls for adding and removing perspectives, and showing or hiding parts of the window to optimize it for various use cases.
Add Perspective
Creates a new custom perspective ready to be customized using the tools described in this chapter.
Gear Menu 
Contains controls to Open, Duplicate, or Delete the selected perspective. Deleting a perspective also removes it from any other synced OmniFocus devices. Since a perspective is simply a view on your data, removing one doesn’t affect the tasks in your OmniFocus database in any way.
Collapse/Expand Editor
Hides or reveals the Editor portion of the Perspectives window. If you primarily use the window to navigate between perspectives, it can be useful to keep the Editor hidden most of the time.