The Inspector
The Inspector holds tools for editing your actions, projects, and tags.
With something selected in the outline or sidebar, the inspector automatically shows fields relevant to the selection. Click the Inspect button in the toolbar  or choose Show/Hide Inspector from the View menu to show or hide it.

This chapter explains the purpose and function of the inspector’s various sections and the options they contain for editing your OmniFocus items.
Each section of the inspector has a disclosure triangle  next to its name. Click it to collapse or expand the section.
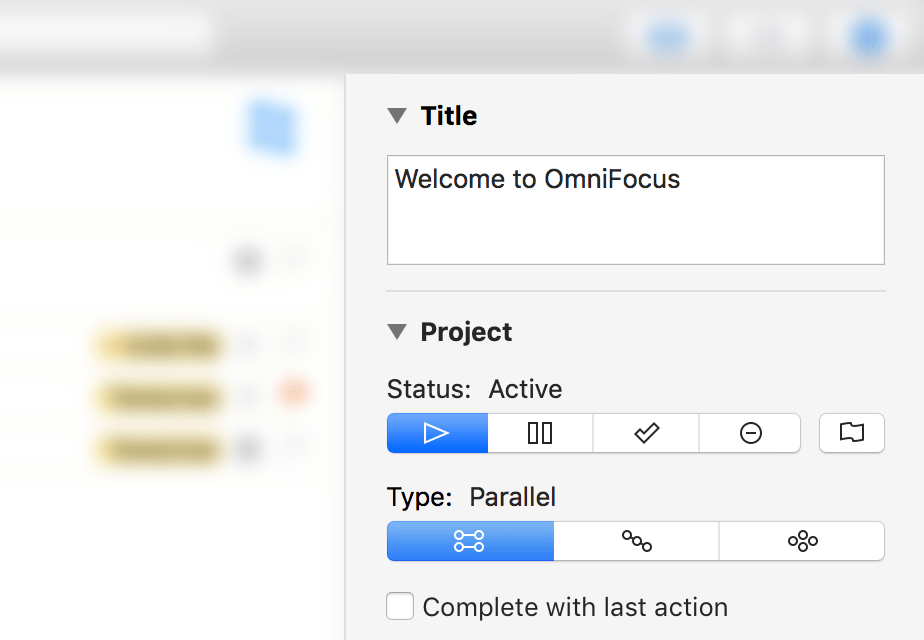
Title
Every item or tag you add to OmniFocus has a title, which you can edit with this section of the inspector.
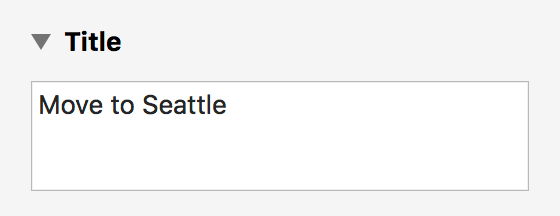
Select the title text in the inspector to edit it.
Most workflows use an item’s title to represent an actionable task—either a standalone action item, a step in a project, or the project goal itself.
By contrast, titles for tags typically represent people, places, things, or situations relevant to completion of the tasks at hand.
Type and Status
Use this section of the inspector to set attributes specific to the type and status of items selected in the outline.
The name of this section changes depending on what you select.
Inbox Item
The Inbox Item section appears when you select one or more Inbox items or item groups.
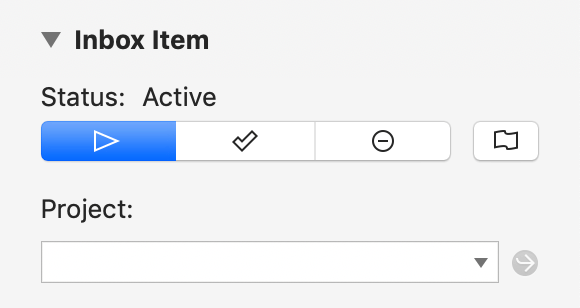
This section includes the following attributes:
-
Status—A switch for setting the status of the selection. Inbox items and groups can be Active, Completed, or Dropped.
-
Flag—A flag that is either empty (unflagged), filled orange (flagged), half filled (mixed selection), or with an orange outline (inherited flag). Click it to set or remove flagged status on the selection.
When a flag is set on an inbox item, it appears in the Flagged perspective. If a flag is set on an item group, the items within it inherit the flag.
-
Type (item groups only)—A switch for setting the type of the group. Item groups can be either Parallel or Sequential.
-
Project—A field for setting the items’ project. For Inbox items and groups, this field is empty; assigning a project to an Inbox item typically causes it to leave the Inbox (this depends on your Organization preferences).
Assign a project to the selection by entering its name in the field, or click the down arrow for a list. To create a new project for the selection, enter it in the field and choose Create new project name (or press Command-Return). Click Go to Project
 to open the assigned project in the Projects perspective.
 -
Complete with last action (item groups only)—A checkbox that determines whether the group status automatically changes to Completed when the last item is completed. (If deselected, the group status must be changed to Completed manually.)
Action
The Action section appears when you select one or more actions or action groups (across any number of projects).
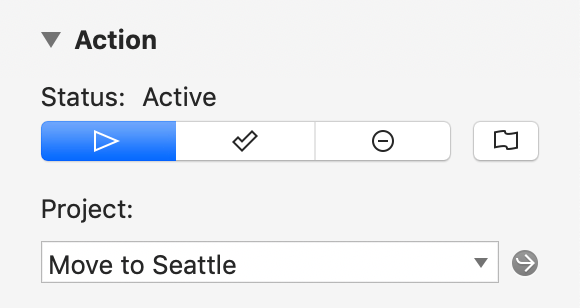
This section includes the following attributes:
-
Status—A switch for setting the status of the selection. Action items and groups can be Active, Completed, or Dropped.
-
Flag—A flag that is either empty (unflagged), filled orange (flagged), half filled (mixed selection), or with an orange outline (inherited flag). Click it to set or remove flagged status on the selection.
When a flag is set on an action, it appears in the Flagged perspective. If a flag is set on an action group, the actions within it inherit the flag.
-
Type (action groups only)—A switch for setting the type of the group. Action groups can be either Parallel or Sequential.
-
Project—A field for setting the actions’ project.
Change the actions’ project by entering a different project name in the field, or click the down arrow for a list. To create a new project for the selection, enter it in the field and choose Create new project name (or press Command-Return). Click Go to Project
to open the assigned project in the Projects perspective. -
Complete with last action (action groups only)—A checkbox that determines whether the group status automatically changes to Completed when the last item is completed. (If deselected, the group status must be changed to Completed manually.)
Project
The Project section appears when you select one or more projects.
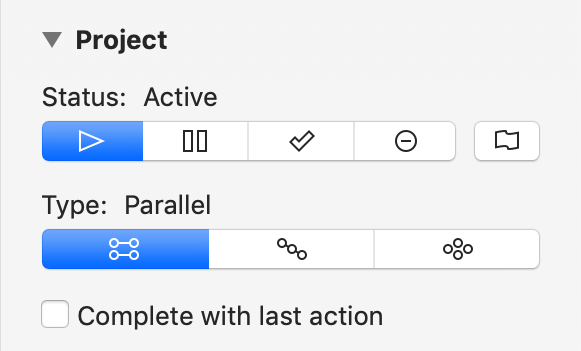
This section includes the following attributes:
-
Status—A switch for setting the status of the selection. Project status can be Active, On Hold, Completed, or Dropped.
Projects have the Active status by default. For more on the meaning of each status and how it affects availability of items within the project, see Project Status.
-
Flag—A flag that is either empty (unflagged), filled orange (flagged), half filled (mixed selection), or with an orange outline (inherited flag). Click it to set or remove flagged status on the selection.
When a project is flagged, the actions inside it inherit the flag and appear in the Flagged perspective.
-
Type—A switch for setting the type of the selection. Projects can be Sequential, Parallel, or Single Actions.
Projects have the Parallel type by default (this can be changed in Organization preferences). For more on the meaning of each type and how it affects availability of items within the project, see Project Type.
-
Complete with last action—A checkbox that determines whether the project status automatically changes to Completed when its last action is completed. (If deselected, the project status must be changed to Completed manually.)
Projects of the Single Actions type do not display this attribute, since they have no last action and are not conventionally considered complete.
Tag
The Tag section appears when you select one or more tags in a view that lists tags in the outline or sidebar.
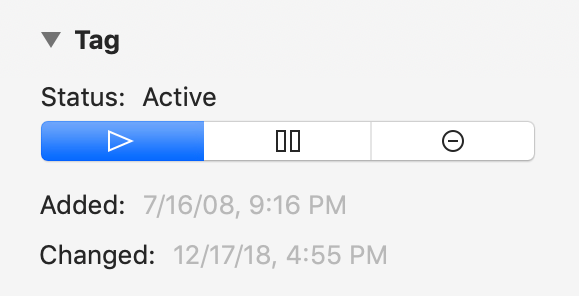
This section includes the following attributes:
-
Status—A switch for setting the status of the selection. Tag status can be Active, On Hold, or Dropped.
Tags have the Active status by default. For more on the meaning of each status and how it affects availability of items the tag is assigned to, see Tag Status.
-
Added—Lists the date that the tag was added to your OmniFocus database. This value is set when the tag is created and cannot be edited.
-
Changed—Lists the date when the tag was last changed. This value is updated automatically when you edit the tag and cannot be directly edited.
Status
The Status section appears when you select multiple items of different types.
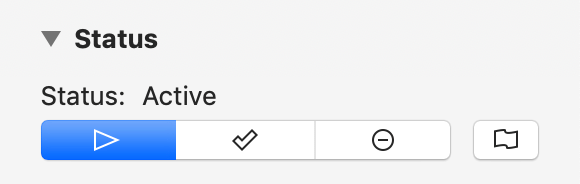
This section includes the following attributes:
-
Status—A switch for setting the status of the selection. Multi-type selections can have their status changed to Active, Completed, or Dropped.
-
Flag—A flag that is either empty (unflagged), filled orange (flagged), half filled (mixed selection), or with an orange outline (inherited flag). Click it to set or remove flagged status on the selection.
Tags
Use the Tags section of the inspector to add tags to items in the current selection, or review any tags they already have. When multiple items are selected, the list includes all tags assigned to them.
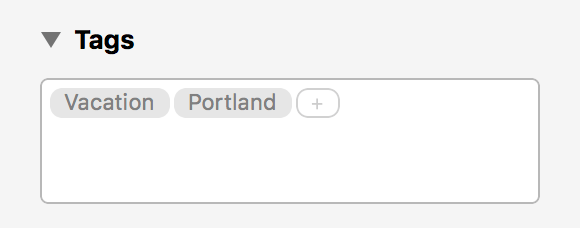
Tags represent associations that tasks have to you and the surrounding world. Click the field in the inspector and start typing to add a tag to an item; existing tags are available to autocomplete. To create a new tag for the selection, enter it in the field and choose Create new tag name (or press Command-Return).
Items can have as many tags as you like. When tags are assigned to a selection, Control-click one to either show it in the Tags perspective or remove it from the selection.
Dates
Use the Dates section of the inspector to set time-related attributes for items that have requirements for when they should start, end, or both. This section also displays times related to the items’ creation, modification, and completion.
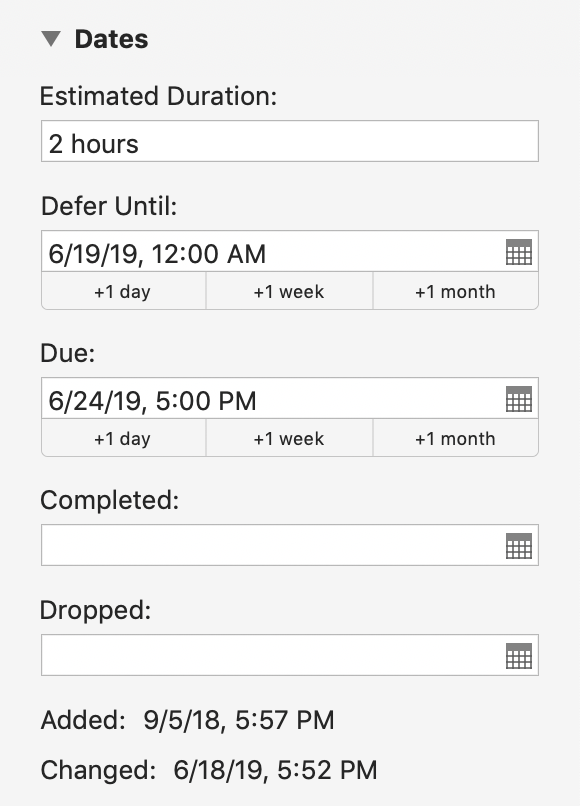
Estimated Duration
Use the Estimated Duration field for the amount of time (in minutes or hours) that you think it will take to complete a task.
Estimated duration is particularly useful when setting up ![]() custom perspectives, where you can use this value to create perspectives for tasks that require a certain amount of time to complete.
custom perspectives, where you can use this value to create perspectives for tasks that require a certain amount of time to complete.
Defer Until
Use the Defer Until field to set or change the selection’s defer date. Use the +1 day, +1 week, and +1 month buttons beneath the field to add a new defer date at the present time plus the button’s value, or augment the existing date by the value of the button.
When a defer date is set on an item, it is not considered available for action until that date is reached.
If a defer date is set on a project or group, items within it inherit that date. (A defer date set directly on the item will override the inherited date, if it is later.)
Due
Use the Due field to set or change the selection’s due date. Use the +1 day, +1 week, and +1 month buttons beneath the field to add a new due date at the present time plus the button’s value, or augment the existing date by the value of the button.
When a due date is set on an item, it is considered due at that date (and due soon based on your Dates and Times preferences).
If a due date is set on a project or group, items within it inherit that date. (A due date set directly on the item will override the inherited date, if it is sooner.)
Completed
Use the Completed field to set or change the selection’s completion date. If the selection has a status other than Completed, entering a date here (even a date in the future) changes its status to Completed.
Dropped
Use the Dropped field to set or change the selection’s dropped date. If the selection has a status other than Dropped, entering a date here (even a date in the future) changes its status to Dropped.
Added and Changed
The date the selection was added to OmniFocus and the date it was last edited. These values are derived from your editing history, and can’t be changed directly.
Supported Date Formats
You can be creative with the way you enter dates; OmniFocus is good at guessing what you mean. For example:
-
2d, –3w, 1h, 1y1m, and so on — Relative dates and times put the date at a certain amount of time from right now. Negative numbers represent times in the past.
-
2 days, –3 weeks, 1 hour, 1 year 1 month, and so on — You can use the full names of units too.
-
yesterday, tomorrow, tonight, next thursday, last month, this friday, and so on — You can refer to relative dates using common words. “This”, “next”, and “last” have specific meanings: this friday always means the Friday in this week, next friday always means the Friday in the next week, and last friday always means the Friday in last week, regardless of what day today is. Other units work in the same way.
-
september, fri, 2019, and so on — If you enter the name of a specific time period, the date will be at its beginning. So september means September first.
-
5/23/08 10a, 9.30.09 2:00 PM,* and so on — You can use the short date format as defined in your Language & Region system preferences.
-
2w sat, 4d @ 5p, mon 6a, aug 6 tue 5p, and so on — Mix the available formats however you like.
-
now, 9, 14:00, tom, and so on — OmniFocus makes its best guess at things like bare numbers, times, and word fragments. If you think something might work, give it a try.
Repeat
Use the Repeat section of the inspector to set up tasks that occur on a regular basis.
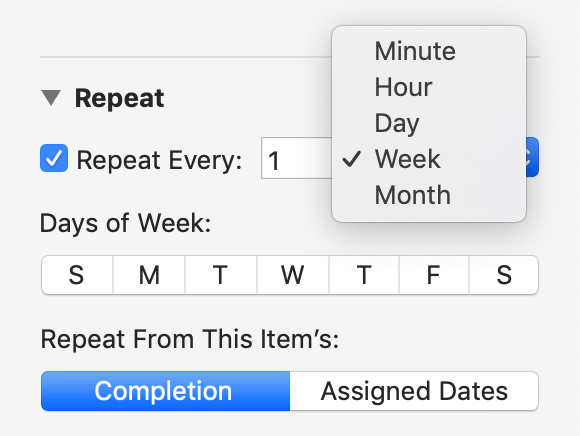
Select the Repeat Every checkbox to indicate that an item repeats. Items can be set to repeat based on a variety of criteria that are progressively disclosed as you make changes in the repeat editor.
Repeat Interval
Choose a number minutes, hours, days, weeks, or months which elapse for every repeat cycle. When weeks or months are chosen, additional custom options become available.
Days of Week
With an interval of weeks, the option becomes available to repeat every weekday chosen here (Monday, Wednesday, and Friday, for example). With an interval of months, the option becomes available to repeat every first through fifth (or last) weekday of the month.
Days in Month
With an interval of months, the option becomes available to repeat on the chosen calendar dates of the month (or the last day of the month).
Schedule the Next
If the item has a defer date, choose whether completing the item will schedule the next occurrence as a:
- Due Date—The item must be completed again by that date. Or;
- Defer Until Date—The item becomes available again on that date.
Repeat From This Item’s
Choose whether completing the item will schedule the next occurrence from:
- Completion—The repeat interval begins when the item is completed. Or;
- Assigned Dates—The repeat interval begins at the originally assigned date.
Notifications
Use the Notifications inspector to view any notifications set for a selected item, to add new custom notifications, and to remove unwanted notifications.
OmniFocus uses technology introduced in macOS Mojave to power its notifications system, providing alerts on your Mac even when the app is closed. Because of this, the notifications feature will not appear in OmniFocus when using operating systems prior to macOS Mojave (10.14).

This inspector contains a list of notifications currently set for the item, followed by a control for adding new custom notifications.
Any notifications, including those automatically created based on your preferences, can be removed from an item by clicking the ![]() next to them on their respective rows.
next to them on their respective rows.
If you have notifications set that don't appear when you expect them to, make sure that Notify on this Mac is checked in Notification preferences.
Preference-Based Notifications
Depending on your Notifications preferences and the attributes you have set on an item, as many as three notifications are created for it automatically.
-
Deferred—With a defer date set and Deferred checked in preferences, a notification for the defer date is automatically added.
-
Latest Start—With a due date and an estimated duration supplied for the item and Latest Start checked in preferences, a notification is created for the latest possible time the task could start for it to be completed by the due date.
-
Due—With a due date set and Due checked in preferences, a notification for the due date is automatically added.
Custom Notifications
Use the Add Notification dropdown menu to create a new notification of one of the following types:
-
Before Due—Adds a notification that occurs a set amount of time before the item is due. A notification of this type depends on the item's due date, so if the due date is changed or removed the time of the notification is likewise altered.
-
Custom—Adds a notification at a custom date and time that you choose from the calendar that accompanies this option. This is a fixed notification that doesn't depend on any other factors, so its date and time won't change even if you change the item's other dates.
Review
Use the Review section of the inspector to change the frequency with which the project comes up for review, and edit the date of a project’s next scheduled review.
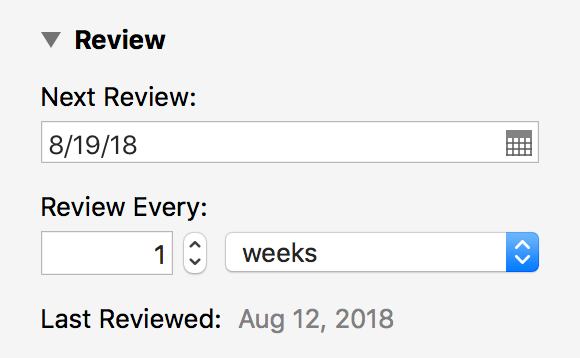
Next Review
Use this field to set the date of the project’s next scheduled review.
Review Every
Set the interval at which the project comes up for review, expressed in days, weeks, months, or years. (The default is every week, beginning a week from the project’s creation.)
Last Reviewed
The date the project was last reviewed. This is derived from your editing history, and can’t be changed directly.
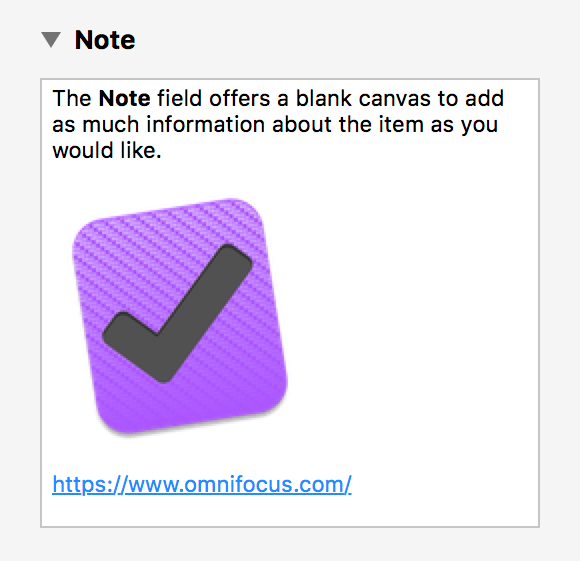
Notes and Attachments
Use the Note section of the inspector to add, view, and edit any notes or attachments associated with the selection.
To add a note to an item, click the note icon ![]() in the outline near the item’s title, edit the note field in the inspector, or choose Edit > Edit Note (Command-’).
in the outline near the item’s title, edit the note field in the inspector, or choose Edit > Edit Note (Command-’).
Note text is indexed along with item titles for the purposes of searching within OmniFocus. Adding longer form text in notes is a great way to include searchable information related to an item without cluttering up its title field.
In addition to plain text, notes support rich text including custom fonts, colors, and styles. Notes also support hyperlinks; enter a URL in the note field and it automatically becomes an interactive link.
The notes field also displays any file attachments associated with the currently selected item.
Attaching Files
With an action or project selected, choose Edit > Attach File. This opens a file selection dialog, where you can browse to find the file you’d like to attach. You can choose whether to link to the file on your system, or embed it into your database (the Embed option is chosen by default).
When you embed an attachment and sync OmniFocus, that file is copied into your OmniFocus database and is stored on the sync server so it can be pulled down wherever you need it.
If you want access to the file on your other devices, this is the option you want—if you attach the file as a link, it stays locally on your system and isn’t included with the rest of your OmniFocus data.
Due to differences in file format support on iOS, not all attachments added in OmniFocus for Mac can be opened in OmniFocus for iOS.
The Attachment List
The Attachment List (Window > Attachment List) gives you quick access to all of the files attached to your database. This can be handy for finding the little pieces of reference material you have added to your actions and projects.
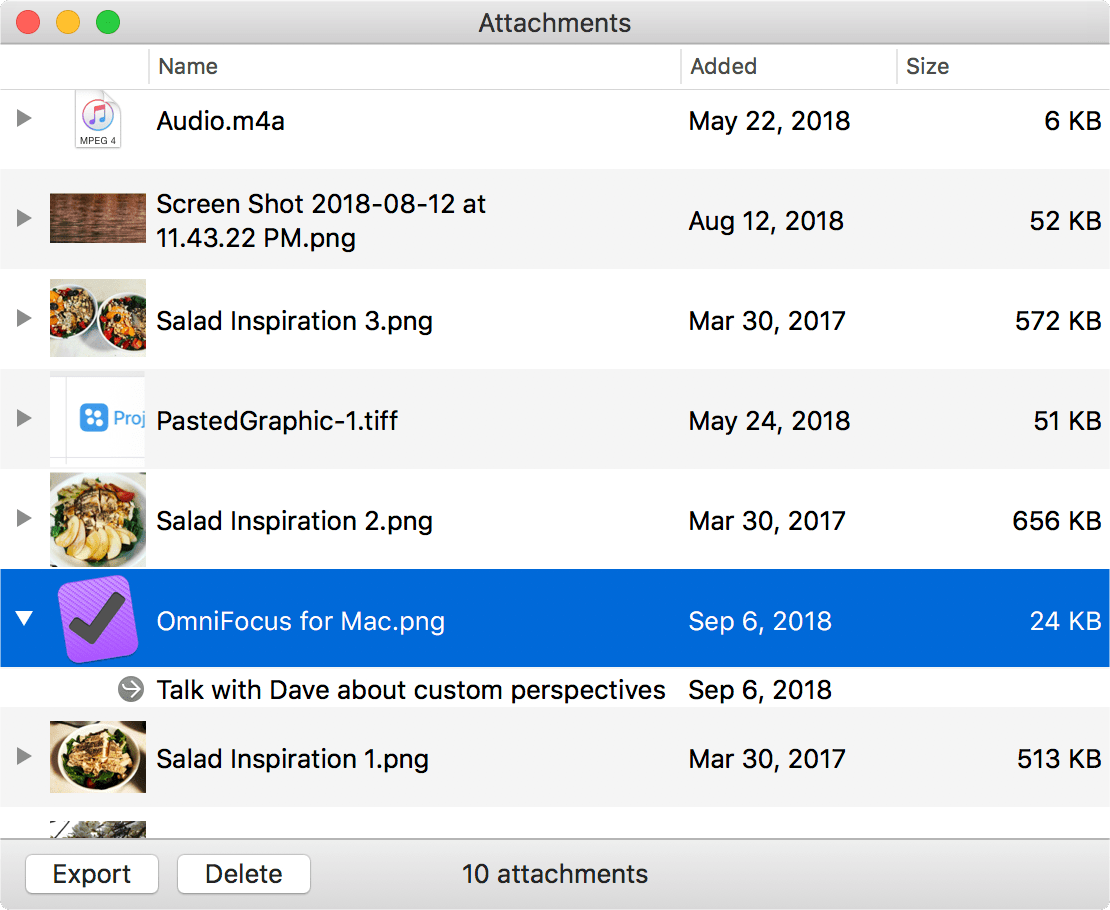
The Attachment List displays a list of all of your attachments along with a thumbnail image, file size, and the date they were added. Click any of the column headers to sort the list by that attribute (in ascending or descending order). Click the disclosure triangle on the left of an attachment row to reveal its associated database items, or double-click the attachment to go straight there.
The Attachment List can also be used for clearing out old attachments, thus slimming your database to take up less space on your devices (especially useful when syncing).
To delete an attachment that you don’t need anymore, select it in the list and click the Delete button in the window’s lower left corner. The Delete dialog indicates how many attachments are selected for deletion, and how many individual database items those attachments are associated with.
Select multiple attachments at once by Command-clicking them, Shift-click to select a range, or use Select All (Command-A) to select all attachments in the list.
If you would like to retrieve attachments from your database (perhaps prior to a big deletion), select them in the list and click Export. An export panel appears where you can choose a location on your Mac to store the attachments. Navigate to the directory you would like to use as the export destination, and click Export again to save copies of the files to your drive.