Object Inspectors
Use the Object inspectors to apply style properties to the objects—shapes, lines, images, and more—on the canvas.
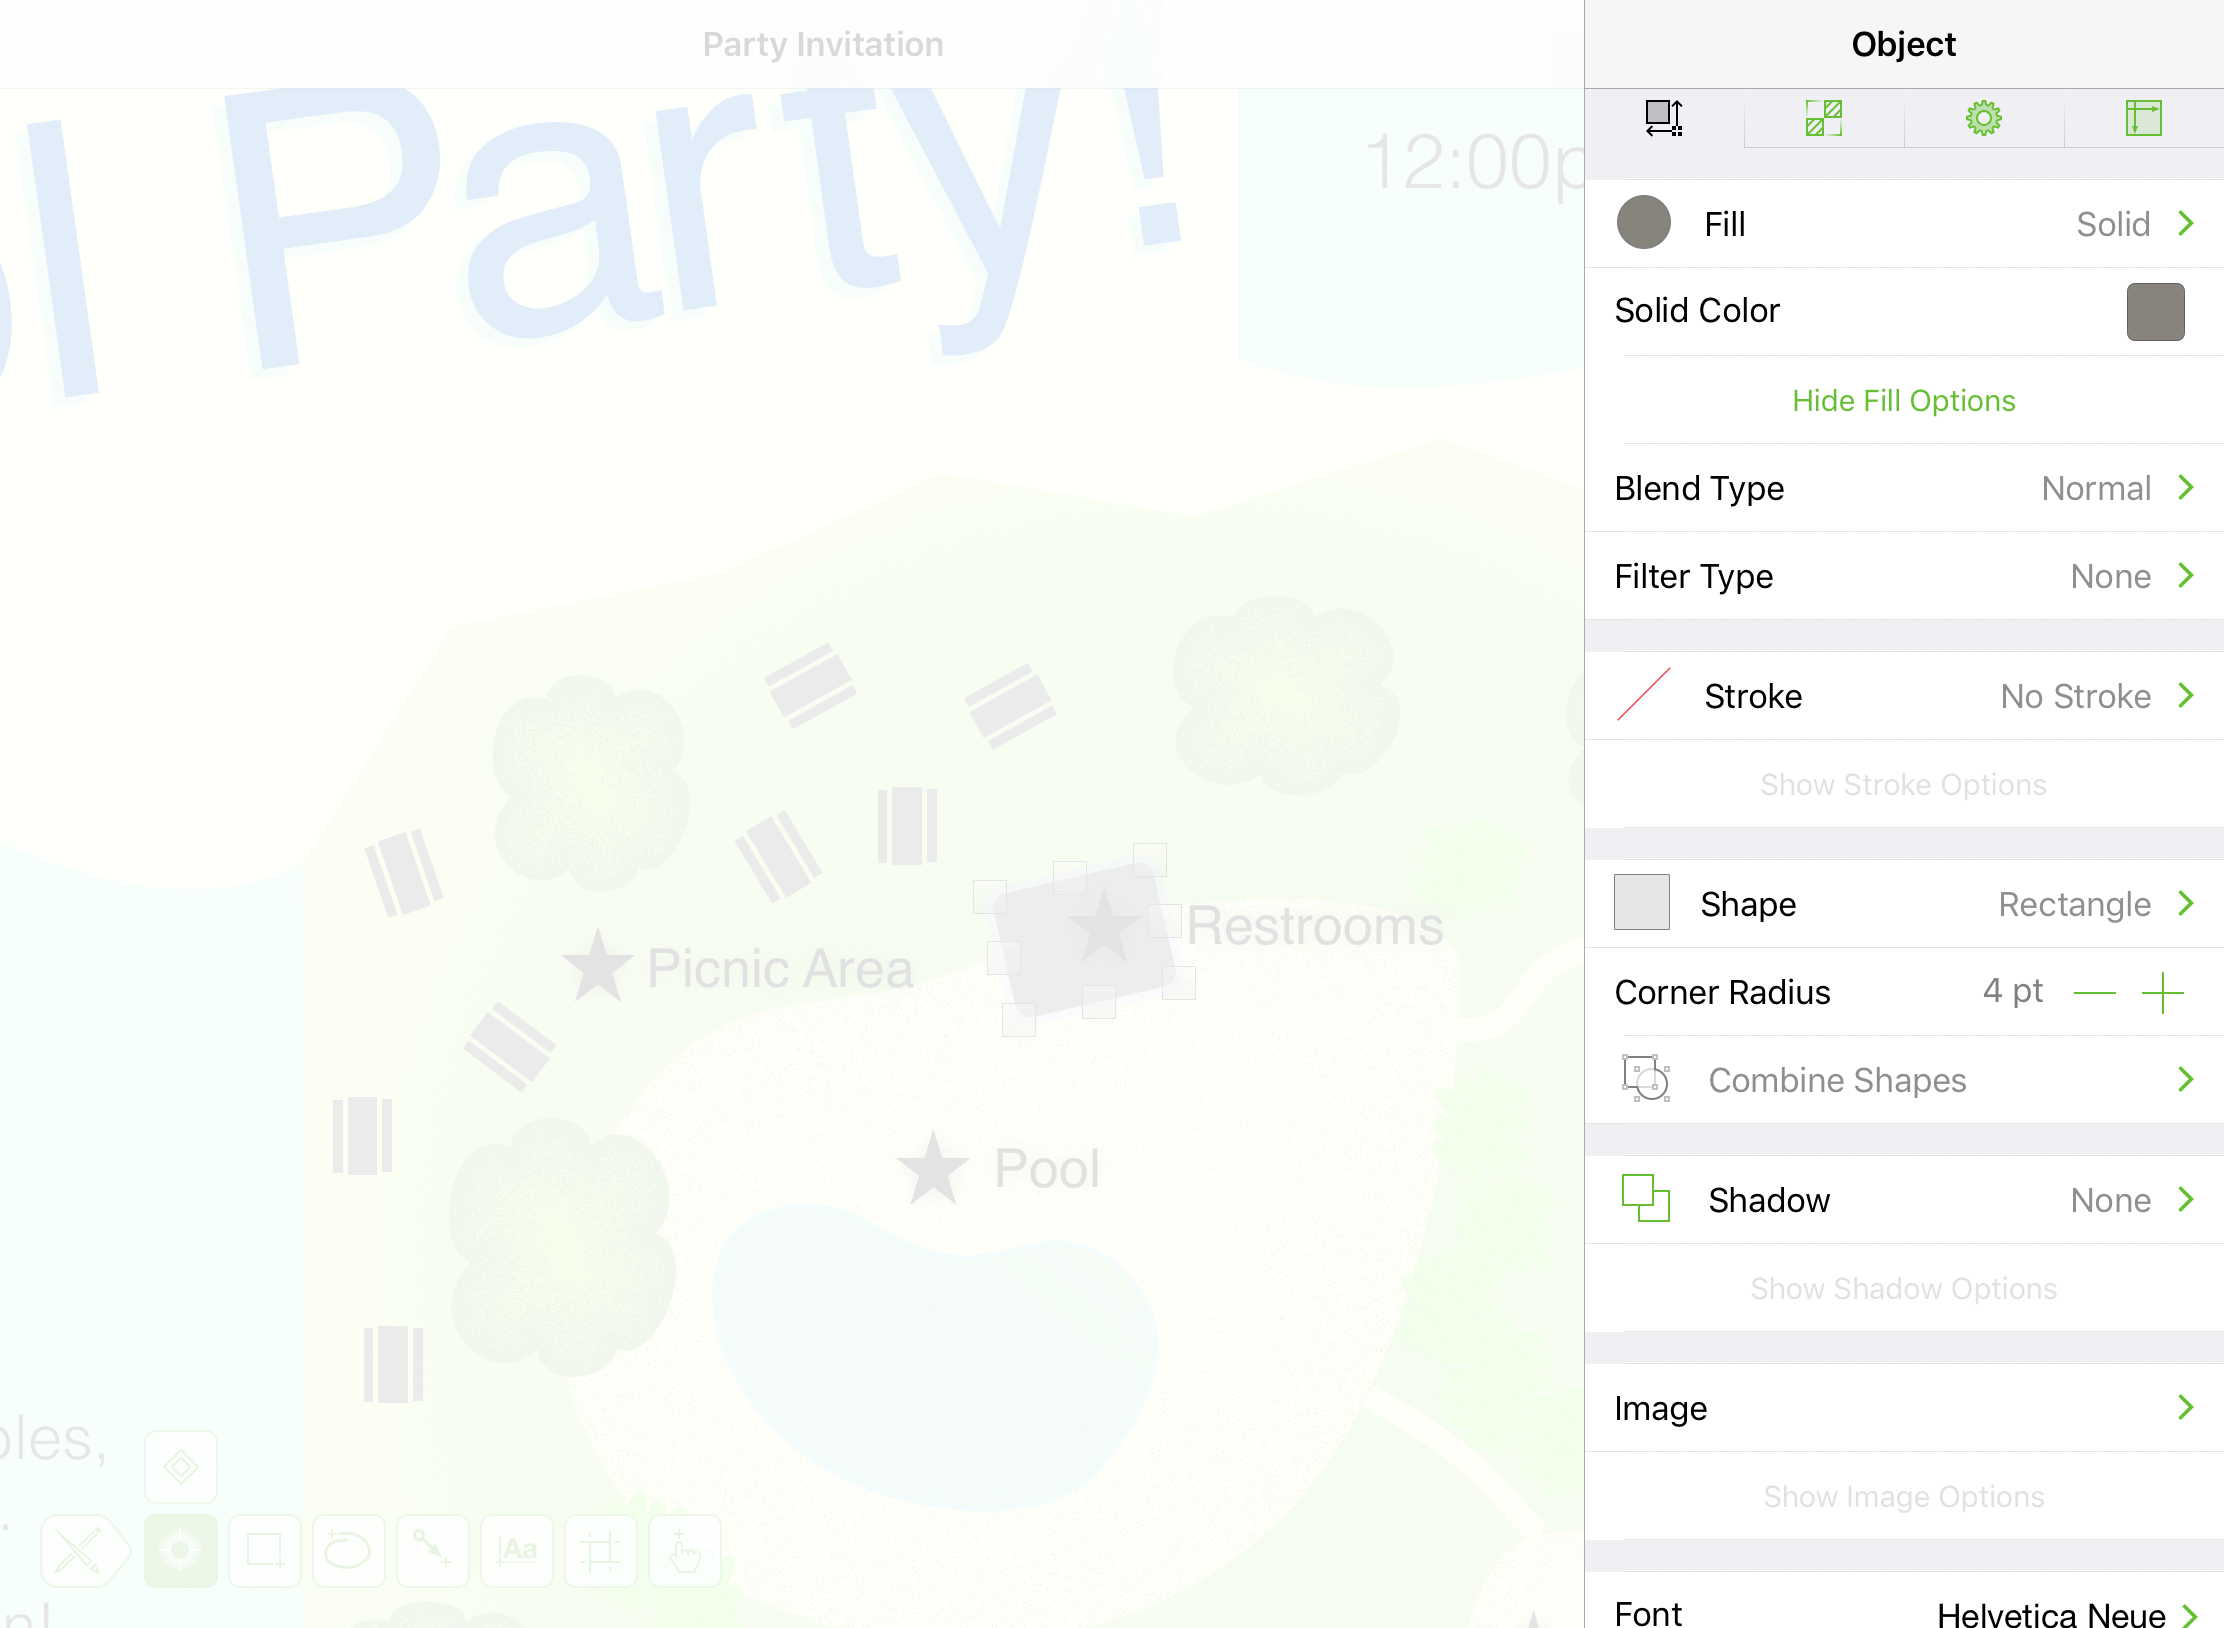
Fill
Available when the Shape or Freehand tool is selected, or when an object is selected with the Selection tool. Use to add fill properties to an object, including its Fill Type and Color properties.
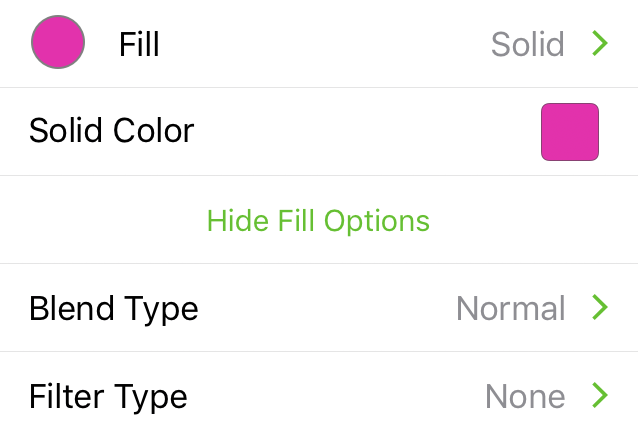
Fill Type
Tap the top row in the Fill inspector to choose a Fill Type; the default is a Solid fill.
Blend Type 
Apply a blend type to the selected object. Blends have a visual effect on objects or layers underneath.
Filter Type
Apply a filter type to the selected object. Filters have a visual effect on objects or layers underneath.
To learn more about the various Fill Types in OmniGraffle, see Fill Types for Objects and Canvases, earlier in this manual. See Choosing Colors for more detail on setting colors in OmniGraffle.
Stroke
Available when the Shape, Freehand, Line, or Artboard tool is selected, or when any object is selected with the Selection tool. Use to define the properties of an object’s stroke.
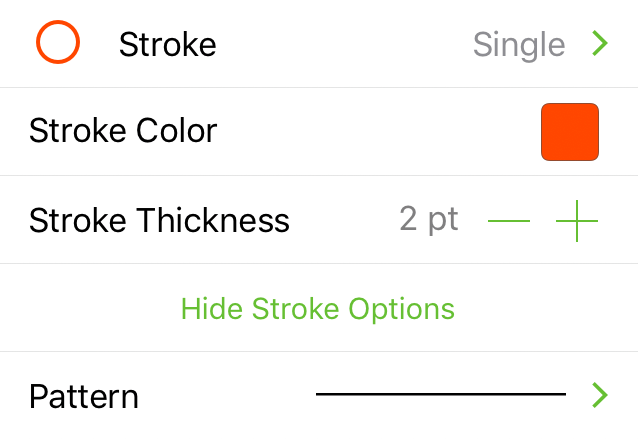
Stroke Type
Choose a style for the object’s stroke.
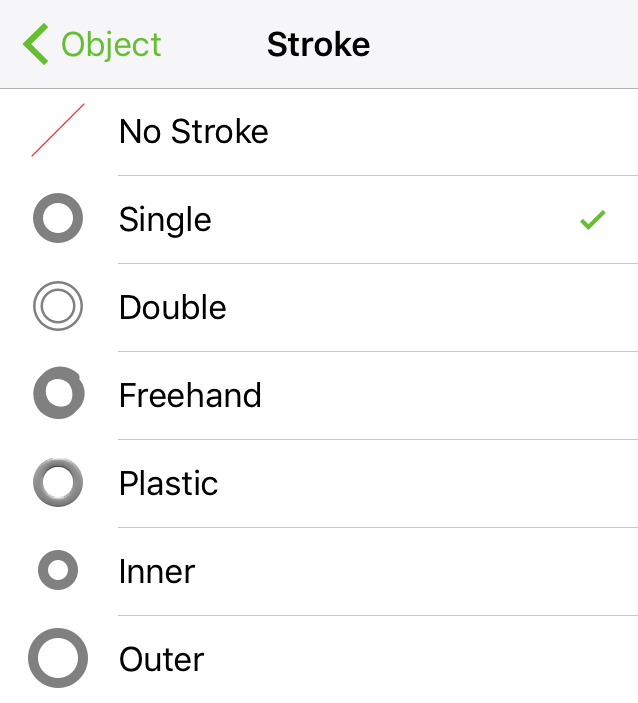
- No Stroke: The object has no visible stroke.
- Single: A single stroke.
- Double: A double stroke.
- Freehand: A stroke that appears to be drawn by hand.
-
Plastic: A raised stroke with a highlight color. Tap
 or
or  to rotate the angle of the plastic stroke’s highlight. Optionally, double-tap the number and enter a different value.
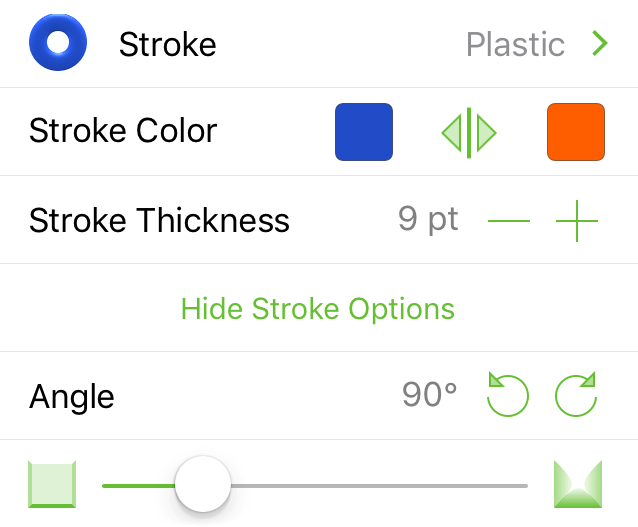
-
Inner: The stroke appears inside the bounds of the object.
- Outer: The stroke appears outside the bounds of the object.
Stroke Color
Tap the Color Swatch to select or mix a color for the stroke. See Choosing Colors for more detail on setting colors in OmniGraffle.
Stroke Thickness
Tap  or
or  to make the stroke thinner or thicker, respectively.
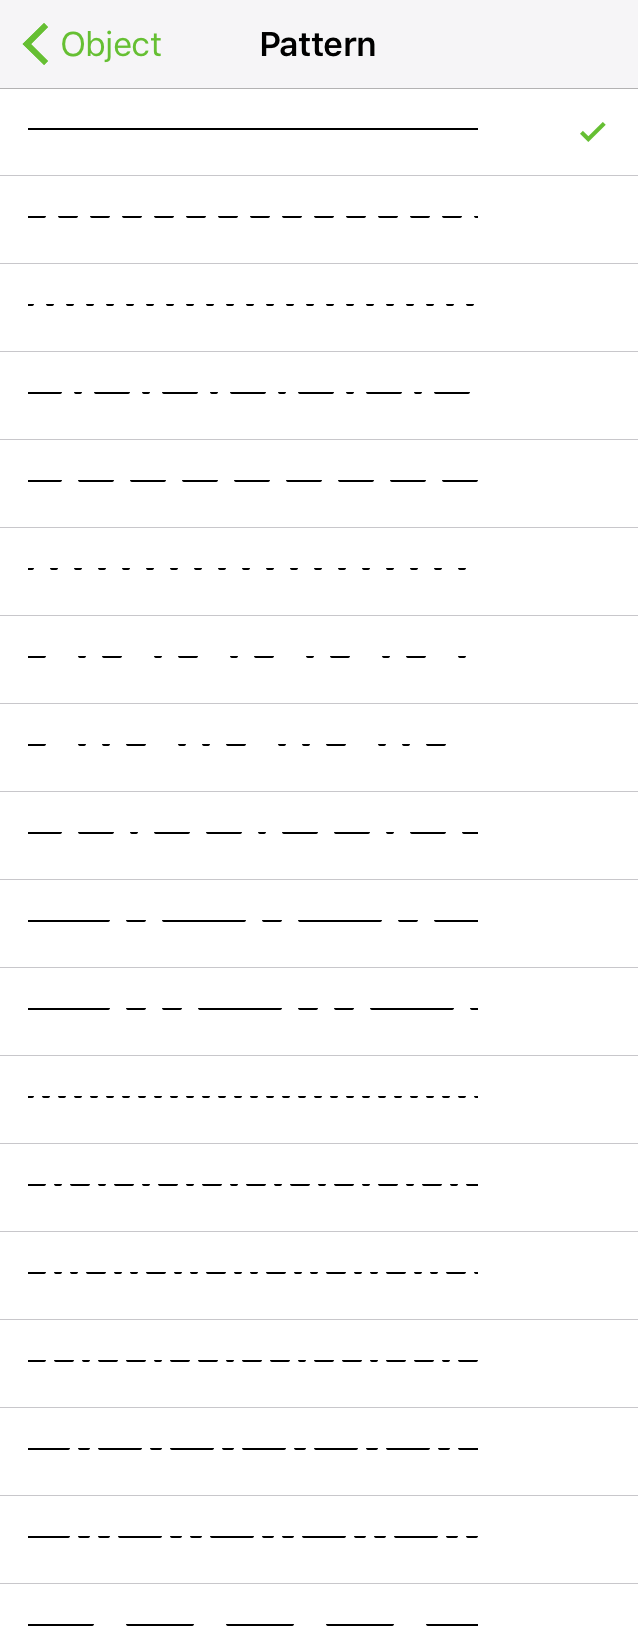
Stroke Pattern
Tap to open a side pane for choosing a pattern for the stroke.
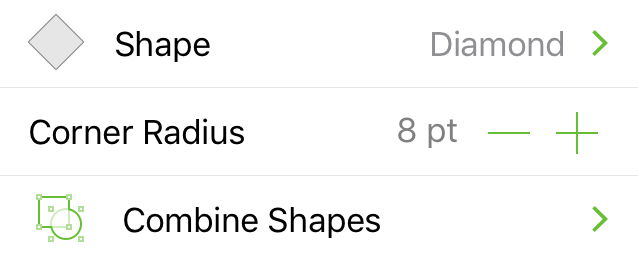
Shape
Available when the Shape or Artboard tool is selected. Use to choose a shape to place on the canvas.
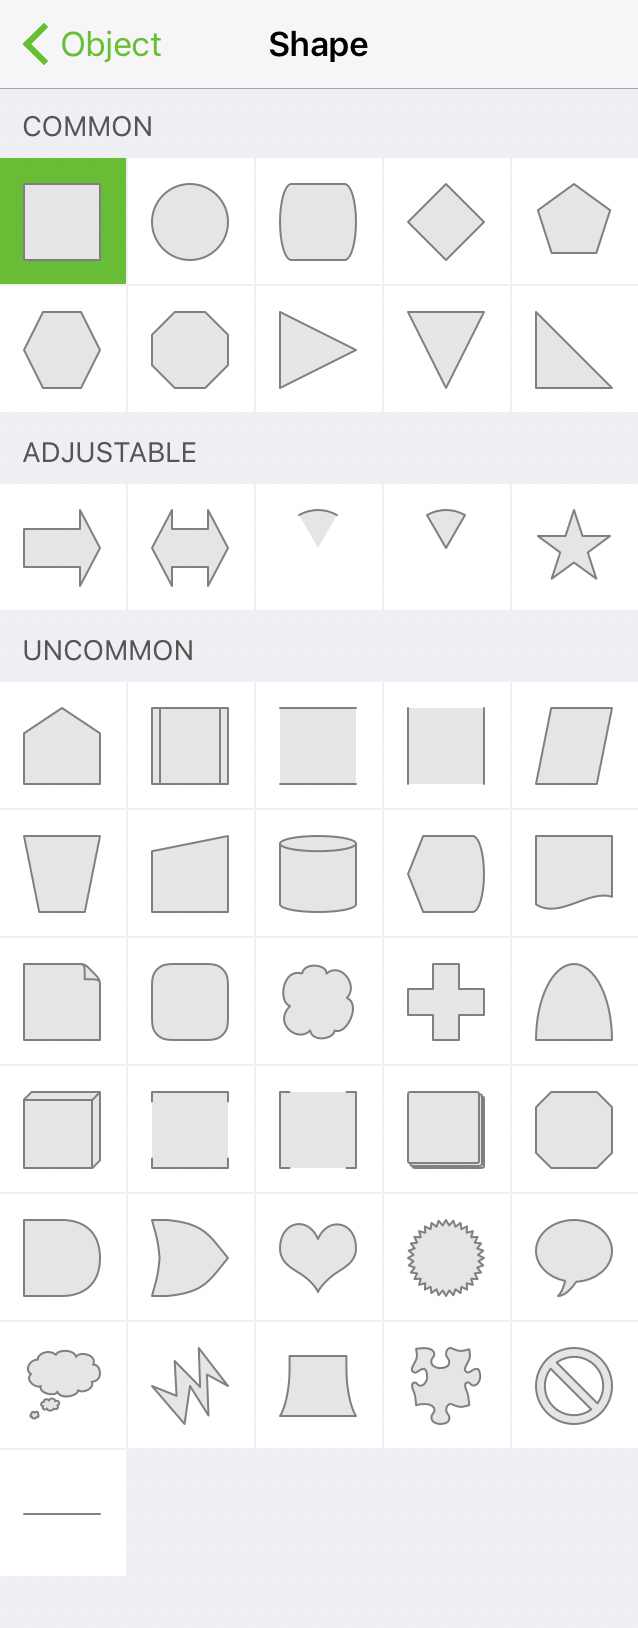
Shape Type
Tap the top row in the Shape inspector to set the Shape Type. This opens a side panel from which you can select one of the following shape types:
- Common: Basic geometric shapes.
- Adjustable: Shapes with adjustable points.
- Uncommon: Shapes for use in diagrams or as image masks.
Corner Radius
Tap or to decrease or increase, respectively, the curvature of an object’s corner points.
Combine Shapes 
Use shape combinations to create unique shapes from two or more shapes:
 Unite Shapes: Combines the selected shapes to create a new, single shape.
 Intersect Shapes: Creates a new shape based on the overlapping areas of the selected shapes.
 Subtract Shapes: When two or more objects overlap, the top-most shape is cut out of the bottom-most shape.
 Uncombine Shapes: Reverts any shape combination action, restoring the shapes to their original state.
Shadow
Available when the Shape, Freehand, or Line tool is selected, or when an object is selected with the Selection tool. Use to add a drop shadow to an object.
No Shadow 
The selected object has no shadow.
Shadow Below Object 
Places a shadow beneath the selected object.
Shadow Below Layer 
Places a shadow beneath the selected object. If other objects are positioned underneath and on the same layer, the shadow appears beneath objects lower on the stack.
Inner Shadow 
Places a shadow inside the selected object.
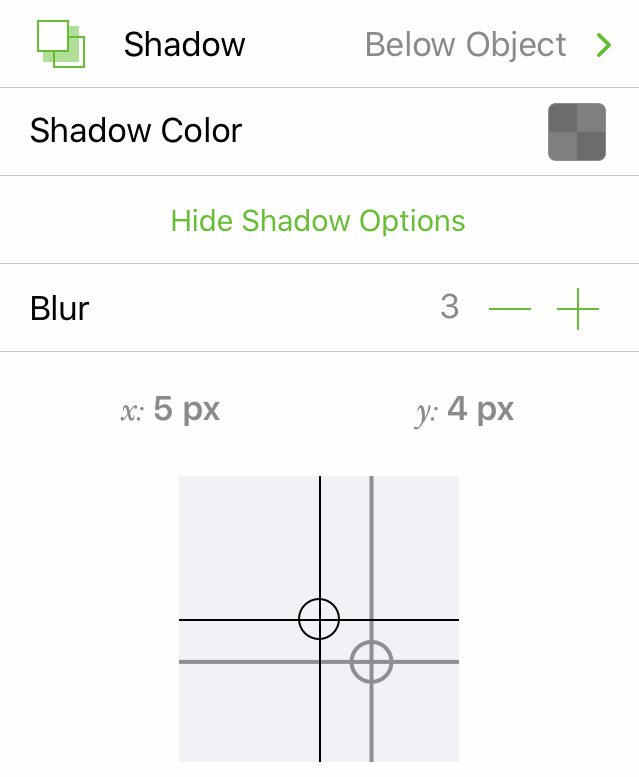
Shadow Color
Tap the color swatch to alter the default shadow color. See Choosing Colors for more detail on setting colors in OmniGraffle.
Blur
Tap or to make the shadow less or more fuzzy, respectively.
Shadow Offset
Tap or tap and drag your finger with in the Shadow Offset box to adjust the position of the shadow in relation to the object. Optionally, double-tap on the x or y values and enter another number to adjust the shadow offset.
Image
Available when an object is selected with the Selection tool. Use to place an image inside an object on the canvas. The first time you choose the Image inspector, you are asked to grant OmniGraffle permission to your photo library.
Photos
Tap the Image inspector with an object selected on the canvas to open the Photos side pane. Choose an image to place within the selected object.
Image Fill Style
Choose one of the following:
 Natural Size: Fill the shape with a full-sized image; use the Size controls to make the image smaller or larger.
 Stretched: Stretch to fit the image within the bounds of the selected shape.
 Tiled: Tiles the image within the selected shape; use the Size controls to make the tiles smaller or larger.
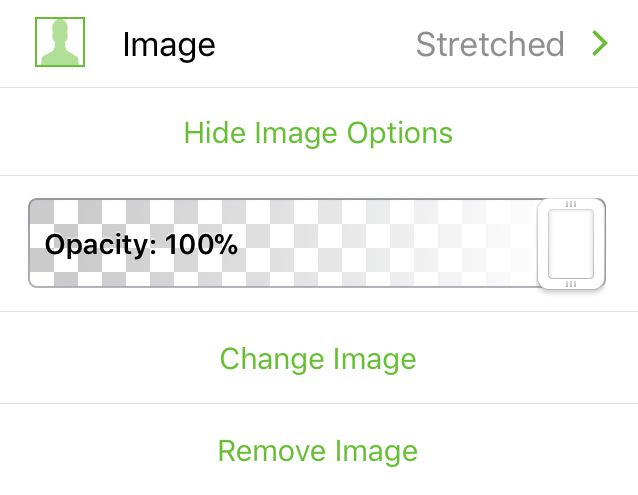
Opacity Slider
Slide left or right to make the image more or less opaque, respectively.
Size
The Size options are available when Natural Size or Tiled is selected as the image fill type. Tap or to scale the image’s size within the object; double-tap the number and enter a specific percentage value.
Change Image
Tap to replace the image in the selected object with a different image from your Photos library.
Remove Image
Removes the image from within the object.
Image Mask Mode
With an object containing an image selected, tap the image on the canvas to enter image mask mode. Handles appear on the corners and edges of the image for resizing its visible area. Note that this does not resize the image itself; to change an image's size, use the regular shape handles instead.
Font
Available when the Shape, Text, or Artboard tool is selected, or when a shape or text object is selected with the Selection tool. Use to define the font properties of a shape’s text.
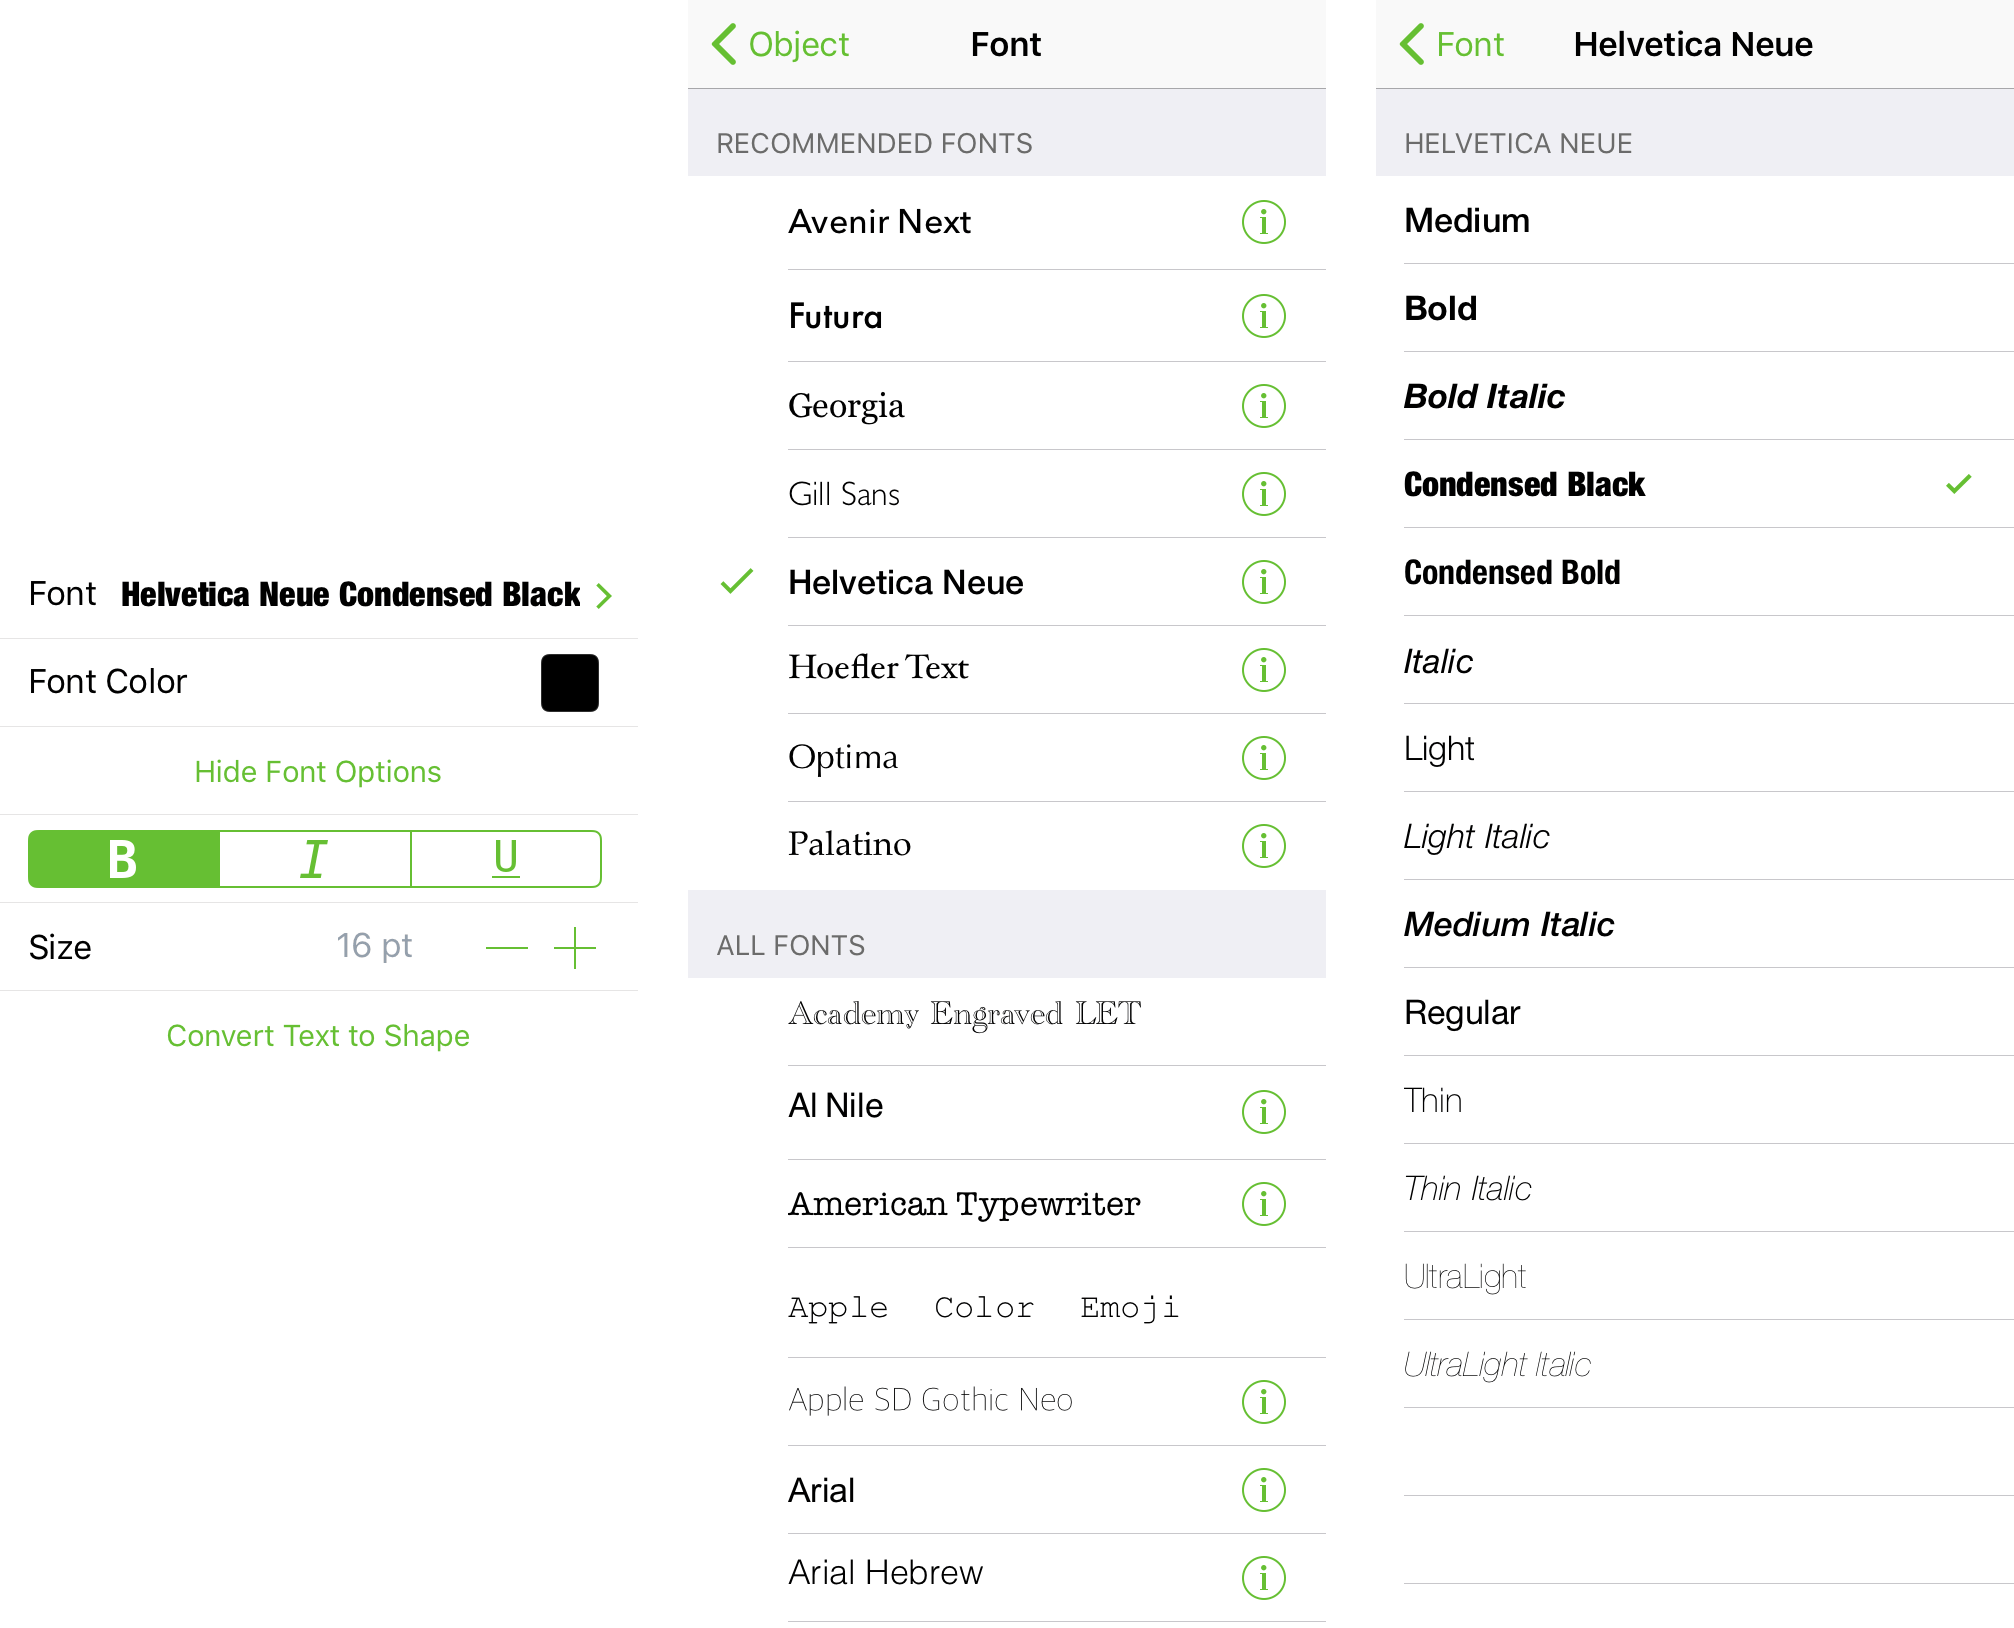
Font Family
Choose from Recommended Fonts or All Fonts; tap  for additional style attributes.
Font Color
Tap to select a color. See Choosing Colors for more detail on setting colors in OmniGraffle.
Bold, Italic, Underline
Tap B to embolden the text; tap I to italicize the text; or tap U to underline the text.
Size
Tap or to make the text smaller or larger, respectively. Optionally, double-tap the point size to enter a specific value.
Convert Text to Shape
Converts the selected text object to shapes.
Text Position
Available when the Shape, Text, or Artboard tool is selected, or when a shape or text object is selected with the Selection tool. Use to define text alignment, positioning, overflow, and wrapping properties.
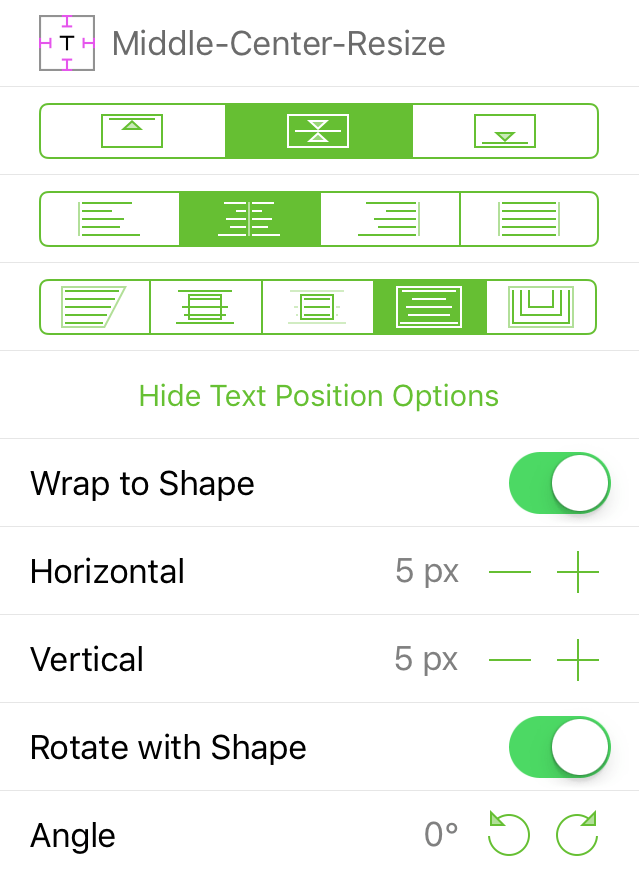
Text Position Indicator 
The indicator changes according to the selections you make in the Text Position inspector.
Vertical Alignment
Choose how text aligns vertically; align to the Top, Middle, and Bottom of the object, respectively.

Horizontal Alignment
Choose how text aligns horizontally; align to the Left, Center, Right, or Justified within the object, respectively.

Text Overflow
Choose how text flows within a shape; fill the shape with the text, allow the text to overflow the shape, crop text within the bounds of the shape, resize the shape to fit the text, or wrap the text around the border of the shape, respectively.

Wrap to Shape
When turned Off, text does not wrap; when turned On, text wraps to the width of the shape.
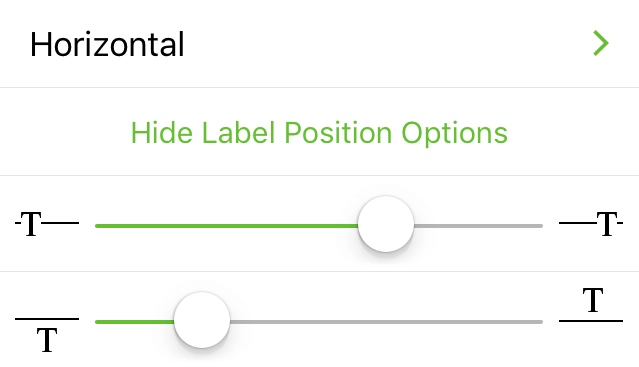
Horizontal
Tap or to decrease or increase, respectively, the amount of padding on the left and right sides of the text.
Vertical
Tap or to decrease or increase, respectively, the amount of padding on the top and bottom of the text.
Rotate with Shape
When turned Off, text does not rotate when the shape's rotation angle is changed; when turned On, the text rotates along with the shape.
Angle
Tap or to rotate the text in 15° increments. Optionally, double-tap on the degree of rotation and enter a specific value.
Geometry
Available when an object is selected with the Selection tool. Use to position and size, rotate, or define the scaling properties of a selected object.
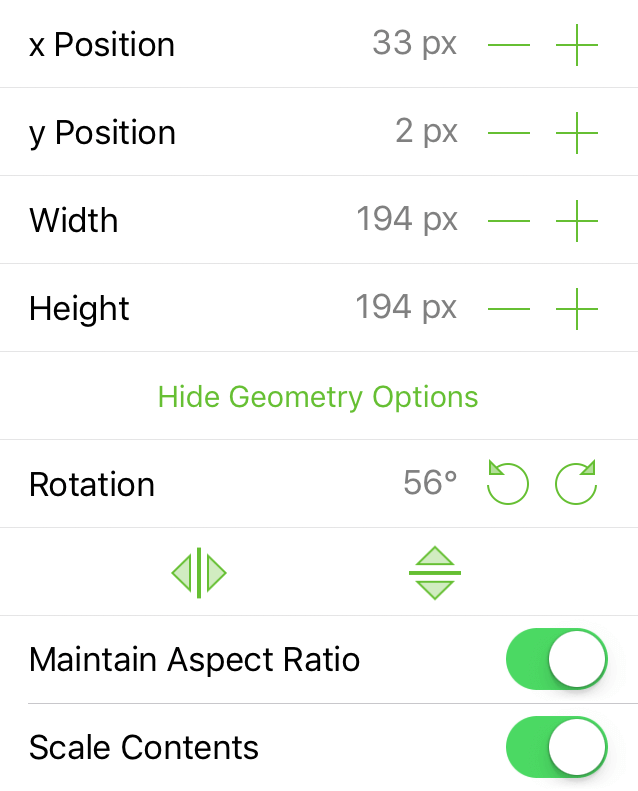
x Position
Tap or to move the object left or right on the canvas, respectively. Optionally, double-tap the x Position value and enter a different value.
y Position
Tap or to move the object up or down on the canvas, respectively. Optionally, double-tap the y Position value and enter a different value.
Width
Tap or to adjust the width of the selected object. Optionally, double-tap the width value and enter a specific value.
Height
Tap or to adjust the height of the selected object. Optionally, double-tap the height value and enter a specific value.
Rotation
Tap or to rotate the selected object in 15° increments. Optionally, double-tap on the degree of rotation and enter a specific value.
Flip Horizontally 
Tap to flip the object horizontally.
Flip Vertically 
Tap to flip the object vertically.
Maintain Aspect Ratio
When turned on, objects maintain their basic shape, but scale when resized.
Scale Contents
When turned on, an object’s contents (text, image, and fill patterns), along with the object’s stroke, scale when the object is resized.
Line
Available when the Line tool is selected, or when a line is selected with the Selection tool. Use to connect objects in a diagram with lines, or to draw lines on the canvas.
Line Type
The Line Type determines the properties of a line’s vertex points; choose from:
 Straight: A straight line whose vertex points have no curvature.
 Curved: A line whose vertex points are curved; Bézier control handles for adjusting the curve are not available when using the Point Editor Tool.
 Orthogonal: A line whose vertex points result in right angles. To adjust the angle of the line, touch and drag the handle; to reset the handle's position, touch and hold on the line to reveal the line’s contextual menu and choose Reset Handle.
 Bézier: A line whose vertex points are curved; Bézier control handles for adjusting the curve are available when using the Point Editor Tool.
Line Ends
Optionally, choose to add an ornament for the end point or start points of the line.
Radius
Designate, in points, the curvature for points on the line.
Label Position
Available when a line label is selected. Choose the label’s relative position with the line; options include:
- Horizontal
- Vertical
- Parallel
- Perpendicular
- Independent
Use the top slider to position the label toward the left or right edge of the line, and the bottom slider to position the label below or above the line.
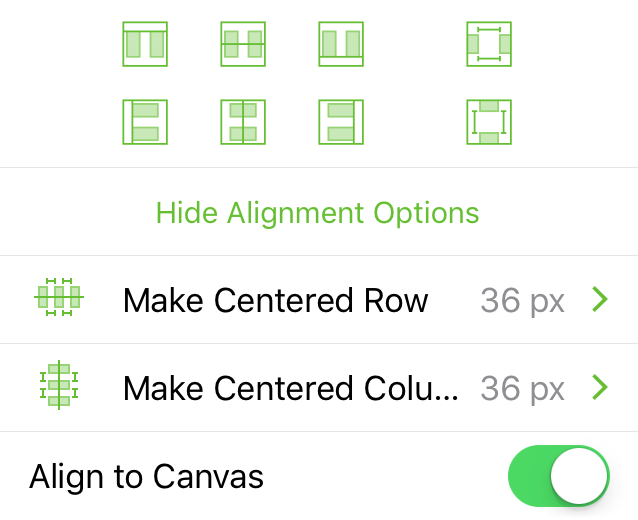
Alignment
Available when one or more objects are selected with the Selection tool. Use to align objects with each other. You can also align objects to the canvas if the Canvas Size inspector is set to either Fixed Size or Flexible.
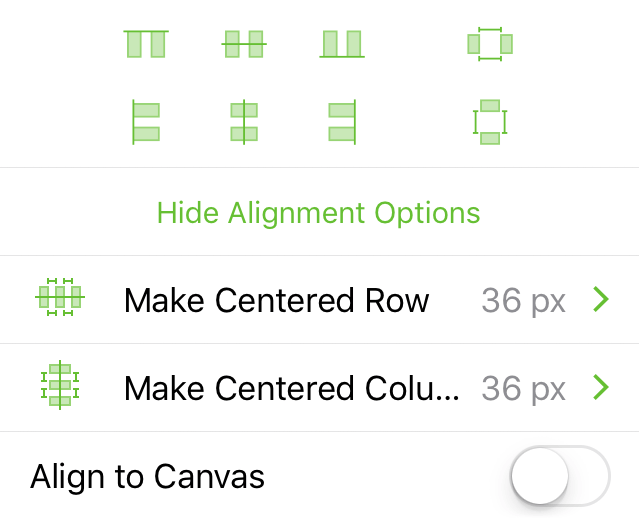
Align Objects with Other Objects
Select two or more objects and then tap one of the alignment buttons to align objects with each other.
When aligning objects, the alignment is based on the object with an edge that is furthest in the desired direction. For example, when you select three objects and tap  Align Top Edges, the top edge of the highest object is chosen as the baseline for the others to match.
This alignment behavior can be changed in OmniGraffle Settings, which offers the option to instead use the first-selected object as the anchor for alignment.
Align Objects to the Canvas
When turned on, the grid of buttons changes to reveal how objects would align in relation to the canvas. Select one or more objects and then tap one of the alignment buttons to align an object in relation to the canvas.
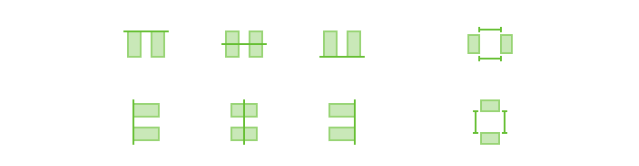
Make Centered Row
Centers the selected objects as a row on the canvas. Objects are spaced apart according to the value shown at right. To change the distance between objects, tap the number, and then tap or to close or widen the gap between objects. Optionally, you can double-tap the number and enter a specific value. After changing the value, tap Lay Out Now.
Make Centered Column
Centers the selected objects as a column on the canvas. Objects are spaced apart according to the value shown at right. To change the distance between objects, tap the number, and then tap or to close or widen the gap between objects. Optionally, you can double-tap the number and enter a specific value. After changing the value, tap Lay Out Now.
Objects cannot be aligned to an Infinite Canvas.