The Sidebar
On the left side of OmniGraffle’s window is the Sidebar. In earlier versions of OmniGraffle, there were actually two sidebars on the left: one for Canvases and another for Contents.
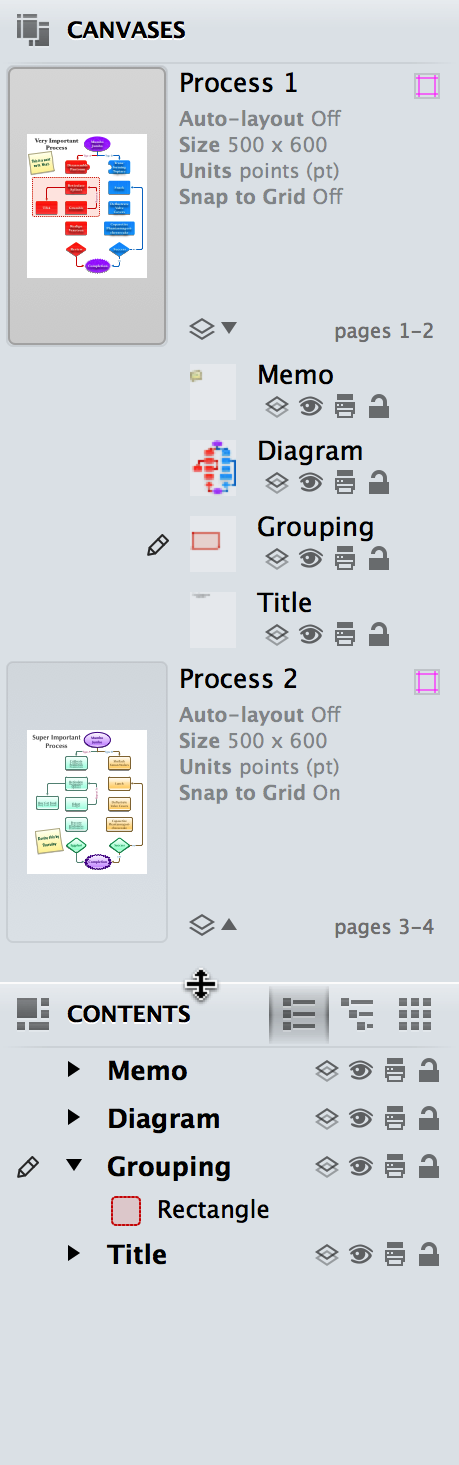
In OmniGraffle 6, however, these two sidebars were combined into one that’s split in half with Canvases on top, and Contents below. This split-level sidebar gives you more room to work with on the Canvas, while still giving you access to your project’s canvases, layers, and the contents editors in one convenient place. Hover over the sidebar just above the Contents section and the pointer changes to a resize control; click and drag up or down to make one
Tip
Need more space? Just hit Option-Command–1 to hide the sidebar or to bring it back again.
Canvases
The Canvases sidebar is open by default, and lists all of the Canvases available in your document. You have many options for hiding and showing the sidebar:
- Click the Hide/Show Sidebar button in the toolbar
- Choose View ▸ Hide/Show Sidebar in the menu bar
- Use the Option-Command–1 keyboard shortcut
To work on a Canvas, select the canvas by either clicking its name or the preview icon in the sidebar. When you do, the preview icon takes on a light blue highlight, and any objects appear on the working canvas in the middle of OmniGraffle’s window.
Each Canvas has a title, a disclosure triangle for showing its layers, and a preview image:
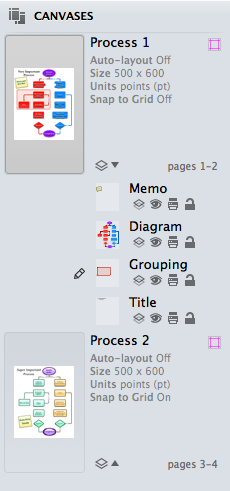
- To select a canvas, click its name or the preview image. The canvas appears in the document window, where you can add and edit objects.
- To rename a canvas, double-click its name in the sidebar.
- To create a new canvas, click the new canvas button at the bottom of the sidebar.
- To delete a canvas, select the preview image in the sidebar and then use one of the following options:
- Press the Delete key
- Choose Edit ▸ Canvases ▸ Delete Canvas
- Control-click on the preview icon and select Delete Canvas from the contextual menu
- Choose Delete Canvas from the Action menu at the bottom of the sidebar next to the Search field
Note
Any document needs at least one canvas, so you can’t delete the last one.
Canvases can be dragged around to rearrange their order, or to copy them between documents.
To change the style attributes of a canvas, first click its preview in the sidebar, and then use the Canvas inspectors (Command–4) to change its style and other attributes such as size, units, grid, and whether or not auto layout is turned on.
Creating and Positioning Guides on the Canvas
When you’re working on the Canvas, one of the more common ways to align objects is to use guides. If you turn on the rulers (View ▸ Rulers, or Command-R), you can click on either the horizontal or vertical ruler bar and drag out a guide onto the canvas. For more precise positioning, you can zoom in on the canvas for pixel-perfect positioning, which is handy when you’re using OmniGraffle to prototype the user interface for an application, or even laying out the floorplan for your home or office.
If you click on the Guides icon (the pink square to the right of each canvas), you’ll find OmniGraffle 6’s new Guides pop-up. To add a new guide, just click +; new guides are spaced apart evenly, or you can enter a specific value to position the guide exactly where you need it.
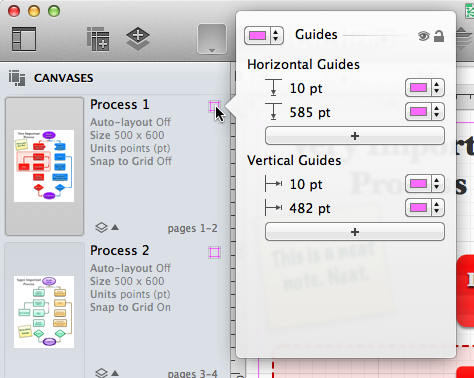
Using any of the color wells, you can choose a default color for your guides, or set their colors individually. This is particularly helpful when you have a background image with varying colors (such as a gradient) that might clash with an otherwise default guide color.
Using the icons in the upper-right corner of the Guides pop-up, you can also toggle the guides’ visibility or lock them into position.
Working With Layers
Layers contain all of the fine details about your Canvases. Each Canvas starts out with one layer, but you can add as many new layers as you need to make it easy for you to keep track of certain objects or blocks of text.
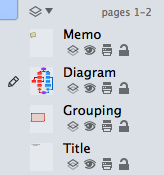
By default, the layers are hidden beneath a disclosure triangle. To see all of the layers in your Canvas, click the disclosure triangle to flip it open; click it again to hide the layers.
Each layer in the list has a small Preview icon of its contents, a Title, and a row of four icons underneath the title.
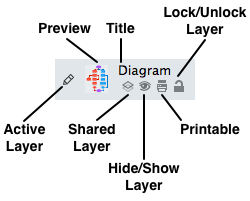
The layer you are currently editing has a Pencil icon to its left. To edit a different layer, just click to the left of its preview and the pencil icon moves there.
To make a layer visible or invisible, click its Eye icon. To set whether a layer is printable, click the Printer icon. To lock or unlock a layer, click the Lock icon; locking a layer prevents its contents from being changed.
You can rearrange layers by dragging them up or down in the list. You can also drag a layer from one Canvas to another, or you can Option-drag a layer to copy it instead. If you drag a layer to a different OmniGraffle document, the layer is always copied.
To add a new layer:
- Click the New Layer button in the toolbar
- Choose Edit ▸ Layers ▸ New Layer
- Choose New Layer from the Action Menu at the bottom of the sidebar next to the Search field
To delete a layer:
- Select it and then press the Delete key
- Choose Delete Layer from the Action Menu at the bottom of the sidebar
- Control-click on a layer and select Delete Layer from the contextual menu
- Select the layer and choose Edit ▸ Delete
And remember, if you delete a layer by accident, you can always hit Command-Z to restore the layer.
Note
A canvas must have at least one layer, so you can never delete every single layer in a project.
(Pro) Sharing Layers with Multiple Canvases
You can share a layer between multiple canvases. That way, whenever you change the layer, it affects every canvas that uses that layer.
To share a layer between canvases, select the layer and then:
- Choose Edit ▸ Layer Settings ▸ Shared Layer
- Under the layer’s title, click the Shared Layer icon
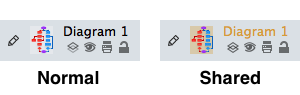
When a layer is shared, the title turns orange and an orange tint is added to the layer’s preview image.
To create a new shared layer:
- Choose New Shared Layer from the Action Menu at the bottom of the canvases sidebar.

- Choose Edit ▸ Layers ▸ New Shared Layer
After creating (or designating an existing layer as) a new shared layer:
- Add and edit objects on the layer normally.
- Any further changes you make to any copy of the layer are also applied to all other copies of it.
Objects on shared layers, the corresponding items in the list sidebar, and shared layer previews in the canvases sidebar all appear in the distinctive shared layer color, to remind you that you could be affecting many canvases if you edit them.
To delete a shared layer, select the shared layer and:
- Press the Delete key
- Choose Edit ▸ Delete from the menu Bar
- Control-click on the shared layer and select Delete Layer in the contextual menu
- Select Delete Layer from the Action Menu at the bottom of the sidebar
There is also a Delete [layer name] from All Canvases option that, when chosen, removes that shared layer from every canvas in your project.
Contents
The Contents portion of the Sidebar offers three different ways to create, view, and edit the objects in your projects: List View, Outline Editor, and Selection Matrix.
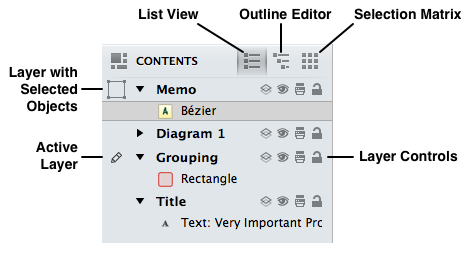
To switch between the different sections of the Contents sidebar, you can either click on the buttons in the header row for the Contents sidebar, or:
- List View:
- Choose View ▸ Show Contents ▸ List View
- Use the Option-Command–2 keyboard shortcut
- Outline Editor:
- Choose View ▸ Show Contents ▸ Outline Editor
- Use the Option-Command–3 keyboard shortcut
- Selection Matrix:
- Choose View ▸ Show Contents ▸ Selection Matrix
- Use the Option-Command–4 keyboard shortcut
The layers in your project have like-named sections in the Contents section as well. This makes it easy for you to keep track of different elements of your project.
As you select an object in the Contents section, the Inspectors (see the Inspectors section) change accordingly. This is particularly helpful for when you are in the Selection Matrix and need to tweak the styles of similar objects (for example, changing the font size for all of your labels at once or adding a drop shadow to certain objects).
List View
List View shows you every object on every layer of the current canvas, in front to back order.
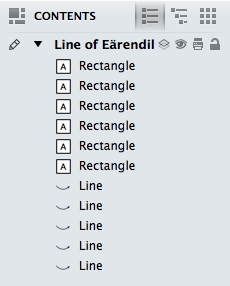
Within that list, you can drag objects into different ordering or from one layer to another.
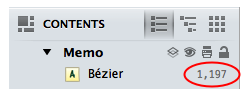
In the General preferences, you can choose to display the object ID numbers along with the items in List View, which can be useful for scripting.
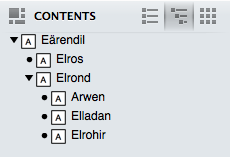
The Outline Editor
The Outline Editor gives you a quick way to enter lots of data, and an alternate way to look at hierarchical diagrams. The outline shows any shapes you’ve created on the canvas, arranged hierarchically according to the lines that connect them. Likewise, as you enter text into the outline, shapes are automatically created and connected on the canvas with corresponding text.
To start working in the outline, just click an existing item, or double-click in an empty area to create a new item. While you work in the Outline Editor, the following keys can be used to create and arrange items:
- Return — creates a “peer” of the currently selected item. Peers appear on the same indentation level in the outline, and, if they are beyond the top level, have connections from the same parent object in the diagram.
- Tab — indents the currently selected item, making it a “child” of the item above it in the outline. A connection line is drawn in the diagram from the parent object to the child object.
- Shift-Tab — outdents the currently selected item, making it a peer of what used to be its parent.
- Escape (esc) — switches between selecting an item and editing the item’s text.
Note
Additional keyboard shortcuts for quickly building outlines can be found in Help ▸ Keyboard Shortcuts.
An item can be dragged around the outline view by its handle, the dot or triangle to the left of each item. Dragging an item with children brings its children along for the ride. While you drag an item, a black line shows the location and indentation level at which the item will be dropped when you let go of the mouse button.
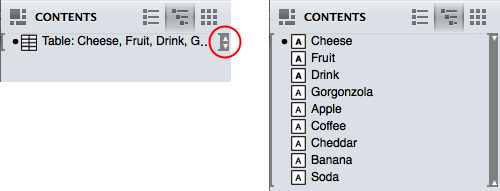
A group, table, or subgraph on the canvas is shown as a single item in the outline, surrounded by brackets. Click the arrows on the right side of the item to see the objects inside and edit their text.
While the Outline Editor is handy for entering lots of information quickly, an outline can’t always perfectly represent the relationships in a complicated diagram. Objects with more than one parent, lines connected to other lines, and circular ancestry (“I’m my own grandpa!”) are all examples of the kinds of things a simple outline can’t properly show. In these cases, the Outline Editor tries its best to be accurate. If your diagram is not strictly tree-like, you probably shouldn’t rely too much on the Outline Editor if what you need is a quick representation of the objects’ relationships.
The Selection Matrix
The Selection Matrix provides an alternative organization scheme for the objects on the Canvas. Objects in the Selection Matrix are grouped together by kind based on their style properties.
Along the top of the Selection Matrix is a row of buttons that look oddly familiar. No, they’re not the symbols you’d expect to see on a football coach’s chalkboard during halftime, these relate to the styles you can set for the objects on the Canvas.
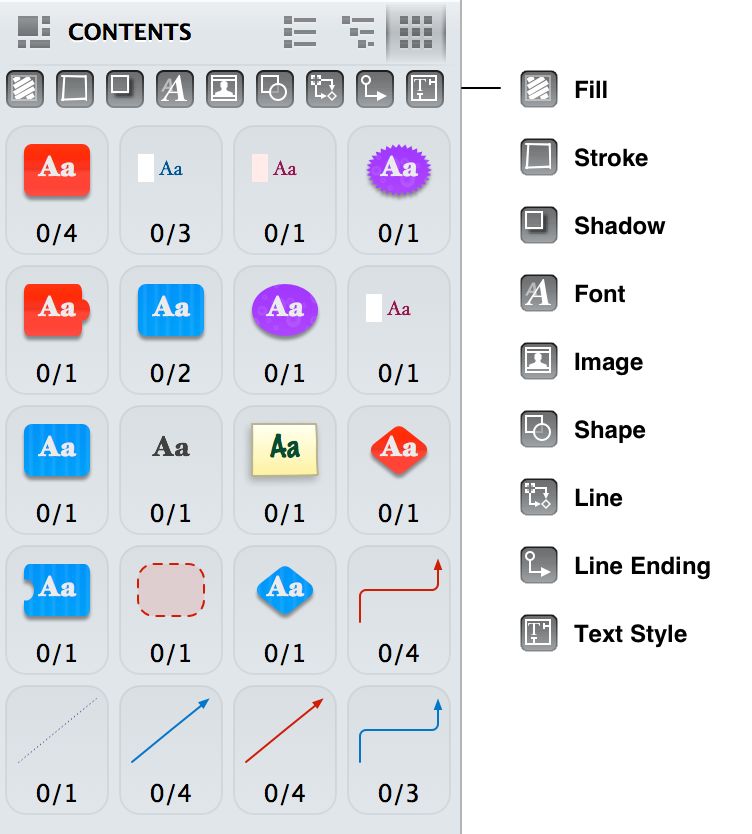
All of these are on by default, and this gives you the finest level of granularity when evaluating your objects. But as you turn one—or all—of them off, you’ll notice that the previews in the Selection Matrix become more compact.
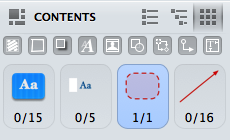
Click on a class of objects in the matrix to select them all for manipulation, or select them individually in the main view.