Menus and Keyboard Shortcuts
Now, you could spend the next couple hours, kicked back in your comfy chair cruising through all of the menus in OmniGraffle to see what’s new or where your favorite command went to. Or, you could just read through this section and see everything in one convenient—and easy to search—place.
The OmniGraffle Menu
The OmniGraffle menu, otherwise known as the app menu, is where you go to find out more about OmniGraffle, set its preferences, enter a license (or find out details about your license), and more.
- About OmniGraffle
- Find out about the particular version of OmniGraffle you are using.
- Check for Updates (for purchases from The Omni Store only)
- Normally, OmniGraffle checks for updated versions of itself regularly based on the Update preferences. Use this command to check once right now. If there is an updated version of the software, you are prompted to download it.
- Preferences (Command-,)
- Open OmniGraffle’s preferences window; you can use it to customize the application’s behavior to your liking.
- Keyboard Shortcuts
- Opens a window that lets you change or reset OmniGraffle’s keyboard shortcuts. You can also export and share your custom keyboard setup, and import sets that other users create and share.
- In-App Purchase (for purchases from the Mac App Store only)
- If you downloaded OmniGraffle 7 from the Mac App Store, you can use this menu to purchase upgrades to OmniGraffle Standard or OmniGraffle Pro.
- Free Trial Mode
- During the 14-day free trial, choose this menu item to switch between using the features of OmniGraffle Standard and OmniGraffle Pro. This helps you decide which version of OmniGraffle is right for you. After the 14-day trial expires, you can still use OmniGraffle to view OmniGraffle files.
- Licenses (for purchases from The Omni Store only)
- Show the Licenses dialog, where you can review your OmniGraffle software licenses. For more information about how licenses work, see Managing Your Omni Licenses, later in this guide.
- Services
- The Services menu is a collection of system-wide services offered by other apps on your Mac. OmniGraffle plays rather well with macOS, so you should be able to use your standard services from within the application.
- Hide OmniGraffle (Command-H)
- Leave OmniGraffle open, but temporarily put away its windows while you work in another application.
- Hide Others (Option-Command-H)
- Hide all windows of other applications you have open, so that you can concentrate on OmniGraffle.
- Show All
- Choose this option if you chose to Hide Others and then want to get all of the windows of those other applications back onscreen. If none of the windows of "other" open windows are hidden, this menu option is grayed out.
- Quit OmniGraffle (Command-Q)
- Choose this if you really must part with OmniGraffle for now. If you have unsaved documents open, you are prompted to save or discard your changes.
The File Menu
- New (Command-N)
- If you have a default template, this creates a new document based on it. If you don’t have a default template, this opens the template chooser.
- New Resource
-
Create a new OmniGraffle stencil, template, or diagram style, starting from the template of your choice.
- New Stencil
- This opens a new document that, when saved, becomes a stencil you can reuse in OmniGraffle or share with friends.
- New Template
- This opens a new document that, when saved, becomes a template you can reuse in OmniGraffle or share with friends.
- Resource Browser (Shift-Command-N)
- Open the Resource Browser, from which you can choose an OmniGraffle document, stencil, or template file to edit. You can also use the Resource Browser to set a default template to be used whenever you create a new document.
- Open (Command-O)
- Browse for a document to open. You can open any OmniGraffle document, or a file in one of the formats OmniGraffle knows how to import.
- Open Recent
- Open a document you’ve recently worked on. Choose Clear Menu to remove the list of recent documents, so no one knows you’ve been working on Surprise Party Invitation.graffle.
- Close (Command-W)
- Close the frontmost window you have open. If you have unsaved changes, you are prompted to save or discard them.
- Close All (Option-Command-W)
- Close all open OmniGraffle windows.
- Save (Command-S)
- Write all of your hard work in the frontmost document onto the disk for safekeeping. If you have already saved the document once, the new version replaces the old one. If it’s the first time you’re saving this document, you are prompted to browse to a location on the disk and enter a file name.
- Save As (Option-Shift-Command-S)
- Save the current OmniGraffle file as another filename and/or to another location.
- Duplicate (Shift-Command-S)
- Make a duplicate copy of the current document. The duplicated file uses the same filename as the file you’re working on, but tacks on copy to the filename so you know which one is the clone.
- Rename
- Change the filename of your current project.
- Move To
- Move the file to another location on your Mac’s hard drive.
- Move to Trash
- Be careful with this one; it moves the file you are currently working on into the Trash. This comes in particularly handy when you’re working on multiple duplicated files as you tweak and compare styles. With the dupes you don’t want, just choose File ▸ Move to Trash and then close the window (Command-W).
- Revert To
- When revisions don’t really work out like you had planned, choose this to go back to the version of the file that’s on the disk; it’s kind of like a mass-Undo. If you open a file that had some changes in an automatic backup, you can choose this command to go back to the last explicitly saved version.
- Place Image
- Browse for an image file; a shape containing the image is created on the canvas at the last place you clicked with the Selection tool.
- Export (Option-Command-E)
- This creates a new file, in a file type of your choice, from some portion of the data in your OmniGraffle document. See Exporting Image and Graphics Files from OmniGraffle, earlier in this guide for more details.
- Submit to Stenciltown
- Submit the current file as a stencil to Stenciltown, a place for OmniGraffle users to find, share, and download stencils. For more information about stencils and Stenciltown, see Using and Creating Stencils.
- Page Setup (Shift-Command-P)
- Show the standard macOS Page Setup sheet. This sheet contains several panes of settings for how to represent your document on pages.
- Print (Command-P)
- Show the standard macOS Print sheet. In addition to the settings in Page Setup, you have a lot of printing-specific options you can set here.
- Print this Canvas
- Print the currently selected canvas. If you Command-Select multiple canvases, this menu option changes to Print Canvases, allowing you to print the selected canvases.
The Edit Menu
- Undo (Command-Z)
- OmniGraffle remembers a list of changes you make to a document. Choose this command to move one step backwards in the list, as if you hadn’t done the last thing in the list. Keep choosing it to keep stepping backwards in time.
- Redo (Shift-Command-Z)
- If the last thing you did was to Undo something, you can step forward and do it again, effectively Undoing the Undo.
- Cut (Command-X)
- Remove the current selection and put it on the clipboard, so you can paste it somewhere else.
- Copy (Command-C)
- Copy the current selection to the clipboard.
- Copy As
-
Copy the selected Canvas items to the clipboard as one of the following file types:
- Put a PDF copy of the current selection on the clipboard for pasting into any app that accepts PDF files for viewing, editing, or sending. If the app you paste into also supports LinkBack (this includes OmniGraffle itself), you can even go back and edit the pasted content in OmniGraffle.
- PNG
- Copies to the clipboard a PNG image asset of the current selection; you can then paste this into any app that accepts PNG image files.
- TIFF
- Copies to the clipboard a TIFF image asset of the current selection; you can then paste this into any app that accepts TIFF image files.
- SVG
- Copies to the clipboard the SVG data for the selected item; you can then paste the SVG data into a text editor and save as an SVG file.
- AppleScript
- Copies to the clipboard the AppleScript code needed to render the selected shape; you can then paste the Applescript code into the Script Editor app and save that as an AppleScript.
- Paste (Command-V)
- Place the contents of the clipboard on the canvas, at the last place you clicked with the Selection tool. (Or insert text from the clipboard if you are editing an object’s text.) If there is an image or some text in the clipboard, a new shape object containing the image or text is created.
- Paste in Place (Shift-Command-V)
- If you copy an item on your canvas with Command-C and then use Paste in Place (Shift-Command-V), you will paste in the contents of the clipboard directly on top of the item you copied. This is particularly helpful when you want to copy an item on one layer and then paste in another copy on another layer that’s higher up in the stack.
- Paste and Match Style (Option-Shift-Command-V)
- When you are editing text, you can use this command to paste in some text without bringing along the style it had in the application you copied it from. Instead, it matches the style of the text you already have, as if you had typed it there yourself.
- Duplicate and Maintain Layers (Command-D)
-
Make a copy of the current selection and place it on the same layer. If you select objects on different layers and choose this option, duplicate copies of those objects will appear on their respective layers.
With an object selected, you can also hold down the Option and Command keys, and then press one of the four arrow keys (Up, Down, Left, or Right) to place a duplicate of the selected object in the direction of the arrow key you press. For example, pressing Option-Command-Up Arrow places the duplicate above the currently selected object.
Objects are automatically placed 36 pixels apart. You can change the distance between objects using the Alignment inspector.
- Delete
- Obliterate the current selection, forever banishing it from this plane of existence (unless you Undo).
- Select All (Command-A)
- Select everything selectable on the canvas. Remember that objects on locked layers can’t be selected. If you are editing the text of an object, this instead selects all of the object’s text.
- Select
-
This menu offers you different options for selecting objects, either based on their style, how they’re connected, or based on their relationships:
- Similar Objects
- Select all of the objects on the canvas that have the same style attributes as the currently selected objects.
- Connected Objects
- Select all shapes that are directly or indirectly connected by lines to the currently selected objects, and all of the lines between.
- Ancestor
- Select all of the ancestors of the currently selected objects, based on the hierarchy established by connection lines.
- Descendants
- Select all of the descendants of the currently selected objects, based on the hierarchy established by connection lines.
- Outlining
-
These commands are only available when you are working in the Outline tab of the Sidebar (Option-Command–3):
- Add Child (Command-})
- Add Sibling (Option-Command-’)
- Add Aunt (Command-{)
- Add Parent (Option-Command-;)
- Add Spouse (Option-Command-/)
- Indent
- Outdent
- Navigation (Standard)
-
These commands are most useful when you invoke their keyboard shortcuts; you can do a whole lot without even touching the mouse:
- Select Shape Left (Command-Left Arrow)
- Select Shape Right (Command-Right Arrow)
- Select Shape Above (Command-Up Arrow)
- Select Shape Below (Command-Down Arrow)
- Mouseless Editing (PRO)
-
With OmniGraffle Pro, the previously mentioned Navigation commands are joined by options for creating a duplicate of the selected object in the direction of the arrow key you pressed. For example, with an object selected, pressing Option-Command-Right Arrow places a duplicate of the object on the canvas to the right. The spacing between objects is controlled by the Alignment inspector’s horizontal and vertical offset values.
- Select Shape Left (Command-Left Arrow)
- Select Shape Right (Command-Right Arrow)
- Select Shape Above (Command-Up Arrow)
- Select Shape Below (Command-Down Arrow)
- (PRO) Create Shape Left (Option-Command-Left Arrow)
- (PRO) Create Shape Right (Option-Command-Right Arrow)
- (PRO) Create Shape Above (Option-Command-Up Arrow)
- (PRO) Create Shape Below (Option-Command-Down Arrow)
See Positioning Objects Neatly with the Alignment Inspector for more information about using the Alignment inspector.
- Canvases
-
Commands related to working with the Canvas:
- New Canvas (Option-Command-N)
- Add a new canvas to the document.
- Duplicate Canvas
- Add a new canvas, identical to the current canvas, to the document.
- Delete Canvas
- Get rid of the current canvas completely.
- Layers
-
Commands related to working with Layers:
- New Layer
- Add a new layer to the current canvas.
- New Layer From Selection
- Moves the selected object(s) to a new layer on the same canvas.
- New Shared Layer (PRO)
- Add a new shared layer to the current canvas.
- New Artboard Layer (PRO)
- Add a new Artboard Layer to the current canvas.
- Duplicate Layer
- Add a new layer, identical to the selected layer, to the canvas.
- Merge Layer Down
- Move everything on the selected layer to the next layer down, then delete the selected layer.
- Delete Layer
- Get rid of the current layer completely. You can’t delete the last layer in a canvas.
- Delete from All Canvases (PRO)
- This command is only available when you select a shared layer. It deletes all instances of the shared layer on any canvas throughout the document.
- Layer Settings
-
Commands for controlling individual layers.
- Visible
- shows or hides objects on the layer
- Printable
- controls whether objects on the layer should be included when printing
- Unlocked
- controls whether objects on the layer can be selected or edited
- Select All in Layer
- Select all of the objects on the selected layer.
- Move Selection to Layer
- Move all selected objects to the selected layer.
- Tables (PRO)
-
Commands for working with Tables:
- Insert Row (Command-Return)
- When you have one cell of a table selected, choose this command to add a new row of cells to the table. The new row appears immediately before the row containing the selected cell.
- Insert Column (Option-Command-Return)
- When you have one cell of a table selected, choose this command to add a new column of cells to the table. The new row appears immediately before the row containing the selected cell.
- Select Row
- When you have one cell of a table selected, choose this command to select the entire row that contains the cell.
- Select Column
- When you have one cell of a table selected, choose this command to select the entire column that contains the cell.
- Magnets
-
Commands for controlling the Magnets attached to objects:
- Copy Magnets
- Put the magnet arrangement of the selected object onto the clipboard, so that you can paste them to a different object.
- Paste Magnets
- If there is a magnet arrangement on the clipboard, apply it to the selected object. Any existing magnets are replaced by the new ones.
- Delete Magnets
- Get rid of all the magnets on the selected objects.
- Positions
- In addition to these options, magnet positions can also be set in the Connections properties inspector (Command–3) in the Other Connections tab:
- No magnets — removes all Magnets from the selected shape
- Cardinal Points:
- 4 magnets: N, S, E, W
- 2 magnets: N, S
- 2 magnets: E, W
- 4 magnets: NE, NW, SE, SW
- 8 magnets
- Per Segment:
- on each vertex — makes it so each point on a shape’s path is also a Magnet
- 1 magnet per side
- 2 magnets per side
- 3 magnets per side
- 4 magnets per side
- 5 magnets per side
- Objects (PRO)
-
Commands for working with Shapes:
- Unite Shapes
- Combine two or more selected shapes, eliminating internal lines to make a single, solid shape.
- Intersect Shapes
- Create a shape from the overlapping areas of the selected shapes.
- Subtract Shapes
- Take the selected shapes and use the front shapes to punch a hole in the back-most shape. You can reorder shapes with the Bring/Send commands in the Arrange menu.
- Uncombine Shapes
- Separates combined shapes, restoring them to their original state.
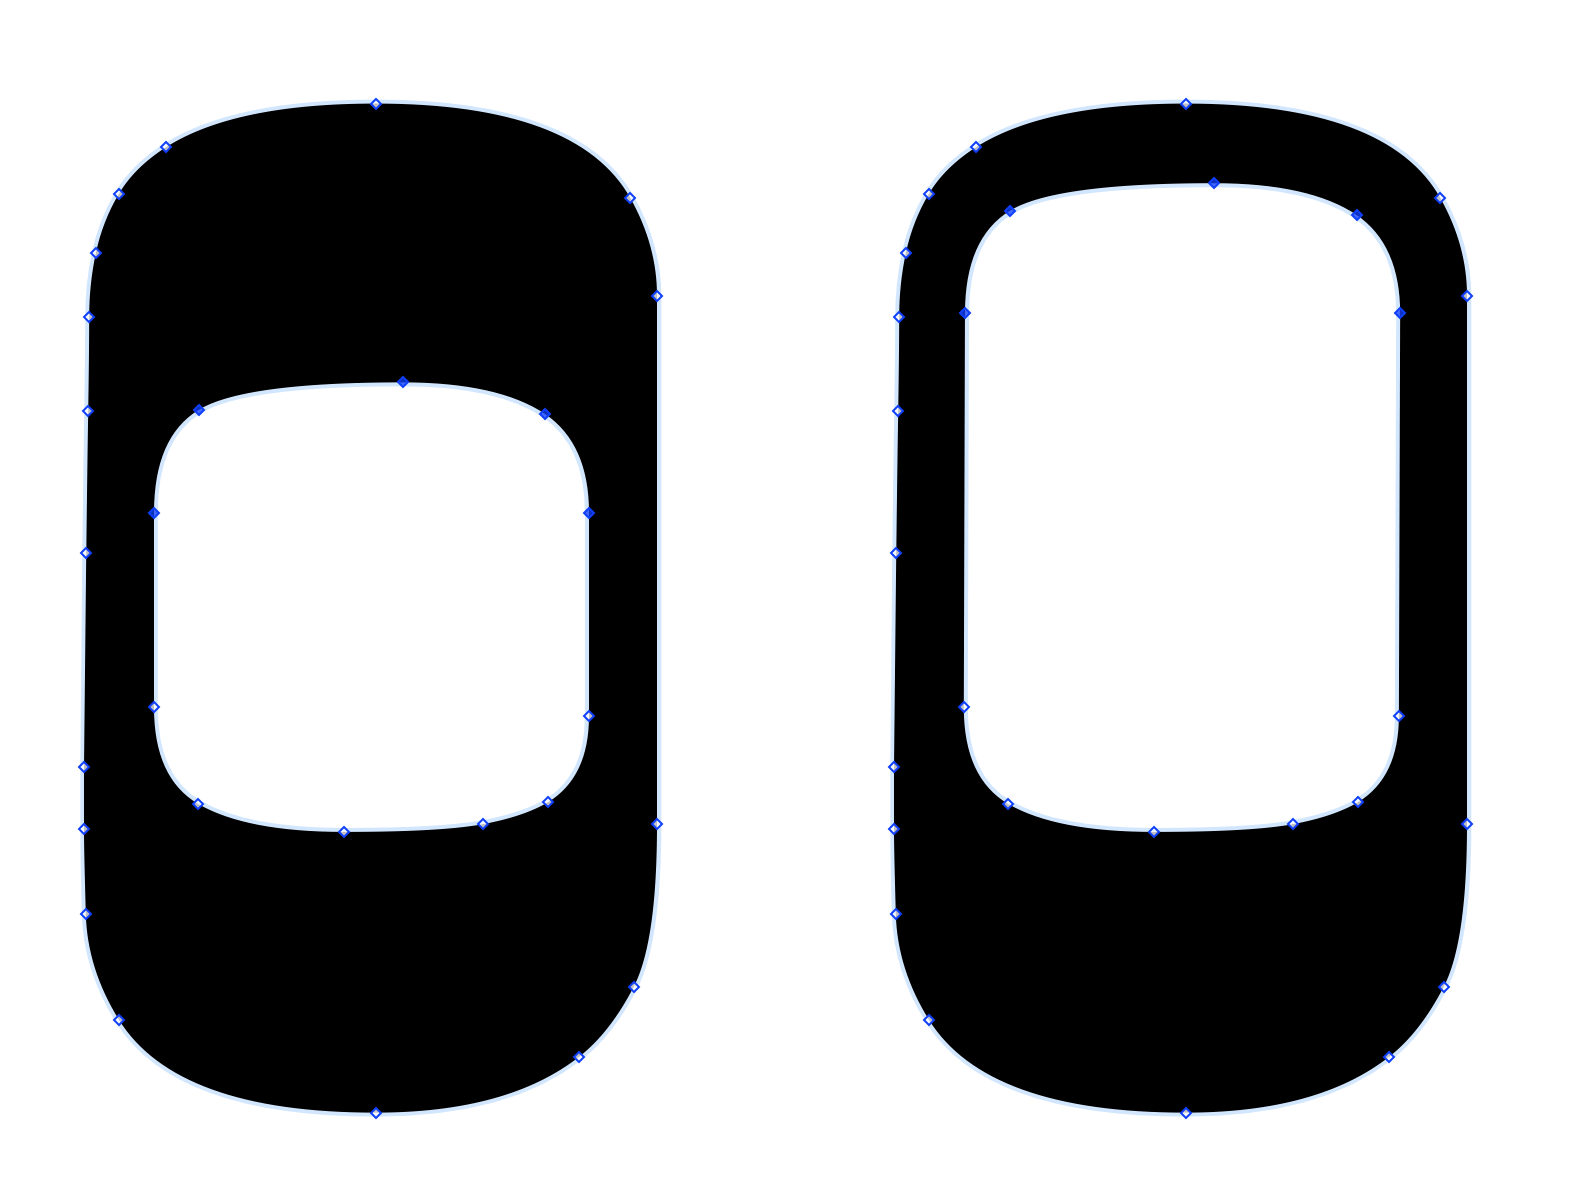
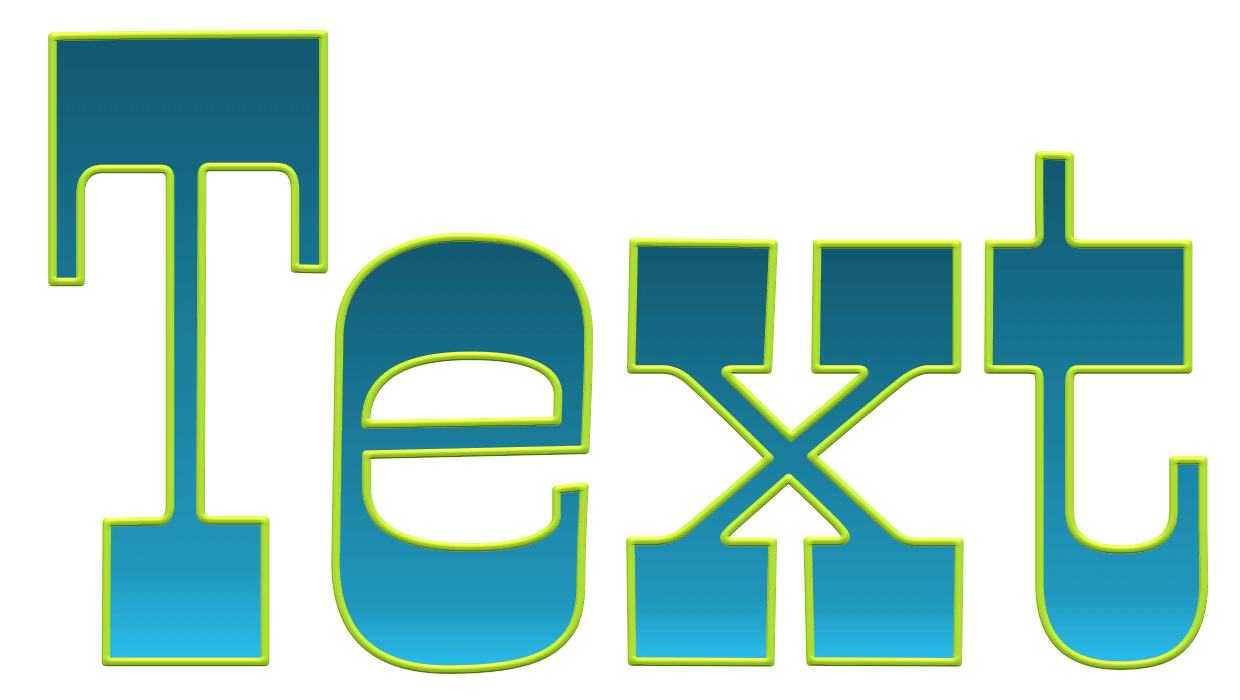
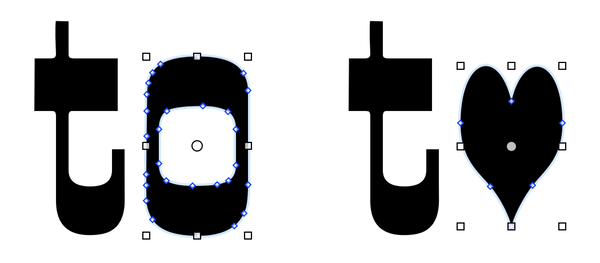
- Convert Text to Shapes
- Converts the selected text or text object to an editable shape.
- Convert Line to Shape
- Converts the selected line or stroke to an editable shape.
- Flip Horizontally
- Flips the selected shape, left-to-right.
- Flip Vertically
- Flips the selected shape, top-to-bottom.
- Mask Image/End Masking
- Resize or rotate an image object on the canvas. Hold Shift to scale the image, and hold Command while hovering over one of the image handles to rotate an image. Holding Shift-Command lets you rotate the image in 15 degree increments. Press Return, or choose Edit ▸ End Masking when finished to accept any masking changes you’ve made to the image.
- Insert Variable
-
While you are editing a shape object’s text, choose one of these commands to insert a special tag. When you finish editing the text, the tag changes to represent some aspect of the object itself, the canvas, the page, or the document. If the data that the tag refers to changes, the tag automatically updates itself. Some variables, such as Page Number, are useful for putting on a shared layer and then sharing that layer with every canvas.
- Canvas Name
<%Canvas%> - the name of the canvas the object inhabits.
- Layer Name
<%Layer%> - the name of the layer.
- Document Name
<%Document%> - the name of the document the object inhabits.
- Current Date
<%Date%> - just what it says; this option inserts the current date. This particularly handy when you want to “stamp” a document you’re printing with today’s date.
- Document Creation Date
<%CreationDate%> - the date that the document was originally created, according to macOS’s filesystem.
- Document Modification Date
<%ModificationDate%> - the date that the document was last saved, according to macOS’s filesystem.
- Creator
<%Creator%> - the name of the user who created the file, according to macOS’s filesystem.
- Modifier
<%Modifier%> - the name of the user who last saved the file, according to macOS’s filesystem.
- Page Number
<%#%> - the number of the page that the object inhabits, based on settings in the Canvas Size inspector and the Page Setup panel.
- Total Pages
<%TotalPages%> - the number of pages in the whole document. Use this with the Page Number variable to get results like “Page 2 of 5”; for example:
<%# of %TotalPages %>- Canvas Number
<%CanvasNumber%> - if you have multiple canvases in your project, you can reference them by number.
- Total Canvases
<%TotalCanvases%> - prints the number of canvases in the document. Use this with the Canvas Number variable to get results like “Canvas 1 of 3”; for example:
<%CanvasNumber of %TotalCanvases %>- X Position
<%X%> - the object’s horizontal distance from the origin, just like in the Geometry inspector.
- Y Position
<%Y%> - the object’s vertical distance from the origin, just like in the Geometry inspector.
- Width
<%Width%> - the object’s horizontal size, just like in the Geometry inspector.
- Height
<%Height%> - the object’s vertical size, just like in the Geometry inspector.
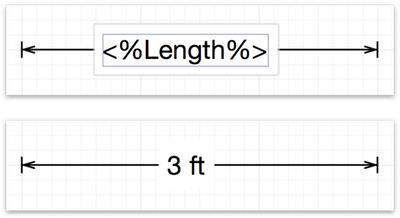
- Line Length
<%Length%> -
Apply the Line Length variable to the label on a line. The Line Length variable relies on the values set in the Units inspector when displaying the line length. For example, let’s say that you are creating a floorplan of your house or apartment. In the Units inspector, you can set the Ruler Units to feet (ft), and the Scale to something like 1 in = 1 ft to get accurate (to-scale) floorplans, using lines and the Line Length variable to display the dimensions.
- GraphicName
<%GraphicName%> - Places on the canvas a text object with the name of the currently selected shape.
- Canvas Name
- Find
-
Commands for searching within OmniGraffle:
- Find (Command-F)
- This summons OmniGraffle’s Find panel. You can search for a specific string of text, or you can use a regular expression to match a whole class of strings. When searching for a specific string, select Ignore Case to match letters regardless of whether they are uppercase or lowercase; select Whole Word to avoid matching portions of a word. If you use groups in a regular expression, you might want to select (or replace) the whole expression, or just one of the groups; use the pop-up menu to indicate which.
- Find Next (Command-G)
- Choose this to find the next occurrence of the text you last entered in the Find panel, as if you had just clicked its Next button.
- Find Previous (Shift-Command-D)
- Choose this to find the previous occurrence of the string you last entered in the Find panel, as if you had just clicked its Previous button.
For the purposes of Previous and Next, OmniGraffle considers objects in left-to-right, top-to-bottom order.
- Enter Selection (Command-E)
- Select some text in an object, then choose this command to put the selected text into the Find panel, replacing whatever was there before. Then you can use the Find Next and Find Previous commands to search for other occurrences of the text.
- Scroll to Selection (Command-J)
- Move the view so that the selected objects are visible.
- Zoom to Selection
- Fits the currently selected object(s) so that they fit within the Canvas view.
- Spelling and Grammar
-
Commands for checking the spelling and grammar within your project file:
- Show Spelling and Grammar (Command-:)
- Opens the Spelling and Grammar dialog. Since the colon (:) is on the upper part of semicolon (;) key, you will also need to use the Shift key to option this dialog (Shift-Command-;).
- Check Document Now (Command-;)
- Checks the spelling in your current document and stops at the first misspelled word it finds.
- Check Spelling While Typing
- This option is enabled by default, but can be turned off by selecting this option in the menu.
- Check Grammar With Spelling
- This option also checks your grammar as it checks spelling. This option comes in particularly handy when you’re entering a lot of text.
For the purposes of Previous and Next, OmniGraffle considers objects in left-to-right, top-to-bottom order.
- Edit LinkBack Item
- If you have pasted LinkBack content from another app, select the object and use this command to open the content in the original app.
- Start Dictation (fn-fn)
- To use Dictation, place a text object on the canvas or double-click a shape to make its its label field active, and then press the fn key twice to start dictation. The words you speak are inserted as text. To stop Dictation, press fn twice.
- Emoji & Symbols (Control-Command-Space)
- Summon the standard macOS Character Palette.
The View Menu
The options in the View menu provide ways for you to zoom in or out, and control the way you look at the Canvas.
- Show/Hide Tab Bar
- If you are using macOS Sierra (v10.12, or higher), you can enable a tab bar within OmniGraffle so you can work on multiple documents. With multiple tabs open, you can use the tab-related options in the Window menu to switch between tabs, move a tab to another window, or to collect all OmniGraffle windows as tabs in the current document window.
- Start Presentation (PRO) (Option-Command-P)
- Enter presentation mode with the frontmost document.
- Zoom
-
These menu options let you zoom in and out on the canvas, and are helpful for when you need fine-grained control over where objects are placed:
- Zoom In (Command->)
- Move up to the next closest zoom level, making the canvas appear larger.
- Zoom Out (Command-<)
- Move down to the next farthest zoom level, making the canvas appear smaller.
- Zoom to Actual Size (Option-Command–0)
- Move to 100 percent zoom, so that the canvas appears as large as it actually is according to the canvas units.
- Zoom to Selection (Option-Command-J)
- Zoom to a level and position that fills the view with the currently selected objects.
- Previous Zoom
- Return to the previous zoom level you had before the current one.
- Fit in Window
- Zoom to a level and position that keep every object on the canvas visible as you work.
- Extras
-
There are several things on the canvas (other than the objects themselves) that you might want to see; choose something from this list to show or hide it.
- Actions
- Any object with an action assigned to it in the Action inspector gets an action tag near its upper-right corner.
- Grid Lines (Command-\)
- This is the grid as defined in the Grid inspector. Note that you can snap to the grid whether it’s visible or not.
- Guide Lines
- These are the manual guides that you set up for aligning objects on the canvas.
- Magnets
- Choose this to see all objects’ magnets, all the time.
- Notes (PRO)
- Any object with a note in the Note inspector gets a note tag near its upper-right corner.
- Origin
- This is the crosshair that represents the canvas origin.
- Page Breaks
- These are the lines that represent borders between pages.
- Rulers (Command-R)
- The rulers help you size objects on the canvas, and include an inspector bar for common object editing.
- Movement Handles
- Choose whether to have object movement handles displayed. When displayed, a handle is placed at the center of the object, which you can click and drag to move the object; clicking and dragging the other handles will resize the object in the direction you drag the mouse.
- Show/Hide Sidebar (Option-Command–1)
- Toggle the visibility of the left sidebar which contains Canvases and their layers, and Contents.
- Show Contents
-
Use these options to toggle the Sidebar’s view options:
- Layers (Option-Command–2)
- This is the default view for the Sidebar, which shows you the canvases, layers, and all associated objects on those layers.
- Guides (Option-Command–3)
- Displays the positions and colors of the Guides.
- Outline (Option-Command–4)
- The Outline Editor makes it easy for you to quickly enter—and edit—objects in a project. This provides you with a hierarchical view of the objects in your project so you can quickly assess their relationships.
- Selection (Option-Command–5)
- The Selection Matrix groups similarly-styled objects—blocks, labels, lines, images, together so you can quickly select objects based on their style.
- Display Canvas
-
These options make it easy for you to switch between the different canvases in your project:
- Next Canvas (Command-])
- Switch to the canvas after the one you are currently editing.
- Previous Canvas (Command-[)
- Switch to the canvas before the one you are currently editing.
- Customize Toolbar
- Conjure up a sheet of controls that you can drag to your toolbar, as in other Mac apps.
- Show/Hide Toolbar
- Set the visibility of the document window’s toolbar.
- Enter/Exit Full Screen (Control-Command-F)
- Enter full screen mode.
The Format Menu
The options in the Format menu provide control over fonts, colors, and object and diagram styles.
- Show Fonts (Command-T)
- Opens the standard Font panel.
- Show Colors (Shift-Command-C)
- Opens the standard Color panel.
- Font
-
Use this submenu to set a font and style to the selected text.
- Bold (Command-B)
- Make the selected text bold.
- Italic (Command-I)
- Make the selected text italic.
- Underline (Command-U)
- Underline the selected text.
- Outline
- Places an outline around the selected text.
- Bigger (Command-+)
- Make the selected text bigger.
- Smaller (Command-–)
- Make the selected text smaller.
- Kern
-
Change the spacing between characters; options include:
- Use Default
- Use None
- Tighten
- Loosen
- Ligature
-
If the font of the selected text offers ligatures, you can use these options to join two or more characters into a single glyph:
- Use Default — characters appear with minimal ligatures, if available.
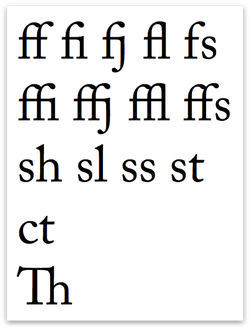
- Use None — characters appear without ligatures.
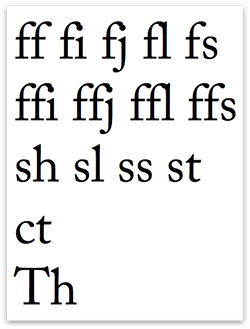
- Use All — characters are joined into a single glyph, if available.
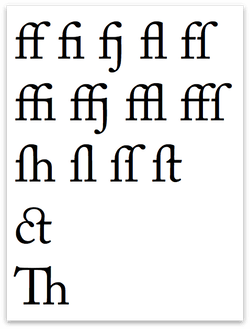
For more information about ligatures, see the Wikipedia page on Typographic ligatures.
- Baseline
-
Alter the text’s baseline; options include:
- Use Default
- Superscript
- Subscript
- Raise
- Lower
- Copy Style (Option-Command-C)
- Copies the style attributes of the selected object.
- Paste Style (Option-Command-V)
- Pastes the style attributes to the selected object.
- Text
-
These options give you control over the selected text’s properties, including:
- Align Left (Control-Command-{)
- Center (Control-Command-|)
- Justify
- Align Right (Control-Command-})
- Align Top (Option-Command-{)
- Center Vertically (Option-Command-|)
- Align Bottom (Option-Command-})
- Center Horizontally & Vertically
- Allow Hyphenation
- Copy Object Style (Control-Command-C)
- Put the styles of the selected object on the clipboard, where they can be pasted onto other objects.
- Paste Object Style (Control-Command-V)
- If there are object styles on the clipboard, apply them to the selected objects.
- Choose Diagram Style
- Opens the diagram style chooser for applying a consistent style to all objects on the canvas.
- Reapply Diagram Style
- Applies the current diagram style again, to catch any differently-styled objects that might have shown up since the last time it was applied.
- Restyle Selected Objects
- Reapplies the current diagram style to just the selected objects.
The Arrange Menu
Use these commands for working with objects on the Canvas or within Layers.
- Bring to Front (Shift-Command-F)
Bring Forward (Option-Command-F) - Objects on the same layer have an order to them: newly created objects appear in front of objects that already existed. Choose Bring to Front to move the selected objects in front of all other objects on the layer. Hold Option to change this command to Bring Forward, which moves the selected objects forward one step in the ordering.
- Send to Back (Shift-Command-B)
Send Backward (Option-Command-B) - Similar to Bring to Front, except it moves the selected objects behind all other objects on the layer. Hold Option to change this command to Send Backward, which moves the selected objects backward one step in the ordering.
- Lock (Command-L)
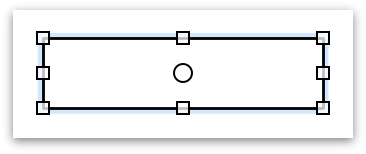
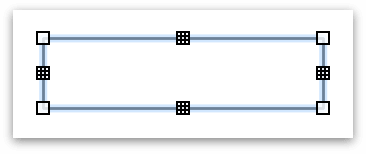
- Lock the selected objects. A locked object can’t be moved or edited. When you try to select a locked object, it shows X marks instead of selection handles. Basically, the only thing you can do with a locked object is unlock it; the exception is that you can change an object’s label and hierarchical position in the outline view. Locking is useful for making sure you don’t accidentally change something you have set up just right.
- Unlock (Option-Command-L)
- Unlock the selected objects so that they can be moved or edited.
- Group (Shift-Command-G)
- Use this command with at least two objects selected to turn them into a group, making them behave like a single object.
- Ungroup (Shift-Command-U)
- Use this command with a group selected to separate it back into its component objects.
- Make Table (PRO) (Shift-Command-T)
- Use this command with one object selected to turn the object into a 1 × 1 table, to which you can then add rows and columns.
- Make Artboard (PRO) (Shift-Command-A)
- Use this command to wrap the selected objects in an artboard. For more details, see Using Artboards (PRO), earlier in this guide.
- Group as Subgraph (PRO)
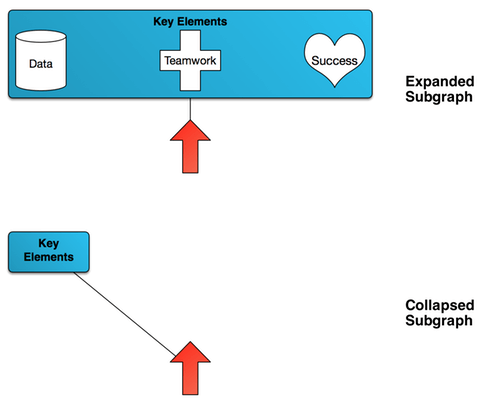
- Turn the selected objects into a self-contained subgraph that you can subsequently collapse to a single object.
- Collapse Subgraph (PRO)
- Change the selected subgraph into a single object, retaining all of the connection lines coming in or out of it.
- Expand Subgraph (PRO)
- Return a collapsed subgraph to its fully expanded majesty.
- Guides
- OmniGraffle offers Smart Guides and manual guides. Smart guides are little blue lines that appear as you move, resize, or rotate objects, to help you keep things aligned and spaced evenly.
-
Manual guides are canvas-spanning magenta lines that you place yourself; you can make as many as you like, use them to align objects, and show or hide them from the View menu.
- Smart Alignment Guides
- These are the Smart Guides that appear to help you line up objects’ edges or centers. They also help you match objects’ rotation when you Command-drag an object’s selection handles.
- Smart Distance Guides
- These are the Smart Guides that help you space out objects evenly.
- Lock/Unlock Guides
- As long as the manual guides are locked, you won’t be able to move them.
- New Horizontal/Vertical Guide
- This puts a guide across the canvas; if the guides are not locked you can use the Selection tool to drag it into position wherever you like. As you drag an object near a guide, its edges or center snap into place along the guide. You can also drag new guides out from the vertical and horizontal rulers.
- Clear Manual Guides
- Remove all of the manual guides from the canvas. If you just want to temporarily hide them, you can do so from the View menu.
- Align
-
These commands replicate the functionality of buttons in the Alignment inspector (Command–1), lining up objects’ edges and centers, or spacing objects out evenly. Options include:
- Align Left Edges
- Align Right Edges
- Align Top Edges
- Align Bottom Edges
- Align Vertical Centers
- Align Horizontal Centers
- Make Centered Row
- Make Centered Column
- Align Edges to Grid
- Align Centers to Grid
- Align to Canvas Left Edge
- Align to Canvas Right Edge
- Align to Canvas Top Edge
- Align to Canvas Bottom Edge
- Align to Canvas Vertical Center
- Align to Canvas Horizontal Center
- Make Centered Row to Canvas
- Make Centered Column to Canvas
- Offset Vertically by Xpx*
- Offset Horizontally by Xpx*
The Xpx* distances associated with the Offset Vertically by and Offset Horizontally by options are determined by the distances set in the Alignment inspector. By default, these are set to 36 pixels.
- Grid
-
Snap to Grid and Align Objects to Grid work just like they do on the Grid inspector; Size Objects to Grid resizes objects to make their edges follow the nearest grid lines. Options include:
- Snap to Grid
- Align Objects to Grid (Option-Command-[)
- Diagram Layout
-
These commands lay out objects, either all objects on the canvas or the selected objects, according to the settings in the Diagram Layout inspector. Options include:
- Lay Out Entire Canvas
- Lay Out Selection
- Object Rank
- Default
- Minimum
- Maximum
- Same
- Size
-
If you have objects of different sizes on the canvas, but would like them to be the same size, first select the object that has the dimensions you’d like the others to emulate, choose Arrange ▸ Size, and then choose one of the resizing options:
- Make Same Width
- Make Same Height
- Make Same Size
- Make Natural Size
- Size to Fit Image
-
Make Natural Size makes an object’s height and width equal. For objects with an image placed in the Image inspector, Size to Fit Image makes the object just big enough to show the whole image at its original size.
The Inspectors Menu
The Inspectors menu provides ways for you to interact with the Inspectors sidebar, the floating window, or individual palettes and other workspaces you create.
- Show/Hide Inspectors (Shift-Command–I)
- Toggles the Inspectors sidebar to the right of the Canvas.
- Object (Command–1)
-
Switches the Inspectors sidebar to reveal the following Object inspectors:
- Fill
- Stroke
- Shadow
- Shape
- Line
- Image
- Font
- Text Position
- Geometry
- Alignment
- Properties (Command–2)
-
Switches the Inspectors sidebar to reveal the following Properties inspectors:
- Connections
- Action (PRO)
- Note (PRO)
- Canvas (Command–3)
-
Switches the Inspectors sidebar to reveal the following Canvas inspectors:
- Canvas Size
- Canvas Fill
- Background Image
- Units
- Grid
- Diagram Layout
- Canvas Data
- Document (Command–4)
-
Switches the Inspectors sidebar to reveal the following Document inspectors:
- Format
- Margins
- Document Data
- Workspaces
-
Workspaces allow you to have more control over how you view and use the Inspectors in OmniGraffle. There are three initial Workspaces:
- Sidebar (F2)
- This workspace returns the inspectors back to their original state as a sidebar attached to the right side of OmniGraffle’s window.
- Floating (F3)
- This workspace detaches OmniGraffle’s inspectors from the main window, creating a floating palette that you can move around on your display—or to another display.
- Inspector (F4)
- When selected, this option creates four individual floating palettes; one for each inspector—Object, Type, Properties, Canvas, Document, and Stencils. When the windows are created, they appear in a stack on top of one another. Just move them apart, or close the ones you don’t need, if that’s the case.
-
However, you can create custom Workspaces by “tearing off” inspectors into a new floating window.
Since most of the function keys (for example, F1, F2, F3, and so on) are already assigned by the system to function with your Mac hardware, you will need to press the fn key and then press the applicable function key. For example, for the Default Workspace, you will need to press fn-F2.
- Edit Workspaces
- Open the Workspaces window, where you can save your favorite arrangements of inspectors. Each workspace you save appears at the bottom of this submenu and has a function key assigned to it.
The Window Menu
Commands for working with OmniGraffle’s windows.
- Minimize (Command-M)
- Shrink the frontmost window into the Dock.
- Zoom
- Size the window to fit its contents, or return to the previous window size.
- New Window on filename (PRO)
-
Opens an additional window of the same document, which can be used to independently view different portions of the canvas (or different canvases) of the same document.
The different windows are denoted by the addition of a number in parenthesis next to the file name at the top of the toolbar. The numbers are added so you can tell which window is which in the Window menu.
If you place two windows next to each other (or move one of the windows to another display) and move an object on the canvas, you will see the object move in the other window.
The next four menu options are only available when using OmniGraffle 7 on macOS Sierra (v10.12 or higher). See Show/Hide Tab Bar for more detail.
- Show Previous Tab (Control-Shift-Tab)
- Switches the view to the document in the previous tab.
- Show Next Tab (Control-Tab)
- Switches the view to the document in the next tab.
- Move Tab to New Window
- Moves the document in the current tab to a separate window.
- Merge All Windows
- Collects all open OmniGraffle windows as tabs in the current document window.
- Stencils
- Opens the Stencils window so you can drag stencils to the canvas or search your system and Stenciltown for the stencil you need.
- Bring All to Front
- Put all of OmniGraffle’s windows in front of all other app windows.
The Help Menu
When you’re in a pinch and can’t sort something out, we’re here to help.
- OmniGraffle Help
- This summons the onscreen help you’re reading right now. Thanks for being the kind of person who reads the documentation.
- Welcome to OmniGraffle 7
- This opens a Welcome document, which highlights the new features you’ll find in OmniGraffle 7.
- Release Notes
- This pops open a window that includes lots of information from our engineering team about the things they’ve fixed, updated, or have added to OmniGraffle. This document changes whenever we issue an update of OmniGraffle, so be sure to read this after updating to the latest and greatest build to see what’s changed.
- Get More Stencils
- Choosing this menu option takes you out of OmniGraffle and opens your favorite web browser to Stenciltown, our online repository for sharing and discovering new stencils for OmniGraffle.
- Open Scripts Folder
- This opens a Finder window, taking you to the Application Scripts folder, used to contain AppleScripts you have created.
- Contact Omni
- Choose this to start an email message to the OmniGraffle support folks. We also give you the option of attaching the OmniGraffle file you are working on, just in case there’s a bug or you have a particular question how to do something. This is the best way to get in touch with us; your version number and license information are automatically entered in the subject field.
