Getting Synced with OmniPresence and Omni Sync Server
Available on the Mac and iOS, OmniGraffle is an essential tool for all your design and diagramming needs. And when it comes to protecting those documents and sharing them between your Mac and iOS devices, we have something a little extra-special for you: OmniPresence and Omni Sync Server.
-
OmniPresence is a free utility that you install on your Mac for synchronizing files. OmniPresence runs in the background, watching a “connected folder.” It makes sure the files inside are in sync with files in the cloud (a WebDAV server of your choice), and with your OmniPresence-enabled iPad apps.
On iOS, OmniPresence is built into all of our current document-based apps, including OmniGraffle 2, OmniOutliner 2, and OmniPlan 3. You’ll access OmniPresence folders and files from within the app’s respective Resource Browsers. The result is that all of your OmniPresence-enabled devices detect changes wherever you make them, and constantly sync up to keep your files up to date.
To get started, you’ll need to download OmniPresence for Mac from our website.
Unlike other Omni apps, OmniPresence isn’t a replacement for your current sync solution for OmniFocus. OmniFocus uses its own built-in sync code (rather than OmniPresence) to push database changes to a WebDAV server and retrieve them from it. OmniFocus for Mac doesn’t require OmniPresence to be installed for its sync to function to work.
-
Omni Sync Server resides in a well-air conditioned secure facility. Omni Sync Server is our own custom WebDAV server and it functions as a central hub for all your syncing needs; it’s what OmniPresence connects to when shuttling files between your Mac and iOS devices.
With Omni Sync Server, we never ever look at your data without your permission. For example, when our Support Humans are working with you to restore a corrupt file or isolate a particular issue you’re having with our server. Beyond that, you can rest assured that your data is safe and secure on Omni Sync Server.
Creating an Omni Sync Server Account
Your first order of business—if you are planning to use OmniPresence with Omni Sync Server—is to create an Omni Sync Server account. In doing so, you will create a Account Name and password, which you will use when connecting OmniPresence on your Mac.
Follow along...
-
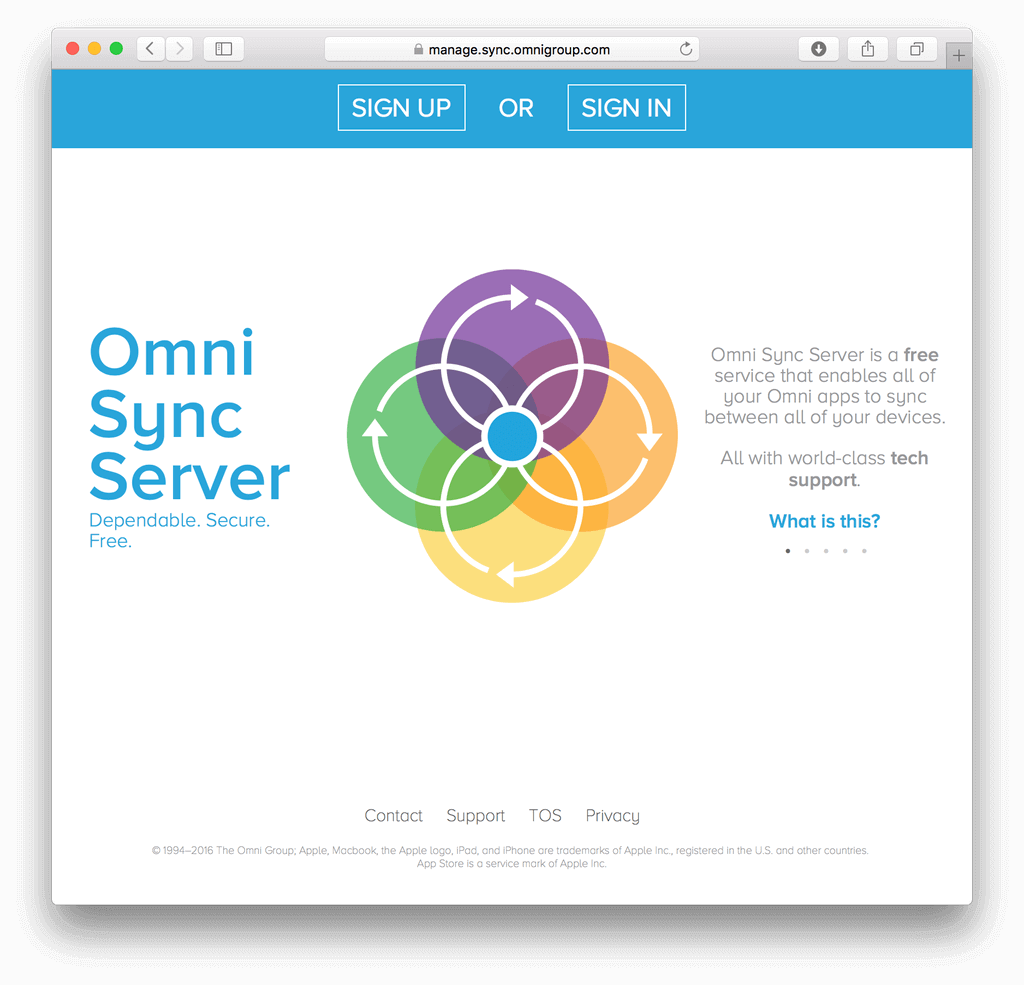
Using your favorite web browser, and go to the Omni Sync Server webpage:
-
At the top of the page, click Sign Up.
-
In the fields provided, enter the following information:
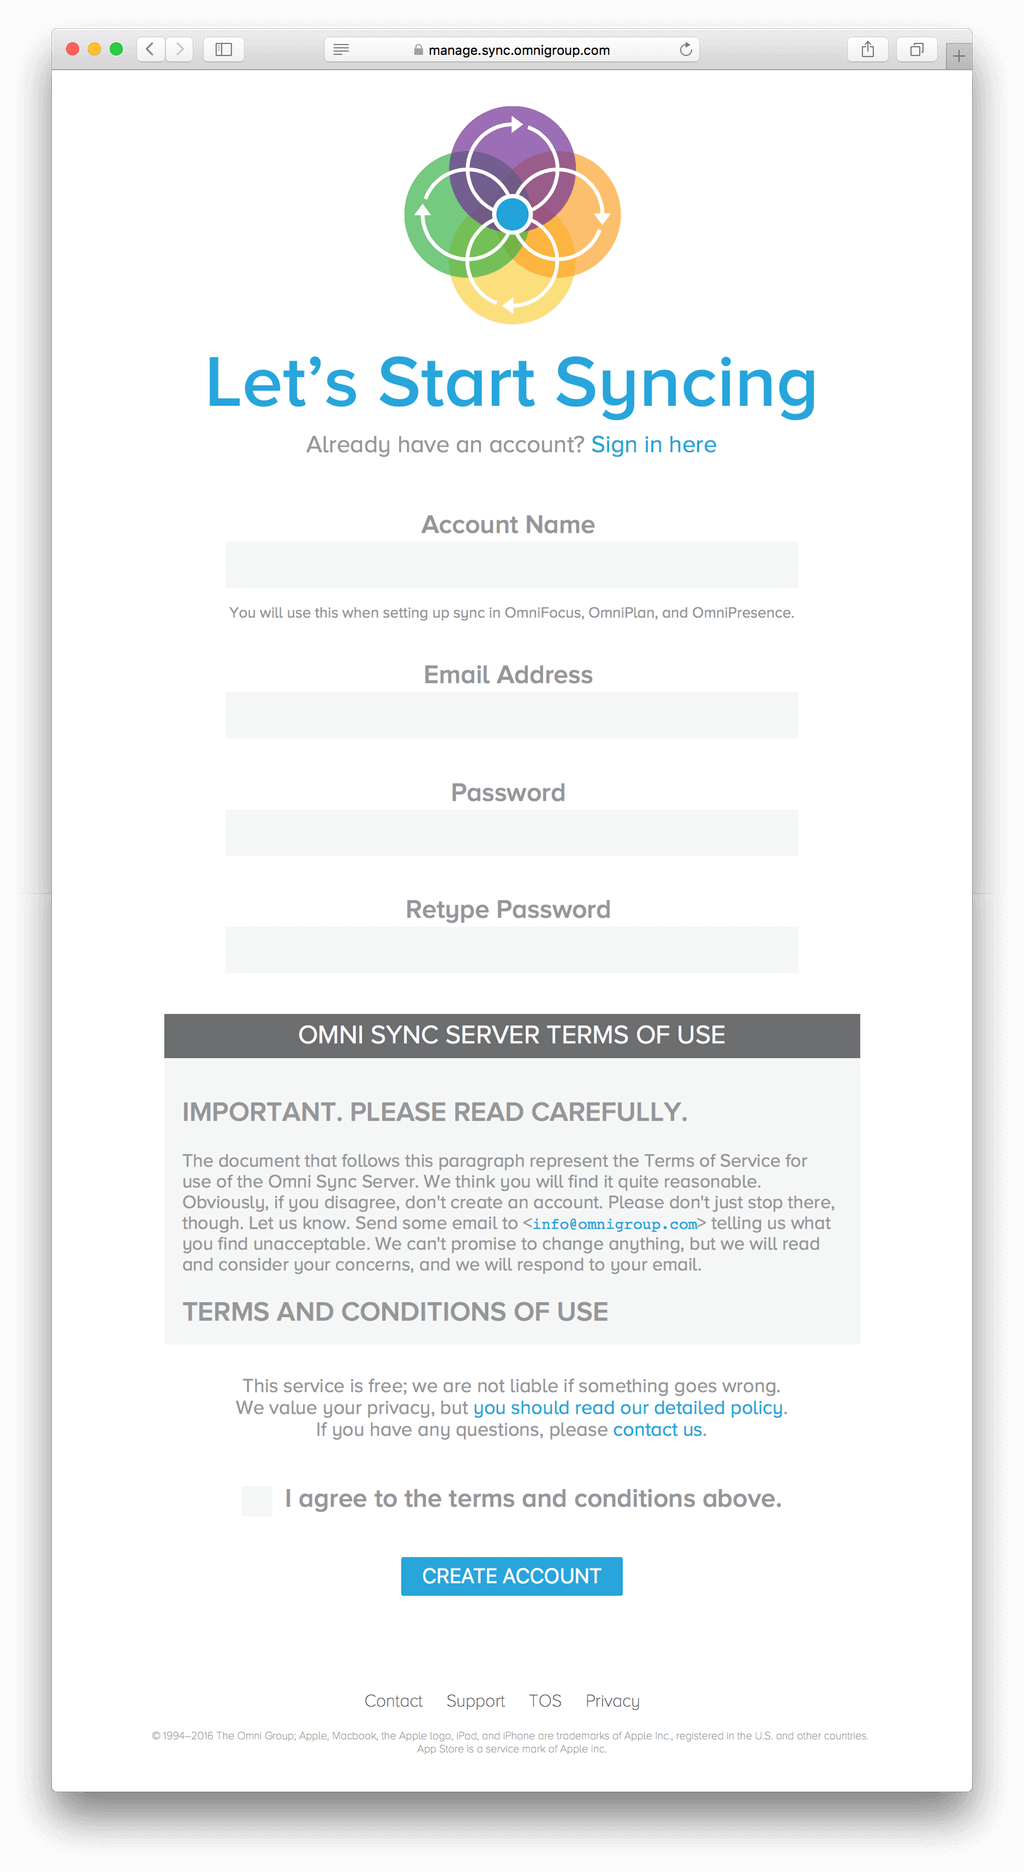
- Account Name — You will use your Account Name when connecting to Omni Sync Server. Account Names can include lowercase letters, numbers, or symbols—sorry, uppercase letters, spaces, and the following symbols are not permitted: ~ ` : / and \.
- Email Address — Enter your email address.
- Password — Enter a unique, and secure, password. After entering your password, you’ll need to enter it again in the next field, just to verify that you have entered the password correctly.
-
Terms of Use — Please take some time to read through the Omni Sync Server Terms of Use. If you agree with the terms and conditions, click the checkbox.
- Finally, click Create Account.
After clicking the Create Account button, we will send a confirmation message to the email address you specified. Keep an eye out for that email; when you receive it, be sure to click the Finish Registration button in that email to activate your Omni Sync Server account.
Keep the Account Name and Password used to create your Omni Sync Server account handy, as you will need them in the next chapter when you install and configure OmniPresence on your Mac.
Installing and Configuring OmniPresence
OmniPresence starts out its life on your Mac just like any other Mac app you install. You download a disk image, and drag the app icon to the Applications folder. However, unlike other Mac apps that show up in the Dock when you launch them, OmniPresence never shows up in your Dock. Instead, OmniPresence spends its life as a menu bar extra—one of those black icons—at the top of the screen.
With the Account Name and Password for your Omni Sync Server account in-hand, this chapter takes you through the process of downloading, installing, and configuring OmniPresence on your Mac.
Downloading OmniPresence from our Server
OmniPresence is only available for download from our website; it isn’t available on the Mac App Store.
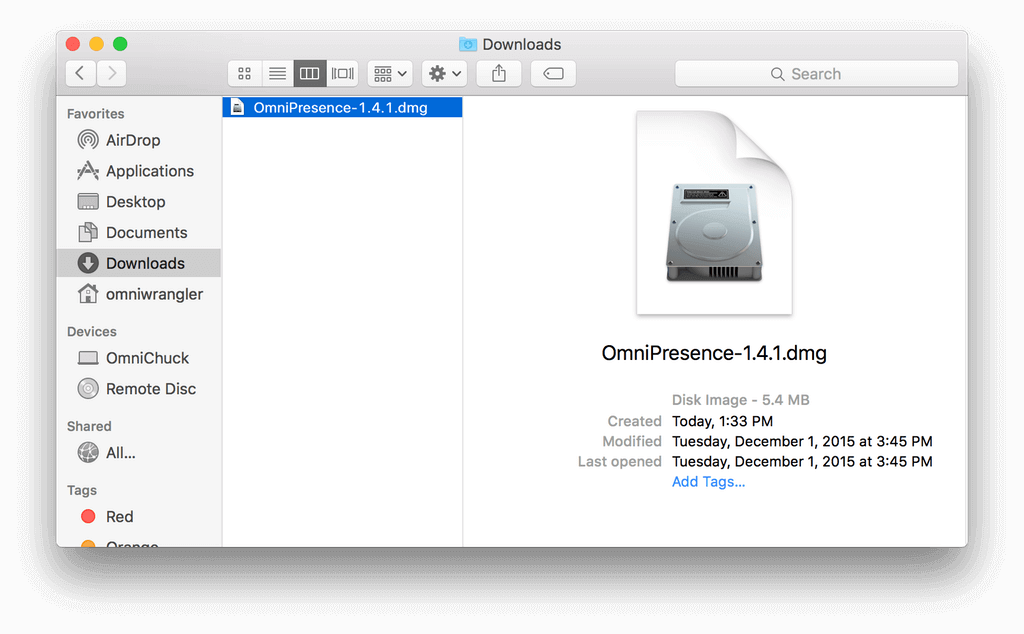
Click this link to download OmniPresence. OmniPresence is packaged within a disk image (a file ending with a .dmg file extension), which is saved to the Downloads folder on your Mac.
Installing OmniPresence
To install OmniPresence, follow these steps:
-
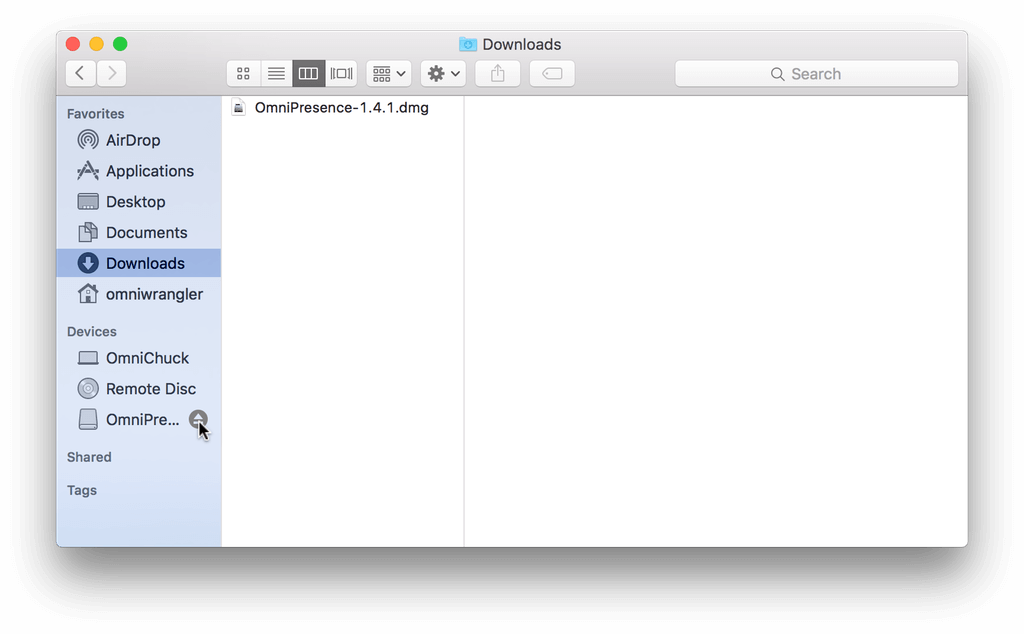
Double-click OmniPresence-1.4.1.dmg to open the disk image. This opens the disk image, mounting it under the Devices section of the Finder’s sidebar.
The filename you see might be slightly different. As of this writing, OmniPresence for Mac is at version 1.4.1 (thus the filename, OmniPresence-1.4.1.dmg). If you see a different number in the filename, don’t be worried; just go ahead and double-click that one. It just means that our engineering team have been hard at work to improve OmniPresence for Mac.
-
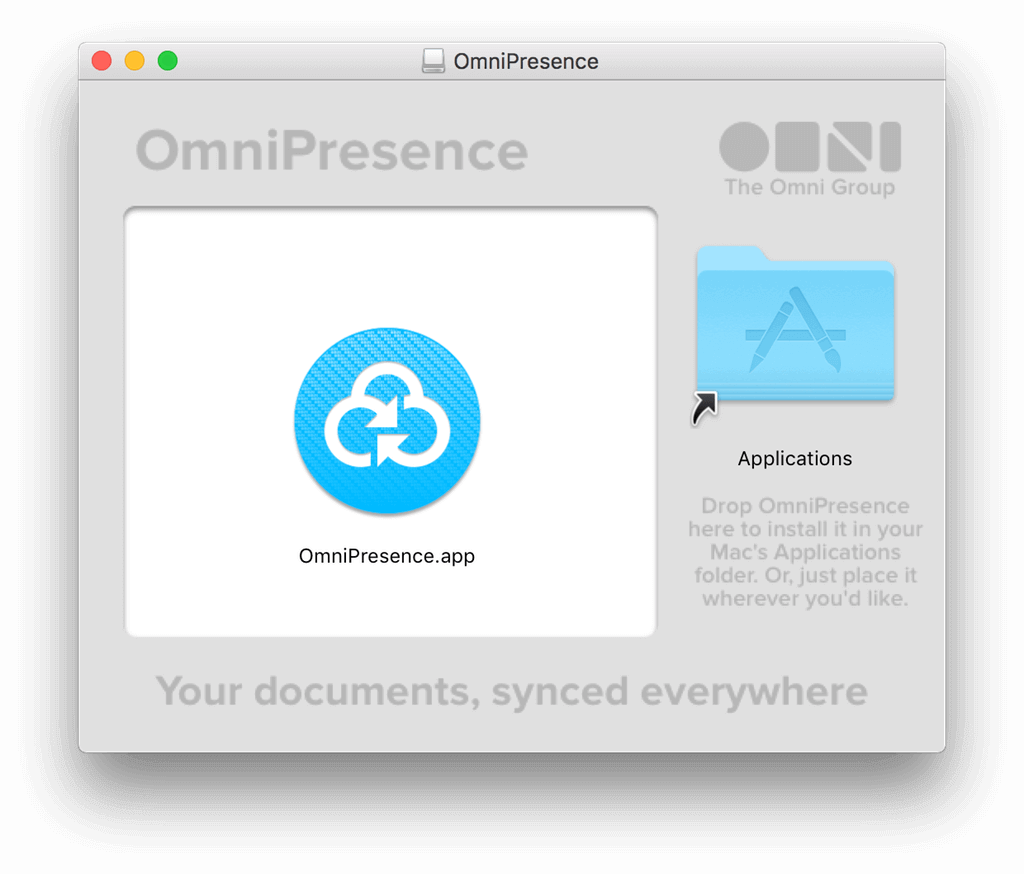
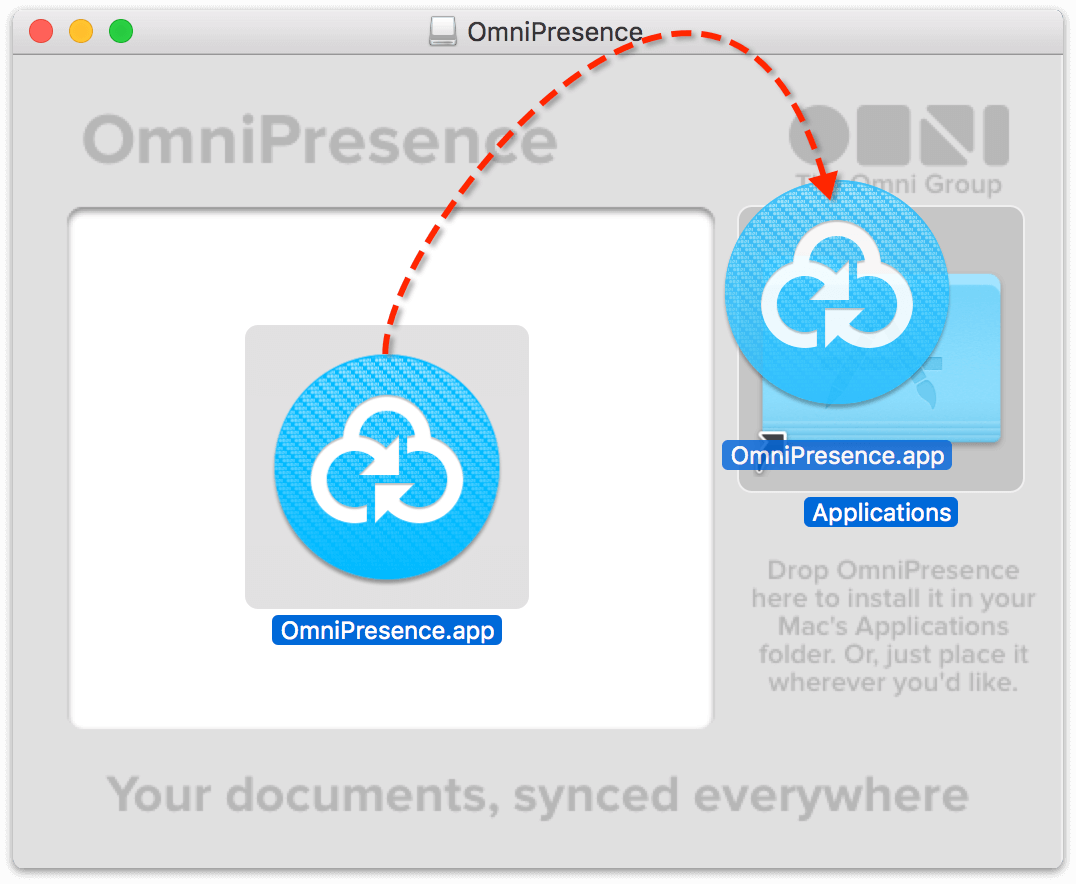
After agreeing to our license, you’re presented with the following window:
-
Drag and drop the OmniPresence.app icon onto the Applications folder to install OmniPresence on your Mac:
-
Close that window by pressing Command-W.
-
In the Finder’s sidebar, click the eject button next to OmniPresence’s disk image; this unmounts the disk image so you can delete the disk image file from your system.
-
In the Finder window, return to the Downloads folder. Select the file OmniPresence-1.4.1.dmg and press Command-Delete to move the file to the Trash. The next time you empty the Trash, that disk image is purged from your system, saving you precious disk space.
With OmniPresence installed, now it’s time to set up a synced folder for OmniPresence to sync to, and then connect to Omni Sync Server.
Starting OmniPresence and Connecting to Omni Sync Server
With OmniPresence installed, it’s time to get it started and connect to your Omni Sync Server account.
Follow along...
-
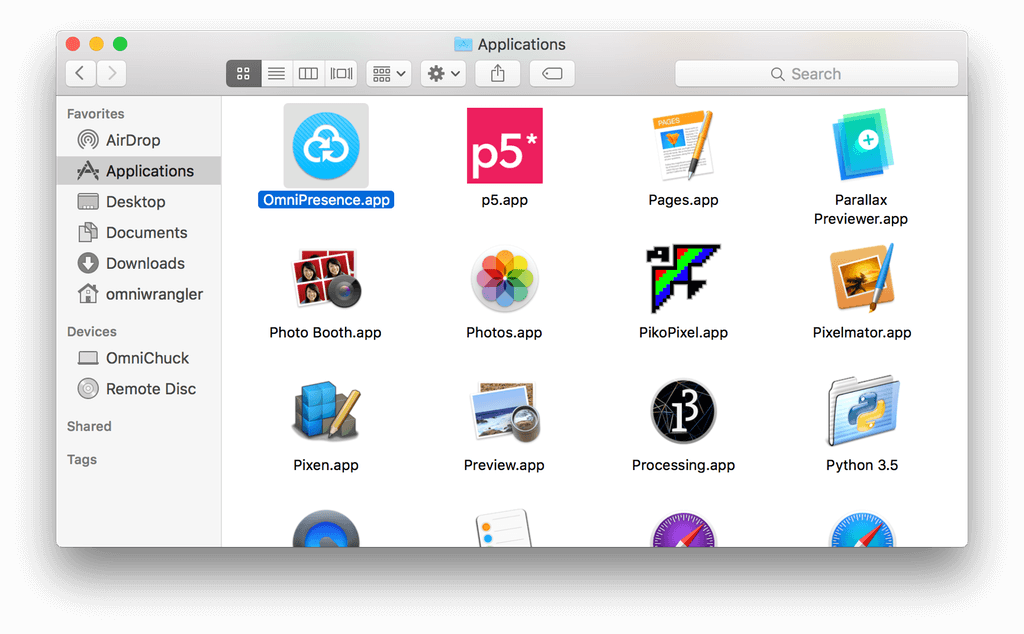
In the Finder window, choose Applications in the Finder’s sidebar. (If you don’t see it there, choose Go ▸ Applications, or use Shift-Command-A.)
-
Scroll down in the list of applications installed on your Mac and locate OmniPresence.app.
-
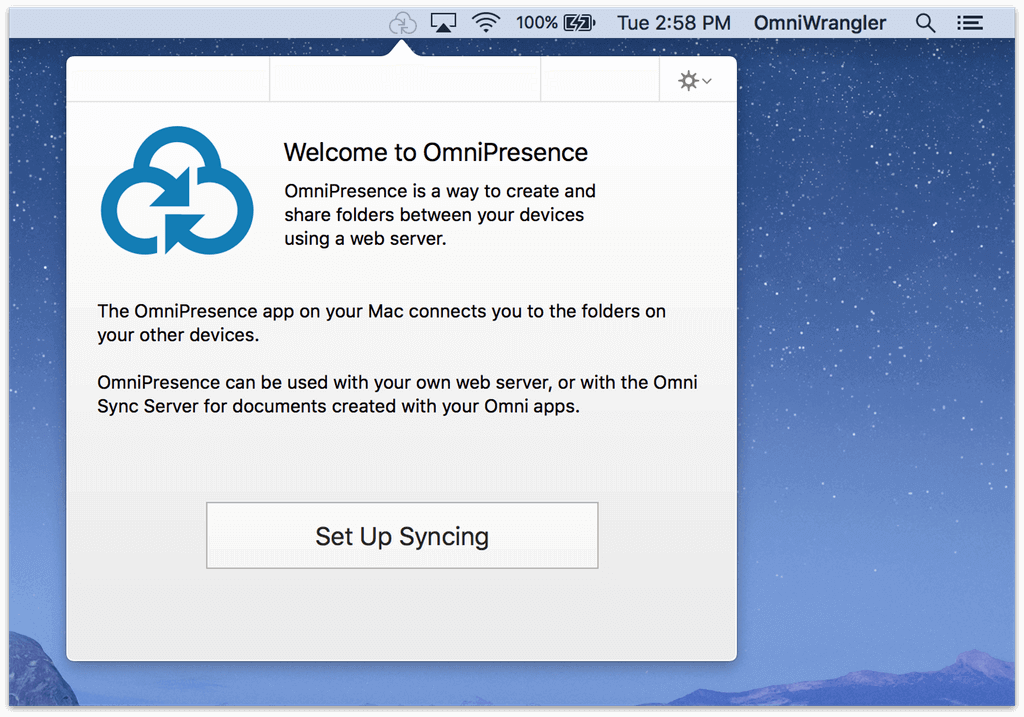
Double-click the OmniPresence.app icon to open the app. You’ll notice that, unlike other Mac apps, OmniPresence’s icon doesn’t appear in the Dock. Instead, OmniPresence installs a menu bar extra —
 — in the menu bar at the top of the screen.
For more details about using OmniPresence’s menu bar extra—and the icon’s various states—see Using OmniPresence on Your Mac.
-
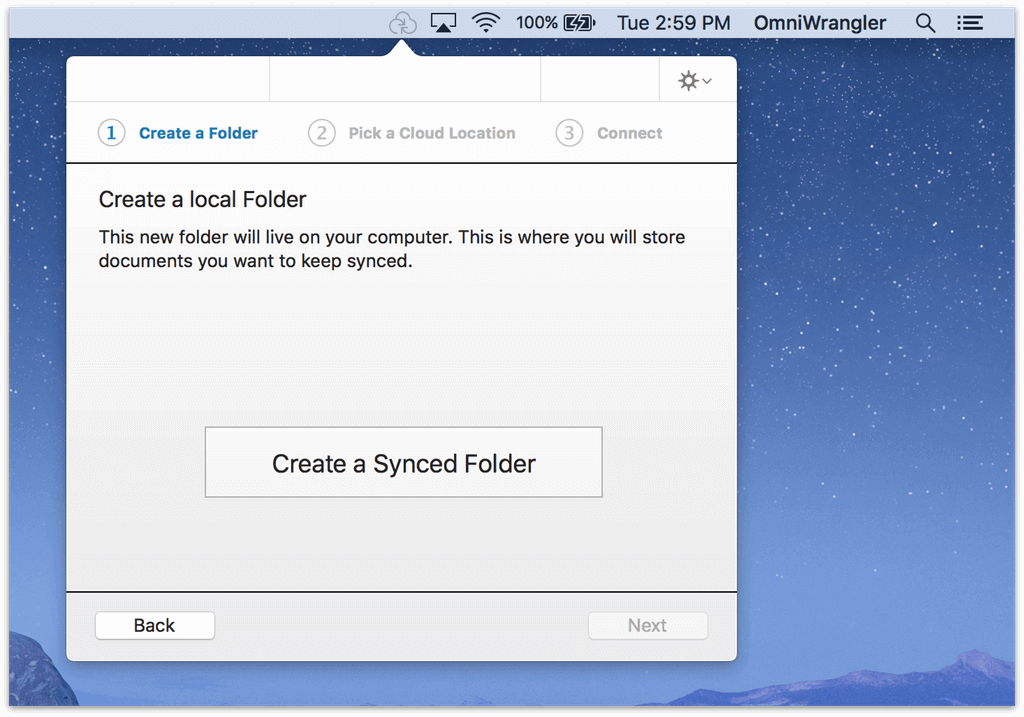
Click Set Up Syncing:
-
Click Create a Synced Folder:
-
In the sheet that appears, you have the option to name the OmniPresence folder that lives on your Mac. We’ve pre-filled the New Folder field with OmniPresence, but you can change this to whatever you’d like.
You have total control over where the sync folder is stored on your Mac. For example, you could create it within the Documents folder, or you could opt to have your OmniPresence folder reside at the bottom level of your Home folder.
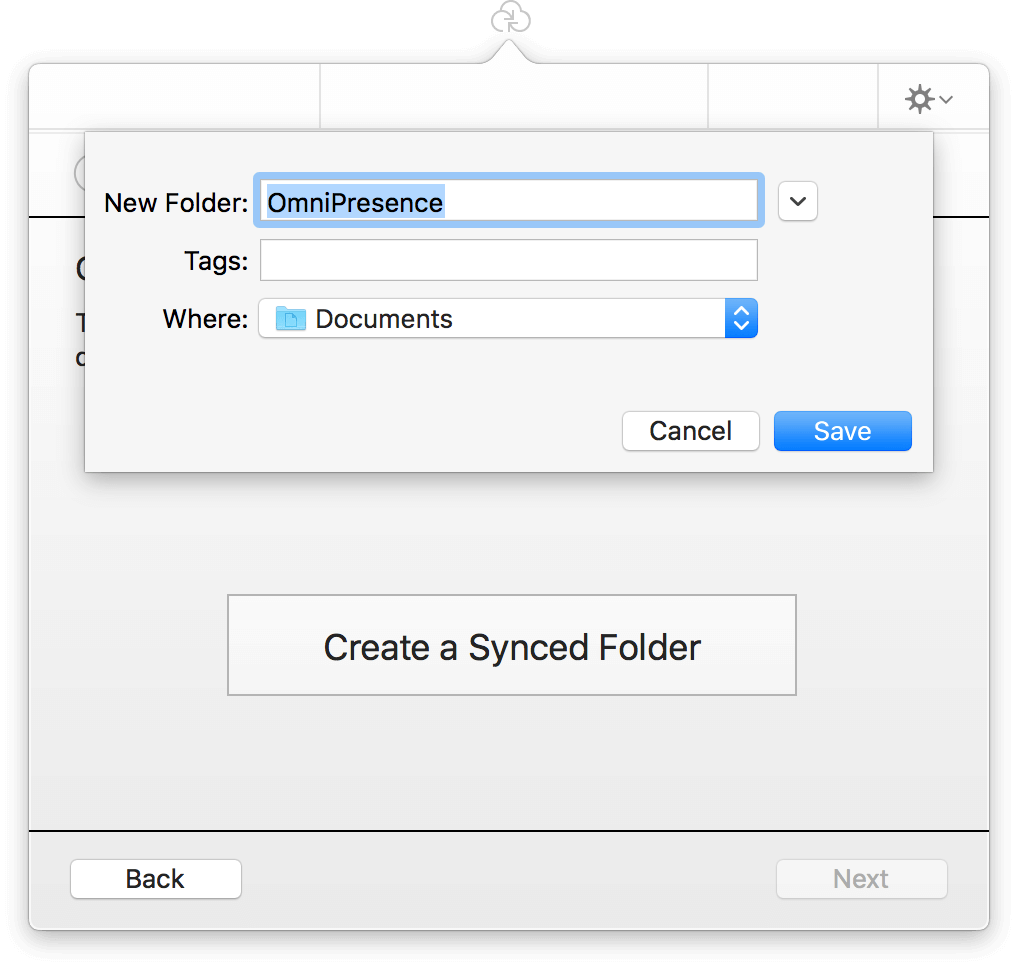

When you’ve settled on a name and location for your OmniPresence folder—or if you’ve decided to go with the default options—click Save. This creates the folder OmniPresence uses to synchronize your files.
-
After creating the OmniPresence folder, your next task is to choose a server in the cloud where OmniPresence stores your synced files.
You have two options to choose from:
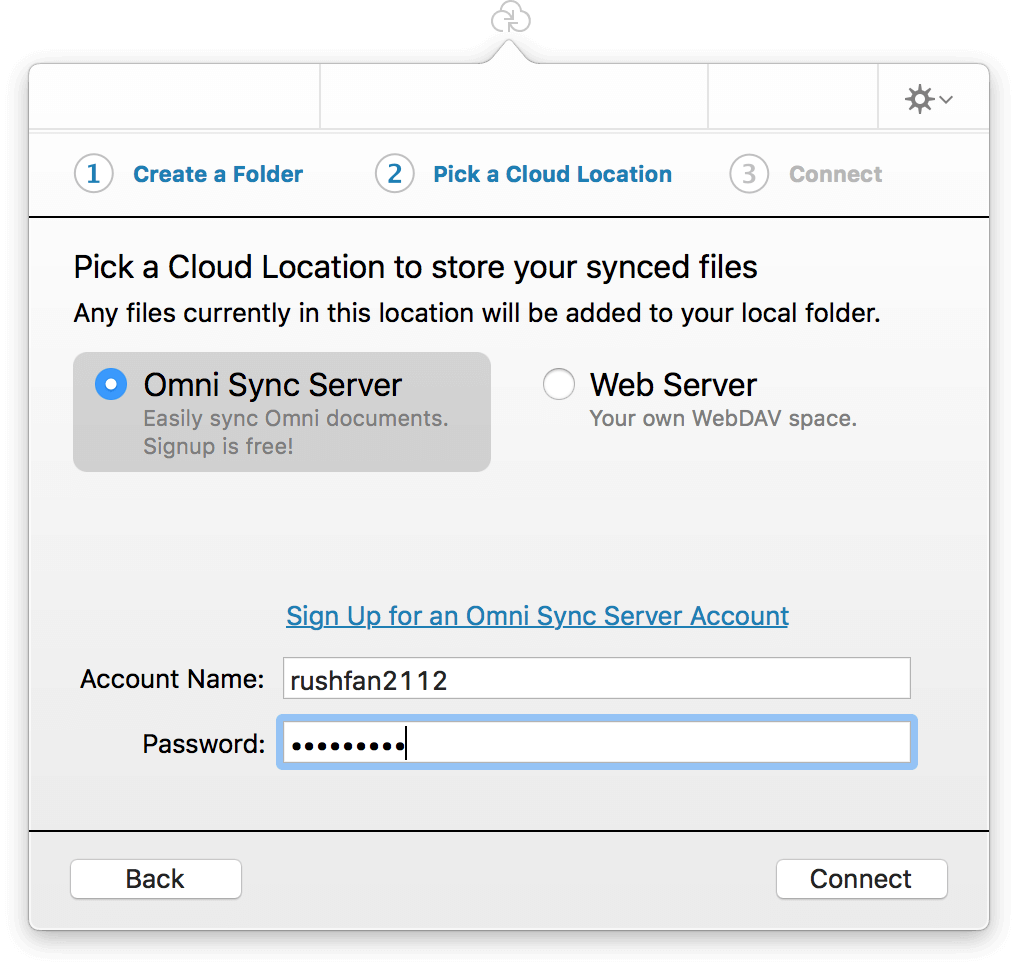
- Omni Sync Server: This is Omni’s free file server, which has specifically been designed to work in unison with OmniPresence.
- Web Server: This could be your own WebDAV server, or a WebDAV server hosted by a third-party provider.
-
If you have an Omni Sync Server account, enter your Account Name and Password in the applicable fields and click Connect.
If you haven’t already set up an Omni Sync Server account, click Sign Up for an Omni Sync Server Account. This opens your default web browser and transports you to the Omni Sync Server site where you can sign up for an account and set your password.
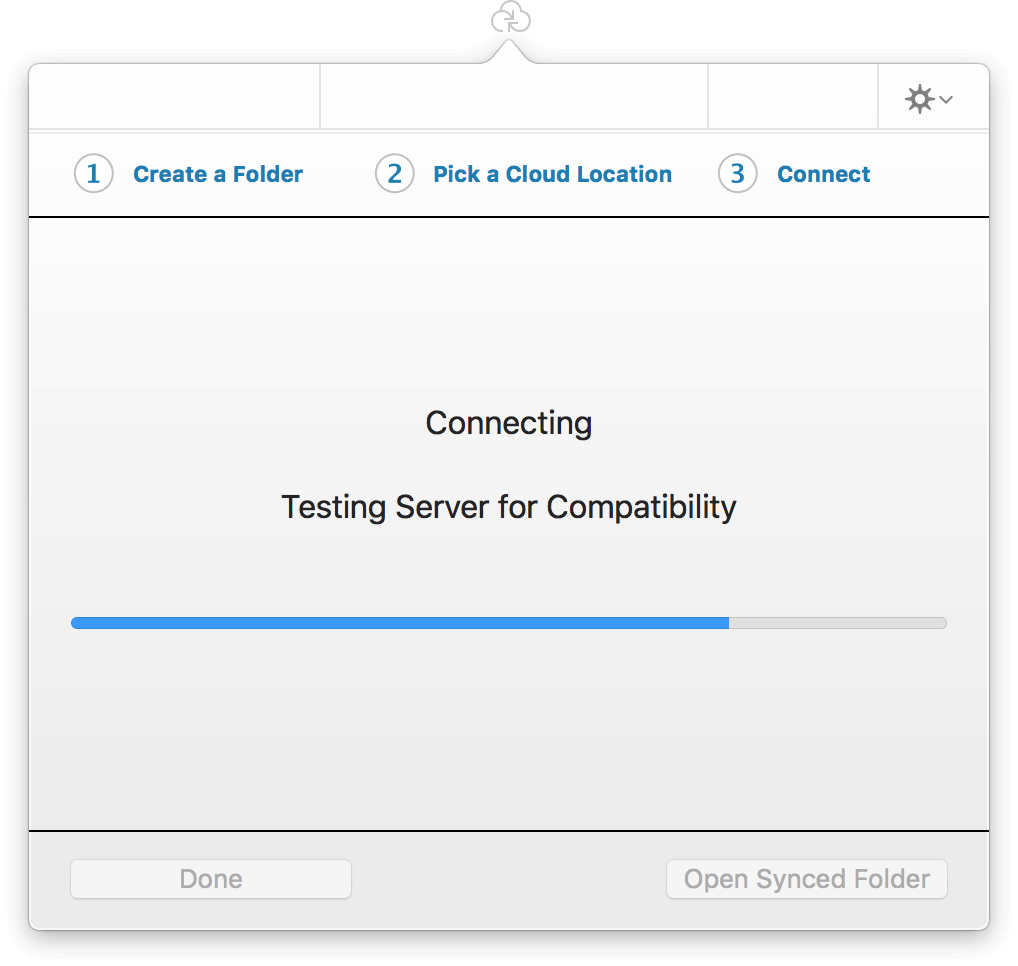
After clicking Connect, OmniPresence connects to the server you’ve chosen and tests for server compatibility. This is more of an issue with third-party WebDAV servers than it is for connecting to Omni Sync Server, which has been designed to work with OmniPresence.
If everything is okay, OmniPresence makes the connection and lets you know if it is able to connect to Omni Sync Server (or the WebDAV server you’ve specified).
-
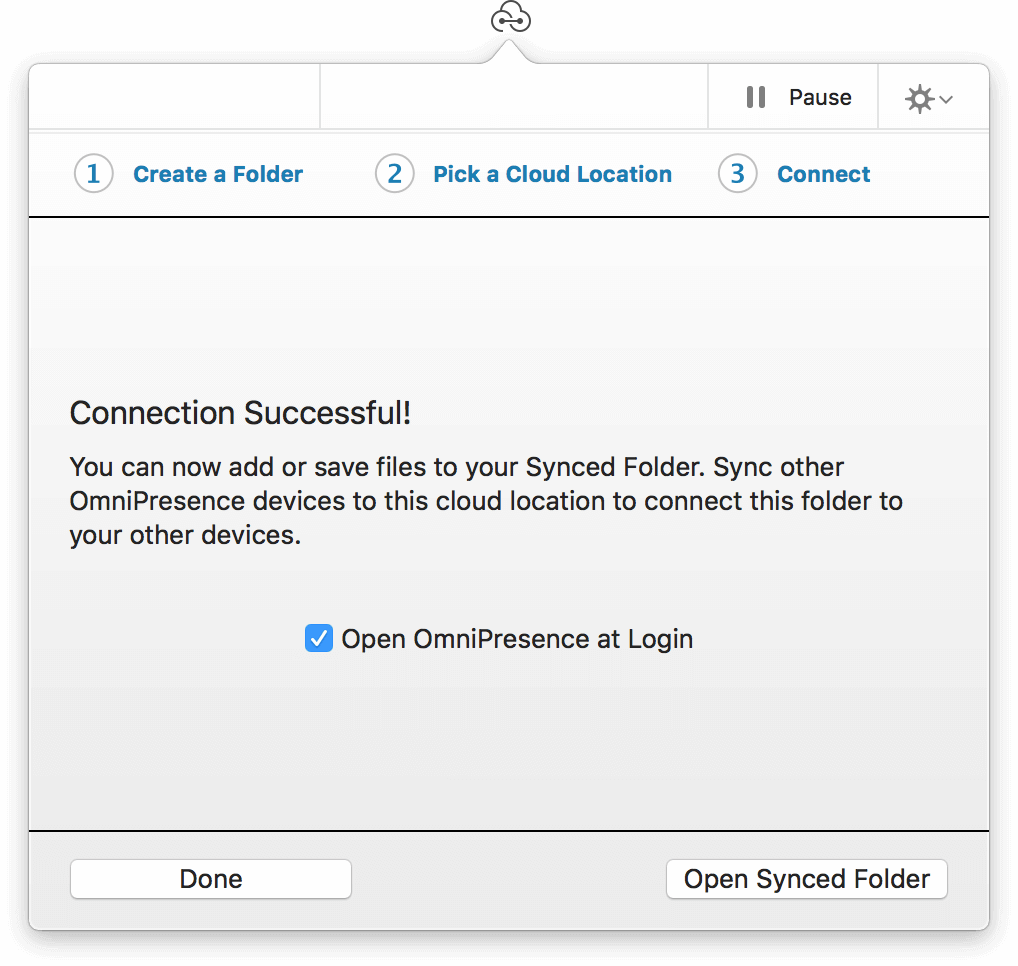
If you would like OmniPresence to start up whenever you log into your Mac, click the checkbox for Open OmniPresence at Login.
-
At the bottom of that window, click Done if you’re finished, or click Open Synced Folder to open a Finder window displaying your new sync folder.
If you’ve already synced with OmniPresence on another device, OmniPresence automatically starts populating this folder with your existing synced files. Otherwise, add files to this folder to start syncing them with the server.
Once OmniPresence connects with Omni Sync Server, you’re ready to go. Whenever you create files with OmniGraffle, OmniOutliner, or OmniPlan, be sure to save them to your OmniPresence folder. And, if you have OmniGraffle, OmniOutliner, or OmniPlan for iOS, don’t forget to connect to Omni Sync Server on your device so your files will be with you wherever you go.
Using OmniPresence on Your Mac
OmniPresence opens up a world of possibilities for syncing—and sharing—files between your Mac and iOS devices. On iOS, you access your synced folders from the Document Browser in OmniGraffle, OmniOutliner, or OmniPlan. On the Mac, however, you use the Finder for file management.
This final section discusses ways to use OmniPresence on your Mac, and from within OmniGraffle, OmniOutliner, and OmniPlan to help streamline your workflow. You’ll also learn some valuable tips about how to deal with conflict files that might occur when the same synced file is accessed on two different Macs or devices.
How Much Data Can I Store on Omni Sync Server?
While we don’t have a hard limit, we ask that you limit your data usage to 1 GB or less. This ensures that all our customers are able to get the best performance from their free Omni Sync Server account.
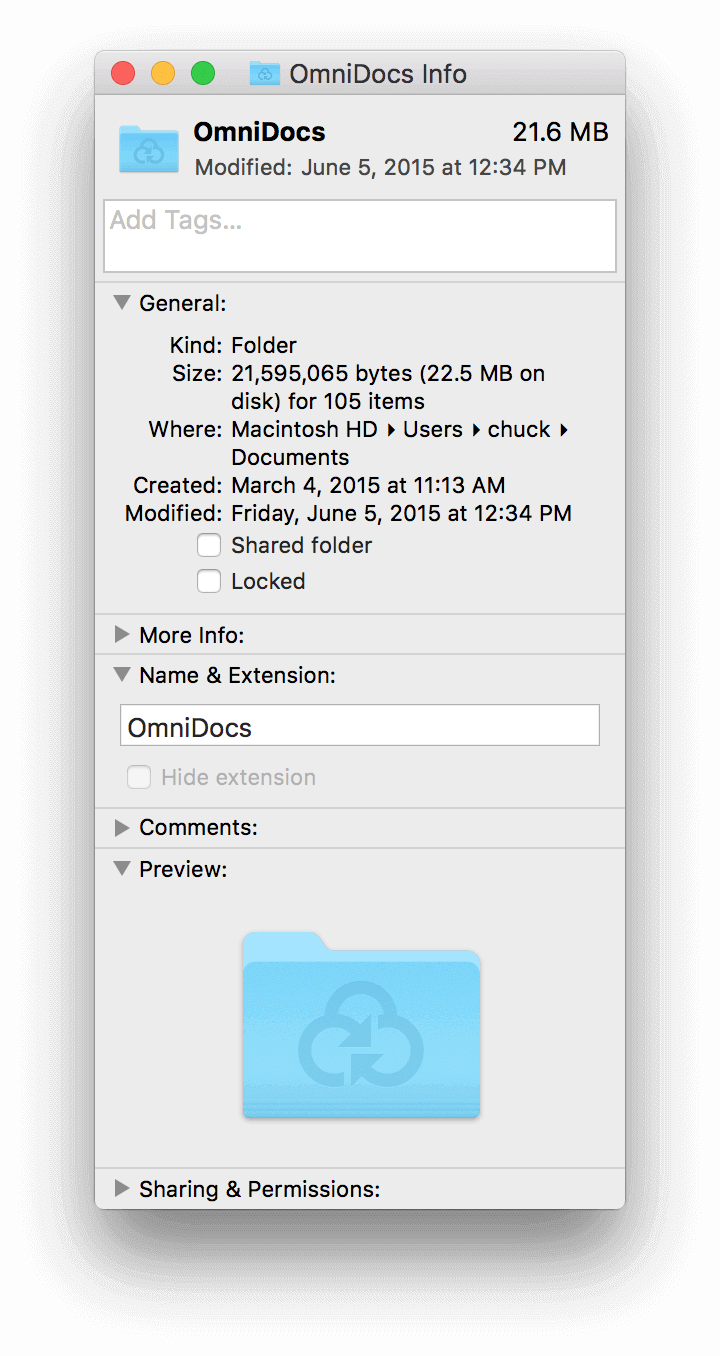
To determine how much data is stored in your OmniPresence folder, select the folder in the Finder and press Command-I. This opens the Get Info window, which not only displays how much data is stored in the folder, but also the number of files within, too.
If you are using more than 1 GB, we may ask you to reduce the amount of data you are storing. It is possible that we will implement a limit in the future, so it’s a good idea to keep your usage of the Omni Sync Server to a reasonable size.
If your workflow requires more storage than 1 GB, you may want to either host your own server, or use a third-party paid WebDAV host. In that case, the only limits are the ones you set for yourself.
If you are interesting in hosting your own server, instructions can be found on our support site, in Configure WebDAV for OmniPresence.
Getting to Know the Menu Bar Status Icons
As noted earlier, the way you interact with OmniPresence as an app is not by clicking an app icon in the Dock, but by clicking its icon in the menu bar.
- In its most basic state, OmniPresence is online and ready to sync files.

- Whenever OmniPresence notices a change to the files in the sync folder, the icon appears to be lifting a barbell.

- If you lose your Internet connection (which is required for syncing), the icon turns gray to denote that you are offline.

-
If you see a gray sync icon with an exclamation mark, it means that OmniPresence failed to connect to the sync server. This could be the result of an invalid Account Name or Password, or something as simple as an intermittent Internet connection that drops while OmniPresence is trying to connect to the sync server.
If the icon remains in this state, here are some things you could try:
- Double-check your Account Name and Password.
- Check your network connection in System Preferences ▸ Network.
- Try quitting and restarting OmniPresence.
If that doesn’t help, contact our Support Humans for assistance.

- If you pause syncing by clicking the Pause button in the popover menu, the icon turns gray and gains a pause symbol. To resume syncing, click the icon to open the popover menu, and then click
 . If you are connected to the Internet, OmniPresence springs back to life and syncs with the server.
Creating Subfolders in Your Sync Folder
After creating your OmniPresence sync folder, there’s nothing that’s stopping you from just dumping all of your OmniGraffle, OmniOutliner, or OmniPlan files in there and calling it a day. But why be so cavalier when you can create subfolders for organizing your files?
Follow along...
-
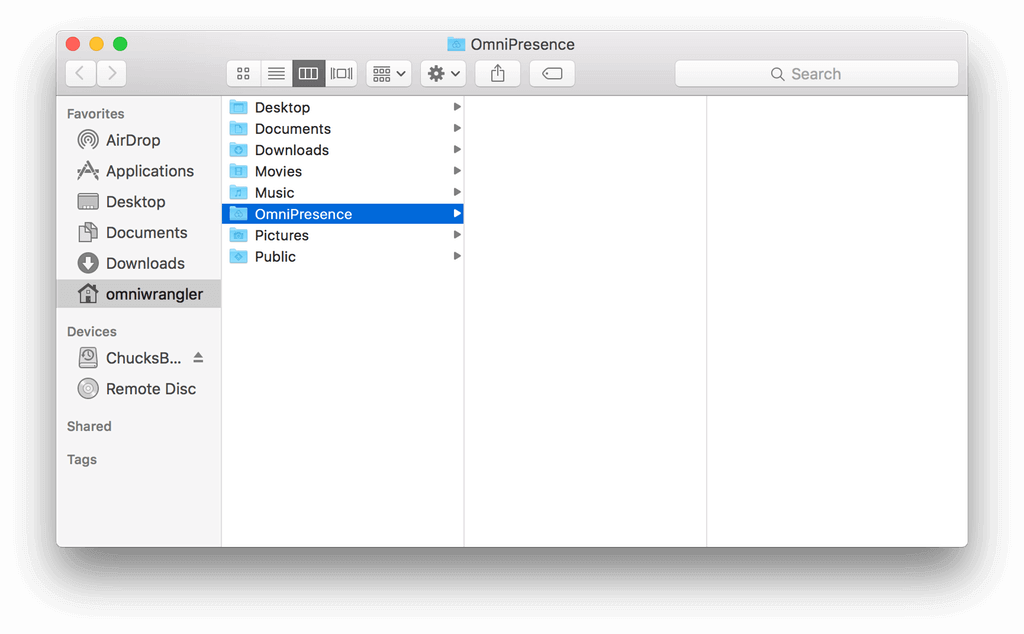
Open a Finder window and select your OmniPresence folder:

-
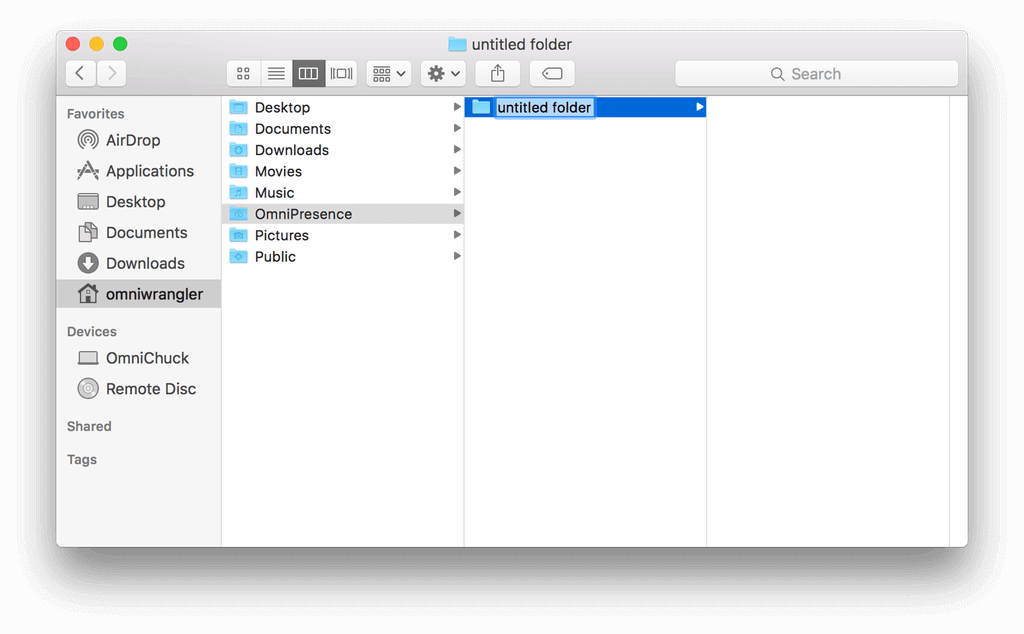
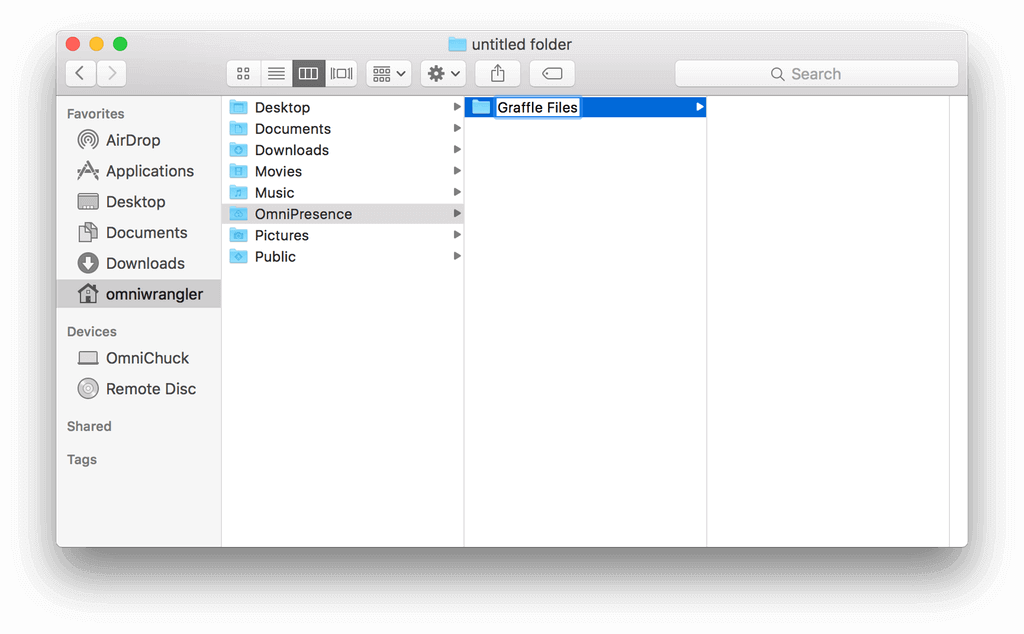
Choose File ▸ New Folder, or use the keyboard shortcut, Shift-Command-N to add an untitled folder inside the OmniPresence folder:
-
Enter a new name for the folder, such as Graffle Files, or Outlines, or Science Project—whatever the case may be:
-
After renaming the folder, press Return to accept the name:
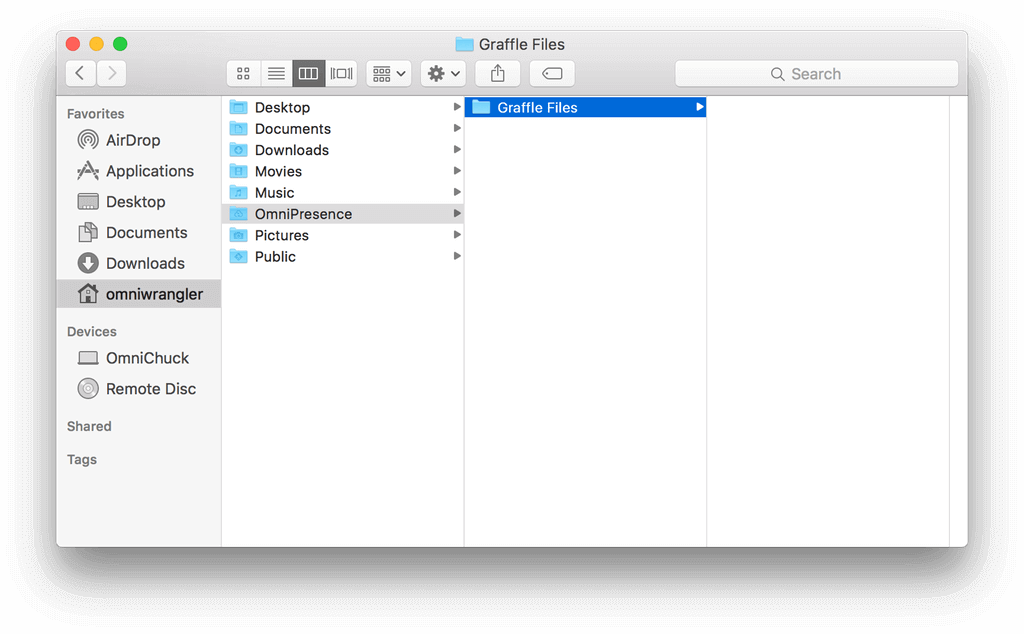
OmniPresence does not sync empty folders. Instead, OmniPresence waits until something is stored in the folder before the file and the folder are synced to the server.
There is no limit (except for the 1 GB storage limit) to the number of subfolders and sub-subfolders your OmniPresence folder can contain. If you delete a folder, OmniPresence recognizes that, too, and will remove that folder (and any files it contains) from Omni Sync Server.
OmniPresence Tips
Here are some helpful tips for enhancing your OmniPresence experience:
-
Click the Action menu (the gear next to the Pause/Resume button) for a host of OmniPresence options, including:
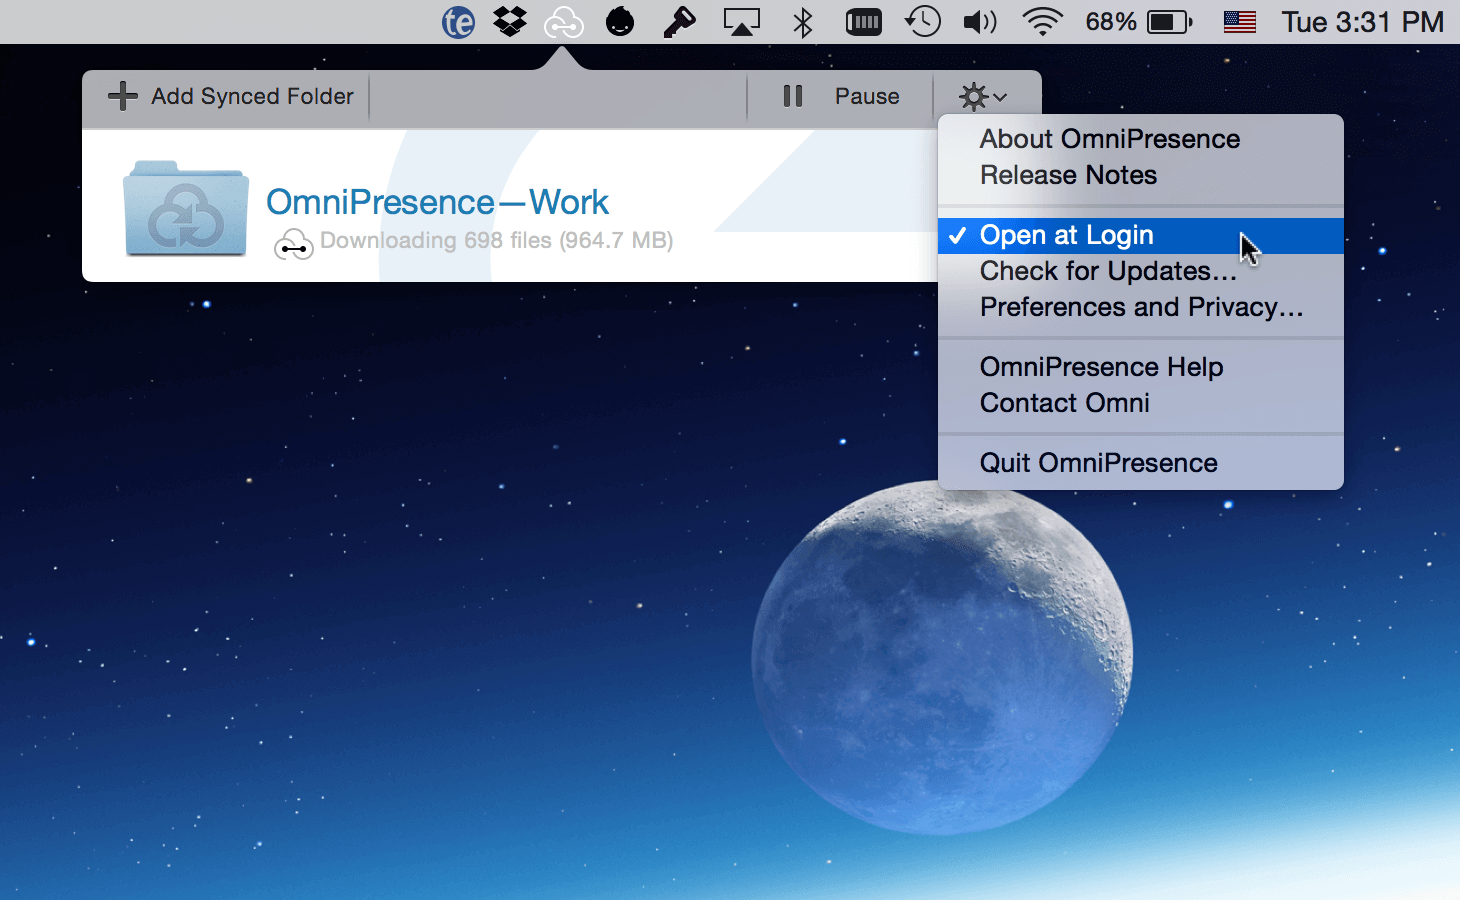
- About OmniPresence
- Release Notes
- Open at Login
- Check for Updates
- Preferences and Privacy
- OmniPresence Help
- Contact Omni
- Quit OmniPresence
-
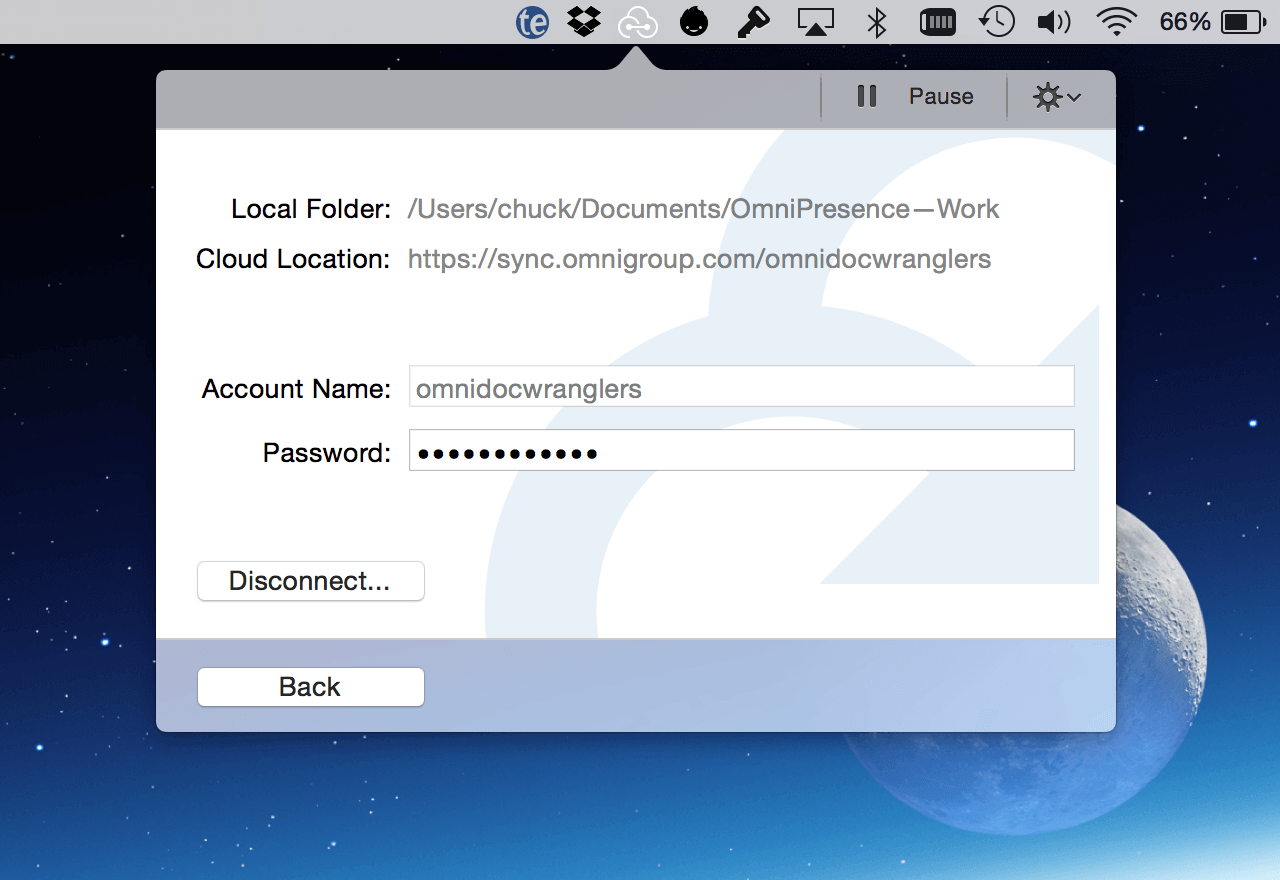
To stop syncing a folder you’ve connected, click its Info button and choose Disconnect. The folder on your Mac is moved to the Trash and the files inside will no longer be synced. Any files left in the folder before disconnecting will stay safe and sound at the cloud server location you’ve specified. To reconnect and start syncing with those files again, just create a new folder connected to that cloud location.
-
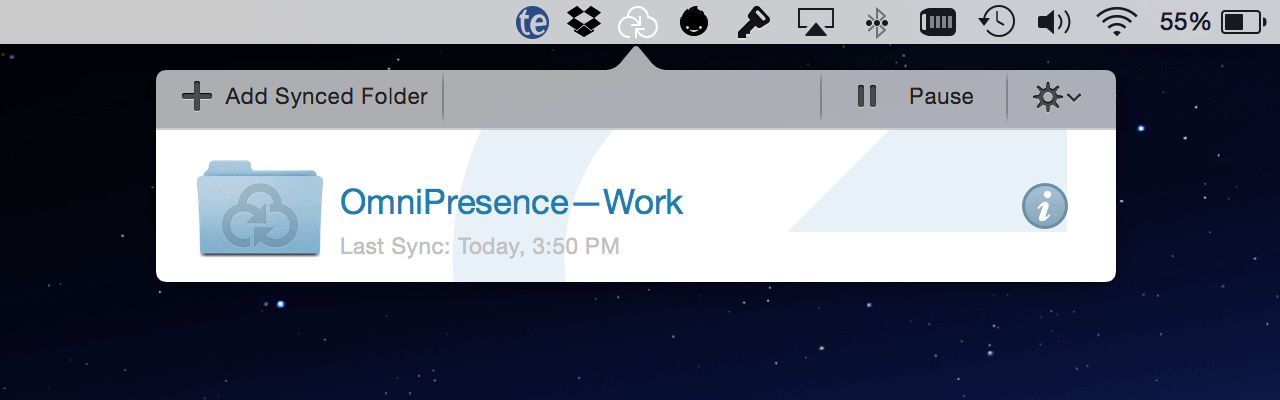
Unsure of when OmniPresence last synced? Click the OmniPresence icon in the menubar and then look beneath each folder name to see the date and time that folder last synced.
If you don’t set up sync now, but later decide that you want to, you can always install OmniPresence and set up an Omni Sync Server account when it’s more convenient for you.
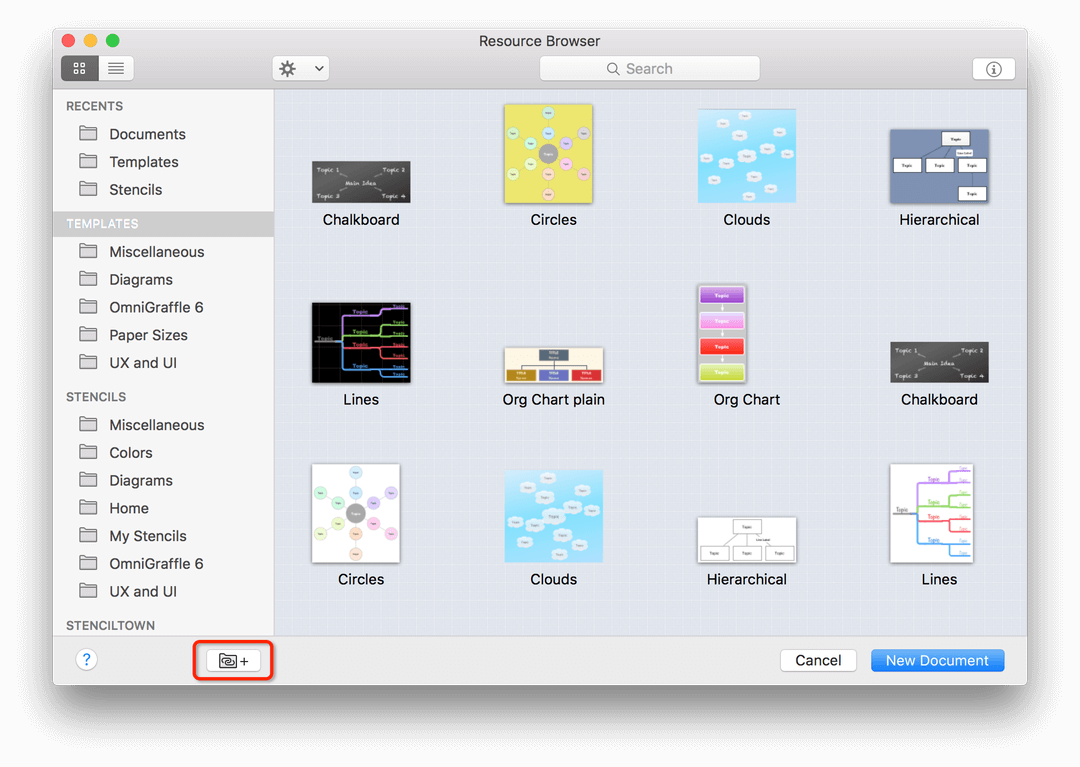
Linking Template and Stencil Folders on your Mac to OmniGraffle
To make it easier for you to quickly find your OmniGraffle stencils and template files, you can create a link to those folders in the Resource Browser. You can link to folders on your Mac’s hard drive, as well as to folders you are syncing, such as those with OmniPresence or on iCloud Drive.
Using the Resource Browser (File ▸ Resource Browser), you can add a Linked Folder to the Templates and Stencils sections of the sidebar.
-
In the Resource Browser, click
 :
:
-
Choose a folder in the sheet that appears and click Open to add the folder to the Resource Browser’s sidebar:
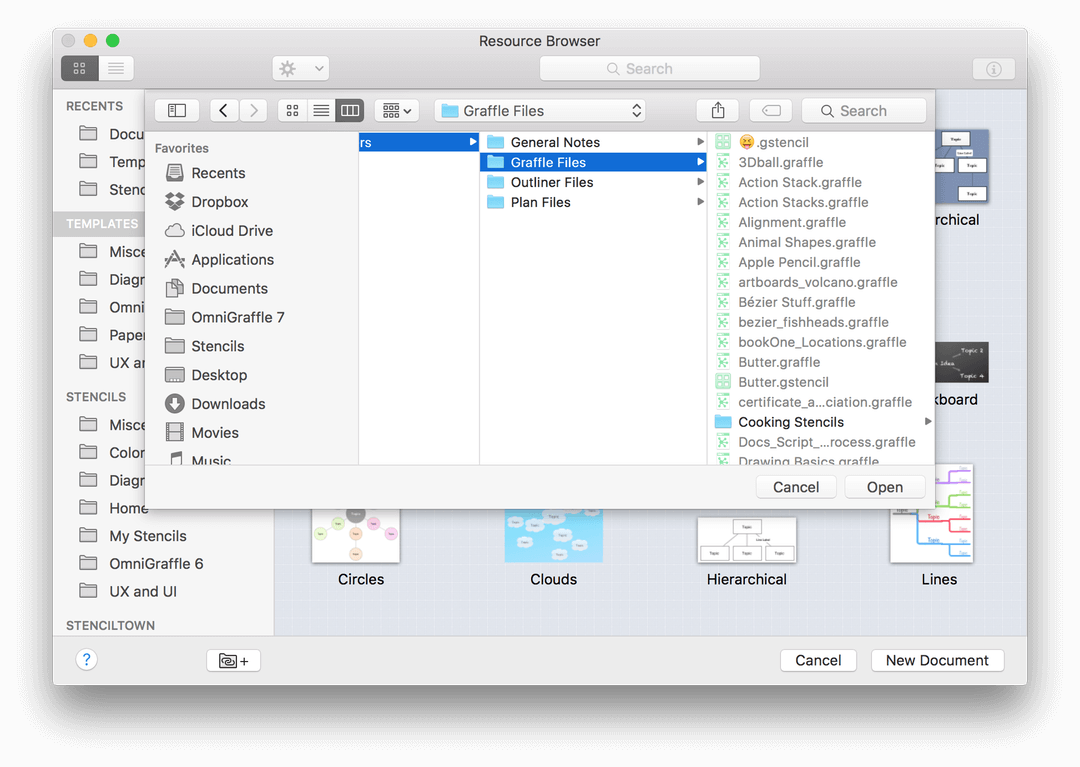
After you click Open, OmniGraffle examines the contents of the linked folder, and places a link to that folder to both the Templates and Stencils sections of the Resource Browser’s sidebar.
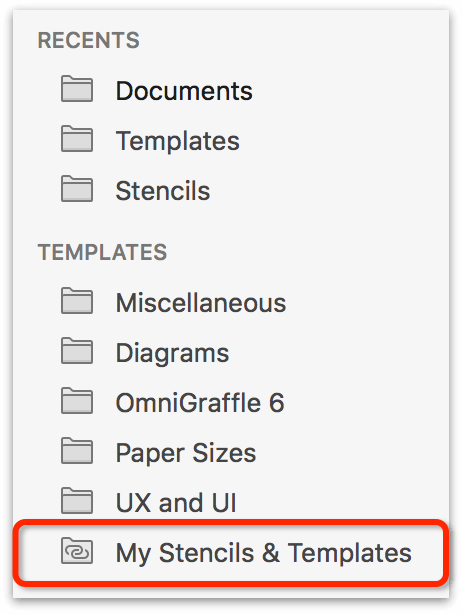
To remove a Linked Folder from the Resource Browser’s sidebar, first select the folder in question, click  , and then choose Remove Linked Folder.