Using Templates and Diagram Styles
When you open a new OmniGraffle document, it calls upon a template that defines the canvas, the units of measurement, and more. For example, the default template, Blank, has a plain white canvas with the units set to pixels. The Blank template is simple, and it’s a good starting point for users new to OmniGraffle.
Conversely, a diagram style is more of a snapshot of the styles used in an OmniGraffle template that you can apply to your projects. Diagram styles allow you, for example, to quickly prototype something without having to worry about applying styles as you go, and to then sweep in at the end, apply the diagram style, and be done with your work.
The really cool part, though, is that a Diagram Style is nothing more than an OmniGraffle template file (.gtemplate) that contains styled objects. When you apply a Diagram Style to a project, OmniGraffle references the objects in the template and applies matching styles to the current document.
This chapter introduces you to Templates and Diagram Styles, showing you how to quickly apply styles from an existing template to help speed up your workflow.
Using Templates
In OmniGraffle, a template is used to define the base properties of a project. When you create a new document—by either choosing File ▸ New or pressing Command-N—OmniGraffle loads the default template into the window, supplying you with a single canvas and its base layer.
As noted earlier, the default template for OmniGraffle 7 is the Blank template. It’s pretty sparse, which is great when you’re just getting started. To choose a different template, rather than choosing File ▸ New to create a new document, choose File ▸ Resource Browser instead. The Resource Browser is kind of like an OmniGraffle-specific Finder, that gives you access to your OmniGraffle files, templates, and stencils.
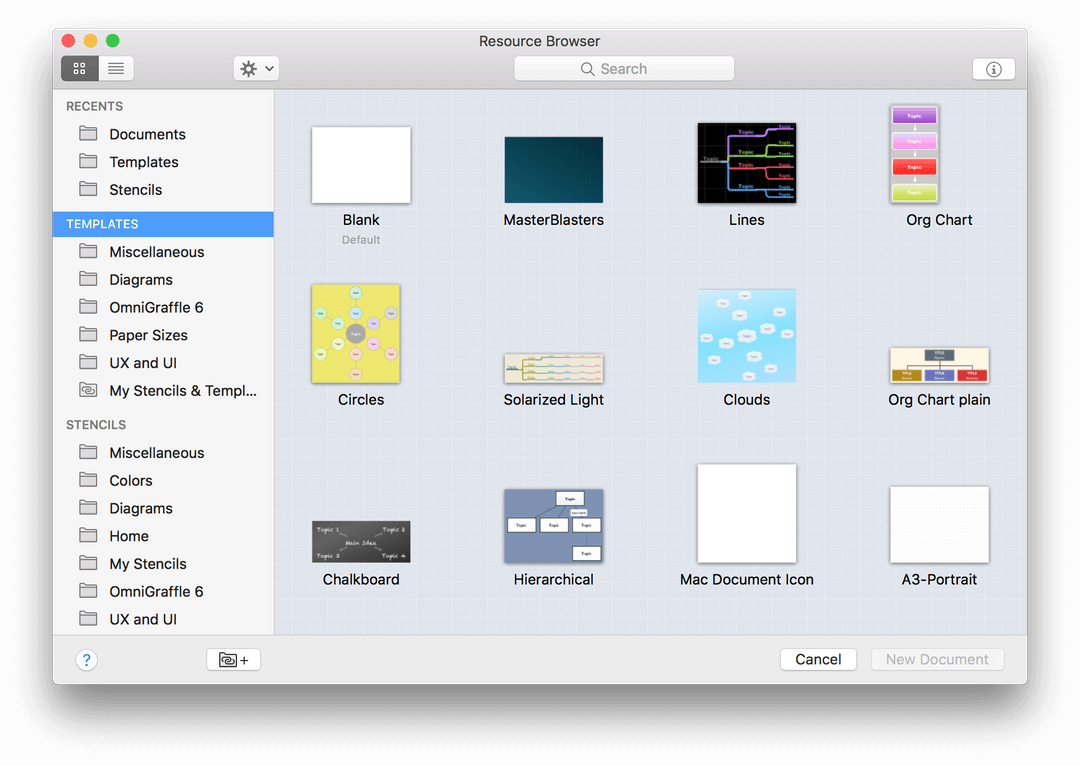
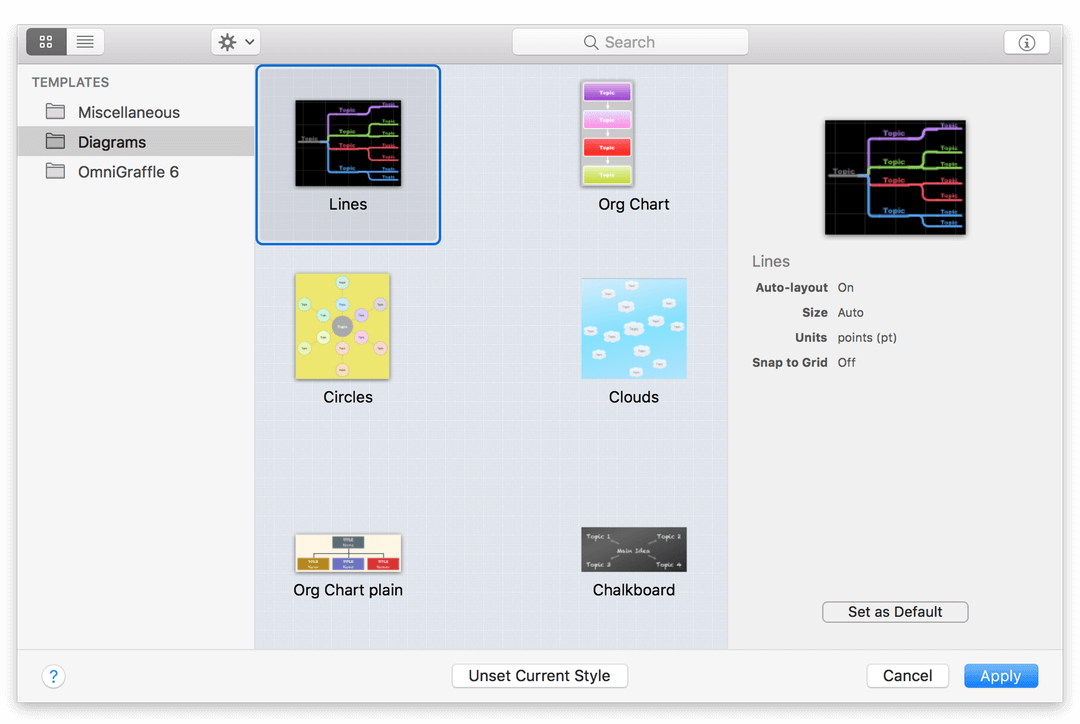
After opening the Resource Browser, you can either click the Templates heading in the sidebar to view all of the available templates, or select one of the folders for something more specific to the project you plan to work on.
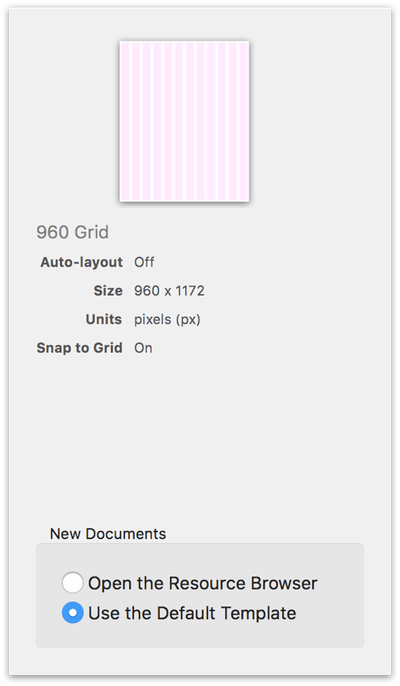
To learn more about a particular template, first click to select a template from one of the folders, and then click  in the Resource Browser’s upper-right corner. This button opens an Info pane along the right side of the Resource Browser that displays additional information about the selected template.
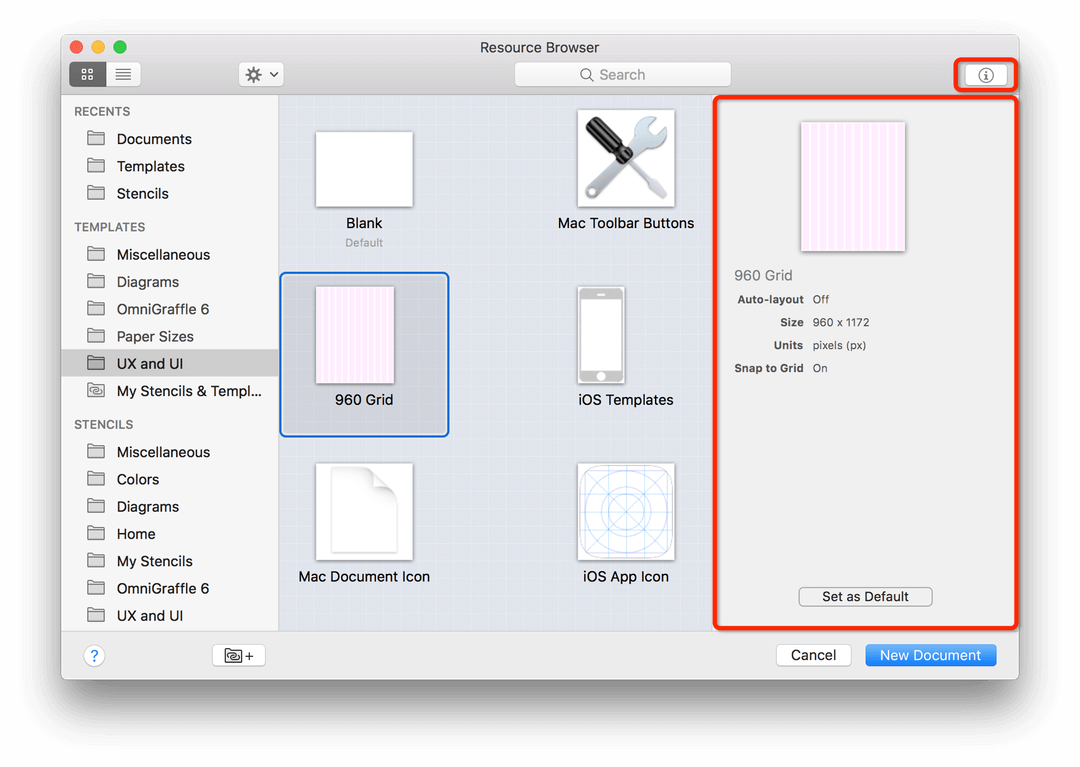
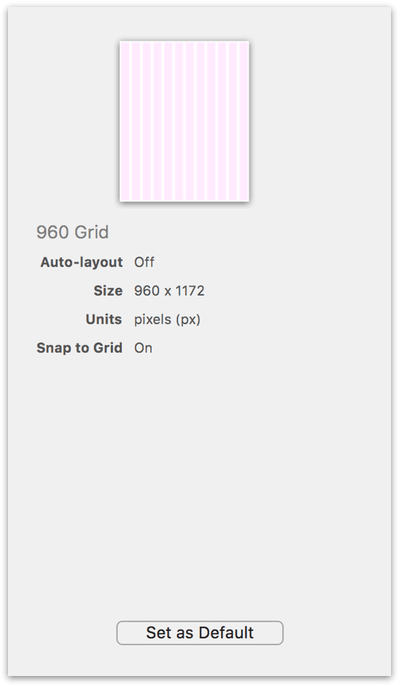
The Info pane displays a preview of the template, along with additional information about the template’s settings, including whether auto-layout is on or off, the dimensions of the canvas, the units of measurement, and whether snap to grid is on or off.
After opening the Resource Browser’s Info pane, that pane remains available until you close it again by clicking  .
.
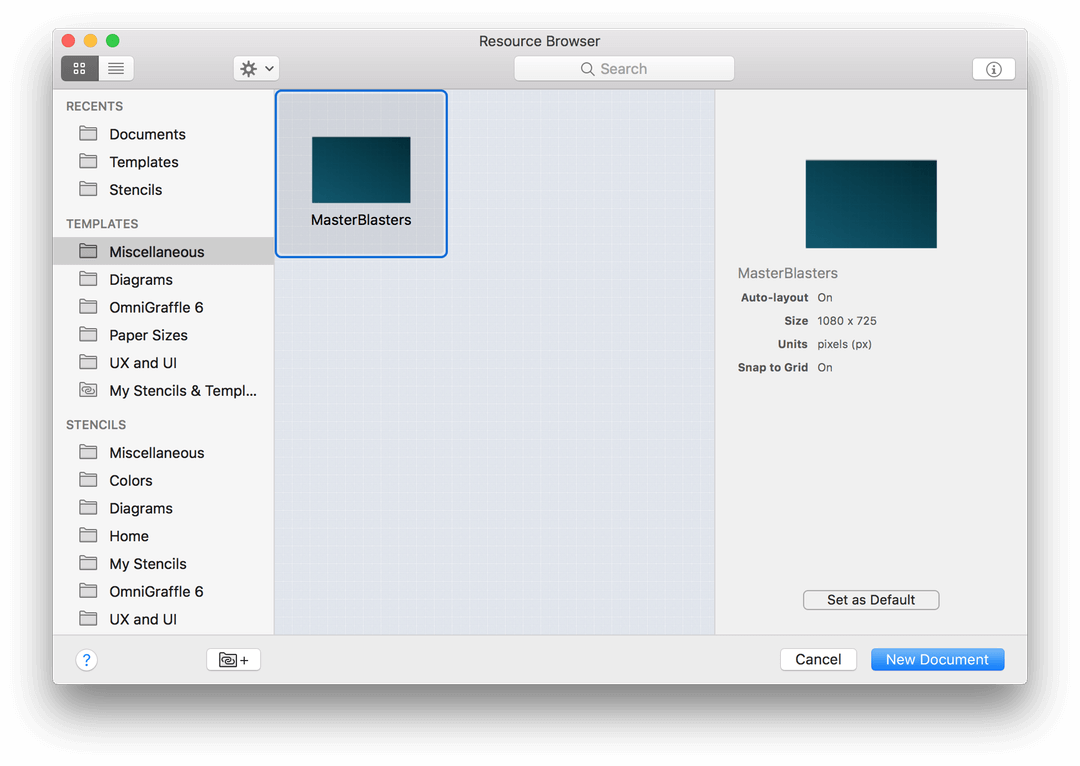
To open a new OmniGraffle project using the selected template, click New Document. Or, if you’d like to change the default template to something else, click Set as Default.
When you change the default template, the area beneath the template preview lets you decide what happens when you choose File ▸ New (or press Command-N) when creating a new document:
You can choose from:
- Open the Resource Browser, which opens the Resource Browser window so you can choose a file, another template, or stencil to work on; or,
- Use the Default Template, which applies the default template to your OmniGraffle project when you click New Document in the Resource Browser’s window.
You can also set the default template in the Resource Browser by right-clicking on a template and choosing Set as Default from the contextual menu, or in OmniGraffle’s General preferences by clicking the Choose button in the New Documents section.
Editing an Existing Template
If you ever need to edit a template—say, to change turn on snap to grid, add ruler guides to the canvas, or to add a background color—OmniGraffle makes it easy:
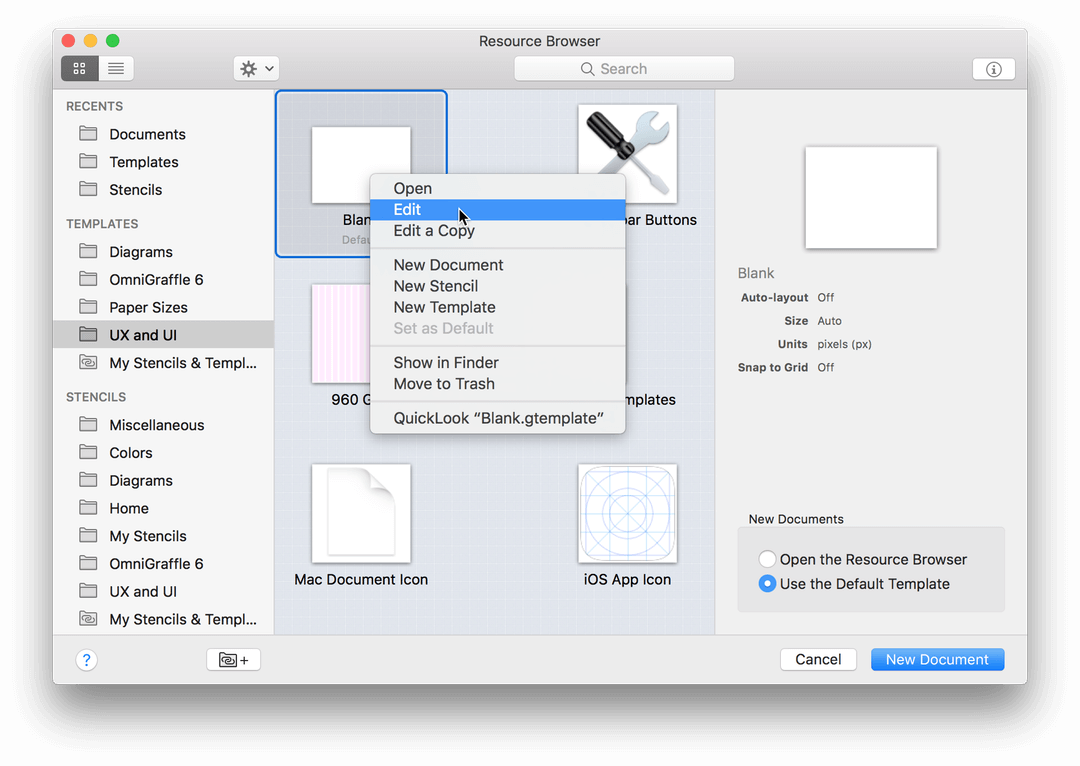
- Choose File ▸ Resource Browser.
-
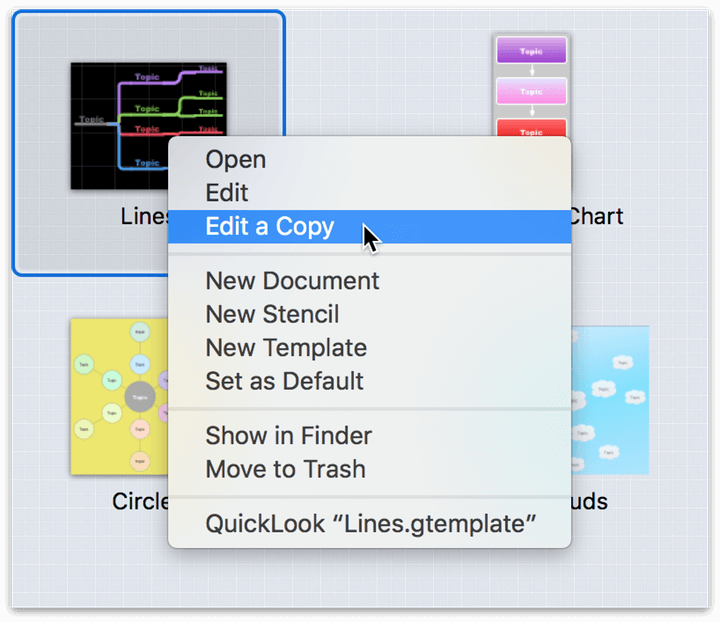
Control-/Right-click the template that you want to edit, and then choose Edit if you want to edit and save the template file, or choose Edit a Copy from the menu:
-
If you choose Edit, the template file opens for you to work on. Once the template is open in OmniGraffle, you can work on it just like you would with any other project. When you have finished making your changes, saving the file overwrites the original file in the Templates folder.
-
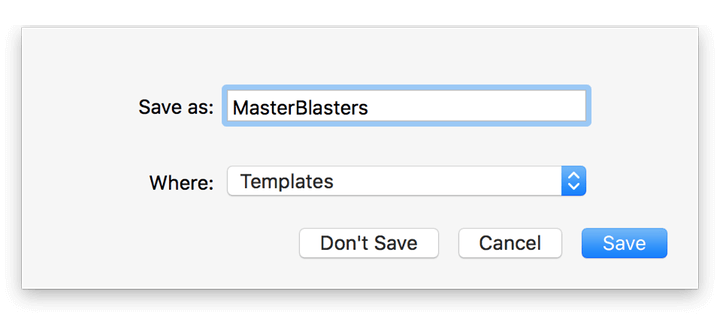
If you choose Edit a Copy, the contents of the template file are placed in a new, Untitled template file. When you’ve finished making your changes, be sure to give this template file a different name than its predecessor so you don’t overwrite the original.
-
Creating a New Template
To create a new template, choose File ▸ New Resource ▸ New Template, and then use the inspectors to set the properties for the template. For example, you can:
- Place Ruler Guides on the canvas so you don’t have to recreate these for every project that uses the template
- Turn on Auto layout in the Diagram Layout inspector
- Choose a default line type in the Line inspector
- Specify an Infinite Canvas in the Canvas Size inspector
- Set a background color or an image to use on the canvas in the Canvas Fill or Background Image inspectors
- Choose how projects that use this template are saved in the Format inspector
- Enter information about the project file in the Document Data inspector
- and more!
When you save the template, OmniGraffle places the file inside the app container’s Templates folder, or you can select one of the subfolders (or create a new one) in which to store your templates.
To view your template, choose File ▸ Resource Browser (Shift-Command-N), and choose the folder in which you saved your template. If you didn’t select a subfolder within the Templates folder, select the Miscellaneous folder in the Resource Browser’s sidebar, and then select your template.
If you want to set your newly-created template as the default, click Set as Default, and then choose one of the two options for what happens when you choose File ▸ New, as shown earlier.
Creating a Shortcut to the Templates Folder
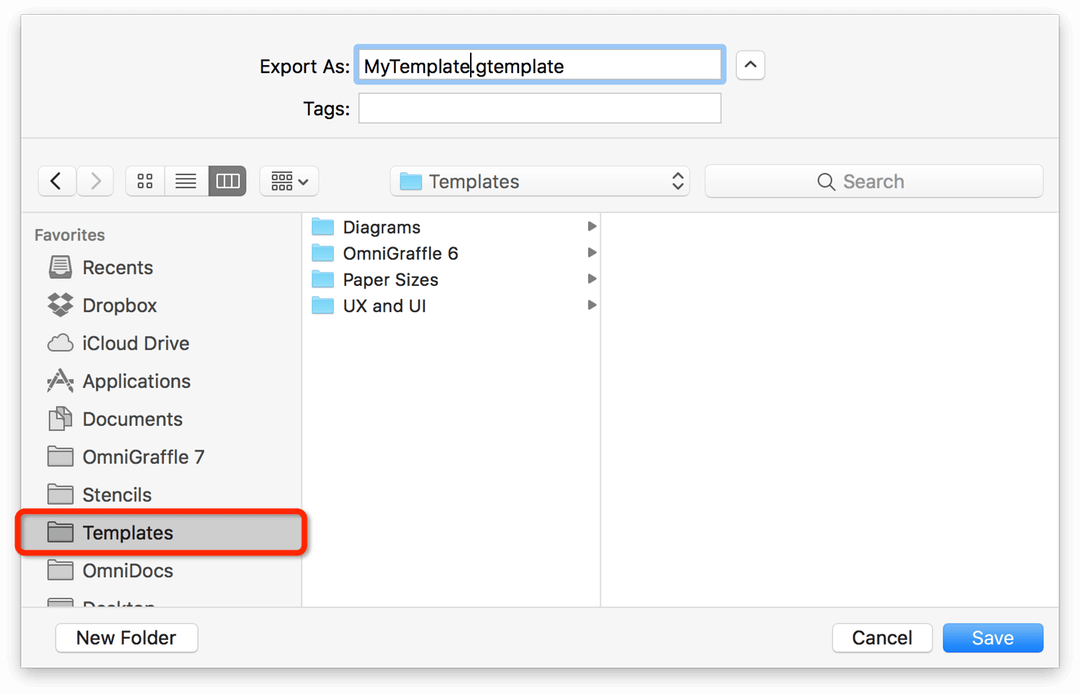
To make the process of exporting an OmniGraffle file as a Template or Diagram Style a little easier, you’ll need to create a shortcut to the Templates folder in the Finder’s sidebar.
The Templates folder lives deep within OmniGraffle’s container, but there’s a quick way to get to the Stencils folder from within OmniGraffle. Follow along...
-
Choose File ▸ Resource Browser, or use the Shift-Command-N keyboard shortcut to open the Resource Browser.
-
In the Resource Browser, select any template, then click the Gear menu and choose Show in Finder:
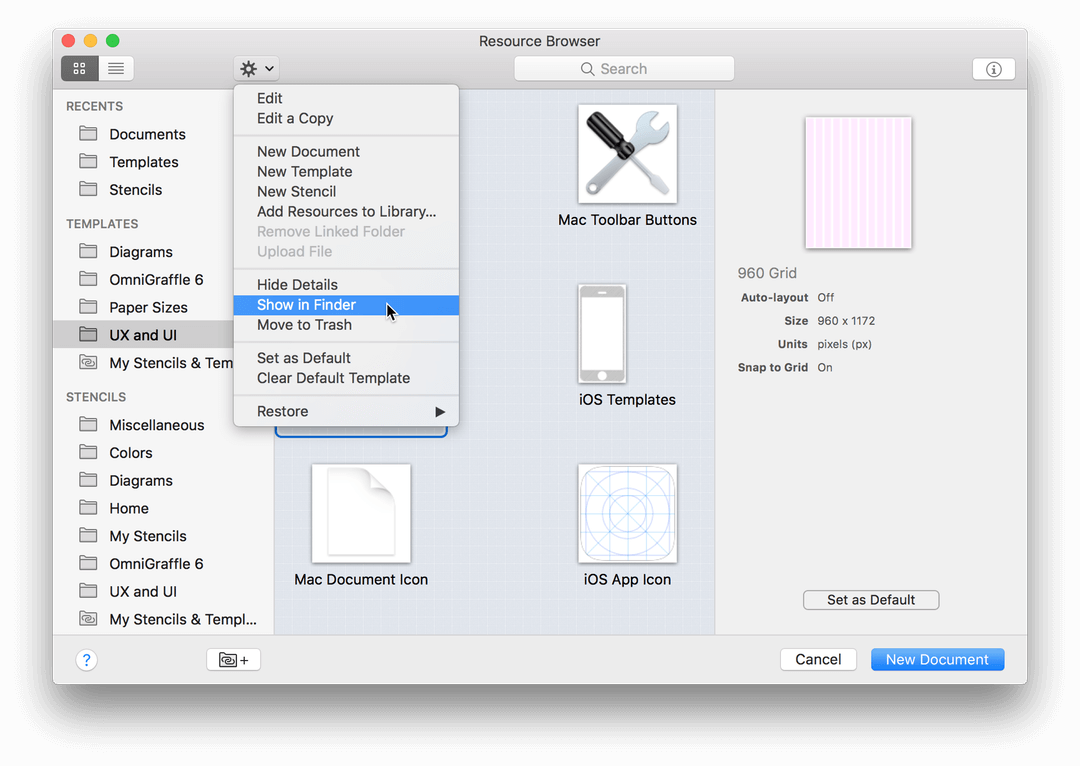
This opens a Finder window with that particular template selected:
-
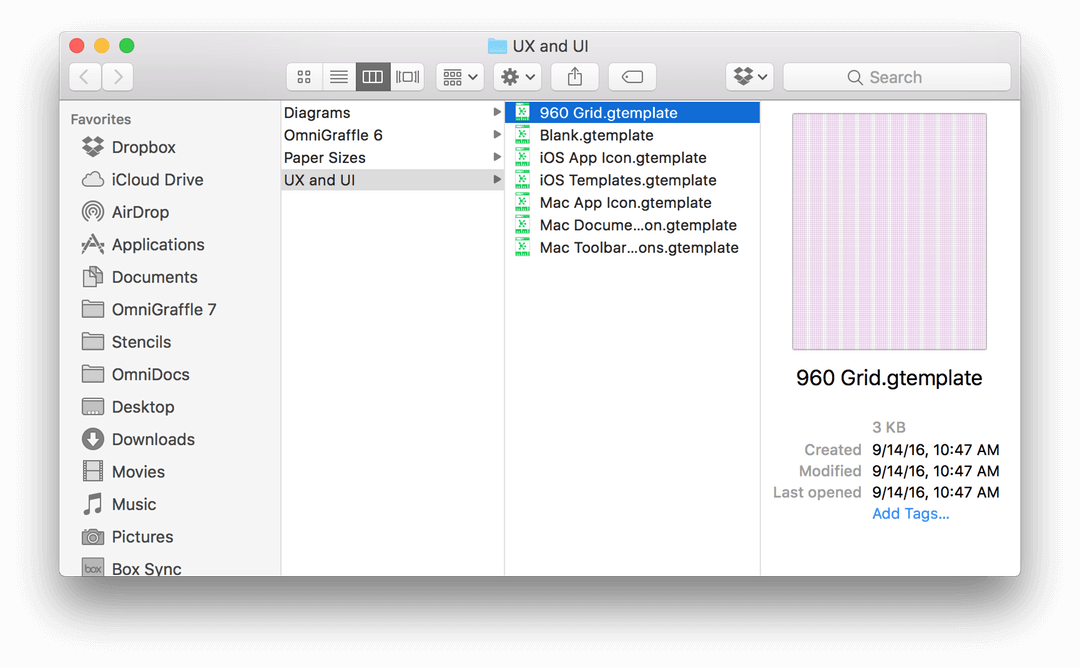
With the Finder window selected, choose View ▸ as Columns (Command-3).
-
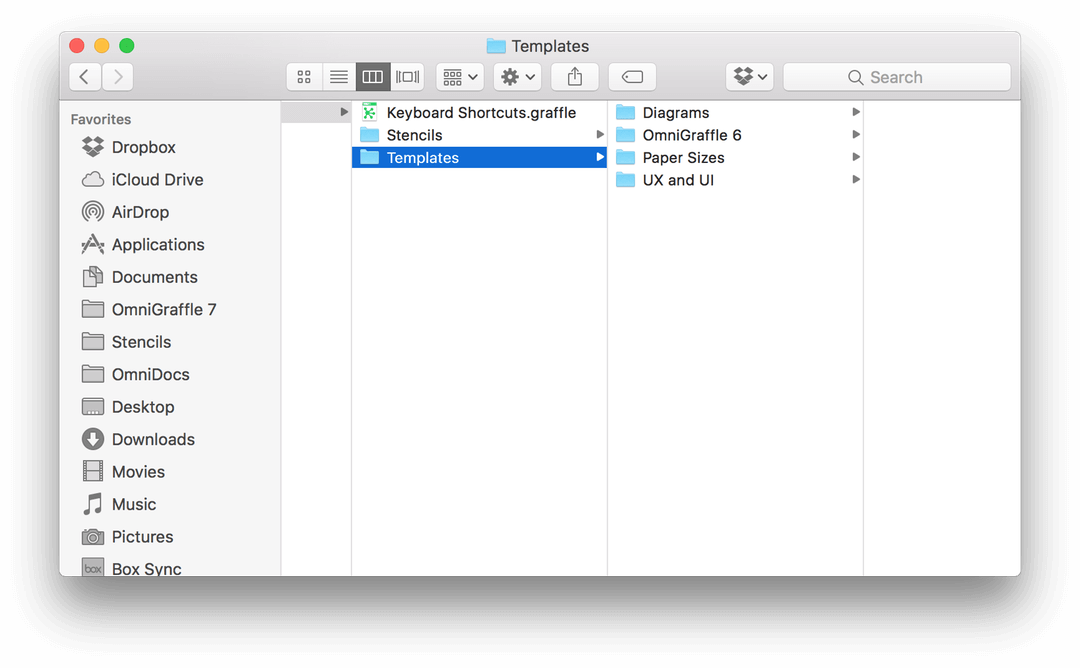
Scroll the Finder view backward until you see the Templates folder; click to select the Templates folder:
-
With the Templates folder selected, choose File ▸ Add to Sidebar (Control-Command-T). This adds a shortcut to the Templates folder in the Favorites section of the Finder’s sidebar.
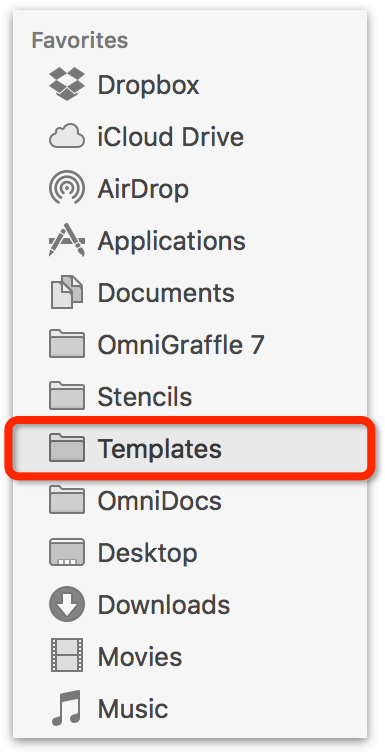
Now when you need to export an OmniGraffle file to use as a Template or Diagram Style, you can choose the Templates folder in the Favorites list on the left side of the save sheet.
The other benefit of knowing where the Templates folder is on your Mac is so you can quickly add subfolders to organize your Templates and Diagram Styles, as well as rename or delete templates, too.
If you need to access the Templates folder from a script you are writing, the Unix path to use is:
-
Non-Mac App Store purchases:
~/Library/Containers/com.omnigroup.
OmniGraffle7/Data/Library/
Application\ Support/The\ Omni\Group/
OmniGraffle/Templates -
Mac App Store purchases:
~/Library/Containers/com.omnigroup.
OmniGraffle7.MacAppStore/Data/Library/
Application\ Support/The\ Omni\Group/
OmniGraffle/Templates
Using Diagram Styles
Diagram Styles, which you can apply to a diagram by choosing Format ▸ Choose Diagram Style, are nothing more than an OmniGraffle Template file (.gtemplate) with styled objects on the canvas. The difference between a template and a diagram style, however, is that templates are used as the basis for a new OmniGraffle project, while a diagram style is applied to an OmniGraffle project that you are already working on.
Still confused? Don’t be. Let’s explore this further...
- Choose File ▸ Resource Browser (Shift-Command-N)
- In the sidebar under Templates, select Diagrams and then select the Lines template:
Do not click New Document quite yet. Keep following to learn more about Diagram Styles...
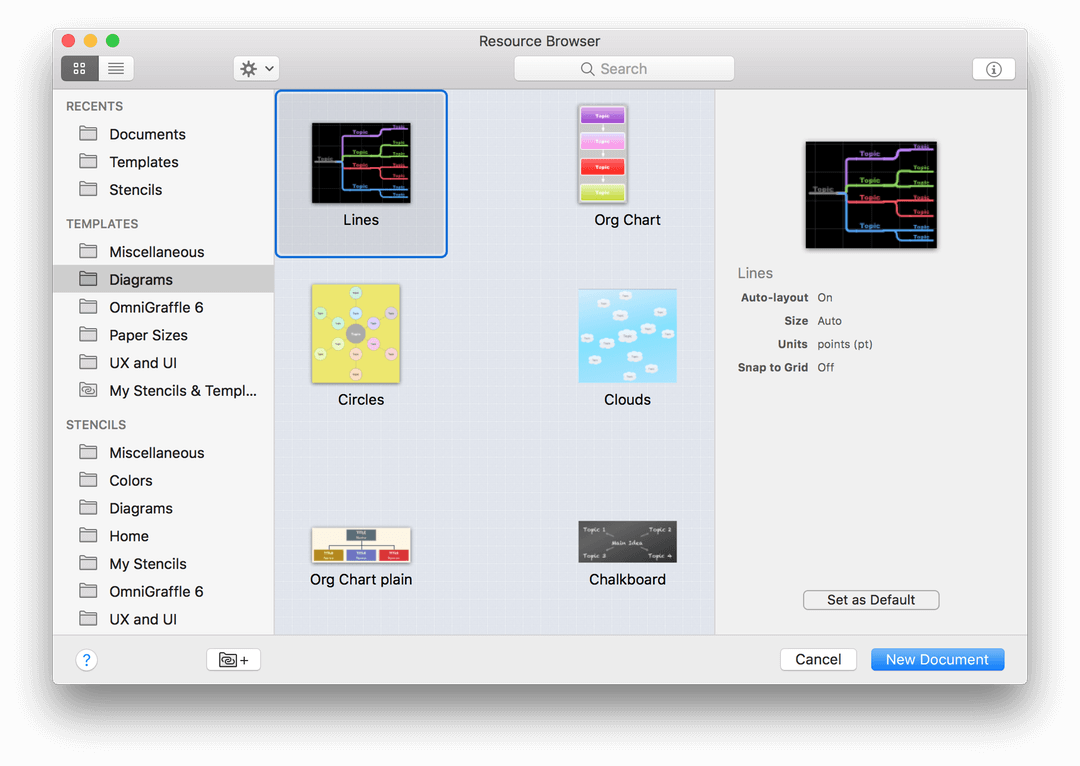
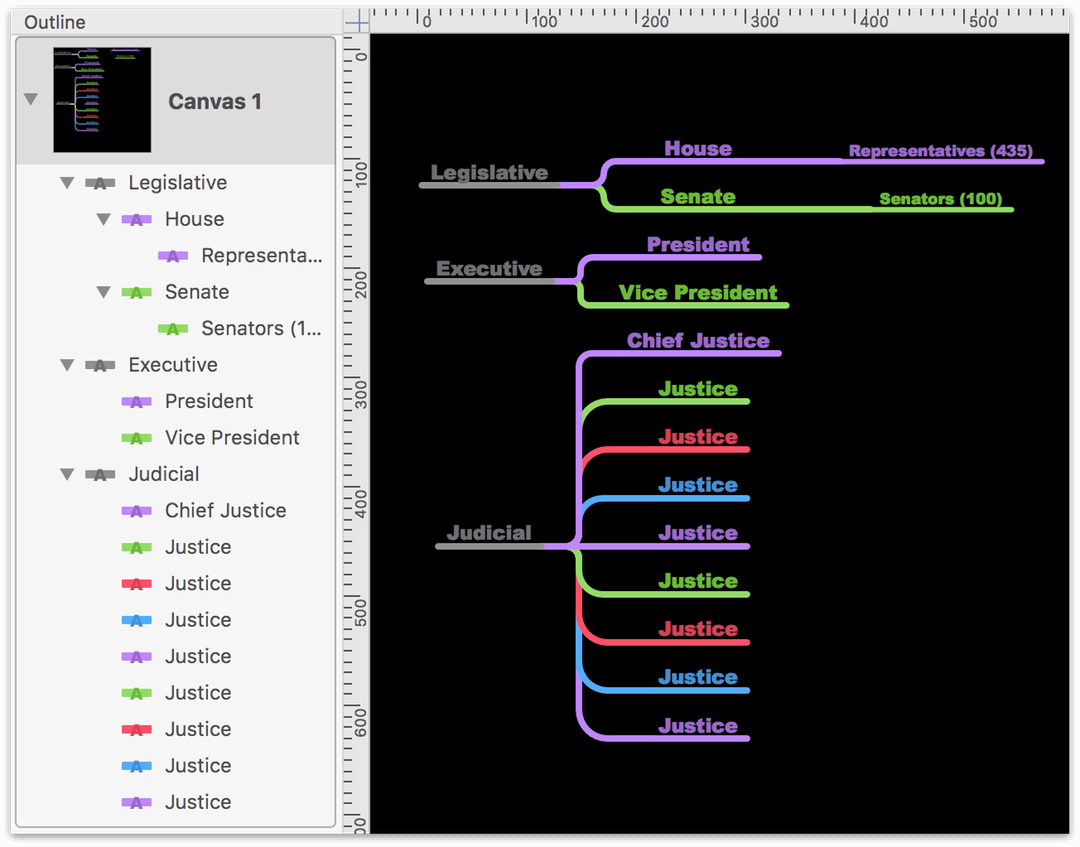
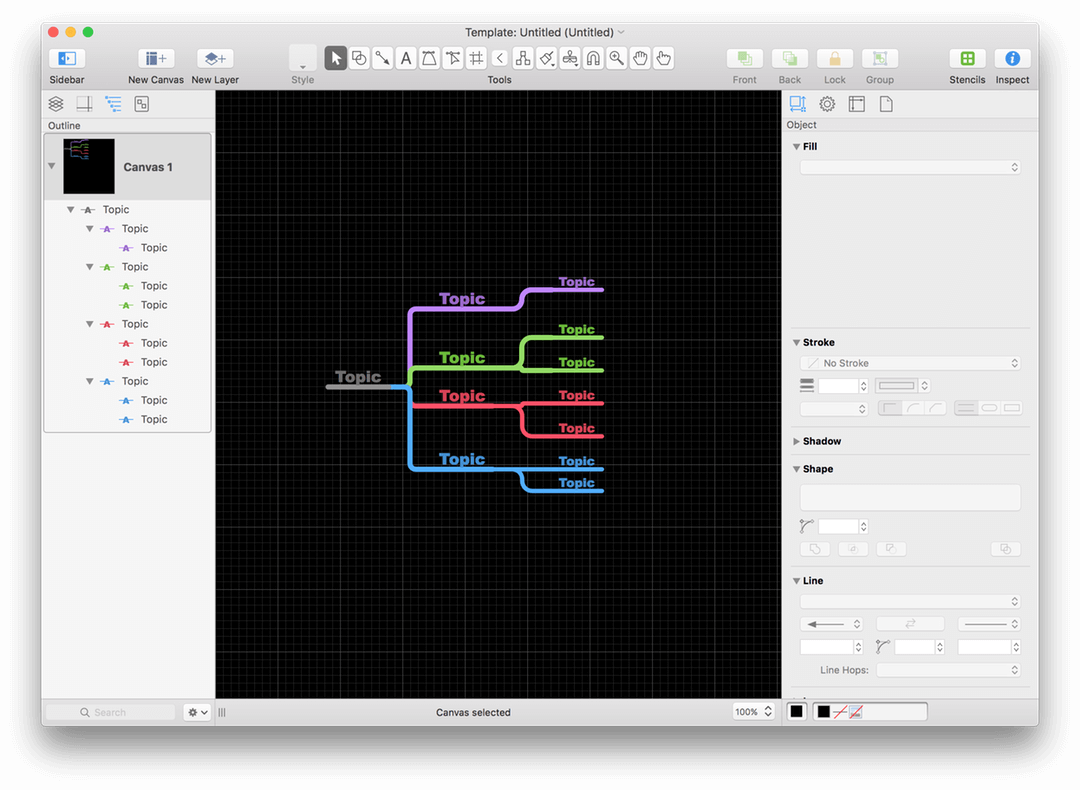
As you can see by looking at the Lines template’s preview in the Resource Browser, this particular template has a black background and a tree of colored lines with labels to denote a diagram’s hierarchy. If you click New Document, OmniGraffle opens a new Untitled document window using the contents of the Lines template, including the diagram that is part of the template.
Now, you might be thinking, "Why would I want to open a project with stuff already on the canvas?". You probably wouldn’t want to, and there’s nothing that’s stopping you from selecting everything that’s on the canvas, pressing Delete and starting with a clean slate. But...
...there may be times when you actually want the stuff that’s already on the canvas. But more importantly, when you create a new document that uses one of the templates in the Diagrams folder, what you are essentially getting is a pre-styled diagram. However, now you have to change all of the labels, and that kind of work can be tedious.
Instead, what you really want is to apply the styles from one of the templates in the Diagrams folder to a diagram that you are already working on. Here’s how you do that:
- Choose File ▸ New from the menu bar.
-
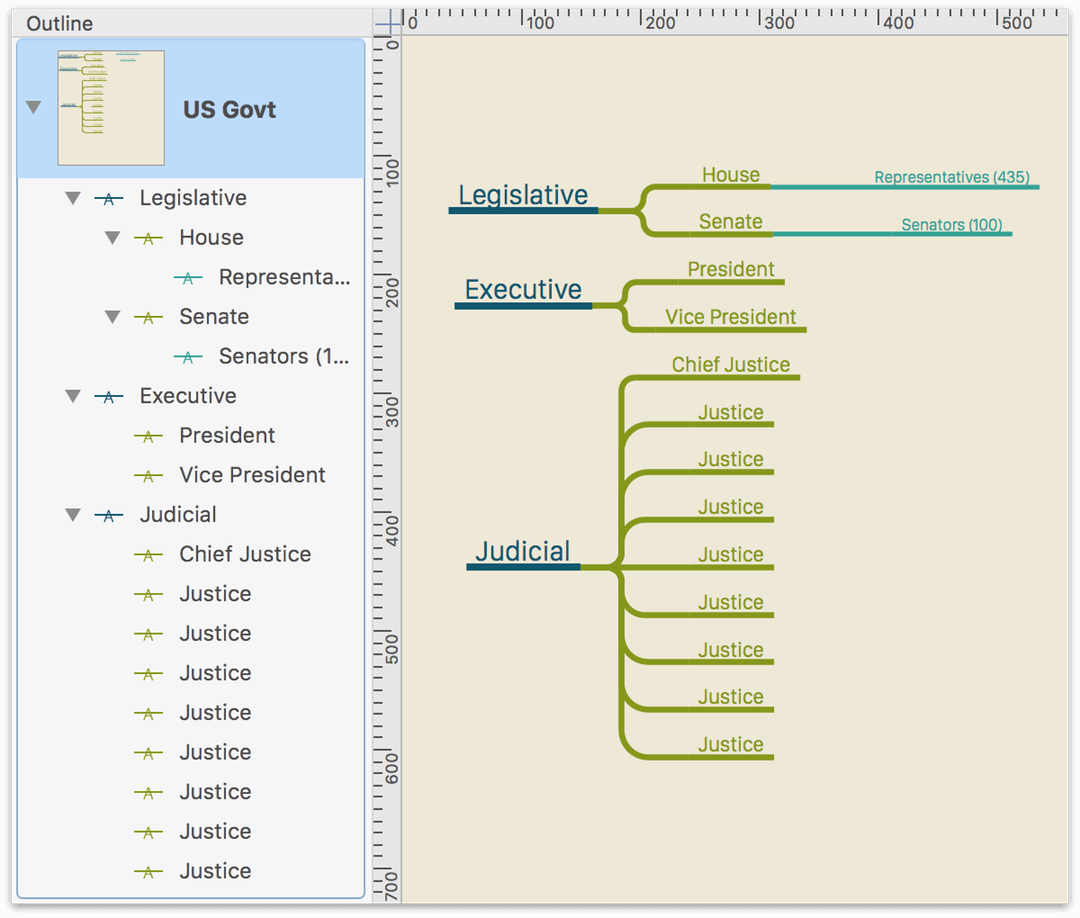
Use the Outline tab in the Sidebar to create the structure for your diagram.
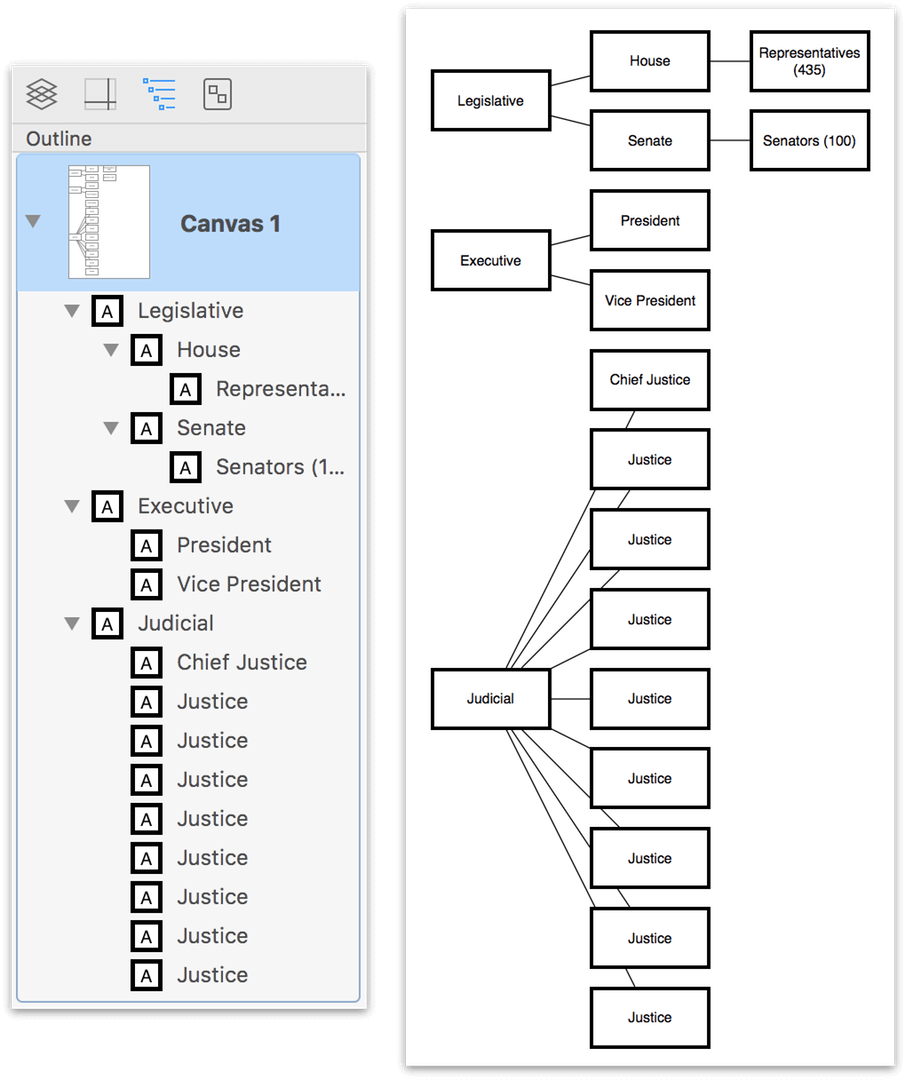
The diagram in its current state doesn’t really look like much; certainly not something that would impress your boss or friends. At this point, you have two options:
- Style objects individually (see Diagramming Basics), which could take a little while; or,
- Apply a Diagram Style to the diagram.
Let’s go with Option 2.
-
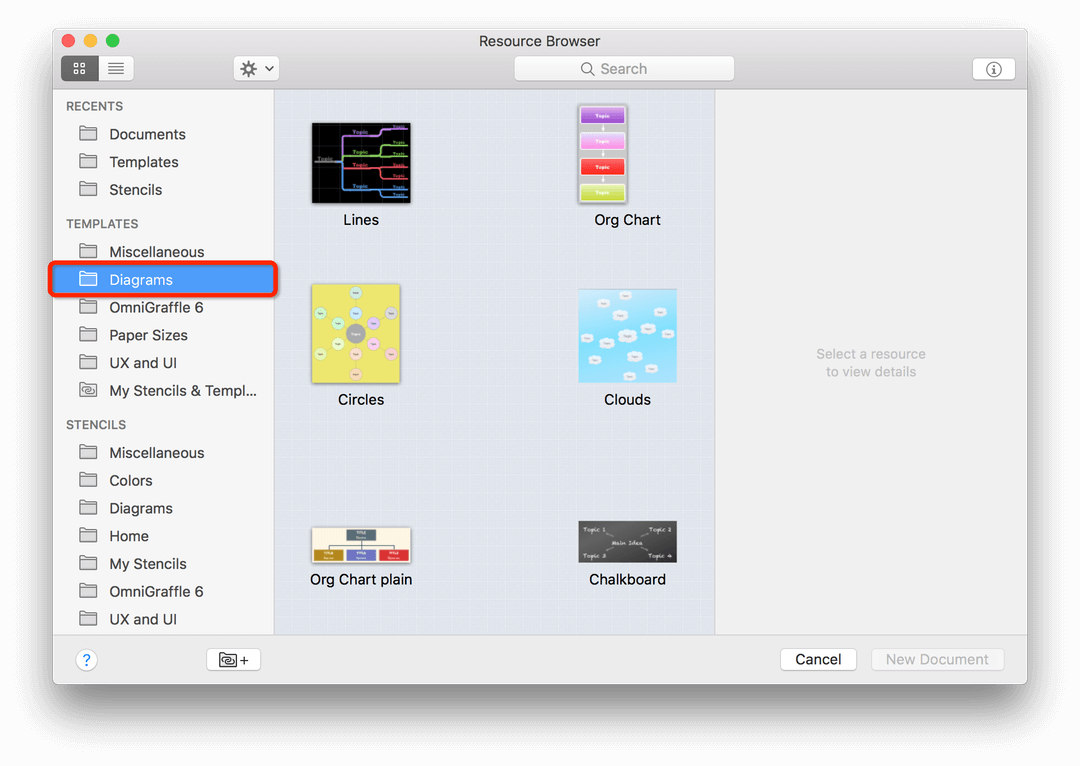
Choose Format ▸ Choose Diagram Style, this opens a sheet displaying the available Templates in the left sidebar.
-
Select the Diagrams folder in the left sidebar, and then click to select the Lines template.
-
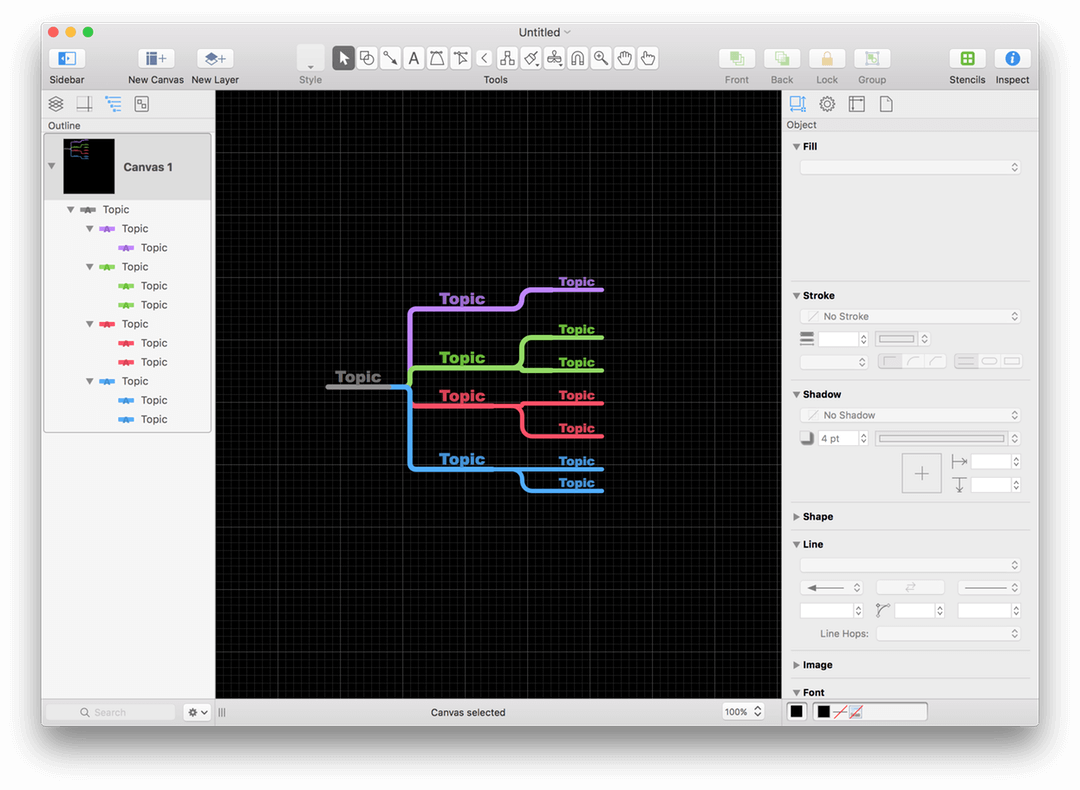
Click Apply to apply the styles from the Lines template to the objects in the diagram:
When you apply a diagram style, the items of the diagram are styled to match the template’s styles for shapes, connection lines, text objects, and automatic layout settings. If your diagram has more levels than in the template you have applied, the deeper items use the styles of the deepest level of the template’s style.
Customizing an Existing Template’s Diagram Styles
Now that you know how to apply a diagram style to your projects, the final step in this journey is to customize an existing template’s diagram styles to create one that’s more your style.
-
Start by opening the Resource Browser (Shift-Command-N), and choose Diagrams in the Templates section of the sidebar:
-
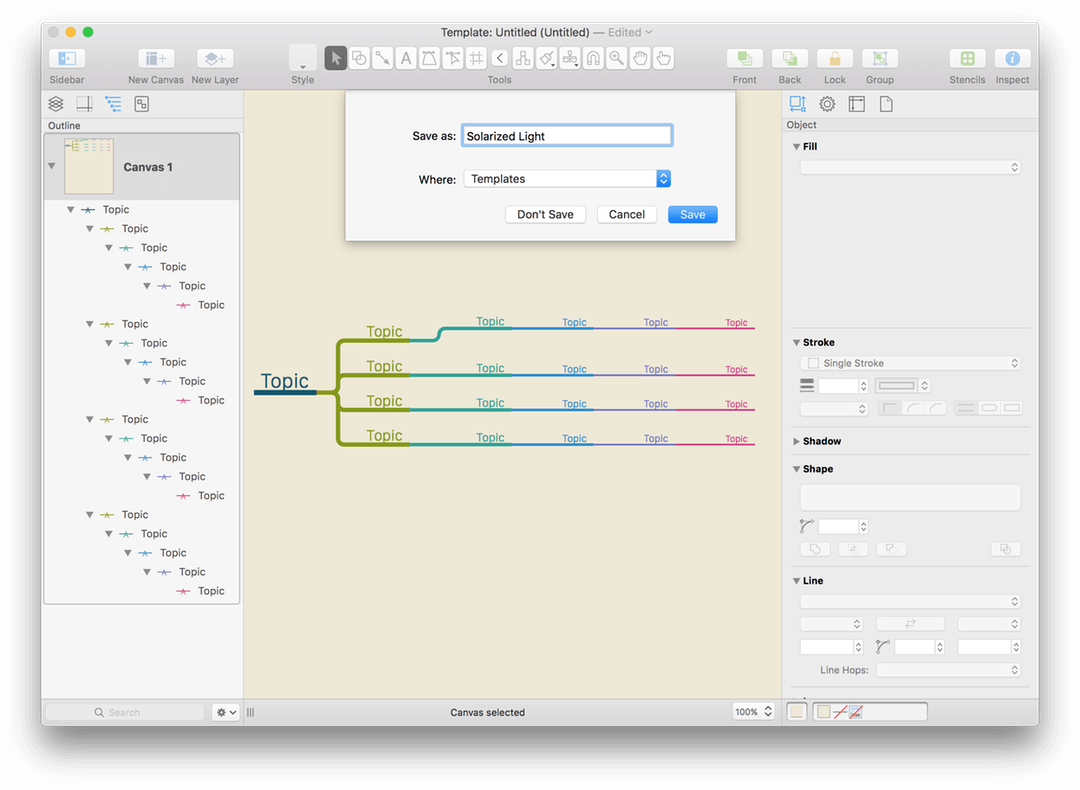
Control-/Right-click on the template that you would like to customize, and choose Edit a Copy from the contextual menu that appears:
This opens a copy of the template file so you can change things up and then save it as a different file name.
-
Change the styles. For example, with the Lines template, you could change the background color, the font and text styles used for the object labels, balance out the object styles so everything at the same hierarchical level has the same style properties, and more.
-
When you have finished, save the template as a different filename. Templates are saved by default to the Templates folder; however, you can click the Where pop-up menu to select a subfolder within the Templates folder (such as the Diagrams folder), if you’d like.
You can double-check your work by going back to the Resource Browser and selecting the folder in which you saved the template, or you can put it to use by applying the template’s diagram styles to an existing project.