The Inspector
OmniOutliner's Inspector, revealed by tapping  , contains controls for customizing the appearance, styling, and theming of your outline.
This chapter describes those controls, including Document wide controls for changing magnification and status checkbox visibility, applying a template to theme the document, and adding row styles to a Selection by choosing from the document template's built-in Styles list.
Document
The Document section of the inspector holds controls that affect the entire outline.
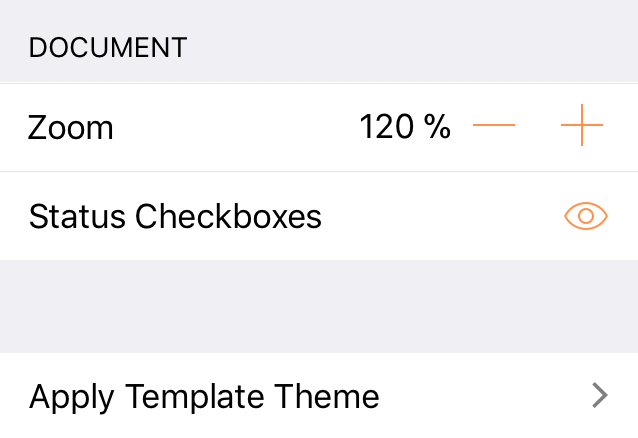
Zoom
The Zoom setting controls the magnification of text in the outline. Tap the plus  and minus
  buttons to increment or decrement the zoom by ten percent.
This setting does not affect the actual size of the text in the outline; just the display size. This is useful for improving visibility of small text or fitting more of the outline onto the screen without changing any of its style properties.
Status Checkboxes
Tap the View icon  next to the Status Checkboxes control to toggle status checkbox visibility on the column.
Changes to checkbox status persist regardless of the checkbox visibility setting, so you can check them off while visible, hide them, and reveal them again, and the latest checked (or unchecked) status remains.
Apply Template Theme
Choose Apply Template Theme to open the template chooser and select a template with preset styles that you would like to apply to the outline.
Unlike choosing a template at initial document creation (where the document you create is populated with sample content from the template), applying a template to an existing outline just overwrites the document's style properties—not any of its content.
Applying a template theme will overwrite the styles currently present in the document.
This includes style presets applied selectively to rows, which will be replaced by the style preset with the same name in the new template.
Ad hoc styles applied directly to text (Bold, Underline, or Italic) will not be cleared by changing templates.
Selection
The Selection section of the inspector holds controls for customizing the text style of any row, row text, or note text you have selected.

Bold, Italic, Underline, Strikethrough
Tap B to embolden the text; tap I to italicize the text; tap U to underline the text; or tap S to apply a strikethrough.
Clear Styles
When editing text in a note or row, the Clear Styles button appears here. Tap it to remove any custom styles you have applied to the selection.
When one or more rows are selected, the Clear Styles button appears at the bottom of the Styles section of the inspector instead. It behaves similarly there, removing any custom styles you have applied to the selected rows.
Styles
The Styles section of the inspector provides controls for applying preset styles to a selection of rows, or removing custom styles from the selection.
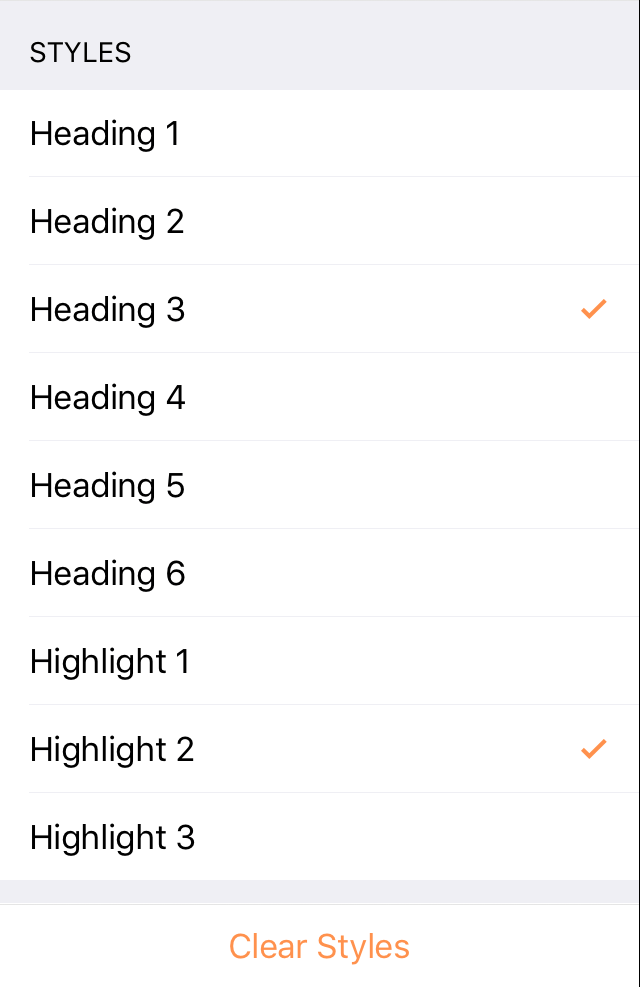
The styles in this list are included with the template currently applied to the document. (This is the template the document was created with, or a newly applied one.)
To apply a style to a selected row or rows, tap the style's name in the inspector. A check mark appears next to the style to indicate that it is applied to the selection. (Tap the style's name again to remove it.)
Rows can have multiple styles applied at the same time (the Heading 3 and Highlight 2 styles, for example). When styles of the same type conflict, the one lowest on the list takes precedence.