The Document Inspectors
OmniOutliner's Inspector, revealed by tapping  , contains controls for customizing the appearance, layout, styling, and technical properties of your document. The inspector controls are split into two groups: the Selection inspectors, which govern properties of selections in the outline, and the Document inspectors, which contain document-wide settings, column controls, and style editing tools.
Tap the segmented control at the top of the inspector pane to switch between the Selection and Document inspectors.

This chapter describes the features of the Document inspectors, including controls for applying a template theme to the entire document, editing the document's structural and named styles, creating, editing, and managing global settings for document columns, and managing other document-wide visual and file properties (such as (encryption and metadata).
Document Styles
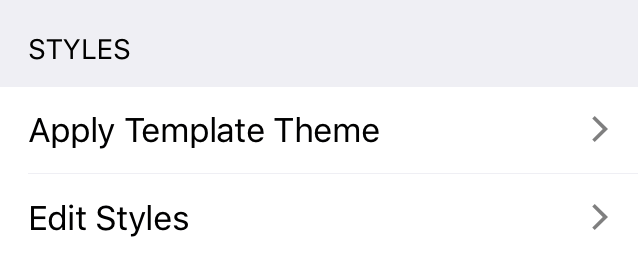
The Styles controls in the Document inspector apply to styles spanning the entire outline. These include controls for applying a set of structural styles to the entire outline at once (using templates), and choosing from a list of document-wide styles to edit (or create).
Apply Template Theme
Choose Apply Template Theme to open the template chooser and select a template with structural styles that you would like to apply to the outline.
Unlike choosing a template at initial document creation (where the document you create is populated with sample content from the template), applying a template to an existing outline just overwrites the document's style properties—not any of its content.
Applying a template theme will overwrite not only the structural styles currently present in the document, but also all of its named styles, including any new or custom styles added after creating the document.
This means that not only will the existing structural styles be replaced; any named styles applied to content in the document will also be removed. (Unless a style with an identical name exists in the new template; in this case, the style will be replaced.)
Ad hoc styles applied directly to text will not be cleared by changing templates.
Edit Styles
Tap Edit Styles to view a list of all style presets currently saved with the document. These include structural styles, which apply to universal components of the outline, and named styles, which are saved sets of style attributes that can be applied to individual selections.
This style editor is similar to the one in the Selection inspectors' Apply Styles section, and is covered there in detail.
Columns
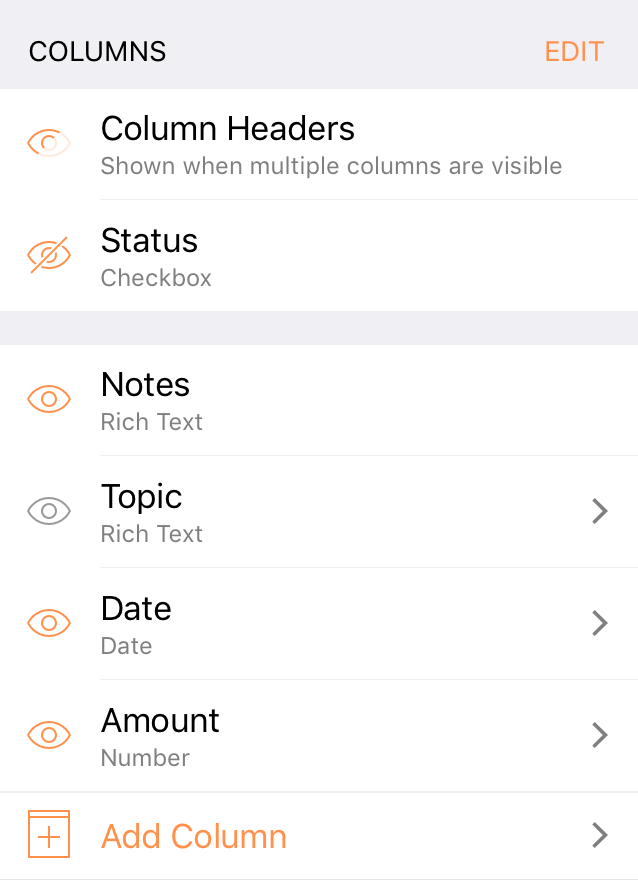
The Columns section of the document inspector governs the appearance of columns in the outline, and provide the opportunity to customize existing columns and create new ones.
Column Headers
Tap the View icon  next to the Column Headers control to toggle between three visibility settings for column headers: Always Shown, Shown when multiple columns are visible, and Hidden.
Status
Tap the View icon  next to the Status control to toggle status checkbox visibility on the Topic column.
The Status checkboxes described here are a component of the outline's hierarchical column (the Topic column by default). Changes to checkbox status persist regardless of the checkbox visibility setting, so you can check them off while visible, hide them, and reveal them again, and the latest checked (or unchecked) status remains.
Note that status checkboxes as a component of the hierarchical column are distinct from status checkboxes as a column type, though they behave similarly.
The Columns List
The columns list is a vertical list of every column in the outline in order from left to right, along with controls for creating new columns, rearranging them, and customizing them.
-
Tap
 Add Column at the bottom of the list to add a new column to the outline. Creating a new column opens it for editing in the inspector, with controls for its style properties and column type as described in the Selection Inspectors' Column section.
 -
Tap Edit next to the Columns inspector header to reveal handles
 next to each column for rearranging them in the outline.
 Touch and drag the reordering handle of the column you want until it is in the desired location in the list.
-
While editing the column order, columns other than Notes and Topic also have buttons
 that can be tapped to delete them from the outline entirely.
 -
Tap the View icon
 next to a column in the list to show or hide it from view. Hiding a column this way only removes it from display in the outline; its contents are preserved intact.
Tap any column in the list to configure its style and column type properties, as described in the Selection Inspectors' Column section.
Two columns are present in every document upon creation, and differ slightly from others subsequently added to the outline: Notes and Topic.
The Notes Column
The Notes column exists in every document, and acts as a visual and interactive indication of the presence of notes on a row.
When visible, the notes column displays icons ![]() next to each row with a note attached. Tap one of these icons to open or close the note on the row, or tap the empty space where an icon would be to add a new note on a row without one.
next to each row with a note attached. Tap one of these icons to open or close the note on the row, or tap the empty space where an icon would be to add a new note on a row without one.
Tap the View icon  next to the Notes column in the columns list to toggle its visibility in the outline.
Other than toggling the column's visibility or changing its order in the columns list, the Notes column cannot be modified.
The Topic Column
The Topic column is the only column that can be structured hierarchically in a document created using one of OmniOutiner's default templates. (For many templates, it is the only column other than Notes.)
As such, it has some unique properties not shared by other columns (See The Anatomy of an Outline for a complete overview).
-
The Topic column can be set to Autosize based on the width of the window or other column widths.
-
The Topic column contains components not present in any other column, including hierarchy, row handles, and its own built-in checkboxes.
-
The Topic column is linked to the Note field such that notes only span the width of the Topic column, not any other subsequently created columns.
-
Unlike other columns, the Topic column cannot be hidden.
When editing the Topic column, its default name can be changed and the document saved as a custom template for outlines where another hierarchical column name would be more descriptive.
Document Properties
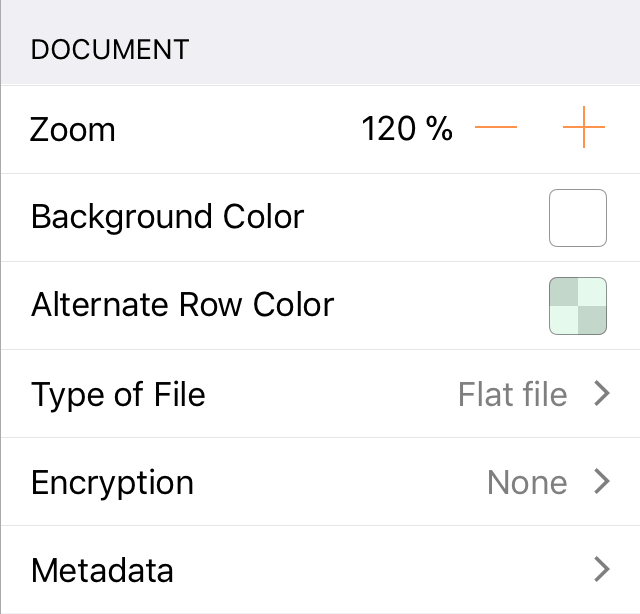
The Document Properties section of the Document inspector include custom style properties that span the entire document, as well as visibility settings and settings for properties of the file itself including file type, encryption, and metadata.
Zoom
The Zoom setting controls the magnification of text in the outline. Tap the plus  and minus
  buttons to increment or decrement the zoom by ten percent.
This setting does not affect the actual size of the text in the outline; just the display size. This is useful for improving visibility of small text or fitting more of the outline onto the screen without changing any of its style properties.
Background Color
This control offers a convenient way to set the background color of the entire outline. This is identical to the background color property of the Whole Document structural style, so changing it in either place leads to the same result (the change is reflected in both places).
Alternate Row Color
This control adds an alternating row color to every row in the outline. This style is applied above the Whole Document style but below any row level structural styles, so setting a background color on a Level X Row style supersedes the alternate row color for that level row and any above it.
See Structural Styles and Style Layers for a general explanation of the order in which styles are applied to content in the outline.
Type of File
By default, OmniOutliner saves documents as flat files: files that are compressed down to the smallest practical size. Flat files don’t just take up less space on your device; they’re also easier to share, and to sync between devices.
Alternatively, you can choose to save your file as a file package. This means the file won't be compressed, and isn't generally recommended. It can be useful in specific cases, however, such as for files stored in a version control or document management system, or when running scripts (Python, Ruby, and so on) on the XML inside your document.
If you're syncing with a third party cloud storage provider such as Dropbox, be sure to use the flat file type for saving your OmniOutliner files. Using the package file type will result in errors when syncing with these services.
Encryption
Encryption adds password protection to documents containing private or sensitive material.
When you choose to encrypt a document, you are prompted to enter and confirm a password. With the enter password and verify password fields matching (and an optional password hint added), tap OK to finish the encryption process.
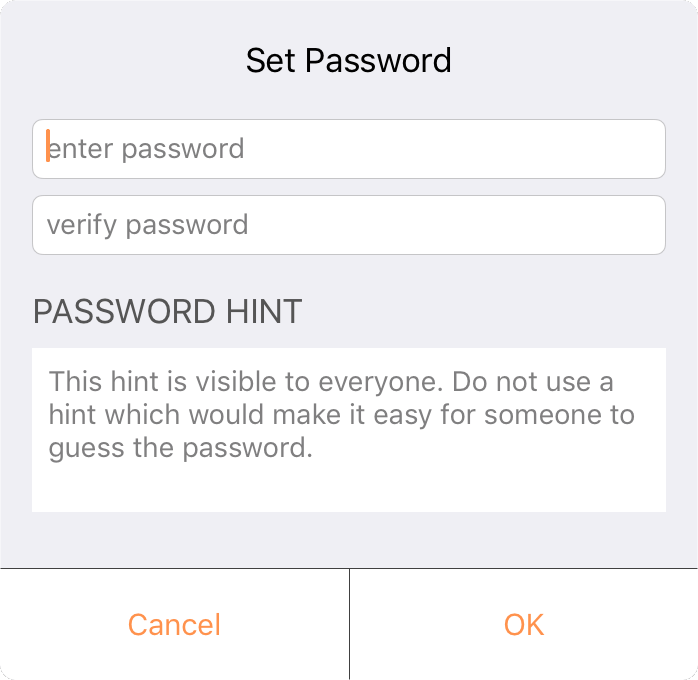
The document is now encrypted using industry standard AES-256 encryption in CCM mode. The document's thumbnail preview in the document browser changes to a lock icon to indicate that the contents are hidden and password protected.
The next time you open the document, you’ll see the following prompt:
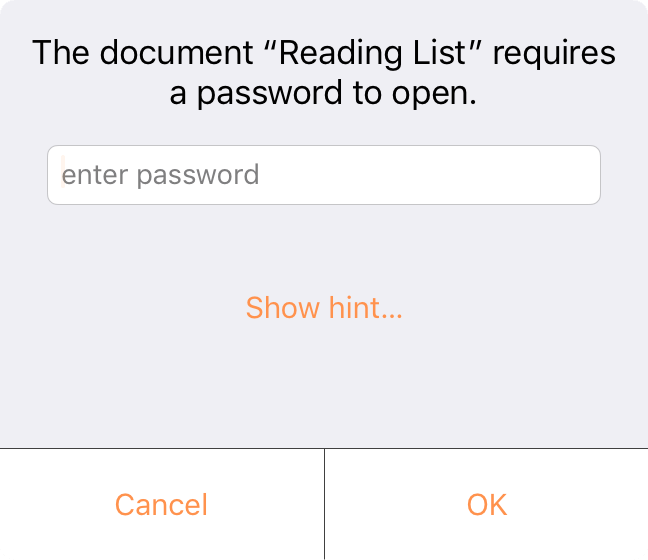
Your document is now encrypted and cannot be opened—or have its contents otherwise read—without entering the password. This is true both of the original document and any copies of it that are subsequently created, so if you send a copy to a coworker they’ll need the password to open it.
After adding a password to a document, controls in this section change to include Remove Password and Change Password. Enter the current password when prompted to either remove the password entirely (and remove encryption from the document), or to change the existing password to something else.
Metadata
The metadata section of the Document inspector provides a set of ten metadata properties for adding information to enrich and contextualize your document.
The first five metadata properties are text fields (labeled Empty by default). Tap any of these to enter text in the field.
- Copyright
- Version
- Subject
- Description
- Comments
The remaining metadata consist of key-value pairs. Each property represents a key; tap it to add values corresponding to that key.
- Authors
- Organizations
- Languages
- Keywords
- Projects
Tap Edit when viewing a key-value list to delete or reorder the values stored there.