Getting to Know OmniOutliner
When you first open OmniOutliner, you’ll see two windows pop open: the editing window and the Inspector. The editing window is where you’ll do all of your work, and the Inspector provides all of the tools you need to style text, format rows and columns. Before diving in, let’s take some time for a quick overview of OmniOutliner’s user interface:
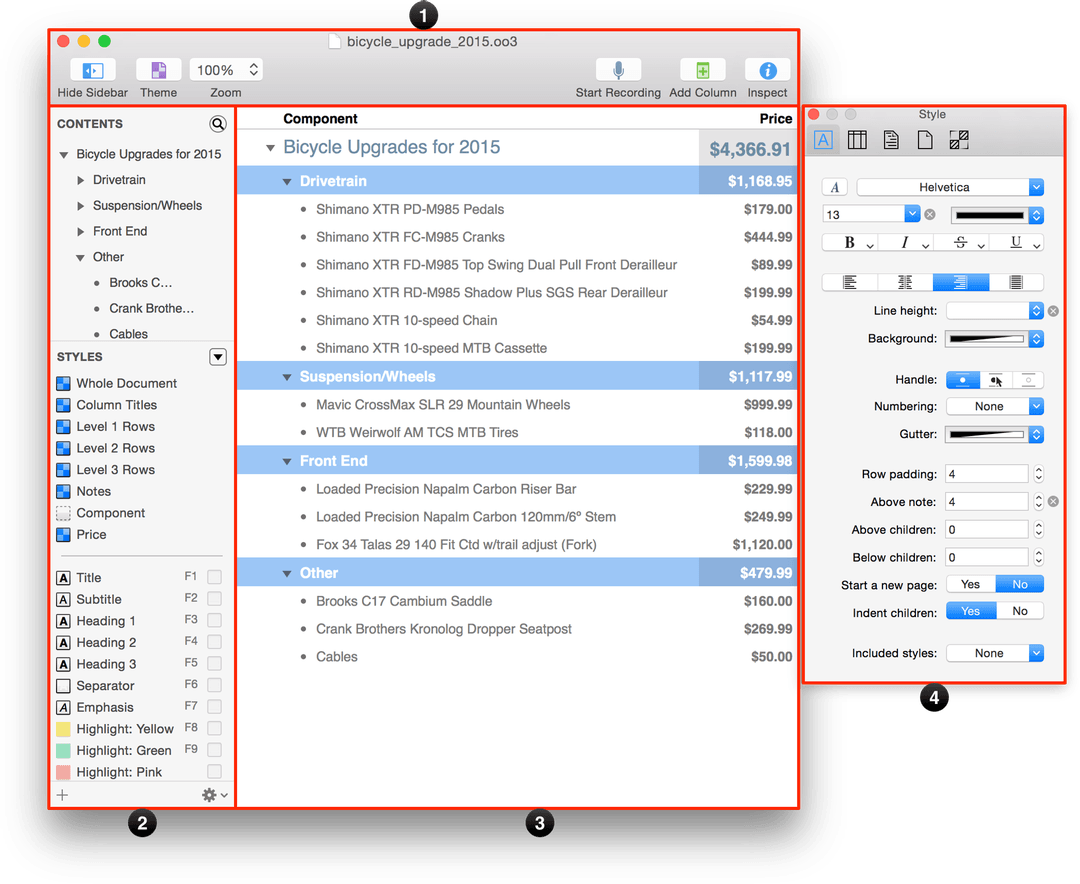
The Toolbar—Along the top of OmniOutliner’s window you’ll find a row of useful buttons in the Toolbar. Fully customizable—including document-specific toolbars—the toolbar makes it easy for you to add columns and attachments, record and embed audio clips, and a whole lot more. See Using the Toolbar for more details.
The Sidebar—Along the left side of OmniOutliner’s window is the Sidebar. Fully collapsible, the Sidebar provides an outline view of everything in the Editor and keeps track of the styles you’ve used in your document. To learn more about the Sidebar, see Using the Sidebar.
The Outline—This is where you enter text in rows and columns, add notes, tick things off using the status checkboxes, attach images, embed audio clips, and a whole lot more. To learn more about how to use OmniOutliner, including details for creating styles and templates, take some time to work through the hands-on tutorial, Working in OmniOutliner.
The Inspector—Floating off in its own window are the Inspectors. Consisting of the Style, Column, Outline, Document, and Style Attributes inspectors, the floating window makes it easy for you to design your OmniOutliner documents with style, and when you don’t need it, you can just hit Shift-Command-I to make it go away until you need the Inspectors again. For more details about the Inspectors and what each of them do, see Using the Inspectors.
Using and Setting Keyboard Shortcuts
From time to time, we’ll mention keyboard shortcuts that you can use in OmniOutliner. If you’re new to the Mac or aren’t accustomed to using keyboard shortcuts, they can really help speed you along while working in OmniOutliner. Rather than having to grab a mouse or take your fingers off the keys while you’re typing to use your Mac’s Trackpad, you can just hit a keyboard shortcut to invoke certain menu commands.
Not every menu option has its very own keyboard shortcut, though. If you find that you’re using a menu option often enough that it warrants its own special keyboard shortcut—or if you want to change an existing keyboard shortcut to something else—you can do this with the System Preferences app on your Mac. To show you how easy this is to do, let’s create your first custom keyboard shortcut for OmniOutliner—for the Zoom to Actual Size menu option.
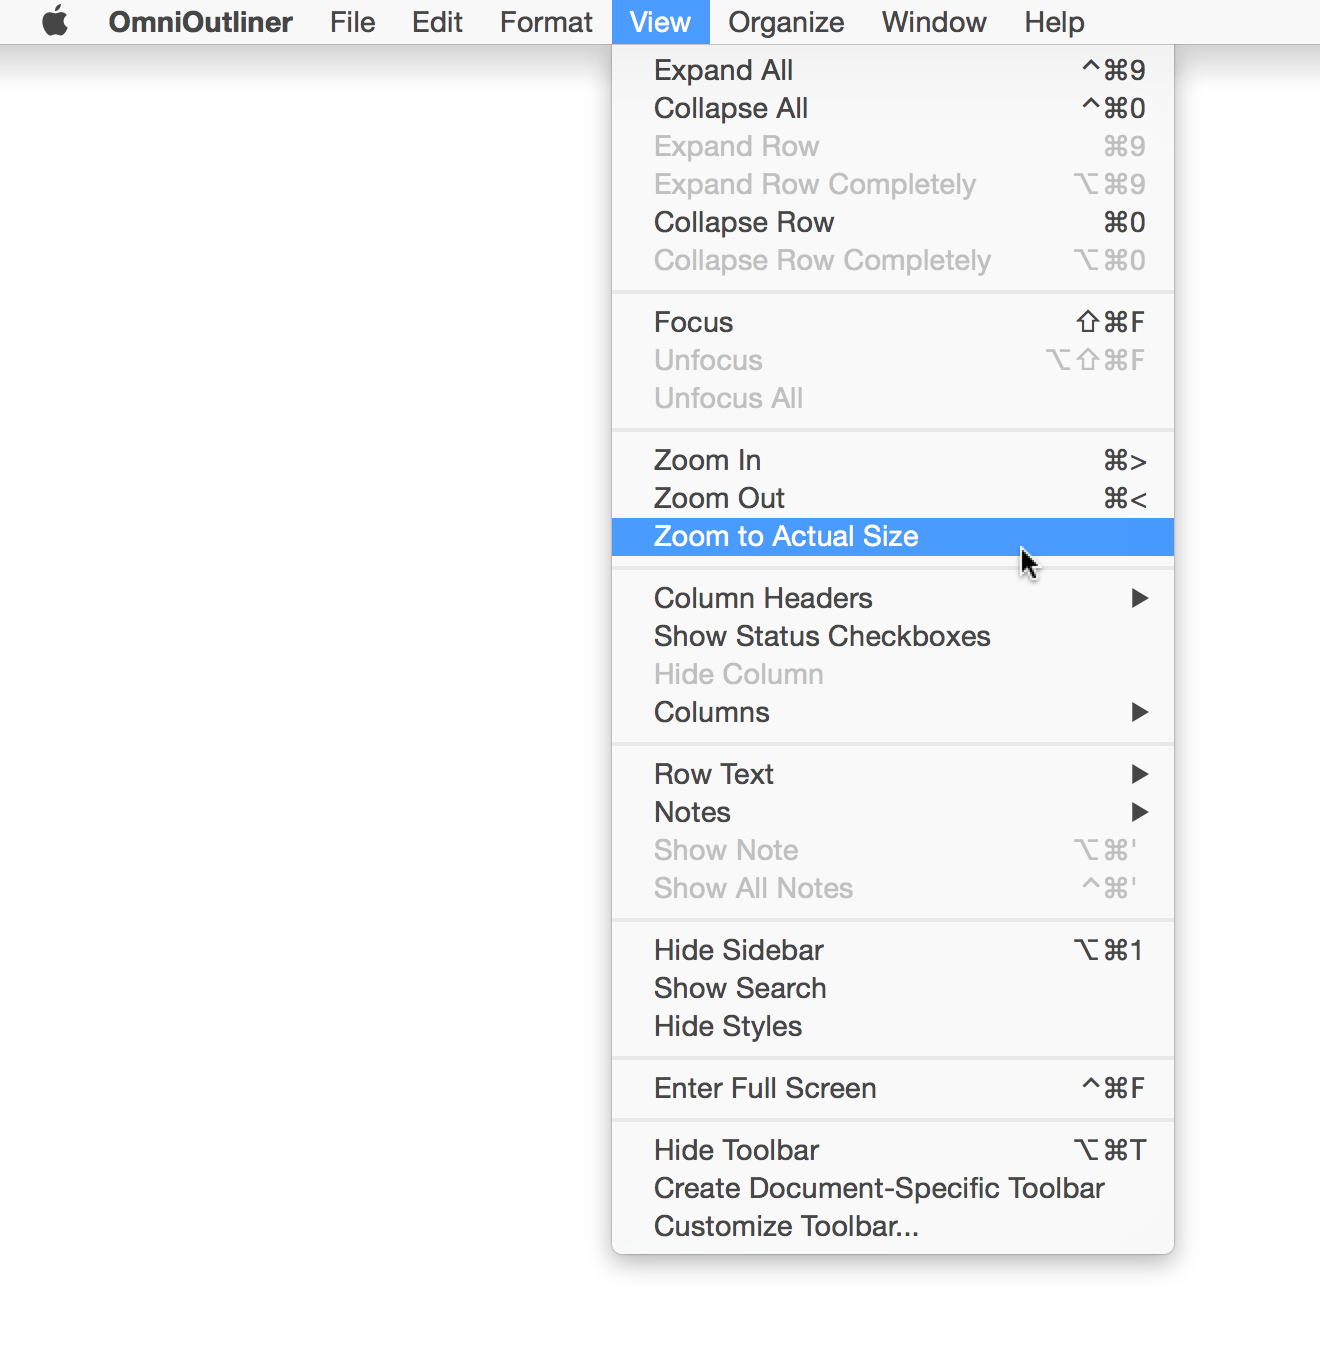
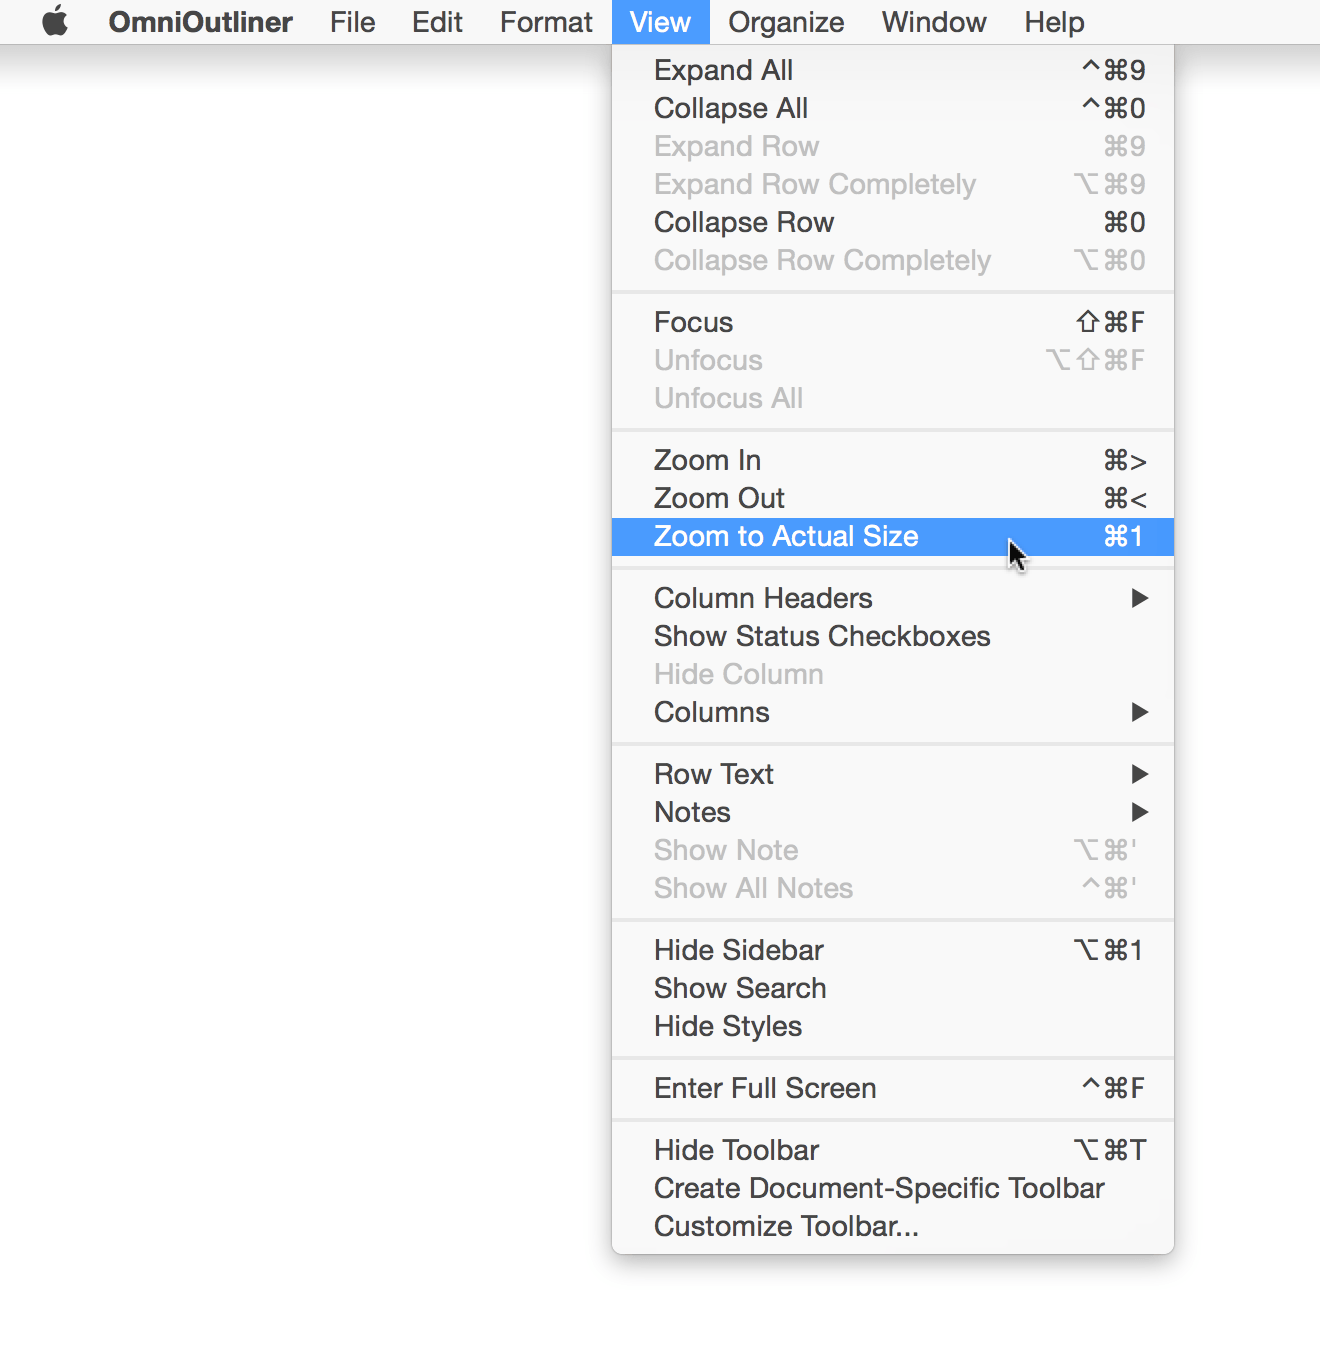
Before you get started, the first thing you need to know is where the Zoom to Actual Size menu item resides amongst OmniOutliner’s menu options. After some poking around, you find it in the View menu:
It’s not that you need to know which menu the option is in (although, that is helpful in other ways), what you really need to know is exactly how that menu option is spelled out. When you go to create this keyboard shortcut, you’ll need to know that. Of course, you can always switch back and forth between OmniOutliner and the Keyboard system preferences pane if you need to, but it’s good to have this piece of information before you get too far along.
In the Dock, click System Preferences.
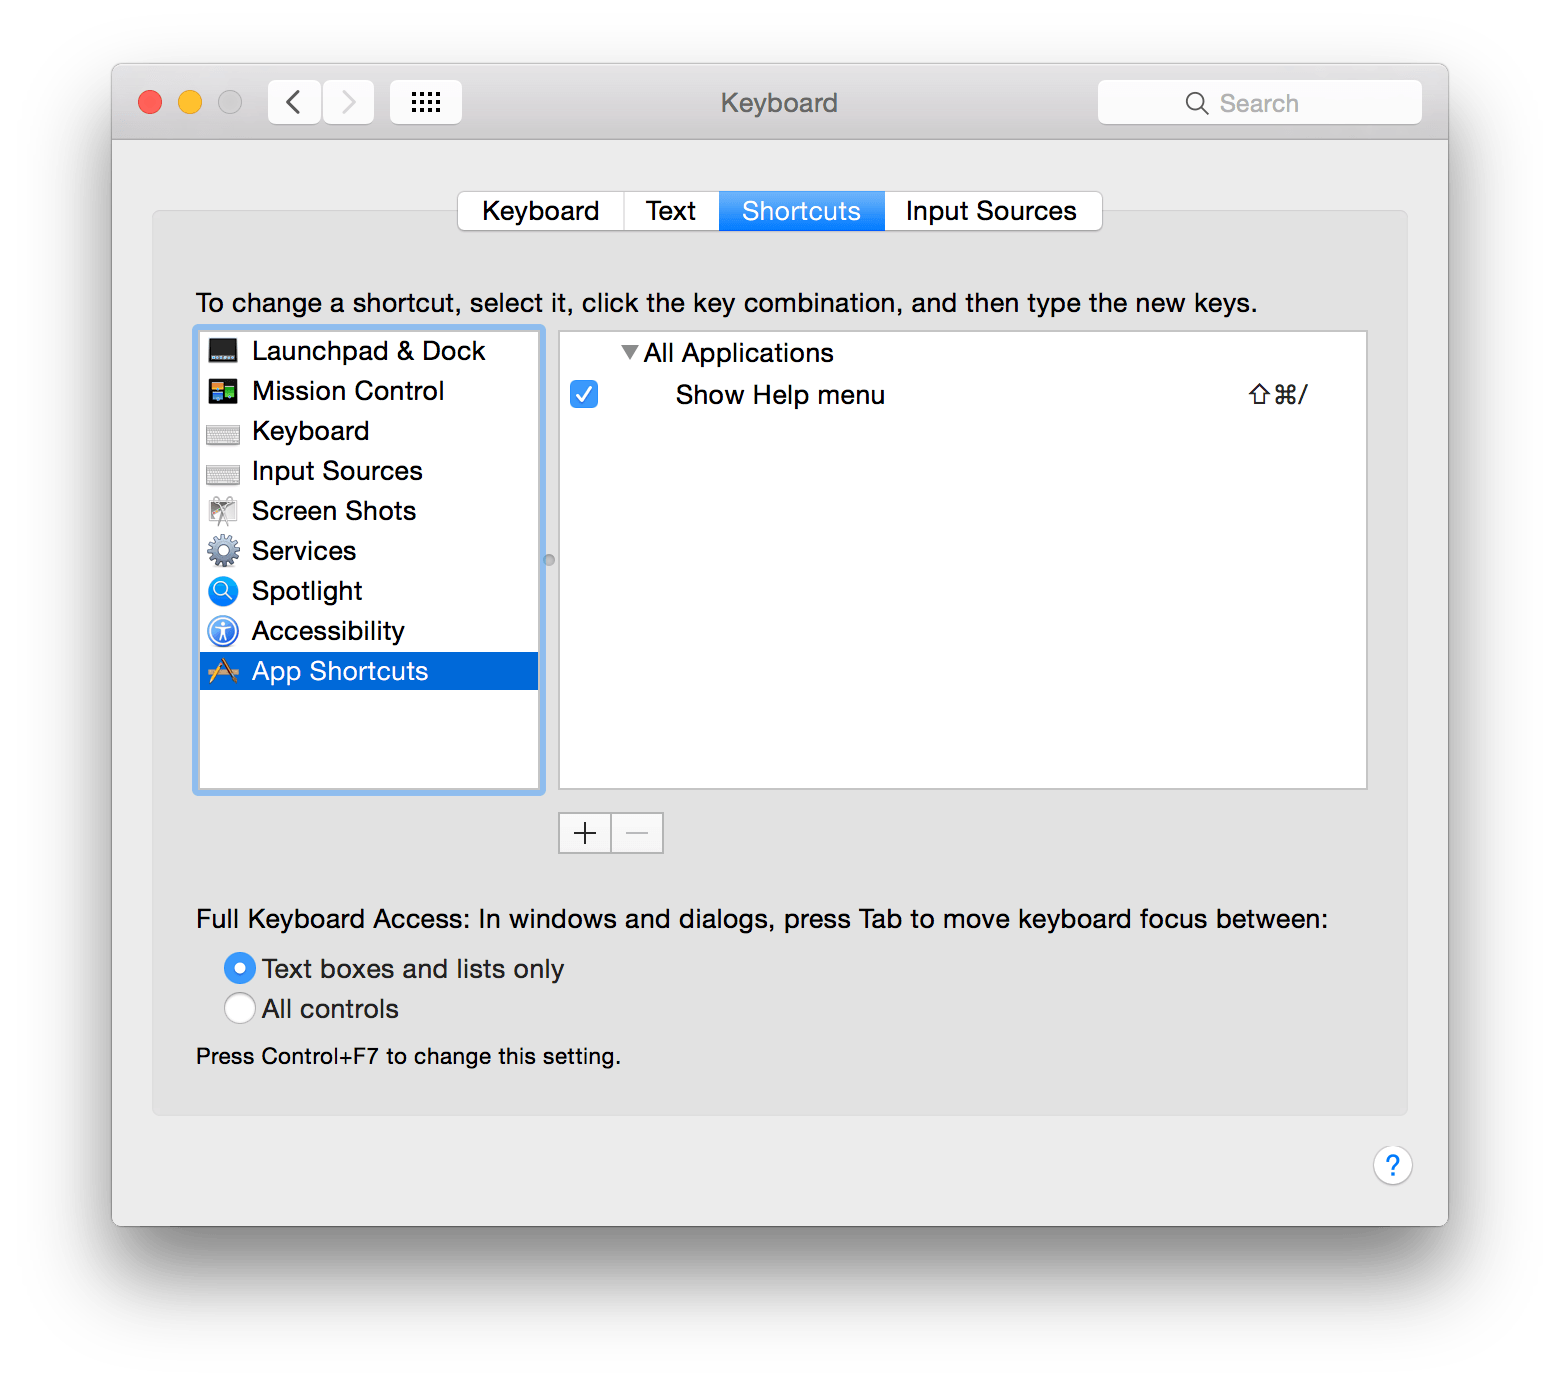
Open the Keyboard preferences panel, and then click on the Shortcuts tab.
In the sidebar on the left, click App Shortcuts; the area to the right lists any custom keyboard shortcuts you’ve created for other apps on your Mac.
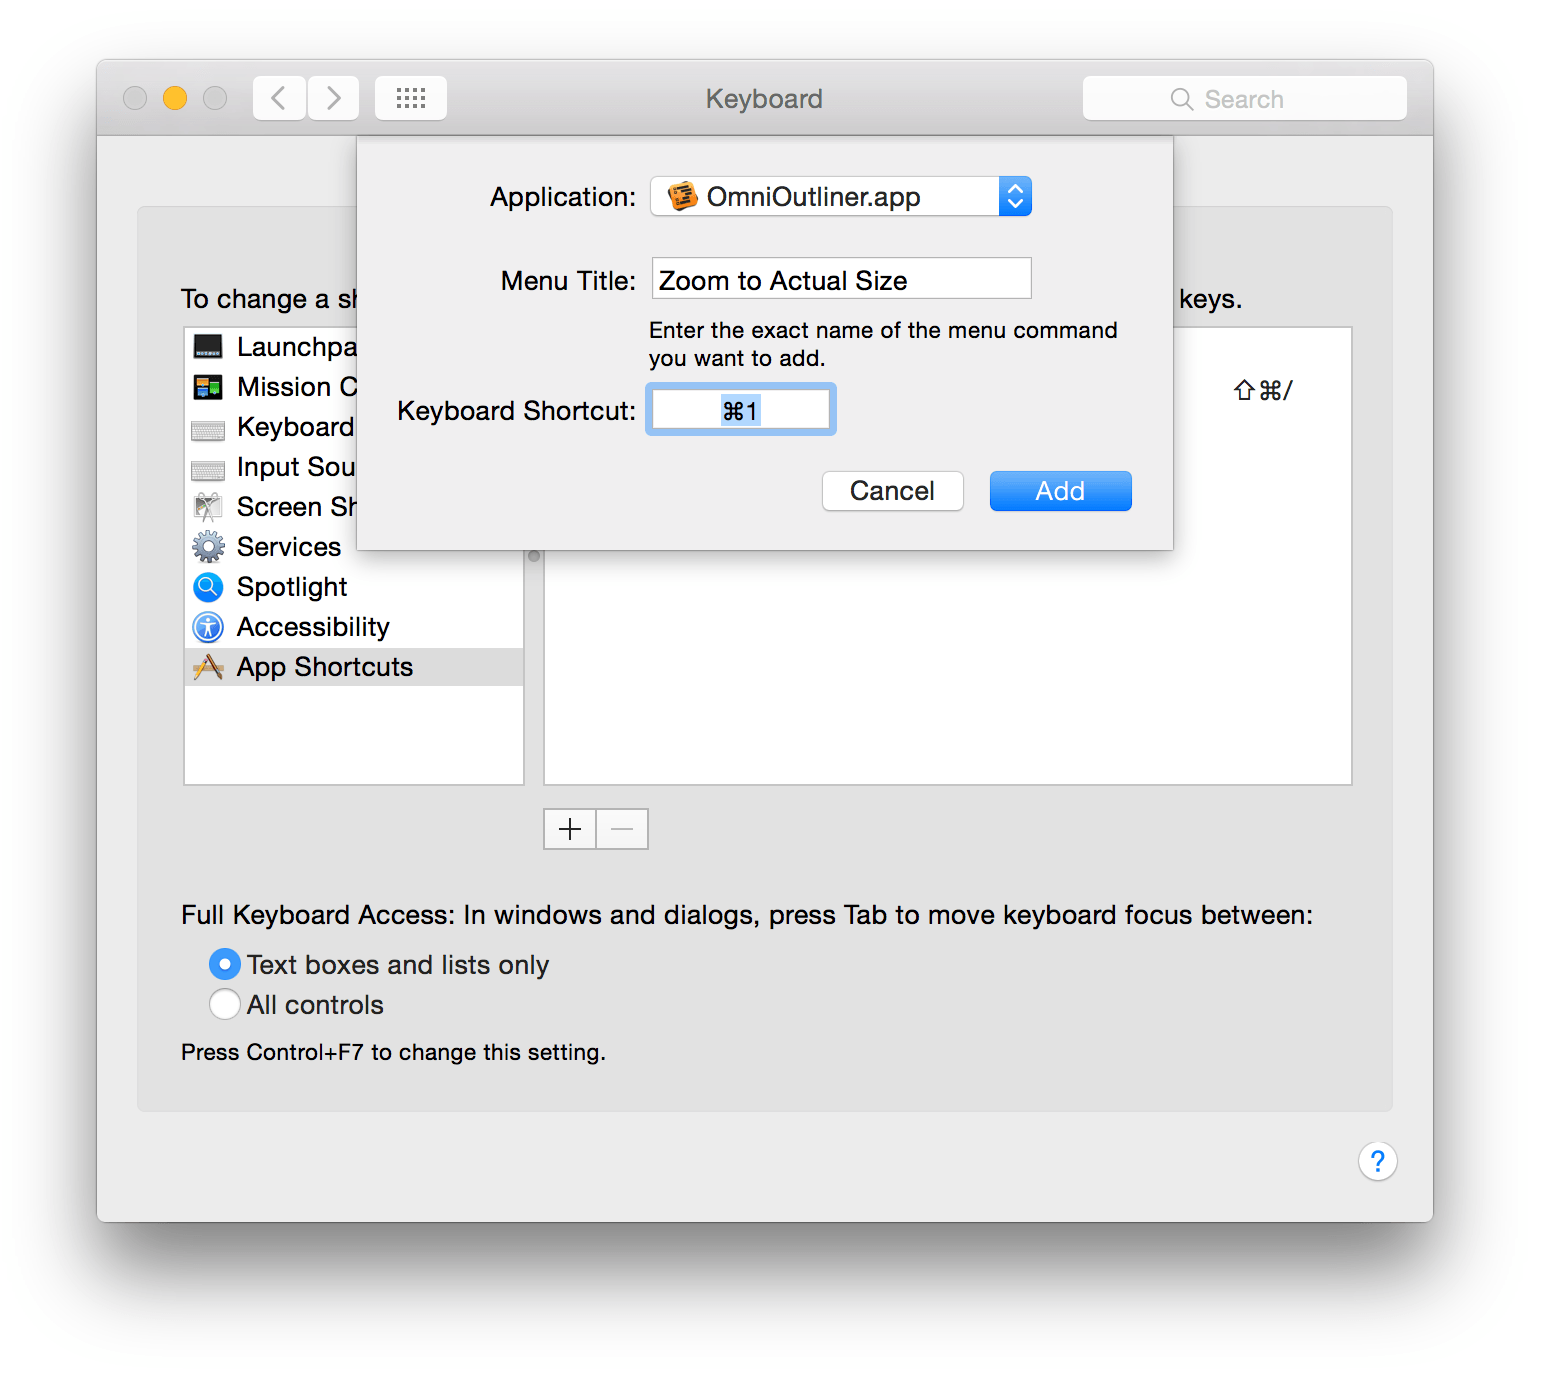
Beneath the listing of custom shortcuts, click the Add button; it’s the one that looks like a plus sign (+). This opens a sheet in which you can create the custom keyboard shortcut.
In the sheet, do the following:
- In the Application menu, choose OmniOutliner.app
- In the Menu Title field, enter Zoom to Actual Size. Be sure to enter the text exactly as it appears in the menu, otherwise this won’t work.
- In the Keyboard Shortcut field, enter the keyboard shortcut you would like to use. Since many popular design apps use ⌘–1 for zoom to actual size, that’s what we’ve used here for this example; you can use whatever you would like, though.
When finished, the sheet should look similar to the following:
Click Add to create the new keyboard shortcut for OmniOutliner.
If you switch back to OmniOutliner and look in the View menu, you’ll see your newly-created keyboard shortcut for Zoom to Actual Size.
To learn more about using keyboard shortcuts on your Mac, read OS X Keyboard Shortcuts on Apple’s support website.