OmniPlan 2 for iOS Tutorial
Welcome to the tutorial! Starting with a blank slate, we’ll build a project from the ground up to show all of the core features of OmniPlan in practical use.
Step 1: Create a Project
For the purpose of this tutorial we’ll be looking at the development process of a game being put together by an independent team of intrepid designers, coders, and testers.
Starting off in the document browser, tap the New Project button.

This opens the Project Editor, where a first task is waiting to be customized or edited. Before we get to that, let’s rename the project to something more interesting.
Tap My Project in the toolbar to edit the project title.

Step 2: Choose a Start or End Date
When setting out to build a project, one of the most important aspects is the timeframe. This, in turn, is dictated by any deadlines or start constraints that exist for the project.
In the case of our game development scheme, we don’t have a hard deadline for the project to be finished - we want it to be done when it’s ready (but as soon as reasonably possible). To indicate this, we’ll go to the project inspector and set the start date as today.
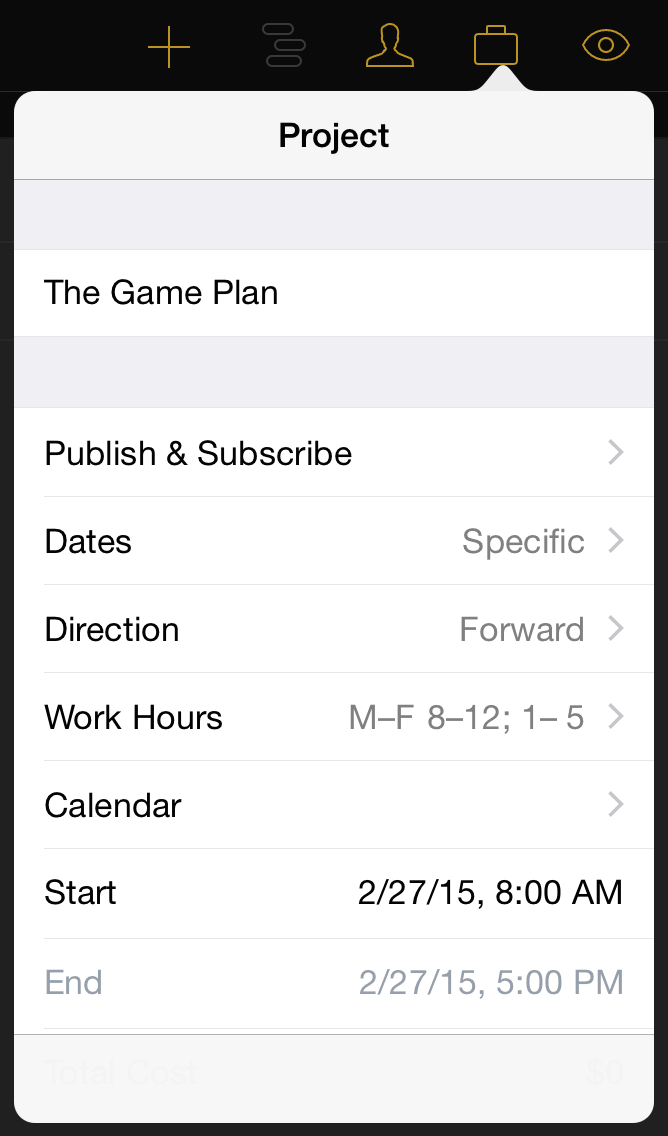
Conveniently, this is the default setting for any new project.
Note
If you’re planning a project in the abstract without a fixed start or end date, you can change the dates from Specific to Undetermined until the timeframe is more set in stone. You’ll get dates that display as T+1d, T +2d... instead.
If you’re planning a project with a specific do-or-die deadline, you’ll want to switch the direction from forward to backward and put the deadline date in the End field. Tasks will be scheduled back from this date, filling in the time from project completion to the present.
Step 3: Create Milestones
Milestones are the anchor points in your project that mark important shifts in focus or unlocking a new phase of the project. Clarifying these will help break a dauntingly large project down into more manageable sections, and help dictate the tasks leading up to and following the milestone.
To create a milestone, tap and hold the new task button until the option appears:
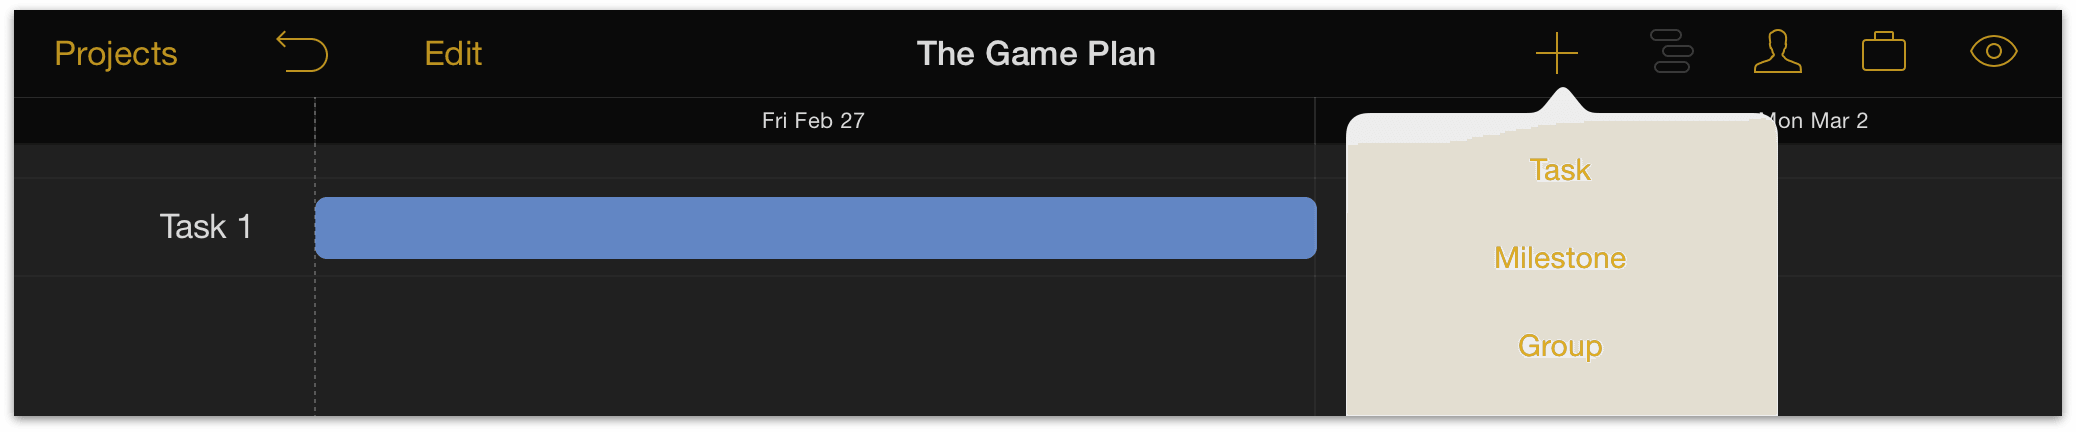
Alternatively, tap the currently existing task ("Task 1") to select it, then open the Task Inspector. You can change the task type from a regular task to a milestone here.

We’ll change the name of "Task 1" by double-tapping it or editing the name field in the Task Info tab, create a few more milestones for our game plan, and then go on to reinforce our milestones with tasks.
Step 4: Create Tasks
Create a task by tapping the new task button.
New tasks appear below the currently selected item in the Gantt view, or at the bottom of the list if no tasks, milestones, or groups are selected.
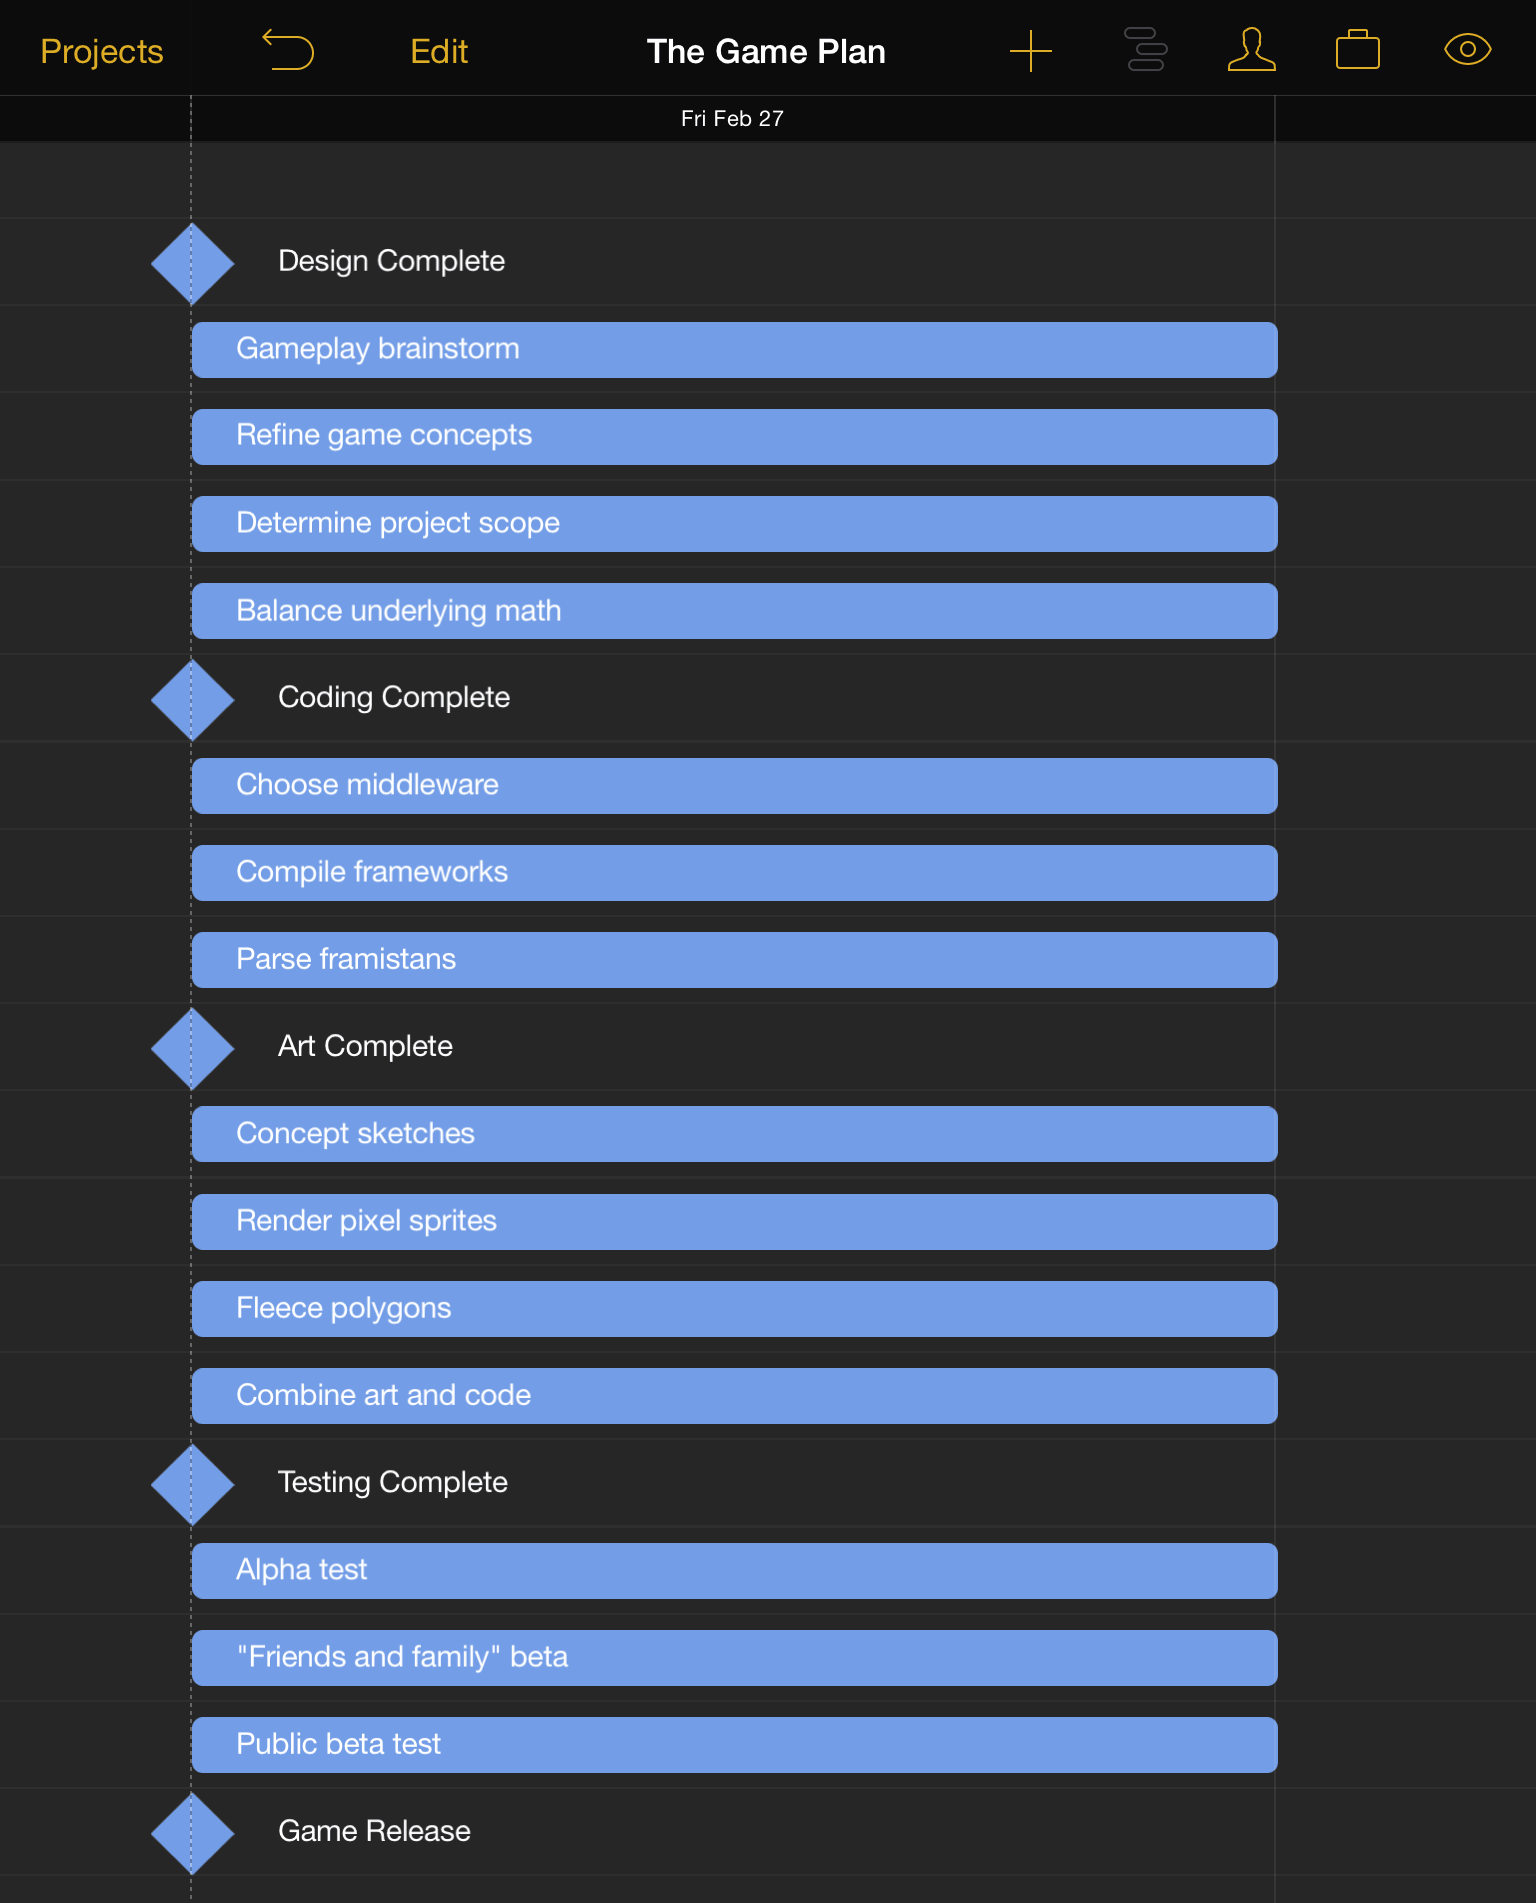
For our project we’ll create several tasks beneath each milestone that they’re related to. Since we now have more items than will fit on the screen at once, pinch vertically on the Gantt view to change the view scale.
Step 5: Edit the Work Week
Now that we’re starting to see the game plan come together, we’ll set tasks aside for the moment and start setting up the work schedule for our project.
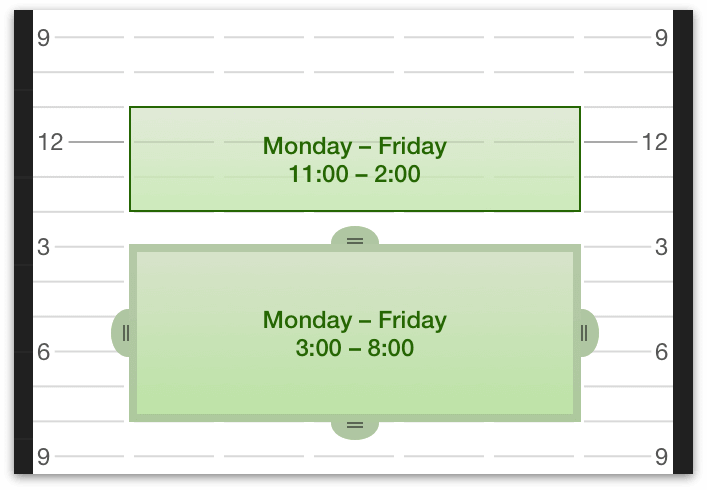
Tap the project inspector and then Work Hours to access the regular weekly work schedule for the project. By default, working hours are Monday through Friday from 8:00 to 5:00, with an hour-long break for lunch at noon.
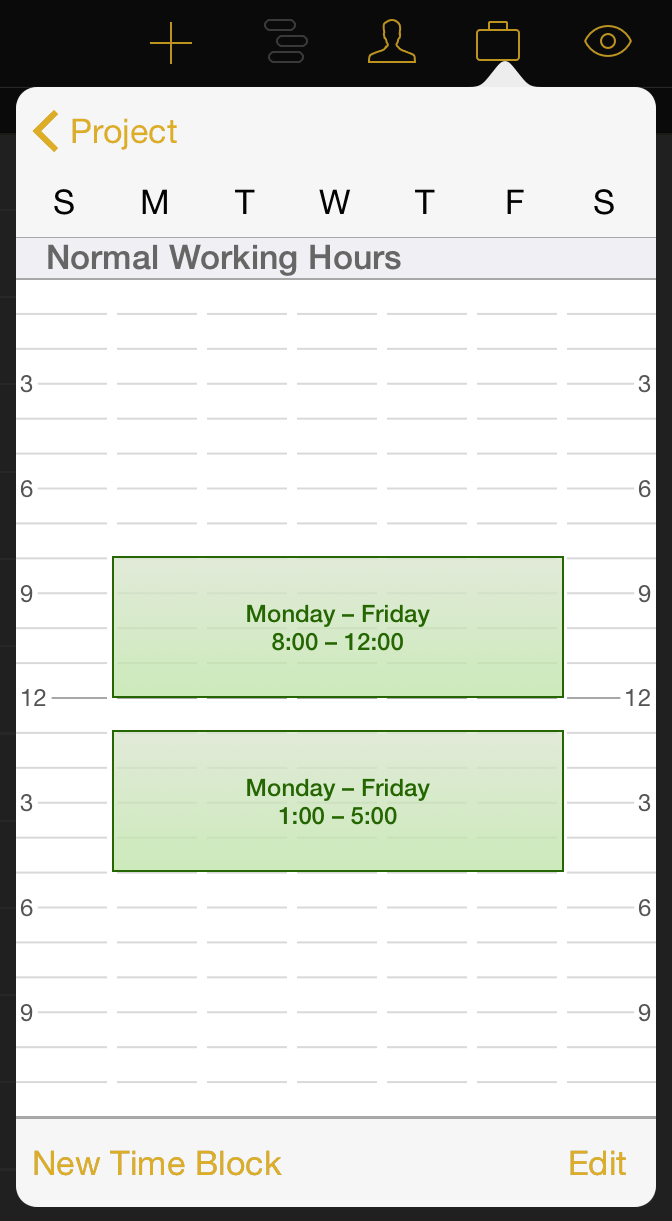
Since we’re working with a bunch of more nocturnal folks, let’s change the schedule to reflect that. Tap and hold one of the time blocks on the calendar to bring it to a new position, or drag one of the side handles to change the size of the block. We end up with a schedule that fits our needs:
Time blocks can be created for individual days to indicate longer or shorter regular working hours (tap New Time Block), and deleted by tapping Edit.
Step 6: Set Schedule Exceptions
Even the most accommodating work week will occasionally have days that are out of the ordinary. Whether it’s a national holiday, a team-wide training seminar, an industry expo or conference, or just a patch of bad weather that keeps folks out of the office, setting exceptions to the regular work schedule can be key to keeping a project on track.
One that we know is in the future for our project is the upcoming Memorial Day. We can add that to our schedule right now by returning to the top level of the project inspector and tapping Calendar.
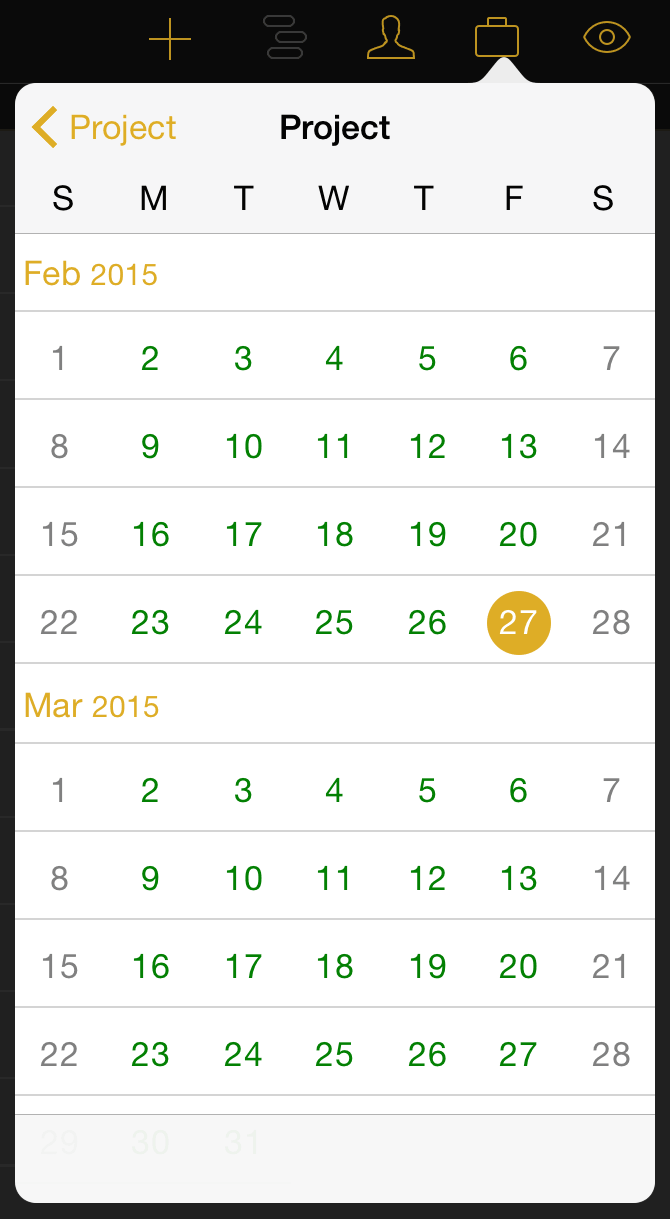
Green days on the exceptions calendar indicate regular work days. Swipe to scroll down to May, then tap on the week of Memorial Day (the 25th) to access the exceptions calendar for that week.
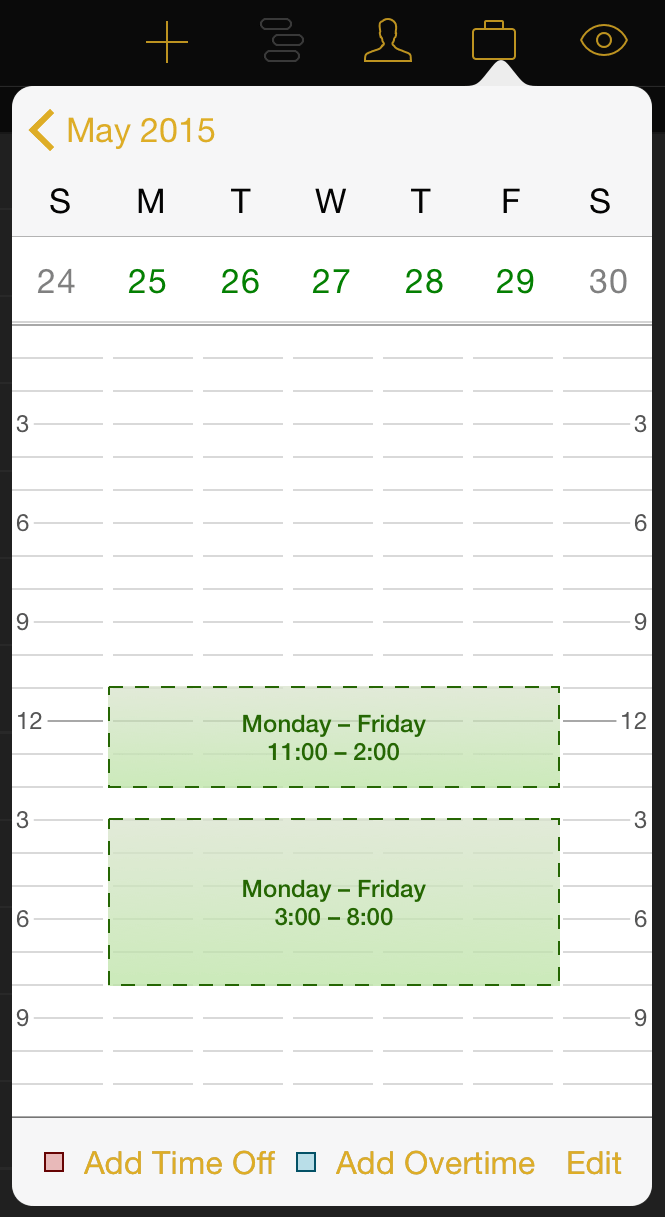
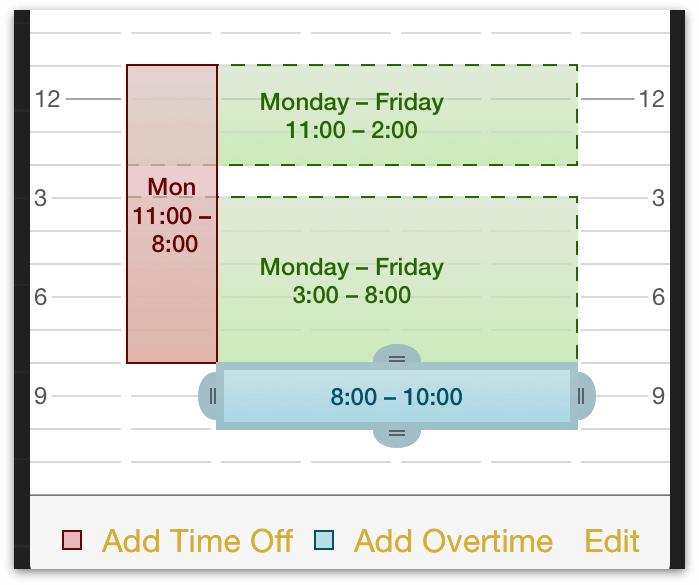
We know we want to take Memorial Day off, but we can also predict that this week will be crunch mode for the team. We use the Add Time Off button to create a block of time that covers the 25th, and then replace that lost time with evening overtime hours through the rest of the week.
Step 7: Set Task Durations
Returning to our tasks in the Gantt view we can begin to scope out how long each task will take. With estimated times for their completion in mind, tap a task and drag the right handle that appears to the appropriate length for the task’s duration (in this case, two full workdays).
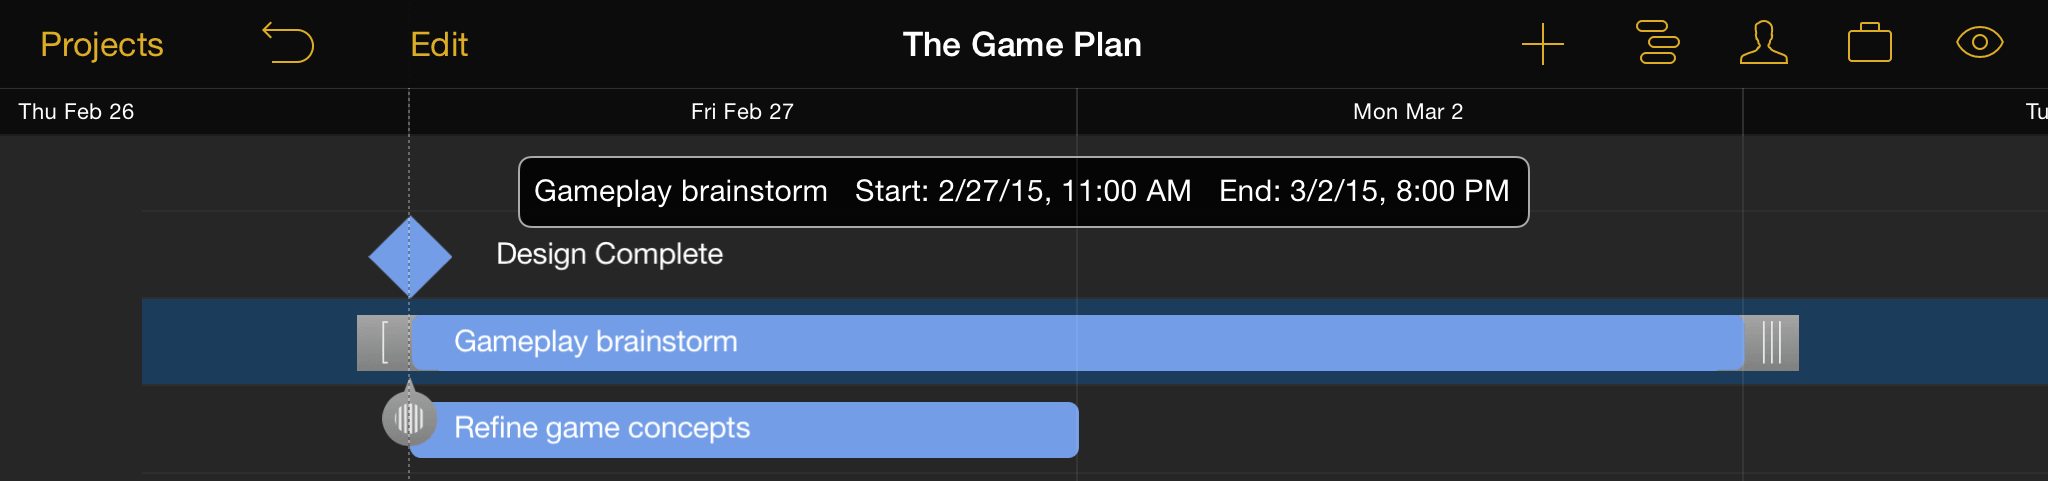
Task duration can also be set using the Task Inspector.
Step 8: Group Tasks
When tasks are closely related or interdependent it can be useful to put them in a group. Groups help organize a project conceptually, and also act as meta-tasks that can be linked via dependencies to other tasks or groups.
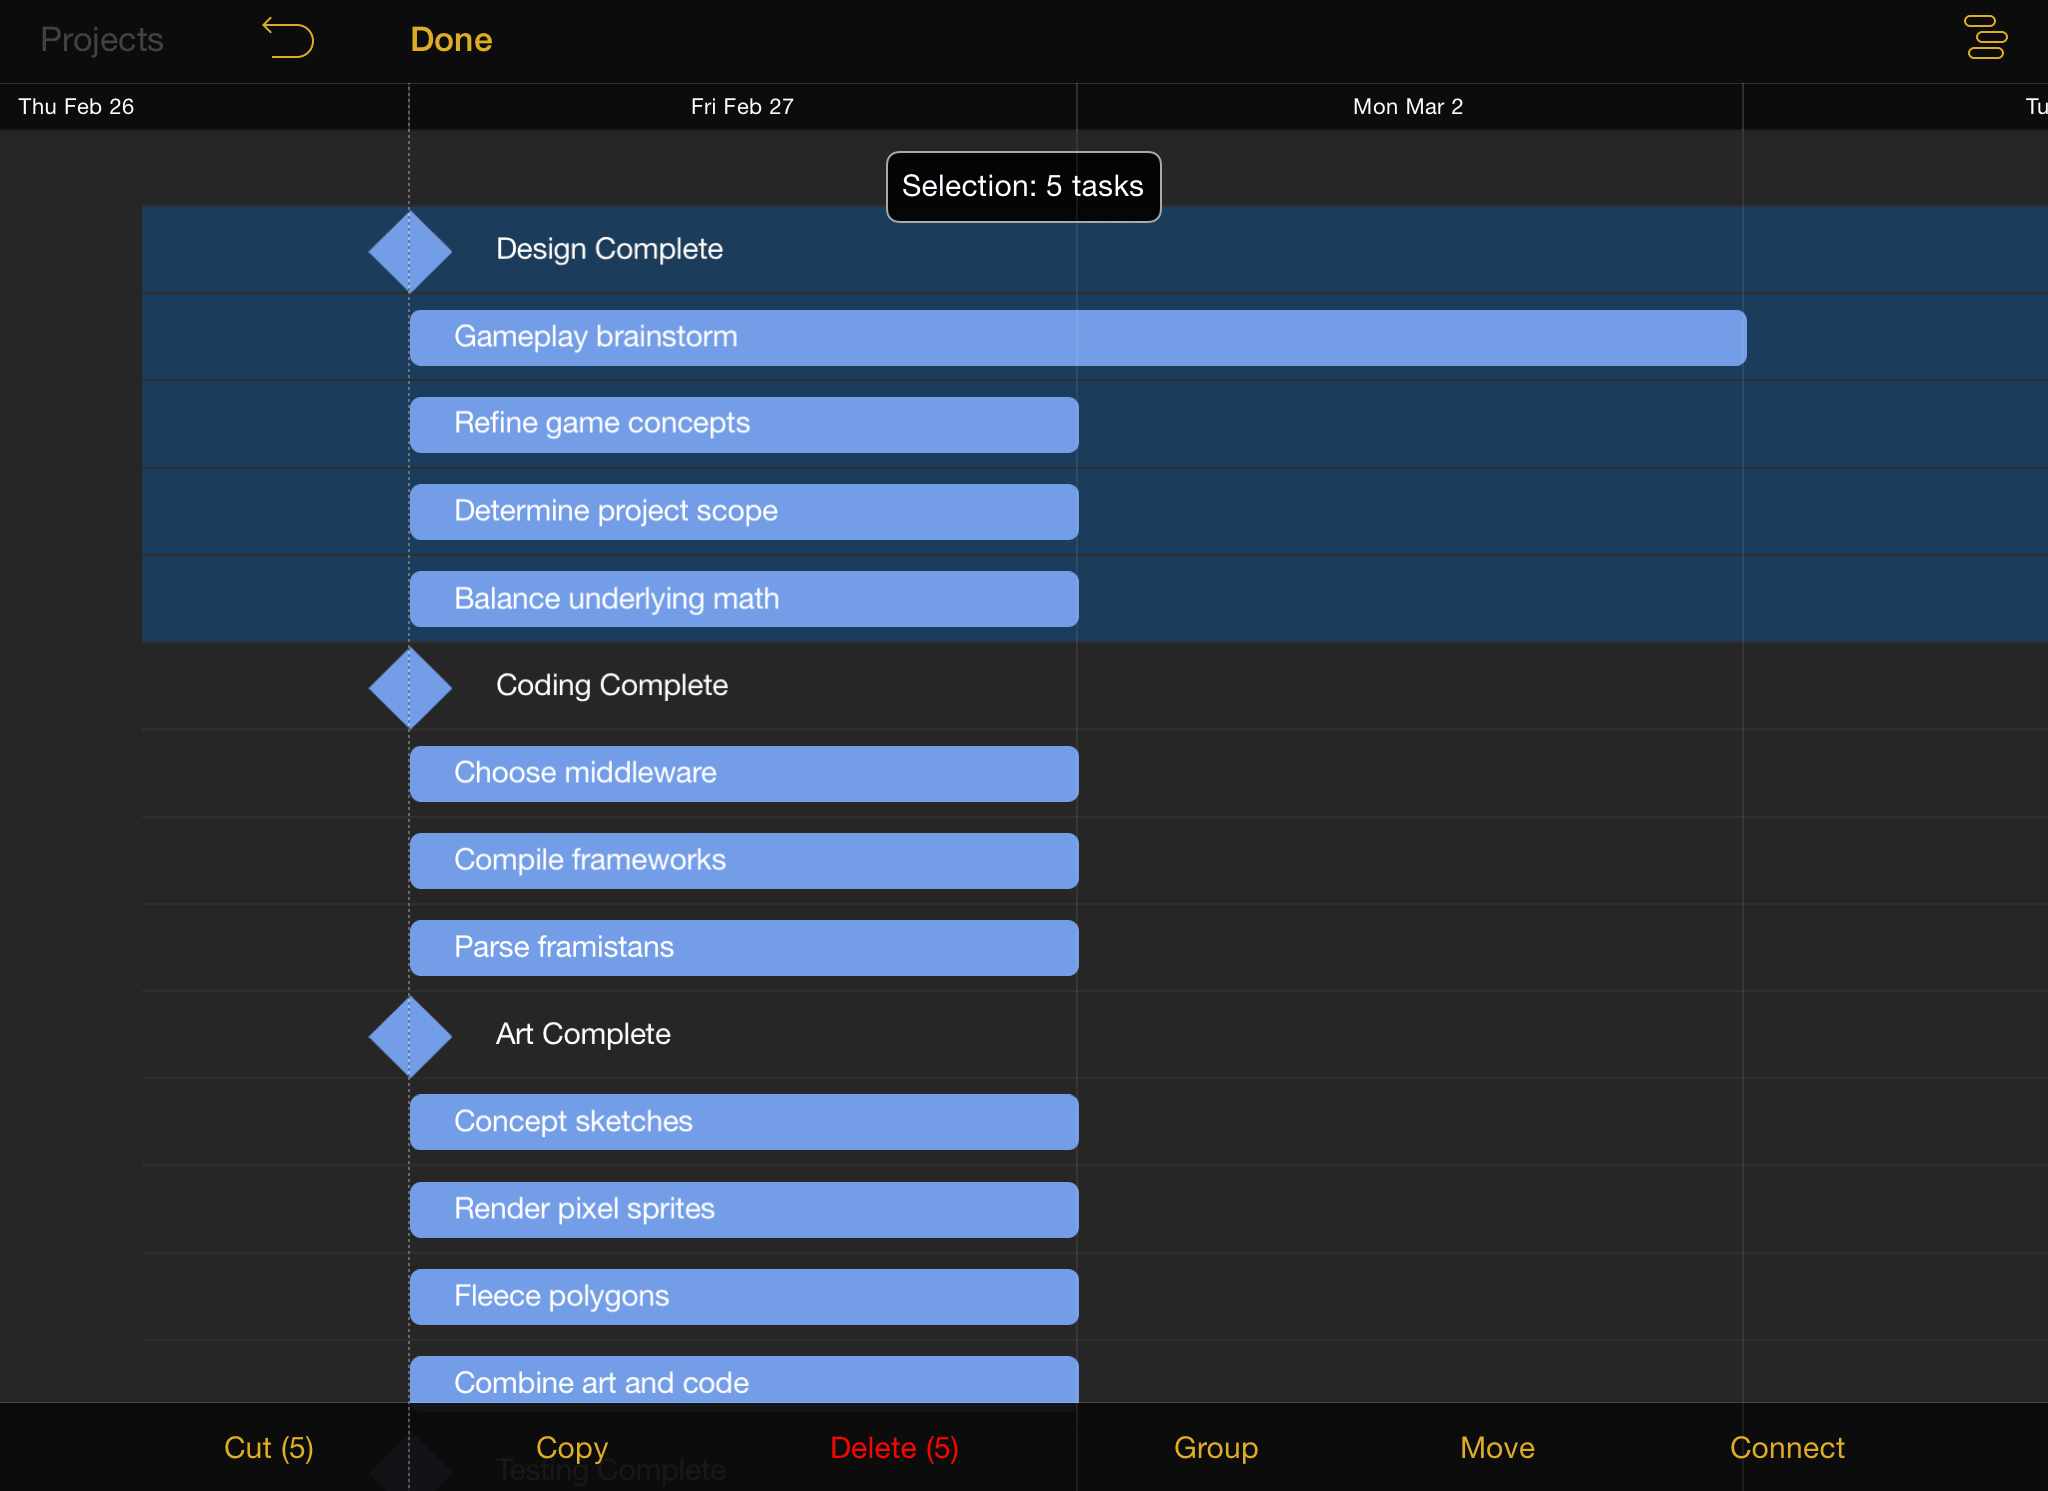
The easiest way to gather tasks into a group in edit mode. Tap Edit on the project screen, then tap to select all of the tasks and milestones to be grouped. Finally, tap Group in the bottom toolbar to complete the edit.
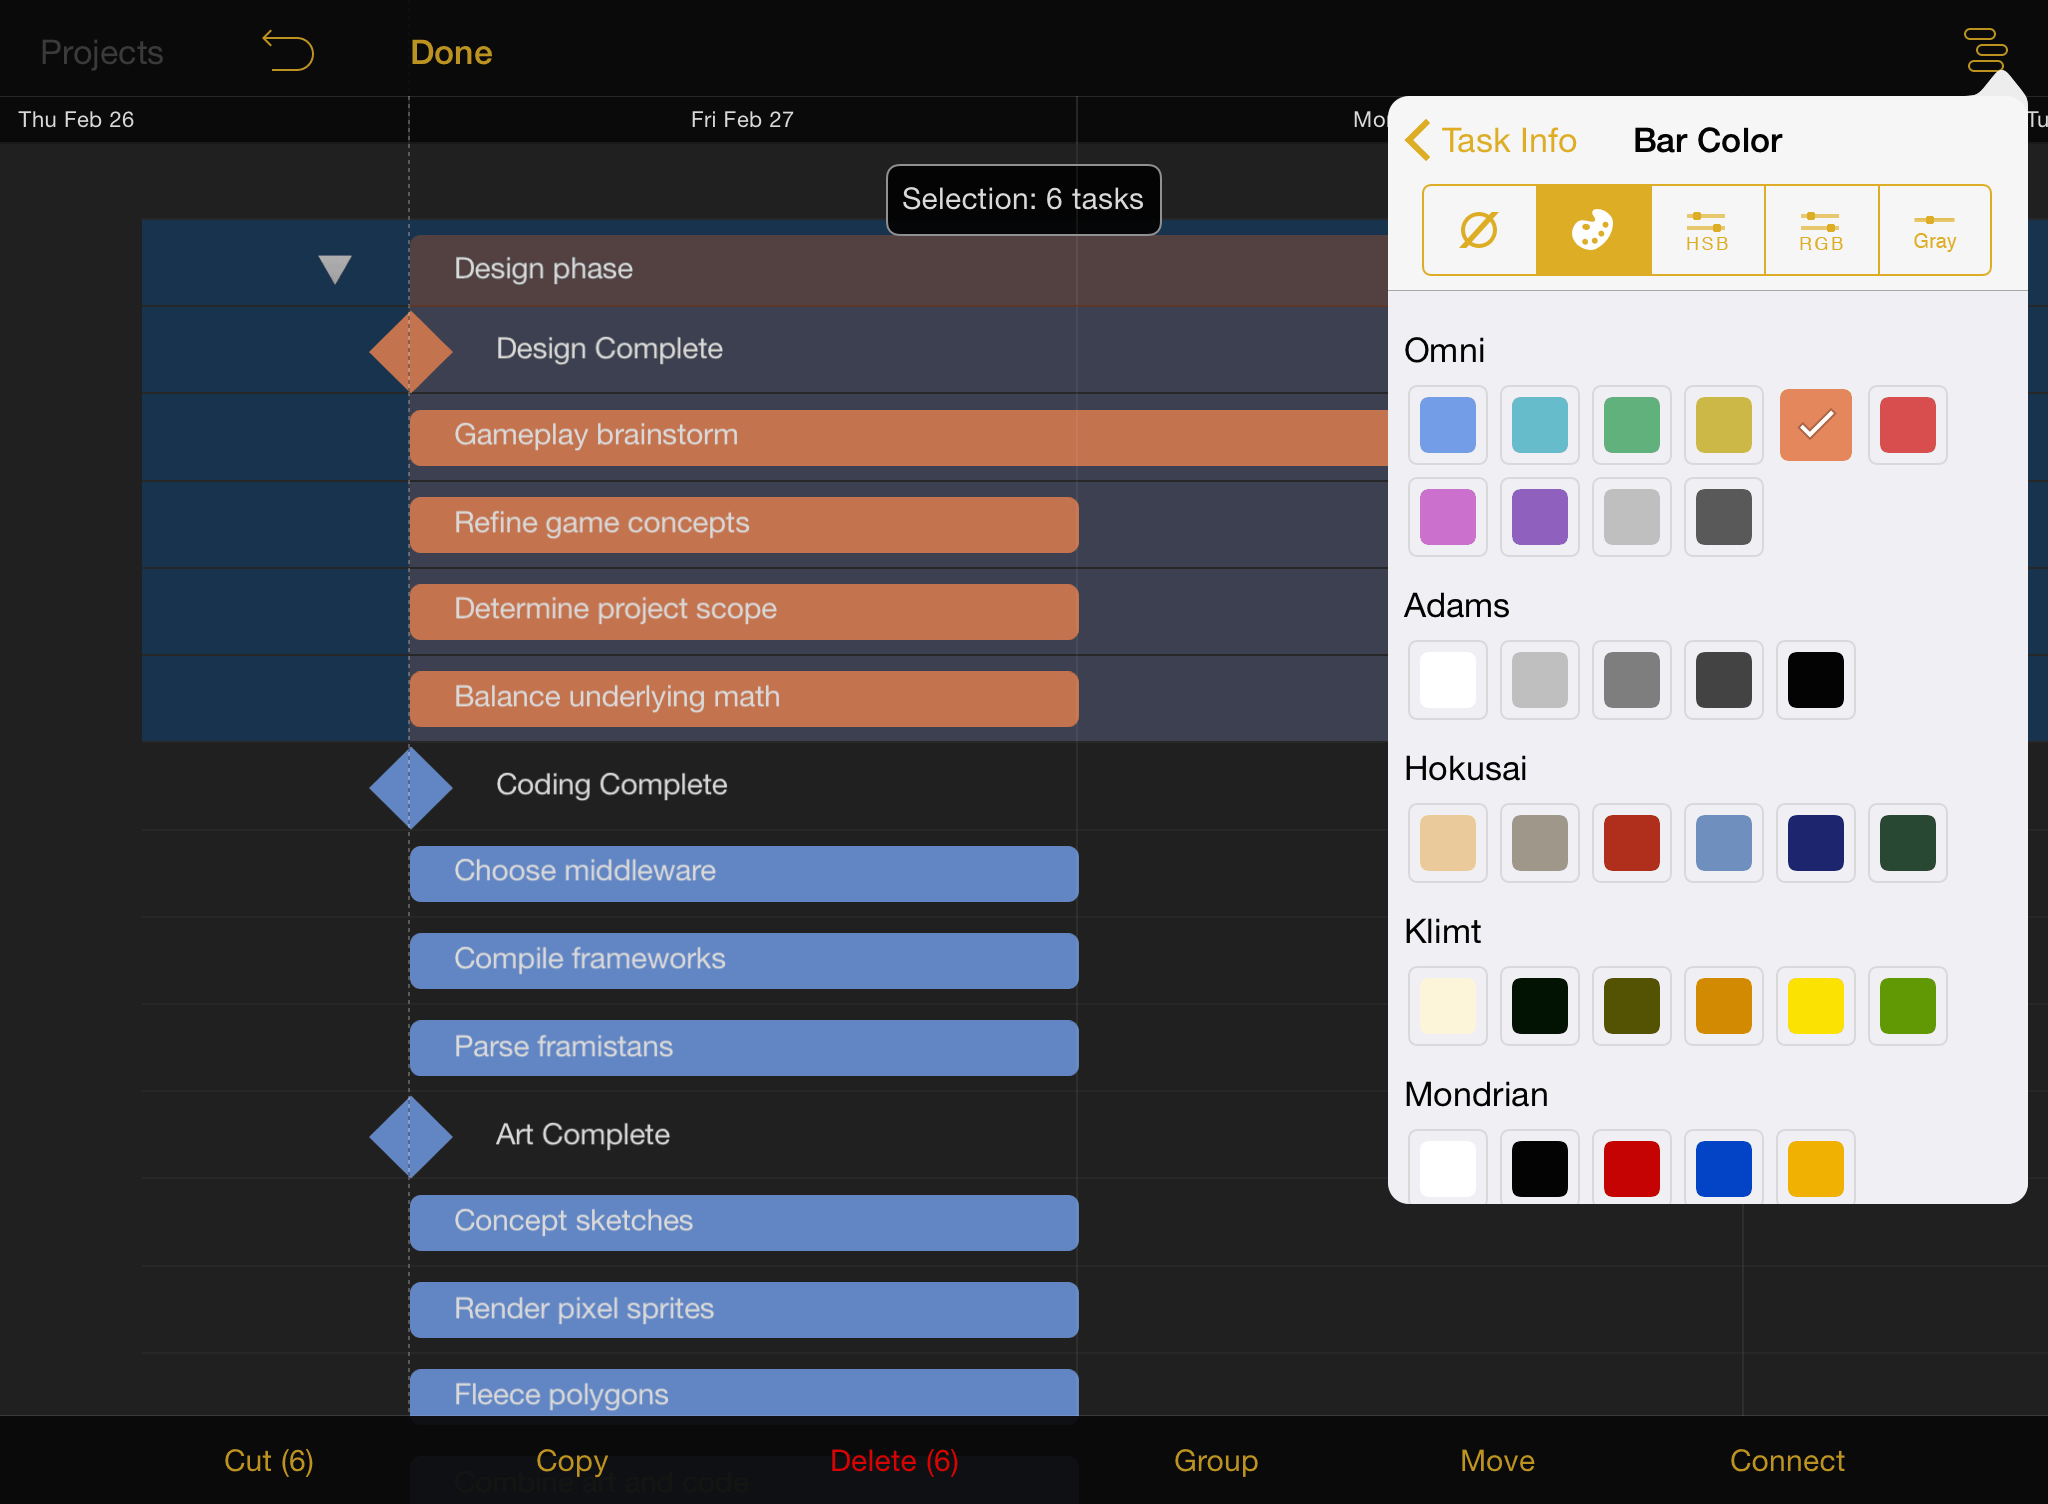
With all of the tasks in the group selected, this would be a good time to add a bit of visual distinction to the group as well. Open the Task Inspector and tap Bar Color to choose a color that will identify all of the tasks in the group.
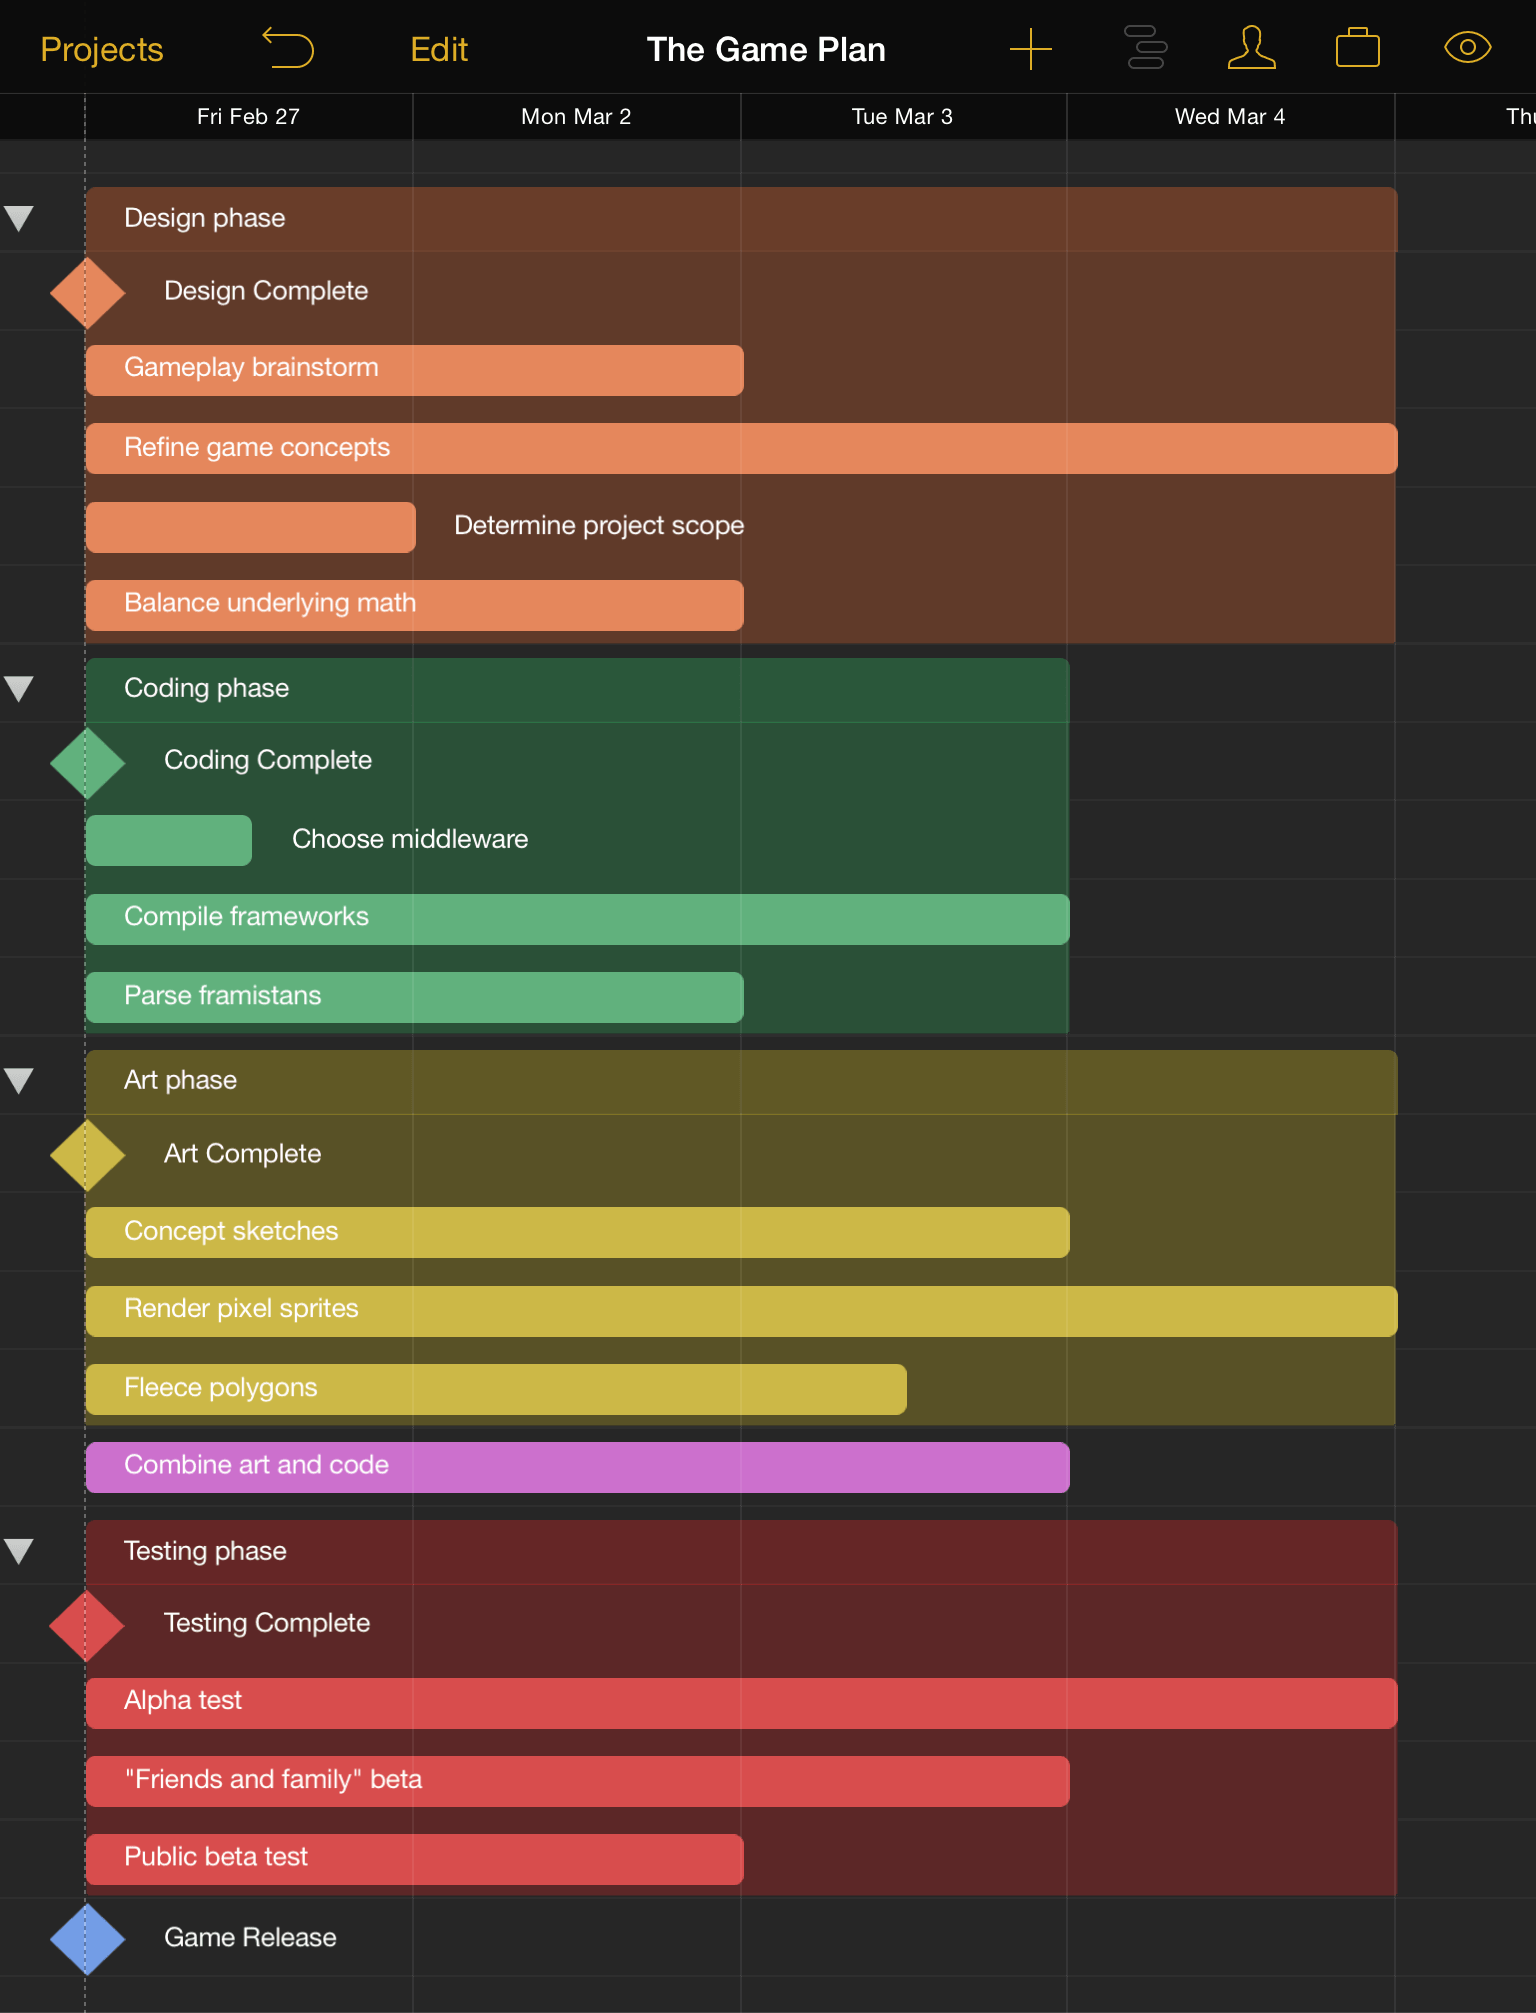
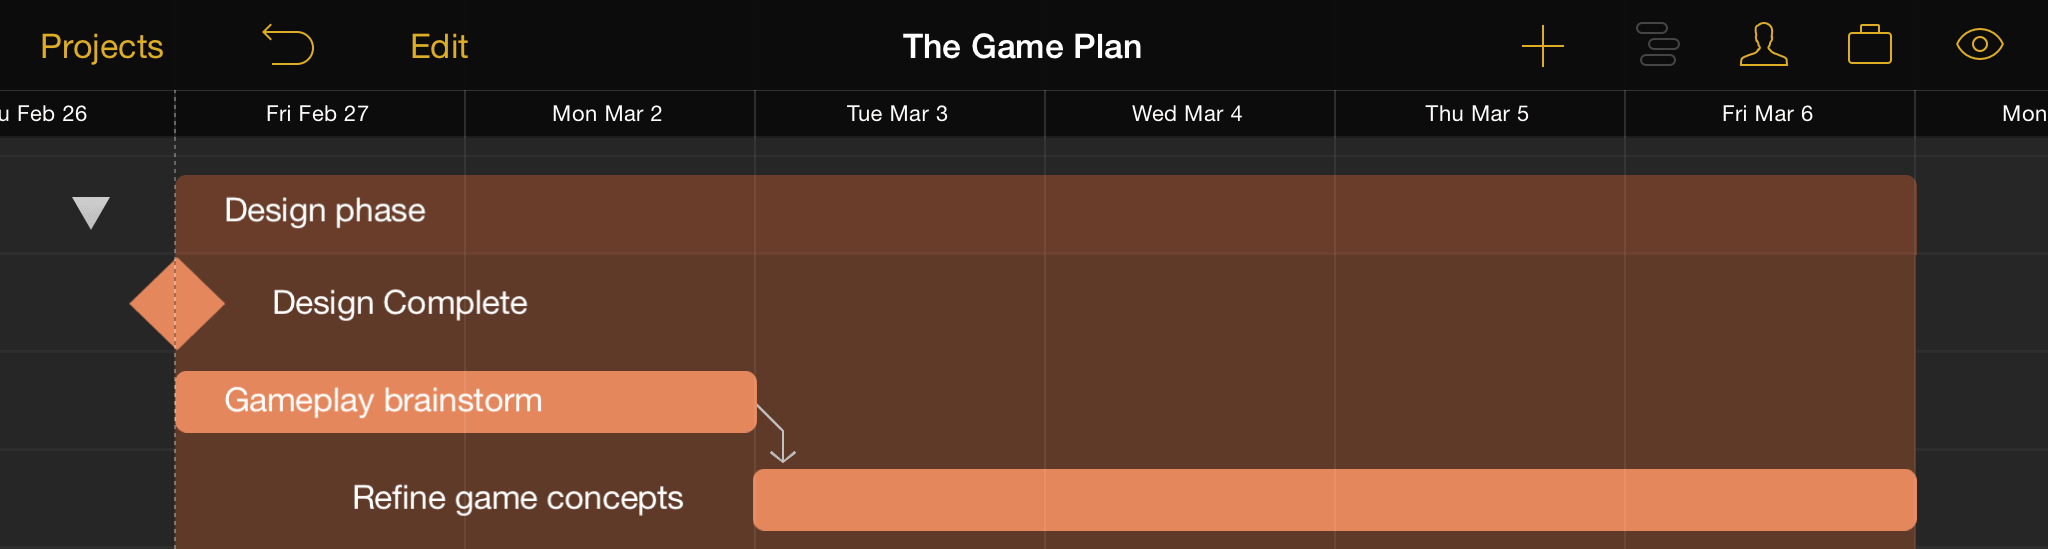
After organizing tasks and milestones into groups and estimating the time required to complete them, we’re starting to get a better picture of how our project will take shape. At this stage our Gantt chart looks something like this:
Step 9: Connect Tasks with Dependency Lines
We can’t complete all of our tasks simultaneously! Even if we had the resources to do so, some parts of the project can’t happen until others are finished. Thankfully, the pieces are now in place to establish the ways that those tasks are dependent on the status of others. There are four ways that dependencies can exist:
Finish → Start dependencies are the most common type, indicating that when task A finishes, task B can start.
Start → Finish dependencies indicate that when task A starts, task B can finish.
Start → Start dependencies indicate that when task A starts, task B can also start.
Finish → Finish dependencies indicate that when task A finishes, task B can also finish.
Connecting tasks in the Gantt view is as easy as tapping a selected task again, which puts dependency arrow handles on either side of the task bar.
Drag an arrow from the selected task to another task to create a dependency. The type of dependency is based on the start- and end- points of the arrow: dragging an arrow from the completion of one task to the beginning of another will create a finish → start dependency, and so on.
While in edit mode, you can use the Connect/Disconnect button to add finish → start dependencies or remove dependencies between any number of selected tasks simultaneously.
Step 10: Create Hammock Tasks
A hammock task is one in which the duration is dependent on both when the previous task ends, and the next task starts. This type of task is useful when facing a hard deadline and deciding what can be compressed if the project is running behind schedule, or if external factors influence when parts of the project must happen.
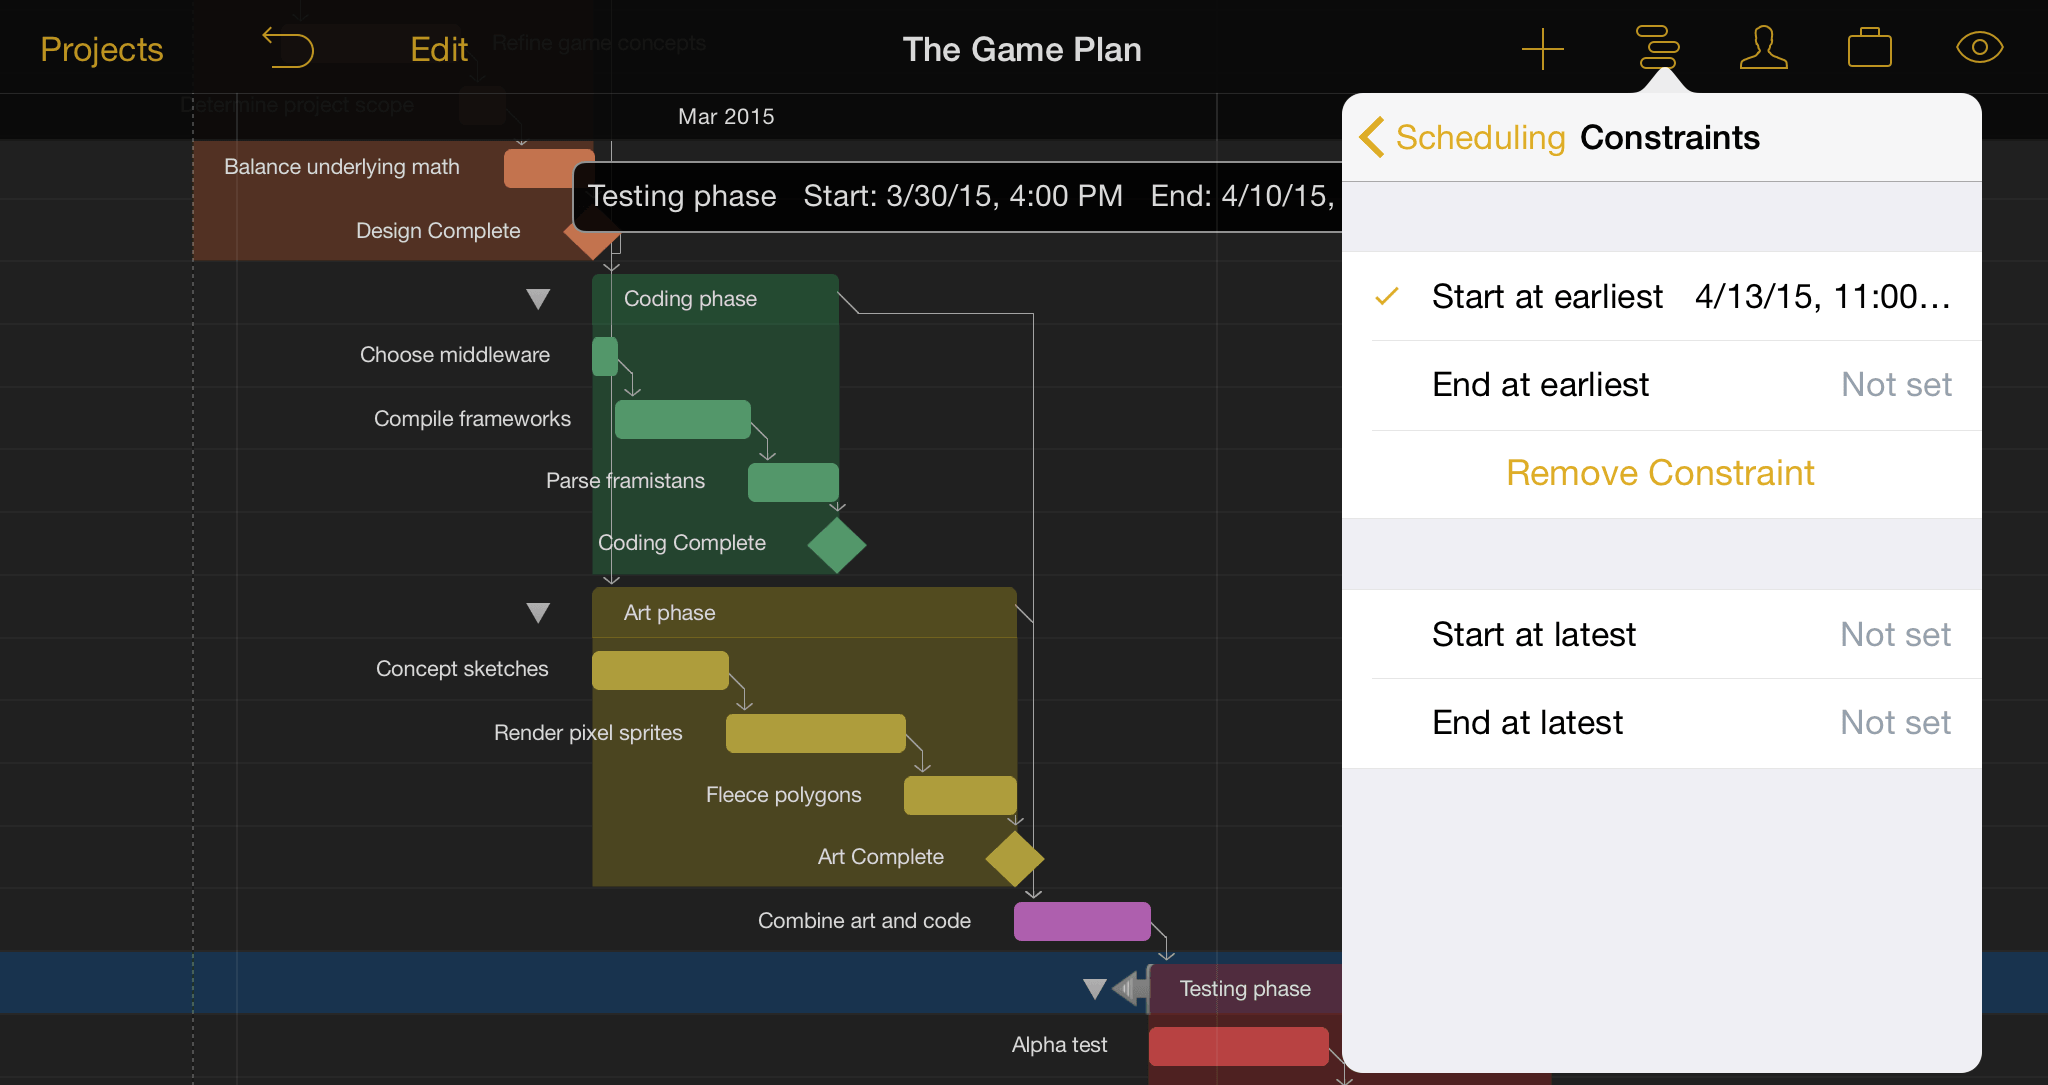
In our example we decide that alpha testing for the game should begin as soon as possible after April 13th, since that’s when we receive our prototype testing hardware. We give the "Testing phase" group a start constraint of April 13th by choosing Constraints in the Scheduling pane of the Task Inspector, and setting Start at earliest to April 13th 11:00 AM.
Note
A Start at earliest constraint can also be set by selecting a task and dragging it along the timeline by the left handle that appears at its edge.
We decide that the "combine art and code" task is the one that’s going to give if the going gets rough. To convert it from a task of fixed duration to a hammock task:
- First, make sure both the "coding" group and the "art" group are linked to "combine art and code" with finish → start dependencies.
- Then, create a start → finish dependency originating from the testing phase and linking to "combine art and code."
- Finally, select the "combine art and code" task and open the Task Inspector. The fourth task type, Hammock, is available for selection.

Step 11: Create Resources
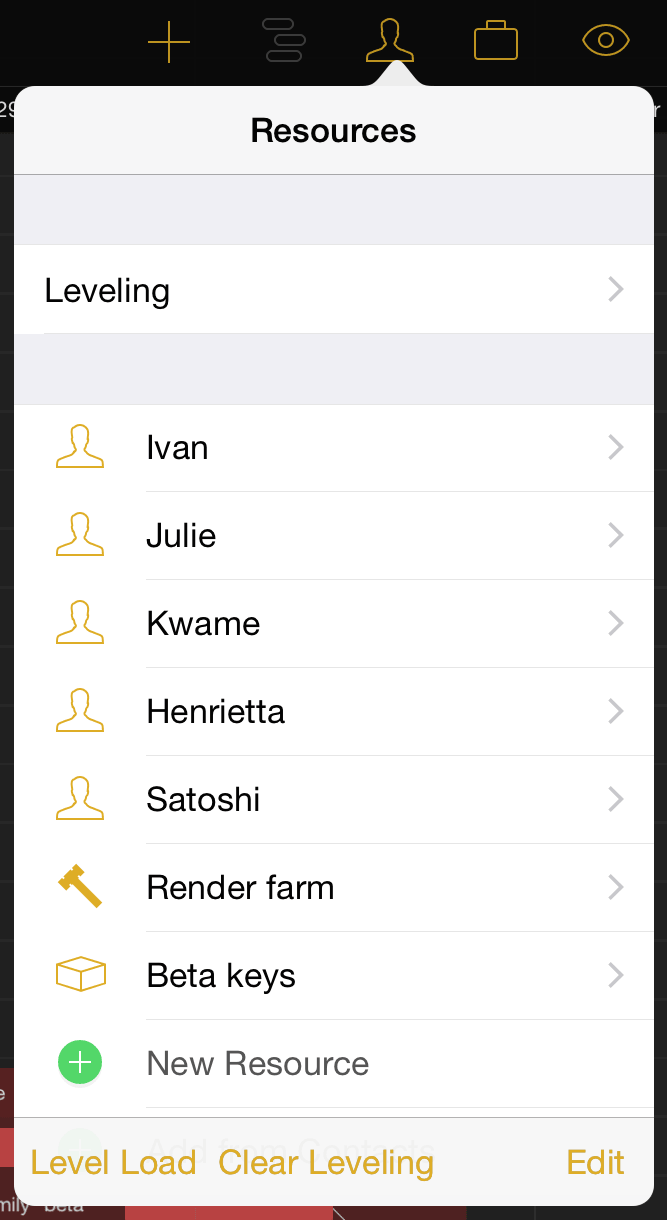
Now it’s time to start adding the team members, equipment and materials we’ll be using to bring the project to fruition. Every person, piece of infrastructure, and raw ingredient that contributes to reaching the project’s goal is counted as a resource, so let’s open the Resources Inspector and get started.
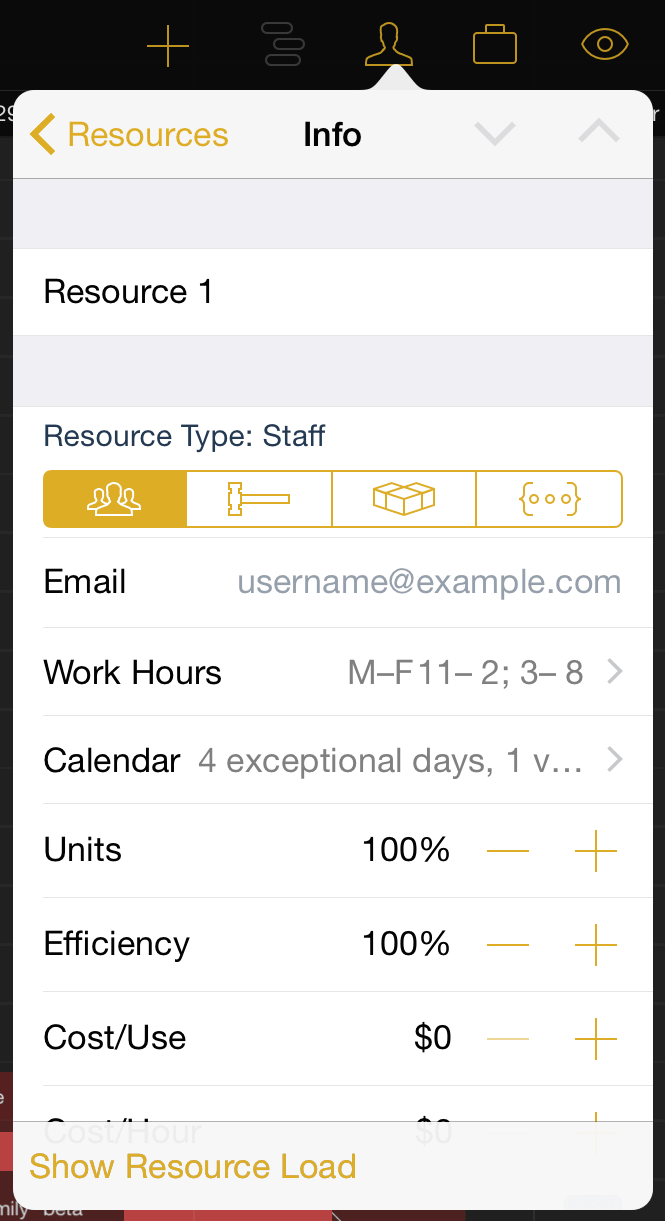
One resource has been created by default for our project – a staff member. Tap it to access and edit their details, including name, resource type, and personal calendar.
When balancing workloads across multiple projects a staff member’s email address is used as their unique identifier, so make sure their address is consistent across all the projects they’re participating in.
After editing the default resource we’ll create a few more to fill out the list of our team members and the technology they’re using to bring the game to life. Remove or rearrange resources at any time using the Edit button.
Step 12: Assign Resources
Assign resources to tasks by selecting the desired tasks in the Gantt view (multiple tasks can be selected simultaneously using edit mode), then opening the Task Inspector and switching to the Assignments tab.
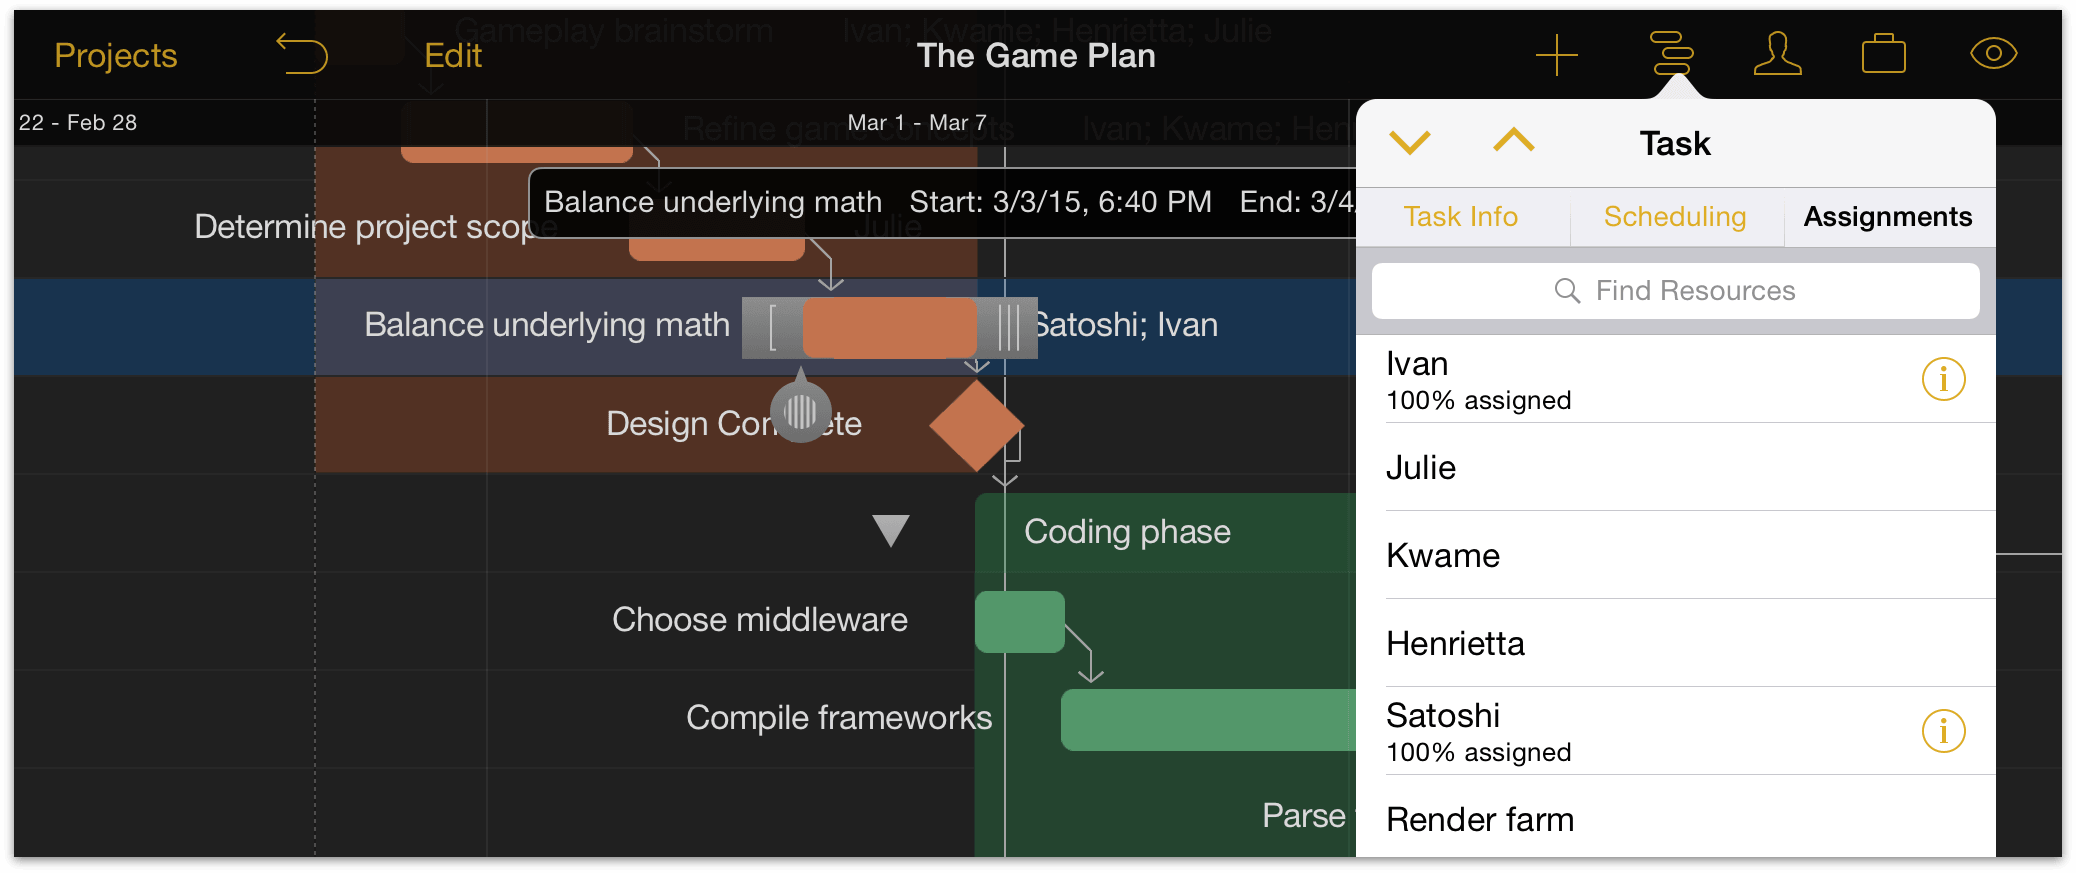
Tap each resource you’d like to assign to the selected task(s) and their names will appear next to each task that they’re assigned to.
Step 13: Level Resources
After assigning team members and equipment to the tasks that make up your project, you can ensure the team is at its most productive by leveling the workload across your resources and tasks.
To level the resource workload for your project, open the Resources Inspector and tap Level Load. Unless your staff is already in the optimal configuration you’ll see the tasks in the Gantt view shift to accommodate the most efficient use of your resources’ time.
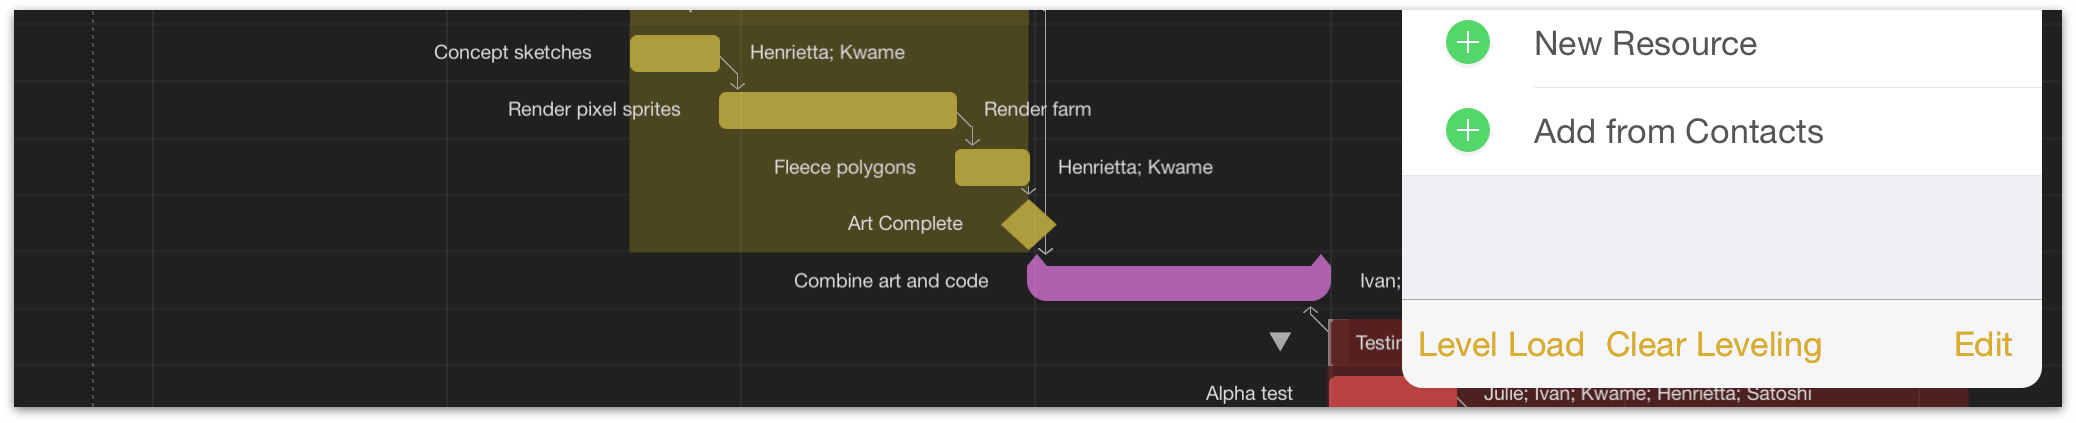
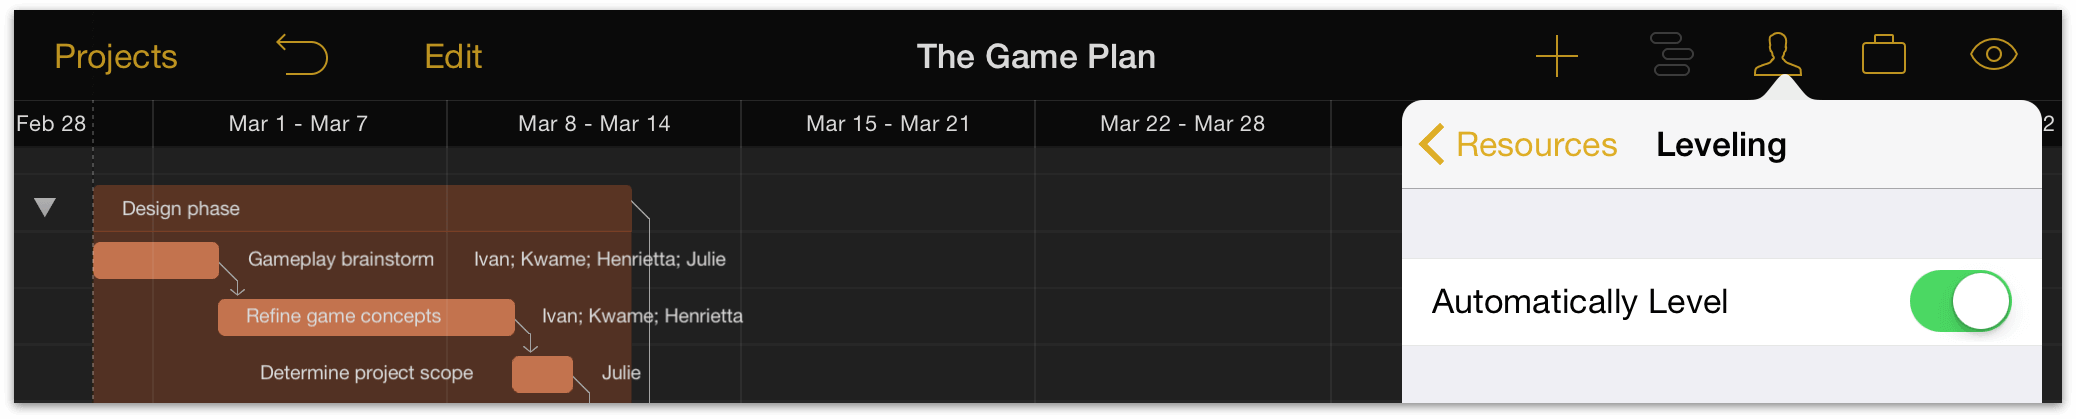
Optionally, choose Leveling from the Resources Inspector and turn on Automatically Level to have OmniPlan optimize your resource use every time a change is made to your project.
Step 14: Set the Baseline
With tasks set and resources assigned and leveled, the state the project is in now may be a glimpse at its fate in the best of all possible worlds – one where unforeseen hindrances don’t bog down progress, and where optimistic estimations rule the day.
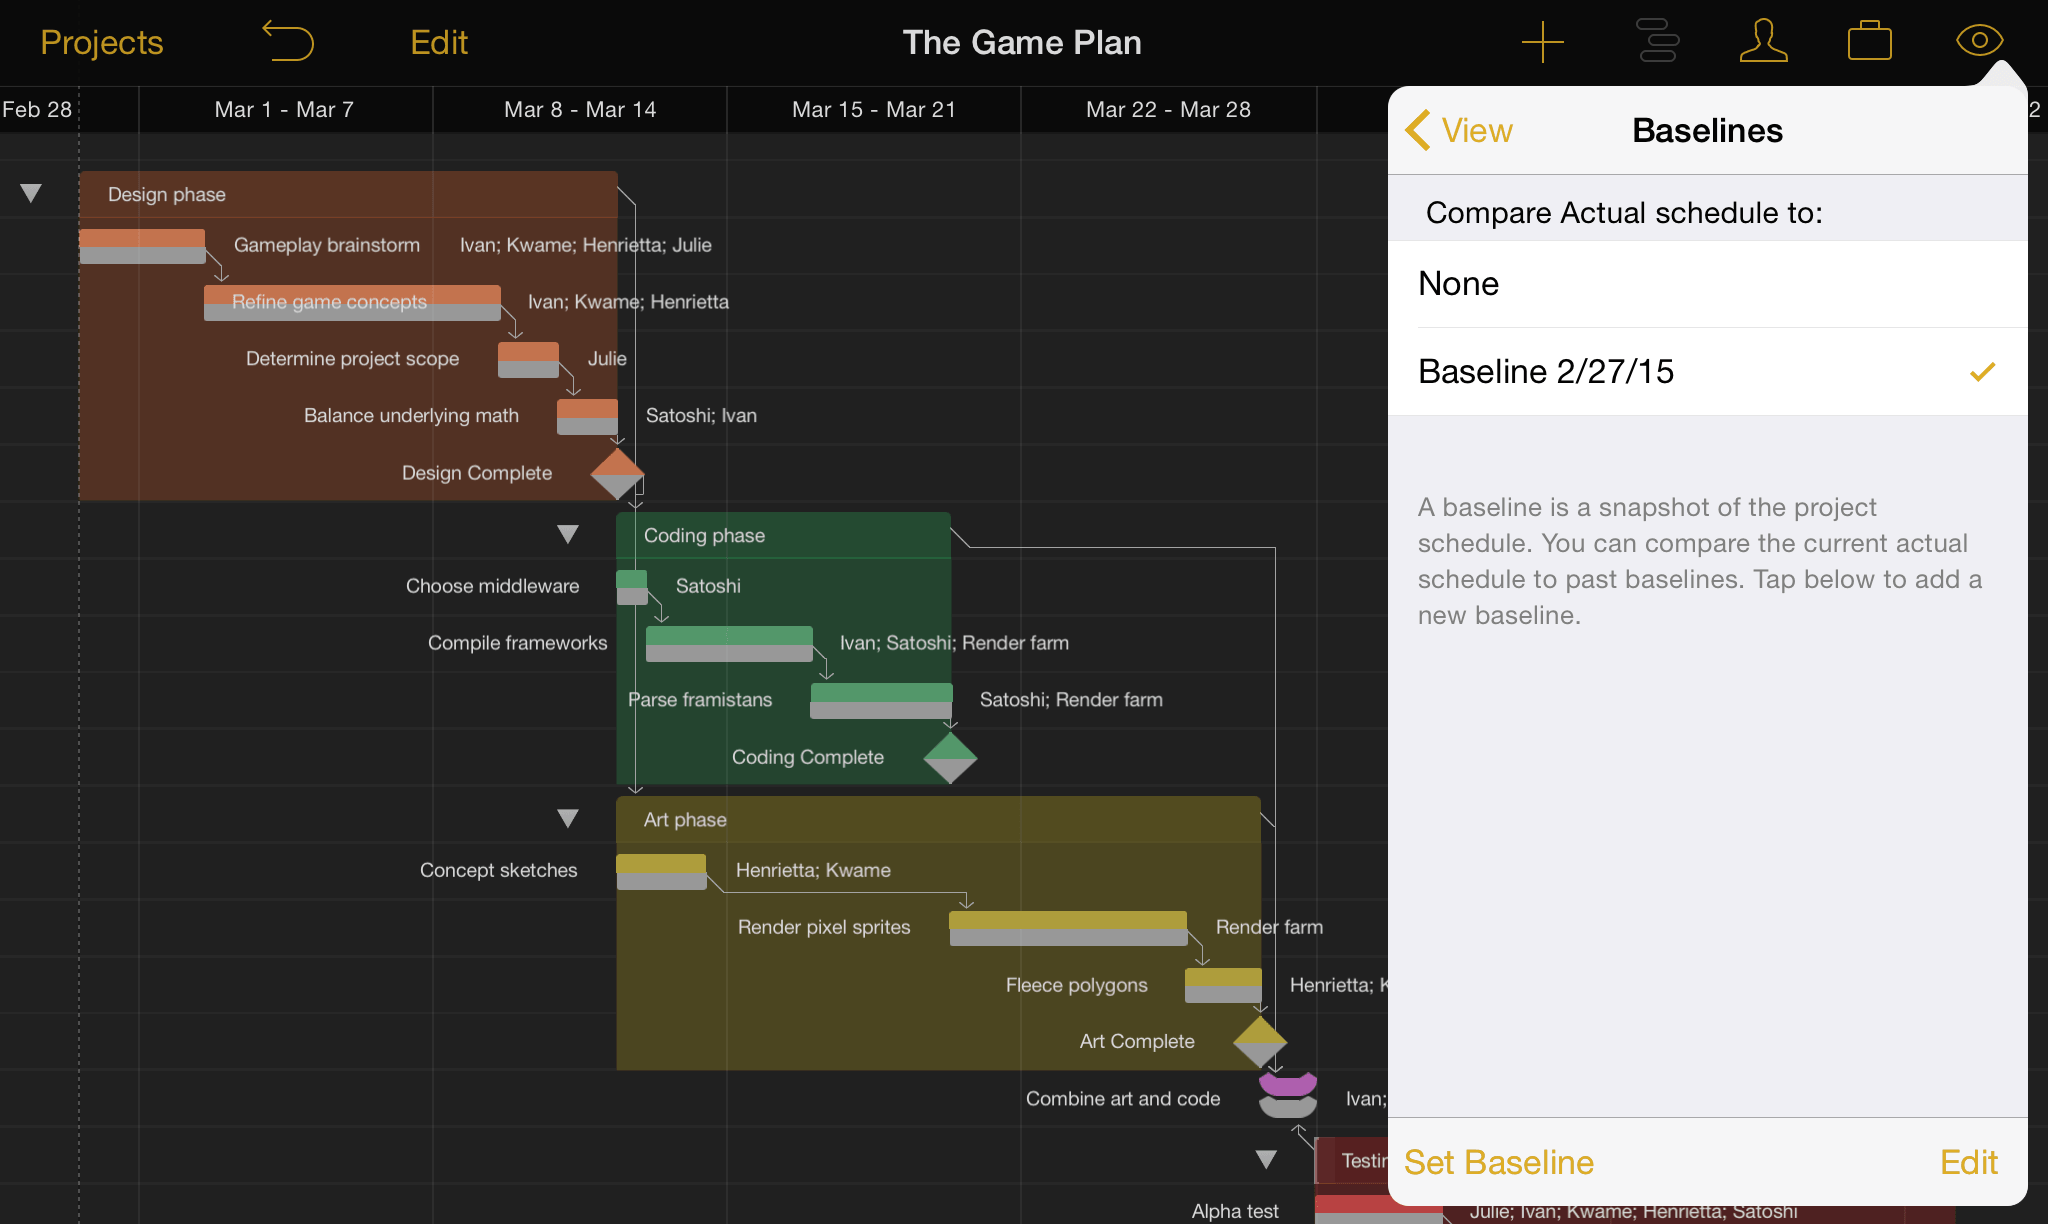
This is the world that is captured when we set a baseline for progress, a feature used to compare how the project is actually doing against initial expectations, so milestones and resource allocation can be adjusted accordingly.
To set a baseline, open the View Inspector and tap Baselines. Tap Set Baseline and enter a name (the current date is the default); it’s now selected for comparison, and can be compared against subsequently set baselines as the project progresses.
Step 15: Update Task Completion
As work on the project begins, you can track progress against the baseline you’ve set by tapping a task currently in progress and moving the slider along to the task’s completion percentage (this can be edited in the Task Inspector as well).
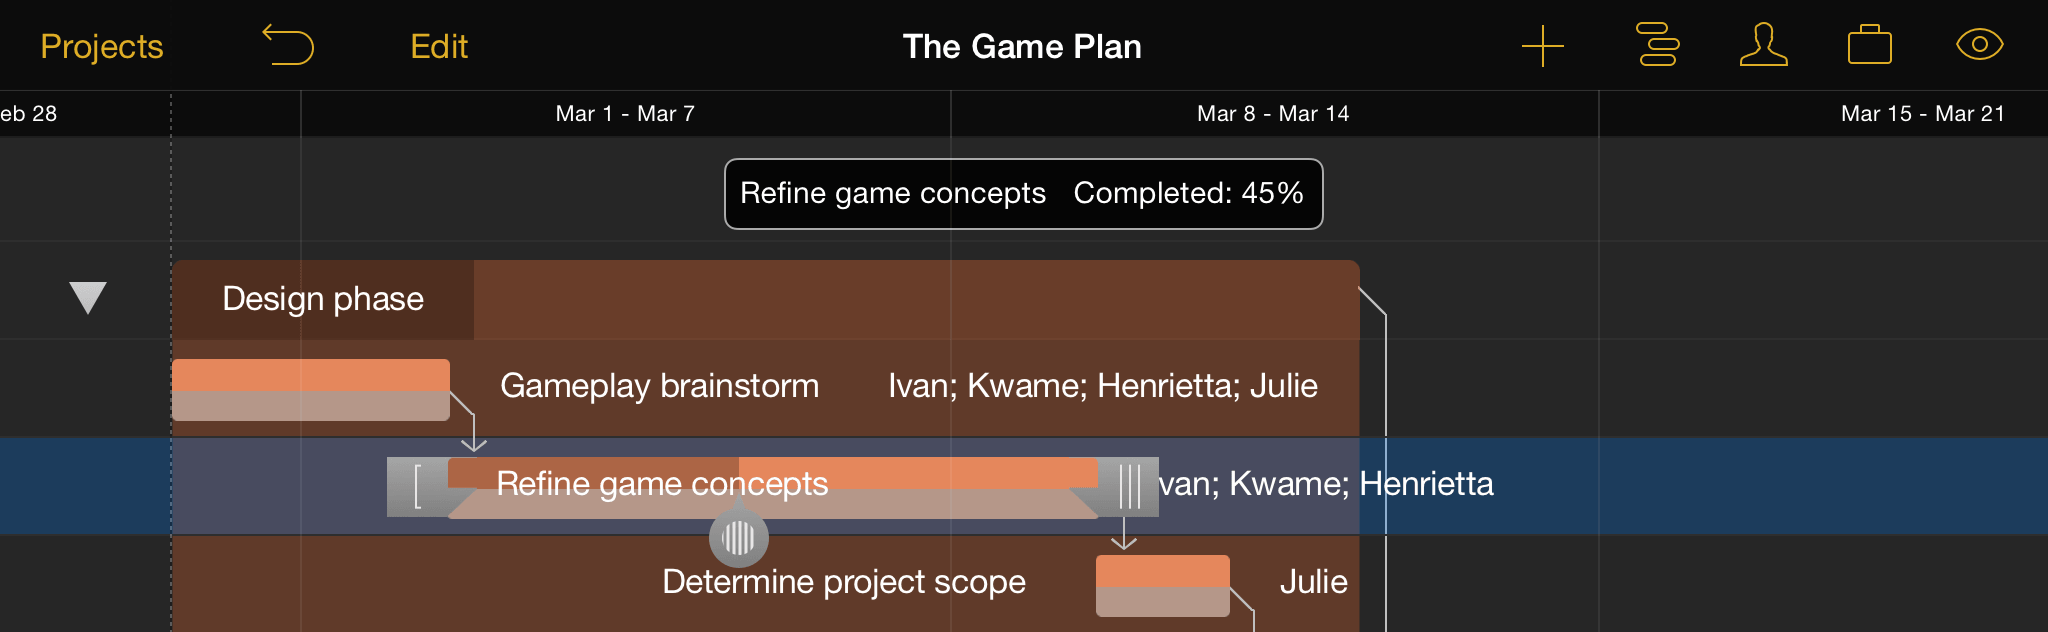
If a task is behind schedule, update the expected duration and level resources again to compensate for the additional time needed.
Step 16: Resolve Violations
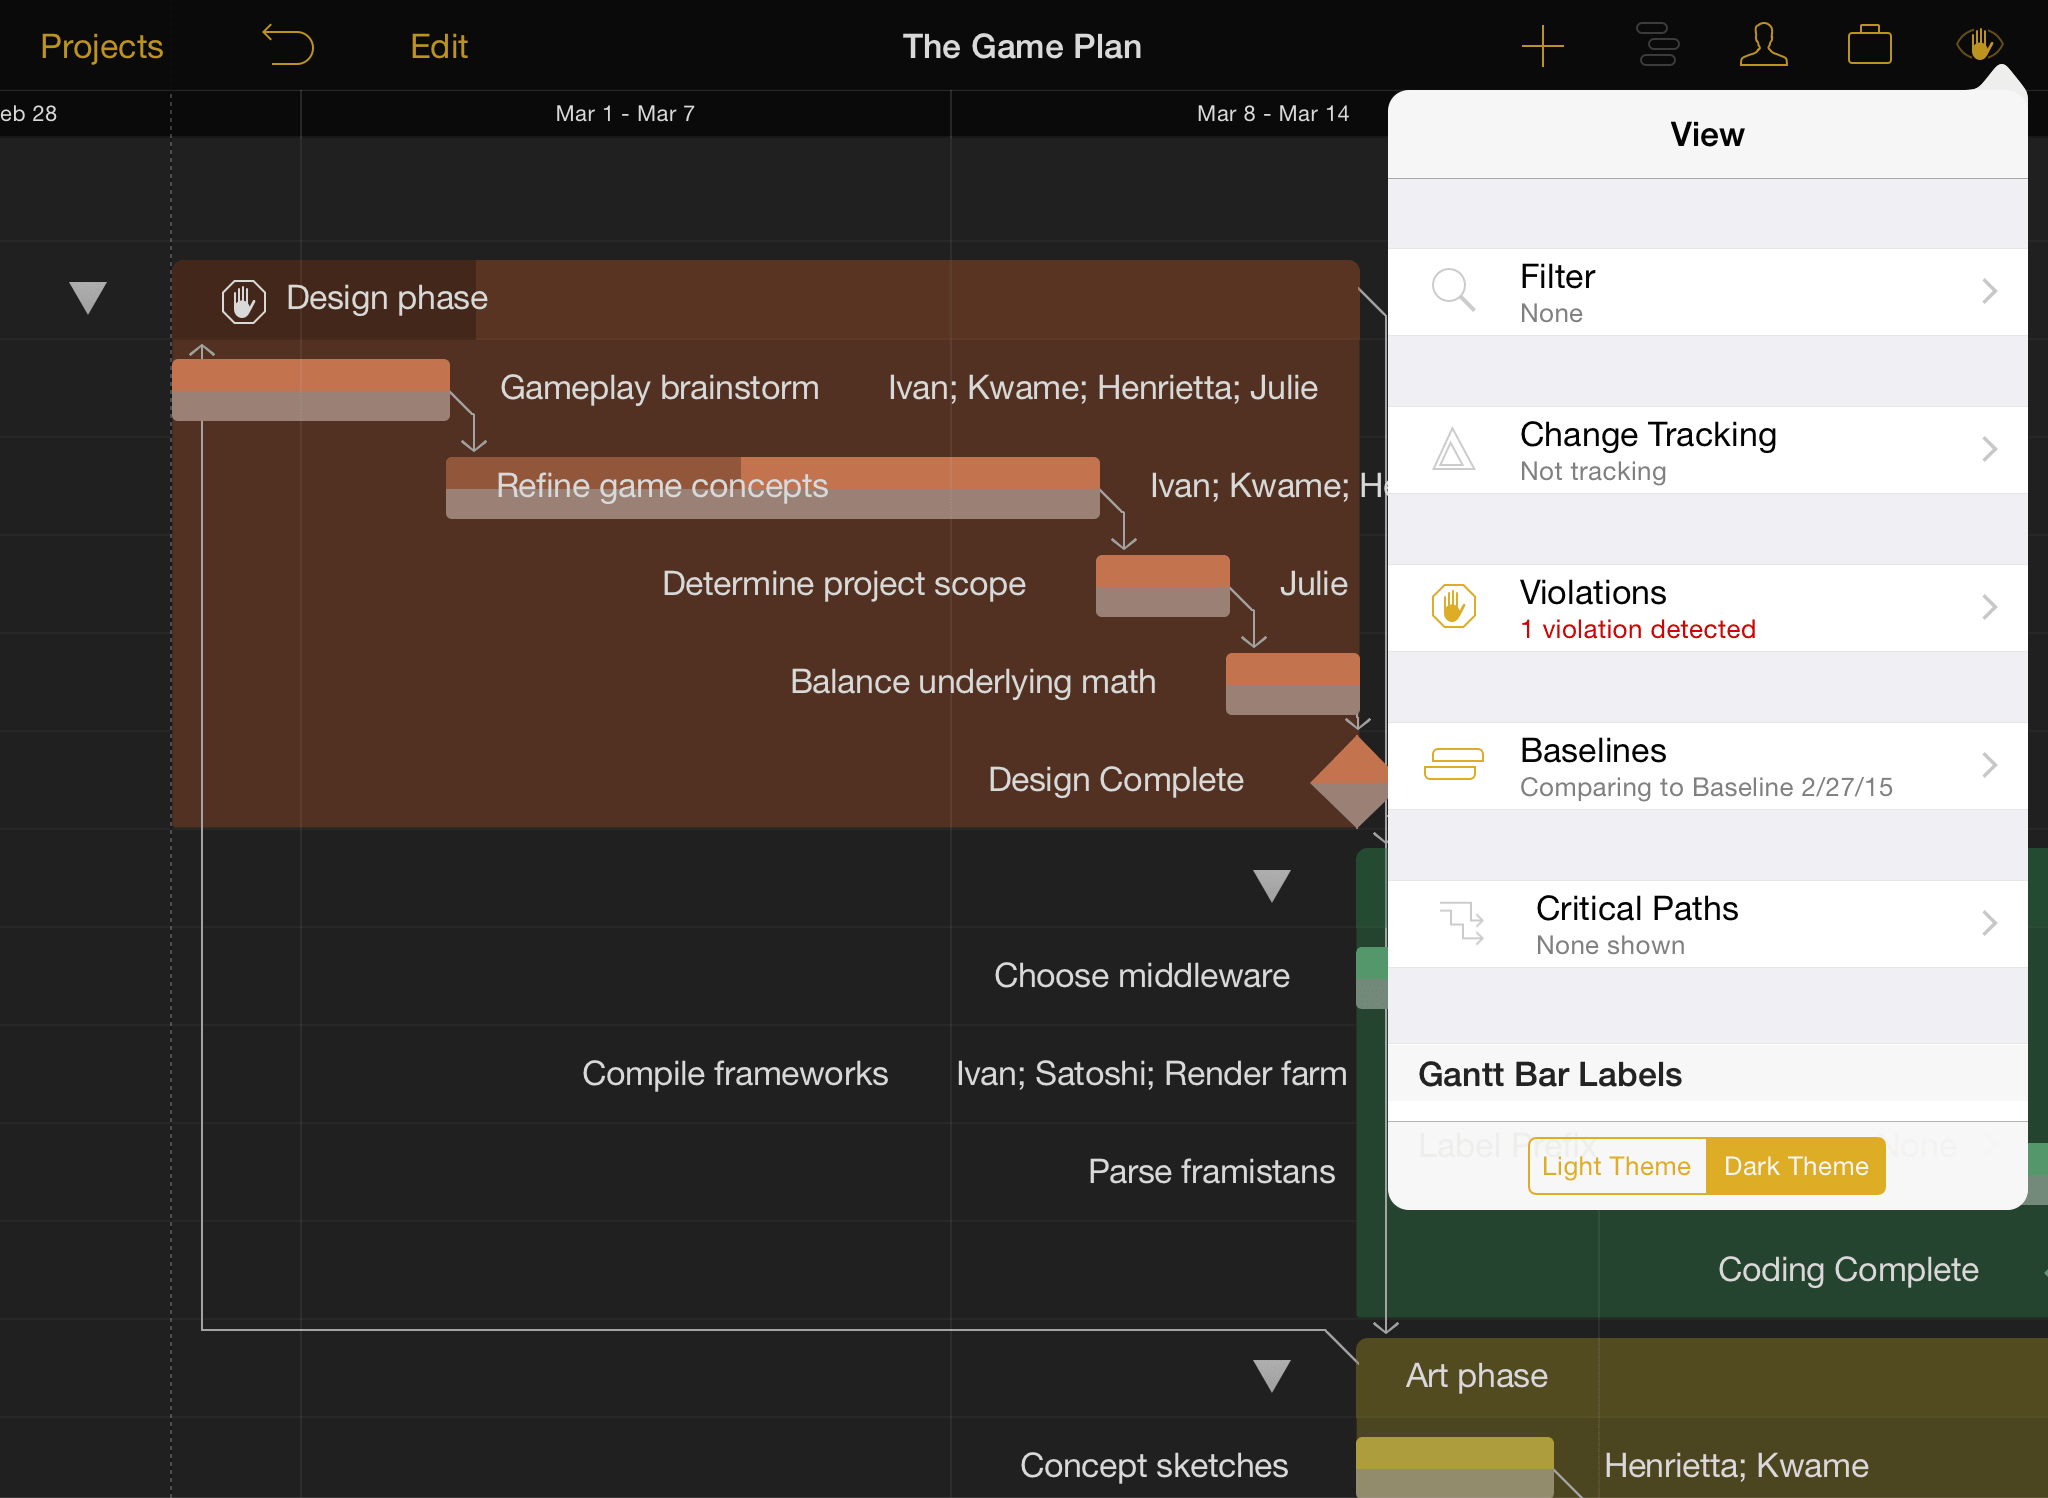
Occasionally situations will emerge that break the rules of logic you’ve set up for your project. When one of these occurs, OmniPlan will let you know with an indicating a violation related to the adjacent task.
Violations can be fixed by opening the View Inspector and tapping Violations. You’ll find a description of the problem and a command to tap that should resolve it.
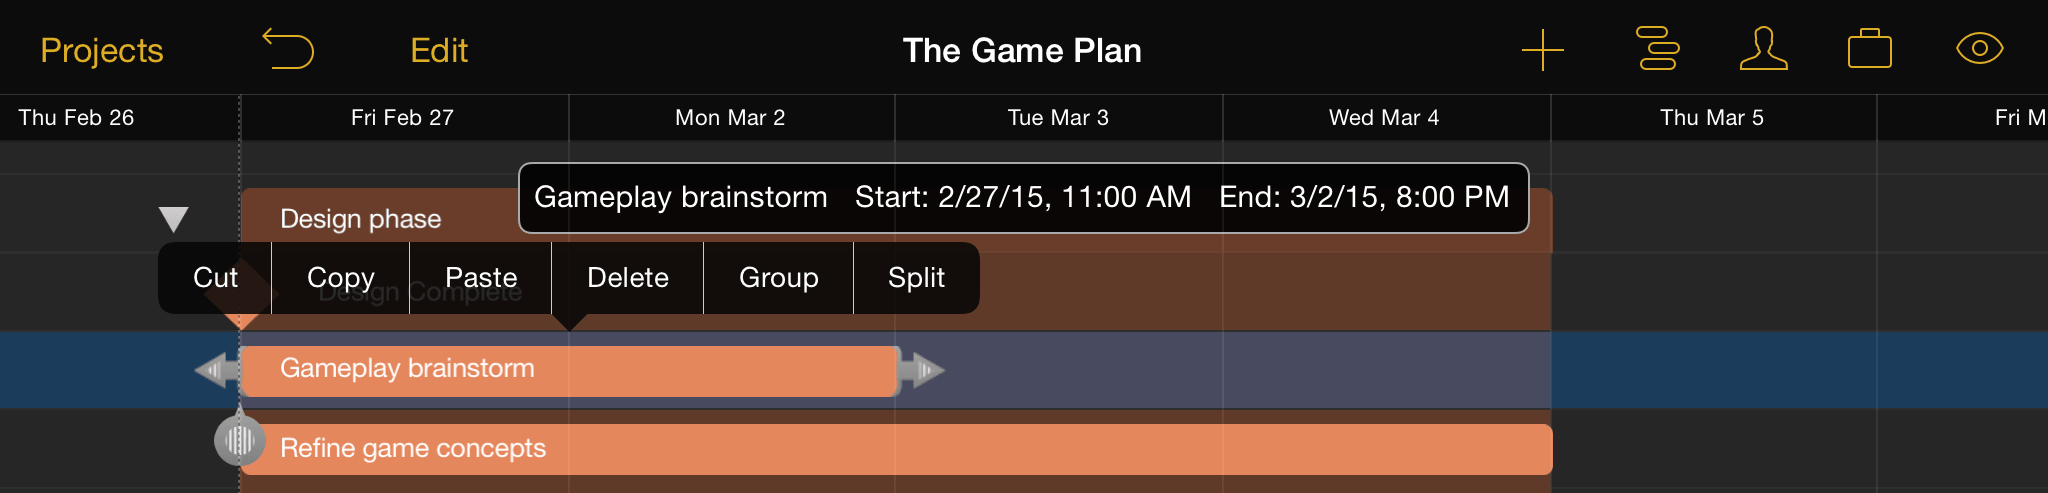
Step 17: Split Tasks
Whether because a key collaborator is on vacation or another part of the project has taken priority, suspending work on a particular task can be very helpful. When you want a resource or team member to devote time to something other than the task they’re currently assigned to, splitting the task into parts around the "time out" period is an ideal solution.
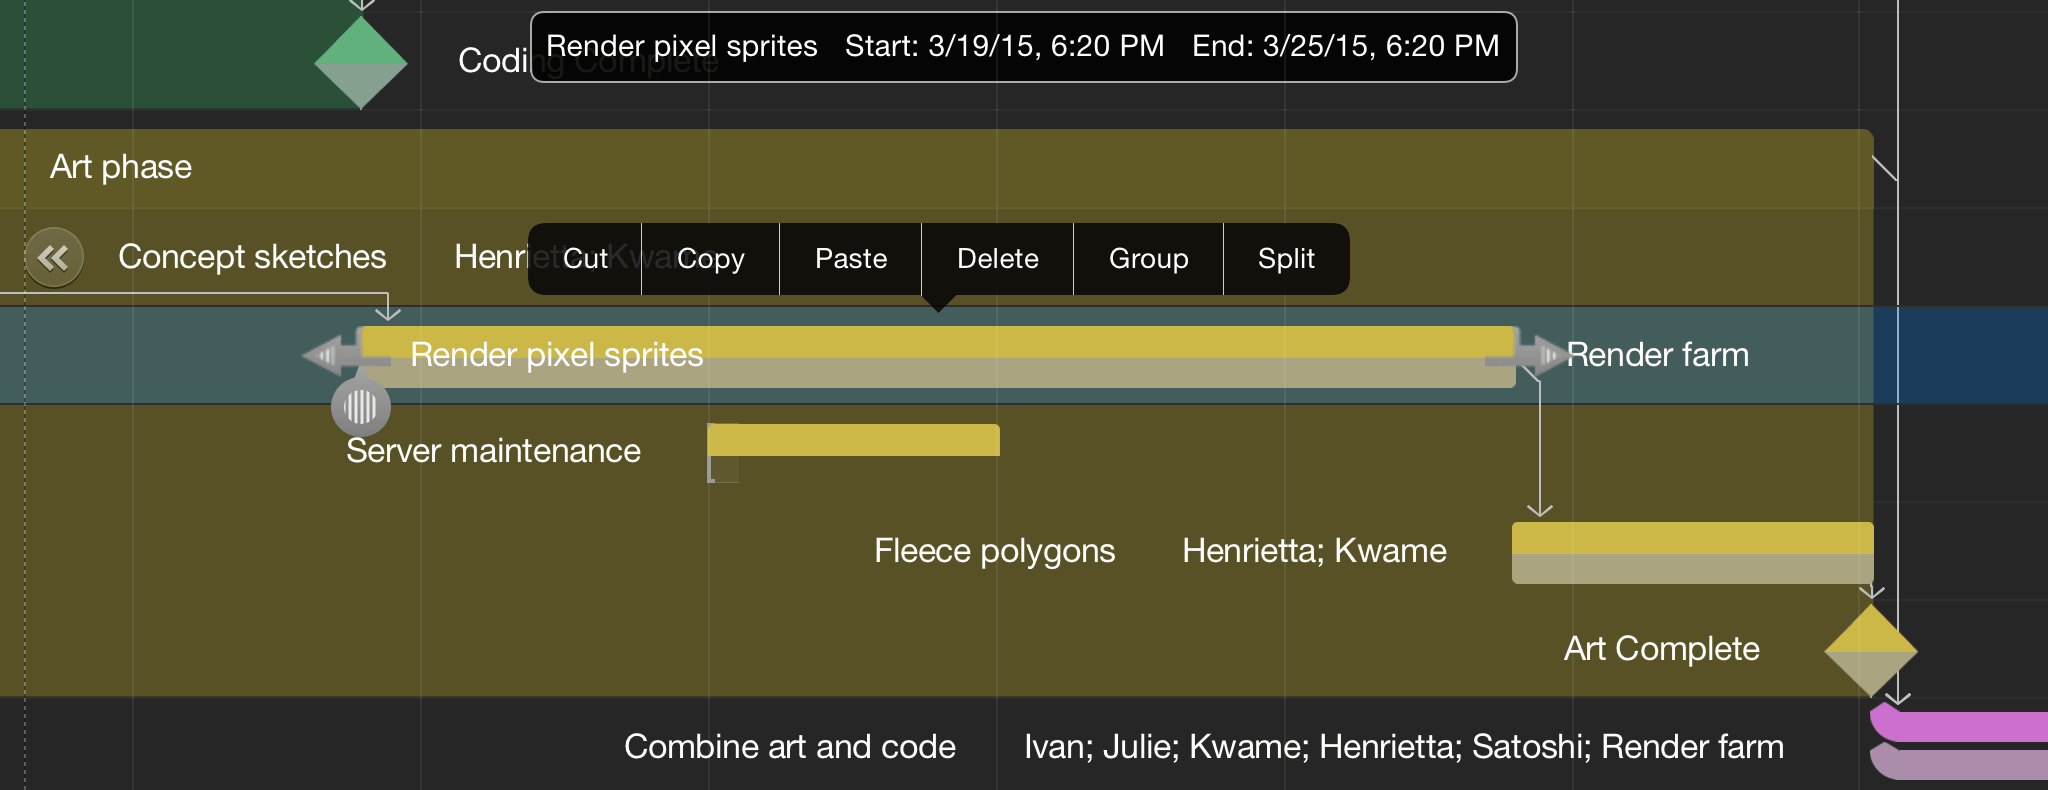
To split a task, press and hold it in the Gantt view until the contextual menu appears, then tap the right arrow and choose Split. You’ll be asked to choose the duration of each segment of the task, and the date and time you want the task to resume after the break. If the resource will be absent during the split, remember to indicate this on its schedule in the Resources Inspector.
Note
The schedules of individual resources (usually workers) can be customized to account for personal vacation or sick days by selecting the resource in the Resources Inspector and choosing Calendar.

After splitting a task it’s always a good idea to level to be sure the split is the most efficient way to manage the task at hand given the project’s available resources and time constraints.
Warning
A split task may mysteriously re-merge after leveling. If this isn’t what you want, make sure that Allow Splitting is turned on in the Resources Inspector’s Leveling submenu.
Step 18: Collaborate via Server Repository
On a large project, or one where the collaborators are spread across diverse geographic locations, you may want to have multiple teammembers able to update the project status remotely. OmniPlan makes this easy!
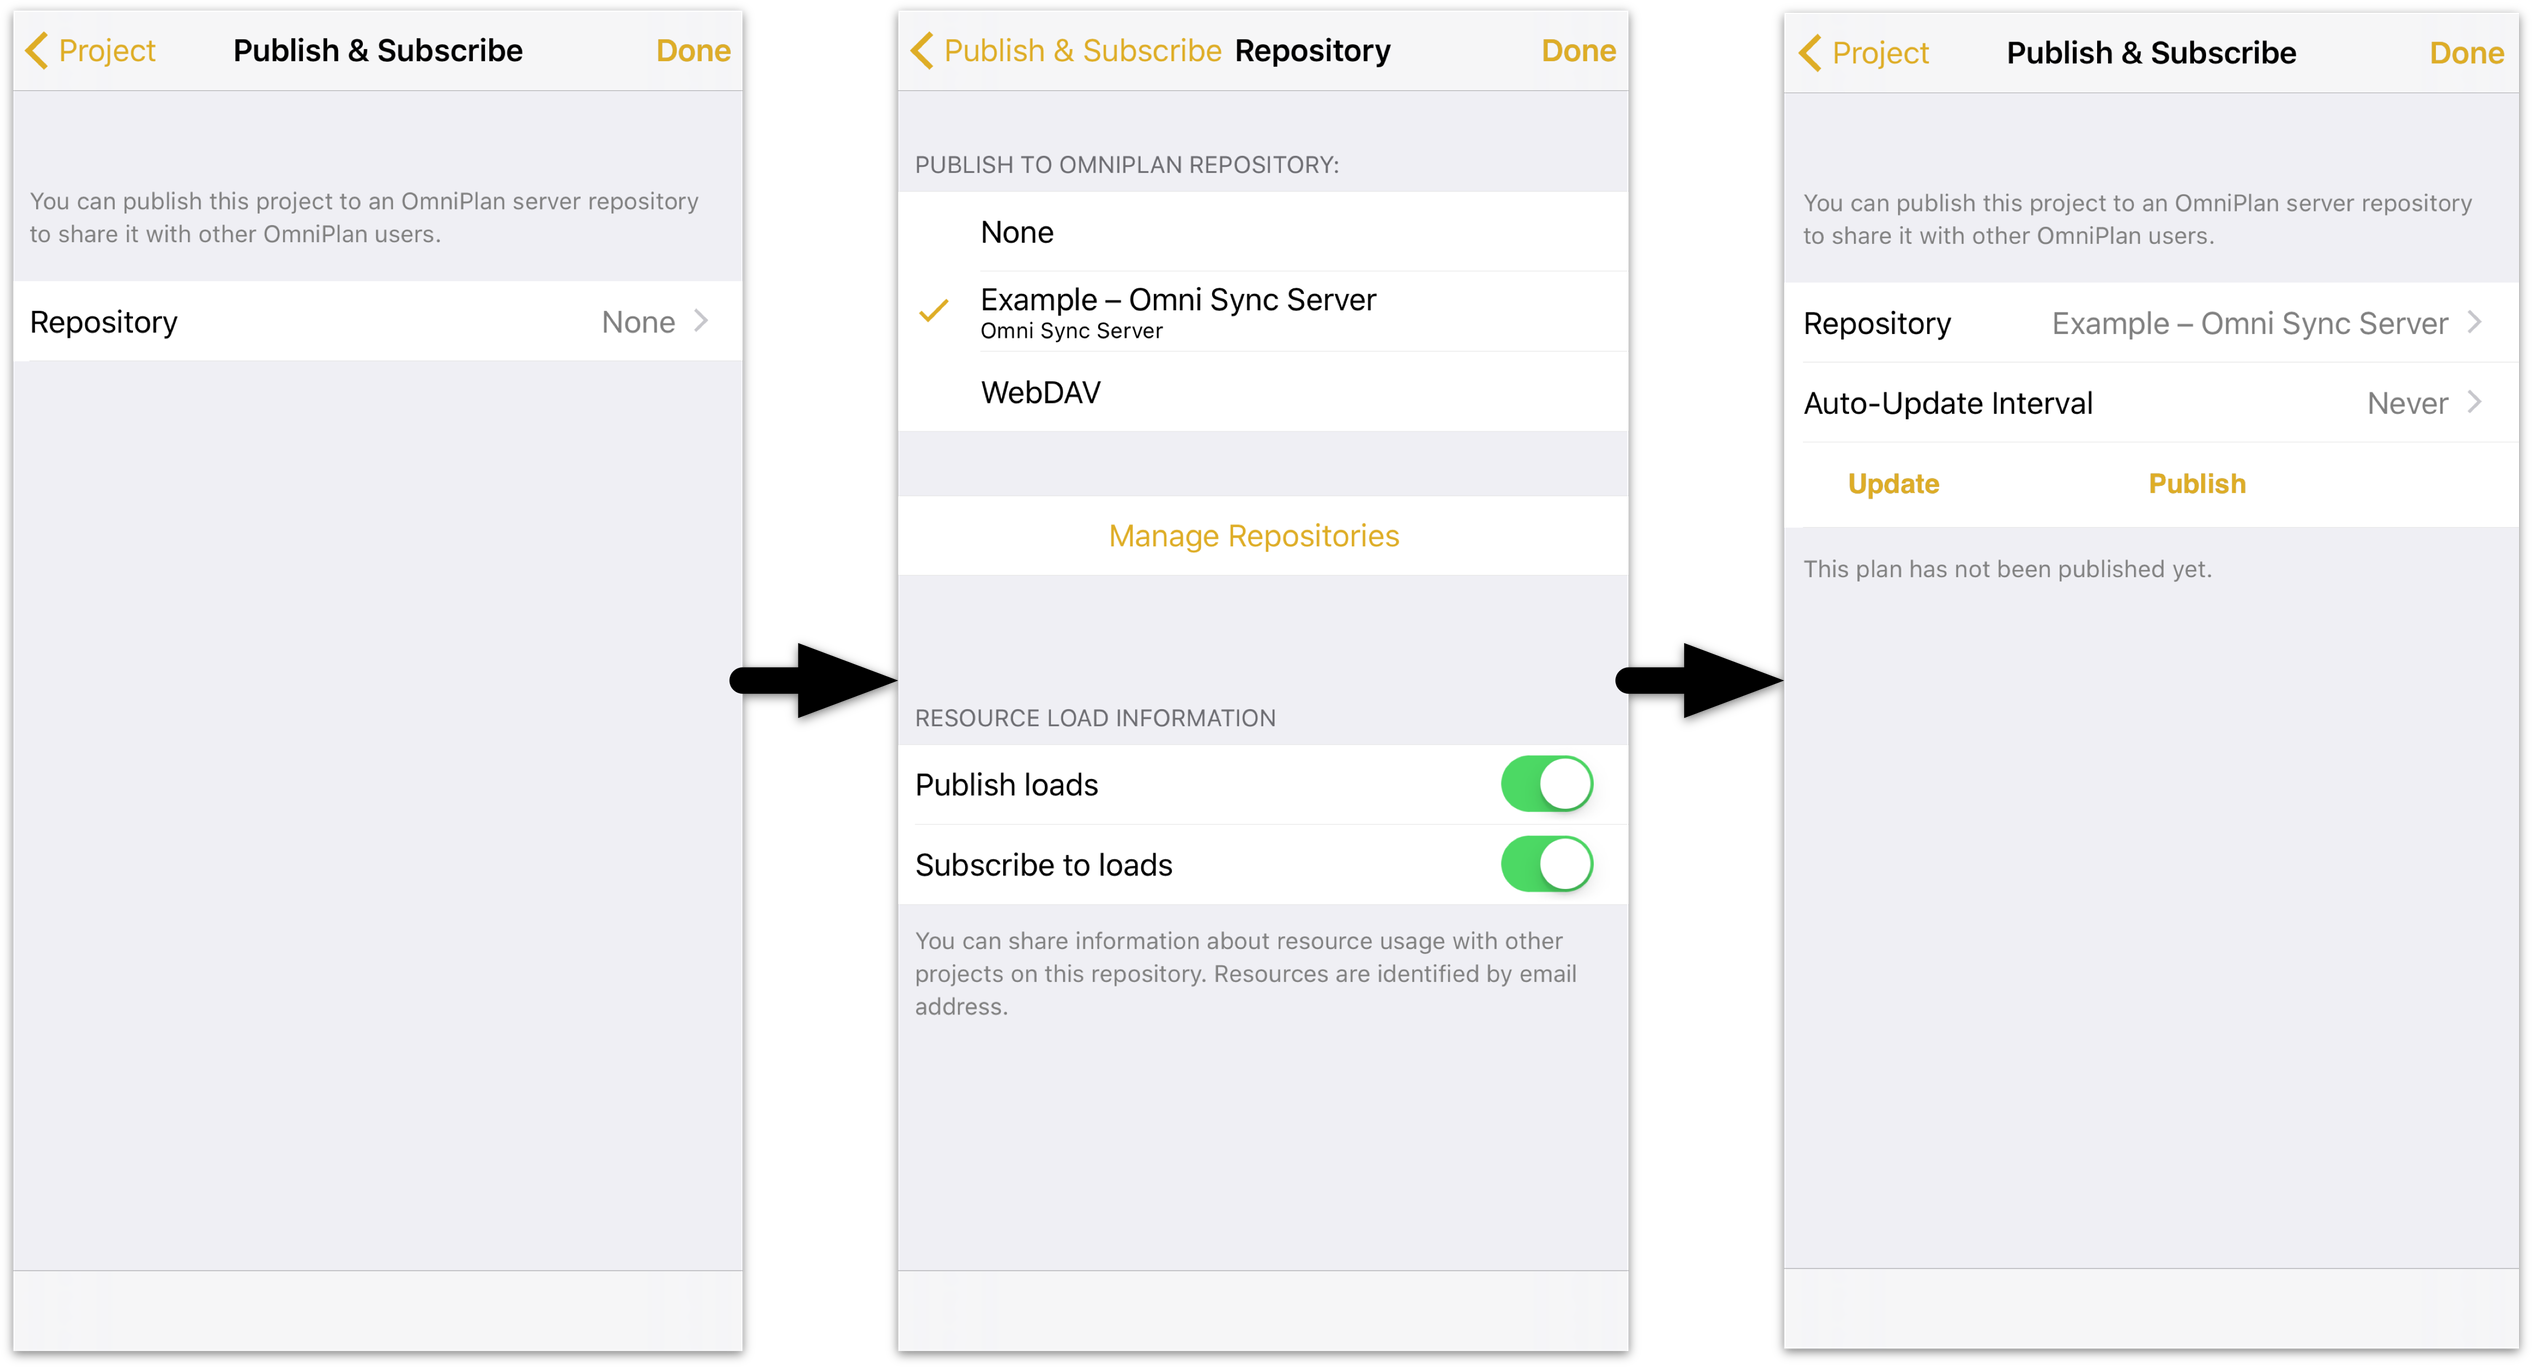
To share the project you’re currently working on, open the project inspector and tap Publish and Subscribe, then Repository. You’ll be asked to choose a repository to sync to; if you don’t have one set up, tap Manage Repositories and see Getting Synced at the beginning of this manual to get started.
After choosing a repository, return to the Sync panel and choose an auto-update interval. This is the frequency with which your project will pull changes from the version stored on the server (you can tap Update to manually cause a sync any time you’d like). When you have the settings the way you want them, tap Publish to bring the project live.
Note
Publication is fully manual to give you complete control over your submissions to the project. Any time you have changes to share, tap Publish to sync them to the server.
When changes come in from other contributors, you can use Change Tracking in the View inspector to review, accept, or reject remote edits to the project.
Step 19: Balance Multi-Project Resource Loads
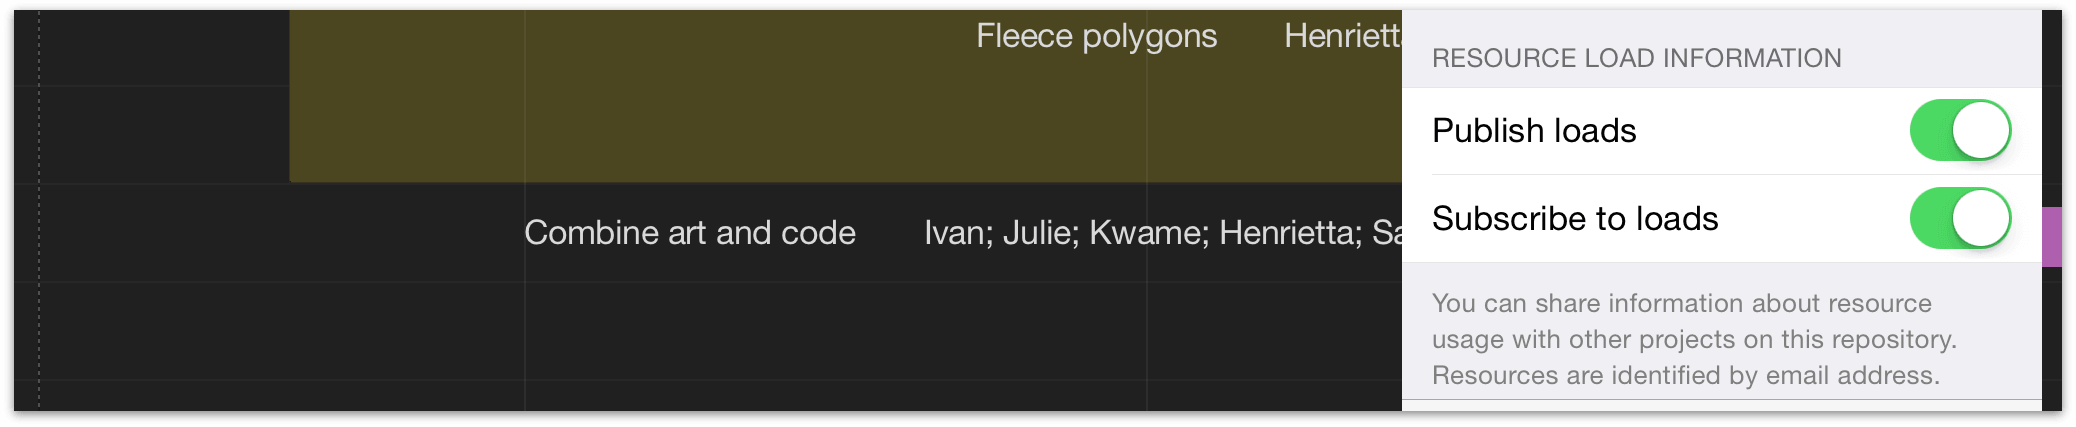
If resources (usually human members of your team) are shared between multiple projects in the same repository, you’ll want to decide in the repository panel whether you’ll publish the current project’s resource loads to other projects and whether the current project will subscribe to the resource loads of others.
Choosing to publish a project’s resource loads means that other subscribing projects will obey its workload information when leveling; if Julie is working on Project A on Wednesday and its loads are being published to Project B, after leveling Project B won’t schedule her to work on Wednesday.
Choosing to subscribe to resource loads means that the project will obey all constraints by projects in the repository that are publishing their loads. By using only the publish or subscribe option a hierarchy of priority can be established between simultaneous projects — a project that only publishes will always have its needs met first, while a project that only subscribes will be assigned resources only when they can be spared.
By both publishing and subscribing, projects are treated as equals — and if a project neither publishes or subscribes, it ignores external factors and syncs only with its own updates.
Note
The key to balancing resource loads across projects is that individual resources be tagged and identified by a unique email address that is shared across all projects. This can be set using the Resources Inspector.