Getting Synced
There are two sync methods available in OmniPlan 2 for iOS: OmniPresence sync, intended for a single user to keep projects in sync across multiple devices, and publication and subscription to a server repository, useful when multiple users need to contribute to a communally shared project. This chapter describes setting up sync in these two distinct ways.
Single User Sync with OmniPresence
By default, OmniPlan stores files locally on your iOS device. As mentioned in the previous chapter, Using the Document Browser, your files are saved in the Local Documents folder on the device. But now that OmniPlan works across iOS devices, you can consider storing your files in the cloud. When you do, your files are accessible on your iPad, iPhone, iPod touch (5th Generation or later), and also on your Mac if you use OmniPlan there, too.
You can sync OmniPlan files (those ending with a .oplx file extension) with OmniPresence to Omni Sync Server, or to another WebDAV-enabled server of your choice, and you can add as many cloud accounts as you’d like. For example, you could add a cloud account for personal use alongside separate accounts for different work clients — pretty much whatever you need. The only real limitation is the amount of available storage space on each device.
This section opens up the clouds by showing you how to create and connect to Omni Sync Server via OmniPlan’s built-in OmniPresence.
What Does it Mean to Work in the Cloud?
Working in the cloud sounds kind of cool and futuristic, but what it really means is that your files are safely stored somewhere else with copies of those files stored locally on your iOS device.
Whenever you make a change to a file, the file in the cloud is updated when OmniPlan performs its next sync operation. Of course, this assumes your iOS device is connected to the Internet. And if you aren’t, those changes will sync the next time you are.
Another benefit of storing files in the cloud is that, if you lose or misplace your iOS device, your documents are safe and secure on your cloud provider’s server. All you need to do to access your files is log in to your cloud account, change your password, sync the files with your new iPhone or iPad, and then you’re back in business.
Note
Of course, your files are only as safe as the strength of your password—and this includes using a Passcode (and/or Touch ID) on your iOS device. Don’t use a simple, dictionary-derived password or something that would be easy for anyone to guess, such as the name of your dog whose name and photos are plastered all over Instagram and Facebook.
Choose a strong password—or look to other iOS and Mac apps such as 1Password and its built-in Password Generator—to help keep your cloud account secure. As an additional measure, if your cloud provider offers two-step verification, you should take them up on that, too.
And while most cloud services—including Omni Sync Server—maintain backups, you shouldn’t trust that your cloud provider will help you out in a pinch. Just because you are storing your files in the cloud doesn’t absolve you from backing up your files—you totally should maintain backups of all your stuff! Be sure to regularly backup your iOS device (either to iCloud or to your Mac), and maintain a regular backup schedule for your Mac, too.
Syncing with OmniPresence
We’ll start your journey into the clouds with the path of least resistance; OmniPresence. We built OmniPresence from the ground up as a solution for our users to store files in the cloud. For you, there are two options for storage:
- Omni Sync Server, which is a bank of servers we maintain so you can store files in the cloud. OmniPresence is built into our iOS apps (there’s a desktop app for your Mac, too), so there’s nothing additional to download. All you need to do is sign up for a free Omni Sync Server account.
- WebDAV Connectivity is a hook we provide in OmniPresence so users who wish to maintain their own server can store and sync files. You can connect to your own WebDAV server, a third-party service that you trust, or you can even set up a WebDAV service on your local network using WebDAVNav Server.
Now that you know your choice of paths for using OmniPresence, let’s show you how to set them up in OmniPlan.
Creating an Omni Sync Server Account
If you plan to use Omni Sync Server with OmniPlan, you will need to set up a free account if you don’t already have one. You can create a free Omni Sync Server account online at:
Just go to that page, enter your email address, and click Sign Up. We’ll send you an email with instructions on how to set up your Omni Sync Server account.
When everything is ready to go with your Omni Sync Server account, return to the Locations screen in OmniPlan and then follow along.
Connecting to Omni Sync Server with OmniPresence
If you have an Omni Sync Server account, follow these steps to configure a cloud account:
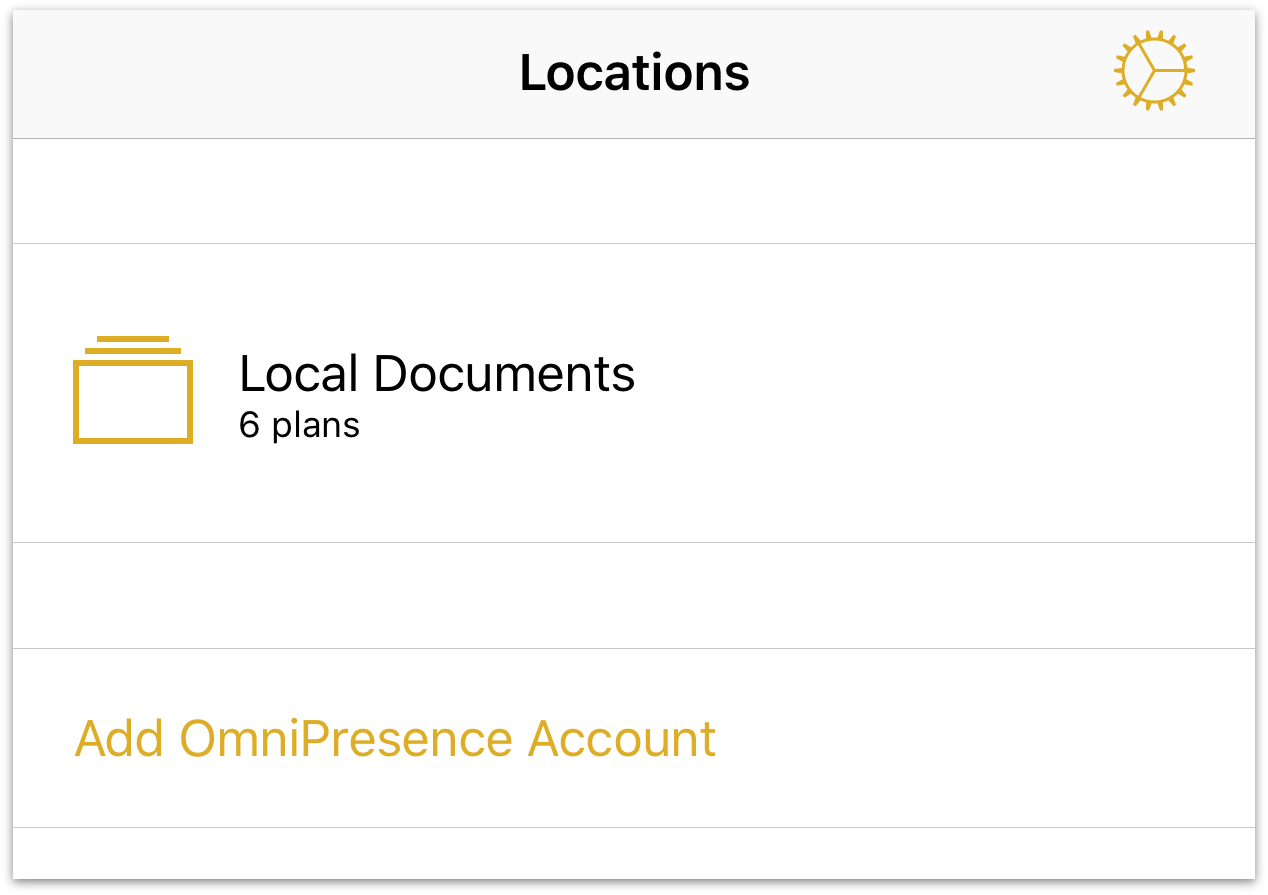
- To start syncing to Omni Sync Server, start on the Locations screen and tap Add OmniPresence Account.
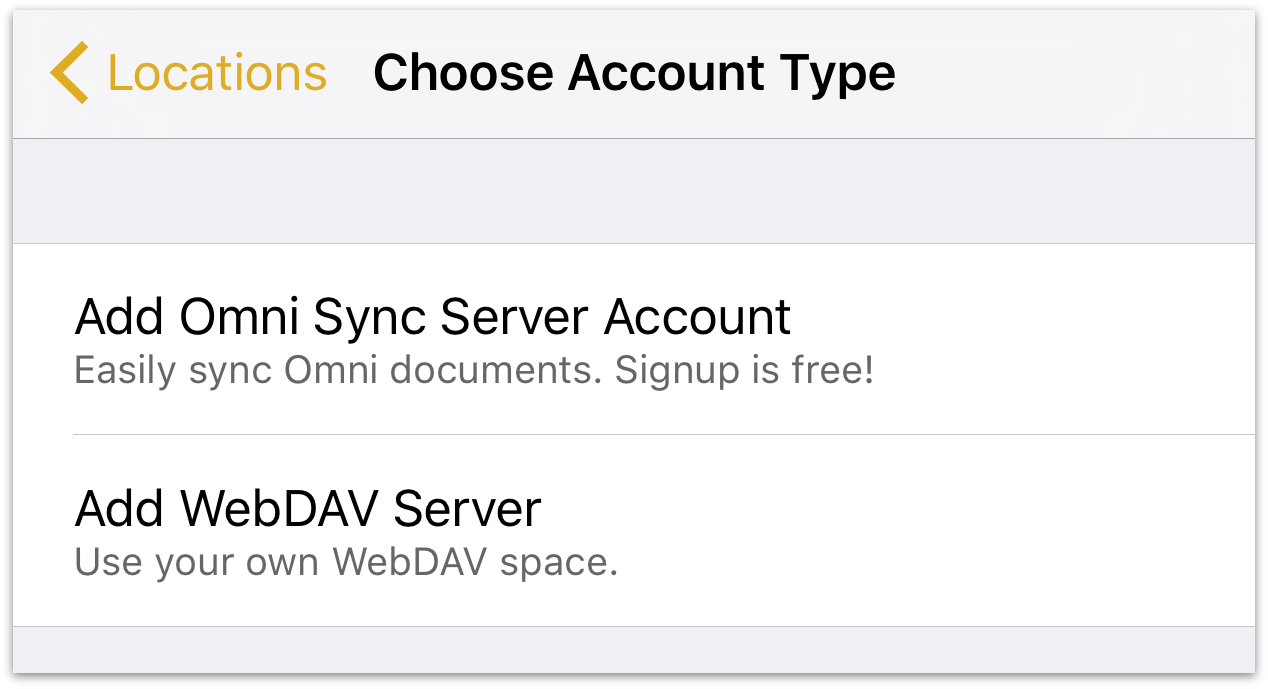
- Next, choose the type of cloud account you would like to use; you can choose between Add Omni Sync Server Account or Add WebDAV Server. The difference between the two is that we host and maintain Omni Sync Server, whereas you would need to find a third-party WebDAV server (or host your own) and entrust them to maintain the server.
Tap Add Omni Sync Server Account.
-
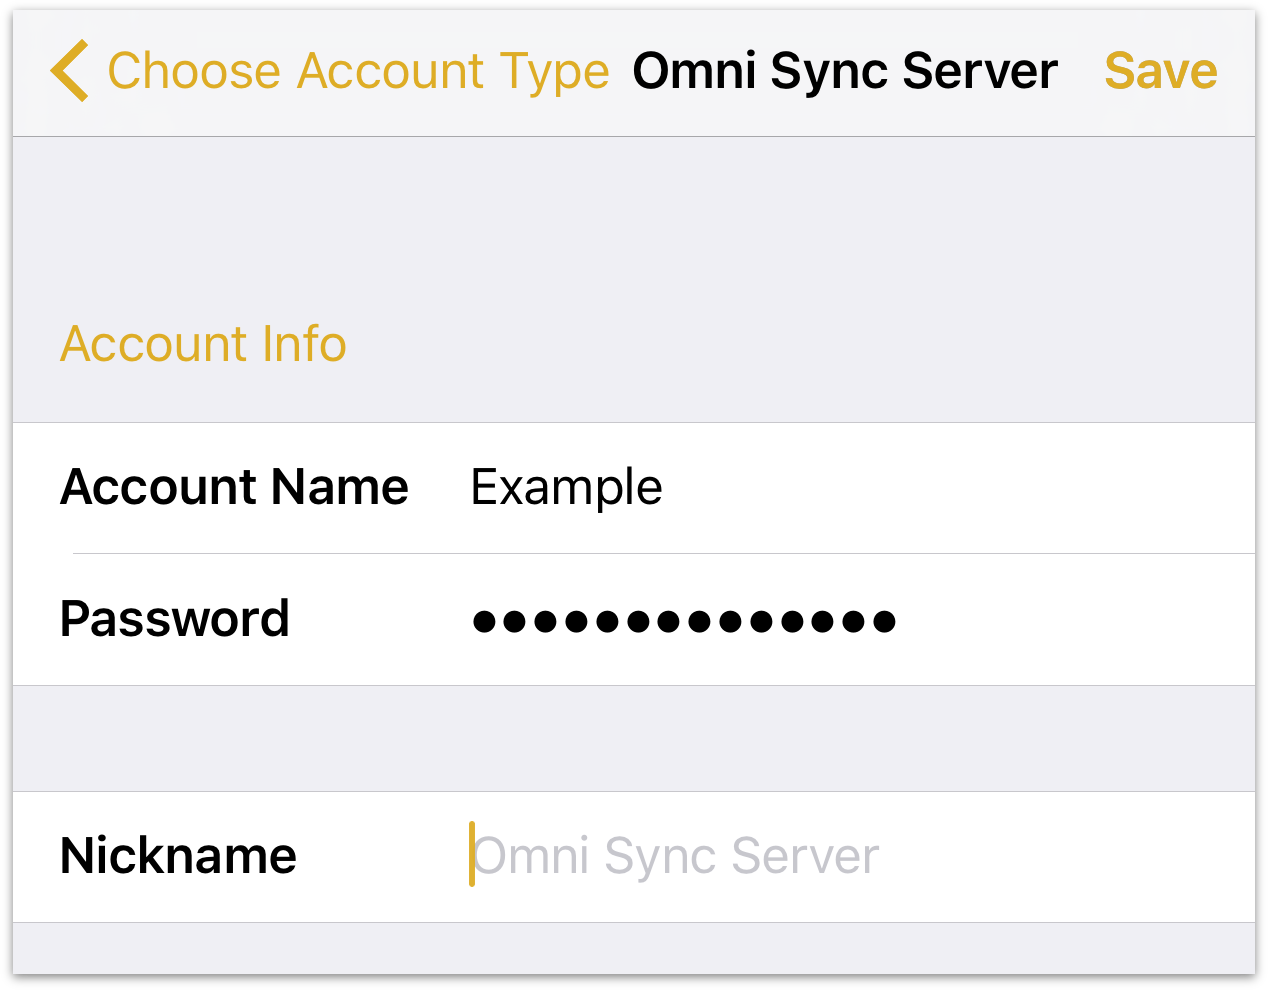
On the Account Info screen that appears:
- Enter your Account Name
- Enter the Password for your account
- Optionally, enter a Nickname to be used as the name for your synced folder
- Tap Save to authenticate with Omni Sync Server
The next message you’ll see is Testing Server for Compatibility along with a progress bar. If everything checks out okay, OmniPlan lets you know that it has successfully connected to Omni Sync Server.

When your credentials have authenticated, you’re taken back to OmniPlan’s Locations screen where you’ll see a new folder for your synced files.
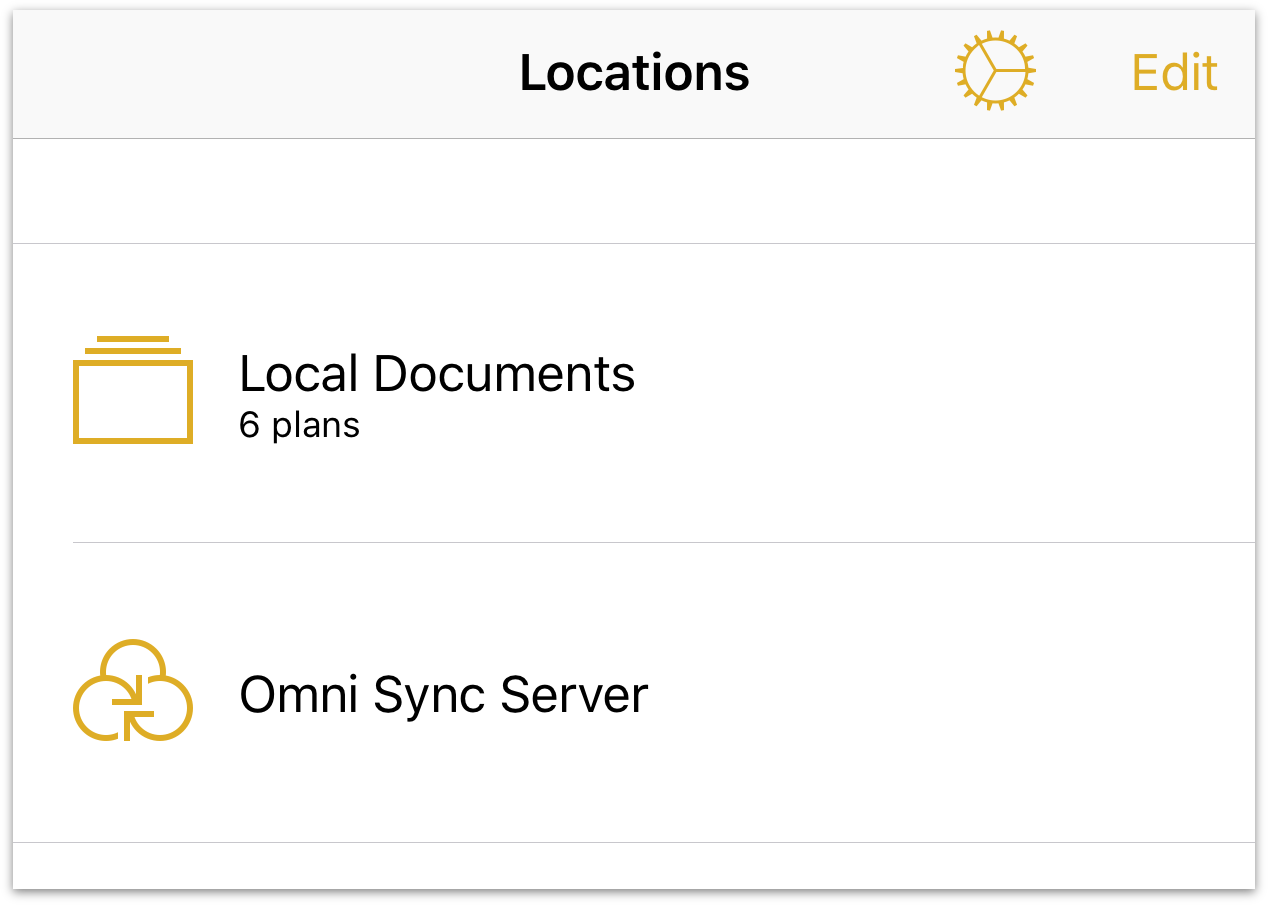
To access the files within a document folder, just tap the folder of your choice, and then tap the file you would like to work on. Or, tap the Add button (+) to create a new OmniPlan project.
Connecting to WebDAV Servers with OmniPresence
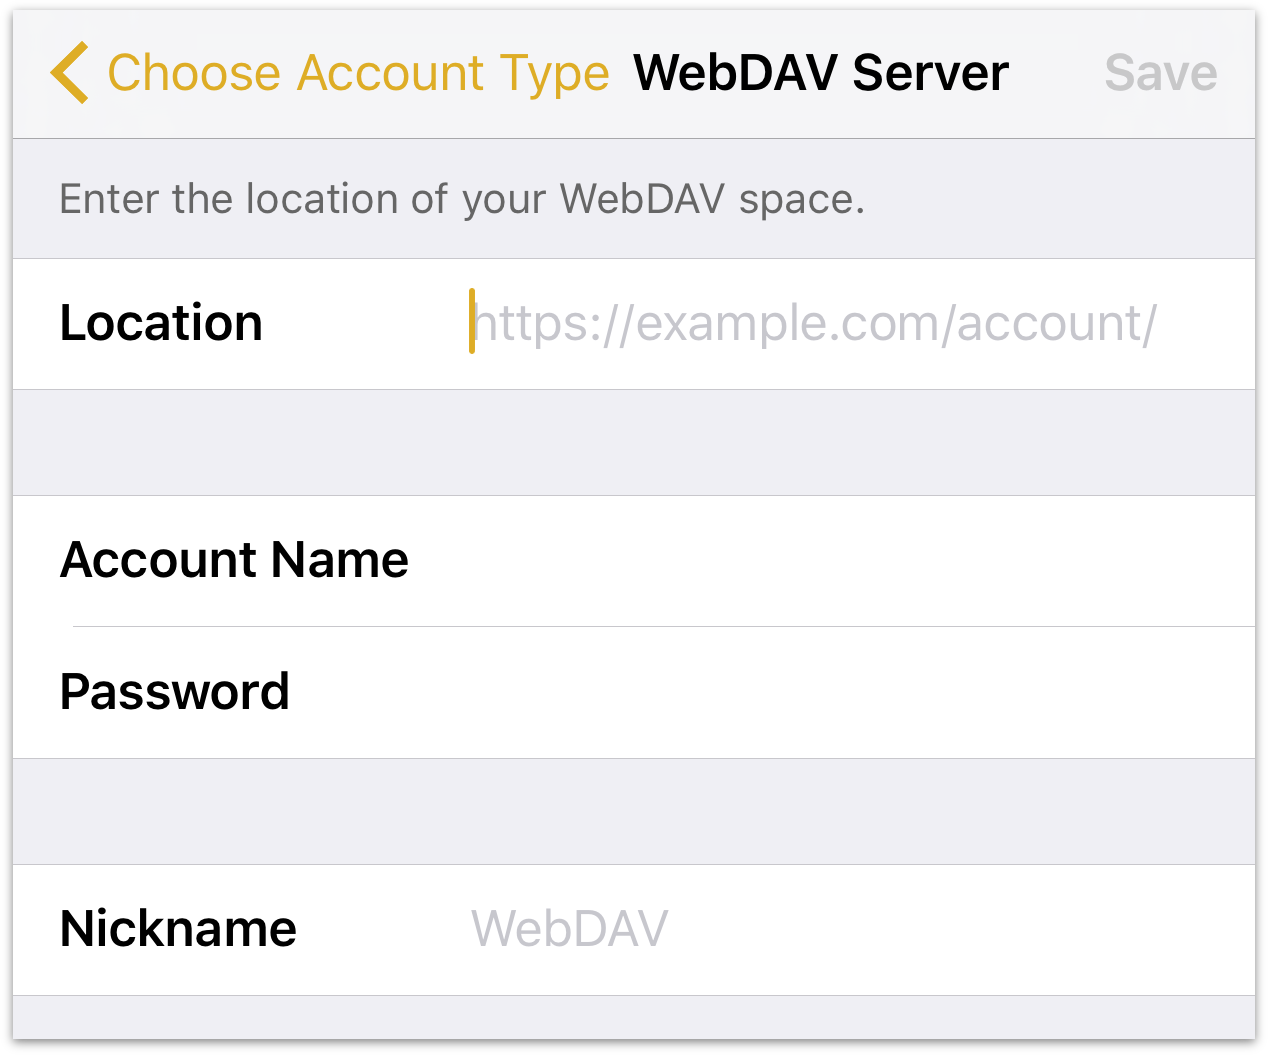
On the Account Info screen that appears, follow these steps:
- Enter the URL for the Location of your WebDAV Server
- Enter your Account Name
- Enter the Password for your account
- Optionally, enter a Nickname to be used as the name for your synced folder
- Tap Save to authenticate with the WebDAV server
As with connecting to Omni Sync Server, OmniPlan informs you that it is Testing Server for Compatibility, and displays the Connected screen when it has connected to the WebDAV server successfully.
Warning
When you expose files and folders on your computer to the Internet (even with strict password protection), you assume some risk. Make sure you understand this risk before setting up a server, and be sure to keep your server up to date with the latest security patches. If you’d prefer not to host your own server, you can sign up for a free Omni Sync Server account or use another standards-compliant WebDAV host to sync files with OmniPlan.
Monitoring OmniPresence
When you have configured OmniPlan to use either type of cloud account (Omni Sync Server or WebDAV), you’ll notice an OmniPresence icon in the toolbar of connected cloud folders.

Keep an eye on this icon to monitor OmniPresence’s sync status:
 — denotes that OmniPresence is active and ready to sync files to the server.
 — denotes that a sync is currently in progress.
 — denotes that your iOS device does not have access to an active Wi-Fi or cellular network.
 — denotes that there was an error when trying to sync your files. You may see this icon if another device is working on the same file, or if a connection cannot be made to the sync server you are using. Try tapping the OmniPresence icon again and if you get the same error icon, please contact our Support Humans for assistance.
OmniPresence checks in with your active sync servers every minute or so, and saves any updates you’ve made to the server. OmniPresence also saves a version of your file to the server whenever you close a file or switch from OmniPlan to another app on your device. Alternately, you can tap the OmniPresence icon to force an update to the server at any time.
Multi-User Publication and Subscription
Publishing and subscribing to a project in a shared server repository provides an additional level of control and change tracking of the document. Keeping these changes gated for approval prevents local versions of the project from being modified remotely without oversight, making this the preferred sync method for working collaboratively with multiple users.
Note
Sync in the form of publishing and subscribing to a shared server repository (the process described in this section) is available in OmniPlan 2 for iOS and OmniPlan 3 for Mac with the Pro upgrade.
For details on using publication and subscription features in your project, see the Collaborate via Server Repository and Balance Multi-Project Resource Loads sections of the tutorial.
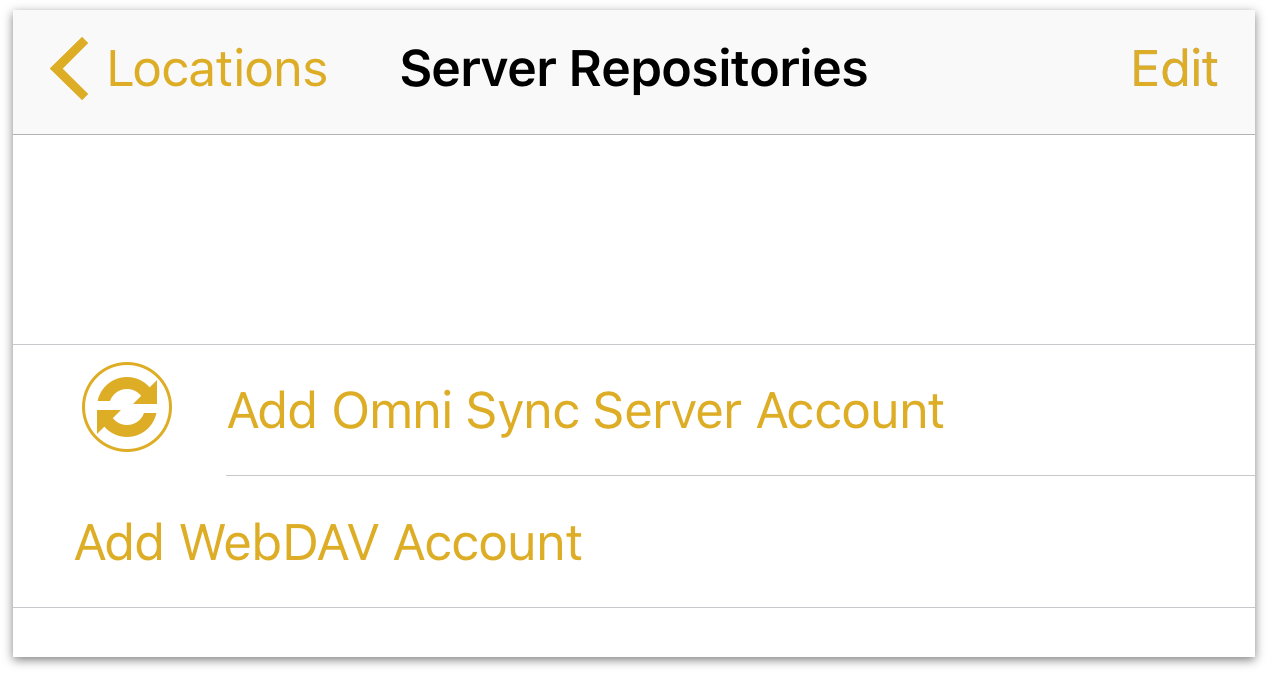
To work on a project accessible for editing by multiple OmniPlan users, start by tapping Server Repositories on the Locations screen.

You’ll see the OmniPlan Server Repositories screen, from which you can choose either Add Omni Sync Server Account or Add WebDAV Account.
You can create a free Omni Sync Server account online at sync.omnigroup.com; see Creating an Omni Sync Server Account above for details on the account creation process.
Warning
Omni Sync Server is available as a cloud sync option for both OmniPresence sync and server repository based publication and subscription. However, these two methods rely on different mechanisms under the hood and are not compatible.
Files stored with OmniPresence on Omni Sync Server (or another WebDAV server) are not accessible via publication and subscription, and vice versa.
Connecting an Omni Sync Server Account
Tap Add Omni Sync Server Account, and on the Server Details screen that appears:
Enter your Username.
Enter the Password for your account.
Set the default Path (or folder) to use. By default, OmniPlan uses the root directory (as denoted by the slash, / ), but you can change this to another folder; for example, using /OmniPlan assumes you have a folder named OmniPlan at the root level of your Omni Sync Server directory.
Optionally, enter a Description that will be used on the Locations screen as the name for your synced folder.
Tap Connect to authenticate with Omni Sync Server.
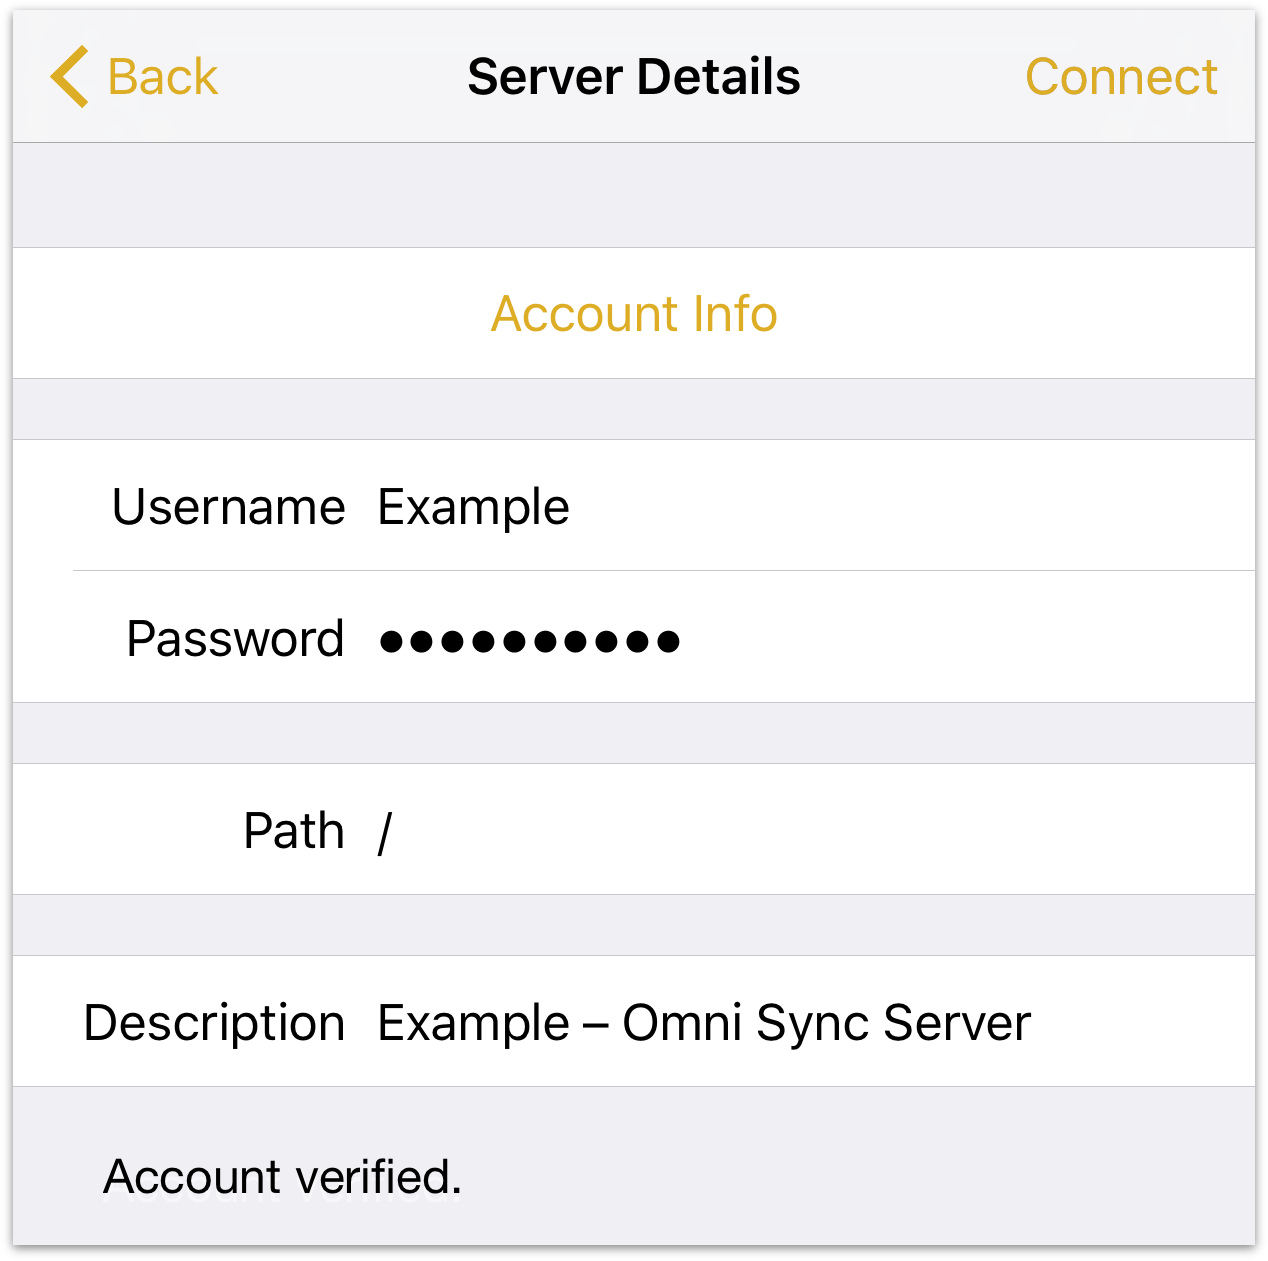
When you tap Connect you’ll see Checking account... at the bottom of the window. When your account information has been validated, the text changes to Account verified and the Omni Sync Server folder is added to OmniPlan on your device.
Connecting a WebDAV Account
Tap Add WebDAV Account, and on the Server Details screen that appears:
Enter the Address (in the form of a URL) for your WebDAV server.
Enter your Username.
Enter the Password for your account.
Optionally, enter a Description that will be used as the name for your synced folder.
Tap Connect to authenticate with your WebDAV server.
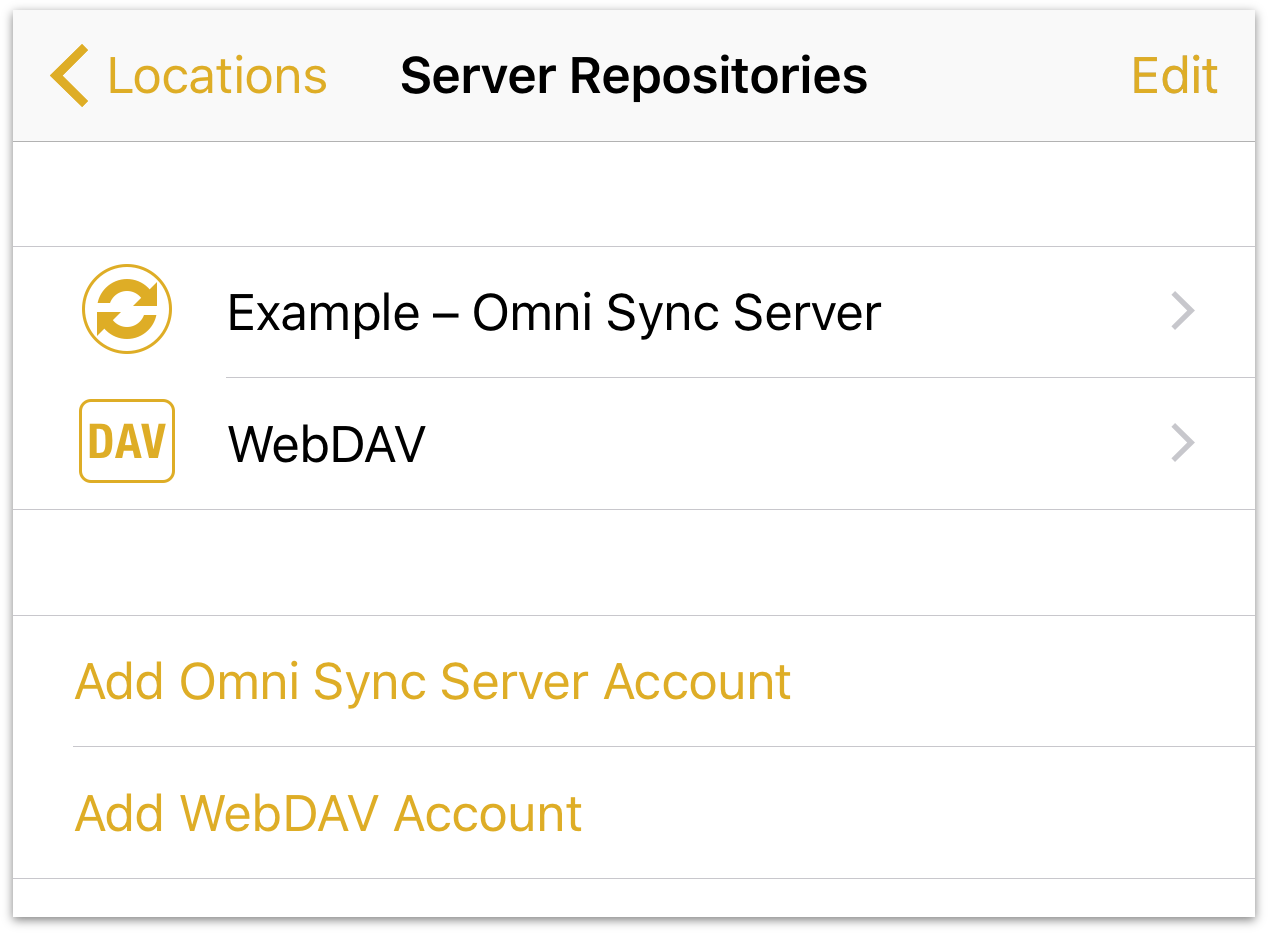
When you tap Back, you’ll see a list of your available server repositories.
To remove an account, tap Edit; a delete handle appears to the left of the account name. If you tap the delete handle, the account name slides to the left and a Delete button appears on the right edge; tap that to delete the account. A quicker way to do this is to just swipe left across the account name to bring up the Delete button. If you change your mind before deleting the account, tap Done and the Delete button goes away.

Warning
Undo will not restore an account that you delete. If you delete one (or all) of your repository accounts, you will need to complete the account setup process again to restore access to that repository.
Tap Locations to return to the Locations screen, where you’ll see the Local Documents folder along with any synced services you’ve added to OmniPlan.
Accessing Documents for Publication and Subscription
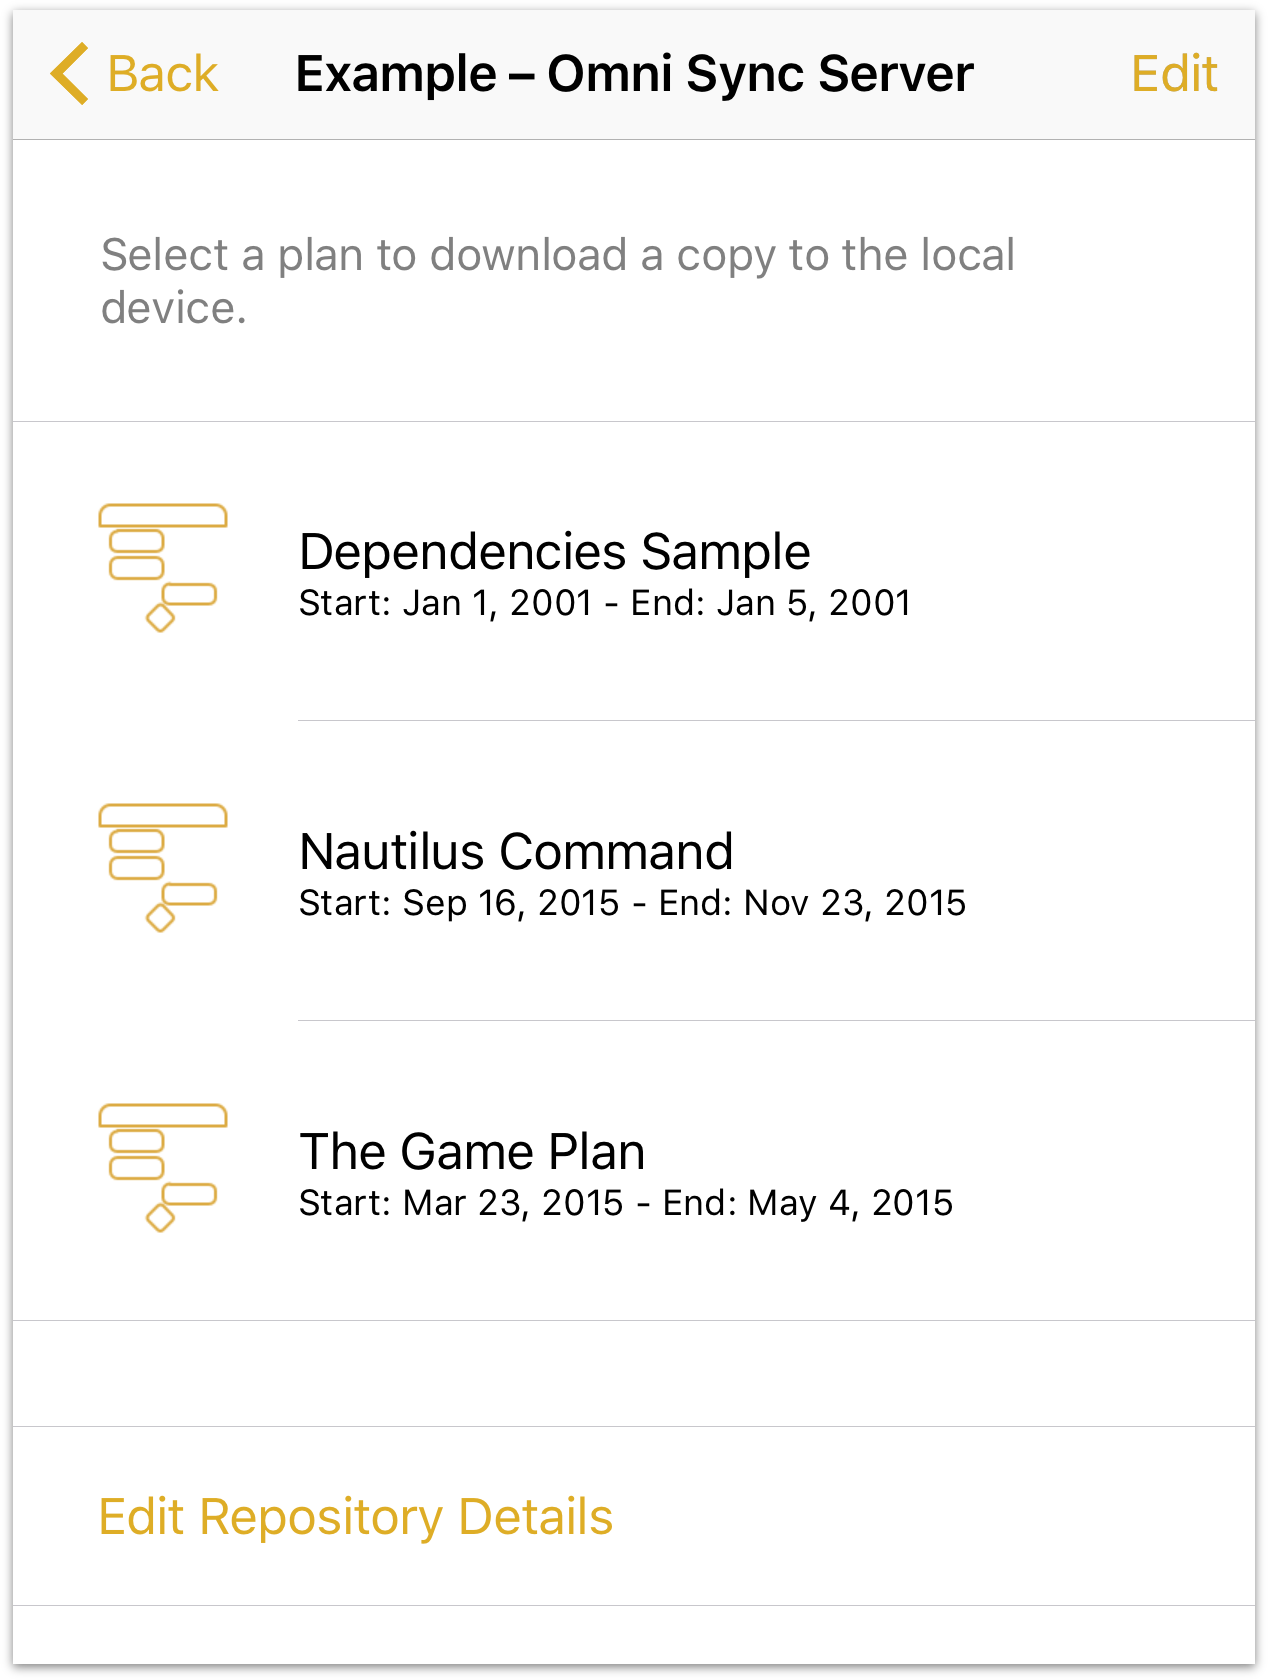
With a server repository account connected, tap its name in Server Repositories to see a list of projects synced to that account. To edit one of these projects locally, tap it and it will be downloaded to your Local Documents folder.
Note
Publishing and subscribing to files in a server repository has a special meaning within OmniPlan. Unlike OmniPresence sync, it’s not just a way to access files from multiple devices. For more on how to collaborate with OmniPlan, see the Collaborate via Server Repository section of the tutorial.