Managing a Project
Once work on a project begins, the steps to keep it running aren’t quite as predictably sequential as the ones used to set it up beforehand. The first few steps presented in this chapter are things to keep an eye on regularly, but some of the other tools are more specialized—they aren’t always needed, but when they are, they can be a huge help for keeping work progressing smoothly or correcting the course when unexpected situations arise.
Step 0: Checking the Baseline
We ended the project building tutorial by establishing our project’s first baseline: a snapshot of the project in its initial state, before work begins. Before proceeding further, double-check that you have this baseline saved for reference — from here on your project will be changing in ways that can’t easily be reverted, and it’s not intended for them to be. The baseline acts as a point of reference for the initial plan when you need one.
Step 1: Updating Task Completion
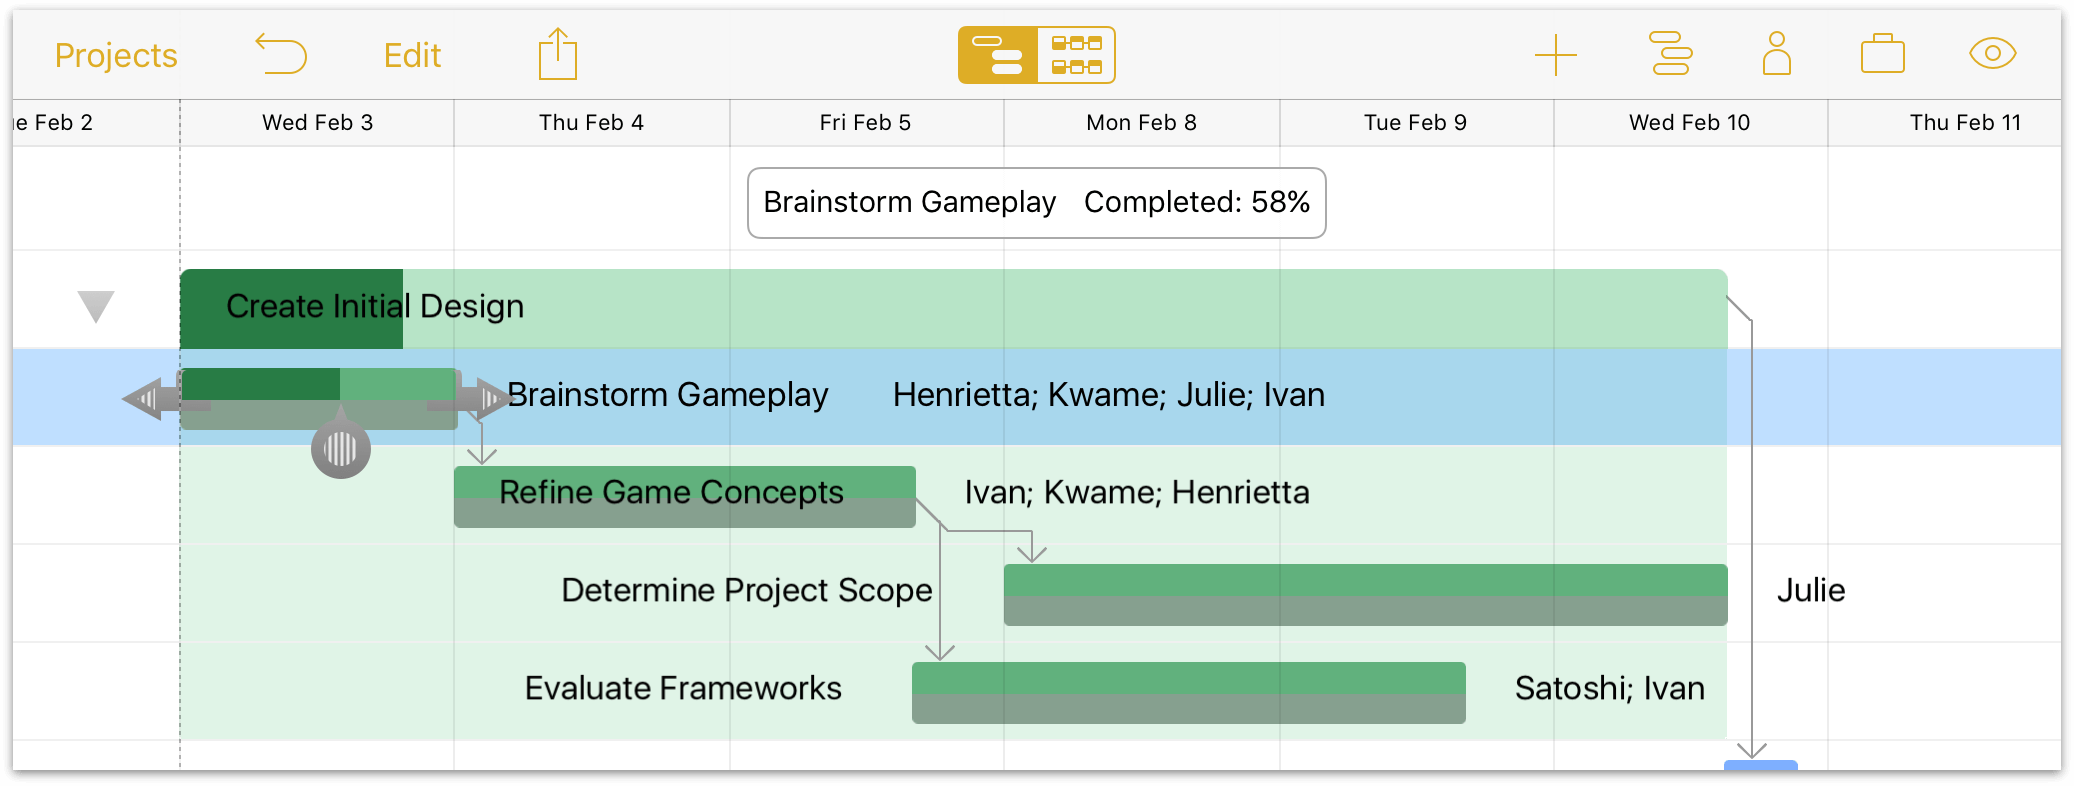
As work on the project begins, you can track progress against the baseline you’ve set by tapping a task currently in progress and moving the slider along to the task’s completion percentage (this can be edited in the Task inspector as well).
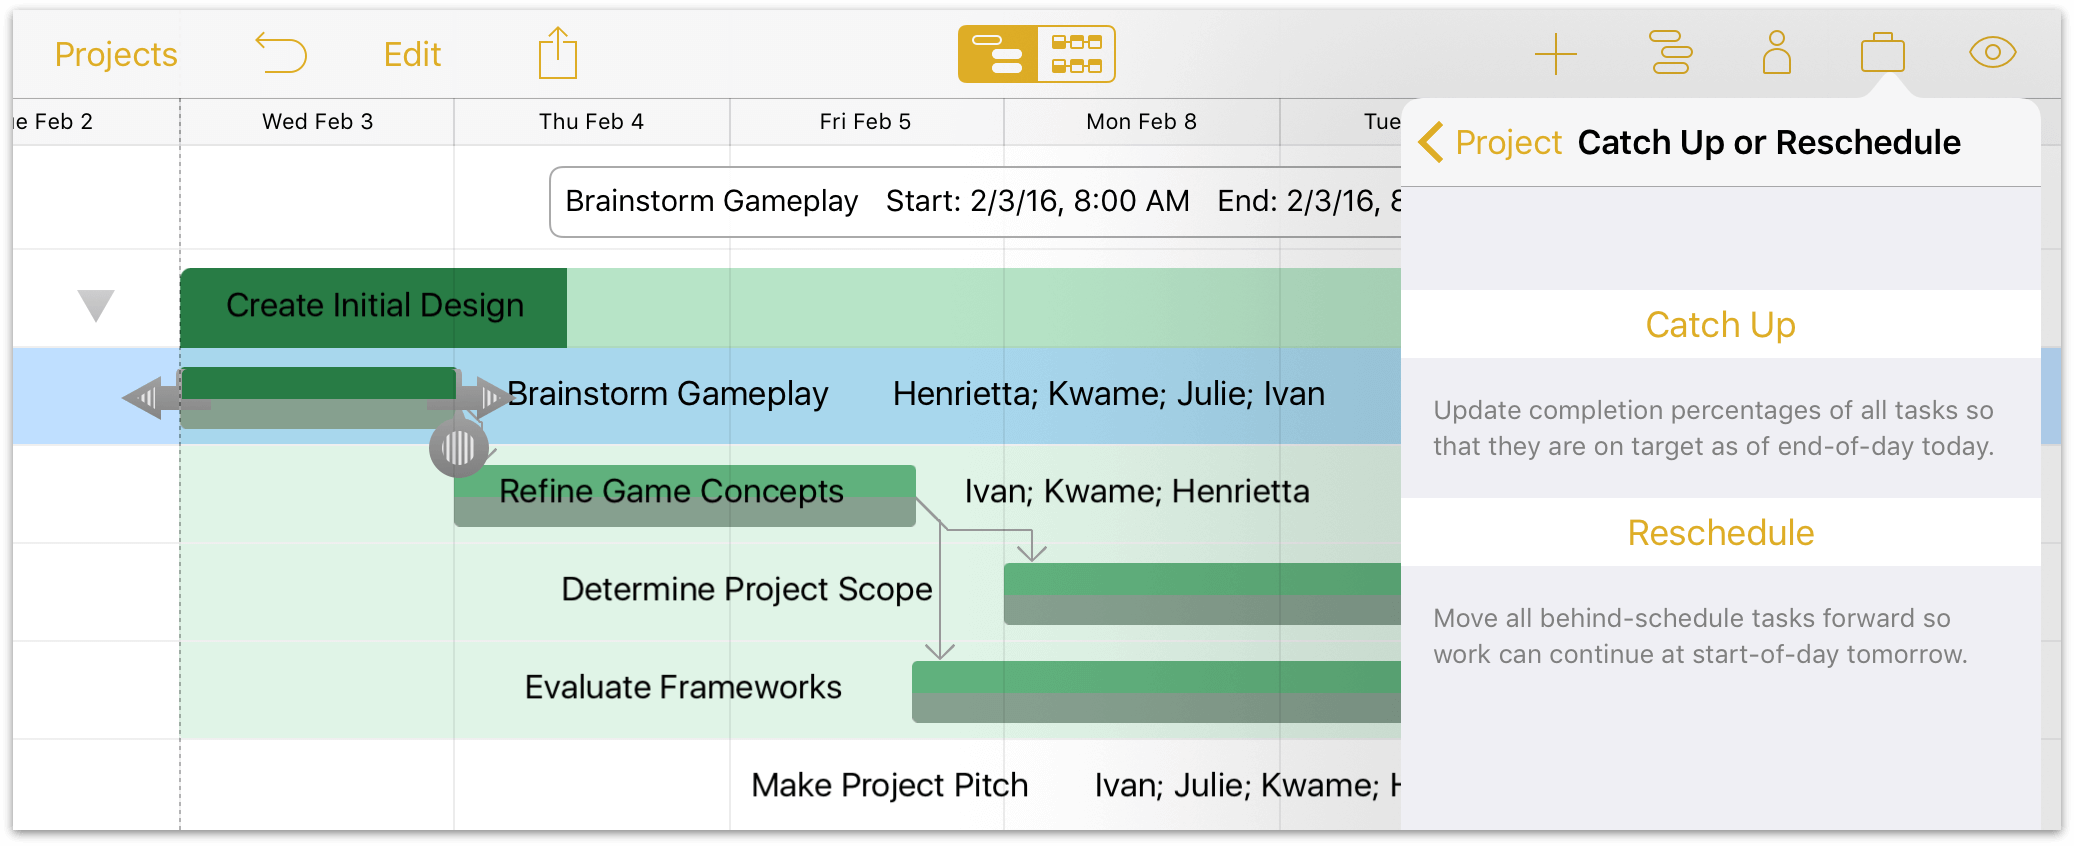
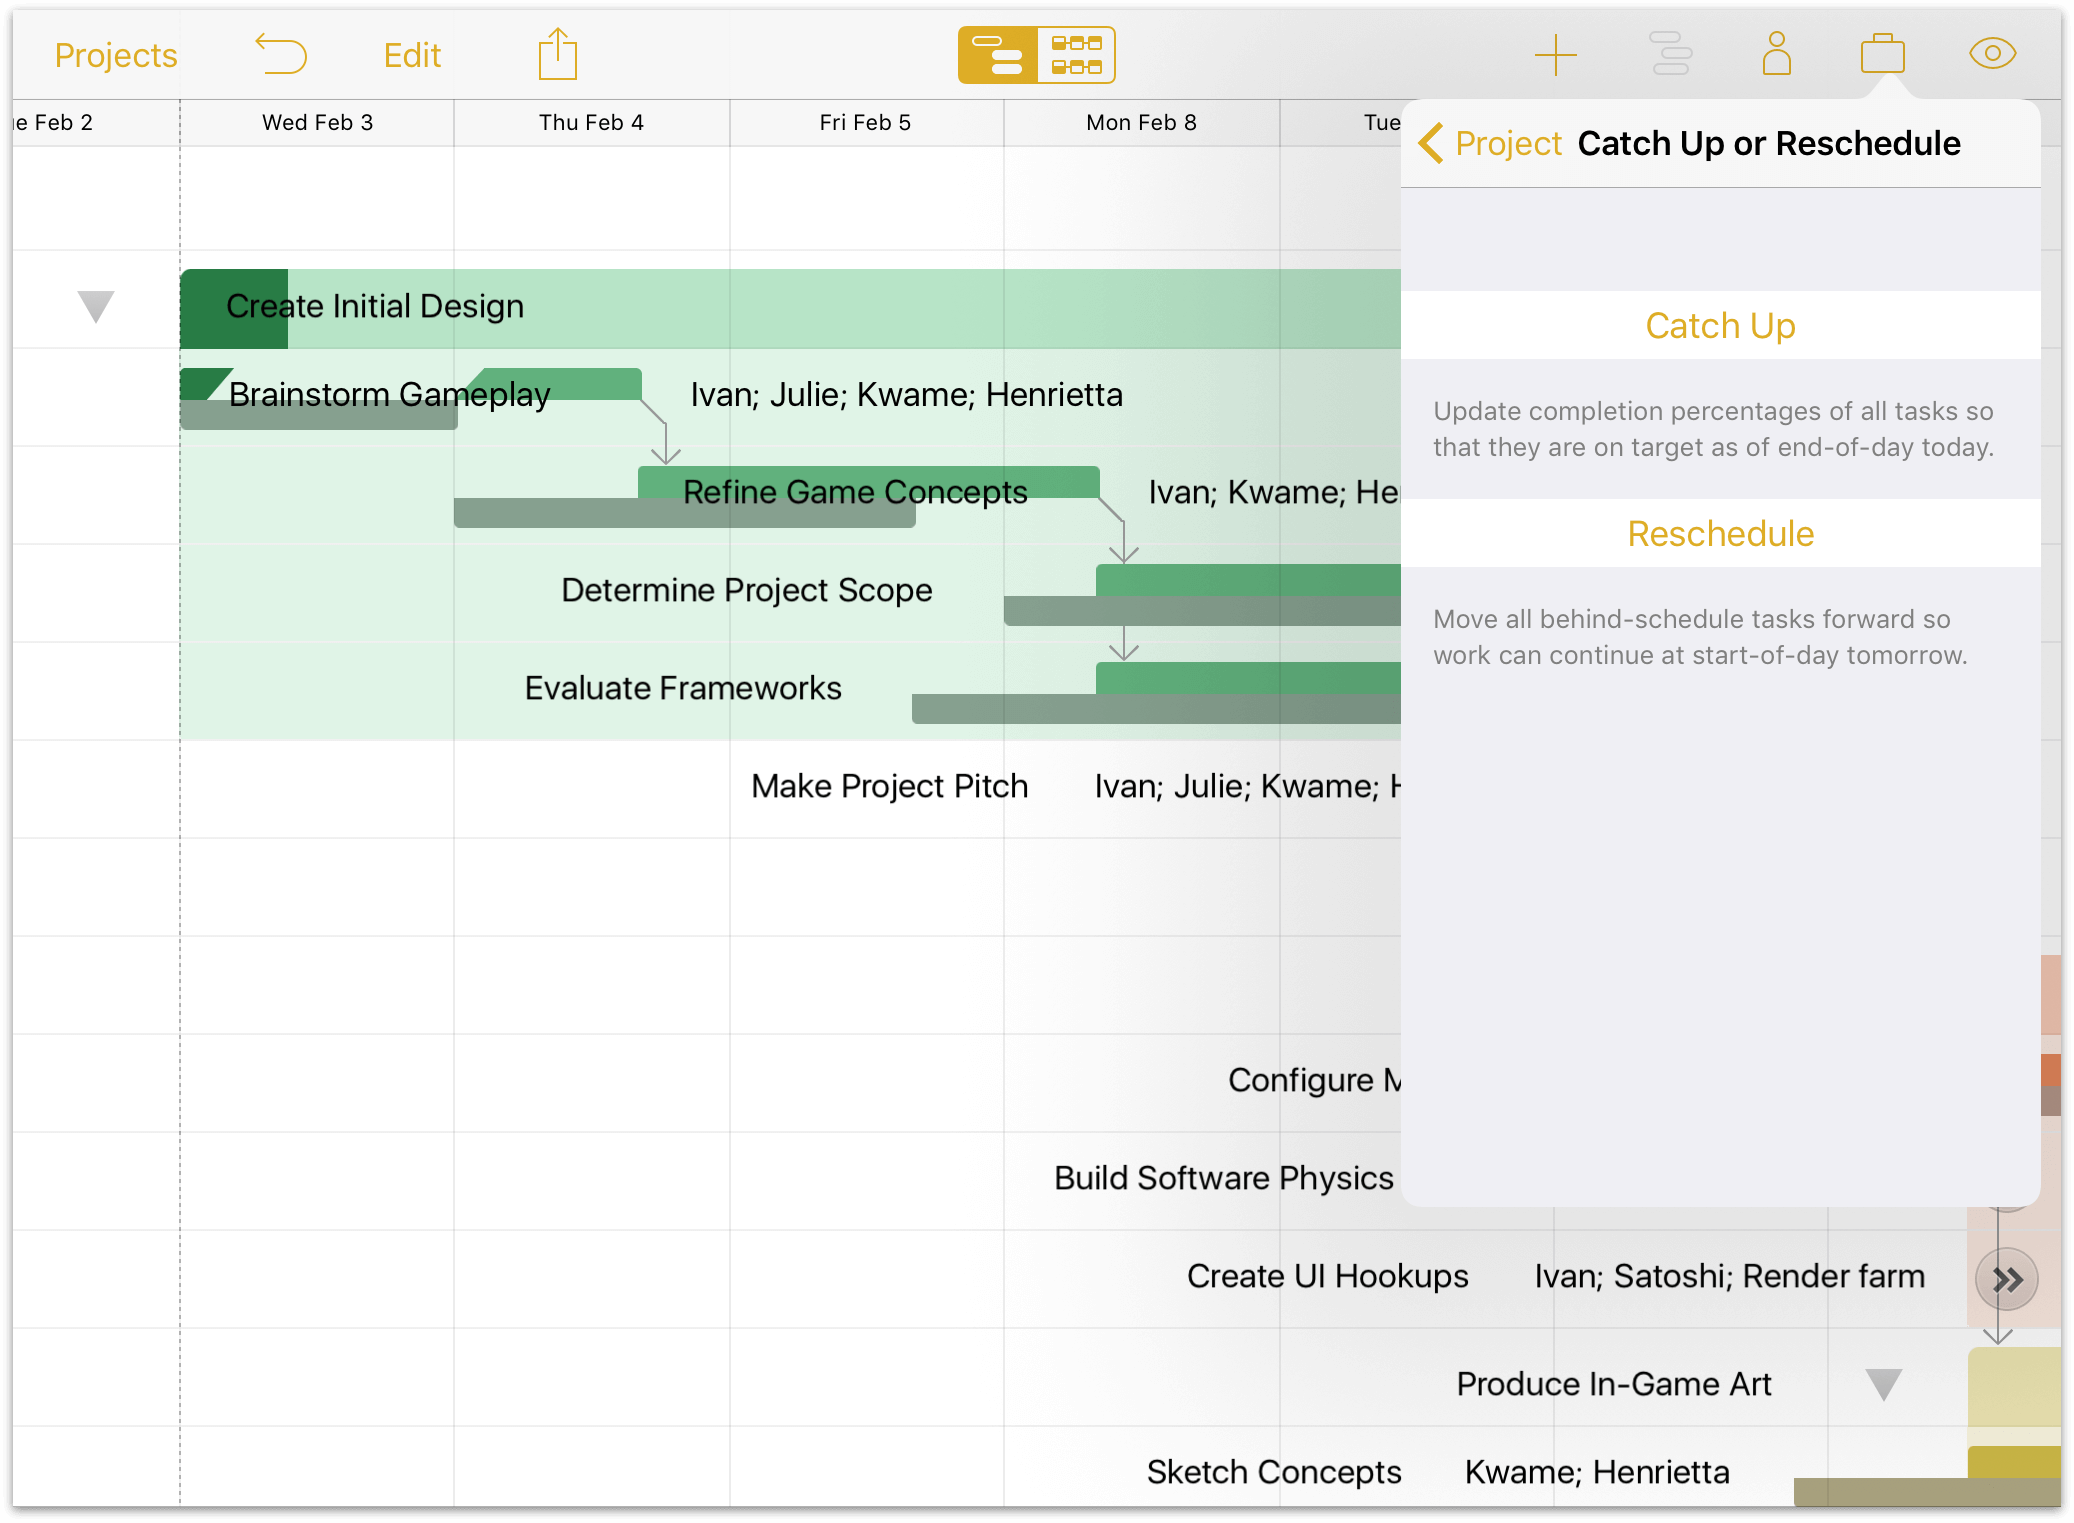
If everything is proceeding according to plan, you can use the Catch Up tool in the Project inspector to advance the completion percentage of all tasks to where they should be as of the end of today’s workday.
Step 2: Rescheduling Tasks
If a task is behind schedule, update the expected duration and level resources again to compensate for the additional time needed.
Alternatively, if all other work in the project has been accounted for manually, you can use the Reschedule tool to advance tasks with incomplete work to the beginning of the next workday.
If a task is partially complete, rescheduling will split the task and leave the completed portion in its original position, advancing only the incomplete work.
Step 3: Resolving Violations
Occasionally situations will emerge that break the rules of logic you’ve set up for your project. When one of these occurs, OmniPlan will let you know with an icon indicating a violation related to the adjacent task.

Violations can be fixed by opening the View inspector and tapping Violations, or by tapping the violation icon next to the task itself. You’ll find a description of the problem and a command to tap that should resolve it.

Step 4: Leveling the Project (Again)
After your project has been progressing for awhile, facts on the ground may change to the point where the initial plan has become largely irrelevant. Things are kept as efficient as possible by automatically leveling, but if something big happens—like a change in deadlines, project requirements, or personnel—you’ll want to be sure those changes are reflected in the plan, and then level the project again.
Optimal resource allocations can shift significantly due to these changes, and it’s important to know about them as soon as possible to make sure resources are working where they’ll be most useful.
Major turning points in the project—whether pre-planned milestones or unexpected diversions—are also a good time to set new baselines for progress. OmniPlan supports as many baselines as you find useful, and resetting the clock after a major shift provides a much more useful basis for progress than continuing to compare with an increasingly outdated preliminary plan.
Step 5: Splitting Tasks
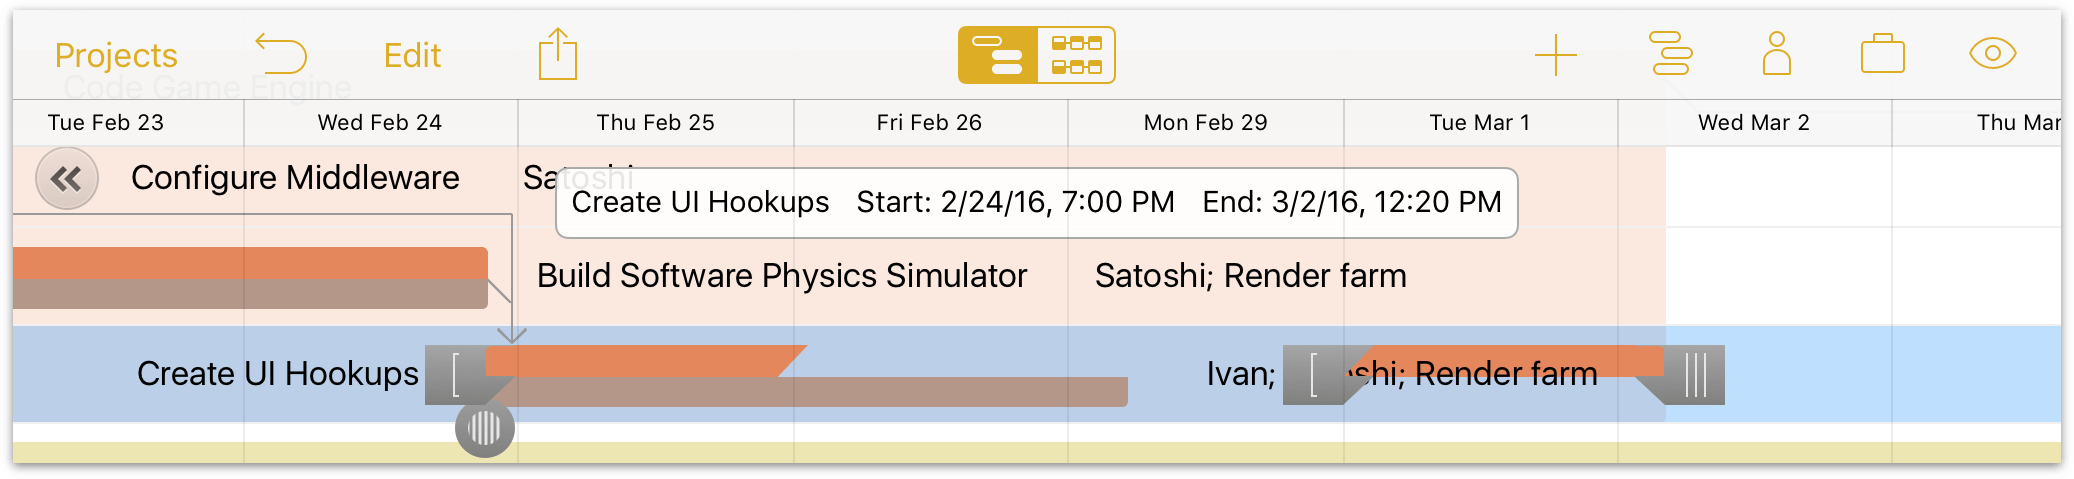
Whether because a key collaborator is on vacation or another part of the project has taken priority, suspending work on a particular task can be very helpful. When you want a resource or team member to devote time to something other than the task they’re currently assigned to, splitting the task into parts around the "time out" period is a possible solution.

To split a task, touch and hold it in the Gantt chart until the contextual menu appears, then choose Split. You’ll be asked to choose the duration of each segment of the task, and the date and time you want the task to resume after the break. If the resource will be absent during the split, remember to indicate this on its schedule in the Resources inspector.
Note
The schedules of individual resources (usually workers) can be customized to account for personal vacation or sick days by selecting the resource in the Resources inspector and choosing Calendar.
After splitting a task it’s always a good idea to level to be sure the split is the most efficient way to manage the task at hand given the project’s available resources and time constraints.
Tip
A split task may mysteriously re-merge after leveling. If this isn’t what you want, make sure that Allow Splitting is turned on in the Resources inspector’s Leveling submenu.
Step 6: Simulating Milestone Completion Estimates (Pro)
OmniPlan 3 Pro includes tools for calculating the degree of certainty that a milestone will be complete by a given deadline, using Monte Carlo simulations based on estimations of the effort required to reach the goal. The results of these simulations can help identify where things might fall behind (or even be ahead of schedule).
To run a simulation, open the Project inspector and choose the Monte Carlo tool. The level of certainty the simulation provides is determined by the amount of effort estimated as required for completion of the tasks within each milestone, so prior to running a simulation you’ll want to use the handy Auto-Estimate Effort feature to add effort estimates to your tasks.
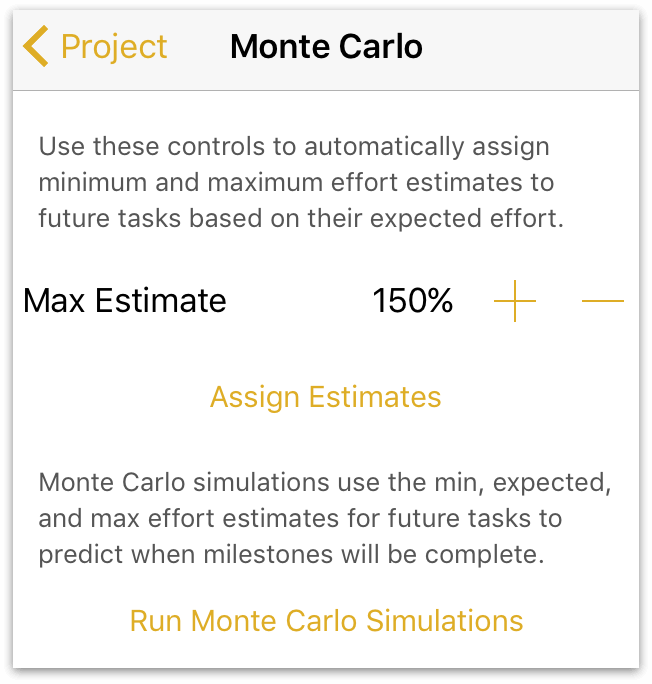
The Max Estimate percentage represents the expected range of deviation for the amount of effort that tasks within your project will require. The default is 150%, indicating that a typical task in your project can be expected to require anywhere between 50% and 150% of its expected effort to complete (the average being 100%).
Lowering the max estimate percentage indicates higher confidence in the effort values currently assigned to tasks, and reduces the variance of the simulation (setting the max estimate to 100% would set the minimum estimate to 100%, implying that you’ve seen the future). Conversely, raising the value indicates that your current effort predictions are more of a shot in the dark.
When you tap Assign Estimates, OmniPlan quickly generates hundreds of random effort values for each task within the percentile range indicated, and then takes the average result and applies it to each task for purposes of determining the likelihood that a given milestone will be completed on time.
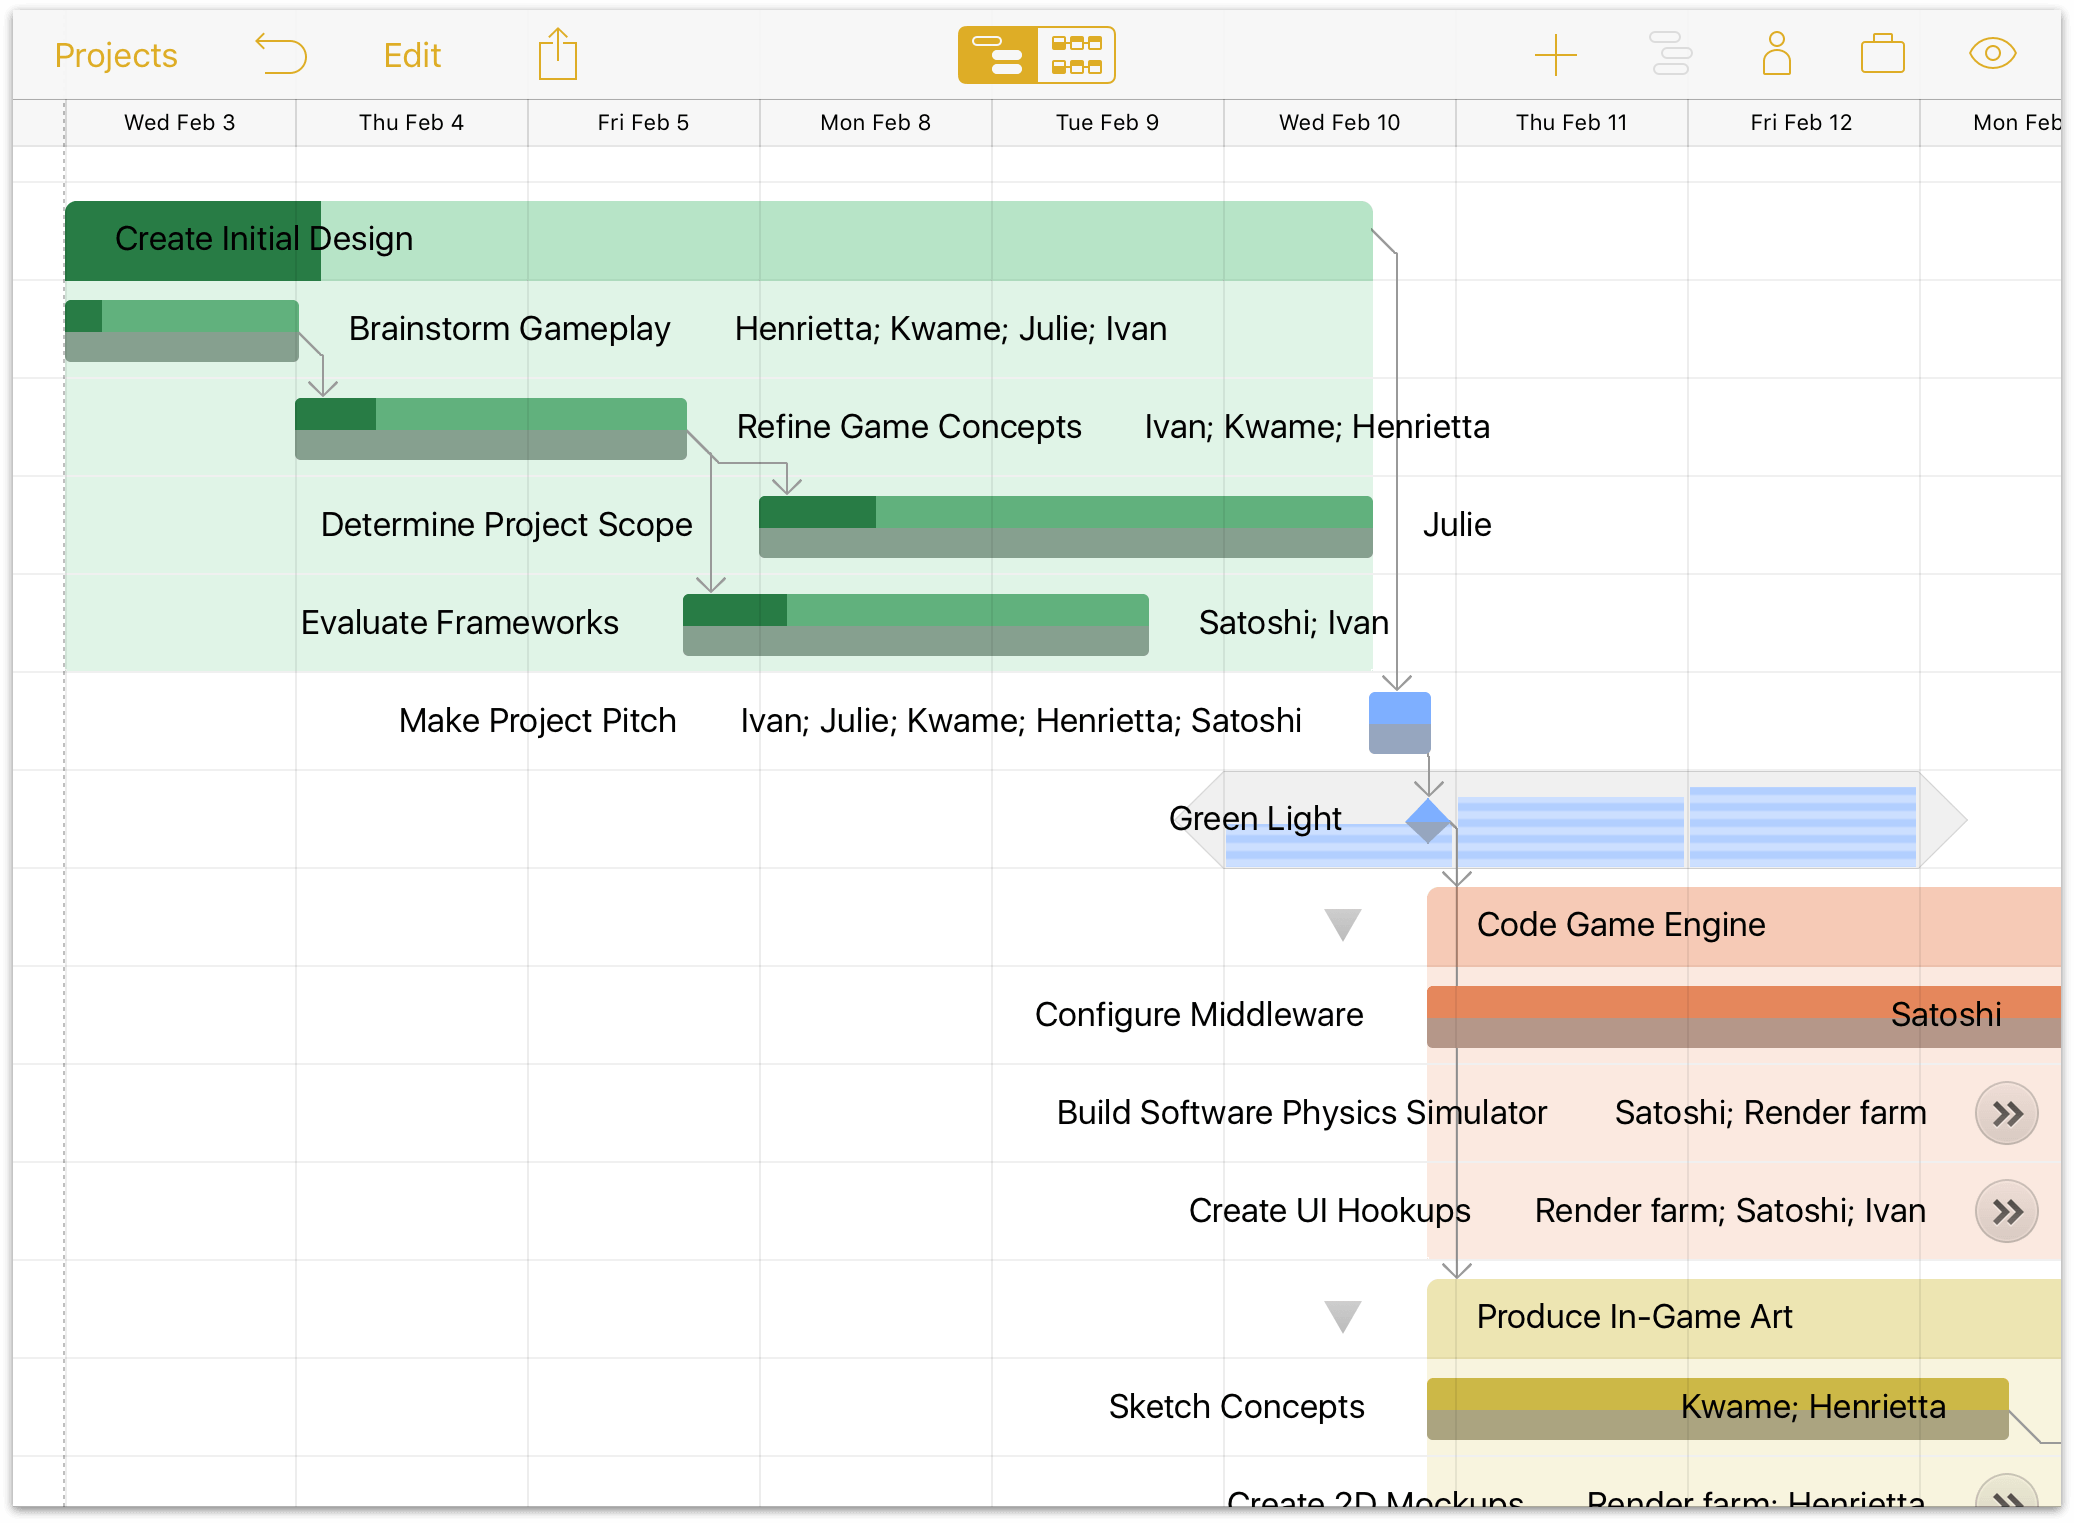
Once the simulation is complete, a set of striped horizontal bars appears on days surrounding each milestone (represented as a small diamond). One stripe equals 10 percent confidence that the milestone will be complete on that day, while 10 bars on a day means that according to the simulation, a milestone is 100% likely to be completed on that day.