Managing Your Project Files
Like many other document-based apps (word processors, spreadsheets, and the like), OmniPlan keeps information about your projects in files that are stored for safekeeping either along with OmniPlan on your device, or in an account in the cloud where they can be synced and accessed from multiple devices. This chapter describes the ins and outs of navigating OmniPlan’s document browser, while the next chapter, Getting Synced, has details on connecting to a cloud sync account.
Note
OmniPlan files use the .oplx extension, a bit of text appended to the filename that tells the operating system what app the files belong to. This extension is hidden when browsing files in OmniPlan for iOS, but is retained when syncing back and forth with OmniPlan for Mac to make sure everything stays in order.
Document Locations
When you first open OmniPlan, you’re taken to the Locations screen which is the place you go to access all of your documents. There is a Local Documents folder, which we’ve preloaded with some sample OmniPlan files that you can use as inspiration for the projects you create.
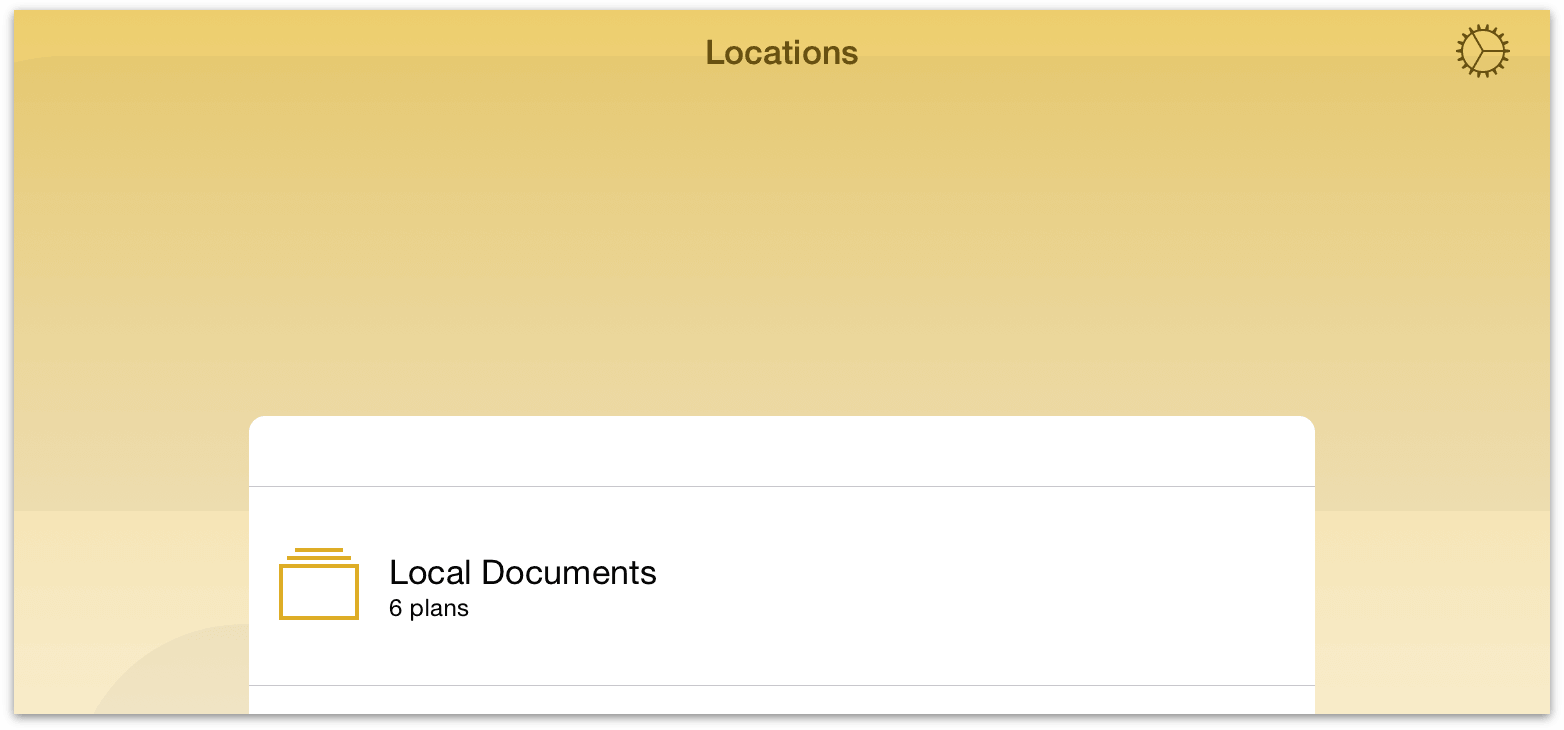
Tap the Local Documents folder to see what’s inside. This opens the Document Browser, which is the place to view, create, and manage your projects.
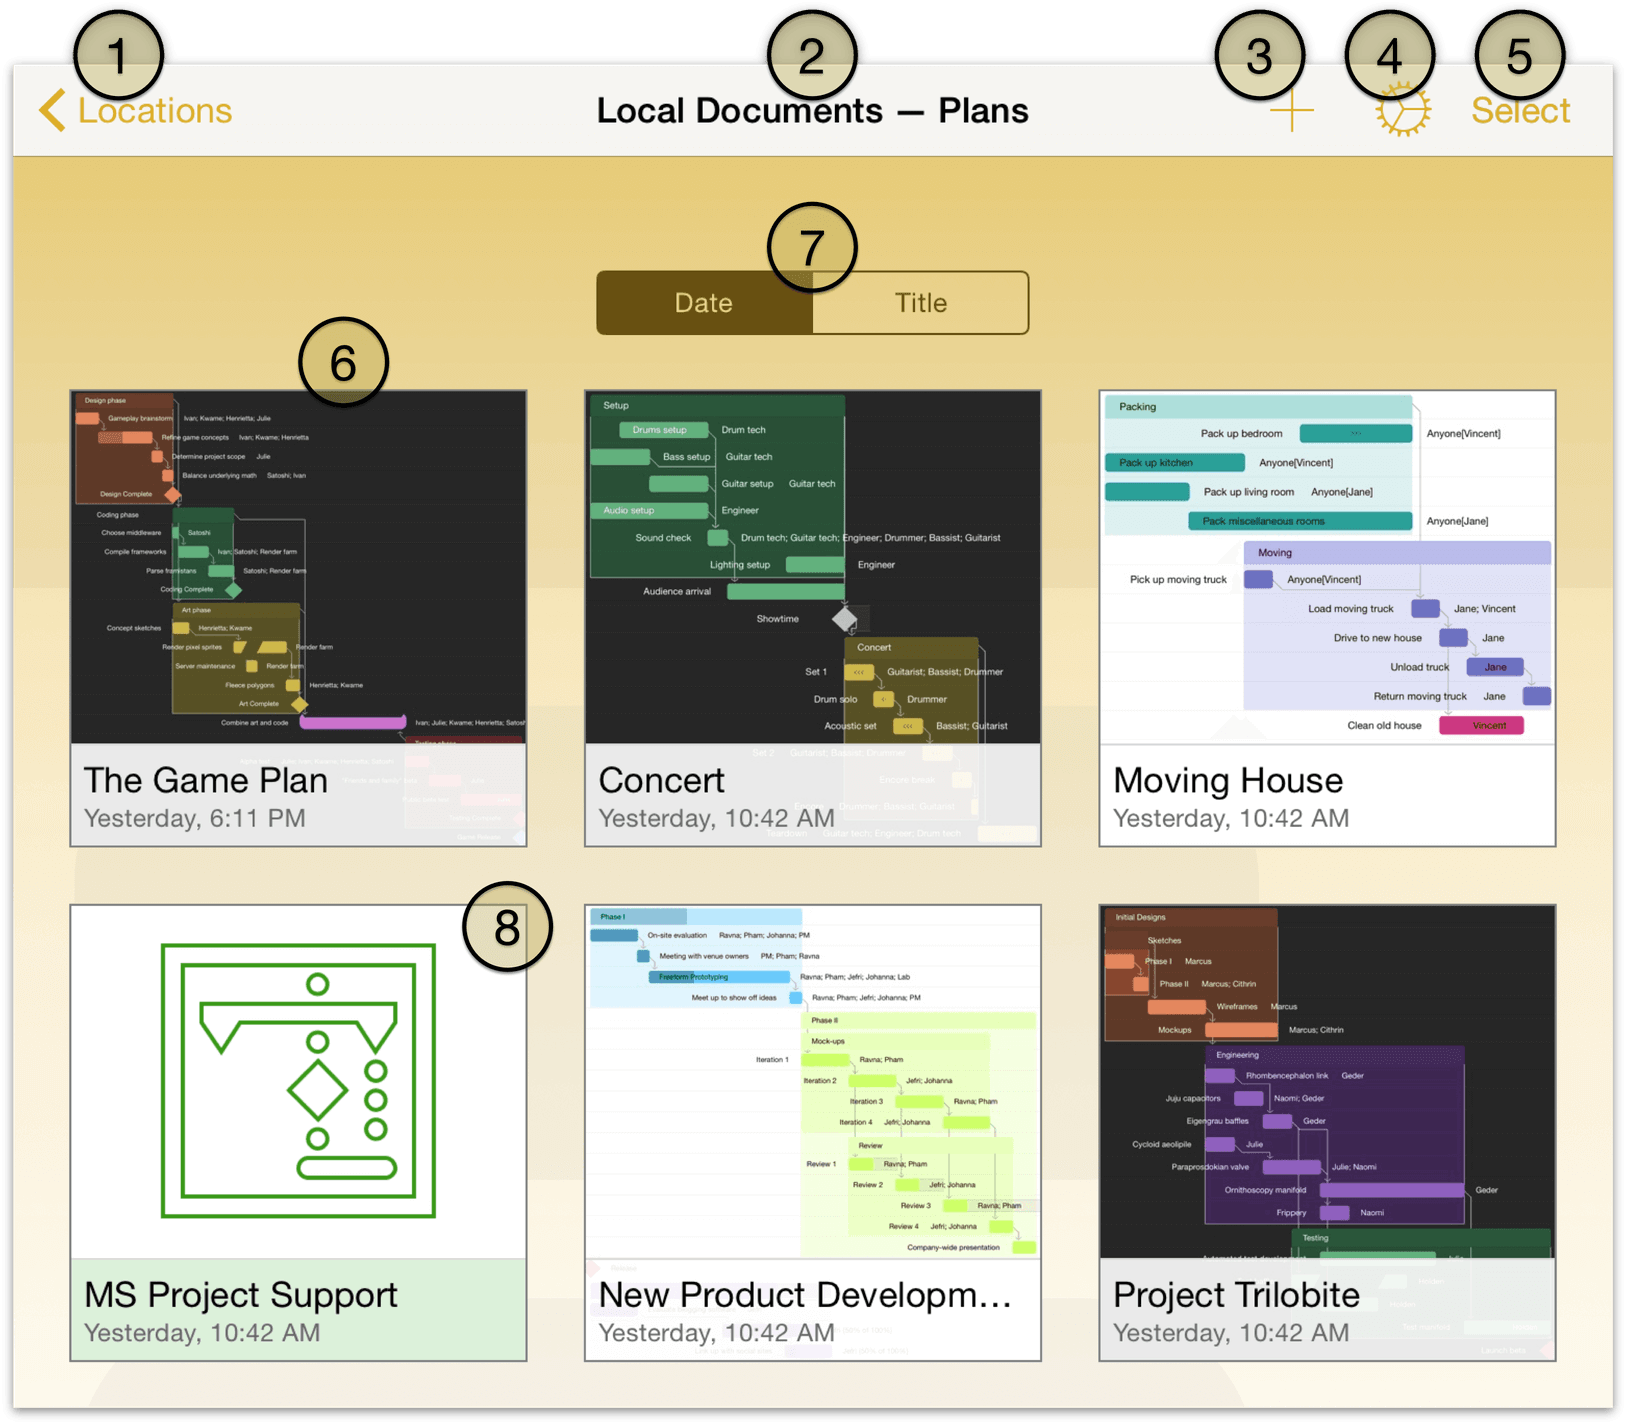
Locations—Tap here to go back to the main screen where you can view the Local Documents folder and any server repositories you’re synced with.
Folder Name and Document Type—This is the name of the current folder. Your default folder for storing files locally is titled Local Documents, and the document type is Plans (this is currently the only document type available).
Add/Plus—Tap to create a new project.
Settings—Tap to reveal a menu with preferences for OmniPlan, as described in Settings.
Select—Tap to edit the contents of a folder. For example, you can select one or more documents and move them to another folder, to the trash, or create a subfolder within the current folder that contains the projects you’ve selected.
Projects—These are your saved projects and any subfolders you’ve created in OmniPlan.
Sort—When you pull down on the screen, the super secret Sort bar comes into view. By default, the projects you create are sorted by their creation date, or you can opt to sort them by title.
MS Project Support—A preview document for the Microsoft Project file import feature, available with the OmniPlan Pro in-app purchase.
Note
With OmniPlan Pro, you can import Microsoft Project .mpp files created by modern versions of Microsoft Project up to 2016. Once imported, these documents can be managed just like any other OmniPlan Project.
OmniPlan Pro can also export Microsoft Project .mpp files. Once exported, these documents can be used in Microsoft Project 2016.
To create a subfolder, tap Select in the navigation bar, and then tap and select one or more files in the Document Browser. Next, tap Move to in the upper-left corner and then tap New folder.
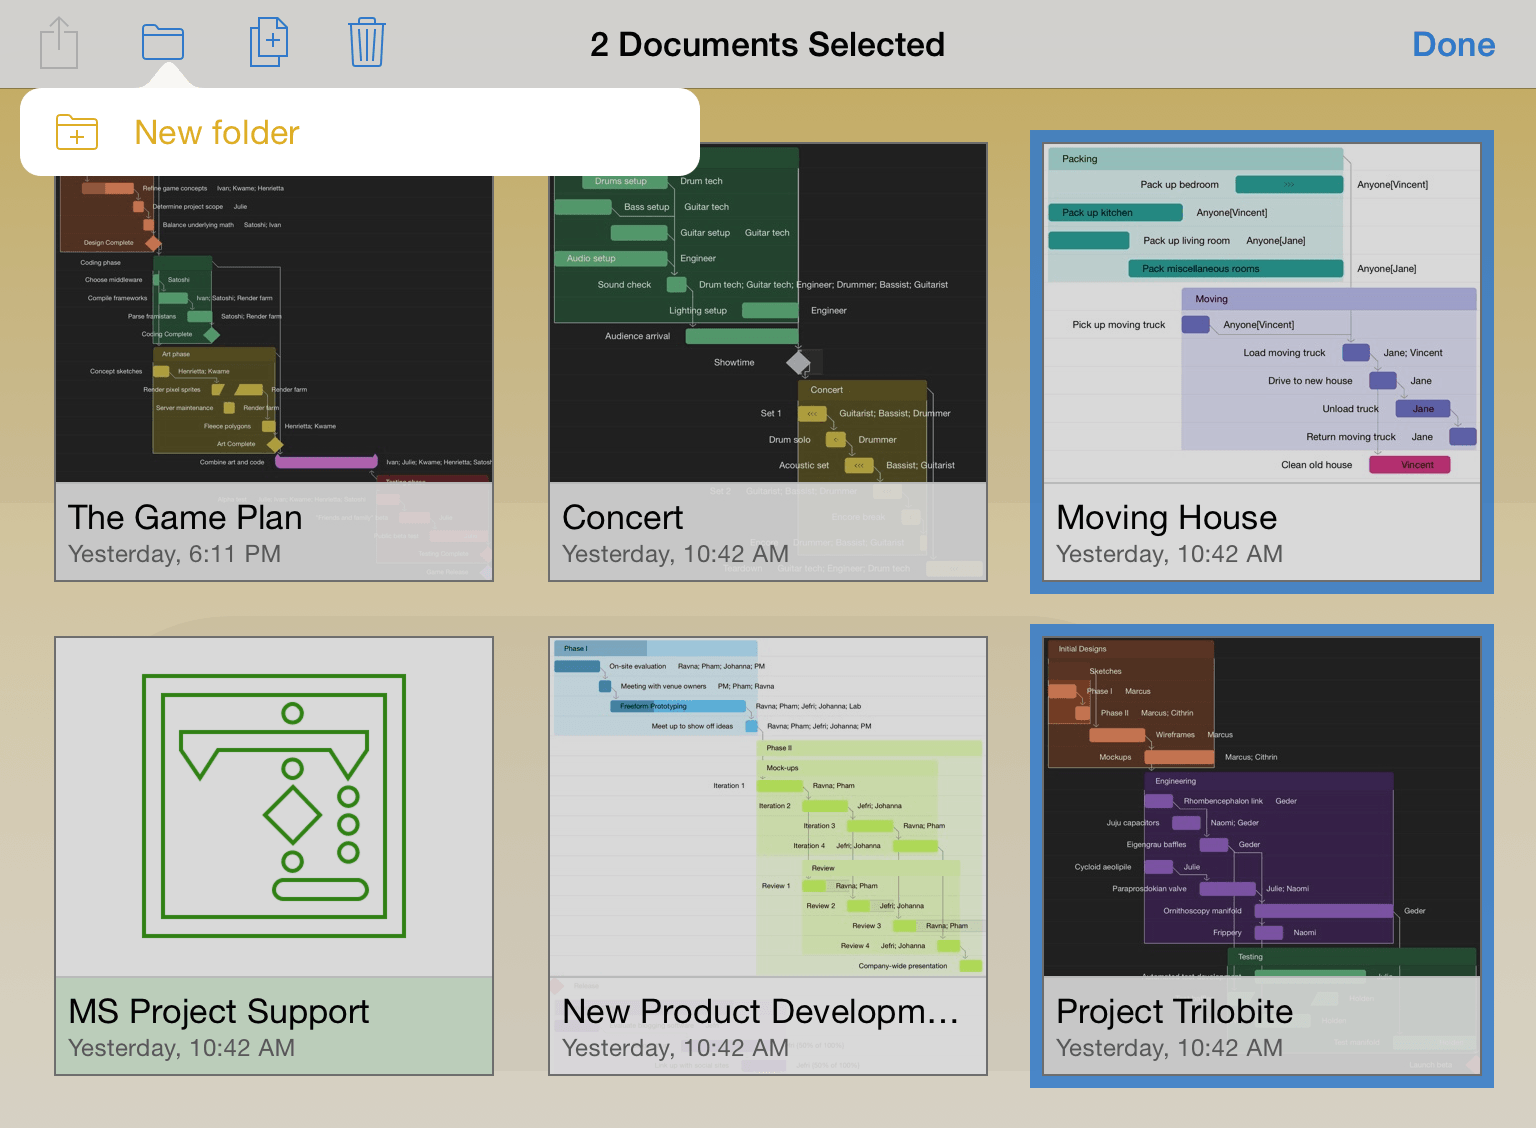
Enter a name for the folder and then tap Done. Subfolders have a dark gray background and display tiny icons for the projects they contain.

Adding Locations
Beneath the Local Documents folder on the locations screen, you’ll see one or more options for adding locations to the list of document sources available to OmniPlan. Unlike Local Documents—which by definition reside on your device—these options grant access to cloud-synced accounts with files that you’ve stored remotely.
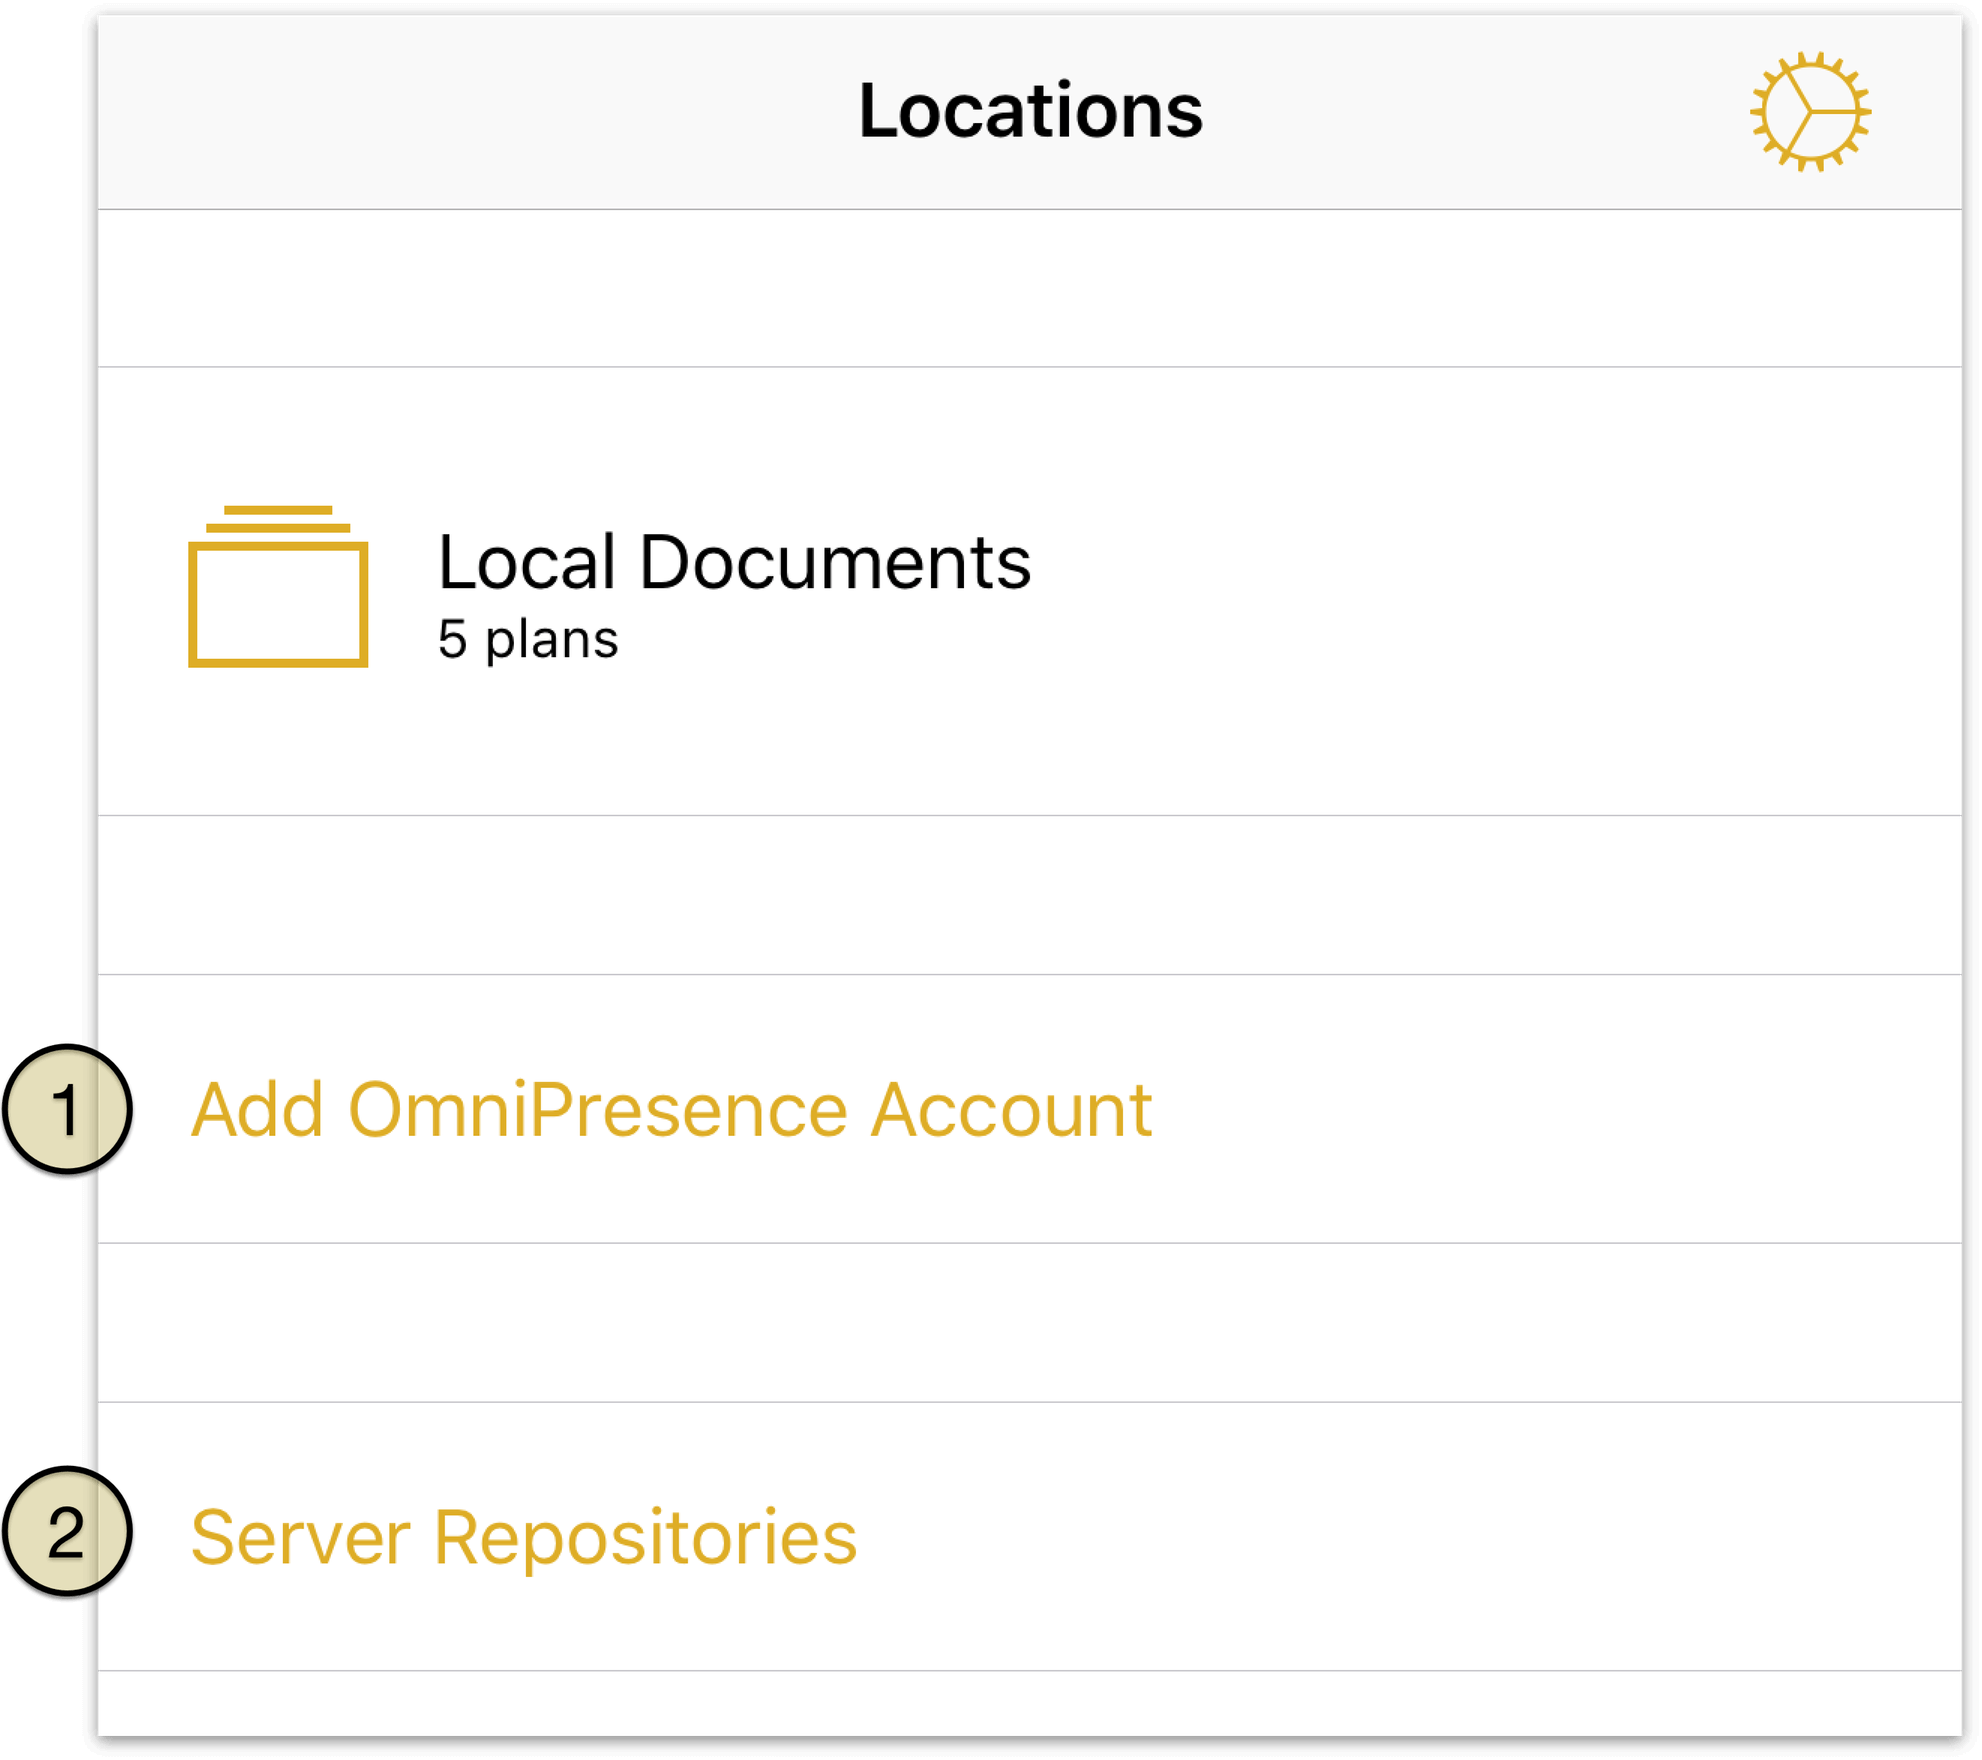
- In the standard version of OmniPlan for iOS, the Add OmniPresence Account option is presented to create an account for syncing between multiple devices used by a single person.
- OmniPlan Pro adds the option to sync with Server Repositories, useful when collaborating with multiple project contributors.
Learn more about setting up the various sync options in the Getting Synced chapter.
After adding an OmniPresence account, you’ll see it listed as a folder that’s a peer to your Local Documents folder on the Locations screen. Any connected server repository accounts are listed on the Server Repositories screen; to view them, tap Server Repositories.
Creating a New Project
To create a new project, go to the Locations screen, select the folder in which you’d like to store the new project file, and then tap the Add button (the + sign) in the navigation bar.
See Working in the Project Editor for details on using the Gantt chart and Network Diagram, or check out the Building a Project chapter to get started with your first project.
Taking Out the Trash
Every now and then, you will find that it’s time to do a little housecleaning in OmniPlan. When a project is no longer relevant, you can queue it for purging from your device (or from a synced cloud location, if you have one configured) forever.
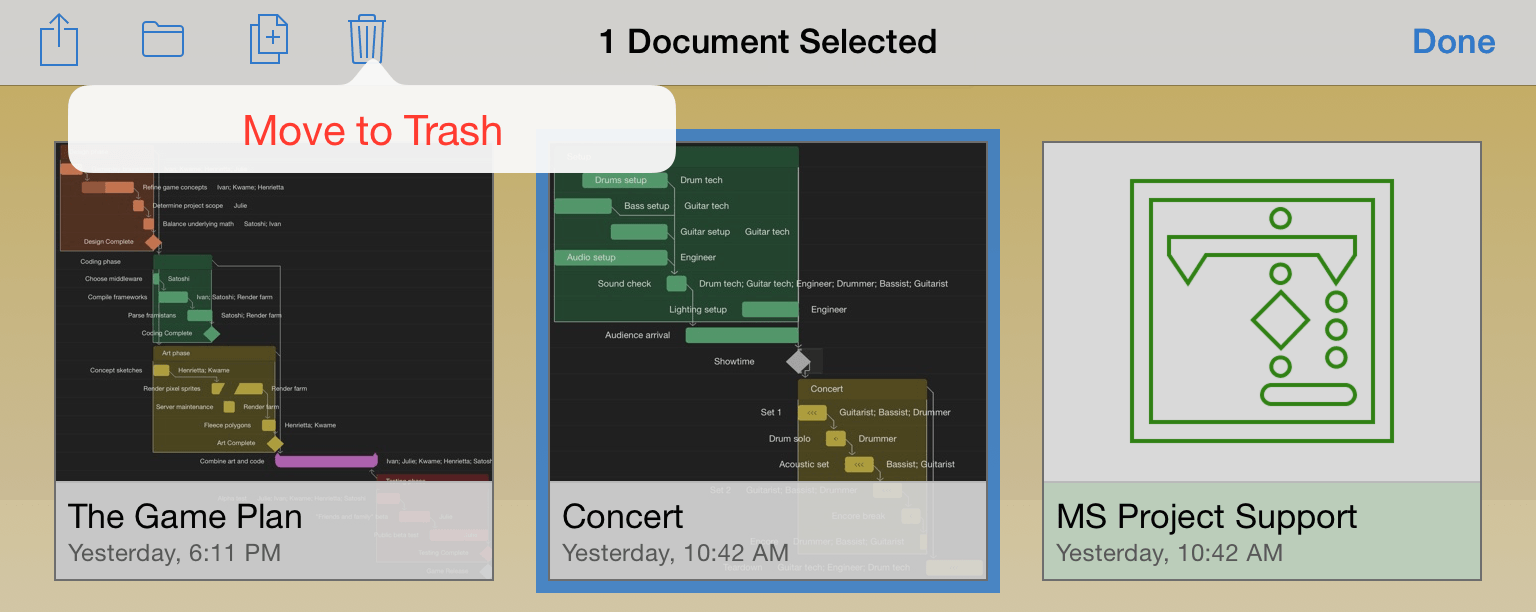
Fortunately, deleting files from OmniPlan is easy. When viewing a folder of documents, tap Select in the navigation bar at the top of the screen. Then tap the documents you’d like to delete; you’ll see that the files now have a blue highlight.
Tap the trash can in the navigation bar to move the document to the Trash.
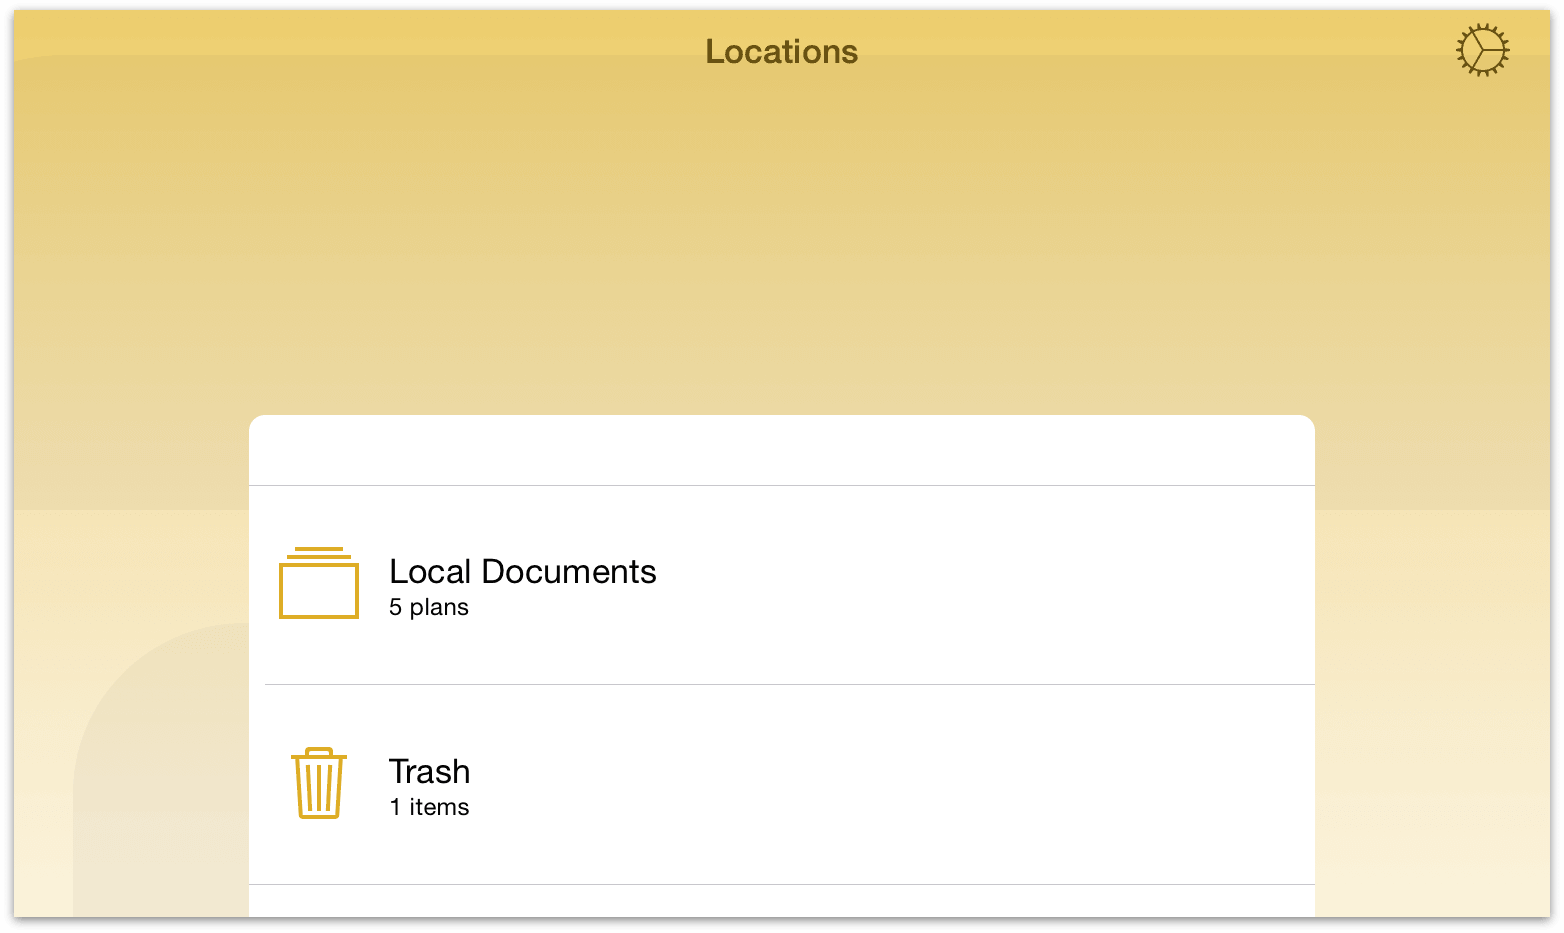
If you tap Locations in the navigation bar, you’ll see a Trash folder in your list of OmniPlan folders. Until you empty the trash, the files remain on your device.
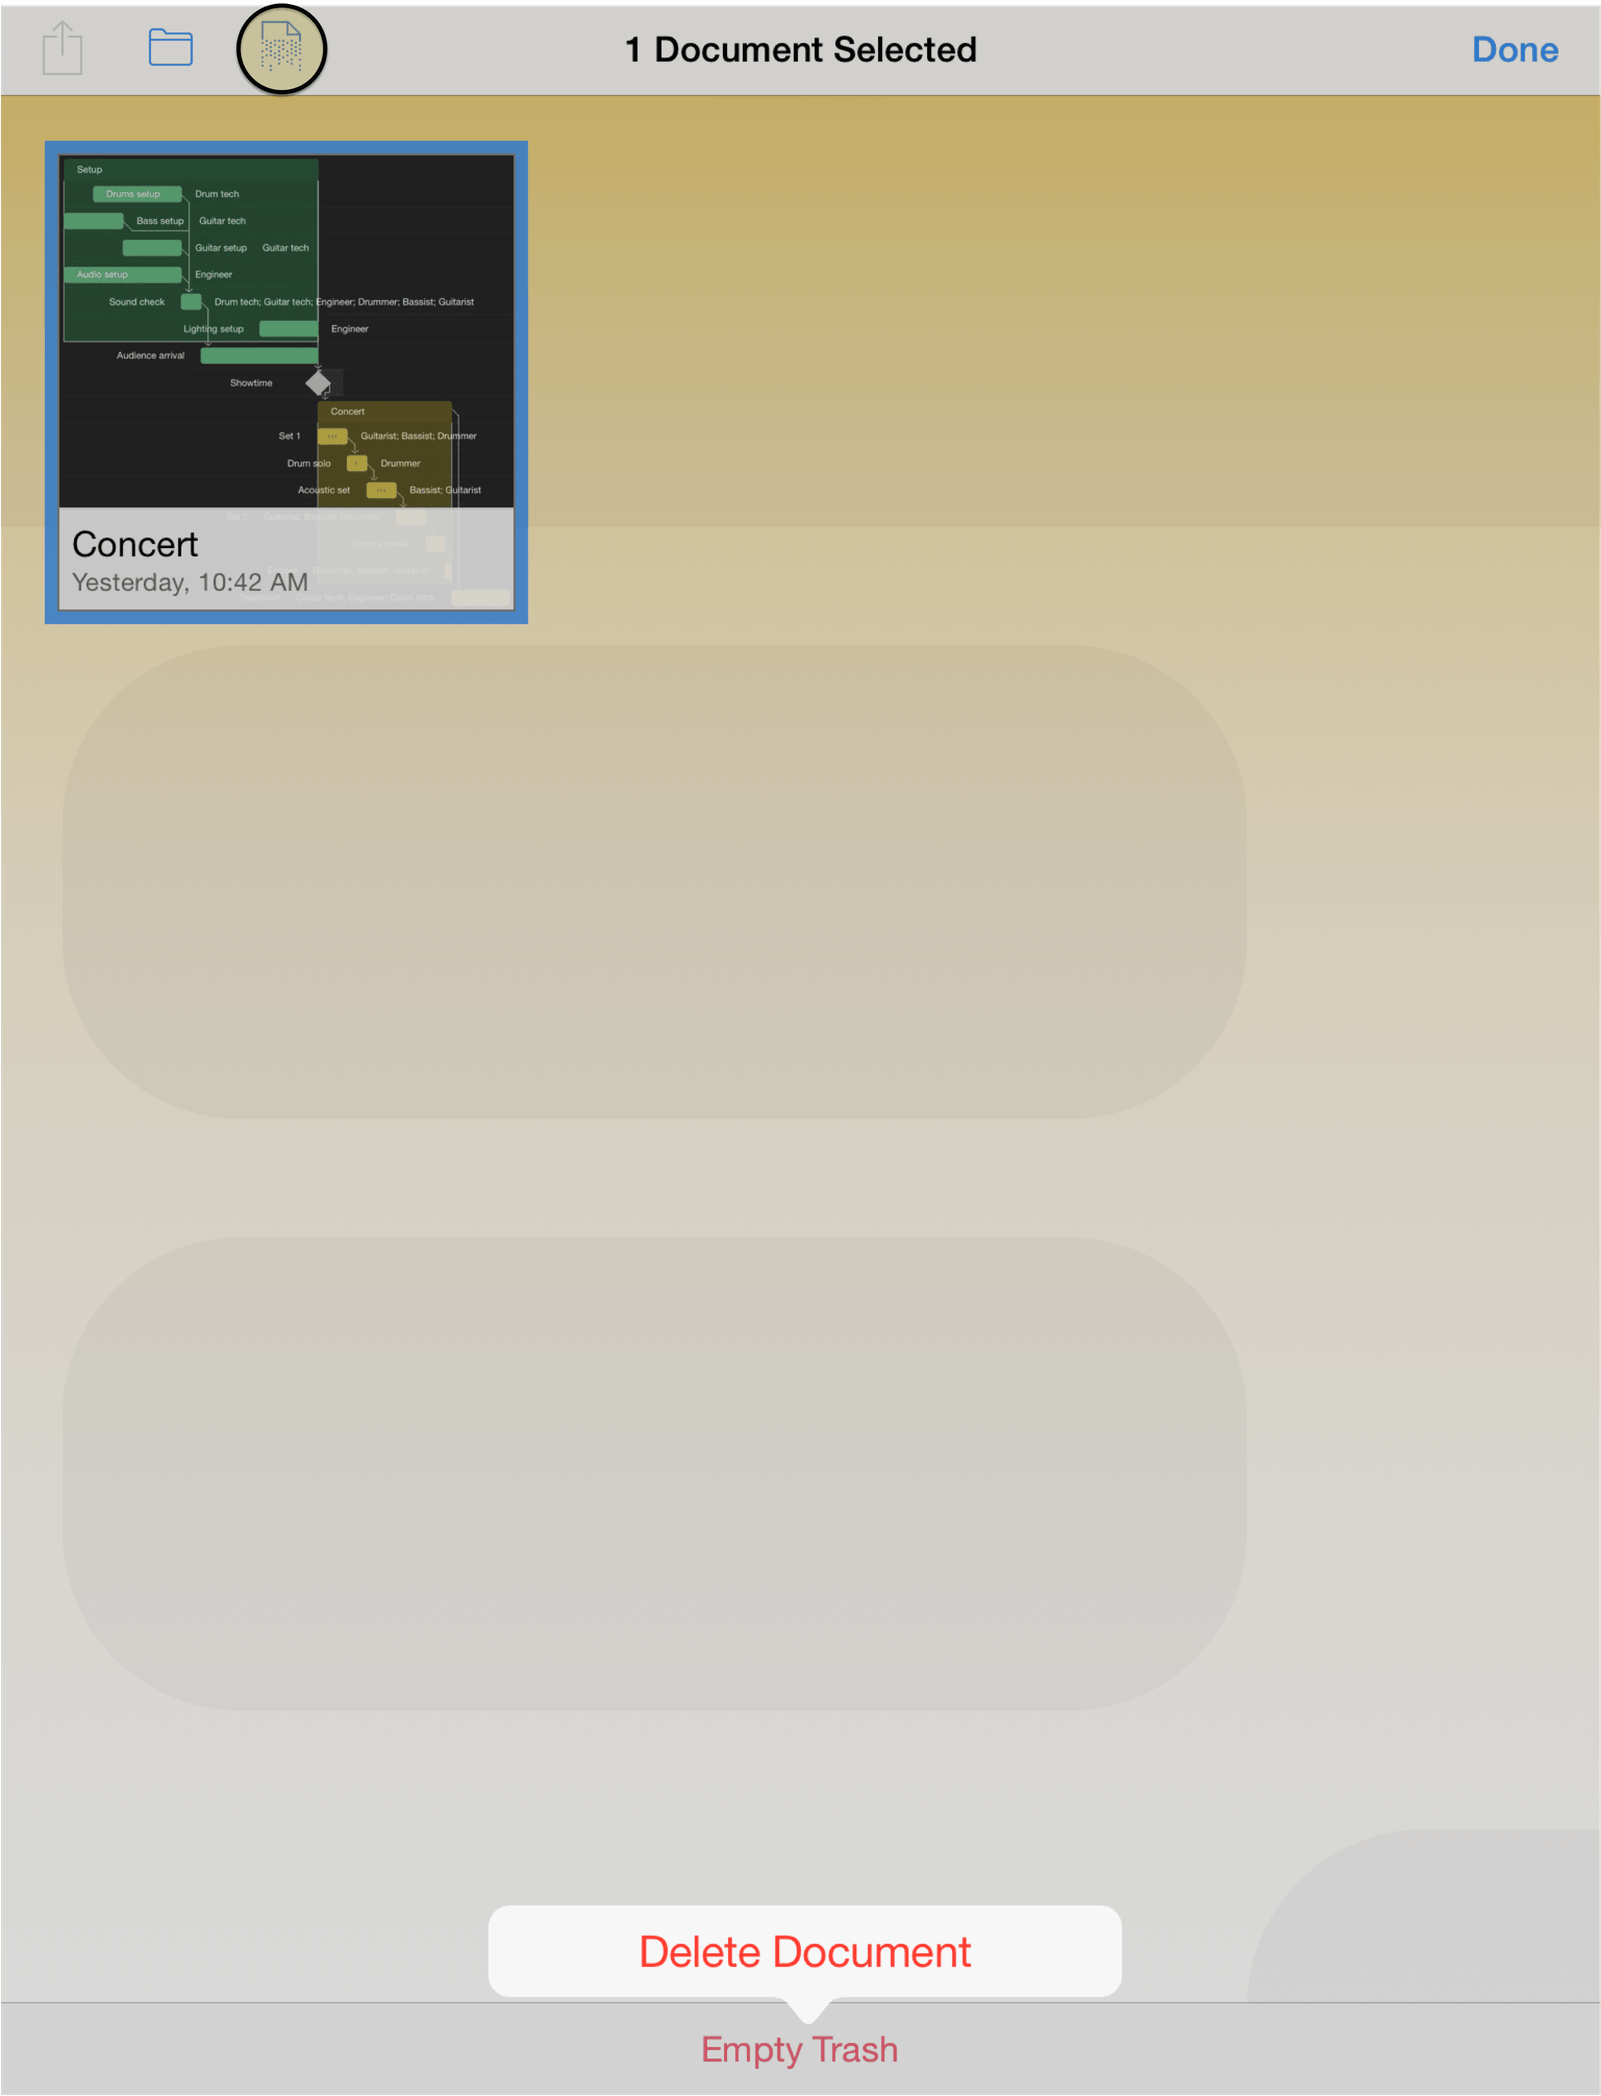
Tap the Trash folder to open it in the Document Browser, and then tap Empty Trash to permanently delete the files from your device. The Delete button (the shredder icon, circled) will also delete items selected normally.
After all files in the Trash folder are deleted, you’re taken back to the Locations screen in OmniPlan.
Exporting from OmniPlan
Every now and then you’ll find the need to share some document you’ve created in OmniPlan with someone else. But with files local to your device, how are you going to do this?
When you open a folder, such as your Local Documents folder, tap Select in the navigation bar, and then select the project that you’d like to share. This places a blue highlight around the file to let you know which file you have selected.
Now tap the Share button in the navigation bar and select from one of the following options:
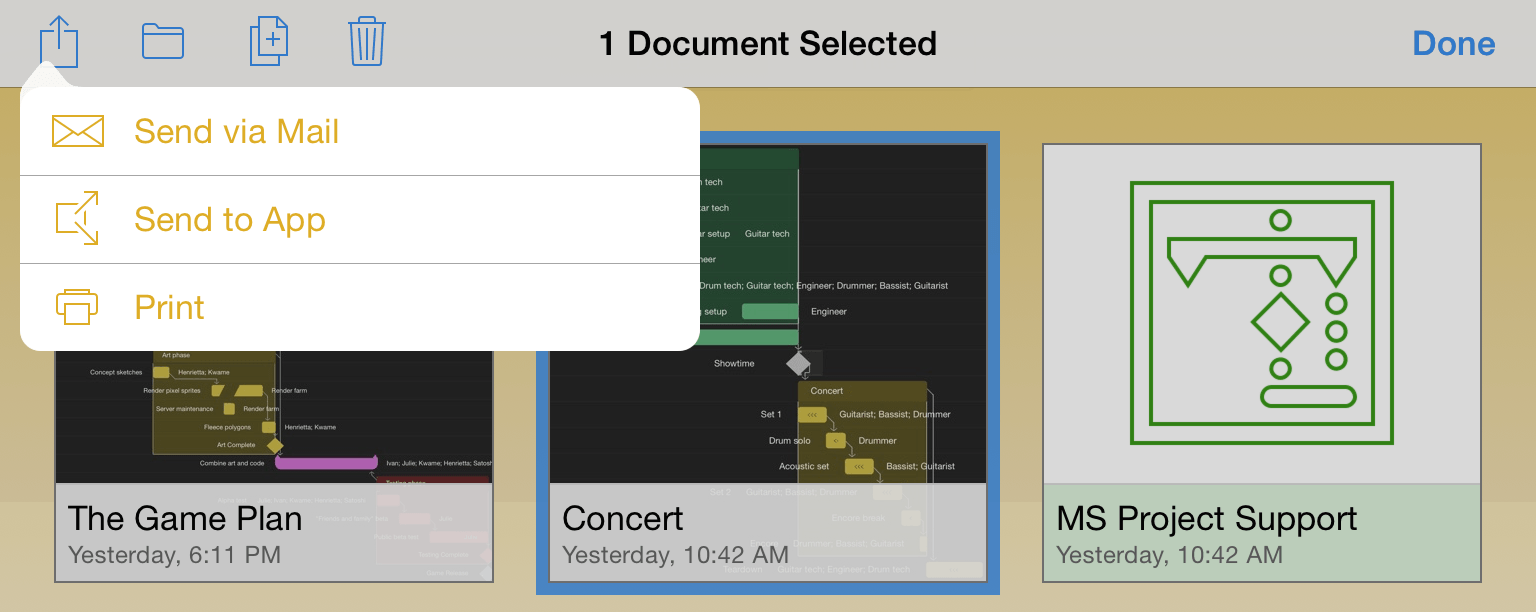
Send via Mail—lets you choose a document format for the file you want to email, and then queues up an email message for your to send.
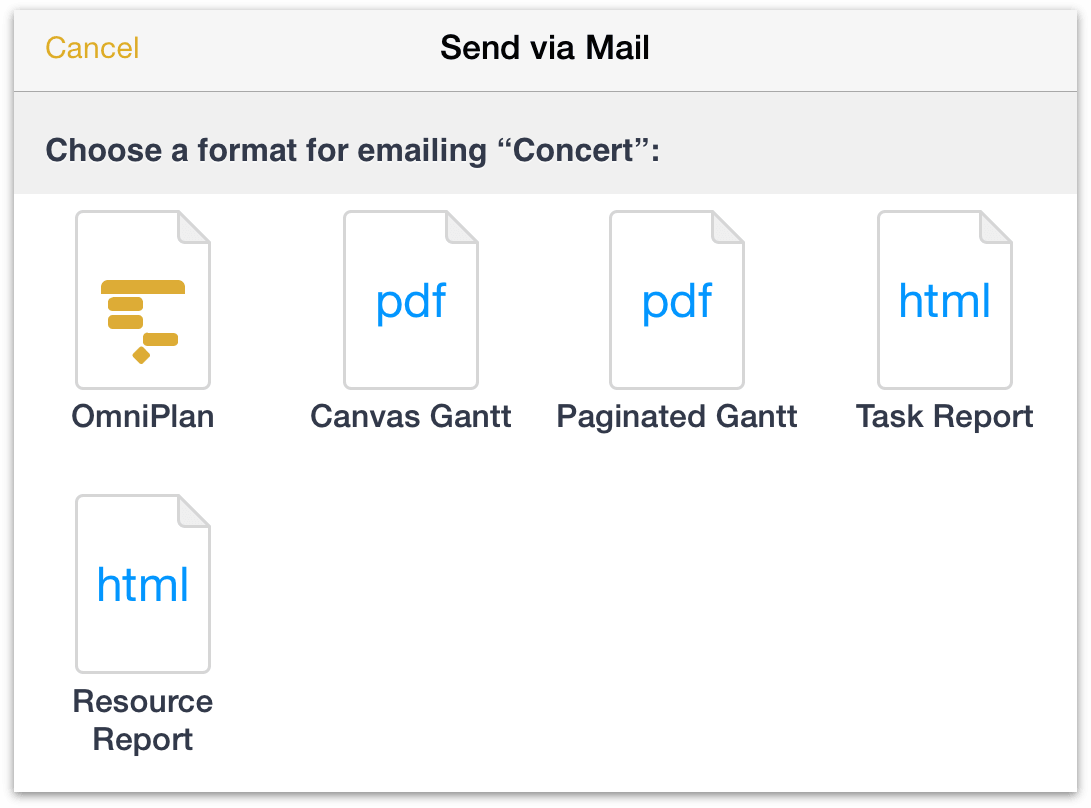
Send to App—lets you open the file in a compatible app on your device, or, if you are on a Wi-Fi network with someone you know, you can share the file with another iOS device using AirDrop. The two PDF options—Canvas Gantt and Paginated Gantt—can also be sent to iBooks or any other iOS app that can render a PDF file.
Print—lets you print the project’s Gantt chart to an AirPrint-compatible printer.
Importing to OmniPlan
If you receive OmniPlan files from elsewhere and would like to open them in OmniPlan for iOS, there are two primary ways to import files from other locations into OmniPlan on your iOS device.
Note
When using OmniPlan on other devices you own, syncing (as described in Chapter 3) is preferable to other methods. It’s faster, simpler (once set up), provides a layer of backup for your documents, and helps avoid a mess of contradictory file copies.
The first way to bring OmniPlan documents from the outside into OmniPlan for iOS is to copy them from another app. This works particularly well with Apple’s built in Mail app for iOS—you can email an OmniPlan file to yourself from anywhere, then tap the attachment and choose Copy to OmniPlan from the Send dialog that appears.
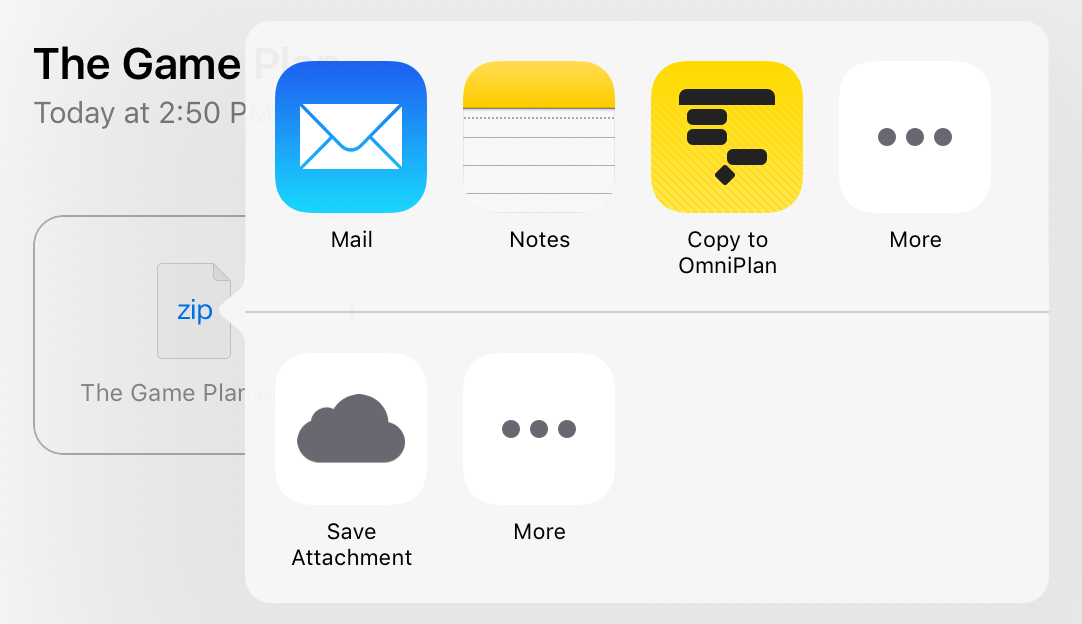
If you have a Mac or a PC with iTunes installed, a second way to transfer OmniPlan files to your iOS device is with iTunes file transfer.
- Make sure your iOS device with OmniPlan is connected to iTunes.
- Choose your device from the device list.
- Choose Apps in the device’s Settings sidebar and scroll down to the File Sharing section of the apps list
- Select OmniPlan in the list of file transfer-capable apps, and drag and drop your files into the list of OmniPlan documents.

Microsoft Project Import and Export (Pro)
With OmniPlan Pro, OmniPlan gains the ability to edit and export Microsoft Project .mpp files.
Tip
The OmniPlan Pro upgrade isn’t required to import and view your Microsoft Project documents in OmniPlan for iOS—just to edit and export them.
If you’re not sure whether OmniPlan’s Microsoft Project support will meet your project’s needs, it’s a good idea to try importing a few files first to see how they look.
With OmniPlan Pro, the option to export documents as Microsoft Project .mpp files is displayed alongside the other options when choosing Send via Mail or Send to App.
To import Microsoft Project files, select them in any app where they live on your device (such as the built-in iOS Mail app) and use that app’s Send feature to choose OmniPlan as its destination.
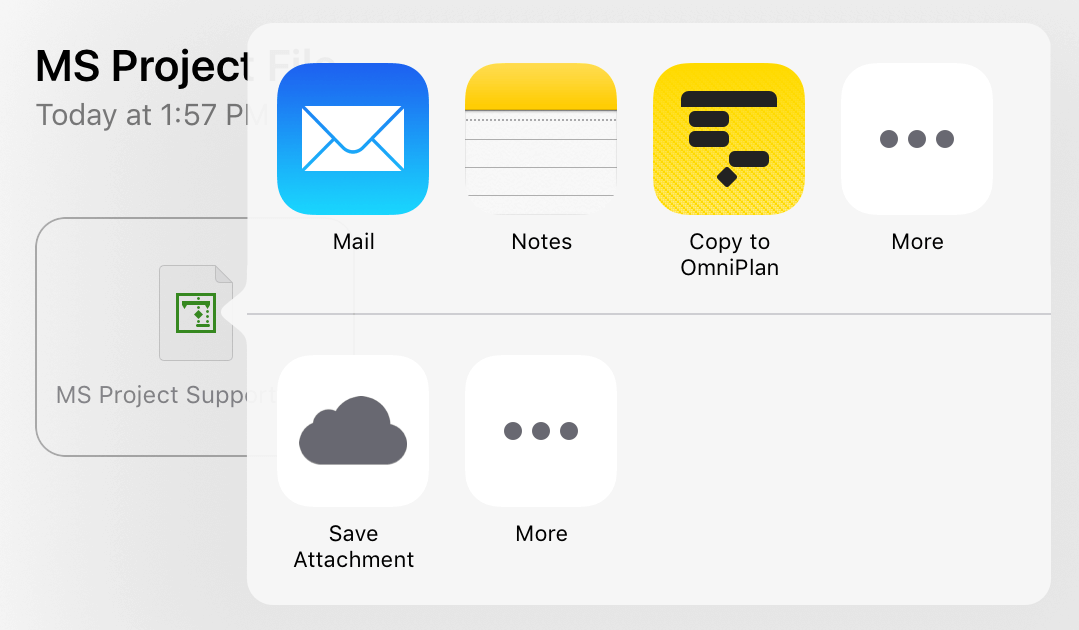
Alternatively, if you have a Microsoft Project file on your Mac or PC with iTunes installed, you can use iTunes file transfer to drag and drop documents directly into OmniPlan for iOS.
- Make sure your iOS device with OmniPlan is connected to iTunes.
- Choose your device from the device list.
- Choose Apps in the device’s Settings sidebar and scroll down to the File Sharing section of the apps list
- Select OmniPlan in the list of file transfer-capable apps, and drag and drop your .mpp files into the list of OmniPlan documents.

Microsoft Project .mpp files that haven’t yet been converted to OmniPlan’s .oplx file format are shown in the document browser with the following icon.

Once converted and saved, a Microsoft Project file appears and behaves just like any other OmniPlan document, and must be exported in the .mpp format again to be read by Microsoft Project.
OmniPlan Settings
Tap the gear icon in the Document Browser toolbar to access OmniPlan settings. You will find lots of useful information about the app here, including links to support resources, the upgrade dialog for accessing Pro features, and diagnostic reference information if you ever need technical assistance from Omni.
About OmniPlan—this displays a screen with information about the version of OmniPlan you have installed.
OmniPlan Help—this takes you a screen with links to support resources for OmniPlan, including web-based and eBook versions of this manual.
Contact Omni—this queues up an email message that you can send to the kind and wonderful Support Humans here at Omni. Don’t hesitate to ask us a question or send us feedback.
Release Notes—discover what’s new in the latest version of OmniPlan.
Restore Sample Documents—if you previously deleted any of the sample documents that came with OmniPlan, tap here to restore them to your device.
Upgrade to Pro—the Pro in-app purchase is an add-on for OmniPlan that includes multi-collaborator publication, subscription, and change tracking, Monte Carlo effort estimation simulations, the ability to import Microsoft Project files as OmniPlan files, and export of OmniPlan files to the MPP format readable by Microsoft Project 2016.
Settings—this screen provides additional privacy options for OmniPlan, and lets you choose to share anonymous device information to help us improve the app.
App Lock—to keep others from accidentally viewing or modifying your OmniPlan data, add a password (or use Touch ID) to unlock the app. See Keeping Your Work Private with App Lock for details on this feature.
Send Anonymous Data—if you’d like to help Omni improve future versions of OmniPlan, you can choose to share anonymous usage data with us. The full content of the data sent is displayed when you tap here.
Keeping Your Work Private with App Lock
If you use OmniPlan on a device that you occasionally share (with your children, coworkers, or clients, for example), there may be times when you would prefer that your OmniPlan data be out of reach.
The App Lock feature prevents accidental taps and casual glances by adding a password-locked privacy screen that must be dismissed before any of your documents or settings can be accessed.
A Note on Security
App Lock does not encrypt your data, and does not prevent someone with access to your device from connecting it to iTunes and copying your files, using VoiceOver to navigate content behind the lock screen, or deleting OmniPlan from your device outright.
App Lock is intended as a privacy feature to prevent accidental exposure or corruption of data when others are using your device. It is not meant to thwart serious attempts to access or compromise your data.
Device-level security measures are recommended for those with additional security needs.
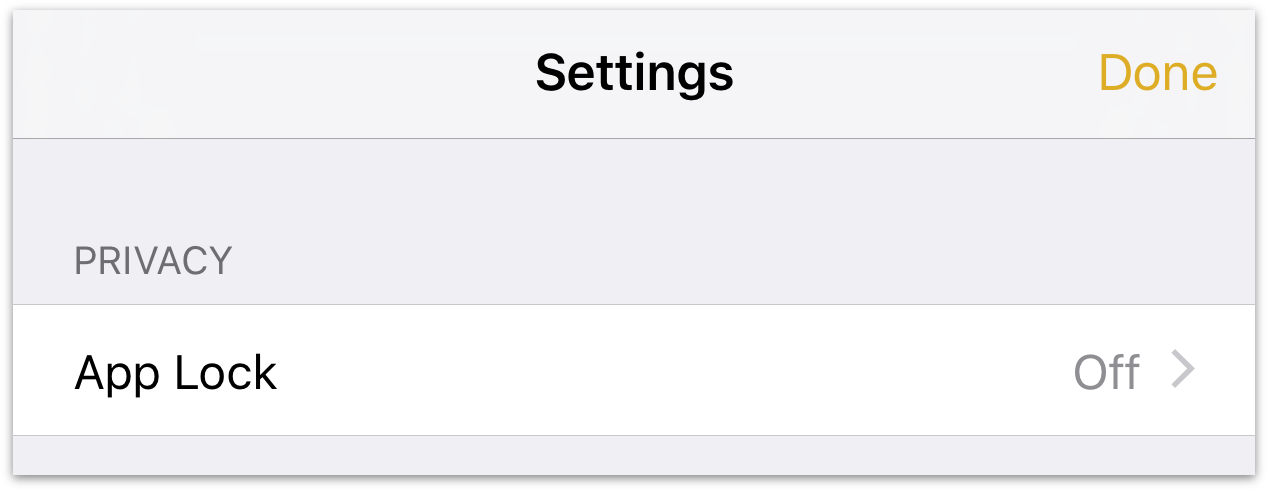
To use App Lock, tap the gear icon ![]() in the Document Browser toolbar and choose Settings. App Lock appears in the Privacy section of Settings, and is turned off by default.
in the Document Browser toolbar and choose Settings. App Lock appears in the Privacy section of Settings, and is turned off by default.
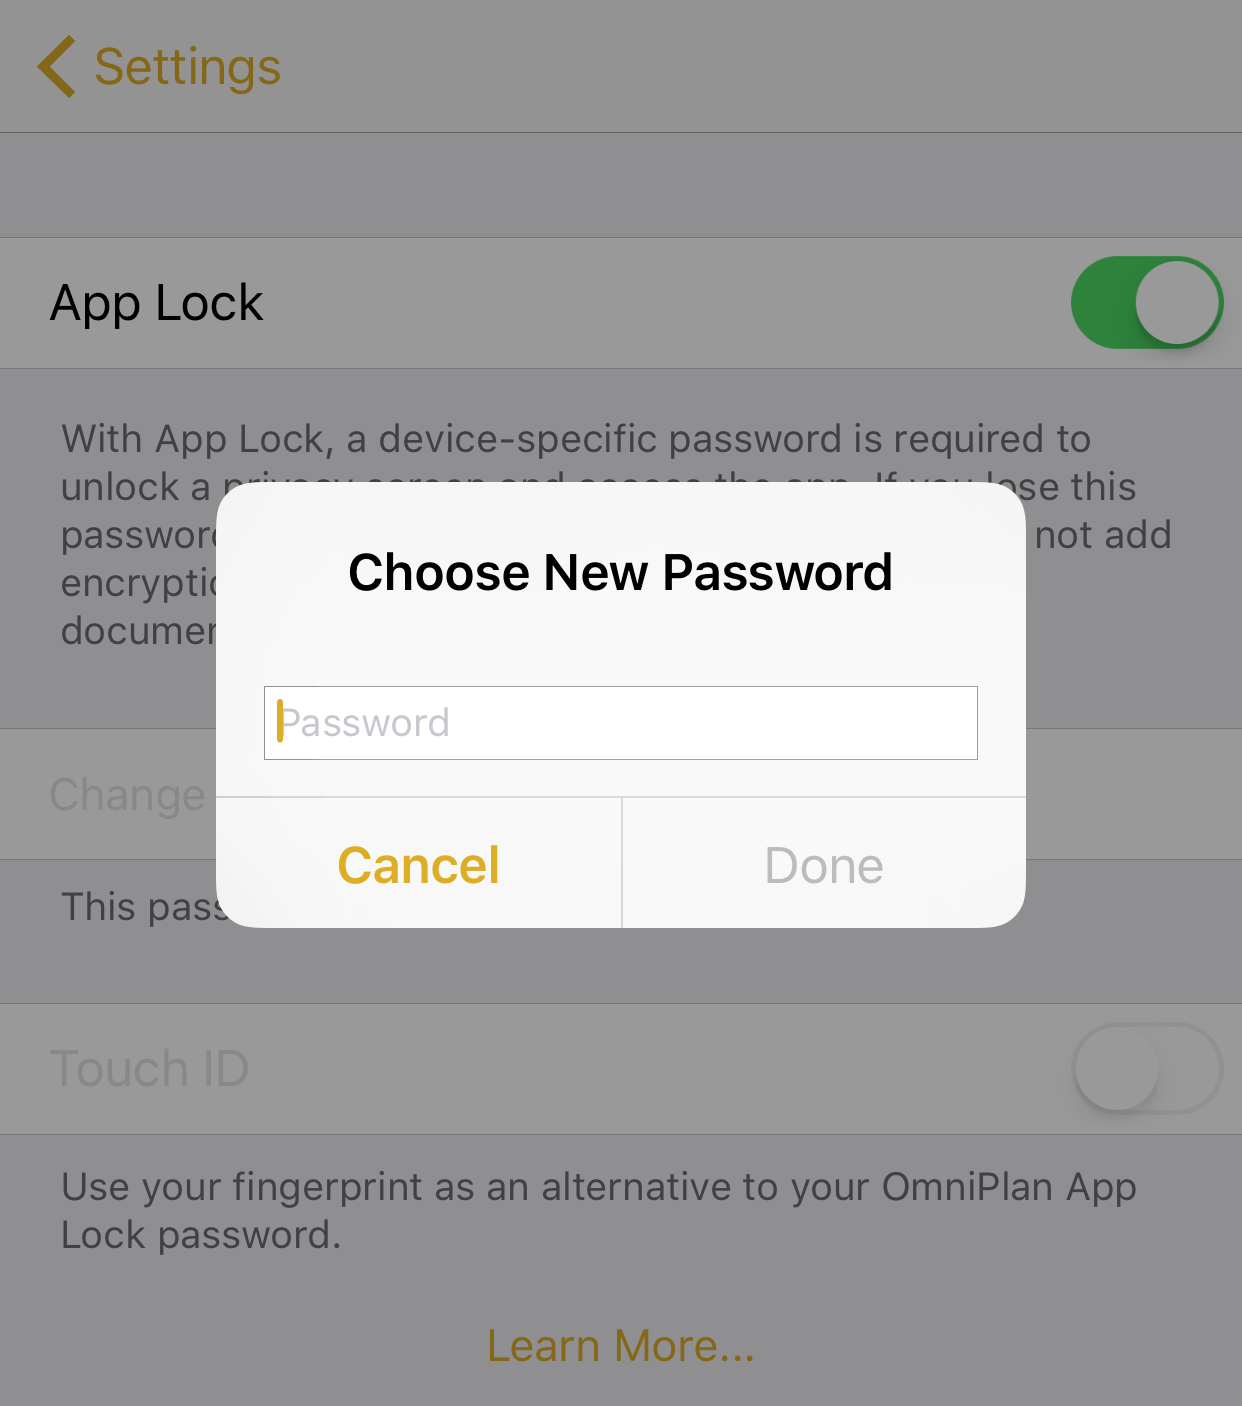
When you turn on App Lock, you will be prompted to choose and confirm a new password. If you use OmniPlan on multiple iOS devices, you need to configure and set an App Lock password on each device. App Lock passwords are device-specific and do not sync across devices.
Warning
If you forget the App Lock password, OmniPlan can no longer be used on your device. However, you can retrieve your OmniPlan data by connecting your device to a computer with iTunes and copying your files to a safe location.
After saving a backup of your data, remove App Lock by deleting OmniPlan from your device and reinstalling it from the App Store. When you delete OmniPlan, your files—and your App Lock password—are deleted from the device. After reinstalling OmniPlan, you can set a new App Lock password and use iTunes again to load your OmniPlan files back onto your device.
If, however, you have your files stored in the cloud—either on Omni Sync Server via OmniPresence or some other cloud storage system—you can skip the whole iTunes process and just delete and then reinstall OmniPlan from the App Store.
After choosing a password, App Lock is turned on. The App Lock Settings screen offers the option to turn App Lock back off, change your password, or enable Touch ID as an alternative means of unlocking OmniPlan on devices that support it.
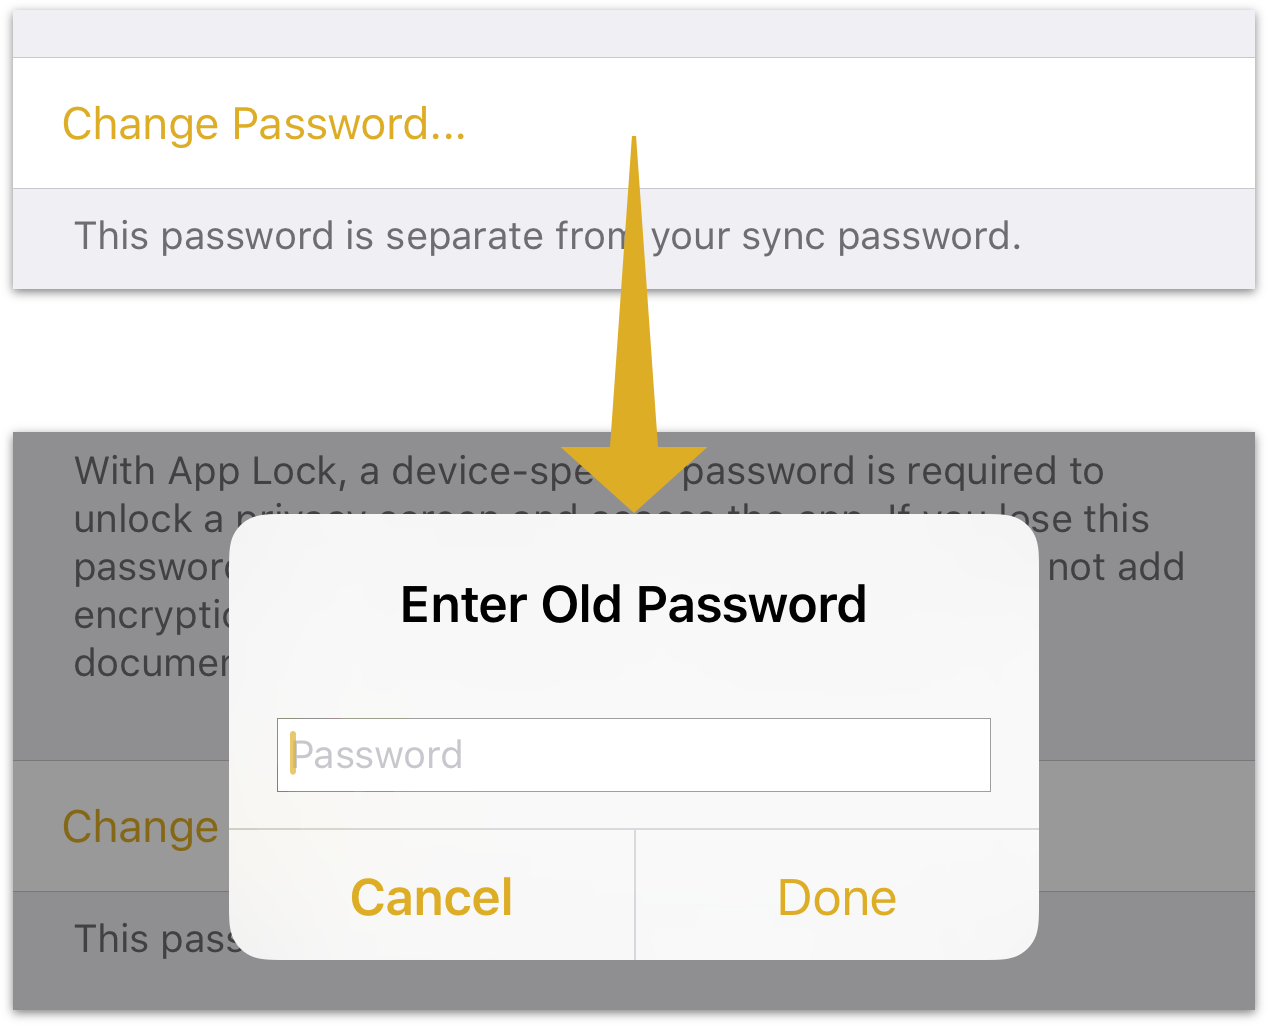
To change your password, Tap Change Password.... You are prompted to enter your old password, and then to choose and confirm a new one.
With App Lock turned on, the next time you open OmniPlan you will see a privacy screen with a field to enter the password you chose. Enter the password, and work resumes unimpeded.

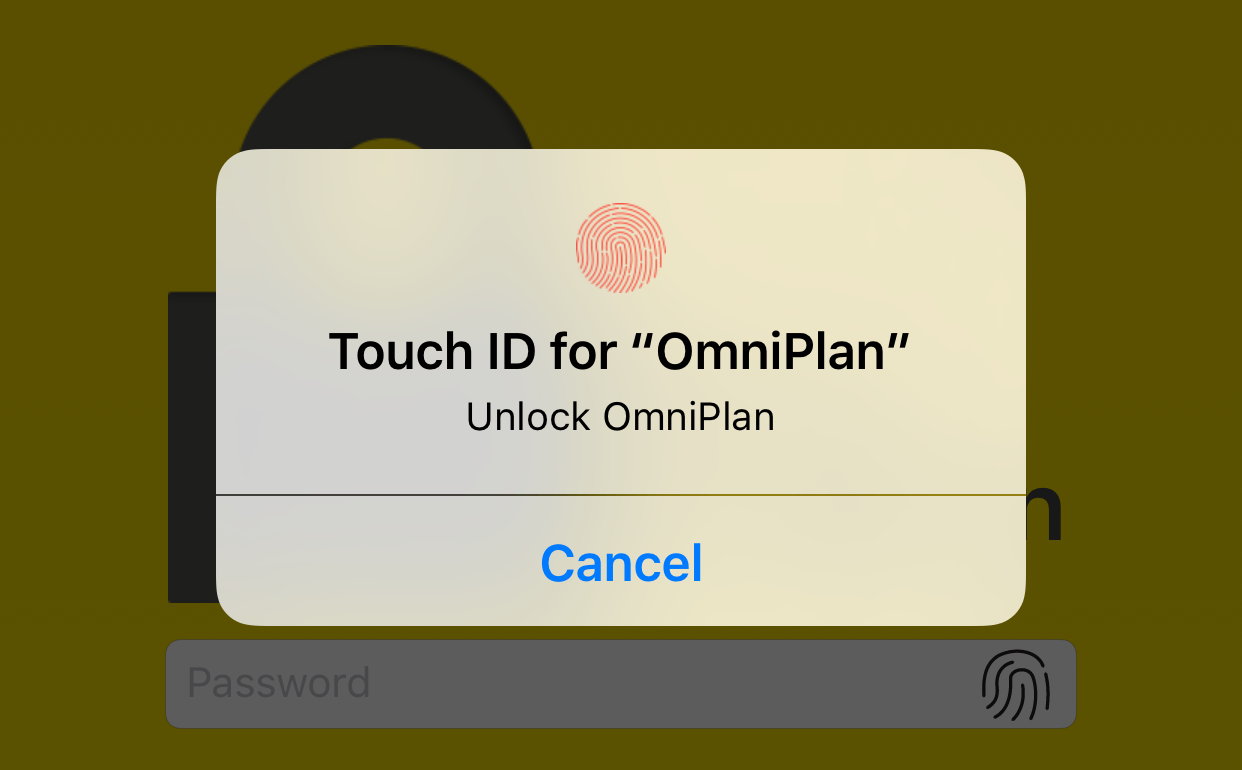
If you choose to use Touch ID, a prompt for your fingerprint will appear instead. You will still have the option to enter your password, or you can tap the fingerprint icon next to the password field to unlock with Touch ID if you dismissed the prompt initially.
