Getting to Know OmniPlan
When you first launch OmniPlan you’re presented with a fresh new OmniPlan document, ready for cultivating to match the precise needs of the project at hand. What follows is an introduction to the various pieces of the app that you’ll be interacting with to craft a project to your specifications. To jump right in and get to work, see the Tutorial.
The Toolbar
Like most applications, the toolbar has buttons for command you use frequently. Some of the buttons change depending on whether you’re using the task view, resource view, or calendar view. Use the Customize Toolbar command in the View menu to set up the controls however you like.

Task View
Click the first button in the view control to see the Task view.
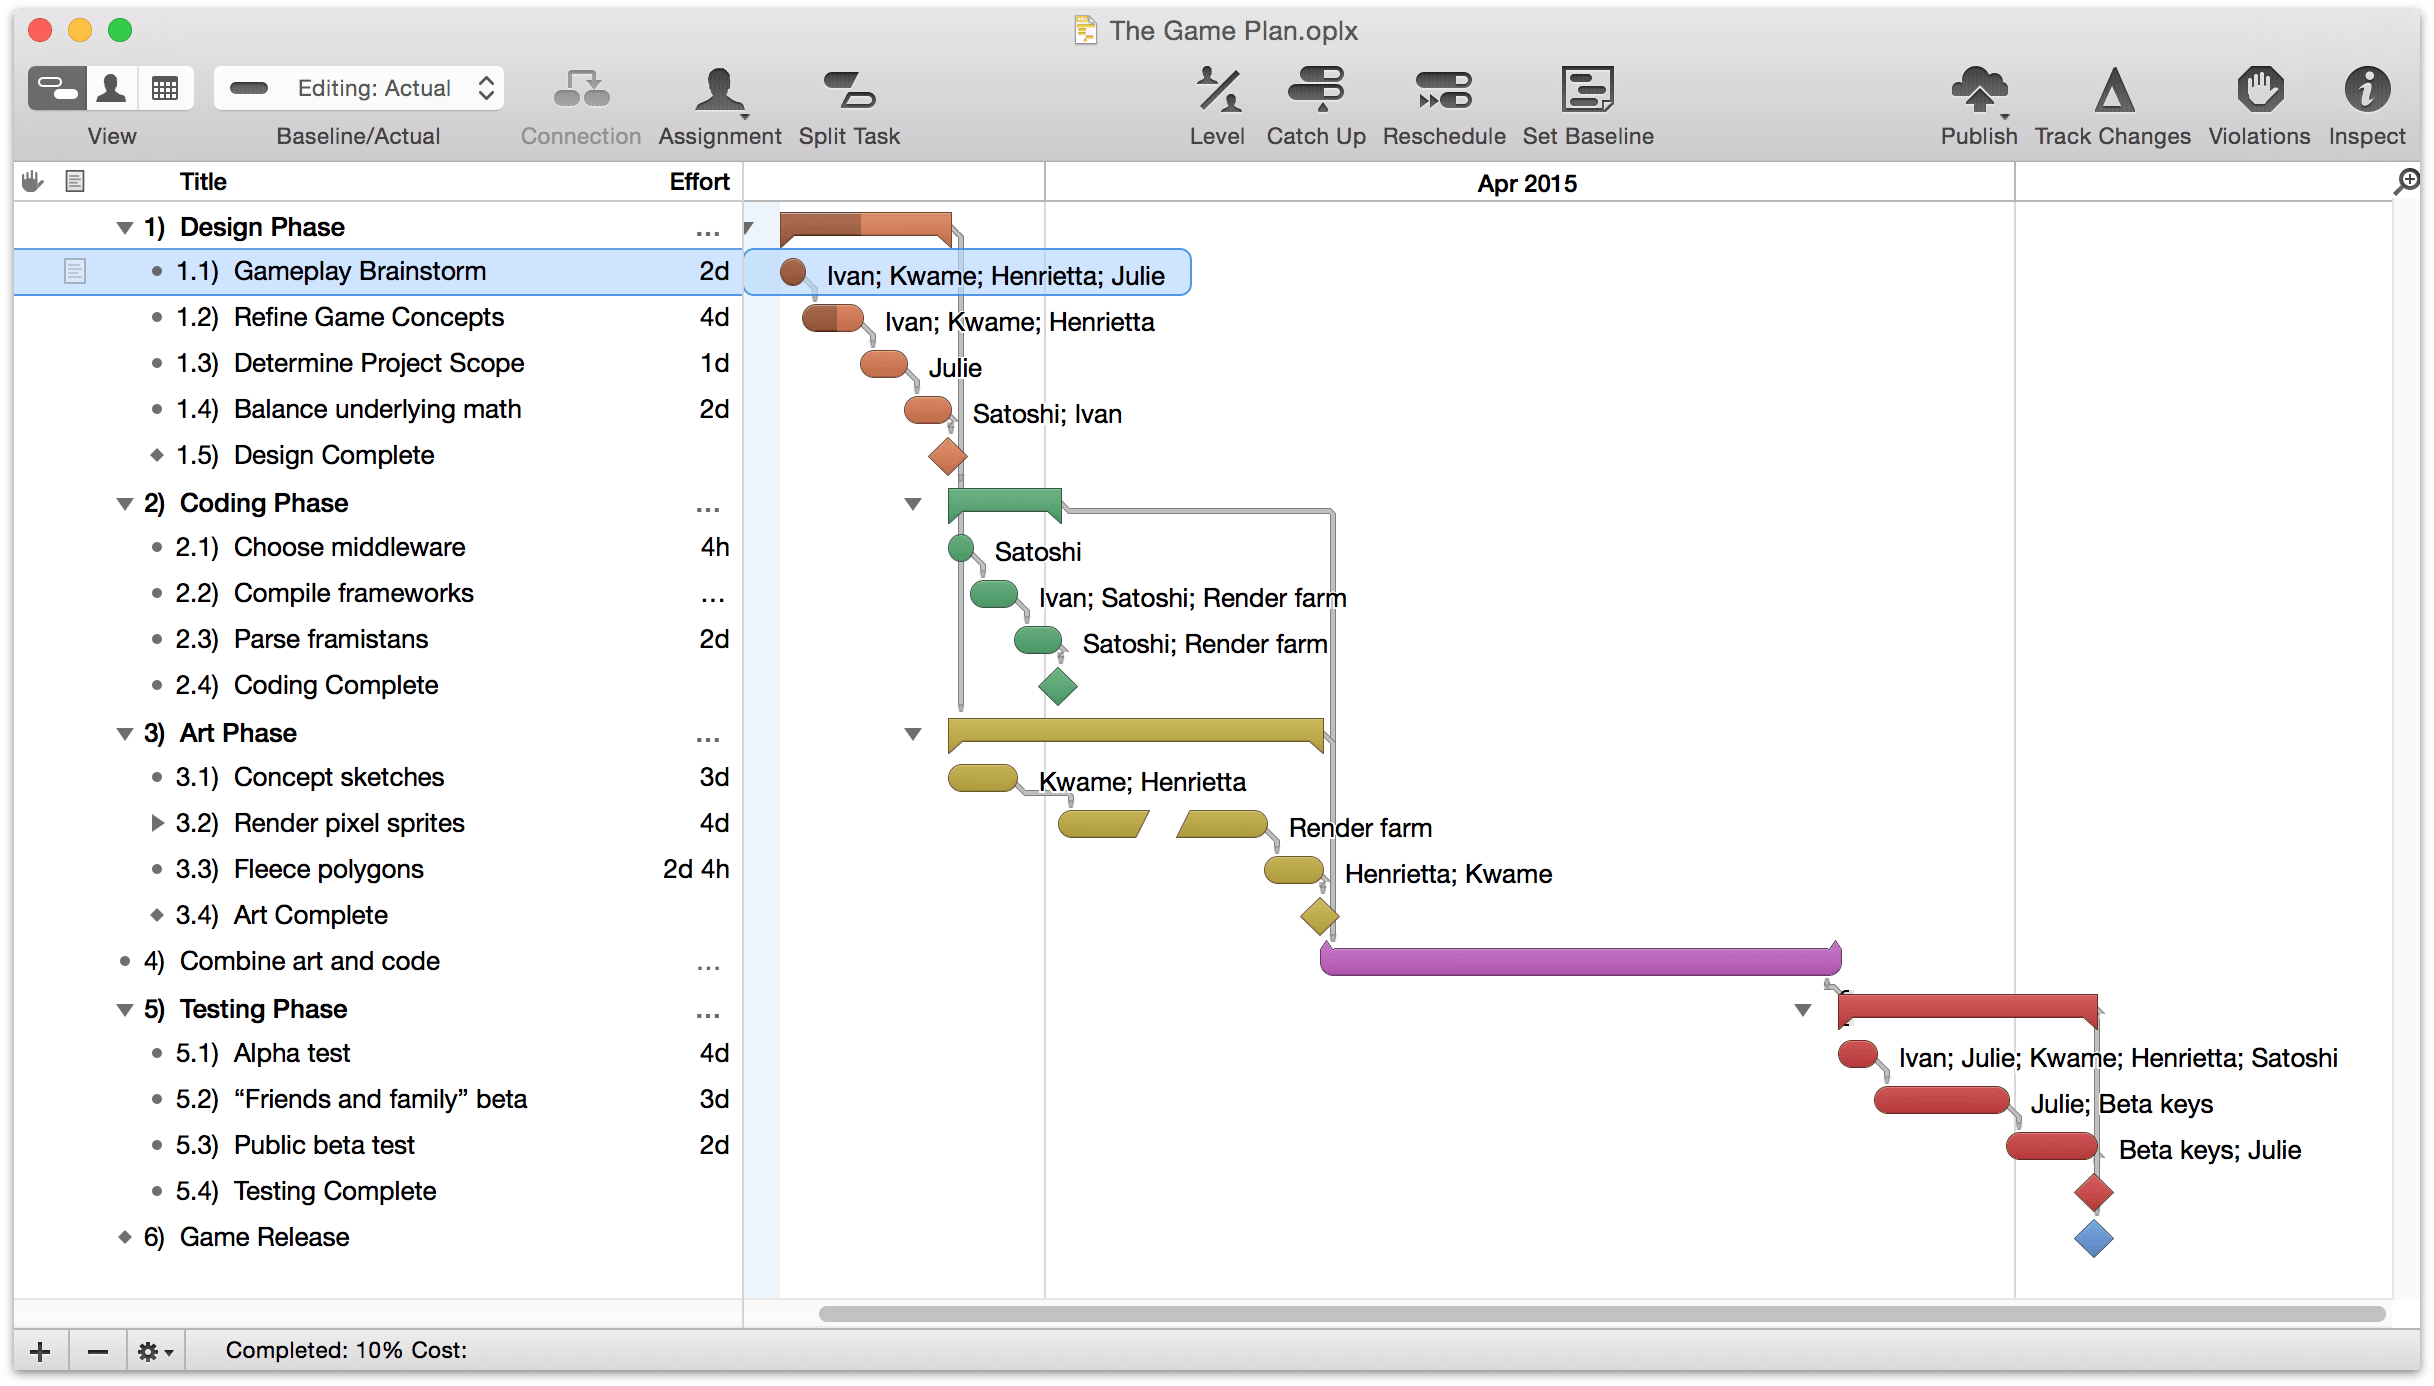
You can type in the task outline to create, edit, and group tasks. The Gantt chart is a visual representation of tasks’ durations and relationships.
Resource View
Click the second button in the view control to see the Resource view.
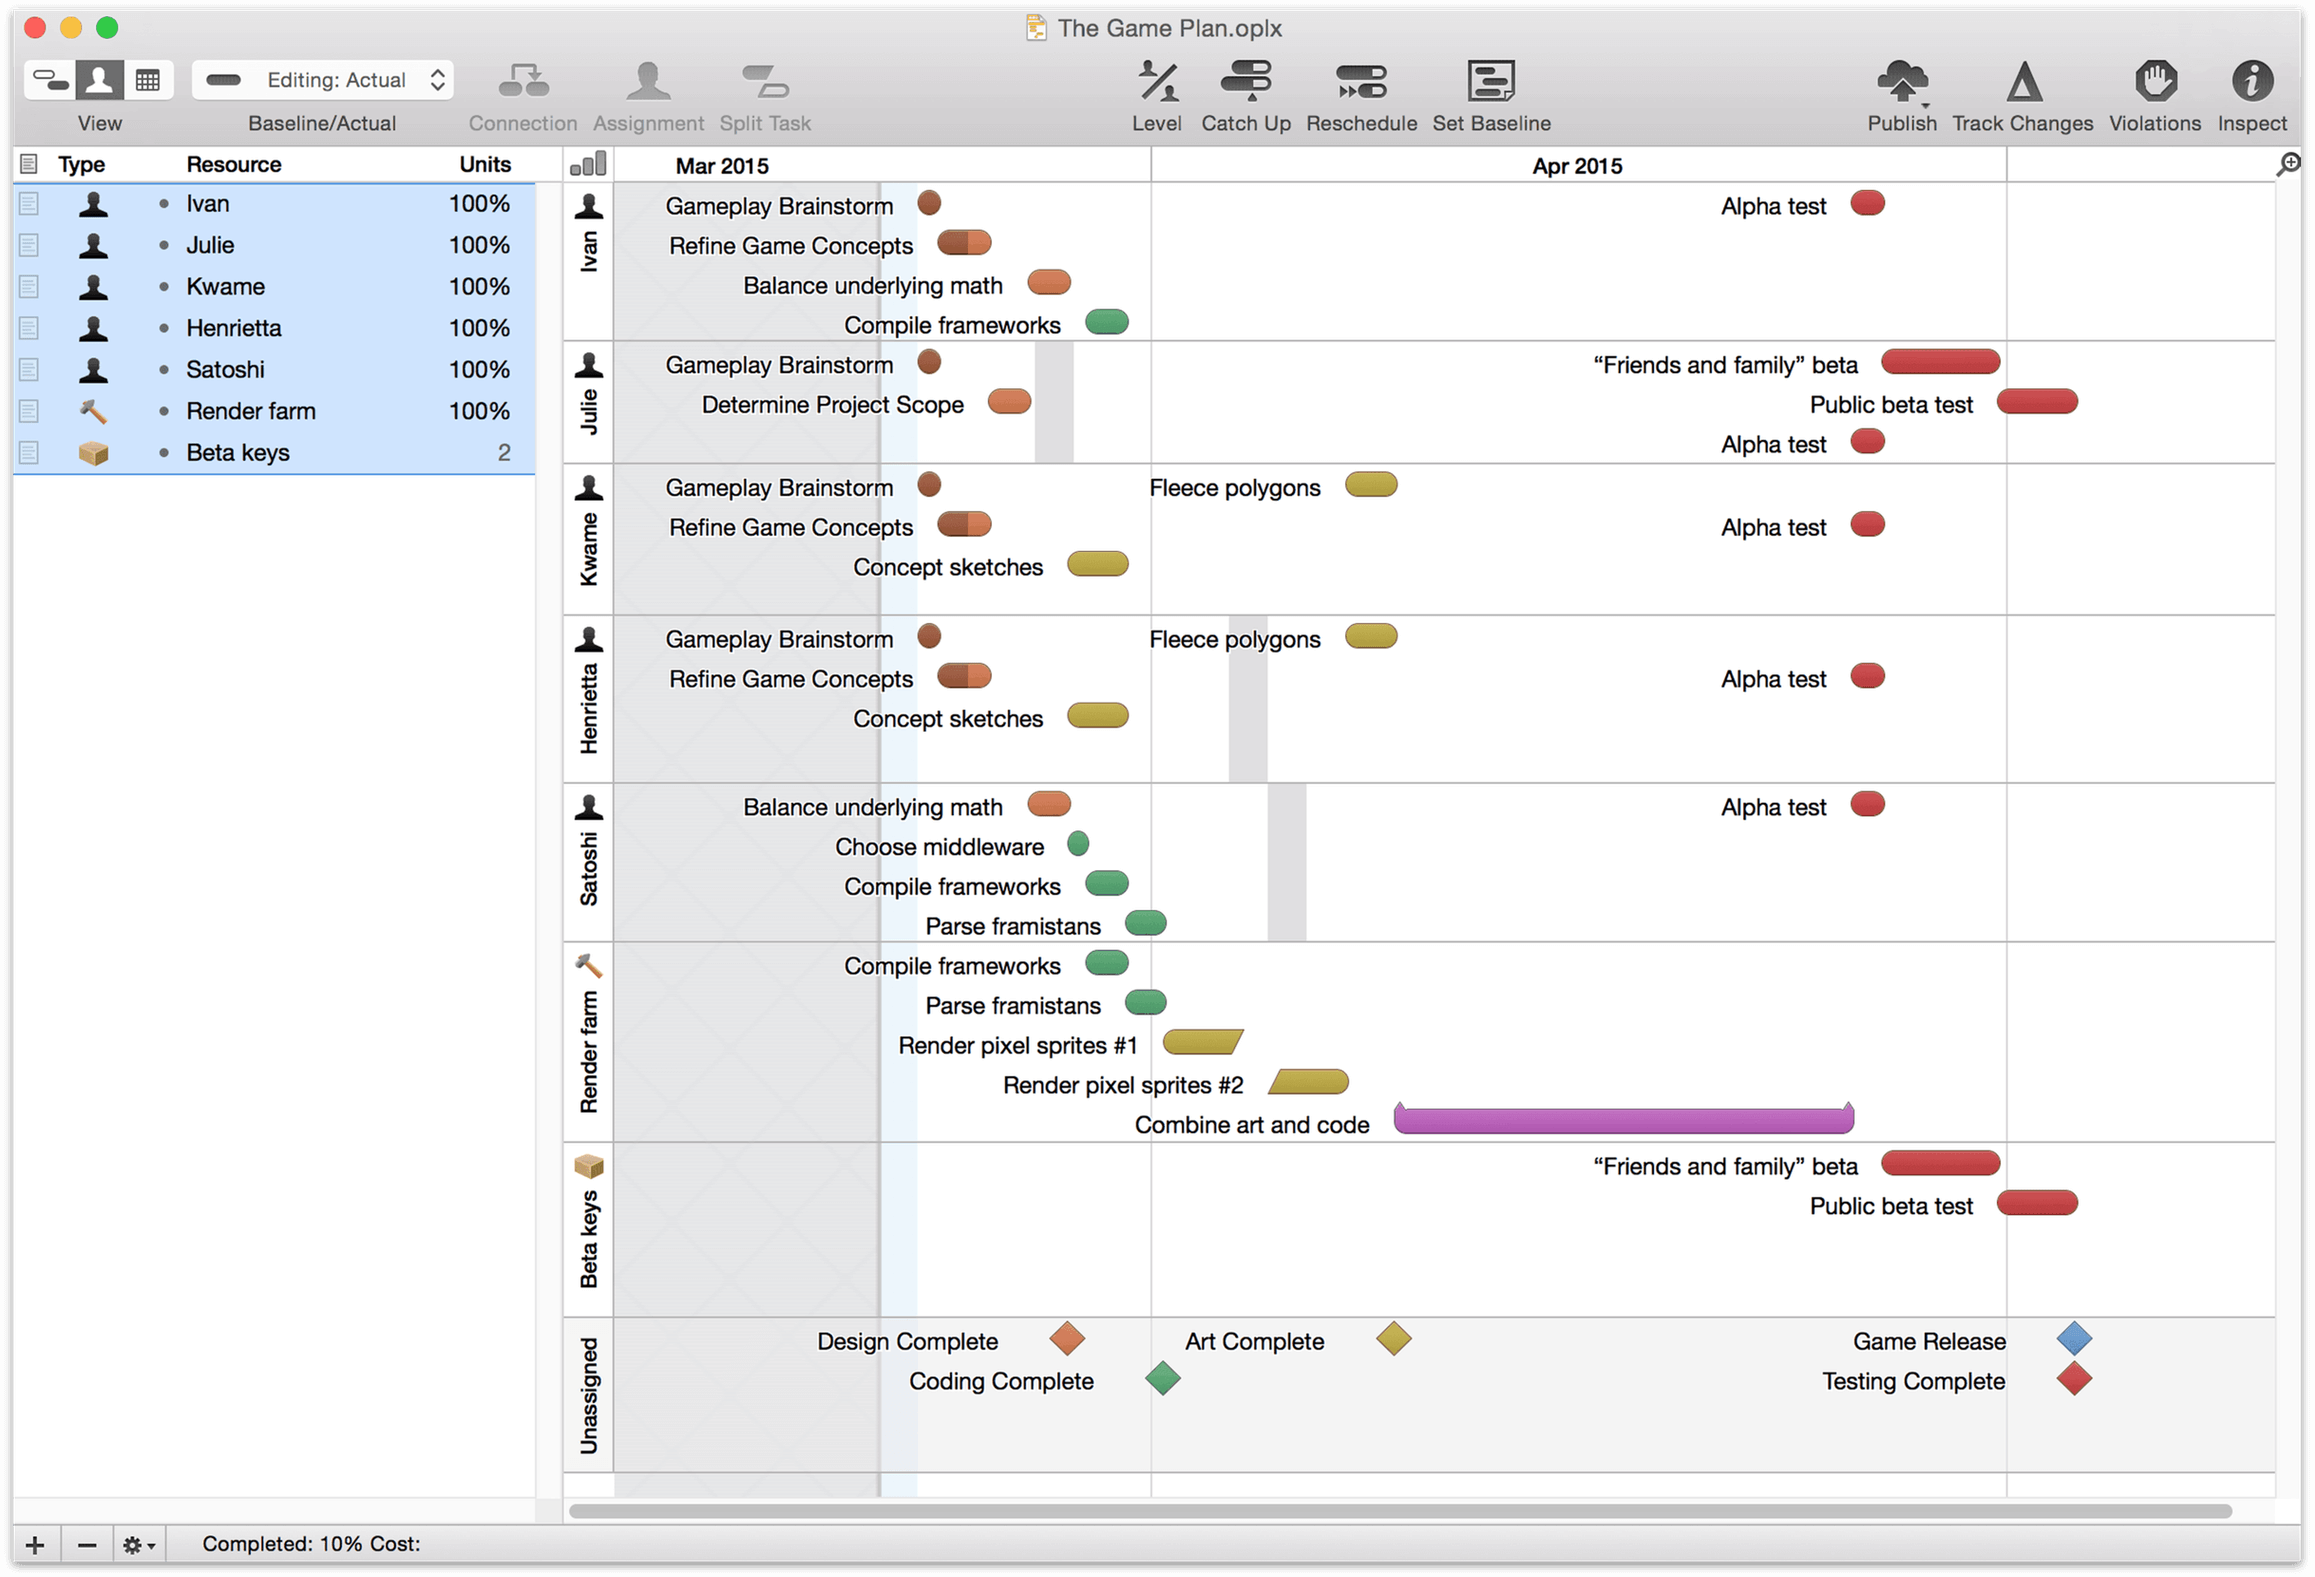
You can use the resource outline to manage staff, equipment, and materials. The timeline shows the same tasks as the task view’s Gantt chart, split up by which resource they are assigned to.
Calendar View
Click the third button in the view control to see your Calendar view.
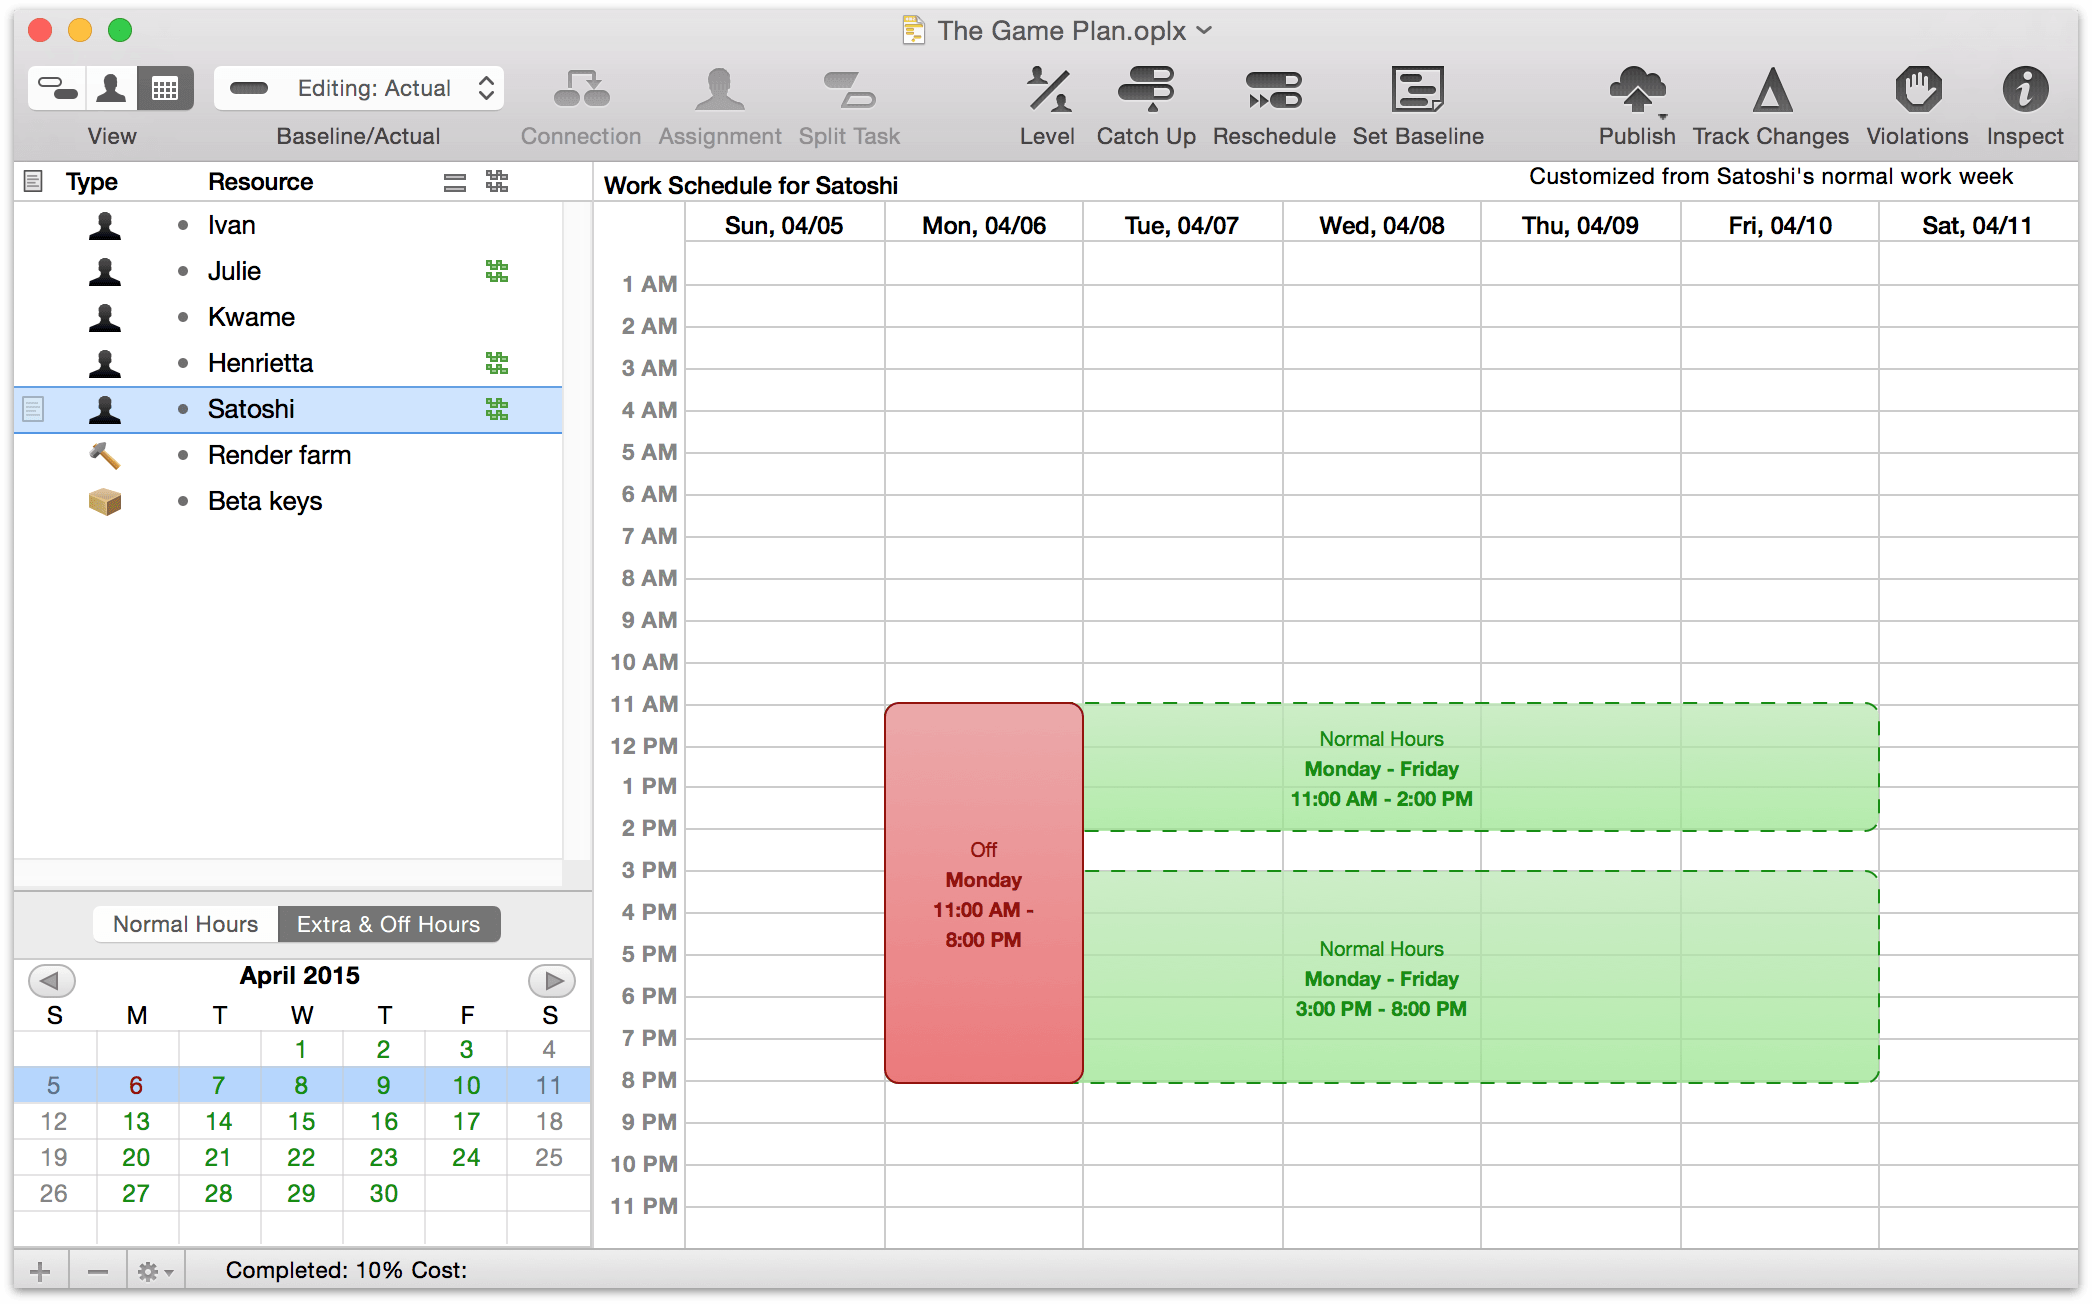
In the Normal Hours view, edit the working calendar for the whole project, and for individual resources (represented by green blocks). Use the Extra & Off Hours view to create hours for instances that deviate from the norm, represented by blue blocks.
Double-click or drag to add a new block or drag the edges of existing blocks to change their hours. Hold shift and drag in the Normal Hours view to create delete hours or mark hours as unavailable in the Extra & Off Hours view, represented by a red box.
To modify the calendars for an individual resource, select it in the outline.
View Options
Open the View menu and choose View Options (⌘J) to see the various ways you can customize the information displayed in the task, resource, and calendar views.
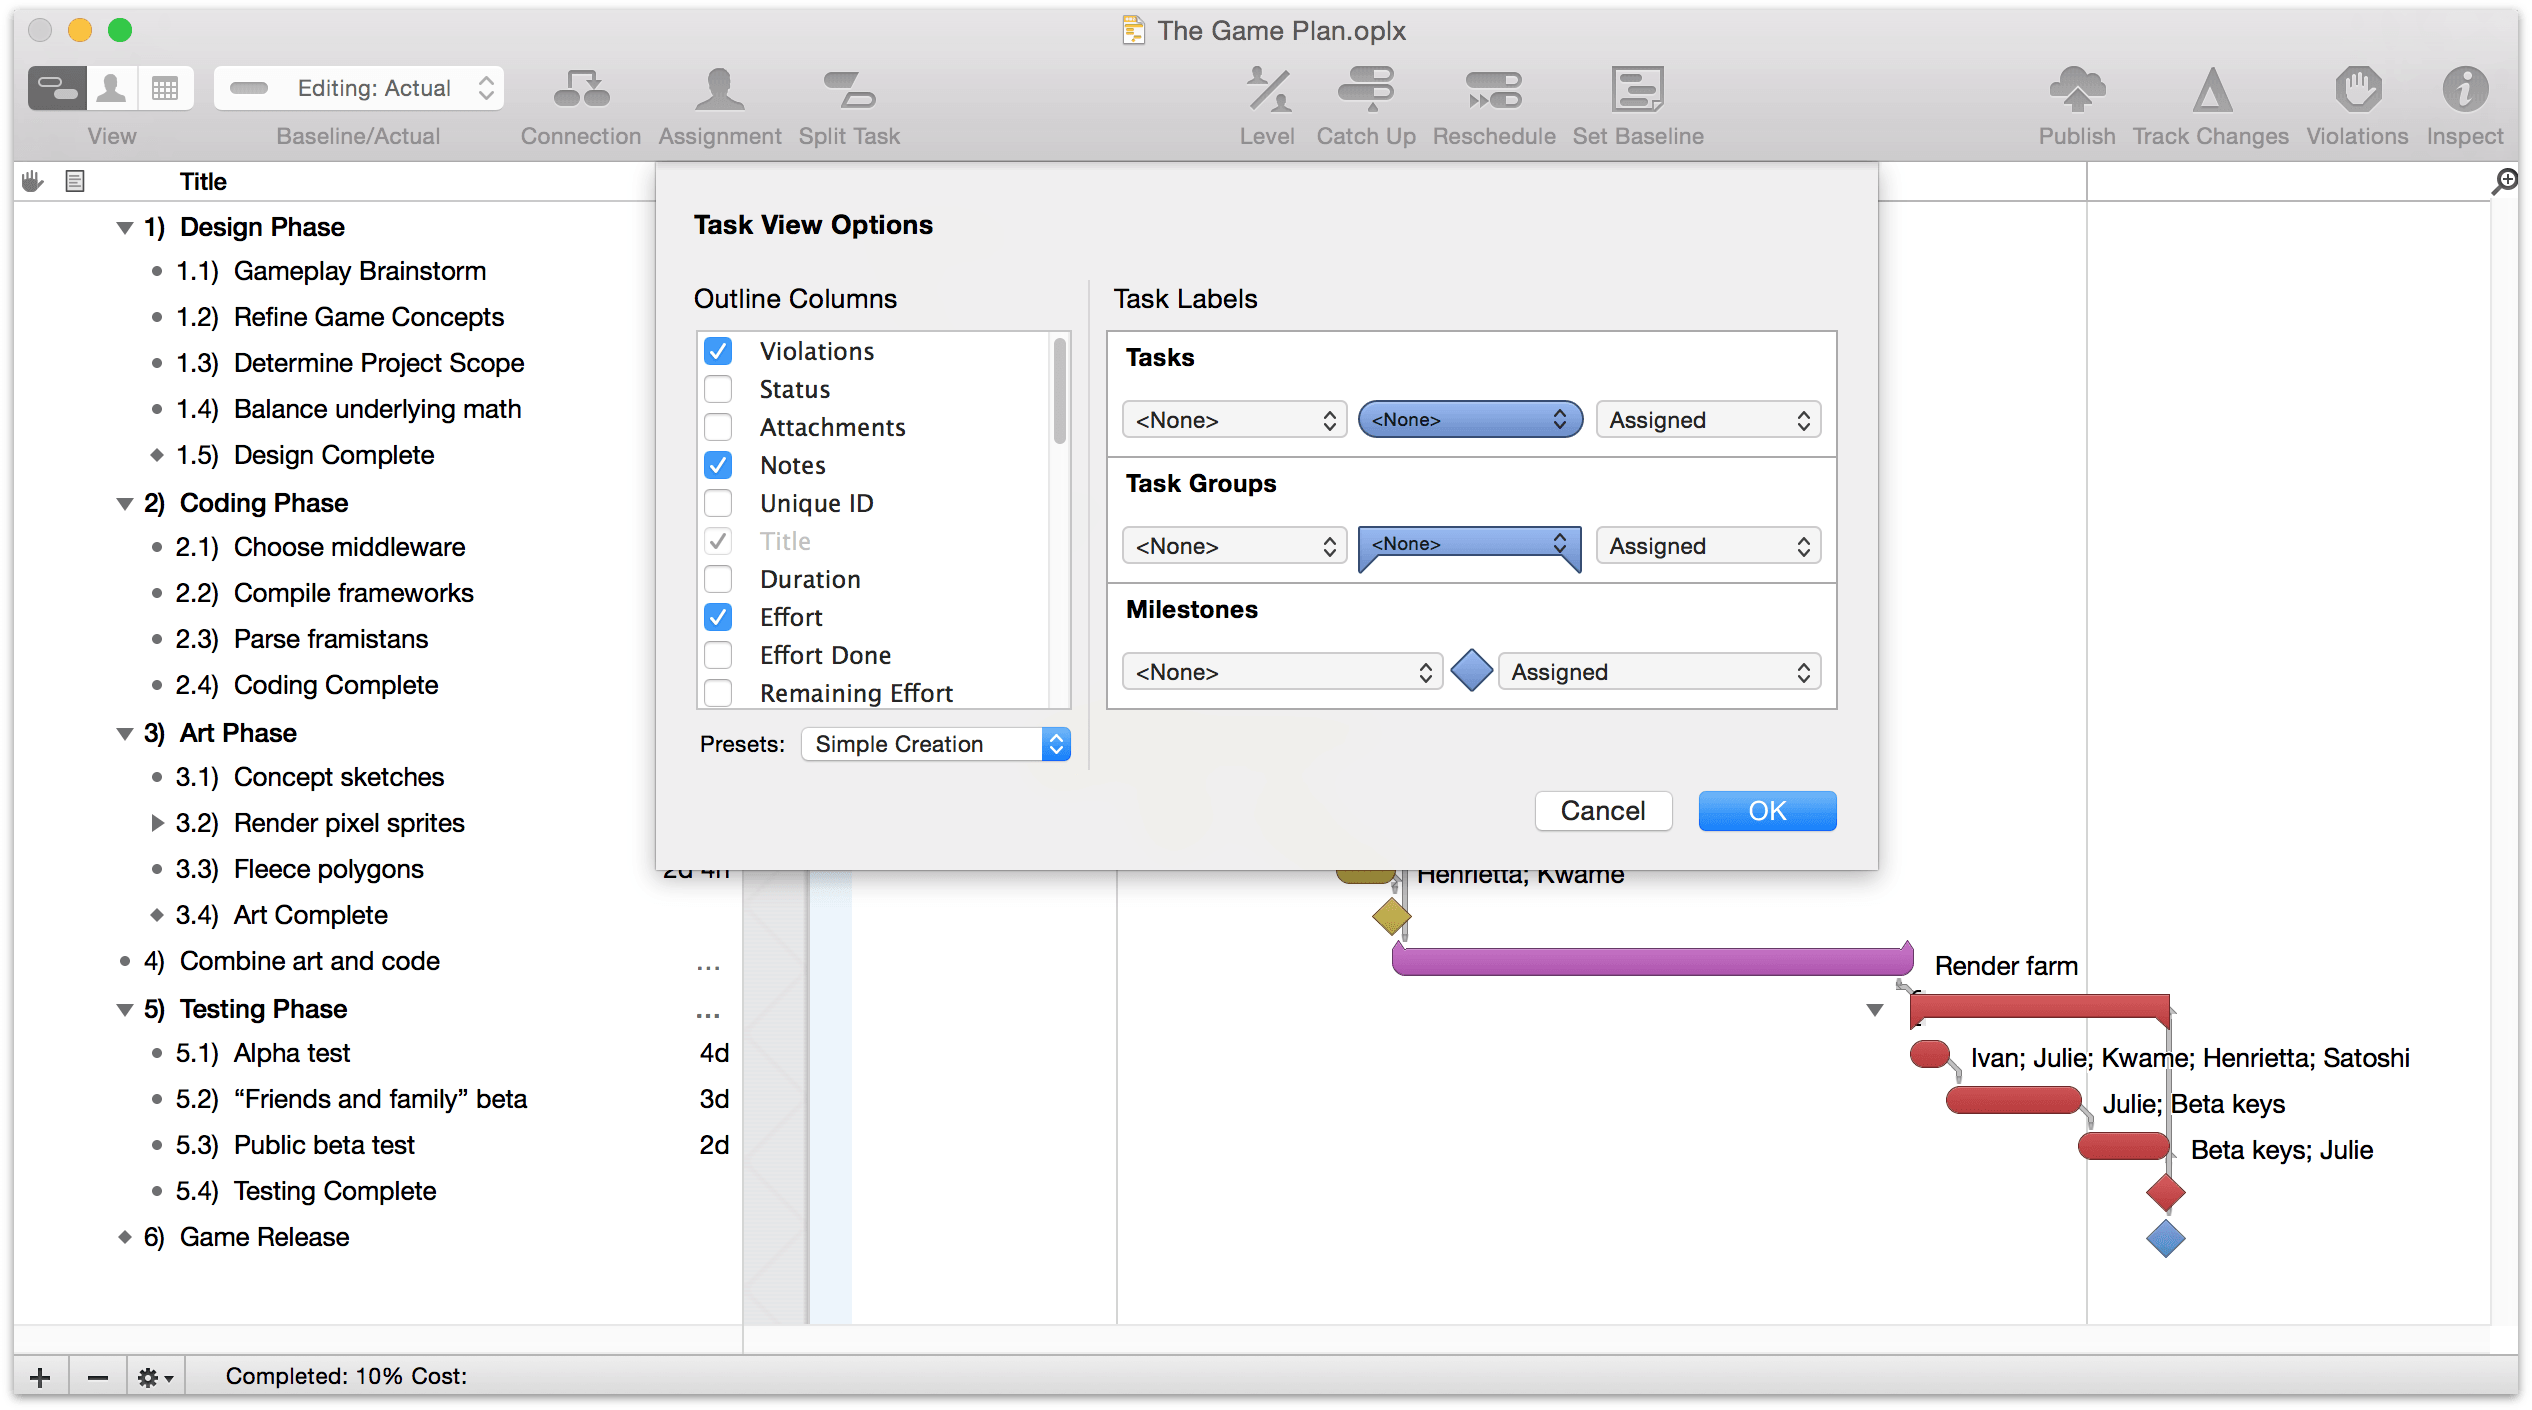
For example, in task view, you can choose which columns are visible in the task outline and what kind of information you’d like to show on the Gantt chart side.
In the task and resource views, you can customize which data to show for objects. Click the pop-up menus beside or inside the task bar, group bar, or milestone to choose which data appears there in the chart.
Inspectors
The inspectors are floating windows which contain information and controls related to what’s selected in the main window. If you don’t see them, click the Inspect button in the toolbar, or pick one from the Inspectors menu. You can show and hide an inspector’s various sections by clicking the icons at the top of each inspector window. Hold Command while clicking to open an inspector section without closing the ones that are already open.
The Project Inspector
The Project inspector has information about the document as a whole.
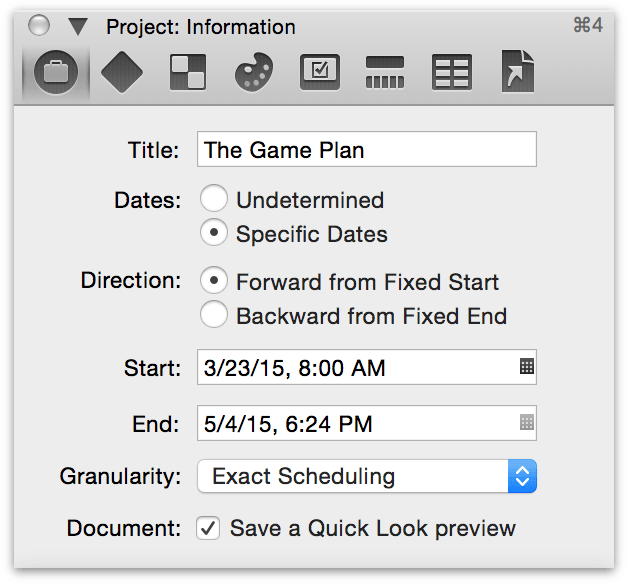
Project Information — General info about the project as a whole, such as its title and if the document works form a start date or an end date. Also, home to the scheduling granularity setting.
Project Milestones — Manage milestones and the display of their critical paths. The slack limit for a milestone determines how closely a task can come to pushing a milestone back before it is considered part of the critical path.
Project Styles — Change the style of tasks and resources.
Project Colors — Change the color of backgrounds, rows, columns, and separators in the various outlines and charts.
Project Formats — Configure your time and currency units.
Project Unit Conversions — Define the hours in a given work day, week, month, and year. Click the Edit Work Week button to go to Calendar View and make adjustments to your working hours.
Project Custom Data — Store any kind of miscellaneous data about the project.
Project Attachments — Link to important files related to the project.
The Task Inspector
The Task inspector has information about the currently selected tasks or milestones, so it’s available only when the main window is in task view.

Task Information — General info about the selected task, such as when it’s scheduled and how long it’ll take.
Task Schedule — Info about the selected task’s schedule, like its start and end dates, and how it should be affected by leveling.
Task Dependencies — A list of the dependencies this task is involved in.
Task Assignments — A list of the resources assigned to this task.
Task Custom Data — Store any kind of miscellaneous data about the task.
Task Attachments — Link to important files related to the task.
The Resource Inspector
The Resource inspector has information about the currently selected resources, so it’s available only when the main window is in resource view.
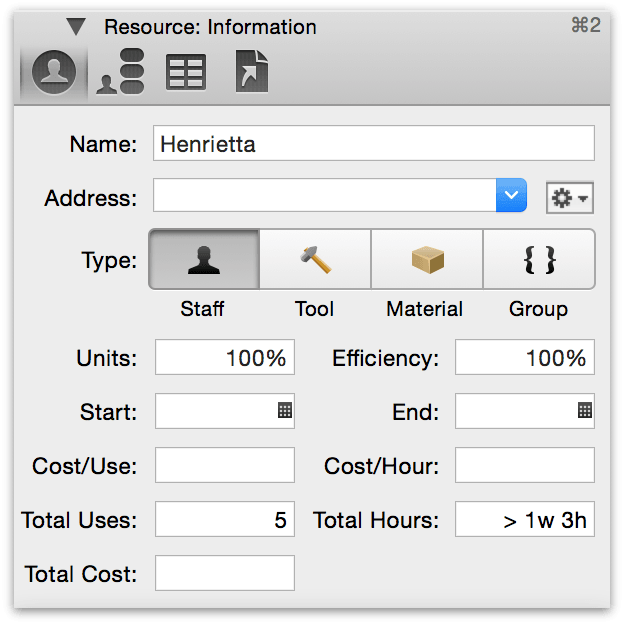
Resource Information — General info about the selected resource, such as how much of it is available and how much it costs.
Resource Assignments — A list of the tasks this resource is assigned to.
Resource Custom Data — Store any miscellaneous data about the resource.
Resource Attachments — Link to important files related to the resource.
Style Attributes
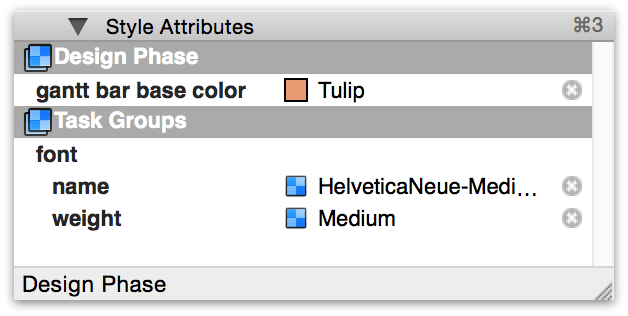
The Style Attributes inspector displays information about any custom text styles applied to the current selection, and allows styles to be copied (drag the style chit from the inspector to an item in the sidebar) and removed (click the X to the right of the style in the inspector). It also indicates whether the style is applied to a class of items (such as Task Groups) or an individual item, and applies changes accordingly.
For more on custom styling in OmniPlan, see Structural Styles and the sections following.