Working in Styles View
OmniPlan’s default visual presentation is designed for clear and professional display of your project data right out of the box. But if you’d like to configure your project’s appearance so it shines in a different light, you’ll find the tools to do so in OmniPlan’s Styles View.
Styles View sets the look of your project’s various parts in a modular way. Changing a setting here changes the default appearance for each item of a given type throughout the document; if you’d rather customize the appearance of a single item or custom selection, ad-hoc styling with the Styles inspector is the way to go.
Styles View is made of three parts that control elements of your project’s visual style in different ways, providing the ability to customize the appearance of your project as a whole as well as individual elements inside it.

-
Project Font and Colors — Choose a font to be used throughout your project, a color for the text, and colors for structural elements of the OmniPlan view interface.
-
Gantt Styles — Select a feature of the Gantt chart in the preview here and use the Styles inspector to change its default settings throughout your document. The appearance of groups, tasks, overdue tasks, completed tasks, and milestones can be edited here; the preview also updates based on changes made elsewhere in Styles View.
-
Document and Named Styles — Choose a Document Style to update all items of the named type in the OmniPlan interface. You’ll also create Named Styles here, which are custom styles you can use the Styles inspector to apply wherever you like.
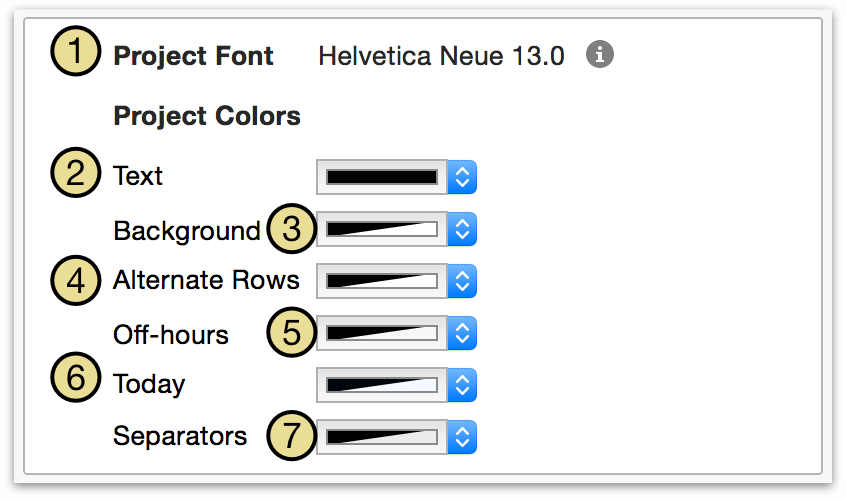
Changing Project Font and Colors
The Project Font and Colors section of Styles View provides tools to customize the colors seen throughout your project, including:
-
The project font. This is the font used for item names and notes throughout the project.
-
The project text color. This is the color applied to the project font throughout the document.
-
The background color of the whole document.
-
A color for every other item; set this to a nice low-opacity color to keep your rows distinctive.
-
The color for non-working hours. Used only if you’ve set up the View Options to show off hours.
-
Today’s date in the chart. Used only if you have a specific start date set in the Project Info section of the Project inspector.
-
The base color for lines between time spans (that fade in and out as you zoom).
Changing the Appearance of the Gantt Chart
Selecting an item type in the Gantt preview changes its appearance throughout the document. With an item selected here, the Styles inspector acts as a control interface for editing its appearance.
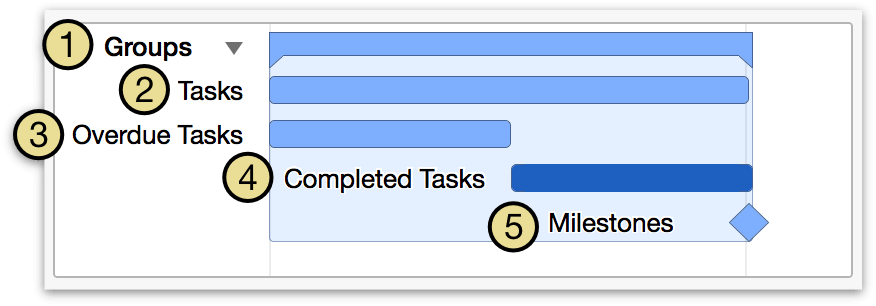
The following visual aspects of the Gantt chart can be edited with the preview:
-
Task Groups — All groups of tasks. By default, their titles are in bold text to distinguish them from single tasks.
-
Tasks — All tasks, but not groups or milestones. Note that the Completed Tasks and Overdue Tasks styles can override this.
-
Completed Tasks — Any task whose completion is at 100%. You could, for example, make tasks’ Gantt bars turn gray when they are finished.
-
Overdue Tasks — Tasks which were scheduled to complete in the past, but are not complete. You might like to turn these bright red so that you can see where your project is getting behind.
-
Milestones — All milestones. By default they are styled the same as regular tasks.
Colors applied to the Gantt preview also appear in the project as shown in Working in Network View.
Changing Document Styles
Beyond project colors and Gantt chart properties, styles of text across the entire project can be edited in the Document Styles section of Styles View.
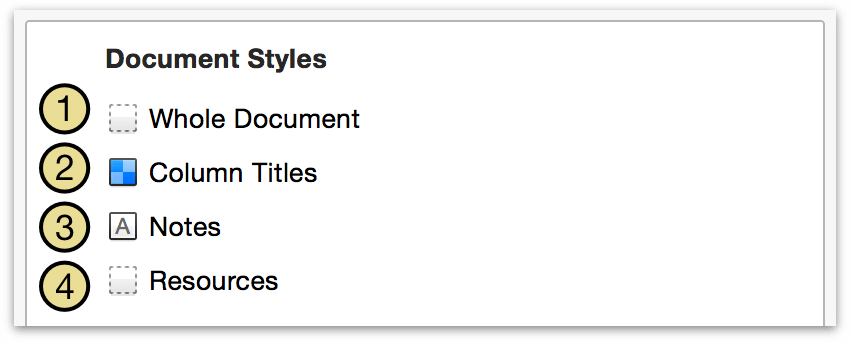
To set up a document style, select the one you want to change from the list in the Document Styles section of Styles View.
Use the style controls in the Styles inspector to change the default style for everything of the selected type.
The following structural styles are associated with various elements of OmniPlan’s interface:
-
Whole Document — All text in outlines throughout the entire document; it can be overriden by the more specific styles listed below it.
-
Column Titles — The headers above the outline views and charts, and the vertical resource names in the resource timeline.
-
Notes — Notes attached to tasks and resources.
-
Resources — All resources, how they appear in the resource outline and as assignments on the Gantt chart.
Document styles are the most general type of style, so named styles or ad-hoc styles can override them.
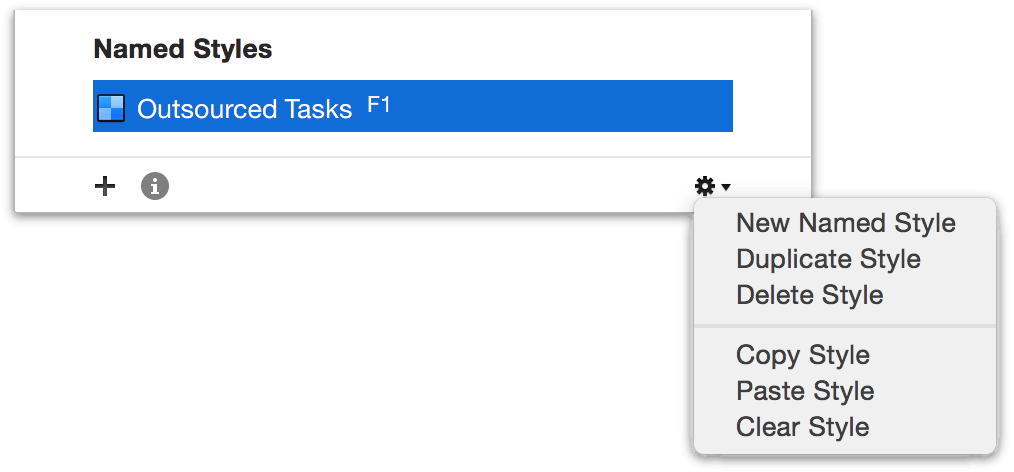
Creating and Using Named Styles
If there’s a specific style you’d like to apply to individual items multiple times over, you can create and save a named style that you can invoke with the touch of a button.
-
Click the plus button at the bottom of the styles list to create a new named style.
-
Then, while you have the named style selected, use the controls in the Styles inspector to change its attributes. The font button next to the plus button beneath the named styles list opens font controls for the selected style.
-
Once the style is set up how you want it, apply it to an item in the main window by selecting the item and choosing the style from the dropdown in the Item Style section of the Styles inspector, or by selecting the item and then pressing the appropriate function key.
By default, each named style you create is assigned to a different function key (F1, F2, F3, and so on, up to F9). This provides automatic keyboard shortcuts for the most common named styles you use; drag and drop styles to rearrange them in the list and promote the ones you use the most.
- You can keep applying the named style to items, and any further changes you make to the named style are applied to every item that has it applied.
Named styles take precedence over document styles; if a document style and a named style are both applied to the same item, the item will be displayed in the named style.
When you have your project styles set up just the way you like, you can save your project as a template to use those styles in new projects.