Chapter 1
Introduction
Welcome to OmniGraffle 2 for iPad!
Thanks for taking the next big leap in advancement on your path to being an awesome designer. OmniGraffle 2 for iPad is packed with a ton of new goodies, including a straight up redesign for iOS 8.
This new iteration of OmniGraffle has been optimized for iOS 8, and the user interface has—once again—gone through a massive transformation.
And finally, there’s a new place in Omni’s family: Stenciltown. Stenciltown is where you can safely find and download new stencils for use with OmniGraffle.
Created with love,
The Omni Group
How This Documentation is Organized
This wonderful manual that you have before you (either in OmniGraffle itself, online, or in iBooks on your Mac or iOS device—or both) has been assembled in such a way that you’re provided with a complete tour of OmniGraffle.
You’ll start out with an overview of OmniGraffle’s interface. Don’t skip over this chapter, as you’ll find many nuggets of information and fine details about OmniGraffle that you might otherwise miss. And, if you do decide to skip this chapter and later find yourself wondering, “Hey, what’s that doohickey do?”, you can always come back here to discover what it’s all about.
To help guide you through the documentation and better learn all the things you need to know about OmniGraffle, here’s a list of all of the chapters in this book:
- Chapter 1, Getting Synced
-
Whether you are just using OmniGraffle on your iPad, or if you’re using it alongside OmniGraffle for Mac, it’s important for you to keep a backup of your illustrations and diagrams in the cloud. OmniGraffle uses our own cloud service, called OmniPresence, to synchronize files with your free Omni Sync Server account or to another WebDAV server of your choosing. Once synchronized, you can access the things you draw in OmniGraffle on your iPad over on your Mac and vice versa. It’s pretty cool; you should check it out.
This first chapter walks you through the process of setting up a cloud account in OmniGraffle on your iPad.
- Chapter 2, Getting Started with OmniGraffle
- The first chapter dives right in and gives you a top-down overview of OmniGraffle’s user interface. You’ll learn about the Resource Browser, Toolbar, Sidebar, the Inspectors and, of course, the Canvas. Nothing too deep; just the basics to get you rolling.
- Chapter 3, Using the Inspectors
- Once you’ve learned about the Tools, you can use the Inspectors to examine the things you draw and modify their properties. Chapter 3 also examines the Stencils built into OmniGraffle and introduces you to Stenciltown.
- Chapter 4, Drawing Basics
- Here you’ll learn some of the basic ways to draw and create objects on the canvas. You will learn how to create, select, resize, and move shapes, how to group and ungroup objects, how to connect objects with lines—including how to adjust the connecting lines and endpoints—and how to add color to your objects using the Fill inspector.
- Chapter 5, Getting Help
- There’s no shame in admitting that you need help. In fact, that’s what we’re here for. If you ever get stuck when working on something in OmniGraffle, or if you have a problem with the app’s license, or you just want to tell our Support Humans and the DocWranglers what an awesome job they’re doing, feel free to get in touch. This chapter points you to all of the resources we have available: Support Humans, Support Articles, Videos, and Documentation.
Using This Book
One of the beauties of having OmniGraffle’s documentation available in electronic form is that it’s always available whenever you need it. We have put all of the documentation on our website where it can be searched and bookmarked. And we’re continuing the ongoing trend of creating EPUB versions of the documentation and making them freely available on the iBooks Store.
Get the iBook
![]() Our preferred method of delivering the Help docs is via the iBooks Store in EPUB3 format. The documentation there is the same documentation you’ll find on our website and bundled within the app.
Our preferred method of delivering the Help docs is via the iBooks Store in EPUB3 format. The documentation there is the same documentation you’ll find on our website and bundled within the app.
The advantage to getting the EPUB version of the docs is that whenever we update the docs for a new version of OmniGraffle, you’ll receive a notification in iBooks telling you that there’s an update waiting for you. And the big win of EPUB over PDF is that any notations or bookmarks you make in the book carry forward to new versions of the documentation.
What’s New in OmniGraffle 2 for iPad
![]() OmniGraffle 2 has new and re-designed features to make drawing and graffling even easier. If you’ve been a long-time OmniGraffle user, it won’t take long before you notice some changes.
OmniGraffle 2 has new and re-designed features to make drawing and graffling even easier. If you’ve been a long-time OmniGraffle user, it won’t take long before you notice some changes.
Some new features you’ll find in OmniGraffle 2 include (but certainly aren’t limited to):
- In-App Purchase—Several Pro features, such as Visio® support, shape combinations, tables, and more, have been moved into an In-App Purchase bundle.
- Stencil Searching—You can now search for user-submitted stencils at our own repository: Stenciltown.
- User Interface—Interface changes have been made to bring OmniGraffle up to date with iOS 8. A new Canvases sidebar has been added, as well as the ability to hide interface controls completely.
- Shape Combinations (Pro)—Combine two or more objects on the Canvas to create custom shapes. (This is included with the Pro In-App Purchase.)
- Visio Support (Pro)—Import and export illustrations and diagrams for Microsoft® Visio®, including Visio 2013. (This is included with the Pro In-App Purchase.)
- OmniOutliner Support—Import and Export support for OmniOutliner files.
- Inspectors—New fill, stroke, and shadow styles have been added.
- AirDrop—Easily AirDrop files between iOS 8 and OS X Yosemite (v10.10) clients.
- Drawing Tools—Manipulate vertex points on shapes with the Freehand Tool, and convert them to Bézier points.
- Templates—When you create a new document, you are presented with a list of available templates which you can start from. Easily turn an existing document into a template or create one from scratch.
- Folders—Have a lot of illustrations and diagrams on your iPad? Organize them with folders, and if you’re syncing with OmniPresence, the same folders and files are visible on your Mac.
These new features, combined with file synchronization with OmniPresence and Omni Sync Server, make this an incredible update worthy of a whole number.
What’s Extra in Pro?
OmniGraffle 2 Pro, available via In-App Purchase includes a lot of advanced features that might not be needed by everyone. OmniGraffle 2 Pro features include:
- Geometry left-center-right
- Vertex Point Geometry
- Note tooltip preferences
- Canvas zoom options
- Share layers between canvases
- Combine shapes
- Add Notes and custom data
- Create tables
- Subgraph support
- Visio® Support
Throughout this guide, we’ll call attention to the features exclusive to OmniGraffle 2 Pro in a little box like this one. All of the other features are available in both the Standard and the Pro editions of OmniGraffle.
Tell Us What You Think
We’re constantly working on updates for our documentation. Whether it’s CSS work, correcting the occasional typo (yeah, they do sometimes slip through), or adding details or clarification for a specific feature based on something we’ve heard from a customer, we’re always trying to make our documentation better and more useful for you.
If you have any specific comments you’d like to send us about the documentation, please do. You can drop us an email message via our Support queue, or you can ping us on Twitter; we’re @OmniWranglers.
Finally, we’d like to thank you for taking the time to read the docs.
Chapter 2
Getting Synced
OmniPresence offers a way for you to store your OmniGraffle documents in the cloud and sync them with other devices. To use OmniPresence you’ll need access to a standard WebDAV server such as the Omni Sync Server (signup is free!).
The Apache server included with OS X Yosemite Server and WebDAV servers available through many web hosting providers are also great options if you’d prefer to set up your own. If you would like to sync your OmniGraffle documents with your Mac you’ll also need OmniPresence for Mac.
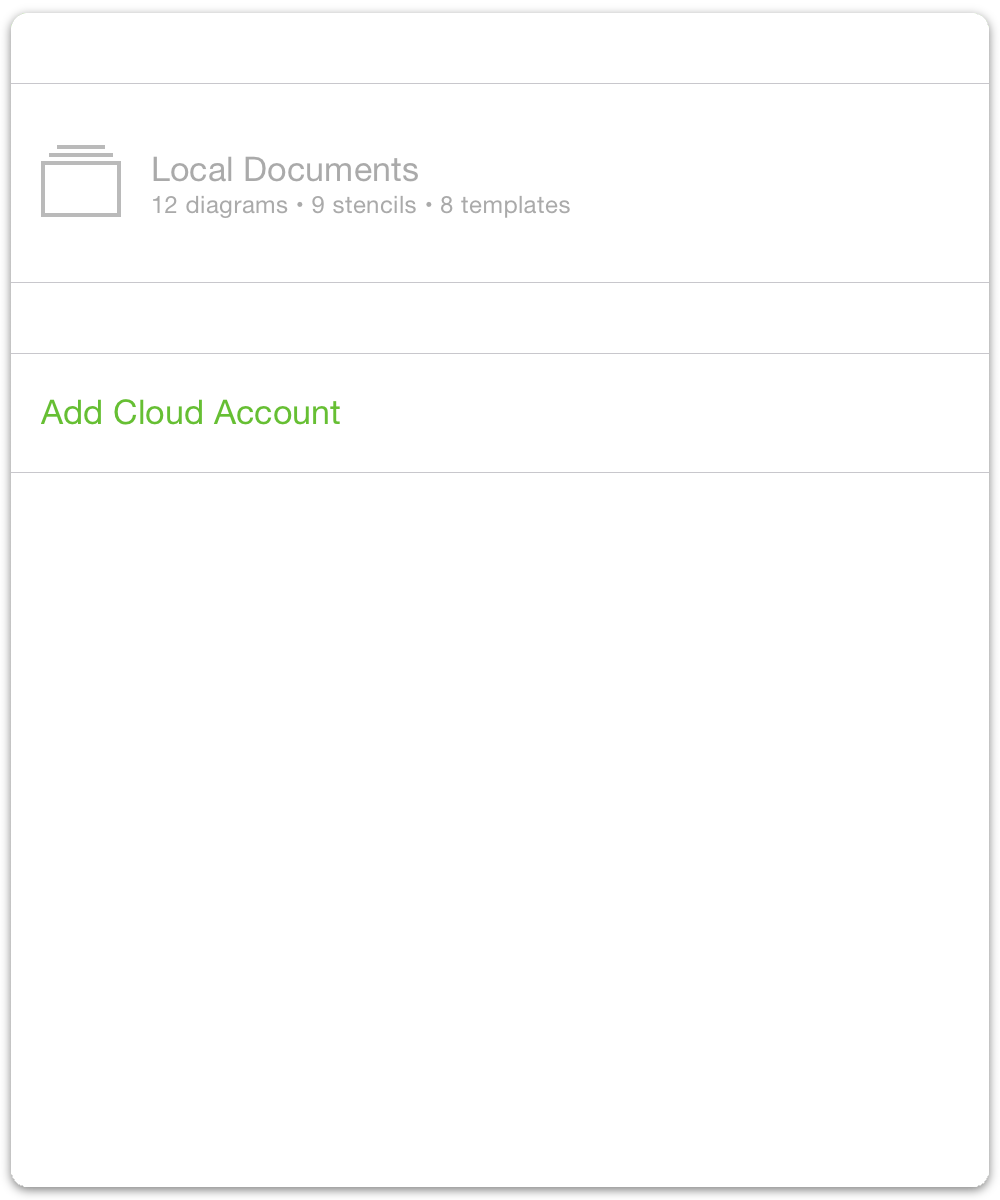
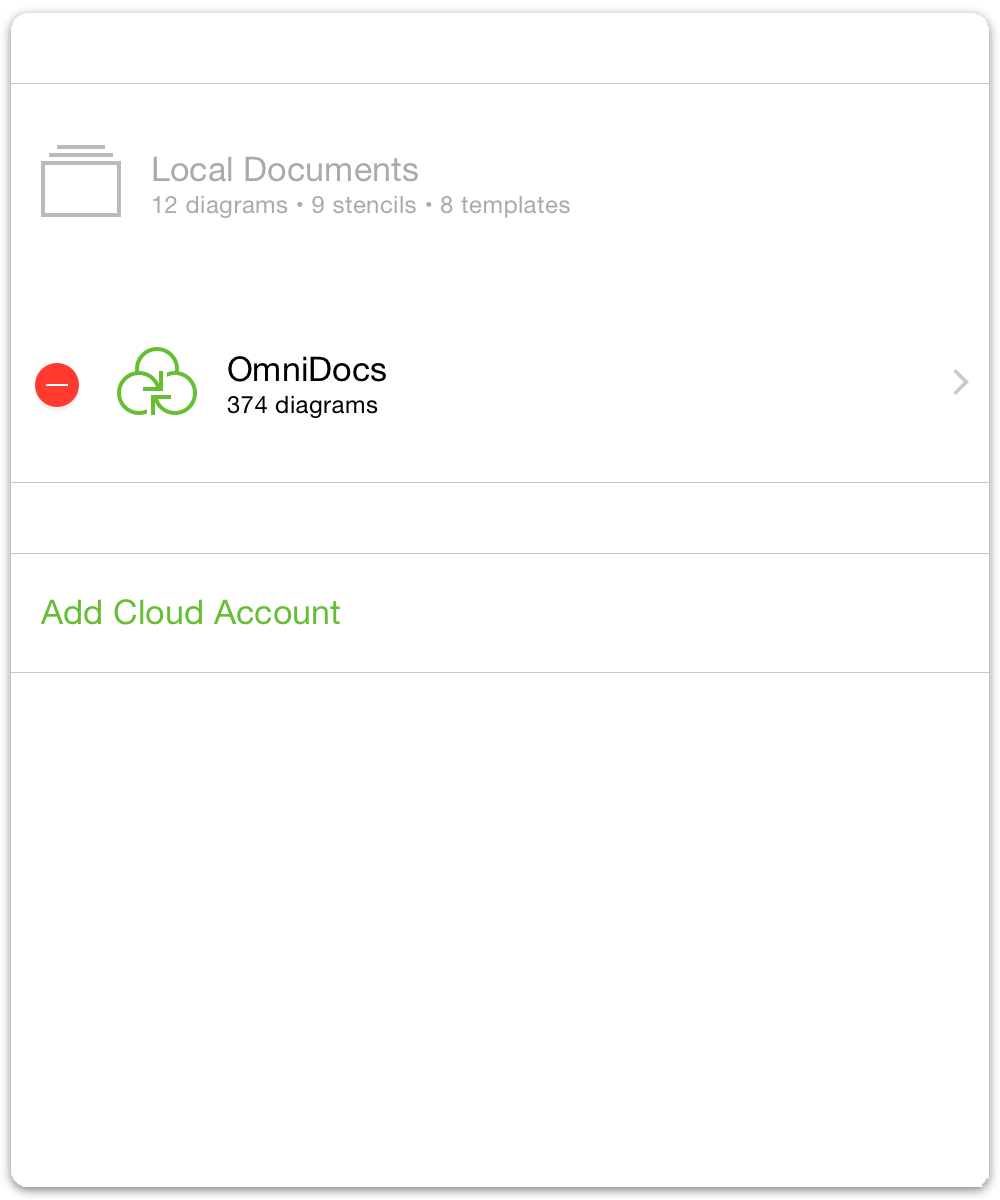
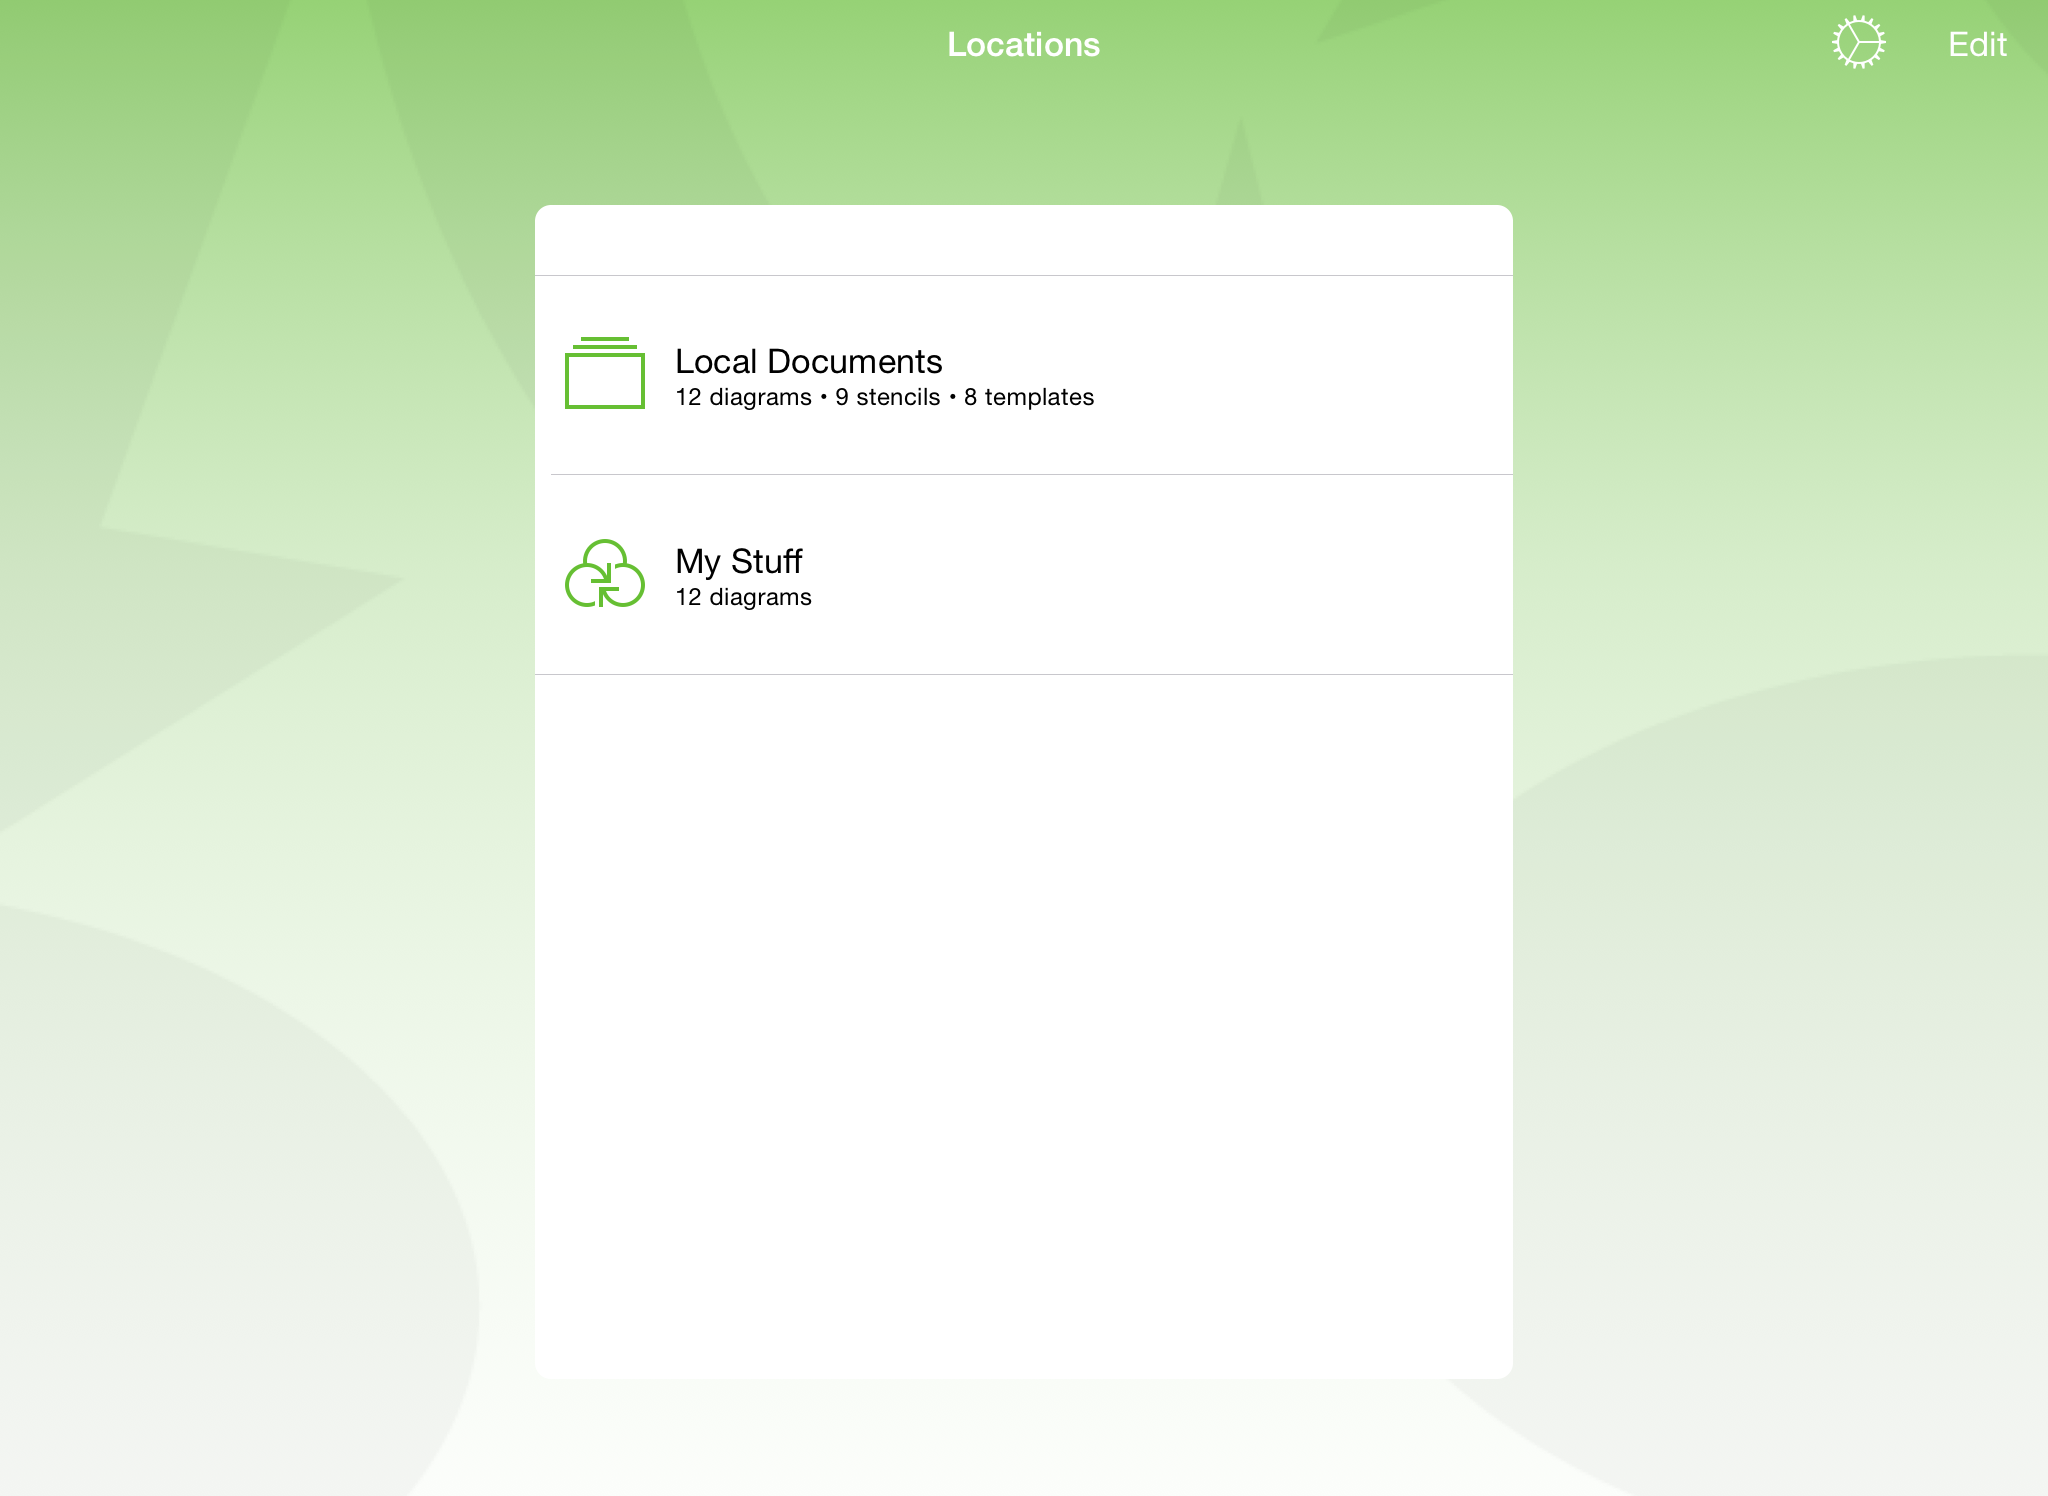
On OmniGraffle’s Locations screen, tap Edit at the far-right of the navigation bar.
Tap Add Cloud Account.
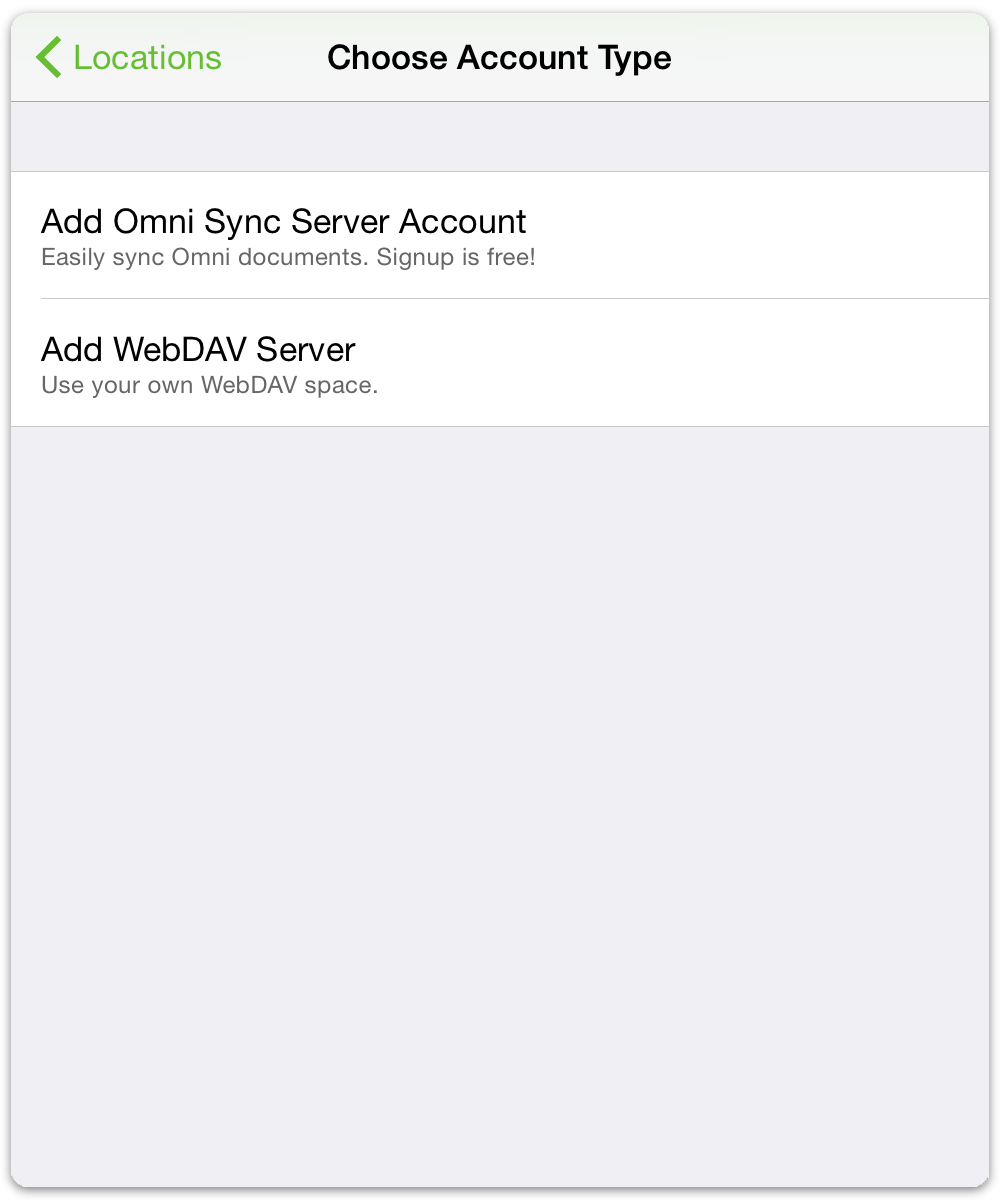
Choose which type of account you’d like to add. If you have an Omni Sync Server account, tap the first option; or if you have your own WebDAV server (or subscribe to an OmniPresence-compatible WebDAV server) tap the second option.
Enter the Account Name and Password used to sign into your cloud account (either Omni Sync Server or a WebDAV server), and then give the folder a Nickname to display on the Locations screen.
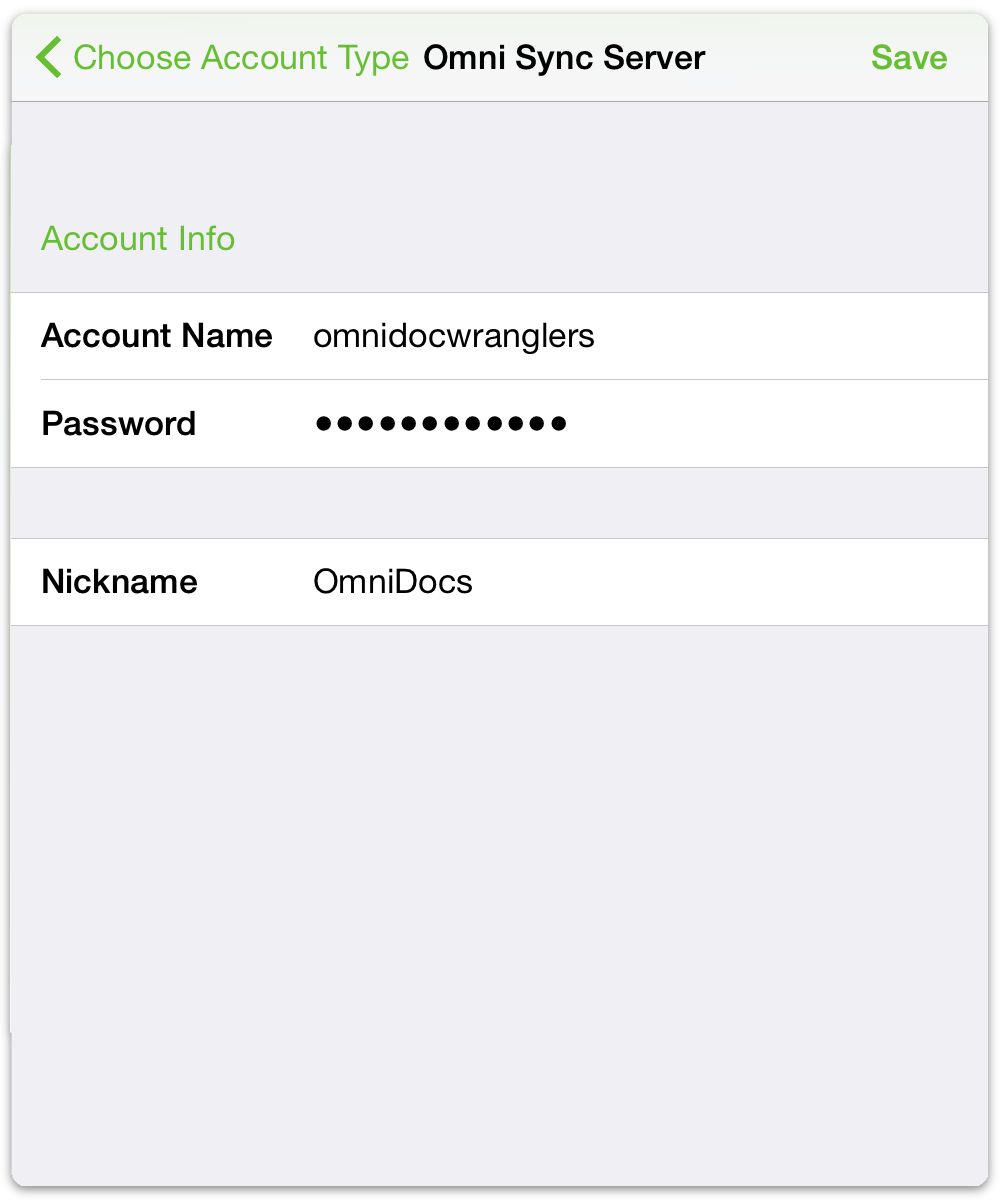
When you’ve finished entering all of that information, tap Save.
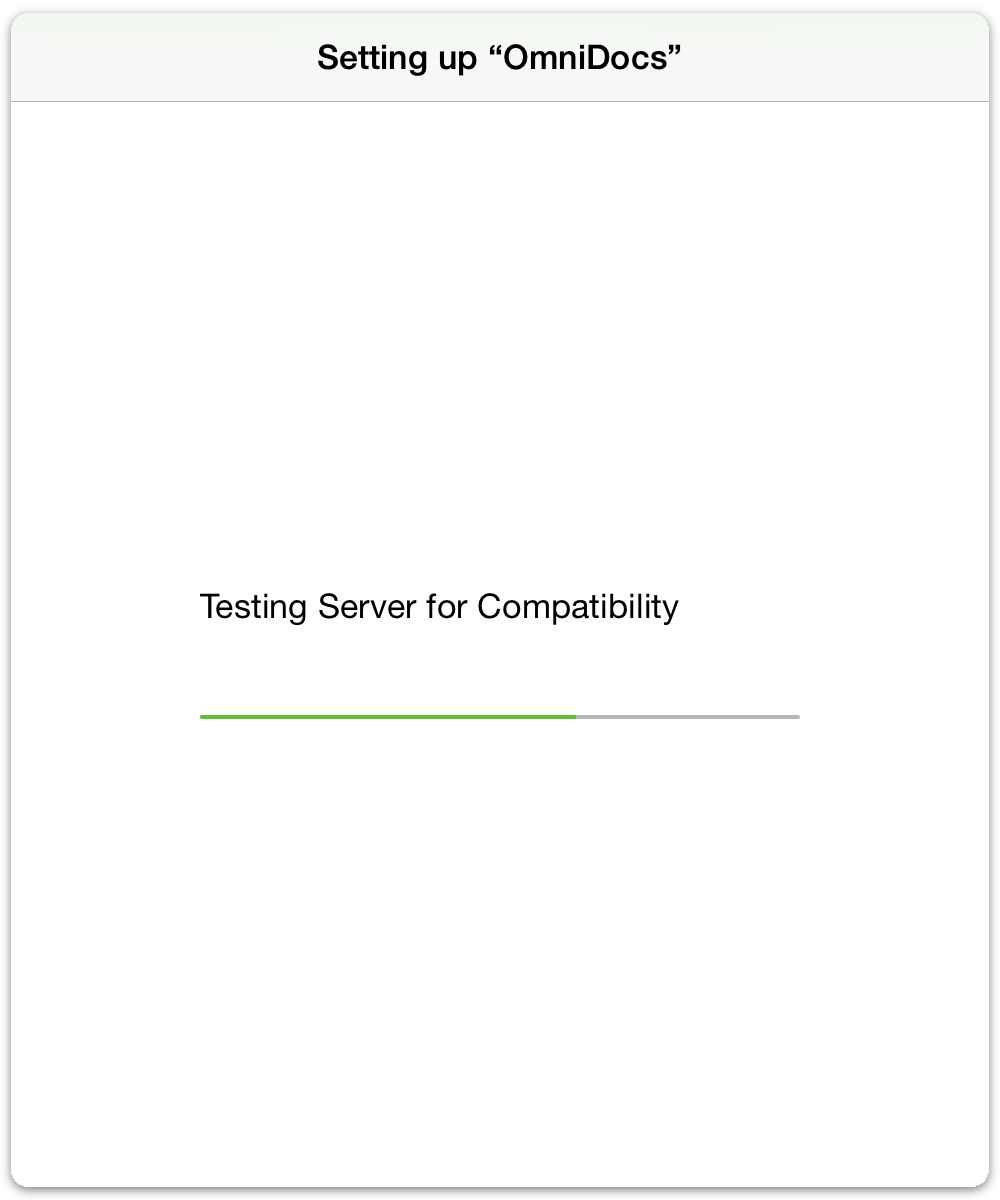
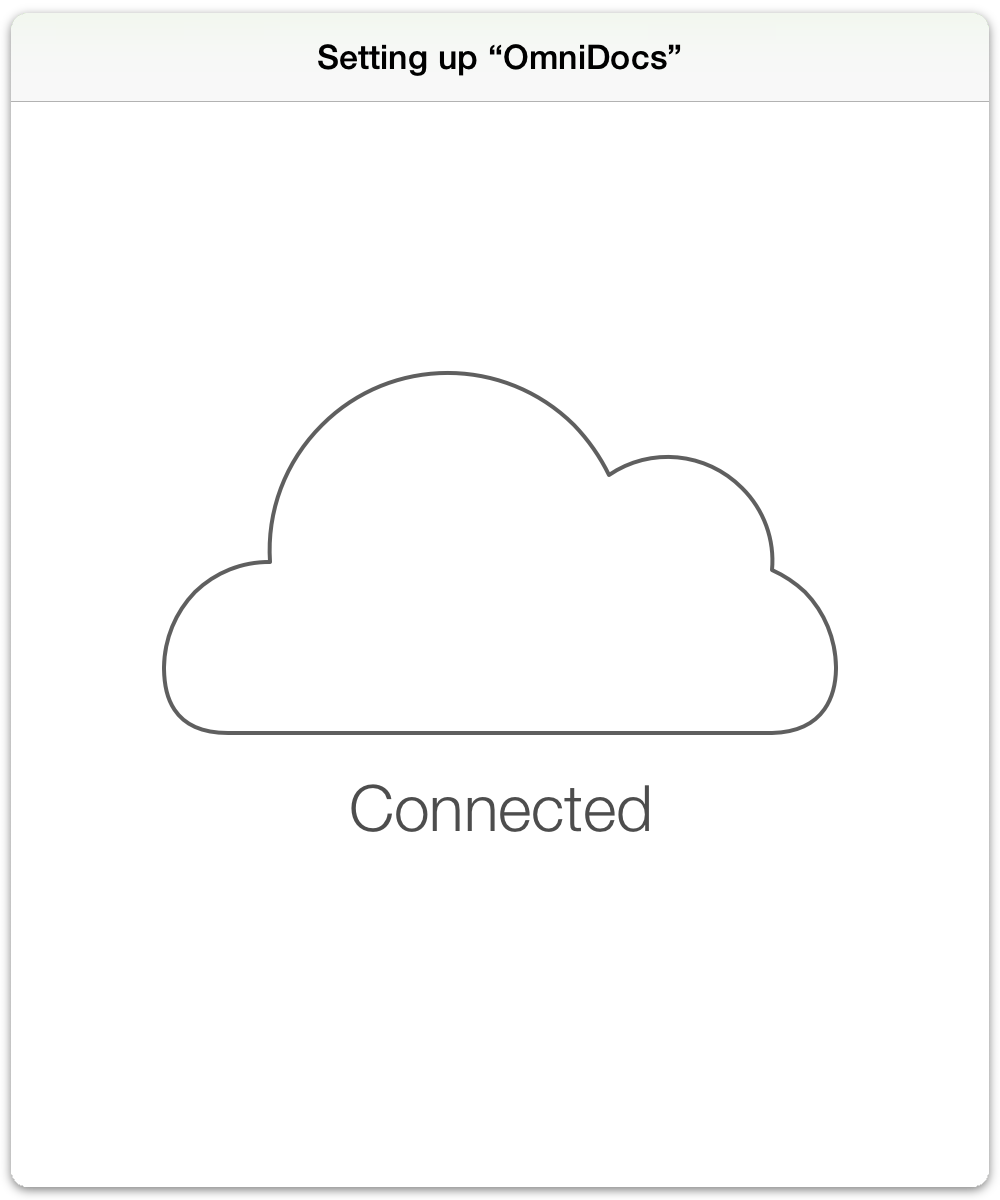
OmniGraffle connects to the server you’ve chosen, and then lets you know when it has successfully configured your cloud account.
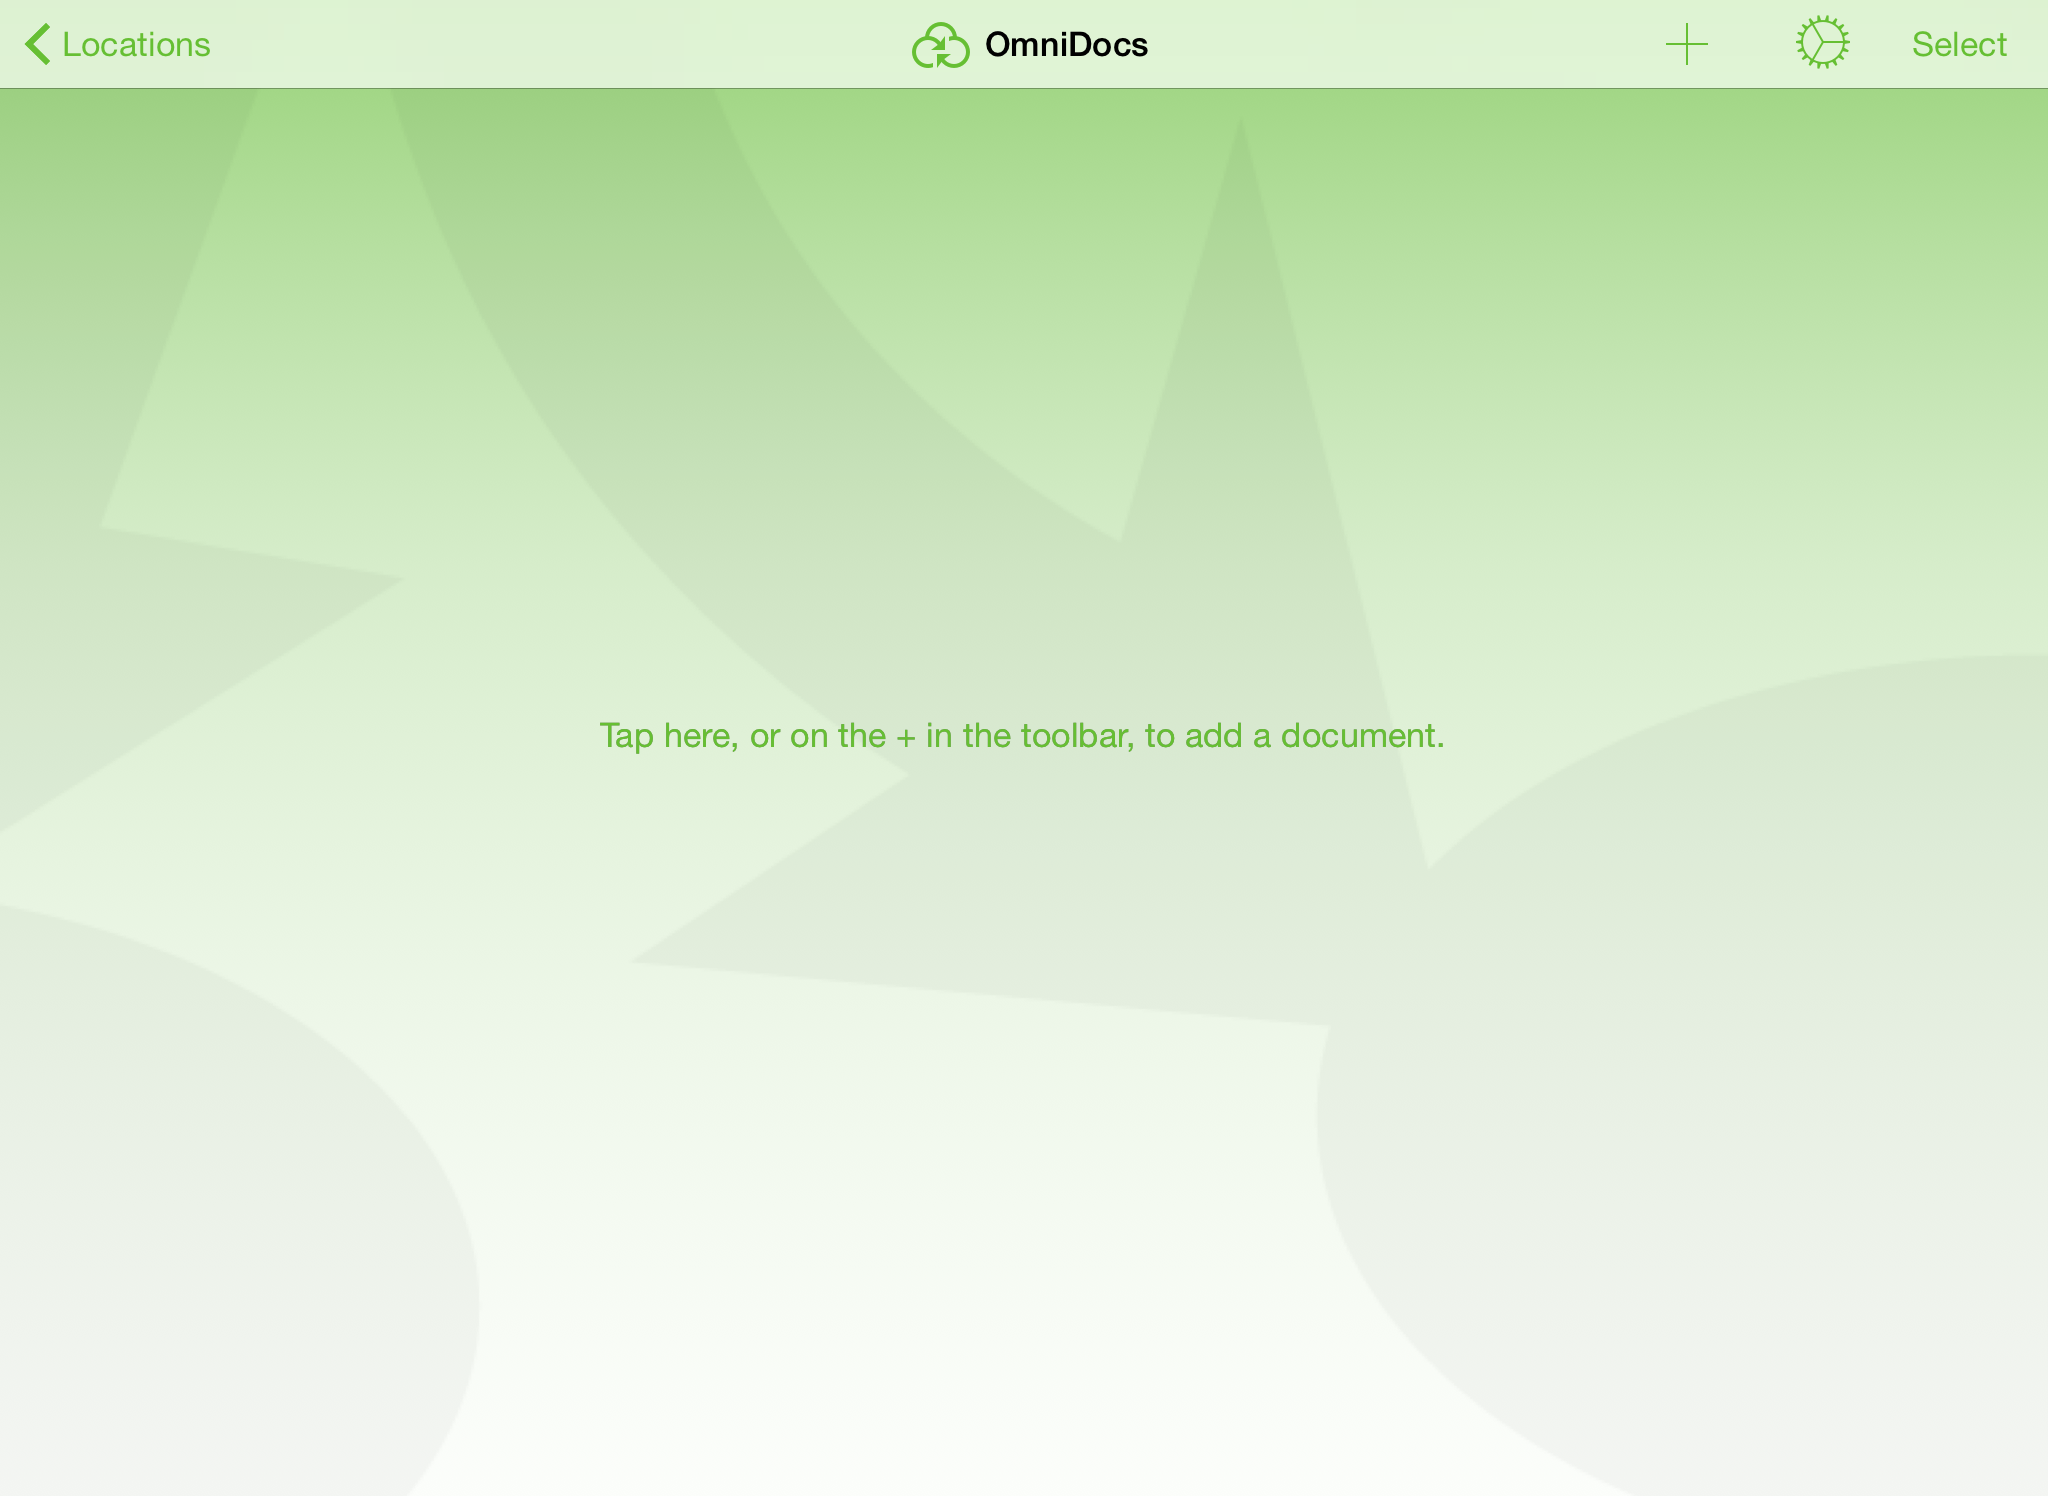
Tap Locations in the toolbar at the top-left of the screen to see the file locations you’ve configured.
If you want to add another account, tap Add Cloud Account and run through Steps 3–6 to configure that account. You can also opt to Use Cellular Data for syncing your files with the cloud. If you enable this option, however, be warned that doing so could have an impact on your cellular bill, particularly if you are in the habit of creating or sharing large multimegabyte files.
When you are finished configuring your cloud accounts, tap Done in the upper-right corner of the toolbar. This saves the settings and returns you to the Locations screen in OmniGraffle. Tap a folder to see what’s inside.
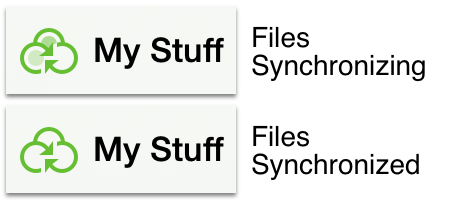
Files stored in an OmniPresence-enabled folder sync automatically whenever changes are made to them. To stop syncing a file, just move it back to Local Documents.
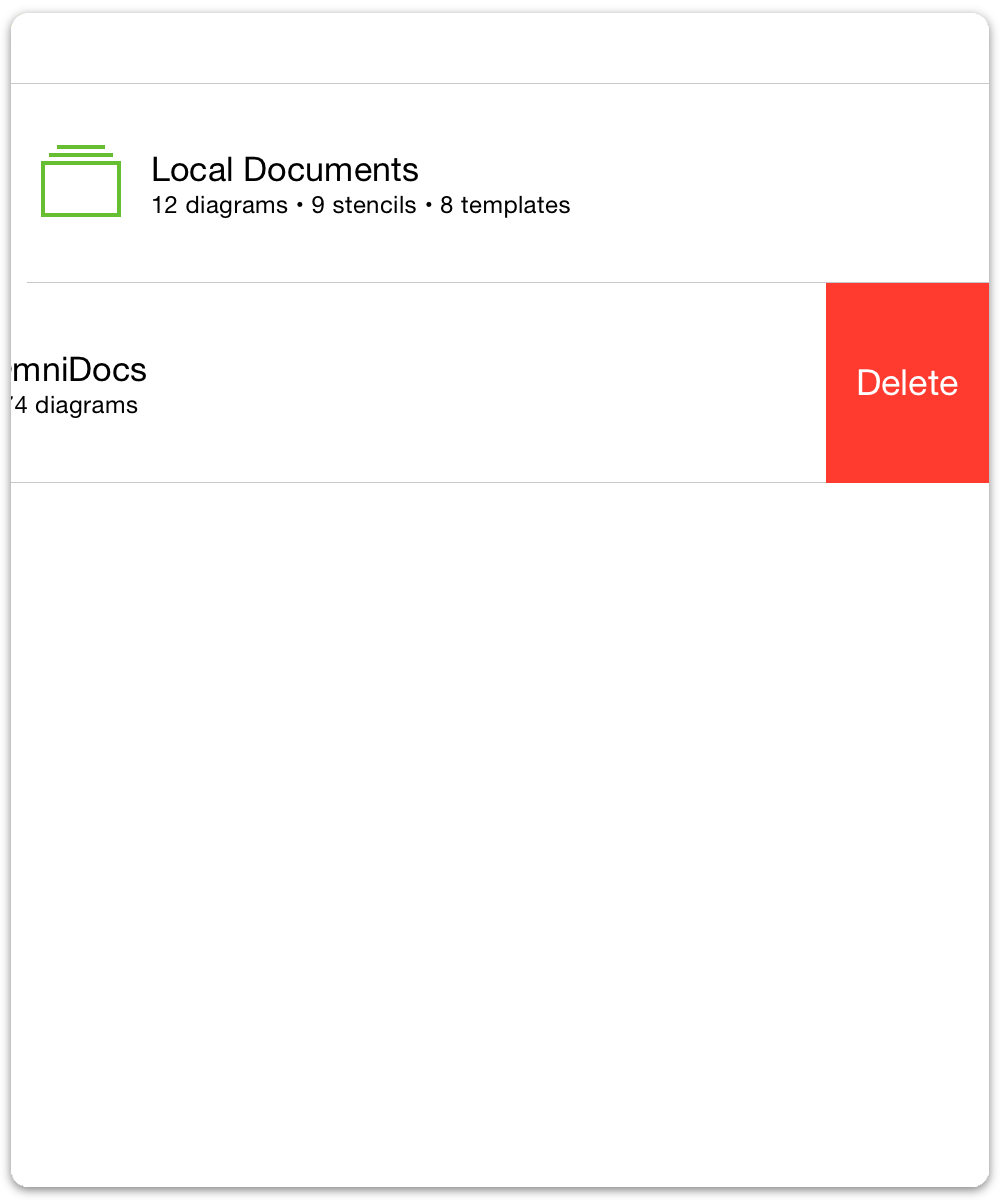
To disconnect a synced folder from OmniGraffle, go to the Locations screen and tap Edit to delete the folder from your list of OmniPresence accounts.
Note that this does not delete the contents of the folder; the files remain in the cloud, but they won’t be available on your device until you reconnect the cloud account.
The OmniPresence button appears in the toolbar next to the folder name when you’re viewing a synced folder. It animates to indicate a sync is in process, and if needed you can tap it to prompt a sync as well.
With Omni Sync Server, we never ever look at your data without your permission. For example, when we’re working with you to restore a corrupt file or isolate a particular issue you’re having with our server. Beyond that, you can rest assured that your data is safe and secure on Omni Sync Server.
Warning
When you expose files and folders on your computer to the Internet (even with strict password protection), you assume some risk. Make sure you understand this risk before setting up a server, and be sure to keep your server up to date with the latest security patches. If you’d prefer not to host your own server, you can sign up for a free Omni Sync Server account or use another standards-compliant WebDAV host to sync files with OmniGraffle.
Chapter 3
Getting Started with OmniGraffle
If you’ve never used OmniGraffle on your iPad, this section’s for you. Heck, even if you have used OmniGraffle before, you might want to read through this, too. This chapter quickly runs through all of the UI thingamabobs you’ll find in OmniGraffle, including the Sidebar, Inspectors, and even some of the more fringy things that you might otherwise not pay much attention to.
Using the Document Browser
The Document Browser is a place to view, create, and manage your OmniGraffle files. Use the Document Browser to create a new document, preview existing documents, and share, duplicate, delete, or otherwise manage them.
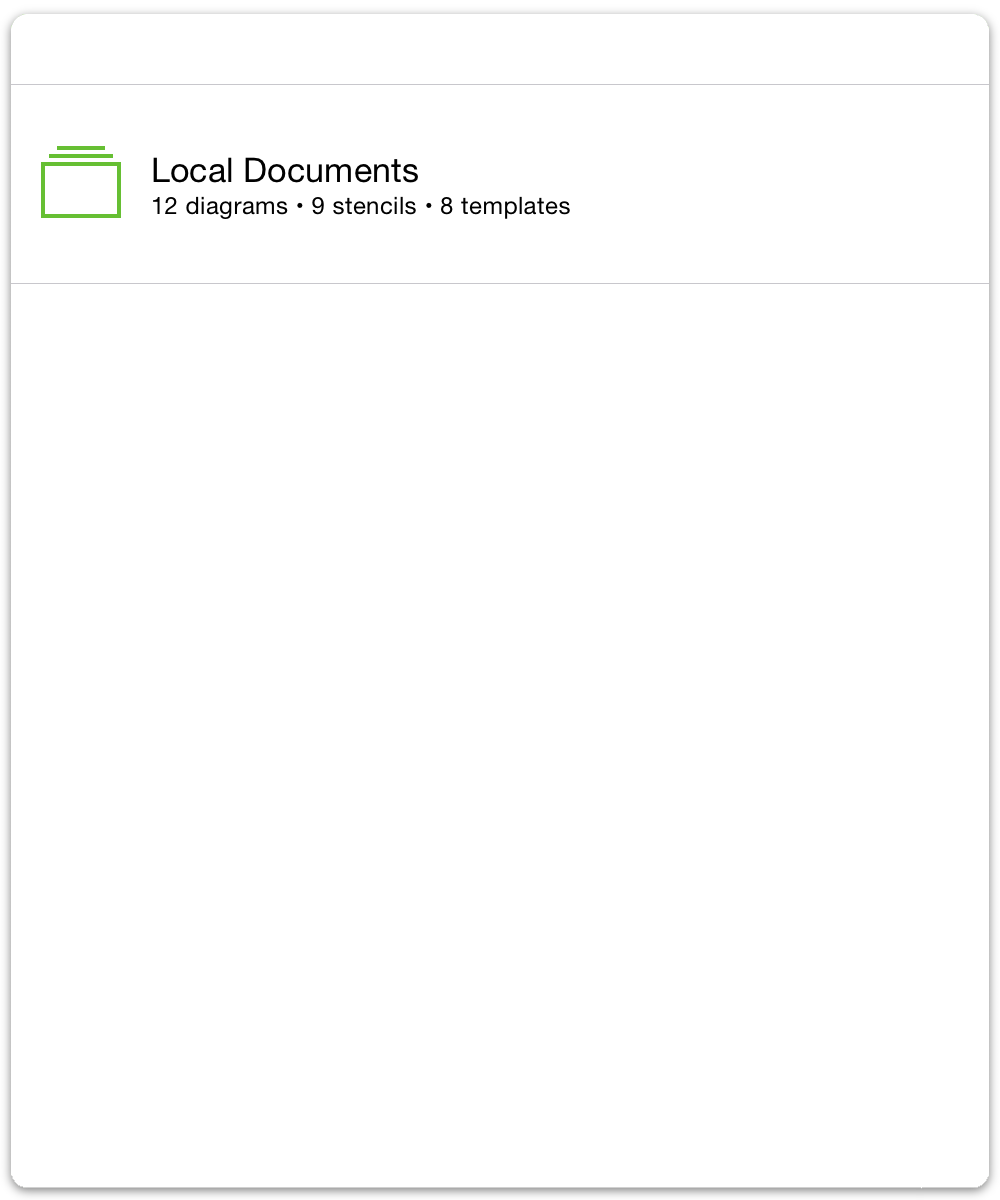
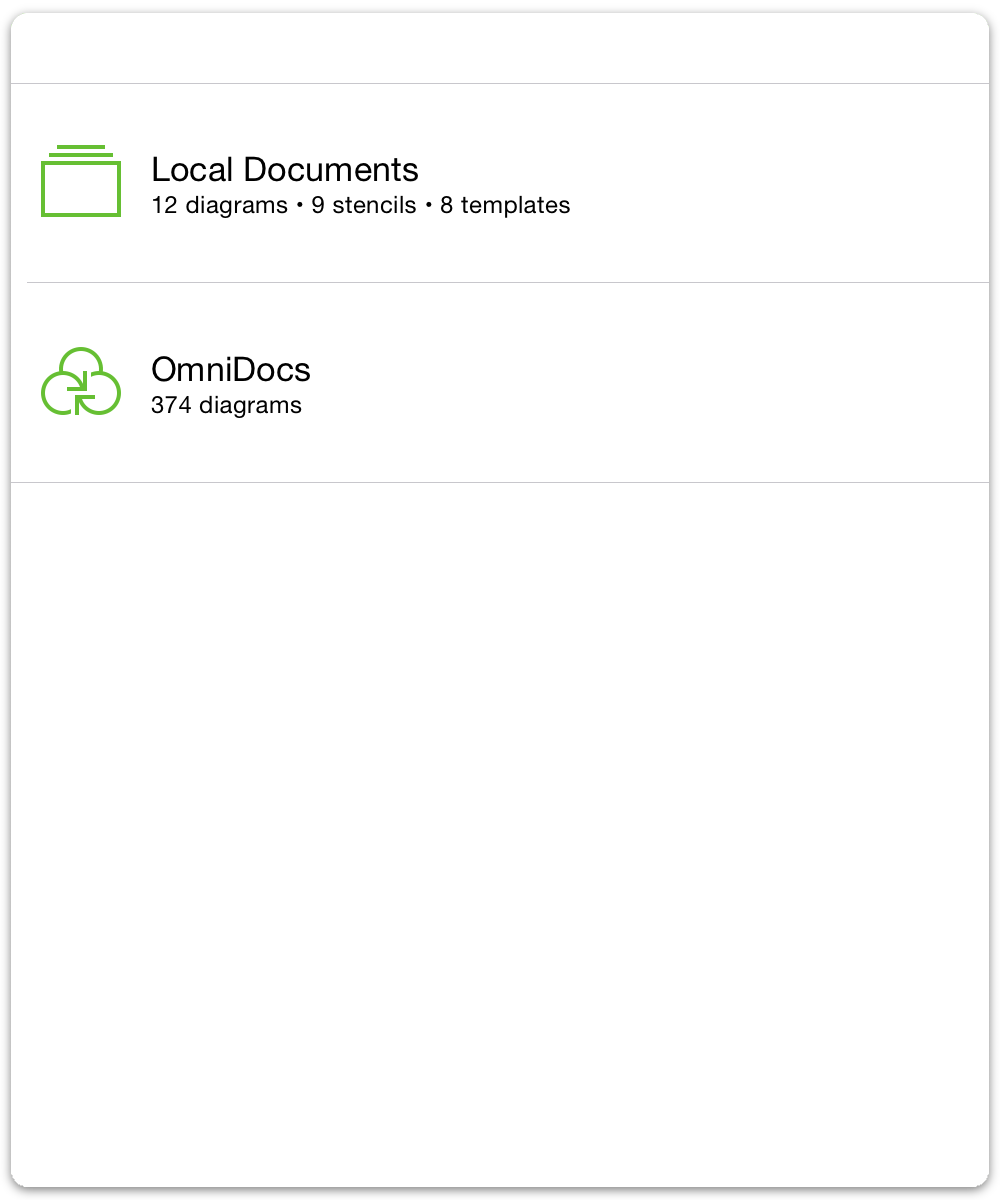
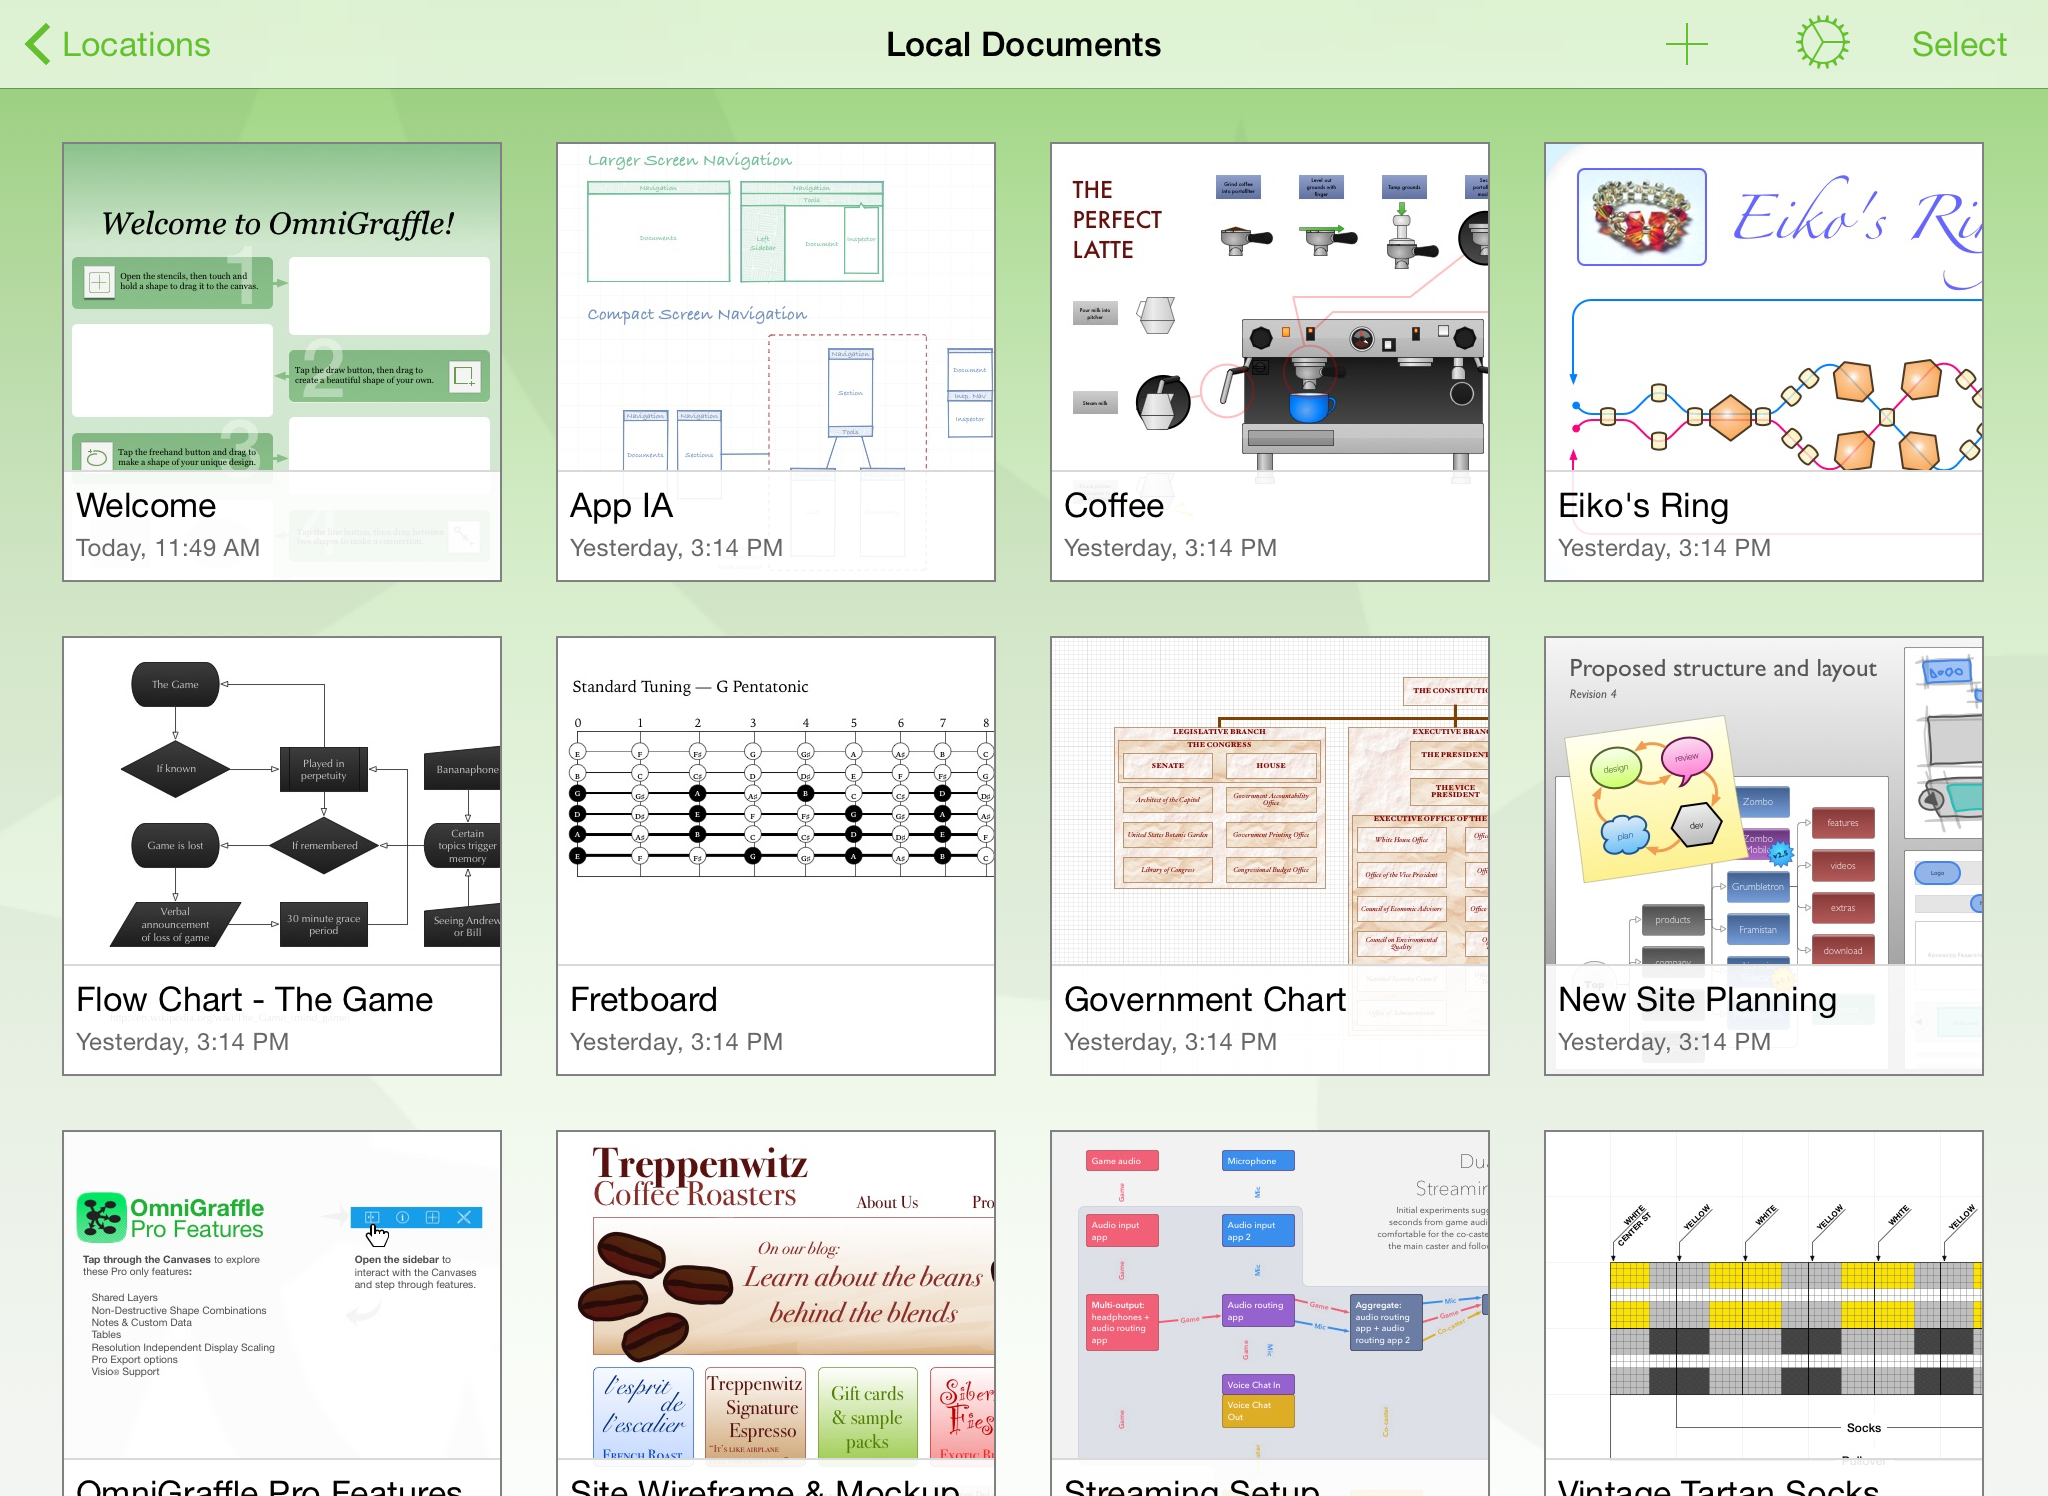
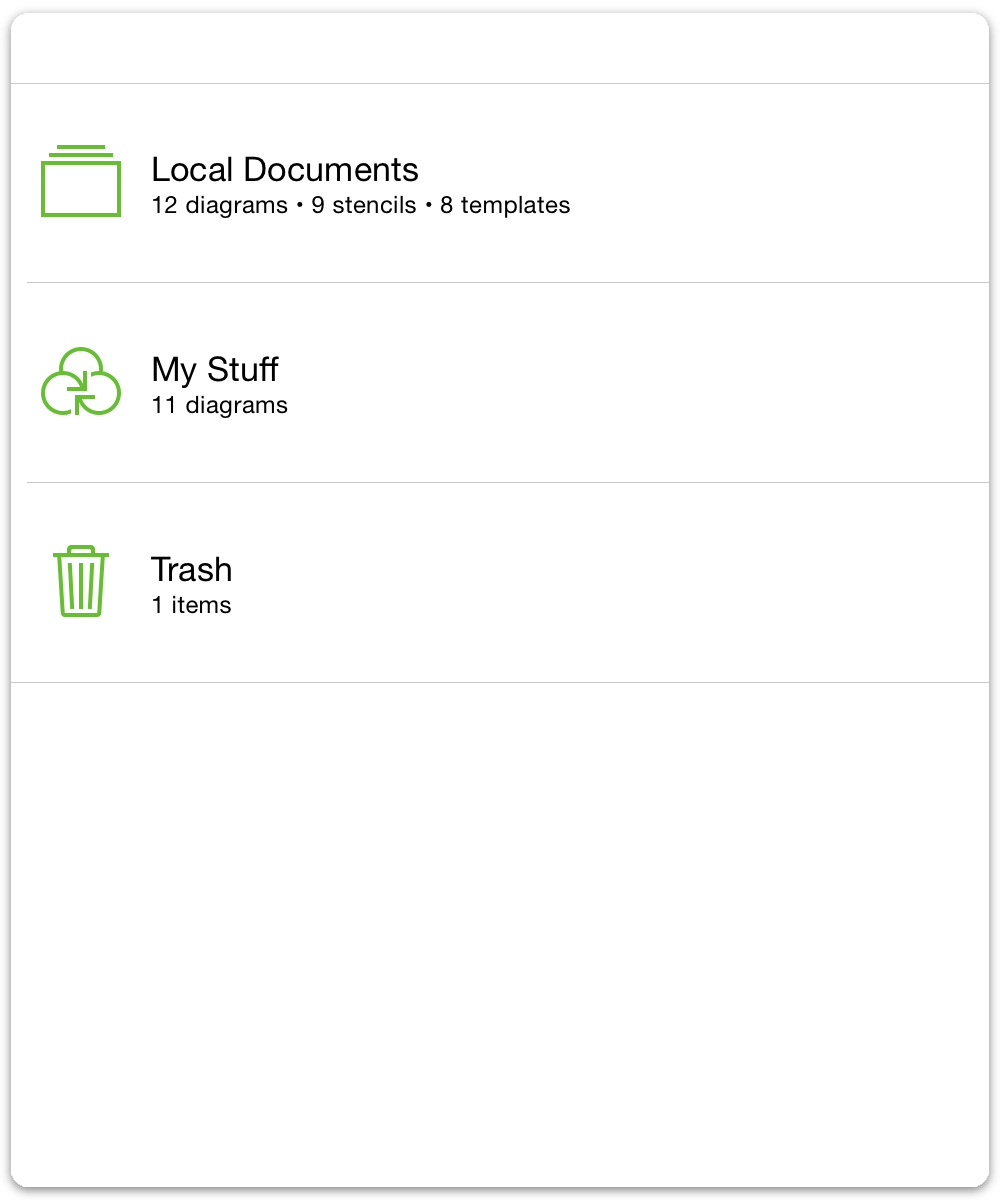
When you first open OmniGraffle, you’re taken to the Locations screen which is the place you go to access all of your documents. There is a Local Documents folder, which we’ve preloaded with some sample Graffle files (diagrams, stencils, and templates) that you can use as inspiration for the things you’ll create.
Tap the Local Documents folder to see what’s inside:
If you swipe down while viewing the contents of a folder, you’ll discover the super secret Document Organizer. By default, OmniGraffle sorts your files by the date created and displays any documents in that folder.

You can choose to sort items in the document browser by the date or by title:
- Choose Sort by date to sort items by the last date the file was opened.
- Choose Sort by title to sort items alphabetically by the document’s title.
The three buttons on the right let you choose which documents are displayed in the Document Browser: diagrams, stencils, or templates.
Along the top of the window, you’ll find OmniGraffle’s navigation bar.

Use the button in the upper-left to navigate between folders.
The title of the current folder is displayed in the middle of the toolbar. If your files are being synced with OmniPresence, you can tap
 to the left of the folder name to force a sync. OmniPresence checks for updates and new files on the server and then downloads them to your iPad.
Tap
 to create a new document. After tapping this button, you are taken to a screen where you can choose a template to use.
Tap
 to reveal a pop-up menu that contains options for finding details about your current version of OmniGraffle, how to access the very help document you are reading, how to Contact Omni, and more.
Tap Select to organize files to organize, share, delete, and print files.
Using the Document Toolbar
The Document toolbar is found above the Canvas and contains most everything you need to use OmniGraffle:

The buttons and doo-dads in the toolbar include:
Tap Documents to close the file you’re working on and return to the Document Browser. (If you are editing a stencil, this button reads Stencils.)
Tap Undo to undo the last change; touch and hold to Redo.
Tap Sync to synchronize files with a cloud account. (See Getting Synced.)
Double-tap the Document Title to change the name of the file you’re working on.
Tap Sidebar to show and hide the Contents Sidebar.
Tap Info to make style and property adjustments to the current selection or Canvas.
Tap Stencils to browse and add stencils or images to the Canvas.
Tap Draw to show and hide the Drawing Toolbar, and quickly add objects to your canvas or create custom shapes.
Using the Drawing Toolbar
The Drawing toolbar is a great way to quickly add a lot of stuff to your Canvas. You can enter draw mode and show the draw toolbar by tapping ![]() in the Documents toolbar.
in the Documents toolbar.

The buttons and doo-dads in the toolbar include:
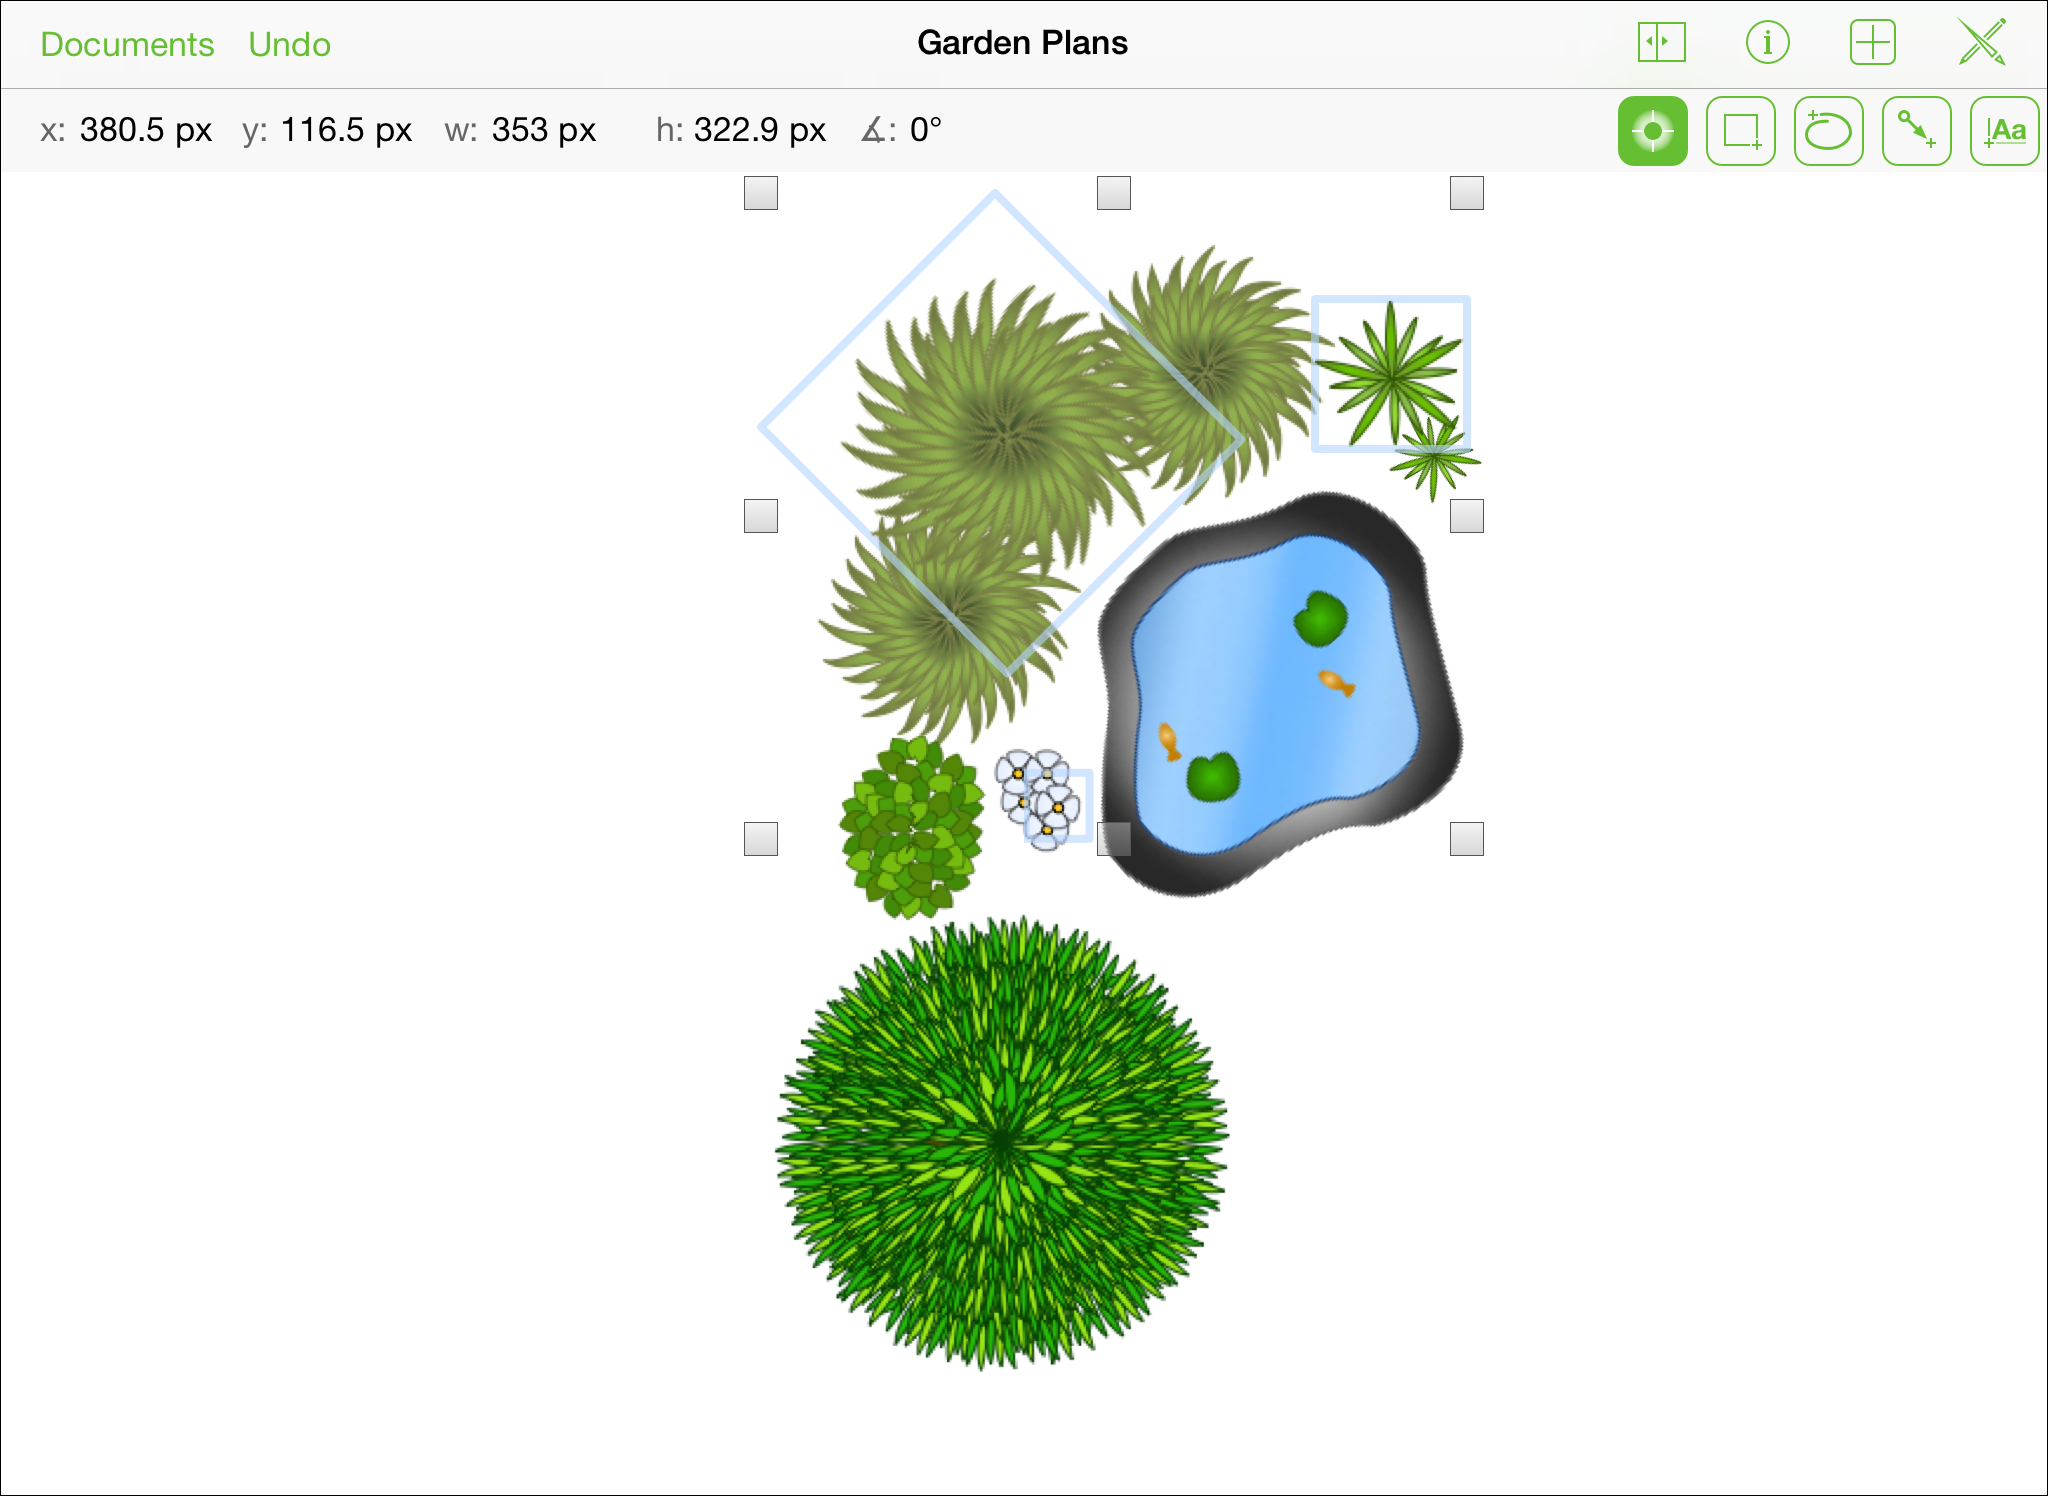
The x position shows an object’s distance from the left edge of the Canvas.
The y position shows an object’s distance from the top edge of the Canvas.
The w dimension shows the width of the selected object.
The y dimension shows the height of the selected object.
The angle indicator shows an object’s degree of rotation.
The Selection tool is used to select, move, and resize objects on the Canvas.
The Shape tool is used to draw shapes (circles, squares, and so on) on the Canvas.
The Freehand tool is used to draw freely on the Canvas. Tap anywhere on the Canvas and drag your finger around to create your own shapes. If the end of the drawing nears the beginning, OmniGraffle will close the shape.
The Line tool is used to either connect two objects together with a line, or to draw a free-standing line on the Canvas. If you begin or end your line on a shape, the line automatically attaches to that shape.
The Text tool is used to add a text label to objects and lines, or anywhere on the Canvas. Tap an existing label to edit; double-tap to select a word.
Tap any draw tool twice to keep it selected. Otherwise, after creating an object it will return to the default selection mode. To leave draw mode, tap the draw button to close the toolbar.
Using the Drawing Tools
To access the Drawing Tools, just tap ![]() . There are five basic buttons in the Drawing Tools bar:
. There are five basic buttons in the Drawing Tools bar:

The tool buttons take on a different look, depending on whether the tool is inactive, selected, highlighted, or sticky:
A tool is inactive when it has a white background:


A tool is selected (or in-use) when it has a light green background:


A tool is highlighted—although only for a short period of time—when you switch from one tool to the next; these have a medium-green background:


A tool is sticky when it has a dark green background:


Tools become sticky, or persistent, when you double-tap its button in the Drawing Tools bar.
Note
The Selection tool is always persistent when it is active (). This makes it easy for you to move and style objects without having to double-tap its button to make it stick.
When you select the Shape, Freehand, Line, or Text tool, you’ll notice that another button appears to the left of the button. This is known as the tool preview button, because it shows you exactly the type of thing you’re about to draw.
Pressing a tool’s preview button pops open an Info window which reveals details about that tool’s preset options, shows a list of Favorites which you can choose from, and also shows things of that type On This Canvas. You can also create a Custom Style from this window.
Go ahead and try this out:
Tap
; your toolbar should appear as follows:
Tap the tool preview button to examine the styles, choose another shape, or create a custom style for the shape.

Tap the circle object under Favorites. You’ll notice that the tool preview button changes to display the circle.
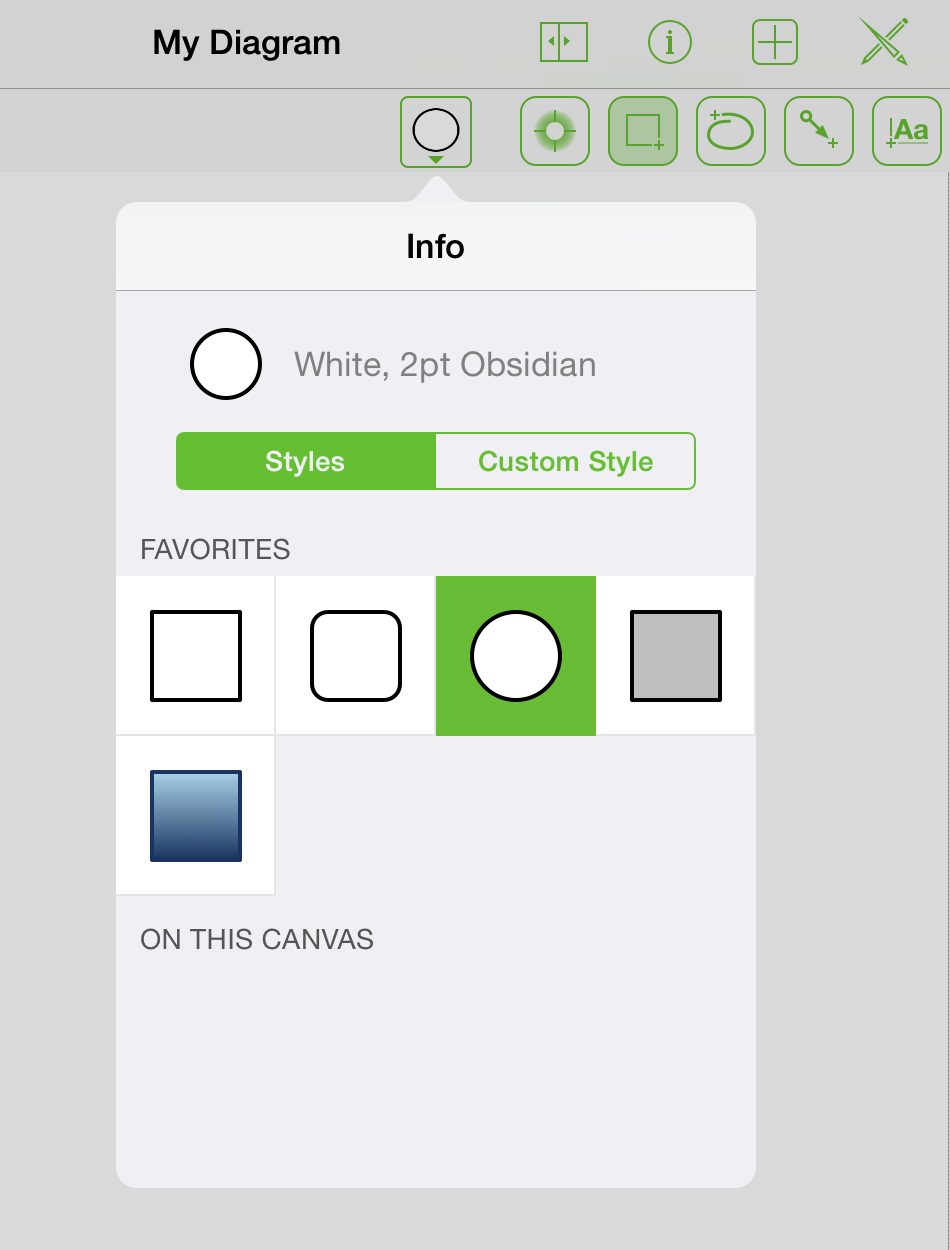
Take some time to try out the rest of the tools to see which options are available in their respective Info windows.
The Contents Sidebar
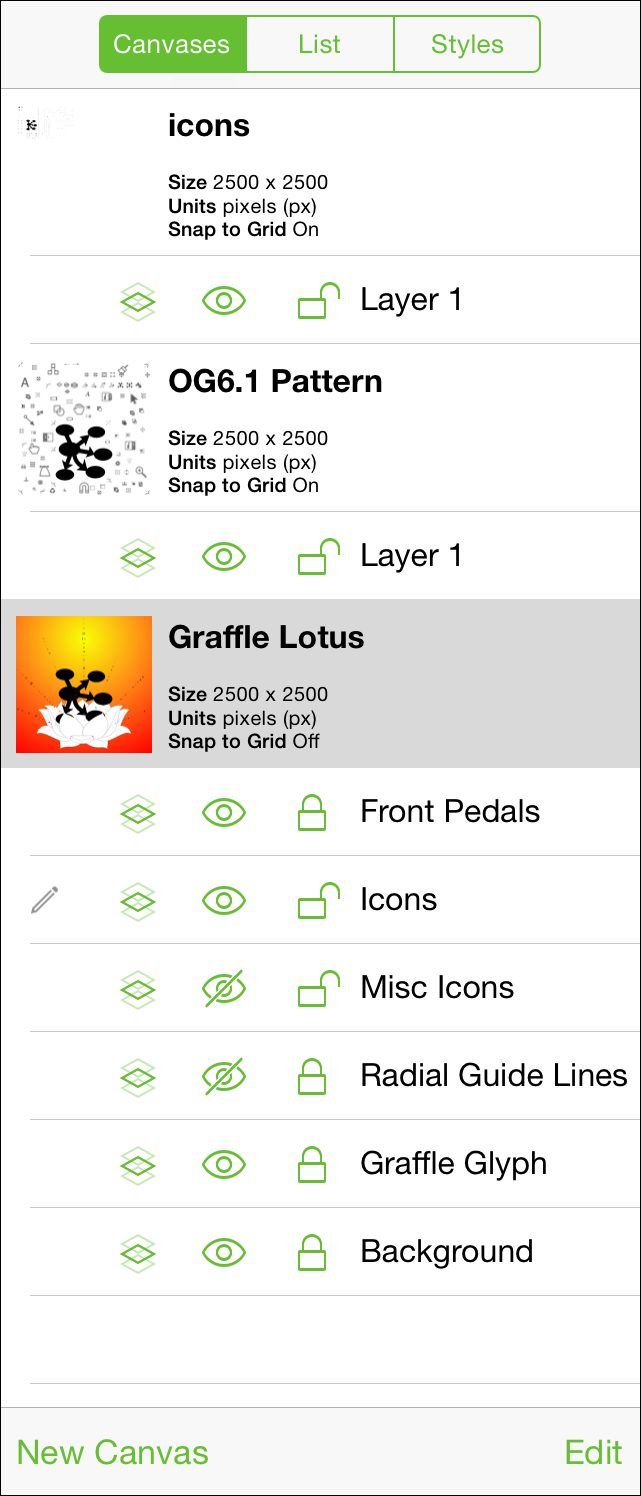
The Contents sidebar contains information about your canvases, their layers, the objects that exist on those layers, and the objects themselves.
To open and close the Contents sidebar, tap ![]() in the Document toolbar. If you have used OmniGraffle 6 for Mac, you’ll notice that the sidebars look quite similar.
in the Document toolbar. If you have used OmniGraffle 6 for Mac, you’ll notice that the sidebars look quite similar.
View and manage your Canvases in the canvas section:
Tap Canvases at the top of the sidebar to view your Canvas list.
To start working on a canvas, select the canvas in the list with a tap.
To create a new canvas, tap New Canvas at the bottom of the sidebar.
To duplicate the selected canvas, touch and hold on the Canvas name, and then tap Duplicate in the contextual menu.
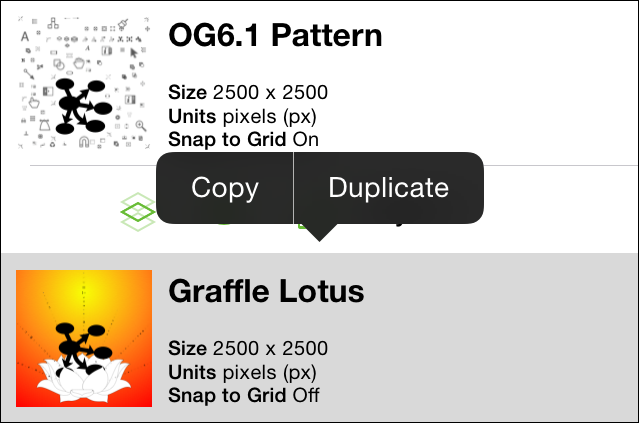
To rearrange, delete, or rename the Canvases and layers, tap Edit. Tap the red circles on the left to delete a Canvas or Layer, and use the handles on the right to rearrange them. To edit a Canvas or Layer’s name, double-tap in the name field to select all of the text, and then enter something new. Tap Done when you’ve finished making changes.
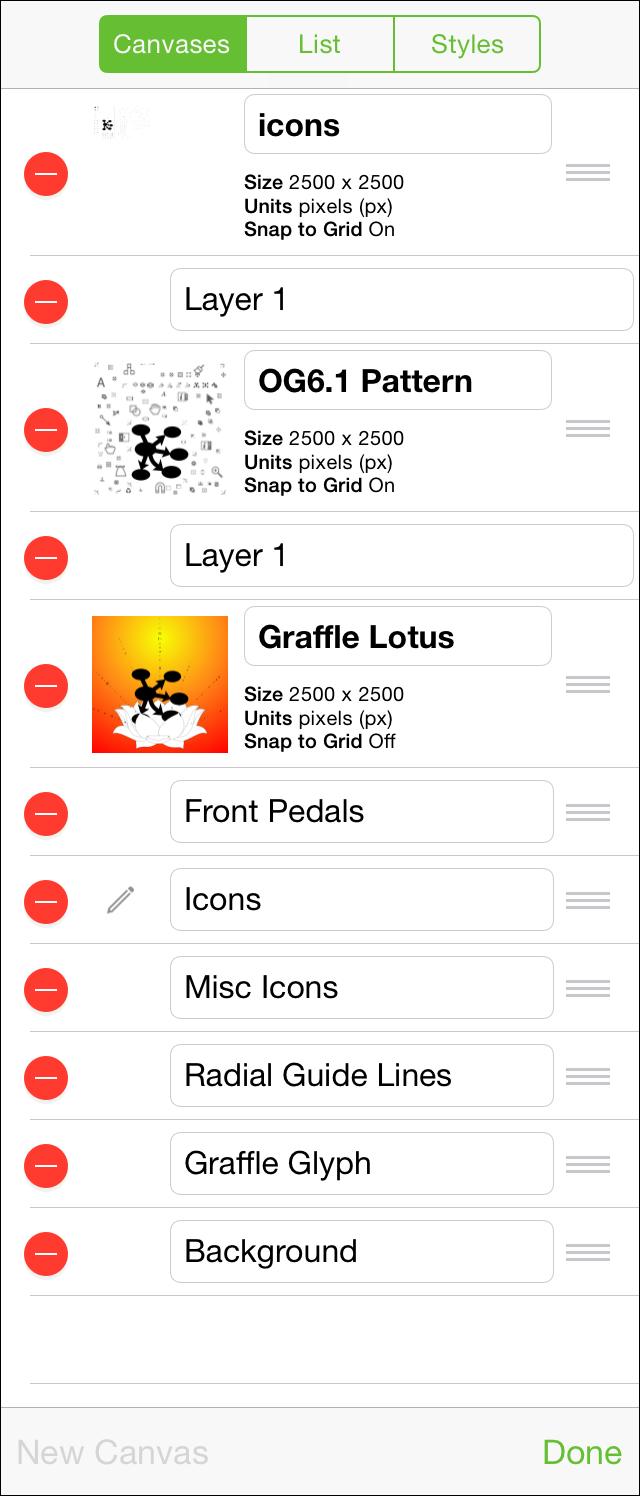
Working with Layers
Each Canvas starts out with one layer. To add new layers, first select a Canvas’s layer and then tap New Layer at the bottom-left of the sidebar. To work on a particular layer, tap to select the layer you’d like to work on.
To work on a specific layer, tap the layer name in the list. You’ll notice a series of icons to the left of each layer name; let’s run through these:
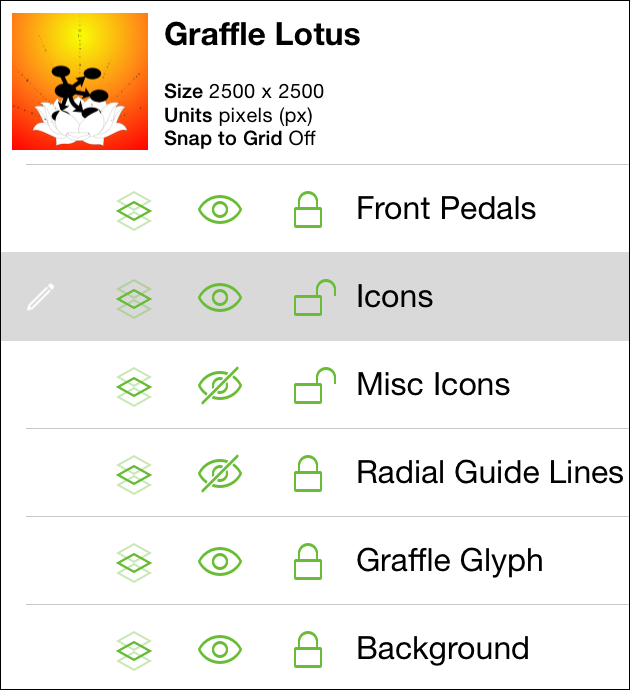
A pencil indicates that the selected layer is editable. If the pencil has a slash through it, that layer is not editable, either because it is locked or its visibility is turned off.
To share a layer across multiple canvases, tap the shared layer button; tap again to turn off sharing.
To show or hide a layer, tap the layer visibility button. If the eye has a slash through it, that means the layer isn’t visible.
Tap the lock to lock or unlock a layer. Locked layers cannot be edited or changed, whereas anything goes with an unlocked layer.
If you need to rearrange or delete layers, tap Edit at the bottom-right of the sidebar. Layers are stacked upon one another on the Canvas—if two layers have overlapping objects, the layer at the top of the list obscures the objects on layers below it in the list.
As with the Canvas, each layer contains its own set of objects. To see everything that’s on a particular layer, first select the layer and then tap List at the top of the sidebar to view and manage its objects:
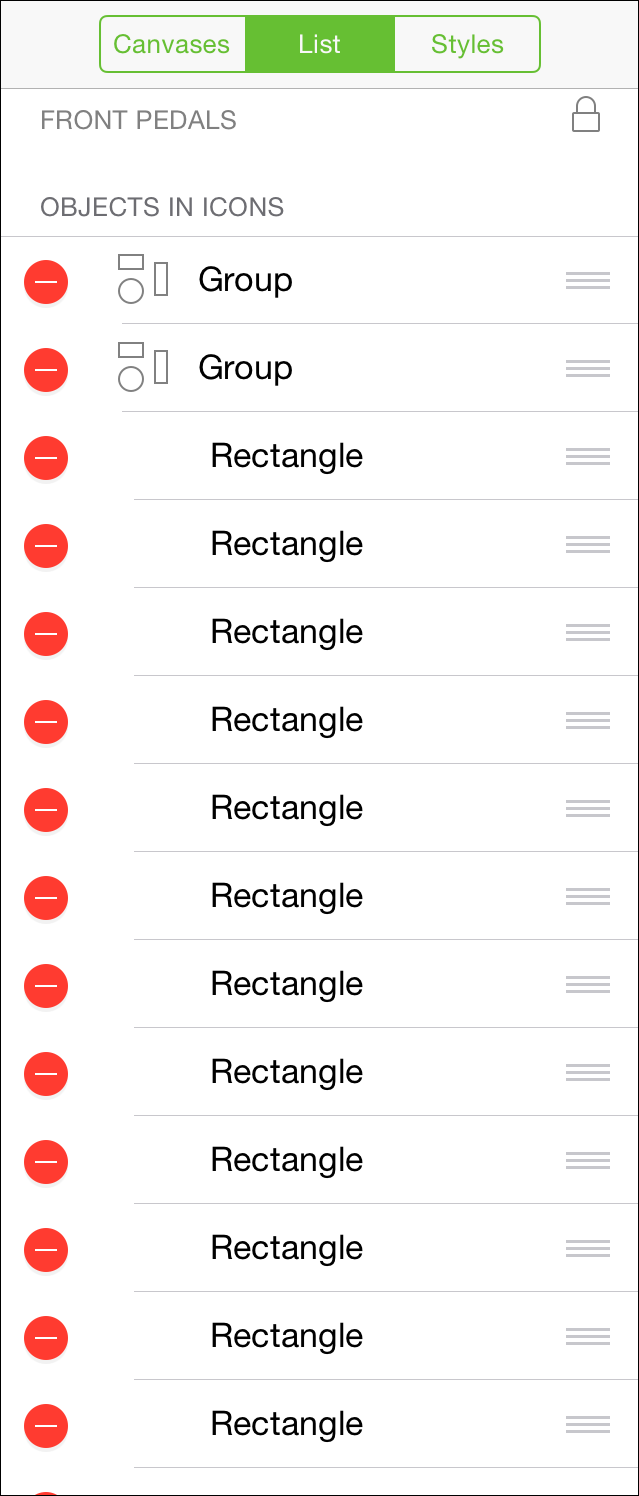
To select an object on that layer, tap the object in the list.
To delete layer elements, tap the red circle on the left and then tap Delete. If you accidentally tap the red circle but don’t want to delete that object, tap anywhere else in the sidebar.
To rearrange layer objects, tap the handle on the right and drag up or down in the list.
Tap Styles at the top of the sidebar to filter and select objects by style on the selected layer.
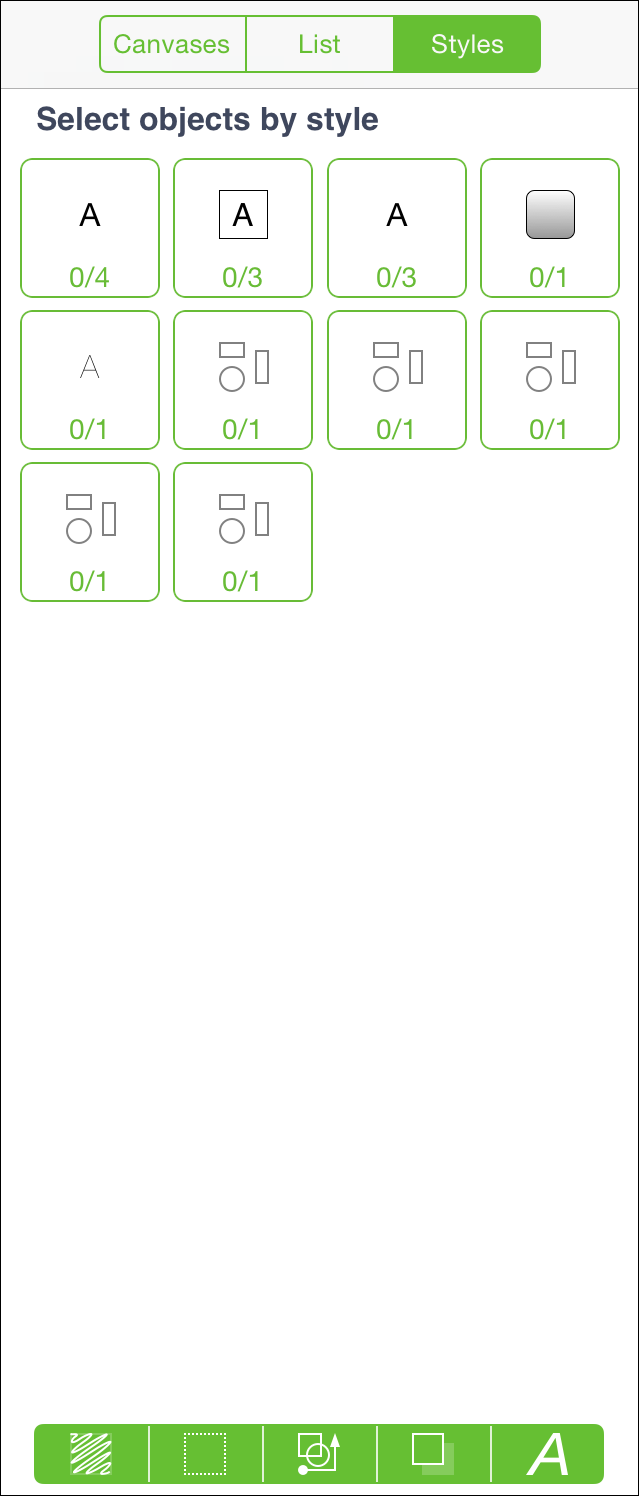
Each style of object has a representation of the object and a pair of numbers. The first number is how many objects you have selected which match that style; the second number is how many objects of that style exist on the canvas.
Along the bottom of the Styles list, you’ll see a grouping of filter buttons. Use these buttons to control which object styles/types are displayed in the list above. Tap a filter to select all objects that match it. You can then tap
 to select and modify that grouping of layer objects.
A white filter button indicates that objects related to that filter are not included; green buttons indicate inclusion. Compounding filters returns objects matching all filters:
Tap the fill button to include or exclude objects on the selected layer with with a fill.
Tap the stroke button to include or exclude objects on the selected layer with a stroke.
Tap the shape button to include or exclude objects on the selected layer of a specified shape.
Tap the shadow button to include or exclude objects on the selected layer with a shadow.
Tap text button to include or exclude text objects on the selected layer.
Keep these filters in mind for when you need to apply changes to a certain grouping of objects. For example, changing all of the text from Helvetica to Gill Sans, or changing the fill color for all round objects on the layer.
Importing Documents
To import a document from a remote location, tap Local Documents and choose Cloud Setup. From here you can create a new account or access an existing account for remote storage or syncing (see the next page for more on OmniPresence sync). To create or access existing Omni Sync Server or WebDAV storage, choose the Import/Export option when setting up your account.
Organizing Files with Folders
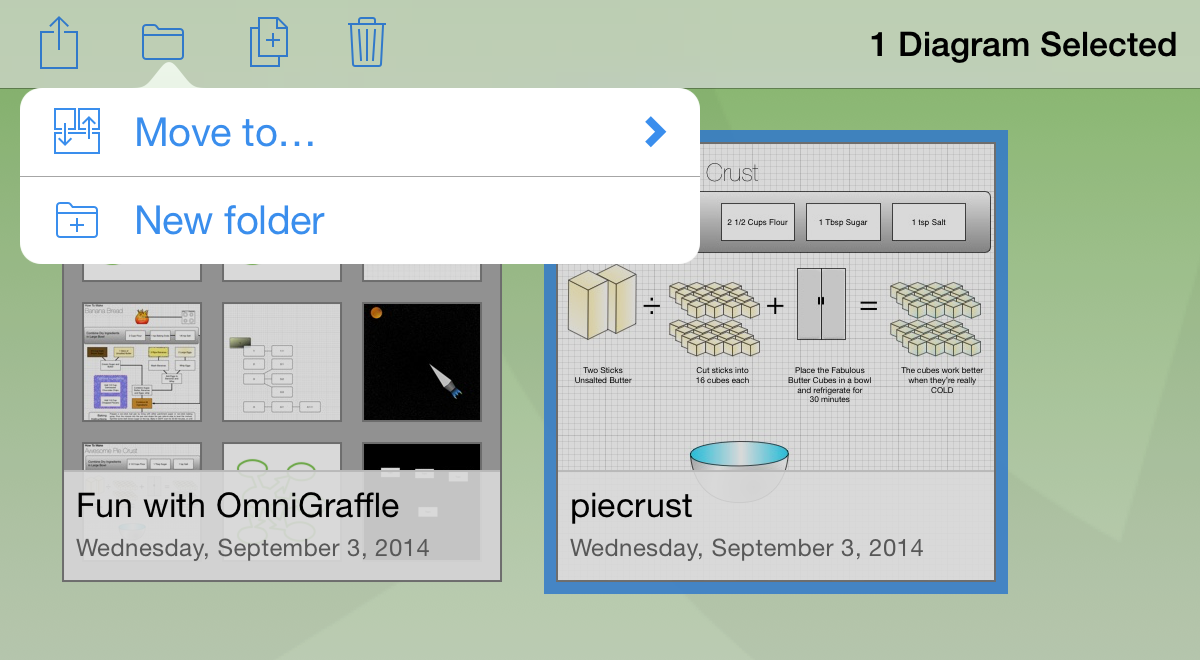
Of course, part of the reason you’re using OmniGraffle on your iPad is so you can draw and design things from wherever you are. And with that flexibility comes the occasional need to shuffle files around when you need to. To move, share, and print files in and from OmniGraffle on your iPad, start by tapping Select in the Document Browser’s toolbar.
After tapping Select in the toolbar, tap to select the files you want to move. When you do, the file(s) you selected gets a blue border around it, like so:
Tip
If you select the wrong file, just tap it again to deselect the file and then choose something else.
With the file selected, tap the folder icon in the toolbar to open the File menu. From here, you can chose Move to to move the file to an existing folder, or tap New folder to create a new folder containing the file you’ve selected.

This is particularly handy for when you want to transfer a file you have stored in the cloud to the Local Documents folder on your iPad; or in the reverse, to a shared folder on another Omni Sync Server account that you have access to.
Note
It’s worth noting that the files you’re storing in the cloud using Omni Sync Server cannot be edited by multiple people simultaneously.
Let’s use that shared folder as an example. If you and the rest of your design team have access to an Omni Sync Server account for sharing documents, you might want to create separate subfolders for each team member, and then have another Shared folder that your group uses to share files with one another. This way, you could each work in your own “sandbox,” and then save a duplicate copy of the file to the Shared folder when you’re finished working on it.
To help you better organize your files, can also move files to other folders or create subfolders that contain similar documents:
Tap Select, and then choose the file (or files) you would like to move.
Tap the folder icon (Move) in the navigation bar to move a file to another folder, or to create a new subfolder containing the selected files.
Tap New Folder to create a new folder containing the selected file. The file is moved out of the current folder into a new Untitled subfolder. Enter a new name for the folder and tap Return.
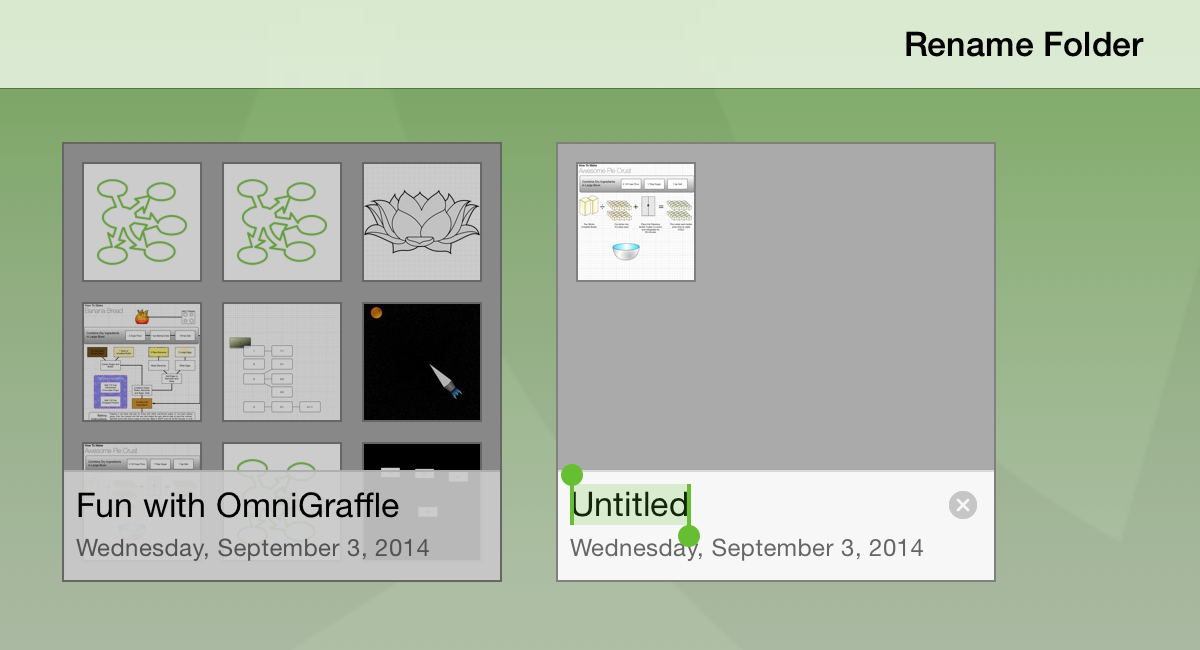
Subfolders have a dark gray background and show mini icons for the files contained within. To open a file within a subfolder, tap the folder to open it, and then tap the file.
Sharing and Printing Graffle Files
Every now and then you’ll find the need to share some document you’ve created in OmniOutliner with someone else. But all of the files are on your iPad, how are you going to do this?
When you open a folder, such as your Local Documents folder, tap Select in the navigation bar, and then select the file (or files) that you want to share. This places a blue highlight around the file to let you know which files you’ve selected to do something with.
After tapping Select in the toolbar, select the files you want to share and then tap the Share button on the far left of the toolbar.
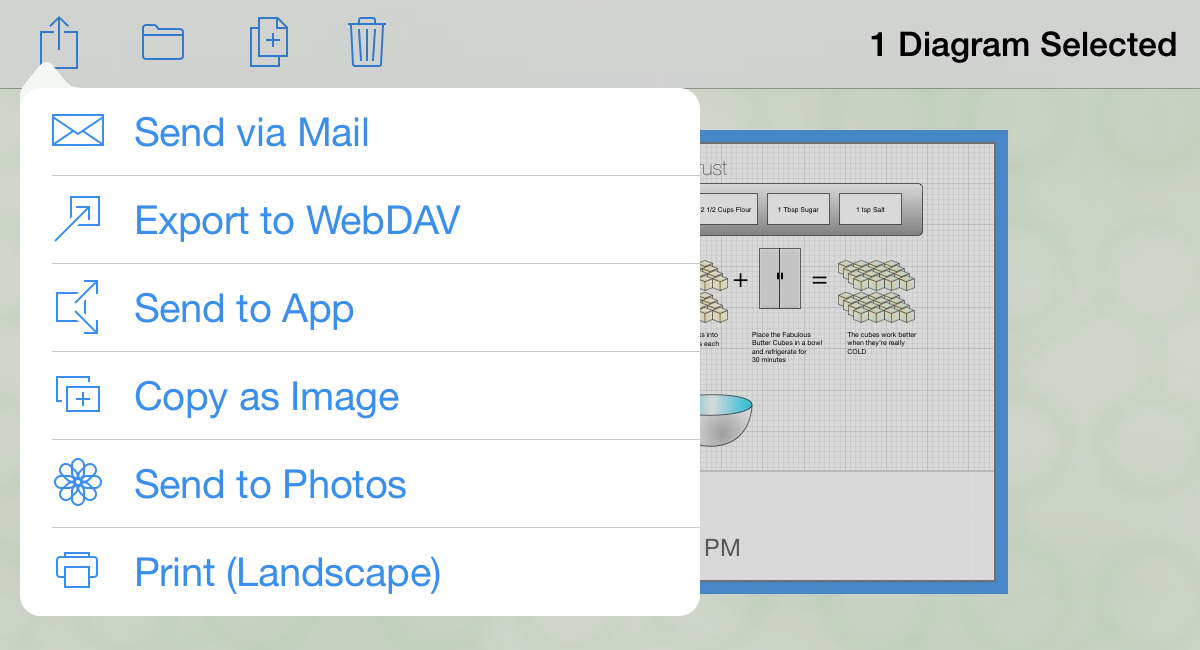
As you can see, there are plenty of options you can choose from, so let’s quickly run through these:
Send via Mail—After tapping Send via Mail, you’re taken to a screen from which you can chose the file format: OmniGraffle, PDF, PNG, or OmniOutliner. Choose the format you’d like to send, and that file gets attached to a new email message. If all you want to do is send a quick snapshot of something you’re working on to a colleague, choose the PNG option.
Export to WebDAV—Choose this option to upload the file to a WebDAV folder. To do this, though, you need to have previously connected to a WebDAV server from OmniGraffle. See Getting Synced, earlier in this book.
Send to App—Choose this option to open this file in another app on your iPad. You’ll first choose the format (either OmniGraffle, PDF, PNG, or OmniOutliner) to send to that app, and then select app to open the file.
Copy as Image—This copies the canvas of the selected document to the clipboard so you can paste it into another app.
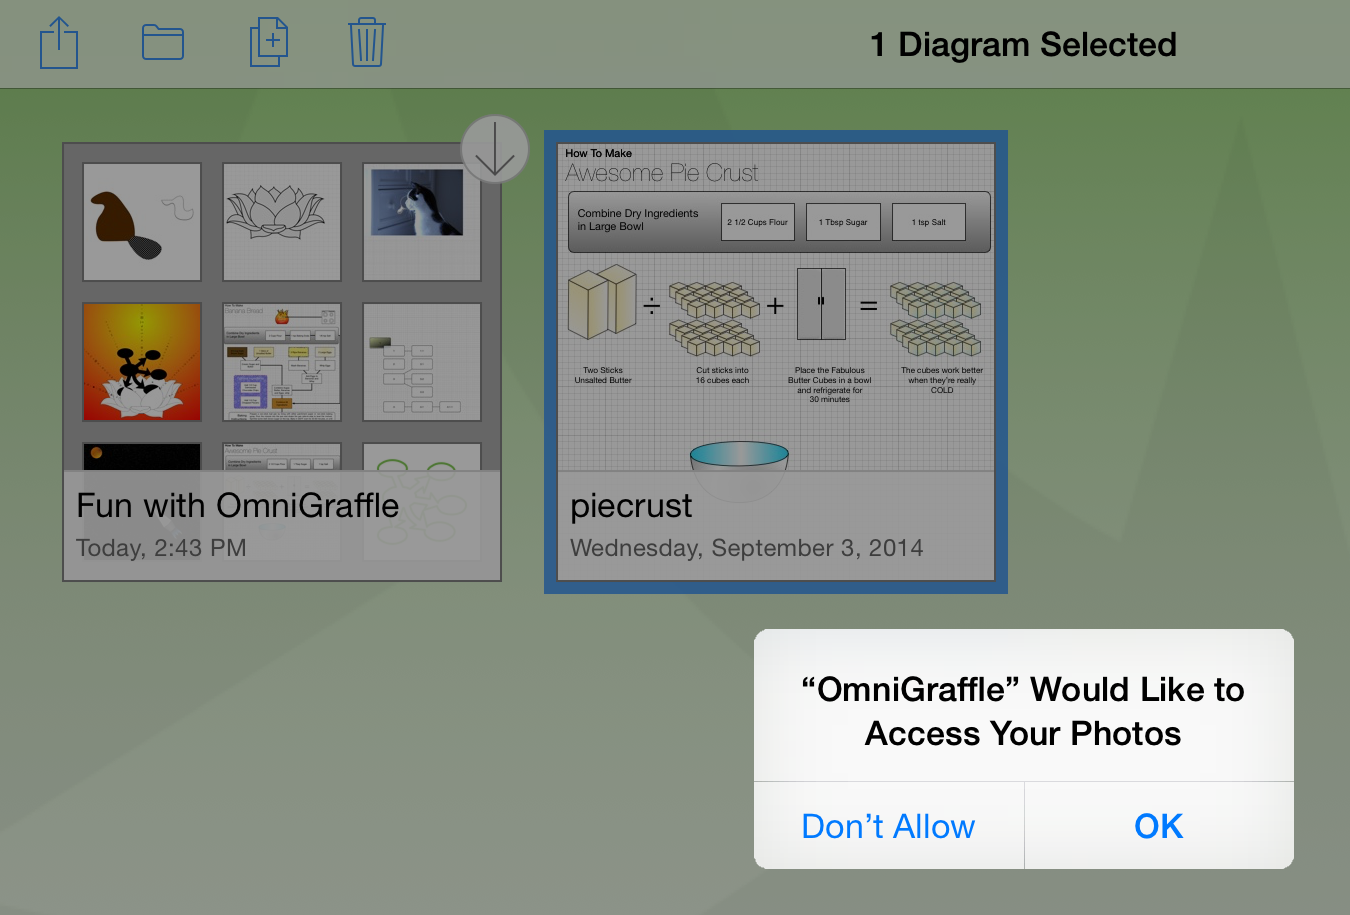
Send to Photos—Choose this option to create a PNG image of the selected file’s canvas and send that to the Photos app on your iPad. If this is the first time you choose this option, iOS prompts you to allow OmniGraffle access to the Photos app on your device.
Print (Portrait or Landscape)—Choose this option to print the selected document. How the document is printed depends on the orientation of your iPad. To print, however, you must have an AirPrint-compatible printer on your wireless network.
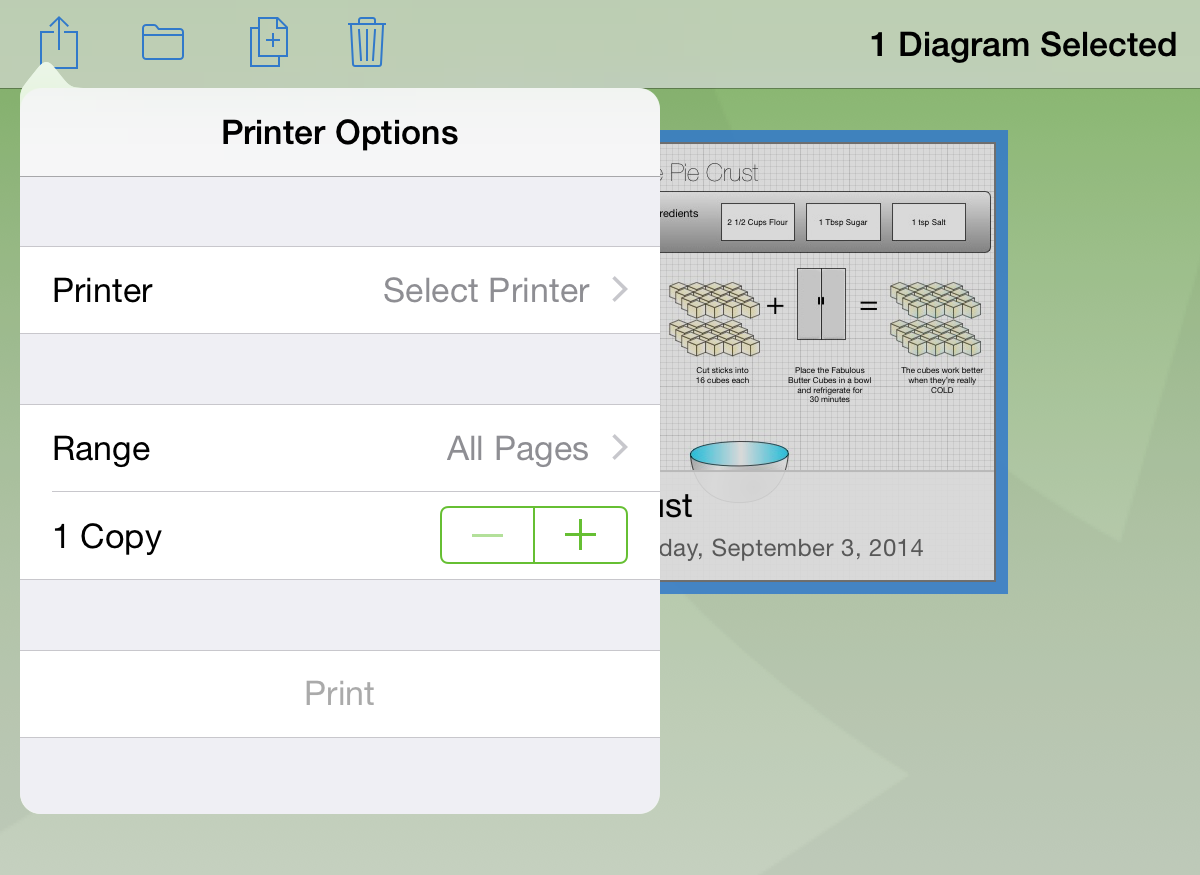
After choosing Print from the Share menu, you have several options: tap Printer to select the printer from which you’d like to print; tap Range to select which pages you’d like to print; and tap the plus and minus buttons to change the number of copies you’d like to print.
Taking Out the Trash
Every now and then, you’ll find that it’s time to do a little housecleaning in OmniGraffle. That organizational chart you created for your previous employer is something you really don’t need to remember, so it’s time to dump that document into the trash and purge it from your iPad (or from your synced Cloud Account, if you have one of those configured) forever.
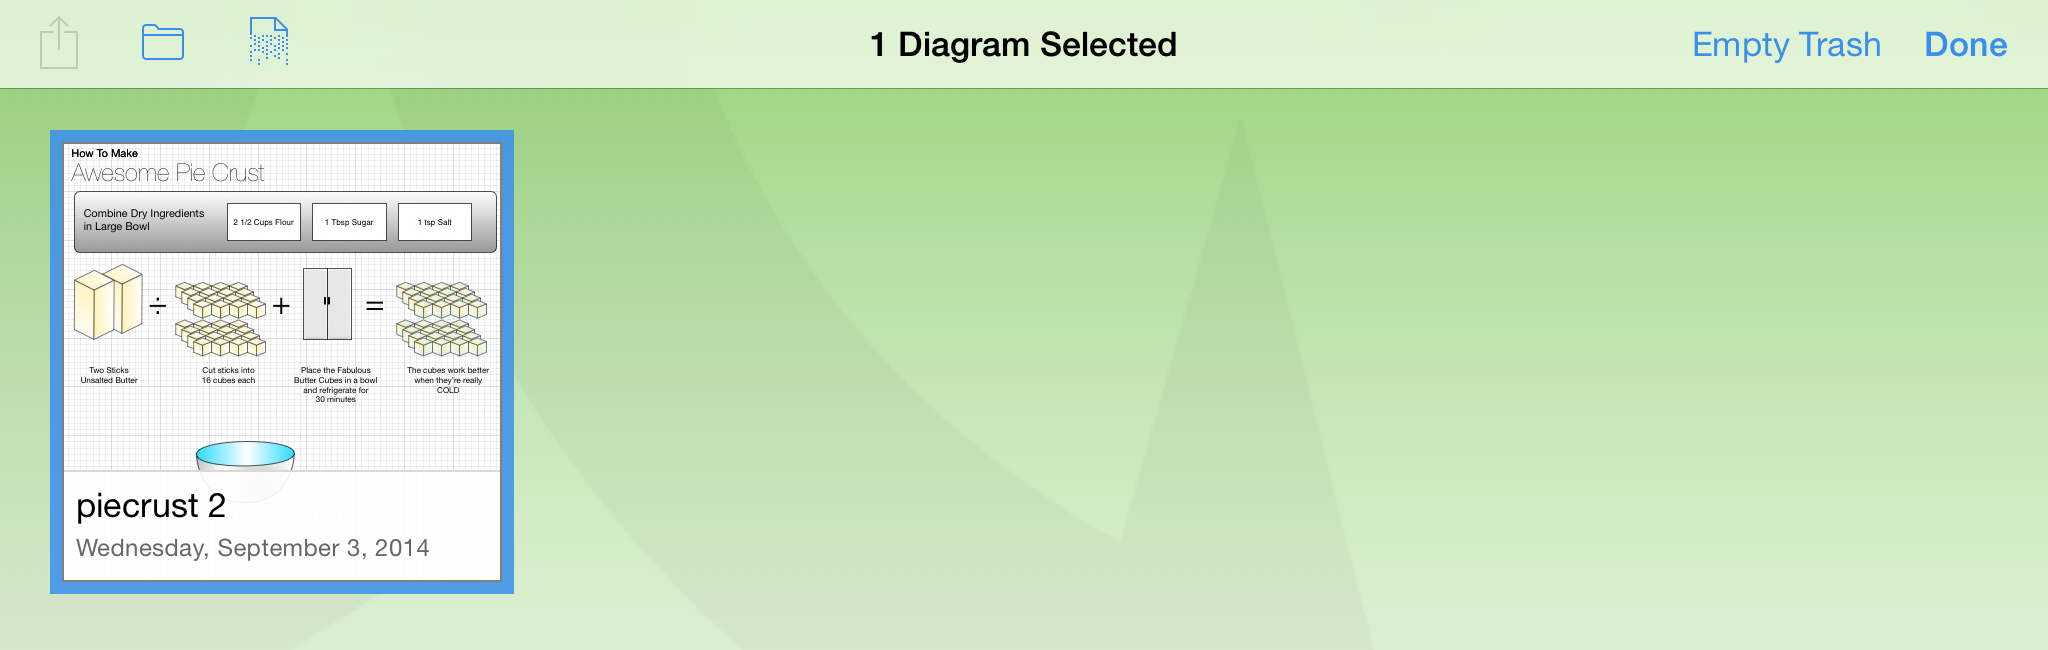
Fortunately, deleting files from OmniGraffle is just as easy as it is to create a new org chart if you need to. When viewing a folder of documents, tap Select in the navigation bar at the top of the screen. Then tap on the document you’d like to delete; you’ll see that the file now has a blue highlight around it.
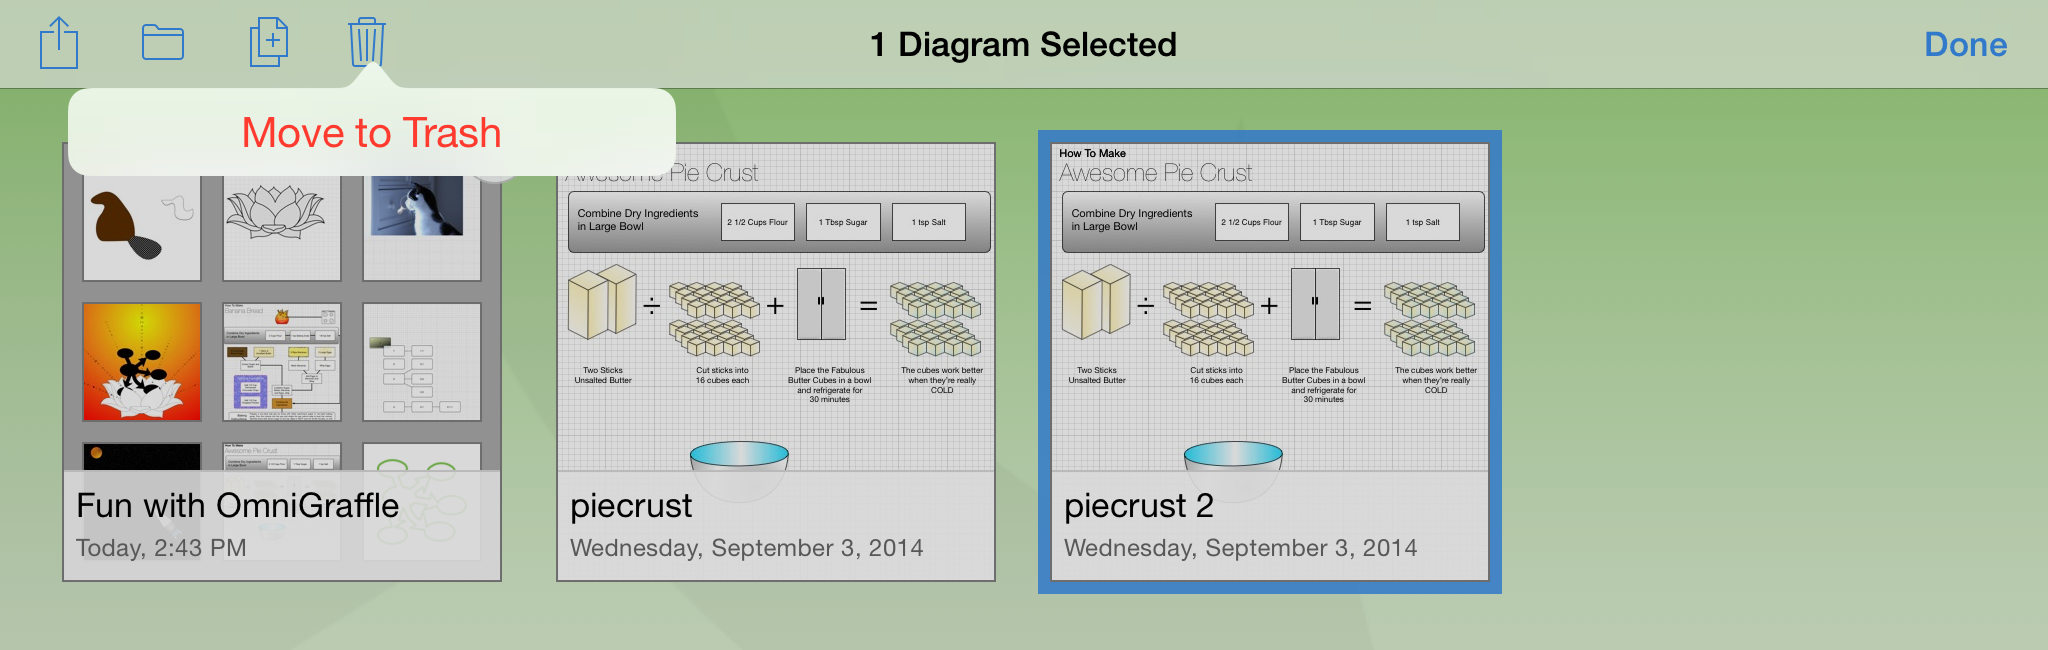
Tap the trashcan (![]() ) in the navigation bar, and then tap Move to Trash to move the document to the Trash folder.
) in the navigation bar, and then tap Move to Trash to move the document to the Trash folder.
If you tap Locations in the navigation bar, you’ll see Trash in your list of folders. Remember, all you’ve done so far is move the file to the trash. This means that the file is still on your iPad.
Tap to open the Trash folder to see its contents. To move the file out of the Trash folder, tap Select, tap to select the file, and then tap the Folder icon (![]() ) in the navigation bar to move the file to another folder on your iPad.
) in the navigation bar to move the file to another folder on your iPad.
Finally, if you really are sure that you no longer need this file, you can either tap the Shredder icon (![]() ), or tap Empty Trash to delete the file.
), or tap Empty Trash to delete the file.
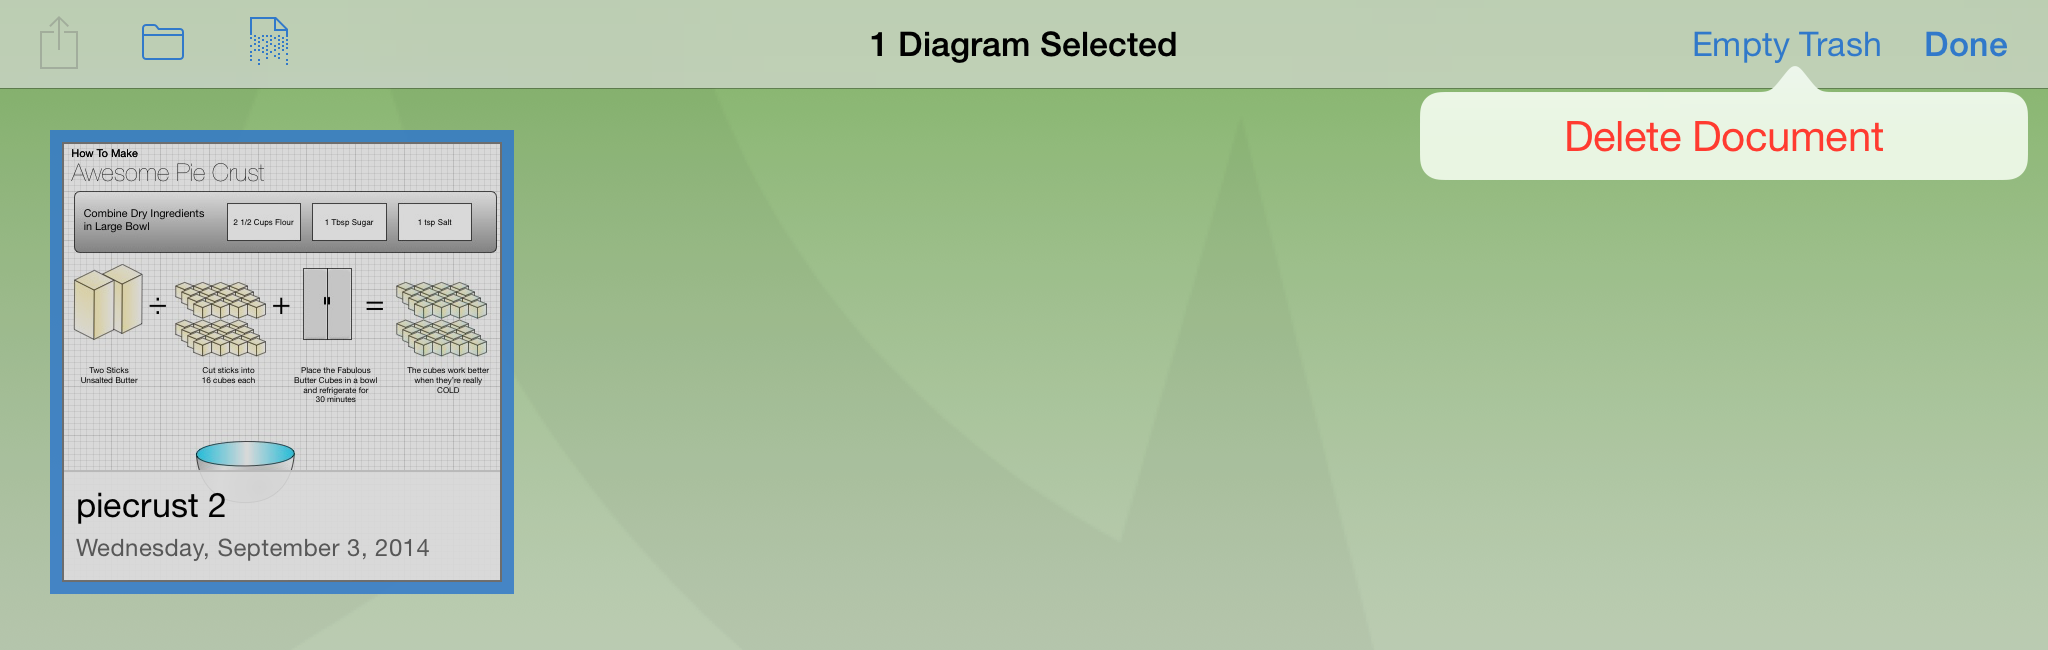
The difference between choosing the Shredder or Empty Trash is that tapping the Shredder icon only deletes any files you’ve selected in the Trash folder, whereas tapping Empty Trash deletes everything in the Trash folder, regardless of whether any files have been selected.
Note
The Trash folder is only available on the Locations screen when it contains something. If you’ve emptied everything from the Trash, that folder disappears until you delete something else. This same principle works for all folders; an empty folder just disappears. The difference is that you don’t have to create and name the Trash folder.
Chapter 4
Using the Inspectors
You use the Inspectors to change the style attributes for the objects on the Canvas, or set the properties of the Canvas itself. To access the Inspectors, tap ![]() in the Document toolbar.
in the Document toolbar.
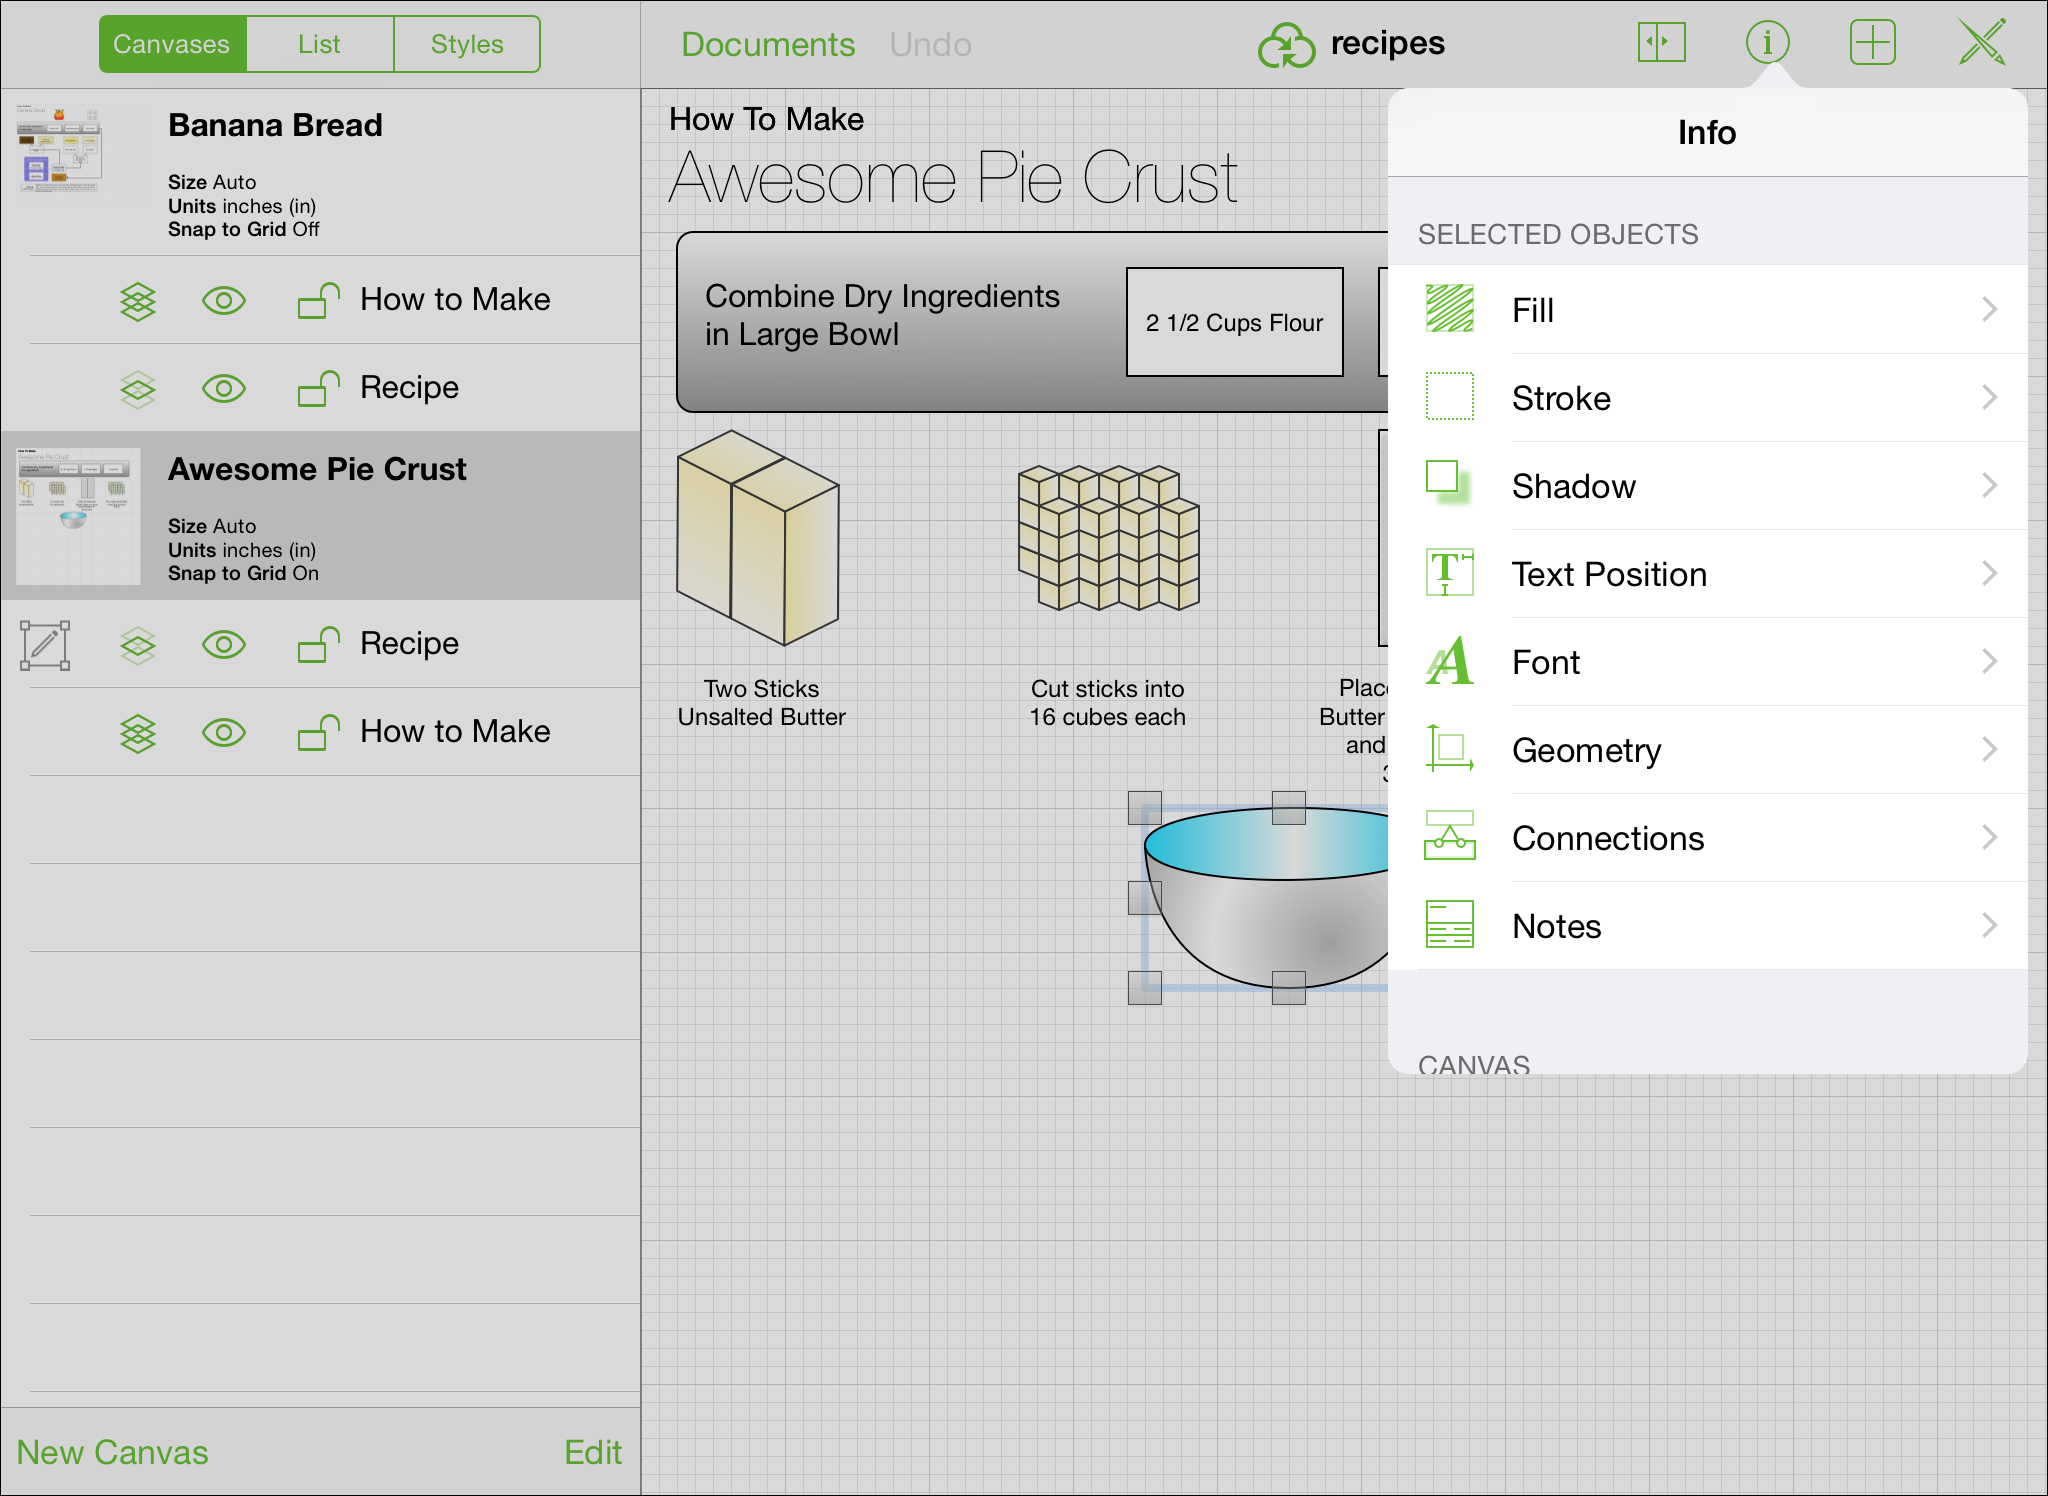
The Info window has two sections:
Selected Objects—This section displays the Inspectors that you can use on the selected object(s).
Canvas—This section displays the Inspectors that are specific to the Canvas alone. Each inspector contains two or more panes, for such things as adding a fill to an object or setting a background image for the illustration you’re working on.
Making Changes to the Canvas
A canvas is a space where you create and manipulate your shapes and other objects. You start off with just one canvas, but you can add as many as you like in the Contents sidebar.
The Canvas section has five different inspectors:
- Canvas Size
- Background
- Units & Scale
- Grid
- Diagram Layout
And if you have purchased the upgrade to OmniGraffle Pro, there is a sixth inspector—Notes. Each of these inspectors are covered in the sections that follow.
Adjusting the Canvas Size
The canvas attributes section has the following elements:
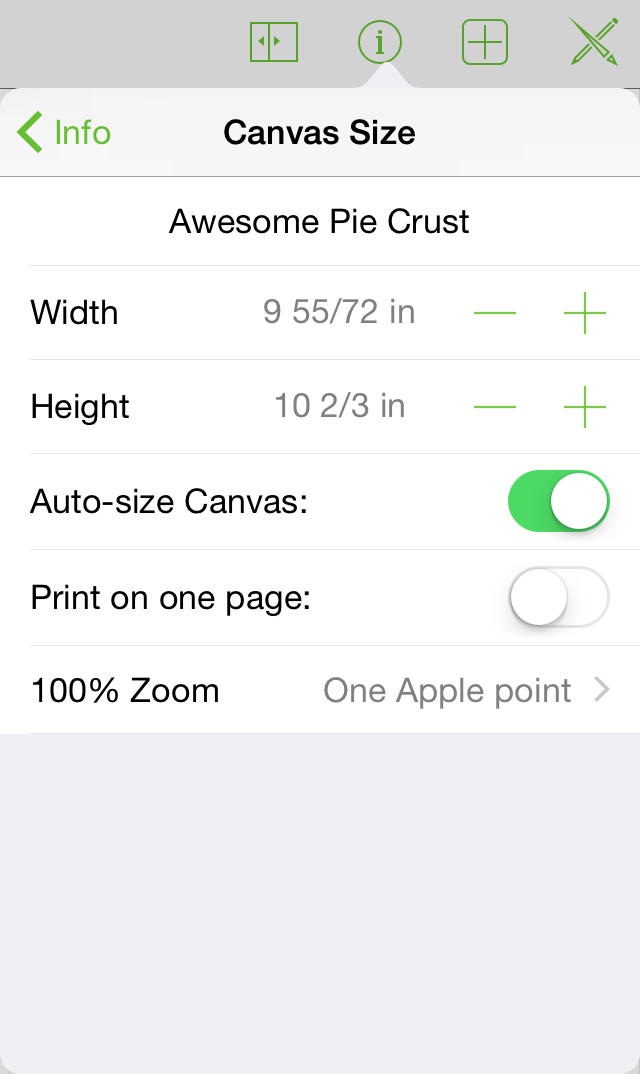
- Canvas Name
- Change the name of the canvas.
- Width
- Adjust the width of the canvas.
- Height
- Adjust the height of the canvas.
- Auto-size Canvas
- Enable and disable to automatically adjust the canvas size should your shapes go beyond the existing boundaries.
- Print on one page
- Fit the canvas to the page if its orientation or size differ from the default when printing.
- 100% Zoom
- Choose the display standard that suits your device and task. A canvas measured in screen pixels will render much larger on a non-Retina device; a canvas measured in Apple points will render at equal size across devices; and a canvas measured in PostScript points will match real-world measurements (WYSIWYG).
Coloring the Background of a Canvas
Use the Background inspector to set a background color for the Canvas:
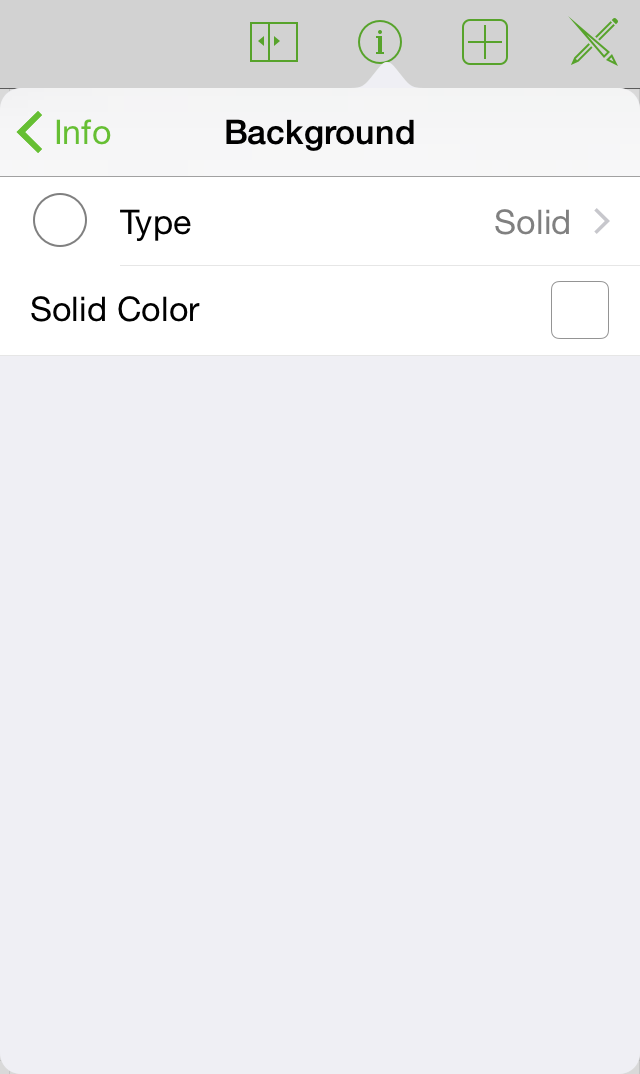
- Type
- Tap Type to change the style of the background color, choosing from Solid (the default for all included templates), Linear Gradient, Radial Gradient, Double Linear Gradient, Double Radial Gradient, Stipple, Squiggle, Plastic, and Marker. When you select one of the different types, the inspector changes slightly so you can fine-tune background to get the effect you’re after.
- Solid Color
- Tap Solid Color to choose a solid background color. You can use the defaults in the color palette, or use the HSB, RGB, and Gray slider controls to create custom colors.
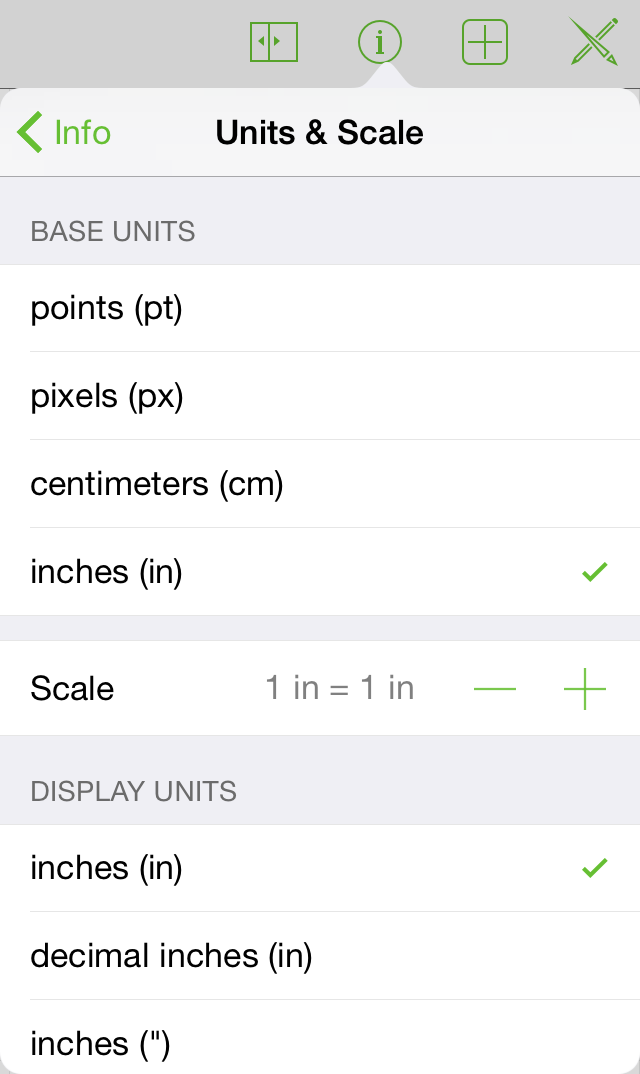
Setting the Unit Size and Scaling Options
Tap Units & Scale to choose the unit of measure you’d like to use to describe object dimensions, grid lines, the canvas size, and so on.
Defining Grid Properties
Grid options include:
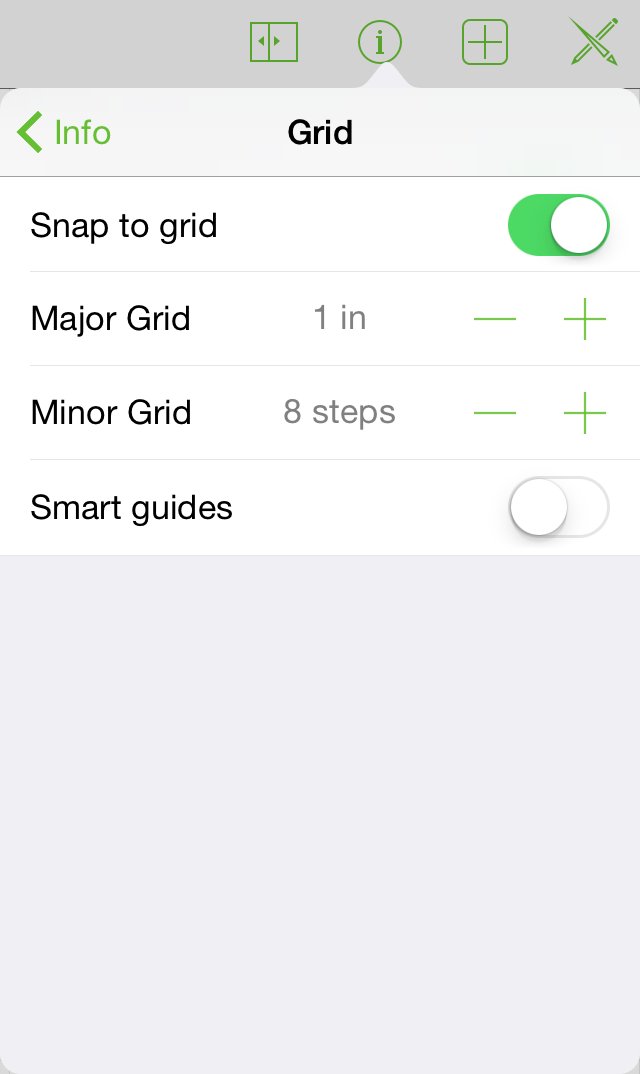
- Snap to grid
- Turn this on to show (and have shapes stick to) the gridlines; turn this off and the shapes move fluidly.
- Major Grid
- Tap the buttons to increase or decrease the grid size; tap the text to type a size.
- Minor Grid
- Increase or decrease the number of minor steps between major grid lines.
- Smart guides
- Enable or disable the blue guide lines that help you position and size your objects.
Note
You cannot enable Snap to grid and Smart guides at the same time; it’s a one-or-the-other option.
Laying Out Canvas Objects
Use the Diagram Layout inspector to change the flow of objects on the Canvas:

- Layout Type
- Choose either a Hierarchical or Force Directed layout.
- Layout Direction
- Use the arrows to change the direction of the layout.
- Rank and Separation
- Use these to specify the amount of spacing between objects.
To apply these settings, tap Lay out now.
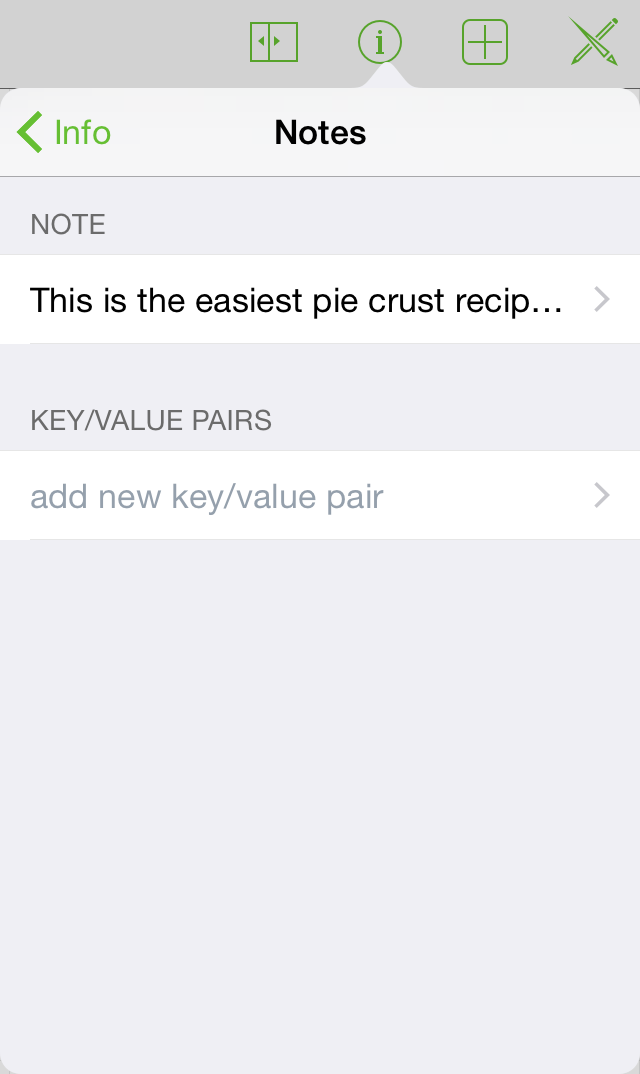
Adding More Detail to Your Canvases with Notes (Pro)
Use the Notes inspector to add a description about your diagram or illustration, and add key/value pairs of information about its content as well.
Making Changes to Selected Objects
Customize things to your heart’s content! Start by selecting an object on the Canvas and then use the Selected Objects section of the Info menu to make style and property changes. Only the inspectors applicable to your selection are available. For example:
When you select Shape and then tap
 , the available inspectors include: Fill, Stroke, Shadow, Text Position, Font, Geometry, Connections, and Notes.
When you select a Line and then tap
 , the available inspectors include: Stroke, Line, Shadow, Connections, and Notes (Pro).
These inspectors are briefly described as follows:
- Connections
- Adjust how the object reacts in relationship to other objects on the Canvas.
- Fill
- Choose a solid color or apply a nice gradient. Tap to view fill info.
- Font
- Customize the font family, typeface, and size of your text.
- Geometry
- Adjust properties of the object like its location and rotation.
- Image
- Place an image from your Photos library onto the Canvas or into an existing shape.
- Shape
- Pick a new shape for your object, including for those you may have created in freehand mode. Tap to view shape info.
- Shadow
- Add a shadow to your shape. The shadow can appear immediately below the shape or below everything on the layer.
- Stroke
- Customize the border around your object, or make it disappear. Tap to view stroke info.
- Text Position
- Adjust the layout of the text with respect to the shape.
- Notes (Pro)
- Add a description and key/value pair metadata to the selected object.
Each of these inspectors is described in the sections that follow.
Making Changes to a Fill
Fills are great way to add polish to a shape or canvas. Slide or tap a fill style in the carousel to choose a fill. This might be a solid color, a nice gradient, or nothing at all. Different fill styles reveal different options.
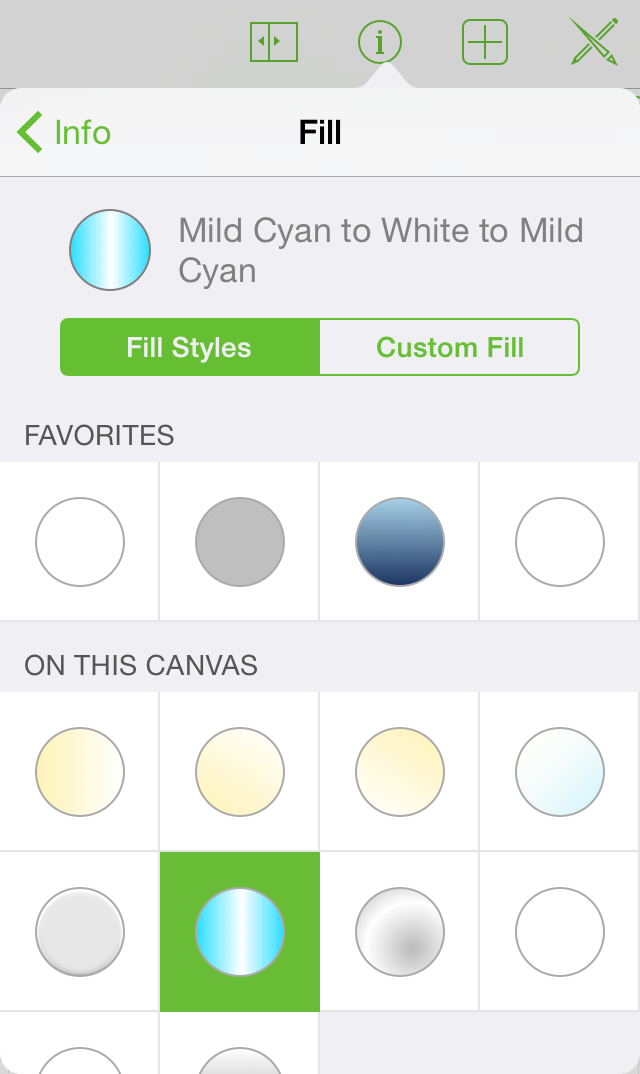
Choose no fill to leave the inside of your shape empty. (Canvases do not have this option because they cannot be see-through.) Any objects behind a shape will be visible.
Choose solid fill to apply a uniform color to the inside of your shape. Tap the color well to choose a color and see more color options.
Choose a linear blend to create a two-color gradient or a double linear blend for a three-color gradient. The colors will appear on the extremes of your shape and blend in the middle.
Choose a radial blend for a two-color, circular gradient or double radial blend for a three-color gradient.
Gradients have a few more options than a solid fill:
Tap the color wells to pick a color for each part of your gradient. To swap the colors, tap the swap button between the wells. (The swap button is not present in the double blends.)
Drag the slider to move the blend towards one side or the other.
Drag the blend rotation wheel to set an angle for the gradient. Tap the cell to type the degree of the angle.
Making Changes to a Stroke
The stroke is the line (or lines) drawn around your object. OmniGraffle has several different strokes for different folks; slide or tap a stroke style in the carousel to choose a stroke for your object.
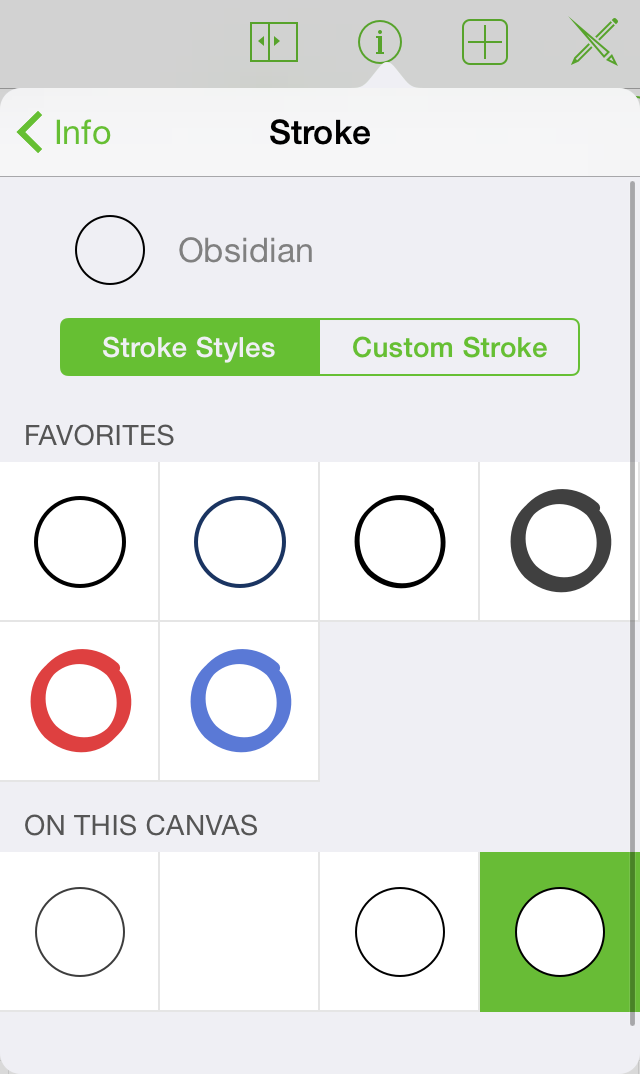
Choosing no stroke removes the border around your shape. (This is not an option for lines.)
A single stroke will add one line around your object and a double stroke will add two, with a color between them.
Different stroke types have slightly different options:
Tap the color well to explore the color options for each part of your gradient. For double strokes, the left color reflects the outer colors of the stroke and the right color sets the inner color.
Tap the buttons on either side of the thickness indicator to increase or decrease the stroke’s thickness. Or, just tap the cell to type a value.
Slide or tap the dash pattern at the bottom to add dashes to your stroke.
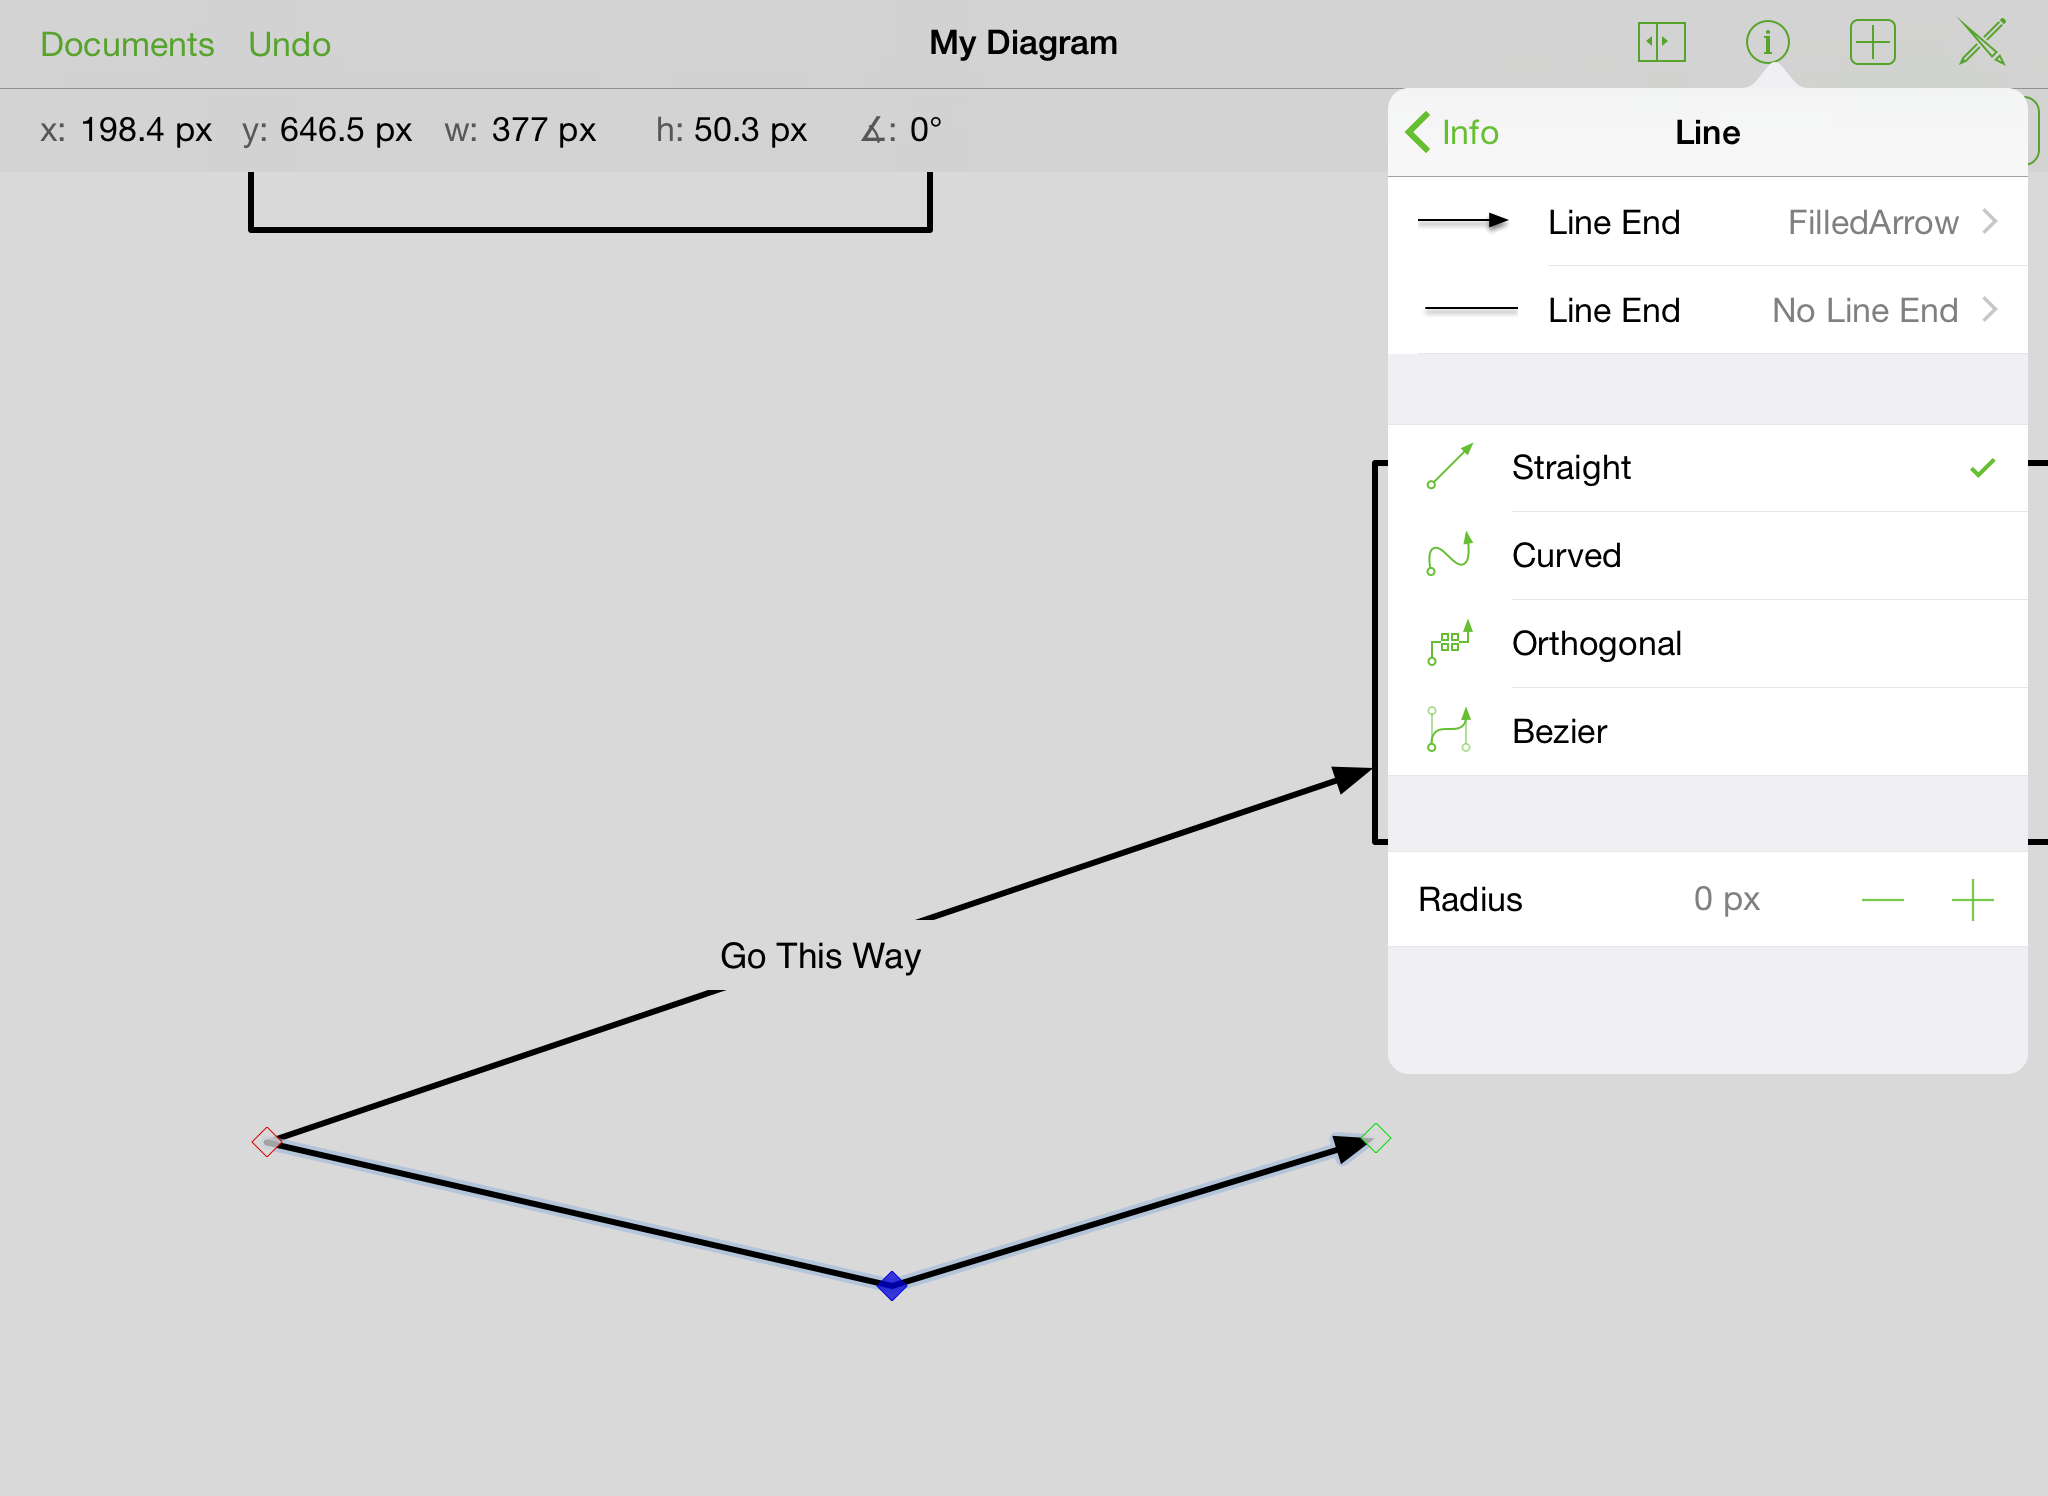
Making Changes to a Line
Lines quickly demonstrate relationships between shapes and other objects but they can also stand alone. Select the line and choose line info to make adjustments.
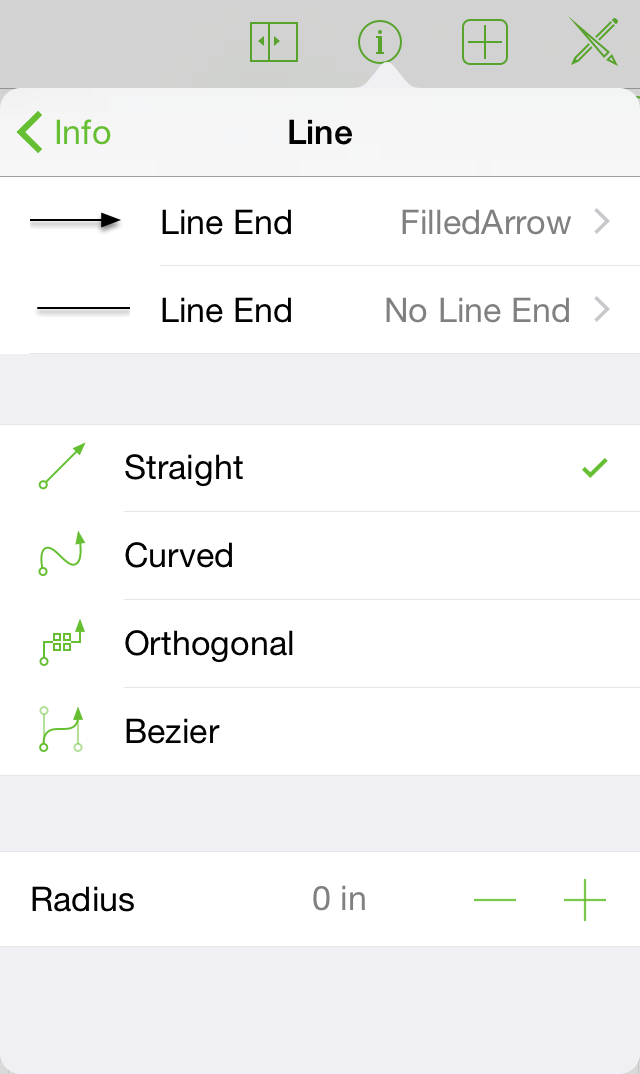
Tap the segmented control to specify your line as straight, curved, or orthogonal.
To choose an end type, slide or tap to choose from the carousel. The upper carousel changes the head arrow (the start point) and the lower carousel changes the tail arrow (the end point).
Change the corner radius to add rounding or rigidity to the bends of your line. Tap the buttons on either side or tap the cell in the center to define a radius by typing.
Making Changes to a Shape
Shapes are two-dimensional objects you can add to your canvas. Swipe to scroll and peruse the list. They are arranged according to commonality and adjustability.
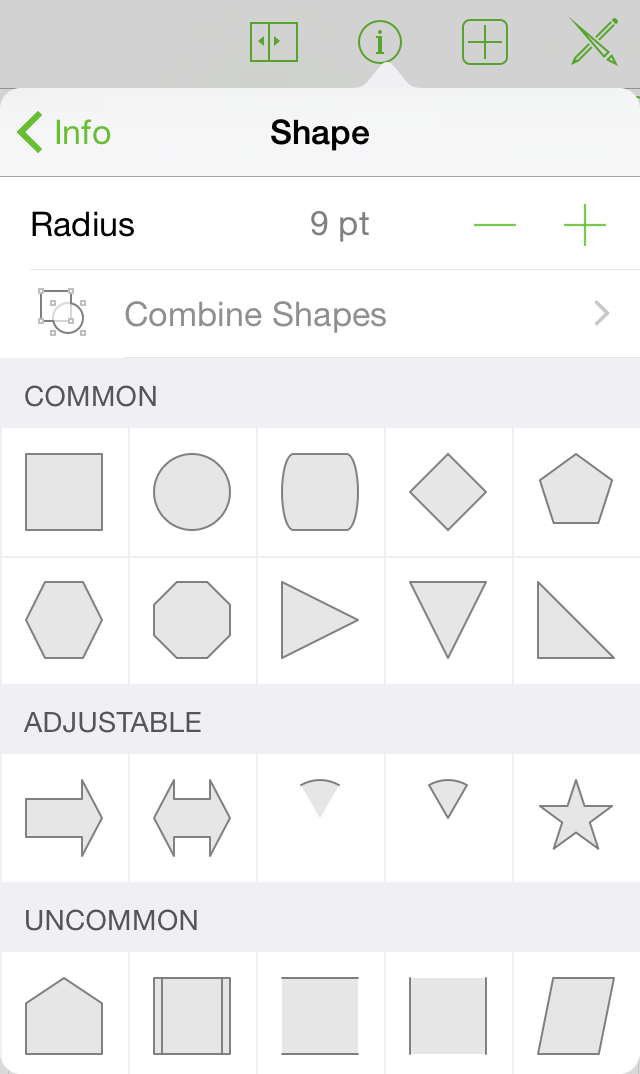
If you have a shape selected on the canvas, tap another in the list to change its shape.
Adjustable shapes have handles that can be dragged to add or subtract elements from the shape. For example, you can increase or decrease the number of points on the star.
Change the corner radius to add a nice rounding or rigidity to the corners of your shape. To change the corner radius incrementally, tap the buttons on the sides of the cell. Tap in the cell to type a value.
Making Changes to a Shadow
Shadows are a great way to add some depth and texture to your diagram.
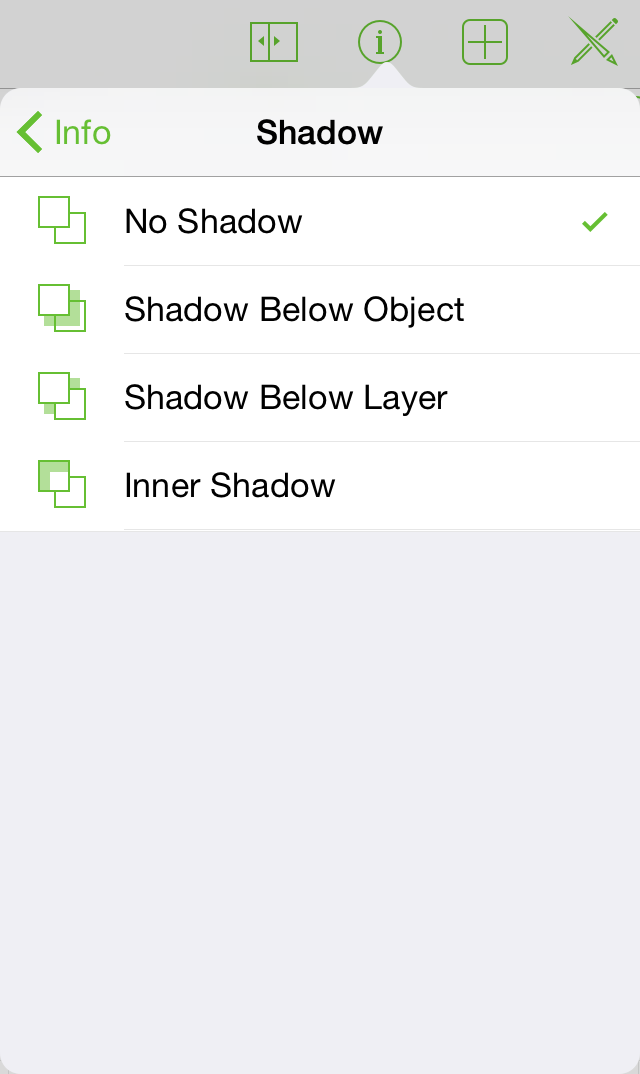
Tap the segmented control at the top to: remove the shadow from your object; add a shadow immediately beneath the object; or add a shadow below all objects on that layer.
If your object has a shadow, tap the color well to change the opacity and explore its color options.
Drag the blurriness slider to the left for a sharper shadow or to the right to add blurriness.
Drag the shadow position indicator to move the shadow or tap in the cells to type x and y offsets.
Making Changes to the Text Position
The text position section contains settings, for your text, as they relate to shapes and the objects around them.
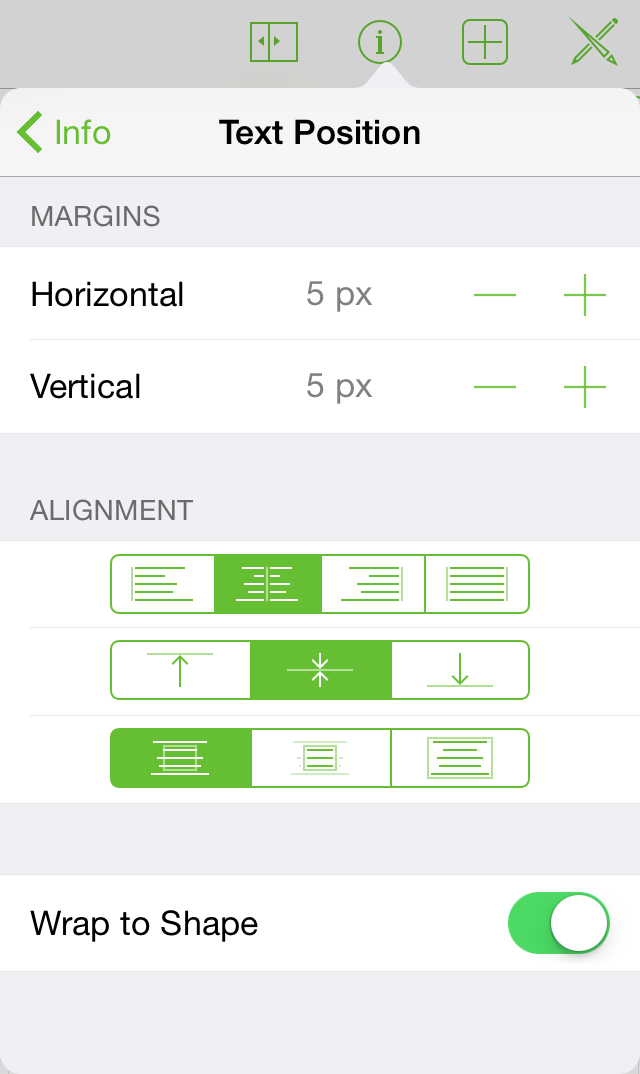
Tap the margin indicator buttons (to the left and right of the cells) to increase or decrease the width or height of the margins for your text object. Tap in a cell to type a value.
Tap the left, center, or right buttons (the upper group of segmented controls) to change the justification of the text.
Tap the top, center, or bottom buttons (the middle set of segmented controls) to change the vertical position of the text in the shape.
Tap the overflow, hide, or resize to fit buttons (the bottom set of segmented controls) to have the text: overflow the shape; be cut off when it does not fit the shape; or to resize the shape to fit the text.
Tap the wrap to shape button to constrain the width of the text to that of the shape.
Making Changes to the Font
The font info section is where you can specify the style of text for your label.
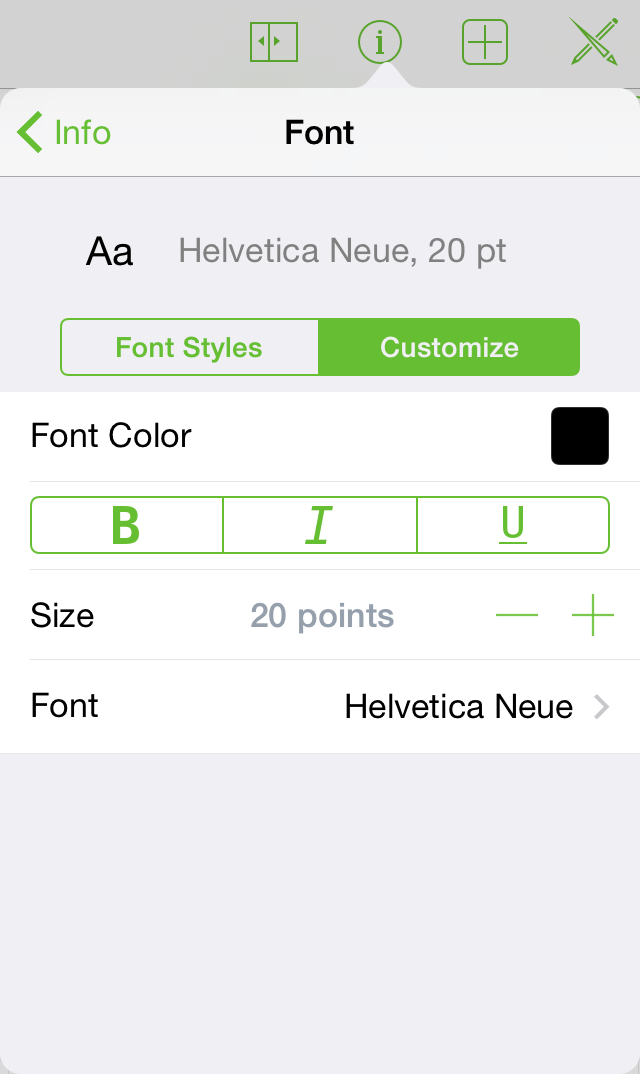
To view the list of fonts, tap the font family name. Choose a recommended font to ensure readability and commonality or, for fonts of all seasons, scroll to see the full list.
To choose a typeface, pick a font family, and tap the typeface option to view a list of typefaces (like bold or italic, for example).
To increase or decrease the size of your font, tap the buttons on the left and right of the font size or tap in the center to define a size by typing.
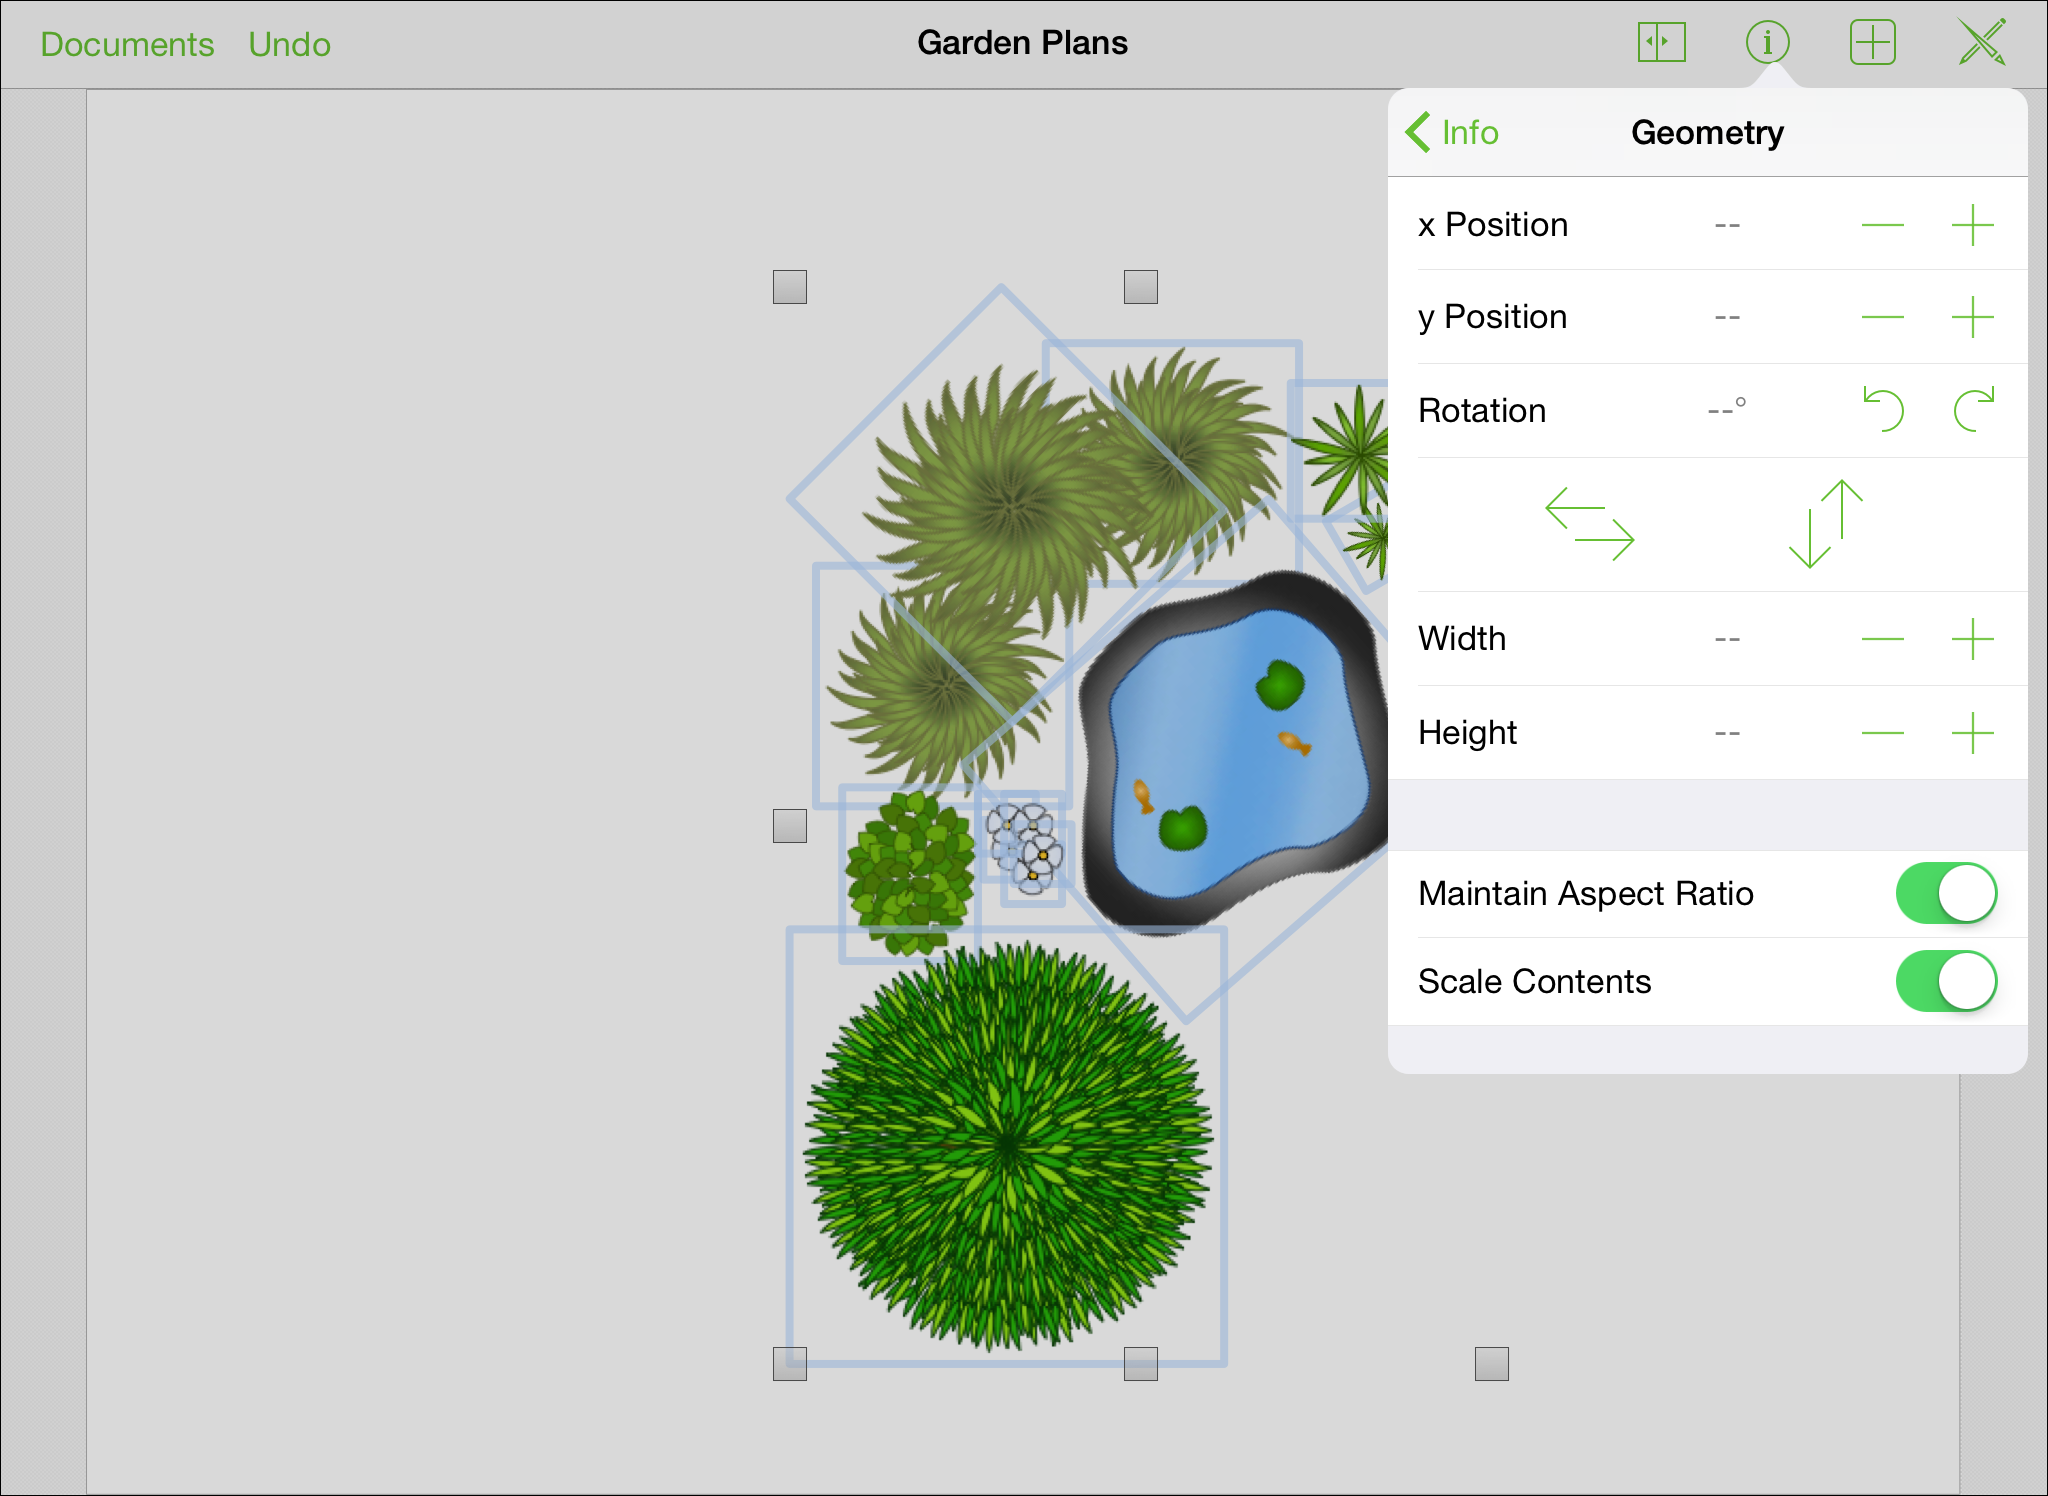
Making Changes to the Geometry
The geometry section is where you can adjust object properties like position, size, and rotation.
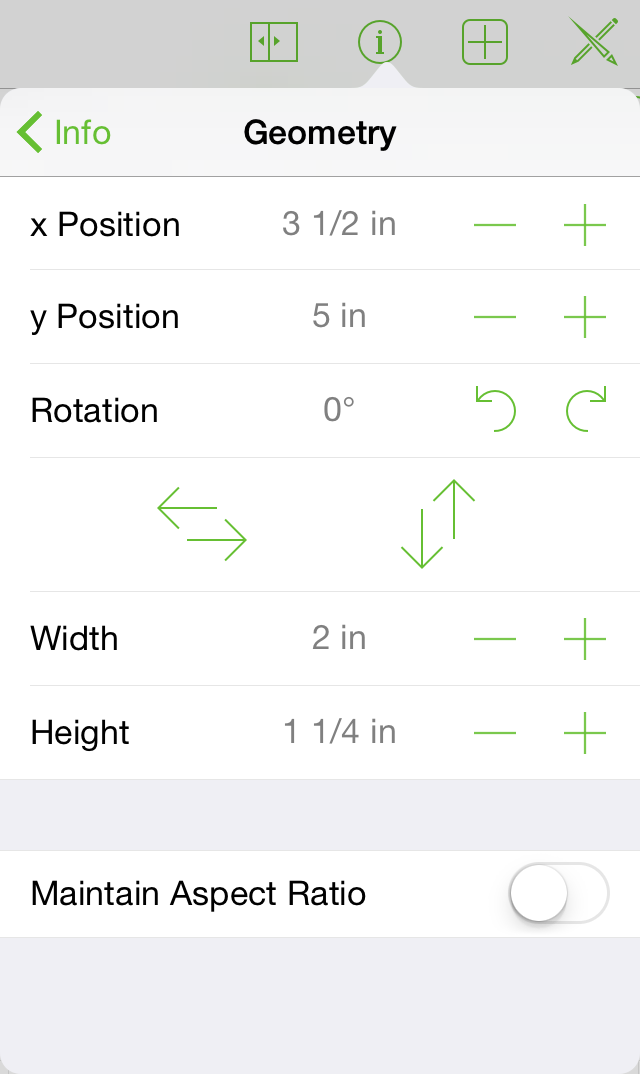
To change the horizontal position of your object, tap the buttons to the left and right of the horizontal position indicator. Tap the center to define a position by typing.
To change the vertical position of your object, tap the buttons to the left and right of the vertical position indicator. Tap the center to define a position by typing.
To change the rotation of your object, tap the rotate left and rotate right buttons. The buttons will rotate the object in increments of 15 degrees. Tap the center to define a degree of rotation by typing.
To flip an object, tap the vertical or horizontal flip buttons.
To change the width of the object, tap the buttons to the left and right of the width Indicator. Tap the center to define a width by typing.
To change the height of the object, tap the buttons to the left and right of the height Indicator. Tap the center to define a height by typing.
To maintain the ratio between the height and width while making adjustments, turn on maintain aspect ratio. To do so, tap the switch so it is blue and reads on. Tap again to turn off.
To maintain the ratio between the content of the object and the object itself, turn on maintain aspect ratio and then tap the scale content switch so it is blue and reads on. Tap again to turn off.
If more than one object is selected and the objects have different values, the inspector displays two dashes (–) in place of a value.
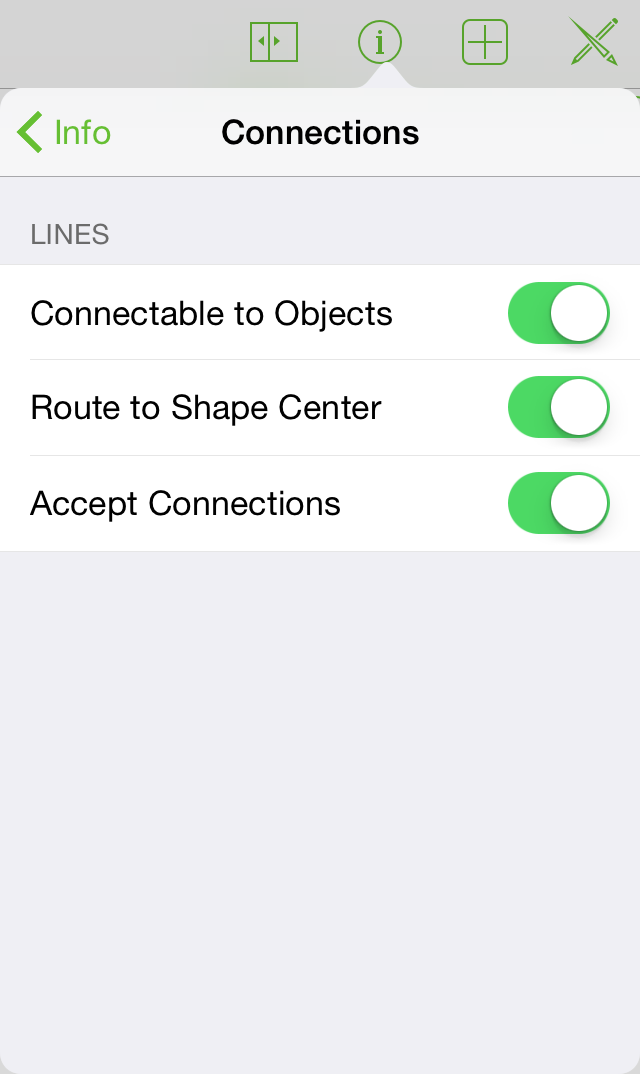
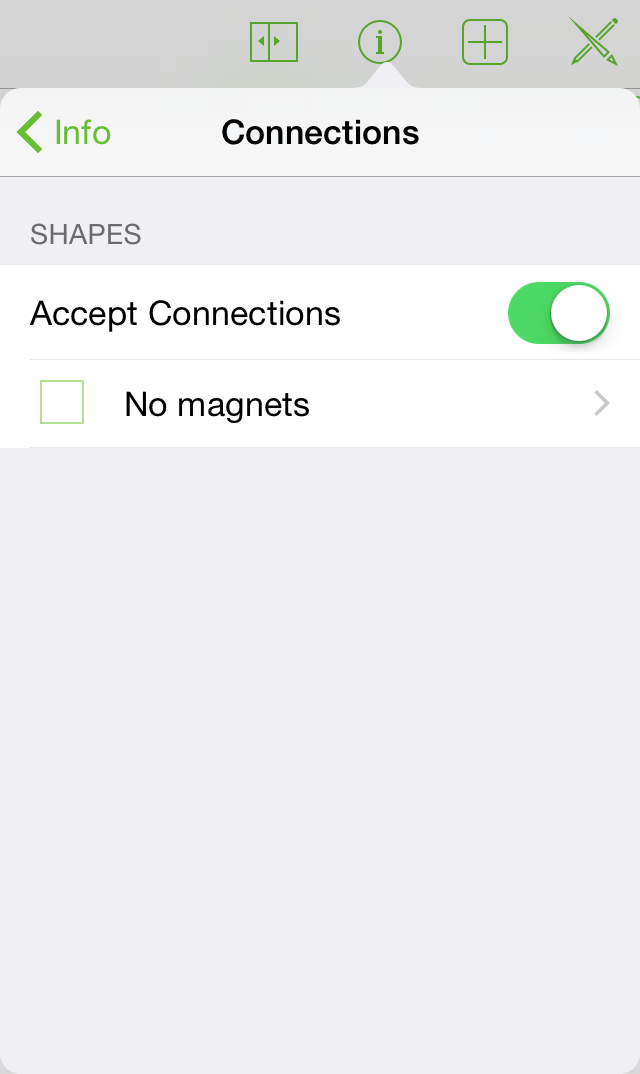
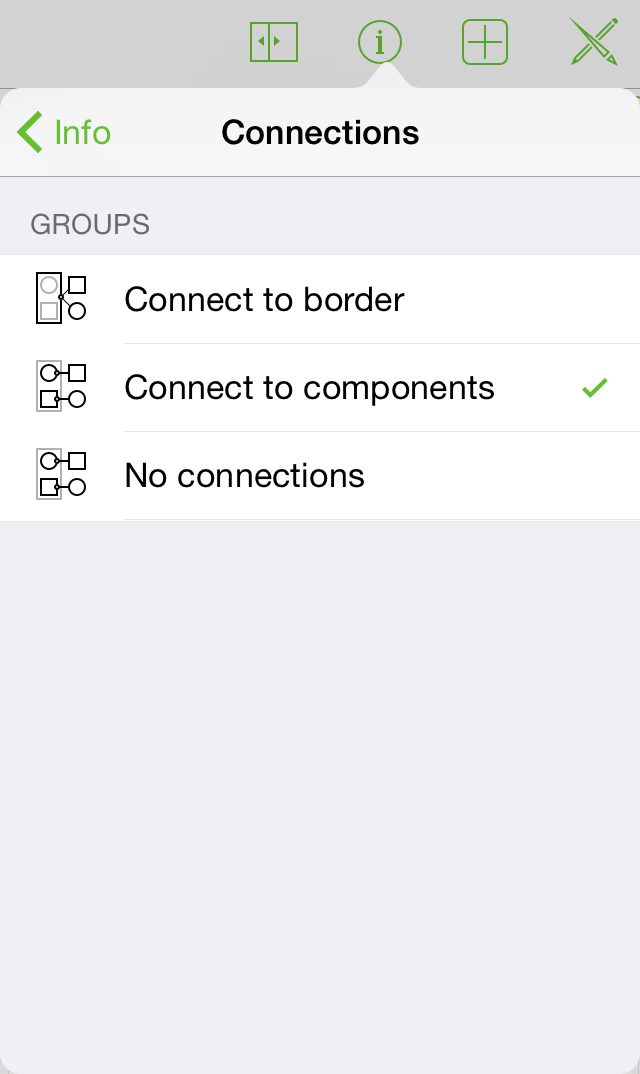
Making Changes to Connections
Connections are an attribute of shapes and lines that keep objects in touch. With a shape or a line selected, use connections info to make adjustments.
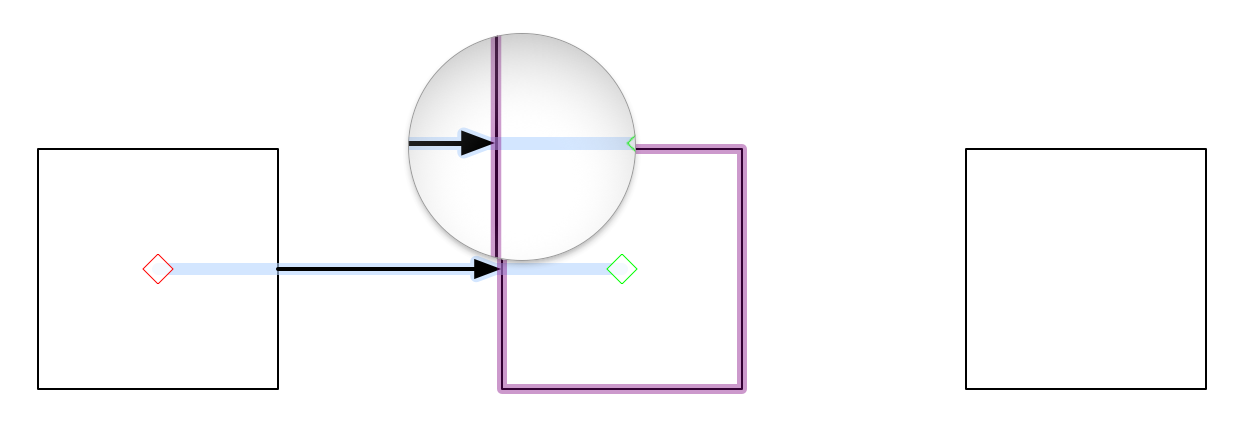
With a line selected: tap the Connectable to Objects, Route to Shape Center, and Accept Connections toggles to allow or disallow these connections.
With a shape selected: use the Accept Connections toggle to turn connections on and off. All objects have magnets turned off by default. If you would like to apply magnets to an object, tap No magnets and the options for magnet placement becomes available. Tap one of the options to customize how the connections interact with the shape.
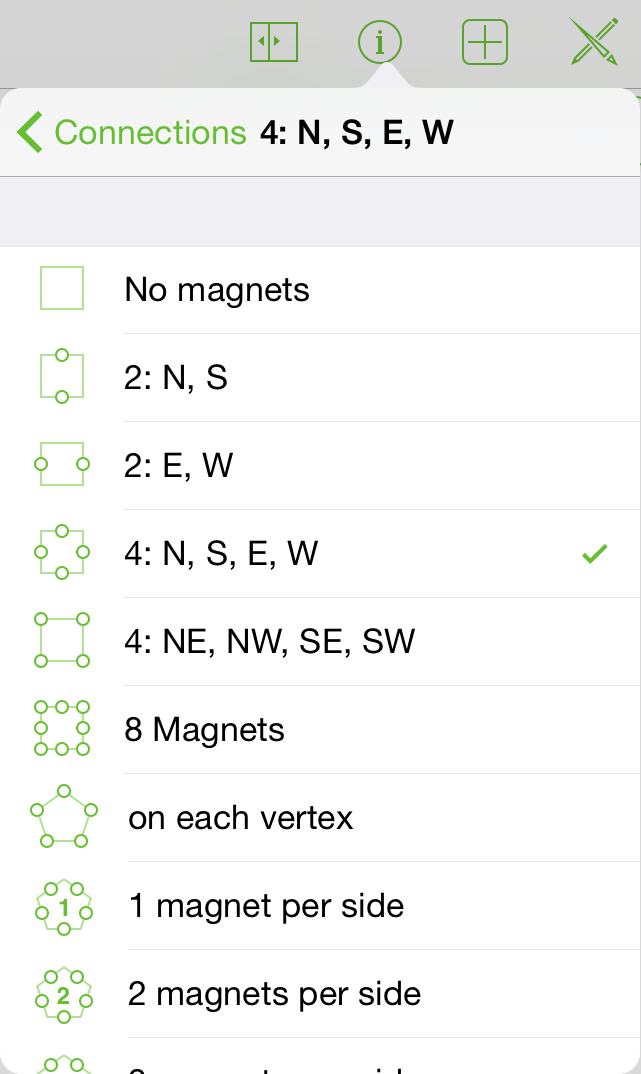
With a line, a shape, or a group selected: a combination of the two is presented. Use the groups section to specify whether you’d like to connect to the border or the components.
Working with Images
Images have a lot in common with shapes. You can add many of the same properties to them—like a stroke or a shadow, for example. In the image info section, you can make changes to how your image is displayed:
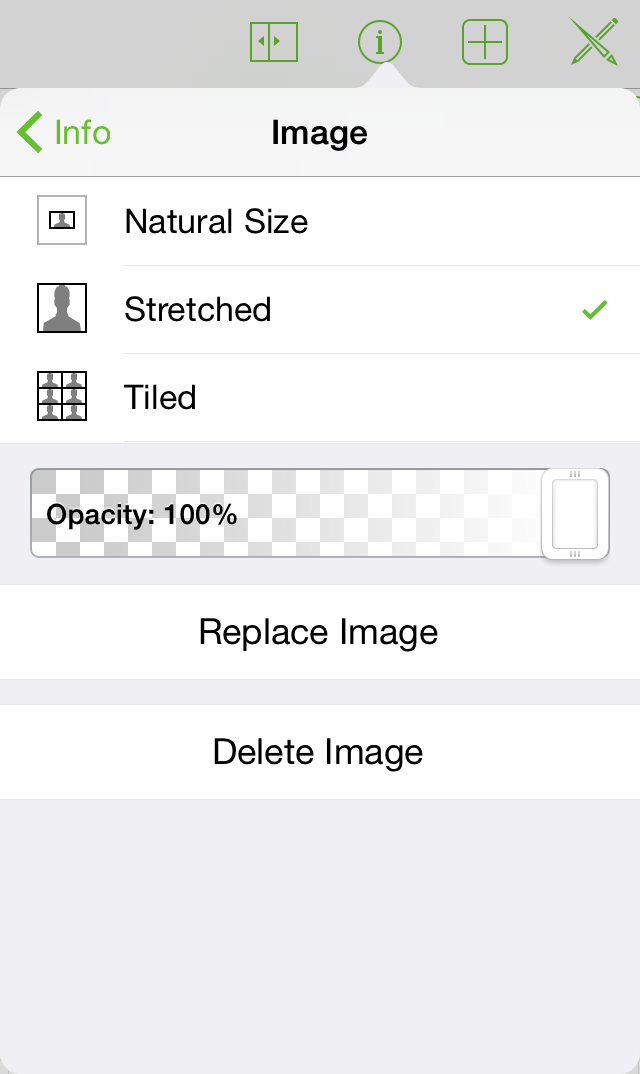
Use the segmented control at the top to specify the image layout. When changing the border size of the object that contains the image: choose its natural size; stretch the image to fill the shape; or tile the image within the shape.
If your image is not stretched, use the size control to increase or decrease the image’s size with the buttons to the left and right of the control, or use tap in the cell to type a value.
Use the opacity slider to create an image you can see through. By default, the image is fully opaque.
Tap the replace image or delete image buttons to swap or remove the image, respectively.
You can also adjust properties of the image directly on the canvas. Tap, then tap again to reveal a slider to change the image’s size. If your object’s layout is its natural size, you can tap the image, tap again, and then drag to move the image within the shape.
Working with Tables (Pro)
Tables are a great way to quickly enter and communicate information. To create a table:
Add a shape to your canvas (if you don’t have one already) and select it.
Touch and hold your selection, then release. Tap more in the context menu that appears; then, tap make table.
OmniGraffle automatically groups and arranges the shapes into a table. The table will have one column and as many rows as shapes in your original selection. For example, if you had three shapes selected, you will end up with one column and three rows.
To add more rows or columns:
Tap the table to select it.
Drag the handle on the right to add more columns. Use the handle on the bottom to add more rows. Any additional rows will match the last shape of the original table. So, if Row 1 was a circle and Row 2 was a square, any new rows will be squares.
If you prefer to use a menu, touch and hold your table, then release. Tap more in the context menu that appears; then, tap add column or add row.
To add labels: Select an individual shape in the table, and then double-tap to show the keyboard.
Exploring the Color Options
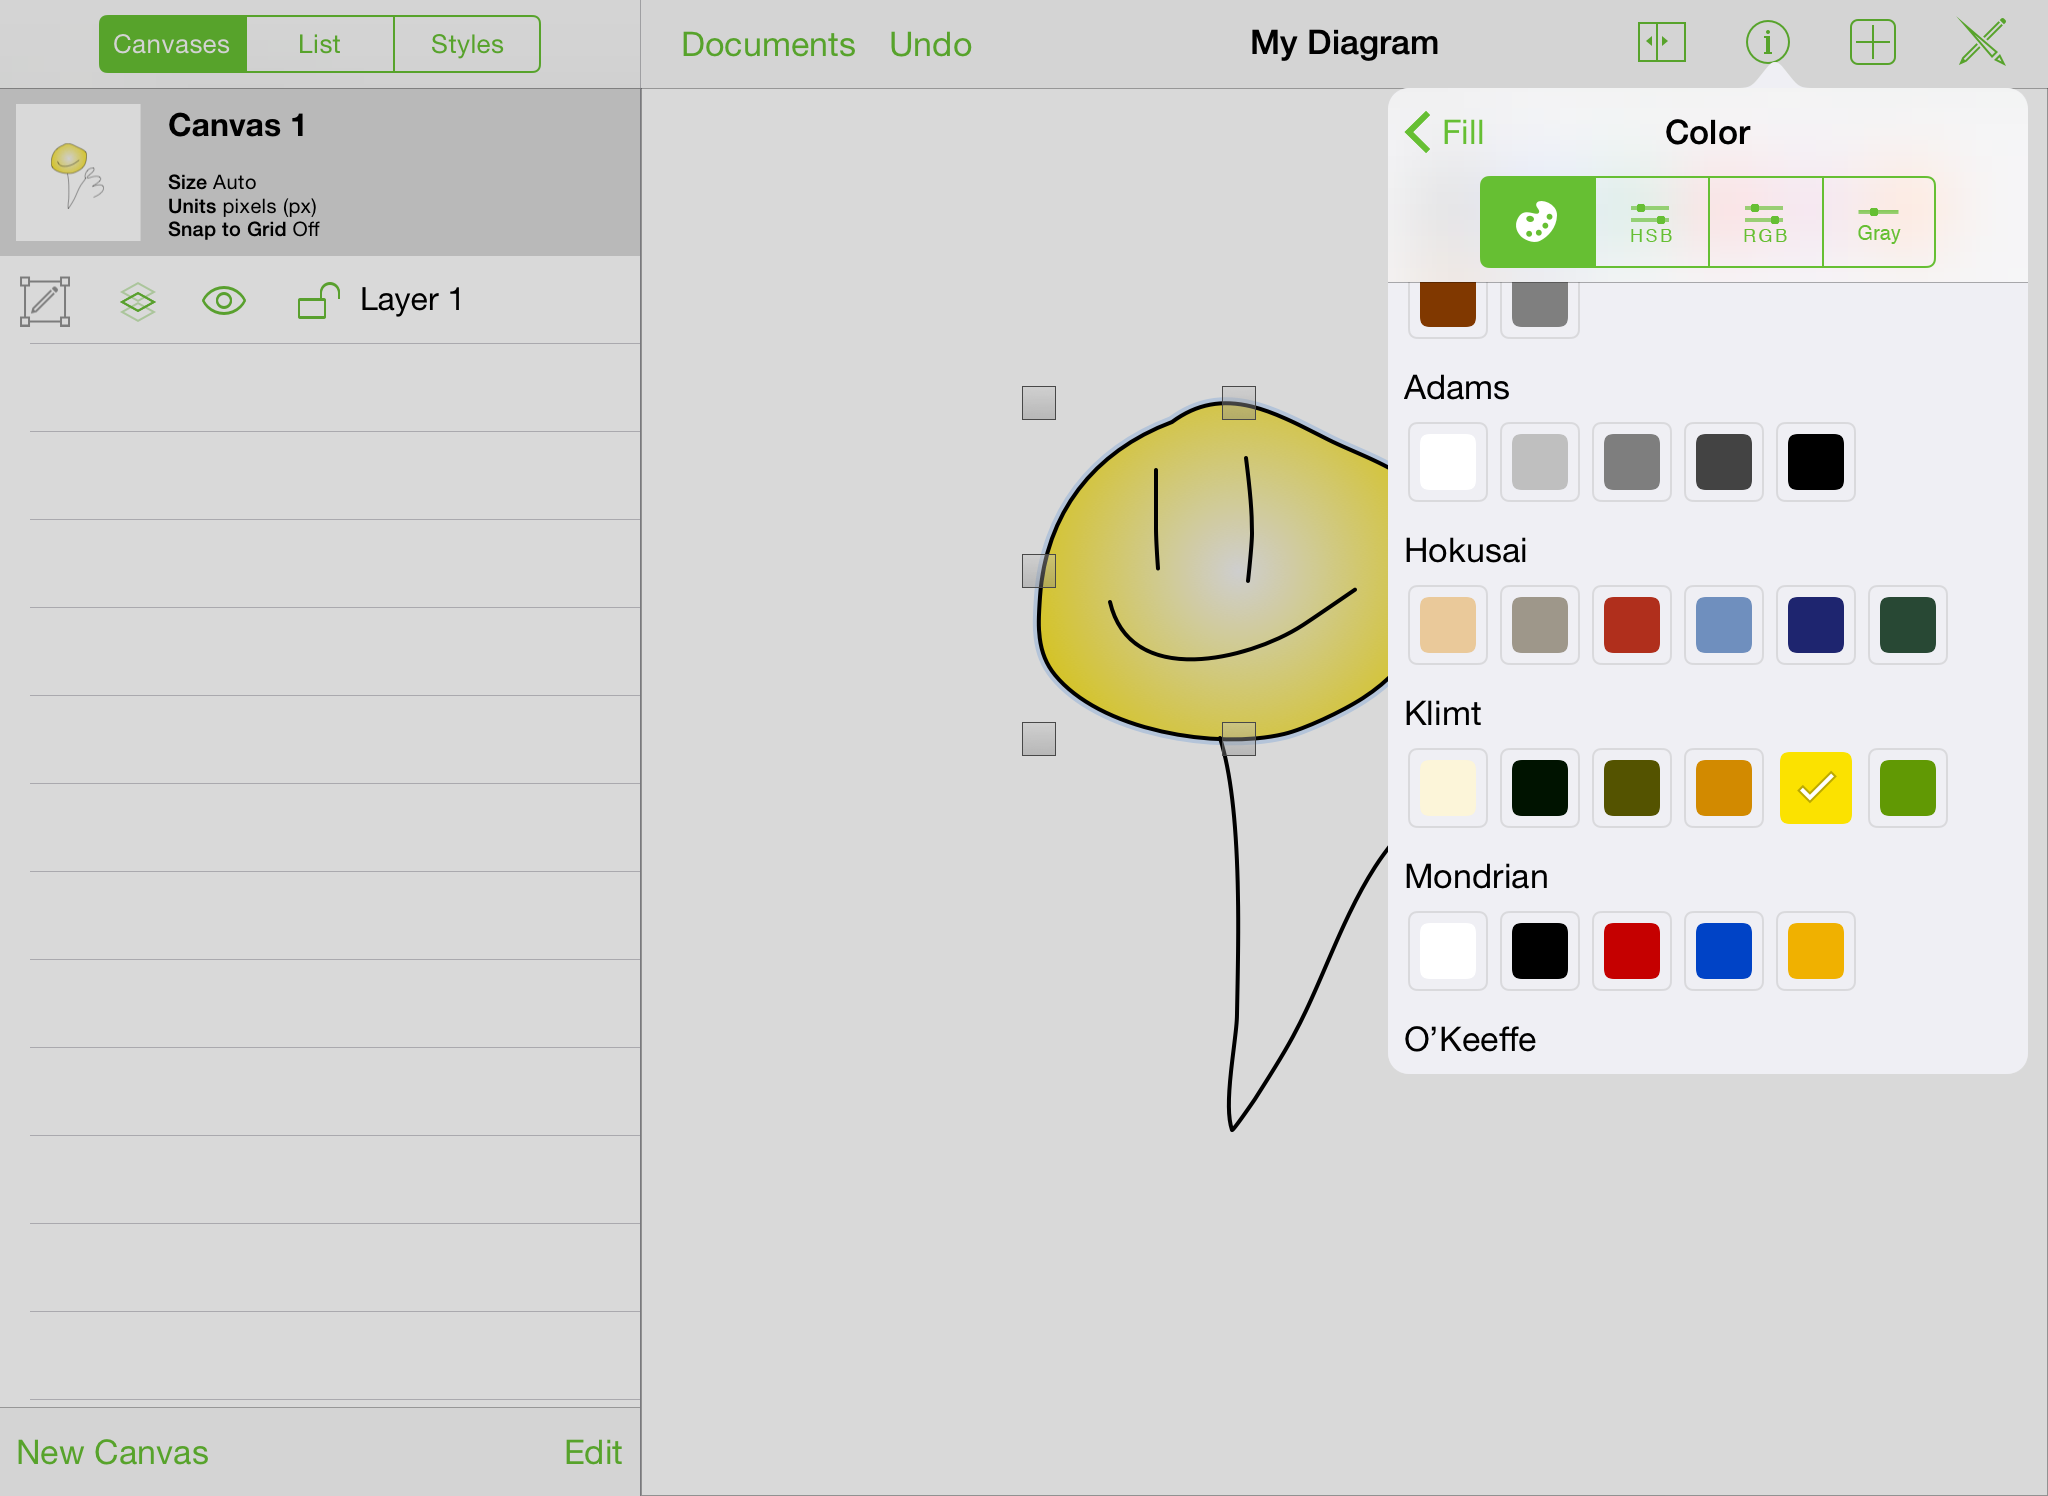
OmniGraffle has a plethora of color options for your perusal. Tap a color well (or the ![More Colors button][moar] more colors button when available) to view palettes based on the work of some people whose choices in color have proved rather successful.
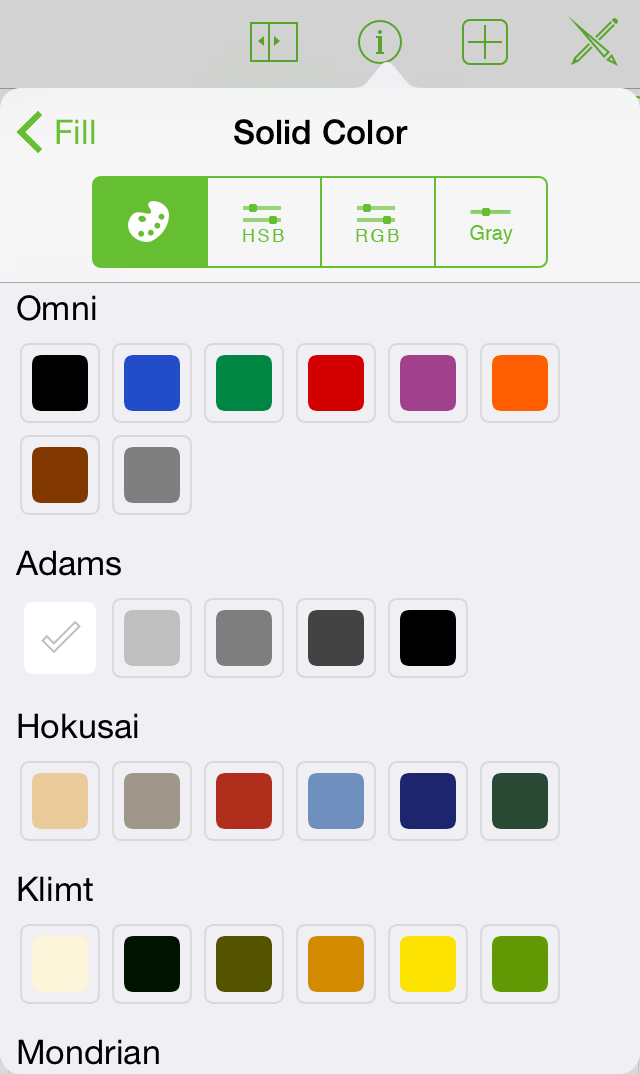
Tap the HSB, RGB, and grayscale buttons to refine:
- HSB
- Change the hue, saturation, brightness, and opacity of your selection.
- RGB
- Change the red, green, and blue values of a color, along with its opacity.
- Grayscale
- Change the white value of your selection and its opacity.
Chapter 5
Drawing Basics
Now that you’ve had a chance to skim through OmniGraffle’s interface, have explored the Document Browser, and have learned about all of the Multi-Touch gestures we’ve built into OmniGraffle, it’s time to put all of that knowledge to good use. It’s time to create a new document and try some of what you’ve learned.
To create a new document:
- Go to the Locations screen.
- Select the folder in which you’d like to store the file.
- Tap in the toolbar at the top of the screen.
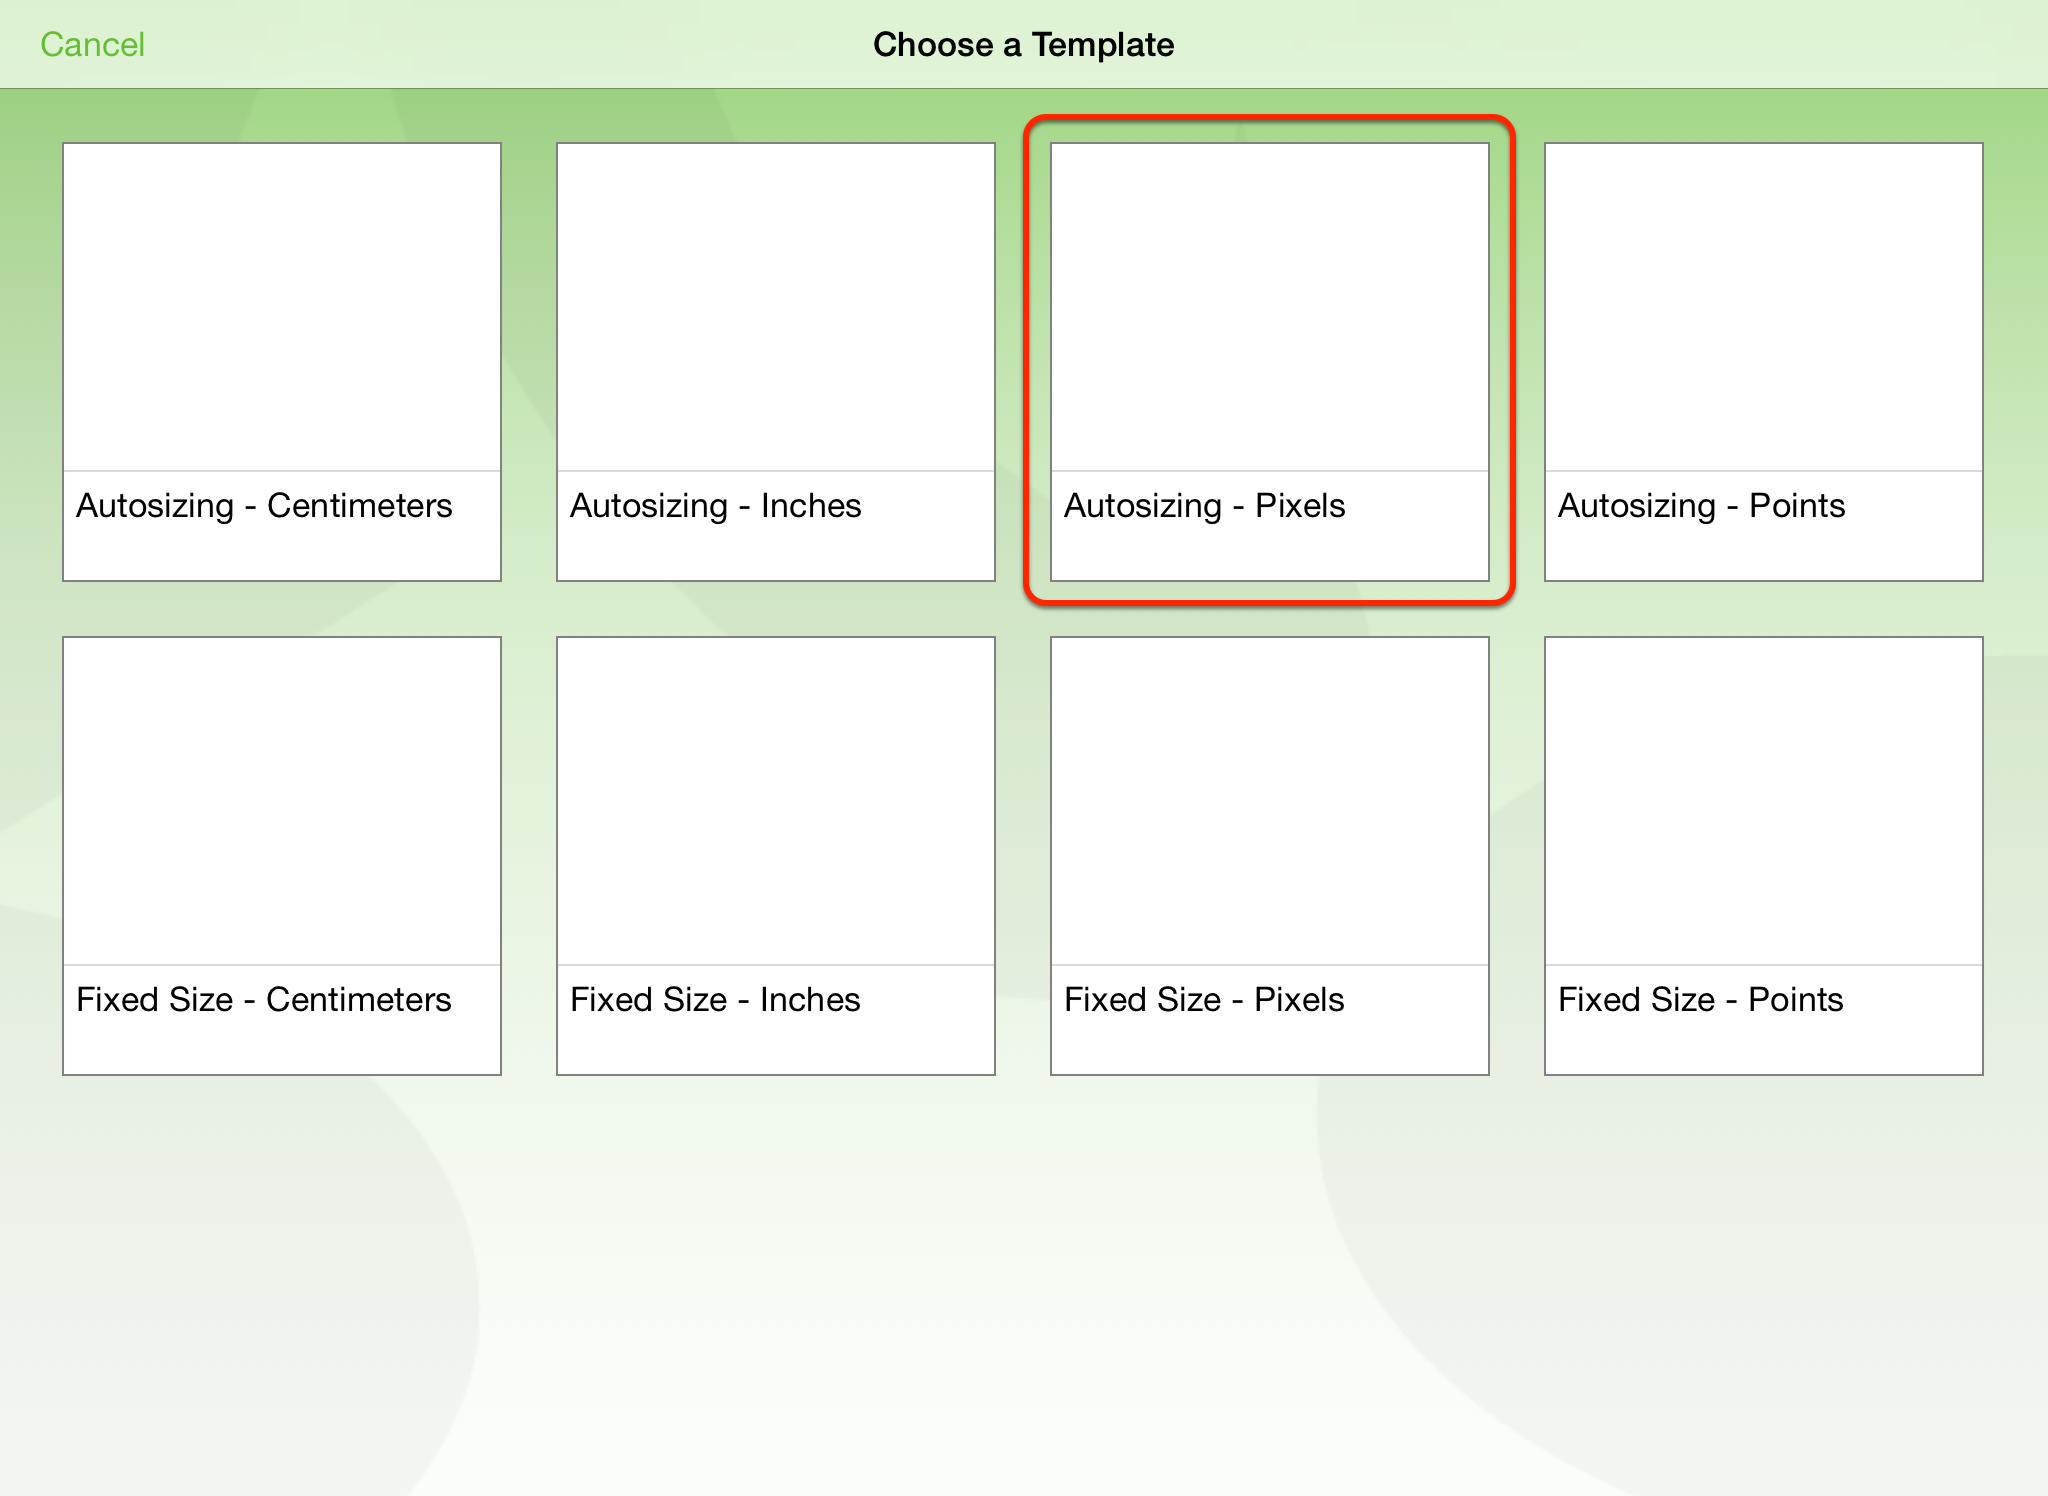
- Choose a Template from one of the eight pre-installed templates or from one you’ve created or added to OmniGraffle. For the sake of following along, choose the third template in the first row, Autosizing - Pixels.
After choosing the template, OmniGraffle opens a new document (named My Diagram, but you can change that later). You’ll notice that there are two bars at the top of the screen, that’s because the Drawing Tools bar (the one on the bottom) is open by default.
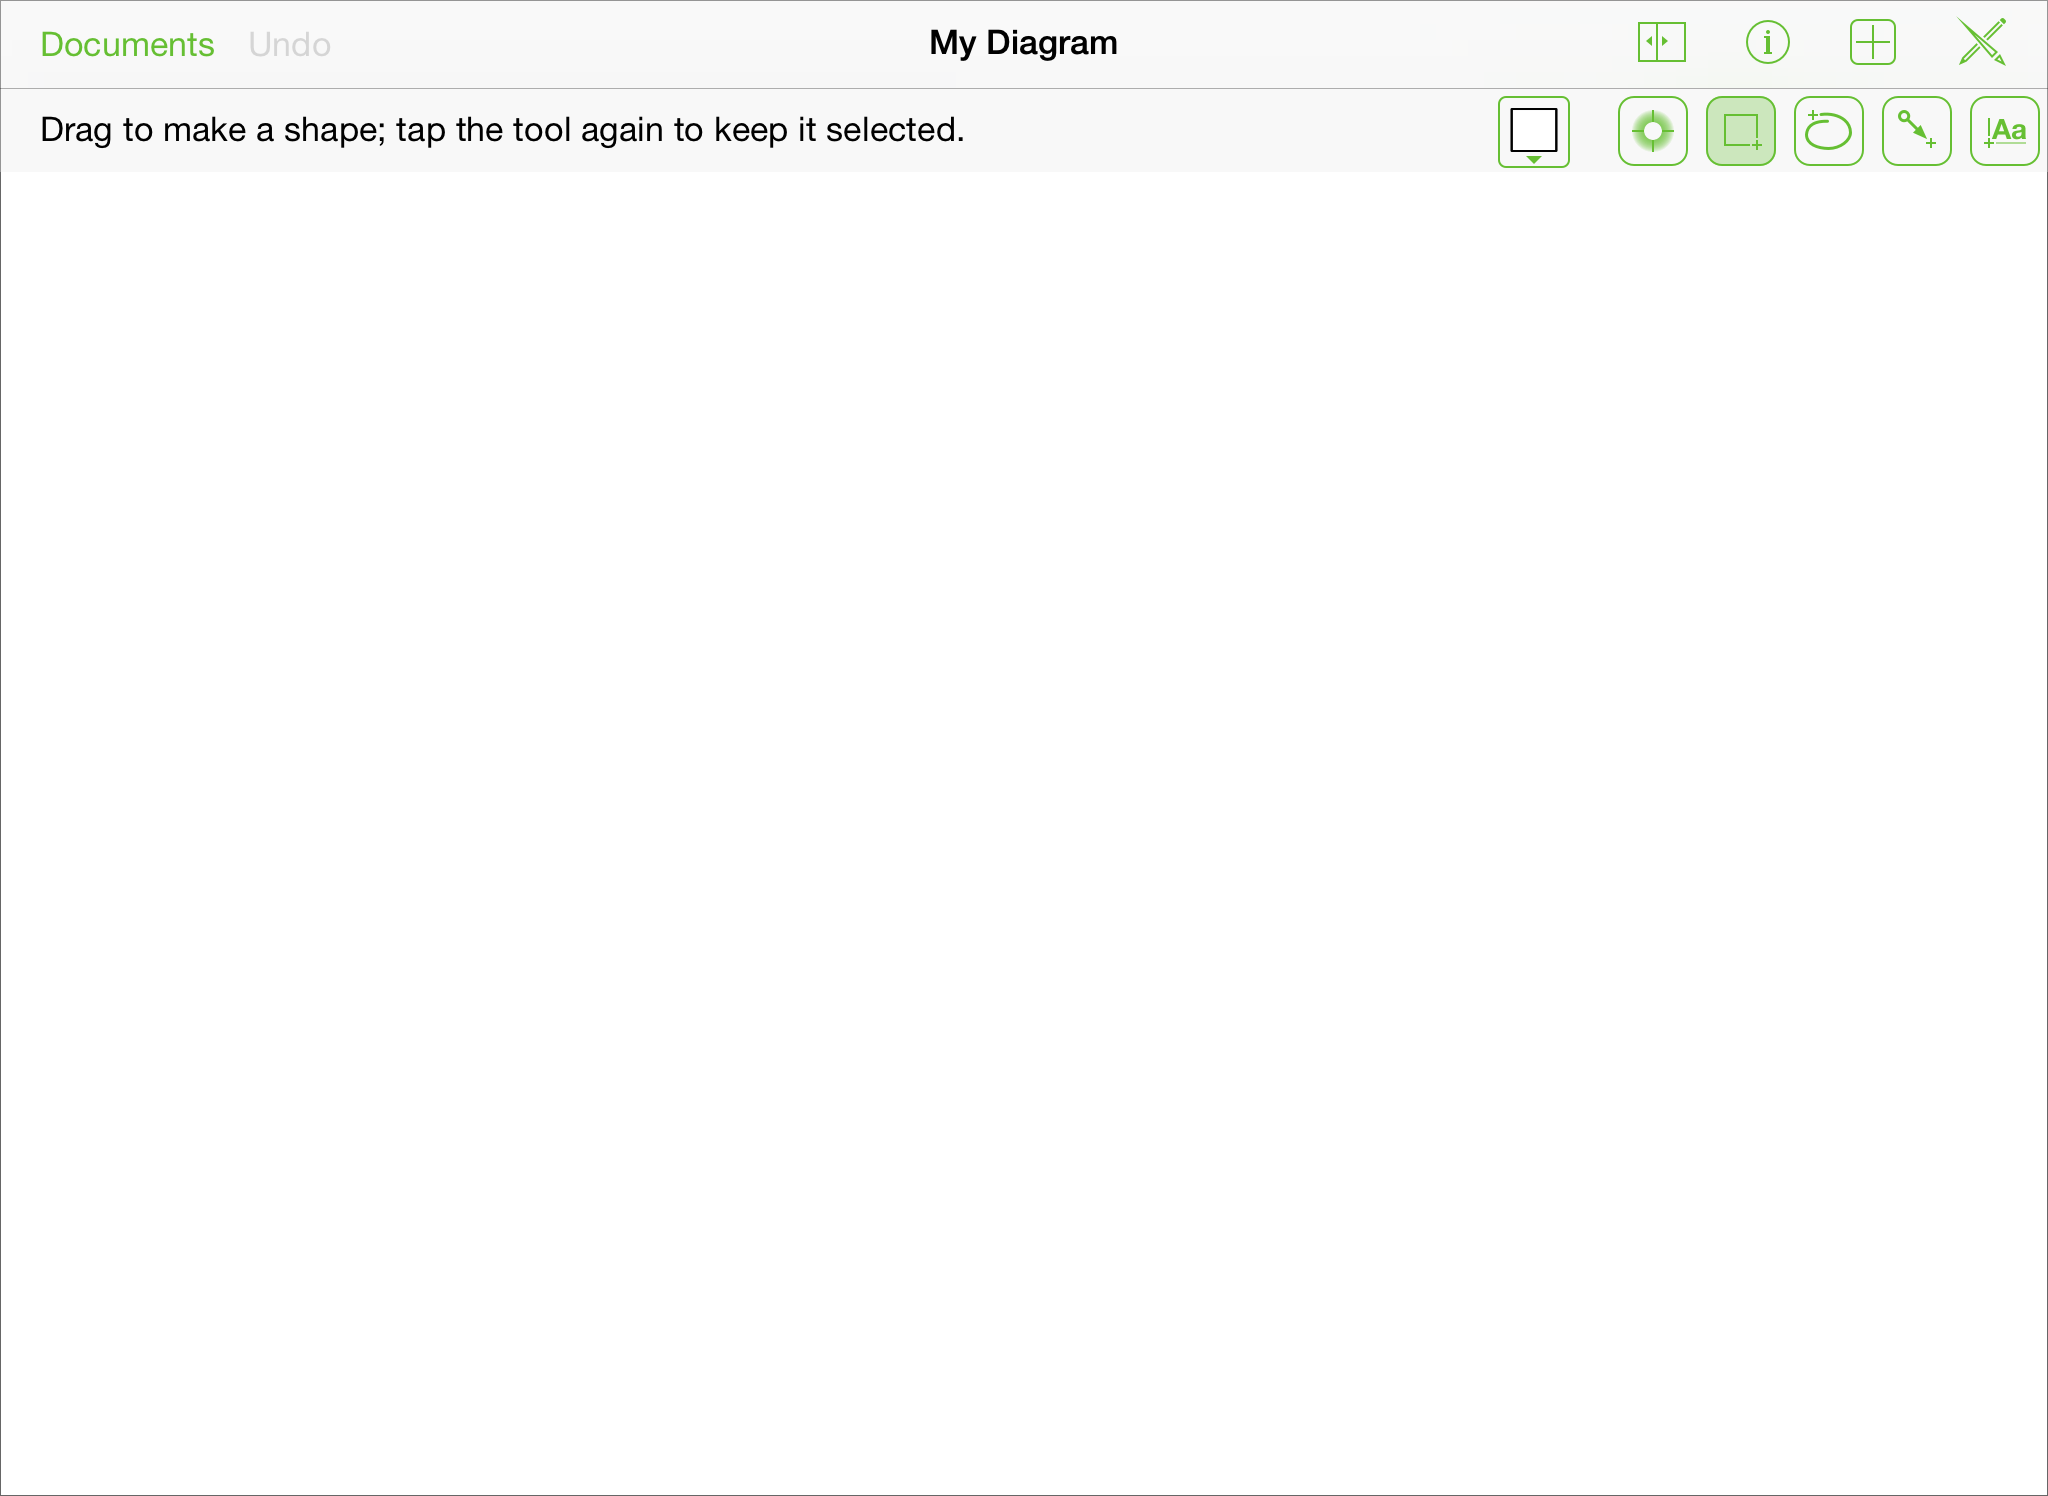
The other buttons in the toolbar include:
Tap
 to open and close the Contents sidebar on the left. This is where you manage, create, and delete Canvases and Layers in your document.
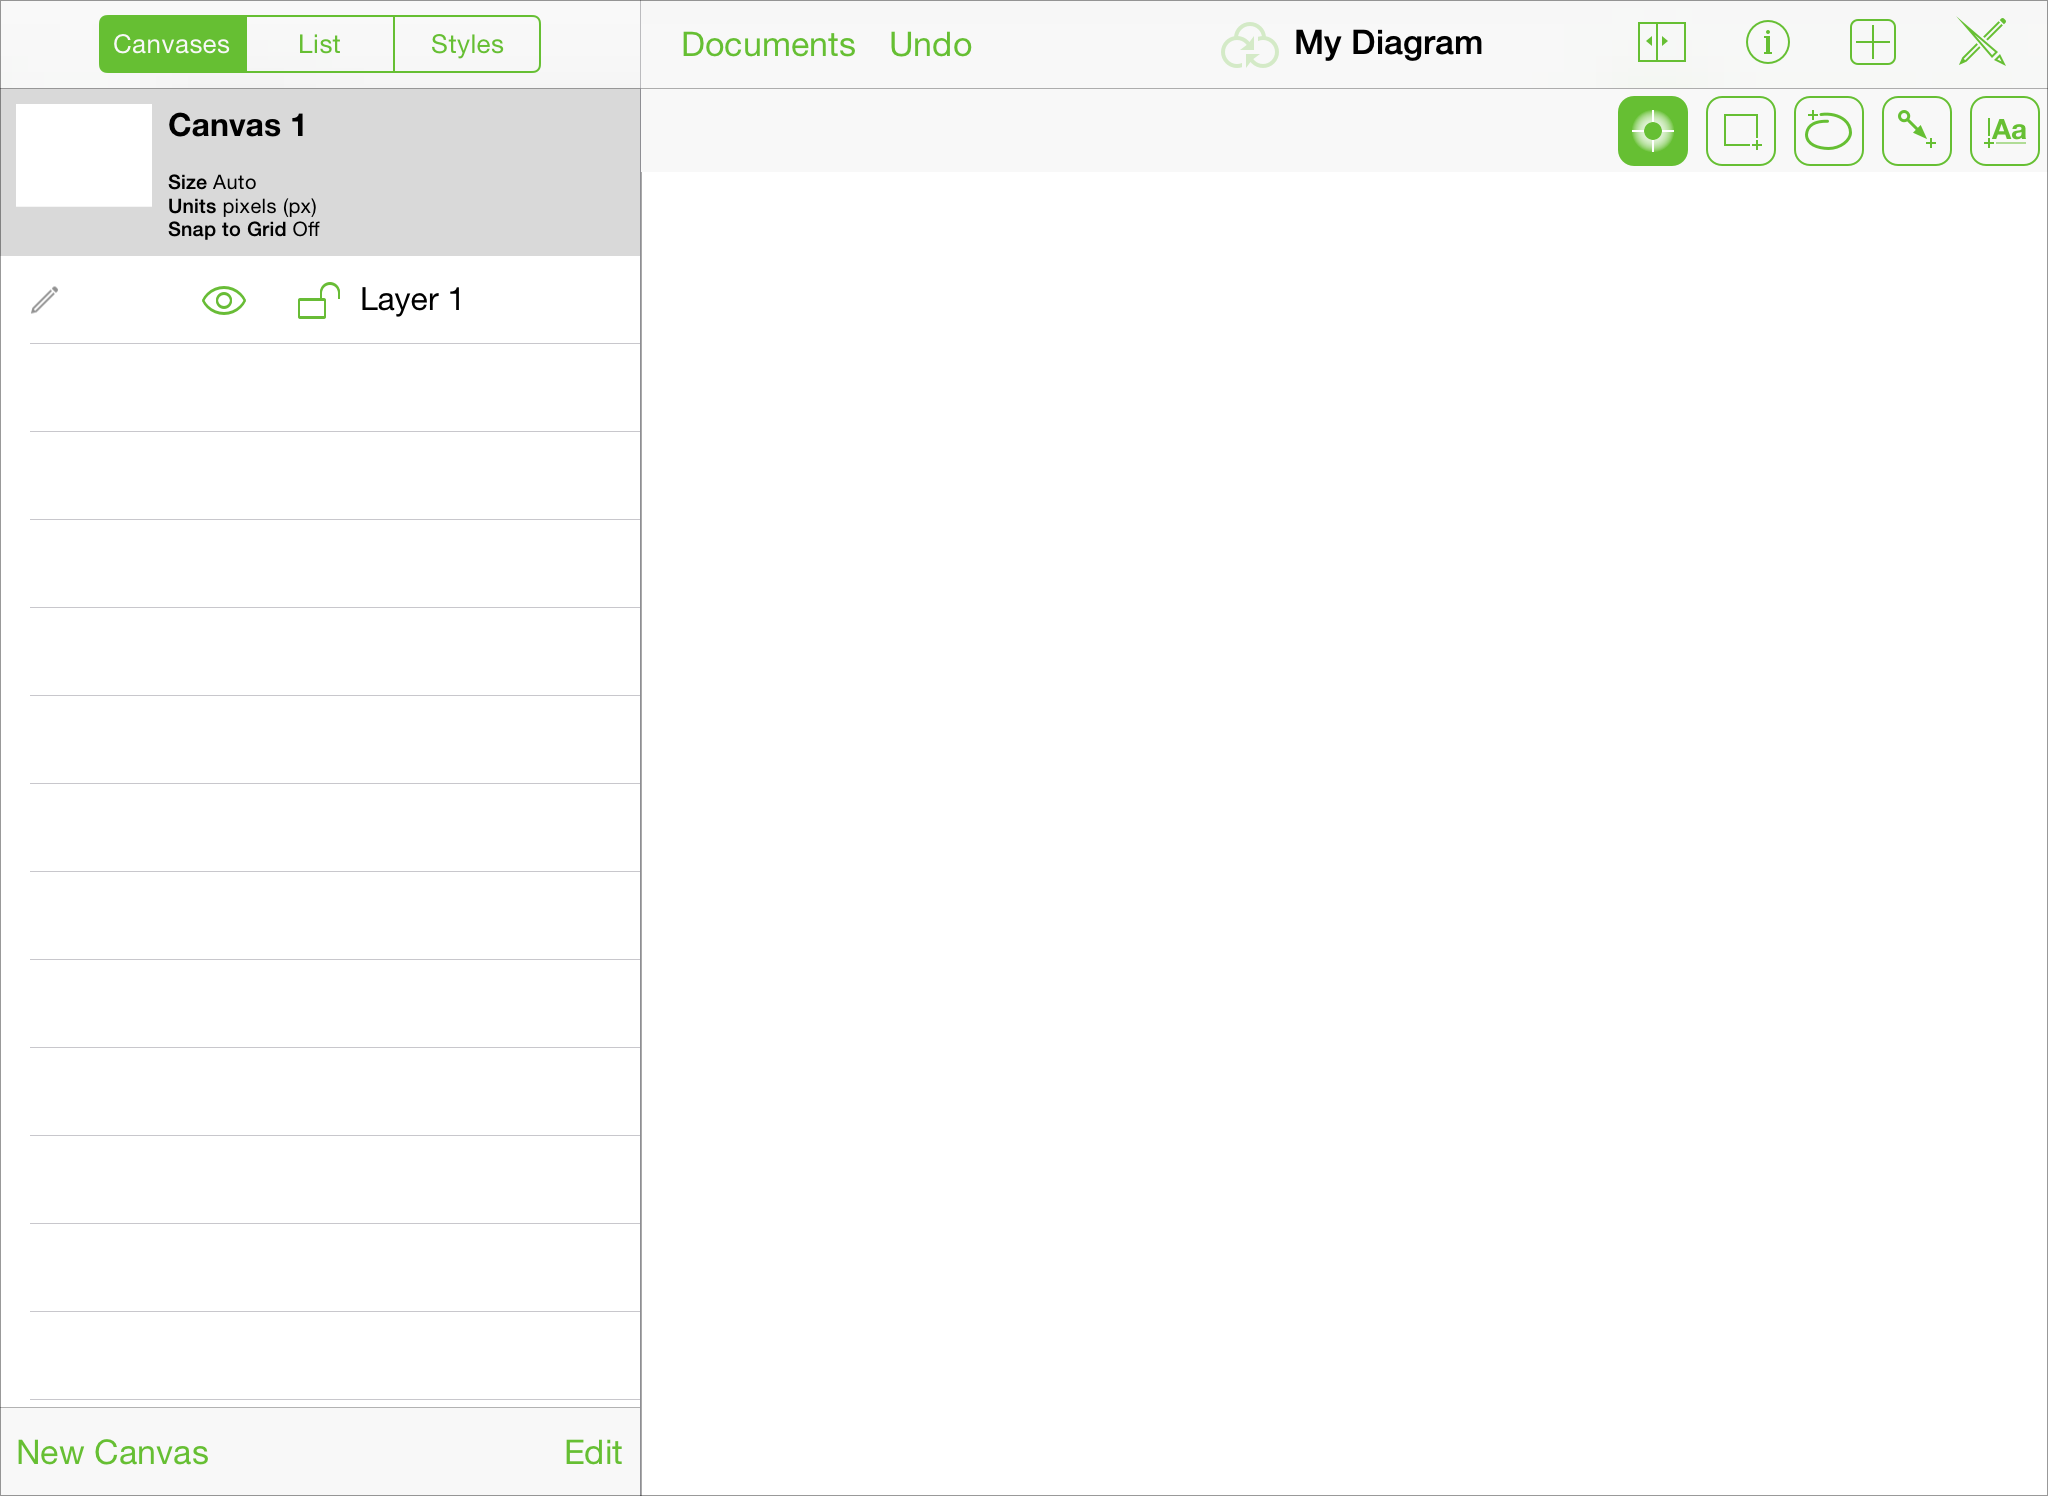
You can also toggle between List or Styles view, which is really convenient for when you need to make changes to a bunch of like-styled objects. You know, for that one instance when your manager wants you to change the fills from aubergine (
#3d0734) to chartreuse (#c1f80a).Tap
to discover details about the Canvas you are working on. If you have an object selected on the Canvas, this is also where you access the Inspectors.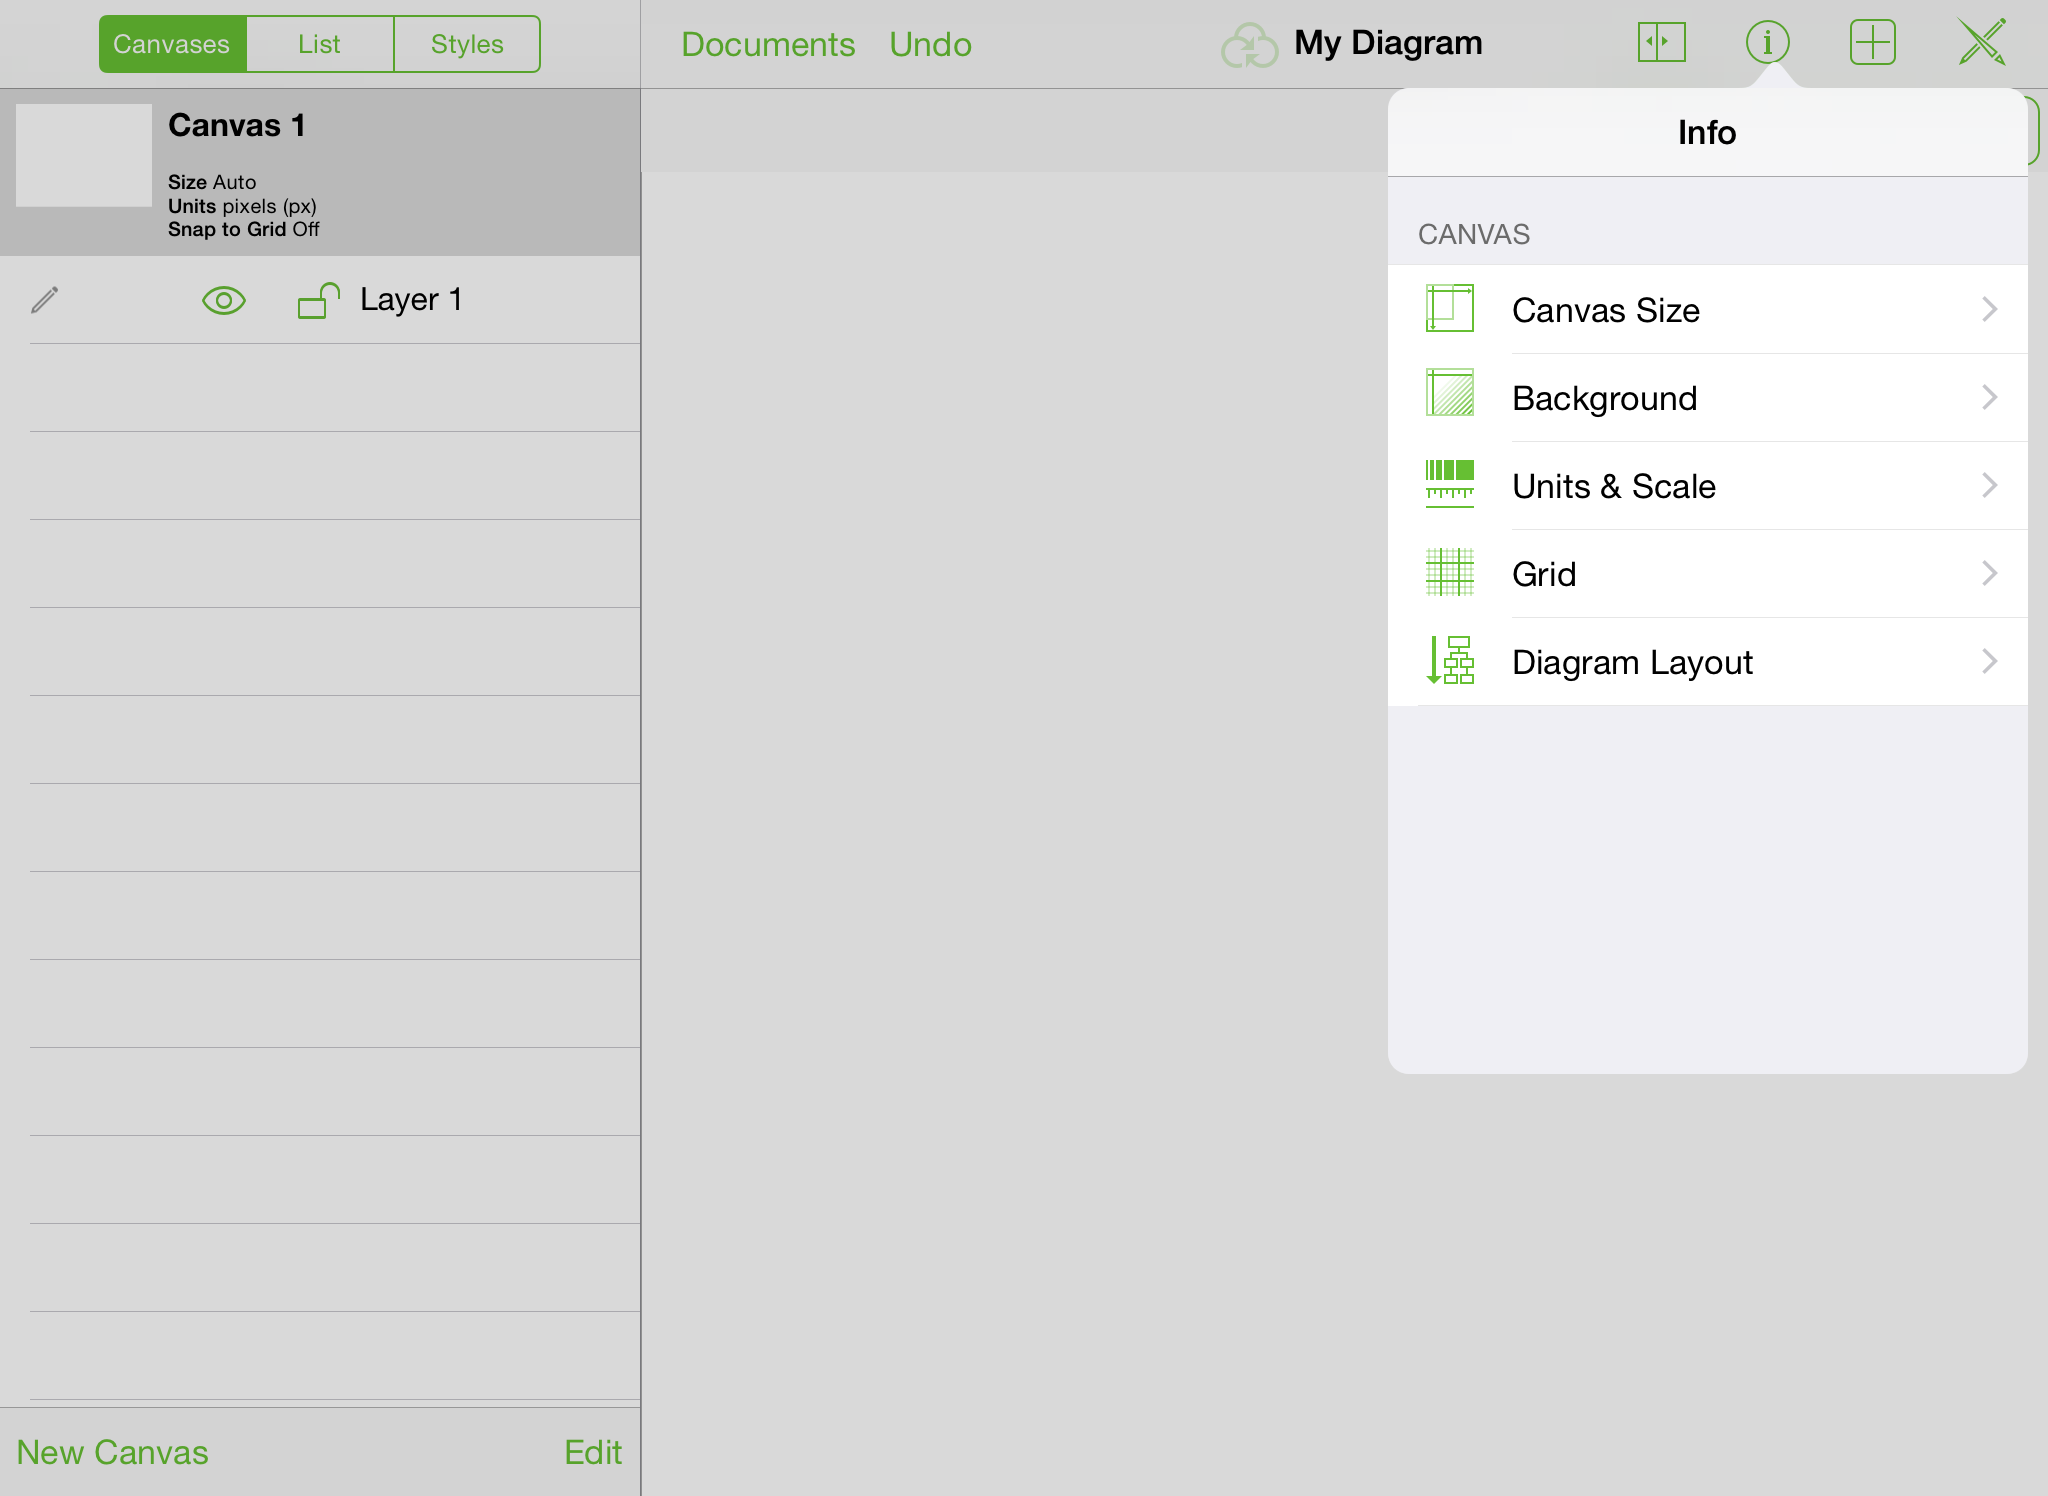
Tap
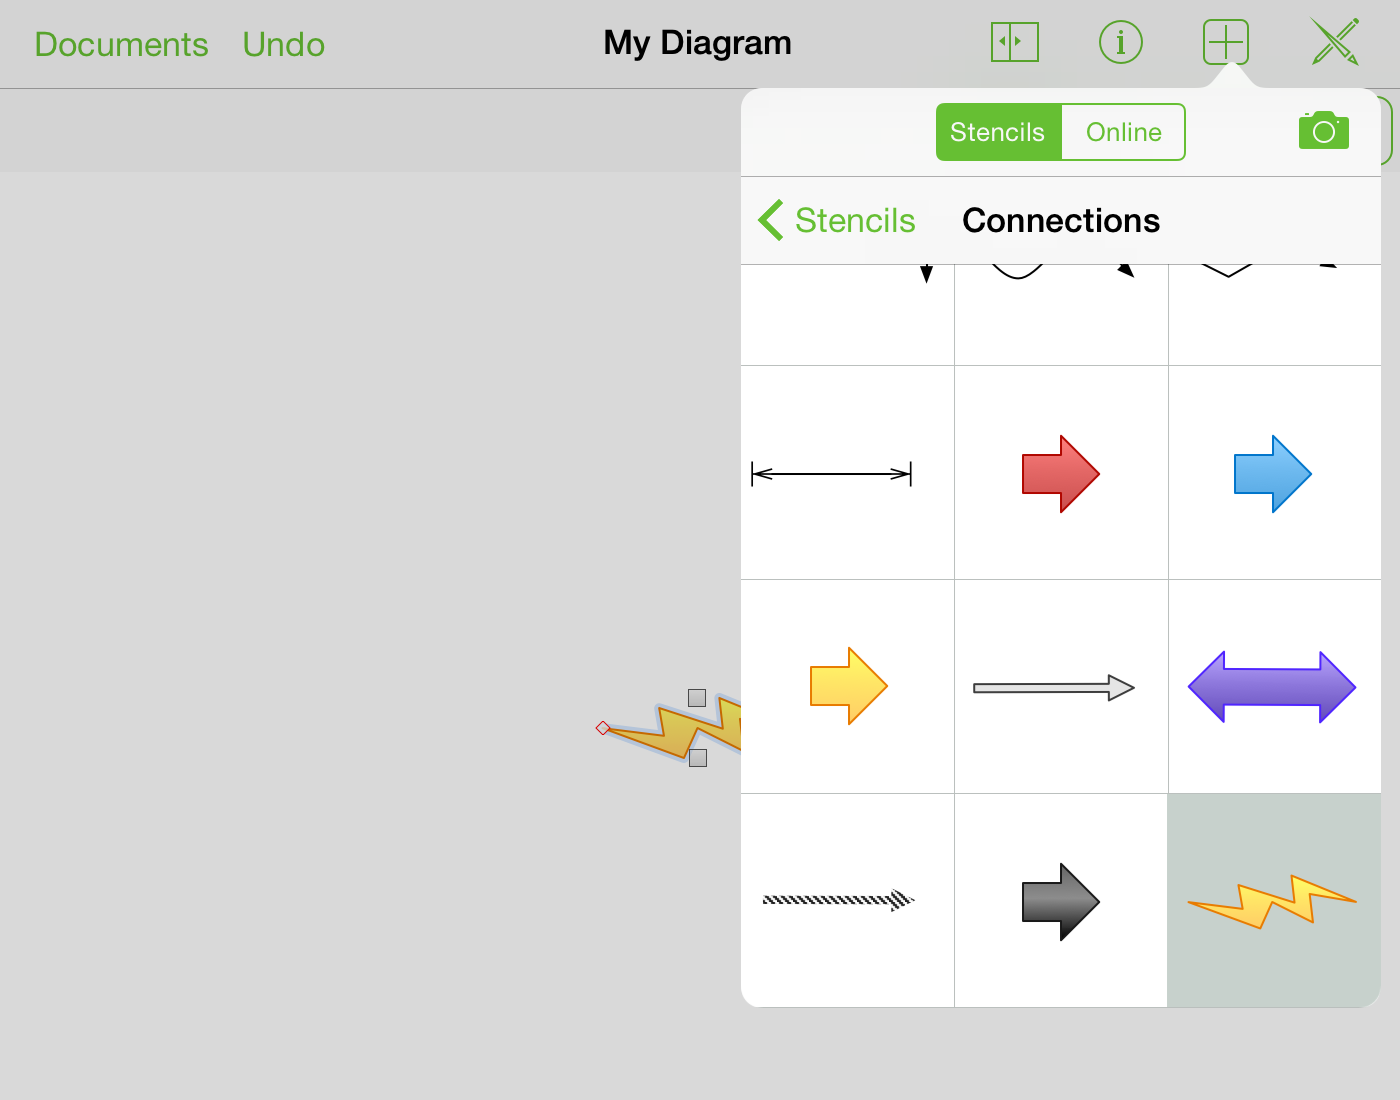
 to open the Stencils library. Use the Stencils library to find and drag objects to the Canvas, or to search Stenciltown online for new stencils.
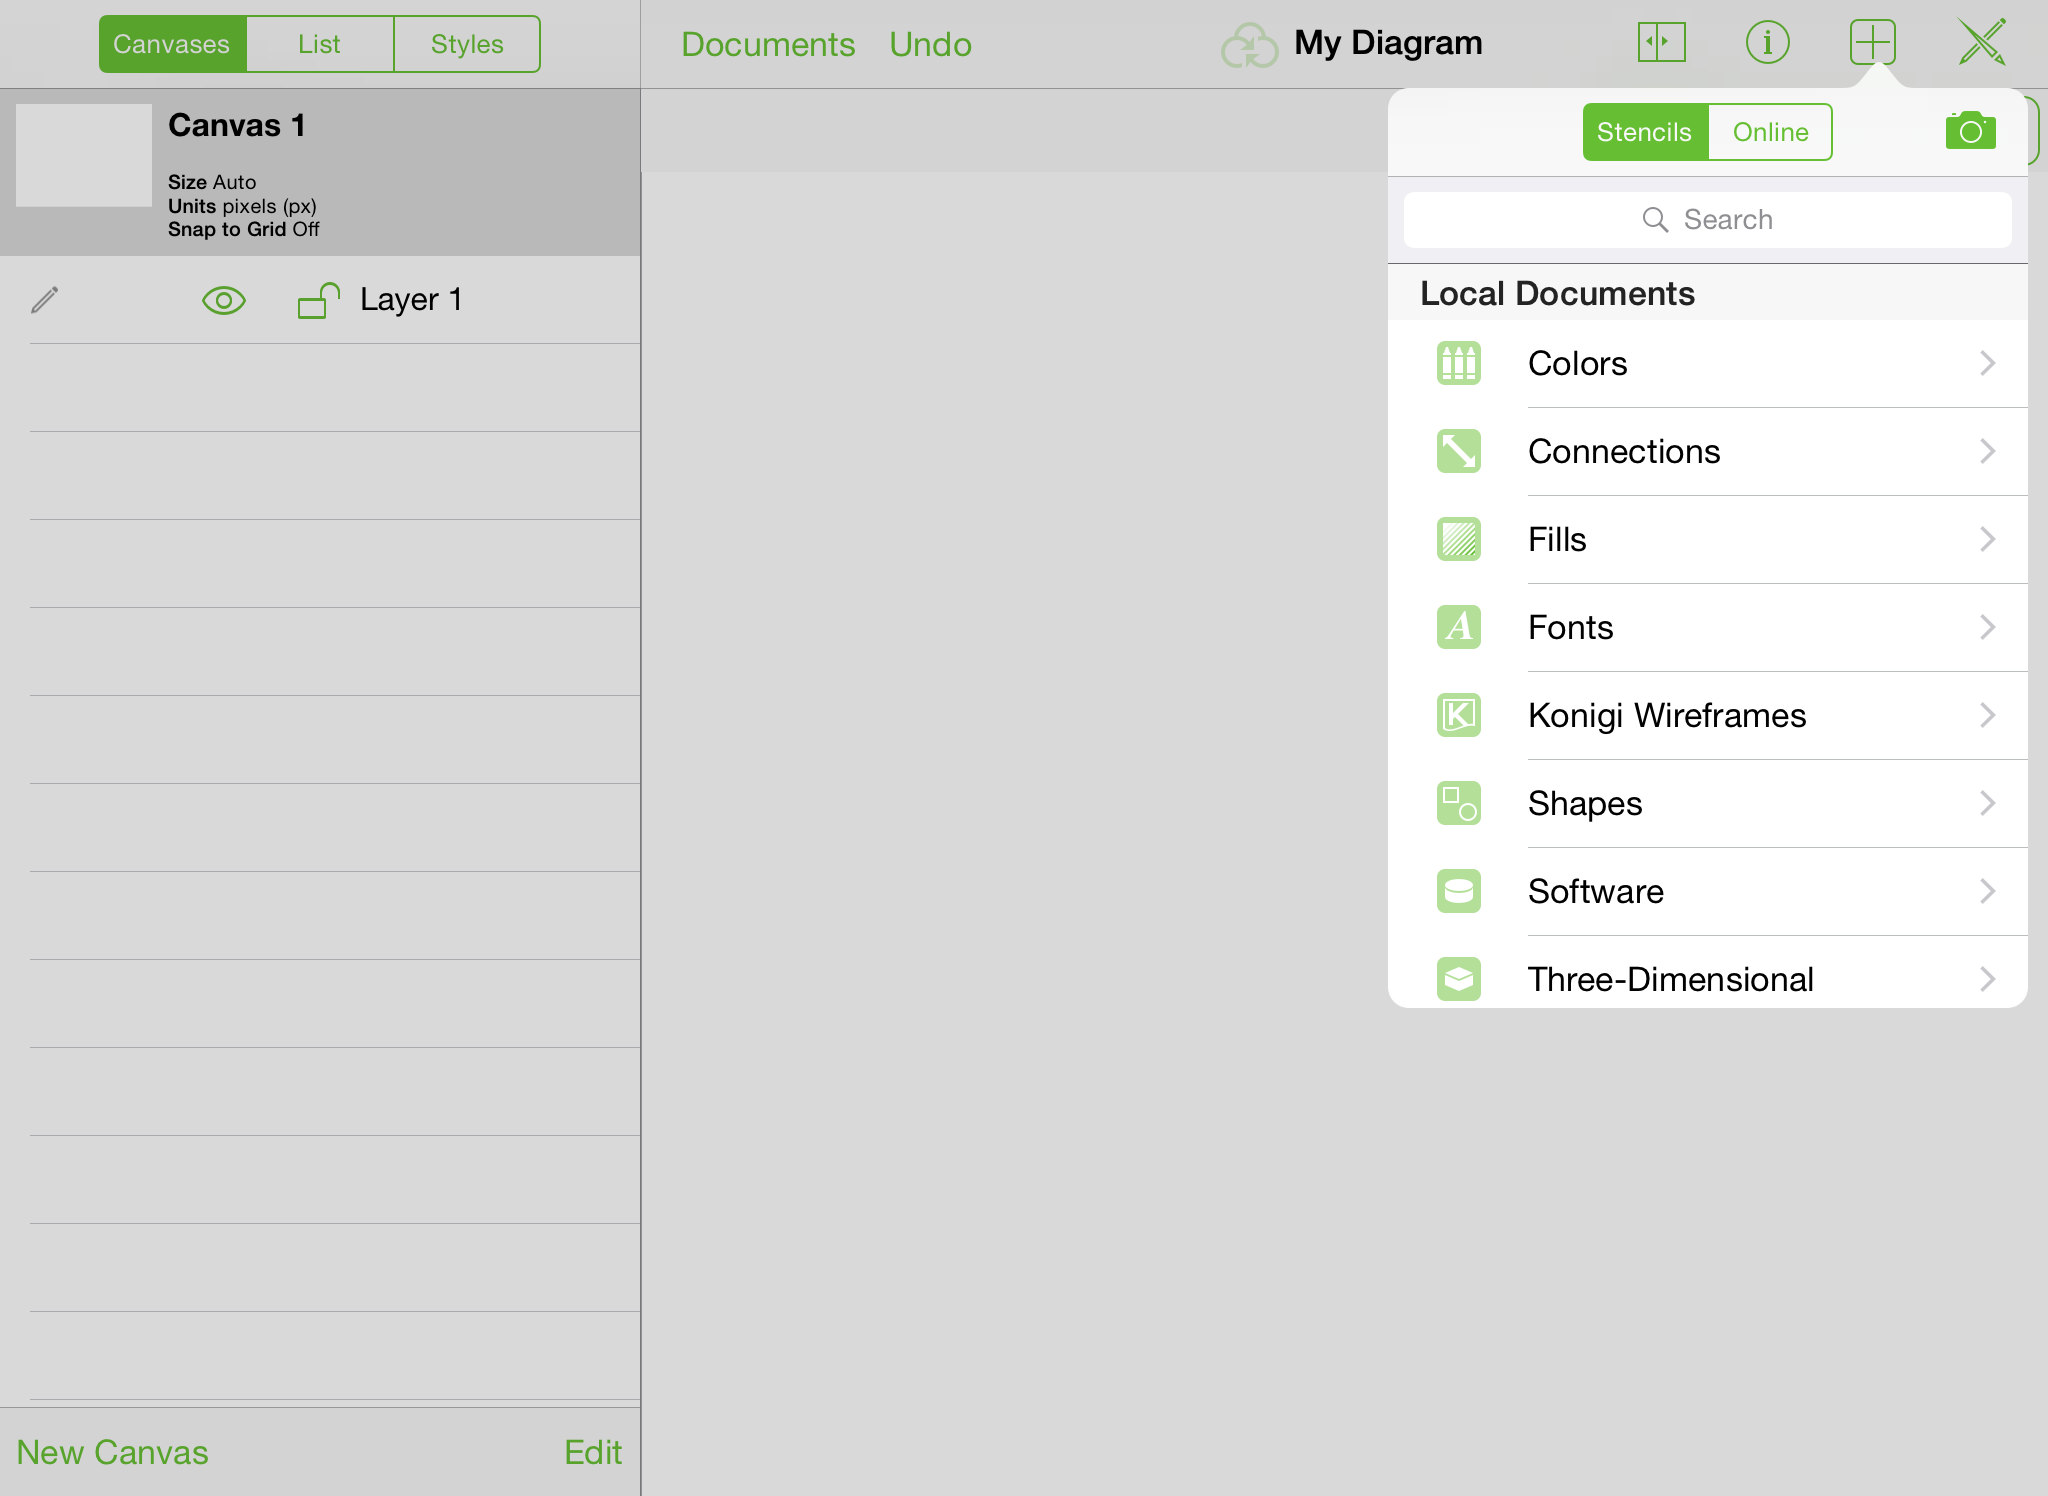
Finally, tap
 a couple times to hide and then show the Drawing Tools bar.
Now that you’ve had a chance to peruse the buttons in the toolbar, it’s time to take the Drawing Tools out for a little test drive.
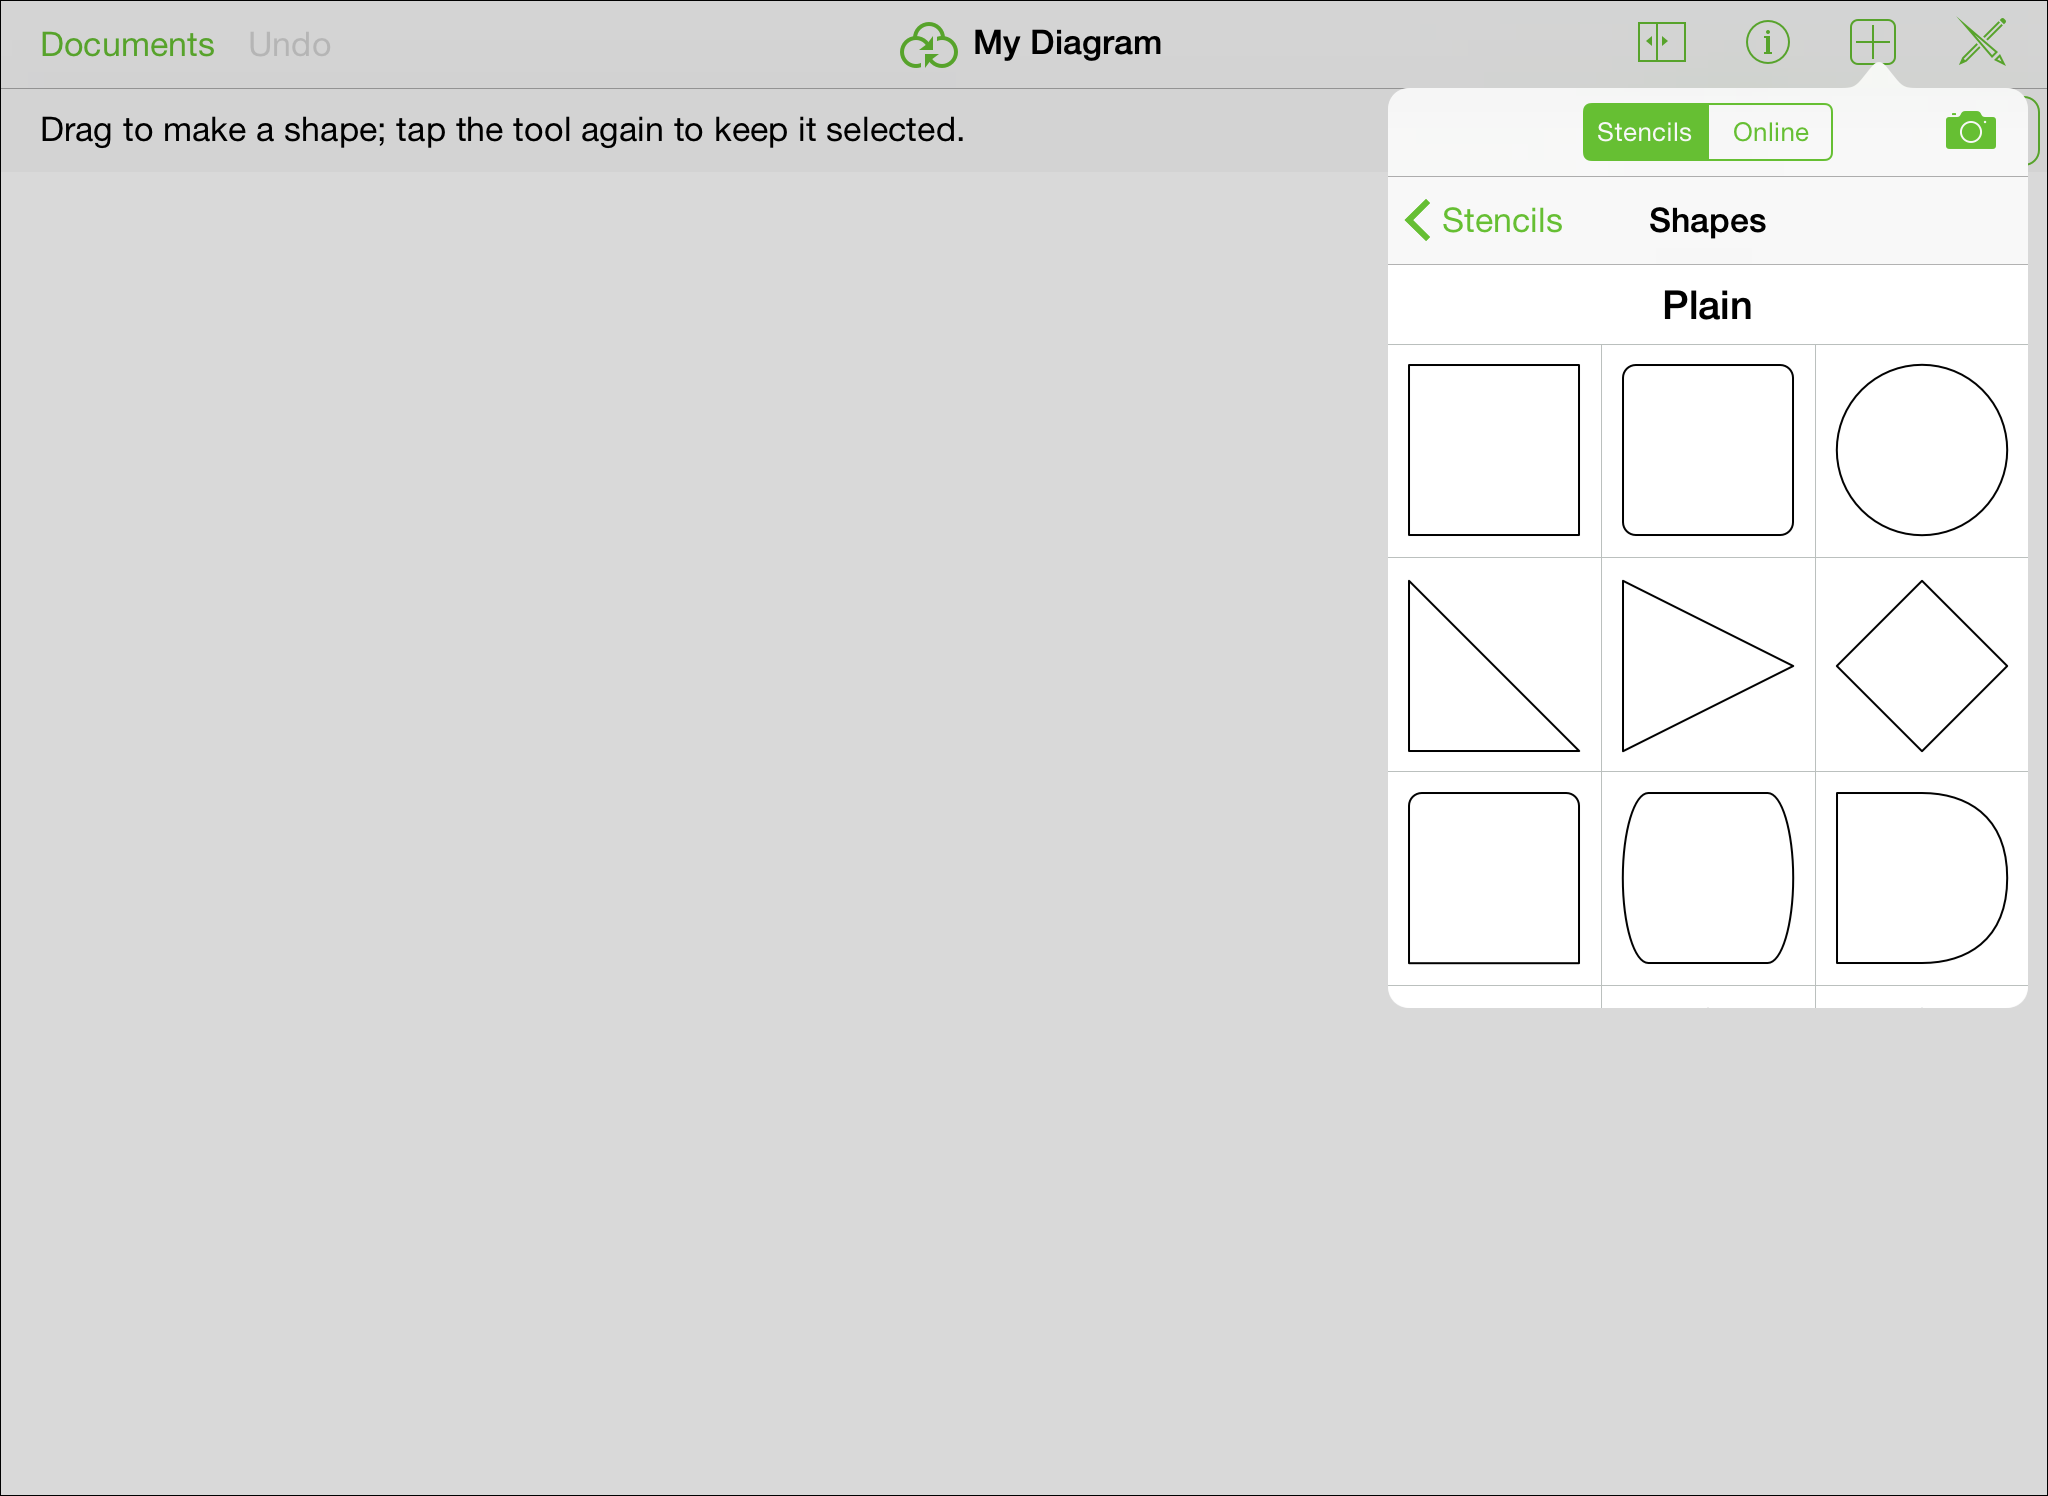
Adding Shapes
A shape is a two-dimensional object that you add to your canvas. Shapes can be styled with an addition like a nice gradient or color, for example. You can also add a label to a shape. The quickest way to add shapes is to drag from the stencil palette:
Tap
to select the Shapes tool.With one finger, tap on the Canvas and drag your finger to draw a shape.
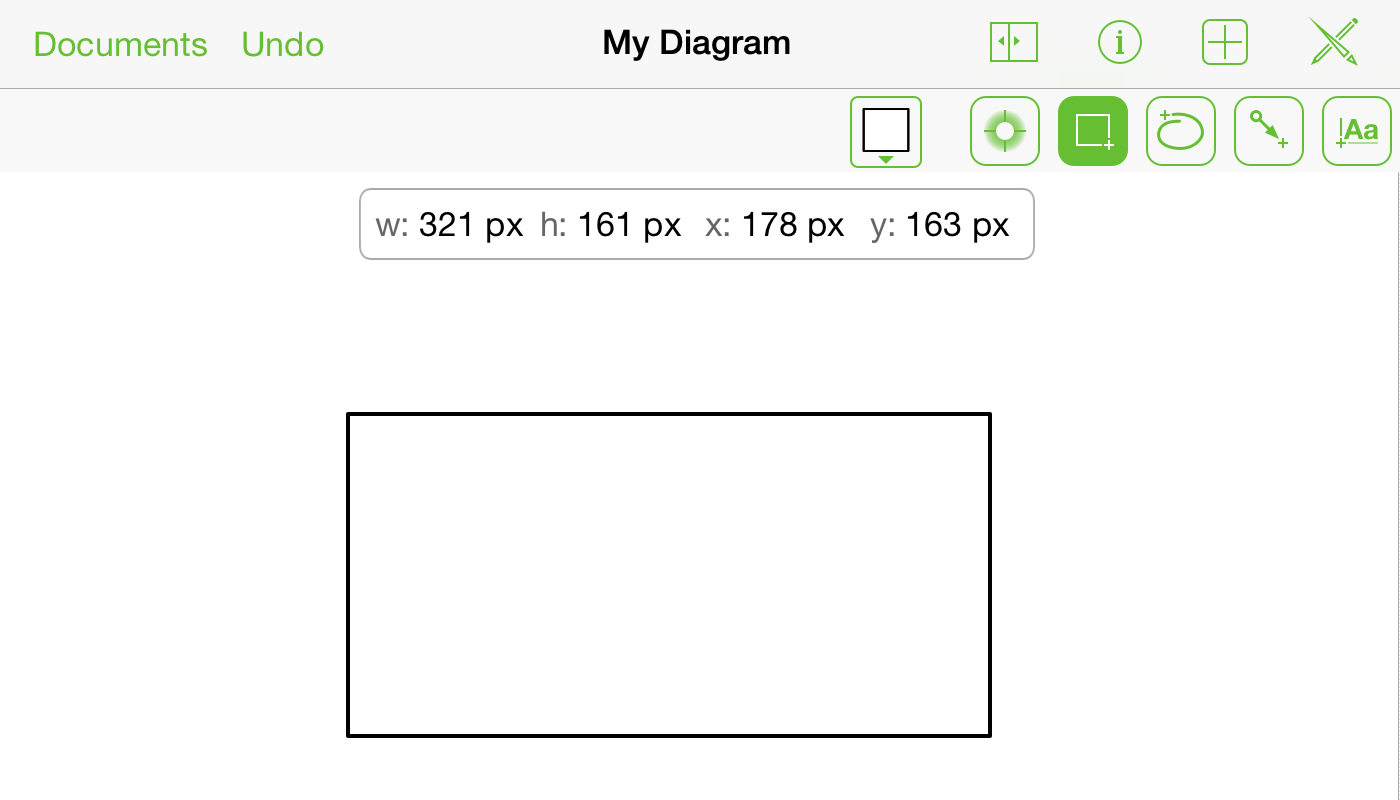
As you draw on the Canvas, OmniGraffle displays the dimensions of the shape you are drawing, as well as its x/y position on the Canvas.
If you prefer to use one of the pre-installed stencils, tap ![]() in the top bar. This opens a menu from which you can select any stencil. You can either double-tap a stencil to add it to the canvas:
in the top bar. This opens a menu from which you can select any stencil. You can either double-tap a stencil to add it to the canvas:
Or you can touch and hold a stencil and then drag it to the canvas:

When you drag a stencil to the canvas, the Stencils menu disappears and blue alignment bars appear to help you position the object on the Canvas.
You can also create custom shapes:
Tap
to activate the Freehand drawing tool. Don’t forget, you can also double-tap on a tool to make it persistent; for example .Use your finger (or your favorite stylus) to draw on the Canvas.
When you’ve finished drawing, tap
 to hide the Drawing Tools toolbar.
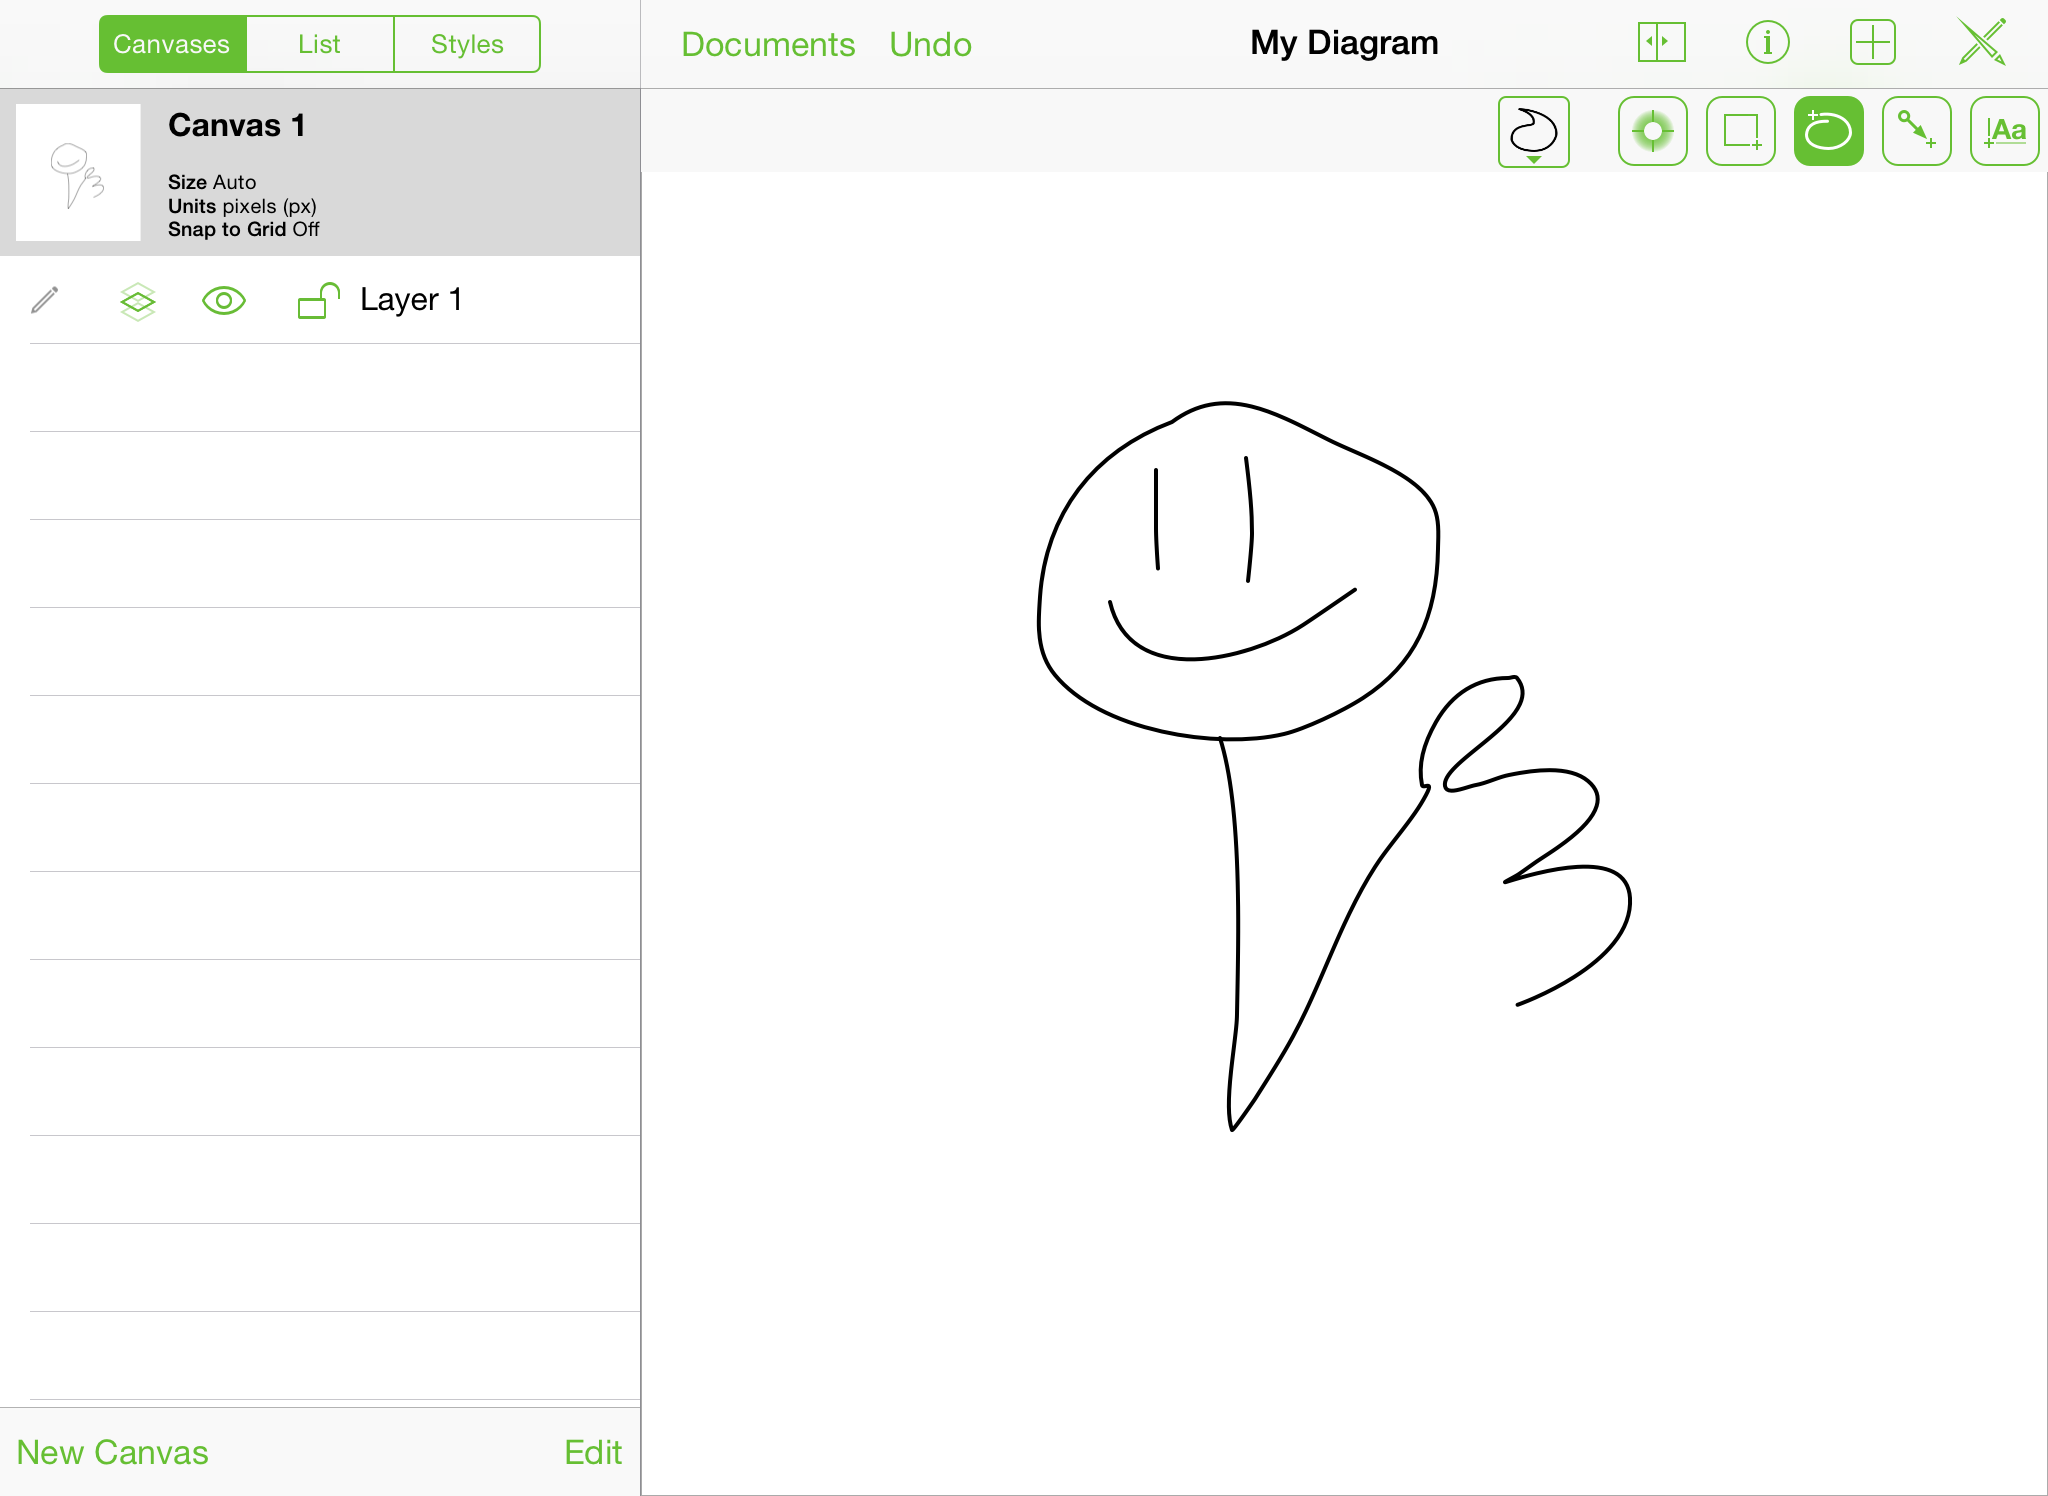
You can select and customize your shapes with the Inspectors by tapping the ![]() button in the top bar. Here, we’ve selected the “head” for the smiley face and have added a yellow radial fill.
button in the top bar. Here, we’ve selected the “head” for the smiley face and have added a yellow radial fill.
You can also add an image to the Canvas through the Stencils menu:
Tap
 in the navigation bar.
Tap
 at the top of the Stencils menu.
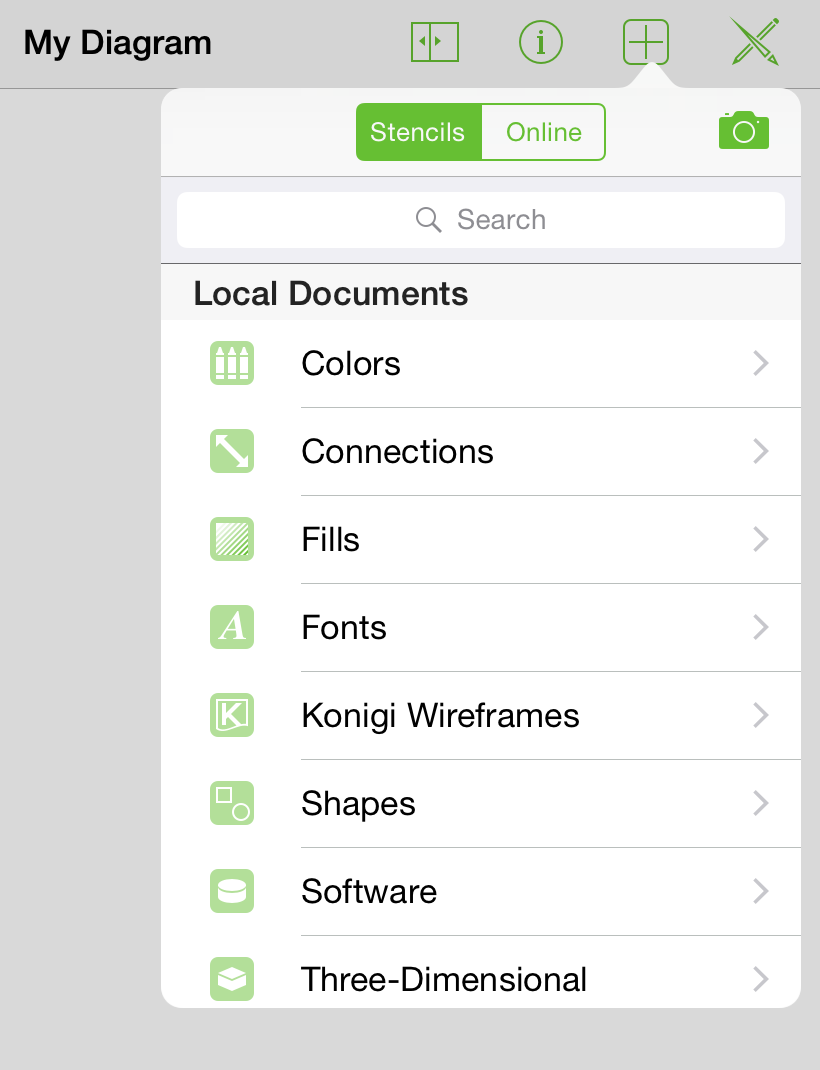
If you haven’t already authorized OmniGraffle access to your Photos app, you’ll see the following alert:
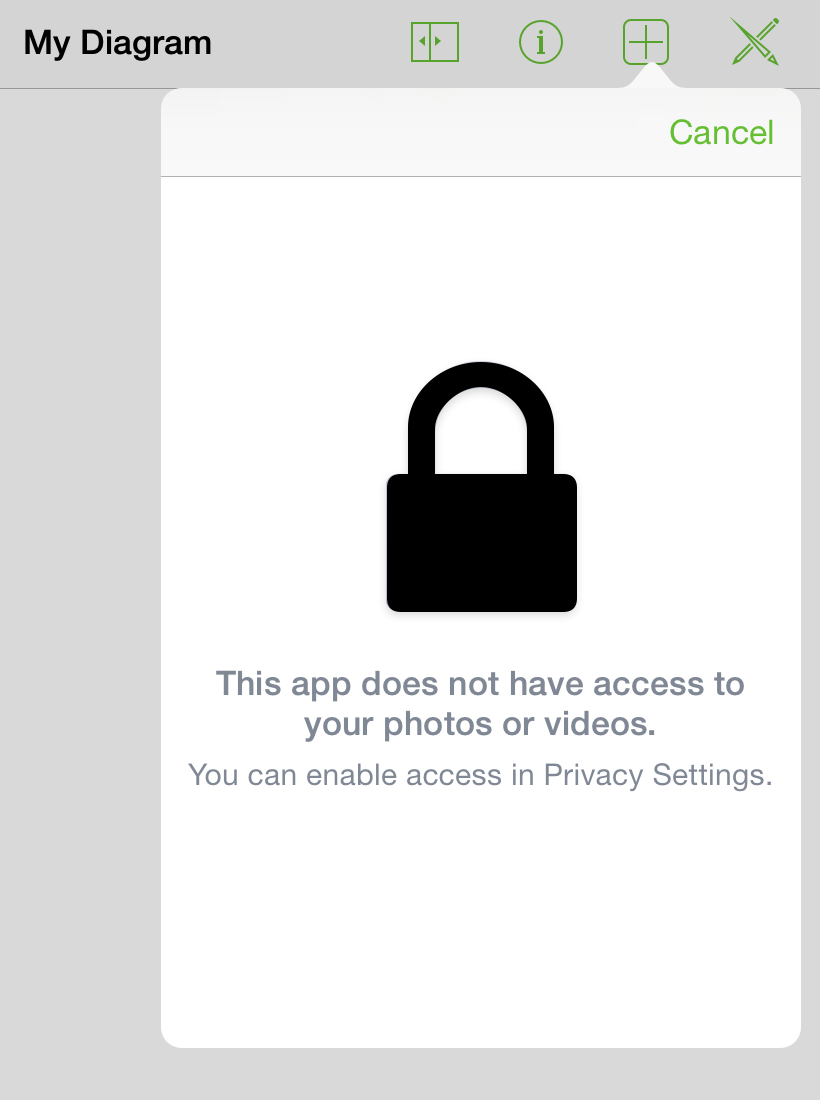
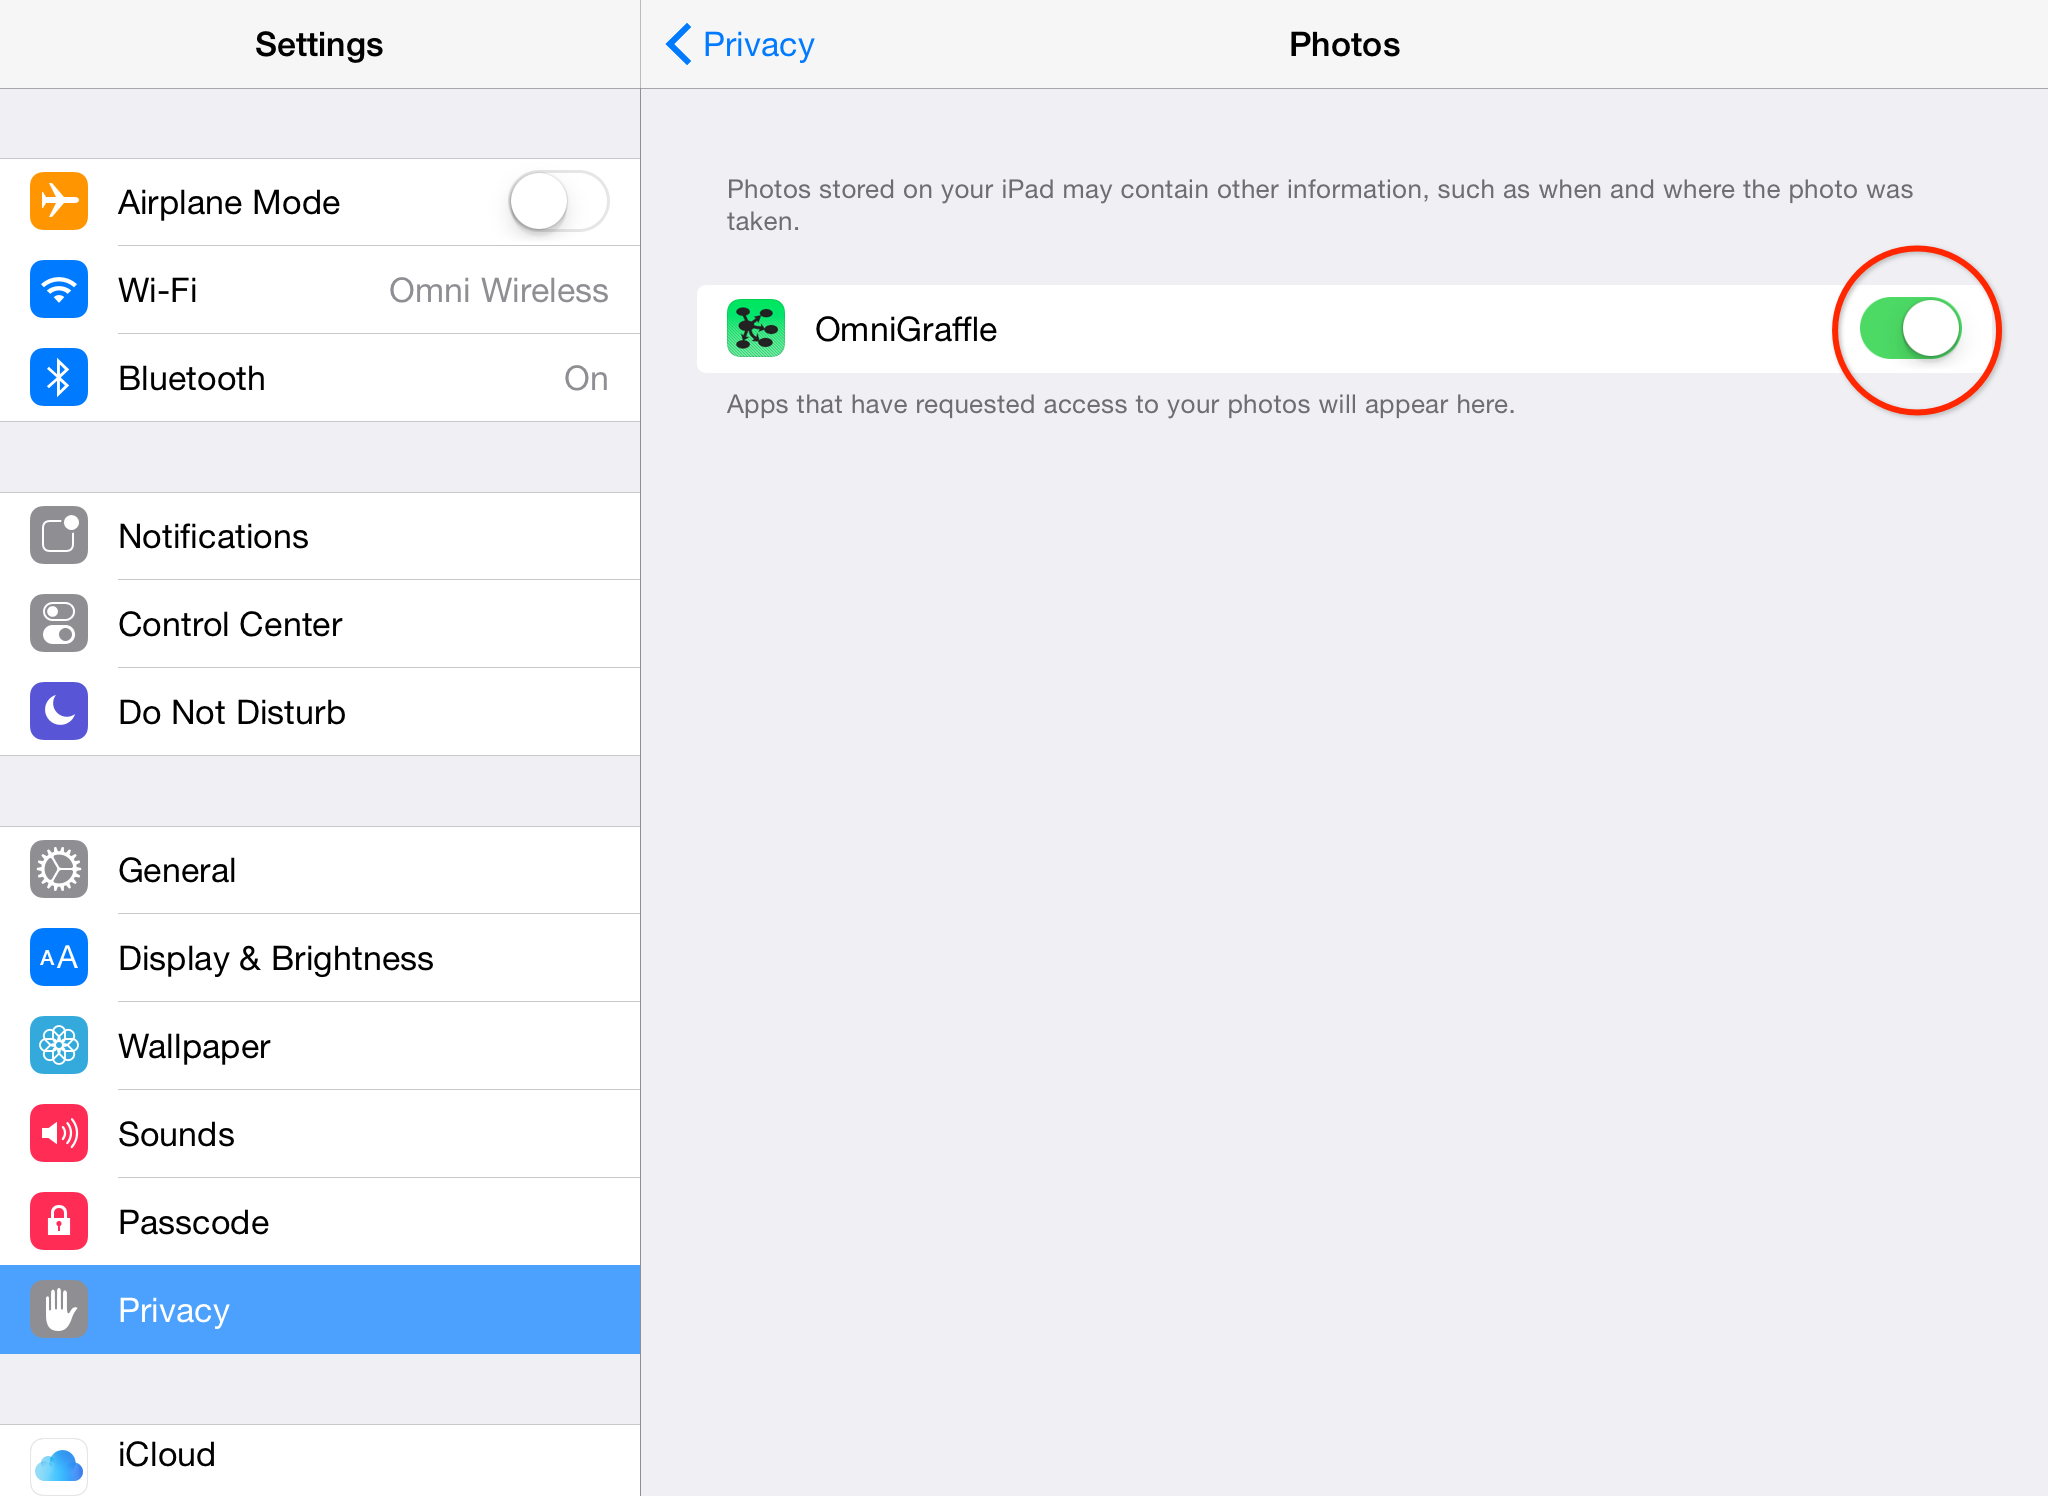
To grant OmniGraffle access, double-tap the Home button on your iPad, locate and open the Settings app, then tap Privacy on the left, and then flip the switch for OmniGraffle.
Now double-tap Home again and switch back to OmniGraffle.
After tapping
 , some options slide up from the bottom of the Stencils menu:
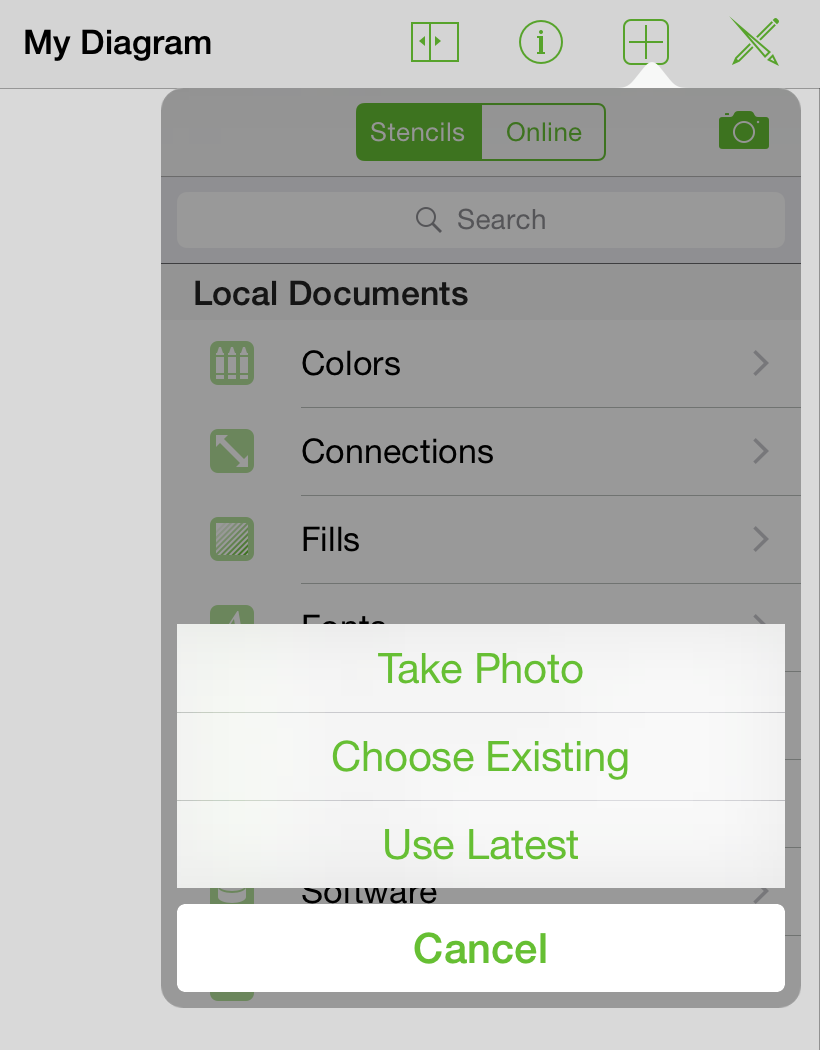
- Tap Take Photo to use the iPad’s camera.
- Tap Choose Existing to select an image from your Photos library.
- Tap Use Latest to have OmniGraffle place the last image added to your Photos library.
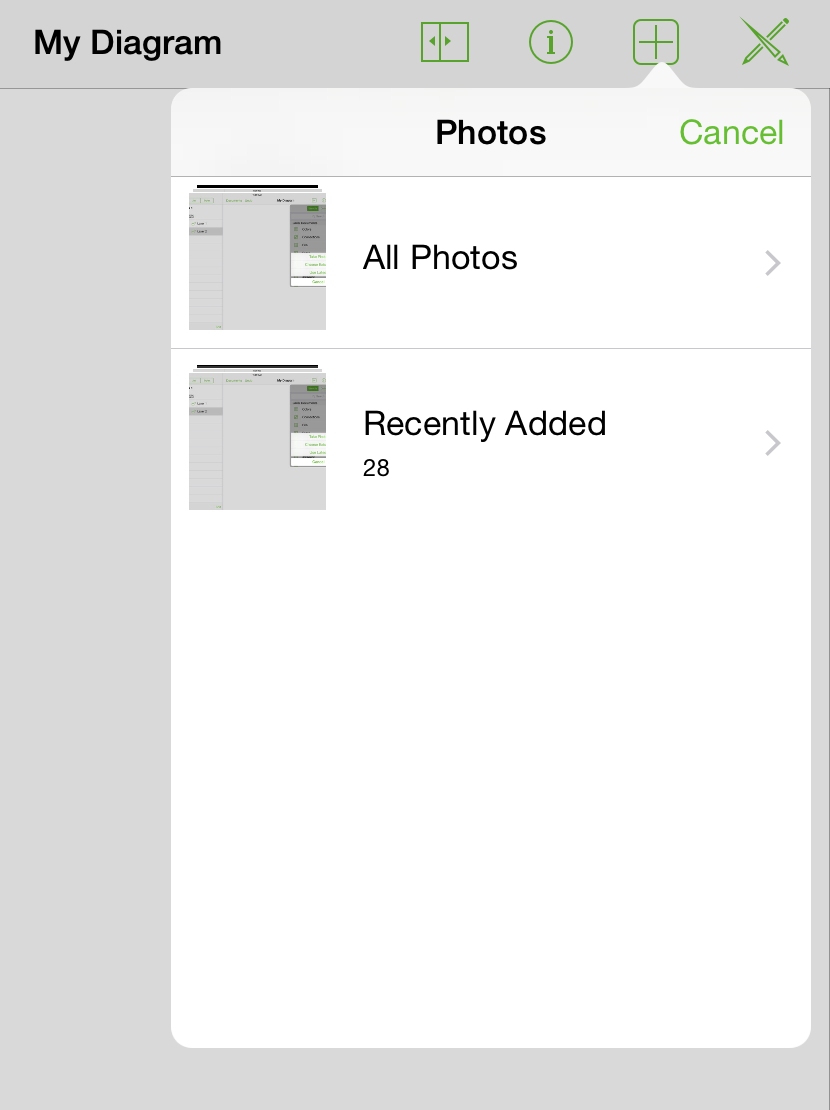
If you tap Choose Existing, a Photos pane slides into the menu. From here, you can choose from All Photos on your iPad, or photos that have been Recently Added.
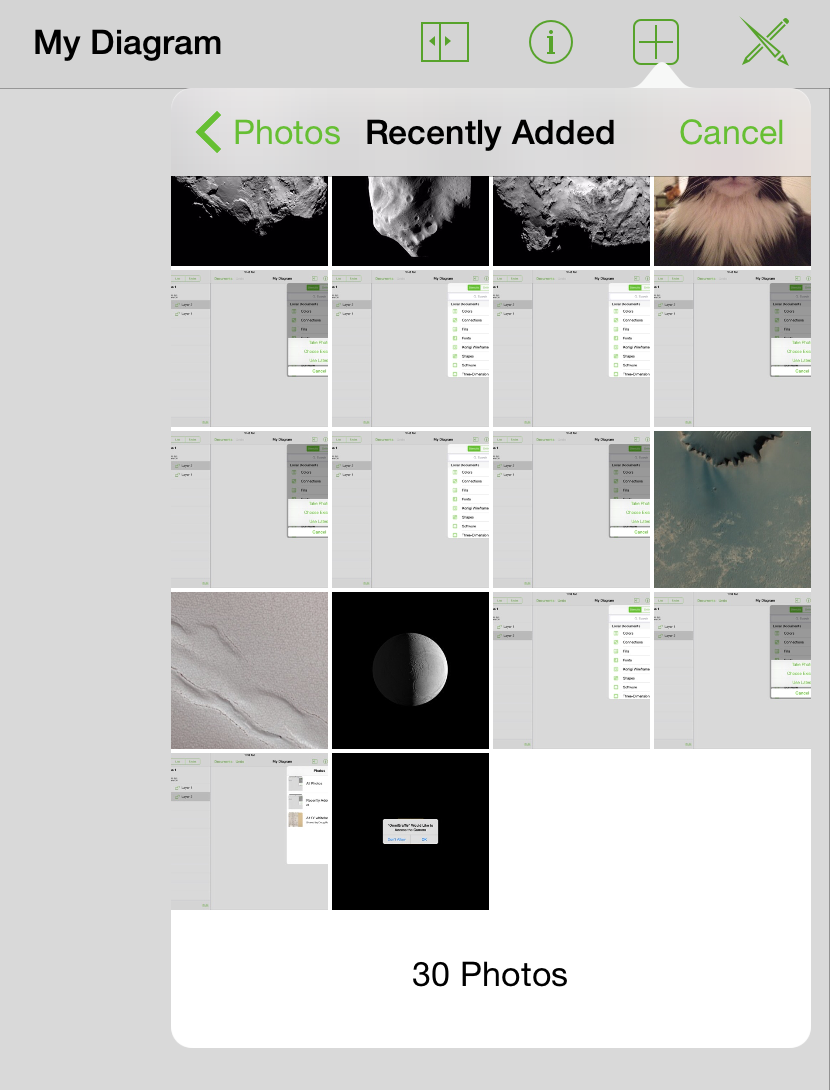
Finally, scroll through the images and tap the image you would like to add to the Canvas.
The Stencils menu disappears and the image is placed on the Canvas.
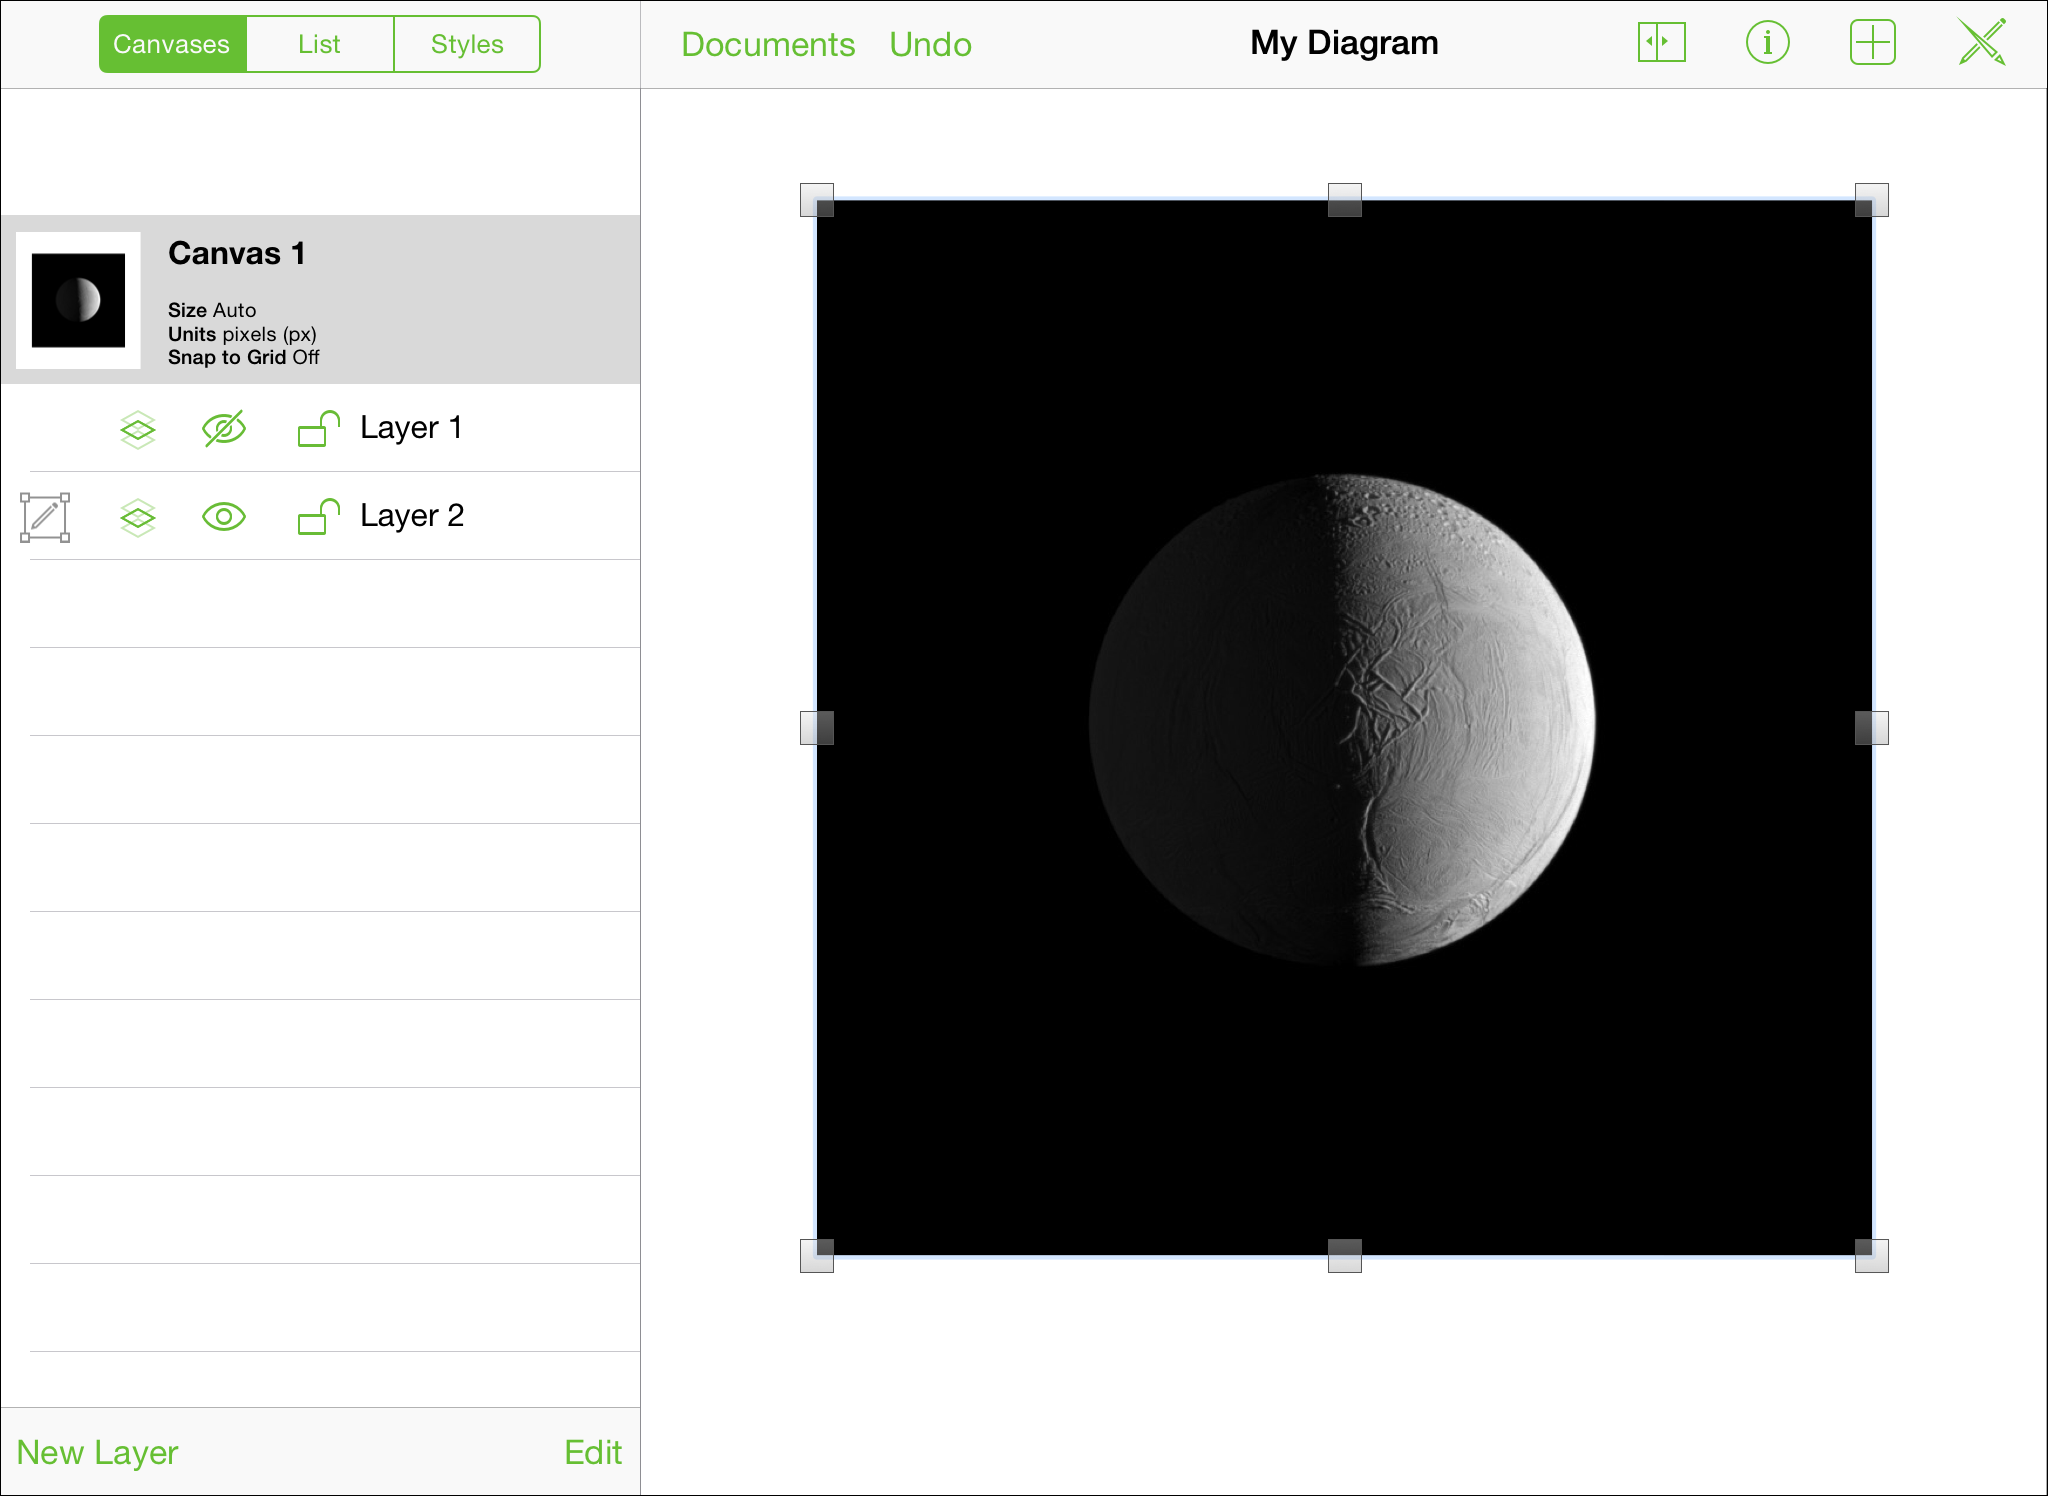
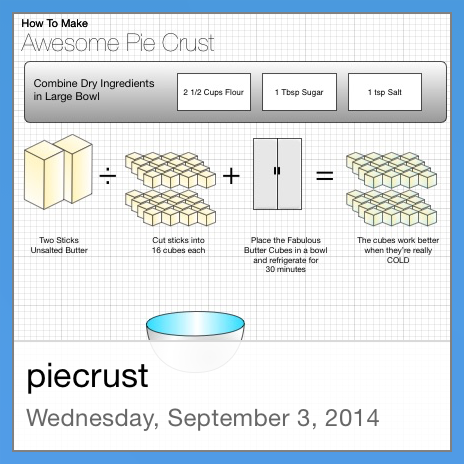
Note
The previous image is titled, Elephant Skin Enceladus, which was taken by the Cassini spacecraft on 7 April 2010. Credit: NASA/JPL/Space Science Institute.
You can further alter the image with the Inspectors. First select the image, and then tap ![]() in the navigation bar. This opens the Inspectors menu, from which you can apply any number of styles and effects to the image.
in the navigation bar. This opens the Inspectors menu, from which you can apply any number of styles and effects to the image.
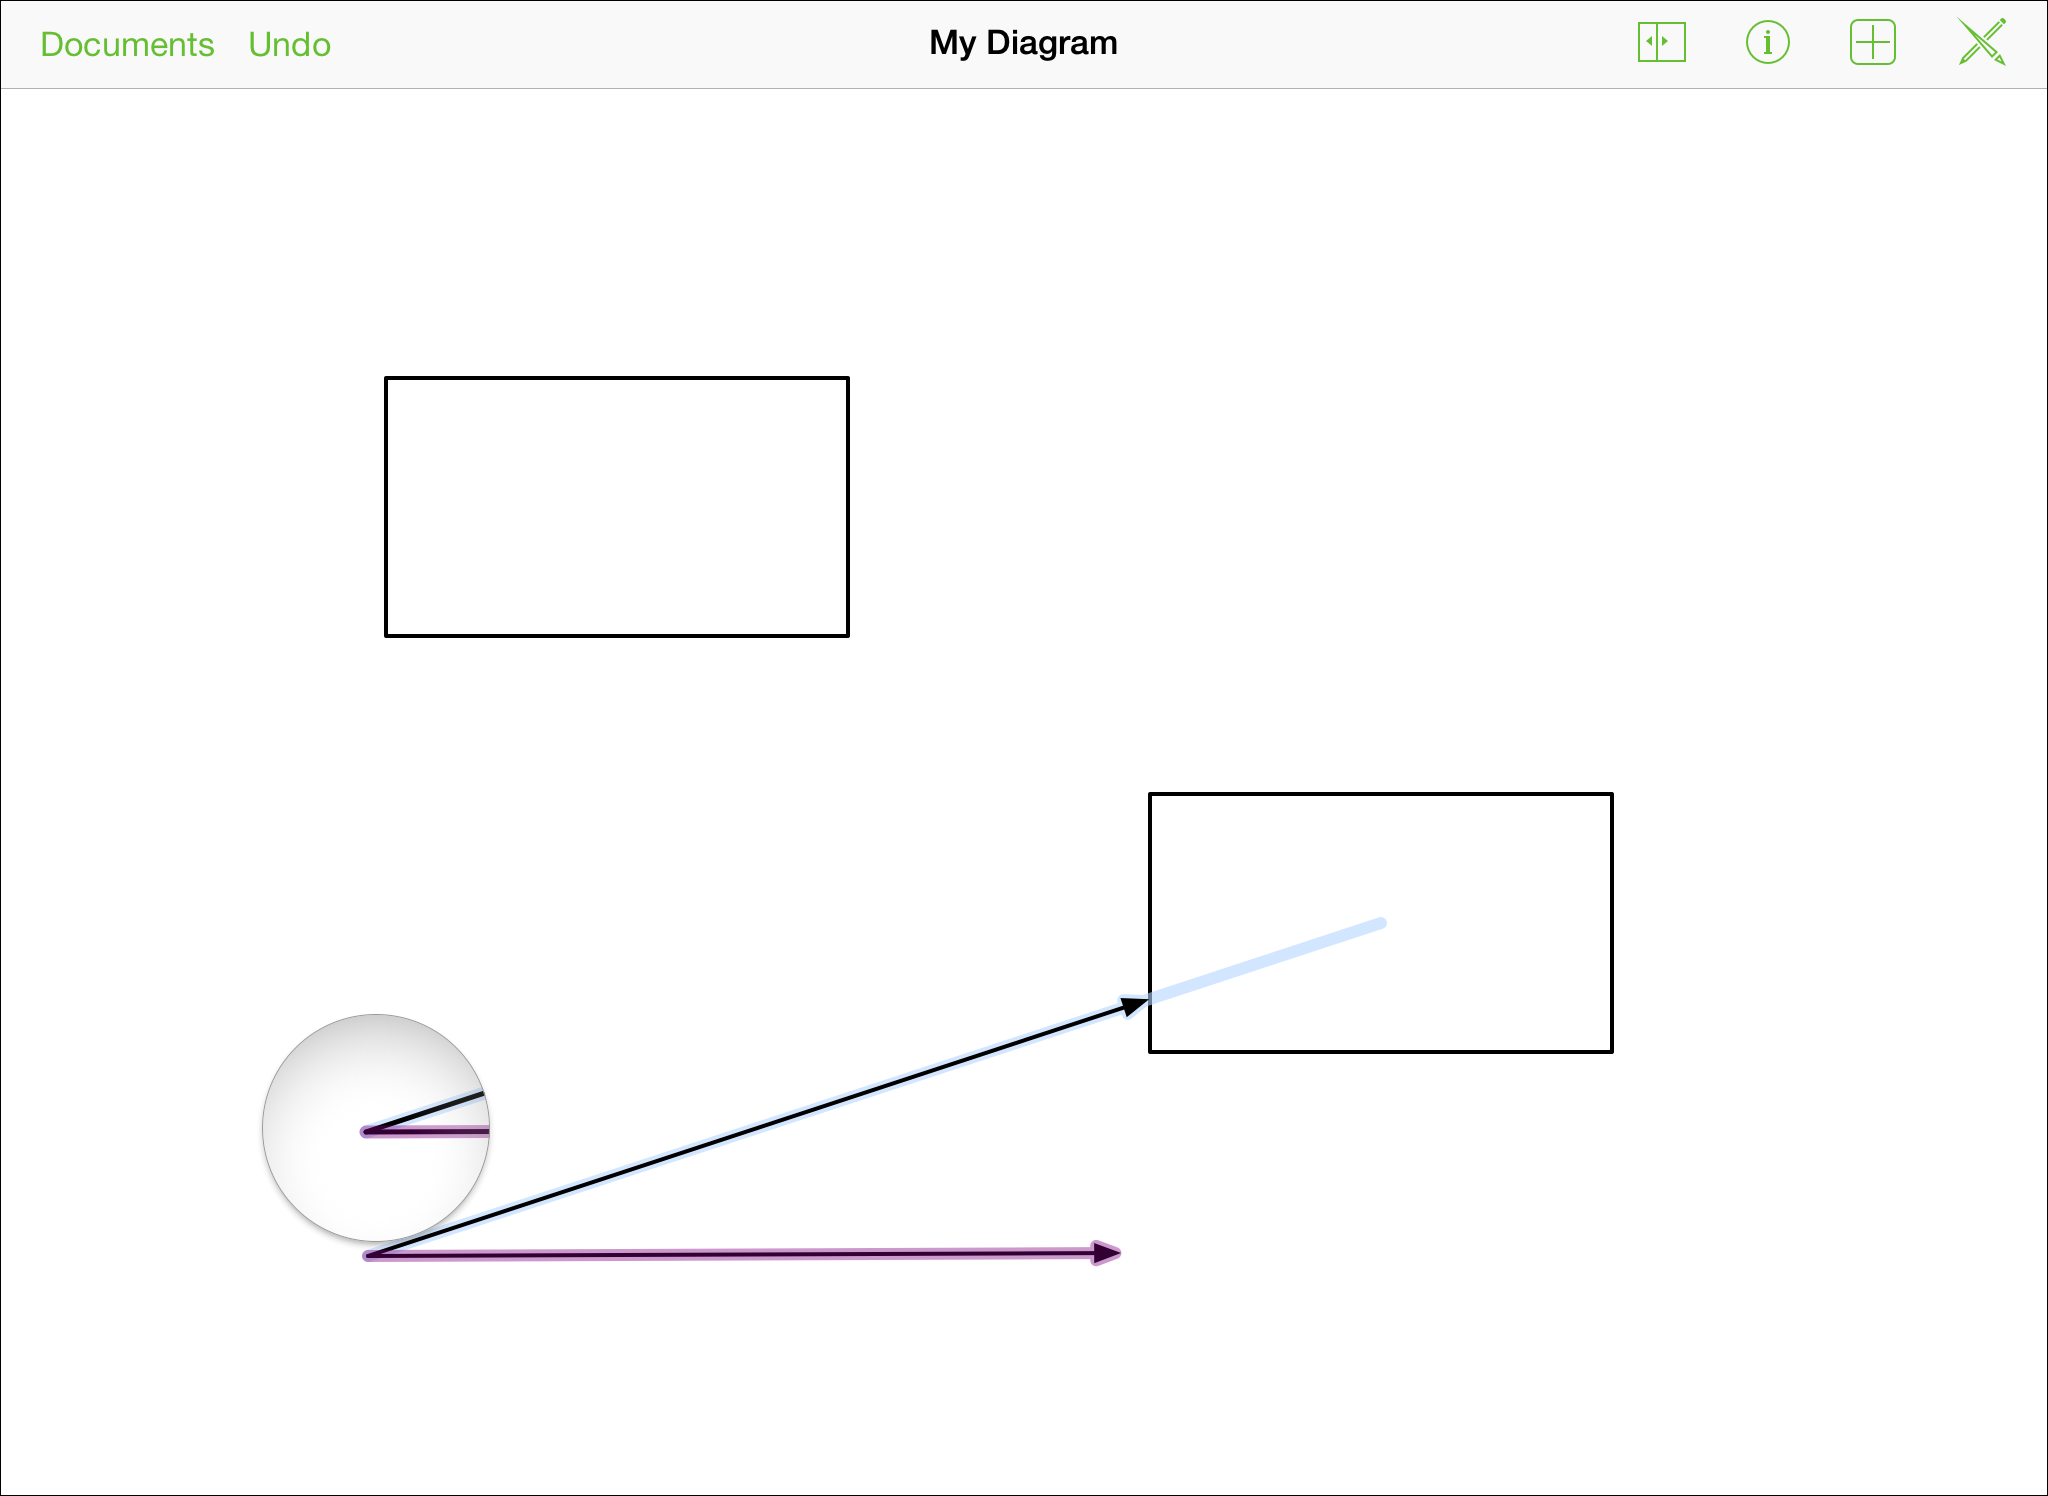
Connecting Objects with Lines
Connections are lines between objects that often help clarify the relationship between the objects. To create connections between objects:
Tap
 in the toolbar to bring up the drawing tools.
Double-tap
so you can draw some objects on the Canvas; a couple rectangular shapes should be good.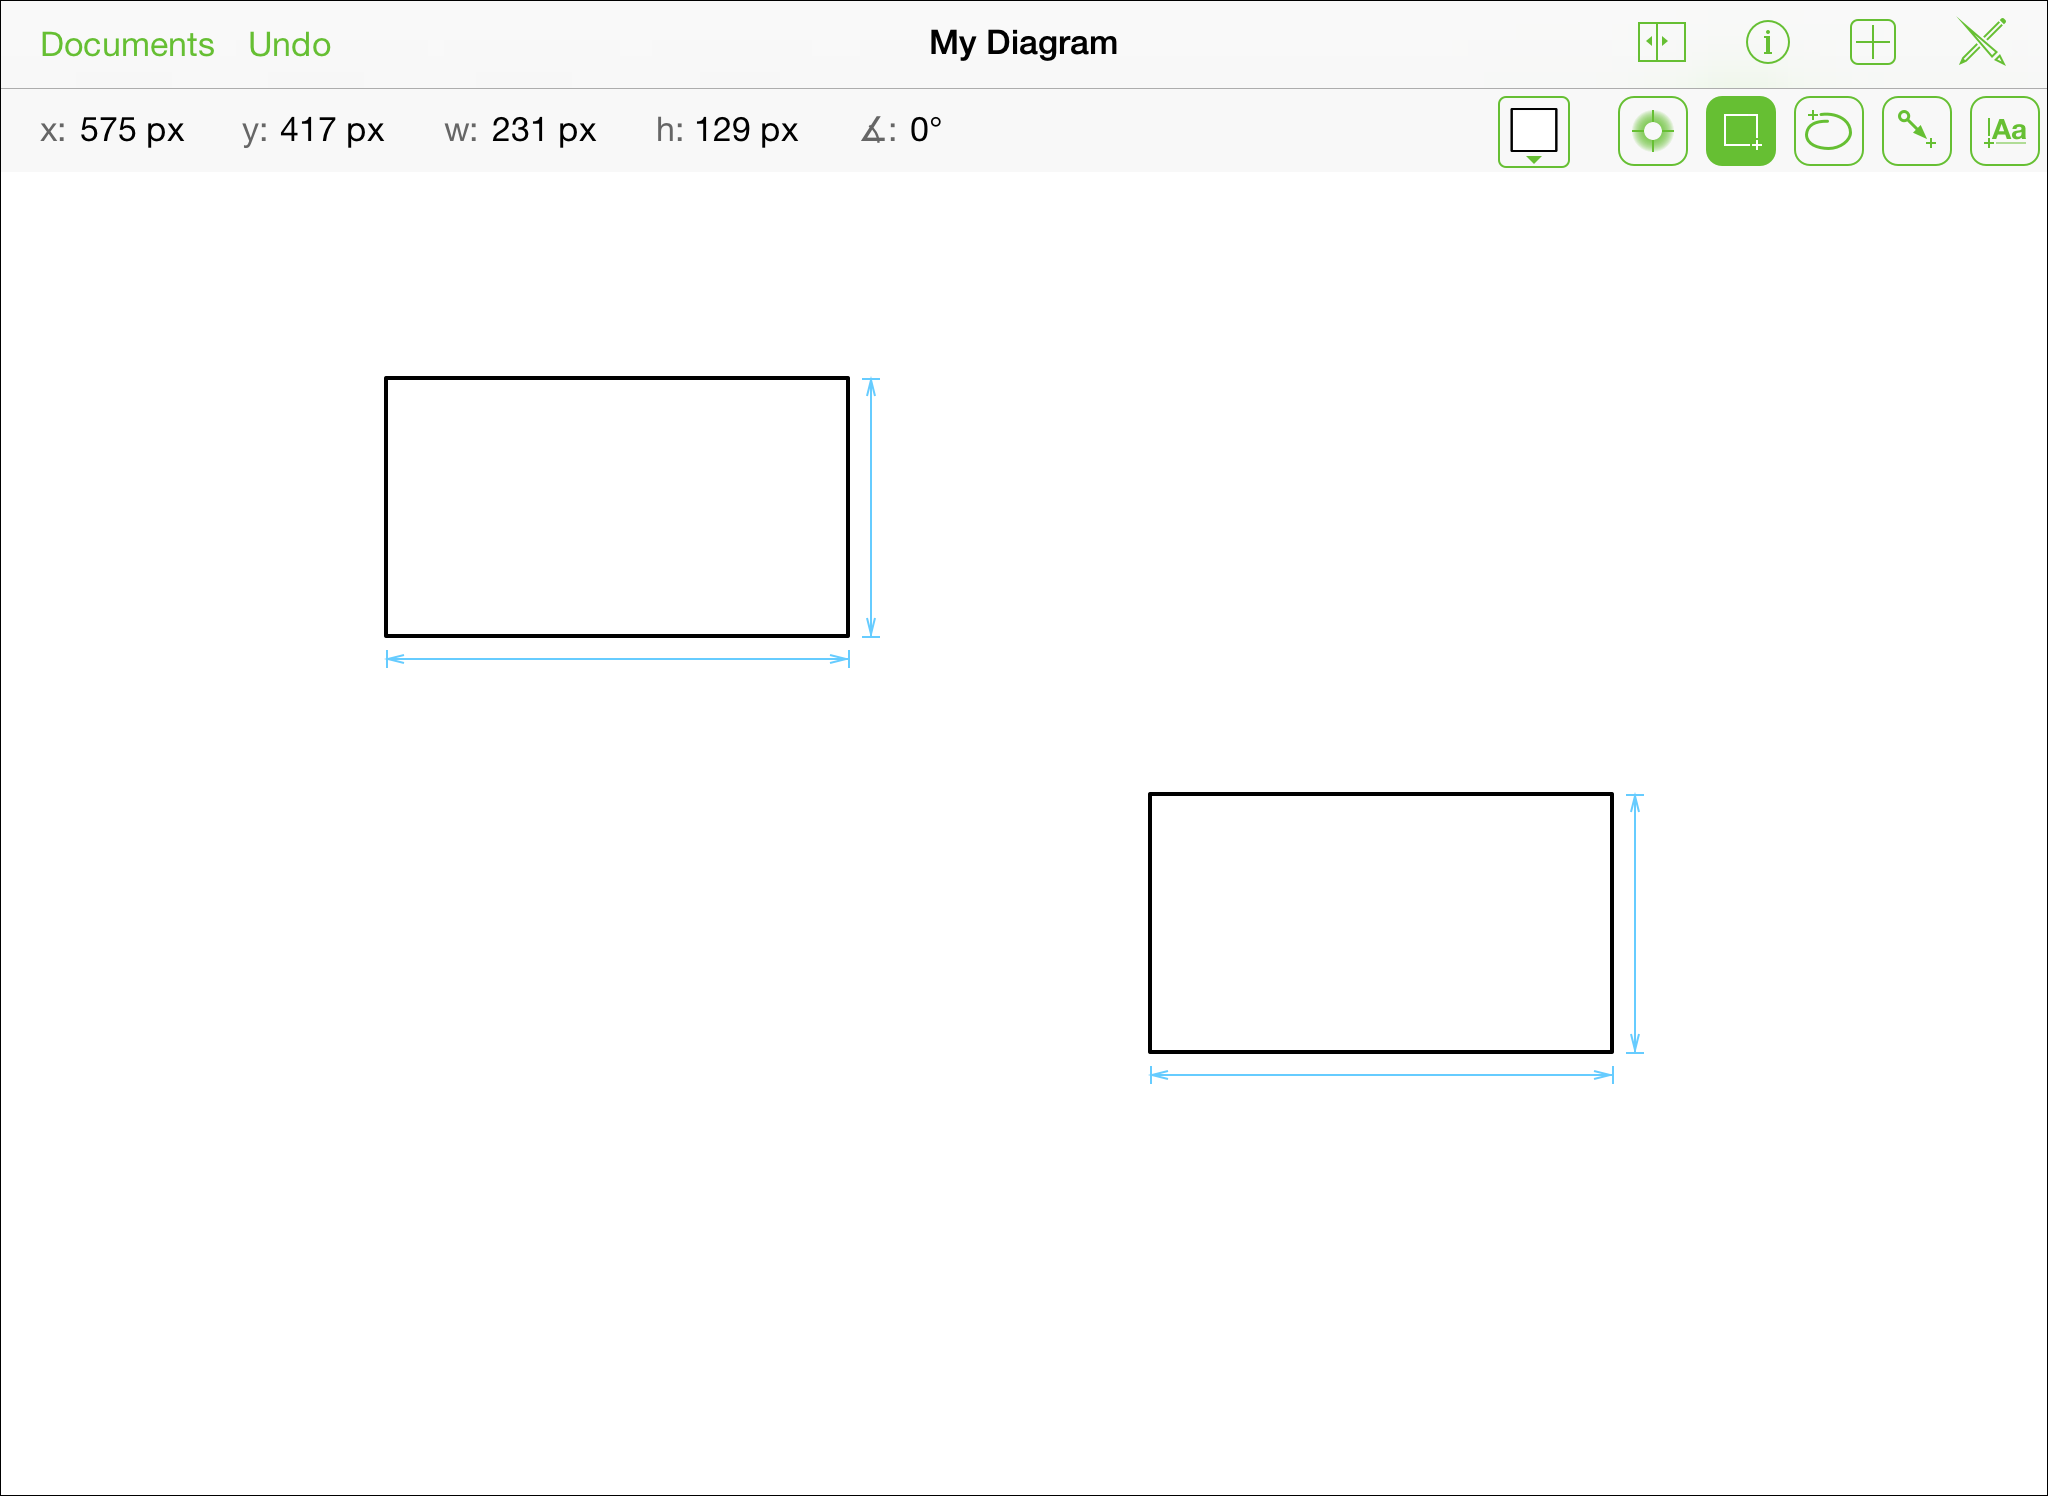
Notice the light blue sizing guides along the objects. These appear when you draw similar shapes on the Canvas so you can match their sizes. (Of course, you could just draw one shape, and then Copy and Paste the object using tap and hold gestures.)
Tap
to make the Line tool active.To draw a line between shapes: drag from one shape to the next.
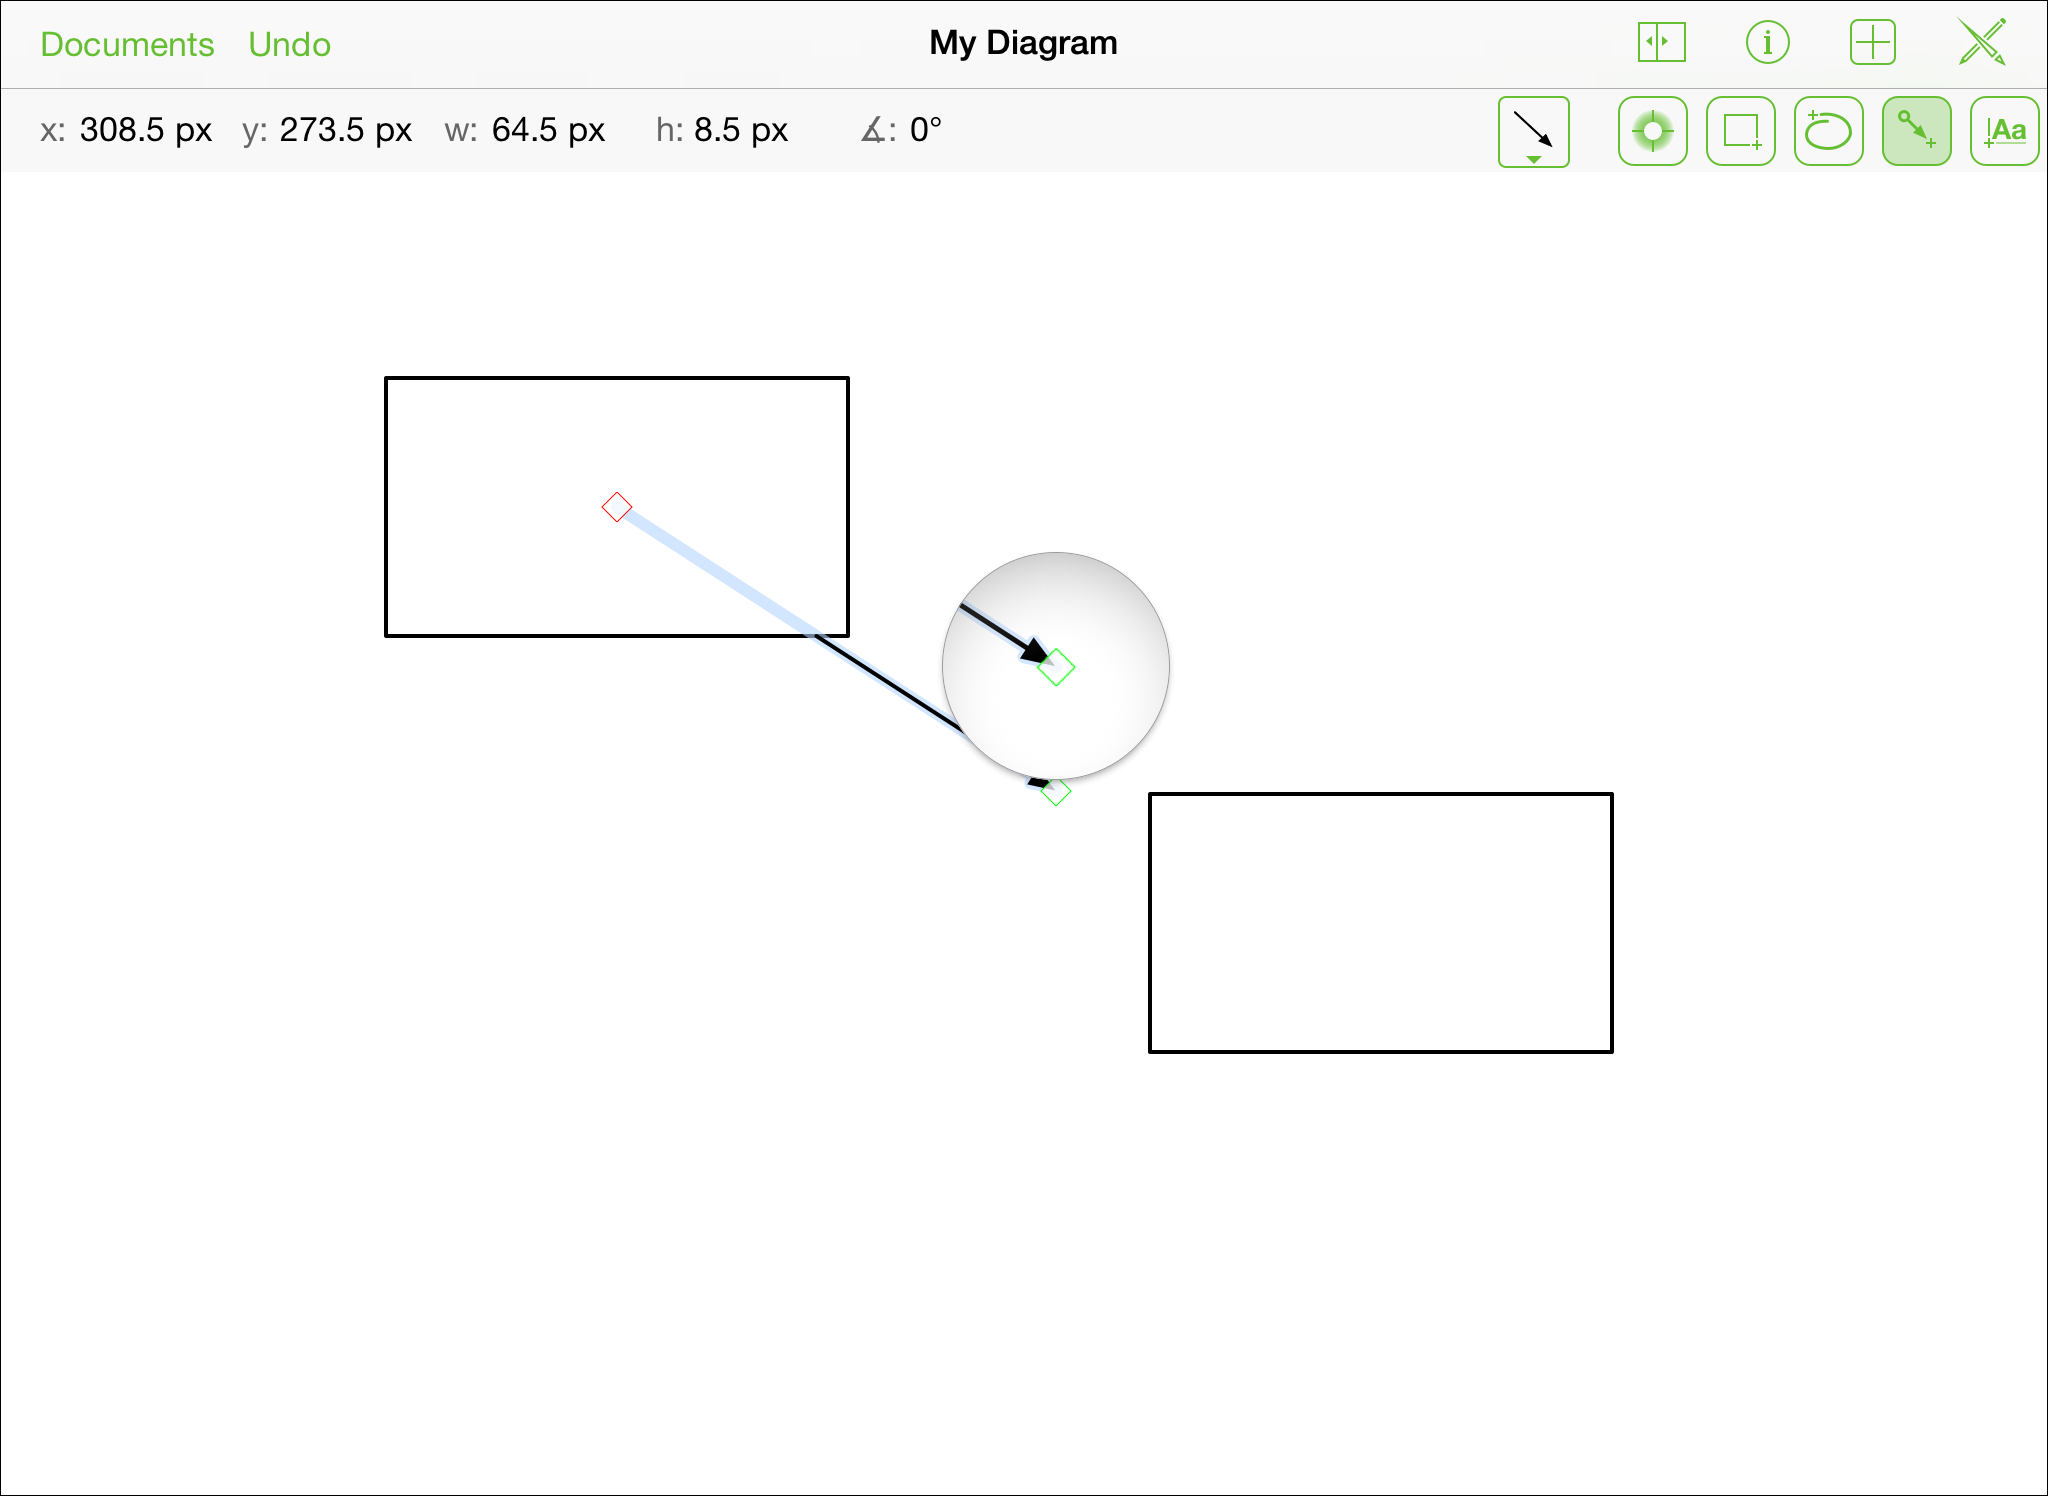
To draw an unattached line: drag across the canvas.
To adjust the endpoints of the line:
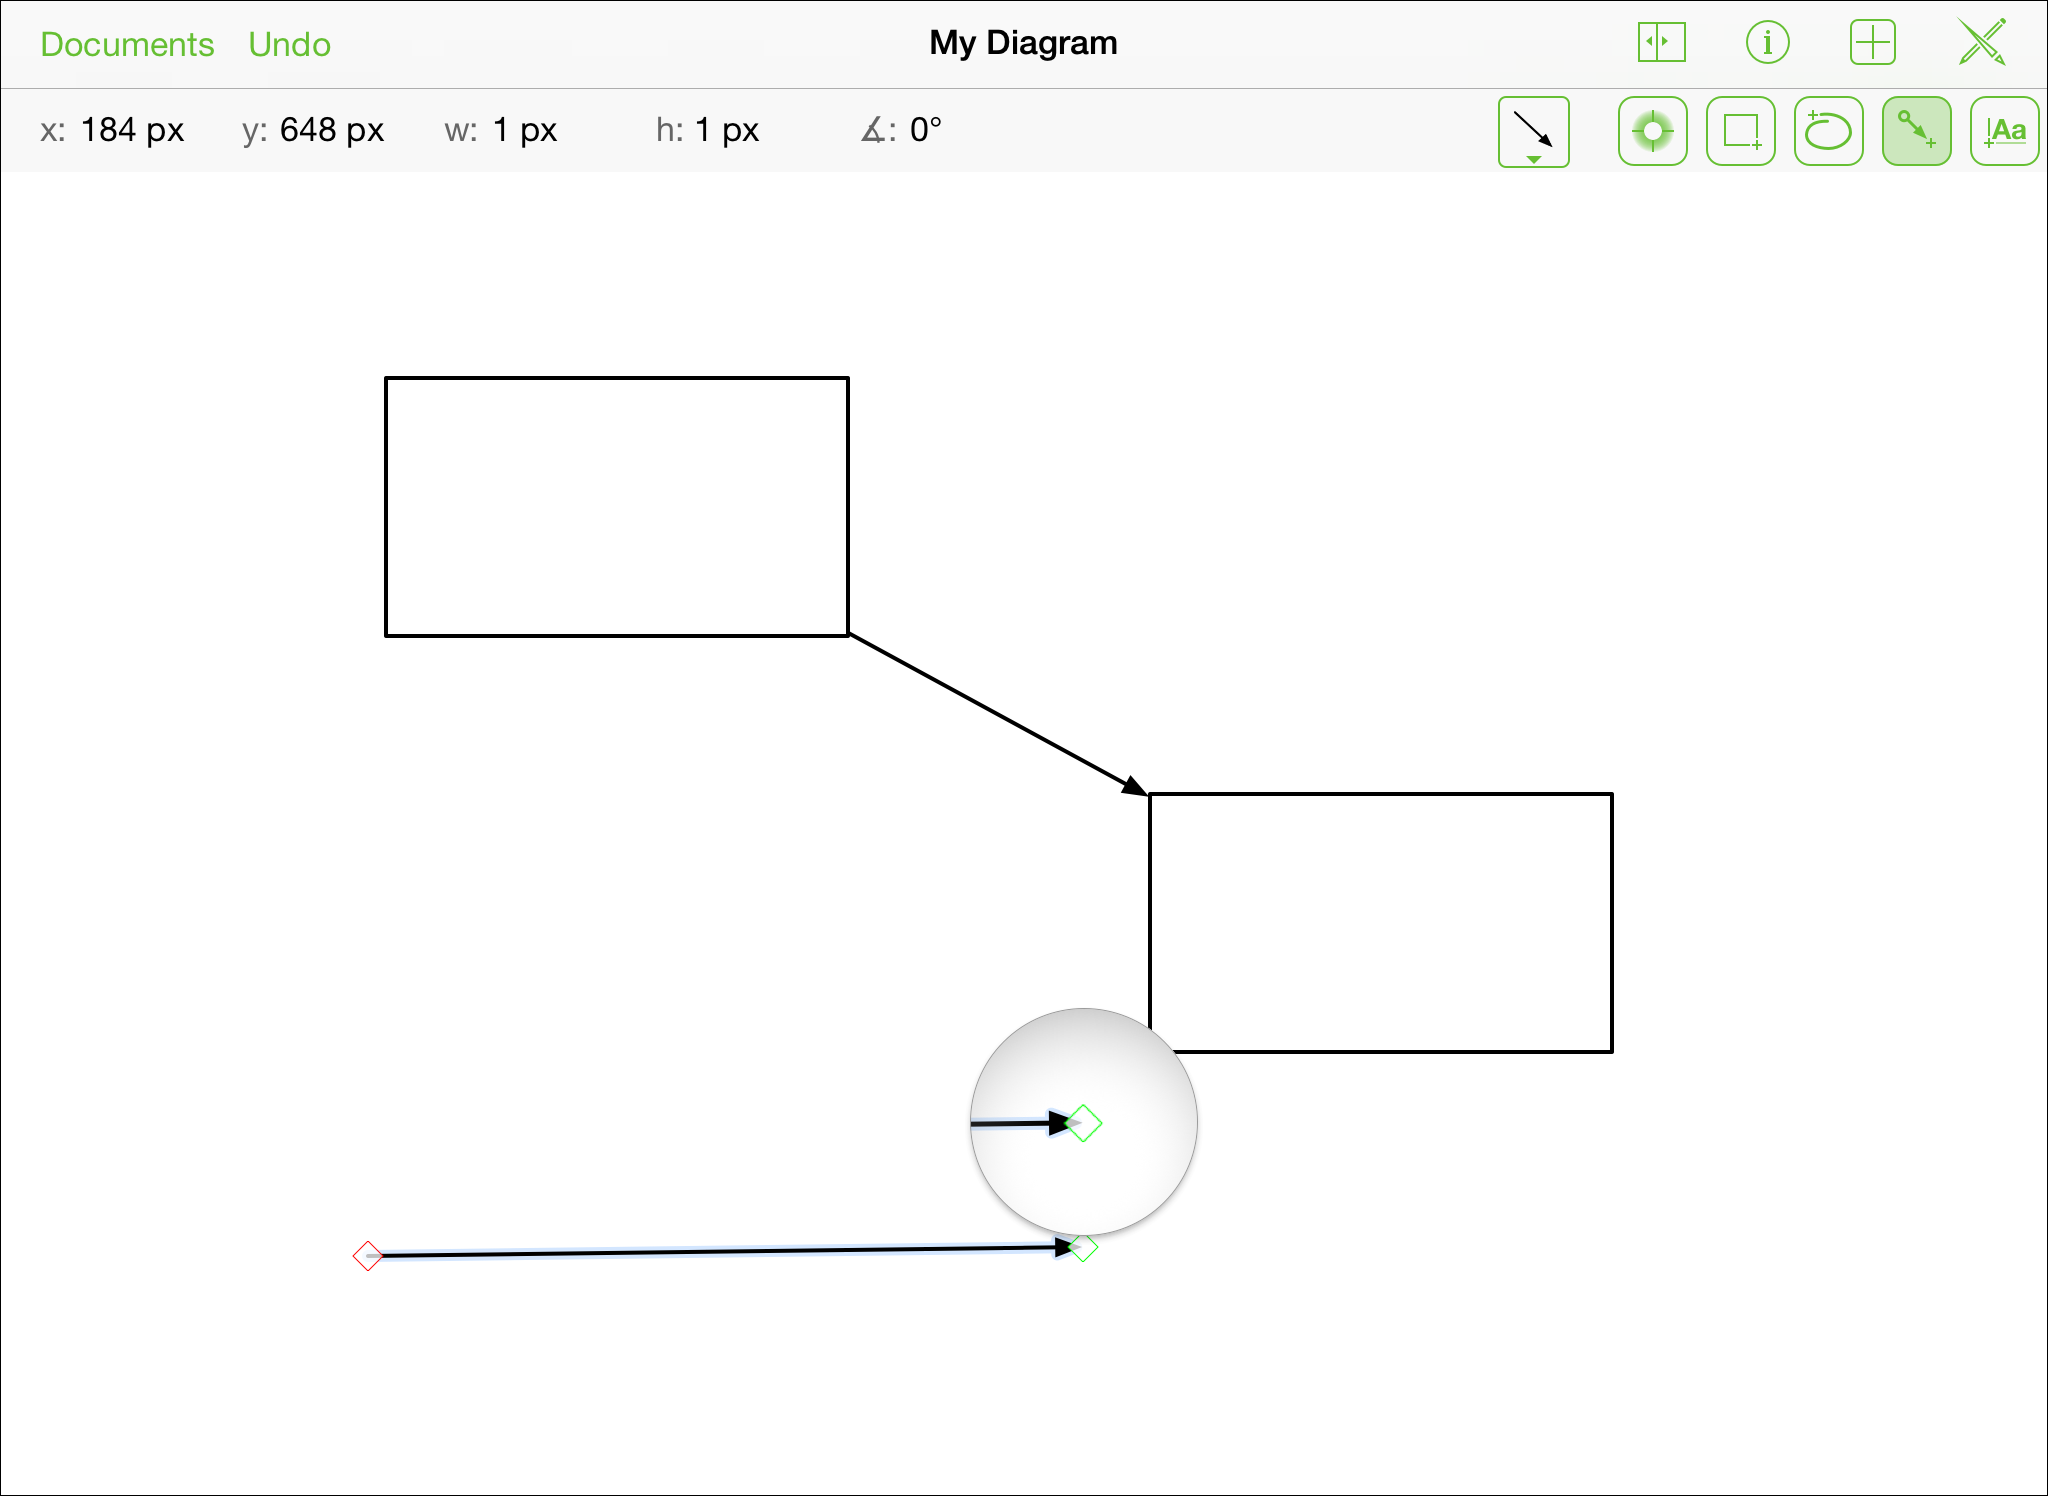
Tap
 to close the Draw toolbar.
Touch and hold an endpoint of your line…
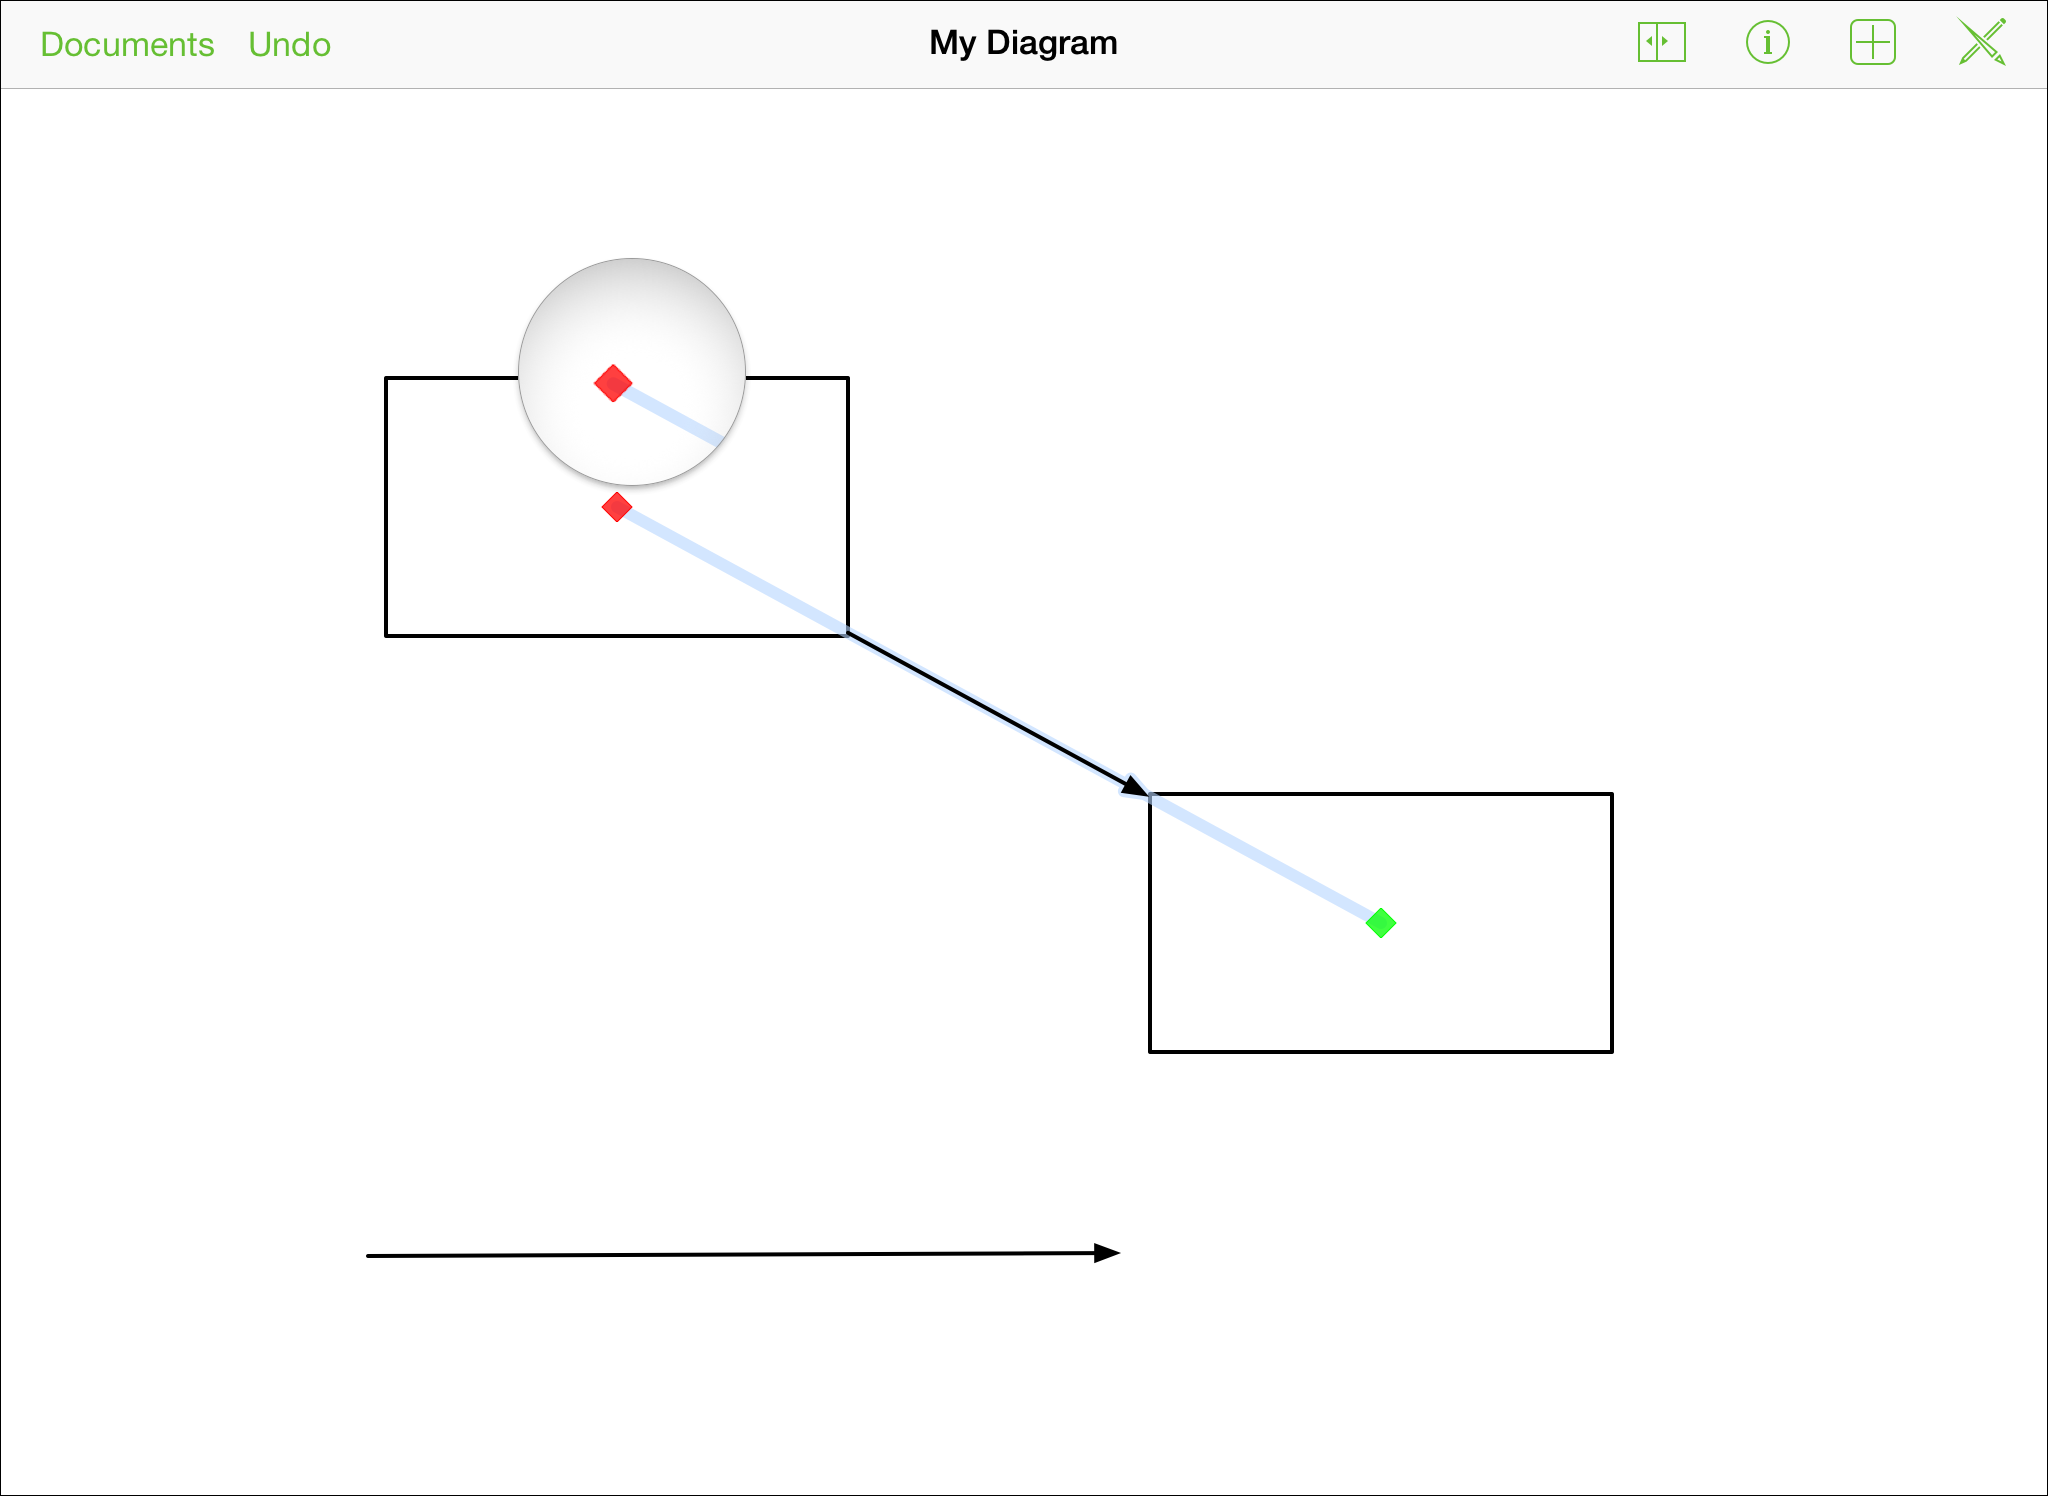
…and then drag it to the new desired location:
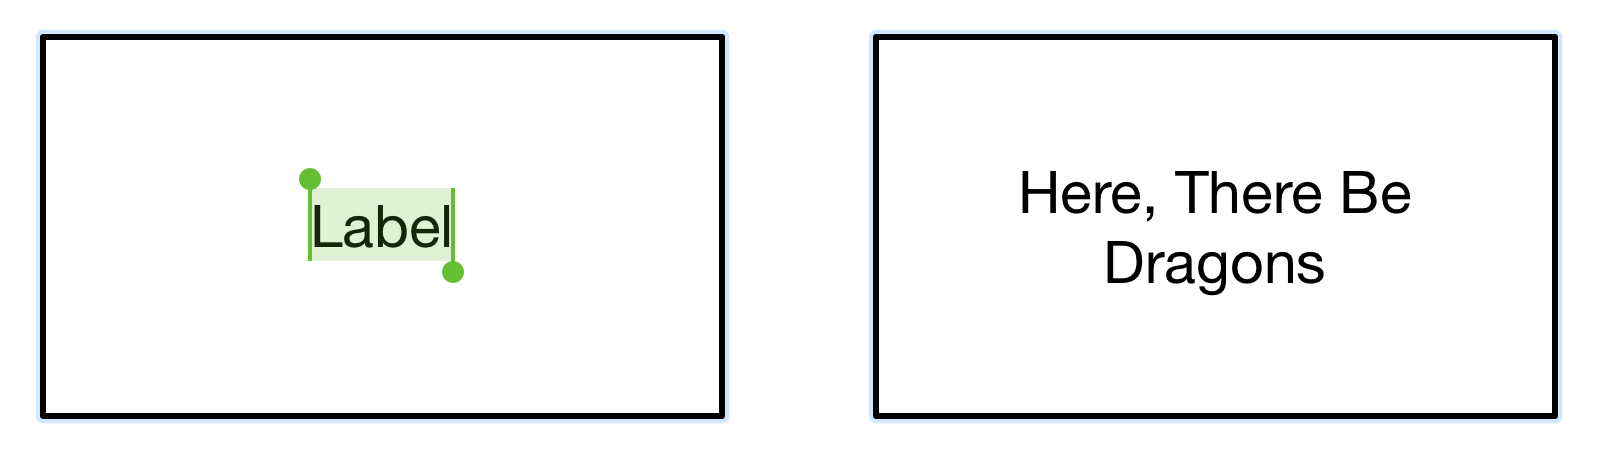
Adding Labels
Labels are text objects that are attached to shapes and lines, typically used to define an object or the relationship between them.
You can also add standalone blocks of text to the Canvas by using the Text tool (). Such blocks of text are independent from the other objects on the Canvas unless you group them together.
To add a label to a shape, double-tap the shape. The default text, Label appears already highlighted so you can just enter text to give the object a proper name.
 When you’ve finished typing, tap the Hide Keyboard button in the lower-right corner of your iPad’s keyboard. If you’re using a Bluetooth keyboard, press Esc to accept the text you’ve entered.
If you ever need to edit a label, all you need to do is double-tap the label to select it, and then make the changes you need. If you need to insert or delete a certain character, you can touch and hold on the text object and then use your fingertip to move the insertion point to another location in the text.
To add a label to a line:
Double-tap on a line and a text label appears.
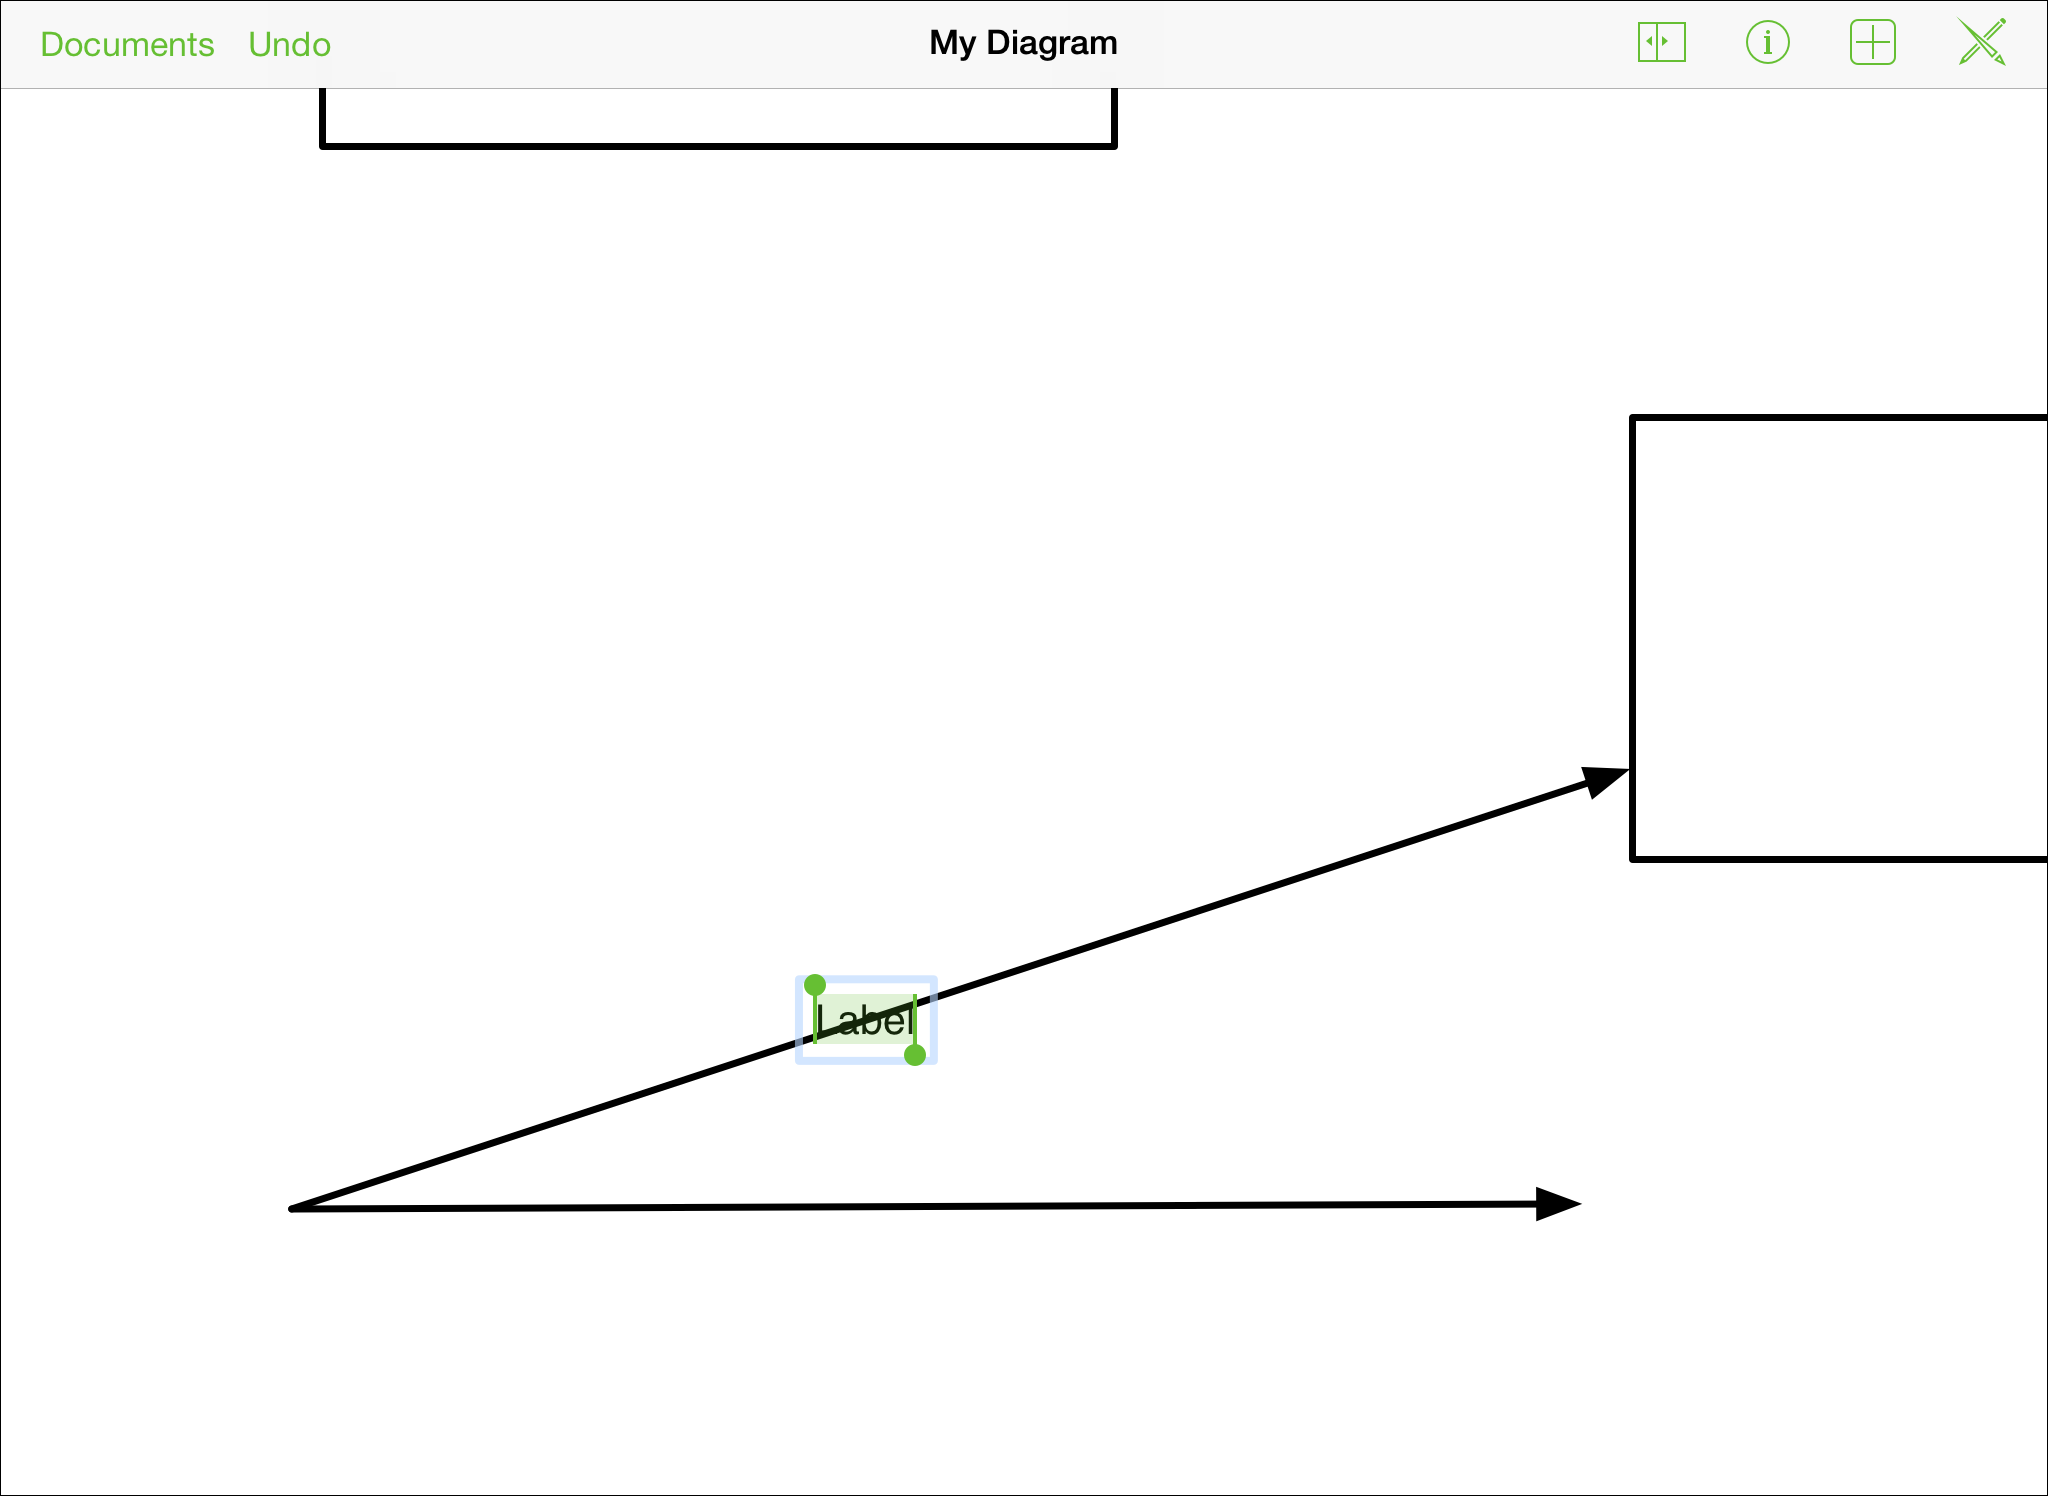
Enter some text to describe the action related to the line’s direction.
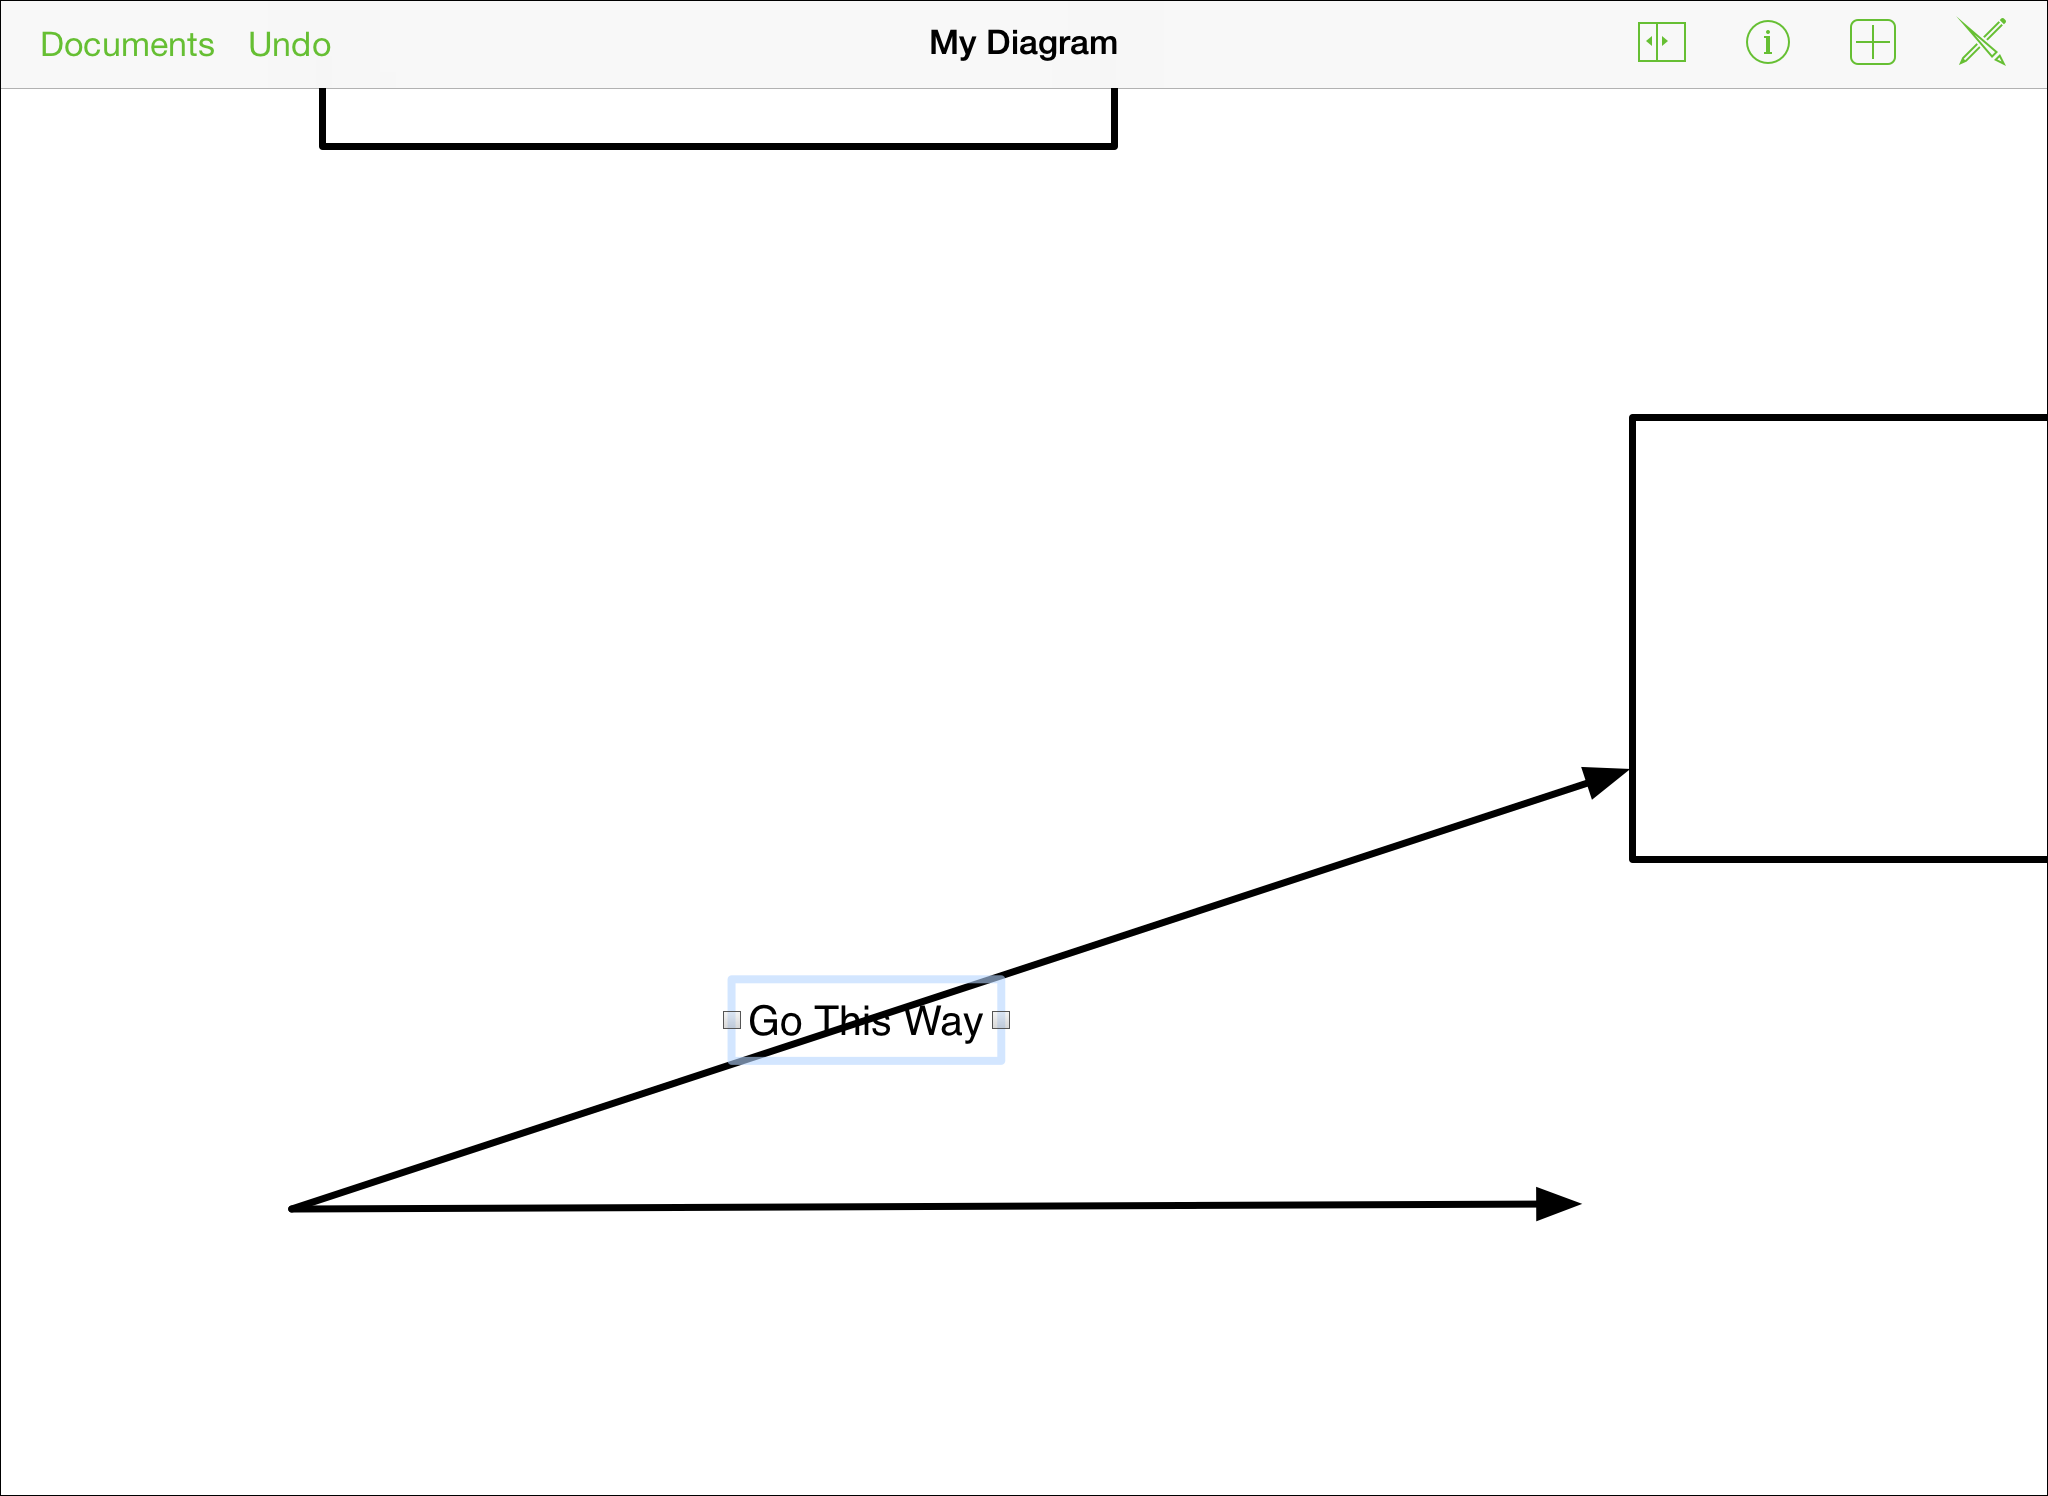
To adjust the label’s position on the line, tap
 to open the inspector.
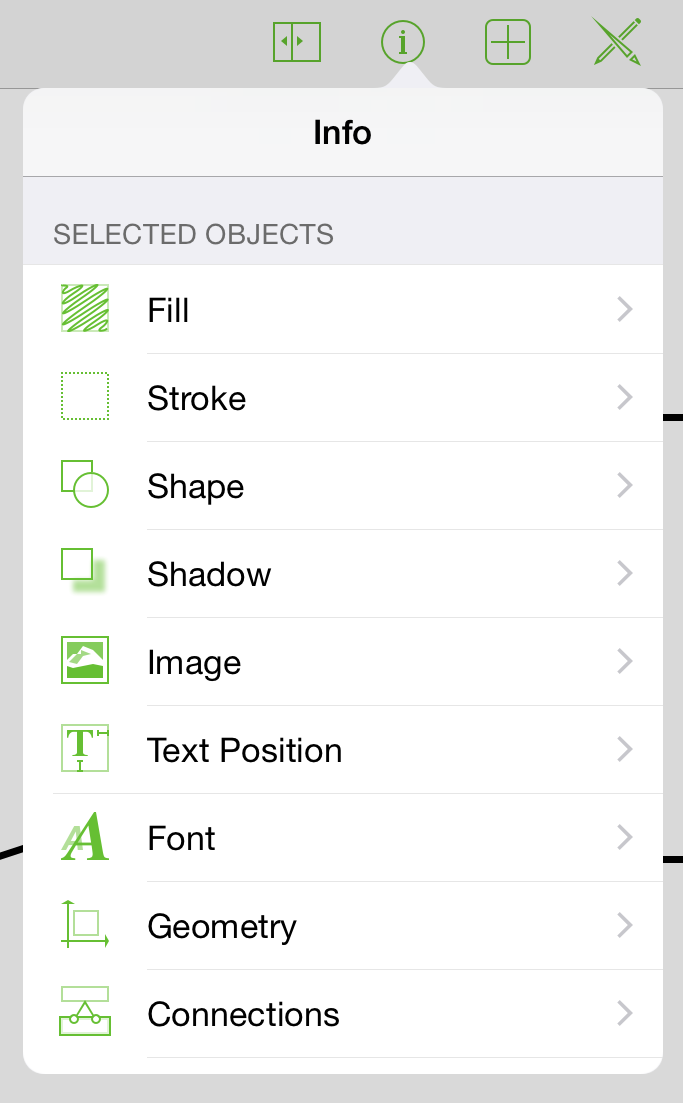
You can:
- use the Fill inspector to add a background color to the label.
- use the Text Position inspector to adjust the label’s position and text alignment.
- use the Font inspector to change the font size, style, and color.
- use the Geometry inspector to rotate the label if you need to.
- use the Notes inspector to add additional information about the label or the objects it connects to.
Tip
Remember, if you ever need to add text to an object, line, or the canvas, just double-tap the thing that needs text and OmniGraffle grants your wish.
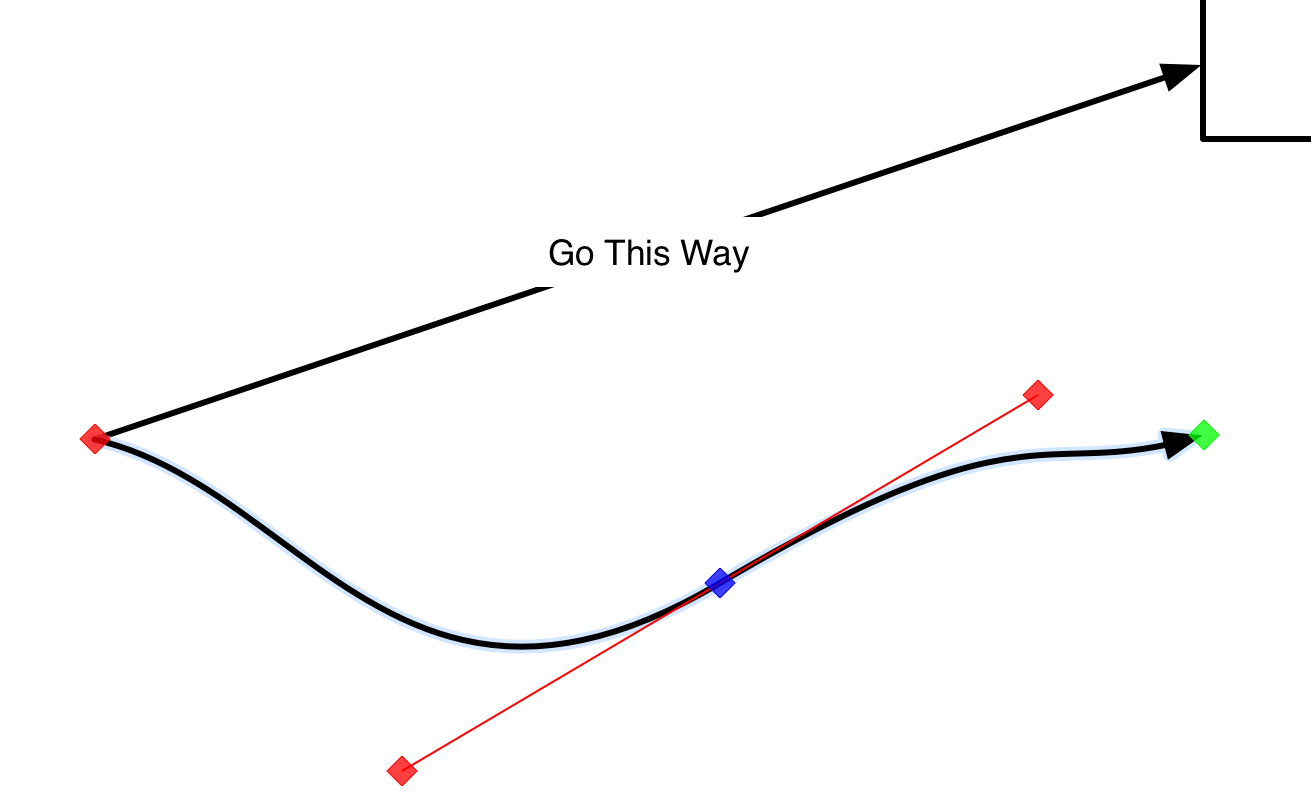
Adding Control Points and Curves to a Line
All forms of drawing begin with a basic line. And while the Line tool makes it easy for you to draw a straight line, there are times when you need to angle or bend a line to get the effect you’re after. For this, you need Control Points. Just as the name implies, a control point gives you more control over the line’s appearance and style.
To add a control point to a line:
Tap
and select the line.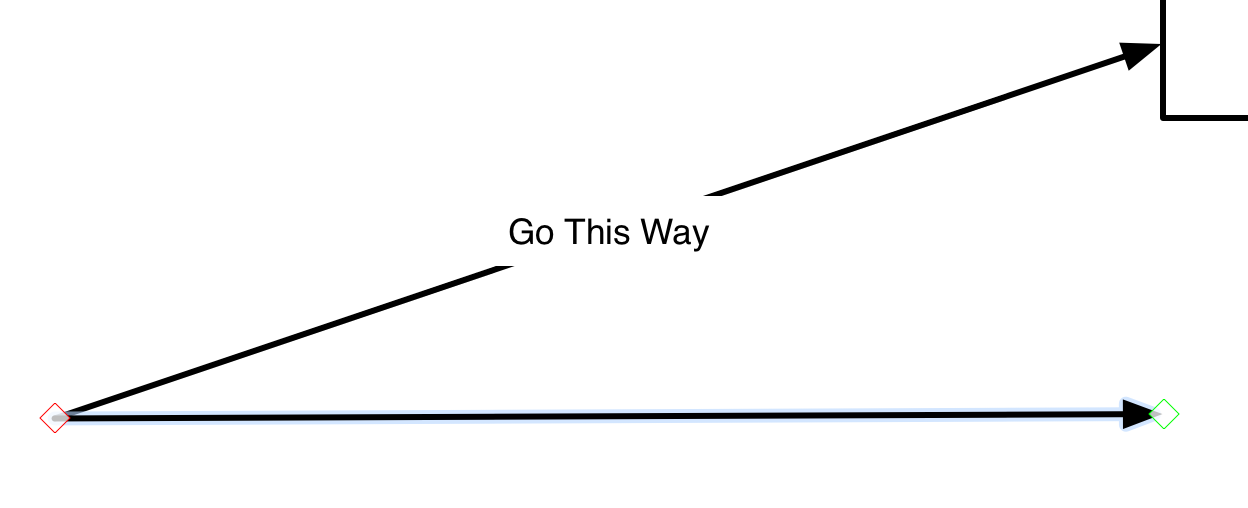
Double-tap
to make the Line tool persistent.Double-tap on the line where you’d like to place the control point. A little blue diamond appears on the line where you tapped.

To move a control point along the line, touch and hold the control point and then slide it along the path of the line.

You can add as many control points as you’d like to a line (as long as all of them fit, of course). After adding the control points, you can further change the line’s appearance using the Line inspector.
For example, you can change the line from Straight to Curved to get a wavy line, or you could change it from Straight to Bézier so you can create beautifully curved lines with ease.
For more details about Bézier curves, see Working with Bézier Curves later in this chapter.
Selecting, Resizing, and Moving Objects
Once you’ve added some objects to the Canvas, you may find that you need to move things around to get the right configuration. For this, you will primarily need the Selection tool.
Start by tapping ![]() , and then tap in the Drawing toolbar to make it active.
, and then tap in the Drawing toolbar to make it active.
To select an object, just tap it.
To select everything on the Canvas, touch and hold the Canvas for a second or two, and then let go. A contextual menu appears just above where you pressed; tap Select All in the menu.
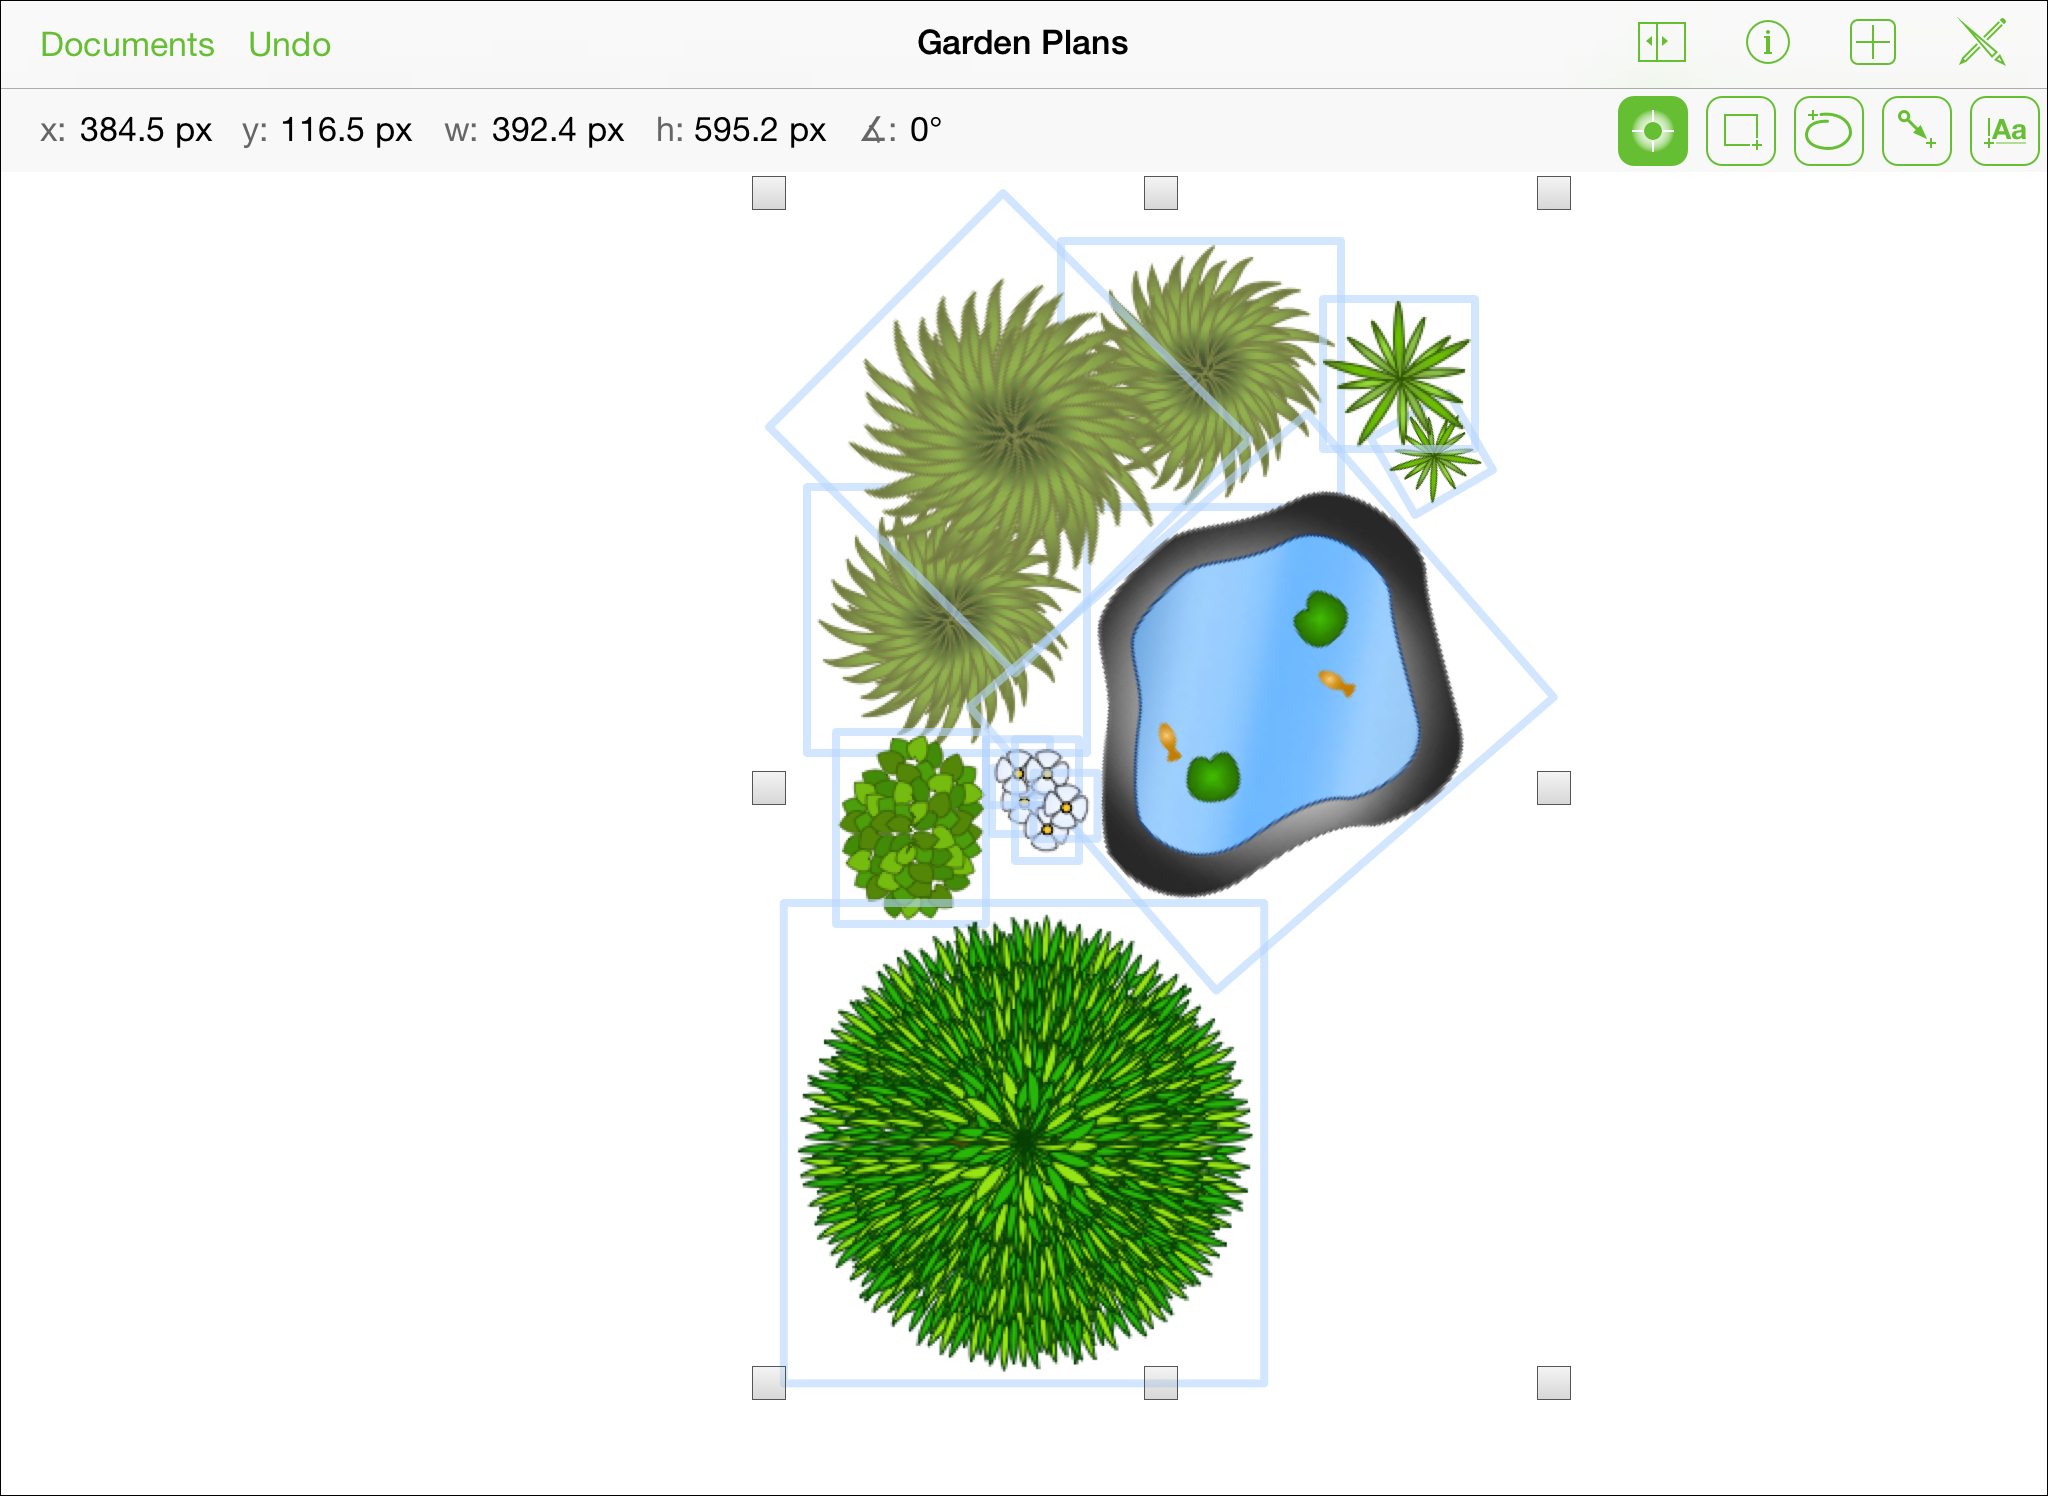
To select multiple objects on the Canvas, touch and hold on the Canvas (don’t let go!); when the selection indicator appears, drag over the objects you’d like to select.
Alternatively, you can touch and hold an object with one finger, while tapping others with another, to add to your selection one object at a time.
To resize an object (or group of objects):
- Select the objects you wish to resize.
- Touch and hold one of the handles, and then drag to resize (either larger or smaller). If the object is a shape or a label, a heads-up display appears on the canvas with the selection’s dimensions.
To specify a size without dragging, tap the object and use the Geometry inspector to specify height and width. You may also want to turn on the Maintain Aspect Ratio and Scale Contents options at the bottom of the Geometry inspector to ensure that your objects continue to look their best.
To move an object: touch and hold the object, and then drag it around the Canvas until you find an appropriate place for it. If the object has connections, its connecting lines come along for the ride, too.
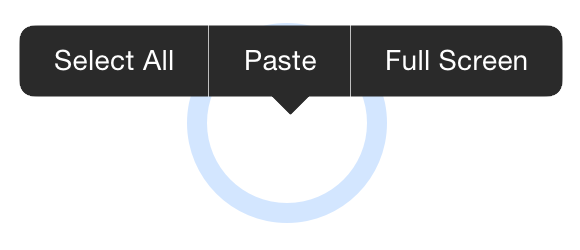
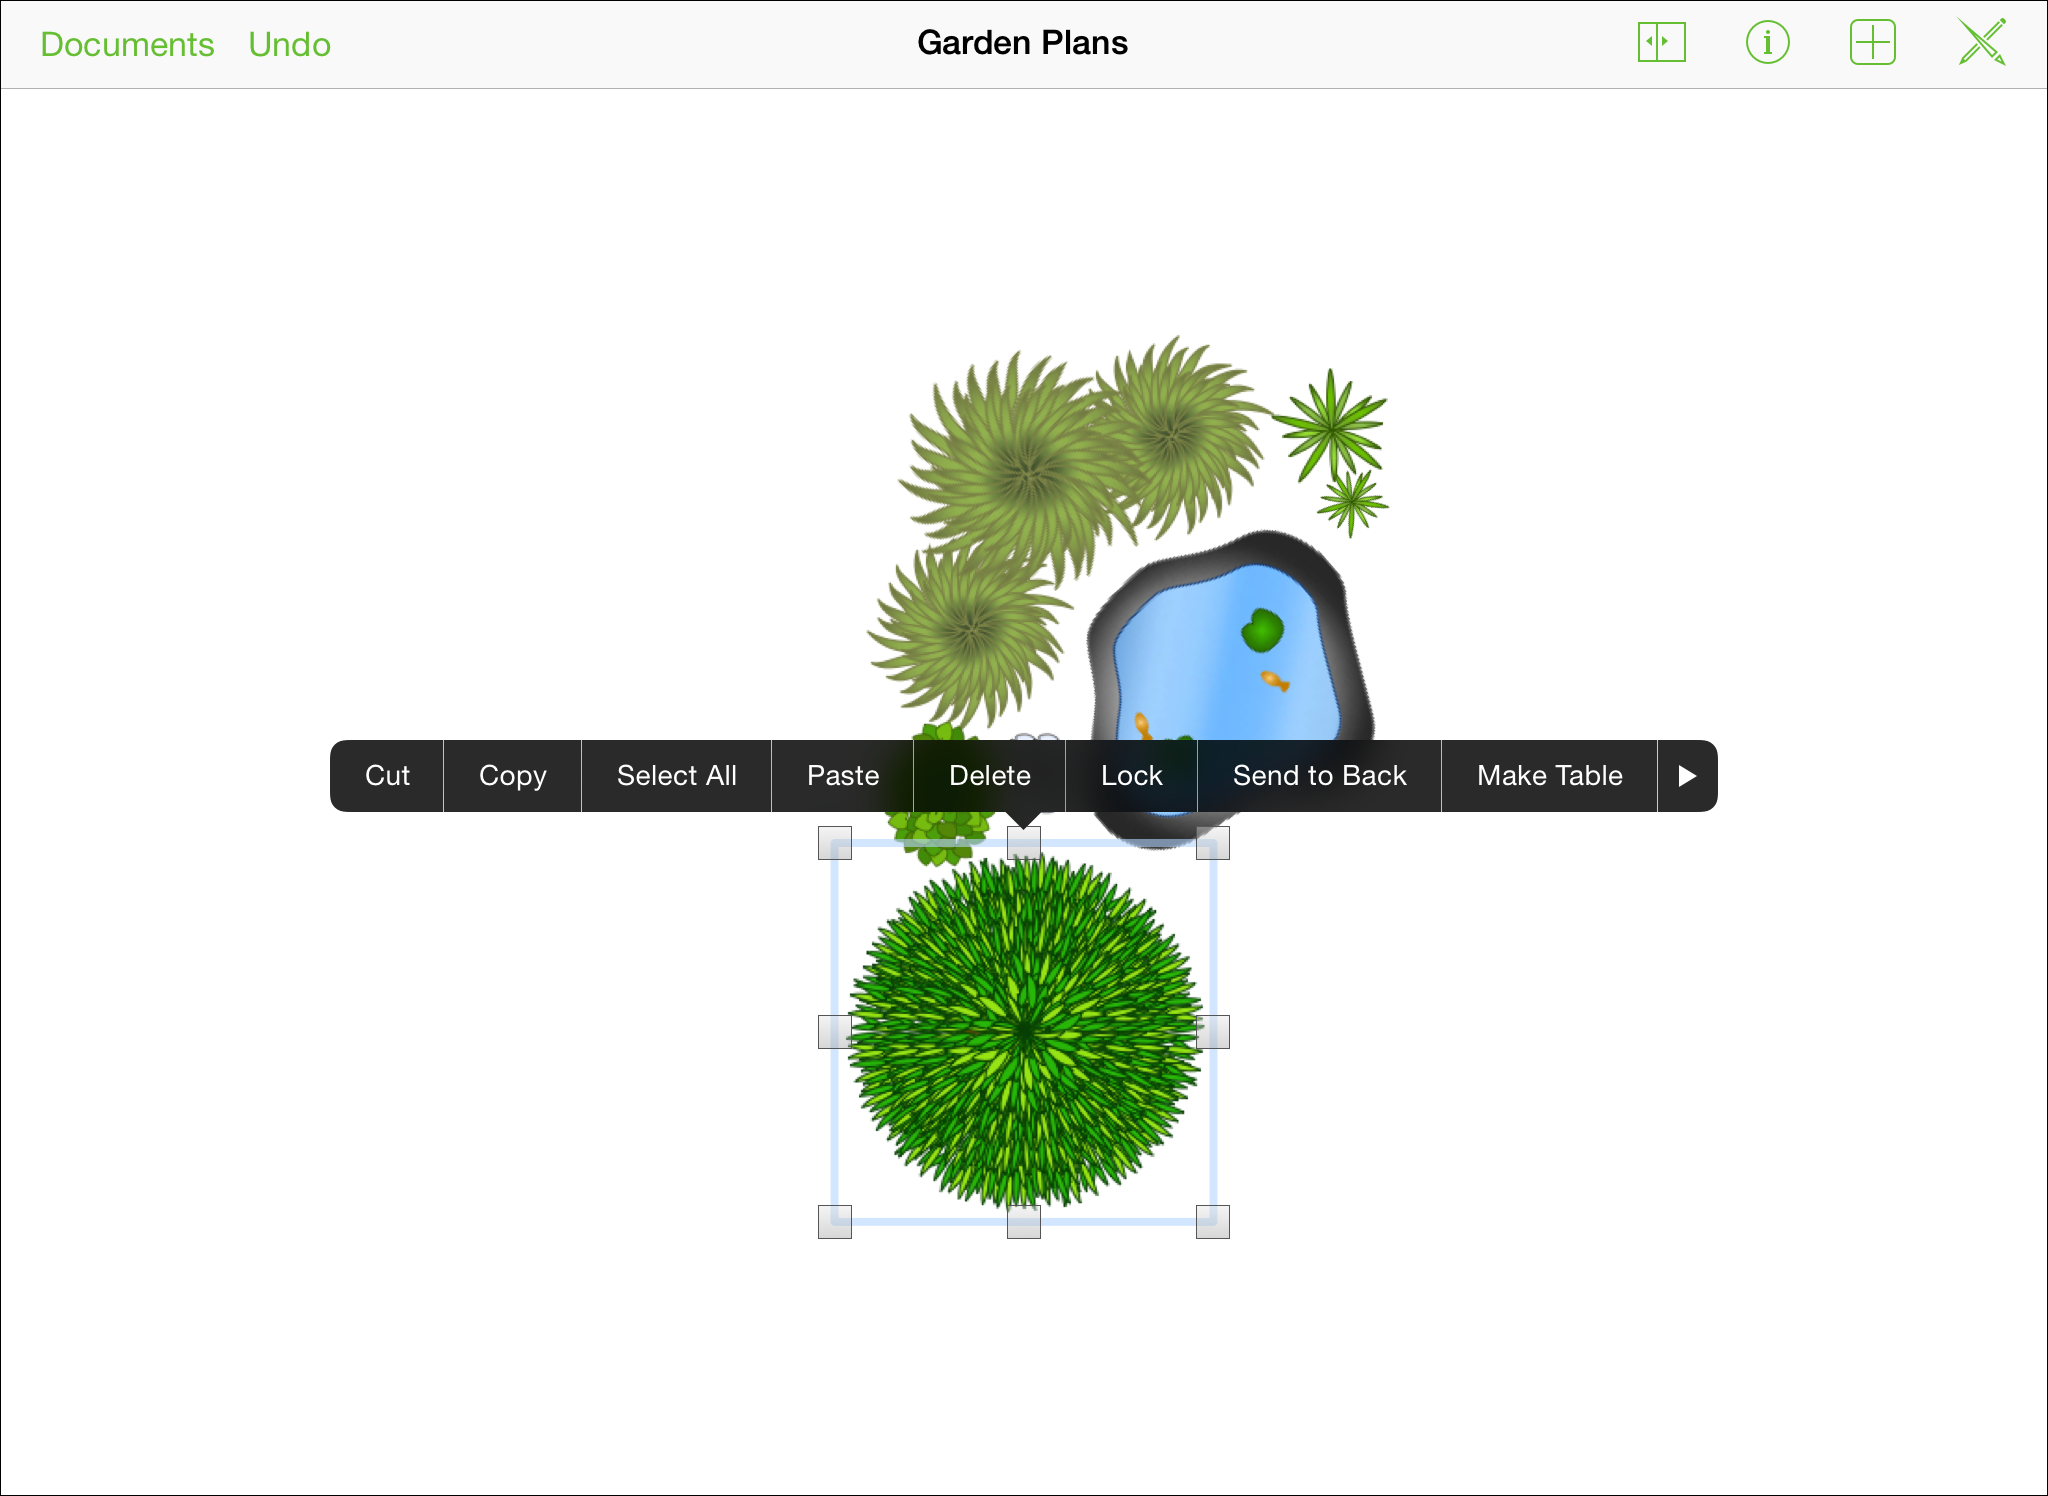
Making Good Use of the Contextual Menu
When you touch and hold on an object or the Canvas, a black and white contextual menu appears above the thing you’ve touched. This menu, much like the contextual menus you find on your Mac, offers shortcuts for common things you need to do.
If you touch and hold on the Canvas, the contextual menu offers these options:
- Select All selects everything on the Canvas.
- Full Screen hides everything but the Canvas. Choose this option for when you need an unfettered view of your work, or when you want to show off the things you’ve been drawing in OmniGraffle. To get the navigation and drawing tools back, touch and hold on the Canvas, and then choose Exit Full Screen from the menu.
- A third option, Paste appears in the Canvas’s contextual menu if something has been copied or cut to the clipboard.
Options you’ll find in the contextual menu when you select a single object are:
- Cut
- Copy
- Select All
- Paste (if something is already on the clipboard)
- Delete
- Lock/Unlock
- Send to Back
- Make Table (Pro)
- Copy Style
- Full Screen/Exit Full Screen
And finally, if you have multiple objects selected and touch and hold to reveal the contextual menu, you’ll get all of the previous options, plus Group or Ungroup.
Using the contextual menu can save you a lot of time for performing tasks you might otherwise use a keyboard shortcut for when using OmniGraffle on your Mac.
Working with Bézier Curves
OmniGraffle isn’t just for creating flow charts and diagrams; it’s a full-blown illustration app. With a little practice, you can quickly master drawing complex shapes in OmniGraffle. And once you have those beautiful things on your Canvas, you can use the Inspectors to style objects to your liking.
This quick tutorial will show you how to take a basic shape (a triangle) and turn that into a leaf. Just follow along…
From your favorite folder, tap
 to create a new document.
Choose the Autosizing - Pixels template.
In the navigation bar, tap
 to open the Stencils menu.
Select Shapes.
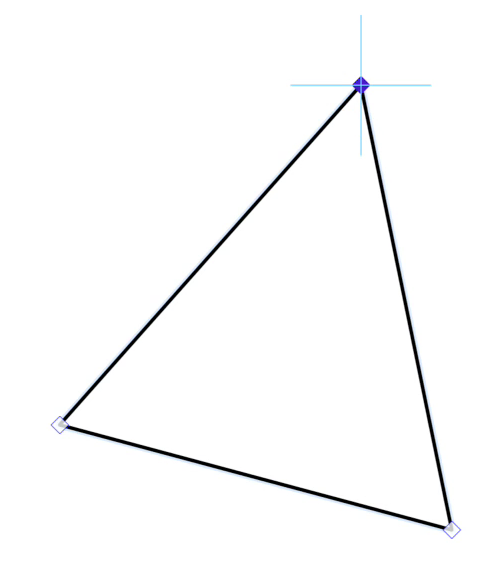
In the listing of Plain shapes, double-tap the triangle shown here to add it to the Canvas:
Tap anywhere on the Canvas to make the Stencils menu go away.
You now have a lone, right-pointing, triangle on the Canvas. And we’re sure that you’re thinking, “How in the heck am I going to turn that into a leaf?!”. Hang on, we’re getting there.

The next task is to rotate the triangle so it is pointing upward (or relatively so).
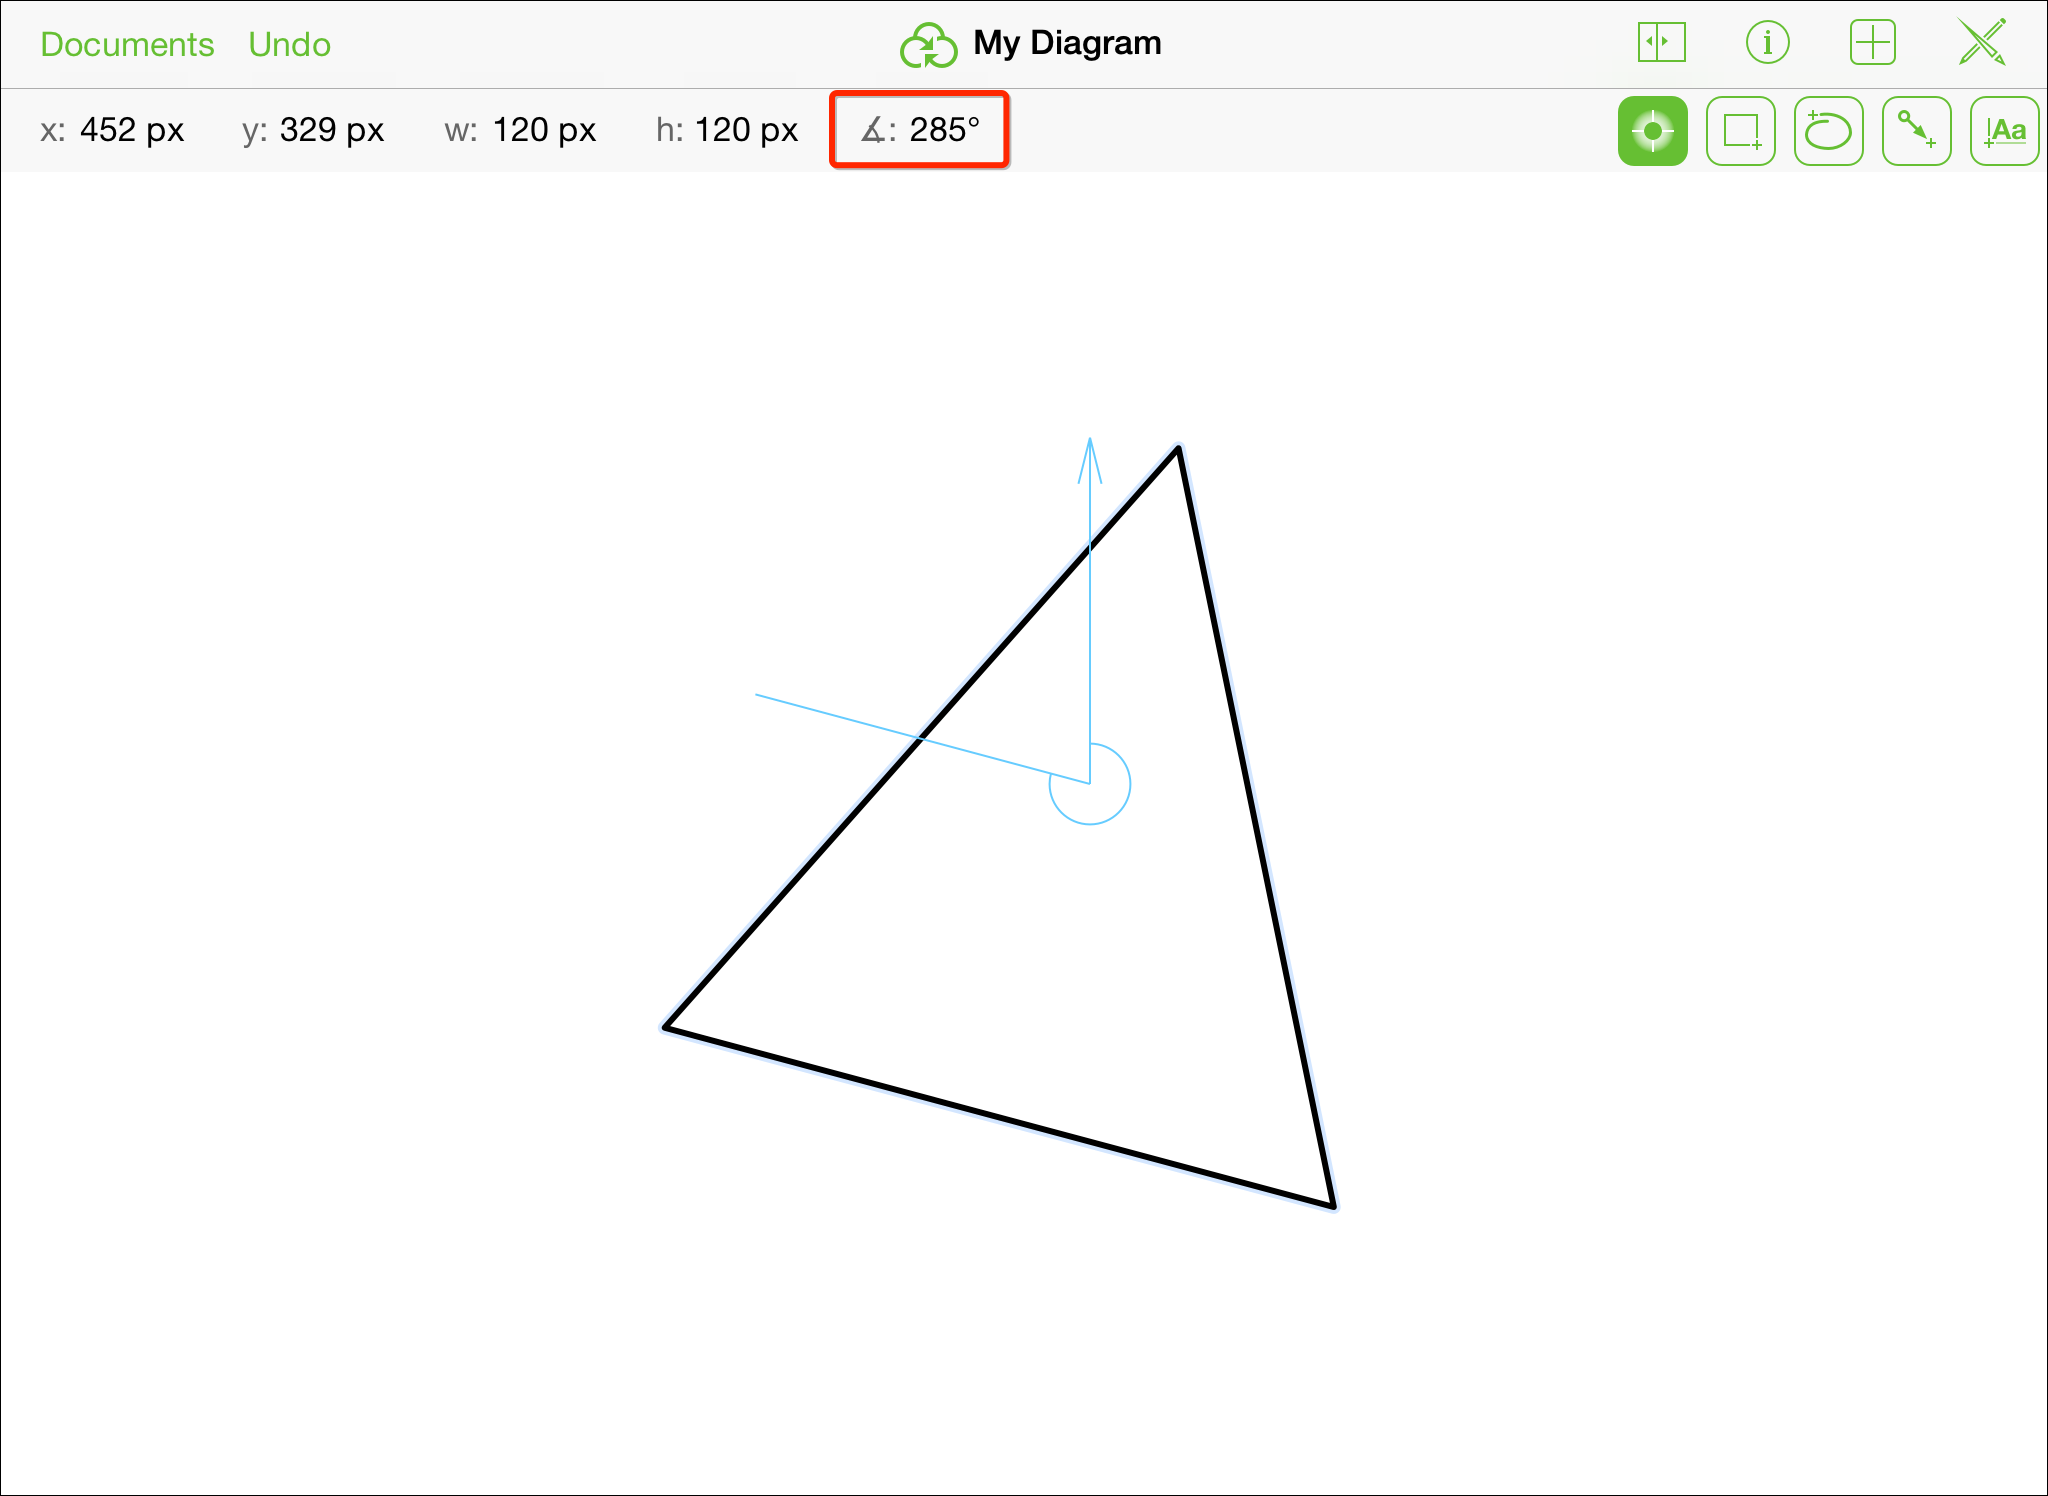
Pinch to zoom in on the triangle. Your zoom may vary; the point here is to zoom in enough so you can use a two-finger gesture to rotate the object.
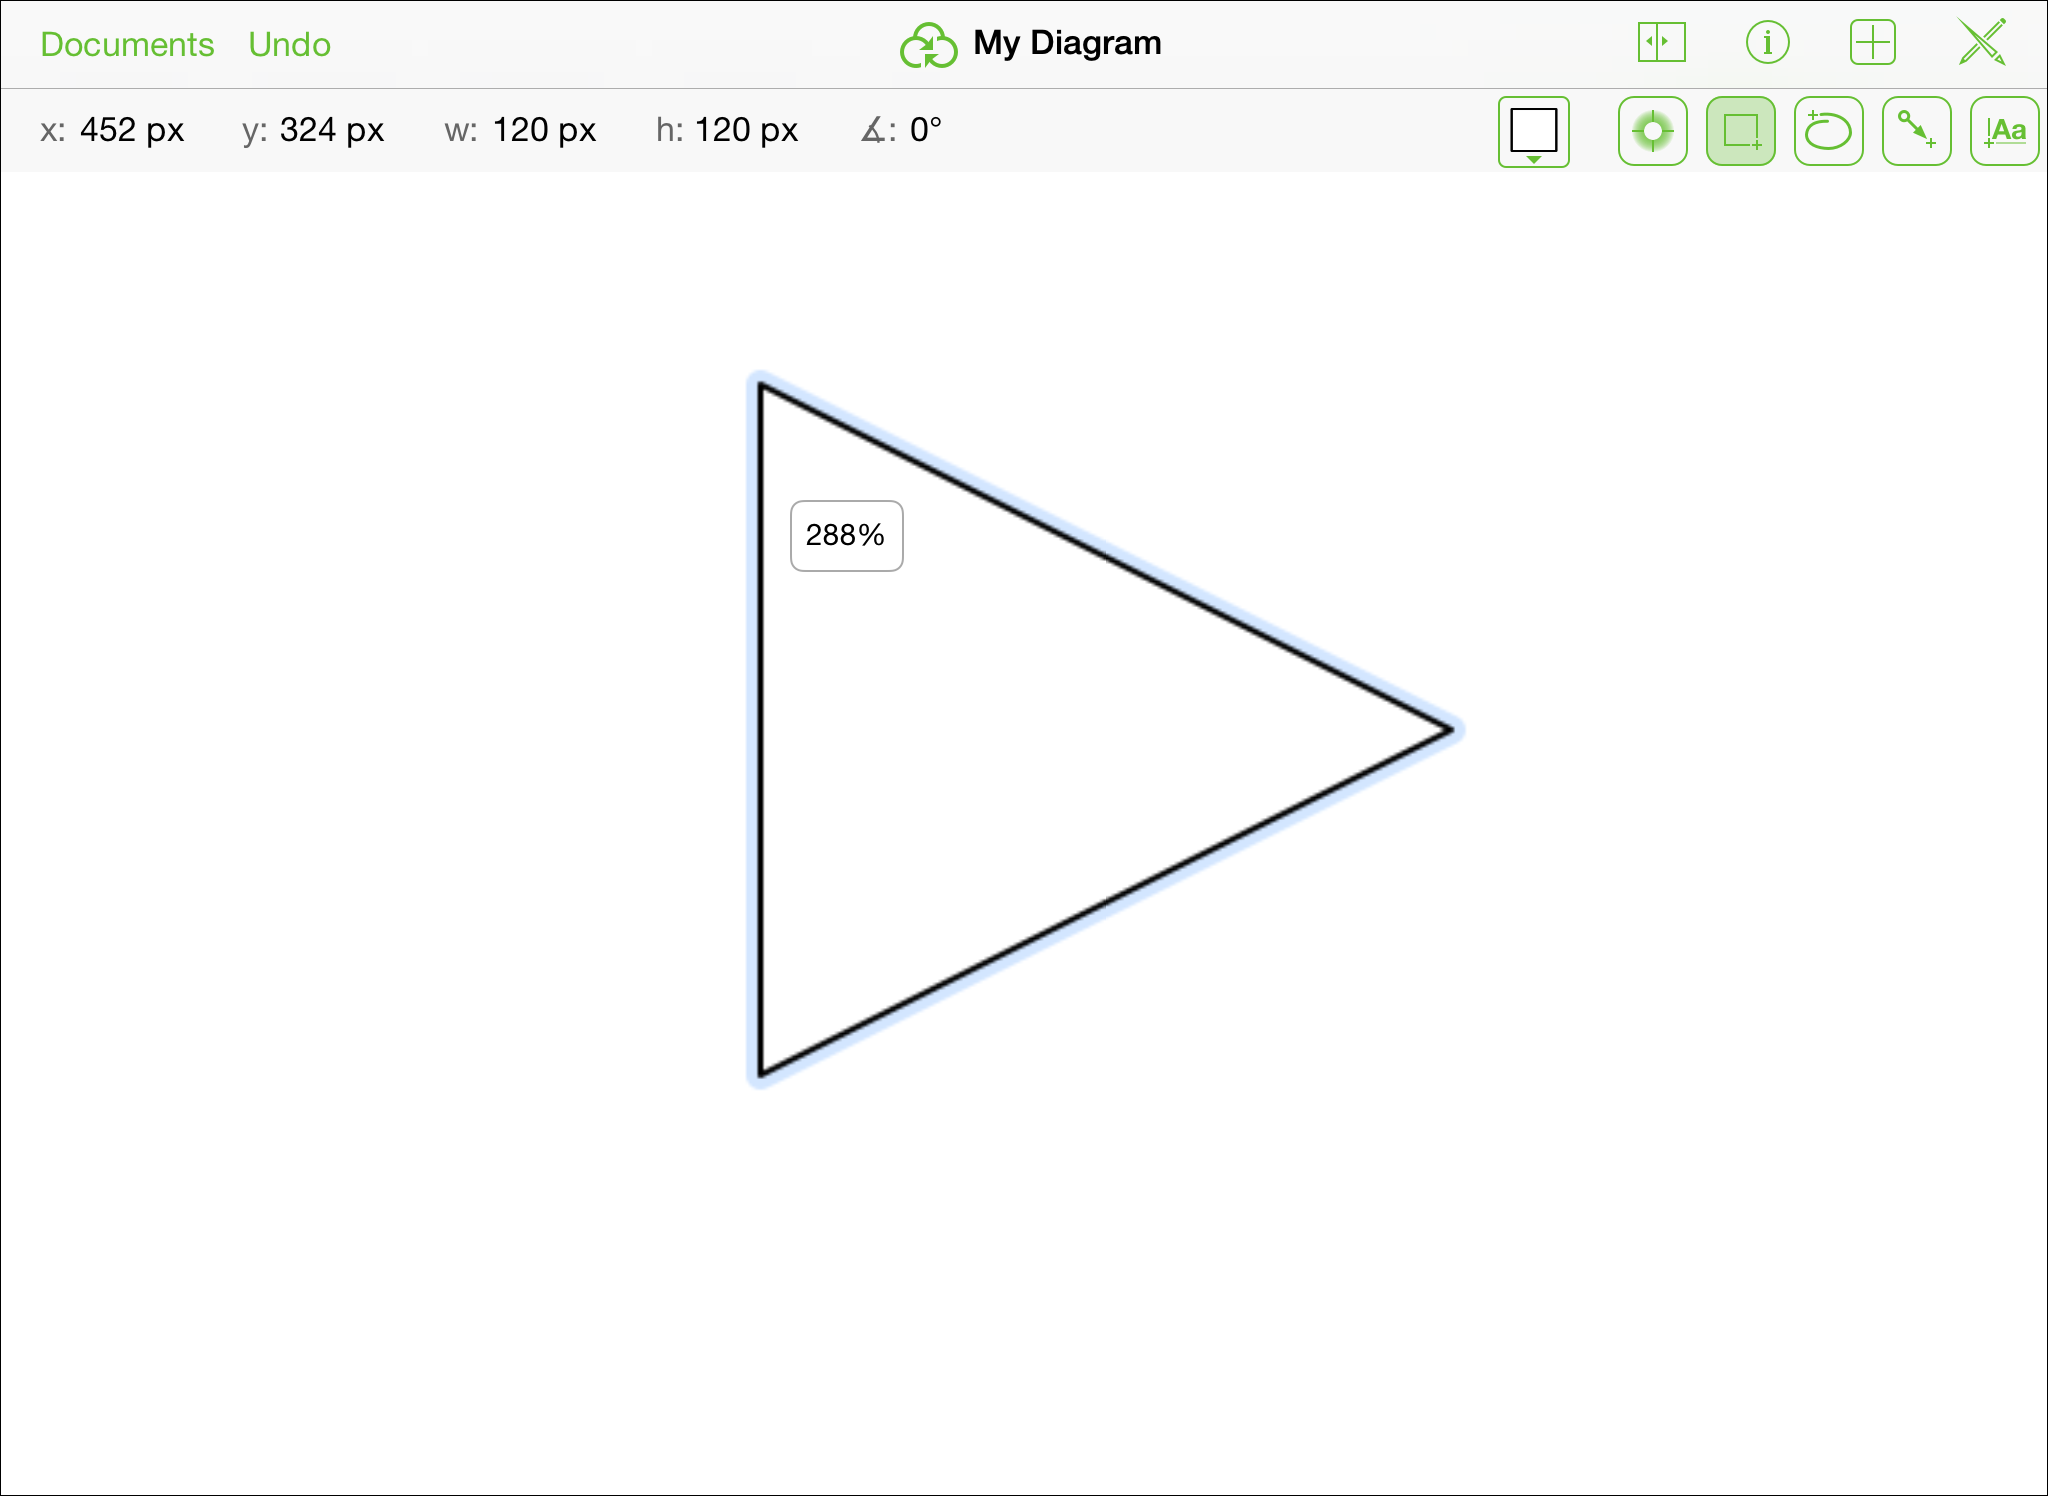
Using two fingers at the same time, touch and hold the triangle. Rotate your fingers slightly. When you see an upward-pointing blue arrow appear, remove one of fingers from the display and then use your other finger to rotate and spin the triangle to the left. You can see the angle of rotation in the Inspector bar; here we’ve set the angle to 285 degrees.
Now we can get down to the business of Béziers. Vive la Béziers!
With the triangle selected, double-tap
to make the Freehand tool persistent. By selecting the Freehand tool, the three points of the triangle now become editable control points. You’re going to convert all three into Bézier curves.Touch and hold the top control point of the triangle. There are a few things that happen rather quickly, so let’s step through them one by one:
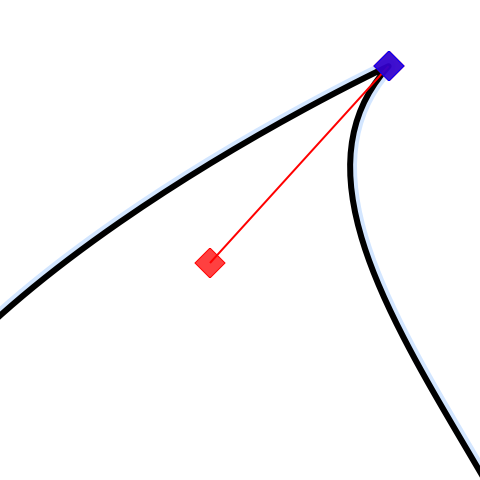
When you touch and hold on the top control point, a blue diamond animates around the point to isolate that control point; this to let you know you can drag the point around to change the shape of the triangle—but don’t do that, there’s more to be done.
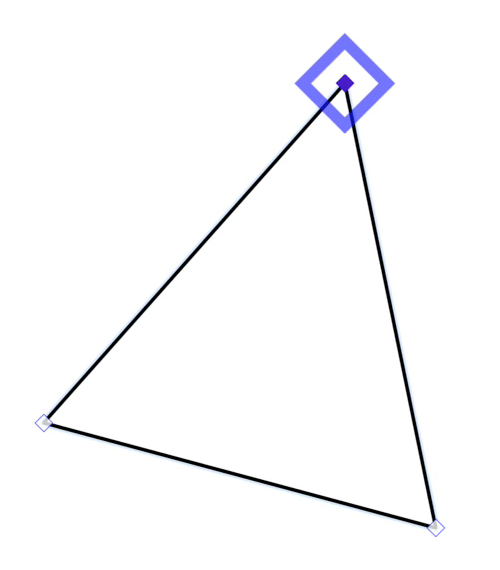
As you continue to touch and hold the top control point, the blue square changes to a red diamond; this to let you know that you can drag to convert this point into a Bézier point:
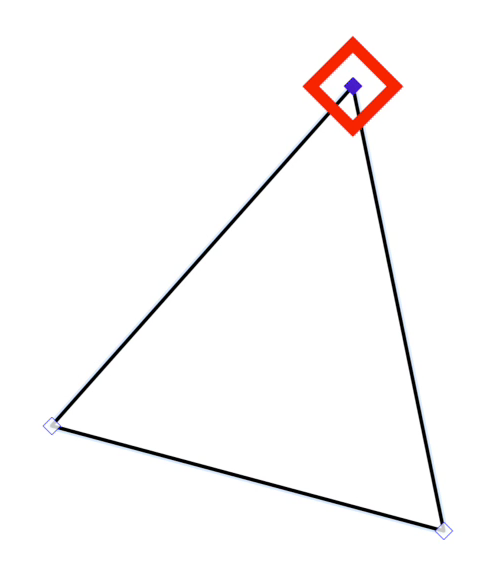
If you continue to touch and hold the top control point, the red diamond changes into a set of blue crosshairs; this to let you know that the control point is temporarily locked into position and you’re free to drag out the Bézier control bar.
Drag your finger to the right to convert the control point into a Bézier curve. A red Bézier control bar follows your finger as you drag it away from the control point.
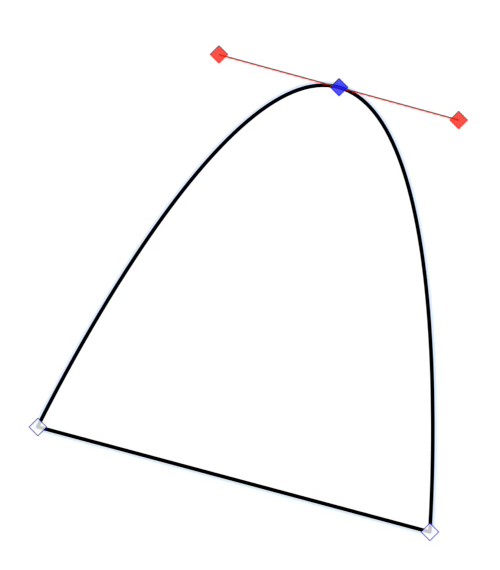
As mentioned earlier, all of this happens in the blink of an eye—okay, maybe two blinks—but it’s important to understand what’s happening here. For example, if all you wanted to do was grab a control point and drag it to alter the shape of the triangle, you would just have to wait for the blue triangle to appear over the point.
Convert the two remaining control points into Bézier curves. You should have something that looks like this:
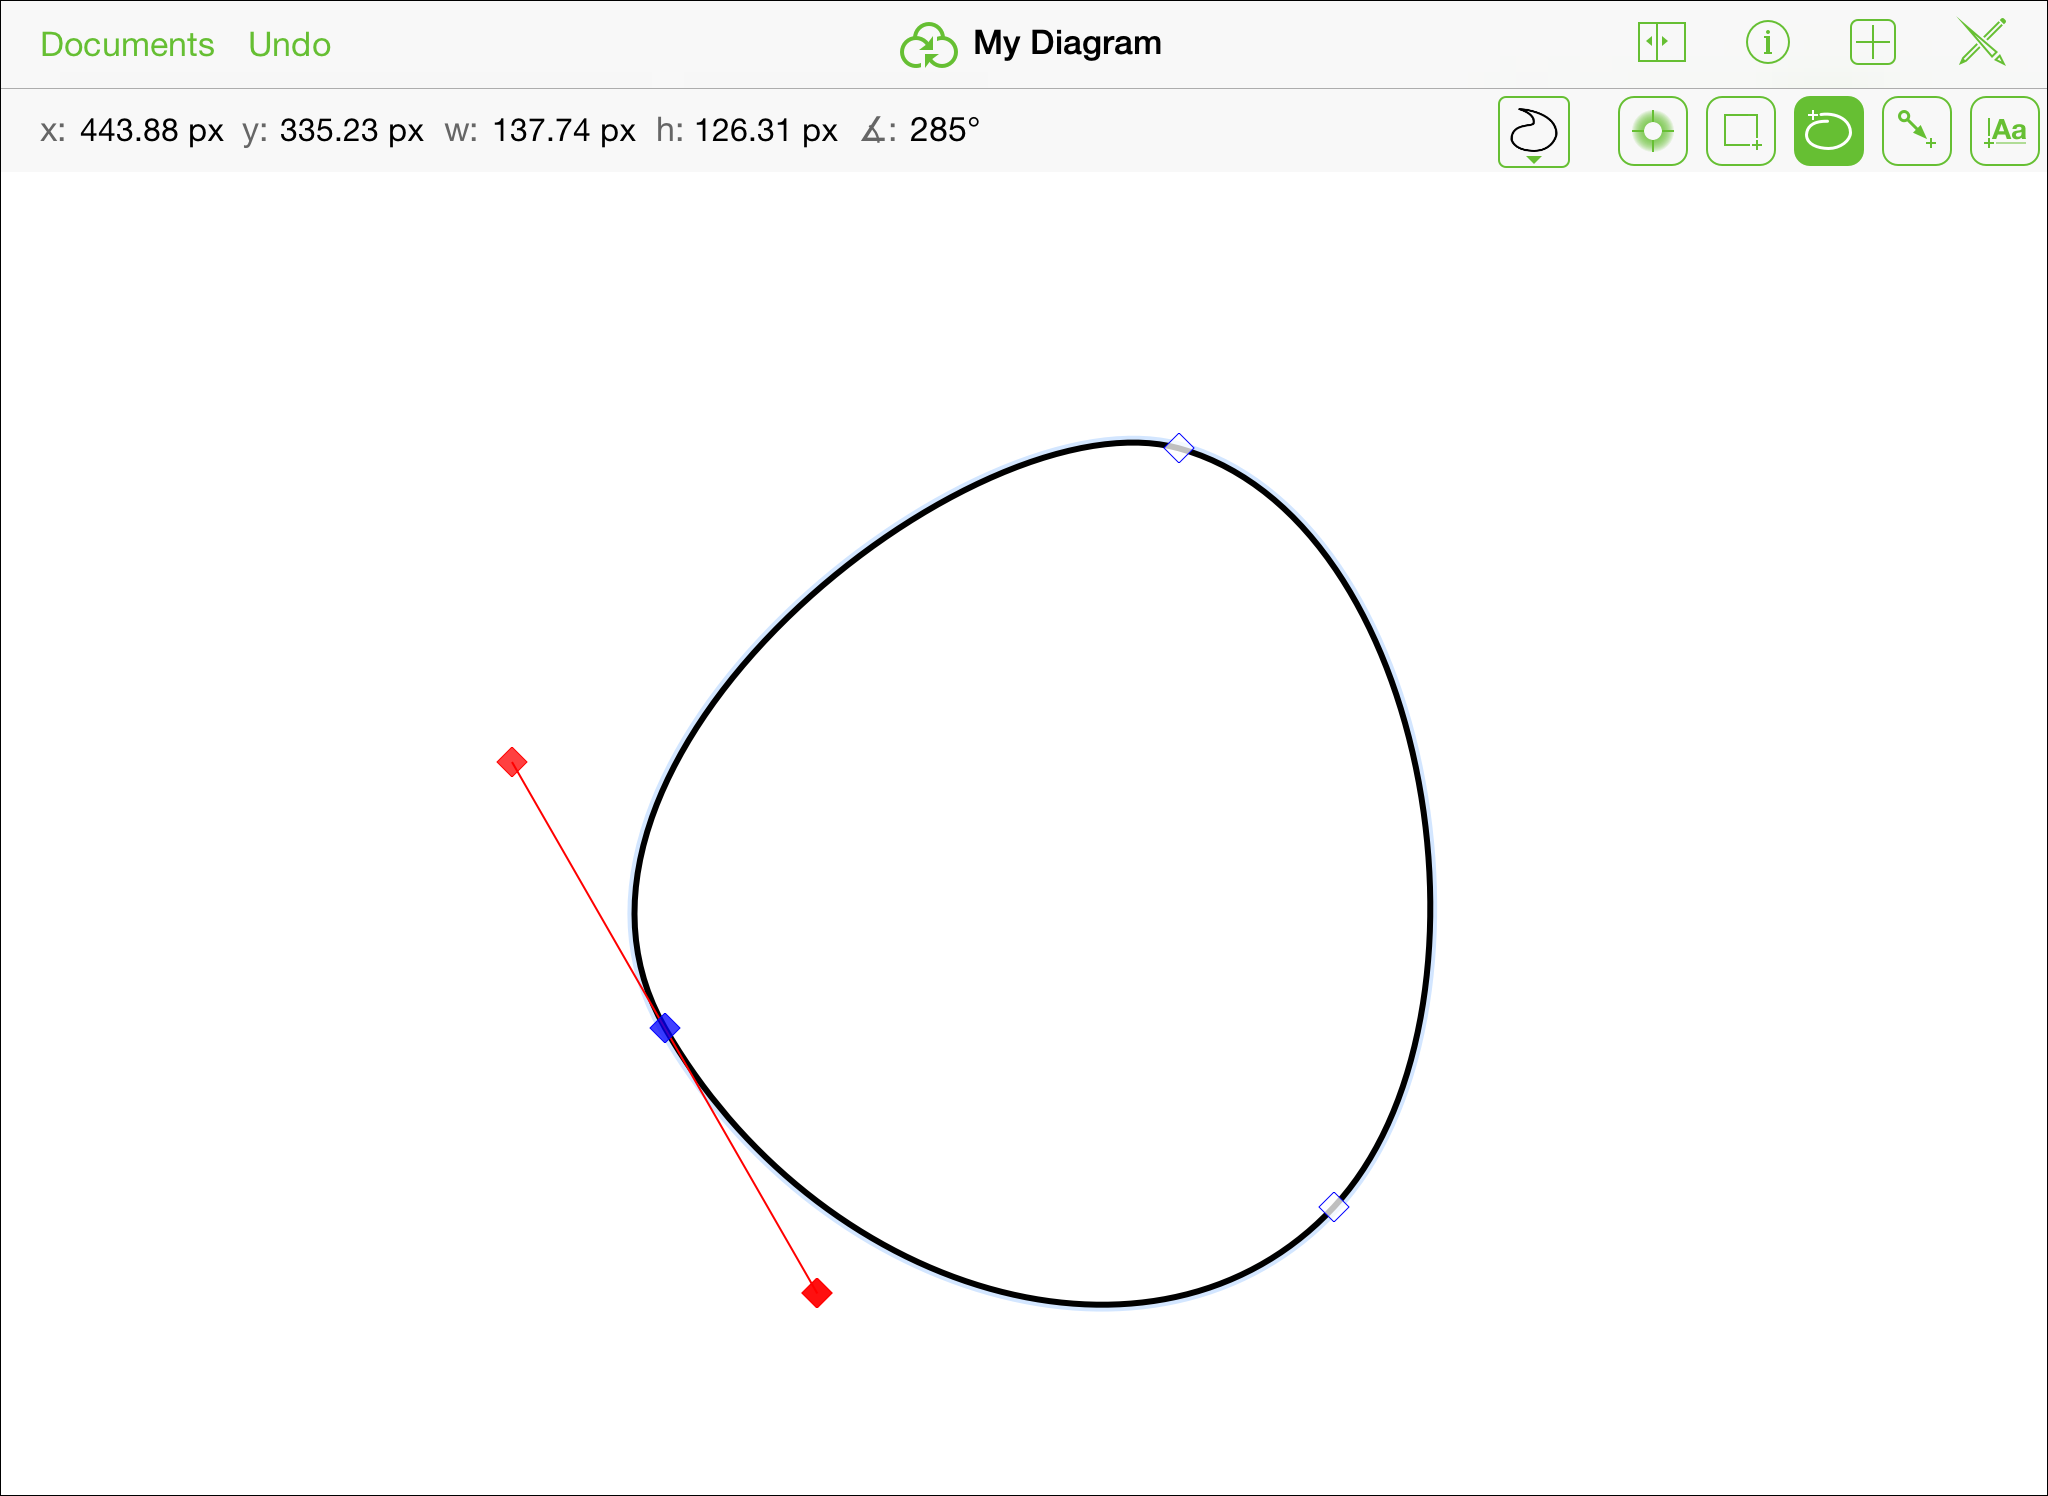
After converting all of the control points to Béziers, it kinda looks like an egg, but with a little work your freaky little circle will take form. Experiment with the different Bézier points on the circle:
Drag the Bézier handles in or outward to get the curvature of the leaf just right.
Double-tap between the existing control points to add more, if needed.
If you only need to adjust one side of the Bézier, first touch and hold one of the Bézier handles, and then touch and hold* somewhere else on the Canvas with another finger. That extra finger you’ve just added locks the Bézier curve’s control point so you can swing the other finger around to create angular or more oblique curves.
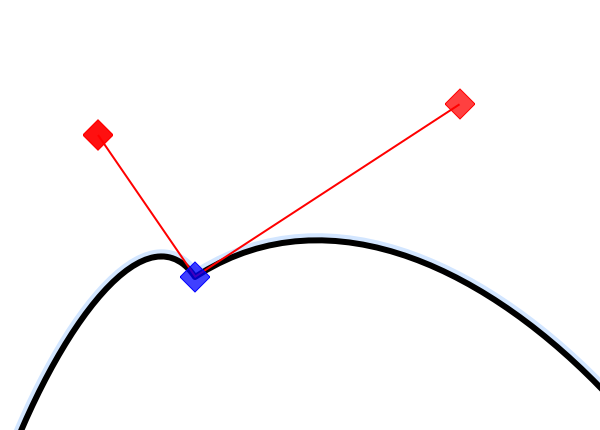
To create a sharp point with a curve on the other side, touch and hold one of the Bézier handles, and then touch and hold with another finger elsewhere on the Canvas to lock the control point. Now, with the finger that controls the Bézier handle, drag that inward to the control point. You’re left with a one-sided Bézier curve.
Finally, after a little work and by adding a few more lines, your leaf can look something like this:
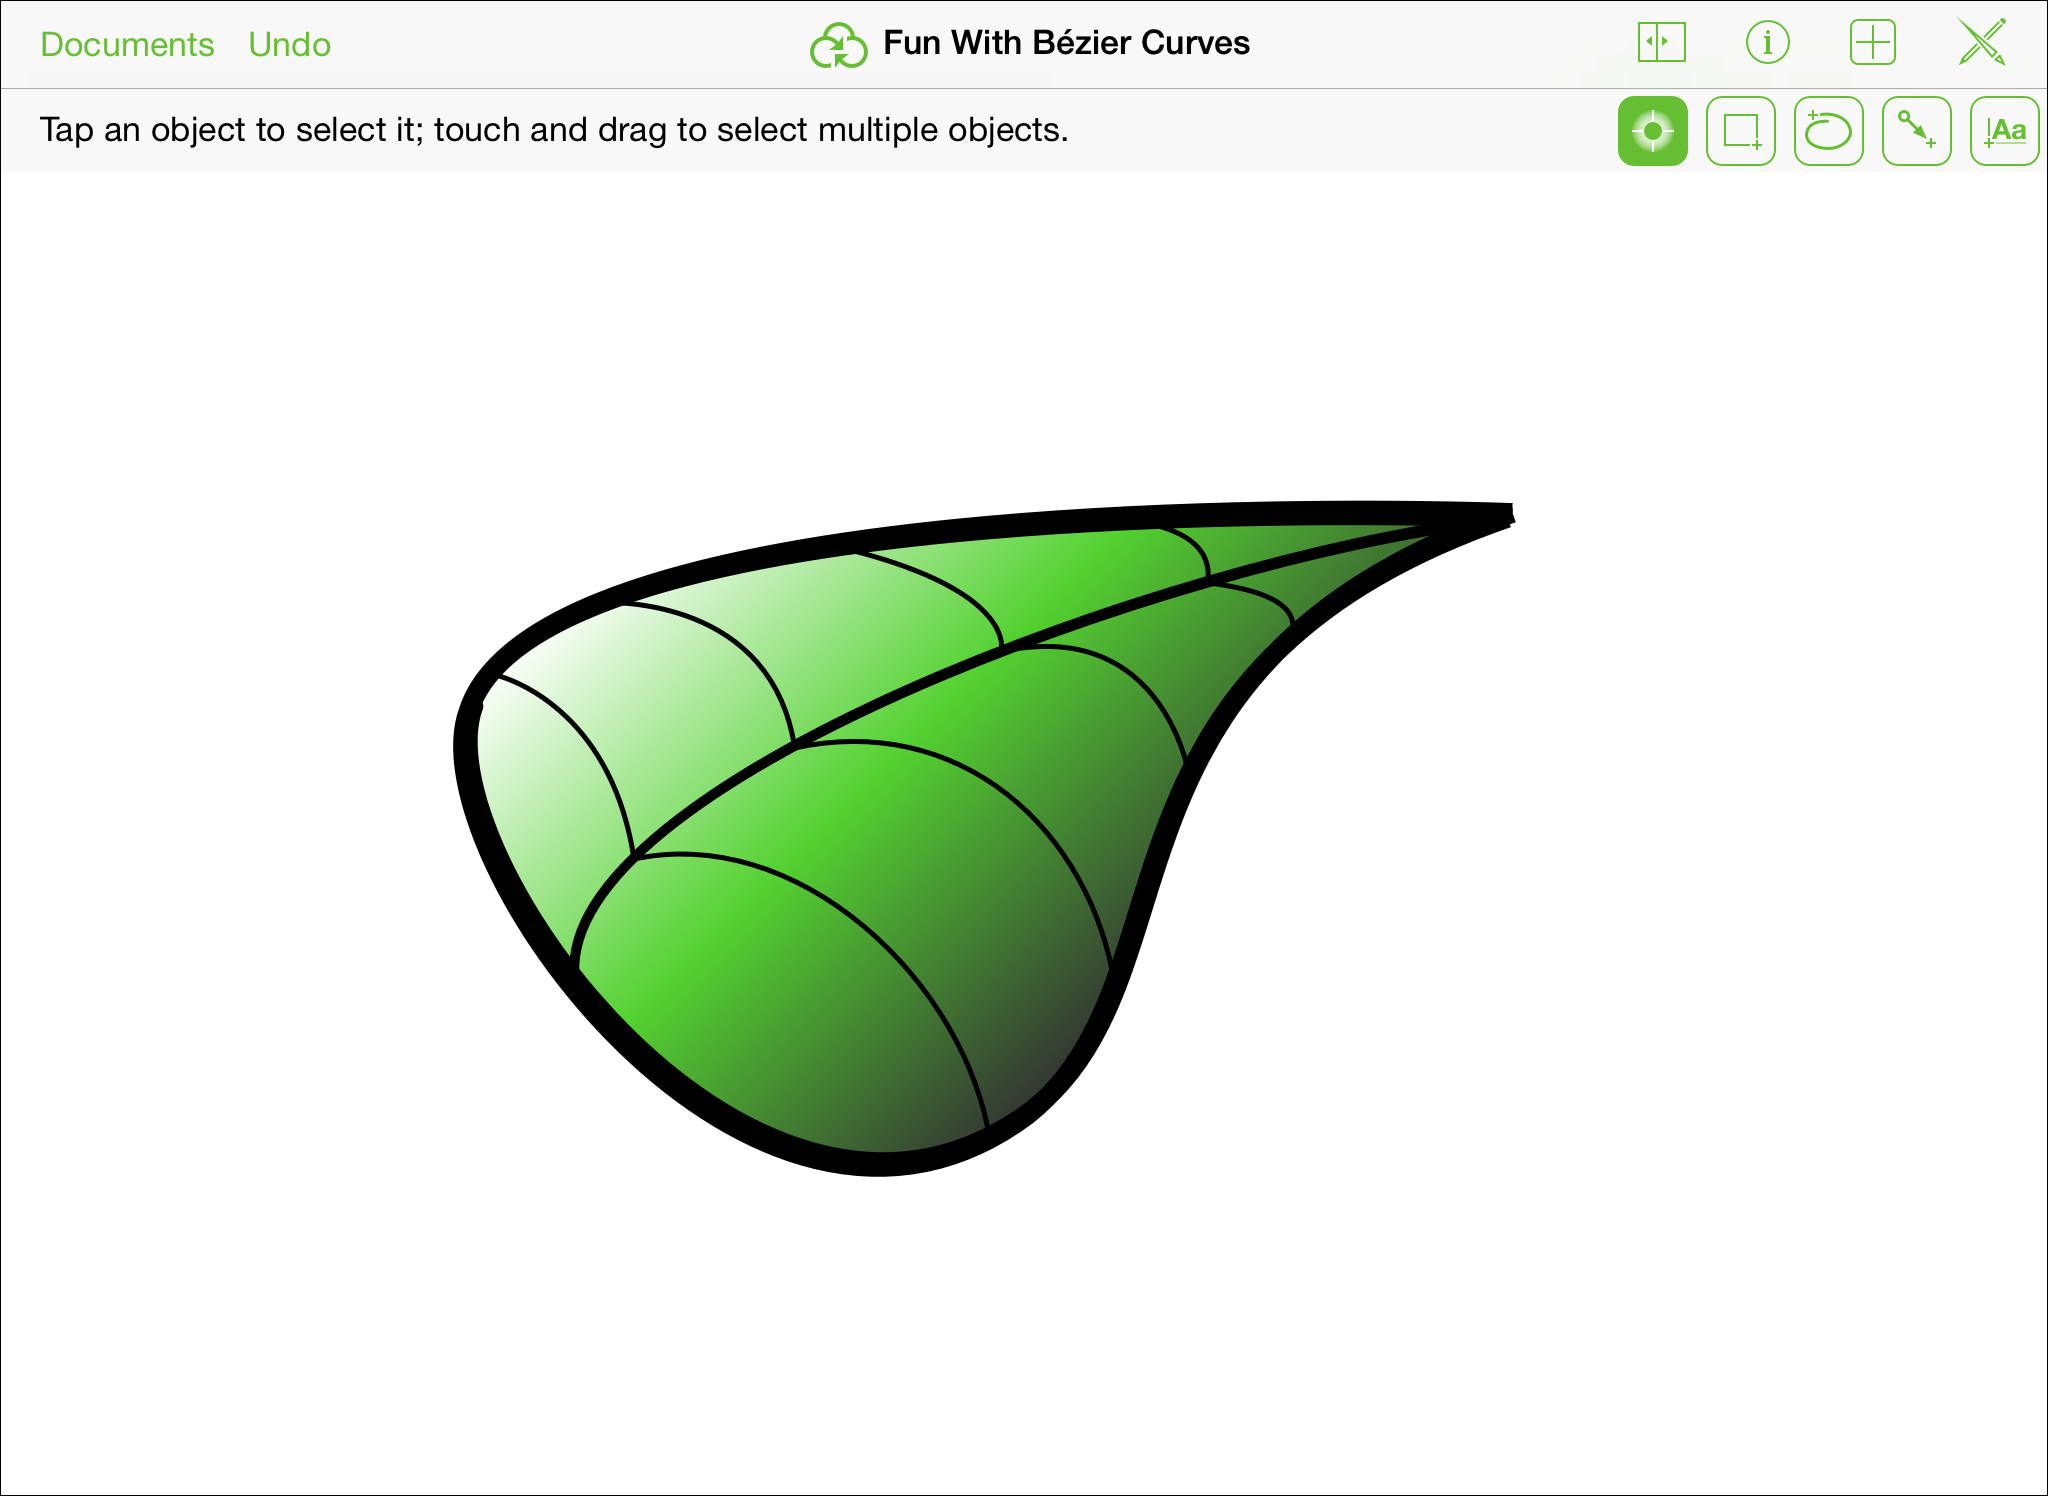
Some of the tools and inspectors you’ll need include:
- Use the Connections inspector on the leaf edge to turn off all possible connections. This makes it so you can place the lines for the spine and veins wherever you need them to be.
- Use the Line tool to create the spine and veins.
- Use the Line inspector to remove endpoints from the lines.
- Use the Stroke inspector to vary the point size of the lines.
- Use the Stroke inspector to change the style of the leaf edge to Freehand.
- Use the Fill inspector to apply a double linear gradient to the leaf.
- Use pinch gestures to zoom in and out on the Canvas while placing the spine and veins of the leaf.
And, if you create something really cool that you think other OmniGraffle users could enjoy, don’t forget that you can submit it as a stencil to Stenciltown.
Chapter 6
Getting Help
When you’re in need of help—whether you’re trying to figure out how layers work, or if you’re having some other issue with OmniGraffle—it’s good to know that the Support Humans at The Omni Group are always available to lend you a hand.
The OmniGraffle Website
The OmniGraffle website is always a good place to find the latest information about OmniGraffle.
Looking for More Stencils? Visit Stenciltown!
With the release of OmniGraffle 2 for iPad and OmniGraffle 6.1 for Mac, we’ve added a new member to the OmniGraffle family: Stenciltown.
Forums
The Omni Group maintains online forums for all of our products, and you’re invited! Come share your questions and ideas with other users and Omni staff.
Email Support
If you’re stuck, if you have a good idea for the next version of OmniGraffle, or if you just want to let us know how we’re doing, go ahead and send us an email. Choose Help ▸ Send Feedback from the menu bar to conjure up a message addressed to us, or just send us an email with your thoughts. We take support pretty seriously, so you can expect a prompt response actually typed by human hands.
Release Notes
For really meticulously detailed information about what has changed in each minor version of OmniGraffle, check out Help ▸ Release Notes from the menu bar.